

Page 1
H
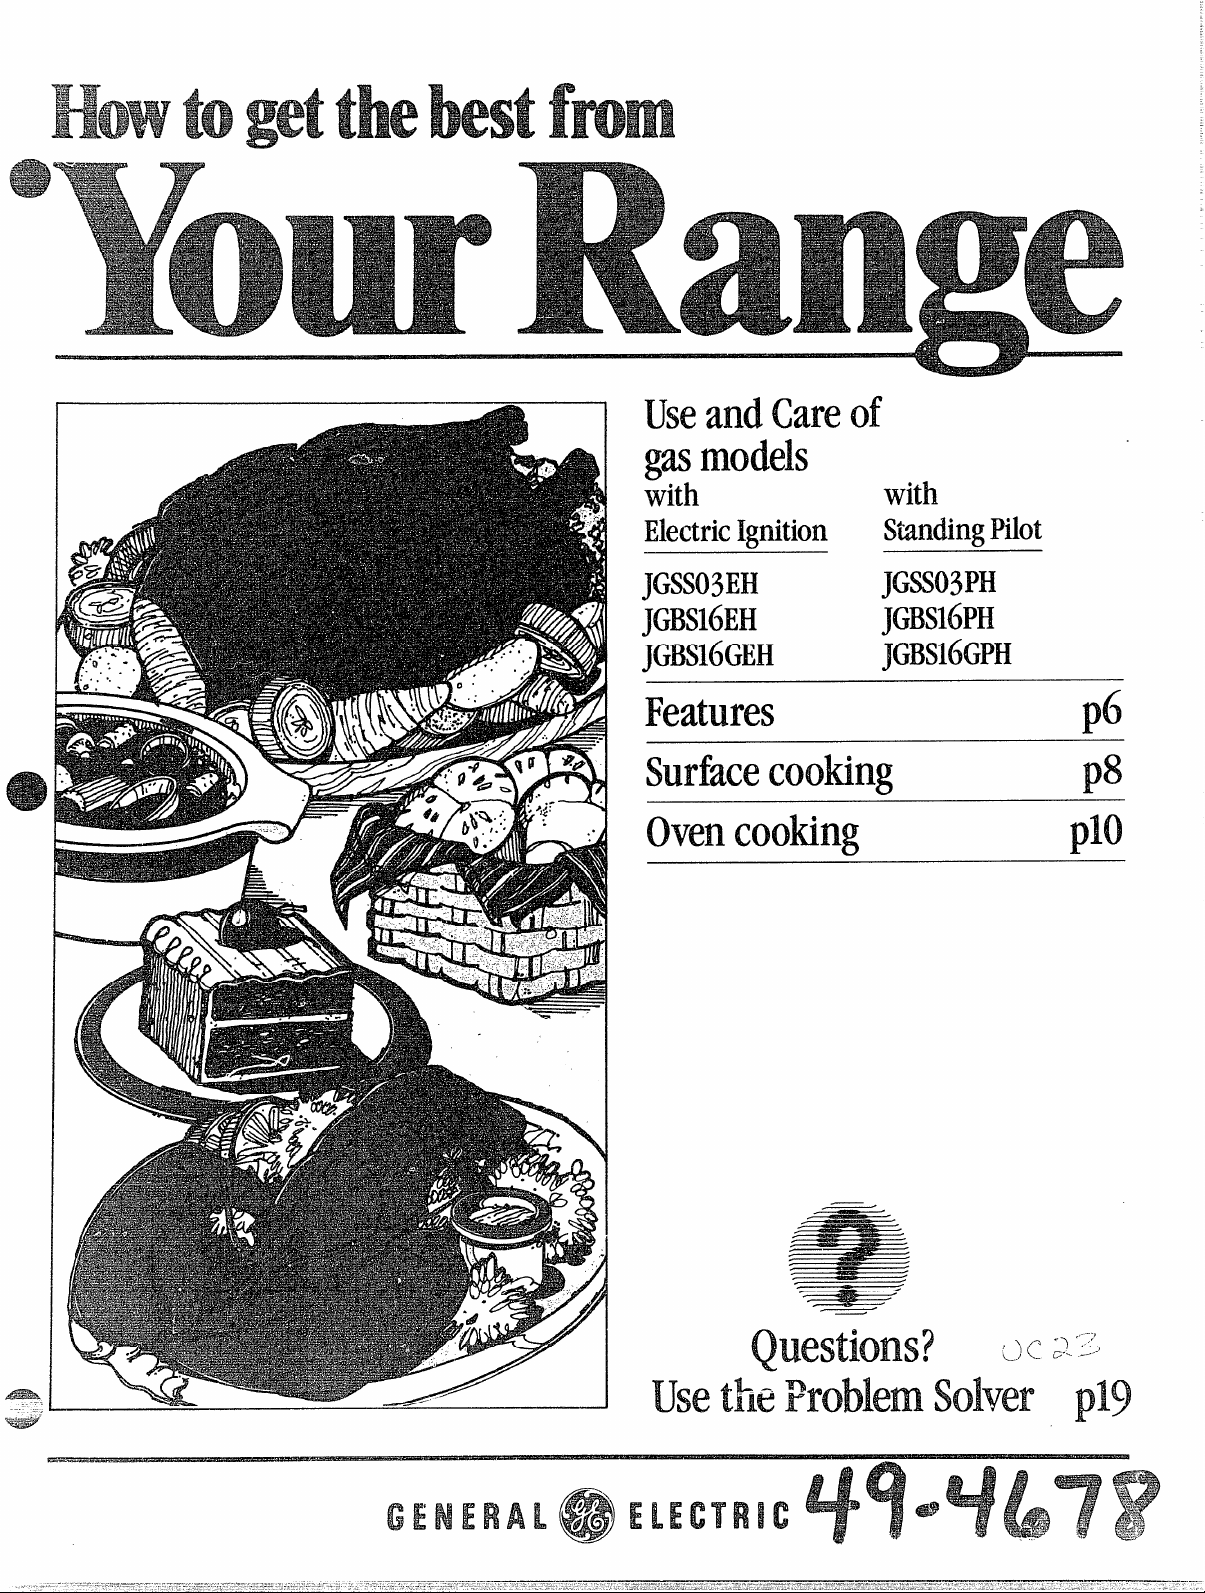
UseandCareof
gasmodels
with
with
ElectricIgnition
JGSS03EH
JGBS16EH
JGBS16GEH
WadingPilot
JGSS03PH
JGBS16PH
JGBS16GPH
Features
Surfacecooking
Ovencooking
pti
p$
pm
-jpVj)
k.—--
Page 2
IMm usingmm’ Range .. .....2
hwdhg the Rmge . . .
LevelingtheRange. . . . . . . . . . ..3
safety Instructions . . . . *● .. ..3-5
PeatuIe~of your ~wge . . . . . .6, 7
SurfaceCooking. . ..........8,9
clock &andTimer . . . + +.. ......9
Using YouIOven . . . . . . . . . . . . KI
Baking . . . . . . . . . . . . . .......11
Bakingchart . . . . ‘. . . . . . . . . ●12
Roasting,Chart. . . . . . . . . . ... . .H
Broiling, Chart . . . .
Careand Cleaning ... ... ...l5-l7 ‘
RemovableCWenDoor ..... ... .l$
Cleaning Chart . . . . ... .......18 -
Problem Solver. . . . . . . . . . . . . . W
If YimNeedi$ervice ... .’. ... ..l9 ~
WarrarMy.... ... ... .i3atikCover ‘
. .
● . . . . *..3
s . . . .‘. .. ..14
ReadMSbookcarefully.
ii& intendedtohelp youoperate and
maintainyournewrangeproperly.
Keepit handy foranswersto your
questions.
Ifyoudon’tunderstandsomething
or needmore help, write (include
yourphone number):
Consumer Affairs
General Electric Company
AppliancePark
Louisville,KY40225
writedownthemodel
serhi’d nmbers.
and
You’llfindthem on alabellocated in
theburner boxunder the cooktop.
Seepage6.
These numbers are also onthe
Consumer Product Ownership
RegistrationCard that came with
yourrange. Beforesendingin this
card, pleasewritethesenumbers
here:
,-
Model Number
Serial Number
Usethesenumbersin any
correspondence or service calls
concerning yourrange.
Wy(m.
a E-angee 00
Immediately contactthe dealer (or
builder) that soldyouthe range.
Check theProblem Solver on
page 19.Mlistsminor causesof
operatingproblems thatyou can
correct yourself.
2
Page 3
}’ourgasrange isequipped with
either a Standing Pilot or Electric
PilotIgnition System.
310&gsJGss&3PH,
and
StandingPilot Systemhas a
continuousflame glowing at
;~l~tinles.
ModelsJGSS03EH,
JGBS16EH
andJGBS16GEH
Electric Pilot IgnitionSystem uses
anelectricsparktoignitetheburners
anddoes not require use ofamatch
unlesselectrical current to your
rangeis interrupted.
Ii.nisho
km- range, like so many otkr
hwsehdd
cm Sem?
!N.dl
carpeting. When moving the range
onthistype of flooring, use care.
Do not install the range over
kitchen carpeting unless you
place an insulating pad or sheetof
l/4-inch-thick plywood between
therangeand carpeting.
W%ellthejlom- coveting ends at
~jle~j-on~~~~ke~~~~ge,the area that
therangewiHrest on should be
builtup with plywood or similar
materialto the same level or higher
thanthefloor ccvermg. This will
allowthe range to be moved for
cleaningor servicing.
items,is wavy and
intosoftfloor Umw!rings
‘as -vinylor
the
Ybm-range must be levelin order to
p~oduceproper cooking and baking
1
results.Af$eritisinitsfinallocation,
placealevelhorizontally on an
wen shelf and check the levelness
front to back and side to side. Level
he range b-yadjusting the leveling
egsor by placing shims under the
;omers as needed.
w-im’lYouG-dYolBrRange
eHave‘the show‘you.
thehmtion ofthe range gas
Cut-offValveand.howtoshut
offifmw!ssmy.
it
@~~v~yow range
and
withtheInstallationInstructions.
Anyadjustmentandserviceshould
beperformedonlybyqualified
gasrangeinstallersorservice
technicians.
@plug
gromikd OUtkt
your H3ngeinto a 120-vdt
removetheroundgroundingprong
fromtheplug.Ifindoubtabout
thegroundingofthehomeekctrical
system,itisyourpersonal
responsibilityandobligationto
haveanungroundedoutletreplaced
withaproperly-groundedthreeprongoutletinaccordancewith
theNationalElectricalCode.Do
notuseanextensioncordwith
thisappliance.
@~~sure all
are fromtherange.
beforeoperatingit, topreventfire
orsmokedamageshouldthe
packingmaterialignite.
@b@e rangeoutofkitchen
trafficpath andout
(OE?mWM$so and
poorair
@~e sureyour is
typeOfgas or UP’)on
whichitisto beused.Gascan
beconverted.fromonetypetothe
other.SeeInstallation
Instructions.
$yW’Rdedby a
im@Her9in accordance
only.Donot
‘topreventpik)tOUltige
correctly
bya service
or for‘the
@After use ofa
mnge!)
may result
f!xweringswill
highfloor
id many floor
not
thiskindofuse.Neverinstallthe
rangeovervinyltileorlinoleum
thatcannotwithstandsuchtypeof
use.Neverinstallitdirectlyover
interiorkitchencarpeting.
using Your Range
4$~()~~~]~~~~&~~’&Q~~~~~~~or
wherearangeishot
or in operation.Theycouldbe
seriouslyburned.
@~(J#~allowanyoneto
stand (w hang on! the doq
broiler c!+rrange
top. They
coulddamagetherange
dimb9
andeventipitovercausingsevere
personalinjury.
o‘CAUTION:Do NOT’
rH!MsOF m
mamwrrs
ABOVE./$mGE ORON
‘THE ‘a?A
C.LM311WONTHERANGE
REACHITEMSCOULDBE
TO
SERIOUSLYINYURE5.
eLetburner ‘gratesandother
surfacescoolbefore
themor themwhere
canreachthem.
~plJ~~~~wearkose fitting‘or
whileusing
the Flammable
materialcouldbeignitedif
broughtincontactwithflame
orhotovensurfacesandmay
causesevereburns.
@I’+J&@ruseyour fol’
or theIMmWIR.
Prokmzeduseoftheran~e
withoutadequateventilation
canbehazardous.
w
v
3
Page 4

@D(.)notwe waterongrease
fires.Neverpickupa flaming
pan.Turnoffburner,then
smotherflamingpanbycovering
pancompletelywithwellfitting
lid,cookiesheetor flattray.
Naminggreaseoutsideapan
canbe
pLHout bycoveringwith
bakingsodaor,ifavailable,a
muh-purposedrychemical
orfoam.
aDonotstore
materialsinan mm or near
theUK&fop.
@Dom{:M cookinggreaseor
otherf’kmmble materials
accumulatein or near the
range.
surface cooking
@AlwaysusetheIJTE position
whenignitingtopburners and
makesuretheburnershave
ignited,
@Neverleavesurfaceburners
unattendedatHIGHflame
settings.Boilovercauses
smokingandgreasyspillovers
thatmaycatchonfire.
@Adjusttopburner flamesize
soit doesnotextendbeyondthe
edgeofthe cookingutensil.
Excessive flameishazardous.
~Useoniydrypothddm-
mokt or damp potholders on hot
sin-faces may
resultinburnsfrom
steam.Donotletpotholders
comenearopenflameswhen
Lf’tingutensils.Donotuseatowel
Orotherbulkyclothinpkiceofa
]-otholder.
~To burns, ignition
ufflammablematerials,and
:pillfige,turnthehandleMa
,<,;l~2,~llel~towardt~:~~~~~Orback
:~therangewithoutextending
adjacent burner.
over
~Alwaysturn surfacehumer to
OFFbeforeremovingutensil.
@fCarefdlywatchfoodsbeing
friedatHIGHflamesetting.
6$Never~~o~~theven~(air
openings)oftherange.They
providetheairinletandoutlet
whichisnecessaryfortherange
tooperateproperlywithcorrect
combustion.
@Do@ useawokonthe
cookingsurfaceifthewokhasa
roundmetalringwhichisplaced
overtheburner gratetosupport
thewok.Thisringactsasaheat
trapwhichmaydamagetheburner
grateandburnerhead.Also,it
maycausetheburnertowork
improperly.Thismaycausea
carbonmonoxidelevelabove
currentstandards,resultingin
ahealthhazard.
@floodsforfryingshouldbeas
dry aspossible.Frostonfrozen
foodsormoistureonfreshfoods
cancausehotfattobubbleupand
oversidesofpan.
~Useleastpossibleamountof’
fat for effectiveshallowordeepfat frying.Fillingthepantoofull
offatcancausespilloverswhen
foodisadded.
@H’a combinationofoilsor
fatswillbeusedinfrying,stir
togetherbeforeheating,orasfats
meltslowly.
*Alwaysheatfatslowly9and
watchasitheats.
@Usedeepfatthermometer
wheneverpossibletoprevent
overheatingfatbeyondthe
smokingpoint.
@UseProperPanSize—Avoid
pansthatareunstableoreasily
tipped.Selectutensilshavingflat
bottomslargeenoughtoproperly
containfoodavoidingboilovers
andspillovers,butlargeenou,gh
tocoverburnergrate.Thiswdl
bothsavecleaningandprevent
hazardousaccumulationsoffood,
sinceheavyspatteringorspillovers
leftonrangecanignite.Usepans
withhandlesthatcanbeeasily
graspedandremainCOOI.
@Useonlyglasscookwarethat
isrecommendedforuseongas
burners.
~Keepallplasticsawayfrom
topburners.
@Toavoidthepossibilityofa
burn, alwaysbecertainthat the
controlsforaHburnersare at
OFFpositiomandallgratesare
coolMore attemptingtoremove
thegrate.
IBwhen flamingfoodsunder
thehood,turn thefanoff.The
fan,ifoperating,mayspread
theflame.
@Hrangeislocatednear a
window,donotuselongcurtains
whichcouldblowoverthetop
burnersandcreateafirehazard.
~Whena pilotgoes10ut9(on
modelssoequipped),youwill
detectafaintodorofgasasyour
signaltorelightpilot.When
relightingpilot,makesureburner
controlsareinOFFpositionand
followinstructions~escribedon
followingpagestorelight.
@Ifyousmellgas9andyouhave
alreadymadesurepilotsarelit,
turnoffthegastotherangeand
callaqualifiedservicetechnician.
Neveruseanopenflametolocate
aleak.
4
Page 5
ewhen cookingperkyfollow
OUISdirectionsexactlyand ~lw~ys
the meat to at least 170°F.
cook
This assures that, in the remote
possibility that trichina may
be
presentinthemeat,itwillbe
killed and meat will be safe
to eat.
and
Roasting
@Do noi use oven
fora storage
area.
@Standawayfromthe range
whenopeningovendoor.“Me
hotair or steamwhichescapes
cancauseburnstohands9face
amlh eyes.
@Keepovenfreefromgrease
buildup.
@Placeovenshelvesindesired
positionwhileoveniscool.
@Pullingoutshelftothe shelf
stopisa convenienceinlifting
heavyfoods.It isaho a
precautionagainstburns from
touchinghotsurfacesofthe
dooror ovenwalk.
@Ddt heatunopenedfood
containersintheoven.Pressure
codd buildup andthecontainer
couldburst causingan injury.
@Don’tusealuminumfoil
anywhereintheovenexceptas
describedinthisbook.Misuse
couldresultinafirehazardor
damagetotherange.
~Whenusingcookingor
roastingbagsinoven9followthe
manufacturer’sdirection.
@Useonlyglasscookware
that isrecommendedforuse
ingasovens.
@Alwaysremovebroilerpan
frombroilercompartmentas
soomas youfinishbroiling.
Greaseleftinthepancancatch
fireifovenisusedwithout
removingthegreasefromthe
broilerpan.
@Whenbroiling,it’meatistoo
dosetotheflame,thefatmay
ignite.Trimexcessfattoprevent
excessiveflare-ups.
oMakesurebroilerpanisin
placecorrectlytoreducethe
possibilityofgreasefires.
@Ifyoushou.IMhaveagrease
firein the broilerpan9turnoff
oven,andkeepdrawerclosedto
containfireuntilitburnsout.
fCkanin~ Your RaBfge
~ Cleanonlypartslistedinthis
Usead CareBook.
* Keeprangecleanand freeof
accumulationsofgreaseor
spilloverswhichmayignite.
mibuNeedservice
~Don’tattempttorepair
or replaceanypart ofyour
rangeunlessit isspecifically
recommendedin thisbook.All
.otherservicingshouldbereferred
toaqualifiedtechnician.
—--—
—
5
Page 6
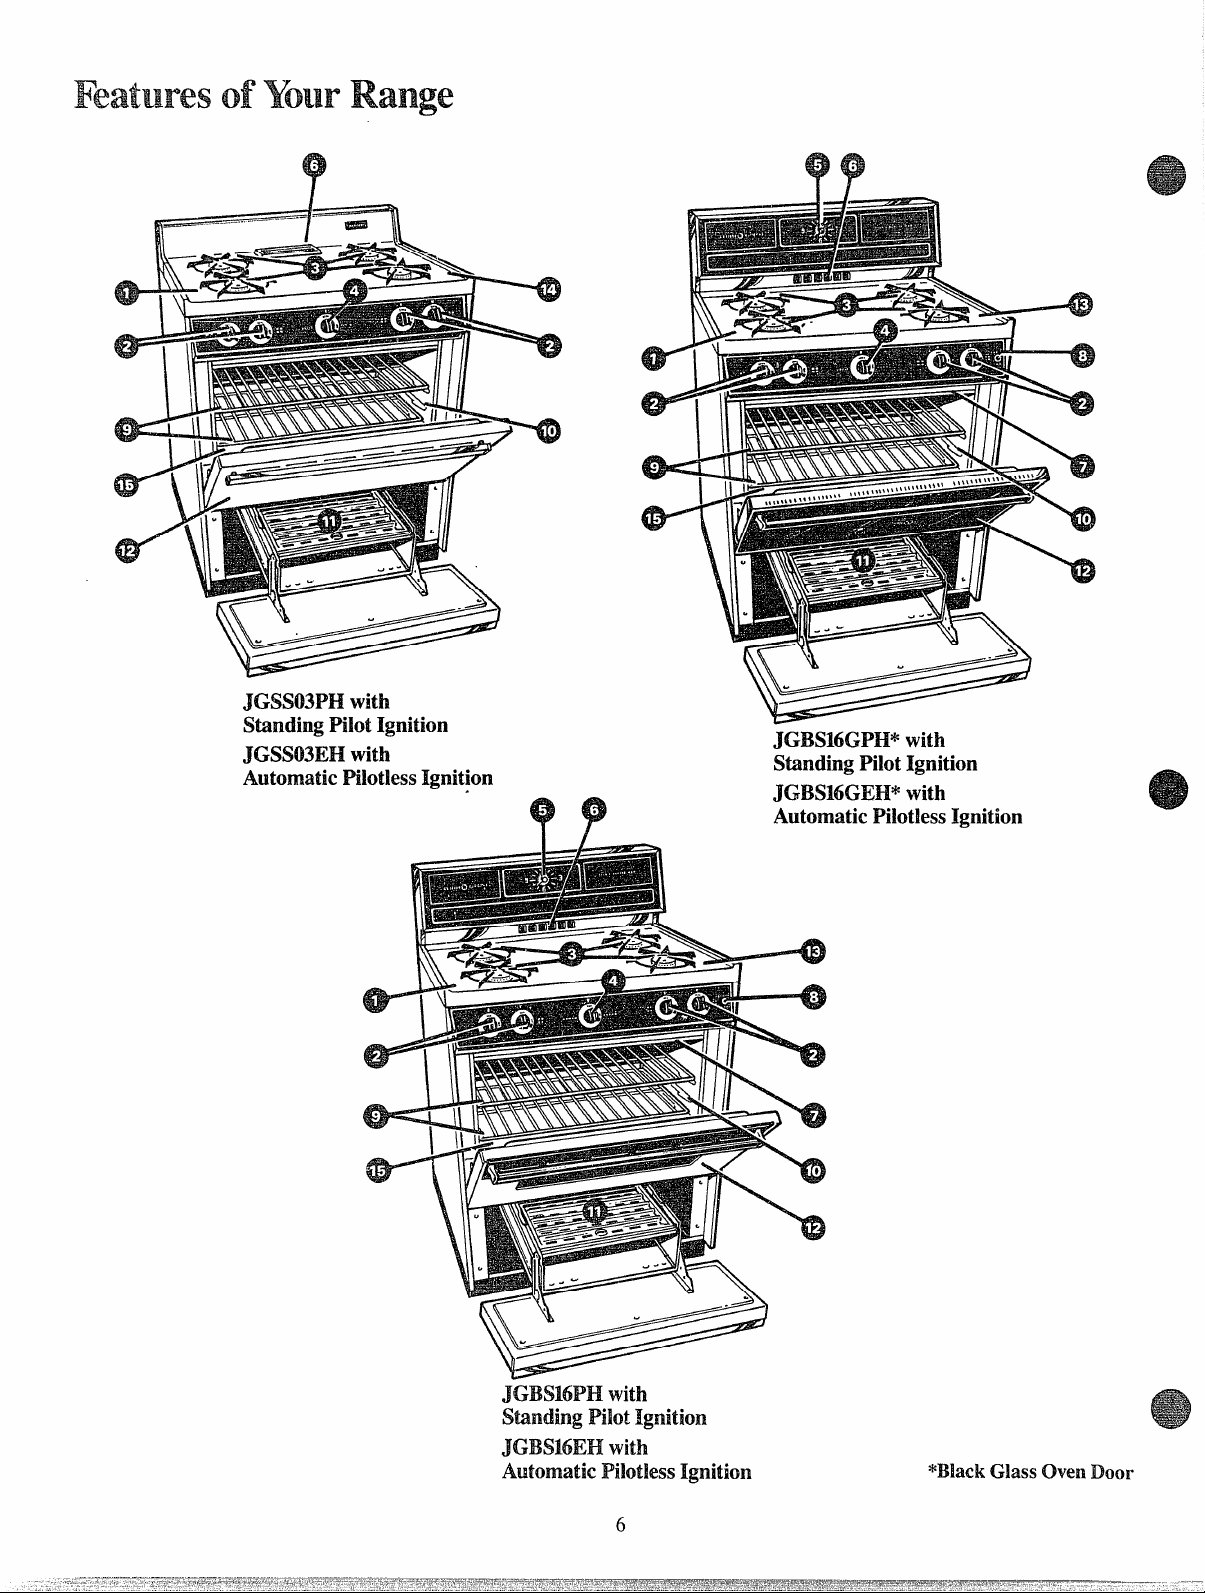
F====!&
KNiMEm3with
standingPilot Ignition
JGSS03EHwith
AutomaticPilotlessIgnition
.
9
I
s
P
.
WBSMKWH* with
StandingPilotIgnition
JGBSMGEFI*with
AutomaticPilotlessIgnition
with
standing PilotIgnition
with
AutomaticPilotlessIgnition
6
Page 7

Feature Index
Explained
m page
JGSS03PH
J7GSS03EH
JGBS16PH
JGBS16EH
JGBSWGPH
JGBSNK’TEH
1 Model and Serial Numbers
(in burner boxunder cooktop)
2 Surface Burner Controls
3 Surface Burners and Grates
4 Oven Temperature Control 10
5 Clock and Timer
6 Oven Vent
7 Oven Interior Light
Oven Light Switch
8
(letsyouturn interior ovenlight on and off)
9 Oven Shelves
(easily removed or repositioned on
shelf supports)
10 Oven Shelf Supports
11 Broiler Pan and Rack
(easily removed for ovencleaning)
10,16 2 2
2
8
8
9
10
10
10
10
14
1612 RemovableOven Door
63
4
4
63
C4
e
4
4
$3
.% e
4
4
.—
2
&iiiF-’
—.s—
-.
-–
IEi%fw -
EE#mWma
e
EE?m
i%i%Y-
Ea6+ati
--
(locksin up position to simpli& cleaning
underneath)
14 Lift-Off Cooktop
(easily removed and replaced)
15 RemovableO~~enBottom
1513 Lift-Up Cooktop
I
15
I
e
e
imEar -
maE?&”–
EHEa
-–
E
7
Page 8

surfaceBurner‘controls
HowtoselectFktmesize
Standing PilotModels
JGSS03PH,JGBS16PHand
JGBS16GPH
Yourrange has standing surface
burner pilot ports that must be lit
initially. To lightthem:
L Be sure surfaceburner control
knobsare in the OFI?position.
2. Removethe grates and lift the
cooktopup or off (see page 15).
3. Locate the twopilot ports and
lighteach ofthemwith a match.
4. Replace or lower the cooktop.
Yoursurfaceburners are now ready
foruse.
ElectricIgnitionModels
JGSSOSE~,JGBS16EHand
JGBSMKWH
Surfaceburners on your range are
lightedby electric ignition, ending
the need for pilotlights.
In ease of z power outage, youcan
lightthe pilotless ignition surface
burners on your range with a
match. Hold a lightedmatch to the
burner, then turn the knob to the
LITE position. Use extreme
caution when lightingburners
inthismanner.
The knobs that turn the surface
burners on and off are located on
the lower front panel in front of the
burners.
The two on the leftcontrol the left
front and left rear burners. The two
on the right control the right front
and right rear burners.
ToLighta surfaceBurner
Push the control knob in and turn it
toLITE. On electricignitionmodels,
youwillhear a littleclickingnoise—
the soundoftheburner lighting.
After theburnerignites,turn the
knobto adjust the fkirnesize.
Note:
@Alwayshavea cookingutensilon
the gratebefore turning on a burner.
The finish on the grate may chip
without a utensil to absorb the heat.
* Check to be sure the burner you
turned on isthe oneyou wanttouse.
The flame size on a gas burner
shouldmatch the cookware you
are using.
NEVER LET THE FLAME
EXTEND UP THE SIDES OF
THE COOKWARE. Any flame
largerthan the bottom of the
cookware is wasted heat and only
servesto heat thehandles.
Whenusingaluminumor
Auninurn-cladstainlesssteel
potsandpans,
the circle it makes is about 1/2inch
smaller than the bottom of the
cookware.
adjust the flame so
Whenboiling,use this same
flame size—1/2inch smaller than
the bottom of the cookware—no
matter what the cookware is made
of. Foodscookjust as quickly at a
gentleboil as theydo at a furious
rollingboil. A high boil creates
steam and cooksawaymoisture,
flavorand nutrition. Avoidit except
for the fewcookingprocesses
which need a vigorousboil.
Whenfryingorwarmingfoods
instainlesssteeI,castironor
enamelware,
lower—toabout 1/2the diameter
ofthe pan.
keep the flame down
Whenfryinginglassorceramic
cookware,
more.
lowerthe flame even
@Be sure the burners and grates are
cool before youplace your hand, a
potholder, cleaning cloths or other
materials on them.
Page 9

(Mow JGB!W$)
}~~~
Anair acijustmcntshutter threach
sLIrkcc buimr t-cgulatcsthetlowof
uirmthe flame.
!Vhen the
flow’sintotheburner,
will be s(cac!y, relativelyquiet and
rightamountofaix*
the tlam
haveapproximately 3/4”sharp blue
corms.This usuallyresultswhen the
shutterisabouthalfwayopen.
With too much
air,the flamewill
beunsteady.possiblywon’t burn all
thewayaround, and willbenoisy,
sounding1ikeablowtorch.
With not enough
air,youwon’tsee
anysharp bluecones inthe flame,
youmaysee yellow tips, andsoot
mayaccumulateonpots andpans.
I
The air adjustment shuttersseton
thehood ofthevalveand areeither
lockedinplace with Phillipshead
screwsor positionedon theburner
tubesby friction fit.
‘h
adjusttheflowofairtothe
burners,
loosen the Phillips head
screwsand rotatethe shutters(or
applya blade-type screwdriver
against the friction-fitshuttersand.
push)to allowmoreor lessair into
theburner tubes asneeded.
cookware
Aiuminum: Medium-weight
cookwareis recommendedbemuse
itheatsquicklyand evenly.Most
foods brC)wllevenly
skillet.
Mimrals infoodand water
willstainbut willnotharm
aluminum. A quick scourwith a
soap-filledwoolpadaftereach usc
keepsaluminumcookwarelooking
shiny
new. Usesaucepims with
tight-fitting lick for cooking with
m inirnum amounts of water.
Castkm: Ifheatedslowly,most
skilletswillgivesatisfactoryresults.
Enamelware:Undersome
conditions,the enamelofsome
cookwaremaymelt.Followcookware
manufacturer’srecommendations
forcookingmethods.
Glass:There are twotypesof glass
utensils—thoseforovenuseonly
and thosefortop-of-rangecooking
(saucepans,coffeeandteapots).
Glassconductsheatvery slowly.
HeatproofGlassCeramic:Can
beusedforeither surfaceor oven
cooking.Itconductsheatvery
slowlyandcools very slowly.Check
cookwaremanufacturer’sdirections
tobesureit canbe usedongasranges.
!N.ainkssSteel:Thismetalalone has
poorheatingproperties,andisusually
combinedwithcopper, aluminum
or other metalsfor improvedheat
distribution. Combination metal
skillets generally work satisfactorily
ifused atmediumheatasthe
manufacturer recommends.
in aIl i]~UnlillUIN
‘1’hcCIOCiiiiIldTimer ;~rchCipfLll
kviccs that SCIW2SCVCriilpU!”pLVW!+.
3%43 clock
thedock, push iFlthe knob
“R)set
and turn the clock hands to the right
to the correct time.
Then M theknob
outmd continue IurningtoOFF.
Timer
The Timerhasbeen combined with
therangeclock. Use itto timeall
yourprecise cookingoperations.
You’llrecognizetheTimer as the
pointerwhich isdifferentincolor
than theclock hands.
Minutesare markedupto30 and
hoursare marked upto4 on the
centerring oftheclock.
TosettheTimer,turn theknobto
theleft, without pushingin, until
thepointer reachesthe number of
minutesor hoursyouwanttotime.
At the end
soundstotell youtime isup.
theknob,withoutpushingin, until
thepointer reachesOFF andthe
buzzer stops.
ofthesettime,abuzzer
Turn
9
Page 10

2. llcmovc the broiier pan and rack
and open the broiler c~mpartmtmt
drawer to the “stop” pusitior I.
3. Locatethe pilot port on the right
sideof the oven burner at the back
ofthe oven.
/
//A-m===+
4. Using a long match or match
holder, reach through the broiler
compartment and light the oven
‘pilot.
5. Close the broiler compartment
drawer.Yourovenand broiler are
nowready for use.
Electric Ignition Models
KXXNM3H,JGBS16EHand
JGBS16GEH
The flowofair to the ovenburner is
tid.jusiedin the same manner as it is
fbrthe surface burners{SWpage 9).
When the air flow ispropwly
adjusted, the ovenburner flame
shouldbe steadywithappmxiinately
l-inch blue cones and should not
extend out overthe baffle edges.
BeforeusingYouroven
1. Look atthe control. Be sure you
understand how to set it properly.
2. Check the inside of the oven.
Look at the shelves. Practice
removingand .rep~acingthem
while the oven is cool.
3. Read the informationand tips
on the followingpages.
4. Keep thisbook handy where you
can refer to it—especiallyduring
the first fewweeks of getting
acquainted with youroven.
Oven Control
The OVEN TEMP control is
located at the center of the control
panel on the front of the range.
ovenshelves
The shelvesaredesigned with stoplocksso whenplacedcorrectlycmthe
shelf supports, they will stopbefore
comingcompletelyoutoftheovenand
will not tjlt when you are removing
foodor placing foodon them.
When placing cookware on a shelf,
pullthe sheif out to the “stop”
position. Place the cookware on
the shelf, then slide the shelf back
intothe oven,This will eliminate
reaching into the hot oven.
Toremovetheshelvesfromthe oven
forcleaning, pushthemback, liftthe
rearofthe shelvesandpullthemout.
shelfPositims
The ovenhas four shelf supports—
A (bottom),B,C and D (top). Shelf
positionsfor cooking are suggested
on Baking and Roastingpages.
The ovenburner on these ranges is
lightedby electric ignition.
CAUTION:DO NOT MAICEANY
ATTEMPT TO OPERATE THE
ELECTRIC IGNITION OVEN
DURING AN ELIXITUCAL
POWER FAILURE. Resumption
ofelectrical power when OVEN
TEMP control is in any position
other than OFF will result in
automaticignition ofthe oven
burnerand could cause severeburns
ifatthetime you were attempting
to lighttheburner with a match.
Standingpilotmodels
Simply turn the knob to the desired
cooking temperatures, which are
marked in 25% increments on the
dial. It will normally take 30 to 60
seconds before the flame comes on.
After the oven reaches the selected
temperature, the ovenburixi- cy~les
Electric pilot models
10
Use switchon control panel to turn
lighton and off.
oven V&t
Yourovenis ventedthrough a duct
at the center rear of the range (see
page 6). Do notblock the opening
ofthisduct when cooking in the
oven—itis important that the flow
of fresh air to the ovenburner be
uninterrupted. Avoidtouching the
ventopeningsor nearby surfaces
during ovencooking-they may
become hot.
Page 11

‘“
1. I%si!ion[heshelf or slmlvcsin
{k oven.
2. Close ovendoor, turn OVEN
TEMP knob to desired temperature
and preheat ovenfbr titleast 10
minutesif’preheating is necessary,
3. Place food inoven on
A1]owatl~~stanin~~b~~ween
shelf.
edgeof bakeware and oven wail
or adjacent utensils.
Ifcooking on twoshelves at the
sane time, place shelves about4
inchesapart and stagger food on
[hem.
4. Check food for doneness at
minimum time on recipe. Cook
kmger if necessary. Switch off
heatand removefood.
Preheating isimportantwhen using
temperatures below225”F.and
whenbaking foodssuch asbiscuits,
cookies,cakesandother pastries.
Preheatingisnotnecessary when
roastingor long-timecooking of
wholemeals.
IMostbaking is done on the second
shelfposition (B)from the bottom.
When baking three or four items,
usetwo shelves positioned on the
second and fourth setsof supports
@ &D) from bottom of oven.
Bakeangel food cakes on first shelf
position (A) from bottom of oven.
‘l@s
*
I?o]1ow a tested recipe and
measurethe ingredients carefully.
Ifyouare using apackage mix,
followlabel directions.
center of
@If moistureisnoticeableon the
frontoft-heovenor on theoven
window
when tlrst turning on theoven, leave
theovendoor ajar fora fewminutes
or untilthe oveniswarm.
*Donotopen theovendoorduring
abakingoperation—heatwillbelost
and thebakingtime mightneed to
beextended. Thiscouldcause poor
bakingresults.
*Do notdisturb the heatcirculation
inthe ovenwiththeuseofaluminum
foil. If foilisused, place asmall
sheetof it, about 10by 12inchesat
themost, on a lowershelf several
inchesbelowthefood. Do notplace
foilonthe ovenbottom.
common Bating Problem
and Possible SOlutiom
Pm
Burning around
*Oventoo
~Edgesof crust too
(on modelssoequipped)
edges
full;avoidovercrowding.
thin.
@Incorrectbakingtemperature.
Bottomcrustsoggyandunbaked
@A11OJVcrust
sufficientlybeforefillingpie shell.
~Fillingmaybe toothin orjuicy.
~~il~ingallowedtostandinpie
and/or fillingto cool
shell
beforebaking.(Fillpieshellsand
bakeimmediately.)
~
Ingredientsandproper measuring
affectthequalityofthecrust.Usea
testedrecipeandgoodtechnique.
Makesuretherearenotinyholesor
tearsinabottomcrust.“Patching”
apiecrustcouldcausesoaking.
Me
fillingrunsover
Topandbottomcrust notwell
*
sealedtogether.
@Edgesofpie crust not built
highenough.
@Toomuch filling.
e Check size ofpie plate.
Pastry istough; crust
TOOmuch handling.
~
@Fat too softor cut in toofine.
Rolldough lightlyandhandleas
littleaspossible.
Up
notflaky
GKE$
Cakeriseshigherononeside
Batterspread unevenlyinpan.
@
~Ovenshelvesnot1evel.
@Usingwarpedpans.
~Incorrect pansize.
Cakescrackingontop
~Check
~Batter
or exactpackagedirections.
@Check forpropershelfposition.
~Check
~Improper mixingofcake.
oventemperature.
toothick, followrecipe
pansizecalledforinrecipe.
Cakefalk
TOOmuch shortening, sugaror
@
liquid.
~Check leaveningagent, baking
powderor bakingsodato assure
freshness.Makea habitto note
expirationdatesofpackaged
ingredients.
~Cakenot bakedlongenough or at
correct temperature.
aIfaddingoilto acake mix, make
certaintheoil isthetypeand
amountspecified.
Crustishard
@check
~Check
temperature.
shelfposition.
Cakehassoggylayerorstreaksat
bottom
LJndermixingingredients.
@
@Shofieningtoosoftforproper
creaming.
~Toomuchliquid.
COOKES & BIscwm
Doughycenter;heavycruston
surface
@Check
oCheck shelfposition.
oFollowbakinginstructions
carefullyas giveninreliable recipe
or onconveniencefoodpackage.
@Flat cookie sheetswill givemore
evenbaking results. Don’tovercrowd
foodsona baking sheet.
~Conveniencefoods used
their expirationdate.
temperature.
beyond
Browningmorenoticeableon
me side
~Ovendoor notclosed properly,
checkgasketseal.
eCheckshelfposition.
11
Page 12

1. ,41uIuinunIpms conduct heat quickly. For most 2. Dark or non-shiny finishes. also glass and pyroceram,
—
con~’cntional
because they help prevent over-browning in the time it takes fix
heat mcook the center areas. Wcrecommend dttll (satin-finish)
baking, 1ighl, shiny fit-tisttcs give best results
gtmmlly absorb heat which may result indry,crispcrusts.
Reduce oven heat
25°F,if lighter crusts we desired, Preheat
cast iron for baking some foods for rapid browningwhen fbod
bottomsurfaces of pans for cake pans and pie plates to bc sure isadded.
those arms browncompletely.
Shelf (kn Time,
Food
cookware
Positions
Bread
Biscuits(!~~-in.thick) ShinyCookieSheet B, c 400”-475°
Coffeecake Shiny;Mctai Pan with B, A
Corn bread or muffins Cast Ironor Giass pan
Gingerbread Shiny Memi Pan with
Muffins
Popovers Deep Giass or Cast IronCups
Quickioaf bread
Yeastbread (2 ioaves)
Plain roils
Sweetroiis
satin-finish bo[tom
satin-finish bottom
Shiny Metai Muffin Pans A, B 400°-4250 20-30
Metal or Giass Loaf Pans B 350°-3750
Metai or Giass Loaf Pans A, B 375°-4250 45-60
ShinyOblongor Mufiin Piins
Shiny Oblongor Muffin Pans
B 400°-4500
B 350° 45-55
B
A, B 375°-4250
B, A
%nnperatures
Minutes O.mments
]5-~~
350°-4000
375”
350°-3750 20-30 For thin roiis, SheifB maybe used.
20-30
20-40”
45-60 Or bake at 450”F. for 25 minutes, tiwnat
45-60
10-25 Forthin roils, SheifB maybe used.
Cakes
(withoutshortening)
Angelfood AiuminumTube Pan
Jeiiy roii Metal Jeiiy RoiiPan
Sponge
Metal or Ceramic Pan A
A 325°-3750
B
375°-4000 10-15 Linepan with waxedpaper.
325°-3500
30-55 Twopiece pan is convenient.
45-60
Cakes
Bundt cakes Metai or Ceramic Pan A, B 325°-3500 45-65
Cupcakes ShinyMetal Muffin Pans
Fruit cakes Metalor Glass Loaf or
Layer Shiny Metal Panwith
Layer,chocoiate Shiny Metal Panwith
Loaf
Tube Pan individual cakes.
satin-finish bottom
satin-finish bottom
Metai or Glass Loaf Pans B
B 350°-3750
A. B
B 350°-3750
B 350°-3750 25-30
275°-3000
350° 40-60
20-25
2-4 hrs. Use300”F.andShelf B for small or
20-35
Cookies
Brownies Metal or Glass Pans B, C 325°-3500 25-35
Drop Cookie Sheet
Refrigerator Cookie Sheet
Rolledor siiced
Cookie Sheet
B, C
B, C
B,C
350°-4000
400°-4250
375°-4000
10-20 UseShelf C andincrease temperature
6-12
7-12
Fruits,
OtherDesserts
Bakedappies Glass or Metai Pans
Custard
Puddings,rice Glass Custard Cups or
md custard
Pies
Frozen
Meringue Spread to crust edges
3ne crust
rWOc~st
Wry shell
Glass Custard Cups or
Casserole (set in pan of hot water)
Casserole
Foii Pan onCookie Shed A 400°-4250
Glass or Satin-finishMetal A, B 400°-4250
Glass or Satin-finish Metal E 400°-4250
Glass or Satin-finish Metal
A, B, C 350°-4000
B 300°-3500
B
B,A 325°-3500
B
325°
450°
30-60
30-60 Reducetemperatureto 300°F.for large
50-90 Cook bread or rice puddingwith custard
45-70
15-25
45-60
40-60
12-15
Miscellaneous
3akedpotatoes Set on Oven Shelf
lcallopeddishes
;ouffles Glass
Glass or Metal
A, B, C
A, B, C 325°-3750
B
325°-4000
300°-3500 30-75
60-90 Increase time for large amount or size.
30-60
Cmmmi,refrigeratwibiscuits ~~kc2 to4
minutes iess time,
Preheat cast iron panforcrisp crust.
Din-easeabout5 minutesformuf!ln
350”F,for 10to 15minutes.
Dark mctai or giassgivesdeepest
browning.
Paper iiners produce more moist crusts.
Bar cookies from mix use sametime.
25 to 50”F.for more browning.
custard.
base 80to 90 minutes.
Large piesuse400°F. and increase time.
Toquicklybrown meringue use 400°F. for
8to 10 minutes.
Custard fillings require iowertemperature,
longer time.
mix.
12
Page 13

r(ushxi uncover-txiinyour own.
breasl-side-upon roustingrack in a
Wasting [cnqxralures, which shailow pan. ‘l%cmelting fatwill
should be low and steady. k(!cp
spatteringto a minimum, Whtn
roasting.‘itisnot necessary to scar.
baste,cover,or add watcwto your
meat.Roastingiseasy,just f;llow “m
these
Stf2j3S:
Step 1. Positionovenshelf at
second from bottom position(B)
baste the meat. $kkct u PN as
closetothe sizeof meat as possible.
(Broiler pan with rack isa good carving, you may wish 10remove
pan forthis.) meat from oven justbcf(weit is
Step 3: Turn OVEN TEMP control
desired temperature, Check the
to
RoastingChati for temperatures
and approximatecookingtimes.
forsmallsizemast(3_to5 lbs.) and at
bottom position(A)for largerrwusts.
being removed from [hc wwn. Fmrare or mcdium inlcrn:ddorxmxs.
if meat is to stand K)to 20 minutes
while making gravy or for easier
~onc. If no stwlJing is pkmned,
cook meat m suggested
temperature.
F1’llzen RWMS
Frozen roasts of beef, pork,
lamb, etc., can be started without
thawing, but allow 10to 25 minutes
per pound additionaltime (10
minutesper pound for roasts under
5 pounds, more time for larger
roasts).
Thaw most frozen poultry before
roastingto ensure even doneness.
Some commercial frozen poultry
can be cooked successfully withwt
thawing. Followdirections given
on packer’s label,
chart
Type Temperature Doneness
Meat
Tendercuts; rib, highquality
sirloin tip, rump or topround*
Lamb leg or bone-in shoulder*
Veaishoulder, legor loin*
Porkloin, rib or shoulder* 325° WellDone:
Iiam, pre-cCOkea 325° ToWarm:
Ham, raw
*Forboneless rolled roasts over6-inches
thick, add 5 to 10minutesper lb. totimes
givenabove.
PouItry 3 to5-lbs.
Chickenor Duck 325°
Chickenpieces 375°
Turkey
Oven
325° Rare: 24-30 18-22
325° Rare:
325° WellDone: 35-45 30-40
325°
325°
Medium: 30-35 22-25 i50°- 1600
WellDone:
Medium: 25-30 24-28 150°-1600
WellDone: 30-35 28-33 170°-1850
WellDone:
WellDone:
Well Done:
WellDone: 20-25
ApproximateRoastingTime internal
in Minutesper Pound Temperature“F
3to5-Ibs. 6to $-lbs.
35-45 28-33 170°-1850
21-25
35-45 30-40 170°-1800
10minutesperlb. (anyweight) 125°-1300
Under10Ibs. 10to 15-lbs.
20-30 17-20 160°
35-40 30-35 185°-1900
35-40 185°-1900
10to15-ibs.
130°-140°
20-23 130°-1400
170°-1800
over 5lbs.
Over15Ibs. In thigh:
15-20
185°-1900
lias -
WA
-----
-—-
E=WQ
_-
m–—u:
mm
E:-
Page 14

hod
Fhcon
i)roil
Positim
c
ConmlenLs
A
rrangcin single 1+’cr.
1. If nmafhas fk[or gristle nearI!?e
edge. cut vertical slushes through
tm{habout 2 inches apart, butdon’t
cw int{?meat. Werccwmmend
trim fatto prewmtexcessive
~fo~
smoking, leavinga layerabout
that
IN-inch thick.
~. Removebroiler pan and rack
from broiler compartment and
piacc food on rack.
3. Pull out drawer and position
broilerpan in compartment.Placing
foodclosertoflameincreasesexterior
browningoffood, butalso increases
spatteringand the possibility of fats
and ineatjuices igniting.
4. Close broiler door and, for most
foods,turn OVENTEMP knob to
BROIL. Exceptions are chicken
and ham which are broiled at a
iowersetting in order to cook food
thro@ before over-browningit.
5. Turn most foodsonce during
cooking; (the exception is thin fillets
of fish; oil one side, place that side
downonbroiler rackandcookwithout
turning until done). Time foods for
aboutone-half the total cooking
time, turn food, then continue to
cook to preferred doneness.
6. Turn OVEN TEMP knob to
OFF. Removebroiler pan from
compartment and serve food
immediately.Leave pan outside
compartment to cool.
(“;roundBwf
We]]IIonc?
IJccfStcuk.$
Ral”t
Mcdiu171
WdiDone
Rare
,Mwtium
WellDone
Chicken(450”)
BakeryProducts
Bread(Toast)or
T&ster Pastries
EnglishMuffins
Lobstertails
(6
tO 8-oz.each)
Fish
Hamslices(450°)
Precooked
Porkchops
WellDone
Lambchops
Medium
WellDone
Medium
WellDone
VVienws,
similarprecooked
sausages,
bratwurst
l-lb. (4pauies)
E Io vi-in. {hick
l-in. thick
(1-1‘/2Ibs.)
l;/2-in.thick
(’2.’2~ ]b$,)
I Whok?
(2 to 2Y~-lbs.),
split lengthwise
2-4 slicm
1 Pkg (2)
2-split
2-4
l-Ib. fillets %to
%-in. thick
l-in. thick
2 (YIin.)
2 (l-in. thick),
about 1lb.)
2(1 inch)
about 10-12
2 (IV2 inch),
about 1lb.
l-lb. pkg. (10)
OZ.
c
A
A
A
A
/4
A
A
c
2-3
3-4
c
13-16
B
c 5
B
A
B
B
B
B
12-14
16-18
2s-30
Do not
5
8
10
10-12
13
8
10
10
17
12-14
6 1-2 If desired, split sausagesinhalf
7-8
5-6
8-9
(?-7
1/2-1
turn
over.
4-5
4-7
4-6
Sfx.wcevenly. Up 108 patties
[alw:Iboutsaint time,
7
S[cakslessth:inl-in. cook
[hroughbefore browning,
pa~lfrying is rcc{)nmlcndcd.
Slash fa!.
Rcctucctinws about5 to 10min.
per side for’cut-upchicken.
Brusheach side with melted
butter.Broilwithskin sidedown
first andbroil withdoorclosed.
Spaceevenly.Place English
muffins cut-side-upand brush
with butter if desired.
Cut throughbackof shell,spread
open. Brush with meltedbutter
beforeandafter half time.
Handle and turn very carefully.
Brush with lemonbutter before
andduring cooking if desired.
Preheat broiler to increase
browning.
8 Increasetimes 5-10min. per side
for lyz-in.thickor home cured,
Slash fat,A
Slash fat,
10
lengthwiseinto5to6-in.pieces.
14
Page 15

Ai%%%
‘ww’-
Proper care and cleaning are
important so your range will give
cffkimt md satisfactory
}“oU
service.
carefully in caring for it to help
assuresafe and proper maintenance.
BE SLJRE
FO11OWthese ciirec~ions
ELECTRICPOWER
N OFFBEFORECLEANING
AN%”PART’OFYOURRANGE.
outer Finish
When the range is cool, wash the
enamel finish with mild soap and
wateror a mild abrasive cleanser
applied with a damp cloth. Rinse
the surface with clean water and
dry with a soft cloth. Ifyou wish,
occasionally apply a thin coat of
mild cleaning wax to help protect
the finish.
There are a number of precautions
you can take to avoidmarring the
surface of the range and to prevent
itfrom becoming dull. Don’tslide
heavy pans across it. If you spill
foodswith a lot of acid (tomatoes,
sauerkraut, fruitjuices, etc.) or
foodswith high sugarcontent,
clean them up as soon as possible.
If allowed to set, these foodscould
cause a dull spot. Also, no matter
howstubborn the food stain, never
use harsh abrasive cleansers. They
could permanently damage the
enamel surface.
CkmtrdPad
It’sa good idea to wipe the control
paneldean after each use of the
oven.For amore thorough cleaning,
theknobs can be removed by
pullingthem off the knob stems.
Clean with mild soap and water,
rinse with clean water and polish
dry with a soft cloth.
Do not use abrasivecleansers,
strongliquid cleaners or oven
cleaners on the control panel as
[heywill damage the finish.
Gmtes
Grates should be washed regularly
and, of course, after spillovers.
Washthem in hot, soapywaterand
rinse with clean water. Dry the
grates with a cloth—-don’tput them
back on the range wet. When
replacing the grates, be sure they’re
lockedintopositionovertheburners.
Toget rid of burned-on food, soak
the grates in a slightlydiluted
liquid cleanser.
Althoughthey’redurable, the
grates will gradually losetheir
shine, regardlessof the care you
takeofthem. This isdue to their
exposure to high temperatures.
Topreserve the grates’porcelain
finish as long as possible, havethe
pan on the grate before youturn on
theburner,andlowertheflamewhen
foodreachesthedesiredtemperature.
~&O~f&
Lift-Up
Ch3kt$)p
Clean the area under the cooktop
often. Built-upsoil, especially
grease, may catch fire.
Tomake cleaningeasier, the
cooktop on model .JGSS03maybe
lifted off or, on model JGBS16,
lifted up and held up bylocking
arms that catch and hold the top up
when it’sallthe wayup.
Be
sure auhmms are turned
offbefumeraising or removing the
eooktop. Then remove the grates,
grasp the front sidesof the cooktop
and lift.
After cleaning underneaththe
cooktopwith hot, mild soapy water
and a clean cloth, put the cooktop
back in place. Forthe lift-uptop,
lift up a little to release the locking
armsand pushthemin whileguiding
the top back down. Be careful not
to pinch your fingers.
J&Ml& Top Burners
The holesin theburners of your
rangemust be keptclean at all
times for proper ignitionand an
even, unhampered flame.
Youshouldclean the burners
routinely and especially after bad
spillovers which could clog these
holes. Burners liftright out for
cleaning.
Note: A screw holds each ofthe
burners inplace to keep them from
wobblingaround during shipment.
Tagsindicatetheir location. Remove
the shipping screw with a Phillips
head screwdriver,lift theburner,
tilt it to one sideat the end closest
to the igniter and move ittoward the
back ofthe range. This disengages
it from the gas valvesat the front of
the range, and itlifls out easily.
Toremoveburned-on food, soak
the burner in a solution of a product
used forcleaningthe insideofcoffee
makers. Soak the burner for 20 to
30 minutes. If the food doesn’t
rinse off completely, scrub it with
soap and water or a mild abrasive
cleanser and a damp cloth.
Beforeputting theburner back, dry
it thoroughly by setting it in a warm
ovenfor 30 minutes. Then place it
back in the range, making sure it is
properly seated and level.
(continuednextpage)
Page 16

D$lm
oven
lle oven door is removable to
malw cleaning the oven easier.
Toremovethe door, open it a few
inchesto the specialstop position
that will hold the door open.‘Grasp
firmly on each side and Iifl the
door straight up and off the hinges.
(Due to the large amount of
insulationand theconstruction
ofthedoor,“itis heavy.)
Note: Be careful not to place hands
between the spring hinge and the
ovendoo; frame. The hinge could
snap back and pinch fingers.
Washwith hot, soapywater. For
stubborn spots, use a solution of
ammonia and water. Do not
immerse the door in water.
To replace the door, position slots
in bottom of door over the hinges
that are in the “out” position. Then
lowerthe door slowly and evenly
overboth hinges at the same time.
If hinges snap back against the oven
frame, pull them back out.
oven
Oven shelves may be cleaned with
a mild abrasive cleanser following
manufacturer’sdirections. Afier
cleaning,rinsethe shelveswithclean
water and dry with a dry cloth. To
removeheavy,burned-on soil, soapy
metal pads may be used following
manufacturer’s directions. After
scrubbing, wash with soapy water,
rinse and dry.
With proper care, the porcelain
enamel walls will retain their goodIookingfinish formanyyears.
Soap and water will normally
do thejob. Heavy spattering or
spilloversmay require cleaning
with a mild abrasive cleanser.
Soapywet pads mayalso be used.
Do notallowfood spillswith a high
sugaror acid content (such as milk,
tomatoes, sauerkraut, fruit juices
or pie filling)to remain on the
surface. They maycause a dull
spot even after cleaning.
Household ammonia may make the
cleaningjob easier. Place 1/2cup
in a shallow glass or pottery
container in a cold oven overnight.
The ammonia fumes will help
loosen the burned-on grease and
food.
If necessary, youmayuse a caustic
cleaner. Followthe package
directions.
(hlt~O1’lS aboutusing
spray-onovencleaners:
careful where theoven cleaner
Be
is sprayed.
@Do not spray on theelectrical
controlsand switches(on models so
equipped) because it could cause a
short circuit and result in sparking
or fire.
@Do
notallow a filmfrom the
cleanertobuildup onthetemperature
sensingbulb—itcould cause the
ovento heat improperly. (The bulb
is located at the top of the oven,)
Carefully wipe the bulb clean after
each ovencleaning, being careful
not to move the bulb as a change
in its position could affect how
the oven bakes.
@Do not spray any oven cleaner on
the oven door, handles or any
exterior surfaceoftheoven, wood
or paintedsurfaces. The cleaner
can damage these surfaces.
The oven
make cleaning easier.
‘l_o
Removetheovenshelves.
L
bottom can be rcn-noved to
removetheovenbottom:
2. Removethe two knurled hold-
down screwsateach front corner.
If screwsare too tighttoremoveby
hand, use a screwdriver.
Place yourfingersin the slots in the
bottom and liftup the front edgeof
the ovenbottom untilit is clear of
the oven front frame.
3. Pull the bottom forward and out
of the oven, keepingthe rear of the
ovenbottom gliding on the bottom
of the lowest shelf glide. This keeps
itfrom catchingontheburner igniter
shield. Toreplace the bottom, just
reverse this procedure, making sure
the two tabs onthe rear of the oven
bottom go into the slotsat the rear.
The ovenbottom has a porcelain
enamel finish. Tomake cleaning
easier, protect the oven bottom
from excessivespillovers.This is
particularly important when baking
a fruit pie or other foodswith high
acid content. Hot fruit fillings or
foodsthat are acid in content such
as milk, tomato or sauerkraut, and
sauces with vinegar or lemon
juice, maycause pitting and damage
to the porcelain enamel surface.
Page 17

oven
“h protectthe ovenbottomsurface,
placea piece of aluminum foil
slightlylarger than the baking dish
or a small cookie sheet on a lower
shelfor unciei.the baking dishto
catch any boilovcrs. It should not
completely coverthe shelf as this
wouldcause unevenheat inthe
OVen.Aluminum foilshould not
be placed on the oven bottom.
If a spilloverdoes occur on the
ovenbottomallowthe ovento cool
first. Youcan clean the bottomwith
soap and water, a mild abrasive
cleanser, soap-filledabrasive pads,
or caustic oven cleaner following
manufacturer’sdirections.
When applying oven cleaner, be
carefulnotto getiton thecountertop,
floor or any other surface.
oven Li@t
@fode#JGBS16)
The light bulb islocated in the
upper right corner of the oven.
Beforereplacing the bulb,
disconnect electric power to the
rangeat the main fuse or circuit
breaker panel. Let the bulb cool
completely before removingit. Do
nottouch a hot bulb with a damp
clothas the bulb will break.
Besure to installa high
temperature appliance bulb of the
same wattageasthe one it replaces.
After broiling, remove the broiler
rack and carefully pour off the
grease. Washand rinse the rack in
hot, soapy water.
lffood has burned on, sprinkle
the rack while hot with detergent
and cover with wet paper towelsor
a dish cloth. That way,burned-on
foodswill soak loose while the
meal is being served.
Do not store a soiled broiler pan
and rack in the oven.
The temperature control in your
newovenhas beencarefullyadjusted
to provideaccurate temperatures.
However,if this ovenhas replaced
oneyouhaveused for severalyears,
youmaynotice adifference in the
degree of browning or the length
oftime required when usingyour
favoriterecipes. Oven temperature
controlshavea tendency to “drift”
overaperiod ofyears and since
thisdrift is very gradual, it is not
readily noticed. Therefore, you
mayhavebecome accustomed to
your,previous ovenwhich may
haveprovided a higher or lower
temperature thanyou selected.
Beforeattempting to havethe
temperature ofyour new oven
changed, be sure you have followed
the baking time and temperature of
the recipe carefully.Then, afler
youhaveused the ovena fewtimes
and you feel the oven is too hot
or too cool, there isa simple
adjustmentyoucan make yourself
on the Oven Temperature knob.
Pull the knob offthe control shaft
and look at the back side. There is
a disc in the center of the knob skirt
witha seriesof notcheson the inner
edge nextto the knob shaft. One of
these notches ispositioned over a
pointeron the sideofthe knob shaft.
Note position of
pointer to notches
~/
~ ~\ Loosen only the
before adjustment
locking screws
Note which notchthe pointer is
located in. Tomake an adjustment,
carefully loosen (approximately
one turn), but do not completely
removethe twoscrewsthathold the
skirt to the knob. Hold the knob
(black or chrome in color) and with
theother hand carefullytilt the skirt
untilthe notch in the disc clears the
pointer on the knob shaft. To raise
the oventemperature, turn the
dial
in the direction ofthe arrow for
“Raise~’
Tolower the temperature, turn
the
dialin the direction ofarr~w
for “LowerVEach notch will
changethe oventemperature
approximately25°F.
It is suggestedyou movethe
adjustment one notch from the
original setting and check oven
performance before making any
additional adjustments.
After the adjustment is made, make
sure the pointer on the knob shafi
is aligned with the notch in the
disc. Press skirt and knob together
and retighten screws so they are
snug, but be careful not to
overtighten.
Re-installknob on range and check
performance. Note that after an
adjustment has been made the
“Of~’ and “Broil” positions on
the skirt will notline up with the
indicator mark on the control panel
as it previously did. This condition
is expected and will not create a
problem. NOTE: The expanded
(shaded) area on the skirt isto
allowfor this condition.
(continuednext page)
E4wr.
—.
-.
Eswz?-
emaa
xEP’--
———
Ef&3%i
17
Page 18

.-
...
NM(2:Lw-atlgqm’tmol
Mmdtmiilg.
.——
PART i$lA’fERIAIAs‘N) t!w GENKXALIIIRECTIONS
Brwik’rMl ikndrkii
———
(’ontrol Knobs * h4kI SO:ipand Water Ptdl off
Outskk Glass h’inish e SOapami
>Ieial
Outcr Poreelaiil @PaperTowel
EnamelFinish
(itkiWillCr
eS(Xlp
*SOilp-FillCdScouring Pad
~Conmwcial OvmlCleaner
Wil[C~ Clean outside of cooled black glassdoor with a glass Cleiincrhit does not contain
e SOfipiindWi~t~r
e DryCloth
~SoapandWater
PaintedSurfaces ~SoapandWater Usea mild solution ofsoap andwater.Do not use anyharsh abrasives or cleaning powders
InsideOvenDoofi @SoapandWater
(hen Liner*
[CAUTION: When in
use. lightbulbs can
becomewarm enoughto
break if touchedwith
moistcloth or towel.
When cleaning, avoid thin layerof cleaner. Use ofrubber glovesis recommended. Wipe or rub lightly on
warm lamps withcleaning
cloths if lamp coveris
removed.)
Removable
Bottom
Surface
Grates
Oven
Burner
Burners ~Solutionfor Cleaning
—.
Shelves
*Spillageof marinades, fruitjuices, and basting materials containing acids maycausediscoloration. Spilloversshould bewiped up immediately, with care
beingtakennot to touchanyhot portionofthe oven. When the surface iscool, clean and rinse.
o Soap-Filled ScouringPad
@CommercialOvenCleaner sidesand lining updoor with hinges. Push door firmly into place.
~
SoapandWater
* Soap-FilledScouring Pad
~CommercialOven Cleaner
e
SoapandWater
QSoap-FilledScouringPad
(Non-Metallic)
o Soap and Water
eISoap-Filled Scouring Pad
(Non-Metaiiic)
Inside ofCoffee Makers and soak them for 20 to 30 minutesin solution of hot water and product for cleaning inside
~SoapandWater ofcoffeemakers, suchas Dip-It brand. If soil does not rinse offcompletely, scmb burners
~Mild AbrasiveCleanser
9Damp Cloth
@Soap andWater
* Soap-Filled ScouringPad
e Commercial OvenCleaner
Drain fal, cod paniUl(i nick slightly.(Do no[ ICIsoiledPiill:ind rack standin broiler
compartment w ccwl.) Sprinktcon dckxgcnt. Fill the piinwith warm wa[crandspnwd
claih or paper [owcloverthe rack, Let pun and riiCkstand fi]ra fcwminutes. Wash: scour
[~~~~s$iiry. Rinseid dry. OITION: TIw broiler piiniindt-ii~kmay:ilsr.)beclcarwd ina
if
dishwxshcr.
kIIObS.Wiishg~ntlybutdo n(}~SOnk.Dry and rc[urn controls to rangemi&ingsure
Illilkh flii( iiIWI 011 lk !-mobiIIKtshiif[.
(O
iii~rnoniti.Washother glass with ch)thdampened in soapy water. Rinse iindpolish with a
dly cloth, If knobsiireremoved,do not allowwater 10run down inside the surface of glass
while cleaning.
Wash, rinse, and then polish with a clrycloth, D() N(Yf USE steel wool, abrasives,
ammonia, acids, or commercial ovencleaners whichmaydamagethe finish.
Avoidcleaningpowdersor harsh abrasives which mayscratch the enamel. If acids should
spill on the range while it is hot, usc iidry paper towelor cloth to wipeup right away.
When the surfacehascooled, washand rinse. For other spills, such m fat smatterings,em.,
washwith
which mayscratchor mar surface.
Tocleanoven door; rcmovebyopeningabout three inches and graspingdoor at sides. Lift
door up and away from hinges. Clean with soapand water. Replace bygrasping door at
Cool beforecleaning.
FOR LIGHT SOIL: Frequentwiping with mild soapand water(especially after cooking
meat) will prolongthetime betweenmajor cleaning. Rinse thoroughly.N(YfE: Soapleft
on liner causesadditional stains whenovenis reheated.
FOR HEAVYSOIL: Choosea non-abrasive cleaner and followlabel instructions, using
stubborn spots. Rinsewell. Wipe offanyovencleaner thatgetson thermostat bulb. When
rinsing ovenaftercleaning also wipethermostat bulb,
The ovenbottompanelcan be removedfor easy cleaning. l-Jsethe same directions for
cleaningas explainedabovefor Oven Liner.
Lift out when cool. Soak5-10minutesif desired in warm solution of dishwasher
detergent. Scour with materials mentioned here toremoveburned-on food particles.
Wipe off burner heads. If heavy spillover occurs, removeburners from range (see page 15)
with soap andwater or a mild abrasivecleanser and a damp cloth. Dry burners in a warm
oven for 30 minutes before returning them to the range.
Yourshelves can becleanedbyusingany and all mentioned materials. Rinse thoroughly to
removeall materialsaftercleaning.NOTE: Somecommercialovencleanerscausedarkening
anddiscoloration. When using for first time, test cleaner on small part ofshelf and check for
discoloration beforecompletely cleaning.
soapmciwi~tcrwhencooled and then rinse. Polishwith dry cloth.
Page 19

.:
.
~fyouneedmore help.. .eall,toll free:
II-wGEAnswercenter@
consumer service
lf YOuiNeed
Toobtainw-vice, see your warranty
onthe back page ofthis book.
‘We’reproud of our service and
wantyouto be pleased. If for some
reasonyou are not happy with the
service you receive, here are three
stepsto follow for ftirther help.
FIRST, contact thepeople who
serviced your appliance. Explain
whyyouare not pleased. In most
cases, this will solvethe problem.
NEXT, if you are still notpleased,
write all the details—including
yourphone number—to:
Manager, Consumer Relations
General Electric
Appliance Park
Louisville, Kentucky 40225
FINALLY, if your problem is still
not resolved, write:
Major Appliance
Consumer ActionPanel
20 North Wacker Drive
Chicago, Illinois 60606
-.
-. --
Page 20

Saveproof of original purchase date such asyour sales slip or cancelled check to establish warranty period.
.—
— .——
;s
Forone year from dateof original
purchase,wewill provide,free of
charge, parts and service labor
in your hometo repair or replace
part ofthe range that fails
any
because of a manufacturing defect.
1S ~ Service trips toyour home to
teach you how to usethe product.
Readyour
If you then have anyquestions
about operating the product,
please contact your dealer or our
Consumer Affairs office at the
address below, or call, toll free:
The GEAnswer Center@
800.626.2000
consumer information service
@Improper installation.
if you havean installation problem,
contact your dealer or installer,
Youare responsible for providing
adequateelectrical, gas,exhausting
and other connecting facilities.
Useand Care material.
This warranty is extendedto
the original purchaser and any
succeeding ownerfor products
purchased for ordinary home use
in the 48mainland states,Hawaii
and Washington, D.C.InAlaska the
warranty is the sameexceptthat it is
LIMITED because you must pay to
shipthe product to the service shop
or for the service technician’s travel
coststo your home.
All warranty service will be provided
byour Factory Service Centers or
byour authorized Customer Care@
servicersduring normal working
hours.
Lookinthe White or YellowPages
of yourtelephone directory for
GENERAL ELECTRICCOMPANY,
GENERAL ELECTRICFACTORY
SERVICE, GENERAL ELECTRIC-
HOTPOINTFACTORYSERVICE or
GENERAL ELECTRICCUSTOMER
CARE@SERVICE.
@Replacement of housefuses or
resetting of circuit breakers.
@Failure of the product if it is used
for other than its intended purpose
or used commercially.
~ Damage to product caused
by accident, fire, floods or acts
of God.
WARRANTORISNOTRESPONSIBLE
FORCONSEQUENTIAL DAMAGES.
Some states do not aHowthe exclusion or limitation of incidental or consequential damages, so the above limitation or exclusion
may not apply to you. This warranty gives you specific legal rights, and you mayalso have other rights which varyfrom state to state.
Toknow what your legal rights are in your state, consult your local or state consumer affairs office or your state’sAttorney General.
R@ No.205C1O26POOI
PU!3~0. 49-4678
h ---1
I P/Af!j60T691P295 ]
—
7-85
VVa~~a~W:
Genera!lHectricCompany
Iffurtherhelpi%needed concerningthiswarranty,contact:
MM%,G%mem$Hecti5cCompany,AppliancePark,Louisville,KY
GEN E 1!c
40225
JGSS03PH
JGBS16PH
JGBS16GPH JGBS16GEI”-I
JGSS03EH
JGBW6EI-I
 Loading...