

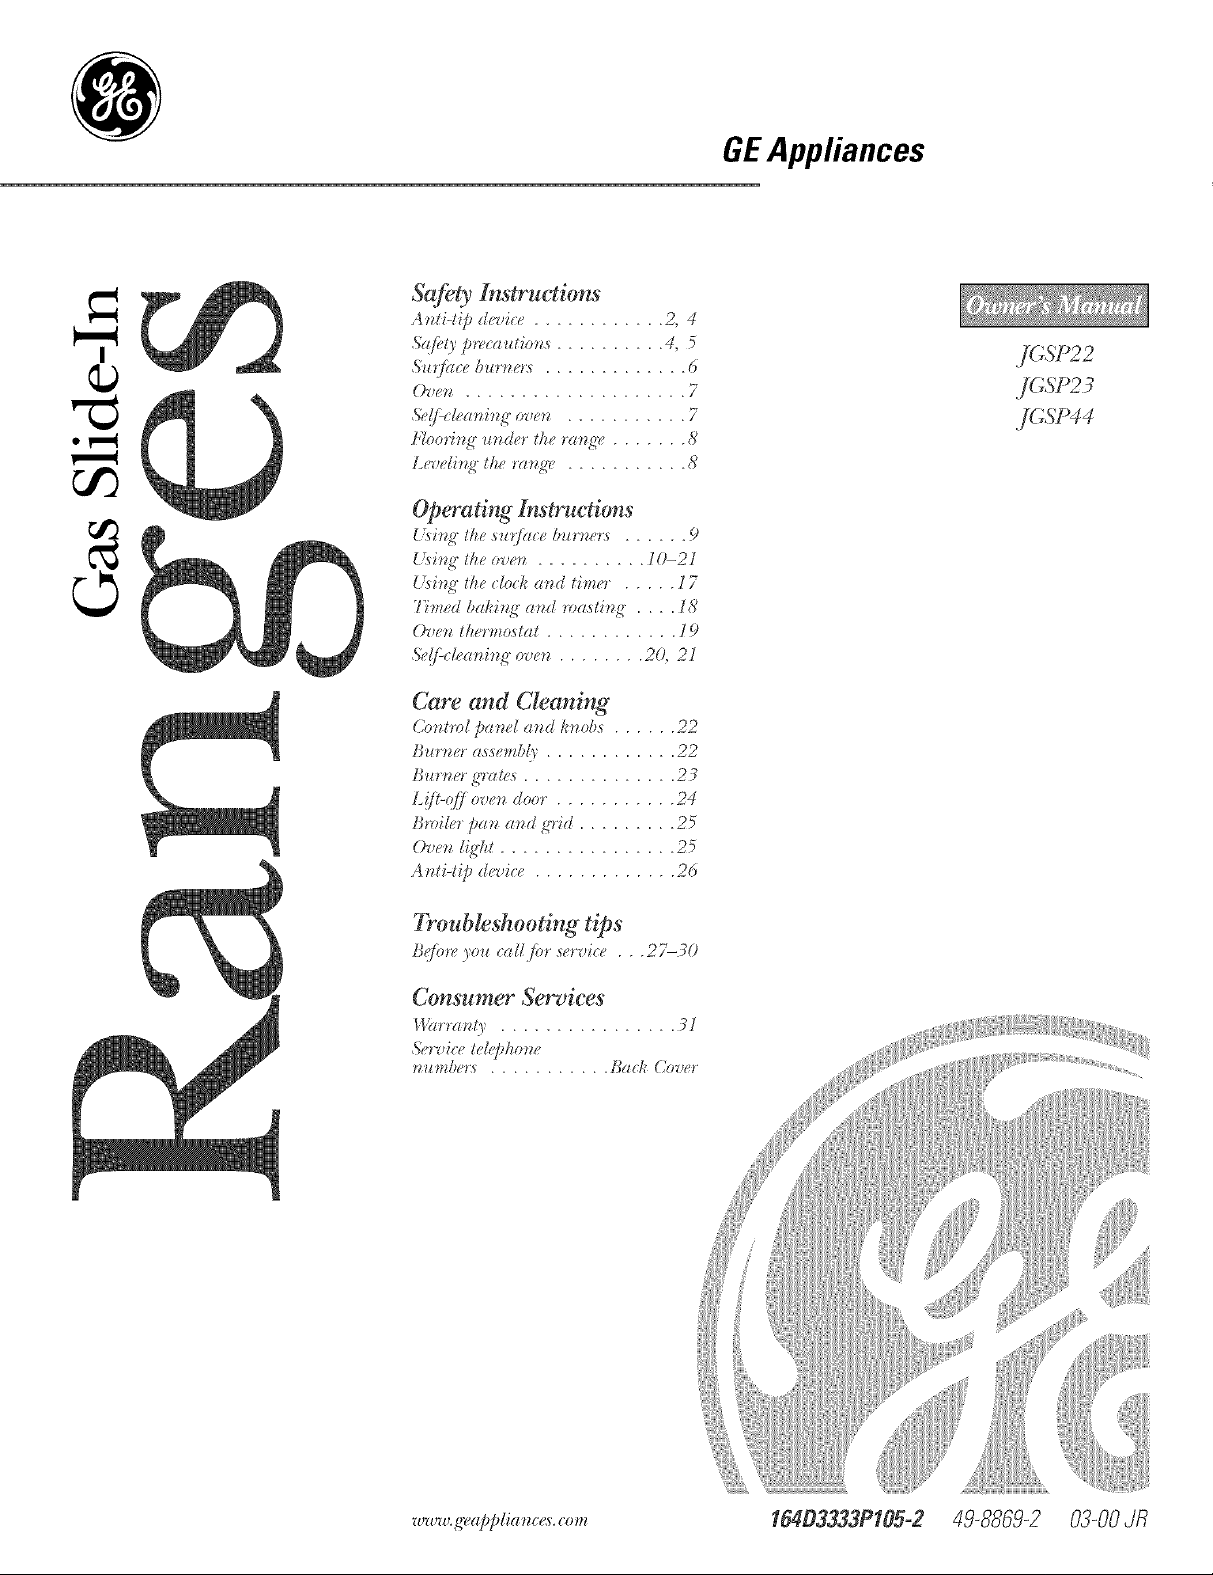
Safe_ In_trucdons
A nti4kiJ devi_'e ............ 2, 4
GEAppliances
o_
oq
.S'm;./,ce/,_r_,._:s ............. 6
Ovetv .................... 7
S(.(/:_"lea_4t_[4.yen ........... 7
k}'oorhq4 ut_der the rat_/d'e....... 8
L_-_Jelh<q"the r_m_. ........... 8
Of_erating Instructions
_tshq4 tf_es_%f?_ceburne<s ...... 9
_Lshq4the _*veu .......... 10-2/
__sh_g"the Hnck at_d i'_ttz¢;" . .... [ 7
7bncd bak_tq4at_d ma.sth_/d". . . . 13_
O'oet_Hl_,t'mo,stat............ 19
_S'd/:."t_.m4n[4oven ........ 20, 21
Care and Cleaning
()ontml pam.I and knnbs ...... 22
Burner a.ss_.ndd)............ 22
Burm-r/d'rates . ............. 2:_
L!,/?-(_(toven door . .......... 24
B*_*ib* pa_ m_d zq:,'id......... 25
Oven li!4¢_t................ 25
Auti4?p ddJM" ............. 26
Troubleshooting tips
B(?(;n_")nu _a//j<;n'.wn'.M....27-_0
JGSP22
j<;s #4
Consumer S_wviees
_n'ran 0 ................ _1
Serviu. _el_jdmm.
nl_tnl,'¢,bs ........... [_ad_" Co'o¢,_'
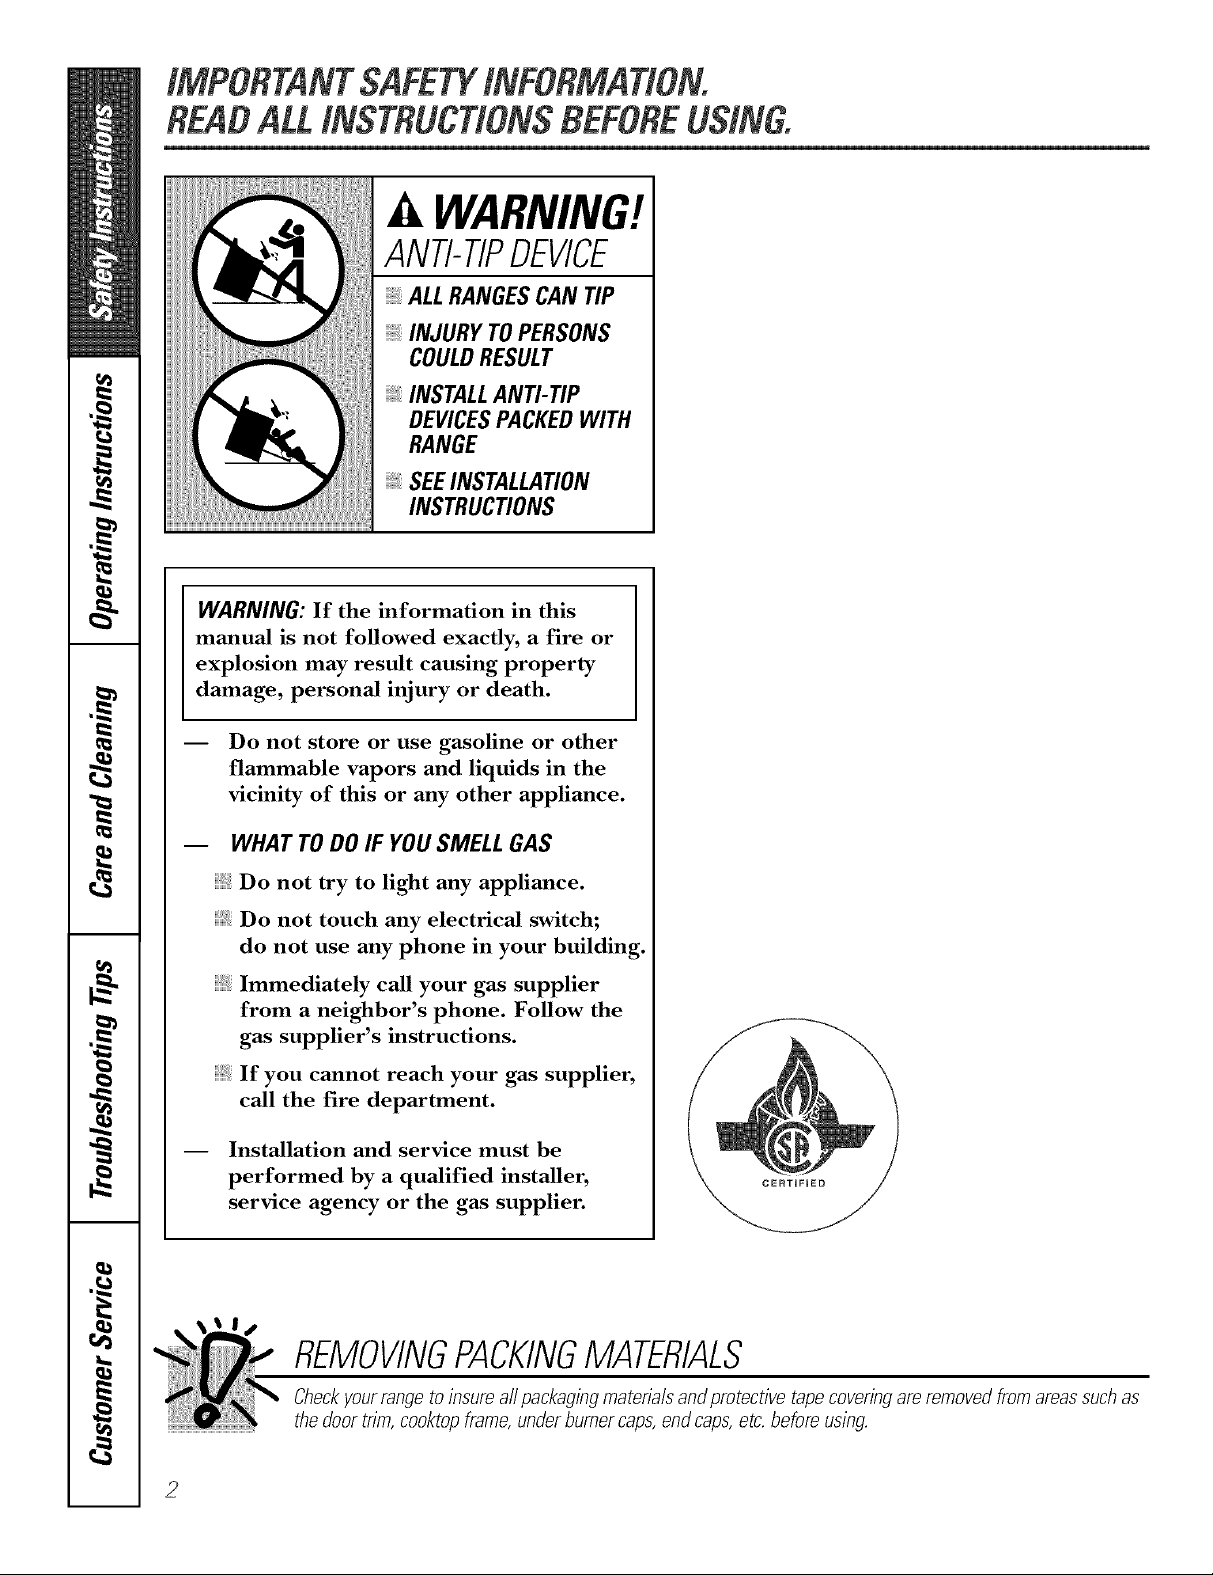
IMPORTANTSAFETYtNFORMA770No
READALLINSTRUC770N$BEFOREUSING
A WARNING!
ANTI-TIPDEVICE
ALLRANGESCANTIP
INJURY TOPERSONS
COULDRESULT
INSTALLANTI-TIP
DEVICESPACKEDWITH
RANGE
SEEINSTALLATION
INSTRUCTIONS
WARNING: If the information in this
manual is not followed exactly, a fire or
explosion may result causing property
damage, personal injury or death.
-- Do not store or use gasoline or other
flammable vapors and liquids in the
vicinity of this or any other appliance.
-- WHAT TO DO IF YOU SMELL GAS
Do not try to light any appliance.
Do not touch any electrical switch;
do not use any phone in your building.
Immediately call your gas supplier
from a neighbor's phone. Follow the
gas supplier's instructions.
If you cannot reach your gas supplier,
call the fire department.
-- Installation and service must be
performed by a qualified installer,
service agency or the gas supplier.
REMOVINGPACKINGMATERIALS
Checkyourrangeto insureall packagingmaterialsandprotective tapecoveringareremovedfromareassuchas
thedoortrim, cooktopframe,underburnercaps,end caps,etc.beforeusing.
2
A Service Partnership.
IMPORTANT!
Fill out and return the (_onsumer Product Registration Card that is packed with this product.
FORYOURRECORDS
Write the model and serial numbers here:
#
#
You can find them on a label on the ti'ont of the range behind the storage (h'awe_:
Staple sales slip or cancelled check here.
Proot of the o_iginal i_m'chase date is needed to obtain se_'ice m_(ler the warranty:
READTHISMANUAL
Inside _ou will find many heli_lifi hints on how to use and maintain _our range properly..lust a little
prexentixe care on your part can saxe you a great deal of time and money oxer the life of your range
You'll find many answei_ to colnlnon problems in the Before You Call For Service section. If _ou review
our chart of Troubleshooting 77psfi_st, you ma} not need to call fin" serxice at all.
IFYOUNEEDSERVICE
It_ou do need service you can relax knowing help is onl_ a phone call away: A list of toll-ti'ee customer
serxice numbers is included in the back section of this manual.
Inthe United States, )ou can alwms call the (;E Answer Centei _) at 800.626.2000, 24 hom_ a day,
7 dm's a week.
/11Canada, }ou can alwms call Camco at 1-800-361-3400, 24 hom_ a day, 7 days a week.
3

IMPORTANTSAFETYINFORMATION.
READALLINSTRUCTIONSBEFOREUSING.
WARNING!
For your safe_ the information in this manual must be followed to minimize the risk of fire or
explosion, electric shock, or to prevent property damage, personal injury, or loss of life.
WARNINGANTI-TIPDEVICE
All ranges can tip and injury could result.
Toprevent accidental tipping of the range, attach itto the wall and floor by installing the Anti--tip
device supplied.
Check if the device is installed and engaged properly. Make sure the chain fits securely into the slot
in the bracket.
Do not allow the chain or bracket to damage the gas plumbing in any way.
If you pull tile range ont from the wall for ally' reason, make snre the device is properly
engag.ed when you push tile rang.e back against tile wall. If it is not, thet.e is a possible risk of
the rang.e tipping ox.er and causing inju U if you or a child stand, sit or lean on all open door
Please refer to tile And-Tip device infounafion ill this manual. Faihu.e m take this pi.ecaufion
cou]d result ill tipping of the rang.e and iI)jnI>
IMPORTANTSAFETYNOtiCE
The Califomb Safe Drinking Water and ToxicEnforcement Act requires the Governor of Californb to
publish a list of substances known to the state to cause cancer, birth defects or other reproductive
harm, and requires businesses to warn customers of potential exposure to such substances.
Gas appliances can cause minor exposure to four of these substances, namely benzene, carbon
monoxide, formaldehyde and soot, caused primarily by the incomplete combustion of natural gas or
LP fuels. Properly adjusted burners, indicated by abluish rather than a yellow flame, will minimize
incomplete combustion. Exposure to these substances can be minimized by venting with an open
window or using a ventilation fan or hood.
SAFETYPRECAUtiONS
Have the installer show you the location of the range gas shut-off valve and how to shut it off
if necessary.
Hax.e your rang.e installed and properly
grounded by a qualified installer; ill
accordance with tile Installation
Instructions. Any adjusunent and service
should be performed only by qualified gas
rang.e installers or service mchnicians.
Do not attempt to repair or replace ally
part of your range unless it is specifically
reconmmnded in this mannal. All other
service should be refetxed to a qualified
technician.
i,ocate the range out of kitchen traffic path
4
and out of draf U locations to prexent pilot
outage and poor air circnlation.
Plug your rang.e into a 120:\_lt grounded
outlet only. Do not remo\'e file round
grounding prong tiom tile ping. If in
doubt about rite gronnding of tile home
electrical system, it is your personal
responsibili U and obligation to have all
ungrounded outlet t.eplaced with a
properly grounded, tht.ee-prong outlet ill
accordance with the National Electrical
(;ode. Do not use all extension cord wiflt
fltis appliance.
Let the burner grates and other surJ_aces
cool before tonching them or leaving them
where children call reach them.
SAFETYPRECAUTIONS
Be sure all packaging mamdals are
removed flom the rang.e before operating
it to prevent fire or smoke damag.e should
the packaging material ignite.
Be sure your range is correctly adjusted by
a qualified service technician or installer
for tile type of gas (nautral or LP) that is
to be used. Your rang.e call be corn.erred
for use with either type of gas. See the
Installation Instructions.
WARNING: These adjusnnents must be
made by a qualified servke technk:ian ill
accordance with file manutCacnn-er's
instructions and all codes and reqnirements
of tile authority haxingjulisdiction. Failure
to follow fltese instructions could t.esuh ill
setJotts iI_juU or property damag.e. The
qualified ag.ency perforating this work
assumes t.esponsibilitv for the conversion.
After prolong.ed use of a rang.e, high floor
mmperaun_es may result and many floor
cox.erings will not withstand this kind of
use. Ne_.er install the rang.e o_.er viwl die or
linoleum that cannot withstand such type
of use. Never install it directly over interior
kitchen carpeting.
Do not leax.e children alone or unattended
where a rang.e is hot or ill operation. They
could be seriously burned.
Do not allow anyone to climb, stand or
hang on the o\.en door; storag.e drawer or
cookmp. They could damag.e the rang.e
and ex.en tip it ox.et; causing sex.ere personal
injm T.
CAUTION: hems of interest to children
should not be stored ill cabinets above a
rang.e or on tile backsplash of a range--
children climbing on the rang.e to reach
items could be seriously iIIjttl'ed.
Always kee I) wooden and plastic utensils
and canned food a safe distance away flom
yonr rang.e.
Always kee I) combustible wall cox.erings,
cmmins or drapes a safe distance flom
vonr rang.e.
Never wear loose fitting or hanging
garments while using file appliance.
Be cat.eflfl when reaching for imms stored
ill cabinets over tile rang.e. Flammable
material could be ignited if brought ill
contact wJfll flame or hot ox.en surfaces
and may cause sex.ere bums.
Teach children not to play with the controls
or any other part of the rang.e.
Never leax.e tile oven door open when you
are not watching the rang.e.
For your safety, never use your appliance
for warming or heating the room.
Always kee I) dish towels, dish cloflls, pot
holders and other linens a salb distance
from your rang.e.
Do not leax.e paper products, cooking
utensils or food ill the ox.en when not
ill ttse.
Do not store flatnmable materials ill an
ox.en, a rang.e storag.e drawer or near a
cooktop.
Do not store or use combustible mamfials,
gv_soline or other flammable vapors and
liquids in the vicinity of this or any other
appliance.
Do not let cooking grease or other
flammable mamnals accumulam ill or
neat the rang.e.
Do not use water oil grease fires. Never
pick up a flaming pan. Turn the controls
off'. Smother a flaming pan on a stnqaace
burner by cox.ering the pan complemly with
a well-fitting lid, cookie sheet or fiat tray.
Use a mulfi-pull)ose dU chemica] or tbam-
type rit.e extinguisher
Flaming gxease outside a pan call be put
ont by cox.efing it with baking soda or;
if available, by using a muld-pm])ose di T
chemical or foam-type fire exdnguishen
Flame ill the oven can be smothered
completely by closing tile oven door and
turning the oven off or by using a muld-
puq)ose dU chemical or foam-type fire
extinguishen
5
IMPORTANTSAFETYINFORMATION.
READALLINSTRUCTIONSBEFOREUSING.
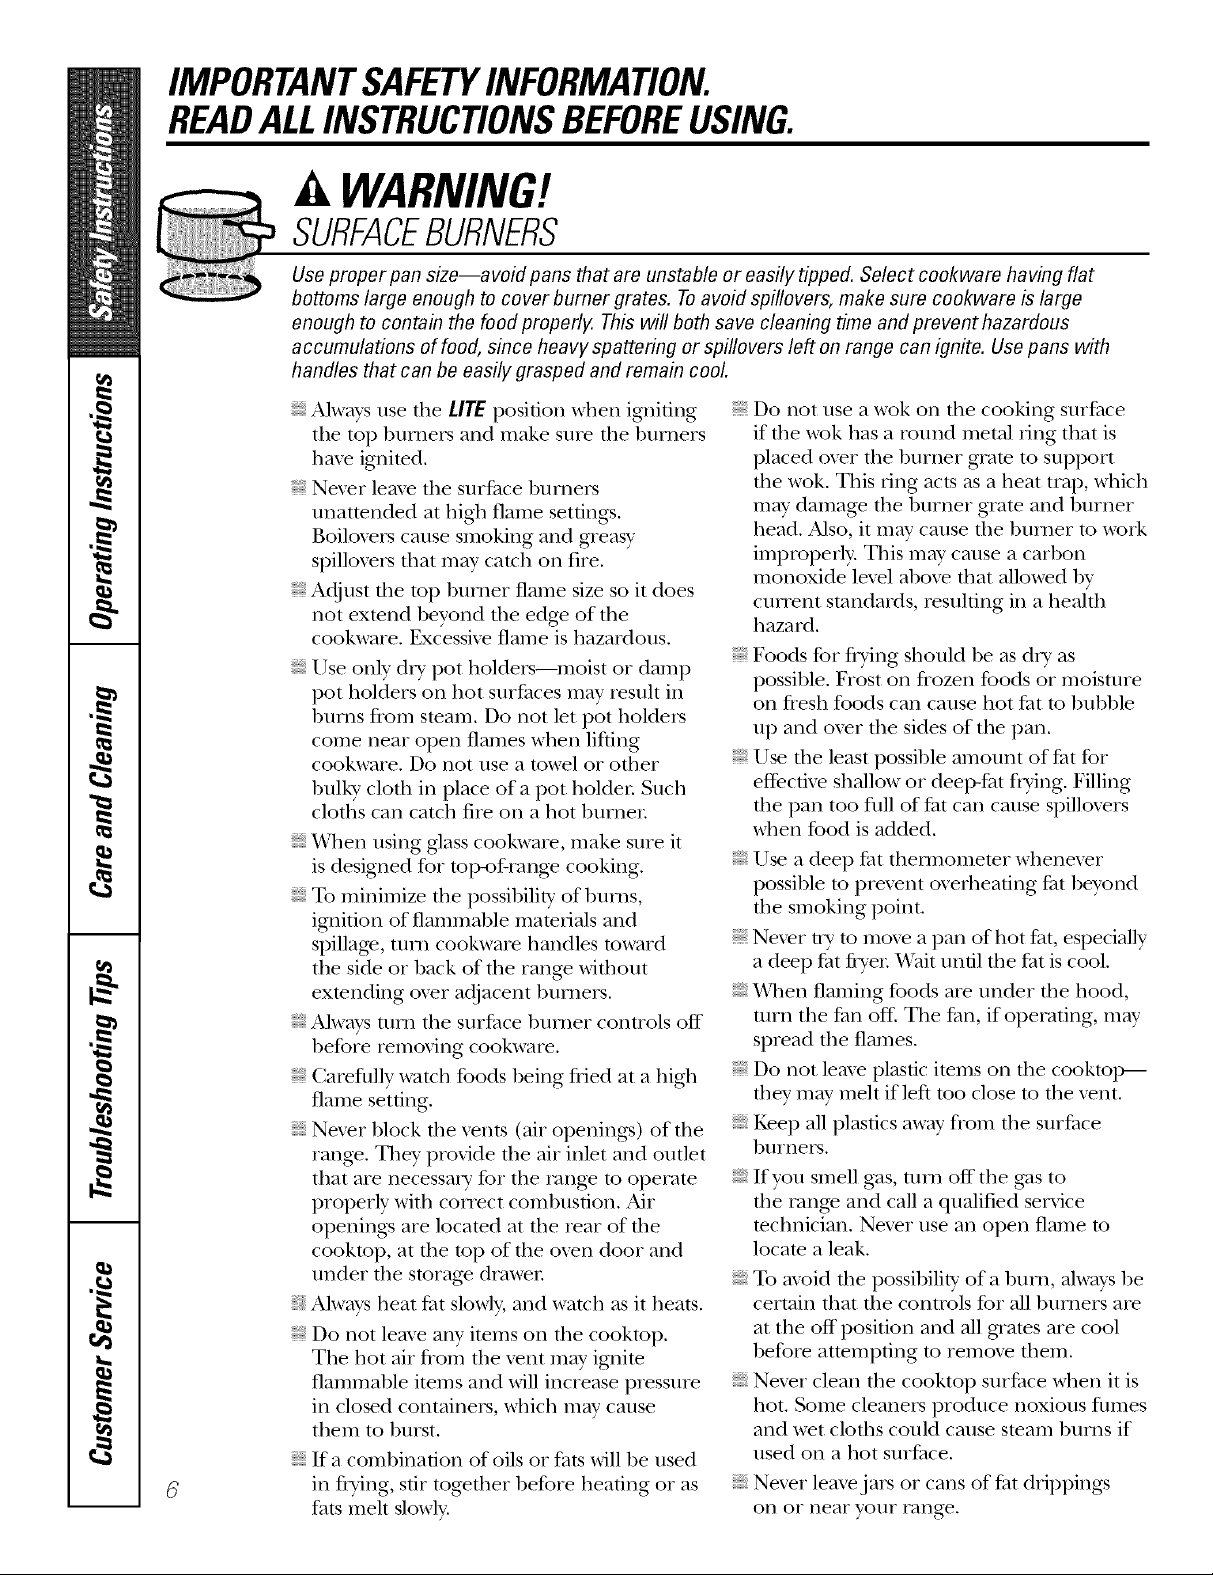
WARNING!
SURFACEBURNERS
Use proper pan size--a void pans that are unstable or easily tipped. Select cookware having flat
bottoms large enough to cover burner grates. Toavoid spillovers, make sure cookware is large
enough to contain the food properly. This will both save cleaning time and prevent hazardous
accumulations of food, since heavy spattering or spillovers left on range can ignite. Usepans with
handles that can be easily grasped and remain cooL
Always use d_e LITE posidon when igniting
the top burners and make sure the burners
haze ignited.
Nexer leave flse surthce burners
unattended at hiOl flame setting:s.
Boiloxers cause smoking and greasy
spilloxers fllat may catch on fre.
Adjust tile mp bui_mr flame dze so it does
,lot extend beyond dse edge of tile
cookware. Excessixe flame is hazardous.
Use only d U pot holders--moist or damp
pot holders on hot surl_aces may resuh in
burlls flom steam. Do not let pot holders
come near open flames when lifting
cookware. Do not use a towel or other
bulky cloth in place of a pot holden Such
cloths can catch fire on a hot burner
When using glass cookware, make sure it
is designed for top-of-range cooking.
To minimize the possibility of btsY/lS,
ignidon of flammable matesials and
spillage, mm cookware handles reward
the side or back of flse range wiflsout
extending o_er adjacent burners.
Aiways mm file surl_ace burner conuols off
before 5emoving cookware.
Carefldly wamh foods being fried at a hiO5
flame setting.
Nexer block tile xents (air opening:s) of tile
range. They provide tile air inlet and outlet
that are necessa5 T tbr the range to operate
properly with connect combustion. Air
openings are located at file rear of file
cookmp, at flse mp of flse oxen door and
under tile storage drawer
AiwWs heat fi_t slowl> and watch as it heats.
Do not leave any items on file cookmp.
The hot air flom tile \etlt 511W ignite
flammable items and will increase plessure
in closed containers, which m W cause
them to burst.
If a combination of oils 05 fats will be used
in flying, stir together before heating or as
fats meh slowly.
Do not use a wok on the cooking suifi_ce
if file wok has a round metal ring that is
placed oxer the burner grate to support
file wok. This 5qng acts as a heat trap, which
may damage tile burner grate and burner
head. Also, it may cause file builder to work
improperly. This may cause a carbon
monoxide lexel above flint allowed by
cmxent standards, resulting in a heahh
hazard.
Foods for flying should be as dry as
possible. Frost on fozen foods or moisture
on flesh foods can cause hot l_atto bubble
up and oxer the sides of the pan.
Use the least possible amount of tht for
eflectixe shallow or deep-tht flTing. Filling
tile pan too flfll of fat can cause spillo_ers
when food is added.
Use a deep fat thermometer whenexer
possible to prexent oveflseafing fat beyond
dse smoking point.
Ne_er n;v to mo_e a pan of hot tht, especially
a deep l_atflyer _4'ait until the tht is cool.
When flaming foods are under tile hood,
turn tile fan off: The thn, if operating, m W
spread the flames.
Do ,lot leaxe plastic items on dse cooktop---
flsey m W melt if left too close to the xent.
Kee I) all plastics aw W flom the surfitce
burners.
If you smell gas, tuYil off the g_s to
the range and call a qualified service
technician. Nexer use an open flame to
locate a leak.
To axoid die possibility of a burn, always be
certain dsat file controls for all burners are
at tile off position and all gaates are cool
befose attempting to remoxe fllem.
Nexer clean tile cooktop s/5iPace when it is
hot. Some cleaners produce noxious fismes
and wet cloflls could cause steam burJls if
used on a hot surl_ace.
Nexer leave jars 05 cans of l_atdrippings
on or near your range.
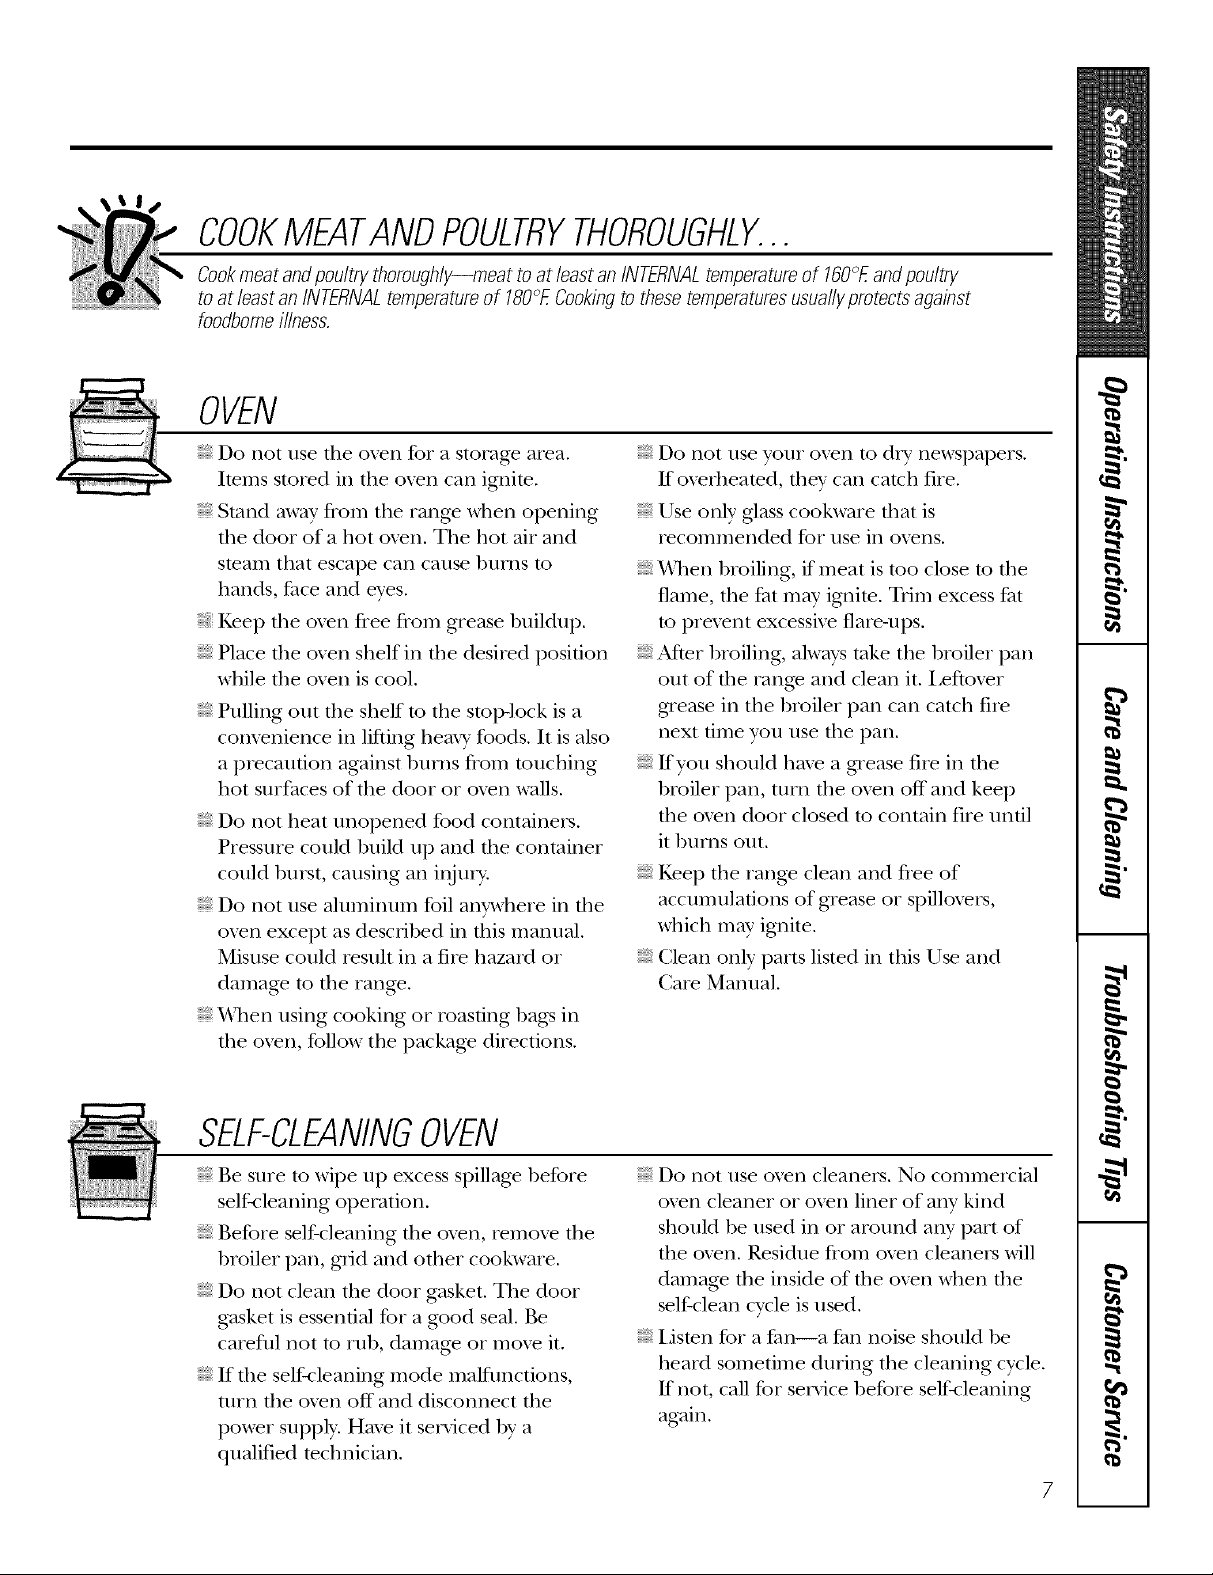
COOKMEATANDPOULTRYTHOROUGHLY...
Cookmeat andpoultry thoroughly--meat to atleast an INTERNALtemperatureof 160°Eandpoultry
toat least an INTERNALtemperatureof 180°ECookingtothese temperaturesusuallypretects against
foodbomeillness.
OVEN
Do not use the o\en for a storage area.
Imms stored in tile o\en can ignim.
Stand away fiom tile range when opening
tile door of a hot oxen. The hot air and
steam that escape can cause bums to
hands, face and eves.
Kee I) the oxen free from grease bnildup.
Place the oven shelf in tile desired position
while the oven is cool.
Pulling out the shelf m the stop-lock is a
comenience in lifting hemy' foods. It is also
a plecaution against bums flom ranching
hot surfaces of tile door or oxen walls.
Do not heat unopened food containers.
Pressure could build up and rile container
could burst, causing an iI_ni>
Do not use aluminum foil an_vhere in rile
oxen except as described in this nmnual,
Misuse could result in a fire hazard or
damage to fl_e range.
_Allen using cooking or roasting bags in
the oxen, follow the package directions.
Do not use vonr o\en to diy' newspapers.
If oxerheated, flier can catch fire.
Use only glass cookware that is
iecommended for use in oxens.
_Allen broiling, if meat is mo close m file
flame, tim/_at may ignim. Trim excess/_at
m prexent excessixe flaie-ups.
A£ter broiling, alwws rake the broiler pan
out of file range and clean it. I,eftoxer
g_ease in tile broiler pan can catch rile
next time you use rile pan.
lt'you should haxe a gTease rile in the
broiler pan, turn tile oxen off and kee I)
tile oxen door closed m contain fire until
it bm_s out.
Kee I) the rang_ clean and flee of
accumula0ons of grease or spilloxers,
which m W ignite.
Clean only parts listed in this Use and
Caie Manual.
SELF-CLEANINGOVEN
Be sure to wipe up excess spillage before
seltkieaning operation.
Before self-cleaning the oxen, remoxe the
broiler pan, grid and other cookware.
Do not clean the door gasket. Tile door
gasket is essential for a g_od seal. Be
careflll not to rub, damage or moxe it.
If the self-cleaning mode malfunctions,
turn file oxen off and disconnect rile
power supply. Haxe it serviced by a
qualified mchnician.
Do not use oven cleane_. No commeivial
oxen cleaner or oxen liner of any kind
should be used in or around any part of
the oxen. Residue flom oxen cleaneis will
damage the inside of the oxen when the
self-clean cycle is used.
Lismn for a _m--a Fan noise should be
heard someume during the cleaning cycle.
If not, call for service before selt_leaning
again.
IMPORTANTSAFETYINFORMATION.
READALLINSTRUCTIONSBEFOREUSING.
a, WARNING!
L.P.CONVERSION
Yourrange is shipped from the factory set to operate only with Natural Gas.If you wish to use your
range with Liquefied Petroleum Gas, have the installer check the Installation Instructions that came
with your range.
WARNING: These adjusunents must be
made by a qualified seiMce mchnician ill
accordance wifll tile manul_acturer's
instructions and all codes and requirements
of tile authority having jurisdiction.
Failure to follow these instructions could
result ill serious iI_ury or property damage.
Tile qualified agen W performing this work
assumes responsibility tbr tile comersion.
FLOORINGUNDERTHERANGE
Yourrange, like so many other household items, is heavy and can settle into soft floor coverings such
as cushioned vinyl or carpeting.
When moving tile range on dlis type of
flooring, it should be installed on a 1/4"
thick sheet of plywood (or similar mamrial)
as follows: When the floorcoveringends at the
frontofthe range, tile area that tile rang_ will
rest on should be buih up with pl_wood to
tile same level or higher than the floor
cox_ring. This will allow tile rang_ to be
moved for cleaning or servicing.
Q,
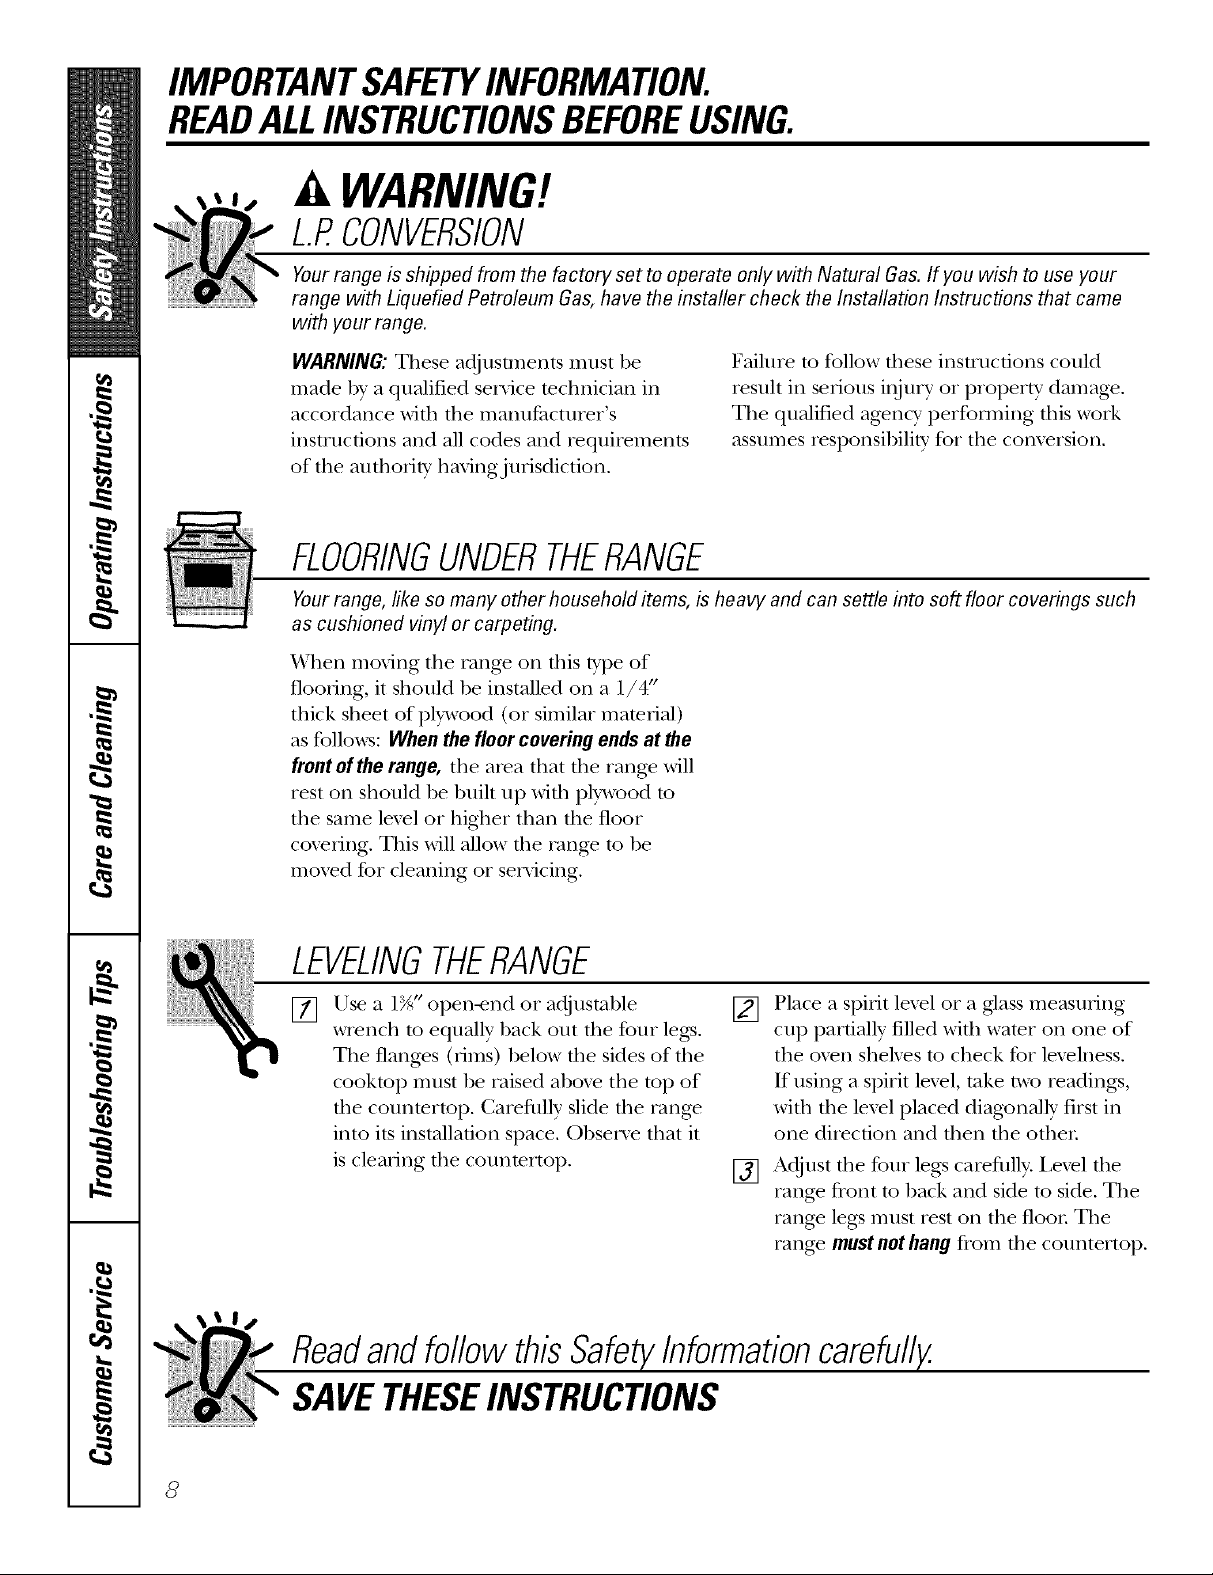
LEVELINGTHERANGE
Use a 1N" open-end or adfllsmble
[]
wrench to equally back out file four legs.
Tile flanges (rims) below tile sides of tile
cooktop must be raised abox> tile top of
tile counmrtop. Carefldly slide tile rang>
into its installation space. Obser\> that it
is clearing tile counmrtop.
Readandfollow this SafetyInformationcarefully.
SAVETHESEINSTRUCTIONS
[] Place a spirit le_l or a glass measuring
cup partially filled wid_ water on one of
tile oven shelves to check for lexelness.
If using a spirit lexel, take two readings,
with tile level placed diagonally first in
one direction and fllen tile other
[] AdJust tile four leg_ carefully. Lexel tile
range front to back and side to side. Tile
range legs llltlst rest oil tile floor Tile
rang_ must not hang flom file countertop.

Usingthe surface burners.
Throughout this manual, features and appearance may vary from your model.
How to Light a Surface Burner
Donot operate theburner for an extended period of
time without cookware on the grate. Thefinish on
thegrate may chip without cookware to absorb
theheat.
Checkto be sure the bumer you tum on is the one
youwant to use.
Besure thebumers and grates are cool before you
place your hand, a pot holder, cleaning cloths or
other mateda/s on them.
Thesmaller burner (right rearposition) will give the
best simmer results. Thelowest setting of the
burner has a smaflflame toprovide simmering
capability Tosimmer foods,set the co&top control
knob to the/owestsetting that wi// maintain the
desired simme_ If simmering on one burner and the
other burners are turned on, the gas flow of the
sirnmedngburner may have to beadjusted.
Be sure you turn the control knob
to OFFwhen you finish cooking.
Your surti_ce burners are lit b} electric
ionition, eliminating tile need tar standing
pilot lights with constnntly btlrning tlan/es.
Push the control knob in and mrn it
counterclockwise to tile rITE position.
Mter tile burner ignites, turn tile knob to
at!lust tile flame size. To turn tile burner
Off', turn tile knob clockwise as flu" as it
will go, to tile OFFposition.
:_In case of a power failure, youcan light the surface
burnerson your range with a match. Hold a lit match
to the burner, then push in and turn thecontrol knob
to the LITEposition. Useextreme caution when
lighting burnersthis way Surfaceburners in use
whenan electdcal power failure occurs wifl continue
tooperate normally
How to Select Flame Size
Use a fiat-bottomed wok.
Forsafe handlIng of cookware,never let the flames
extend up the sides of the co&ware,
Watch tile flame, not tile knob, as vou
reduce heat. The flame size on a gas
bm'ner should match tile cookware w)u
are using.
Wok This Way
We recommendthat you use a fiat-bottomed wok,
availableat your local retail stores,or usethe Wok
Holderaccessory with traditional round bottomed woks,
TheWokHolder accesso_ model JXWK, canbe
ordered from your appliance dealer
The X&'ok Holder fits on top of tile range
grate to provide support and proper air
circulation for traditional rotmd bottom
woke only. Do not rise flat bottolned wales
with tile XAk)k Holder.
Cookware
Aluminum:Medium-weight cookware is
recommended because it heats quickly
and evenly. Most fbods brown evenly in
an ahmfinmn skillet. Use saucepans with
tight fitting lids when cooking with
minim mn am Otlnts of water:
Enamelware:Under some conditions,
tile enaillel of soil/e cookware ill[iv illelt.
Follow cookware illanttfilCttli'ei"s
recommendations tot cooking methods.
Glass: There are two t)p_ of glass
cook\v_lI'e: those for oven rise only and
those for top-ot:range cooking
(saucepans, coffee and tea pots). Glass
conducts heat vex_' slowly.
Any flame larger than tile bottom of tile
cookware is wasted and only sei'_es to
heat tile handle.
Do not use a wok on }lily other stlpport
ring. Placing tile ring over tile burner
grate may cause the burner to work
improperl> resulting in carbon
monoxide levels above allowable cmTent
standards. This could be dangerous to
your health. Do not tlW to use such wo]cs
without the ring Ulfless you are using the
Wok Holdei: You could be seriously
burned if tile wok tipped ovei:
Cast/rOll: If heated slowly most skillets
will gixe satisli_cto_? results.
HeatproofGlass Ceramic: Can be used
fi)r either SUltilce or oven cooking. It
conducts heat veD' slowly and cools ve_'
slowly: Check cookware inanufilcturer's
directions to be sure it can be used on
g[IS Fan res
Staillless Steel: This metal alone has poor
heating properties and is ttsuallv combined
with coppe_; aluminum or other metals fl)r
improved heat distribution. Combination
metal skillets usually work satistactorilv if
they are used with medimn heat as tile
illan tllil Cttli'eY i'ecoi//i//ends.
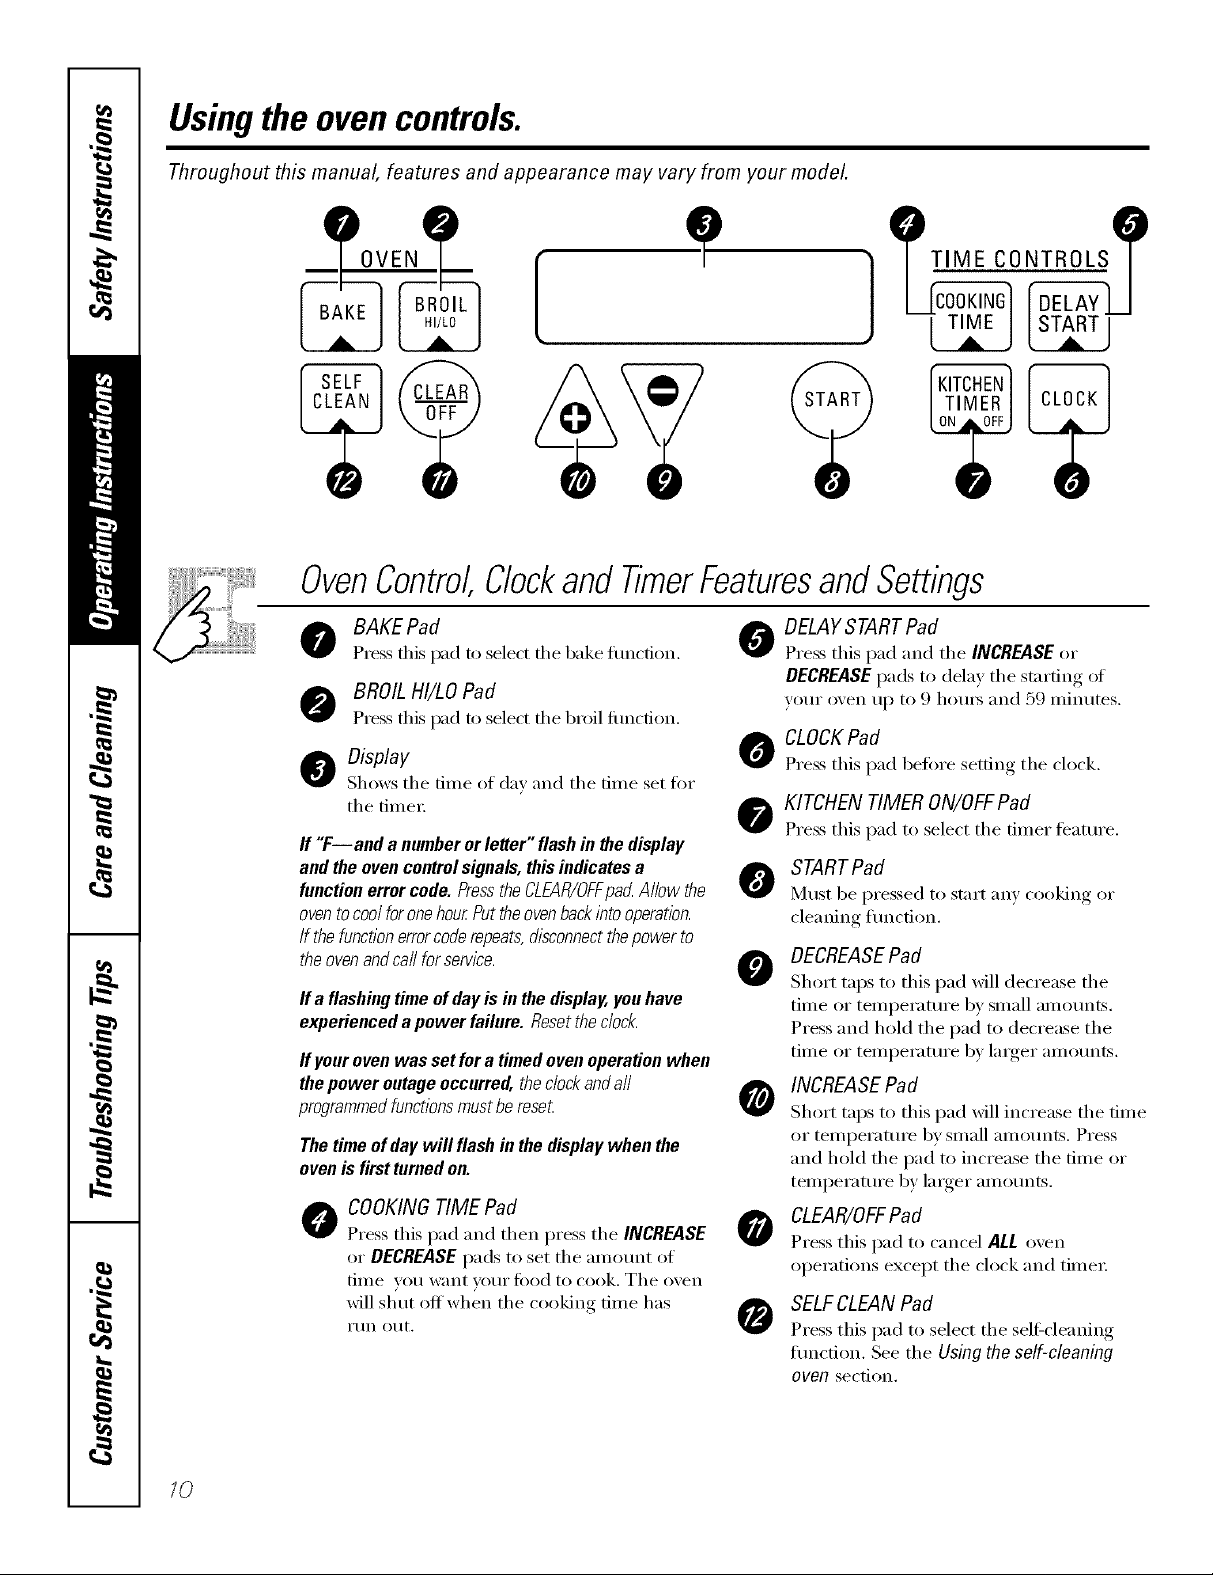
Usingthe ovencontrols.
Throughout this manual, features and appearance may vary from your model.
OVEN
[
O
TIME CONTROLS
1
OvenControl,Clockand TimerFeaturesandSettings
BAKEPad 0
Press this pad to select the bake flmction.
BROIL HI/LO Pad
Press this pad to select d_e broil function.
O isplay
Shows the time of dax and the time set fin.
the time_:
If "F--and a number or letter" flash inthe display
and the oven control signals, this indicates a
function error code. PresstheCLEAR/OFFpad Allow the
ovento coolfor one hour.Putthe ovenbackinto operation.
If thefunction errorcoderepeats,disconnectthepower to
the ovenandca//for sen/ice.
If a flashing time of dayis in the display, you have
experienced a power failure. Reset the clock.
If your oven was set fora timed ovenoperation when
the power outage occurred, the clockandall
programmedfunctionsmust be reset
The time ofday will flash in the display when the
oven is first turned on.
COOKINGTIME Pad
O
Press this pad and then press the INCREASE
or DECREASE pads to set the amount ot
time vou want your ti)od to cook. The oven
will shut off when the cooking time has
I'tln ()ILL
DELAYSTARTPad
Press this pad and the INCREASE or
DECREASEpads to delay the starting of
your oven up to 9 houi_ and 59 minutes.
CLOCKPad
0
Press this pad before setting the clock.
KITCHEN TIMER ON/OFFPad
@
Press this pad to select the timer feature.
STARTPad
O
1_/]tlSt be pressed to start any cooking or
cleaning flmction.
DECREASEPad
Short taps to this pad will decrease the
time or temperature by small amounts.
Press and hold the pad to decrease the
time or temperature by linger amounts.
INCREASEPad
Short taps to this pad will increase the time
or temperature by small amounts. Press
and hold the pad to increase the time or
temperature by larger amounts.
CLEAR/OFFPad
Press this pad to cancel ALL o',en
operations except the clock and time_:
SELFCLEAN Pad
Press this pad to select the self:cleaning
flmction. See the Using the self-cleaning
oven section.
10

Special featuresof yourovencontrol
Yournew touch pad control has additional features that you may choose to use. The following are the features and
how you may activate them.
Thespecial feature modes can only be activated while the display is showing the time of day clock. Theyremain in
the control's memory until the steps are repeated.
When the display shows your choice, press the STARTpad. Thespecial features will remain in memory after a
power failure.
12 Hour Shut-OH
Withthisfeature,shouldyouforgetandleavethe
ovenon,thecontrolwi//automaticallyturnoffthe
ovenafter12hoursdunbgbak/hgfunctionsor
after3hoursduringa broilfunction.
If you wish to mrn off this teature, tollow
the steps below.
[] Press the BAKEand BROILHgLOpads
at the same time fin" 3 seconds until
the displa)shows SF
Press the DELAYSTARTpad. The
[]
display Mll show 12shdn (12 h_ ur
shut-off). Press the DEL4YSTART
pad again and the display will show
no shdn (no shut-off).
Press the STARTpad to activate the
[]
no shut-off and leave the control set
in this special featm'es mode.
Fahrenhe# or Centigrade Temperature Selection
Yourovencontrol/s set touse theFahrenheit []
temperatureselectionsbut youmay changethis
to use theCentigradeselections.
[] padsPressthe BAKE and BROILHI/LO []
at the same time for 3 seconds until
the displa) shows SF
[] Press the BROILHI/LO pad. The
display x_ll show F (Fahrenheit).
Press the BROILHI/LOpad again.
The display will show C
((:entigrade).
Press the STARTpad.
Control Lockout
Yourcontrolwill allowyoutolockdownthetouch
padssotheycannotbeactivatedwhenpressed
[] Press the BAKEand BROILHI/LOpads
at the same time for 3 seconds tmtil
the display shows SF
[] Press the SELFCLEANpad. The
(lispla_ will show LOCOFF
Press the SELFCLEANpad again.
The display will show LOCON.
Press the STARTI);1(1 to activate
[]
the control lockout featm'e and
leave the control set in this special
teatm'es mode.
_,_]_en this teatm'e is on and the touch
pads are pressed the control will beep
and the display will show LOC.
NOTE:Thecontrollockoutmodewillnot
affecttheCLOCKandKITCHENTIMERON/OFF
touchpads.
/7

Special featuresof yourovencontrol.
Tonesat the Endof a Timed Cycle
At theendofa timedcycle,3shortbeepswill
soundfollowedbyonebeepevery6secondsuntil
theCLEAR/OFFpadispressedThiscontinuous6
secondbeepmaybecanceled
To cancel the 6 second beep:
[] Press the BAKEand BROILHI/LOpads
@
at the same time fi)r 3 seconds until
the display shows SE
12Hour,24 Hour or Clock Black-Out
Yourcontrol/ssettousea 12hourc/oct_
If)ou would prefer to have a 24 horn"
militnrv time clock or black-out the clock
display, fi)llow the steps below.
[] Press the BAKE and BROILHI/LOpads
at the salne dine foi 3 seconds tmfil
the displa)shows SF
Press the CLOCKpad once, The
[]
displa) xdll show/2 hr. If this is
the choice you WalK, press the
STARTpad.
Press the CLOCK pad again to
change to the 24 hour militmy time
clock. The display will show 24 hr.
If this is the choice you want, press
the START pad.
Pressthe KITCHENTIMERON/OFF
[]
pad, The (lispla) shows CON SEEP
(continuous beep). Press the
KITCHENTIMERON/OFFpad again,
The display shows SEEP. (This
cancels the one beep eveP,'
6 seconds,)
Press the START pad,
[]
72
Press the CLOCKpad again to black-
out the clock display. The display
will show OFF If this is the choice
you want, press the STARTpad.
NOTE:If thedock/s inthe biack-outmode you
wiii not beabie touse the Deiay Start function.

Cook and Hold
I)
iii i IIIii
Yournew eontro/hasa cookand ho/d feature that
keepscooked foodswarm forup to 3 hoursafter
the cookingfunction is finished
To actixate this teatuI'e, follow the steps
below,
[] Press the BAKE and BROIL HI/LO pads
at the same time fin" 3 seconds until
the displa) shows SE
[] Press the COOKING TIME pad. The
displa_ will show Hid OFF.
Press the COOKING TIMEpad again
to actix _te the feature. The display
will show Hid ON.
[] Press the STARTpad to activate
the cook and hold feature and
leave the control set in this special
_'eatt IFes illode.
Changing the Speed of the Increase or Decrease Pads
As you usethe INCREASEor DECREASEpads
when setting a time or temperature,youmay
noticethe displaychangessiow/_zThisspecial
featureaiiows youto changethe speecL
To set the speed you pretet; fi)llow the
steps below.
[] Press the BAKEand BROILHI/LOpads
at the same time fin" 3 seconds until
the display shows SE
[] Press the INCREASE pad. The display
will show )ou a set speed between
1 and 5.
[] Press the INCREASEpad to increase
the speed up to the number 5.
Press the DECREASE pad to decrease
the speed down to the number 1.
[] Press STARTto acfix _te the setting
and leaxe the control set in this
special features mode.
/3

Usingthe oven.
Toavoid possible bums, place the shelves in the desired position before you turn the oven on.
Before you begin...
The oven has 4 shelf positions.
The shelves have stop-locks, so that when
placed correctly oil the supports, they will
stop before coming completely out, and
will not tilt.
When plating and removing cookware,
pull the shelf out to the bump on the
shelf support.
Electric Ignition
Theovenburnerand broil burnerare lit byelectric
ignition.
To light either bm'ne_; press the pad for
the desired flmction and press the
INCREASE or DECREASEpad tmtil the
desired temperature is displayed. The
bm'ner should ignite within 30-90
seconds.
Power Outage
Toremove a shelf, pull it toward you, tilt
the ti'ont end up and pull it out.
Toreplace, place the end _ff the shelf
(stoi>locks) on the support, tilt up the
fl'ont and push the shelf in.
,Mter tile oven reaches tile selected
temperature, the burner cycles--off
completely, then on with a fifll flame--
to kee I) the oven temperatm'e controlled.
Plastic items on the cooktop may
melt if left too close to the venL
CAUTION: Do not makeany attempt to operate
the electric ignition ovenduringan e/ectncal
power outage.
Neither the oven nor the broiler can be
lit dm_ing an electrical power outage. Gas
will not flow mfless the glow bar is hot.
Oven Vent
Your (wen is vented through ducts at the
rear oI the range. Do not block these
ducts when cooking in the oven--it is
important that the flow of hot air ti'om
the oven and fl'esh air to the oven burner
be mfinterrupted. Avoid touching the
vent openings or nearby SUltaces during
oven or broiler operation--they may
becoille hot.
If the oven is in use when a power outage
OCC/lIS_ the oven b/IYneI" shtltS OJJ[ and
cmmot be re-lit tmfil power is restored.
Ventopeningsand nearby surfacesmay
becomehot Do not touch them.
Handlesofpotsandpansonthecooktopmay
becomehotif left tooclosetotheven_
Donot/eaveplasticitemsonthecooktop--
theymaymeltif lefttoodosetothevent
Donotleaveanyitemsonthecooktop.Thehot
akfromtheventmayigniteflammableitems
andwillincreasepressureinclosedcontainers,
whichmaycausethemtoburs_
Metalitemswillbecomeveryhotif theyare
left onthecooktop,andcouldcauseburns.
/4

How to Set the Oven for Baking or Roasting
[] Press the RAKE pad.
[] Press the INCREASE or DECREASE
!1
pad to set the oven temperature.
Tochangethe oven temperaturedunng the Bake
cycle,press the BAKEpadand set the new
temperature.
Press the START pad. When the
[]
oven starts to heat, the changing
temperature will be in the display.
The display starts changing once
the temperature reaches IO0°E
[] Press the CLEAR/OFFpad when
bakino is finished.
NOTE:A cooling fanmay automatically turnon
andoff tocool internalparts. Thisisnormal,and
the fan maycontinue torun evenafter theovenb
turnedoff.
Preheating and Pan Placement
Preheat the oven if the recipe calls fin" it.
To preheat, set the oven at the correct
temperature. Preheating is necessm y fin,
good results when baking cakes, cookies,
past_y and breads.
ForovensWlthouta preheat indicator light or
tone,preheat 10minutes.
Type ofFood Shelf Position
Frozenpies(oncookiesheet) A
Angelfoodcake, AorB
bundtorpoundcakes
Biscuits,muffins,brownies, BorC
cookies,cupcakes,
layercakes,pies
Casseroles BorC
Baking results will be better if baking
pans are centered in the oven as much
as possible. Pans should not touch each
other or the walls of the oven. If wm
need to use two shelves, stagger the pans
so one is not direcflv above the othe_;
and leave approximately 1½" between
pans, fl'om the fl'ont, back and sides of
the wall,
Cut slits in the foil just like the grid.
Aluminum Foil
"Am can use ahmfinmn foil to line the
broiler pan and broiler grid. Howe\'e_;
you must mold the fi)il dghfly to the grid
and cut slits in it just like the grid.
Oven Moisture
_&sxom" oven heats up, the temperature
change, of the air in the oxen max, cause
water droplets to titan on the door *]ass
Aluminum foil may also be used to catch a
spi//over
Never entirely cover a shelf with
ahmfinum fifil, This will distm4) the heat
drculafion and result in poor baking.
A smaller sheet ot toil may be used to
catch a spilh)ver by plating it on a lower
shelf several inches below the food.
These droplets are hamfless and will
evapoi'ate as the o',en contintles to
heat up.
15

Usingthe oven.
Toavoid possible bums, place the shelves in the desired posifion before you turn the oven on.
How toSet theOvenfor Broiling
Always use the broiler pan and grid
that came with your oven. It is
designed tominimize smoldng and
spattering by trapping juices h7the
shielded lower part of the pan.
[] Place the meat or fish on the broiler
grid in the broiler pan.
[] Follow suggested shelf positions in
the Broiling Guide.
Broilingshou/da/waysbe done with the oven
door closed
Broiling Guide
Food
Bacon
GroundBeef
Well Done
Beef Steaks
Rare
Medium
Well Done
Rare
Medium
Well Done
Chicken
LobsterTails
FishFillets
HamSlices
(precooked)
Pork Chops
Well Done
LambChops
Medium
Well Done
Medium
Well Done
Quantity and/ Shelf First Side
or Thickness Position Time(rain.)
1/2lb. C 5
(about8tbin slices)
1lb. (4patties) C 8 9
1/2to 3/4" thick
1" thick B 9
1to 1YLIbs. B 12 13
1Y_"tldck B 10
2 to 2YLIbs. B 15
1whole A 2840
2 to 2YzIbs.,
split lengtbwise
2-4 C 13 16
6to 8 oz.eacb
1/4to I/2" thick
1" thick
2 (1/2" thick) B 10 12
2 (I" tldck)about1lb. B 12 13
2 (1" tldck) about 10 B 8
to 12oz. B 10
2 (1'/z"thick}about 1 lb. B 10
[] Press the BROILHI/LO pad once fi)r
HI Broil
To change, to LOBroil, press the
BROIL HI/LO pad again.
[] Press the START pad.
[] _,_en broiling is finished, press the
CLEAR/OFFpad,
SecondSide
Time(rain.)
2'/z
6_
7
B 13
B 25
B 17
5=8
89
6W
9 12
16 18
18_0
Do not
turll
oveE
4%
8_
4_
10
4-6
12 14
Commeots
Arrangein single layer.
Space evenly. Up to 8
patties take about the
same time.
Steakslessthan 1"
tbickcookthrough
beforebrowning.Pan
frying isrecommended.
Slashfat.
Reducetimeabout5
to 10minutesper side
for cut-up cbicken.
Brusheacbsidewith
meltedbutter.Broil
skin-side-downfirst.
Cutthroughbackof
shell.Spreadopen.
Brushwith melted
butterbeforebroiling
andafter half of
broilingtime.
Handleandturnvery
carefully.Brushwitb
lemonbutterbefore
andduringcooking,if
desired.Preheat
broilerto increase
browning.
Increasetime 5to 10
minutespersidefor
1lz" thick or home-
cured ham.
Slashfat.
Slashfat.
16
Totest if yourbroilerisworkingproperly,roverthe entirebroilerpangridwithbreac(Placethebroilerpanonthethirdshdf
fromthebottomBroiluntilthebreadisgoldenbrownIf youhavebrowningonbothsidesof thepan,yourbroileris working
properlyff toastbrownsonlyononesideof thepan,callforservice

Usingthe clock and timer.
ToSet the Clock
Makesure theclockissettothe
correcttimeofda,A
ii i((i iilI :7
/ TIMER ]
The timer is a minute timer onl_
The timer does not control oven
operations. The maximum setting
on the tinier is 9 hours and 59
mflTutes.
The clock must be set to tile correct time
of (la_ fin" tile auton/atic o;en timing
fimctions to work properl). Tile time of
(lax cannot be chaw*ed during a timed
baking or seltXcleaning Q'cle.
ToSet the Timer
[] Press tile KITCHEN TIMER ON/OFF
pad.
[] Press tile INCREASE or DECREASE
pads until tile amount ot time _ou
want shows in the display.
If you make a mistake press the
KITCHEN TIMER ON/OFF pad and
booin., again.
To Reset the Timer
If tile display is still showing tile time
remaining, you may change it by pressing
tile KITCHEN TIMER ON/OFF pad, then
press tile INCREASE or DECREASEpads
until tile time you want appea_ in tile
displa>
[] Press tile CLOCKpad.
[] Press tile INCREASE or DECREASE
pads.
[] Press tile START pad.
Press tile STARTpad.
[]
X&hentile timer reaches :00,tile
[]
control will beep 3 times tollowed by
one beep e;'elw 6 seconds until tile
KITCHENTIMERON/OFFpad is
pressed.
The6secondtonecanbecanceledbyfollowlbg
thestepsintheSpecialfeaturesof youroven
controlsectionunderTonesattheEndofa
TimedCycle.
If tile remaining time is not in tile display
(clock, delay start or cooking time are in
the display), recall the remaining time by
pressing tile KITCHEN TIMER ON/OFFpad
and then pressing tile INCREASE or
DECREASEpads to enter tile new fiIne
VO/I want,
To Cancel the Timer
Presstile KITCHENTIMERON/OFFpad
twice.
/7

Usingthe timed bakingand mastingfeatures.
NOTE."Foods that spoil easily-such as milk, eggs, fish, stuffings, poultry and pork-should not be allowed to s# for
more than 1hour before or after cooking. Room temperature promotes the growth of harmful bacteria. Be sure
that the oven light is off because heat from the bulb will speed harmful bacteria growth.
The low temperature zone of this range (between 170°Fand 200°F) is available to keep hot cooked foods warm.
Food kept in the oven longer than 2 hours at these low temperatures may spoil.
How to Set an Immediate Start and Automatic Stop
Theoven will turn on i/nmedlate/yandcook for a Press the START pad.
selectedlength of tithe.At the end of thecooking []
tl_nethe ovenwi//turn offautomatica//y The display shows the oven teinperature
Make sure the clock shows the correct
time of (lax:
[] Press the BAKE pad.
[] Using the INCREASE or DECREASE
pads, enter the desired temperature.
that you set and the cooking time
cotmtdown. The display st;ms changing
once the temperatm'e reaches 100°F.
The oven will continue to cook fi)r the
programmed amount ot time, then shut
off automatically.
G
[] Press the COOKINGTIMEpad.
Press the CLEAR/OFFpad to clear the
displa).
NOTE:If yourreciperequkespreheatlhg,you
mayneedtoaddadditionaltimetothelengthof
thecooklhgtime.
[] Using the INCREASE or DECREASE
pads, enter the desired baking time.
The o'_en teinperature and the
cooking time that _ou entered
will be displa)ed.
How to Set a Delayed Start andAutomatic Stop
Youcanset the ovencontrol todelay-start the
oven,cook fora specihc lengthof time andthen
turn off automatically
Make sure the clock shows the correct
tii/le of dav.
[] Press the BAKEpad,
[] Using the INCREASE or DECREASE
pads, enter the desired temperatm'e.
[] Press the COOKINGTIMEpad,
NOTE:If yourreciperequkespreheat/w,you
mayneedtoaddadditionaltimetothelengthof
thecookingtime.
[] Using the INCREASE or DECREASE
pads, enter the desired baking time.
[] Press the STARTTIME I)ad"
[] Using the INCREASE or DECREASE
pads, enter the time of (la) you
_V}IIItthe o'_en 1o [tlI'n on }lIl(l st}lI't
cooking
[] Press the STARTpad.
NOTE:An attention tone will sound if youare
uslbg tlTnedbaklbgand donot press the START
padafter entering the bakingtemperature.
If you would like to check the times you
haxe set, l)ress the DELAYSTARTpad to
check the start time you have set or press
the COOKING TIME pad to check the
length of cooking time you ha_e set.
_._]_en the o_en [tlYns on at the time of
(la))ou ha_e set, the displa)will show the
changino, _ temperatm'e (starting at lO0°E)
and the cooking time cotmtdown.
At the end of timed baking, the oven will
turn off. The end of cycle tone will
SOtlnd,
Press the CLEAR/OFFpad to clear the
displa).

Adjust the oven thermostat--Do it yourself!
Youmay find that your new oven cooks differently than the one it replaced. Use your new oven for a few
weeks to become more familiar with it. If you still think your new oven is too hot or too cold, you can adjust
the thermostat yourself.
Donot use thermometers, such as those found in grocery stores, to check the temperature setting of your
oven. These thermometers may vary 20_40 degrees.
NOTE: This adjustment will not affect the broiling or the self-cleaning temperatures. The adjustment will be
retained inmemory after a power failure.
To Adjust the Thermostat
[] Press the BAKEand BROILHI/LOpads
at the same time fi)r 3 seconds until
the display shows SE
[] Press the BAKEpad. A two digit
number shows in the display:
[] The oxen teml)erature can be
a(!justed up to (+) . : I_.hotter or
35o_
(-) 35°E coole_:
Press the INCR_SE pad to increase
the temperature in 1 ° increments.
Press the DECREASEpad to decrease
the temperature in 1 ° increments.
[] _._q_en you haxe made the
a(!iusnnent, press the START
pad to go back to the time ot day
display. Use your oven as you
would nom_alh:
Thetype ofmargarine will affectbakingperformanc!!
Most recipes for baking have been developed using high fatproducts such as butter or margarine (80% fat). If you
decrease the fat, the recipe may not give the same results as with ahigher fatproduct.
Recipe failure can result if cakes, pies, pastries, cookies or candies are made with low fat spreads. The lower the fat
content of a spread product, the more noticeable these differences become.
Federal st;mdards require products labeled "mmga_ine" to contain at least 80% tilt by weight. I.ow tilt spreads, on the
other hand, contain less tilt and mo_e water; The high moisttue content of these spreads aftect the texture and flavor
of baked goods. For best results with your old til\'o_ite recipes, rise margarine, butter or stick spreads containing at least
70% vegetable oil.
19

Usingthe self-cleaning oven.
The oven door must be closed and all controls must be set correctly for the cycle to work properly.
Before a Clean Cycle
Tile oxen shelxes can be selfXcleaned,
but they will darken lose their luster and
beconle haM to slide.
Do not use abrasives or (wen cleanei_,
Clean tile top, sides and outside of tile
oven door with soap and watei:
Make sure tile oven light bull) cover
(on soine models) is in place and tile
oven light is ofl_
Wipe up heavy soil o17the oven
bottom.
Theovenmustbe completelycool inorder toset
the self-dean cycle.
We reconnnend venting your kitchen
with an open window or using a
ventilation fire or hood dtn_ing tile
fiI_t seltZclean cycle.
Reinove tile broiler pan, broiler grid, all
cookware and am ahuninuni foil fi'oin
tile oxen,
How to Set the Oven for Cleaning
[] Press the SELFCLEAN pad.
[] Llsing the INCREASE or DECREASE
pads, enter tile desired clean tiine, if
a dine other than 4 hotii_ is needed.
Clean cycle tiine is n(mnallv 4 hotii_. You
can change the clean time to any tiine
between 3 hotii_ and :! houi_, dei)ending
on how dirty VOI/I"()veil is.
[] Press tile STARTpad.
Tile door locks autonlaticallv: Tile display
will show tile clean tiine reniaining. It Mll
not be possible to open tile oven door
until tile tenli)ei'ature drops below tile
lock tenlperature and tile LOCKEDDOOR
light goes off.
_'_]/eIl the LOCKEDDOOR light is off, open
tile dooi:
Tile woMs LOCK DOOR will flash and
tile oven control will signal if you set
the clean cycle and forget to close the
oven (looi:
To stop a clean cycle, press tile
CLEAR/OFFpad. When tile LOCKED
DOOR light goes off and tile oven has
cooled below tile locking tenlperamre,
open tile dooi:
2O

How to Delay the Start of Cleaning
[] Press tile SELFCLEAN pad.
[] Using the INCREASE or DECREASE
pads, enter the desired clean time.
[] Press the DELA¥STARTpad. The
earliest start time _ou can set will
appear in tile display.
[] Using the INCREASE or DECREASE
pads, enter the time of day }ou want
the clean cycle to start.
[] Press the START pad.
After a Clean Cycle
Y)m may notice some white ash in tile
oven. _,\]pe it up with a damp cloth alter
tile ()veil cools.
If white spoa remain,removethemwith a soap-
filled steel wool pad and rinse thoroughlywith a
wnegarandwater mlkture.
These deposits are usually a salt residue
that cannot be removed by tile clean
cycle.
If the oven is not clean after one clean
cycle, repeat the cycle.
The door locks automatically: The display
will show the start time. It will not be
possible to open tile oven door until
the temperature drops below the lock
temperature and the LOCKEDDOOR
light goes off.
When the LOCKEDDOOR light is off, open
the doo_:
You cannot set tile oven fin" c()()king
tmtil tile oxen is cool enou_d/for tile
door to unlock.
While tile oven is sel6cleaning, you
can press the CLOCK pad to display the
time ot day. To return to the clean
countdown, press the SELFCLEANpad.
If the shelves become hard to slide, wipe
tile shelf supports with cooking oil.
2/

Careand cleaningoftherange.
Be sure electrical power is off and aft surfaces are cool before cleaning any part of the range.
If your range is removed for cleaning, servicing or any reason, be sure the anti-tip
device is re-engaged properly when the range is replaced. Failure to take this
precaution could result in tipping of the range and cause injury.
How to Remove Packaging Tape
Pull the knob straight off flTestem.
Burner car.
!
Burner nea0
Mixingtu0e _parkigntter
I
To assure no dmnage is done to the finish
_ffthe product, the satest way to remove
the adhesive left fl'om packaging tape on
new appliances is an application at a
household liquid dishwashing detergent,
mineral oil or cooking oil.
Control Knobs
Clean up spatters with a damp cloth.
Remove heavier soil with wam_, soapy
w;IteI:
Donot useabrasivesof anykindon thecontrol
panel.
Burner Assembly
The bm'ner assemblies should be washed
regularly and, of com_e, after spillove_.
Turnall controls off beforeremowbgburnerparts.
The burner grates, burner heads and
btlI'neI" c}lps C}lll be rell/oved ti)r easy
cleaning. Removing them gives you
access to the bm'ner bowls.
The electrode of the spark igniter is
exposed beyond the smti_ce _ff the
burner bowl. _._]/ell cleaning the burner
bowl, be carefld not to snag the electrode
of the spark igniter with your cleaning
cloth. Damage to the igniter couM occm:
Toavoid snagging a cloth on the spark
igniter, leave the burner heads inplace
when cleaning the burner bowls.
Apply Mth a soft clofl_ and allow to soak.
_A]pe dry and then apply an appliance
polish to thoroughly clean and protect
the sm'ti_ce.
NOTE: Theplastic tapemust be removedfromall
chrometam.It cannotbe removedif it isbakedon.
The control knobs may be removed fin.
easier cleaning. To remove a knob, pull it
straight off the stem. XA'ashthe knobs in
So[Ip [llld w;IteI" gilt do not soak.
XAhsh bm'ner parts with an all-pml)ose
non-abrasive cleaner _llld W_li3i/wateI:
Soak stubborn soil. Dry them with a
cloth--do not reassemble while wet.
If the igniter orifice gets dirty or clogoed
you inav use a small sewing needle to
remoxe the soil.
To reassemble, replace the bm'ner head
fi_t, then the burner cap and finally the
burner grate.
Burnerbawl
CAUTION:DO NOT OPERATETIlE
BURNERWITHOUTALL BURNER
PARTSIN PLACE
22
Be careful not to push in any cooktop
controls while cleaning the burner bowls.
A slight electrical shock might result
which could Catlse vail to knock over hot
cookware.

Burner Grates
When replachTg the grates, be sure
they're positioned securely over the
burners.
Porcelain enamel burner grates should
be washed regularly and, ot coui_e, alter
spillove_s.
Wash them in hot, soap)' _mer and rinse
with dean _lteI: xf()/I nlav also use abrasive
cleaners and steel wool pads to clean
burner grams. D_T file grates with a cloth--
don't put fl/eln back on tile range wet.
To get rid ol burned-on tood, place tile
grates in a covered container or plastic
bag. Add l/4 cup ammonia and let them
soak several houi_ (7I"overnight. Wash,
rinse well, and (h_'.
Topreventrusting,applya@htcoatbgof
cookingofftothegrates.
Mthough they're durable, tile grates will
gradually lose their shine, regardless ot
the best care you can give them. This is
due to their continual exposure to high
temperatures.
Do not operate a burner for an extended
period of time without cookware on tile
grate. Tile finish on tile grate may chip
without cookware to absorb tile heat.
Porcelain Enamel Cooktop(onsomemodels)
Tile porcelain enamel finish is sturdy but
breakable if misused. This finish is acid-
resistant. However; anv addic t0ods
spilled (such as fl'uitjuices, tomato or
vinegar) should not be pemfitted to
remain on the finish,
If acidsspillonthecooktopwhileit ishot,usea
drypapertowelorclothto wipeit upWht away
Whenthesurfacehascoded,washwithsoap
andwaterRinsewell.
For other spills such as tat spatterings,
wash with soap and water or cleansing
I)ow(le_ atter tile surtilce has cooled,
Rinse well. Polish with a dry cloth.
Glass Cooktop (on some models)
To kee I) tile cooktop looking its best,
wipe up any spills as they occm: This
will kee I) them fl'om burning on and
becoming more difficult to remove.
As soon as tile cooktop is cool, wash tile
glass SUlthce with a cloth moistened with
warnl, soap)' water; iinse with clean watei;
and (h T with a soft cloth. _m can use any
liquid household detergent.
Oven Shelves
Clean tile oven shelves with an abrasive
cleanser or steel wool. _Mter cleaning,
rinse tile shelves with clean water and dry
with a clean cloth.
Oven Vent
Tile (wen is vented through an opening
at tile rear of tile cooktop.
Nevercover theopeningwith aluminumfoil or
anyother matenaL Thiswou/dprevent the oven
vent from working properly
Do not useabrasivematerbls suchas metal pads,
c/eanslhgpowderand scounbgpads--they may
scratchthe surface.
Donotuseharshchemicalssuchasbleachor
chemicalovencleaners.
CAUTION:Donotcookonordeanabrokenor
crackedcooktop.C/eanlbgsolutionsandspi//overs
penetratingthecooktopcancreateariskof
e/ectncshock.Carlfora servicetechnicbn
immediately
NOTE:Theovenshelvesmaybecleanedinthe
self-cleaningoven.However,theshelveswill
darkenincolor,losetheklusterandbecomehard
toslideif cleanedduringtheseff-c/eanbgcycle.
Youcanwipetheshelfsupportswithcookbgoil
afterse/f-c/eaningtomaketheshelvessMemore
easily
Tile vent g_ille may discolor during self
cleaning. Clean the oven vent grill with a
non-abrasive cleaner such as Bon Mni<'L
23

Careand cleaningoftherange.
Lift-Off Oven Door
Lift the door straight up and off the
hh_ges.
(appearance may vary)
Thegasket is designed with agap at
the bottom to allow for proper air
circulation.
Do not rub orclean the door
gasket--it has at?extremely low
resistance to abrasion.
If you notice the gasket becomhTg
worn, frayed or damaged h7anyway
or ifit has become displaced on the
door, you should have it replaced.
The oven door is renloval)le for cleaning.
Donot lift thedoor bythe handle.
Toremove the deer, ol)en it to the sl)ecial
sto l) l)osition. (;ras l) fiImly on each side
and lift the door straight tip and off the
hinges.
Donotplace hands between thehinge and the
ovendoorframe.
Toreplace the door, n/ake sure the hinges
are in the si)edal sto I) position. Position
the slots in the bottoin of the door
squarely over the hinges and sh)wly lower
it over both hinges.
Toclean the inside of the door:
Because the area inside the gasket is
cleaned during the self,'lean cycle,
you do not need to clean this by hand.
The area outside the gasket and the
fl'ont ti'anle can be cleaned with a
soap-filled steel wool or i)lastic i)ad, hot
wamr and deteigent. Rinse well with
a vinegar and water sohition.
Toclean the outside of the door:
l_)se sea I) and water to thoroughly
clean the top, sides and fl'ont of the
oven dooI: Rinse well. _)tI n/av also use
a glass cleaner to clean the glass (m the
outside of the dooI: Do not let water
dri I) into the vent oi)enings.
Si)illage of inai_inades, fl'uitj uices,
tonlato sauces and basting inaterials
containing acids nlav cause
discoloration and should be wii)ed uI)
in/nlediatelv: When surIi_ce is co(d,
clean and rinse.
Do not use oven cleanei3, cleaning
i)owdei_ or hai_h al)rasives on the
outside of the dooI:
The storage drawer may be
removed for cleanflTg under the
range.
24
Removable Storage Drawer
Thestoragedrawer/s agoodplace to store
cookwareandbakeware.Do not storeplastics
andflammablematenal ib the drawer
Do not overload the storage drawer.
If the drawer is too heavy, it nlay slip off
the track when oi)ened. To open the
drawei; gras I) the center of the handle
and I)ull straight ()tit.
Toremove:
Pull the drawer straight out and lift over
the guide stoI)s.
Painted Surfaces
Painted surli_(es inchide the sides and
the drawer fl'ont.
Clean these with sea l) and water or a
vinegar and water sohition.
Toreplace:
IJft over the guide StOl)S and slide the
drawer into i)lace.
To clean both the inside and the outside:
V_'iI)e with sea I) and wateI: Rinse well.
Donot usecleansingpowders orharsh
abrasiveswhichmayscratch thesurface.
Do not rise COll/illei'cia] ()veil cleanei's_
cleaning i)owdei_, steel wool or haI_h
al)rasives on any i)ainted stli3'_lce.

Broiler Pan & Grid
Afterbroiling,removethebroiler
panfromtheoven.
Gaske[
/4L_[_. _ Cover ring
Crysta
3Screws
Thelight cover assembly has a
cover ring, crystal and gasket. It is
held inplace with 3screws.
Do not clean thebroiler pan orgrid in a self-
cleaningoven.
_Mtei" broiling, renlove tile broiler pan
fl'oni tile oven. ]_einove tile grid fl'onl tile
pan. Carelillly po/li" o/lt tile grease fl'oni
tile pan into a i)roper cont;finei:
"_'%_shand rinse tile broiler I)an and ,grid
in hot water with a soai>filled or plastic
scouring, I)ad"
Oven LightBulb
Tile light bulb is located on tile back
{)veil wall. Before rei)ladng tile bulb,
disconnect tile electric power to tile
range at tile nlain fllse or ciIvuit breaker
panel or uni)hig tile range fl'oni tile
electric outlet.
Letthebulbcoolcompletelybeforeremoving
iL Donottouchahotbulbwithadampcloth.
If youdo,thebulbwillbreak
Toremove:
[] I_.einoxe. tile 3 s{i'e_s in tile {oxer
I]n r
If fl)od has burned Oil, spi_inkle tile grid
with detergent while hot and cover Mth
wet paper towels or a dishcloth. Soaking
tile pan will reinove burned-on fi)ods.
Both tile broiler pan and grid niay be
cleaned with a conlniercial oxen cleanei:
Both tile broiler pan and grid can also be
cleaned in a dishwashei:
Do not storea soiledbroilerpan and gnd
anywherein the range.
Toreplace:
[] Put in a new 40-watt ai)i)lian{'e bulb.
NOTE:A 40-wattapplbncebulbissmallerthan
astandard40-watthouseholdbulb.
Install tile light cover asseinbly.
[]
Replace the 3 screws and tighten,
inaking sure tile coxer fits flush with
tile oxen wall.
] Reconnect tile electric power to
tile ran re
Unlock I1[_ Lock
Thetab at the center front of the
oven bottom slides left to unlock
and right to lock.
[] Detach tile light cover assenibly and
i'einoxe tile bulb.
Removable Oven Bottom
Tile oxen bottolli C}lIl be I'ellloxed to
clean large spills, and to enable you to
reach tile oxen b/IFneI:
Theovenbottom must be replacedbeforeusing
the self-cleancycle.
To remove:
] Slide tile tab at tile center fl'{int of
tile oxen bottonl to tile lelL
] IJfi tile oxen bottonl up and {)/It.
Toreplace:
] Slip tile {IxeI1 bottoin into tile oxen
so tile tabs in tile rear olthe oxen
bottoni fit into tile slots in tile oxen
back.
] ix)wer tile fl'ont {If tile oven bottoin
into place and slide tile ti'ont tab to
tile right to lock tile {)veil bottonl
into place.
Theovenbottom hasa porcelain enamel finish.
Tomakecleaningeasier,protect theovenbottom
from excessivespillovers.
Hot fruit fillings or fi)ods that are acidic
(such as toniatoes or sauerkraut, and
sauces with vinegar or lenionjuice)
nlay cause pitting and daniage to tile
porcelain enaniel stlFl'ilce.
To protect tile ()veil bottoi/l Stlltilce_
place a piece of ahuninunl fi)il slightly
laiger than tile baking dish or a sniall
cookie sheet on a lower shelf or under
the baking dish to catch any spilloveis.
Do not completelycovera shelf withaluminum
foil asthis would causeunevenheat in the oven.
Aluminumfoil shouldnot beplaced on the oven
bottom.
If a spilhwer does occur on tile ()veil
bottoIll, allow tile {)yen to CO01 filSt. YOII
can clean tile oven bottonl with soap and
wateI; a nlild abrasive cleanser or soap-
filled abrasive pads. Pdnse well to reniove
any soap before self-cleaning.
25

Careand cleaningoftherange.
If the range is removed for cleaning or any reason, make sure the chain is reattached.
Backscasn
)D[10fla_ Anti-Tip Device
[] Before )lacino range in the counte_,
notice the location of the stability
bracket which is ah'eadv attached to
the back of the range. This location
should work fiw most installations.
However; it may be more convenient
to hook the stabilit), chain to the
trait when the stability bracket is
attached to the ui)per set of holes in
the back of range.
Theupper levelset ofholes is intendedfor use
with a backsplashkiL If the backsplashis not
beingused,makesure thatthere areno
structuralsupportsfor thecountertop which will
interfere with thestability bracketwhen located
in the upperset of holes.
[] Fasten one end of the stabiliw chain
to the floor or wall with the long
screw and washer suI)plied.
NOTE"If attachingtomasonry,,youcanbuy
suitablescrewsandanchorsathardwarestores.
Usea masonrydrifttodrifttherequkedho/es.
Long screw !,
\ \\\
Makecerta/#thescrewisgolbg1hiethewall
plateat thebaseofthe walloroneofthestuds
in thebaseofthewall.
Chain",
i','i
Wallplate
_,_]/ether you attach tile chain to tile wall
or floo_; be certain that the screw is in
at least 3/4" thickness of wood other
than baseboard and that there are no
electrical wires or l)lumbing in tile area
which the screw could penetrate. Attach
the stabili_' chain in a location which will
allow the chain to be in line with the
bracket side to aide as much as possible
when attached to the trait, Test to see if
the chain is secm'ely fastened by tugging
on the chain,
Tape
[] Temporarily attach tile loose
end of tile chain to tile rear of tile
counterto l) with tile tape fl'om tile
packaging.
[] Place the range in the cotmter
cutout leaving just enough room
between the back of the range and
the wall to reach the stability bracket.
Hook tile loose end of tile chain
[]
onto tile bracket b) slipping tile
nearest link of the chain into the
slot in the bracket. Make sm'e the
chain is pulled as tight as possible
and that there is no excess slack in
the chain after the chain is attached
to tile bracket.
[] Slide tile range all tile wa) back into
the counter Once the range is
l)ushed back in place, there will be
a small alllO/lnt oil slack in tile chain.
This is nomml.
CAUTION: Excessive slack in the chab could
allow the range to tip over
26
Control Panel
It's a good idea to wipe tile control panel
after each use. Clean with mild soap and
water or vinegar and wateI; IJllse with
clean water and polish dry with a soft
cloth,
Do not rise abI'asi','e cleansei,s_ strong
liqtfid cleansers, plastic scorning pads or
oven cleansers on the control panel--they
_ill damage tile finish. A 50/50 solution of
vinegar and hot wamr works well.

Beforeyoucall forservice...
Troubleshooting -tips
Save time and money! Reviewthe charts on the following
pages first and you may not need to call for service.
Possible Causes
Burners have yellow or The combustion quality of
yellow-tippedflames burner flames needs to be
determined visually.
What ToDo
• Use the illustrations below to (letem/ine if your burner
flaules are noF/nal. If burner flames look like A, call for
service. Noimal burner flames should look like B or C,
tel)ending on the type of gas you use. _._]th I,P gas, some
yellow ill)ping on outer cones is noi_mal.
A-Yellow flames Biyellow tips CiSoft blue flames
Carlfor service on outercones Normal for natural
NormalforLPgas gas
Surface burner knobs Surface controls • To turn from the OFF position, push the knob in and
will not turn improperly set. then turn.
Surfaceburners Plug on range is not • Make sure electrical plug is l)lugged into a live, l)roperlv
do not light completely inserted in the gr_)t/nded ot/flet.
electrical outlet.
Gas supply not commcted • See the Installation Instructions that came with your
or tunmd on. range.
A fuse in your home may be • Rel)lace tire fi/se or reset tire circuit breakel:
blown or the circuit breaker
tripped.
Pan sitting on burner grate may • Reluove the pan and try again.
be partially blocking the free air
flow needed for combustion.
Igniter orifice ha burner body • P.emove the obstruction. See tire Care and cleaning of
may be clogged, therange section.
Burner parts not replaced • See tire Careand cleaningof therange section.
correctly.
Hole in burner top behind • Use a small sewing needle to Uul)lug.
the igniter may be dogged.
Tickingsoundofspark Surface control knob is still • TurI] tire knob out of tire LITEposition to tire desired
igniterpersistsafter ha the LITE position, setting.
burner lights • Turn the btu'uer off and relight./f ticking is still
present, call tor service.
Ticking sound persists Be sure the knob is in the • Remove knob by pulling it straight oH tire stem and
after burner is turned off OFF position, check tire bottonl of tire knob tot any build-ul) of soil.
Burner flames very Improper air to gas ratio. •/f range is connected to l.P gas, check :Ill steps in tire
large oryellow Installation Instructions that came with your range.
Ovenwill not work
butcooktopdoes
Oven shut-off valve is ha the
closed position.
• I,ocate the oven shut-off wdve on the pressure
regulator h)cated behind the storage drawer (see the
Insta lla tion ] nsti uctions). Move the sh ut-ofl' level" to
the open position. 2 7

Beforeyoucall forservice...
Troubleshooting tips
Possible Causes What To Do
Clock and timer A fuse ha your home maybe *Replacetheltlseorresetthecir(uitl_reake_:
do not work blown or the circuit breaker
tripped.
Oven controls * See tile Using the clock and timer section.
improperly set.
Oven light does not work Light bulb is loose or defective. * Tighten or replace the bulb.
Plug on range is not completely : Make,st_re electric_li l_t/g, i_.l-,lugged,, into a live, properly
hlserted ha the electrical outlet, grotmded ot/tlet.
Switch operating light * Call for service.
is broken.
Oven temperature too Oven thermostat * See the Adjust the oven thermostat--Do it yourself[
hot or too cold needs adjustment, section.
Oven will not work A fuse ha your home may be * Replace the fl/se or reset the circtfit l_reake_:
blown or the circuit
breaker tripped.
Oven controls * See the Using the oven section.
improperly set.
Controlsignals after You forgot to enter * Press the BAKE pad and desired temperature or the
entering cooking time a bake temperature SELFCLEAN pad and desired clean time.
or delay start or clemfing time.
Displaygoes blank A fuse ha your home may * Replace the fl/se or reset the circuit breaker:
Food does not Oven door not closed. * See the Using the oven section.
broil properly
be blown or the circuit
breaker tripped.
The clock is in the * See the Special features of your oven control sectiou.
black-out mode.
Oven controls improperly set. * Make sure you press the BROILHI/LO pad.
Improper shelf position * See the Broiling Guide
being used.
Cookware not stilted * tlse the broiling, laan and ,grid that came with vottr oven.
for broiling.
Aluminum foil used on the * See the Using the oven section.
broiling pan mad grid has
not been fitted properly mad
slit as recommended.
Oven bottom not securely * See the Care and cleaning of the range se(tiou.
seated in position.
28

le_ :::i_iii:i _ Possible Causes What ToDo
Food does not bake Oven controls * See tile Using the oven section.
or roast properly hnproperly set.
Shelf position is incorrect * See tile Usingthe oven section.
or the shelf is not level.
Incorrect cookware or * See tile Usingthe oven section.
cookware of improper
size being used.
Alumhaum foil used * See tile Using the oven section.
hnproperly in the oven.
Oven bottom not securely * See tile Care and cleaning of the range section.
seated ha position.
Oven thermostat needs * See tile Adjust the oven thermostat--Do it yourself[
adjustment, section.
Ovenwill notself-clean The oven temperature is too • _Mll)w tile oven tl) cool to rl)l)m teml/erature and
high to set a self-clema operation, reset the (()ntFl)ls.
Oven controls • See tile Using the self-cleaning oven section.
improperly set.
"Crackfing " or This is the sound of the * This is normal.
"popping" sound metal heating and cooling
during both the cooking mad
cleaning functions.
Excessive smoking Excessive soil. * Press tile CLEAR/OFF pad. Open tile windows to
Oven door will not open Oven too hot. • Allow the oven to cool below locking teInpeI'atuI'e.
after a clean cycle
Oven notclean aftera Oven controls not properly set. * See tile Using the self-cleaning oven section.
clean cycle
Oven was heavily soiled. * Clean till heavy spillovers before starting tile clean
rid tile roon/ of smoke. _'_.lit until tile LOCKED DOOR
light goes off. Wipe till tile excess soil and reset tile
clean cycle.
cycle. He;wily soiled ovens may need to sell:clean
again or fl)r a llmger i/eriod of time.
"LOCKOOOR"flashes The self-clean cycle has * Close tile oven door,
in the display been selected but the
door is not closed.
LOCKEDDOORlight The oven door is locked * Press tile CLEAR/OFFpad. Allow tile oven to cool.
is onwhen youwant because the temperature
to cook inside the oven has not
dropped below the
locking temperature.

Beforeyoucall forservice...
Troubleshooting tips
Possible Causes What ToDo
_'F-- and a number or You have a function error code. * Press the CLEAR/OFF pad. _Adlow the oxen to cool fin.
letter!" flash in the display one horn: Put the oxen back into operation.
If the fm_ction code repeats. * Disconnect all power to the range, for at least 30
seconds and then reconnect power. If the flmction
error code repeats, call for serxice.
Displayflashes Power failure. * Reset the clock.
Unable to get the Oven control pads were * The BAKE and BROIL HI/LOpads Inust be pressed
displaytoshow "SF" not pressed properly, at the same time and held for 3 seconds.
Power outage, Power outage or surge. * Reset the clock./f the oven was in use rot! In ust reset
clock flashes it by )ressing the CLEAR/OFF pad, ,, l , settin,, the clock
and resetting any cooking flmction.
"Burning" or "oily" This is normal in a new oven * To speed the pl'ocess, set a self'clean cycle fOl" ;i
odoremittingfrom and will disappear in time, minimum of 3 hotll'S. See the Using the self-
the vent cleaning oven section.
Strongodor An odor froln the insulation * This is teml)Ol'al'y.
around the inside of the oven
is normal for the first few times
the oven is used.
hnproper air/gas ratio in * (',;111 fin" service.
the oven.
Fannoise A cooling fan may * This is normal. The cooling thn will turn off and on.
automatically turn on and
off to cool internal parts.
3O

GasRange Warranty.
Aft warranty service provided by our Factory Service Centers
or an authorized Customer Care® technician.
For service in the United States call 800-GE-CARES.
For service in Canada call 1-800-361-3400
We Will Replace, At No Charge To You:
One Year
Fromthedate
originalpurchase
Service trips to your home to teach you how to use
the product.
hnproper h_staJlation.
Failure of the product if it is abused, misused, or
used for other thaa_ the intended purpose or used
commercially.
Anypart of the range which tidls due to a detect in materials or w()rkmanship.
During this full one-year warranty, we will also provide, free of charge, all labor
and in-home service to replace the defecti\'e part,
Replacement of house fuses or resetting of circuit
breakers.
Damage to the product caused by accident, fire, floods
or acts of God.
h_cidentaJ or consequential damage to personal
property caused by possible defects with this appfim_ce.
This warranty is extended to the original purchaser and any succeeding owner for products purchased for
home use within the USA. In Alaska, the warranty excludes the cost of shipping or service calls to your home.
Some states do not aflow the exclusion or limitation of incidental or consequential damages. This warranty
gives you specific legal rights, and you may also have other rights which vary from state to state. Toknow
what your legal rights are, consult your local or state consumer affairs office or your state's Attorney General
Warrantor."General Electric Company.Louisville, KY 40225
This warranty is extended to the original purchaser and any succeeding owner for products
purchased for ordinary home use in Canada.
Aft warranty service will be provided by our Factory Service Centers or by our authorized
Customer Care®servicers during normal working hours.
Should your appliance need service, during warranty period or beyond, carl Camco Inc. 1-800-361-3400.
Some provinces do not allow the exclusion or limitation of incidental or consequential damages, so the above
limitation or exclusion may not apply to you. This warranty gives you specific legal rights, and you may also have
other rights which vary from province toprovince. Toknow what your legal rights are in your province, consult your
local or provincial consumer affairs office.
Warrantor:CamcoInc.
Iffurtherhelp is needed concerningthiswarranty, write:
CustomerRelationsManager, Camco Inc., 1 FactoryLane,Suite310,Moncton, N.B. EIC 9M3
31

ServiceTelephoneNumbers
gEAnswerCenter®In theU.S.:800.626.2000
The GE Answer Cente_ 4' is open 24 hom_ a din' 7 days a week.
In Canada, call 800-361-3400.
In-HomeRepairService/ntheU.S.:800-_2-2737
Expert GE repair service is only a phone call away:
In Canada,call 800-361-3400.
SpecialNeedsService/ntheU.S.:800.626.2000
GE offers, fl'ee ot charge, a br(whm'e to assist in planning a barrie_fl'ee kitchen for pe_ons
with limited mobility. In _e U.S., call 800-TDD-GEAC (800-833-4322).
In Canada,call 800-361-3400.
ServiceContracts/ntheU.S.:800-626-222#
Pro'chase a GE service contract while _om _warrant_ is still in effect and you'll receive a
substnnfial discount. (;E Consumer Set\ice will still be there after )our warrant} expires.
In Canada, call 800-461-3636.
PartsandAccessories/ntheU.S.:800-626-2002
Individuals qualified to service their own appliances can have pm_s or accessolies sent directly
to their homes (VISA, MasterCard and Discover cards are accepted).
Instructions contained inthis manual cover procedures to be performed by any user.Other servicing
generally should be referred to qualified service personnel Cautionmust be exercised, since improper
servicing may cause unsafe operation.
In Canada, call 800-361-3400.
ServiceSatisfaction
If _ou are not satisfied with the sex_,ice you receive fl'om (;E:
First contnct the people who serviced your appliance.
Next, if you are still not pleased, ill the U.S., write all the detnils--including your phone numbex_
to: Managex; (]onsulner P,elations, GE Appliances, Appliance Park, Ixmisville, KY 40225; m;
ill Canada, to Managex; Consunler Relations, Camco Inc., 1 Factory I.ane, Suite 310, Moncton,
N.B. El(; 9M3
32 Printed in LaFayette,GA
 Loading...