

o_
U3
©
ge.com(U.S.)
vvwvv.GEApp/iances.ca(Canada)
Safety Instruc_ons ............ 2-7
Operating Instrudions
Baking or Roasting .............. 11
Broiling, Broiling Guide ......... 14
(',lock and Timer . .............. ]5
Con trol I,ockout ............... ]5
Cookware ...................... 9
Oven ...................... ] 0-22
Sabbath Feature ................ 22
Self:Cleaning ............... 18, 19
Special Features ............. 20-21
Surfi_ce Burnei's .............. 8, 9
Thermostat .................... 17
Timed Baking & Roasting ........ 16
I Jft-Off Oven Door ............. 26
Light Bulbs .................... 24
Packagfng Tape ................ 23
Painted Surfhces ................ 27
Racks ........................ 25
Stainless Steel Surfi_ces .......... 27
Storage Drawer . ............... 25
Vent ...................... 24, 27
Care and Cleaning
Broiler Pan and Grid ........... 25
Burner Assembly ............... 23
Burner Grates and
Vent Grille .................... 24
Control Panel ................. 27
Door. ........................ 26
Floor ......................... 27
Glass Cooktop .............. 28, 29
Knobs ........................ 23
Troubleshooting Tips ........ %-34
Accessories .................... -,9
Cons_tmer Support
Consumer Support ..... Back Co_vr
Product RegSstrafion
(Canada) .................. 37, 38
Product Registration (U.S.A.) . 35, 36
_\arrantv for Customei's
in Canada .................... 43
_\arranty fbr Customers
in the U.S.A ................... 42
o
Write the model and serial
numbers here:
Model #
Serial #
You can find them on a label
behind the open oven door
on the lower left corner of the
range fl'ame.
49-80371 11-05Jfl

IMPORTANTSAFETYINFORMATION.
READALLINSTRUCTIONSBEFOREUSING.
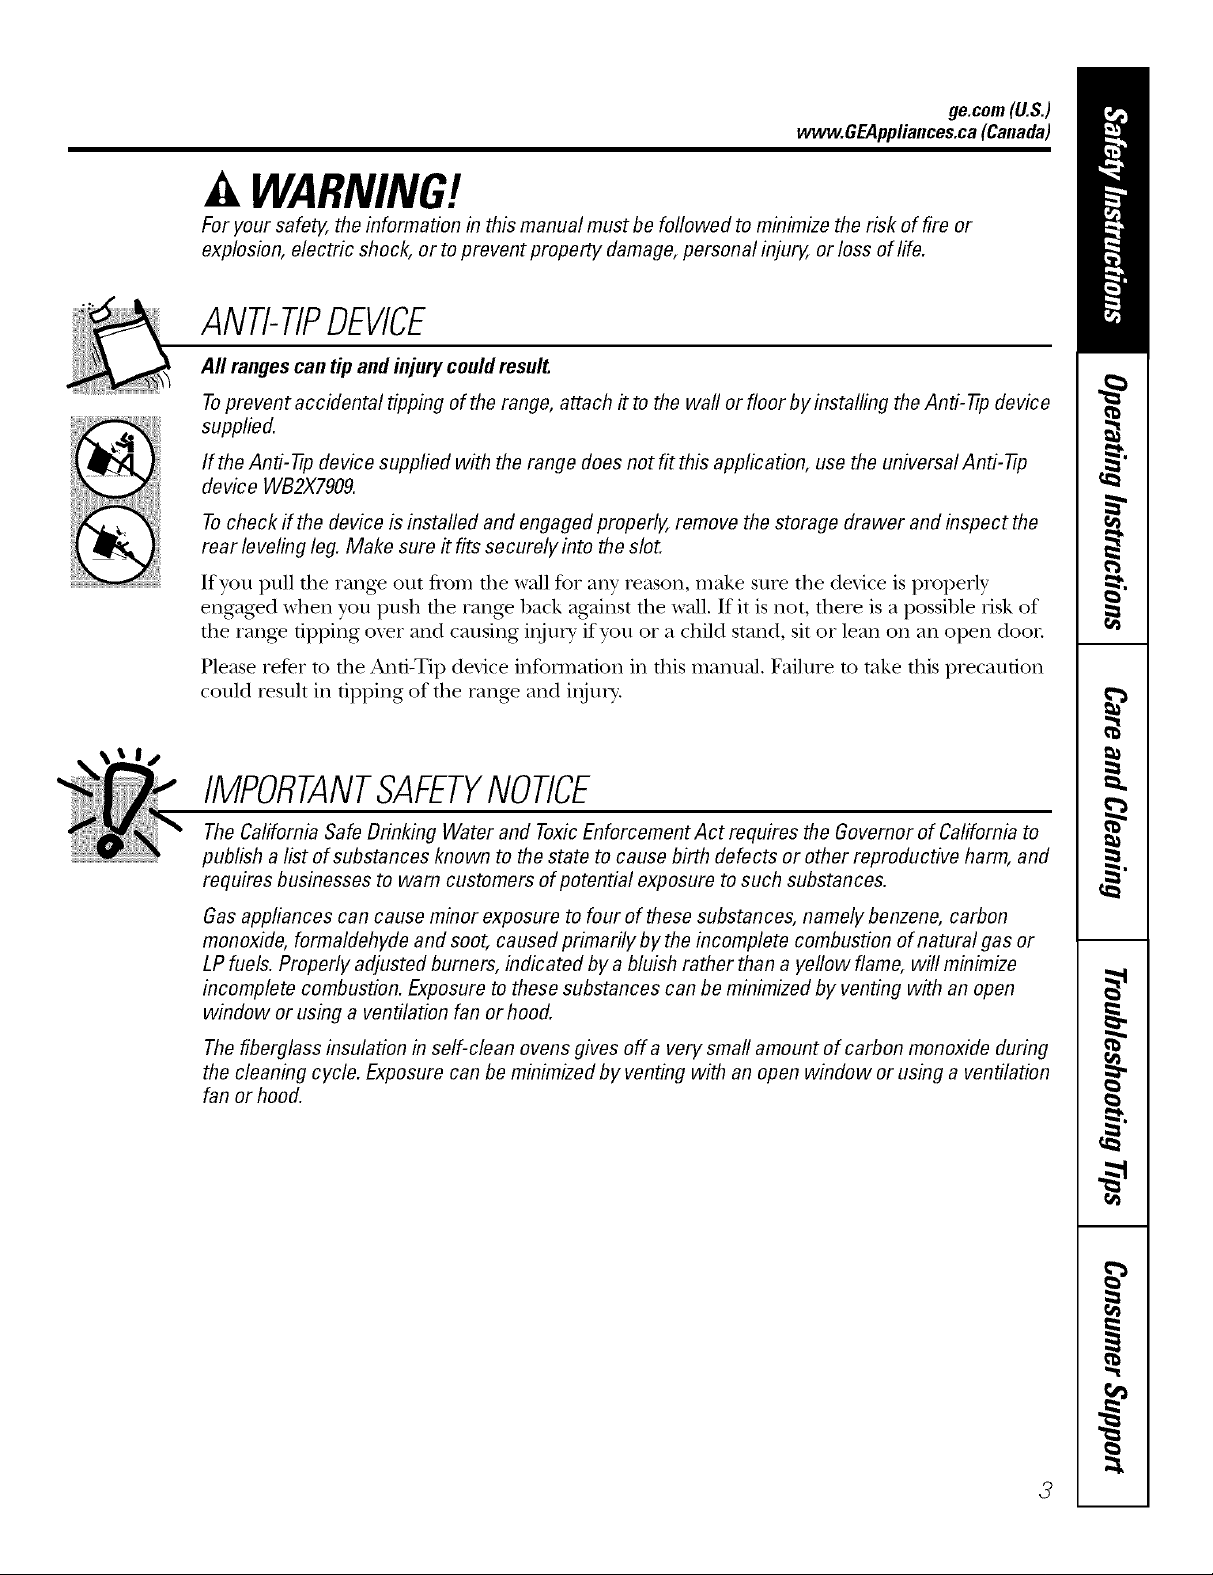
WARNING!
ANTI-TIPDEVICE
_!_ALLRANGESCAN TIP
_;i:INJURY TOPERSONS
COULDRESULT
@INSTALLANTI-TIP
DEVICESPACKEDWITH
RANGE
_ SEEINSTALLATION
INSTRUCTIONS
A WARNING:If the information
in this manual is not followed exactly,
a fire or explosion may result causing
property damage, personal injury
or death.
I Do not store or use gasoline or other
flammable vapors and liquids in the
vicinity of this or any other appliance.
- WHATTODOIF YOU
SMELLGAS
iJ_:illDo not try to light any appliance.
i_i:iDo not touch any electrical switch;
do not use any phone in your building.
Immediately call your gas supplier
from a neighbor's phone. Follow the
gas supplier's instructions.
If you cannot reach your gas supplier,
call the fire department.
-- Installation and service must be
performed by a qualified installer,
service agency or the gas supplier.
GAS-FIRED
2
LI_TED
ge.com(U.S.)
vvvvw.GEAppliances.ca(Canada)
WARNING!
For your safety, the information in this manual must be followed to minimize the risk of fire or
explosion, electric shock, or to prevent property damage, personal injury, or loss of life.
ANTI-TIPDEVICE
All rangescan tip and injury could result.
Toprevent accidental tipping of the range, attach it to the wall or floor by installing the Anti--tip device
supplied.
If the Anti--tip device supplied with the range does not fit this application, use the universal Anti--17p
device WB2X7909.
Tocheck if the device is instafled and engaged properly, remove the storage drawer and inspect the
rear leveling leg. Make sure #fits securely into the slot.
If yOU pull tile range otlt flom tile wall for ally reason, mal_.e stlie the device is properly
engaged when you push tile rang_ back against file wall. If it is not, there is a possible risk of
the rang_ tipping oxer and causing iIlju]_y" if YOUor a child stand, sit or lean on an open door
Please refer m the And-Tip device infounafion in tiffs manual. Failure m rake fills precaution
could result in tipping of the rang_ and iIIjm>
IMPORTANTSAFETYNOTICE
The Californb Safe Drinking Water and Toxic Enforcement Act requires the Governor of Californb to
publish a list of substances known to the state to cause birth defects or other reproductive harm, and
requires businesses to warn customers of potential exposure to such substances.
Gas appliances can cause minor exposure to four of these substances, namely benzene, carbon
monoxide, formaldehyde and soot, caused primarily by the incomplete combustion of natural gas or
LP fuels. Properly adjusted burners, indicated by abluish rather than a yellow flame, will minimize
incomplete combustion. Exposure to these substances can be minimized by venting with an open
window or using a ventilation fan or hood.
The fiberglass insulation in self-clean ovens gives off a very small amount of carbon monoxide during
the cleaning cycle. Exposure can be minimized by venting with an open window orusing a ventilation
fan or hood.
3

IMPORTANTSAFETYINFORMATION.
READALLINSTRUCTIONSBEFOREUSING.
WARNING!
SAFETYPRECAUflONS
When using electrical appfiances, basic safety precautions should be foflowed, including the
following:
_7{_Use this appliance only %r its intended
purpose as described m tins )wner s
Mannal.
_::Be sure your appliance is properly installed
and grounded by a qualified technician in
accordance with the provided installation
instrnctions.
_{:_Before perfo_ning any service, disconnect
the range power supply at the household
disu-ibufion panel by removing the fl_se or
switching off the circuit breaken
;fi:,iHaxe the installer show you tile location of
tile circuit breaker or fl_se. Mark it for easy
reference.
J; Do not leme children alone----r'hildren
should not be left alone or unattended in
all area where all appliance is ill use. They
should nexer be allowed to sit or stand on
ally part of the appliance.
J; Haxe the installer show you the location
of the range gas shut-offxahe and how to
shut it off if necessa U.
J; Hax> your rang_ installed and properly
grounded by a qualified installei; in
accordance with tile Installation
Instructions. Ally' adjusunent and se_Mce
should be perfomled only 1)y qualified gas
range installers or service technicians.
_{:_Locate the range out of kitchen traffic pafll
and out of dr_fftv locations to prexent poor
air circulation.
_t_::Be sure all packaging materials are
removed from rite rang_ before operating
it to pre\ent fire or smoke damage should
the packaging mamrial ignite.
J; Do not leme children alone or nnattended
where a range is hot or in operation. They
could be seriously bm_led. _:;
Do not attempt to repair or replace ally
part of your range unless it is specifically
recommended in this manual. All other
service should be refelTed to a qualified
technician.
Be sure your range is con-ecfly adjusted
by a qualified se_Mce mchnician or installer
for tile type of g_s (natural or LP) that is
to be used. Your rang_ call be comermd
for use with either type of gas. See the
Installation Instructions packed with
the rang_.
_::Plug your range into a 190=\_lt grounded
outlet only. Do not remo_e tile round
g_ounding prong from the plug. If in
doubt about the grounding of the home
elecuical system, it is your personal
_esponsibilitv and obligation to haw
all ungrounded outlet replaced with a
properly gTonnded, three-prong outlet ill
accordance with flae National Electrical
(',ode (U.S.). Do not use all exmnsion cord
with fl)is appliance.
WARNING:theseadjustments
must be mode by a qualified service
technician in accordance with the
manufacturer's instructions and aftcodes
and requirements of the authority having
jurisdiction. Failure to follow these
instructions could result in serious injury or
property damage. The qualified agency
performing this work assumes
responsibility for the conversion.
_{::Kee I) the hood and grease filters clean to
maintain good xenting and to axoid grease
fires.
Teach children not to play with tile
controls or ally other part of the range.
Always kee I) dish towels, dish cloths, pot
holders and other linens a satb distance
fronl vonr rangP.
4
SAFETYPRECAUTIONS
ge.com(U.S.)
vvvvvv.GEAppliances.ca(Canada)
;_?:,:Always kee I) wooden and plastic utensils
and canned tbod a safe distance fiom your
range.
_i:,iAlways kee I) combnsdble wall coxetings,
curtains or drapes a safe distance fiom
yonr range.
_{:;Do not clean tile rang_ with flammable or
xolatile cleaning fluids.
_i:,:After prolong>d use of a range, high floor
mmperautres may result and many floor
coxelJng3 will not withstand this kind of q?{::
use. Nexer insta]l tile range oxer vinyl tile
or linoleum that cannot wifllsmnd such
type of use. Nexer install it directly over _::
inmrior Mtchen caq)efing.
;f?:':Avoid scratching die glass cooktop widt
sharp instruments, or wifl3 tings and other
jeweh T.
;_i:,:Do not allow anyone to climb, stand or
hang on die oxen door; storage drawer or
cooktop. They could damag> the rang>
and even tip it oxel; causing sexere
personal ilIjm T.
CAUTION:Itemsinteresttochildren
shouldnot bestoredin cabinetsabovea rangeor
on thebacksplashof a range--children climbing
on therangeto reachitemscouldbeseriously
injured.
mamfial could be ignimd if brought in
contact with flame or hot oxen surtZaces
and may cause sexere b/li-/ls.
Do not store flammable materials in an
oxen, a range storag> drawer or near a
cooktop.
Do not store or use combnsuble mamrials,
gasoline or other flammable vapors and
liquids in the vicinity of this or any other
appliance.
Do not let cooking grease or other
flammable mamrials accumulam in or
near the rang>.
Do not use wamr on grease fires. Nexer
pick up a flaming pan. Turn dm conuols
off: Smother a flaming pan on a surfl_ce
burner 1)5' coxering tile pan complemly
with a well-fitting lid, cooMe sheet or fiat
trW. Use a multi-pml)ose dU chemical or
foam-type rite extinguisher
Flaming grease outside a pan can be put
out by covering it with baking soda or;
if available, by using a multi-pm])ose d U
chemical or foam-type fire extinguisher
Flame it3 die oxen can be smodtered
completely by closing the oxen door and
turning tile control to off or 1)5'using a
nmlti-pm])ose d_T chemical or foam-type
fire extinguisher
WARNIN&NEVERusethis
appliance as a space heater to heat or
warm the room. Doing so m W result
in carbon monoxide poisoning and
oxedteafing of the cookmp or oxen.
_i:,:For your safety, hexer use your appliance
for wanning or heating the room.
;_?:':Large scratches or impacts to glass doors
can lead to broken or shatmred glass.
;_?:':Do not clean fire rang_ when the appliance
is in use.
_i:,:Nexer wear loose-fitting or hanging
gammnts while using the appliance.
Be carefifl when reaching for imms stored
in cabinets oxer the range. Flammable
Let tile burner g_ates and other surtZaces
cool before touching them or leaving
then3 where children can reach them.
_?_::Nexer block dte xents (air openings) of
the range. They provide die air inlet and
oudet fllat are necessa U for the range to
operam properly with cotwect combustion.
'Air openings ate located at rite teat of the
cooktop, at tile top and bottom of file
oxen door; and at tile 1)oUom of the rang>
under the storage drawer or kick panel.
_7_::Do not lift tile cooktop. Lifting the
cooktop can lead to damag> and improper
operation of the rang>.
5
IMPORTANTSAFETYINFORMATION.
READALLINSTRUCTIONSBEFOREUSING.
WARNING!
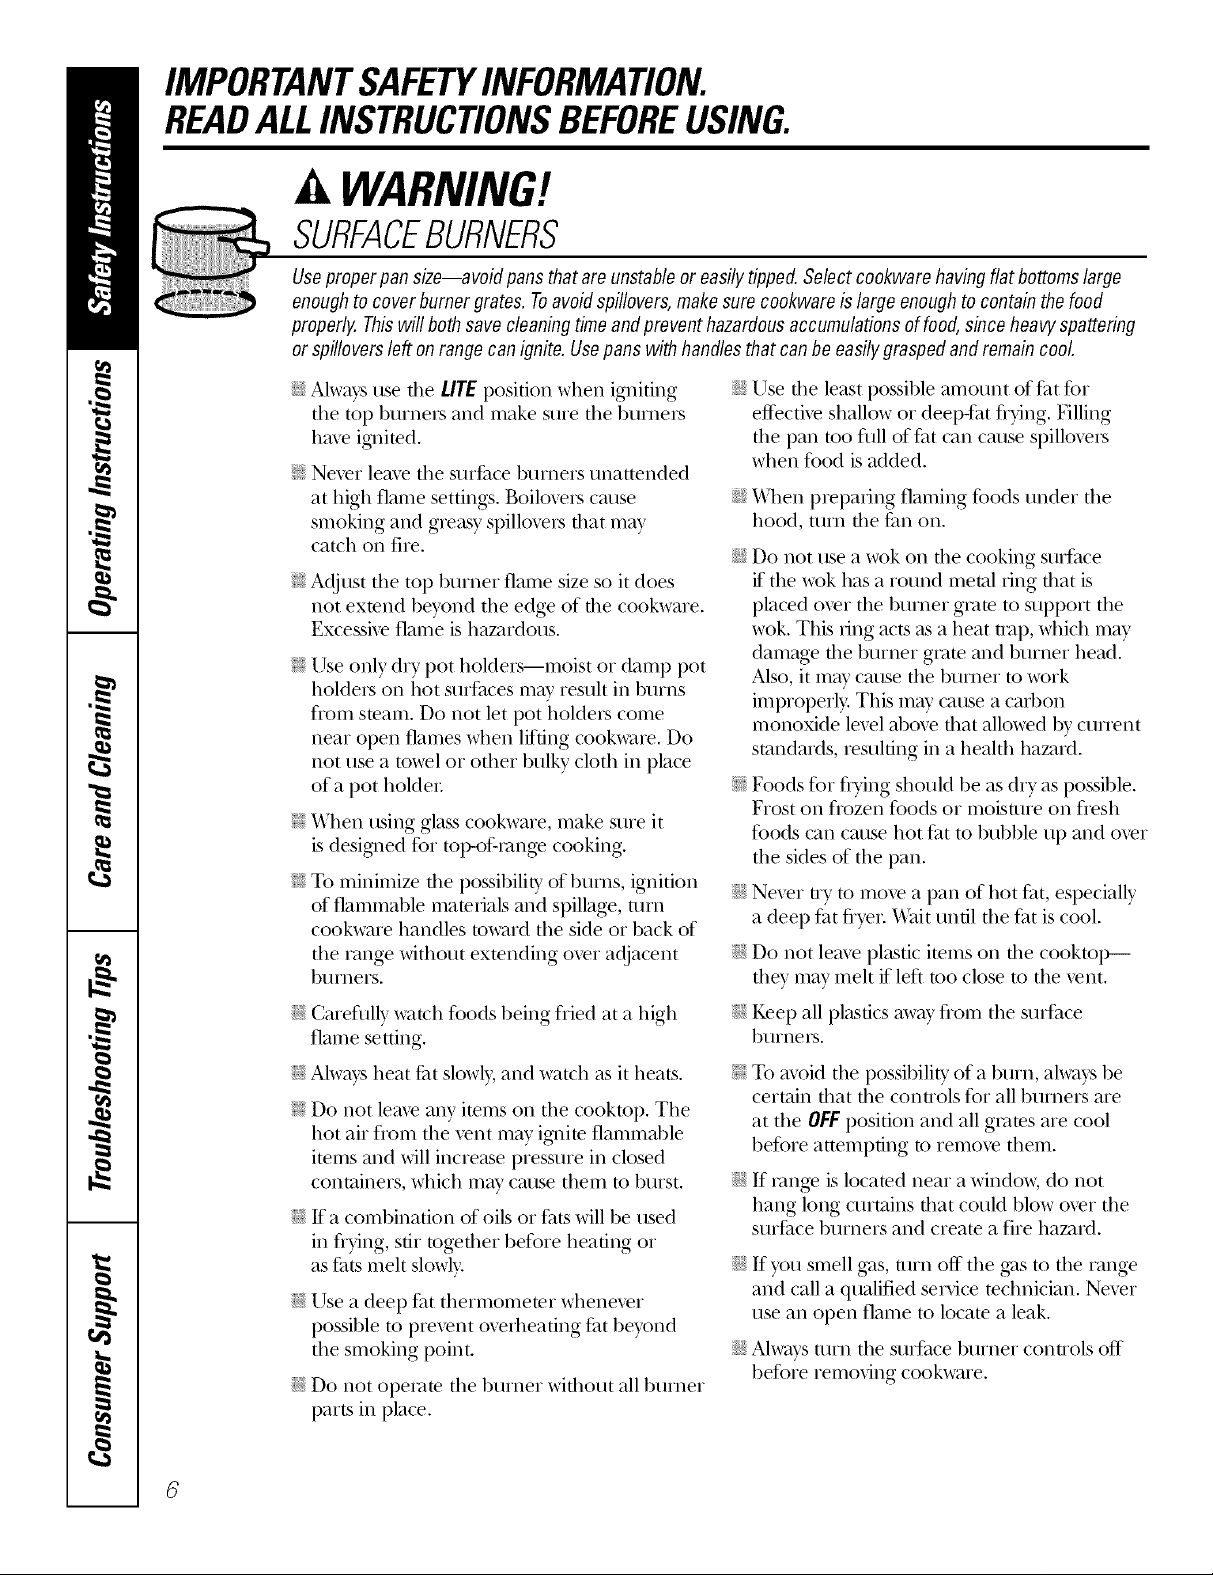
SURFACEBURNERS
Useproperpan size--avoid pansthatare unstableor easilytipped.Selectcookwarehavingflatbottomslarge
enoughto coverburnergrates.Toavoidspillovers,makesure cookwareis largeenoughto containthe food
properly, Thiswillbothsave cleaningtimeandpreventhazardousaccumulationsof food,sinceMaw spattering
or spilloverslefton rangecan ignite.Usepans with handlesthat canbe easilygraspedand remaincooL
_i)!Ahvays use tim Life position when igniting
the top burners and make sure the burners
hme ig_fited.
!?'Never leme the stirface btunets unattended
at high flame settings. Boilovers cause _i_!
smoking and greasy spillovers that may
catch on fire. _i_!
!?'Adjust the top burner flame size so it does
not extend beyond the edge of the cookware.
Excessive flame is hazardous.
!_:Use only dry pot holders--moist or damp pot
holders on hot surPaces may resuh in burns
flom smam. Do not let pot holders come
near open flames when lifting cookware. Do
not use a towel or other bulky cloth in place
of a pot holder:
!?'X_\hen using glass cookware, make sure it
is desig_md for top-of-range cooking.
!?'To minimize the possibili b, of 1)urns, ignition
of flammal)le materials and spillage, mm
cookware handles toward the side or back of
the range without extending over adjacent
btlI'IleI's.
[_lse tim least possil)le amount of flu for
efl>ctive shallow or deep-_lt flying. Filling
the pan too fifll of_u can cause spilloxers
when food isadded.
X&qmnpreparing flaming foods under the
hood, turn the f,m on.
Do not use a wok on tim cooking sur£1ce
if the wok has a round metal ring that is
placed o\er the burner giv_m m support the
wok. This ring acts as a heat m_p, which mW
damage the N_rner gram and N_rner head.
Also, it may cm_se the N_mer m work
improperly. This may cause a carl)on
monoxide le\_l abo\_ that allowed by current
standards, _esuldng in a heahh hazard.
Foods for fi)ing should be as dr) as possil)le.
Frost on fiozen foods or moisture on fiesh
foods can cause hot Pat to 1)ubble up and over
the sides of the pan.
Nexer uy to move a pan of hot Pat especiall;.'
a deep flit flyer. X'\hit until the flit is cool.
Do not lem_e plastic items on tim cooktop--
they may meh if left too close to the vent.
_i_!Careflflly watch foods 1)eing flied at a high
flame setting.
_i_!Ahvays heat fat slowly and watch as it heats.
!_:Do not lea\e any imms on the cooktop. The
hot air flom the \'ent may ig_im flammable
imms and will increase pressure in closed
containers, which may cm_se them m l)u_st.
_i)!If a coml)ination of oils or _lts will be used
in flying, stir together before heating or
as _lts meh slowh,
_i_!Use a deep flu thermometer whenever
possible to prevent oxerheating _t 1)eyond
the smoking point.
_i)!Do not operate the burner wifl_out all btuner
parts in place.
Kee I) all plastics mvay flom the surPace
1)tlI'Ile I'S.
To moid the possibili b, of a burn ahvavs be
certain that the conuols for all burners are
at the OFFposition and all grates are cool
before attemi)dng to remove them.
If _ange is located near a window, do not
hang long curtains that could 1)lowover the
surface burners and create a fire hazard.
If you smell gas, turn off the g:_s to the range
and call a qualified service technician. Nexer
use an open flame to locate a leak.
Ahvays ttun the stuJ_ce 1)tunet conuols off
before removing cookware.
ge.com(U.S.)
_GEAppliances.ca (Canada)
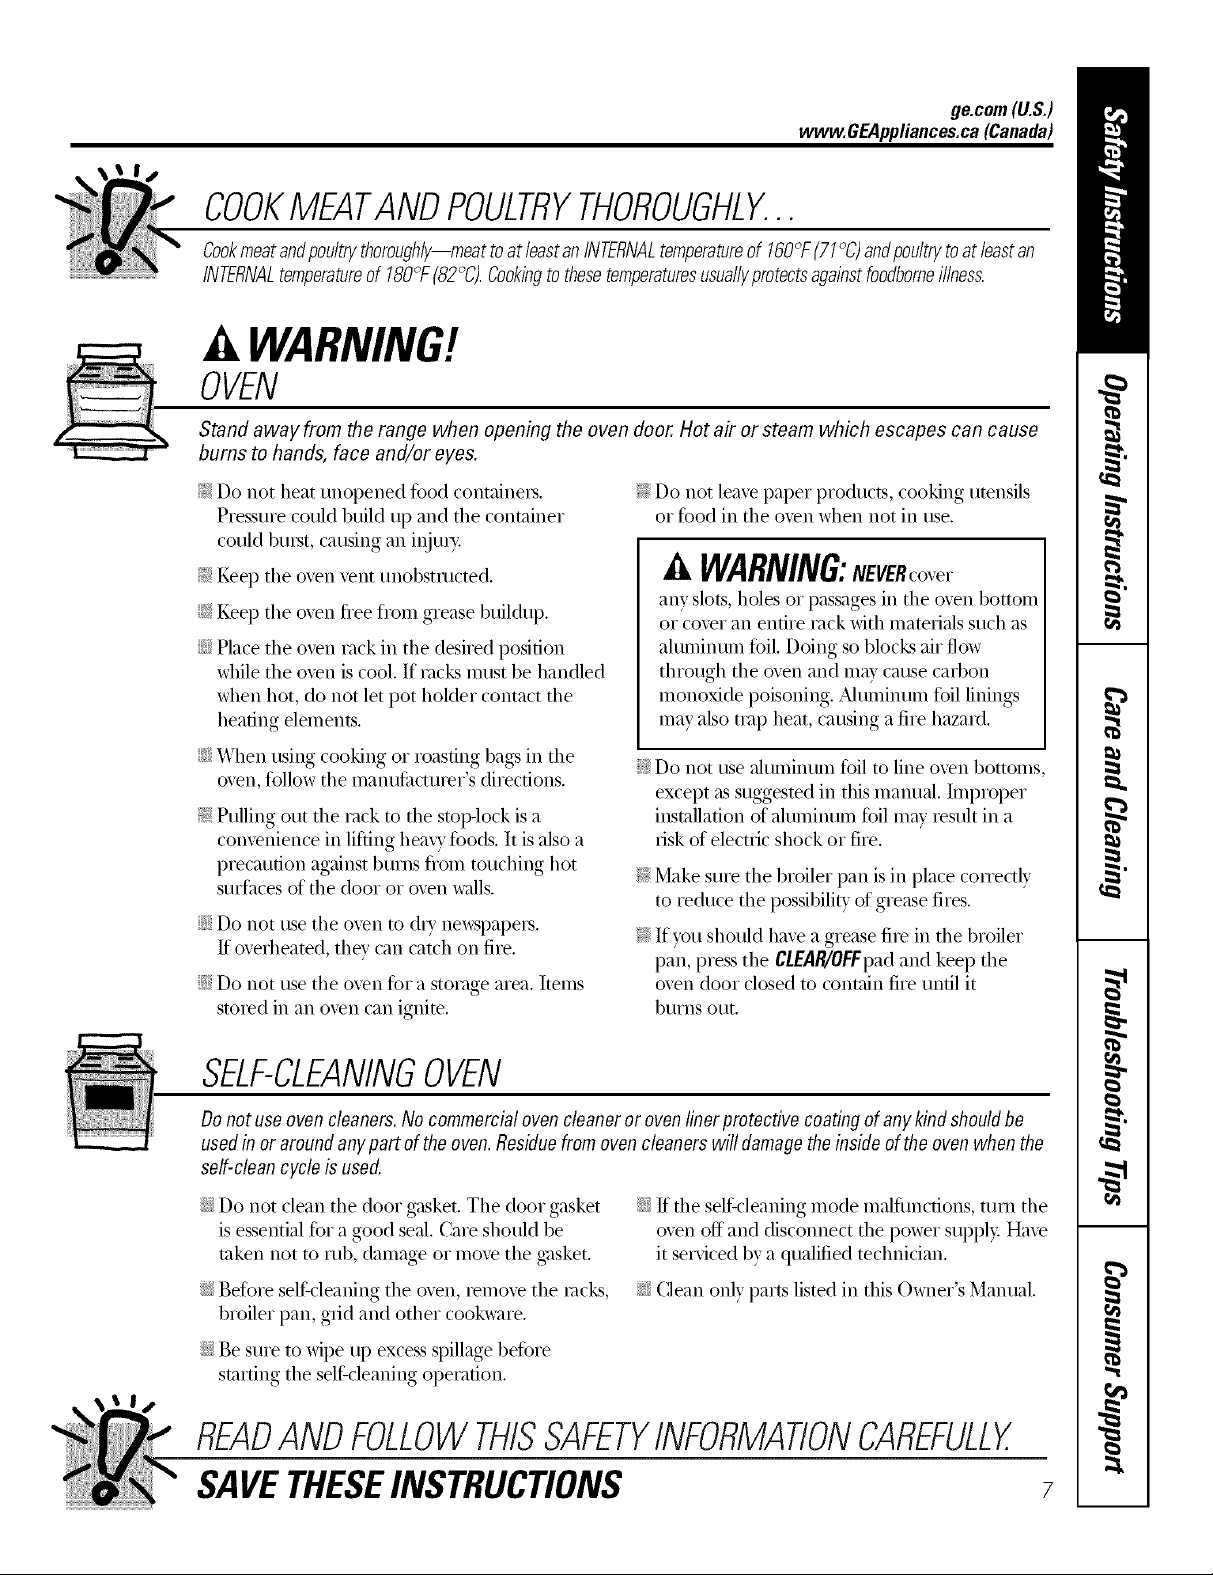
COOKMEATANDPOULTRYTHOROUGHLY...
Cookmeatandpoultrythoroughly--meattoatleastanINTERNALtemperatureof 160°F(71°C)andpoultrytoat leastan
INTERNALtemperatureof 180°F(82°C).Cookingto thesetemperaturesusuallyprotectsagainstfoodborneillness.
it WARNING!
OVEN
Stand awayfrom the range when opening the oven door. Hot air or steam which escapes can cause
bums to hands, face and/or eyes.
Do not heat unopened flood containers.
Pressurecould build up and the container
could bulst, causing an inju U.
Keep tile oven vent unobstructed.
KeeI) the oven flee from grease buildup.
Place tile oven rack in tile desired position
while the oven is cool. If rocks must be handled
when hot, do not let pot holder contact the
heating elements.
iJii:iWhen using cooking or roasting bags in tile
oven, follow tile manufi_ctu,er's directions.
Pulling out tile rock to tile stop-lock is a
convenience in lifting heavy fbods. It is also a
precaution against burns flom touching hot
surfilces of the door or oven walls.
Do not use tile oven to dU newspape,s.
If overheated, the} can catch on fire.
Do not use the oven fur a storage area. Items
stored in an oven can ignite.
Do not leave paper products, cooking utensils
or food in the oven when not in use.
a, WARNING:NEVERcover
any slots, holes or passages in tile oven bottom
or cover an entire rack with materials such as
alunfinuln toil. Doing so blocks air flow
through the oven and may cause carbon
inonoxide poisoning. Alunlinuln %il linings
may also trap heat, causing a fire hazard.
Do not use aluminum fi0ilto line oven bottoms,
except as suggested in this inanual, hnproper
installation of alulninuln foil may result in a
risk of electric shock or fire.
Make sure tile broiler pan is in place conectl)
to reduce the possibilit) of grease fires.
If you should have a grease fire in tile broiler
pan, press tile Cl£AR/Offpad and keep tile
oven door closed to contain fire until it
buI'nS OUt,
SELF-CLEANINGOVEN
Donot useovencleaners.No commercialovencleaneror ovenliner protective coatingof any kind shouldbe
usedin or aroundanypartof theoven.Residuefrom ovencleanerswill damagetheinside oftheoven whenthe
self-cleancycle is used,
iJii:iDo not clean tile door gasket. Tile door gasket
is essential fbr a good seal. Care should be
taken not to rub, damage or move tile gasket.
iJi;:iBe%re selfkleaning the oven, remove tile rocks,
broiler pan, grid and other cookware.
iJii:iBe sure to wipe up excess spillage before
starting the self cleaning operation.
iJii:iIf tile self cleaning mode malflmctions, turn the
oven off and disconnect tile power supply. Have
it serviced b} a qualified technician.
iJi;:iClean only parts listed in this Owner's Manual.
READANDFOLLOWTHISSAFETYINFORMATIONCAREFULLY.
SAVETHESEINSTRUCTIONS 7
Usingthegas surfaceburners.
Throughout this manual, features and appearance may vary from your model.
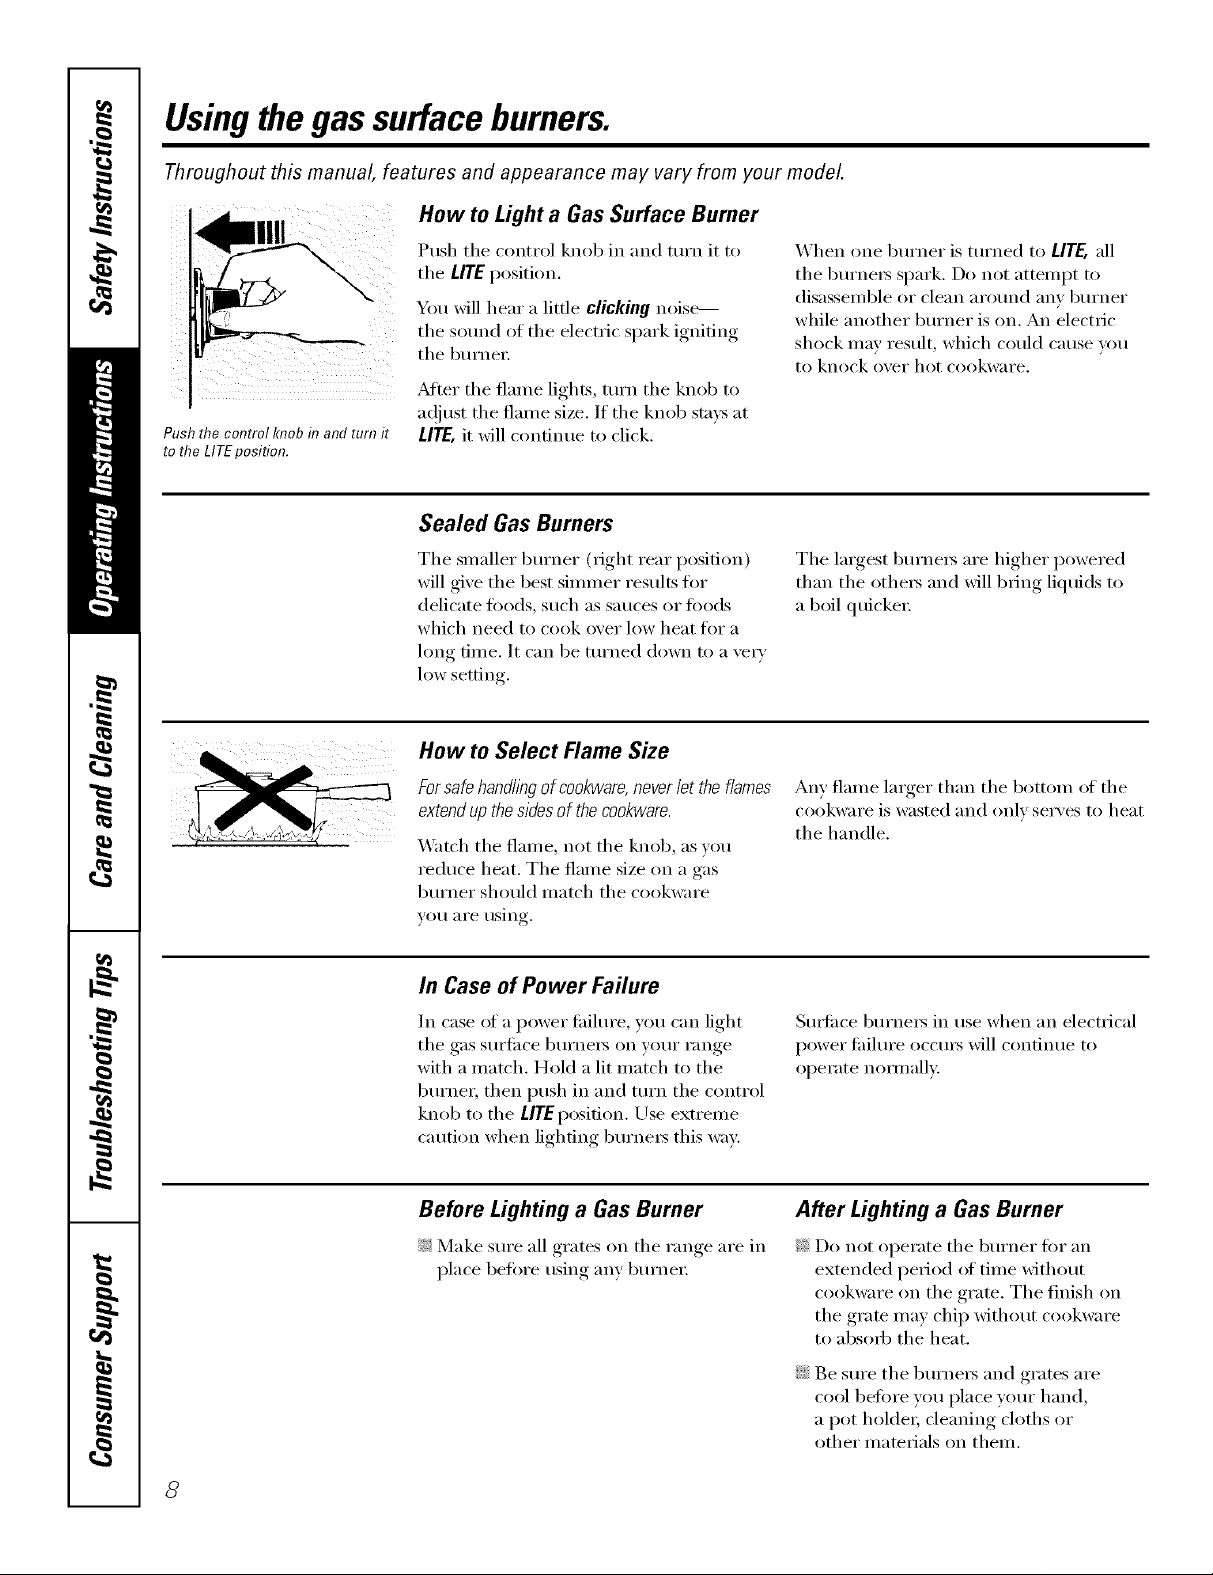
How to Light a Gas Surface Burner
Push the control knobin and turn it
to the LITEposifion.
Push the control knob in and turn it to
tile LITE position.
You will hear a little clicking noise---
tile sound of the electric s,)ark ionifin,_
the burlwl;
Mtei" the flame lights, turn the knob to
ac!iust the flmne size, If the knob stays at
Ill'E, it will continue to click,
Sealed Gas Burners
When one burxler is turxled to LITE, all
the burne_ spark. Do not attempt to
disassemble or clean around anv bm'ner
while another burner is on. An electric
shock may result, which could cause you
to knock over hot cookware.
Tile slnaller burner (right rear posidon)
will give the best silnlner results flw
delicate fi_ods, such as sauces or fi)ods
which need to cook over low heat fiw a
hmg dine. It can be turned down to a vei_'
low setting.
How to Select Flame Size
Forsafehandllegof cookware,neverlettheflames
extendupthesidesof thecookware.
_'atch the flalne, not the knob, as you
reduce heat. The flame size oil a gas
burner should inatch the cookware
VOII aI'e rising.
In Case of Power Failure
In case _ffa power tililm'e, you can light
the gas surlilce burnei_ on your range
with a inatch. Hold a lit inatch to the
burner, then push ill and turn the control
knob to the UTEposidon. Use extrelne
caution when lighting burnels this way:
The largest, burnels are hi_*her,_ l)°wered
than the othels and will 1)ring liquids to
a boil quickeI:
An} flame larger than the bottom of the
cookware is wasted and only ser\ es to heat
the handle.
Surtilce burners in use when an electrical
power fililure occms will continue to
operate nommllv.,
Before Lighting a Gas Burner
!;_:Make sure ;111grates on the range are in
place before using any burner
After Lighting a Gas Burner
_: Do not operate the burner for an
extended period of tilne without
cookware on the grate. The finish on
the grate Inay chip without cookware
to absorb the heat.
;;Ji::Be sure the burners and grates are
cool betore you place your hand,
a pot holder; cleaning cloths or
other inatelials on theln.
8
Top-of-Range Cookware
ge.com (U.S.)
www.GEAppliances.ca (Canada)
Aluminum: Meclimn-weight cookware is
reconm_ended because it heats quickly
and evenly: Most fi)ods brown evenly in
an almninunl skillet. Lrse saucepans with
tight-fitting lids when cooking with
lIlinilIltlll/ aiilo/ints oil _;KeI:
Cast-Iron: If heated slowly, most skillets
will give satisti_ct(n T results.
Enamelware: Under scnne conditions,
tile enalllel of SOllle cookwaI'e l//_lY
nlelt. Follow cookware Ill_lnUtlilCttlI'eI"S
reconnnendations fin" cooking methods.
Glass: There are two t)l)es of glass
cookware--those fi)r ()\'ell /lSe only
and those fi)r toi>oFrange cooking
(saucepans, coffee and teapots).
Glass conducts heat vecv slowly.
Stove TopGrills
Do not use stove top grills on your sealed
gas burnei_. If' you use tile st()ve tit I) grill
on the sealed gas bumei; it will cause
inc(nnplete c()mbusfion and can result
ill exposure to carbon monoxide levels
above allowable current standards.
Heatproof Glass Ceramic: Can be used
tor either sui_ilce or oven cooking. It
conducts heat vei_' slowly and cools vei_'
sh)wh'. Check cooi_ware manufi_cmrer's
directions to be sure it can be used (m gas
ranges.
Stainless Steel'. This met;fl alone has
poor heating properties and is usually
c(nnbined with coppeI; almninun/
or other metals fin" improved heat
distribution. (;ombinafion metal skillets
usually _)rk safisfi_ctofilv if they are used
with mediunl heat as tile manufi_cmrer
i'ecoi/lillends.
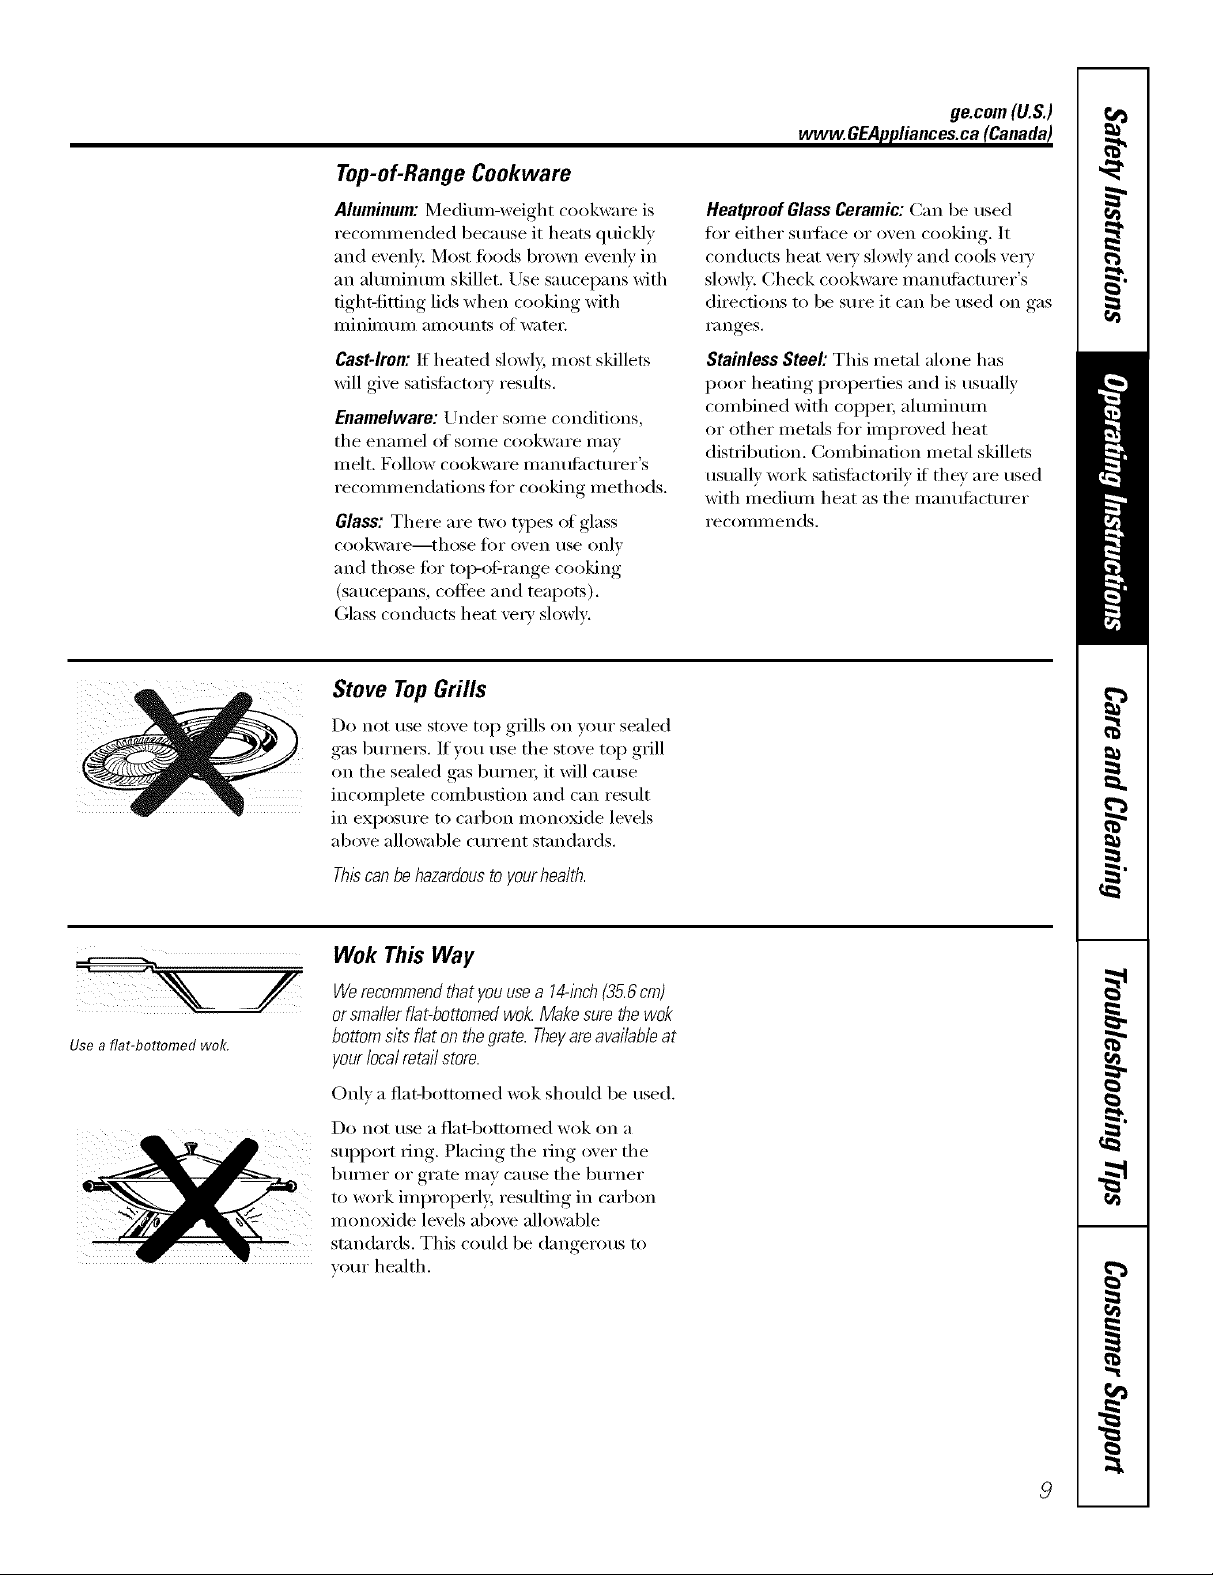
Use a fiat-bottomed wok.
Thiscanbehazardousto yourhealth.
Wok This Way
Werecommendthatyou usea 14-/hch(35.6cm)
orsmaller flat-bottomed wok. Make sure thewok
bottom sits flat on thegrate. Theyare availableat
yourlocal retail store.
Onh a flat-bottonmd wok should be used.
Do not/lse a []at-bottoi//ed wok on a
support ring. Placing tile ring over tile
burner or grate may cause tile burner
to work improperly, resulting ill carbon
monoxide levels above allowable
standards. This could be dangerous to
your health.
9
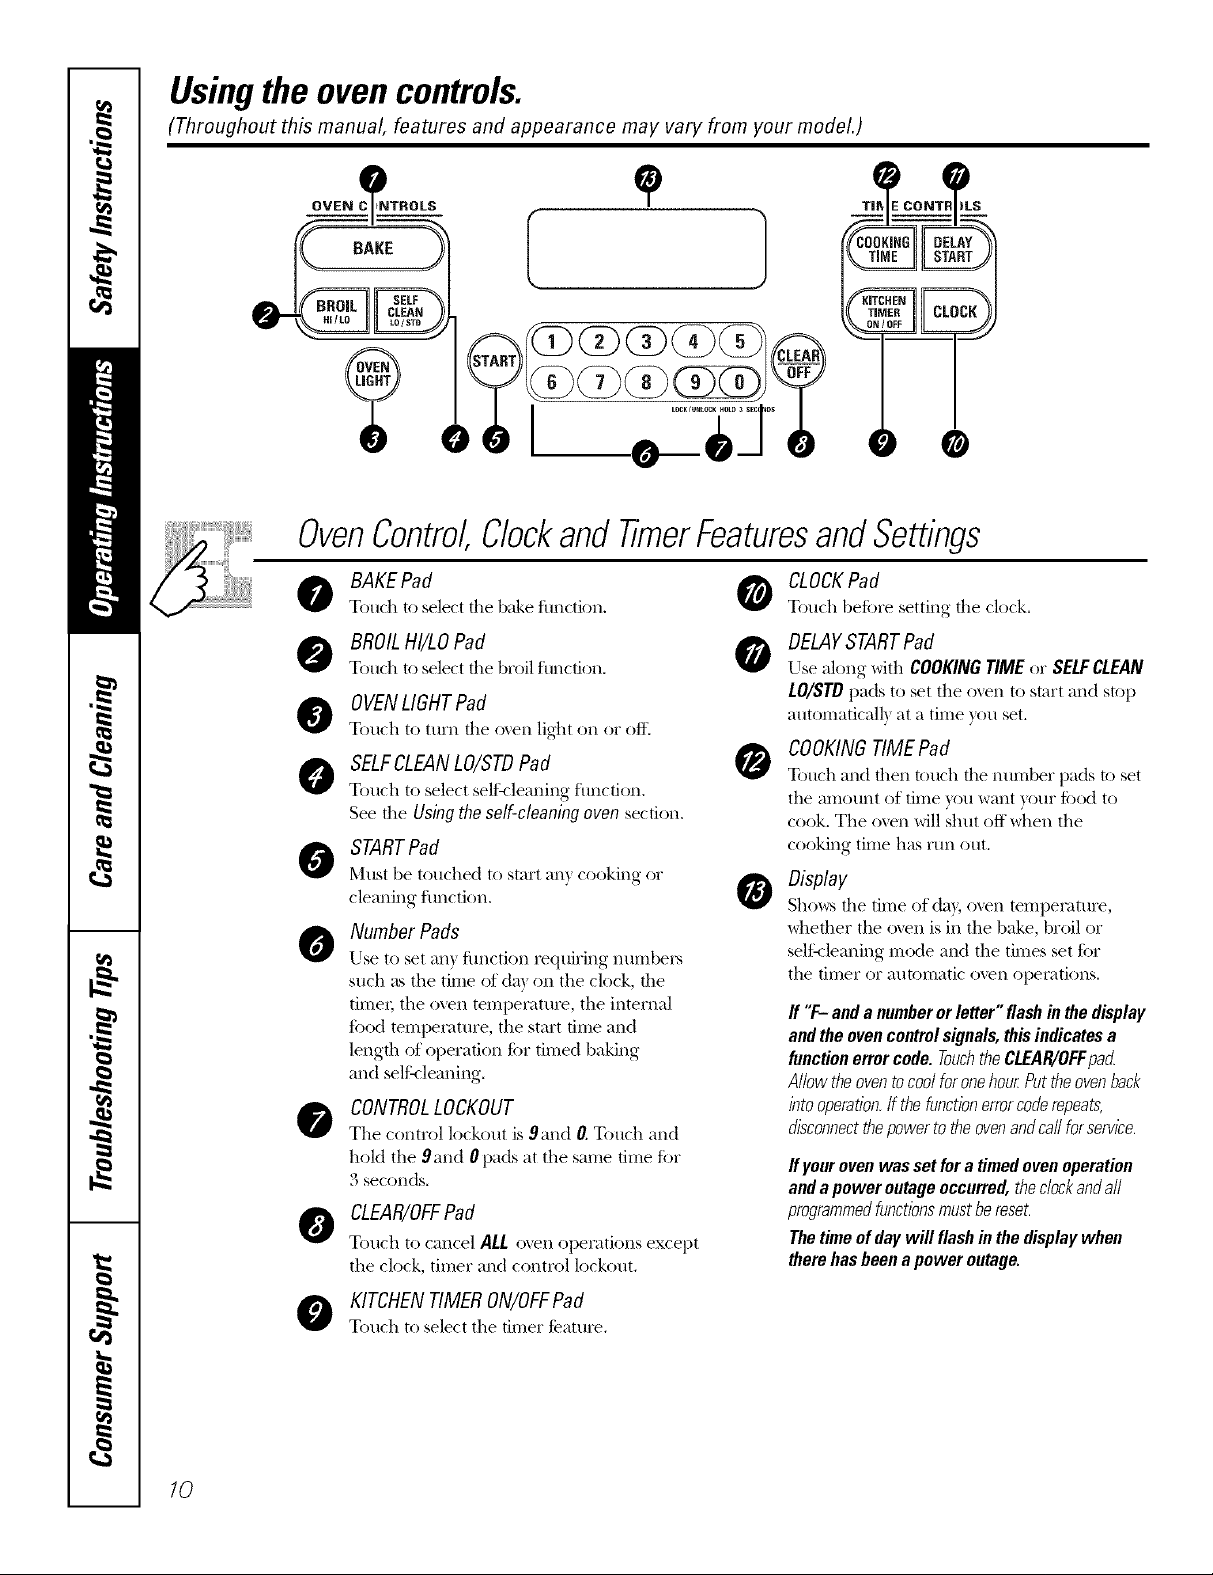
Usingthe ovencontrols.
(Throughout this manual, features and appearance may vary from your model.)
OvenControl,ClockandTimerFeaturesandSettings
BAKEPad
Touch to select the b_&e function,
BROILHI/LOPad
Touch to select the broil function,
0VENLIGHTPad
Touch to ttlrn the oven light on or off.
SELFCLEANLO/STDPad
Touch to select seli:<leaning ftmction.
See the Using the self-cleaning oven secdon.
STARTPad
MHst be tOtlched to start all} cooking or
cleaning flmction.
Number Pads
Use to set anY,fimction re(luiring', numbers
such as the time of da) on the clock, the
timeI; the oven tempeIatm'e, the internal
filed tempelatm'e, the start time and
length of operation fi)r timed baking
and self:cleaning.
CONTROLLOCKOUT
Tile control lock()ut is 9and O.Touch and
hold the 9 and 0 pads at the same time tbr
3 seconds.
CLEAR/OFFPad
Touch to cancel ALL o_en operations except
tile clock, timer and control lockout.
CLOCKPad
Touch before setting the clock.
DELAYSTARTPad
Use along with COOKINGTIME or SELFCLEAN
LO/STD pads to set the o_vn to start and stop
automaticall) at a time you set.
COOKINGTIMEPad
0
Touch and then touch the nun-)ber pads to set
the amount of time you want your filed to
cook. Tile ()veil will shut oft when tile
cooking time has i)ln O)lt.
Display
Sho_s the dine of day, ()veil temperature,
whether the o_vn is in the bake, broil or
self:cleaning mode and the times set ti)r
the timer or automatic o_vn opeiations.
ff "F- anda numberorletter"flashinthedisplay
andtheovencontrolsignals,thisindicatesa
functionerrorcode.TouchtheCLEAR/OFFpad
AllowtheoventocoolforonehourPuttheovenback
intooperation,ff thefunctionerrorcoderepeats,
disconnectthepowertotheovenandcaflre(service.
ff your ovenwas set for a timed ovenoperation
and a power outageoccurred, thedockand aft
programmedfunctionsmustbereset.
Thetimeof day will flashin the display when
therehas been a power outage.
10
KITCHENTIMERON/OFFPad
Touch to select the timer feature.
ge.com (U.S.)
Using the oven. vvvvw.OEAppliances.ca(Canada)
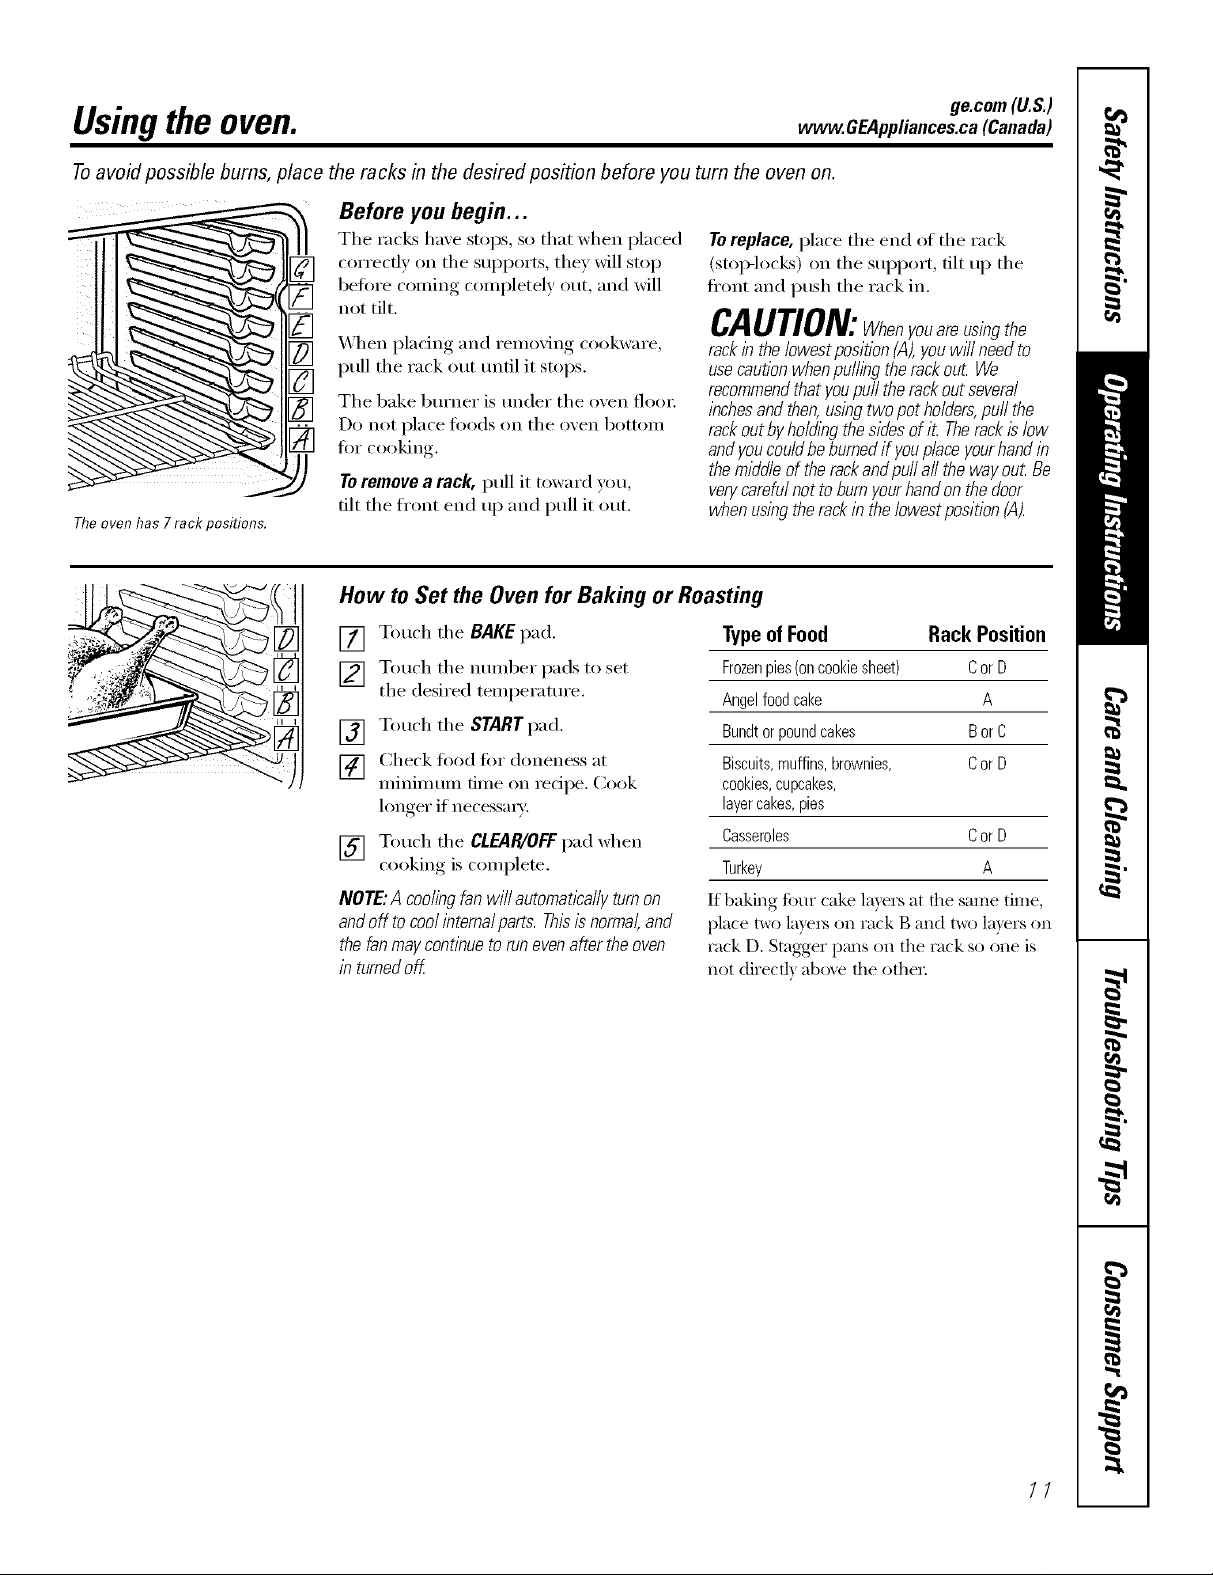
Toavoid possible bums, place the racks in the desired position before you turn the oven on.
Before you begin...
The racks have stops, so that when placed
correcflv on the supports, they will stop
before coming completely out, and will
not tilt.
Toreplace, place the end of the rack
(stop-loci<s) on the support, tilt up the
fl'ont and push the rack in.
CAUTION:Whenyouareusingthe
_A]/en placing and removing cookware,
pull the rack out until it stops.
The bake burner is under the oven floo_:
Do not place toods on the oven bottom
fi)r cooking.
Toremove a rack, pull it toward you,
tilt the ti'ont end up and pull it out.
Theoven has 7 rack positions.
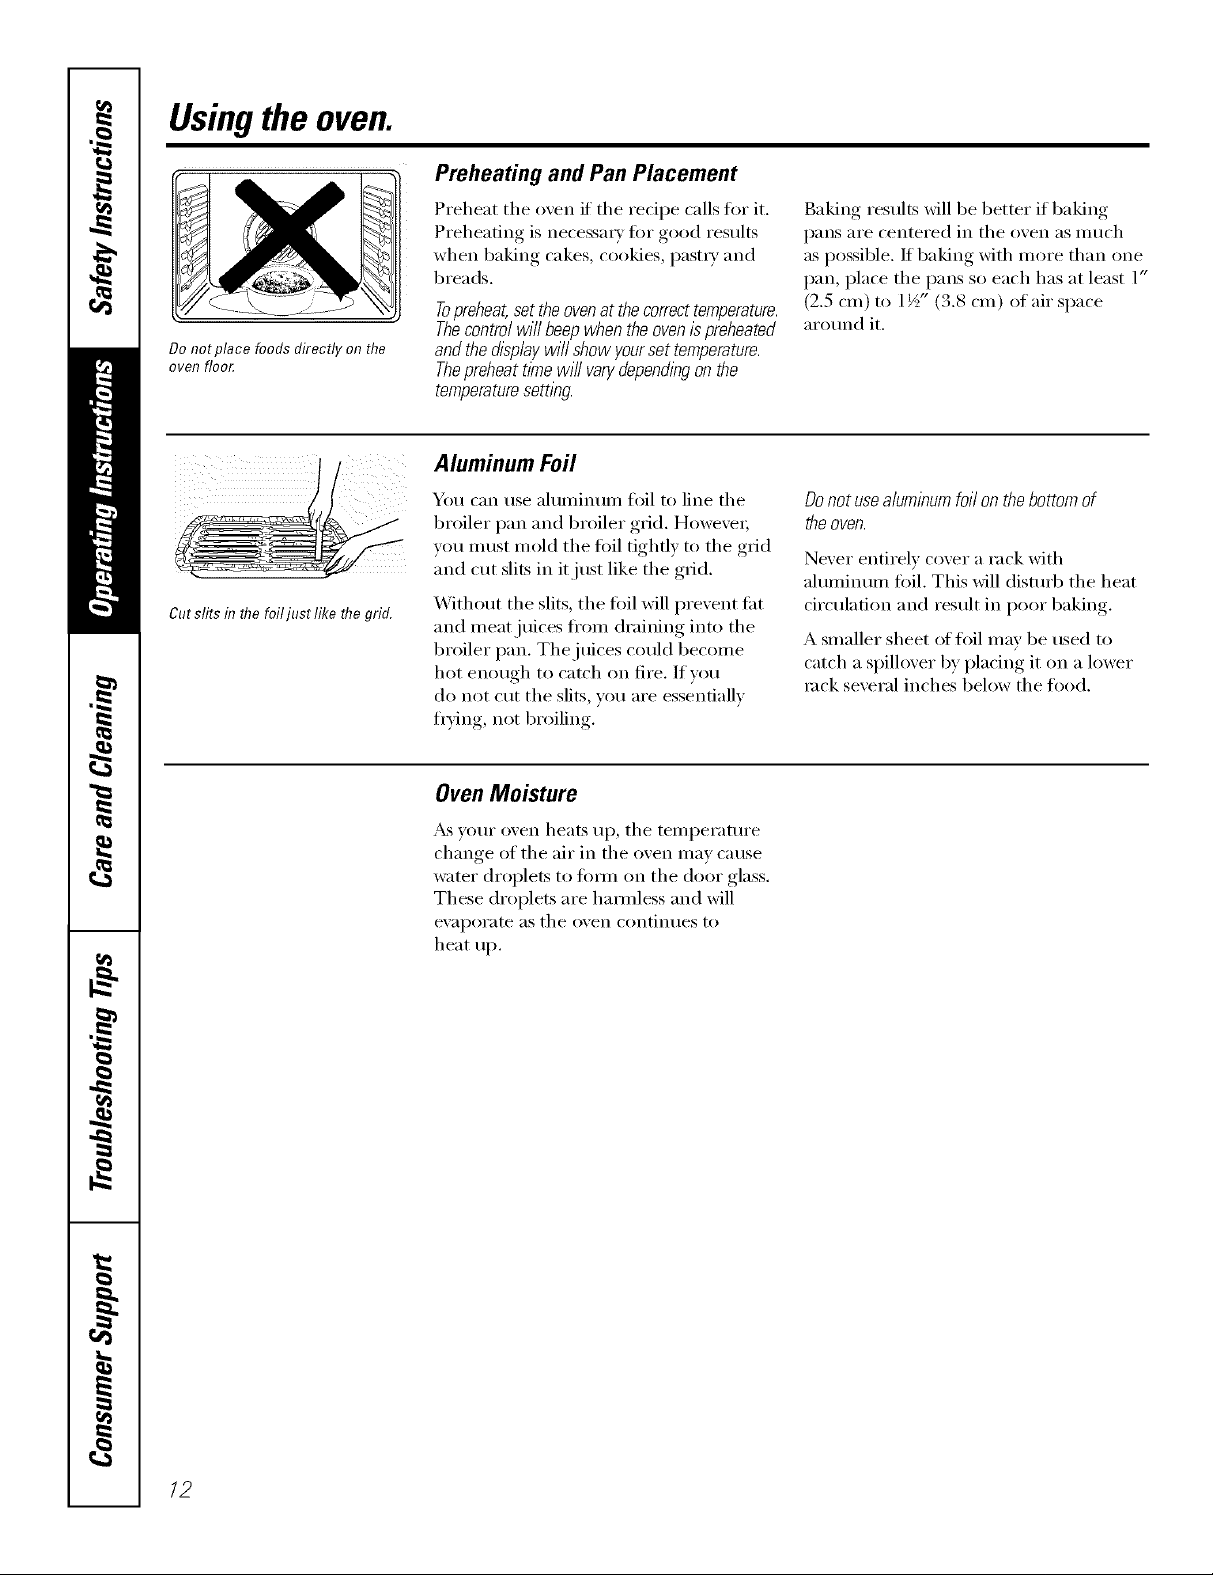
How to Set the Oven for Baking or Roasting
rackin the lowest position (,4),youwffl needto
usecautionwhen pulling the rackout We
recommendthat youpuff the rackout several
inchesandthen, using two pot holders,puff the
rackout byho/ding the sidesof it Therackis low
andyou couldbe burnedif youplaceyourhand in
the middleof therackand pu// a// the way out Be
verycarefulnot to burnyour handon the door
when using therack in the/owestposition (A).
[] Touch the BAKE pad.
[] Touch the number pads to set
the desired temperature.
[] Touch the START pad.
[] Check fi)od fin" doneness at
minimum time on recipe. Cook
longer if necessmT:
[] Touch the CLEAR/OFFpad when
cooking, is coml)lete.
NOTE:A coolingfanwill automaticallyturnon
andoff tocoolinternalparts.Thisisnormal,and
thefanmaycontinuetorunevenaftertheoven
in turnedoff
TypeofFood Rack Position
Frozenpies(oncookiesheet) CorD
Angelfoodcake A
Bundtorpoundcakes BorC
Biscuits,muffins,brownies, CorD
cookies,cupcakes,
layercakes,pies
Casseroles CorD
Turkey A
If baking fi)ur cake layers at the same time,
place two la)'e_ on rock B and t_ layers on
rack D. Stagger pans on the rack so one is
not (tirect]} ab_)_e the othe_:
77
Usingthe oven.
Preheating and Pan Placement
Preheat the oven if the redpe calls fin" it.
Preheating is necessm T for good results
when baking cakes, cookies, past_ T and
breads.
Topreheat,set theovenat thecorrecttemperature.
Thecontrol will beep when the ovenis preheated
Do not place foods directly on tlTe
oven floo_
andthe display will show yourset temperature.
Thepreheat timewill varydependingon the
temperaturesettl))g.
/ Aluminum Foil
/ 1¢ You can use ahuninuin foil to line the
_/ broiler pan and broiler grid. Howexe_;
__S you must mold the fifil tighfl) to the grid
and cut slits in it just like the grid.
gut slits in the foiljust like the grid.
Without the slits, the toil will prevent ti_t
and meat juices ti'om draining into the
broiler pan. The juices could become
hot enough to catch on fire. If w_u
do not cut tile slits, you are essentially
fiTing , not broiling.
Oven Moisture
Baking results will be better if baking
pans are centered in the oven as much
as possible. If baking with more than one
pan, place the pans so each has at least 1"
(2.5 cm)to 1½" (3.8 cm) of air space
around it.
Donotusealuminumfoilonthebottomof
theoven.
Never entirely cover a rack with
aluminum fifil. This Mll disturb tile heat
circulation and result in poor baking.
A smaller sheet of fl)il may be used to
catch a spillover by placing it on a lower
rock several inches below tile food.
_&svour oven heats up, tile temperature
change of tile air in tile oven may cause
water droplets to tOm_ on tile door glass.
These droplets are hamfless and will
eV}ll)OI'}lte }IStile oven contintles to
heat up.
/2
Oven Vent
ge.com(U.S.)
www.GEAppliances.ca(Canada)
Y_)ur oven is vented through one vent
located toward the rear ot the range, Do
not block this vent when cooking in the
oven--it is important that the flow oI hot
air fl'om the oven and fl'esh air to the
oven burner be uninterrupted, Avoid
touching the vent openings or nearby
surfaces duringoven or broiler operation--
they may become hot
Power Outage
CAUTION: Do not make any attempt to operate
the electric i_?nitionoven during an electrical
power failure.
The oven or broiler cmmot be lit dtwing a
power fifilm'e, Gas will not flow tmless the
glow bar is hot.
_ Handlesofpotsandpansonthecooktopmay
becomehotif left toodosetothevenL
_ Donot leaveplastic items on the cooktop--
theymay melt if left too closeto the venL
;;Ji::Donot leaveany items on thecooktop. Thehot
air fromthe vent mayignite flammableitems
and will increasepressurein closedcontainers,
whichmay cause themto burst.
_ Metal items will becomeveryhot if theyare
left on the cooktop,and couldcause burns.
If the oven is in use when a power fifilm'e
occm_, the oven bm'ner shuts off and
cannot be re-lit tmfil power is restored.
This is bec;mse the flow of gas is
automatically stopped and will not resume
when power is restored tmtil the glow bar
has reached operating temperattu'e.
13
Usingthe oven.
How to Set the Ovenfor Broiling
IMPORTANT'.Toavoidpossib/eburns,placethe
shelvesinthedesiredpositionbeforeyouturnthe
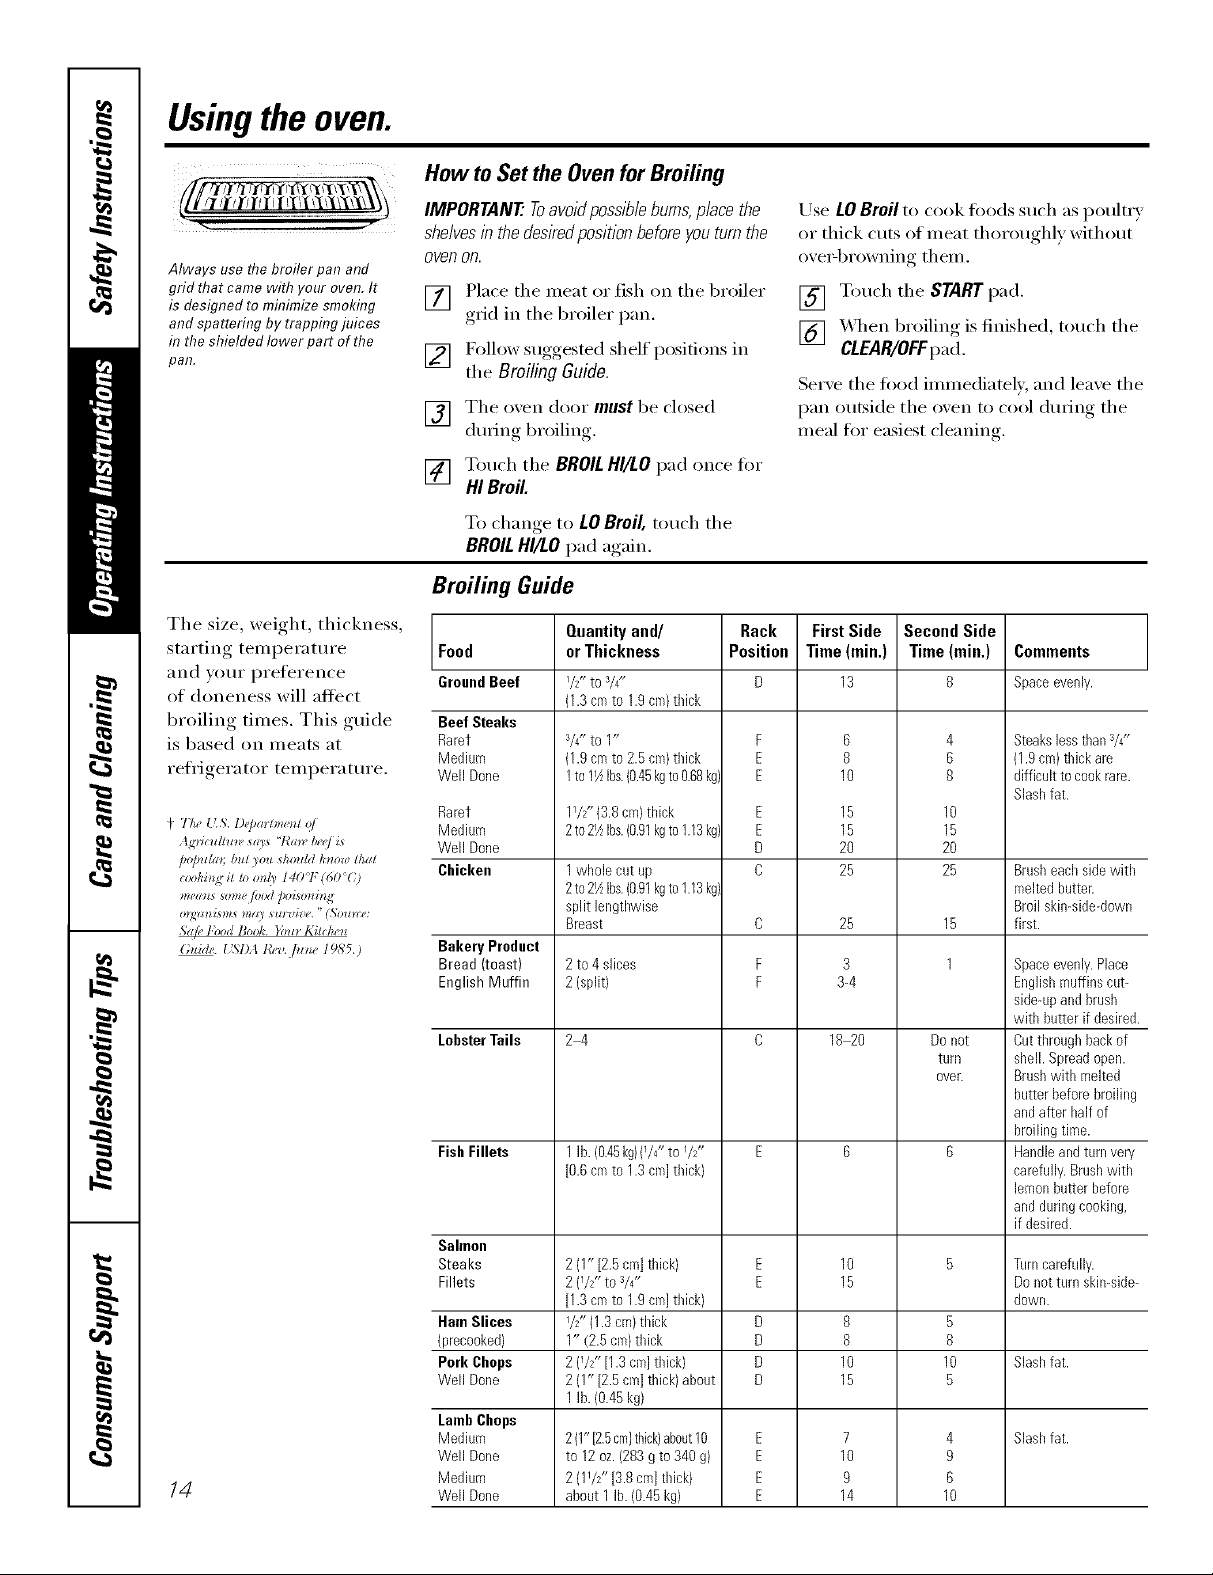
Always use the broiler pan and
grid that came with your oven. It
is designed to mflTimizesmoking
and spattering by trappfl?gjuices
fl?the shielded lower part of the
pan.
oven on.
[] Place the meat or fish on the broiler
g_i(1 in the broiler pan.
[] Follow suggested shelf positions in
the Broiling Guide.
V_] The oxen door must be closed
during broiling.
[] Touch the BROILHI/LOpad once fi)r
HI Broil.
To change to LOBroil, touch the
BROILHI/LOpad again.
Broiling Guide
The size, weight, thickness,
starting temperature Food
and VOtli" preference GroundBeef
of doneness will affect
broiling times. This guide Beef Steaks
is based on meats at Rarer
rell'igerator temperatm'e. Well Done
4 7,5,,[L.'_.l)(jJa_lm_l o/
Ag'Hc*Hmn,*_(/*'7{a*_,&('_Jis
pop,Hartb_*l)o_t _ho_ddknow lhal
c_x)ki_g il W o)_13 140'l (60 ()
",fff("l"fx)dBool,'.}b_l_Kil_ke_
(_*tide. { '_l).t t'_,w, flz_ze 19N5.)
/4
Medium
Rarer
Medium
Well Done
Chicken
Bakery Product
Bread (toast)
English Muffin
LobsterTails
FishFillets
Salmon
Steaks
Fillets
HamSlices
(precooked)
Pork Chops
Well Done
LambChops
Medium
Well Done
Medium
Well Done
Use LO Broil to cook fi)ocls such as poultx T
or thick cuts of meat thorotlghly without
ove_q)rowning them.
[] Touch the STARTpad.
[] _&q_en broiling is finished, touch the
Serve the food immediately, and leave the
pan outside the oven to cool dtuJng the
meal fi)x" easiest cleaning.
E
E
D
D
D
F
F
FirstSide
Time(min.)
2O
25
25
3-4
18 20
Quantityand/ Rack
or Thickness Position
l/Z' to a/4"
(1.3cmto 1.9cm}thick
3/4" to 1" F
(1.9 cm to 2.5 cm) thick E
1to 11_Ibs.(0.45kgto O.B8kg) E
11/2'' (3.8cm)thick
2to21_Ibs.(0.91kgto1.13kg)
1wholecut up
2to21_Ibs.(0.91kgto1.13kg)
split lengthwise
Breast
2 to 4slices
2 (split)
24
1lb. (0.45kg}(1/4*'to I/2*'
[0.6cmto 1.3 cm]thick)
2 (1" [2.5cm]thick) E
2 (1/2" to s/4" E
[1.3cmto 1.9 cm]thick)
1/2"(1.3c[n)thick D
1" (2.5cm}thick D
2 (_/2"[1.3cm]thick) D
2 (1" [2.5cln]thick)about D
1lb. (0.45kg)
2(1"[2.5cm}thick)about10 E 7
to 12oz.(283 g to 340g) E 10
2 {11/2" [3.8 cm] thick) E 9
about 1 lb.(0.45kg) E 14
CLEARIOFFpad.
SecondSide
Time(rain.)
13
6
8
10
15
15
3
8
8
10
15
4
6
8
10
15
2O
25
15
1
Donot
turn
OVer.
5
8
10
5
4
9
6
10
Comments
Spaceevenly.
Bteakslessthan3/4"
(1.9cm)thick are
difficultto cookrare.
Slashfat.
Brusheachsidewith
meltedbutter.
Broilskin-side-down
first.
Spaceevenly.Place
Englishmuffins cat-
side-upandbrush
with butter if desired.
Cutthroughback of
shell. Spreadopen.
Brushwith melted
hatterbeforebroiling
andafter Mf of
broilingtime.
Handleandturnvery
carefully.Brushwith
lemonbutter before
anddaringcooking,
if desired.
Turncarefully.
Donotturn skin-side-
down.
Slashfat.
Slashfat.
 Loading...