

GE JGBS80WEL2WW, JGBS80SEM3SS, JGBS80SEM2SS, JGBS80SEM1SS, JGBS80SEL2SS Owner’s Manual
...
ge.com
m
U
m
(J1
O
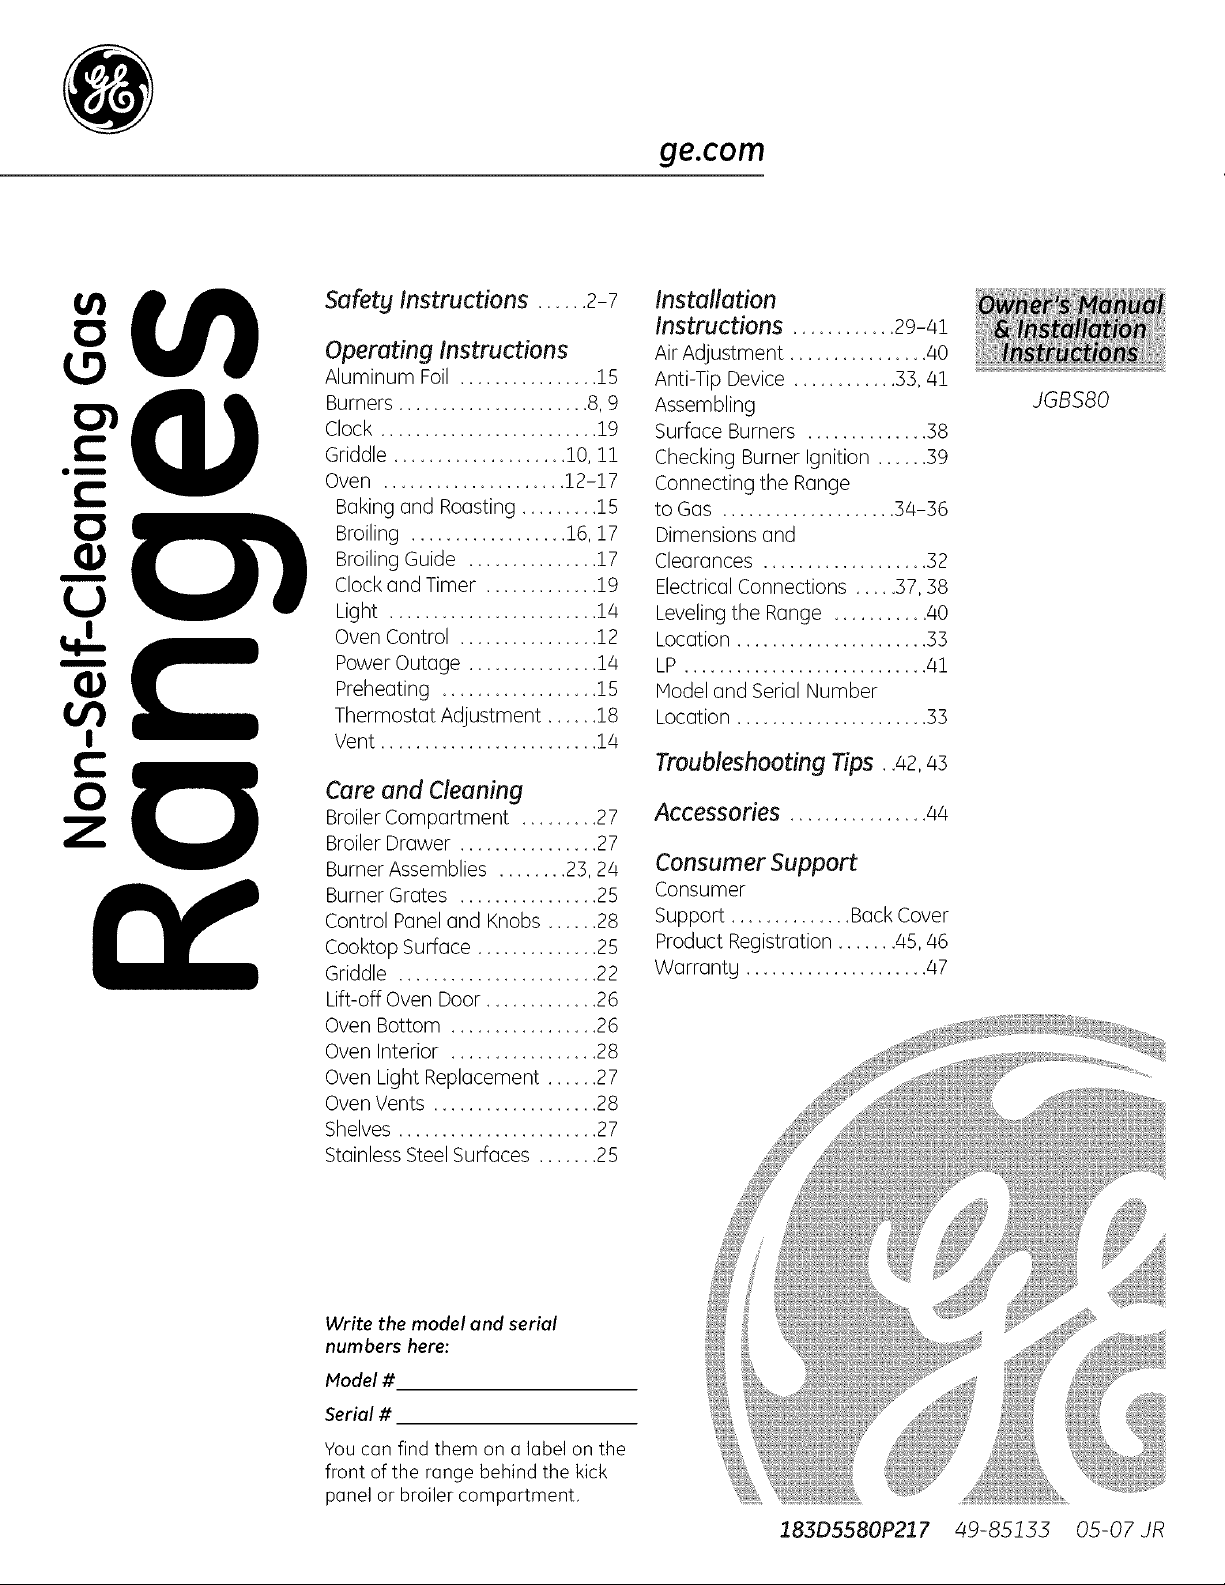
Safety Instructions ...... 2-7
Installation
Instructions ............ 2%41
Operating Instructions
Aluminum Foil ................ 15
Burners ...................... 8, 9
Clock ......................... 19
Griddle .................... !0, !!
Oven ..................... 12-17
Baking and Roasting ......... 15
Broiling .................. 16, 17
Broiling Guide ............... 17
Clock and Timer ............. 19
Light ........................ 14
Oven Control ................ 12
Power Outage ............... 14
Preheating .................. 15
Thermostat Adjustment ...... 18
I
Vent ......................... 14
Air Adjustment ................ 40
Anti-Tip Device ............ 33, 41
Assembling
Surface Burners .............. 38
Checking Burner Ignition ...... 39
Connecting the Range
to Gas .................... 34-36
Dimensions and
Clearances ................... 32
Electrical Connections ..... 37, 38
Leveling the Range ........... 40
Location ...................... 33
LP ............................ 41
Model and Serial Number
Location ...................... 33
JGBS80
Troubleshooting Tips..42, 43
Careand Cleaning
Broiler Compartment ......... 27
Broiler Drawer ................ 27
Burner Assemblies ........ 23, 24
Burner Grates ................ 25
Control Panel and Knobs ...... 28
Cooktop Surface .............. 25
Griddle ....................... 22
Li_off Oven Door ............. 26
Oven Bottom ................. 26
Oven Interior ................. 28
Oven Light Replacement ...... 27
Oven Vents ................... 28
Shelves ....................... 27
Stainless Steel Surfaces ....... 25
Accessories ................ 44
Consumer Support
Consumer
Support .............. Back Cover
Product Registration ....... 45, 46
Warrantg ..................... 47
Write the model and serial
numbers here:
Model #
Serial #
You can find them on a label on the
front of the range behind the kick
panel or broiler compartment,
183D5580P217 49-85155 05-07JR
IMPORTANT SAFETY INFORMATION.
READ ALL INSTRUCTIONS BEFORE USING.
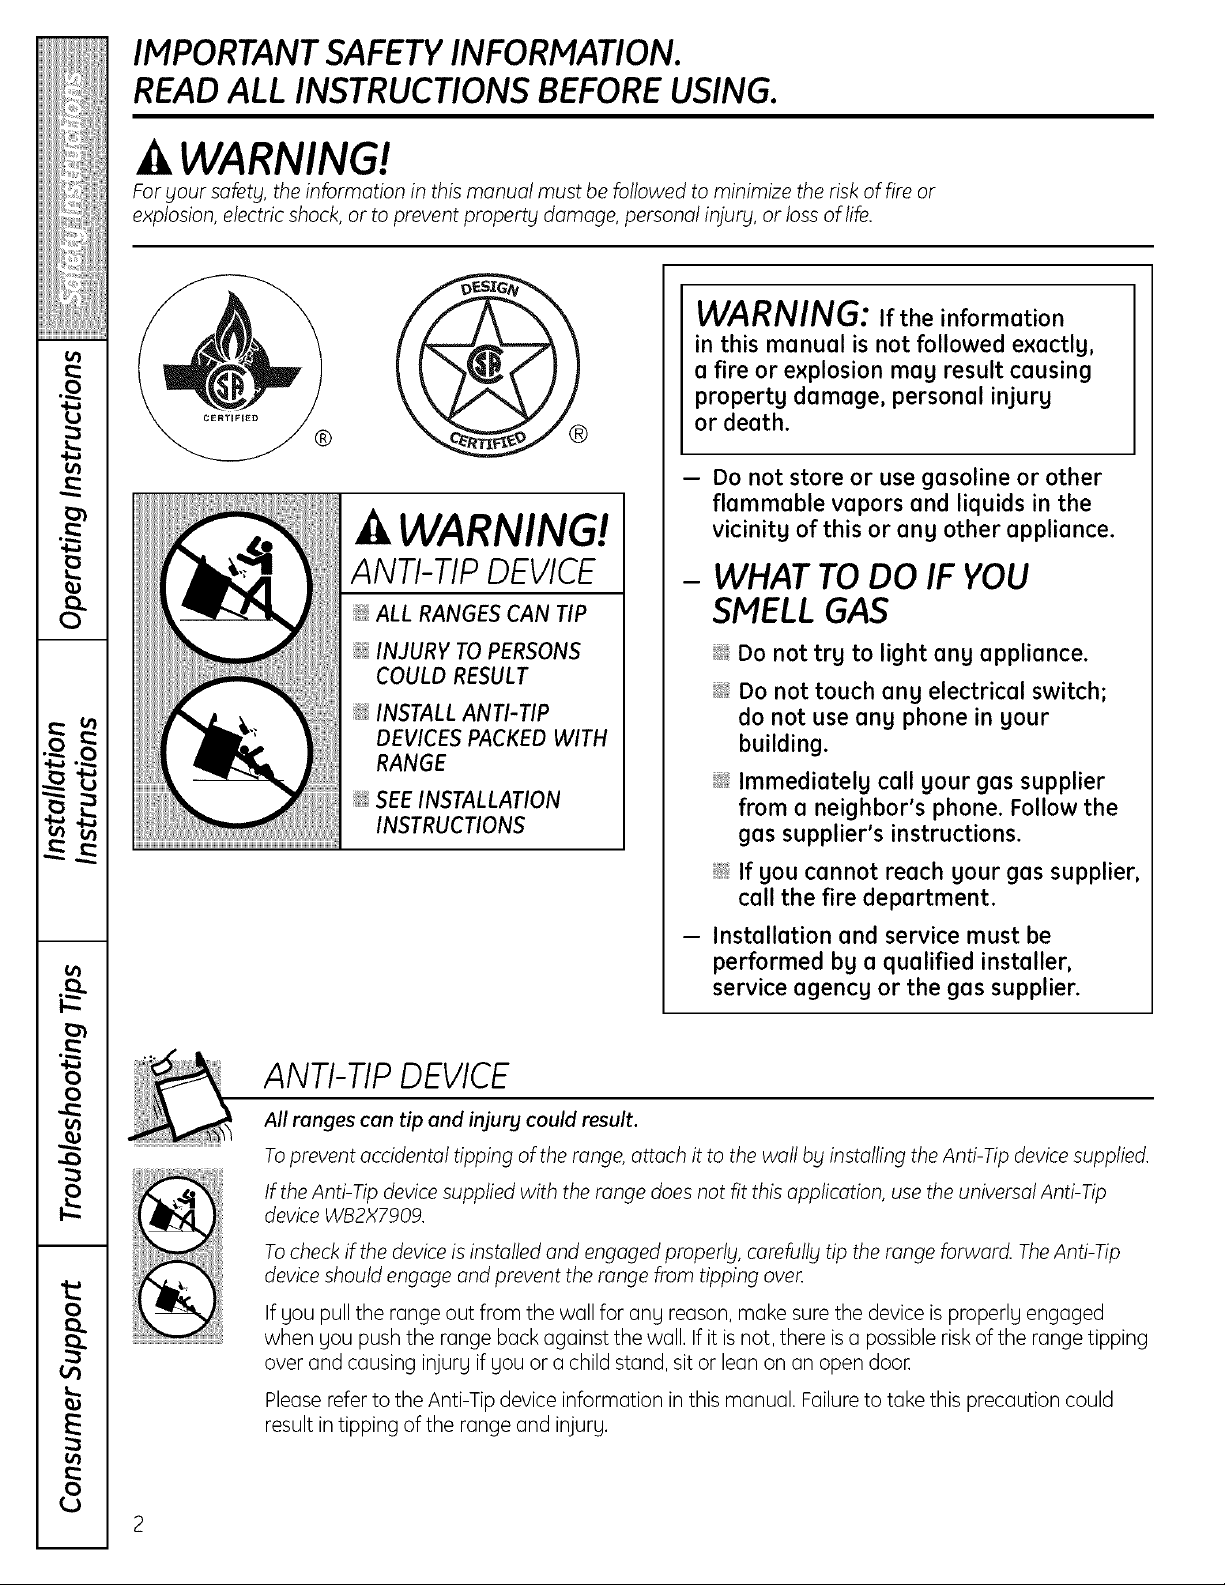
WARNING!
For your safety, the information in this manual must be followed to minimize the risk of fire or
explosion, electric shock, or to prevent property damage, personal injury, or loss of life.
WARNING: If the information
in this manual is not followed exactlg,
a fire or explosion meg result causing
propertg damage, personal injurg
® ®
WARNING!
or death.
- Do not store or use gasoline or other
flammable vapors and liquids in the
vicinitg of this or ang other appliance.
ANTI-TIPDEVICE
_! ALL RANGES CAN TIP
@ INJURY TO PERSONS
COULD RESULT
_: INSTALL ANTI-TIP
DEVICES PACKED WITH
RANGE
_il;SEE INSTALLATION
INSTRUCTIONS
ANTI-TIP DEVICE
All ranges can tip and injury could result.
- WHAT TO DO IF YOU
SMELL GAS
i_;:;i;Do not trg to light ang appliance.
i_;:iDo not touch ang electrical switch;
do not use ang phone in gour
building.
i_i_iImmediatelg call gour gas supplier
from a neighbor's phone. Follow the
gas supplier's instructions.
i_i_iIf gou cannot reach gour gas supplier,
call the fire department.
- Installation and service must be
performed bg a qualified installer,
service agencg or the gas supplier.
Toprevent accidental tipping of the range, attach it to the wall bg installing the Anti-Tip device supplied.
If the Anti-Tip device supplied with the range does not fit this application, use the universal Anti-Tip
device WB2X7909.
Tocheck if the device is installed and engaged properly, carefully tip the range forward. The Anti-Tip
device should engage and prevent the range from tipping oveL
If you pull the range out from the wall for any reason, make sure the device is properlg engaged
when gou push the range back against the wall. Ifit is not, there isa possible risk of the range tipping
over and causing injurg if gou or a child stand, sit or lean on an open door,
Please refer to the Anti-Tip device information in this manual. Failure to take this precaution could
result in tipping of the range and injurg.
ge.com
WARNING!
IMPORTANTSAFETYNOTICE
The California Safe Drinking Water and Toxic Enforcement Act requires the Governor of California to
publish a list of substances known to the state to cause birth defects or other reproductive harm, and
requires businesses to warn customers of potential exposure to such substances.
Gas appliances can cause minor exposure to four of these substances, namelg benzene, carbon
monoxide, formaldehyde and soot, caused primarily by the incomplete combustion of natural gas or
LP fuels. Properly adjusted burners, indicated by o bluish rather than a yellow flame, will minimize
incomplete combustion. Exposure to these substances con be minimized by venting with an open
window or using a ventilation fan or hood.
SAFETYPRECAUTIONS
Have the installer show you the location of the range gas shut-off valve and how to shut it off
if necessarg.
_::Have your range installed and properly
grounded by a qualified installer, in
accordance with the Installation Instructions.
Any adjustment and service should be
performed only by qualified gas range
installers or service technicians.
_t_:_Do not attempt to repair or replace any
part of your range unless it is specifically
recommended in this manual. All other service
should be referred to a qualified technician.
_t_:_Plug your range into a 120-volt grounded
outlet onlg. Do not remove the round
grounding prong from the plug. If in doubt
about the grounding of the home electrical
system, it is your personal responsibility and
obligation to have an ungrounded outlet
replaced with a properly grounded,
three-prong outlet in accordance with
the National Electrical Code. Do not use
an extension cord with this appliance.
ii//i/i!ii_i_iiii/
o
t_
o
_°
}
oo
rb
o
IMPORTANT SAFETY INFORMATION.
READ ALL INSTRUCTIONS BEFORE USING.
SAFETYPRECAUTIONS
_t_:_Locate the range out of kitchen traffic path
and out of drafty locations to prevent poor air
circulation.
;_i:,:Be sure all packaging materials are removed
from the range before operating it to prevent
fire or smoke damage should the packaging
material ignite.
;_::,:Besure your range is correctlg adjusted by
a qualified service technician or installer for
the tgpe of gas (natural or LP)that is to be
used. Your range can be converted for use
with either type of gas. Seethe Installation
of the range section.
WARNING:These adjustments must
be made by a qualified service technician
in accordance with the manufacturer's
instructions and all codes and requirements of
the authoritg having jurisdiction. Failure
to follow these instructions could result in
serious injury or propertg damage. The
qualified agency performing this work
assumes responsibilitg for the conversion.
_::After prolonged use of a range, high floor
temperatures may result and many floor
coverings will not withstand this kind of use.
Never install the range over vinyl tile or
linoleum that cannot withstand such type
of use. Never install it directlg over interior
kitchen carpeting.
;;):,:Do not leave children alone or unattended
where a range ishot or in operation. They
could be seriouslg burned.
Do not allow anyone to climb, stand or hang
on the oven door, broiler compartment or
cooktop. They could damage the range and
even tip it over, causing severe personal injury.
CAUTION: Itemsof interestto children
should not be stored incabinets above a
range or on the backsplash of a range-
childrenclimbing on the range to reach items
couldbe seriouslginjured.
WARNING: NEVERusethis
appliance as a space heater to heat or
warm the room. Doing so may result
in carbon monoxide poisoning and
overheating of the oven.
_i_Clean onlg parts listed in this Owner's Manual.
_::Never wear loose fitting or hanging garments
while using the appliance. Becareful when
reaching for items stored in cabinets over the
range. Flammable material could be ignited if
brought in contact with flame or hot oven
surfaces and may cause severe burns.
Do not store flammable materials in an oven,
a range broiler, behind the kick panel or near
a cooktop.
Do not store or use combustible materials,
gasoline or other flammable vapors and
liquids in the vicinity of this or any other
appliance.
Do not let cooking grease or other flammable
materials accumulate in or near the range.
Do not use water on grease fires. Never pick
up a flaming pan. Turn the controls off.
Smother a flaming pan on a surface burner
by covering the pan completely with a well-
fitting lid, cookie sheet or flat tray. Use a
multi-purpose dry chemical or foam-type
fire extinguishe[
Flaming grease outside a pan can be put
out by covering it with baking soda or,
if available, by using a multi-purpose dry
chemical or foam-type fire extinguisher
Flame in the oven can be smothered
completelg by closing the oven door and
turning the control to off or by using a multi-
purpose dry chemical or foam-tgpe
fire extinguishe[
;_i:,:Let the burner grates and other surfaces cool
before touching them or leaving them where
children can reach them.
_::Never block the vents (air openings)of the
range. They provide the air inlet and outlet
that are necessary for the range to operate
properlg with correct combustion. Air openings
are located at the rear of the cooktop, at the
top and bottom of the oven door, and at the
bottom of the range under the broiler
compartment or kick panel.
_?_::Large scratches or impacts to glass doors can
lead to broken or shattered glass.
4
ge.com
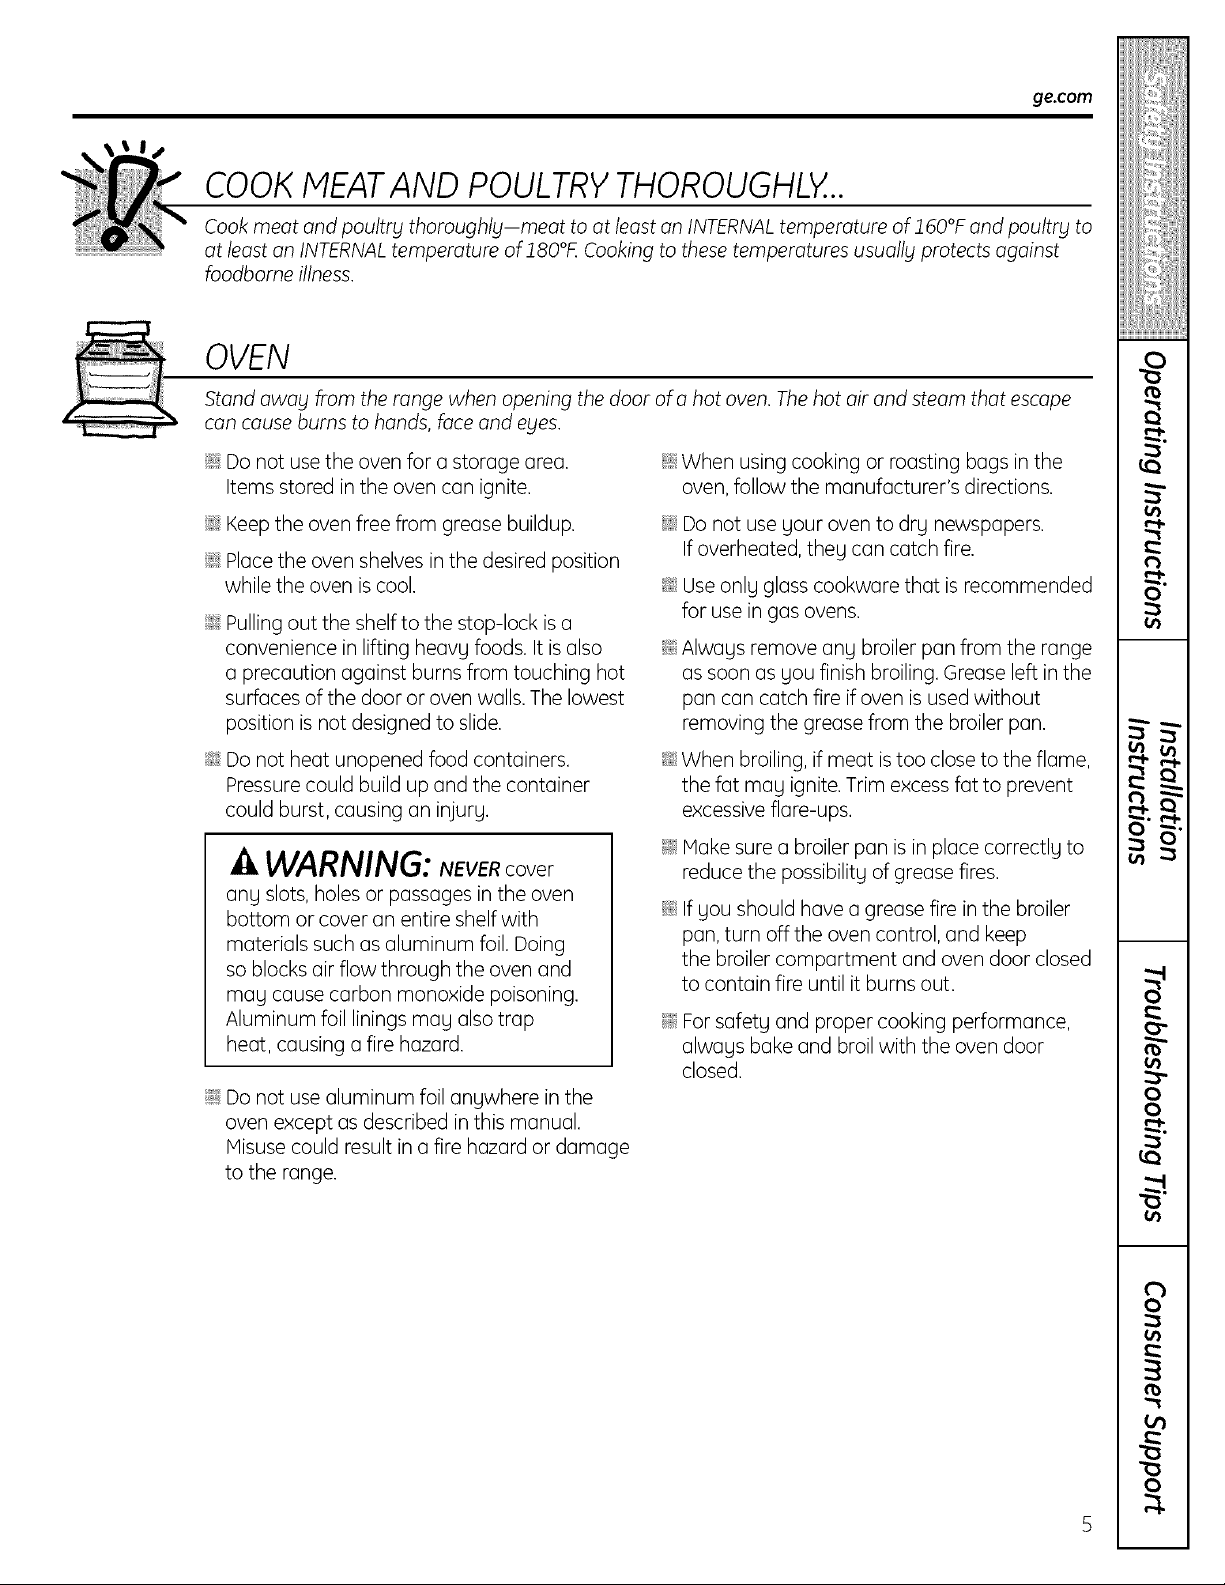
COOKMEATAND POULTRYTHOROUGHLY...
Cook meat and poultry thoroughly-meat to at least an INTERNALtemperature of 160°F and poultry to
at least an INTERNALtemperature of l80°E Cooking to these temperatures usually protects against
foodbome illness.
OVEN
Stand away from the range when opening the door of a hot oven. The hot air and steam that escape
can cause burns to hands, face and eyes.
ii//i/i!ii_i_iiii/
;_):,:Do not use the oven for a storage area.
Items stored inthe oven can ignite.
;_i:,:Keep the oven free from grease buildup.
;_i:,:Place the oven shelves in the desired aosition
while the oven is cool.
;_i:,:Pulling out the shelf to the stop-lock is a
convenience in lifting heavy foods. It is also
a precaution against burns from touching hot
surfaces of the door or oven walls. The lowest
position is not designed to slide.
_t::_Do not heat unopened food containers.
Pressure could build up and the container
could burst, causing an injury.
WARNING: NEVERcover
any slots, holes or passages in the oven
bottom or cover an entire shelf with
materials such as aluminum foil. Doing
so blocks air flow through the oven and
may cause carbon monoxide poisoning.
Aluminum foil linings may also trap
heat, causing a fire hazard.
;_i:,:Do not use aluminum foil anywhere in the
oven except asdescribed in this manual.
Misuse could result in a fire hazard or damage
to the range.
;_i:,:When using cooking or roasting bags in the
oven, follow the manufacturer's directions.
;_):,:Do not use your oven to dry newspapers.
If overheated, they can catch fire.
_t_::Use only glass cookware that is recommended
for use in gas ovens.
_t_::Always remove any broiler pan from the range
as soon as you finish broiling. Grease left in the
pan can catch fire if oven is used without
removing the grease from the broiler pan.
_t_:_When broiling, ifmeat istoo close to the flame,
the fat may ignite. Trim excess fat to prevent
excessive flare-ups.
;_i:,:Makesurea broiler pan isin place correctlg to
reducethe possibilitgof greasefires,
_:::If you should have a grease fire inthe broiler
pan, turn offthe oven control, and keep
the broiler compartment and oven door closed
to contain fire until it burns out.
;;i:,:For safetg and proper cooking performance,
always bake and broil with the oven door
closed.
o
_°
}
oo
¢b
o
IMPORTANT SAFETY INFORMATION.
READ ALL INSTRUCTIONS BEFORE USING.
WARNING!
SURFACEBURNERS
Use proper pan size-avoid pans that are unstable or easily tipped. Select coo!<wore having flat
bottoms large enough to cover burner grates. Toavoid spillovers, mal<esure coo!<wore is large enough
to contain the food properly. This will both save cleaning time and prevent hazardous accumulations of
food, since heavy spattering or spillovers left on range can ignite. Use pans with handles that can be
easily grasped and remain cool.
_;):,:Always use the Life position when igniting the
top burners and make sure the burners have
ignited.
_t_::Never leave the surface burners unattended at
high flame settings. Boilovers cause smoking
and greasy spillovers that may catch on fire.
_;i:,:Adjust the top burner flame size so it
does not extend beyond the edge of the
cookware. Excessive flame is hazardous.
_t_:_Use only dry pot holders-moist or damp pot
holders on hot surfaces may result in burns
from steam. Do not let pot holders come near
open flames when lifting cookware. Do not
use a towel or other bulky cloth in place of
a pot holder.
;_i:,:When using glass cookware, make sure it
is designed for top-of-range cooking.
_:::To minimize the possibilitg of burns, ignition
of flammable materials and spillage, turn
cookware handles toward the side or back of
the range without extending over adjacent
burners.
_t_:_Carefully watch foods being fried at a high
flame setting.
_t_:_Always heat fat slowlg, and watch as it heats.
Do not leave any items on the cooktop. The
hot air from the vent may ignite flammable
items and will increase pressure in closed
containers, which may cause them to burst.
_t_::If a combination of oils or fats will be used in
frying, stir together before heating or as fats
melt slowlg,
;_::,:Use a deep fat thermometer whenever
possible to prevent overheating fat beyond the
smoking point.
_t_::Use the least possible amount of fat for
effective shallow or deep-fat frying. Filling the
pan too full of fat can cause spillovers when
food is added.
;_):,:Do not flame foods on the cooktop, If you do
flame foods under the hood, turn the fan on.
;_i:,:Do not use a wok on the cooking surface
if the wok has a round metal ring that is
placed over the burner grate to support
the wok. This ring acts as a heat trap, which
may damage the burner grate and burner
head. Also, it may cause the burner to work
improperlg. This may cause a carbon
monoxide level above that allowed by current
standards, resulting in a health hazard.
6
ge.com
iiIIiIi!ii_i_iiiil
_t_::Do not use aluminum foil to line the griddle.
Misuse could result in a fire hazard.
_' Never leave the kitchen while using the griddle.
_t::_Foods for frging should be as drg as possible.
Frost on frozen foods or moisture on fresh
foods can cause hot fat to bubble up and over
the sides of the pan.
_ Never trg to move a pan of hot fat, especiallg
a deep fat frger. Wait until the fat is cool.
_t::_Do not leave plastic items on the cooktop-
theg mag melt if left too close to the vent.
;_i:,:Keep all plastics away from the surface
burners.
;_i:,:To avoid the possibilitg of a burn, always be
certain that the controls for all burners are at
the Off position and all grates and the griddle
are cool before attempting to remove them.
_::_If range is located near a window, do not hang
long curtains that could blow over the surface
burners and create a fire hazard.
_t::_If you smell gas, turn off the gas to the range
and call a qualified service technician. Never
use an open flame to locate a leak.
;_i:,:Always turn the surface burner controls off
before removing cookware or the griddle.
_t_:_Do not lift the cooktop. Lifting the cooktop can
lead to damage and improper operation of the
range.
_:_Do not place or store items that can melt or
catch fire on the grates, even when the
cooktop is not being used.
;_::,:Keep range clean and free of accumulations of
grease or spillovers, which may ignite.
o
t_
o
_°
READAND FOLLOW THISSAFETYINFORMATION CAREFULLY.
SAVE THESE INSTRUCTIONS
}
oo
rb
o
Using the gas surface burners.
Throughout this manual, features and appearance may vary from your model.
i i i i i i i i
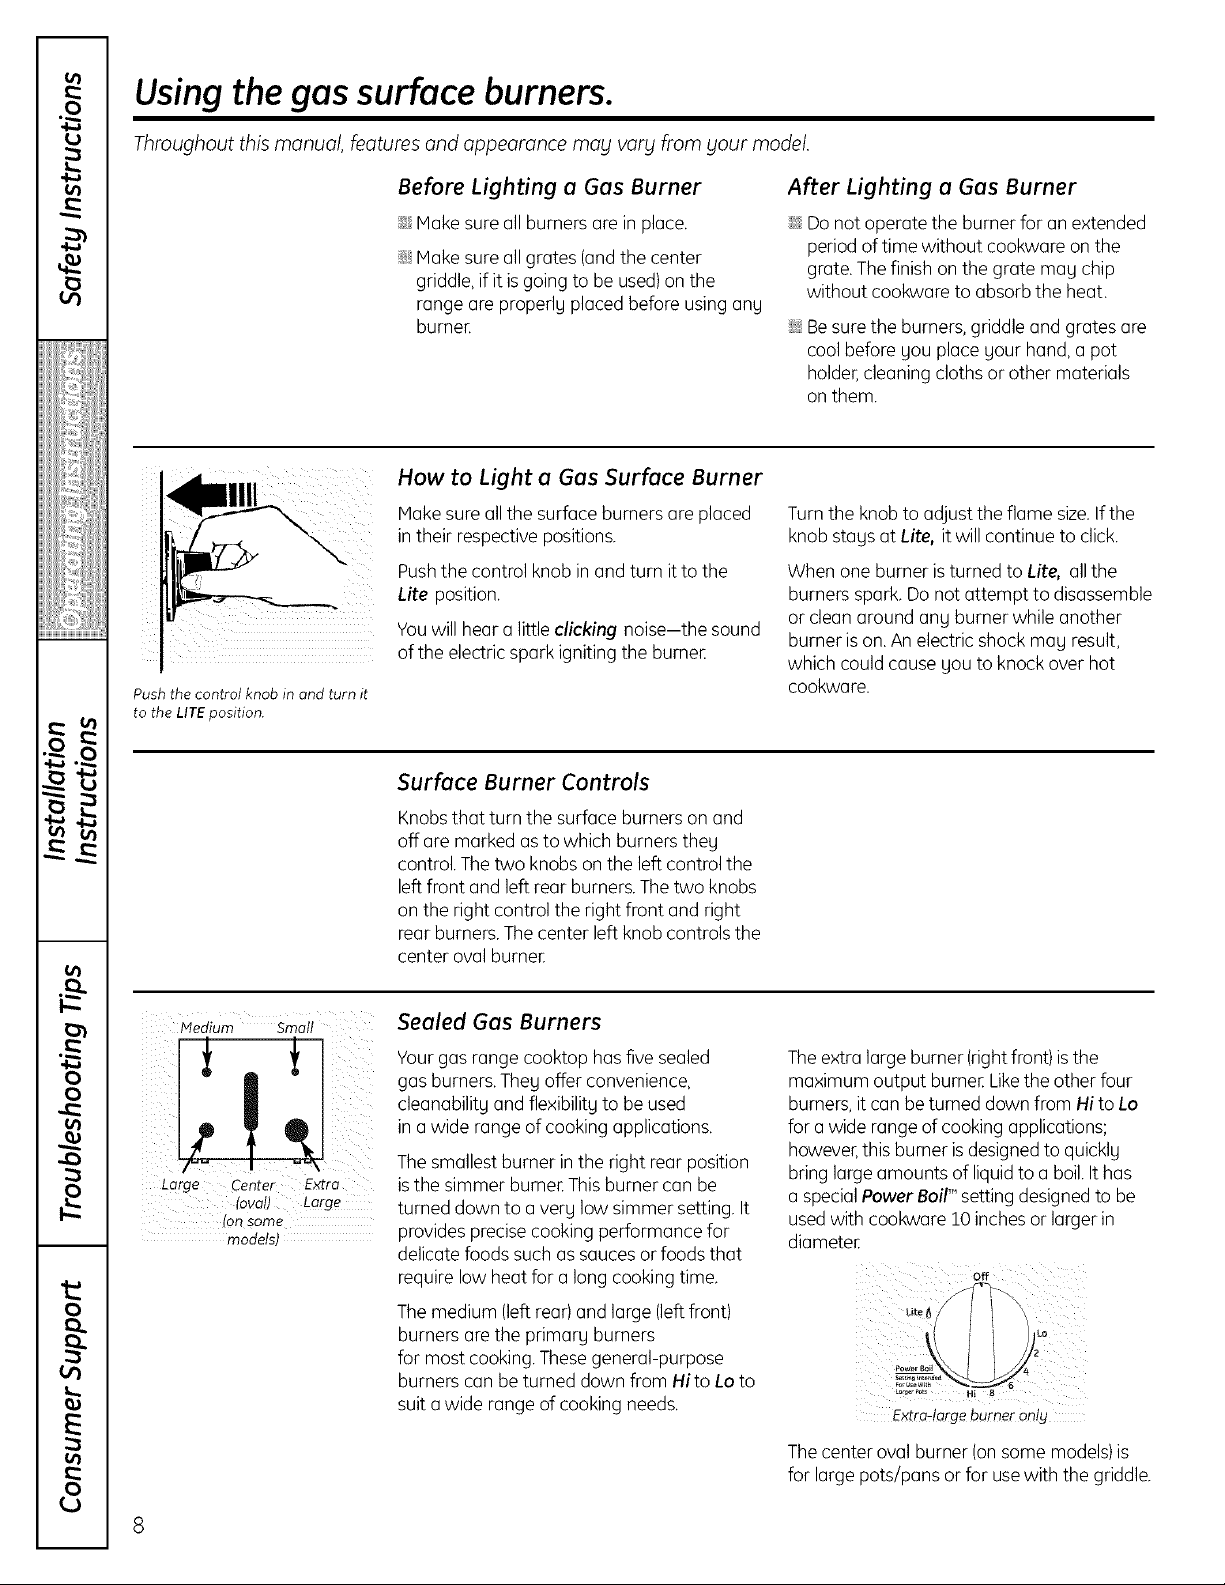
Push the control knob in and turn it
to the LITE position.
Before Lighting a Gas Burner
iJi::Make sureall burners are in place.
iJi::Make sureall grates (andthe center
griddle,if it isgoing to be used)onthe
range are properly placed before using any
burner:
How to Light a Gas Surface Burner
Makesure allthe surface bumers are placed
intheir respectivepositions.
Pushthe control knob in and turn it to the
Lite position.
Youwill heara little clicking noise-the sound
ofthe electricspark igniting the bumeE
After Lighting a Gas Burner
ij_::Do not operate the burner for an extended
period of time without cookware on the
grate. The finish on the grate mag chip
without cookware to absorb the heat.
;;Ji::Besurethe burners, griddleand grates are
cool before you place your hand, a pot
holder,cleaning cloths or other materials
on them.
Turnthe knob to adjust the flame size.If the
knob stagsat Lite, it will continue to click.
When one burner isturned to Lite, all the
burners spark.Do not attempt to disassemble
or clean around ang burner while another
burner is on.Anelectric shock mag result,
which could cause you to knock over hot
cookware.
Hedium Small
Large Center Extra
{oval) Large
{on some
models)
Surface Burner Controls
Knobsthat turn the surface burners on and
off are marked as to which burnerstheg
control.Thetwo knobs on the left control the
left front and left rear burners.Thetwo knobs
on the right control the right front and right
rear burners.The center left knob controls the
center oval burneE
Sealed Gas Burners
Your gas range cooktop hasfive sealed
gasburners.Theg offer convenience,
cleanability and flexibilitg to be used
in awide range of cooking applications.
Thesmallest burner in the right rear position
isthe simmer burneEThis burner can be
turned down to averg low simmer setting. It
provides precisecooking performance for
delicate foods such as saucesor foods that
require low heat for a long cooking time.
Themedium (leftrear) andlarge (leftfront)
burners are the primarg burners
for most cooking.Thesegeneral-purpose
burners can be turned down from Hito Lo to
suit awide range of cooking needs.
The extra large burner (right front) isthe
maximum oumut burneE Like the other four
burners, it can be turned down from Hi to Lo
for a wide range of cooking applications:
howeve/this burner is designed to quickly
bring large amounts of : uid to a boil. t has
a special Power Boil _"setting designea to be
used with COOKware10 inches or larger in
diameteE
off
L// J;
-'LJ-.S
Lo,_.,po_ Hi 8
Extra-large burner or
Thecenter oval burner (onsome models)is
for large pots/pans or for usewith the griddle.
8
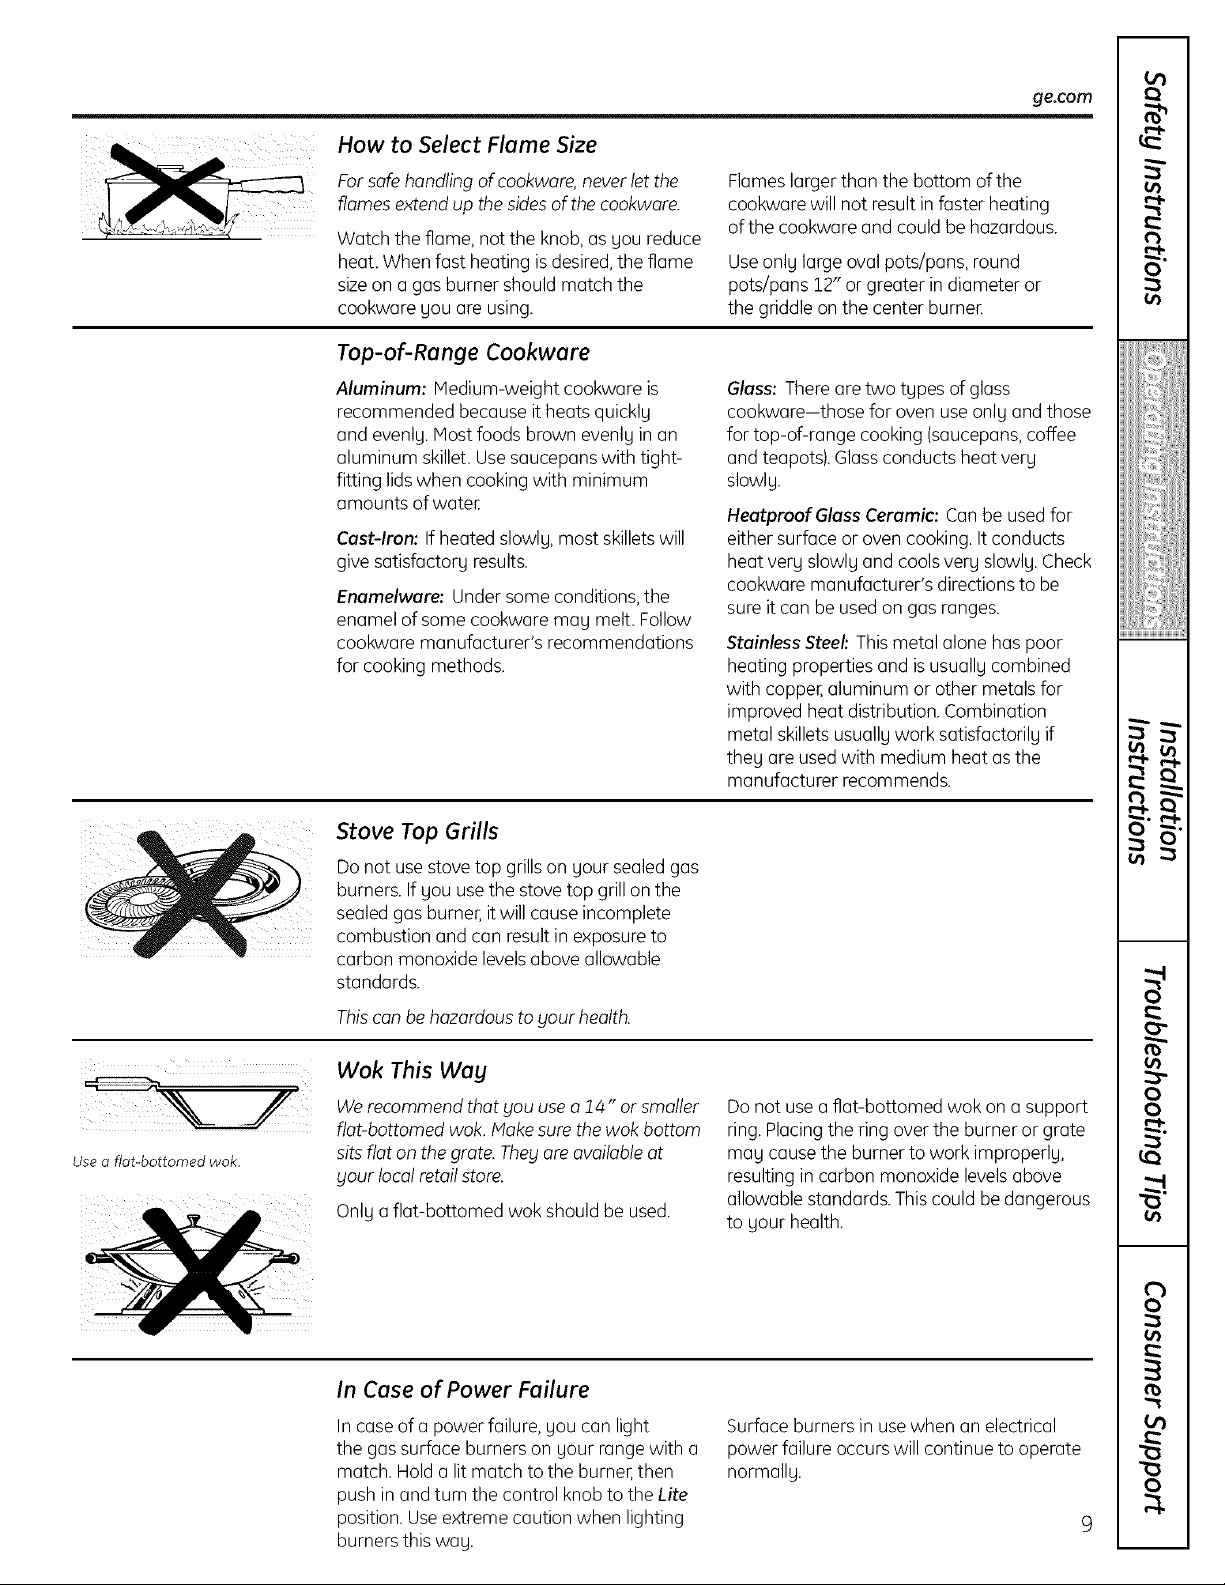
How to Select flame Size
ge.com
Forsafehandling ofcookwore, neverletthe
flamesextend up thesidesof the cookwore.
Watch the flame, not the knob, as gou reduce
heat. When fast heating is desired,the flame
sizeona gasburner should match the
cookware gou are using.
Top-of-Range Cookware
Aluminum: Medium-weight cookware is
recommended because it heats quicklg
and evenlg.Most foods brown evenlg in an
aluminum skillet. Usesaucepanswith tight-
fitting lidswhen cooking with minimum
amounts of water
Cast-Iron: If heated slowlg, most skillets will
give satisfactorg results.
Enamelware: Under some conditions, the
enamel of some cookware mug melt. Follow
cookware manufacturer's recommendations
for cooking methods.
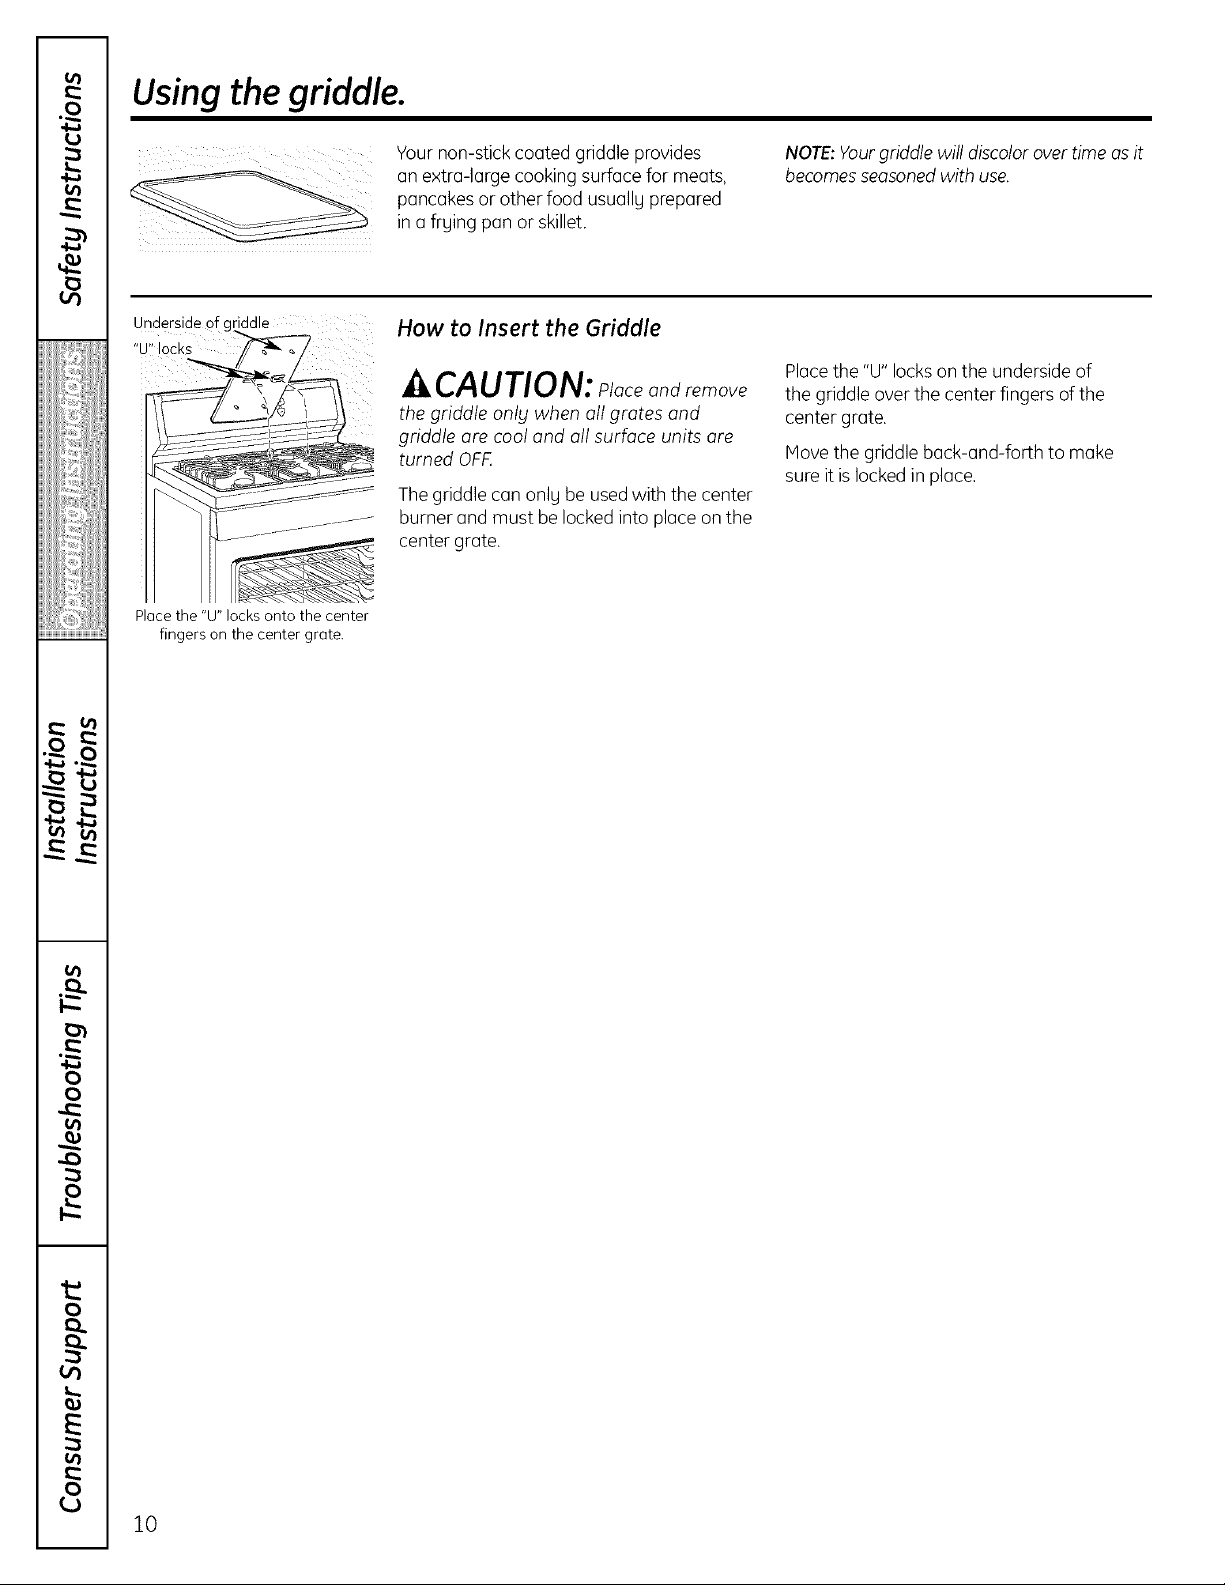
Stove Top Grills
Flameslarger than the bottom of the
cookwarewill not result infaster heating
ofthe cookware and could be hazardous.
Useonlglarge oval pots/pans, round
pots/pans 12" or greater in diameter or
the griddle on the center burner
Glass: Thereare two tgpes of glass
cookware-those for oven use onlg and those
for top-of-range cooking (saucepans,coffee
and teapots).Glassconducts heat verg
slowlg.
HeatproofGlass Ceramic: Can be usedfor
either surface or oven cooking. It conducts
heat very slowlg and cools very slowlg. Check
cookware manufacturer's directions to be
sure itcan be usedon gas ranges.
Stainless Steel: This metal alone has poor
heating properties and isusuallg combined
with copper,aluminum or other metalsfor
improved heat distribution. Combination
metal skillets usuallgwork satisfactorilg if
theg are used with medium heat as the
manufacturer recommends.
t_
0
iijiiiiii]iiiijjil
i_iii_ii,i,:>iiiii
L_
Use a fiat-bottomed wok.
Do not usestove top grillson gout sealedgas
burners. If gou use the stove top grill on the
sealedgas burner,itwill cause incomplete
combustion and can result in exposure to
carbon monoxide levelsabove allowable
standards.
Thiscan behazardous to your health.
Wok This Way
We recommend that youuse a 14 " or smaller
flat-bottomed wok. Hake sure the wok bottom
sits flat on the grate. They are available at
your local retailstore.
Onlg a flat-bottomed wok should be used.
In Case of Power Failure
In case of a power failure, gou can light
the gas surface burners on gour range with a
match. Hold a lit match to the burner,then
push in and turn the control knob to the Lite
position. Useextreme caution when lighting
burners this wag.
Donot usea flat-bottomed wok on asupport
ring. Placingthe ring over the burner or grate
mag cause the burner to work improperlg,
resulting in carbon monoxide levels above
allowable standards. Thiscould be dangerous
to gour health.
Surface burners in usewhen an electrical
power failure occurswill continue to operate
normallg.
tb
:b-
8
{,t}
('b
o
R
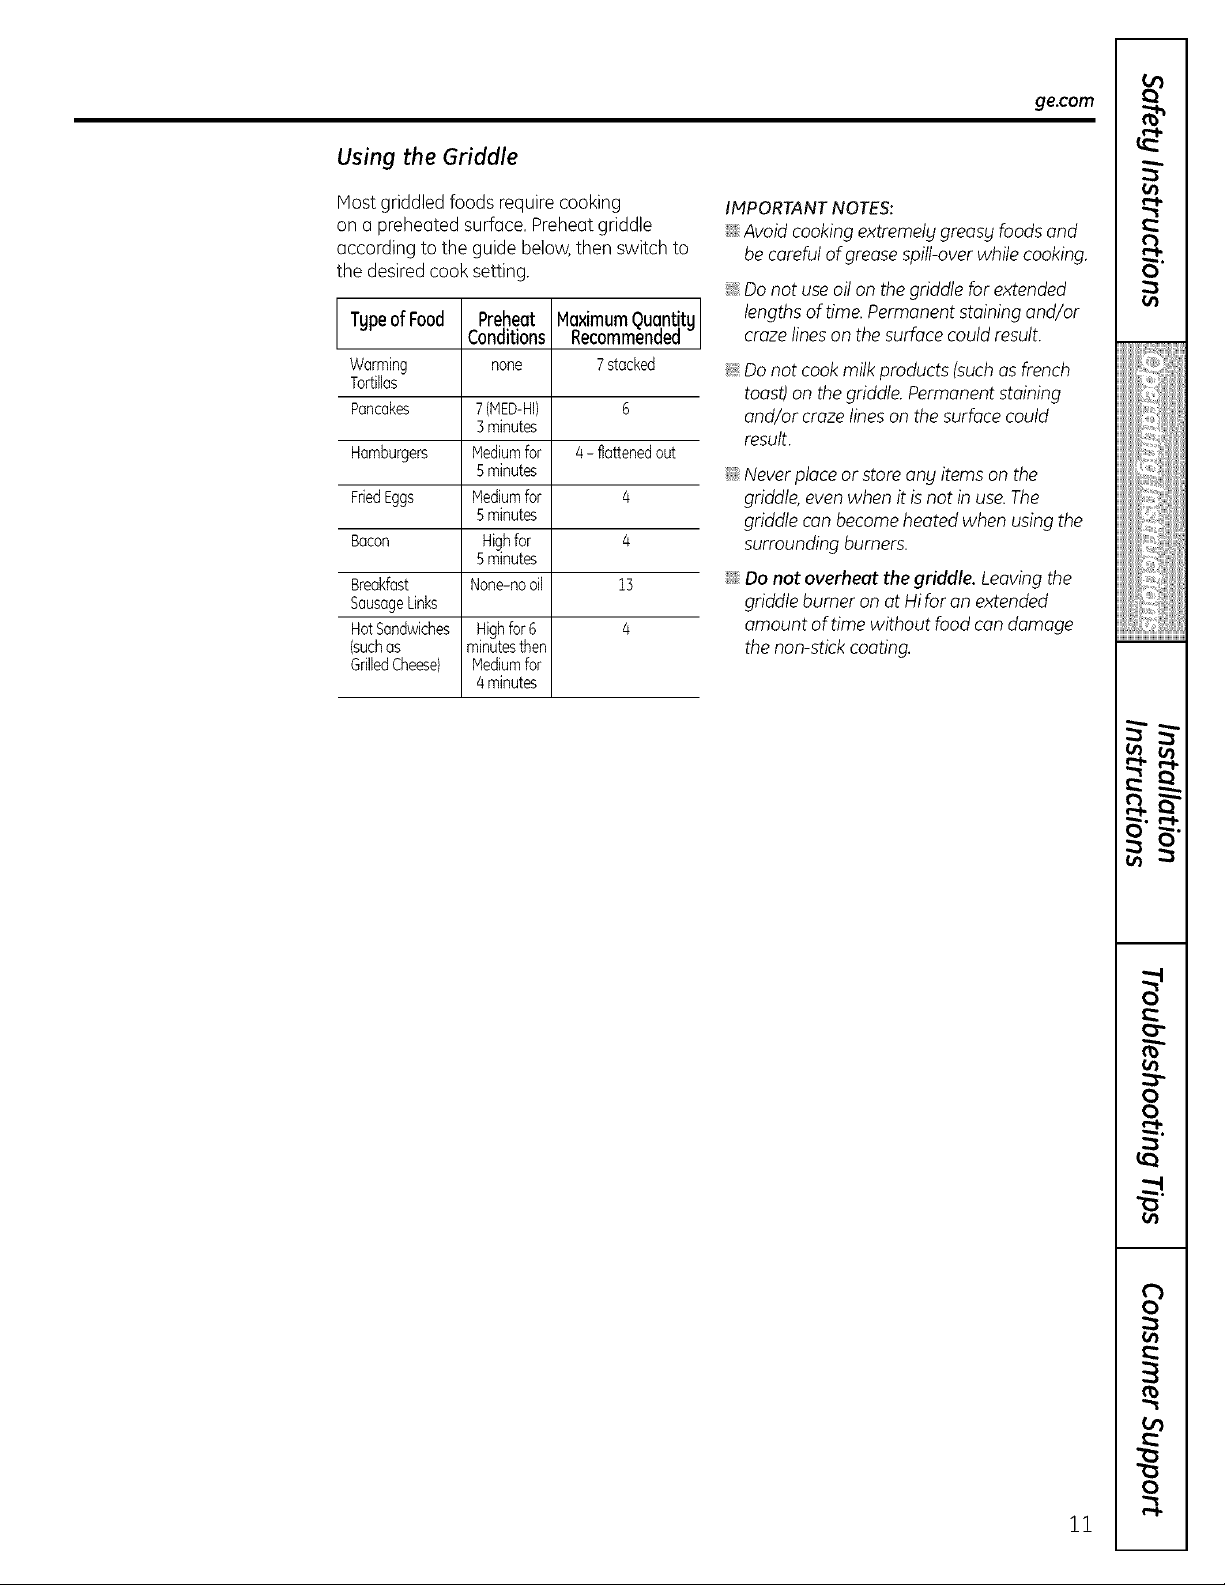
Usingthe griddle.
Underside oft riddle
locks
Place the "U" locks onto the center
fingers on the center grate.
Your non-stick coated griddle provides
an extra-large cooking surface for meats,
pancakes or other food usually prepared
in a frying pan or skillet.
How to Insert the Griddle
CAUTlON: puceandremo e
the griddle onlg when all grates and
griddle are cool and all surface units are
turned OFF,
The griddle can only be used with the center
burner and must be locked into place on the
center grate.
NOTE:Yourgriddle will discolor over time asit
becomesseasonedwith use.
Placethe "U" lockson the underside of
the griddle over the center fingers of the
center grate.
Move the griddle back-and-forth to make
sure it islocked inplace.
10
Using the Griddle
ge.com
Host griddled foods require cooking
on a preheated surface. Preheatgriddle
according to the guide below,then switch to
the desiredcook setting.
k TgpeofFood Preheat MaximumguqntitgI
Warming none 7stacked
Conditions _ecommenaea j
Tortillas
Pancakes 7 (NED-HI) 6
] minutes
Hamburgers Mediumfor 4- flattenedout
5minutes
FriedEggs Nediumfor 4
Bacon Highfor 4
5minutes
5minutes
Breakfast None-nooil 13
SausageLinks
HotSandwiches Highfor6 4
(suchas minutesthen
GrilledCheese) Nediumfor
4minutes
IMPORTANTNOTES:
;;J_::Avoidcookingextremely greasy foods and
becarefulof greasespill-overwhile cooking.
_: Donot useoil on thegriddle for extended
lengthsof time.Permanentstaining and/or
crazelinesonthe surface could result.
_ Do not cookmilk products (suchasfrench
toast)on thegriddle.Permanent staining
and/or craze lines onthe surfacecould
result.
;;J_:,Neverplaceor storeany items on the
griddle,evenwhen it isnot in use.The
griddle can become heatedwhen usingthe
surroundingburners.
::Ji::Do not overheat the griddle. Leavingthe
griddle burner on at Hifor an extended
amount of time without food candamage
the non-stickcoating.
11
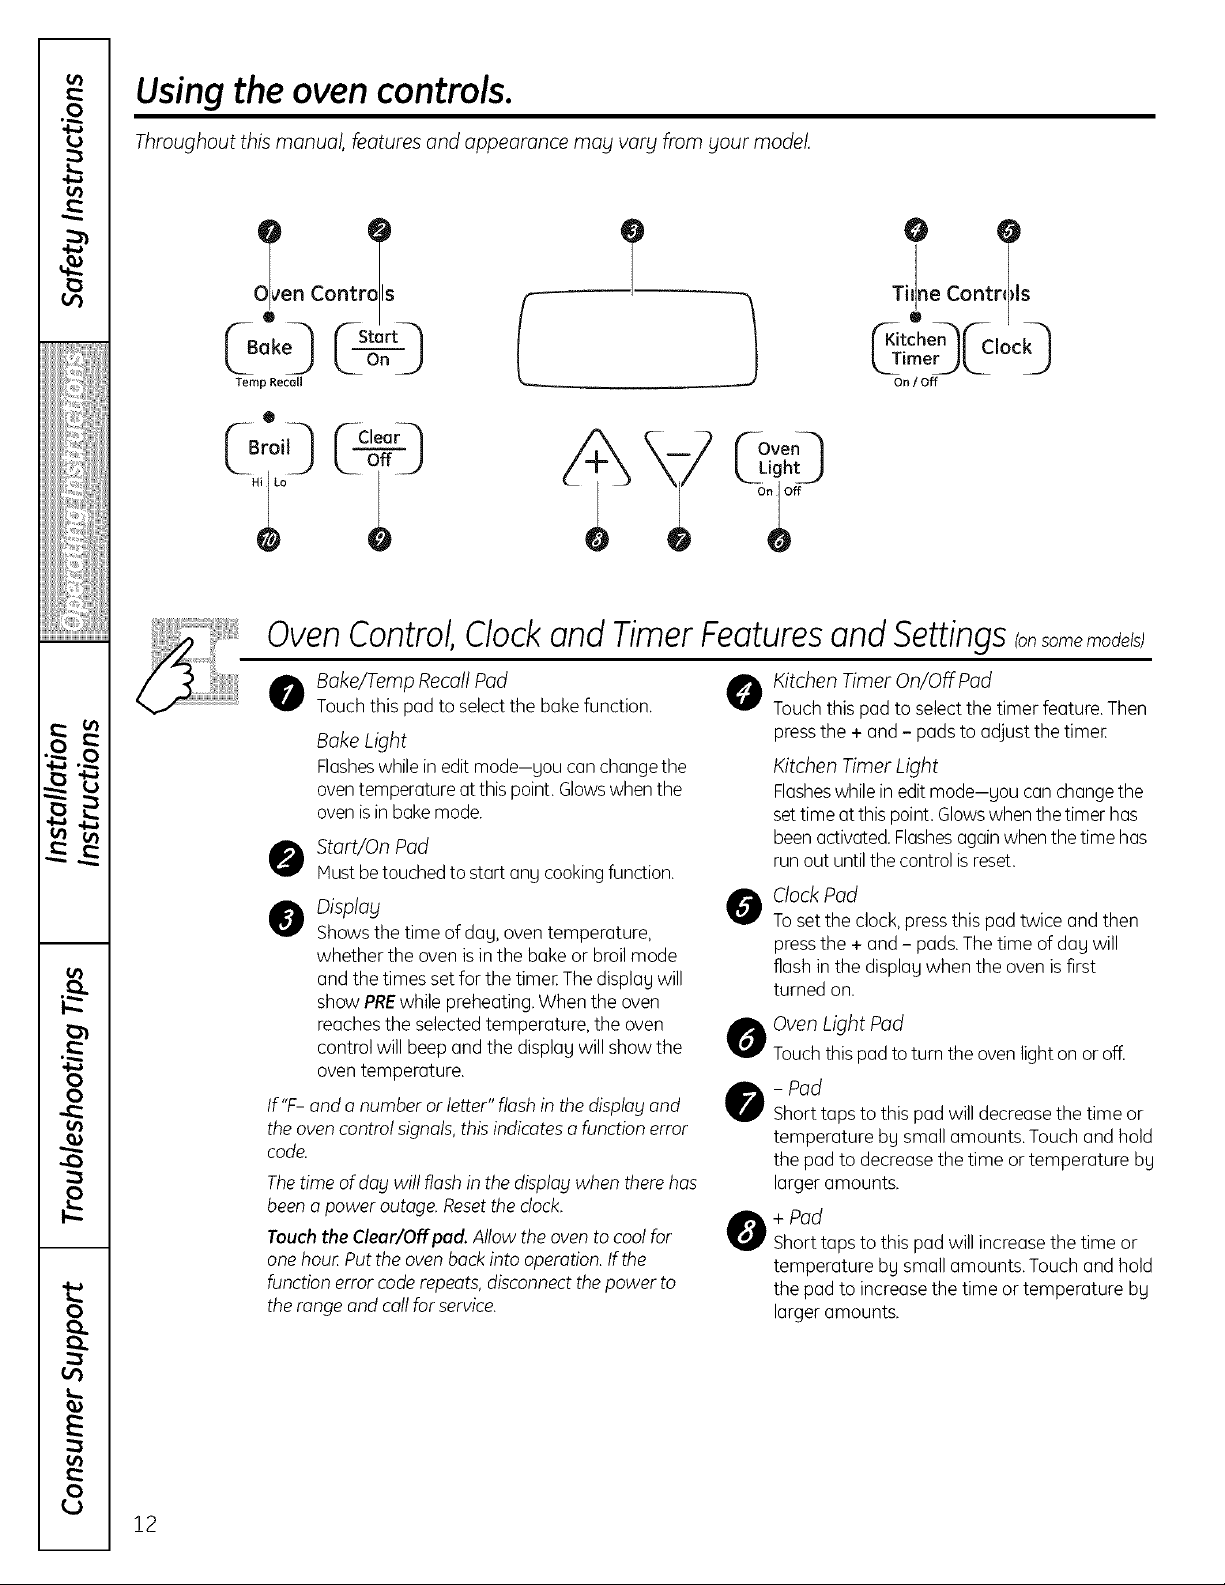
Using the oven controls.
Throughout this manual, features and appearance mag vary from gout model.
®
o k-iJ
OvenControl,Clockand TimerFeaturesand Settings(onsomemodets)
O ake/Temp Recall Pad O
Touchthis pad to select the bake function.
Bake Light
Flasheswhileinedit mode-uou canchangethe
oventemperatureat this point.Glowswhen the
ovenisin bakemode.
O Start/On Pad
lust betouchedto start ang cookingfunction.
O Display
Showsthe time of day, oven temperature,
whether the oven is in the bake or broil mode
and the times set for the timer.Thedisplay will
show PREwhile preheating.When the oven
reaches the selected temperature, the oven
control will beep and the display will show the
oven temperature.
tf "F-and a number or letter" flash inthe display and
the ovencontrol signals,thisindicates a function error
code.
Thetime of dablwill flashin the disploblwhen therehas
been o power outage. Resetthe dock.
Touch the Clear/Off pad. Allow the ovento cool for
one hou: Put the oven backinto operation.If the
function error code repeats,disconnectthe power to
the range and callfor service.
Kitchen Timer On/OFFPad
Touchthis pad to select the timer feature. Then
pressthe + and - padsto adjust the timer.
Kitchen Timer Light
Flasheswhilein editmode-uou can changethe
settime atthis point.Glowswhenthetimer has
been activated.Flashesagainwhen thetime has
run out until the controlisreset.
Clock Pad
0
Toset the clock,pressthis pad twice and then
pressthe + and - pads.The time of day will
flash in the display when the oven is first
turned on.
O Oven Light Pad
Touchthis pad to tum the oven light onor off.
- Pad
Short taps to this pad will decreasethe time or
temperature by small amounts. Touch and hold
the pad to decrease the time or temperature by
larger amounts.
+ Pad
taps to this pad will increasethe time or
temperature by small amounts. Touch and hold
the pad to increase the time or temperature by
larger amounts.
12
ge.com
Oven Control, Clock and Timer Features and Settings _onsomemode_s_
e,,l,
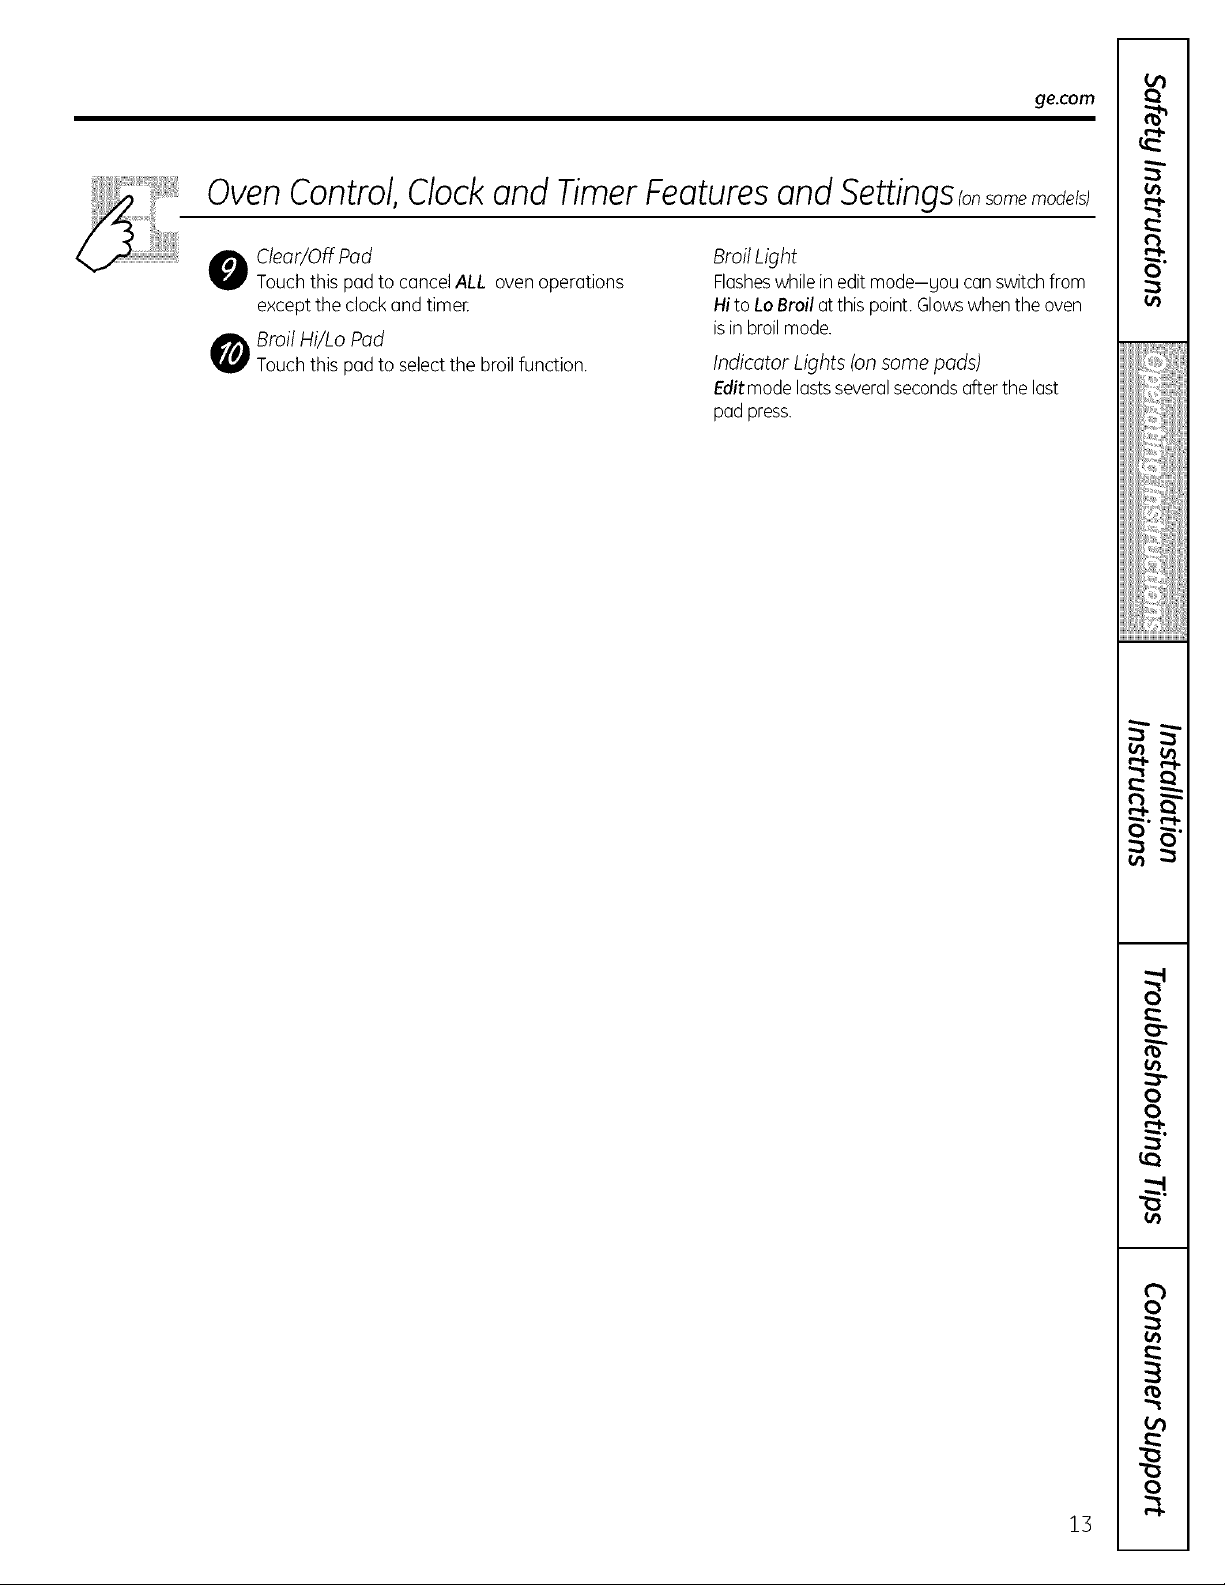
O lear/OffPad
Touchthis pad to cancel ALL oven operations
except the clock and timer
O Broil Hi/Lo Pod
Touchthis pad to select the broil function.
Broil Light
Flasheswhilein editmode-you canswitch from
Hito Lo Broilat this point.Glowswhen the oven
isin broilmode.
Indicator Lights (on some pads)
Editmode lastsseveralsecondsafter the last
pad press.
9"
15
8
rb
o
to
0
0
0
e"l.
Using the oven.
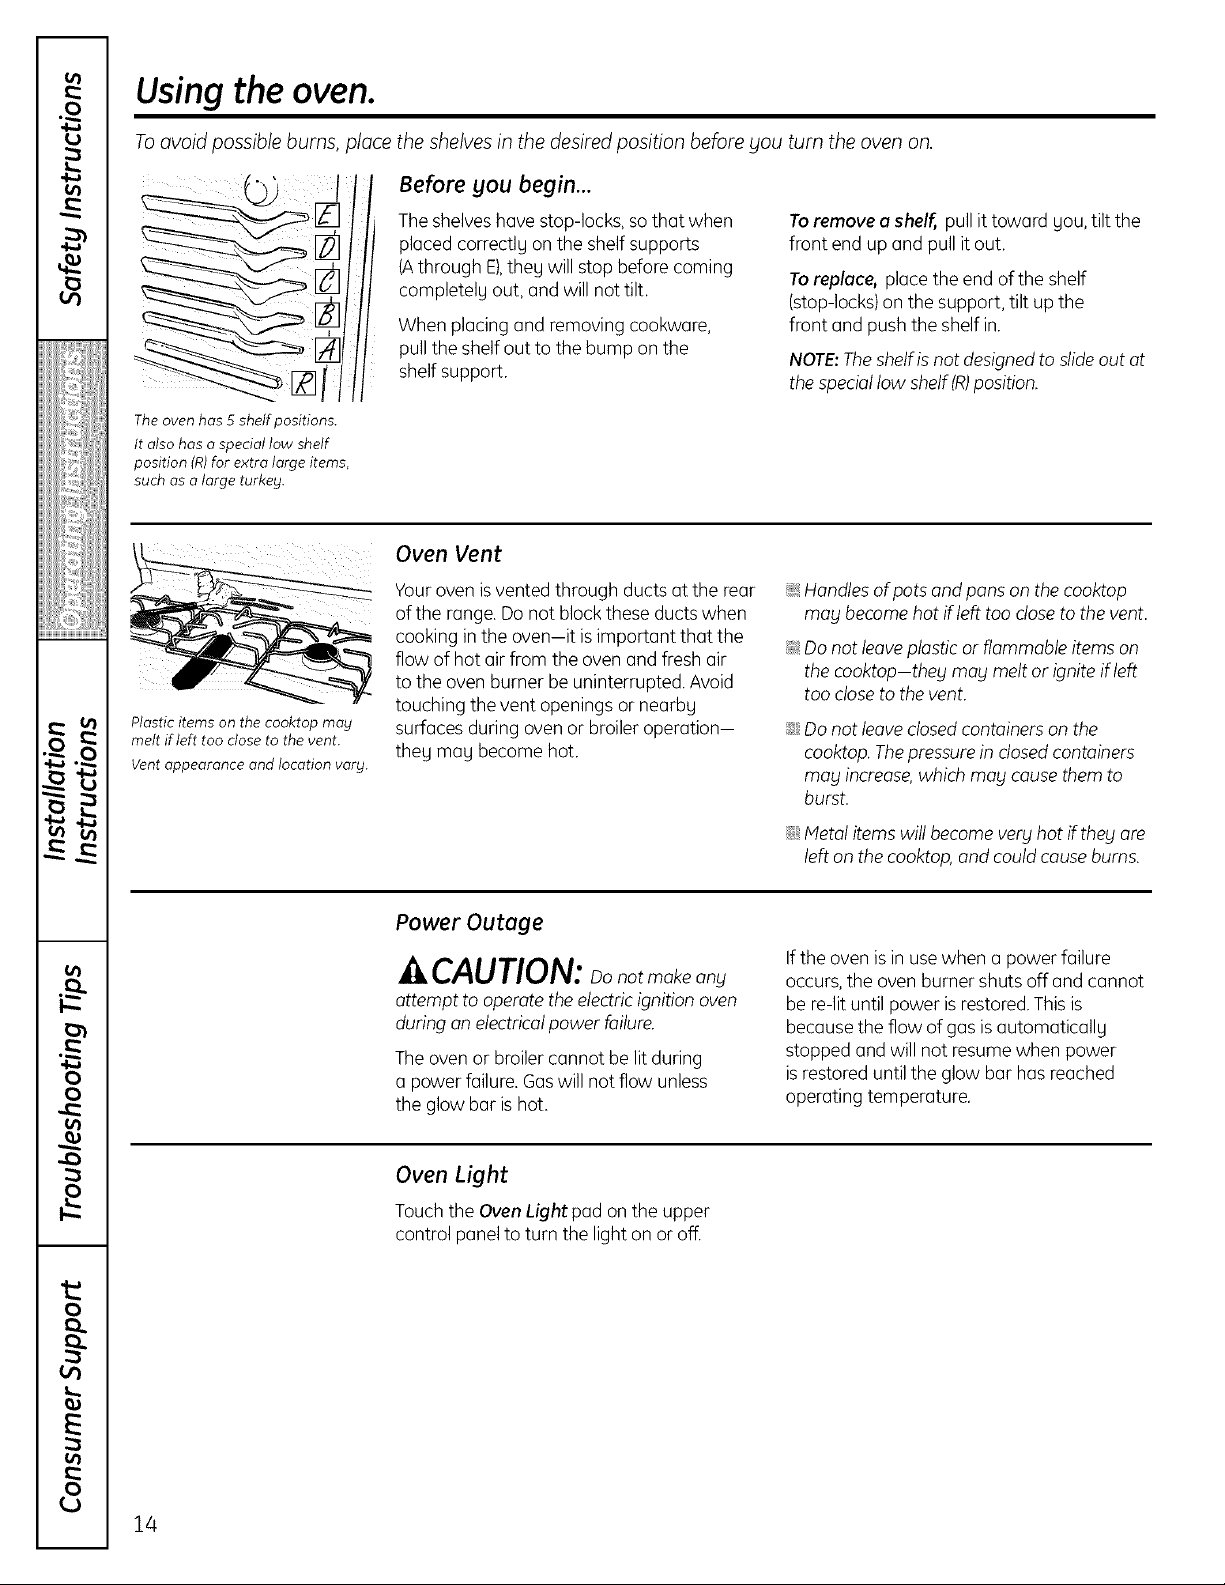
To avoid possible burns, place the shelves in the desired position before you turn the oven on.
Before you begin...
The oven has 5 shelf positions.
It also has a special low shelf
position (R)for extra large items,
such as a large turkey.
Plastic items on the cooktop mag
melt if left too close to the vent.
Vent appearance and location vary.
Theshelveshave stop-locks, sothat when
placed correctlu on the shelf supports
(Athrough E),they will stop before coming
completelu out, and will nottilt.
When placing and removing cookware,
pull the shelf out to the bump on the
shelf support.
Oven Vent
Your oven isvented through ducts at the rear
of the range.Do not block these ductswhen
cooking in the oven-it isimportant that the
flow of hot air from the oven and fresh air
to the oven burner be uninterrupted. Avoid
touching the vent openings or nearby
surfaces during ovenor broiler operation-
they may become hot.
Toremove oshelf, pull it toward Uou,tilt the
front end up and pull it out.
Toreplace, place the end of the shelf
(stop-locks)on the support, tilt up the
front and push the shelf in.
NOTE:Theshelfis not designedto slideout at
the speciallow shelf(R)position.
_ Handlesof pots andpans on the cooktop
mog become hot if left too closeto the vent.
_ Do not leaveplasticor flammable items on
the cooktop-theg may melt or ignite if left
too closeto the vent.
;;Ji::Do not leaveclosedcontainers on the
cooktop.Thepressurein dosedcontainers
may increase,whichmay causethem to
burst.
Power Outage
^ CAUTION: notmakeany
attempt to operate the electric ignition oven
during an electricalpower failure.
Theoven or broiler cannot be lit during
a power failure. Gaswill not flow unless
the glow bar is hot.
Oven Light
Touch the OvenLightpad on the upper
control panelto turn the light on or off.
iJi::Metal itemswill becomeverg hot if thegore
left on the cooktop,and could causeburns.
Ifthe oven is in use when a power failure
occurs, the oven burner shuts off and cannot
be re-lit until power is restored. This is
because the flow of gas is automaticall9
stopped and will not resume when power
is restored until the glow bar has reached
operating temperature.
14
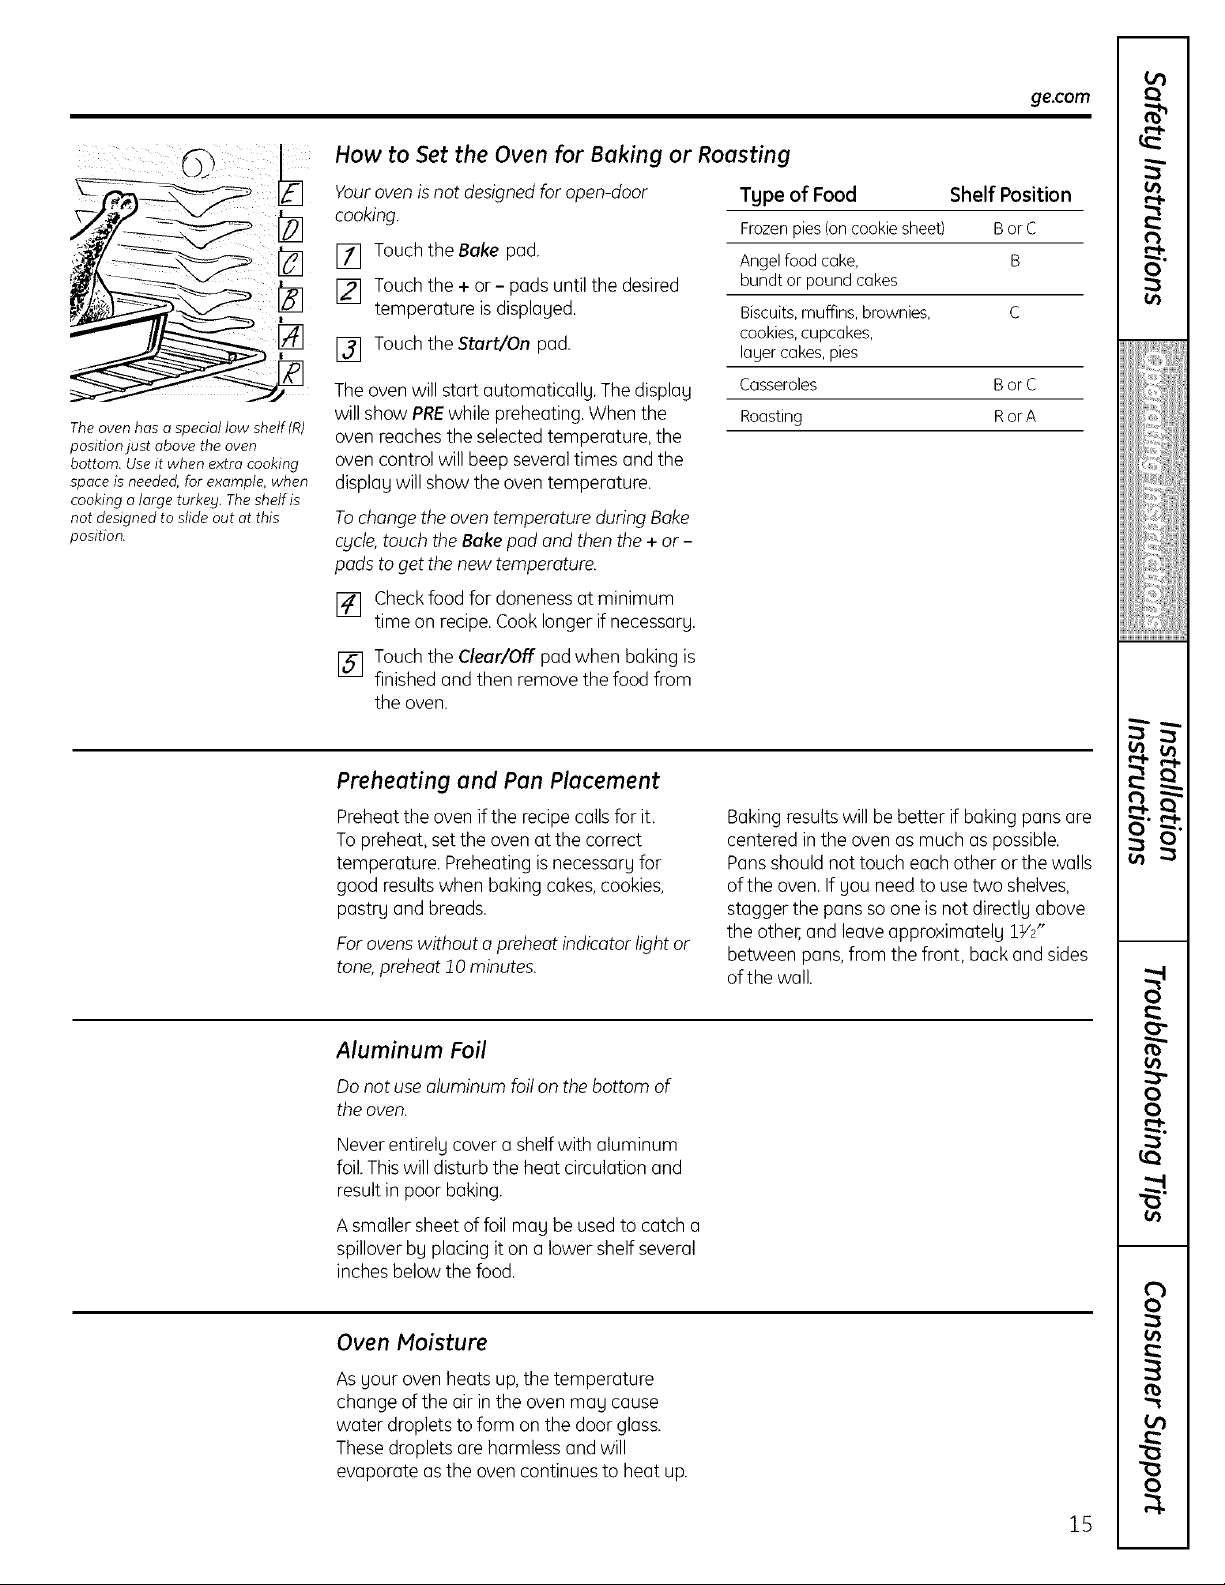
The oven has a special low shelf(R)
position just above the oven
bottom. Use it when extra cooking
space is needed, for example, when
cooking a large turkey. The shelf is
not designed to slide out at this
position.
How to Set the Oven for Baking or Roasting
Yourovenisnot designedfor open-door
cooking.
[] Touch the Bake pad.
[] Touch the + or- pads until the desired
temperature is displayed.
[] Touch the Start/On pad.
Theovenwill start automatically. Thedisplay
will show PREwhile preheating. When the
oven reaches the selected temperature, the
oven control will beep severaltimes and the
display will showthe oven temperature.
Tochangethe oventemperature during Bake
cycle,touch theBake pod andthen the + or -
pods to getthe new temperature.
[] Checkfood for doneness at minimum
time on recipe.Cooklonger if necessary.
[] Touch the Clear/Off pad when baking is
finished and then remove the food from
the oven.
Tgpe of Food Shelf Position
Frozen pies (on cookie sheet) B or C
Angel food cake, B
bundtorpoundcakes
Biscuits, muffins, brownies, C
cookies, cupcakes,
layer cakes, pies
Casseroles BorC
Roasting RorA
ge,com
¢t)
t_
0
iiiiiii_iiiiiii'iiiiiiiii
@i_i_,,iliJii_i,
Preheating and Pan Placement
Preheatthe oven if the recipe calls for it.
To preheat, set the oven at the correct
temperature. Preheating is necessary for
good results when baking cakes,cookies,
pastry and breads.
Forovenswithout apreheat indicator light or
tone,preheat 10 minutes.
Aluminum Foil
Do notuse aluminum foil on the bottom of
the oven.
Never entirely cover a shelfwith aluminum
foil.Thiswilldisturb the heat circulation and
result in poor baking.
A smallersheet of foil may be usedto catch a
spillover by placing it on a lower shelf several
inches below the food.
Oven Moisture
Baking resultswill be better if baking pans are
centered in the oven as much as possible,
Pansshould not touch each other or the walls
of the oven. If you need to usetwo shelves,
stagger the pans so one isnot directly above
the other,and leave approximately 1V2"
between pans,from the front, back and sides
of the wall.
_° r _
g
¢b
o
Asyour oven heats up,the temperature
change ofthe air inthe ovenmay cause
water droplets to form on the door glass.
These droplets are harmless and will
evaporate as the oven continues to heat up.
R
15
 Loading...