

Page 1
ge.com
Safety Instructions ....... 2-7
Operating Instructions
Clock, Kitchen Timer
and Control Lockout ........ ] 5
Oven ................. 12-24
Sabbath Feaulre ........ 19, 20
Self-Cleaning .......... 23, 24
Special Features ........ 17, 18
Thermostat .............. 20
Timed Baking and Roasting..16
Surface Units ........... 8-1 l
_'arming Drawer . ....... 21,22
Care and Cleaning
Broiler Pan and Grid ....... 27
Control I_ol)s ............ 25
Glass Cookmp .......... 29, 30
I,if't-Off Oven Door . ........ 26
Light .................... 27
Racks .................... 27
Removable Drawer . ........ 28
Troubleshooting Tips ... 31-34
jg9oo
Accessories ............. 38
Consumer Support
Consumer Support . . Back Coxer
Product Registration ..... 35, 36
Warranty ................. 39
Write the model and serial
numbers here:
Model #
Serial #
You can lind them on a label
behind the storage drawer on
the front of the range frame.
49-80363 11-05Jfl
Page 2
IMPORTANTSAFETYINFORMATION.
READALLINSTRUCTIONSBEFOREUSING.
m
For your safety, the information in this manual must be followed to minimize the risk of fire,
electric shock, or to prevent property damage, personal injury, or loss of life.
A WARNINGANti-TIPDEVICE
All ranges can tip andinjury could result.
Toprevent accidental tipping of the range, attach it to the wall and floor by installing the Anti--tip
device supplied.
If the Anti--tip device supplied with the range does not fit this application, use the universal Anti--17p
device WB2X7909.
Tocheck if the device is instated and engaged properly, remove the kick panel or storage drawer
and inspect the rear leveling leg. Make sure it fits securely into the slot.
If you pull the range out from the wall tbr any reason, make Stlie the device is properly
engaged when you push the range back against the wall. If it is not, there is a possible _isk of
the rang_ dpping oxer and causing ii_tli T if you or a child stand, sit or lean on an open door
Please reDr m fl_e Anti-Tip device infot_nafion in this manual. Failure m rake fills precaution
could iesult in dpping of the rang_ and i,_tl_>
IMPORTANTSAFETYNOtiCE
The California Safe Drinking Water and ToxicEnforcement Act requires the Governor of California to
publish a list of substances known to the state to cause cancer, birth defects or other reproductive
harm, and requires businesses to warn customers of potential exposure to such substances.
The fiberglass insulation in self-clean ovens gives off a very small amount of carbon monoxide during
the cleaning cycle. Exposure can be minimized by venting with an open window or using a ventilation
fan or hood.
2
Page 3
ge.com
SAFETYPRECAUTIONS
When using electrical appliances, basic safety precautions should be followed, including the following:
_i:,iUse dfis appliance only for its intended
puq)ose as desciibed in this Owner's
Manual.
_{:;Be sure your appliance is properly
irrsmlled and grounded by a qualified
irrsmller in accordance with tile provided
irrsta]lafion irrstrucfions.
_{:_Haxe die irrstaller show you tile location
of the circuit breaker or filse. Mark it fbr
easy reference.
_?{:_Do not atmmpt to repair or replace arty
part of your range unless it is specifically
iecommended in this manual. All other
servicing should be referred to a qualified
mchnician.
.,\.,%'z a, WARNING!
iiiiii_
may penetrate a broken control panel and create a risk of electrical shock. Contact a qualified
technician immediately should your glass control panel become broken.
_]_:Do not store flammable mamrials in
an oven or near file cooktop.
CAOTlON: emsofinterestto
children should trot be stored in cabinets
aboxe a range or on the backsplash of a
range--children climbing on tire range
to leach imms could be seiJously ir)jured.
_:;Nexer wear loose-fitting or hanging
gm_nents while using the appliance.
Be carefifl when reaching for imms stoied
oxer the range. Flammable mamfial could
be ignimd if brougt/t ira corrtact with hot
surface units or heating elements and may
cause sexere burns.
;_;Use only dU pot holders--moist or damp
pot holders on hot surthces may result in
bruits from storm. Do not let pot holders
touch hot surthce units or heating
elements. Do not use a towel or oilier
bulky cloth in place of pot holders.
;_?:':Before perfol_ning aW service, disconnect
tire range power supply at dre household
distribution panel by iemoving tile fllse or
switching off tile circuit breaken
;f; Do not leaxe children alone--childien
should not be left alone or unattended ira
an area where an appliance is ira use. They
should nexer be allowed to sit or stand on
arty part of the appliance.
_f):':Do not allow anyone to climb, stand or
hang on file dooi, storage drawer or
cookmp. They could damage tile range
arrd exen up it oxel; causing sexere
personal injm T.
_: Do not use wamr on grease fires. Nexer
pick alI) a flaming pan. Turn tile cormols
off'. Smother a flaming pan on a surface
unit by coxefing the pan complemly with
a well-fitting lid, cookie sheet or fiat tray.
Use a multi-puq)ose d U chemical or
foam-type fire extinguisher
Flaming giease outside a pan can be put
out by coxelJng it with baking soda oI;
if available, by usfirg a multi-puq)ose &T
chemical or foam-type fire extinguishen
Flame in tire oxen can be smothered
completely by closing the oxen door arrd
turning tile oxen off or by using a multi-
purpose dU chemical or foam-wpe fire
extinguishen
3
Page 4
IMPORTANTSAFETYINFORMATION.
READALLINSTRUCTIONSBEFOREUSING.
WARNING'!
SAFETYPRECAUTIONS
Do not operate the oven or cooktop controls if the glass is broken. Foodsplatter or cleaning solution
may penetrate a broken control panel and create a risk of electrical shock. Contact a qualified
technician immediately should your glass control panel become broken.
_: For your safety, never use your appliance
for warming or heating the room.
_: Do not let cooking grease or other
flammable mamtials accunmlam in
or near the range.
_i:,:Do not touch rite sm/_ace units, rite
heating elements or the inmtJor surface
of rite ox>n. These surfaces may be hot
enough m hum exen though fltey are
dark in color During attd after use, do not
much, or let clothing or other flammable
mamrials contact rite surfi_ce units, areas
nearby the surthce units or arty intexior
area of fire ox>n; allow sufficient time tbr
cooling first.
Potentially hot snrfaces include the
cooktop, areas facing the cooktop, oxen
xent opening, surlhces near the opening,
crevices around the oxen door
REMEMBER:The inside surPace of the oxen
may be hot when the door is opened.
_: Do not store or use combustible mamrials,
gasoline or other flammable vapors attd
liquids in the vicinity of this or arty other
appliance.
;_i:,iKee I) the hood and grease filters clean
to maintain g_od x>nfing attd to ax_id
grease fires.
_::Teach children not m pl W with rite
conwols or arty oflter part of the rang>.
;_;Alwws kee I) dish rowels, dish cloflts, pot
holders and oflter linens a sad distance
from your rang>.
_{_:Alwws kee I) wooden attd plastic umnsils
attd canned tbod a sad distance flom
your range.
_;{_:Alwws kee I) combustible wall coxetJngs,
curtains or drapes a sad distance from
your range.
COOKMEATANDPOULTRYTHOROUGHLY...
Cookmeat andpoultry thoroughly--meat to at least an INTERNALtemperatureof 160°Eandpoultry toat least
an INTERNALtemperatureof 180°ECookingto thesetemperaturesusuallypretectsagainst foodbomeillness.
RADIANTSURFACEUNITS
Use proper pan size--select cookware having flat bottoms large enough to cover the surface unit
heating element. The use of undersized cookware will expose a portion of the surface unit to direct
contact and may result in ignition ofclothing. Proper relationshJ _of cookware to surface unit will
also improve efficiency.
q_{_Nexer leme the surface units unattended
at high heat settings. Boiloxers cause
smoking attd greasy spilloxers that m W
catch on fire.
_f;Only certain types of glass, glassAeramic,
earthenware or other glazed containers
ate suitable for cooktop service; others
may hreak because of the sndden change
4
in temperature.
_{_To minintize the possil)ilitv of 1)nI_tS,
ignition of flammable mamrials attd
spillage, the handle of a container
should be turned toward the cenmr of
the range without exmnding oxer nearhv
surface units.
_:;Always utrn the surface units off 1)efbte
removing cookware.
;_i:,:When preparing flaming foods under
the hood, umt fire fhn on.
Page 5
RADIANTSURFACEUNITS
ge.com
;fi:,:Use care when touching fl_e cooktop. The
glass surfi_ce of fl_e cooktop will retain heat
after tile conuols have been turned off:
_t{_;Kee I) an eye on foods being flied at higil
or medium high heat settings.
;f; Foods for flTing should be as dt T as
possible. Frost on fiozen foods or moisun_e
on fresh foods can cause hot fat to bubble
up and ox>r tile sides of tile pan.
_t{_;Use little tht for effective shallow or deep
fat flTing. Filling the pan too fllll of/ant can
cause spillovers when food is added.
;f; If a combination of oils or thts will be
used in flTing, stir together before heating,
or as fi_ts melt slowly.
_i_Always heat fi_t slowly, and watch as it heats.
_:;Use a deep fat thermomemr whenever
possible to I)_ex_nt ox_rheafing t_atbeyond
file smoking point.
_?{:_Avoid scratching the glass cookmp.
The cooktop can be scratched with imms
such as sharp insuuments, rings or other
jewehT, and Iix>ts on clothing.
;_i:,:Do not operate dm radiant surface units if
tile glass is broken. Spilloxers or cleaning
solution m W penetrate a broken cooktop
and cieam a risk of elecudcal shock.
Contact a qualified technician immediately
should your glass cooktop become broken.
_?{::Nexer use tile glass cooktop snit_tce as
a cutting board.
_?{::Do not place or store imms that can melt
or catch fire on the glass cookmp, e_en
when it is not being used.
_i:,:Be carefill when placing spoons or other
sdrfing utensils on glass cookmp surPace
when it is in use. They may become hot
and could cause bums.
_i:,:Clean file cooktop widl caution. If a wet
spong_ oi cloth is used to wipe spills on
a hot snr/aace unit, be careflll to ax_id
smam bm_ls. Some cleaners can produce
noxious fiunes if applied to a hot surface.
NOTE,"We recommendthatyouavoid wipingany
surfaceunit areasuntil they havecooledand the
bdicator light has goneoff Sugarspills are the
exception to this. Pleaseseethe Cleaning the
glass cooktop section.
_ V_]len the cooktop is cool, nse only
CE_ BRYTE (_Ceramic Cooktop
Cleaner and the CERAMA BRYTE _°
Cleaning Pad to clean tile cooktop.
;_?:':To avoid possible damag_ to the cooking
surface, do not apply cleaning cieam m
file glass surface when it is hot.
_:;After cleaning, use a d U cloth or paper
towel to remove all cleaning cream
residue.
_: Read and tbllow all instructions and
warnings on the cleaning cream labels.
_ti_:Larg> scratches el impacts to glass doors
or cooktops can lead m broken or
shattered glass.
;_?:':Do not leave any imms on the cooktop.
Tile hot air flom the x>nt m W ignite
flammable imms and will increase p_essure
in closed containers, which m W cause
fl/em to burst.
_: Do not ]em_ plastic items on tile
cooktoi>---flley may melt if left too close
to file \_nt.
_i:,iDo not lilt dm cooktop, iZting dm
cooktop can lead to damag_ and improper
operation of tile rang_.
5
Page 6
IMPORTANTSAFETYINFORMATION.
READALLINSTRUCTIONSBEFOREUSING.
WARNING'!
OVEN
Stand away from the range when opening the oven door. Hot air or steam which escapes can cause
bums to hands, face and/or eyes.
_{;_Do not heat tmopened tbod containers.
Pressure could build up and tile container
could bnrst, causing all inju U.
;f; Kee I) file oxen xent nnobstrncted.
;f; Kee I) tile oxen free tom grease bnildup.
;f; Place tile oxen rack in tile desired position
while tile oxen is cool. If racks must be
handled when hot, do not let pot holder
contact tile heating elements.
_7{::¼]ran using cooMng or roasting bags
ill tile oxen, follow the mamdZacUlrer's
directions.
;_i:.:Pnlling out the rack to tile stop-lock is a
comenience ill lifting heavv tbods. It is also
a precaution against bnrns tom touching
hot surtZaces of tile door or oxen walls.
_7{;_Do not use tile oxen to dry newspapers.
If oxeflleamd, tiley can catch on fire.
qT_;Do not use tile oxen fox a storage, area.
Imms stored in all oxen call ignim.
_f;Do not leaxe paper products, cooking
umnsils or food in tile oven when not
ill use.
Do not use aluminum foil to lille oxen
bottoms, except as suggested in this
mannal. Improper installation of
aluminum foil may resuh ill a risk
of electric shock or fire.
SELF-CLEANINGOVEN
Do not use oven cleaners. No commercial oven cleaner or oven liner protective coating of any kind
should be used in or around any part of the oven. Residue from oven cleaners will damage theinside
of the oven when the self-clean cycle is used.
_{;;Do not clean the door gasket. Tile door
gasket is essential fox a good seal. Care
should be token not to rub, damage, or
moxe tile gasket.
;_i:,:Befox.e. self-(leaning tile oven, remoxe tile
broiler pan, grid and other cookwm.e..
_:;Take tile racks ont of tile oxen 1)efbx.e.you
begin tile self-clean cycle or tiley m W
discolox; unless your oxen is equipped with
gr W poxvelain-coamd oxen racks.
_{;;Be sure to wipe off excess spillage, before
starting tile self-cleaning operation.
_:;If tile self-vleaning mode malflmcfions,
uml tile oxen off and disconnect tile
power supply. Hme it serviced by a
qualified mchnician.
_]{;;Clean only parts lismd ill tills Owner's
Mannal.
READANDFOLLOWTHISSAFETYINFORMATIONCAREFULLY.
SAVETHESEINSTRUCTIONS
Page 7
WARMINGDRAWER
ge.com
_; Tile pml)ose of file wai_ning drawer is _;
to hold hot cooked foods at serving
temperature. Always start with hot food;
cold food cannot be heamd or cooked
in the wai_ning drawen
_ Do not use tile drawer m di T newspapers.
If oxerheamd, they can catch on fire. _!':i
_i:.iDo not leme paper products, plastics, canned
tbod or comhustihle mamiials in the div_wer
_:;Nexer leaxejars or cans of fat diipping_
in or Ileal your drawer
_fi:.iDo not warm food in file drawer for more
than two hours.
_fi:.:Nexer place, use or self,lean the lower
oxen drawer pan in tile upper oxen.
Do not touch the heating element or the
interior surface ofthe drawer. These surPaces
may he hot enough to bum.
REMEMBER:Ti_e inside sur_ce of file dl_awer
may he hot when the &awer is opened.
Use care when opening file drawei: Open
tile drawer a crack and let hot air or steam
escape before iemoving or replacing food.
Hot air or smam which escapes can cause
l)nF/ls to hands, face and/or eyes.
Do not use aluminum foil to line file lower
oxen drawen Foil is an excellent heat
insulator and will trap heat heneath it. Tills
will upset tile perfoi_nance of tile drawer
and it could damage tile inmrior finish.
Page 8
Usingthe surface units.
Throughout this manual, features and appearance may vary from your model.
How to Set
LO HI
Be sure you turn flTecontrol knob to
OFFwhen you finish cooking.
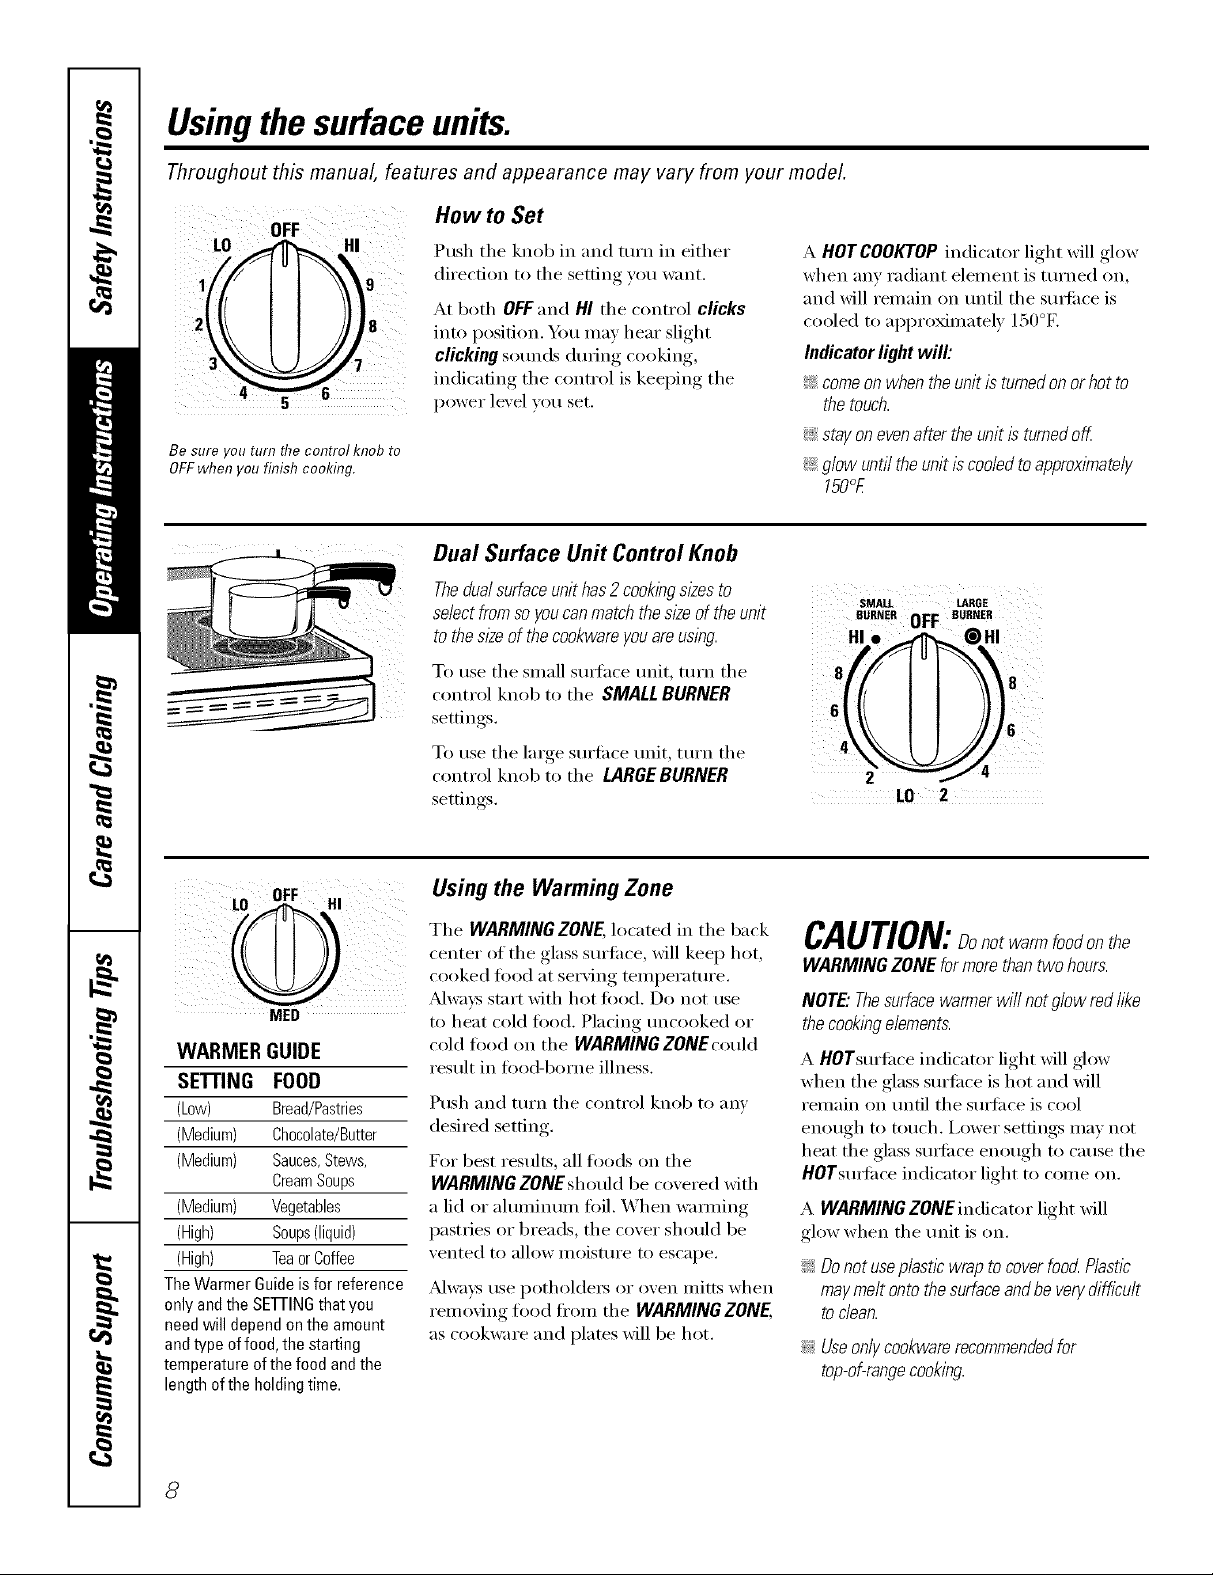
Push tile knob in and ttlrn in either
direction to the setting you want.
At both OFFand HI tile control clicks
into position. Ym may hear slight
clicking sounds during cooking,
indicating the control is keeping the
power level you set.
Dual Surface Unit ControlKnob
A HOT COOKTOP indicator light will glow
when anv radiant element is turned on,
and will remain on tmtil tile sm_li_ce is
cooled to approximately 150°E
Indicator light will:
_: come on when the unit is turnedon or hot to
the touch.
!_:istay on evenafter the unit is turned off
_ glow until the unit iscoded to approximately
150°£
MED
WARMER GUIDE
SETI'ING FOOD
(Low) Bread/Pastries
(Medium) Chocolate/Butter
(Medium) Sauces,Stews,
CreamSoups
(Medium) Vegetables
(High) Soups(liquid)
(High) TeaorCoffee
TheWarmer Guideisfor reference
onlyand the SEFI-INGthatyou
needwill dependonthe amount
andtype offood,the starting
temperatureof thefood and the
lengthof the holdingtime.
Thedualsurface unit has2 cooklhgs/2esto
select fromso youcan match the sizeof the unit eURaEROR: BURNER
to the slze of the cookware you are using. H/._'_ HI
control knob to tile SMALL BURNER
To rise the si/lal] S/llq';ice tlnit, ttlFn tile :_((_ {J_'_ 18
settin ,s
To rise the large s//rlilce t/nit, tt/rn the
control knob to the LARGEBURNER
settin ,s LO 2
SMALL LARGE
Using the Warming Zone
The WARMINGZONE,located in tile back
center of the glass sm'li_ce, will kee I) hot,
cooked food at ,serxin,*_temperatm'e.
_Mwaxsstart with hot food. Do not use
to heat cold toed. Pladng tmcooked or
cold toed on the WARMING ZONE could
result in tOocl-borne illness.
Push and mrn tile control knob to am'
desired setting.
For best results, all toocls on the
WARMING ZONE should be covered with
a lid or aluminum foil. When wamfing
pastries or breads, the cover should be
vented to allow moisture to escape.
Always use potholde_ or oven mitts when
relno'dno food fl'oln tile WARMING ZONE,
as cookware and plates will be hot.
CAUTION:Donotwarmfoodonthe
WARMING ZONE formore thantwo hours.
NOTE."Thesurface warmer will not glow red like
the cookingelements.
A HOTsm'li_ce indicator light will glow
when the glass surti_ce is hot and will
remain on tmtil tile s/wIi_ce is cool
enotlgh to fetich. I,ower settings IIl_lV not
heat the glass sui_ilce enough to cause the
HOTsuiqfilce indicator light to come on.
A WARMINGZONEindicator light will
glow when the unit is on.
_: Donot useplastl? wrap to cover food.Plastl?
maymelt onto the surfaceandbe very difficult
to dean.
!;>Useonlycookware recommendedfor
top-of-rangecooking.
8
Page 9
Throughout this manual, features and appearance may vary from your model.
Temperature Limiter
Every radiant surIi_(-e unit has a
temperature limited:
Tile temperature limiter protects tile
glass cooktop ti'om getting too hot.
Tile temperature limiter may c) cle
the traits offfi)r a time if:
N Thepan boils d_/
!;> Thepan bottom is not flat
iJi::Thepan is off center
iJi::Thereis no pan on the unit
Home Canning _ps
Be sure the (miner is (entered over tile
smfhce unit.
Make sure the caroler is flat on tile
bottom,
To prevent burns ii'om steam or heat,
use caution when camfing.
Use redpes and procedures fi'om
reputable sources. These are m:dlable
fl'om manufimmrei_ such as Ball: and
Kerr > and the Depamnent of Agriculture
Extension Se_Mce.
Fla[-bottoll/ed calli/ei's aI'e l'eCollllllellded.
Use of water bath cmnei_ with _ippled
bottoms may extend the time required
to bring tile water to a boil.
ge.com
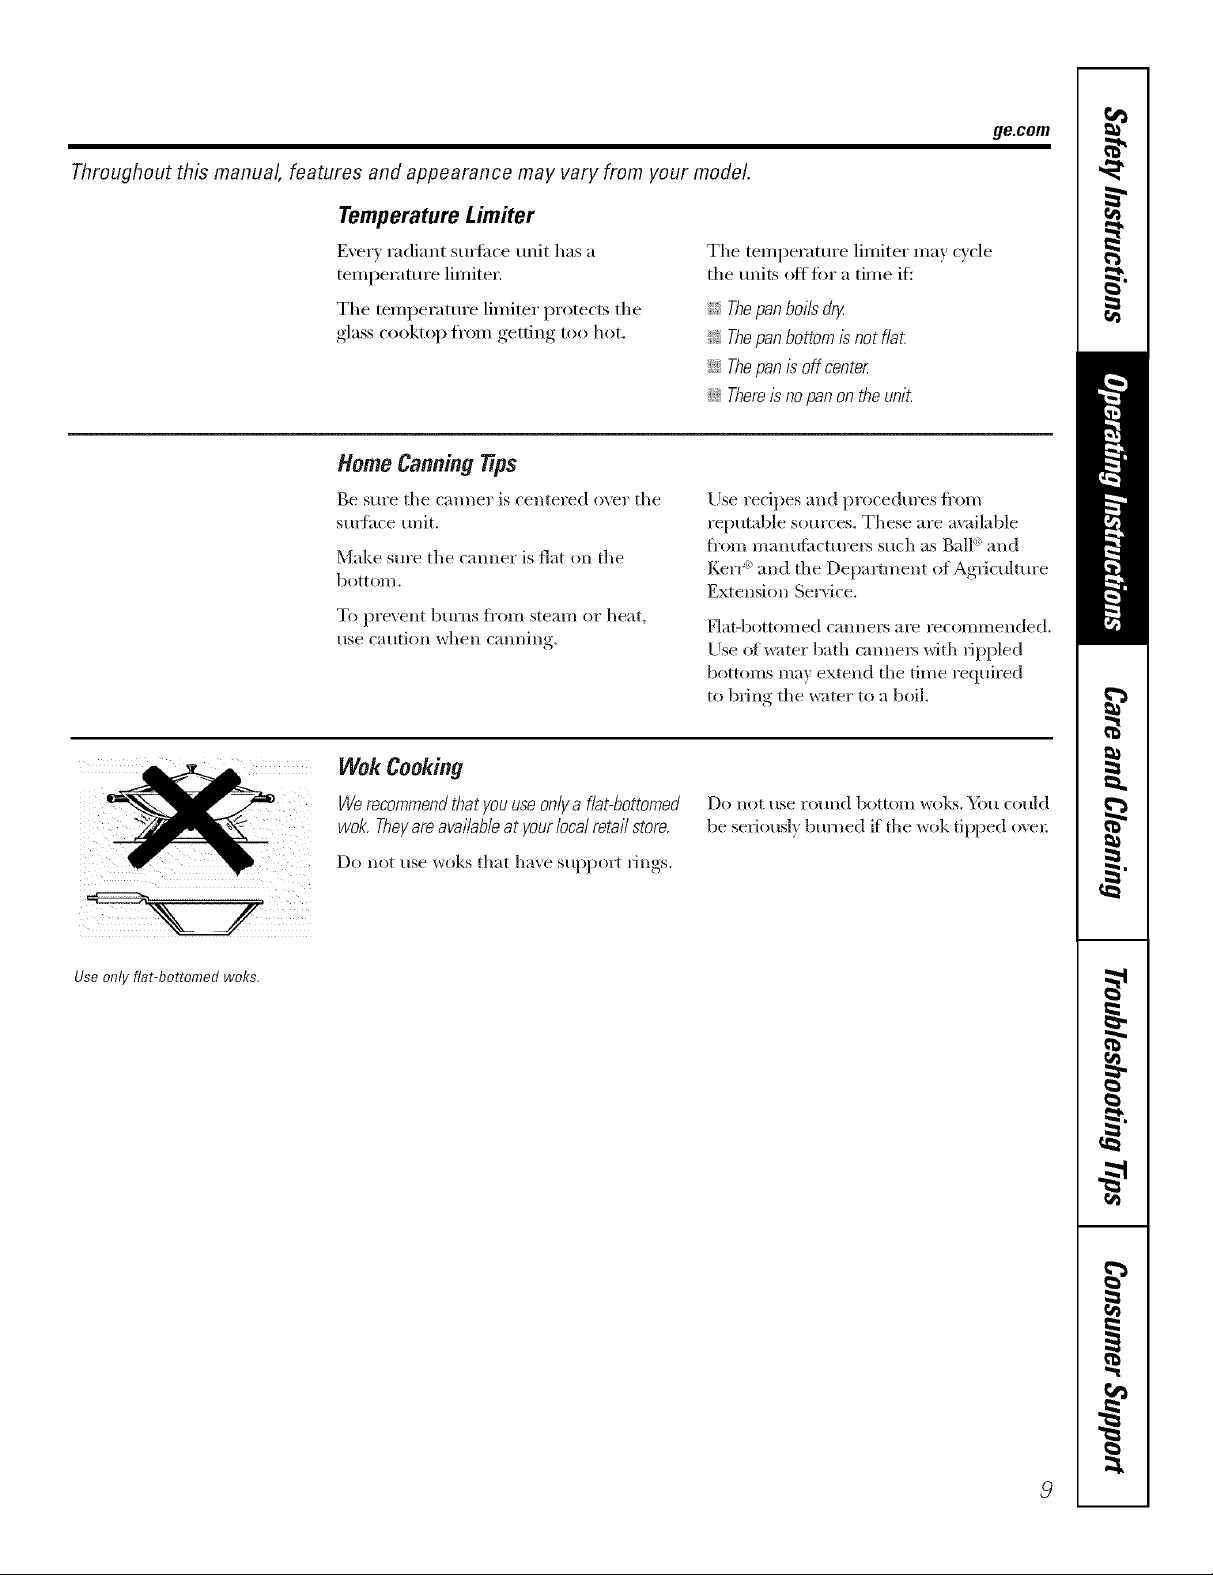
Use only flat-bottomed woks.
Wok Cooking
We recommendthat }/ouuse on/}/a f/at-bottomed
wok. The}/areavai/ab/eat }/our/ocal retai/store.
Do not use woks that have support tings.
Do 110[ use l'Otllld bottolll woks. _()tl cotdd
be selJousl} binned if tile wok tipped o\el:
9
Page 10
Usingthe surface units.
The following information will help you choose cookware which will give good performance on glass cooktops.
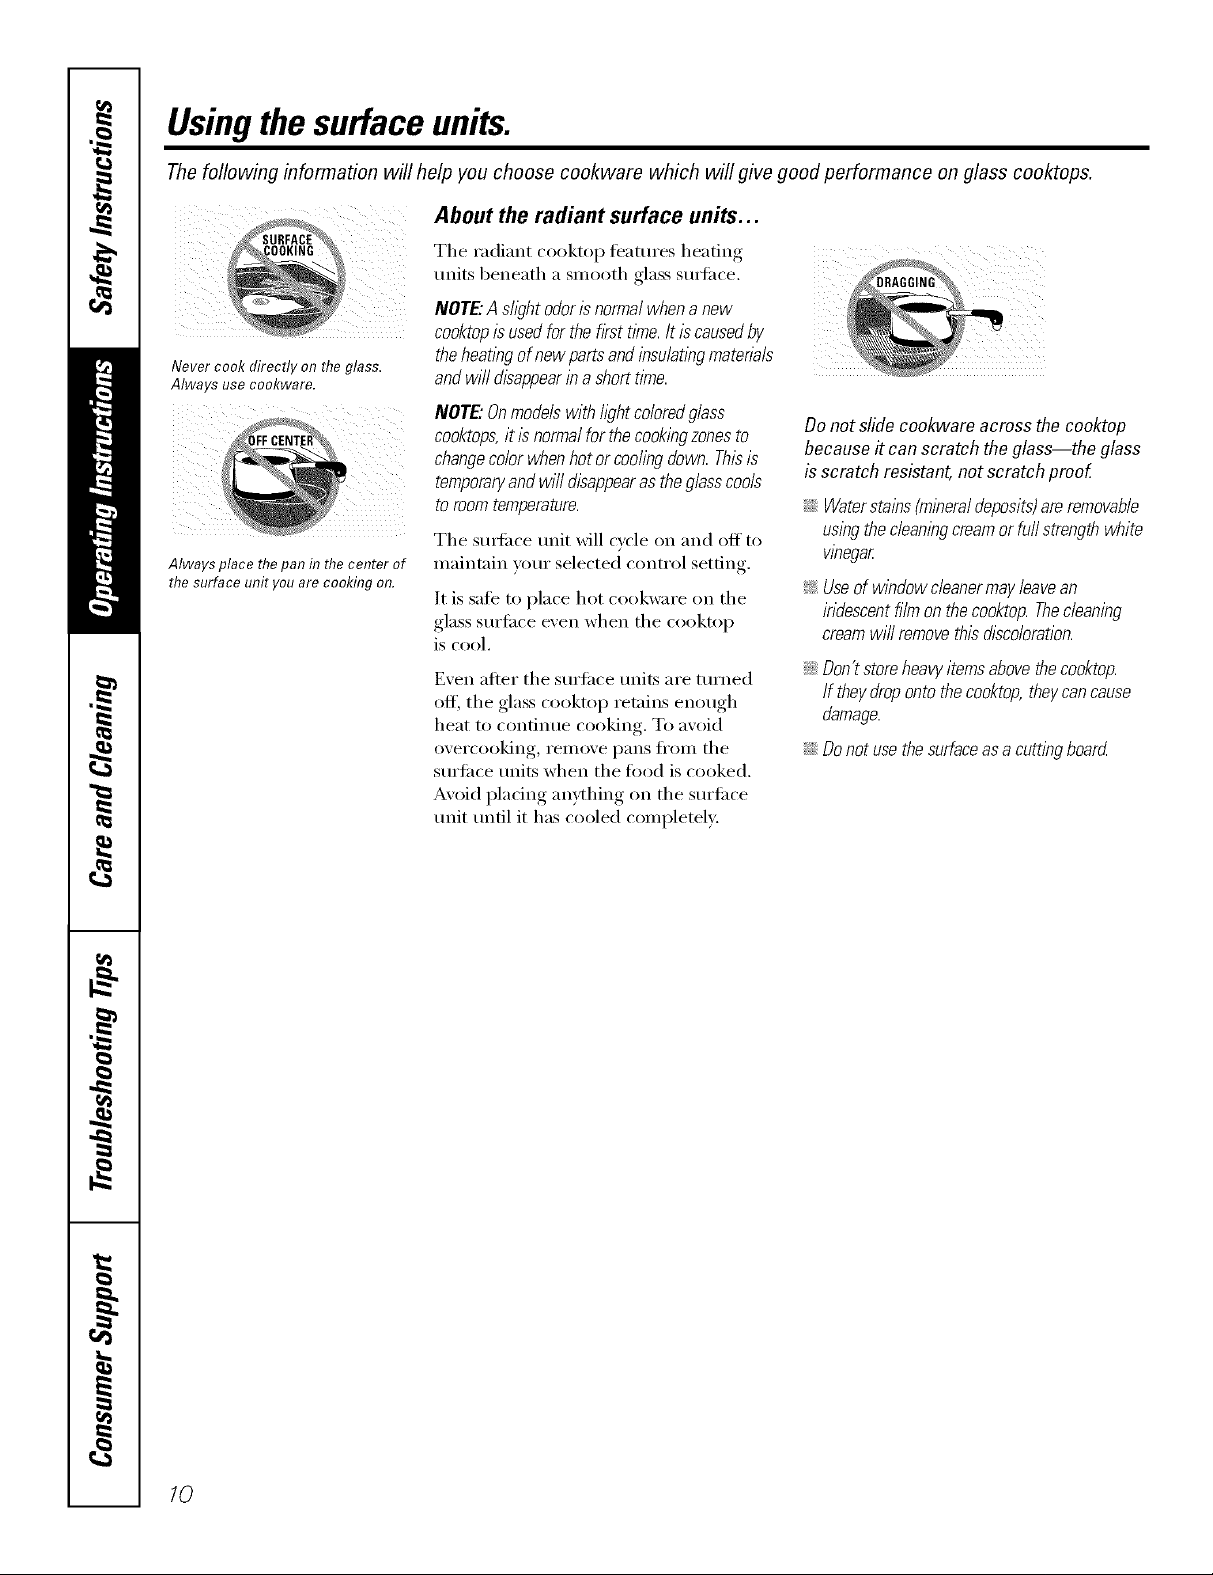
About the radiant surface units...
Tile radiant cooktop teatures heating
units beneath a smooth glass sudi_ce.
NOT£"A sh)ht odoris norma/when a new
Never cook directly on rne glass.
AIwal s use COOKware
AIwavs #lace tlTe#an r7tl?ecenter of
tl?esurface unit you are cooking on.
cooktopisusedforthef, stt,melt,scausedbytheheatingofnewpartsandinsulatingmateriaN
andwill disappearina shorttime.
NOTE."Onmodelswithhghtcoloredglass
cooktops,it/s normalforthecookingzonesto
changecolorwhenhotorcodingdown.Thisis
temporaryandwi//disappearas theglasscools
toroomtemperature.
Tile smtace unit will cycle on and off to
maintain umr selected control setting.
It is sale to place hot cookware on tile
glass surihce e\'en when tile cooktop
is cool.
Even after tile surti_ce units are turned
off, tile glass cooktop retains eno/lgh
heat to continue cooking. To avoid
ovei'cooking_ i'elllOVe i)_liiS ][i'Oiil tile
surtilce units when tile toed is cooked.
Avoid placing an}_hing on tile surfi_ce
unit until it has cooled completely.
Donot slidecookwareacross the cooktop
becauseit canscratch theglass--the glass
isscratch resistant,not scratch proof.
::Ji::Waterstains(mineraldeposits)areremovable
usingthecleaningcreamorfu//strengthwhite
vinegar
_: Useof windowcleanermayleavean
iridescentfilmonthecooktop.Thecleaning
creamwill removethbd12coloration.
::Ji::Don'tstoreheavyitemsabovethecooktop.
If theydropontothecooktop,theycancause
damage.
::J_::Donotusethesurfaceasa cuttingboard
10
Page 11
Selecting types of cookware. 9e.co,,
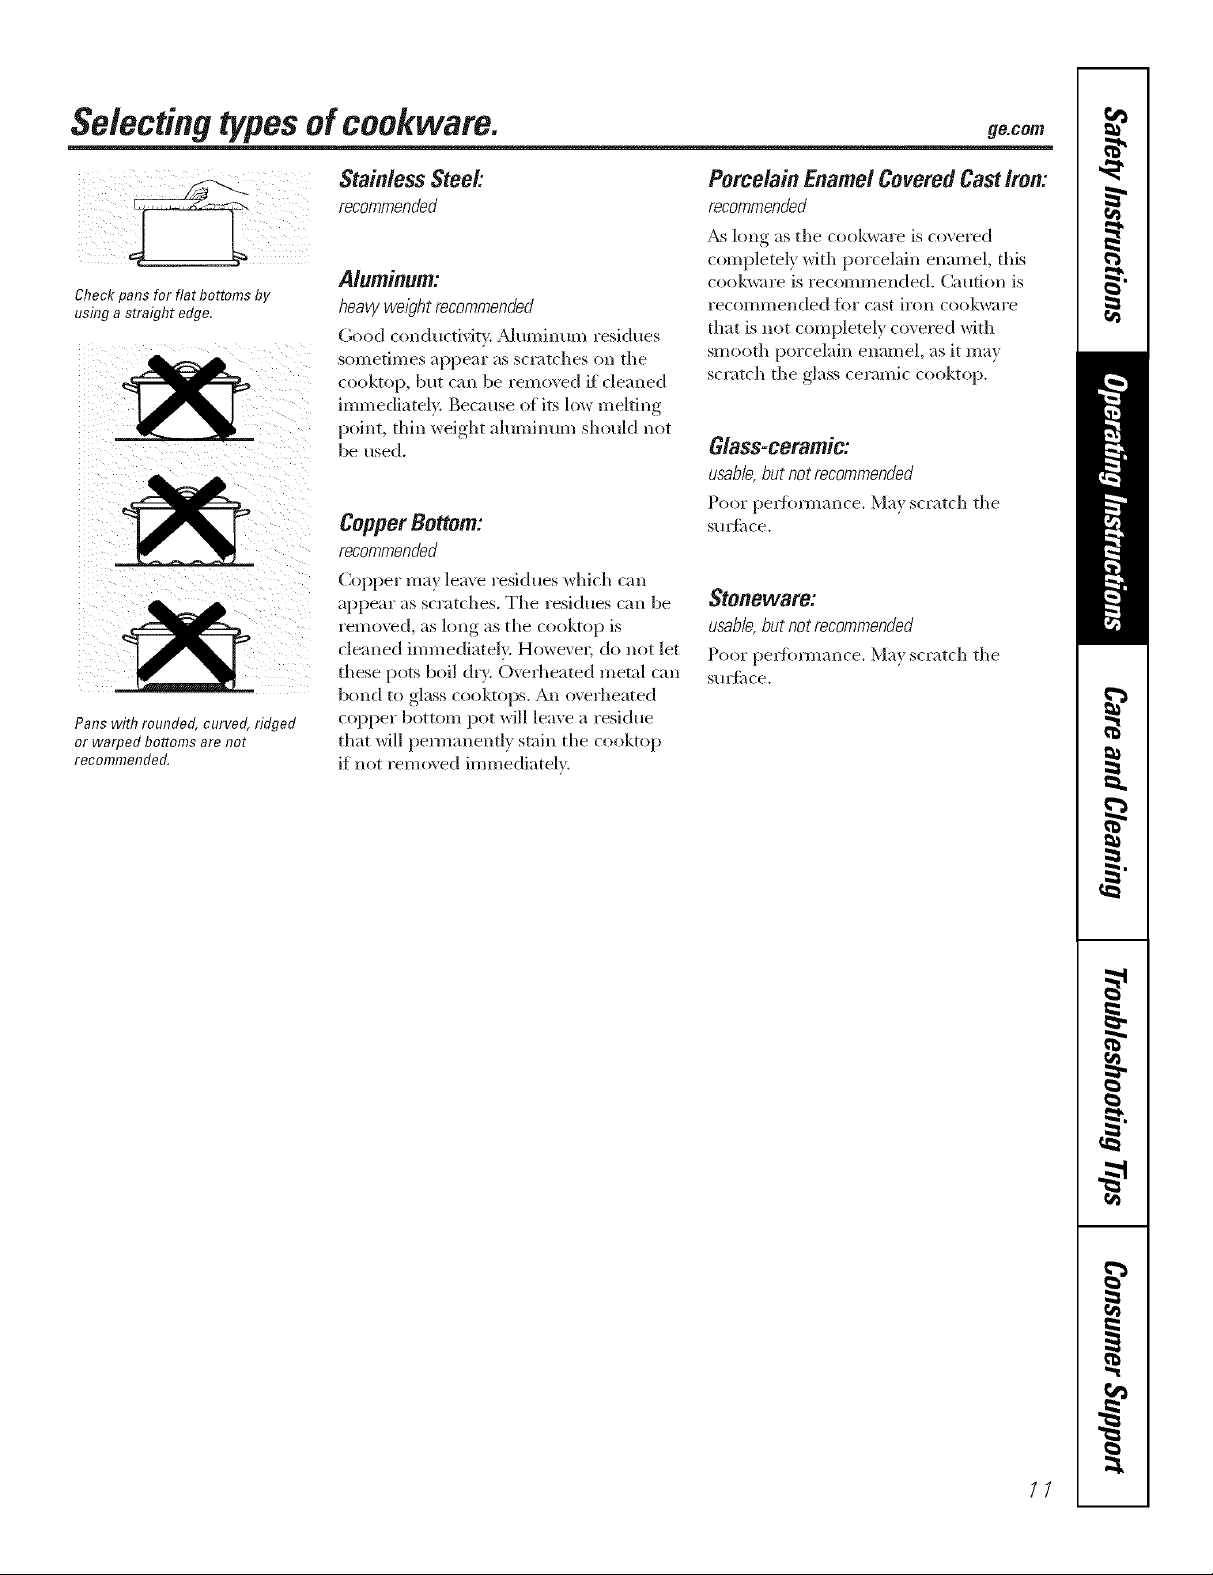
Check pans for flat bottoms by
using a straight edge.
Pans with rounded, curved, ridged
or warped bottoms are not
recommended.
Stainless Steel:
recommended
Aluminum:
heavy we/_?htrecommended
Good conductivity. ;duminum residues
sometimes appear as scratches on the
cooktop, but can be remo', ed if cleaned
immediately. Because of its low melting
point, thin weight aluminum shoukl not
be used.
Copper Bottom:
recommended
(_opper may lem'e residues which can
appear as scratches. The residues can be
_emoved, as long as the cooktop is
cleaned immediately. However; do not let
these pots boil dry. (-)vefl_eated metal can
bond to glass cooktops. An ovefl_eated
copper bottom pot will leave a residue
that will pem_anenfly stain the cooktop
if not remo\ ed immediately.
Porcelain Enamel Covered Cast Iron:
recommended
_ long as the cookware is(oveied
completely with porcelain enamel, this
cook_re is recommended. Caution is
recoi/llllellded ti}r cast iroll cookwal'e
that is not completely covered with
smooth porcelain enamel, as it may
scratch the glass ceramic cool<top.
Glass-ceramic:
usable,butnotrecommended
Poor pel_bunance. May scratch the
Sill _ilce,
Stoneware:
usable,but notrecommended
Poor pel_mmance. May scratch the
Sill _ilce,
//
Page 12
Usingthe ovencontrols.
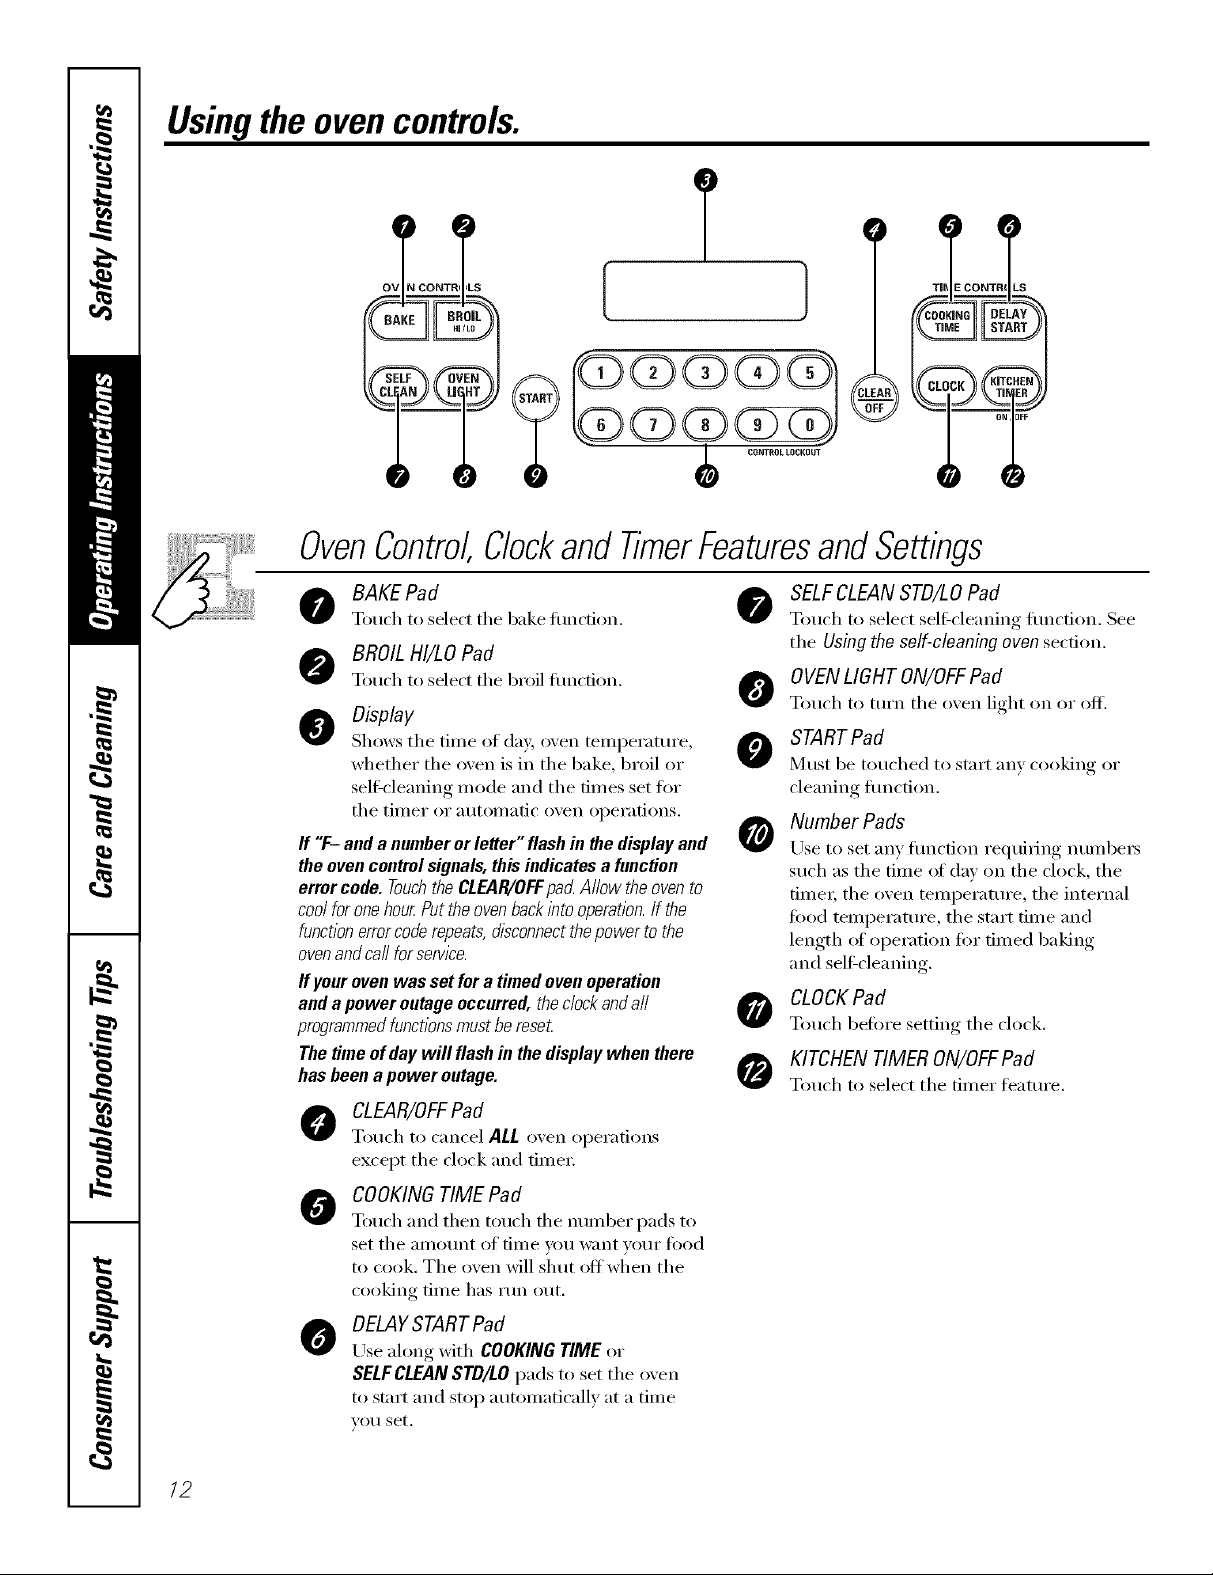
OvenControl,ClockandTimerFeaturesandSettings
T
BAKE Pad
Touch to select the bake timcfion.
BROIL HI/LOPad
Touch to select the broil flmcfion.
Display
Shows tile tiIlle of day, oven teillperattlre,
whether tile oven is in tile bake, broil or
self-cleaning mode and tile times set fi:,r
tile tiIller or atltoI/latic ()veil opei'ations.
If "F- anda numberor letter"flashin thedisplayand
theovencontrolsignals,thisindicatesafunction
errorcode. 7-ouchthe CLEAR/OFFpadAllowtheovento
coolfor onehourPuttheovenbackintooperation.If the
functionerrorcoderepeats,disconnectthepowertothe
ovenandcallforservice.
Ifyourovenwassetfora timedovenoperation
anda poweroutageoccurred,thedockandall
programmedfunctionsmustbereset
Thetimeof daywill flashin thedisplaywhen there
hasbeenapower outage.
CLEAR/OFFPad
Touch to cancel ALLo',en operations
except the clock and fimei;
COOKINGTIME Pad
Touch and then touch tile ntlIllbeI" p[l(1s to
set the _li/lOtlnt of tiil/e VOtl w;lilt VOtli" fi)od
to cook. Tile oven will shut off when tile
cooking tiI/le has I'[In ()ILL
DELAYSTARTPad
0
Use along with COOKING TIME or
SELF CLEAN STD/LO pads to set tile oven
to start and stop automatically at a time
VO/I set,
SELFCLEANSTD/LO Pad
@
Touch to select sel6cleaning flmcfion. See
the Using the self-cleaning oven section.
OVENLIGHT ON/OFFPad
0
Touch to mrn tile oven light on or ofl_
STARTPad
0
Mtlst be touched to stnrt any cooking or
cleaning flmction.
Number Pads
Use to set any flmcfion requiring numbers
such as the time (ff day on the clock, the
time_; the oven temperature, the internal
ti)od temperature, the start time and
length (ff operation Ira" timed baking
and sel6cleaning.
CLOCKPad
Touch befm'e setting the clock.
KITCHEN TIMER ON/OFFPad
Touch to select the timer teatm'e.
/2
Page 13

Usingtheoven. ,ecom
Toavoid possible burns, place the shelves in the desired position before you turn the oven on.
Before you begin...
Theovenhas6shelf _ositions.
The shelves have stop-hwl<s, sty that when
placed correcth' on the shelf suppoi_ts (A
through F), they will stop befi)Ie coining
con_pletely out, and will not tilt.
/Allen plating and removing cookware,
ptlll the shelf out to the bmnp on the
shelf SUpl)O_qt.
Toremove a shell, pull it to_;trd you, tilt
the fi'ont end up and ptil] it out.
Toreplace, place tile end of the shelf
(StOl)-hmks) on the support, tilt up the
fl'ont and push the shelf in.
CAUTION:Whenyouareus,bgthe
shelf lb the Iowest position{,4),youwill need to
usecautionwhen pu/hhg the shelf out. We
recommendthat you puffthe shelf out several
/bchesand then,us/bg two pot holders,puff the
shelf out by holflbg the sidesof it. Theshelf is
low and you couldbe burnedif youplace your
hand /b the middle of the shelf andpufi afl the
way out.Be verycarefulnot to burnyourhandon
the door when us/bg theshelf/b the lowest
position (A).
How to Set the Oven for Baking orRoasting
[] Touch the BAKE pad.
[] Touch the ntunber pads to set the
()veil tellll)erattli'e.
Tochangethe oven temperaturedunbg the
Bakecycle,touch the BAKEpadand set the
new temperature.
Touch the STARTpad. When the
[]
oven starts to heat, the changing
tenii)ei'attu'e will be ill the displa):
The display starts changing once
the tenii)ei'attii'e reaches 100°E
TypeofFood Shelf Position
Frozenpies(oncookiesheet) D
Angelfoodcake A
Bundtorpoundcakes BorC
Biscuits,muffins,brownies, CorD
cookies,cupcakes,
layercakes,pies
Casseroles CorD
Turkey A
Center bakflTgpans m the oven.
Cut stirs f17the foil just like the grid.
[] Touch the CLEAR/OFFpad when
bakino is finished.
Preheating and Pan Placement
Preheat tile (5\ en if the recipe rails for it.
Preheating is necessary fi)r good results
when baldng cakes, cooldes, pastry and
breads.
Topreheat,set theovenat the correcttemperature
Thecontrol will beepwhen the ovenis preheated
andthe d/&/ay wffl show yourset temperature.
Th/2will take approxknately6-10 mbutes.
Aluminum Foil
Never cover the ovenbottom
with aluminum foil.
Youcanusealuminum foil to linethe broiler pan
andbroilergrid However,youmust mold the foil
flghtiy to thegrid andcut siits in itjust iike thegrid
_Munlinuln flfil nlav also be used to catch
a spilloveI: To do so, place a snlall sheet
of foil on a lower shelf several inches
below the food.
Baldng resuhs will be better if baking
pans are centered in the oven as mtich
as possible. If baking with moie than one
pan, place the i)ans so each has at least
1 to 1½" of air space ar(mnd it. If baldng
fimr cake layers at the saine (line, place
two layers Oll rack B and two lave_ olx
rock D. Stagger pans on the rock so one
is not directly oxvr the other:
Never entirely cover a shelf with
ahuninunl fifil. This will (listult) the heat
circulation and result ill poor baking.
13
Page 14

Usingtheoven.
How to Set the Upper Oven for Broiling
Leavethedooropentothebroilstopposition.
Thedoorstaysopenbyitself,yettheproper
temperature is maintained in the oven.
Use LO Broil to cook toods such as
poulU'y or thick cuts of meat thoroughly
without oxe_q)rowning them.
[] Place the meat or fish on the broiler
grid in the broiler pan.
[] Follow suggested rack positions in
the Broiling Guide.
If yourrangeis connectedto208volts,
raresteaksmaybe broiled bypreheating
thebroiler andpositioning the ovenrack
oneposition higher
[] Touch the BROILHI/LO pad once fi)r
HI Broil
To change to LOBroil, touch the
BROILHI/LO pad again.
Broiling Guide
The size, weight, thickness,
starting tempemttu'e Food
and Votlr preference Ground Beef
of doneness will affect Well Done
broiling times. This guide
is based on meats at
reflJgerator temperatm'e.
+ The U.& i)@artm_l o/Ag'ricullu_
_gs "l_a_ bee/is popuho; but you
_houM hn0zl!thai _ookhzg it to o_d_ Rarer
14001``m_,(ms somejood poism_i_g Medium
oqGzmismsm(n survive. " (,%tmw We[[Done
5,a/e Food Book. }_)u_Kitche*z
(;uide. __,1).tR_,v.]um_ 19>;5.)
Beef Steaks
Rarer
Medium
Well Done
Chicken
LobsterTails
Fish Fillets
Ham Slices
"_receoked)
Pork Chops
Well Done
SahnonSteaks
Quantityand/
or Thickness
1lb.(4 patties)
1/2 to 3/4" tldck
1" thick
1to 1VzIbs.
1½"tbick
2 to 21/zIbs.
1whole cut up
2 to 2YzIbs.,
split lengthwise
2 Breasts
24
10to 12 oz.each
1/4to 1/2" tldck
1/2" thick
2 (1/2" thick)
2 (1" tbick)about 1 lb.
2 (1" tbick)
4 (1" tbick)about 1 lb.
Shelf
Position
F
E
E
D
D
D
D
E
D
D
D
[] Touch the START pad.
[] _'_hen broiling is finished, touch the
CLEAR/OFFpa d.
FirstSide
Time(rain.)
11
11
14
18
22
25
25
18_0
10
15
10
12
Second Side
Time (rain.)
9
7
9
6
10
5
6W
89
11
14 16
20
10
10 15
Donot
turn
ovelt
10
15
78
10
Comments
Spaceevenly.Upto8
pattiestakeabout the
sametime.
Steakslessthan1"
thickcooktbrough
beforebrowning.Pan
fryingis recommende(
Slashfat.
Broilskin-side-down
first.
Cutthroughbackof
shell. Spreadopen.
Brushwith melted
butterbeforebroiling
andafter half of
broilingtime.
Handleandturnvery
carefully.Brushwith
lemonbutterbefore
andduringcooking,
if desired.
Increasetiroe 5 to 10
minutesperside for
11/z"tldck orhome-
curedham.
Slashfat.
Grease pan. Brush
steaks with melted
butter.
14
Page 15

Usingthe clock,kitchen timer and controllockout, gocorn
To Set the Clock
Make sure the clock is set to the
correct time ofda_
i i!!'>@?!i i
OR]OFF
The Kitchen 77merisa minute timer only.
The Kitchen T#ner does not control
oven operations. Themaximum
set&?gon the Kitchen Timeris 9 hours
and 59 mh?utes.
Tile clock must be set to tile correct time
of day fi>r tile automatic oven timing
hmctions to work properly. Tile time of
dW calmot be changed dm'h*g a timed
baldric or selgcleaning cycle.
To Set the Kitchen Timer
[] Touch tile KITCHEN TIMER
ON/OFFpad.
[] Touch tile number pads until tile
ai//otlnt of time }o/x want shows
in tile display: For example, to set
2 houI_ and 45 ininutes, touch 2, 4
and 5 in that ordei: If you make a
mistake, touch tile KITCHEN TIMER
ON/OFF pad and begin again.
[] Touch tile STARTpad.
After touching theSTART pad, SET disappears,
thistells youthe time iscounting down, although
ToReset the Kitchen Timer
[] Touch tile CLOCKpad.
[] Touch tile number pads.
[] Touch tile START pad.
the displaydoesnot change until oneminute has
passed Secondswff/not beshown in the d/spley
until the lest mleute is counting down.
[] X._q/entile tqtchen Timer reaches .OO,
tile control will beep 3 times followed
by one beep every 6 seconds/mtil
tl;e KITCHEN TIMER ON]OFF pad
is touched.
The6-secondtonecanbecanceledbyfollowleg
thestepsin theSpecialfeaturesofyouroven
controlsectionunderTonesat theEndofa
T/medCycle.
CONTROL LOCKOUT
If tile display is still showing tile time
remaining, you may change it by
touching tile KITCHEN TIMER ON]OFFpad,
then touch tile nmnber pads tmtil tile
time you want appeai_ in tile display:
ToCancel the Kitchen Timer
Touch tile KITCHEN TIMER ON/OFF
pad twice.
Control Lockout
Yourcontrolwillallowyoutolockout thetouch
padssotheycannotbeactivatedwhenpressed
or whencleanlegthecontrolpanel.
To actix Ke this feature:
Touch tile 9 and 0 touch pads
[]
at tile same time until tile control
beeps twice, The display will show
I,OC continuously and tile time of
(lm if not blacked Otlt.
If tile remaining time is not in tile display
(clock, delay start or cooking time are in
tile display), recall tile remaining time by
touching tile KITCHEN TIMER ON]OFFpad
and then touching tile ntlIIlbeF pads to
enter tile new tiI/le Veil want.
NOTE"Aft cookingand tl_nlegfunctionswill be
cancelledwhen locklegout the control
[] To mflock tile control, touch and
hold tile 9 and 0 pads at tile same
time tmtil tile control beeps twice,
and LOCwill be removed fl'om
the display.
15
Page 16

Usingthe timed bakingand mastingfeatures.
NOTE" Foods that spoil easily--such as milk, eggs, fish, stuffings, poultry and pork--should not be allowed to sit for
more than 1hour before or after cooking. Room temperature promotes the growth of harmful bacteria. Be sure that
the oven light is off because heat from the bulb will speed harmful bacteria growth.
How to Set an Immediate Start and Automatic Stop
iiiQQQQ(D
@@@@@
@(Z>@@@
¸/¸¸{(i¸7jii @) }ji)
Theoven will turnon lYnmediatelyandcookfor
aselected lengthof time.At the endof the
cookIw time the oven will turnoff automatically
[] Touch the BAKEpad.
[] Touch the number pads to set the
desired oxen temperature.
[] Touch the COOKING TIME pad.
NOTE: If yourrecipe requirespreheating,youmay
need to addadditional t/meto the length of the
cookingtime.
[] Touch the number pads to set the
desired length of cooking time. The
minimum cooking time you can set
is I minute.
Tile oven teml)erature that you set
and tile cooking time that you
entered will be in the display.
[] Touch tile STARTpad.
Tile oven Mll mrn ON, and tile display _dll
show file cooking time countdown and tile
changing temperature strafing at 100°F.
(Tile temperature display Mll start to
change once file (wen telllpeI_KtlI'e reaches
100°E) X._]/en the oven reaches the
mmperature you set, 3 beeps will sound.
The oven will continue to cook fin.
the set amount ot time, then mrn off
automatically, unless tile _._&l{[_/lfeature
was set. See the How to Set the Oven for
Warmingsection.
[] Touch tile CLEAR/OFF pad to clear
tile display if necessary: Remove tile
fl_od from tile oven. Remember;
even though tile oven turns off
automaficall); food left in tile oven
will con[.intle cooking al*eI" tile oven
tt II'ns ()fl_
NOTE."Anattentiontonewi//soundif youareuslW
flmedbakinganddonottouchtheSTARTpad
How to Set a Delayed Start and Automatic Stop
@@@@@
@@@@@
@@@@@
@@@@@
@(Z>@@@
i i
@@@@@
16
Theoven will turnon at the time of day youset,
cookfor a speci@ length of time and thenturn off
automatically
Make stlre tile clock sho_:s tile correct
tim e of da>
[] Touch tile BAKEpad.
[] Touch tile number pads to set tile
desired oxen temperature.
[] Touch tile COOKINGTIME pad.
NOTE: If yourrecipe requirespreheating,youmay
need to addadditional time to the length of the
cook/w t/me.
[] Touch tile number pads to set tile
desired length of cooking time. The
minimum cooking time you can set
is 1 minute.
Tile oven temperature that you set
and tile cooking time that you
entered will be in the displa),
[] Touch tile DELAYSTART pad.
[] Touch tile number pads to set tile
time of day you want tile oxen to
tt/i'ii on _lll(1 start cooking.
[] Touch tile STARTpad.
NOTE."Anattentbntonewillsoundif youareusIw
flmedbakbganddonottouchtheSTARTpad
NOTE:If youwouldliketocheckthetimes
youhaveset,touchtheDELAYSTARTpadto
checkthestarttimeyouhavesetortouchthe
COOKINGTIMEpadto checkthelength
ofcookingtimeyouhaveseL
_,_qlen tile oven turns ONat tile dine
of day you set, tile display will show tile
cooking time countdown and tile
changing temperature strafing at 100°E
(Tile mmperature display will start to
change once tile oven temperature
reaches 100°E) X._l/en the oven reaches
the temi)eratme you set, beeps will so/md.
The oven will continue to cook t0r
tile set anlount of dine, then turn off
automaticall> unless tile WARM featm'e
was set. See tile How to Set the Ovenfor
Warmingsection.
[] Touch tile CLEAR/OFFpad to clear
tile display if necessm T. Remove tile
food fl'om tile oven. Remember;
even though tile oven turns off
automatically, t0od left in the oven
will continue cooking after the oven
tt II'ns ()J_
Page 17

Special featuresofyourovencontrol ge.com
Yournew touch pad control has additional features that you may choose to use. The following are the features
and how you may activate them.
Thespecial feature modes can only be activated while the display is showing the time of day. They remain
in the control's memory until the steps are repeated.
When the display shows your choice, touch the $TARTpad. The special features will remain in memory after
a power failure, exceptfor the Sabbath feature, which will have to be reset.
12-Hour Shutdown
D
With this feature,should youforget and leave the
ovenon, thecontrol wi// automatically turn off the
ovenafter 12hours dunbgbak/bg functionsor
after 3 hoursdunbg a broil function.
]f_ou wish to mrn OFFthis feature, fidlo_
the steps belong.
[] Touch the BAKEand BROIL HI/LO
pads at the same time m_til the
displa_ shows SE
[] Touch the BELAYSTART pad tmfi}
no shdn (no shut-off) appem_ in the
displa).
[] Touch the START pad to activate the
no shut-off and lea_e the control
set in this special ieamres mode.
Fahrenhe# or Celsius Temperature Selection
YourovencontrolissettousetheFahrenheit
temperatureselectionsbutyoumaychangethis
tousetheCelsiusselections.
[] Touch the BAKEand BROILHI/LO
pads at the same time until the
(lispla_ shows SF
[] Touch the COOKINGTIMEand BROIL
HI/LO pads at the same time. The
(lisp}a) will show F (Fahrenheit).
[] Touch the COOKING TIMEand BROIL
HI/LO pads again at the same time.
The displa} will show C (Celsius).
[] Touch the STARTpad.
Tonesat the End of a Timed Cycle
/i)iii ilii:iiii(il)
@
At the end ofa timedcycle, 3 short beeps will
soundfollowed by one beepevery 6seconds
until the CLEAR/OFFpadis touche_ This
continual 6-secondbeepmaybe canceled
To cancel the (;-second beep:
[] Touch the BAKE and BROILHI/LO
pads at the same time tmtil the
display shrews SE
Cook and Hold
Yournew controlhas acook andhold feature that
keepscooked foodswarm for up to3hoursafter
thecookingfunction is flbishecL
To acdx Ke this featm'e, follow the
steps below.
[] Touch the BAKE and BROILHI/LO
pads at the same time tmti} the
display shrews SF
[] Touch the KITCHEN TIMER ON/OFF
pad. The display shows CON BEEP
(continuous beep). Touch the
KITCHEN TIMER ON/OFFpad a_fin.
The display sho_:s BEER (This cmcels
the one beep ever)' 6 seconds.)
[] Touch the STARTpad.
[] Touch the COOKINGTIMEpad.
The (lispla_ xdll show Hid OFF.
Touch the COOKINGTIME pad again
to activate the teatme. The display
will show Hid ON.
[] Touch the START pad to activate
the cook and hold Ii_atm'e and
leave the control set in this
special ti_atm'es mode. 17
Page 18

Special featuresofyourovencontrol.
12-Hour, 2#-Hour or C/ock Blackout
Yourcontro//sset to usea 12-hourc/ock
,Q
0,
If*ou *_(>uld pretbr to hme a 24-h( m
militm", time clock or black out the clock
display, fi)llow the steps below.
[] Touch the RAKE mid BROILH//LO
pads at the s_m_e time mltil the
displa? sho_s SE
Touch the CLOCKpad (race. The
[]
displ_Lx will show 12hr. If this is
the choice you want, touch the
START pad.
Touch the CLOCKpad again to change
to tile 24 hour militm)' time clock. Tile
display will show 24hr. If this is the choice
you want, touch the START pad.
Touch tile CLOCKpad again to black out
the clock display. Tile display will show
OFF.If this is the choice you want, touch
the START pad.
NOTE:If thedockIL_Intheblack-outmode,you
willnotbeabletousetheDelayStartfunction.
18
Page 19

Usingthe Sabbathfeature.
(Designed for use onthe Jewish Sabbath and Holidays) (On some models)
TheSabbathfeature canbe usedforbaking/roastingonlg It cannot be usedfor convection,broiling,self-cleaning or
DelayStart cooking.
NOTE;Theovenlightcomesonautomatica/fy(onsomemodels)whenthedoorisopenedandgoesoffwhenthedoorisclosed.Thebulbmaybe
removed.SeetheOvenLightReplacementsection.Onmodelswithalightswitchonthecontro/pane/,theovenlightmaybeturnedonand/efton.
How to Set Sabbath Feature for Regular Baking/Roasting
Using the mmfl)er pads, emer ill(
(lesired tel/iperalilre betweell 170'F and
550:'E No signal or temperature will be
gJ'V( l/.
Touch die START pad.
[]
Atier a random dela} period of
[]
approximalel? 30 seconds to 1 inhmw,
D c will appear ill the display
indicating that the o_en is baking!
roasting. Tip c (Ioesn'l apllear in tile
display, start ag;dn at Step 4.
To a(Ijust tile o_en temperatmx', touch tile
BAKEpad, emer tile new temperature using
th( ram/beT pads and touch th( STARTpad.
NOTE: Tile CLEAR/OFFand COOKING TlME pads
Hr(' }lctive (l/llJI/g the Sabbath Ibatmx.
@@@(Z}@
%7/¸(@{ (}/ []
When flTedisplay shows D the []
oven is set in Sabbath. When the
display shows D C the oven is
baking/roasting. []
Make sure the clock shows the correct time of day and [_]
theoven is off
Tou(h and hoM both ih_ BAKEand
[]
BROIL HI/tO pads, at the same time, mldl
th( display shows SE
NOTE: If bake or broil appears in the
displa), tile BAKEand BROIL HI/tOpads
w(re not touch(d at tile same time.
'Ibuch tile CLEAR/OFFpad and begin
ag:dn.
']Sp tile OELAYSTART pad mltil SAb bAtH
appears in th( (tispla}.
Touch dw START pad and D will apl)ear
in he ( ispl IX:
'Ibuch dw BAKE pad. No signal will
be_,iv(n.
ge.com
(3}@@@@
@@@@@
@@@6}@
@@@@@
@
When the display shows D the
oven is set t7 Sabbath. When the
display shows D C the oven is
baking/roasting.
!{} ili i!i} iliii ! i
How to Set Sabbath Feature for Timed Baking/Roasting--
Immediate Start and Automatic Stop
Make sure the clock shows the correct time of day and I_q "lbud_ the START pad.
theoven is off
"lbuch and hoM both the BAKEand
[]
BROILHI/tO pads, at the same time, umil
the display sho_:_ SE
NOTE:If bake or broil at/pears ill the
dist/la }, tlie BAKf and BROIL HI/LOpads
were llot touched at tile sam( time.
"Ibuch die CLEAR/OFFpad and begdn
agvdn.
Tap the DELAYSTART pad mltil SAb bAtH
[]
appem:s in d_e display.
"Ibuch the START pad and D will appear
[]
in the (tispla)
"Ibuch the COOKING tiME pad.
[]
"Ibuch tile mtmber pads to sei the
[]
desired lenglh of cooking time between
1 mim_m and 9 hom:s and 59 mimlws.
The cooking time thai you entered will
be displayed.
] "lbu(h the BAKEtYad. No sigllal will 1)e
g]'_ el/,
] Lsing the taunt er pads, enter the
desired [e]//l)el'Htllre, No sigllal or
|emperamre will be gixen.
] "l'oud_ the START pad.
[_ ,\fmr a random delay t)eriod of
apt)roximatel) 30 se(/mds |o 1 retire|e,
D C will appear in tile displa} indi(adng
dla| the o\en is baking/roasting. II D C
doesn't appear in the displa}, start aKrOn
at Stop 7.
"Ib a(!just the oven ten/t)eratm:e , |ouch |he
BAKEpad, enter the new temperat m:e using
tile mtmber pads and touch the STARTpad.
When (ooking is finished, the display will
change tir)m D c to D and 0:Q0will al/pea c
indicating that the oven has turned OFFbut is
still set in Sabbath. Remoxe the cooked ti)od.
How to Exit the Sabbath Feature
F1I "lbu(h |he CLEAR/OFFpad.
I.,'1
] It |he ovell is (ooking, wait ti)r a ralldom
dela} period of apt/roximately 30
se(ol/ds tO ] l//illIlie, /lllIil 01/1% D
is ill the dist)lay.
] "lbuch and hoM both the BAKEand
BROILHI/LO pads, at the same time, mJdil
|he displ; 9 shows SE
[_l Tap |he DELAYSTART pad umil 12shdn
i/i
or no shdn apt/ears in the distlla }
] (_hoose 12shdn, iH(ticatiHg that |he oxen
will automaiicalh |urn otI" afler 12 horn's
or no shdn, indk ating d_at die oven will
not automatically mrn offa/ier 12 hom:s.
Tou(h SYnRTwhen the Olltion that you
FX]
I_1 Wallt is in the dislllay (12 shdn or no shdn).
NOTE: If a power ou|age occm:red while
|he oven was in Sabt)ath, the oven will
a/ltOH/aIicallv [[Irll Off Gild sta_ ott e\ ell
when |he power returns. The oven ]
(OI/tFO1 lllllS| be reset.
Page 20

Adjustthe oventhermostat--Do it yourself!
Youmay find that your new oven cooks differently than the one # replaced. Use your new oven for a few weeks to
become more familiar with it. If you still think your new oven is too hot or too cold, you can adjust the thermostat
yourself.
Do not use thermometers, such as those found in grocery stores, to check the temperature setting of your oven.
These thermometers may vary 20_40 degrees.
NOTE,"This adjustment will only affect baking and roasting temperatures; # will not affect broiling, convection or
self-cleaning temperatures. The adjustment will be retained in memory after a power failure.
To Adjust the Thermostat
G+D
O}(Z>@@Q
QQQ@@
®
[] Touch the BAKEand BROILHI/LO
pads at tile same time until tile
display shows BE
[] Touch tile BAKE pad, A v,_o digit
number shows in tile displa?.
Touch BAKEagain to alternate
between increasing and decreasing
tile ovffsl temperature.
] Tile (5veil teil/pel'attll'e C;III be
a(!)usted up t(5 (+) ?5 F hottel (51 (-)
35°F coole*; Touch tile number pads
tile same way you read them. For
example, to change tile (5\ell
temperature ] 5°K touch I and 5.
[] _qlen }ou have made tile
ac{)usnnent, touch tile STARTpad to
go back to tile time (Y day display.
Ijse }'(Till" oven ;IS you would 51(sI_///;ll]y.
Thetype ofmargarine will affect bakingperformanc!!
Most recipes for baking have been developed using high fat products such as butter or margarine (80%fat). If you
decrease the fat, the recipe may not give the same results as with a higher fat product.
Recipe failure can result if cakes, pies, pastries, cookies or candies are made with low fat spreads. Thelower the
fat content of a spread product, the more noticeable these differences become.
Federal standards require products labeled "margarine" to contain at least 80% tat by weight. I,ow tat spreads, on tile
other hand, contain less tat and more water: The high moisture content ot these spreads affects the texture and flavor
ot baked goods. For best results with veto" old ti_\'orite recipes, use margarine, butter or stick spreads containing at least
70% vegetable oil.
2O
Page 21

Usingthe warming drawer, ge.com
The warming drawer will keep hot, cooked foods at serving temperature. Always start with hot food. Do not
use to heat cold food other than crisping crackers, chips or dry cereal.
WARNIRGDRAWER
OFF
NED
To Use the Warming Drawer
Push and mrn the control knob to any
desired setting,
When Using the Warming Drawer
The wamfing drawer will keep hot,
cooked fl)o(ls _mm. _Mwav_start with hot
fi)ocl. Do not use to heat cold fi)od other
than crisping cracke_, chips or (hT cereal.
Donot line the warming drawer or pan
with aluminum foil. Foil is an excellent heat
insulator and will trap heat beneath it. This
will upset theperformance of the drawer
and could damage the interior finish.
Allow approximately 25 minutes for the
warming drawer to preheat.
_: Do not put liquid or water in the
wamfing (h'awe_:
::Ji::All foocls placed in the wamfing drawer
should be covered with a lid or
ahmfinum fifil. When wamfing pastries
or breads, the cover should be vented
to allow moisture to escape.
::Ji::Food should be kept hot in its cooking
container or transferred to a heat-sati _
serving dish.
CAUTION:P/astl?containersorp/ast/?wrap wi//
melt if in dkect contact with the drawer, panor ahot
utensil Me/ted p/astlc maynot beremovableand/s
not coveredunderyour warranty
_: Remove serving spoons, etc., before
placing containe_ in wamfing (h'awe_:
21
Page 22

Usingthe warming drawer.
Temperature Selection Chart
To keep several different tbods hot,
set the control to tile fl)od needing tile
highest setting.
_: The temperature, t}])e and amount
ot fl)od, and the time heM will affect
tile quali U oI tile fi_od.
_: Repeated opening oI tile drawer allows
tile hot air to escape and tile fi)od
to cool
_4"ith laroe loads it may be necessax_ to
use a higher wamfino drawer setting
and co%eF SOille of tile cooked food
items.
iJi::Do not use plastic contninet_ or
plastic wrap.
ToCrisp Stale Items
!_'JPlace food in lo_si(led dishes or pans.
_: Preheat on LOsetting,
::Ji::Check crispness after 45 minutes. Add
time as needed.
IFoodType ControlSettingI
Bacon HI
Breads LO
Casserole MED
Chicken,fried HI
Ham HI
Muffins LO
Pies LO
Pizza HI
Potatoes,baked HI
Tortilla Chips LO
CAUTION:Do not keep foodin the warming
drawer for more than two hours.
ToWarm Serving Bowls and Plates
To wam_ se_Mng bowls and plates, set tile
control on LO.
!_'JUse only heat-sale dishes.
_: If you want to heat fine china, please
check with the manufi_ctm'er of the
dishes for their maxim um heat
tolerance,
::Ji::Ym may wam_ erupt' serving dishes
while preheating tile drawe_:
CAUTION:Disheswi//behot.Usepotholdersor
mittswhenremovinghotdishes.
22
Page 23

Usingthe self-cleaning oven. gecom
Theoven door must be closed and all controls set correctly for the cycle to work properly.
Before a Clean Cycle
Wipe up heavy soil on flTe
over bottom.
_\'e reconnnend venting your kitchen
with an oi)en window or using a
ventilation tim or hood during tile
fii_t sel6clean cycle.
I_.einox e tile broiler i)an, broiler grid,
all cookware and any ahuninun/fifil
fI'OIl/ the o_,eil.
NOTE."
::Ji::If your oven is equiI)I)ed with shiny,
silvei=colored oven racks, ren/ove then/
betore you begin the sel6clean cycle.
::Ji::If your ()veil is equii)i)ed with gray
i)orcelain-coated ()veil racks, they
nlav be left in the oven during the
self clean cycle.
Tile shiny, silvei_colored oven racks
(Oil sonle nlodels) and the convection
roasting rack can be sel6cleaned, but they
will darken, lose their lusmr and beconle
hard m slide.
Soil on tile fl'ont fl'anle of tile range and
outside the gasket Oil the door will need
to be cleaned by hand. Clean these areas
with hot watei; soap-filled steel-wool i)ads
or cleansei_ such as Soft Scrub _Rinse
well with clean water and dry.
Do not clean the gasket. The fibeiglass
nlaterial oI the ()veil door gasket cannot
withstand abrasion. It is essential tor tile
gasket to renlain intact. If you notice it
becon/ing worn or ti'ayed, rei)lace it.
Wipe up any hea\?' sI)illoveI_ on the
()veil bot[oiil.
Make sure tile ()veil light bulb cover is
in I)lace and the ()veil light is ofli
IMPORTANT'.The health of some birds
is extreinelv sensitive to the flunes given
off during tile sell=cleaning cycle oI any
range. Move birds to another well-
ventilated roonl,
@
(DO(D(D(D
(3)(E)(DQ(D
How to Set the Oven for Cleaning
[] Touch tile SELFCLEAN pad
on(e [()I" a _4-h()/IF t-]eall [iIlle or
twice till" a 4-horn" clean tin/e.
A 3-hour selgclean time is
I'eColllI/lended f(H" rise whell
cleaning small, contained sl)ills.
A sell:clean time of 4 hom_ or
longer is recolnmended fin"
a dirtier oven.
V2] If a time other than 4 hom_ or
3 horn's is needed, use tile number
pads and enter tile desired
clean time.
YOu can change tile clean dine to an)
tin/e bet_een 2½ hom_ and 5 houI_,
del)ending, on how dirt_ _our o'_en is.
[] Touch tile STARTpad.
Tile door locks automatically. Tile display
will show tile clean tiine i'emaining. It will
not be i)ossible to oi)en tile o\en door
until tile tempemtuie drops below the
lock temperature and tile LOCKED light
goes off.
When the LOCKEOlight goes off; you will
be able to open tile (lo(n:
_: Tile word LOCKED will flash and tile
word deorwill disl)lay if you set tile
clean cycle and toiget to close tile
()veil door.
_: To stop a clean cycle, touch tile
CLEAR/OFFpad. _]/eI1 tile LOCKEDlight
goes off, indicating the oven has cooled
below tile h)c!dng tenll)eramre , you
will be able to oi)en tile (h)oi:
23
Page 24

Usingthe self-cleaning oven.
Theoven door must be closed and all controls set correctly for the cycle to work properly.
How to Delay the Start of Cleaning
(D(D(D(D(D
(D(D(D(D(D
(DQ(D(D(D
(D(5)(D(DQ
[] Touch tile SELFCLEAN pad
once fin" a 3-hour clean time or
twice for a 4-hour clean time.
A 3-hour self=clean time is
recommended fin" use when
cleaning small, contained spills.
A self:clean time of 4 l/om_ or
longer is recommended fin.
a dirtier oven,
[] If a time other than 4 hom_ or
3 hom_ is needed, use tile number
pads and enter tile desired
clean time.
Y_m can change tile clean time to am
fiIne between 2½ houls and 5 houi_,
dei)ending, on how dirt_, your, oxen is.
After a Clean Cycle
You may notice some _dlite ash in tlle
oven, Wipe it up with a damp cloth after
tile ()',ell cools.
If white spotsremain,remove them with a soap-
filledsteel wool pad and rinse thoroughlywith
a vinegarandwater mMure.
These deposits m'e usually a salt residue
that cannot be remo\vd by tlle clean
cycle.
If tlle oven is not clean after one clean
cycle, repeat tile cycle.
[] Touch tile DELAYSTARTpad.
[] Using tile number pads, enter tile
time of (la_ _(:,t:lwant tile clean cycle
to stnrt.
[] Touch tile STARTpad.
Tile door locks automadcall); Tile display
will show tile start time. It will not be
possible to open tile oven door until
the temperature drops below the lock
temperature and tile LOCKEDlight
goes off.
_4]/en tile LOCKEDlight goes off, 7:,u
will be able to open tile dora:
_: _i_)tl cannot set tile ()veil lor cooking or
another selfXclean cycle until tile oven
is cool enough fin" tile door to tmlock.
9_:\4]/ile tile oven is sel6cleaning, you
can touch tile CLOCKpad u) display tile
time of day. To return to tile clean
countdown, touch tile SELFCLEANpad.
_: If tile shelves become hard to slide,
apply a small amount _ff cooking oil to
a paper rowel and wipe tile edges (ff
tile oven shelves with tile paper towel.
24
Page 25

Camandcleaningoftherange. 9e.co,,
Be sure aft controls are off and all surfaces are cool before cleaning any part of the range.
If your range is removed for cleaning, servicing or any reason, be sure the anti-tip
device is reengaged properlywhen the range is replaced. Failure to take this
precaution could result in tipping of the range and cause inju_
How toRemoveProtective ShippingFilmand Packaging Tape
Carefully grasp a corner of tile protective
shipping fihn with your finge_ and slowly
peel it fl'on/ tile appliance surli_ce. Do not
use any shaq) items to remove tile fihn.
Remove all of tile fihn before using tile
appliance fi:,r tile fi_t time.
Control Knobs
The control knobs may be removed for easier
c/eanlbg.
Make sm'e tile knobs are in tile OFF
positions and pull them straight off tile
stems for cleaning.
Oven Vent
Theoven ventis located behind the wht rear
surfaceunit.
This area could become hot dtwing
oven rise.
To _lSStlI'e no d_lIll_lge is done to tile
finish of tile product, tile safest way to
remove tile adhesive ti'om packaging tape
on new appliances is an application (ff a
household liquid dishwashing dem_gent.
Apply with a sott cloth and allow to soak.
NOTE."Theadhesivemustbe removed fromall
parts./t cannotbe removedif it is baked on.
Tile knobs can be cleaned in a
dishwasher or tile)' may also be washed
with soap and water: Make sure tile inside
of the knobs are dry befi)re replacing.
Replace tile knobs in tile OFFposition to
ensure proper placement.
It is noIl//_ll [()I" ste_lIll to COi//e ()/It of
tile vent and moisture may collect
tmderneath it when tile oven is in use.
TheventIs lYnportantforproperair ckculation.
Neverblock this vent
25
Page 26

Careand cleaningof the range.
Painted Surfaces
Sbt- __
Pull hingo locks down to unlock.
/C../ position. A tool, such as a small flat-
Removalposition
The gasket is designed with a gap
at the bottom to allow for proper atr
circulation.
Do net rub or clean the door
gasket it has an extremely low
resistance to abrasion.
If you notice the gasket becoming
worn, frayed or damaged fl?any
way or if it has become displaced
on the door, you should have it
replaced.
26
Painted surtimes include the sides of file
range and the dooI, top of control panel
and tile drawer fl'ont. Clean these with soap
and water or a vinegar and wamr solution.
Control Panel
It's a good idea to wipe file control panel
after each use of file oven. Use a damp
cloth to clean or rinse. For cleaning, use
mild soap and water or a 50/50 solutkm of
vinegar and water: For rinsing, Elseclean
water Polish dI 3 with a soft cloth,
Lift-Off Oven Door
Thedoorisveryheavy.Be carefulwhen
removingandliftingthedoor.
Donotlift thedoorbythehandle.
Toremovethedoor:
[] Full} open tile door.
[] Pull tile hinge locks down toward
the door fl'ame, to the mdocked
blade screwdrixe_; may be required.
at tile top.
[] Firefly grasp both sides of tile door
[] Close door to the door remox d
position, which is halfwa? between file
broil stop position and flfllv closed.
[] Lift door up and out tmfil tile hinge
aml is clear of the slot.
Toreplacethedoor."
[] Firefly grasp both sides of tile door
at tile top.
i
[] X4ith tile Bottom i
door at tile of si0t _LL/I '1//
same angle as N _i
tile i'eillo_, al
position, seat tile
indentation of
the hinge aml
into tile bottom
edge of the hinge slot. The notch in
tile hinge aml must be fifth' seated
into tile bottom ot tile slot.
[] Fully open tile doo_: If tile door will
not rifle open the indentation is
not seated correctly in tile bottom
edge of the slot,
[] Push tile hinge locks up against tile
fl'ont fl'ame of tile oxen caxitx to tile
locked position.
edge I I Hin earm
T
Do not use commercial oxen cleane_,
cleaning powdec% steel wool or harsh
abrasixes on an} painted sm'titce.
Do not use abrasi_ cleanse_, strong liquid
cleane_, plastic scouring pads or o_en
cleane_ on the conm)l panel--the) will
dmnage the finish.
Hing
Hinge,
arm
Pushhinge locks up to lock.
[] Close tile oven (lore:
Toclean the &side of the door:
@ Do not allow excess water to run into
am holes or slots in tile (loo_:
@ Because tile area inside tile gasket is
cleaned dewing tile self:clean c'_cle you
do not need to clean this bx hand.
::Ji::Tile area outside tile gasket and tile
door liner can be cleaned with a soap-
filled steel wool or plastic pad, hot
water and detergent, Rinse well with a
vinegar and water solution,
To clean the outside of the door:
_: Use soap and water to thoroughly
clean the top, sides and fl'ont _ff the
oven doo_: Rinse well. You may also use
a glass cleaner to clean the glass on the
outside of tile doo_: Do not let water
drip into tile vent openings.
::J?::If any stain on tile door \'ent trim is
pe_3istent, Else a soft abrasive cleaner
and a Sl)onge-scrubber for best results.
_: Spillage ot marinades, fl'uitjuices,
tomato sauces and basting materials
containing acids may cause
discoloration and should be wiped up
immediately. X&]/en s/m'hce is cool,
clean and rinse.
@ Do not Else oven cleanei_, cleaning
powde_ or hm_h abrasixes on tile
outside of tile (loo_:
Page 27

After broiling, remove the broiler pan
from the oven. Do not store a soiled
broiler pan and grid anywhere f17
the range.
Oven Racks
Clean the o_en ra('k_ with an abrasive
cleanser or scouring, I)ad _dter cleanin,_,,
rinse the shelves with clean water and (h_'
with a clean cloth.
If yore" oven is equipl)ed Mth gray
porcelain-coated oven tacit% they may
be cleaned in the oven dm_ing the self
clean cycle.
NOTE."
::Ji::If yourovenIsequippedwithsh/egsilver-
coloredovenracks,removethembeforeyou
begintheself-cleancycle.
Broiler Pan and Grid
Do not clean the broiler pan orgrid in a
self-c/ean/egoven.
_Mter broiling, remove tile broiler pan
fl'om the oven. Remove the grid fl'om the
pan. Carefiflly pour out the grease fl'om
tile pan into a proper containe_:
_M_sh and rinse the broiler pan and grid
in hot water with a soap-tilled or plastic
scouting pad,
ge.com
::Ji::If youroven Is equippedwith gray porcelain-
coated ovenracks,theymay be left in the oven
duringthe self-clean cycle.
To nlake tile racks slide inore easily; apply
a small amount of vegetable oil to a paper
towel and wipe the edges (ff the oven
racks with the paper towel. Do not spray
with Pare': or other lubricant sprays.
If ti)o(l has bm'ned on, sprinkle tile grid
with detergent while hot and cover with
wet paper towels or a dishcloth. Soaking
tile pan will relnove burned-on fi)o(ls.
Both tile broiler pan and gIi(l may be
cleaned with a COlnlnercial oven cleanei:
Both the broiler pan and grid can also
be cleaned in a dishwasher:
i i iiiii! i
Wire cover bolder.
Oven Light Replacement
CAUTION: Before replacing your oven light
bulb, disconnect the electrical power to
the range at the main fuse or circuit breaker
panel
Be S/lI'e to let the light (o&er and bulb
cool completely:
!iI
Toremove the cover:
Hold a hand under tile cover so it
[]
doesn't tidl when released. _&'ith
finge_ of the same hand fimfl_
push back tile wire co_,er holder;
I,ift off tile co'_e_:
Oven Heating Elements
Do not dean the bake elementor the broil
element.Anysoil will burn off when the elements
am heated
Do not removeanyscrews to removethe cover
[] ]?.el)lace bull) with a 40-watt
appliance bulb.
Toreplace the cover:
[] Place it into groove of tile light
receptacle. Pull wire forward to tile
center ()I tile cover until it snaps
into place.
[] Connect electrical power to tile
range.
To clean tile oven flo(m gend) lift tile
bake element. Clean with _<mn soap)
27
Page 28

Careand cleaningof the range.
Removable Warming Drawer Pan
NOTE"Formode/s with a warming drawer,
beforeperforming anyadjustments,cleaning or
service,disconnecttherange electricalpower
supplyat thehousehold&stnT_utionpanel by
removingthe fuseor switching off the circuit
breaker Make sure the warming drawer
heating elementis cool
NOTE: Allow warnT/bgdrawer to coolbefore
mmovlbgpan.
NOTE: Wipe spi//sprompt/yafter eachuse.
_Ji::Neve_" place, use o_"sell:clean the
wmming chmve_" pan in the uppe_" oven.
?_:X_'_ming (h'awe_" has a removable pan
t0_"easy cleaning. Clean with hot soap)'
water" and a sponge or dish towel. D_'v
with a clean cloth. Replace the pan in
the wamfing d_'awe_:
28
Page 29

Cleaningthe glass cooktop, ge.com
Normal Daily Use Cleaning
Cleanyourcooktopafter
eachspill. Use CERAMA
BRYTE®CeramicCooktop
Cleaner.
ONLY use CEIL_JIA BRYTE _'Ceranfic
Cooktop Cleaner on the glass cooktop.
Other creams ma_ not be as efli_ctixe.
To maintain and protect the sm_hce of
your glass cooktop, t011ow these steps:
[] Before using the cooktop for the
fi_t time, clean it with CEI_d'dA
BRYTE '_Ceramic Cooktop Cleane_:
This helps protect the top and
makes clean-up easier:
[] Daily use of CEIL_dMA BRYTE ')
Ceramic Cooktop (?leaner will help
kee I) the cooktop looking new.
Burned-On Residue
[] Shake the cleaning cream well.
Appl) a few drops of CEIL_dVIA
BRYTE (')Ceramic Cooktop Cleaner
directly to the cooktop.
[] Use a paper towel or CERAMA
BRYTE _:'Cleaning Pad for Ceramic
Cooktops to clean the entire
c()()kt() I) Stli]ilce.
[] Use a oh) cloth or paper towel
to remove all cleaning residue.
No Ileed to IJIlse.
NOTE:Itis very/YnportantthatyouDONOTheat
thecooktopuntilit hasbeencleanedthoroughly
UseaCERAMABRYT£_Cleaning
PadforCeramicCo&tops.
TheCERAMABRYTE'_:Ceramic
Cooktop Scraper and all
recommended supplies are
available through our Parts Cente_
See flTstructions under "To Order
Parts" section on next page.
NOTE:Do not use a dull or
nicked blade.
WARNING:DAMAGEtoyourglasssurfacemay
occurif youusescrubpadsotherthanthose
recommendecL
[] _Mlow the cooktop to cool.
[] Spread a few drops of CEI_L_/IA
BRYTE <_:'Ceramic Cooktop Cleaner
on the entire burned residue area.
Using the included CEIL_dMA
[]
BRYTE _)Cleanino Pad fin" Ceramic
Cooktops, rub the residue area,
ali,) )lxing, pressm'e as needed.
Heavy, Burned-On Residue
[] _dlow the cooktop to cool
[] Use a single-edge razor blade
scraper at approximately a 47)° angle
against the glass surfime and sctai)e
the soil. It will be necessm T to apply
pressure to the I'ilZOf SCl';ipel" ill
order to remove tile I'esi(hle.
_Mter sc*aping with the razor
[]
scrape1; spread a fbw drops ot
CEIg_,]A BRYTE <:Ceramic
Cooktop Cleaner on the entire
burned residue area. Use the
CE]g_,]A BRYTE <:Cleaning Pad
to I'el//OVe any I'eI//aillillg I'esi(hle.
[] If any residue remains, repeat the
steps listed above as needed.
[] For additional protection, alter all
residue has been remoxed, polish
the entire surfiwe with CE1L_dMA
BRYTE e_Ceramic Cooktop Cleaner
and a paper towel.
For additional protection, after all
[]
residue has been remoxed, polish
the entire smfitce xdth (;EIE_,Lk
BRYTE <_)Cer'mfic Cookto ) Cleaner
and a paper towel.
29
Page 30

Cleaningthe glass cooktop.
Metal Marks and Scratches
Be careflll not to slide pots and pans
[]
across w)ur cooktop. It will leave
metal markings on the cooktop
S/li'J[ilce.
These marks are remox_d)le using
the CEI_dMA BRYTE <'_Ceramic
Cooktop Cleaner with the CEI_dMA
BRYTE <'_Cleaning Pad fin" Ceramic
Cooktops.
Rubber-like Seal
To clean the rubbexqike seal at the outer
edge of the glass, wipe it with cooktop
cream when needed.
[] If pots xdth a thin oxerlay of
ahmfinum or copper are allowed
to boil dr):, the overlay may leave
black discoloration on the cooktop.
This should be removed
immediately before heating again or
the discoloration may be pemmnent.
WARNING:Care ullycheckthe
bottomof pans for roughnessthat would scratch
the cooktop.
Glasssurface--potential forpermanentdamage.
Ourtestingshowsthat if
you are cookinghighsugar
mixtures suchasjelly or
fudgeand havea spillover,
it can causepermanent
damagetothe glasssurface
unlessthe spilloveris
immediatelyremoved.
30
Damage from Sugary Spills and Melted Plastic
[] Turn offall surtilce units. Reinove
hot pans.
[] Wea_ing an oven mitt:
a. Use a single-edge razor blade
scraper (CEI_BdMA BRYTE (_
Ceramic Cooktop Scraper) to
move the spill to a cool area
on the cooktop.
b. Remove the spill with
paper towels.
To Order Parts
To order (:EILBdMA BRYTE '_Ceramic
Cooktop Cleaner and the cooktop
scrape_; please call ore" toll-ti'ee number:
National Parts Center 800.626.2002
CERAMA BRYTE®Ceramic
CooktopCleaner ........... # WX78)(388
CERAMA BRYTE_ Ceramic
CooktopScraper ........... # WXTOX030£
Kit ........................ # WB64XSO£7
(Kitincludescream and cooktopscraper)
CERAMA BRYTE_ Cleaning Pads for
Ceramic Cooktops ......... # WXTOX350
[] Any remaining spillover should be
lett until the sm]i_ce of the cooktop
has cooled,
] Don't use the SUltace milts again
tmfil all of the residue has been
completely removed.
NOTE:If pittl?;gorindentationin theglass
surfacehasalreadyoccurred,thecooktopglass
willhavetobereplacedInthiscase,service
willbenecessan/
Page 31

Beforeyoucall forservice...
Troubleshooting -tips
Save time and money! Review the charts on the following
pages first and you may not need to call for service.
ge.com
Possible Causes
Surface units will not Improper cookware
maintain a rolling boil being used.
What To Do
• Use pans which are flat and match the diameter
of the surihce unit selected.
or cooking is not
Sur[ace units de not Cooktop controls • Check to see the correct control is set t0r the sm_hce
work properly improperly set. unit you are usin ,
A fuse in your home may be • Replace the filse or reset the circuit breakei:
blown or the circuit breaker
tripped.
Scratches (may appear
ascracks)oncooktop
/ i iiii
Incorrect cleaning
methods being used.
Cookwa_e with rough bottoms
being used or coarse paxtides
(salt or sm_d) were between
the cookwm'e and the surface
of the cooktop.
Cookwaxe has been slid
• Scratches are not rem_wable. Tinv scratches will become
less visible in time as a result of cleaning.
• To avoid scratches, use the recommended cleaning
procedtlres. Make stu'e bottoms of cookware ai'e clean
before use, and use cookware with smooth bottolns.
across the cooktop surface.
Areas of discoloration Food spillovers not cleaned • See the Cleaning the glass cooktop section.
on the cooktop before next use.
Hot surface on a model • This is noruml. The surthce may appear discolored
with a light colored glass when it is hot. This is temporary and will disappear
cooktop, as the glass cools.
Plastic melted to Hot cooktop crone into • See the Glass surface potential for permanent damage
thesurface contact with plastic placed section in the Cleaning the glass cooktop section.
on the hot cooktop.
Pitting (or indentation) Hot sugar mixture spilled • Call a qualified technician for replacement.
of the cooktop on the cooktop.
Frequent cycling Improper cookware • Use only flat cookware to minimize cycling.
off and on of being used.
surface units
Control signals a#er You forgot to enter a • Press the BAKEpad and desired temperature or the
entering cooking time bake temperature or SELF CLEAN pad and desired clean time.
or delay start cleaning time.
Fooddoesnotbake Oven controls improperly set. • See the Using the oven section.
or roast properly
Rack position is incorrect • See the Using the oven section.
or the rack is not level.
Incorrect cookware or • See the Usingthe oven secdon.
cookware of improper
size being used.
Oven thermostat needs
adjustment. _ /
• See the Adjust the oven thermostat--Do it yourself!
section.
Page 32

Beforeyoucall forservice...
Troubleshooting -tips
Possible Causes What To Do
Clockandtimer
donotwork
Oven light does Light bulb is loose or defective. * Tighten or replace the btflb.
not work
Fooddoes not Door not open to the broil stop * See the Using the oven section.
broil properly position as recommended.
Plug on range is not completely * Make sure electrical i)lug is i)lugged into a live, i)roperly
hlserted ha the electrical outlet, gr()unded outlet.
A fuse in your home may * Replace the fllse or reset the circuit breaker.
be blown or the circuit
breaker tripped.
Oven controls improperly set. * See the Using the clock and timer section.
Switch operating light * Call for service.
is broken.
Oven controls improperly set. * Make sure you press the BROIL HI/LO pad.
Improper rack position * See the Broiling Guide.
being used.
Cookware not suited for * Use the broiling, l)an and ,grid that came with votu', range.,
broiling.
Alumhlum foil used on the * See the Using the oven section.
the broiling pall and grid has
not been fitted properly mid
slit as recommended.
In some areas the power * Preheat the In'oil element fi)r 10 minutes.
(voltage) may be low,
• Broil for the longest period of time recol/lll/euded
in the Broiling Guido.
Oven temperature Oven thermostat • See the Adjust the oven thermostat--Do it yourself[
too hot or too cold needs adjustment, section.
Oven will not work Plug on range is not • Make sure electrical .I)ltw_is l)lugged,, into a live,
completely inserted in l)ro l)erlv.,grotmded outlet .
the electrical outlet.
A fuse in your home may • Rel)lace the fi/se or reset the circuit breaker.
be blown or the circuit
breaker tripped.
Oven controls improperly set. • See the Using the oven section.
32
Page 33

ge.com
Possible Causes
Ovenwill notself-clean
"Crackling " or This is the sound of the • This is n(mnal.
The oven telnperature is
too high to set a self-clem_
operation.
Oven conlrols improperly set. • See tile Using the self-cleaning oven section.
What ToDo
• Allow tile oven to cool to i'oonl tenlpei'attli'e and
reset tile controls.
"popping" sound metal heating and cooling
during both the cooking and
cleaning functions.
Excessive smoking Excessive soil. • Press tile CLEAR/OFFpad. Open tile windows to
during a clean cycle rid tile room of smoke. _4'ait until tile LOCKED door
light goes ott. Wipe up the excess soil and reset the
clean cycle.
Oven door will not Oven too hot. • Allow the oven to cool beh)w locking temperature,
open after a and LOCKEDor CLEANno longer appems in the displa):
clean cycle
Oven not clean after Oven controls not properly set. • See the Using the self-cleaning oven section.
a clean cycle
Oven was heavily soiled. • (3ean tq) hea\y spillovers heft)re starting the clean
cycle. Heavily soiled ovens lnav need to sell=clean
again or fin" a hmger period of time.
"LOCK DOOR" flashes The self-clean cycle has been • Close tile oven door.
in the display selected but the door is not
closed.
LOCKED DOORlight The oven door is locked • Press the CLEAR/OFFpad. Allow the oven to cool.
is on when you want because the temperature
tO COOk inside the oven has not
dropped below the
locking temperature.
"F-- and a number
or letter" flash
in the display
You have a flmction
error code,
• Disconnect all power to tile range fl)r at least
30 seconds and then reconnect power: If tile flmction
error code repeats, call for service.
33
Page 34

Beforeyoucall forservice...
Troubleshooting -tips
Possible Causes What To Do
Displaygoes blank A fuse in your home may be * Replace the fuse or reset the circuit breaker.
blown or the circuit brea_ker
pped.
The clock is in the * See the Special features of your oven control section.
black-out mode.
Oisplayflashes Power failure. * Reset the dock.
Unable to get the Oven control pads were * The BAKE and BROIL HI/LO pads must be pressed
displayto show "SF" not pressed properly, at the same time and held fi)r 3 seconds.
Power outage or surge. * Reset the clock. If the oven was in use, you umst reset
it 1)_,l)ressing, the CLEAR/OFFpad, setting" the clock
and resetting any cooking flmction.
"Burning" or "oily" This is normal in a new * To speed the process, set a self-clean cycle for a
odor emitting from oven and will disappear ufiniumm of 3 hours. See the Using the self-cleaning
the vent in time. oven section.
Strong odor An odor from the insulation * This is tempera ry.
around the inside of the
oven is normal for the first
few times the oven is used.
Drawer does not slide Drawer is over-loaded or * Reduce weight. Redistribute drawer contents.
smoothly or drags load is unbalanced.
Warming drawerwil! A fuse ha your home may be * Replace the tuse or reset the circuit breaker.
not work blown or the circuit breaker
t pped
Controls improperly set. * See the Warming drawersection.
Excessive condensation Liquid in drawer. * Remoxe liquid.
in the drawer
Uncovered foods. * Co'_er food with lid or ahuninmn foil.
Temperature setting too high. * Reduce temI)erattu'e.... setting,.
Food dries out in the Moisture escaping. * Coxer food with lid or ahuninmn foil.
warming drawer Drawer not fully closed. * Push drawer in tmtil latch engages.
34
Page 35

GE Service Protection Plus 'M
GE, a name recognized worldwide for quality and dependability; offers you
Service Protection Plus '"--comprehensive protection on all your appliances--
No Matter What Brand!
Benefits Include:
* Backed by GE
* All brands covered
* Unlimited service calls
* All parts and labor costs included
* No out-of-pocket expenses
o No bidden deductibles
o One 800 number to call
You _ill be completel) s_tisfied _ith ore" service protection or )ou m_) request )our mone) b_ck
on the remaining value of yore" contn_ct. No questions asked. It's that simple.
Protect yore" refl'igeratox; dishwasher, washer and cbTer, range, TV_ VCR and much more--azay brand!
Plus there's no extra charge _br emergency service and low monthly financing is available. Even icemaker
coverage and ibod spoilage protection is off, red. You can rest easy, knowing that all your valuable
household products are protected against expensive repairs.
Plaice )our ronfidenre in (;E and r;dl us in the [).S. toll-free at 800.626.2224
tor I-t/ore illtorn/atiOll.
,_]l bl_lllds (iJx,(!l(!d, tip [o 20 )(il]_s ilia, ill [h(! (i)]ltillellt_tl I_.S.
........................................................................................... _ (]tit here
We'll CoverAny Appliance.
Anywhere. Anytime.*
Please place in envelope and mail to:
General Electric Company
Warranty Registration Department
EO. Box 32150
Louisville, KY 40232-2150
35
Page 36

Consumer Product Ownership Registration
Deal Customer:
Thank you for purchasing our product and thank you for placing your confidence in us.
We are proud to haxe you as a customer!
Follow these three steps to protect your new appliance investment:
Complete mid mail
your Consumer
Product Ownership
Registration today:
Ilavc the peace ot
nlind of knowing we
Call COlltaCt yol/ ill
th{ unlikely event of a
satk*tv moditication.
After mailing the
registration below,
store this document
in a saf::, place. It
contains intk)rnlation
w)u will need should
VOll require service.
Our service numl)er is
800.GE.CARES
(800.432.2737).
Model Number Serial Number
,,I I,,
Important: If you did not get a registration card with your
product, detach and return the form below to
ensure that your product is registered, or register
online at ge.com.
Consumer Product Ownership Registration
Read VOllr ()Wller's
Manual careftfllv
It will help you
operate VOllr lleW
appliance properl>
, I
._,,,_ Cut here
Model Number Serial Number
his. Mrs. Miss
First I ] Last I
Nam_ I I I I I I I I I Nam_ I I I I I I
Street [
Address I I I I I I I I I I I I I I I I I I I I I I I I
Apl. #I , , , , , , , I E-mailAddr,,_*
* Please provide your e-mail addre,,,, to receixe, xia e-lnail, discounts, special offi,rs and other important
communications fl-onl (;E Appliances (GIL\).
[ Check here if you do not want to receive communicalions h-ore GILVs carefiflly selected partnel'_.
36
Appliances
General Electric Cornpany
GE Consumer & Industriol
Louisville, KY40225
ge.corn
FAILI 5RE TO COMPLETE AN[) RET[ RN Tt tlS CM)-.DDOES NOT DIMINISt t Y( )l JR
i _,__)-_1_\N'[_," RIGI ITS.
For more inlin malion about G15Vs prixaQ" and data usage poll%; go to ge.conl and click on
"Privacy Polky" or call 800.696.2224.
I I I I I I
I
I
Page 37

Notes.
I
m
m.
w
w
m
37
Page 38

Accessories.
You can find these accessories and many more at ge.com, or call 800.626.2002
Looking For Something More?
(during normal business hours). Have your model number ready.
i iZZZZZZ ii _i
< <_i__ _i:i<i_i_i_i_i_ii/_i_i__<_I!_I_I_I_IIIIZ_Ii_ _< _<_i_i_
m
Surface Elements and Drip Pans
Oven Elements
Cleaner Cleaning Pads Scraper
Oven Racks BroHerPan
LightBulbs
Knobs
38
Tired of discolored racks? Wishing you had extra-heax3,-dut ), oven racks?
NOW AVAILABLEfor your range:
(;E's innovative, selfk:leanable porcelain-coated oven racks!
• Hea_ 3, Dut?,
• Durable
• Able m be cleaned in a self-cleaning oven
Visit go.corn fbr more infbrmation.
Page 39

GEElectricRange Warranty.
Aft warranty service provided by our Factory Service Centers,
or an authorized Customer Care®technician. Toschedule
service, on-line, 24hours a day, vis# us at ge.com, or cafl
800.GE.CARES (800.432.2737).Please have serial number and
model number available when calling for service.
GEWill Provide:
Anypart of the range which tifils due to a defect in materials or workmanshii). During this
Fromthedate of the
originalpurchase
::Ji::Service trips to your home to teach you how to use
the product.
!_,JImproper installation, delivery or maJntenm_ce.
)_ Failure of the product if it is abused, misused,
or used for other than the intended purpose or
used commerciaJly.
::Ji::Damage to the glass cooktop caused by use of demlers
other thml the recommended clemlh_g creams and
pads.
limited one-year warranty, GE will also provide, free of charge, all labor and in-home service
to replace the (lefecti\'e part,
Staple your receipt here.
Proof of the original purchase
date is needed to obtain service
under the warranty.
::Ji::Replacement of house fuses or resetting of circuit
breakers.
_: DaJnage to the product caused by accident, Fwe, floods
or acts of God.
_: IncidentaJ or consequential dmnage caused by possible
defects with this appliance.
iJi::Dmnage caused after delivery.
!i?:Product not accessible to provide required service.
::Ji::Damage to the glass cooktop caused by hardened
spills of sugaxy materials or melted plastic that
are not clemled accordhlg to the directions in
the Owner's MmmaJ.
EXCLUSIONOFIMPLIED WARRANTIES--Your sole and exclusive remedy isproduct repa# as provided hi this Limited ]
Warranty.Any implied warranties, iueluding the implied warranties ofmerchantability or fitness for a particular purpose,
are limited to one year or the shortestperiod allowed by law.
This warranty is extended to the original purchaser and any succeeding owner for products purchased for
home use within the USA. If the product is located in an area where service by a GEAuthorized Servicer is not
available, you may be responsible for a trip charge or you may be required to bring the product to an Authorized GE
Service location for service. In Alaska, the warranty excludes the cost of shipping or service calls to your home.
Some states do not allow the exclusion or limitation of incidental or consequential damages. This warranty
gives you specific legal rights, and you may also have other rights which vary from state to state. Toknow
what your legal rights are, consult your local or state consumer affairs office or your state's Attorney General.
Warranter: GeneralElectric Company.Louisville,KY 40225
I
I
39
Page 40

ConsumerSupport.
GEAppliancesWebsite go.corn
Have a question ol need assistance with your appliance? Try tile GE Appli;mres Website 24 houl's a day,
ally day of tile year! For greater convenience and faster seIMce, you call now download Owner's Manuals,
order parts, catalogs, or e\ ell schedule se_Mce (m-line. You call also "_sk Our Team of Expel_ts .....
yotlr qt/estions, and so l//(Ich l/lore_.
ScheduleService
Expel_ (;E repair se_ice is onl_ one step awa_ ti'om }(mr do(m Get on-line and schedule _our servire at
}our convenience 24 hotlrs an} da} of tile }ear! (-)r call 800.GE.(_ARES (800A32.2737) dtu_ing noiInal
business horn's.
go.corn
RealLifeDesignStudio go.corn
OE suppol_s tile [)nivel'sal Design concept--products, services and environments that can be used by
people ot all ages, sizes and capabilities. We recognize tile need to design %r a wide range of physical and
mental abilities and impairments. For details of GE's Universal Design applications, including kitchen
design ideas %r people with disabilities, check out our Website today. For tile hearing impaired, please call
800.TDD.GEAC (800.833.4322).
ExtendedWarranties
Pro'chase a GE extended warrant} and learn about special discounts that are available while xour warrant}
is still ill effect. YOu can purchase it on-line an}time, or call 800.626.2224 dining normal business hom_.
GE (]onstlmer Home Services will still be there atter }our warrant} expires.
PartsandAccessories
go.corn
go.corn
Individuals qualified to sel'vice their own appliances call have pal_s or accessoiies sent direcdv to their
homes (VISA, Master( ard and Disco\ er cards are accepted). Order on-line toda), 24 h(_m's evel T clay or
by phone at 800.626.2002 dining nom/al business hours.
Instructions contained in this manual cover procedures tohe performed byany user. Other servicing generally
shouM he referred to qualified service personnel. Caution must he exercised, since impreper servicing may cause
unsafe operation.
ContactUs
If you are not satisfied with tile service you receive fl'om GE, contact us on our Website with all tile details
including your phone numbe_; or wlite to: General Manage_; (Mstomer Relations
GE Appliances, Appliance Park
Louisville, KY 40225
RegisterYourApplbnce
Register your new appliance on-line---at your convenience! Tilnel} prodtlct registration xdll allow for
enhanced communication and prompt serxice under tile tem/s of }our _arranty, should tile need arise.
YOu ma} also mail in tile pre-p_fnted registration card included ill tile l)acldw*_ matelial.
Printed in fl?eUnited States
go.corn
go.corn
 Loading...