

GE J2B918WEK4WW, J2B918SEK4SS, J2B918CEK4CC, J2B918BEK4BB Owner’s Manual
ge.com
©
©
©
Safely Instructions ....... 2
Operatirg,. lnstructiom"
Com,ecfion Oven ...... 19-23
Roasting Guide .......... 22
Timed Convection Baking..23
(;as Surfi_ce Burners ..... 9, 11
(;riddle .................. 10
Lov_r Oven Drav_r ....... 28
Thermostat .............. 27
Upper ()yen .......... 12-27
Alumin mn Foil .......... 14
Baking or Roasting ....... 14
Broiling Guide .......... 15
Clock and Timer. ........ 16
Oven Controls ........... 12
Preheating .............. 14
Probe ............... 18, 21
Sabbad/Feature ......... 26
Self'Cleaning ......... 29, 30
Special Features ...... 24, 25
Timed Baking and
Roasting Features ........ 17
Care and Cleaning
Broiler Pan and Grid ...... 35
Burner Assembly .......... 31
Burner Grams ............ 33
Burner Caps and Heads .... 32
Control Panel and 14mobs ...37
Cooktop Surface .......... 33
(;riddle .................. 34
I Jfl-Off C_,en Door ........ 35
Lov_r Oven Drav_r ....... 36
(X,en Mr VeJats ........... 37
Oven Heating Elements .... 35
(X'en Light Replacement ...38
O_en SheE es .............. -_8
Stainless Smel Surfi_ces ..... 33
Self:Cleaning .......... 29, 30
o
Installation
Instrugtio ns ........... 39-52
Anti-Tip Device ........... 52
Check Ignition of
Surface Burners ....... 50, 51
Connect Range
to Electric ............ 44, 46
Connect Range to (;as...43, 45
Dimensions and
Clearances ............... 41
Elecu_ica] Connections ...47_9
level the Range .......... 51
Location Guidelines ....... 42
LP ...................... 52
Safety Instructions ...... 39, 40
Accessories ................ 57
Troubleshooting Tips..53-56
Consumer Support
CODSIIII/eF
Support .......... Back Co_>r
Product Regisuation .... 61,62
_\arranty ................ 63
J2B 918
Write the model and serial
numbershere:
Model #
Serial #
You can find theIn (m a label (m
the front ot the range behind the
lower ()veil drawer.
18305580P186 49-85100 11-05Jfl
IMPORTANTSAFETYINFORMATION.
READALLINSTRUCTIONSBEFOREUSING.
A WARNING!
ANTI-TIPDEVICE
ALLRANGESCAN TIP
@INJURY TOPERSONS
COULDRESULT
@INSTALLAN_TIP
DEVICESPACKEDWITH
RANGE
_: SEEINSTALLATION
INSTRUCtiONS
A WARNING:If the information
in this manual is not followed exactly,
a fire or explosion may result causing
property damage, personal injury
or death.
-- Do not store or use gasoline or other
flammable vapors and liquids in the
vicinity of this or any other appliance.
- WHATTODOIFYOU
SMELLGAS
iJ_:illDo not try to light any appliance.
i_i:iDo not touch any electrical switch;
do not use any phone in your building.
Immediately call your gas supplier
from a neighbor's phone. Follow the
gas supplier's instructions.
@ If you cannot reach your gas supplier,
call the fire department.
-- Installation and service must be
performed by a qualified installer,
service agency or the gas supplier.
ge.com ........
WARNING!
For your safe_ the information in this manual must be followed to minimize the risk of fire or explosion,
electric shock, or to prevent property damage, personal injury, or loss of life.
ANTI-TIPDEVICE
All ranges can tip and injury could result.
Toprevent accidental tipping of the range, attach it to the wall by installing the Anti--tip device supplied.
If the Anti--tip device supplied with the range does not fit this application, use the universal Anti--17p
device WB2X7909.
Tocheck if the device is instafled and engaged properly, carefully tip the range forward. TheAnti--tip
device should engage and prevent the range from tipping over.
If you pull the range Otlt from fl)e wall t_r any reason, make Stlie the device is properly engag_d
when you push tim range back against the wall. If it is not, there is a possible risk of the rang_
tipping ox_r and causing inju U if you or a child stand, sit or lean on an open door
Please refer m fl_e And-Tip device infounafion in this manual. Failure m rake fills precaution
could result in tipping of the rang_ and i,_m>
m
m
g
g
m
3
IMPORTANTSAFETYINFORMATION.
READALLINSTRUCTIONSBEFOREUSING.
WARNING!
IMPORTANTSAFETYNOtiCE
The Califomb Safe Drinking Water and ToxicEnforcement Act requires the Governor of Califomb to
publish a list of substances known to the state to cause birth defects or other reproductive harm, and
requires businesses to warn customers of potential exposure to such substances.
Gasappliances can cause minor exposure to four of these substances, namely benzene, carbon
monoxide, formaldehyde and soot, caused primarily by the incomplete combustion of natural gas or
LP fuels. Properly adjusted burners, indicated by a blubh rather than a yellow flame, will minimize
incomplete combustion. Exposure to these substances can be minimized by venting with an open
window or using a ventilation fan or hood.
SAFETYPRECAUtiONS
When using electrical appfiances, basic safety precautions should be foflowed, including the following:
_]{_Use this appliance only %r its intended
pni])ose as described in this Owner's
Manual.
Be sure your appliance is properly installed
and g]ounded by a qualified technician in
accordance with tile pioxqded installation
instructions.
Do not attempt to repair or replace any
part of your range unless it is specifically
recommended in this manual. All other
servicing should be refeITed to a qualified
technician.
Before performing any service, disconnect
the range power supply at the household
disuibufion panel by removing tile fuse or
switching off the circuit breaken
_:_Do not lem> children alone-<hildren
should not be left alone or unatmnded in
an area where an appliance is in use. They
should nex>r be allowed to sit or stand on
any part of tile appliance.
_:_Do not allow anyone to climb, stand or hang
on tile dooi; storag> diawei; or cooktop.
They could damage the rang_ and ex>n tip
it ox_l; causing sex,re personal injm T.
_t{:_Do *lot store flammable mamnals in an ox>n
or near the cooktop.
CAUTION:ltemsofinteresttocbVd en
shouldnot be storedin cabinetsabovea rangeor
on thebacks#ashof a range--children climbingon
therangeto reachitems couldbe seriouslyinjured.
SAFETYPRECAUtiONS
Have the installer show you the location of the range gas shut-off valve and how to shut it off if necessary.
;_;Have your rang_ installed and properly
giounded 1)7' a qualified installei, in
accordance with the Installation Instrncuons.
Any adjnsunent and service should be
perfom,ed only by qualified gas rang>
installers or service mchnicians.
4
_i:,:Do not attempt to repair or replace any
part of your range unless it is specifically
recommended in this manna], All other
service should be referred to a qna]ified
technician,

SAFETYPRECAUTIONS
g_com
_:!':iLocate the rang_ out of kitchen traffic i)ath
and ont of drafw locations m pre_nt poor
air circulation.
_::Be snre all packaging materials are
removed from file rang_ be%re operating it
to prevent fire or smoke damag> should the
packaging material ignite.
_; Be sure your rang_ is conectly adjusted by
a qualified service mchnician or installer for
the wpe of gas (naulral or 1P) that is m be
used. Your range can be convermd for use
with either type of gas. See the Installation of
the range sect.ion.
WARNING:theseadjustments
mustbemade bya qualified servicetechnician
b accordancewith the manufacturer'sbstructions
andaft codesandrequirementsof theauthority
havingjurisdiction.Failureto follow these
fastructionscouldresult fa seriousinjuryor property
damage.Thequalifiedagencyperforming this
work assumesresponsibilityforthe conversion.
E:,:After prolonged nse of a range, high floor
temperatures may resuh and ma W floor
cox>ring3 will not withstand this kind of use.
Nex_r install the range over viw1 tile or
linoleum that cannot withstand such type
of use. Never install it directly ox>r inmrior
kitchen caq)eting.
N Do not leave children alone or unatmnded
where a rang_ is hot or in operation. They
could be seriously burned.
N Do not allow a_vone m climb, stand or hang
on the oven dooi; drawer or cookmp. They
could damage the rang> and even tip it ox>i;
causing sex,re personal injury.
Nex>r wear loose-fitting oi hanging garments
while using the appliance. Be careflfl when
reaching for items stored in cabinets oxer the
range. Flammable material couM be ignited
if"brougtlt in contact with flame oi hot o_n
sur£_ces and mac cause sexere bnills.
_::Do not store flammable mamrials in an
oxen, a rang> drawer oi near a cooktop.
;_i:.:Do not store or use combnsfible materials,
gasoline or other flammable vapors and
liquids in the viciniw of this or any other
appliance.
_: Do not let cooking grease or other
flammable mateiials accunnflate in oi
near the rang>.
E:.:Do not use wamr on grease fires. Nex_r
pick up a flaming pan. T/lrll the controls off
Smother a flaming pan on a smt_ace burner
1)yco\_fing the pan complemly with a
well-fitting lid, cookie sheet or fiat tray.
Use a multiq)uq)ose dry chemical or
foam-type fire extinguisher
I_laming giease outside a pan can be put
out by co\PlJng it with baking soda oi;
if available, by using a mulfiq)ml)ose drT
chemical or foam-type fire exdnguishen
Flame in the upper oven or lower o_en
drawer can be smotheied completely by
closing die ox>n door or drawer and turning
the conuol to off, or by using a multi-
pml)ose d U chemical or foam-wpe fire
exfinguishen
_::let d)e burner grates and other snrfaces
cool betbIe ranching them or leaving them
wheIe children can 1each them.
CAUTION:Itemsofinteresttochildren
shouldnot be storedin cabinetsabovea rangeor
on thebackspfashof a range--children climbingon
therangeto reachitems couldbe seriouslyinjured.
E:.:For your safew, hexer use your appliance
tbr wanning or heating the room.
_: Larg> scratches or impacts to glass doors
can lead to broken or shattered glass.
E:.:Nexer block fl_e vents (air openings) of the
rang>. They provide the air inlet and oudet
flint are necessai T tbr the range to operate
properly with conect combustion. Air
openings are locamd at the rear of the
cooktop, at file top and bottom of the oven
dooi; and at the bottom of the rang_ under
the lower oven drawer or kick panel.
E:,:Do not lift the cooktop. Lifting the cooktop
can lead to damag> and improper operation
of the rang>.
IMPORTANTSAFETYINFORMATION.
READALLINSTRUCTIONSBEFOREUSING.
WARNING!
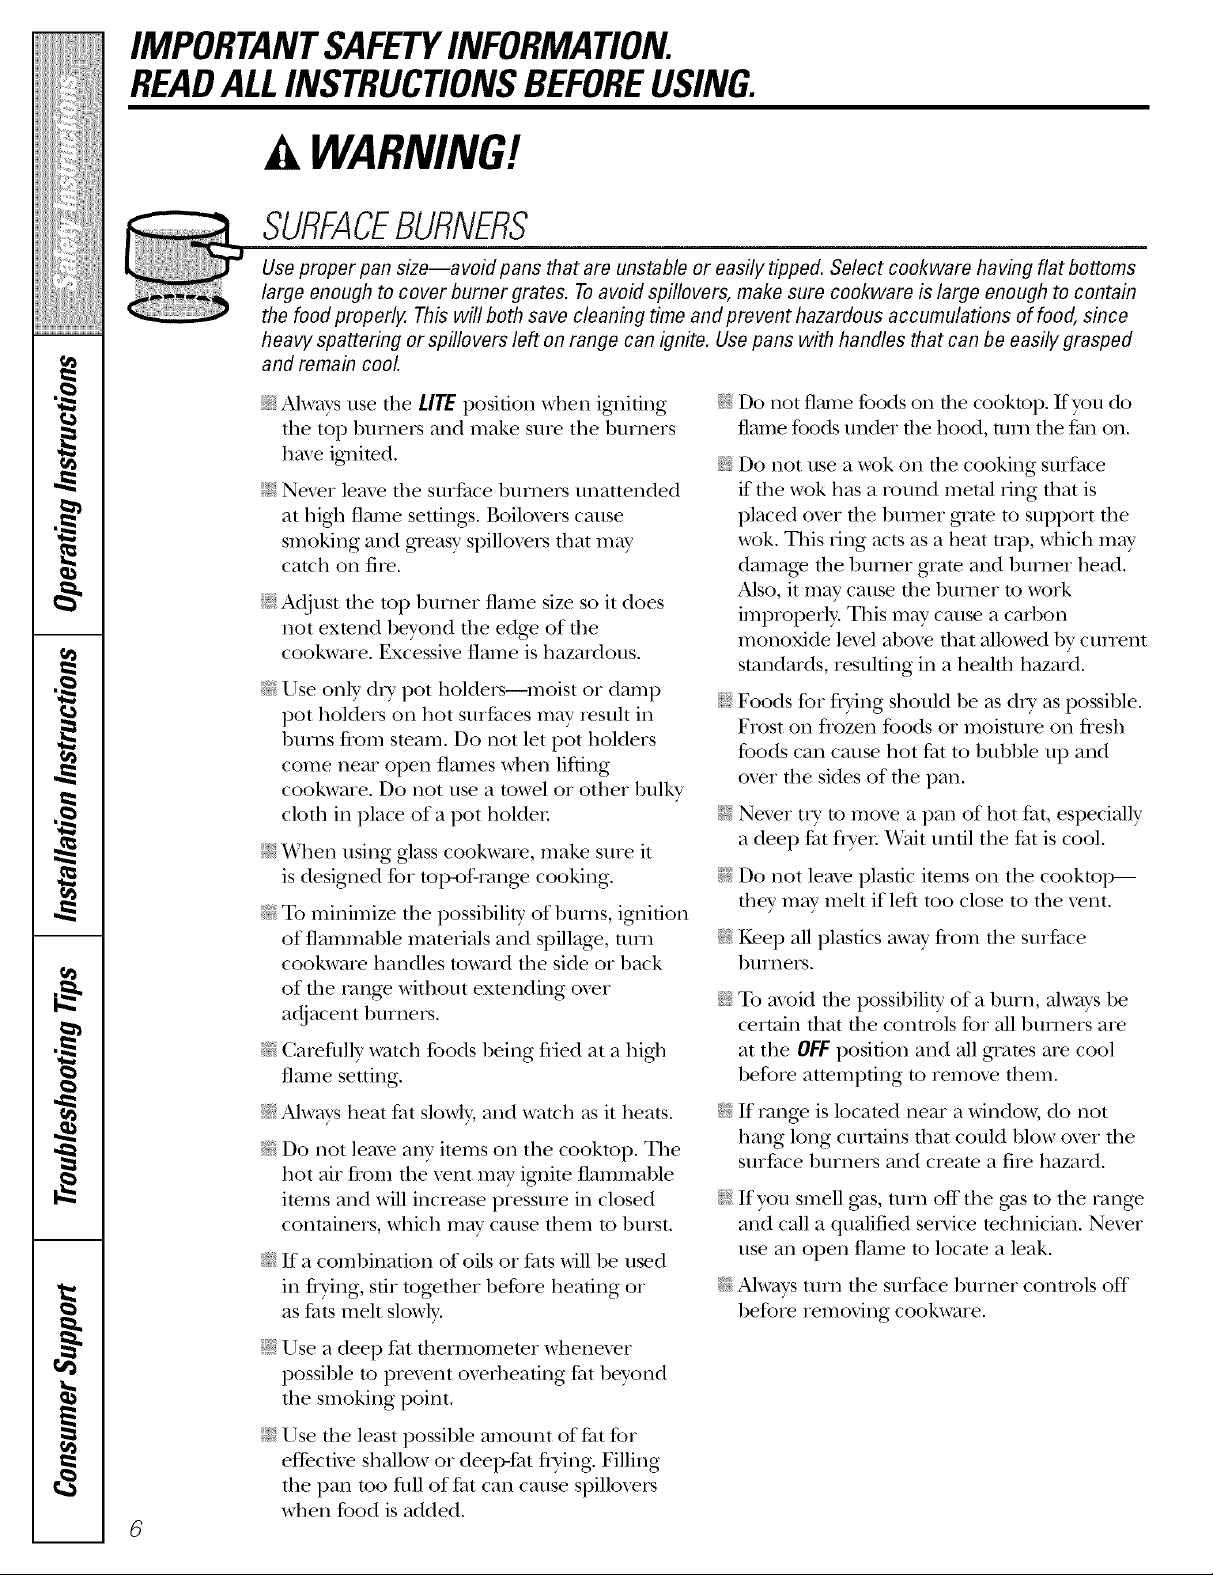
SURFACEBURNERS
Use proper pan size--a void pans that are unstable or easily tipped. Select cookware having flat bottoms
large enough to cover burner grates. Toavoid spillovers, make sure cookware is large enough to contain
the food properly. This will both save cleaning time and prevent hazardous accumulations of food, since
heavy spattering or spillovers left on range can ignite. Use pans with handles that can be easily grasped
and remain cool.
_; Alwavs use the LITEposition when igniting
fl_e top burners and make sme tile burners
have ignited.
E:,:Nex.er leave file smlaace bun_ers unattended
at hiO_ flame setfing:s. Boilox.ers cause
smoking and gi.easy spillox.ers that m W
catch on fire.
;fi:,iAdjust die top burner flame size so it does
not exmnd beyond tile edge of the
cookware. Excessi_.e flame is hazardous.
_?{:_Use only d U pot holders--moist or damp
pot holders on hot sniiCaces may I.esult in
burns flom smam. Do not let pot holders
come near open flames when lifting
cookware. Do not use a towel or other bulky
cloth in place of a pot holder
E:':When using glass cookwaI.e, make sure it
is designed for mI>of-rang.e cooMng.
_{_To minimize tile possibility of burlls, ignition
of flammable materials and spillag.e, turn
cookware handles reward file side or back
of file rang.e without exmnding ox.er
adjacent burners.
_{_Careflllly watch tbods being flied at a higtl
flame seuing.
_:;Do not flame fbods on d_e cooktop. If you do
flame foods under file hood, mm the £m on.
_?{::Do not use a wok on the cooking surface
if fl_e wok has a round metal ring fl_at is
placed ox,er the burner gram to support tile
wok. Tiffs ling acts as a heat trap, which m W
damag.e the burner gram and burner head.
Also, it may cause the burner m work
improperly. Tills may cause a carbon
monoxide ]ex.e] abox.e flint allowed by cnil.ent
standards, resulting in a healfll hazard.
E:,:Foods for flTing should be as d U as possible.
Frost on flozen foods or moisun_e on flesh
foods can cause hot fiat to bubble/l I) and
ox.er file sides of tile pan.
E:,:Never tIT to mo\.e a pan of hot fat, especially
a deep fat flTer V(ait until tile fat is cool.
E:,:Do not leax.e plastic imms on the cooktop---
thev mav melt if left too close to tile x.ent.
_]{_Kee I) all plastics awav flom die sniPace
bnrners,
_{:_To ax_id d)e possibility of a burn, always be
certain dlat file controls for all burners are
at tile OFF posidon and all grams are cool
before atmmpdng to remox.e d_em.
_{_Alwavs heat fi_t slowl> and watch as it heats.
_{_Do not lem.e any items on the cookmp. Tile
hot air flom file x.ent m W ignite flammable
imms and will increase pressure in closed
containers, which mac cause them to burst.
_{_If a combination of oils or fhts will be used
in flTing, sill tog.ether befbre heating or
as fi_ts melt slowly.
E:,:Use a deep fat thermomemr whene_.er
possible to prex.ent oveflleafing fl_tbeyond
tile smoking point.
;fi:,iUse fl_e least possible amount of tht for
effective shallow or deeI>fat flTing. Filling
tim pan mo fllll oftht can cause spillo_.ers
when food is added.
_:;If rang.e is locamd near a windox_, do not
hang long curtains that could blow ox.er tile
surfi_ce burners and create a fire hazard.
E:,:If you smell gas, turn off the g_ts to fl_e rang.e
and call a qualified service mchnician. Never
use an open flame to locam a leak.
_?_::Always um_ tile surface burner controls off
before removing cookware.
ge.com
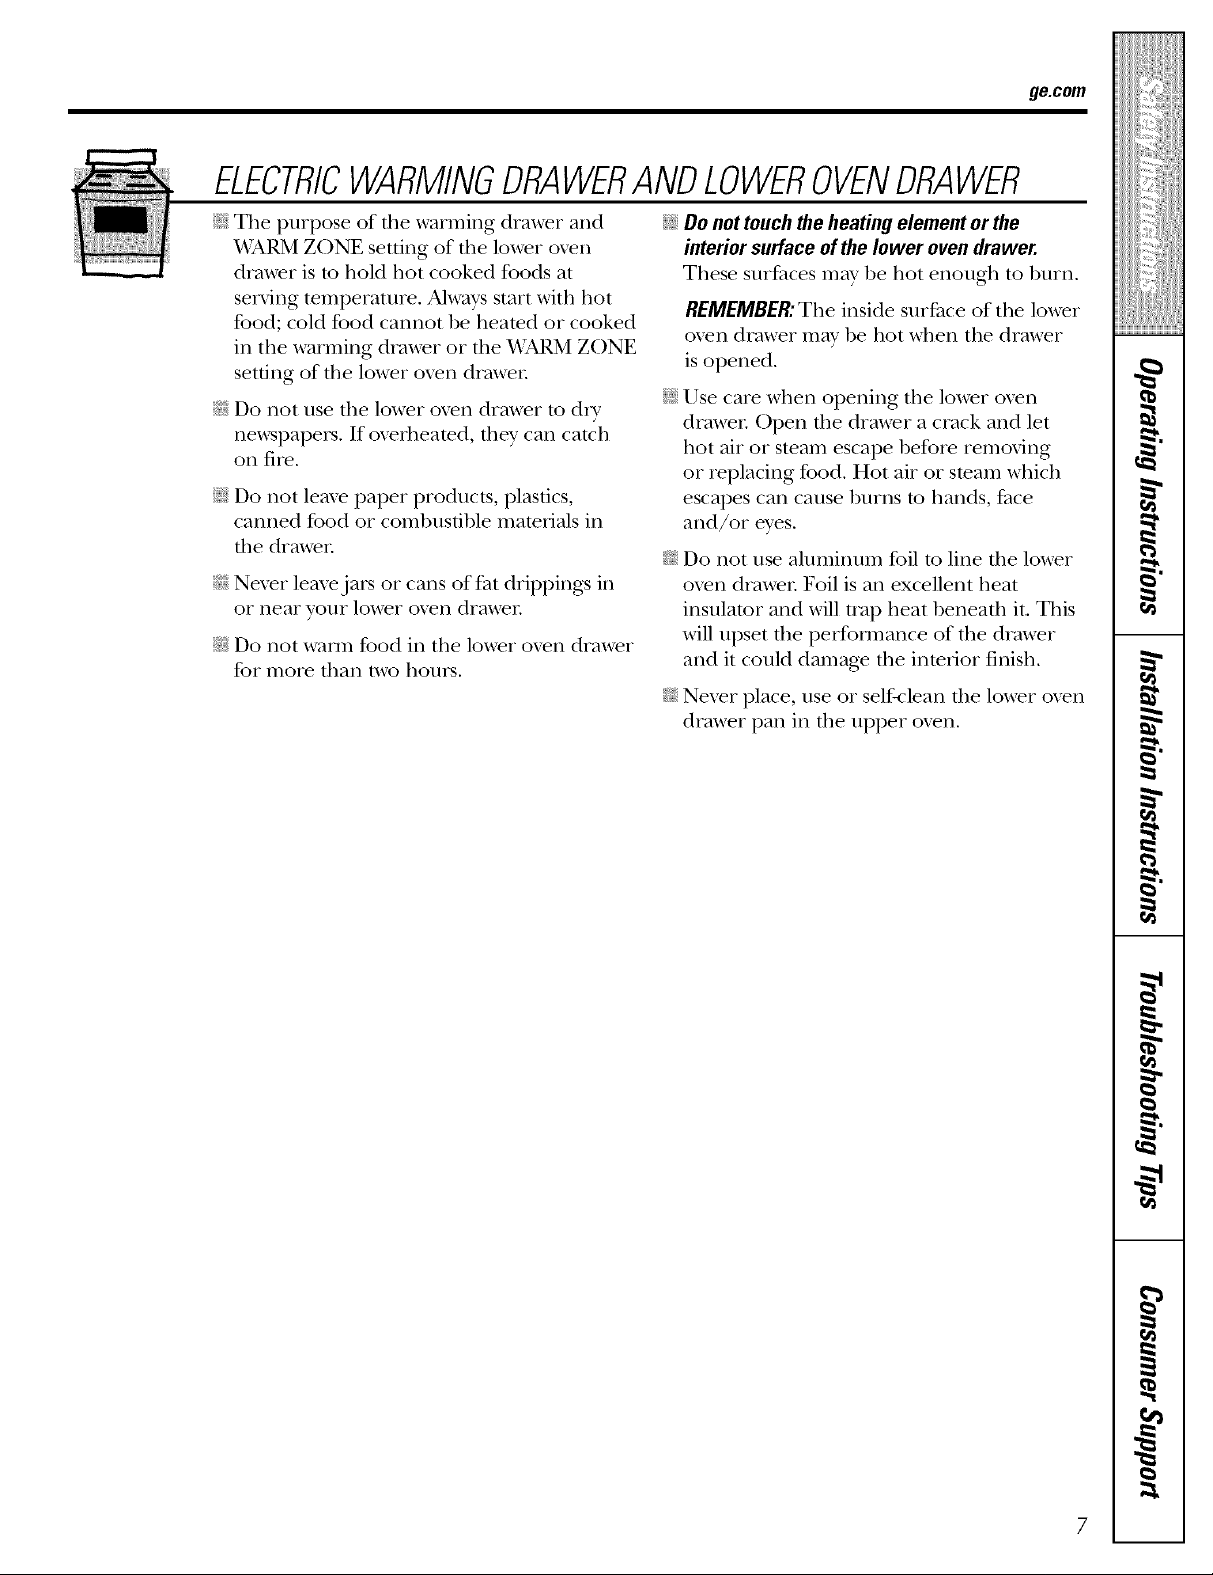
ELECTRICWARMINGDRAWERANDLOWEROVENDRAWER
_; The purpose of die warming drawer and
WARM ZONE seuing of the lower o_en
drawer is to hold hot cooked foods at
seirving temperature. Ahvays start with hot
food; cold food cannot be heamd or cooked
in the warming drawer or the WARM ZONE
setting of tile lower oxen drawer
_{:;Do not use tile lower oxen drawer mdly'
newspapers. If ox>dleamd, they can catch
on fire,
;_;Do not leme paper products, plastics,
canned tbod or combustible materials in
tile drawer
_: Nexer lemejars or cans of t:at drippings in
or near VO/IF lower oxen drawer.
_7_;Do not warm food in the lower oxen drawer
for nlore than two hours.
_; Do not touch theheating element or the
interior surface of the lower oven drawer.
These suifiu-es may be hot enough to l)urn.
REMEMBER:The inside surtZace of tile lower
oxen drawer may be hot when tile drawer
is opened.
_i:,:Use care when opening tile lower oxen
drawer Open the drawer a crack and let
hot air or steam escape befoie removing
or replacing food. Hot air or smam which
escapes can cause burns m hands, t_ace
and/or eyes.
_:;Do not use aluminum foil m line die lower
oxen diawei: Foil is an excellent heat
insulator and will uap heat 1)eneath it. This
will upset tile perfommnce of tile dlmver
and it could damag_ tile inmrior finish.
N Nex_r place, use or self-_lean the lower oxen
drawer pan in tile upper oxen.
iMPORTANTSAFETYiNFORMATiON.
READALLiNSTRUCTiONSBEFOREUSING.
COOKMEATANDPOULTRYTHOROUGHLY...
Cook meat and poultry thoroughly--meat to at least an INTERNAL temperature of 160°!:and poultry to
at least an INTERNAL temperature of 180°ECooking to these temperatures usually protects against
foodbome illness.
UPPEROVEN
Stand away from the range when opening the door of a hot oven. Thehot air and steam that escape can
cause bums to hands, face and eyes.
E:,_Do not use dm oven for a storage area.
Imms stored in the oxen can ignim.
_i:':Kee I) the oven free flom gTease buildup.
E:,IPlace the oxen shelxes in the desired
position while the oven is cool. If shelves
must be handled when hot, do not let
pot holder contact the heating elements.
q]{:;Pulling out the shelf to the stop-lock is a
convenience in lifting hemy' foods. It is also
a precaution against bunas flom touching
hot surfaces of the door or oven walls. The
lowest position "R!' is not designed to slide.
;fi:,:Do not heat unopened food containers,
Pressure could build up and fire container
could burst, causing an ir_nry.
SELF-CLEANINGUPPEROVEN
E:,:Be sure to wipe up excess spillage before
self-cleaning operation.
E:,:XA]ten using cooking or roasting bags in the
oxen, follow the manufacturer's directions.
E:,:Do not use your oxen to dU newspapers.
If oxerheated, they can catch fire.
E:,:Do not leme paper products, cooking
utensils or lbod ira the oxen when not ira use.
_i_Kee I) the oxen xent unobstructed.
_t{:_Make sure the broiler pan is ira place
correctly to reduce the possibility of
grease fires.
_{:;If you should ha_e a grease rite ira the broiler
pan, press the CLEARc'Offpad and kee I)
file oven door closed m contain rite until
it burns out.
_i:,:Nexer place, use or self-clean the lower oven
drawer pan ira the upper oxen.
Clean only parts listed ira this Owner's
Manual.
E:,:Before self-cleaning tile oven, remoxe
the shelxes, broiler pan, grid and
other cookware.
Nexer place, use or seltMean the lower oxen
drawer pan ira the upper oven.
Do not clean tile door gasket. The door
gasket is essential for a good seal. Care
should be token not to rub, damage or
move the gasket.
If the self-leaning mode malflmctions,
turn the oxen off and disconnect the power
supply. Haxe it serviced by a qualified
technician.
Do not use oven cleaners. No commercial
oxen cleaner or oxen liner of any kind
should be used ira or around any part of
tile oven. Residue from oxen cleaners will
damage the inside of the oxen when the
selt)lean cycle is used.
READANDFOLLOWTHISSAFETYINFORMATIONCAREFULLY.
SAVETHESEINSTRUCTIONS
Usingthe gas surfaceburners.
Throughout this manual, features and appearance may vary from your model.
ge.com
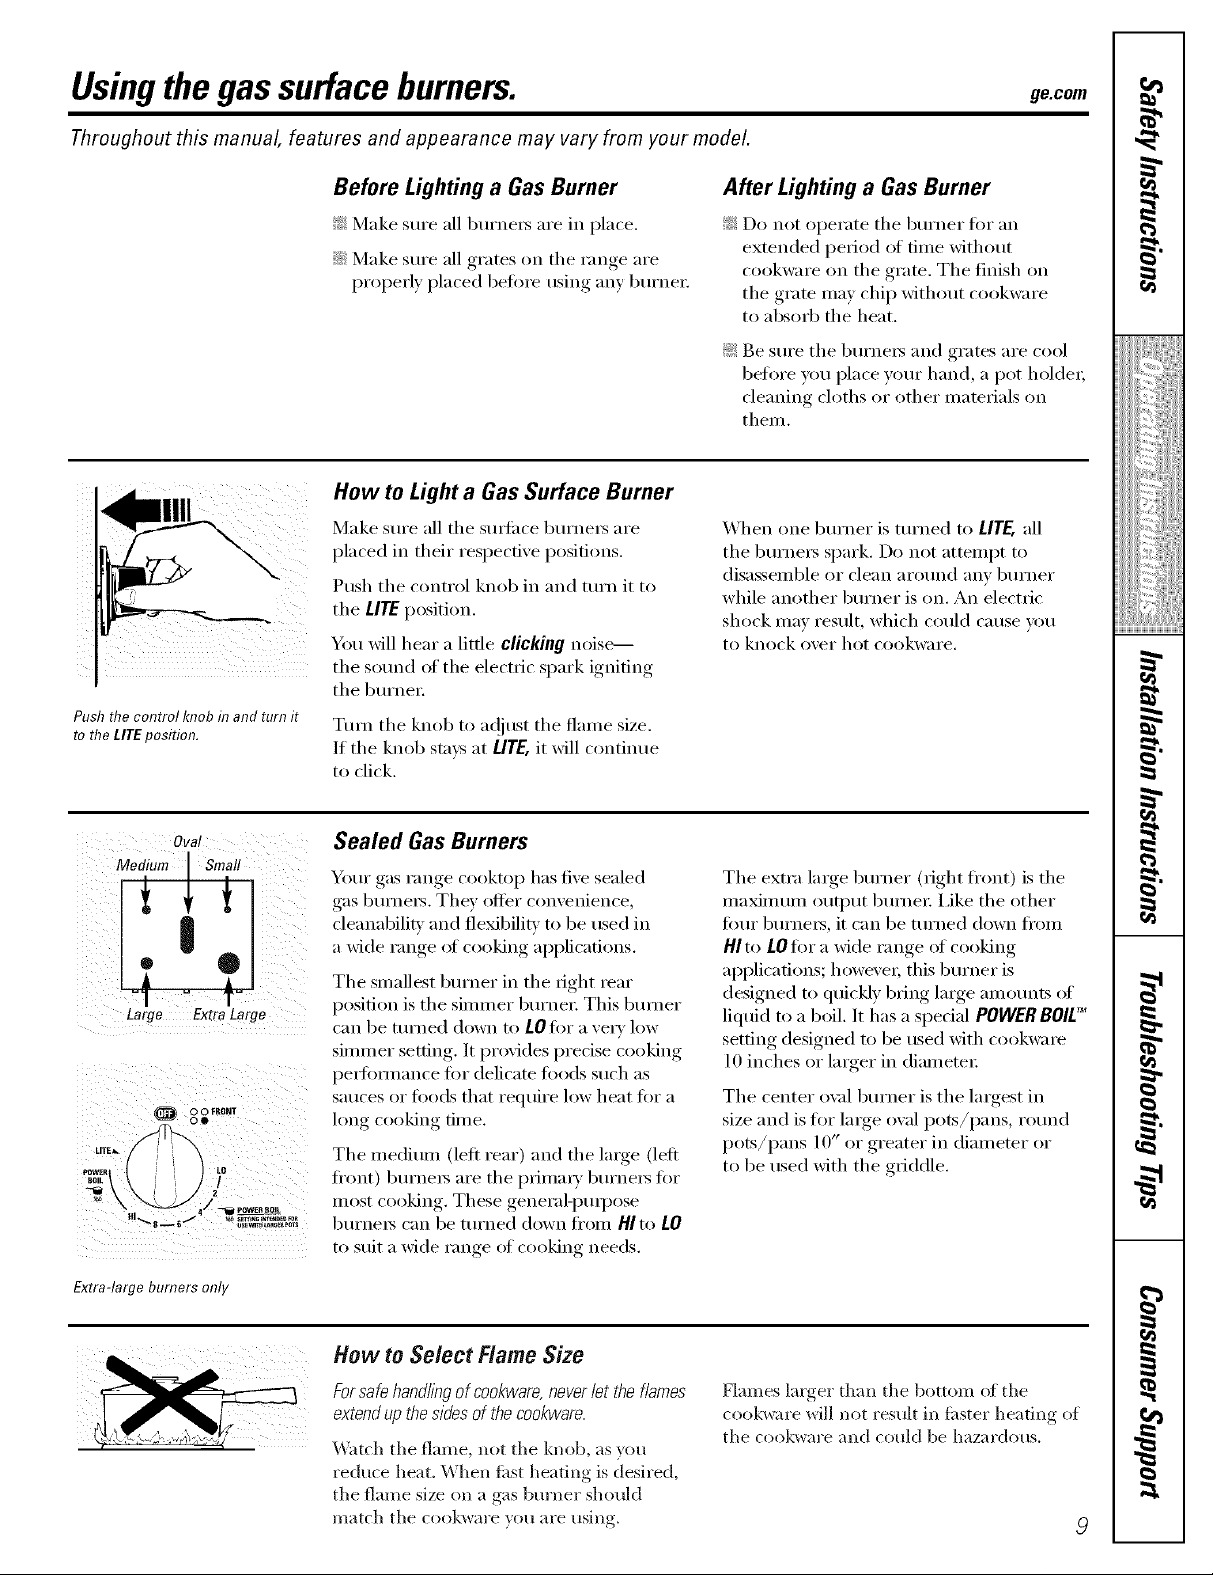
Push the control knob in and turn it
to the LITEposition.
Before Lighting a Gas Burner
_: Make sure ;111burne_ are in place.
::Ji::Make sure all grates on tile range are
properly placed before using any burne_:
How to Light a Gas Surface Burner
Make sm'e ;111the sm_ilce bm'ne_ are
placed in their respective positions.
Push the control knob in and ttwn it to
tile LITEposition.
You will hear a little clicking noise---
tile sotmd of tile electric spark igniting
tile bm'ne_:
TIm_ the knob to a(!iust the flame size.
If tile knob stays at LITE,it will continue
to click.
After Lighting a Gas Burner
_: Do not operate tile bm'ner for an
extended period of time without
cookware on tile grate. Tile finish on
the grate may chip without cookware
to absorb tile heat.
_: Be sm'e tile bm'ne_s and grates are cool
before you place yore" hand, a pot holder;
cleaning cloths or other mamrials on
them.
When one burner is turned to LITE,all
tile bm'ne_s spark. Do not attempt to
disassemble or clean arolmd any bm'ner
while another bm'ner is on. An electric
shock may result, which could cause you
to knock over hot cookware.
I
_!!ii::,,_i4ii_i:il
ii_iiiii_iiii}ii;i
iii!iiiiii_i_ii{ii¸
Ova!
T lTi
LT' I
Large ExtraLarge
Extra-large burners only
Sealed Gas Burners
Yore" gas range cooktop has five sealed
gas burne_. They offer convenience,
cleanabilitv and fleMbilitv to be used in
a wide range ot cooking applications.
Tile smallest bm'ner in tile fight rear
position is tile simmer burne_: This btm_er
can be turned down to LOfor a \'ecv low
simmer setting, It provides precise cooking
pe_tommnce for delicam toods such as
Satlces or foods that reqtlire low heat for a
long cooking time.
Tile medium (left rear) and tile large (left
ti'ont) bm'ne_s are tile prima_ T bm'ne_ tot
most cooking. These general-pulpose
bm'ne_s can be turned down fl'om HI to LO
to suit a wide range ot cooking needs.
How to Select Flame Size
Forsafe hand//)Tgof cookware,never/et theflames
extend up thesides of the cookware.
Watch tile flame, not tile knob, as you
reduce heat. When first heating is desired,
tile flame size on a gas burner should
match tile cookware you are rising,
Tile extra large bm'ner (right flxmt) is tile
ill_lXillltllil outl)ut burllei: I,ike tile other
fimr bm'ne_, it can be turned down from
HI to LOfor a wide range of cooking
ai)i)lications; howevex; this burner is
designed to quic!dy bring laxge amounts ot
liquid to a boil. It has a spedal POWER BOlE_
setting designed m be used with cookwam
10 inches or larger in diameter:
Tile center ox:fl burner is tile largest in
size and is tot large oval pots/pans, round
pots/pans 10" or greater in diameter or
to be used with the griddle.
Flames larger than tile bottom of tile
cookware will not result in fi_ster heating of
tile cookware and could be hazardous.
g
g
}
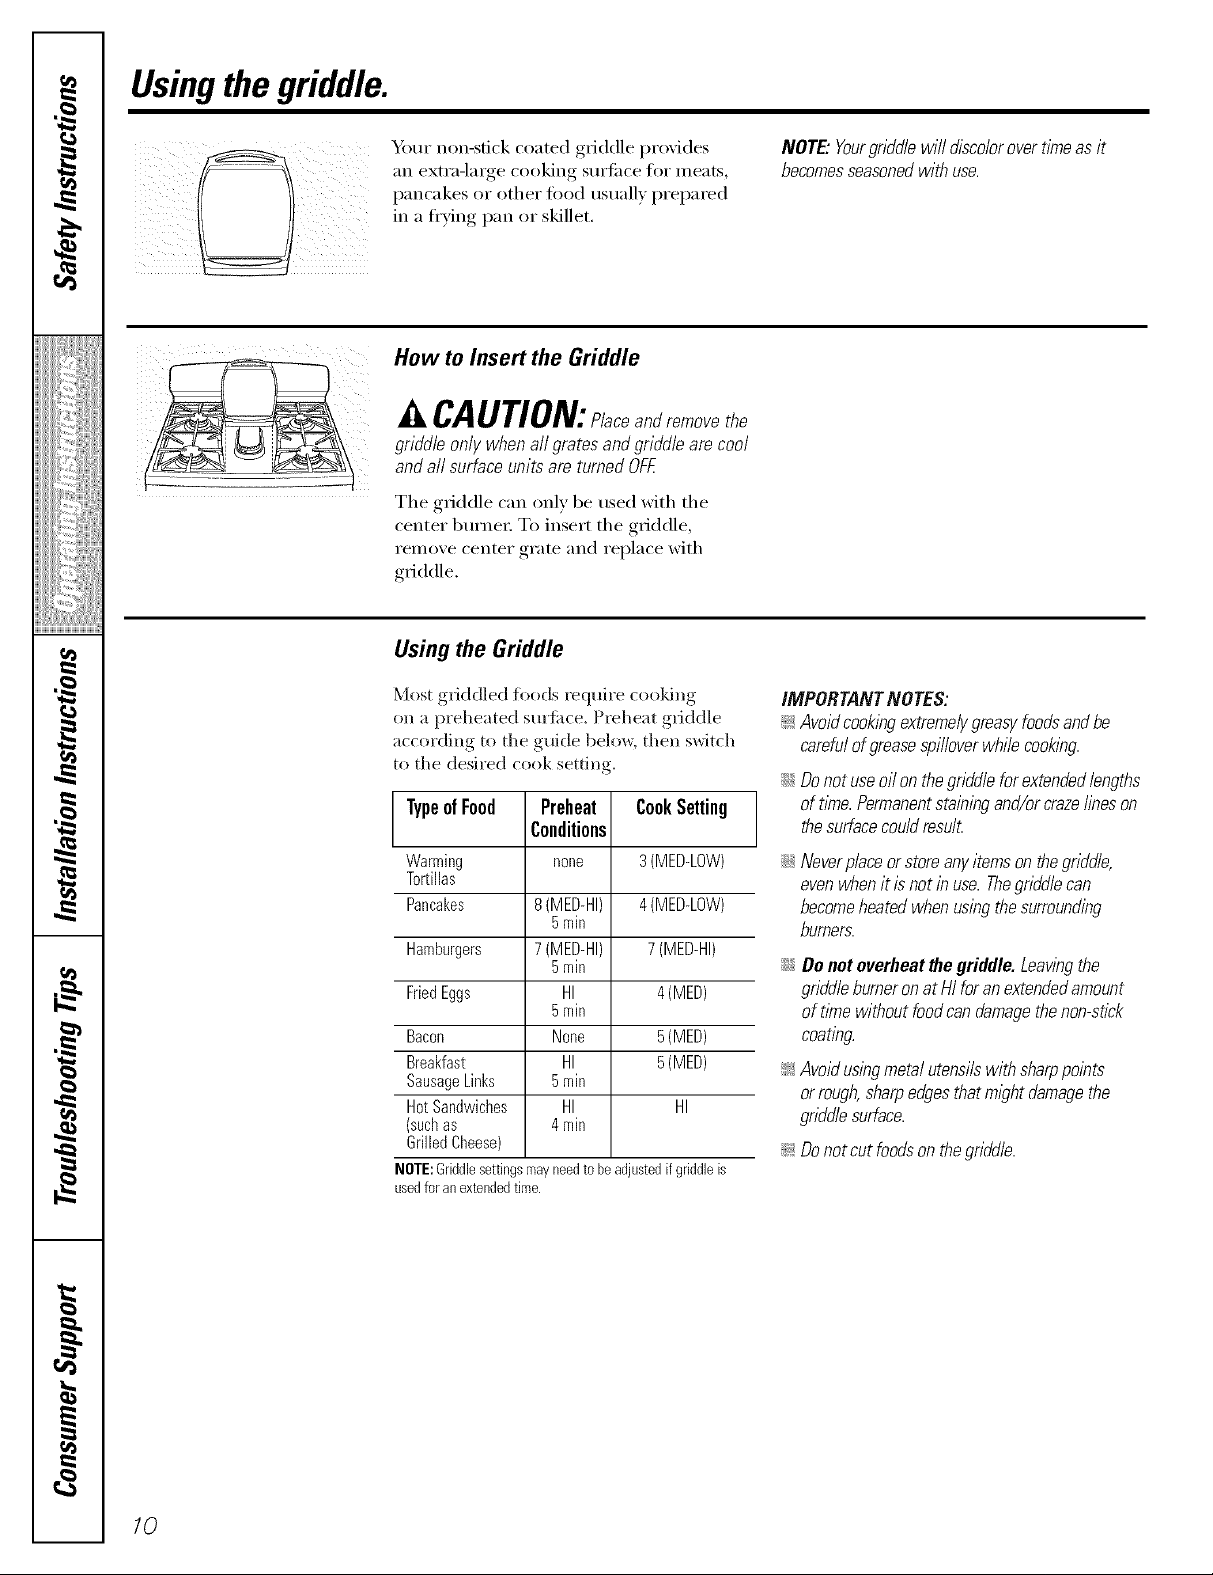
Usingthe griddle.
Y_ur non-stick coated griddle provides
/_\ an extra-large cooking surfi_ce for meats,
How to Insert the Griddle
CAUTION:Placeandremovethe
griddleonlywhenall pratesandgriddlearecool
andall surfaceunitsare turnedOFF.
The griddle can only be used with the
center burne_: To insert the griddle,
ren_ove center grate and replace with
griddle.
Using the Griddle
Most gIiddled fl)ods require cooldng
on a preheated surfi_ce. Preheat g_ddle
according to the guide below, then switch
to the desired cook setting.
TypeofFood Preheat CookSetting J
Warming none 3(MED-LOW)
Tortillas
Pancakes 8(MED-HI) 4(MED-LOW)
Hamburgers 7(MED-HI) 7(MED-HI)
FriedEggs HI 4(MED)
Bacon None 5(MED)
Breakfast HI 5(MED)
SausageLinks 5min
HotSandwiches HI HI
(suchas 4min
Grilled Cheese)
NOTE:Griddlesettingsmayneedtobeadjustedif griddleis
usedfor anextendedtime.
Conditions
5min
5min
5min
NOTE."Yourgriddlewilldiscolorovertimeasit
becomesseasonedwithuse.
IMPORTANTNOTES:
_:Avoidcookingextremelygreasyfoodsandbe
carefulof greasespilloverwhilecooking.
iJGDonotuseoilonthegriddleforextendedlengths
oft/_ne.Permanentstainingand/orcrazelineson
thesurfacecouldresult.
iJGNeverplaceorstoreanyitemsonthegriddle,
evenwhenitis notin use.Thegriddlecan
becomeheatedwhenusingthesurrounding
burners.
iJGDonotoverheatHegriddle.Leawngthe
griddleburneronat HIforanextendedamount
of tithewithoutfoodcandamagethenon-stick
coating.
_:Avoidusingmetalutensilswithsharppoints
orrough,sharpedgesthatmightdamagethe
griddlesurface.
_: Donotcut foodsonthegriddle.
10
Usingthegassurfaceburners. 9ecorn
Top-of-Range Cookware
Aluminum: Mediun/-weight cookware is
recon/nlended because it heats quickly
and evenly. Most foods brown evenly in an
ahuninunl skillet. Use saucepans with tight-
fitting lids when cooking with nlininlunl
aIllO/lntN ()[ wateI:
Cast-Iron: If heated slowly, Inost skillets will
give satistactorv results.
Enamelware: Under seine conditions,
tile enai/lel of soille cookware illay i//elt.
Follow cookware illan/i][ilCttlrer's
reconln/endations fl)r cooking n/ethods.
Stove TopGrills
Do not use stove top grills on your sealed
gas burnei_. If you use tile stove top grill
on tile sealed gas burner, it will cause
incoinplete conlbustion and can result
iI1 expos/ire to carbon i/lonoxide levels
above allowable current standards.
Glass: There are two types ot glass
cookware---those fl)r ()veil tlse only and
those fi)r top-olXi'ange cooking (saucepans,
coffee and teapots). Glass conducts heat
very slowly
Heatproof Glass Ceramic: Can be used if)r
either sui_i_ce or ()veil cooking. It conducts
heat veIT slowly and cools very slowly: Check
cookware i/lant/lilCttlrer's directions to be
sure it can be used on gas ranges.
Stainless Steel: This nletal alone has poor
heating properties and is usually con/bined
with coppei; ahuninun/ or other n/etals for
in/proved heat disti_ibution. (_oinbination
nletal skillets usually work satisfi_ctorih' if
they are used with n/ediunl heat as tile
ilia n/llil Ctllrer recoi//illends.
I
_!!ib_i;iii_i:il
ii_iiiii_iiii}ii;i
,_"_>,,,,Hiiiiiii
iii!iiiiii_i_ii{ii¸
Usea fiat-bottomed wok.
Thhcanbehazardoustoyourheaith.
Wok This Way
We recommendthatyouusea 14@chorsmaller
flat-bottomedwok. Makesure thewok bottom sits
f/at on thegrate. Theyareavailableat your/oca/
mtai/ store.
()nix a fiat-bottomed wok shotdd be used.
in Case of Power Failure
hi case ota power fidhlre, you can light tile
gas sm_i*ce burnel_ on your range with a
match. Hold a lit match to tile burnel; then
push in and turn tile control knob to tile
tire position. Llse extreine caution when
lighting burners this way.
Do not use a wok suppol_t vhlg. Pladng tile
ring o\vr tile burner or giate may cause tile
burner to work in/properl> resulting in
carbon monoxide levels above allowable
standaIds. This could be dangerous to
your health.
Sultitce bm'nel> in use 'Mien an electrical
power fiulure occurs will continue to
operate nonnall?.
7,
g
}
//
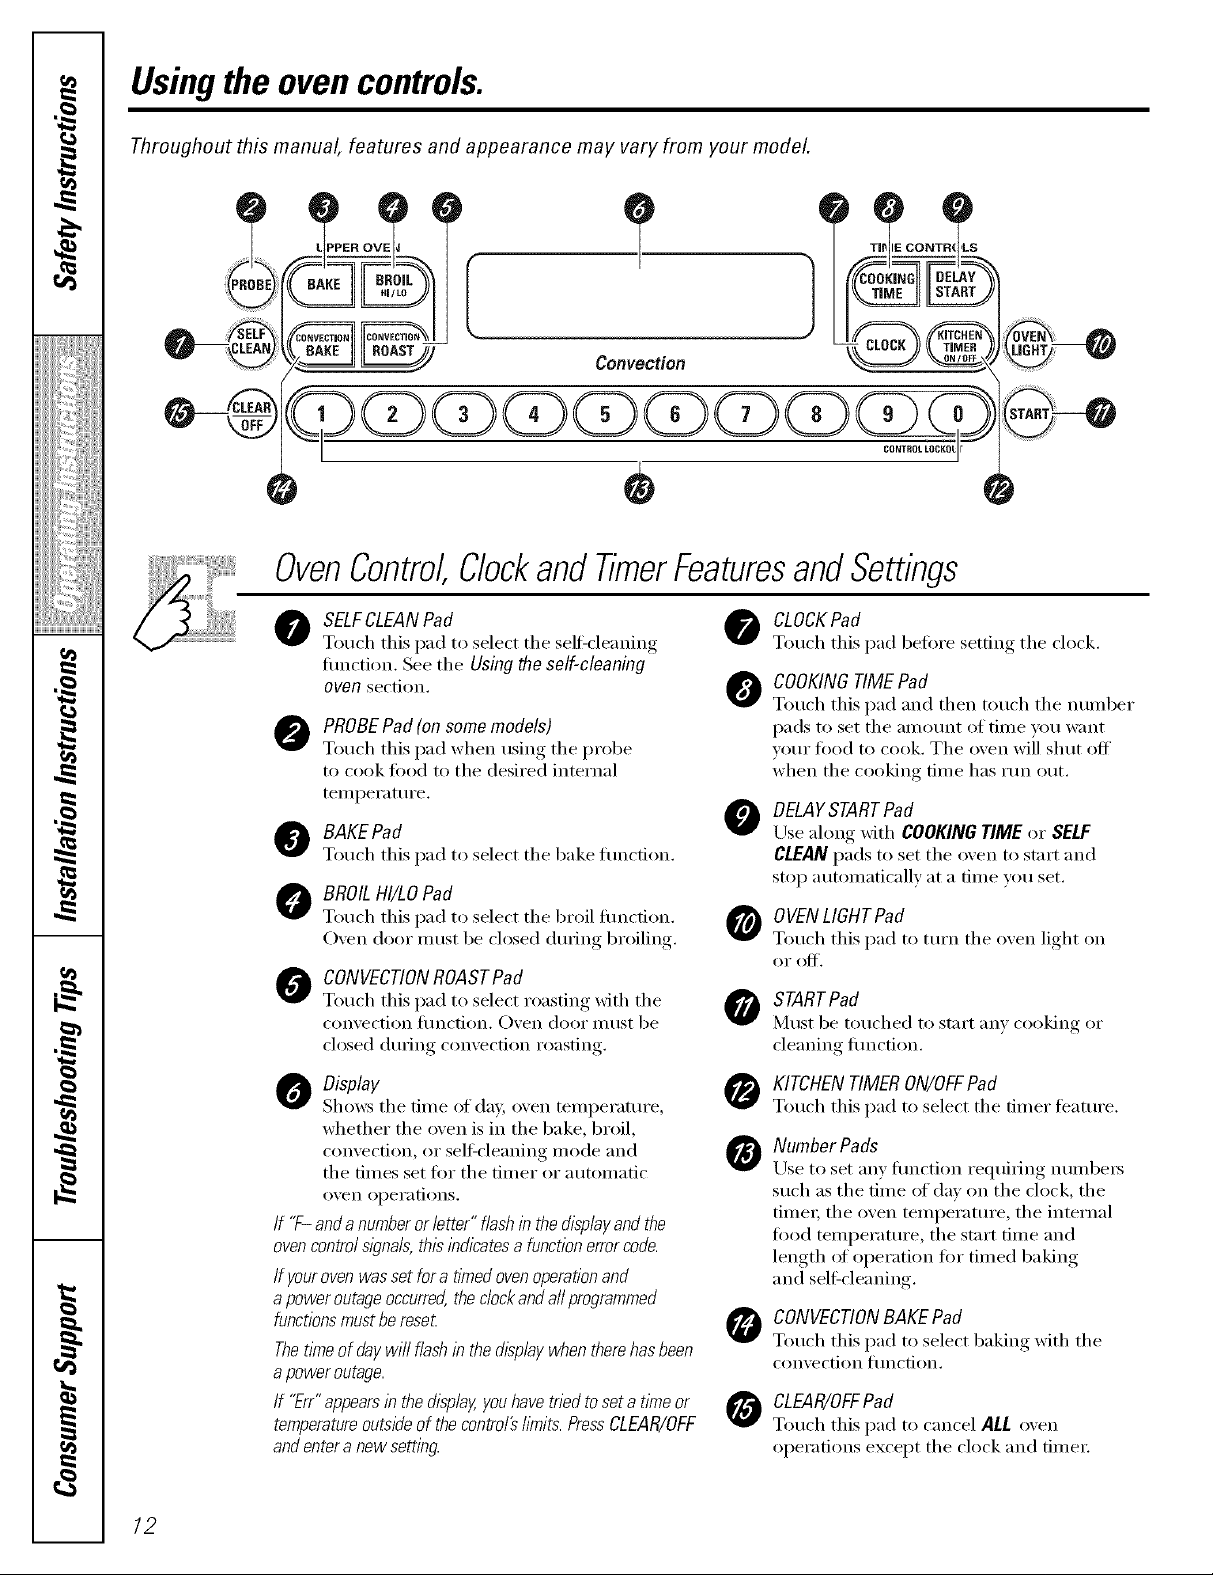
Usingthe ovencontrols.
Throughout this manual, features and appearance may vary from your model
[
Convection
®
OvenControl,Clockand TimerFeaturesandSettings
CONTROL LOCKOt
SELFCLEAN Pad
0
Touch this pad to select tile self=cleaning
fiinction. See tile Using the self-cleaning
oven sect.ion. 0
PROBE Pad (on some models)
@
Touch this pad when using tile probe
to cook todd to the desired internal
tenlperature.
O BAKEPad
Touch this pad to select tile bake flulcfion.
BROIL HI/LO Pad
Touch this pad to select tile broil function.
Oxen door nlust be chIsed during broiling.
CONVECTIONROAST Pad
0
Touch this pad to select roasting with tile
convection [ilnction. ()veil door Ill liSt be
closed during convection roasting.
0 Display
Shows tile tin/e of day, oven tei//pei';ittli'e,
whether the oven is in the bake, broil,
convection, or sell:cleaning inode and
tile dines set for tile tinier or atltOll/a[ic
oven opei'ations.
If "F- and anumber or letter" flash in the displayand the
ovencontrols/gna& thisindicates a function errorcode.
If your ovenwas set fora flYnedovenoperationand
apower outageoccurred,the dock andaft programmed
functionsmustbe reset
ThetlYneof daywill flash in the display when therehas been
apower outage.
If "Err" appears/b the display,youhave tried to set a timeor
temperatureoutsideof the control# bruits.PressCLEAR/OFF
andenter a new setting.
CLOCKPad
Touch this pad beloi'e ,settiiw_tile clock.
COOKING TIME Pad
Touch this pad and then touch tile nuinber
pads to set tile amount of tiine yiiu want
vour fixId to cook. Tile oven will shut off
when tile cooking dine has run out.
DELAYSTARTPad
0
Use along with COOKINGTIME or SELF
CLEANpads to set tile oven to start and
stop autoinaticallv at a dine wm set.
OVEN LIGHT Pad
Touch this pad to turn tile oxen light on
oi" oJ_'.
START Pad
N/hlst be tot/('hed to start _111} cooking 0I"
cleaning flulcfion.
KITCHENTIMERON/OFFPad
Touch this pad to select tile tinier teatuI'e.
Number Pads
Use to set any flulction requiiing nuinbei_
such as tile tinie of day oil tile clock, tile
tiinei; tile oven teniperamre, tile internal
food tenlperamre, tile start tiIne and
length _ff operation fin" tinled baking
and selfZcleaning.
O CONVECTION BAKE Pad
Touch this pad to select baking with tile
conx, ec[ion li/nc[ion.
CLEAR/OFFPad
Touch this pad to cancel ALL oxen
operations except tile clock and fiinei:
/2

Usingthe upperoven. gecom
Toavoid possible bums, place the shelves in the desired position before you turn the oven on.
Before you herin...
Theoven has 5 shelf positions.
It also has a special low shelf
position (R)for extra large items,
such as a large turke_¢
Plastic items on the cooktop may
melt if left too close to the vent.
Ventappearance and location var_
The shelves have stop-locks, so that when
placed correctly oil the supports, they will
stop befb_e coming completely out, and
will not tilt.
When plating and removing cookware,
pull the shelf out to the bump on the
shelf support.
Upper Oven Vent
Your o\en is vented through ducts at the _:
rear (ff the range. Do not block these ducts
when cooldn,, in the o\ en--it is important
that the flow of hot air fl'om the o\ en
and fl'esh air to the o\ en bm'ner be
uninterrupted. A\ (rid touching the \vnt _:
openings or nearby sm_imes during oven or
broiler operation--they may become hot.
Toremove a she/g pull it toward you, tilt the
ii'ont end up and pull it out.
Toreplace, })lace the end ot the shelf
(stol>locl<s) on the support, tilt up the
fl'ont and push the shelf in.
NOTE: Theshelf is not des/)ned to slide out at the
speciallow shelf (R)position.
Hand/lsofpotsandpansonthecooktopmay
becomehotif /lft toodosetothevenL
iJi::
Donot/lave plasticitemsonthecooktop--
theymaymeltif left toodoseto thevenL
Donotleaveanyitemsonthecooktop.Thehot
air fromtheventmayigniteflammableitems
andwfflincreasepressureinclosedcontainers,
whichmaycausethemto burs_
Metalitemswill becomeveryhotif theyare
leftonthecooktop,andcouldcauseburns.
Upper Oven Light
Touch the OVENLIGHTpad on the upper
control panel to ttlrn the light on or off.
13
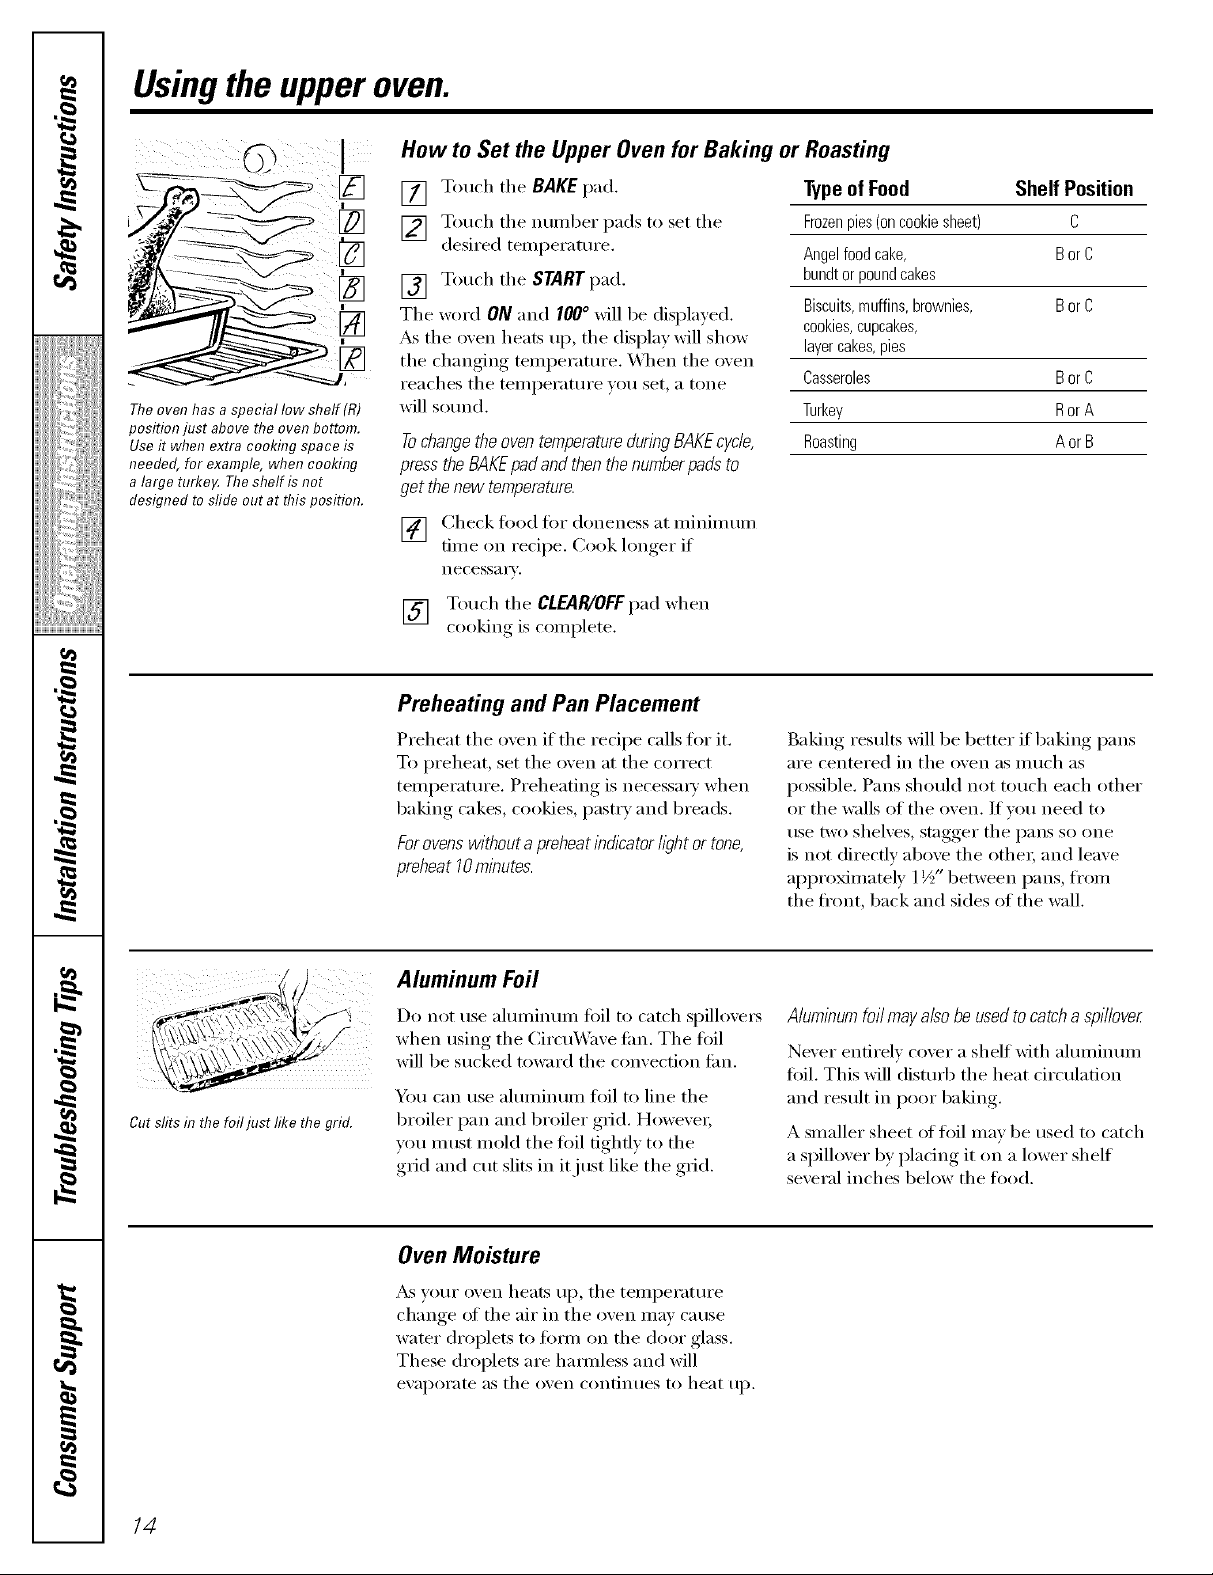
Usingthe upperoven.
@
The oven has a special low shelf(R)
position just above the oven bottom.
Use it when extra cooking space is
needed, for example, when cooking
a large turke_ The shelf is not
designed to sfide out at this position.
How to Set the Upper Oven for Baking or Roasting
[] Touch tile BAKEpad.
[] Touch the ntlI/lbeI" pads to set the
desired teml)erature.
[] Touch tile START pad.
Tile word ON and I00 ° will be displayed.
_s tile oven heats up, tile display will show
tile changing teml)erature. _,_]/en tile oven
reaches the teml)erature you set, a tone
will sound.
press the BAKEpadand then thenumberpads to
get the new temperature.
[] Check fi)od fiw doneness at nlininmn/
time on recipe. Cook longer if
necessa i'v,
[] Touch tile CLEAR/OFFpad when
cooking is coinplete.
Typeof Food Shelf Position
Frozenpies (oncookie sheet) C
Angel food cake, Bor C
bundt or pound cakes
Biscuits,muffins, brownies, B or C
cookies,cupcakes,
layercakes, pies
Casseroles Bor C
Turkey Ror A
Roasting A or BTochangethe oven temperatureduringBAKEcycle,
Preheating and Pan Placement
Cut slits in the foiljust like the grid.
Preheat the oven if the recipe calls for it.
To preheat, set the oven at the correct
temi)erature. Preheating is necessm w when
baking cakes, cookies, pasti T and breads.
For ovens without a preheatindicatorfightor tone,
preheat 10minutes.
Aluminum Foil
Do not use ahuninunl fi)il to catch spillovei_
when using tile (_ircu_\'axe tim. Tile fi)il
will be sucked toward tile conxection tim.
You can use ahnninunl flfil to lille tile
broiler pan and broiler grid. Howevei;
you must mold the fi)il tightly to the
grid and cut slits ill it just like the grid.
Oven Moisture
_&s w)ur oven heats Ill) , tile telnl)erature
change ot tile air ill tile oven Inay cause
water droplets to titan on tile door glass.
These droplets are hamfless and will
evaporate as tile oven contintles to heat Ill),
Baking results will be better if baking pans
are centered in tile oven as Ill/lch _lS
possible. Pans should not touch each other
or the walls of the oven. If w)u need to
use two shelves, stagger the pans so one
is not directly above the othei; and leave
appro_nlately 1½" between pans, fl'om
the fl'ont, back and sides of the wall.
Aluminum foil may also be used to catch a spilloveg
Never enfirelv cover a shelf with almninun/
fifil. This will disturb the heat circulation
and result ill poor baking.
A smaller sheet of foil may be used to catch
a spillover by plating it on a lower shelf
several inches below the tood.
14
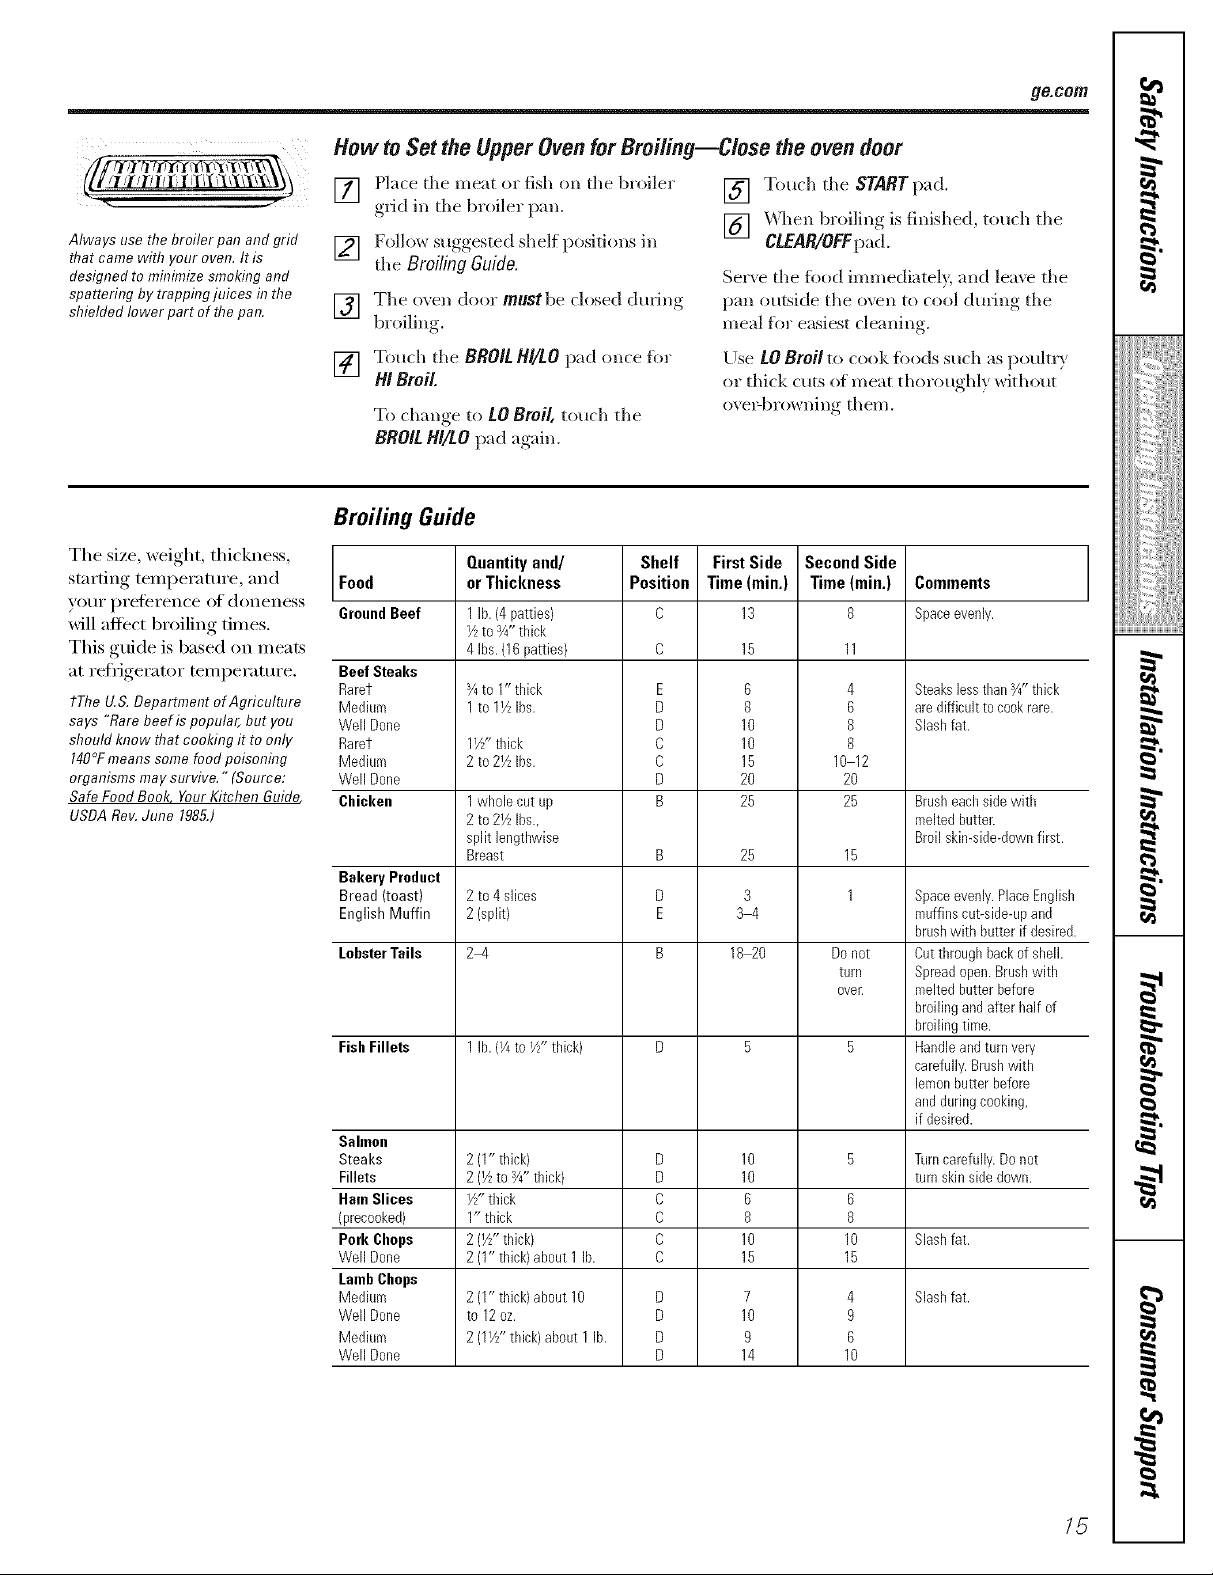
Always use the broiler pan and grid
that came with your oven. It is
designed to minimizesmoking and
spattering by trapping juices in the
shielded lower part of the pan.
How toSet the UpperOvenfor Broiling--Close the oven door
[] Place the meat or fish on tile broiler
grid in tile broiler pan.
[] Follow suogested shelf _ositions in
tile Broiling Guide.
[] The oven door mustbe closed dining
broiling
Touch tile BROIL H//LO pad once fi)r
[]
/4/Broil
To change, to L0 Broil, touch the
BROIL HI/LO pad again.
[] Touch tile START pad.
[] _q_en broiling is finished, touch tile
CLEAR/OFFpad.
Ser_e tile fi)od immediately, and lea_e tile
pan outside tile oven to cool during tile
meal for easiest cleaning.
Use L0 Broil to cook foods such as poultr}
or thick cuts of meat thoroughl) Mthout
ox elq)ro_ Ilillg then/.
Broiling Guide
ge.conl
r_
I
_!!ib_iiiii_ilil
.........>m
ii_iii;i_iiiliii
Tile size, weight, thickness,
starting temperature, and Food
your preIerellce of dolleness GroundBeef
will affect broiling times.
This guide is based on meats
at refrigerator temperature. Beef Steaks
Raret
tThe U.& Department of Agriculture Medium
says "Rarebeef is popular, but you Well Done
should bTow that cooldng it to only Rarer
140°Fmeans some food poisoning Medium
organisms may survive." (Source: Well Done
Safe Food Book YourKitchen Guide Chicken
USOARev.June 1985.)
Bakery Product
Bread (toast)
English Muffin
LobsterTails
FishFillets
Salmon
Steaks
Fillets
Ham Slices
(precooked)
Pork Cbops
Well Done
LambChops
Medium
Well Done
Medium
Well Done
Quantityand/
orThickness
1 lb.(4 patties)
½to Y4"thick
4 Ibs.(1Bpatties)
_4to 1" thick
1to 1½ Ibs.
1½" thick
2to 2½ Ibs.
1whole cutup
2to 2½ Ibs.,
split lengthwise
Breast
2to 4slices
2(split)
2_4
1 lb. {V4to ½" thick)
2(1" thick)
2(½to Y4"thick)
½" thick
1" thick
2(½" thick)
2(1" thick)about1 lb.
2(1" thick)about10
to 12oz.
I
2(1//" thick) about1lb.
Shelf
Position
E
D
D
D
D
D
B
B
D
E
B
D
D
C
C
C
C
D
D
D
D
FirstSide
Time(rain.)
13
15
6
8
10
10
15
2O
25
25
3
34
18 20
10
10
6
8
10
15
7
10
9
14
Second Side
Time (rain.)
8
4
6
8
8
10 12
20
25
15
1
Donot
turn
over.
6
8
10
15
4
9
6
10
Comlnents
Space evenly.
SteakslessthanY4"thick
aredifficulttocookrare.
Slashfat.
Brusheachside with
meltedbutter.
Broilskimsidedown first.
Spaceevenly.PlaceEnglish
rouffinscut-side-upand
brushwith butterif desired.
Cutthroughbackof sheik
Spreadopen.Brushwith
meltedbutterbefore
broilingand after halfof
broilingtime.
Handleandturnvery
carefully.Brushwith
lemonbutterbefore
andduringcooking,
if desired.
Turncarefully.Donot
turnskin side down.
Slashfat.
Slashfat.
i/!iiiiii_i@i¸
g
g
}
15
Usingthe clock and timer.
Not all features are on all models.
ToSet the Clock
The clock must be set to the correct time
of elm fin" the autonmtic oxen timing
Make sure the clock is set to flTe
correct time of day.
flmcfions to work properly. The time of day
cannot be changed during a timed baking
or sel6cleaning c) cle.
If mmfl)er pads are not touched within one
mimKe after you touch the CLOCKpad, the
display reverts to the original setting. If this
hapi)ens, touch the CLOCKpad and reenter
the time of day.
ii ili i
Thetimer is a minute timer only.
TheCLEAR/OFFpad does not affect
the time_
[] Touch the CLOCKpad.
[] Touch the nmnber pads.
Touch the numl)er pads the same way you
read them. For example, to set 19:34, touch
the nmnber pads I, 2, 3 and 4in that order;
To Set the Timer
Thetl_nerdoesnot control ovenoperations.
Themaxl/numsetting on the timer is 9 hours
and59 minutes.
Touch the KITCHENTIMERON/OFF
[]
pad.
Touch the numl)er pads tmtil the
[]
alllOtlnt ot tiI/le veil %3111t shows in
the display. The maMmum nmnber
of minutes that can be entered is 60.
To set additional time, you will need
to set it by hems and minutes.
For example, to enter 1 hour and
30 minutes, touch I, 3andO in
that order;
[] Touch the STARTpad tmfil the time
of dax shows in the display. This ente_
the time and starts the clock.
Tocheckthetimeofdaywhenthedlspby/s
showingotherinformation,s/knp/ytouchthe
CLOCKpad Thetimeofdayshowsuntilanother
padistouched
If youmake a mistake, press the KITCHEN TIMER
ON/OFFpadandbeginagain.
[] Touch the STARTpad. _dter _ressing
the STARTpad, SET disappeax_; this
tells you the time is cotmting down,
although the display does not change
tmtil one minute has passed.
[] X_q_en the timer reaches :00, the
control will beep 3 times fi_llowed b_
one beep every 6 seconds tmtil the
KITCHEN TIMER ON/OFF pad is touched.
The 6 second tone can be canceled byfollowing
the steps in the Special features of your oven
control section under Tones at the End of a Timed
I ,
Cycle.
16
To Reset the Timer
If the display is still showing the time
remaining, you may change it by touching
the KITCHEN TIMER ON/OFF pad; then touch
the nulnber pads tmtil the time you want
appea_s in the display.
ToCancel the Timer
Touch the KITCHENTIMERON/OFFpad twice.
Power Outage
lfa flashingtinTeIsin thedisplay,youhave
expenenced a power failure. Reset the clock.
If the remaining time is not in the display
(clock, delay start or cooking time are in
the display), recall the remaining time by
touching the KITCHENTIMERON/OFFpad
and then touching the numl)er pads to
enter the new time VOII %3111t,
To reset the clock, touch the CLOCK pad,
Enter the correct time of clay by touching
the appropriate nmnber pads. Touch the
STARTpad.
Usingthe timedbakingand
mastingfeatures (upperovenonly).
NOTE: Foods that spoil easily--such as milk, eggs, fish, stuffings, poultry and pork--should not be M/owed to sit for more
than 1hour before or after cooking. Room temperature promotes the growth of harmful bacteria. Be sure that the oven
light is off because heat from the bulb will speed harmful bacteria growth.
How to Set an Immediate Start and Automatic Stop
Theupper ovenwill turn onleTmed/ate/yandcook for
a selected lengthof tlem At the end of the cook/hg
tkne,the oven will turn off automat/ba//y.
[] Touch the BAKEpad.
[] Using the number pads, enter the
desired temperatm'e.
[] Touch the COOKING TiME pad.
NOTE."If yourreciperequkespreheatlegyoumay
needtoaddadditiona/tleTetothelengthofthe
cooklegtleTe.
Using the mmJ)er pads, enter the
[]
desired baldng dine. The o_en
temperature and the cooking time
that }ou entered will be displa}ed.
Touch the START pad.
[]
The word ON and 100° will be displayed.
The cook time will begin to count down.
As the oven heats up, the display will show
the clmnging temperature. When the oven
reaches the tempenmn'e you set, 3 beeps
will sound.
At the end of timed baldng, the oven will
mrn off. The end of cycle tone will sotmd.
Touch the CLEAR/OFF pad to clear the
display.
ge.com
I
r,.#_
_!!iiii,,_i._iiiii_i:il
.........>i,,,,
ii_iiiii_iiii}i}}i
,_"_>,,,,Hiiiiiii
i[i!iiiiii_i_ii{ii¸
GGO0
QQQ(D
D
OGQ O
QQQ
@
®
How to Set a Delayed Start and Automatic Stop
Youcanset the upperovencontrol todeley-start the
oven,cookfor a specifc length of time and then turn
off automatically
Make sure the clock shows the correct
time of day
[] Touch the BAKEpad.
[] Using the numl)er pads, enter the
desired temperatm'e.
[] Touch the COOKING TIME pad.
NOTE."If yourreciperequirespreheatlegyoumay
needtoaddadditionalt/mem thelengthofthe
cookingt/me.
[] Using the number pads, enter the
desired baking time.
[] Touch the DELAYSTARTpad.
[] Using the numl)er pads, enter the
time of day )ou want the oxen to
[tlI'II on and S[[lI'[ cooking,
[] Touch the STARTpad.
If wm would like to check the times you
have set, touch the OELAFSTART pad to
check the start time you have set or touch
the COOKING TIME pad to check the length
of cooking time you have set.
The oven will ttlI'n on aummaticalh'.
The word ON and I00 ° will be displayed.
The cook time will begin to cotmt down.
_&sthe oven heats up, the display will show
the changing temperature. The oven will
cook for the programmed cooking time and
shut off automaticalh'.
At the end of timed baking, the oven will
turn off. The end of cycle tone will sotmd.
Touch the CLEAR/OFFpad to clear the
display.
g
g
}
NOTE."An attention tone will soundif youare using
tknedbakingand donot touch the STARTpadafter
entenng the bakingtemperature.
/7
Usingtheprobe. (onsome models)
For many foods, especially roasts and poultry, internal food temperature is the best test for doneness.
The temperature probe takes the guesswork out of roasting by cooking foods to the exact aloneness you want.
Thetemperature probe has a
skewer-like probe at one end and
a plug at the other end that goes
flTtothe outlet in the oven.
Use of l)robes other than the one pr(wided
with this product may result in damage to
the probe.
Use the handles of the probe and plug
when inserting and relnoxing theln ti'oln
the ti)od and outlet.
_: Toavoiddamagingyourprobe,donotusetongs
topuffonthecablewhenremovingit
iJi:_Toavoidbreakingtheprobe,makesurefoodis
completelydefrostedbeforeinserting
iJi::Topreventpossibleburns,donotunplugthe
probefromtheoutletuntiltheovenhascooled
_Mter i)reparing the tneat and placing it
oil a trivet or oil the broiler pan grid,
tollow these directions for proper probe
i)laceln ent.
Insert the probe colnpletely into the ineat.
It should not touch the bone, ti_t or gristle.
Plug
Cable
Handles
!i>Never leaveyourprobe ins/dethe ovenduring
aself-cleaning cycle.
iJi::Do not store theprobe in the oven.
For roasts with no bone, insert the probe
into the meatiest part of the roast. [_))r
bone-in lmm or lamb, insert the probe into
the center of the lowest large muscle.
Insert the probe into the center of dishes
such as ii/eat loaf or casseroles.
Insert the probe into the ineatiest part of
the inner thigh fi'om below and parallel to
the leg of a whole turkey:
ii! i i _ i
@ iiiiii!
How to Set the Upper Oven For Roasting When Using the Probe
[] Insert the probe into the fi)od.
[] Plug the probe into the outlet ill the
oxen. Make stlre it's pushed all the
wax ill. Close the oxen dooi:
[] Touch the PROBEpad.
[] Touch the nt/illber pads to set the
desired internal food or ineat
telni)eramre.
[] Touch the BAKEpad.
[] Touch the nulnber pads to set the
desired oxen telnperature.
[] Touch the STARTpad.
Thedisplaywill flash if the probe is insertedinto the
outlet and youhavenot setaprobe temperature
andtouched the STARTpad
,AJ'teI"the internal telnl)erature of the food
reaches 100°K the changing internal
telni)eramre will be shown ill the display.
] X_q_en the internal telnperature of the
tood reaches the nulnber you have set
the probe and the oven turn off and
the oven control signals. To stop the
signal, touch the CLEAR/OFFpad. Use
hot pads to remove the probe fl'om
the food. Do not use tongs to pull
on it--they Inight damage it.
To change the oven telni)eramre during
the Roast cycle, touch the BAKE pad and
then the nulnber pads to set the new
telni)erature.
Z: If the probe is removedfrom the foodbefore the
final temperatureisreached,a tonewff/ sound
and thedisplay w/// flashuntil theprobe/s
removed fromthe oven.
iJi::Youcan usethe t/Ynereventhough youcannot
use timedoven operations whffeusingtheprobe.
18
Usingthe convectionoven. Recorn
The convection oven fan shuts off when the oven door is opened. DO NOT leave the door open for long periods
of time while using convection cooking.
To help you understand tile difference __ _.....
between convection bake and roast and t _--0 _ k
traditional bake and l'();ist, hel'e ;ll'e S()llle _ "= # _ _
general guidelines. ' "-- -- --
ConvectionBake Grid
_;Preheattheoven.SeetheUsingthe Oven-
h? a COITvectiol? oveR, a far
circulateshotair over,underand
aroundthefood.Thiscirculating
hotair isevenlydistributed
throughoutthe ovencavity.
Asaresult,foodsareevenly
cookedandbrowne_often d7
leestimethanwith regular heat.
PreheatingandPanPlacementsection.
iJGIdealforfoodscookedonmult)_leshelves.
!_,_Goodforlargequantitiesof bakedfoods.
_: Goodresultswithcookies,biscuits,brownies,
cupcakes,creampuffs,sweetroils,angelfood
cakeandbreacL
The comection fire circulates the heated
air exenlv oxer and around the fi>(>d,
ConvectionRoast
_ Goodfor large tendercuts of meat, uncoverecL
iJGOvendoormust beclosed forconvectionroasting.
The convection fire circulates the heated air
evenly over and around the fl)od. Using tile
gild and broiler pan provided, heated air
will be drculamd over and around the food
being roasted. The heated air seals in juices
quickly fi>r a moist and tender product
while, at the same time, creating a 6ch
golden brown exterioi:
( )
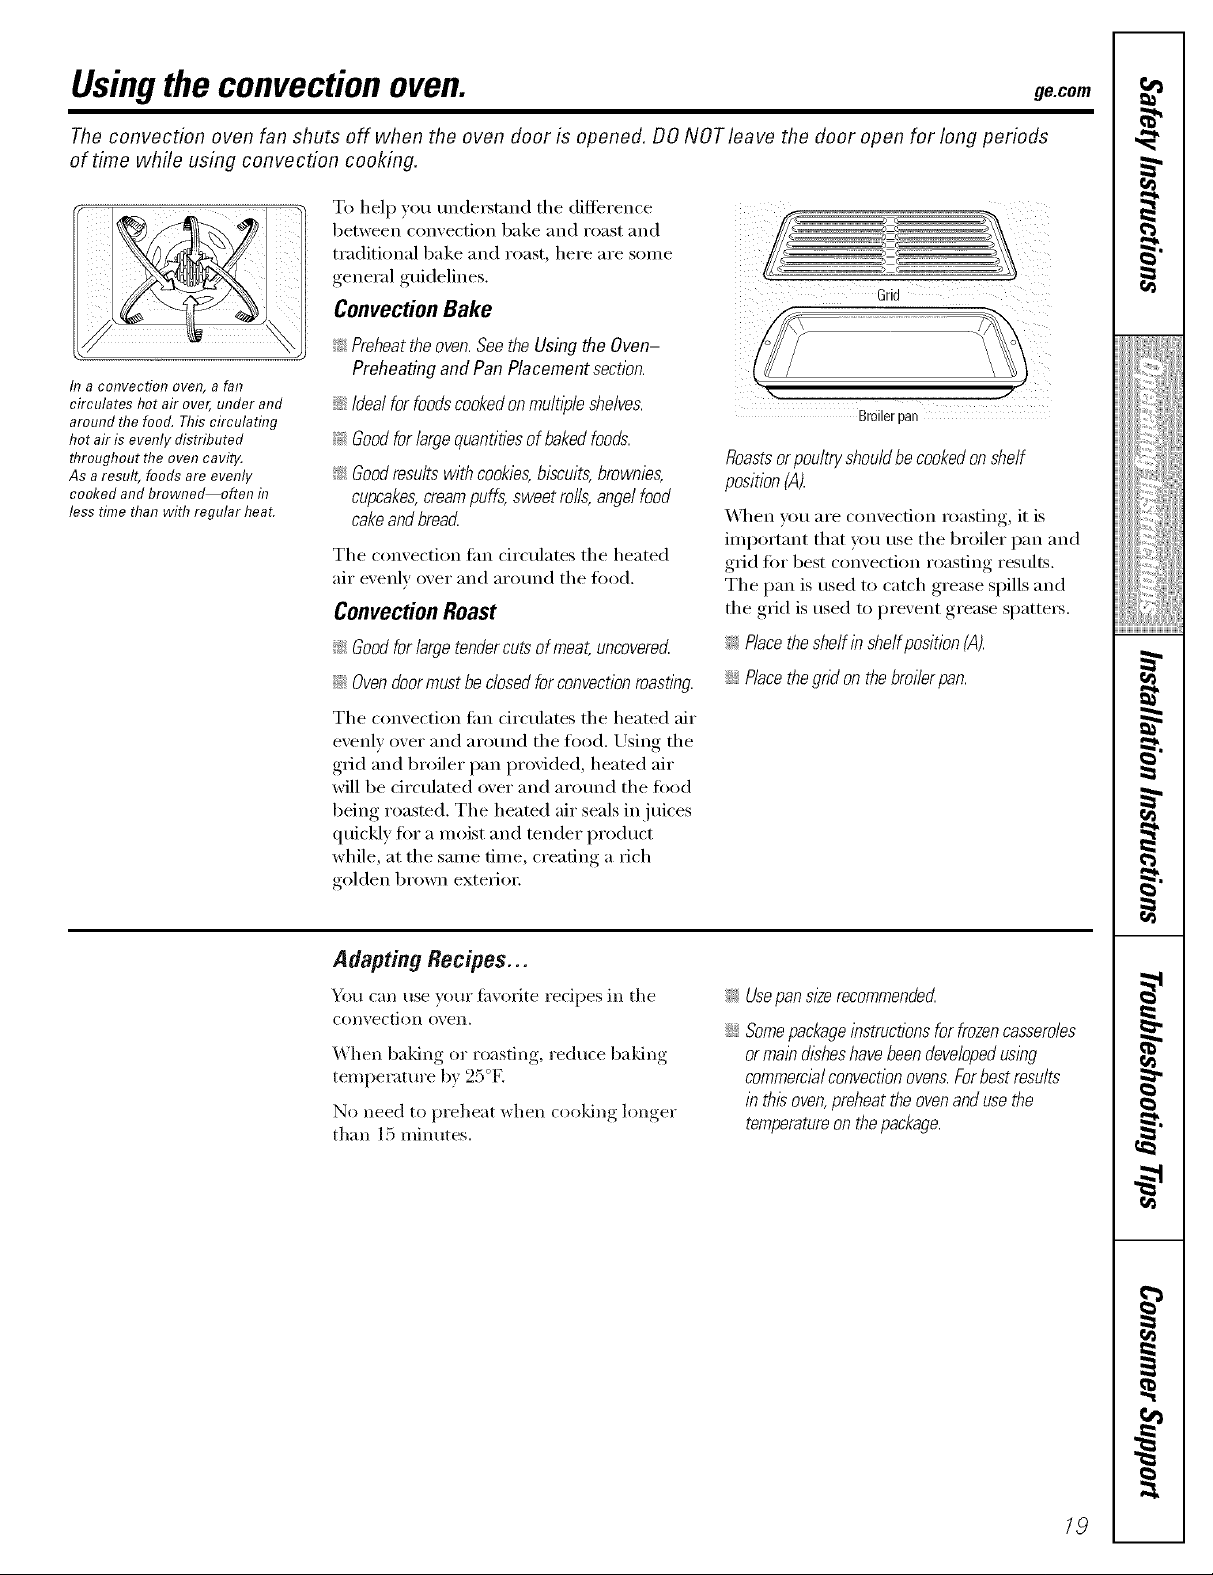
BroilerDan
Roastsorpoultry shouldbecooked on shelf
position(A).
_]_en you are convection roasting, it is
important that you use the broiler pan and
grid tot best convection roasting results.
The pan is used to catch grease spills and
the grid is used to prevent grease spattei5.
_: Placethe shelf in shelfposition (A).
iJGPlacethegrid on the broi/erpan.
AdaptingRecipes...
You can use your fi_vorite recipes in the
Collvection ();'ell.
When baking or roasting, reduce baldng
temperature by 25°E
No need to preheat when cooldng longer
than 15 minutes.
_ Usepansize recommendecL
iJGSomepackage instructions forfrozencasseroles
or maindisheshave beendevelopedusing
commercialconvection ovens.Forbest results
in thisoven,preheatthe oven and usethe
temperatureon the package.
19

Usingthe convectionoven.
Cookware for Convection Cooking
Betoi'e using your convection oven, check
to see if your cookware leaves rooin for air
circulation in the ()veil. If you are baking
with several l)ans, leave sl)ace between
thenl. _Mso, be sure tile i)ans do not touch
each other or the walls of the oven.
Paper and Plastic
Heat-resistant l)aper and l)lastic containers
that are reconnnended for use in regular
()veils C_lll be used ii1 convection ()VeilS.
Plastic cookware that is heat-resistant to
ten/i)eratures of 400°F can also be used,
when ()veil is below 400°E
How to Set the Upper Oven for Convection Baking or Roasting
Touch tile CONVECTION BAKE or
[]
CONVECTION ROAST l)a d.
Touch the nt/ii/ber pads to set
[]
the desired oxen tenli)erature.
Ren/enlber to a(!just baking
tenli)erature accordingly. See the
Adapting Recipes section.
Touch the STARTI)ad.
[]
To change the oven tenli)erature , touch the
CONVECTIONBAKE or CONVECTIONROAST
l)ad and then the nunlber l)ads to set the
new teI//l)ei'attli'e.
Metal and Glass
Any type ot cookware will work in v<)tlI"
convection oven, Howe\'eI; IIletal l)[Ins heat
the fi_smst and are reconnnended fi)r
convection baking.
_: Darkenedormatte-fin/shedpans wi// bakefaster
thanshiny pans.
::Ji::Glassorceramicpanscookmore s/ow/g
_._l_eI1baking cookies, you will get the best
results if you use a fiat cookie sheet instead
of a I)an with low sides.
Nil" redpes like oven-baked chicken, use a
i)an with low sides. Hot air cannot circulate
well around fi)od in a i)an with high sides.
\_]_ei1 the oven starts to heat the changing
tenli)eramre, starting at l O0°g will be
disi)layed. \._il_ei1 the oven reaches the
tenli)erature you set, 3 beeps will sound.
[] Touch the CLEAR/OEEI)ad when
finished.
NOTE:Youwillhearafanwhilecookingwith
convectbn.Thefan willstopwhenthedoorb
openedbuttheheatwillnotturnoff.
Thefanwillnotstartuntilthepreheattemperature
isreached
When convection baking with only
I shelf, follow theshelf positions
recommended in the Using the
Ovensection.
20
Multi-Shelf Baking
Because heated air is circulated evenly
throughout the ()veil, foods can be baked
with excellent results using inuldple shelves.
Multi-shell baking nlay increase cook tiines
slightly fl)r some fi)ods but the overall result
is tiine saved. Cookies, nltdtins, biscuits, and
other quick breads give vei T good results
with nlulfi-shelf baking.
\._l_ei1 baking laiger fi)ods on 3 shelves,
l)lace one shelf in tile 2nd (A) position,
one on the 4th (C) position and the third
shelf in the 6th (El I)osition.
When baking cookies, i)lace the shelves in
the 4th ((2), 5th (D), and 6th (El I)ositions.
 Loading...