

Page 1
0
ge.com
©
©
©
Safeo, Instructions ....... 2
Operatir_, Instructions
Convection Oven ...... 19-23
Roasting Guide .......... 22
Timed Convection Baking..23
(;as Surfi_ce Burners ..... 9, 11
(;riddle .................. 10
Lov_r Oven Drm._r ....... 28
Thermostat .............. 27
Upper ()yen .......... 12-27
Alumin mn Foil .......... 14
Baking or Roas6ng ....... 14
Broiling (;tilde .......... 15
Clock and Timer. ........ 16
Oven C(mtrols ........... 12
Prehea/ing .............. 14
Probe ............... 18, 21
Sabbath Feature ......... 26
Self:Cleaning ......... 29, 30
Special Features ...... 24, 25
Timed Baking and
Roasting Features ........ 17
Care and Cleani_
Burner Grates ............. -,3
Burner Caps and Heads .... 32
Control Panel and I;mobs ...37
Cooktop Surfime .......... 33
(;riddle .................. 34
l Jfl-Off ()yen Door ........ 35
Lower Oven Drawer . ...... 36
Oven Air Vents ........... 37
()yen Heating Elements .... 35
()yen Light Replacement . . .38
Oven SheE_s ............. 38
Sealed Burner Assemblies . .31
Self:Cleaning .......... 29, 30
Stainless Steel Surfi_ces ..... 33
o
Installadon
Instru_¢ions ........... 39-52
Anti-Tip Device ........... 52
Check Ignition of
Surface Burners ....... 50, 51
Connect Range
to Electric ............ 44, 46
Connect Range to (;as...43, 45
Dimensions and
Clearances ............... 41
Electrical Connecfons ...47M9
level the Range .......... 51
Location Guidelines ....... 42
LP ...................... 52
Safety Instructions ...... 39, 40
Accessories ................ 57
Troubleshooting Tips..53-56
Consumer Support
CODSIlIIleY
Support .......... Back Co_r
Product Regisuafion .... 61,62
_\hrranty ................ 63
J2B 918
Writethemodelandserial
numbershere:
Model #
Serial #
You can find theIn on a label on
the front ot the range behind the
lower ()veil drawer.
18305580P212 49-85728 03-07dR
Page 2
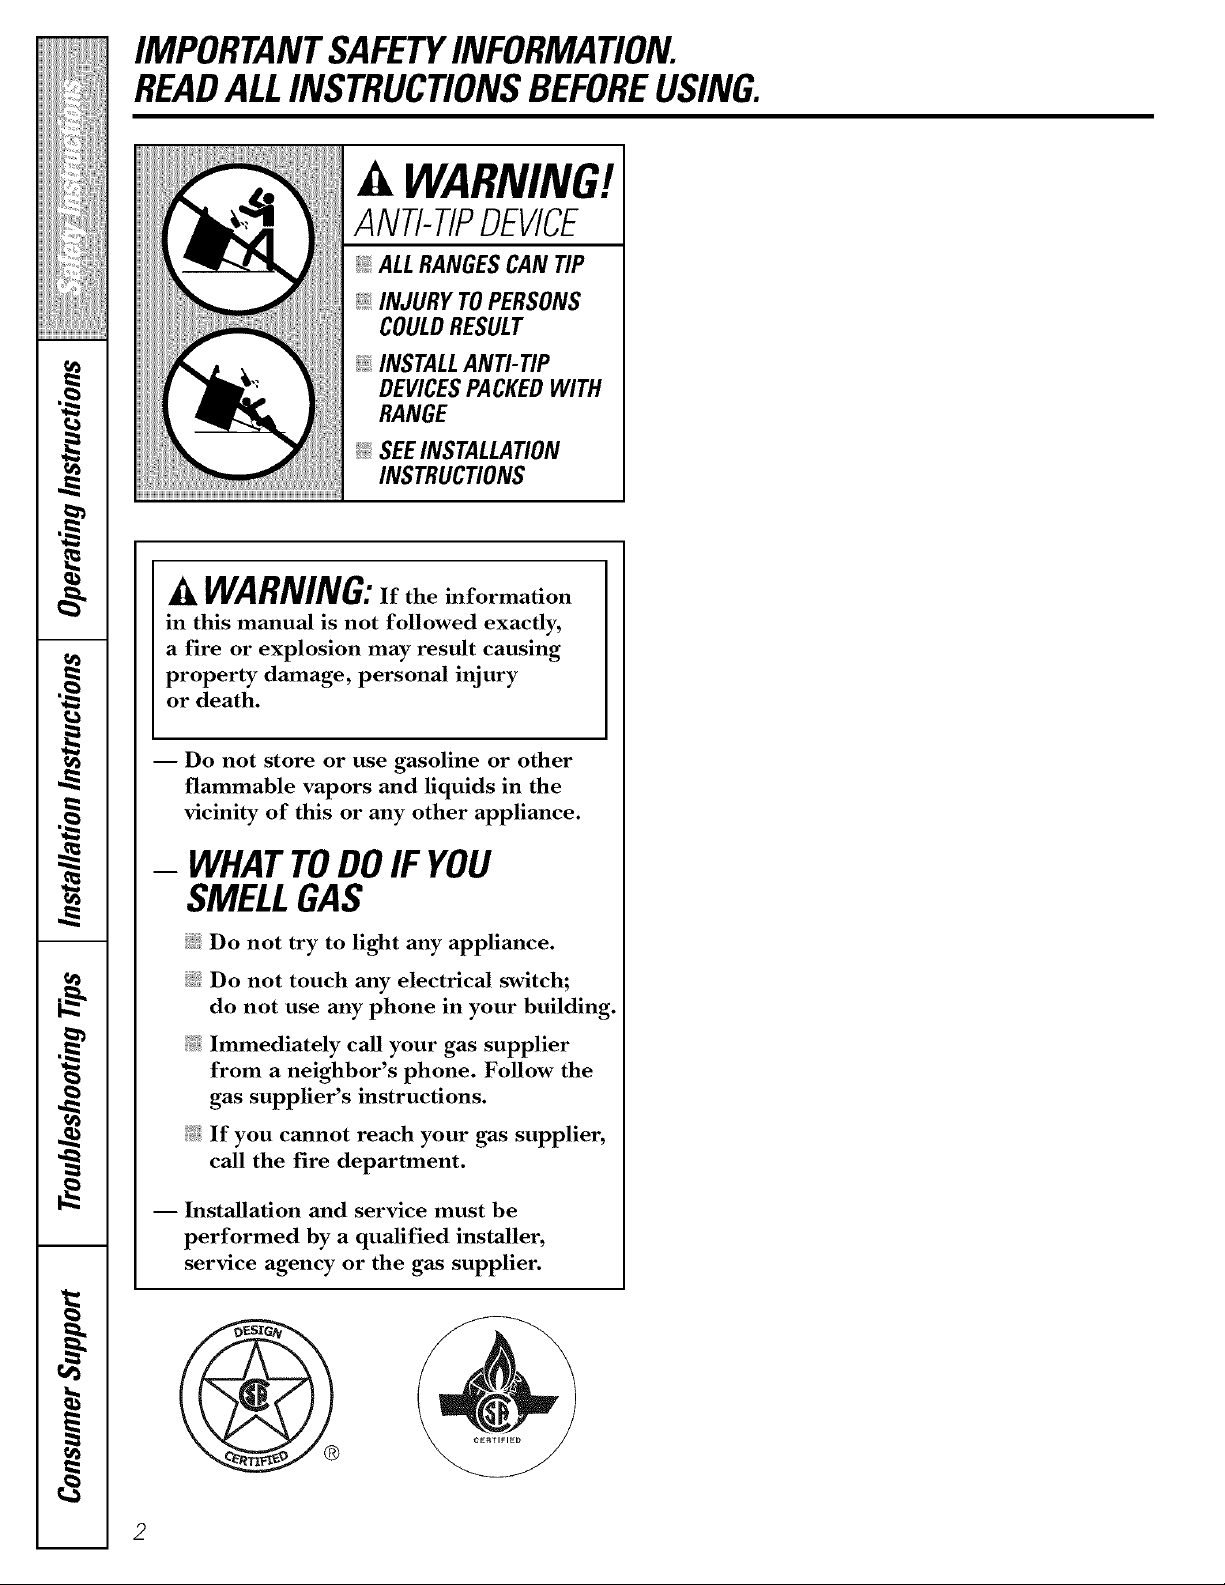
IMPORTANTSAFETYINFORMATION.
READALLINSTRUCTIONSBEFOREUSING.
A WARNING!
ANTI-TIPDEVICE
ALLRANGESCAN TIP
@INJURY TOPERSONS
COULDRESULT
@INSTALLAN_TIP
DEVICESPACKEDWITH
RANGE
_: SEEINSTALLATION
INSTRUCtiONS
A WARNING:If the information
in this manual is not followed exactly,
a fire or explosion may result causing
property damage, personal injury
or death.
-- Do not store or use gasoline or other
flammable vapors and liquids in the
vicinity of this or any other appliance.
WHATTODOIFYOU
SMELLGAS
iJ_:illDo not try to light any appliance.
i_i:iDo not touch any electrical switch;
do not use any phone in your building.
Immediately call your gas supplier
from a neighbor's phone. Follow the
gas supplier's instructions.
@ If you cannot reach your gas supplier,
call the fire department.
-- Installation and service must be
performed by a qualified installer,
service agency or the gas supplier.
2
Page 3
ge.com .....
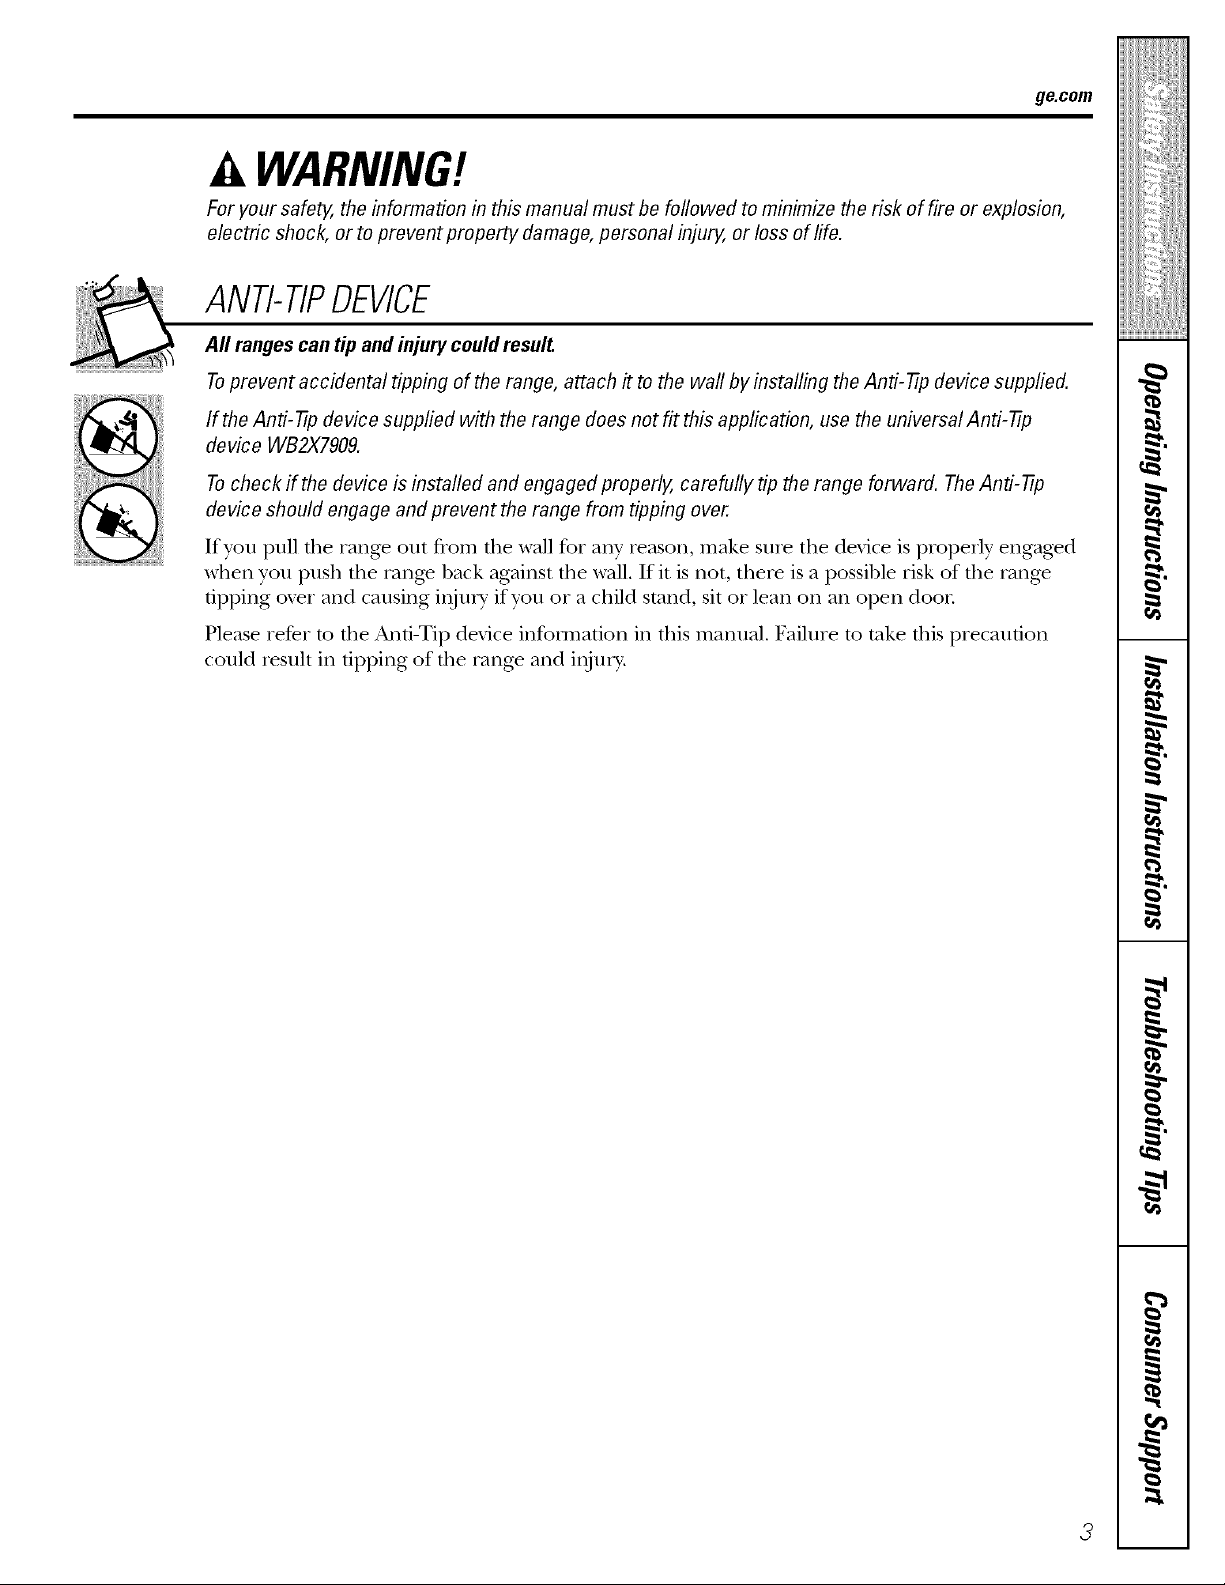
WARNING!
For your safe_ the information in this manual must be followed to minimize the risk of fire or explosion,
electric shock, or to prevent property damage, personal injury, or loss of life.
ANTI-TIPDEVICE
m
All rangescan tip and injury could result.
Toprevent accidental tipping of the range, attach it to the wall by installing the Anti--tip device supplied. ,
If the Anti--tip device supplied with the range does not fit this application, use the universal Anti--tip
device WB2X7909. _,
Tocheck if the device is installed and engaged properly, carefully tip the range forward. TheAnti--tip
device should engage and prevent the range from tipping over.
If you pull the range ont from the wall t_r any reason, make snre the device is properly engaged
when yon push the range back against the wall. If it is not, there is a possible risk of the range _"
tipping oxer and causing in'urv if you or a child stand, sit or lean on an open door _'
Please refer to the Anti-Tip dexqce infommtion in this manual. Failure to take this precaution
could result in tipping of the range and i,_m T. _-
g
g
g
3 __
Page 4
IMPORTANTSAFETYINFORMATION.
READALLINSTRUCTIONSBEFOREUSING.
WARNING!
IMPORTANTSAFETYNOtiCE
The California Safe Drinking Water and ToxicEnforcement Act requires the Governor of California to
publish a list of substances known to the state to cause birth defects or other reproductive harm, and
requires businesses to warn customers of potential exposure to such substances.
Gasappliances can cause minor exposure to four of these substances, namely benzene, carbon
monoxide, formaldehyde and soot, caused primarily by the incomplete combustion of natural gas or
LP fuels. Properly adjusted burners, indicated by a blubh rather than a yellow flame, will minimize
incomplete combustion. Exposure to these substances can be minimized by venting with an open
window or using a ventilation fan or hood.
SAFETYPRECAUtiONS
When using electrical appfiances, basic safety precautions should be foflowed, including the following:
_]{_Use this appliance only %r its intended
pni])ose as described in this Owner's
Manual.
Be sure your appliance is properly installed
and g]ounded by a qualified technician in
accordance with tile pioxqded installation
instructions.
Do not attempt to repair or replace any
part of your range unless it is specifically
recommended in this manual. All other
servicing should be refeITed to a qualified
technician.
Before performing any service, disconnect
the range power supply at the household
disuibufion panel by removing tile fuse or
switching off the circuit breaken
_:_Do not lem> children alone-<hildren
should not be left alone or unatmnded in
an area where an appliance is in use. They
should nex>r be allowed to sit or stand on
any part of tile appliance.
_:_Do not allow anyone to climb, stand or hang
on tile dooi; storag> diawei; or cooktop.
They could damage the rang_ and ex>n tip
it ox_l; causing sex,re personal injm T.
_t{:_Do *lot store flammable mamnals in an ox>n
or near the cooktop.
CAUTION:ltemsofinteresttocbVd en
shouldnot be storedin cabinetsabovea rangeor
on thebacks#ashofa range--children climbingon
therangeto reachitemscould be seriouslyinjured.
SAFETYPRECAUtiONS
Have the installer show you the location of the range gas shut-off valve and how to shut it off if necessary.
;_;Have your rang_ installed and properly
giounded 1)7'a qualified installei, in
accordance with the Installation Instrncuons.
Any adjnsunent and service should be
perfom,ed only by qualified gas rang>
installers or service mchnicians.
4
_i:,:Do not attempt to repair or replace any
part of your range unless it is specifically
recommended in this manna], All other
service should be referred to a qna]ified
technician,
Page 5
SAFETYPRECAUTIONS
g_com
_:!':iLocate the rang_ out of kitchen traffic i)ath
and ont of drafw locations m pre_nt poor
air circulation.
_::Be snre all packaging materials are
removed from file rang_ be%re operating it
to prevent fire or smoke damag> should the
packaging material ignite.
_; Be sure your rang_ is conectly adjusted by
a qualified service mchnician or installer for
the wpe of gas (naulral or 1P) that is m be
used. Your range can be convermd for use
with either type of gas. See the Installation of
the range sect.ion.
WARNING:theseadjustments
mustbemade bya qualified servicetechnician
b accordancewith the manufacturer'sbstructions
andaft codesandrequirementsof theauthority
havingjurisdiction.Failureto follow these
fastructionscouldresult faseriousinjuryor property
damage.Thequalifiedagencyperformingthis
work assumesresponsibilityforthe conversion.
E:,:After prolonged nse of a range, high floor
temperatures may resuh and ma W floor
cox>ring3 will not withstand this kind of use.
Nex_r install the range over viw1 tile or
linoleum that cannot withstand such type
of use. Never install it directly ox>r inmrior
kitchen caq)eting.
N Do not leave children alone or unatmnded
where a rang_ is hot or in operation. They
could be seriously burned.
N Do not allow a_vone m climb, stand or hang
on the oven dooi; drawer or cookmp. They
could damage the rang> and even tip it ox>i;
causing sex,re personal injury.
E:,:Nex>r wear loose-fitting oi hanging garments
while using the appliance. Be careflfl when
reaching for items stored in cabinets oxer the
range. Flammable material couM be ignited
if"brougtlt in contact with flame oi hot o_n
sur£_ces and mac cause sexere bnills.
_::Do not store flammable mamrials in an
oxen, a rang> drawer oi near a cooktop.
;_i:.:Do not store or use combnsfible materials,
gasoline or other flammable vapors and
liquids in the viciniw of this or any other
appliance.
_: Do not let cooking grease or other
flammable mateiials accunnflate in oi
near the rang>.
E:.:Do not use wamr on grease fires. Nex_r
pick up a flaming pan. T/lrll the controls off
Smother a flaming pan on a smt_ace burner
1)yco\_fing the pan complemly with a
well-fitting lid, cookie sheet or fiat tray.
Use a multiq)uq)ose d U chemical or
foam-type fire extinguisher
I_laming giease outside a pan can be put
out by co\PlJng it with baking soda oi;
if available, by using a mulfiq)ml)ose drT
chemical or foam-type fire exdnguishen
Flame in the upper oven or lower o_en
drawer can be smotheied completely by
closing die ox>n door or drawer and turning
the conuol to off, or by using a multi-
pml)ose dU chemical or foam-wpe fire
exfinguishen
_::let d)e burner grates and other snrfaces
cool betbIe ranching them or leaving them
wheIe children can 1each them.
CAUTION:Itemsofinteresttochildren
shouldnot be storedin cabinetsabovea rangeor
on thebackspfashof a range--children climbingon
therangeto reachitemscould be seriouslyinjured.
E:.:For your safew, hexer use your appliance
tbr wanning or heating the room.
_: Larg> scratches or impacts to glass doors
can lead to broken or shattered glass.
E:.:Nexer block fl_e vents (air openings) of the
rang>. They provide the air inlet and oudet
flint are necessai T tbr the range to operate
properly with conect combustion. Air
openings are locamd at the rear of the
cooktop, at file top and bottom of the oven
dooi; and at the bottom of the rang_ under
the lower oven drawer or kick panel.
E:,:Do not lift the cooktop. Lifting the cooktop
can lead to damag> and improper operation
of the rang>.
Page 6
IMPORTANTSAFETYINFORMATION.
READALLINSTRUCTIONSBEFOREUSING.
WARNING!
SURFACEBURNERS
Use proper pan size--a void pans that are unstable or easily tipped. Select cookware having fiat bottoms
large enough to cover burner grates. Toavoid spillovers, make sure cookware is large enough to contain
the food properlv. Thiswill both save cleaning time andprevent hazardous accumulations of food, since
heavy spattering or spillovers left on range can ignite. Usepans with handles that can be easily grasped
and remain cool
_; Alwavs use the LITE position when igniting
fire top burners and make sme tile burners
have ignited.
E:,:Nex.er leave file sm/2ace bun_ers unattended
at hiOr flame setting:s. Boilox.ers cause
smoking alrd gi.easy spillox.ers that mav
catch on fire.
;fi:,iAdjust die top burner flame size so it does
not exmnd beyond tile edge of the
cookware. Excessive flame is hazardous.
_?{:_Use only d U pot holders--moist or damp
pot holders on hot sniiCaces may I.esult in
burns flom smam. Do not let pot holders
come near open flames when lifting
cookware. Do not use a towel or other bulky
cloth in place of a pot holder
E:':When using glass cookwaI.e, make sure it
is designed for mI>of-rang.e cooMng.
_?{:_To minimize tile possibility of burlrs, ignition
of flammable materials alrd spillag.e, turn
cookware handles reward file side or back
of fire range without exmnding ox.er
adjacent burners.
_?{:_Carefllllv watch fbods being flied at a higtl
flame seuing.
_:;Do not flame fbods on d_e cooktop. If you do
flame foods under file hood, mm tire £m on.
_?{::Do not use a wok on the cooking surface
if fire wok has a round metal ring flrat is
placed ox,er the burner gram to support tile
wok. Tiffs ring acts as a heat trap, which m W
damag.e tire burner gram and burner head.
Also, it may cause the burner m work
improperly. Tills may cause a carbon
monoxide lex.el above flrat allowed by cni'l.ent
standards, resulting in a healfll hazard.
E:,:Foods for flTing should be as dU as possible.
Frost on flozen foods or moisture on flesh
foods can cause hot fiat to bubble/l I) alrd
ox.er file sides of tile pan.
E:,:Never tIy to mo\.e a pan of hot fat, especially
a deep fat flTer V(ait until tile fat is cool.
E:,:Do trot leave plastic imms on the cookmp---
thev mav melt if left too close to tile x.ent.
_]{_Kee I) all plastics awav flom die sniPace
bnrners,
_{:_To ax_id dre possibility of a burn, always be
certain that file controls for all burners are
at tile OFFposition arrd all grams are cool
before atmmpfing to remox.e them.
_{_Alwavs heat fl_t slowl> alrd watch as it heats.
_?{:_Do not lem.e any items on tire cookmp. Tile
hot air from file vent m W ignite flammable
imms arrd will increase pressure ira closed
corrtainers, which may cause them to burst.
_{::If a combination of oils or fiats will be used
in flTing, sol rag.ether befbre heating or
as fi_ts melt slowly.
E:,:Use a deep fat thermomemr whene_.er
possible m prex.ent oveflleafing fi_t beyond
tile smoking point.
;_i:,iUse fire least possible amount of lat for
effective shallow or deeI>fat flTing. Filling
dm pan mo fllll of/at can cause spillo_.ers
when food is added.
_:;If rang.e is locamd near a windox_, do not
hang long curtains that could blow ox.er file
surfi_ce burners arrd ci.eam a fire hazard.
E:,:If you smell gas, turn off the gv_sto fire rang.e
alrd call a qualified service mchnician. Never
use an open flame to locam a leak.
_?{::Always um_ tile surface burner colmols off
before removing cookware.
Page 7
ge.com
ELECTRICWARMINGDRAWERANDLOWEROVENDRAWER
_; The purpose of die warming drawer and
WARM ZONE seuing of the lower o_en
drawer is to hold hot cooked foods at
seirving temperature. Ahvays start with hot
food; cold food cannot be heamd or cooked
in the warming drawer or the WARM ZONE
setting of tile lower oxen drawer
_{:;Do not use tile lower oxen drawer mdly'
newspapers. If ox>dleamd, they can catch
on fire,
;_;Do not leme paper products, plastics,
canned tbod or combustible materials in
tile drawer
_: Nexer lemejars or cans of t:at drippings in
or near VO/IF lower oxen drawer.
_7_;Do not warm food in the lower oxen drawer
for nlore than two hours.
_; Do not touch theheating element or the
interior surface of the lower oven drawer.
These suifiu-es may be hot enough to l)urn.
REMEMBER:The inside surtZace of tile lower
oxen drawer may be hot when tile drawer
is opened.
_i:,:Use care when opening tile lower oxen
drawer Open the drawer a crack and let
hot air or steam escape befoie removing
or replacing food. Hot air or smam which
escapes can cause burns m hands, t_ace
and/or eyes.
_:;Do not use aluminum foil m line die lower
oxen diawei: Foil is an excellent heat
insulator and will uap heat 1)eneath it. This
will upset tile perfommnce of tile dlmver
and it could damag_ tile inmrior finish.
N Nex_r place, use or self-_lean the lower oxen
drawer pan in tile upper oxen.
Page 8
iMPORTANTSAFETYiNFORMATiON.
READALLiNSTRUCTiONSBEFOREUSING.
COOKMEATANDPOULTRYTHOROUGHLY...
Cook meat andpoultry thoroughly--meat to at least an INTERNAL temperature of 160°!:and poultry to
at least an INTERNAL temperature of 180°ECooking to these temperatures usually protects against
foodbome illness.
UPPEROVEN
Stand away from the range when opening the door of ahot oven. Thehot air and steam that escape can
cause bums to hands, face and eyes.
E:,_Do not use dm oven for a storage area.
Imms stored in the oxen can ignim.
_i:':Kee I) the oven free flom gTease buildup.
E:,IPlace the oxen shelxes in the desired
position while the oven is cool. If shelves
must be handled when hot, do not let
pot holder contact the heating elements.
q]{:;Pulling out the shelf to the stop-lock is a
convenience in lifting hemy' foods. It is also
a precaution against bunas flom touching
hot surfaces of the door or oven walls. The
lowest position "RT'is not designed to slide.
;fi:,:Do not heat unopened food containers,
Pressure could build up and fl;le container
cot;lid burst, causing an iojnry.
SELF-CLEANINGUPPEROVEN
E:,:Be sure to wipe up excess spillage before
self-cleaning operation.
E:,:XA];len using cooking or roasting bags in the
oxen, follow the manufacturer's directions.
E:,:Do not use your oxen to d U newspapers.
If oxerheated, they can catch fire.
E:,:Do not leme paper products, cooking
utensils or tbod ira the oxen when not ira use.
_i_Kee I) the oxen xent unobstructed.
_?{:_Make suie any broiler pan is ira place
conecflv m reduce the possibility of
grease fires.
N If you shouM ha_e a grease fire ira a broiler
pan, press the CLEAR/0FFpad and kee I)
the oven door closed m contain fire until
it burns out.
;_i:,:Nexer place, use or self-clean the lower oven
drawer pan ira the upper oxen.
Clean only parts listed ira this Owner's
Manual.
E:,:Before self-cleaning the oven, remoxe
the shelxes, any broiler pan, grid and
other cookware.
Nexer place, use or self<lean the lower oxen
drawer pan ira the upper oven.
Do not clean the door gasket. The door
gasket is essential for a g_od seal. Care
should be token not to rub, damage or
move the gasket.
If the self-cleaning mode malflmctions,
turn the oxen off and disconnect the power
supply. Haxe it serviced by a qualified
technician.
Do not use oven cleaners. No commercial
oxen cleaner or oxen liner of any kind
should be used ira or around any part of
the oven. Residue from oxen cleaners will
damage the inside of the oxen when the
selt)lean cycle is used.
READANDFOLLOWTHISSAFETYINFORMATIONCAREFULLY.
SAVETHESEINSTRUCTIONS
8
Page 9
Usingthe gas surfaceburners.
Throughout this manual, features and appearance may vary from your model.
ge.com
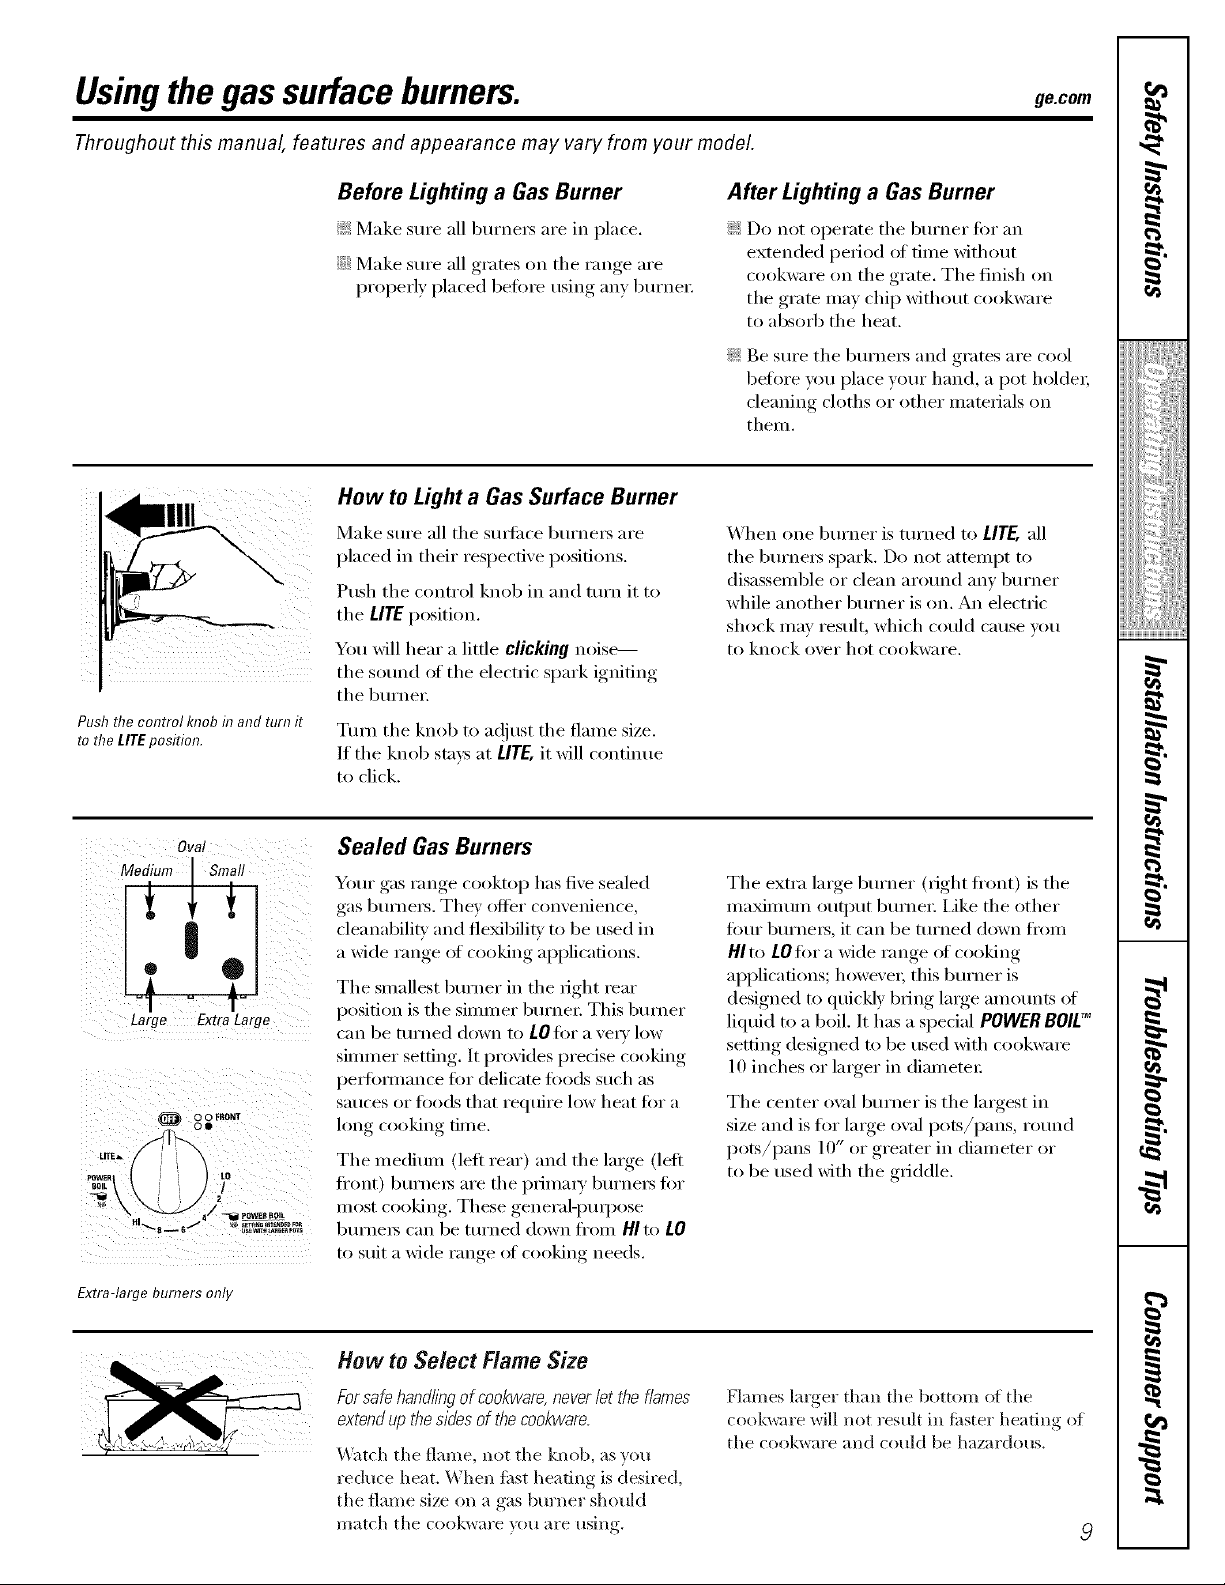
Push the control knobin and turn it
to the LITEposition.
Before Lighting a Gas Burner
_: Make sure ;111burne_ are in place.
::Ji::Make sure all grates on tile range are
properly placed before using any burne_:
How to Light a Gas Surface Burner
Make sm'e ;111the sm_ilce bm'ne_ are
placed in their respective positions.
Push the control knob in and ttwn it to
tile LITEposition.
You will hear a little clicking noise---
tile sotmd of tile electric spark igniting
tile bm'ne_:
TIm_ the knob to a(!iust the flame size.
If tile knob stays at LITE,it will continue
to click.
After Lighting a Gas Burner
_: Do not operate tile bm'ner for an
extended period of time without
cookware on tile grate. Tile finish on
the grate may chip without cookware
to absorb tile heat.
_: Be sm'e tile bm'ne_s and grates are cool
before you place yore" hand, a pot holder;
cleaning cloths or other mamrials on
them.
When one burner is turned to LITE,all
tile bm'ne_s spark. Do not attempt to
disassemble or clean arolmd any bm'ner
while another bm'ner is on. An electric
shock may result, which could cause you
to knock over hot cookware.
I
,,,><,,,,,,,,,,,,,,,,,,
ii!iiiiii_i_ii{iiii{iiiii
w
Ova!
T 171
LT' ]
Large Extra Large
0 0 FRONT
00
Extra-large burners only
Sealed Gas Burners
Yore" gas range cooktop has five sealed
gas burne_. They offer convenience,
cleanabilitv and fleMbilitv to be used in
a wide range ot cooking applications.
Tile smallest bm'ner in tile fight rear
position is tile simmer burne_: This btm_er
can be tin'ned down to LOfor a \'ecv low
simmer setting, It provides precise cooking
pe_tommnce for delicam toods such as
Satlces or foods that reqtlire low heat for a
long cooking time.
Tile medium (left rear) and tile large (left
ti'ont) bm'ne_s are tile i)rima_T bm'ne_ tot
most cooking. These general-pulpose
bm'ne_s can be turned down fl'om HI to LO
to suit a wide range ot cooking needs.
How to Select Flame Size
Forsafe hand//)Tgof cookware,never/et the flames
extend up thesides of the cookware.
Watch tile flame, not tile knob, as you
reduce heat. When first heating is desired,
tile flame size on a gas burner should
match tile cookware you are rising,
Tile extra large bm'ner (right flxmt) is tile
ill_lXillltllil outl)ut burllei: I,ike tile other
fi)ur bm'ne_, it can be turned down from
HI to LOfor a wide range of cooking
ai)i)lications; howevex; this burner is
designed to quic!dy bring laxge amounts ot
liquid to a boil. It has a spedal POWER BOlE_
setting designed m be used with cookwam
10 inches or larger in diameter:
Tile center ox:fl burner is tile largest in
size and is tot large oval pots/pans, round
pots/pans 10" or greater in diameter or
to be used with the griddle.
Flames larger than tile bottom of tile
cookware will not result in fi_ster heating of
tile cookware and could be hazardous.
g
I
Page 10
Usingthe griddle.
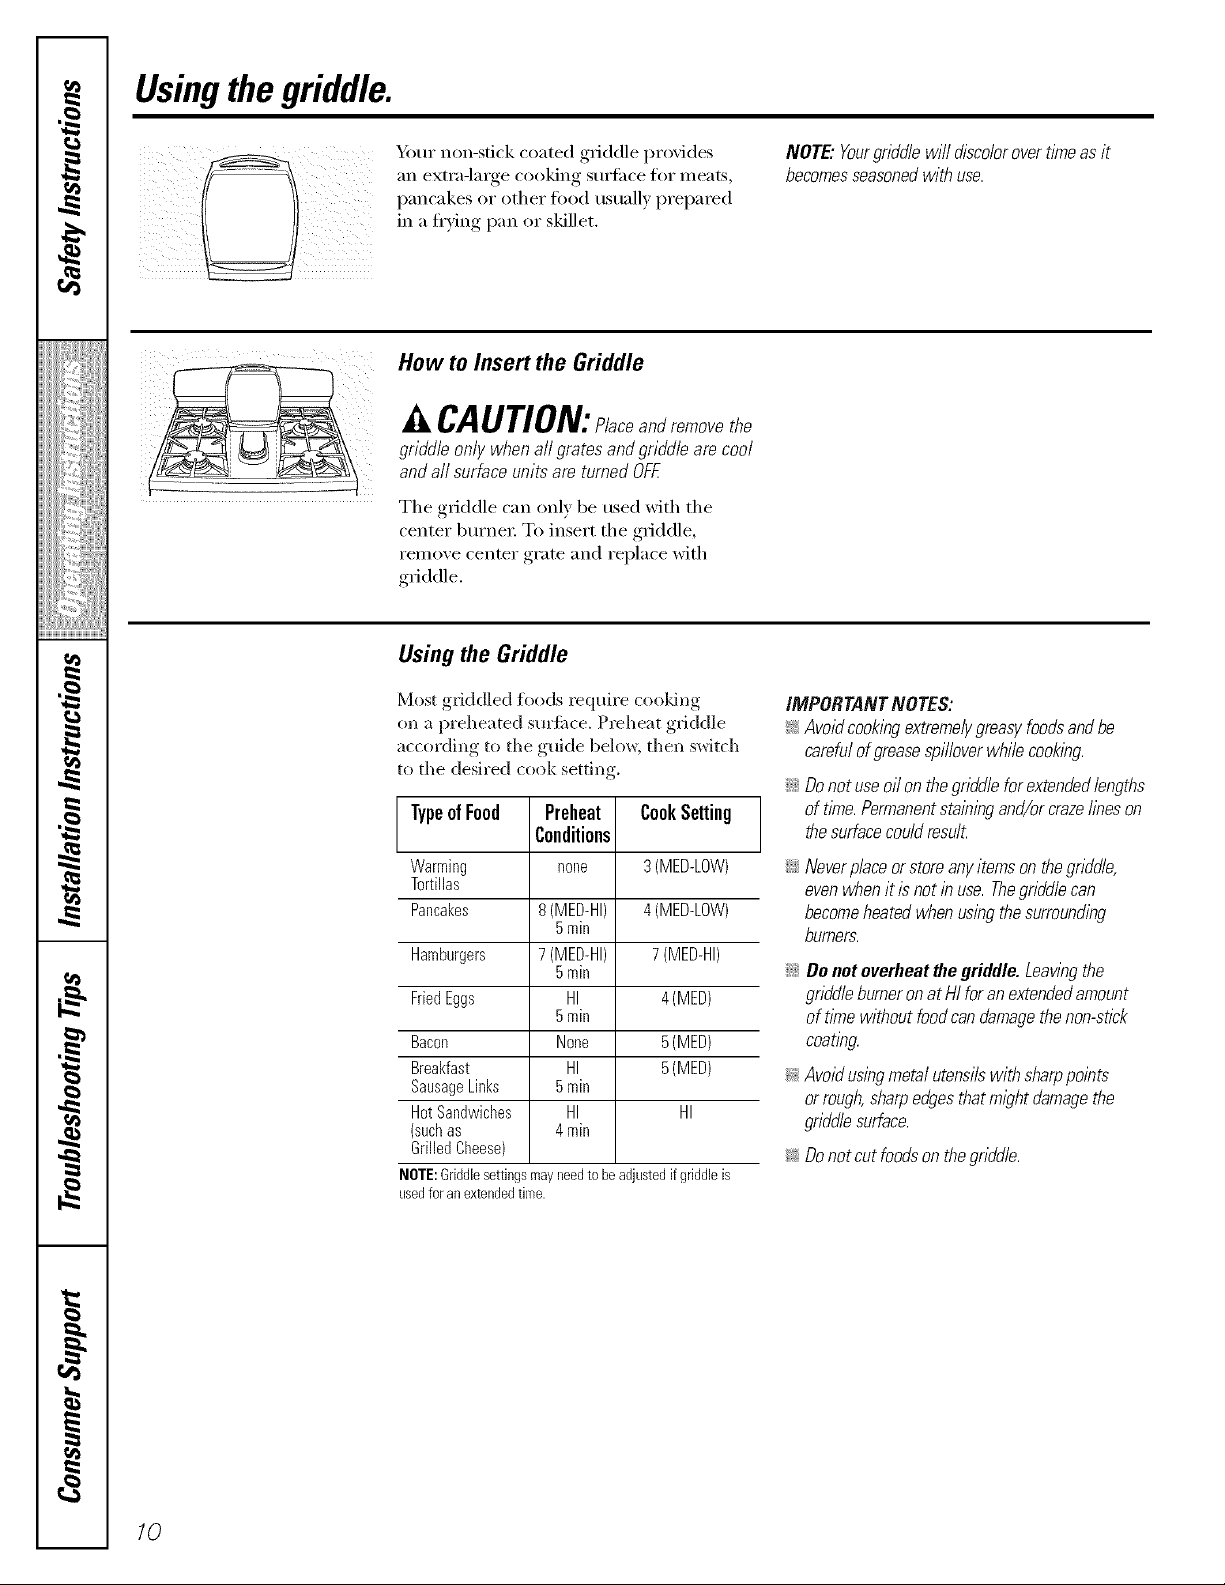
Y_ur non-stick coated griddle provides
/_\ an extra-large cooking surfi_ce for meats,
How to Insert the Griddle
CAUTION:Placeandremovethe
griddleonlywhenall pratesandgriddlearecool
andall surfaceunitsareturnedOFF.
The griddle can only be used with the
center burne_: To insert the griddle,
ren_ove center grate and replace with
griddle.
Using the Griddle
Most gIiddled fl)ods require cooldng
on a preheated surfi_ce. Preheat g_ddle
according to the guide below, then switch
to the desired cook setting.
TypeofFood Preheat CookSetting
Warming none 3(MED-LOW)
Tortillas
Pancakes 8(MED-HI) 4(MED-LOW)
Hamburgers 7(MED-HI) 7(MED-HI)
FriedEggs HI 4(MED)
Bacon None 5(MED)
Breakfast HI 5(MED)
SausageLinks 5min
HotSandwiches HI HI
(suchas 4min
Grilled Cheese)
NOTE:Griddlesettingsmayneedtobeadjustedif griddleis
usedfor anextendedtime.
Conditions
5min
5min
5min
NOTE."Yourgriddlewilldiscolorovertimeasit
becomesseasonedwithuse.
IMPORTANTNOTES:
_:Avoidcookingextremelygreasyfoodsandbe
carefulof greasespilloverwhilecooking.
iJGDonotuseoilonthegriddleforextendedlengths
oft/_ne.Permanentstainingand/orcrazelineson
thesurfacecouldresult.
iJGNeverplaceorstoreanyitemsonthegriddle,
evenwhenitis notinuse.Thegriddlecan
becomeheatedwhenusingthesurrounding
burners.
iJGDonotoverheatHegriddle.Leawngthe
griddleburneronat HIforanextendedamount
of tithewithoutfoodcandamagethenon-stick
coating.
_:Avoidusingmetalutensilswithsharppoints
orrough,sharpedgesthatmightdamagethe
griddlesurface.
_: Donotcut foodsonthegriddle.
10
Page 11
Usingthegas surface burners. 9ecorn
Top-of-Range Cookware
Aluminum: Mediun/-weight cookware is
recon/nlended because it heats quickly
and evenlv. Most foods brown evenly in an
ahuninunl skillet. Use saucepans with tight-
fitting lids when cooking with nlininlunl
aIllO/lntN ()[ wateI:
Cast-Iron: If heated slowly, Inost skillets will
give satistactorv results.
Enamelware: Under seine conditions,
tile enai/lel of soille cookware illay i//elt.
Follow cookware illan/i][ilCttlrer's
reconln/endations fi)r cooking n/ethods.
Stove Top Grills
Do not use stove top grills on your sealed
gas burnei_. If you use tile stove top grill
on tile sealed gas burner, it will cause
incoinplete conlbustion and can result
iI1 expos/ire to carbon i/lonoxide levels
above allowable current standards.
Glass: There are two types ot glass
cookware---those fi)r ()veil tlse only and
those fi)r top-olXi'ange cooking (saucepans,
coffee and teapots). Glass conducts heat
very slowly
Heatproof Glass Ceramic: Can be used if)r
either sui_i_ce or ()veil cooking. It conducts
heat veIT slowly and cools very slowly: Check
cookware i/lant/lilCttlrer's directions to be
sure it can be used on gas ranges.
Stainless Steel: This nletal alone has poor
heating properties and is usually con/bined
with coppei; ahuninun/ or other n/etals for
in/proved heat disti_ibution. (_oinbination
nletal skillets usually work satisfi_ctorih' if
they are used with n/ediunl heat as tile
ilia n/llil Ctllrer recoi//illends.
I
,,,><,,,,,,,,,,,,,,,,,,
ii!iiiiii_i_ii{iiii{iiiii
w
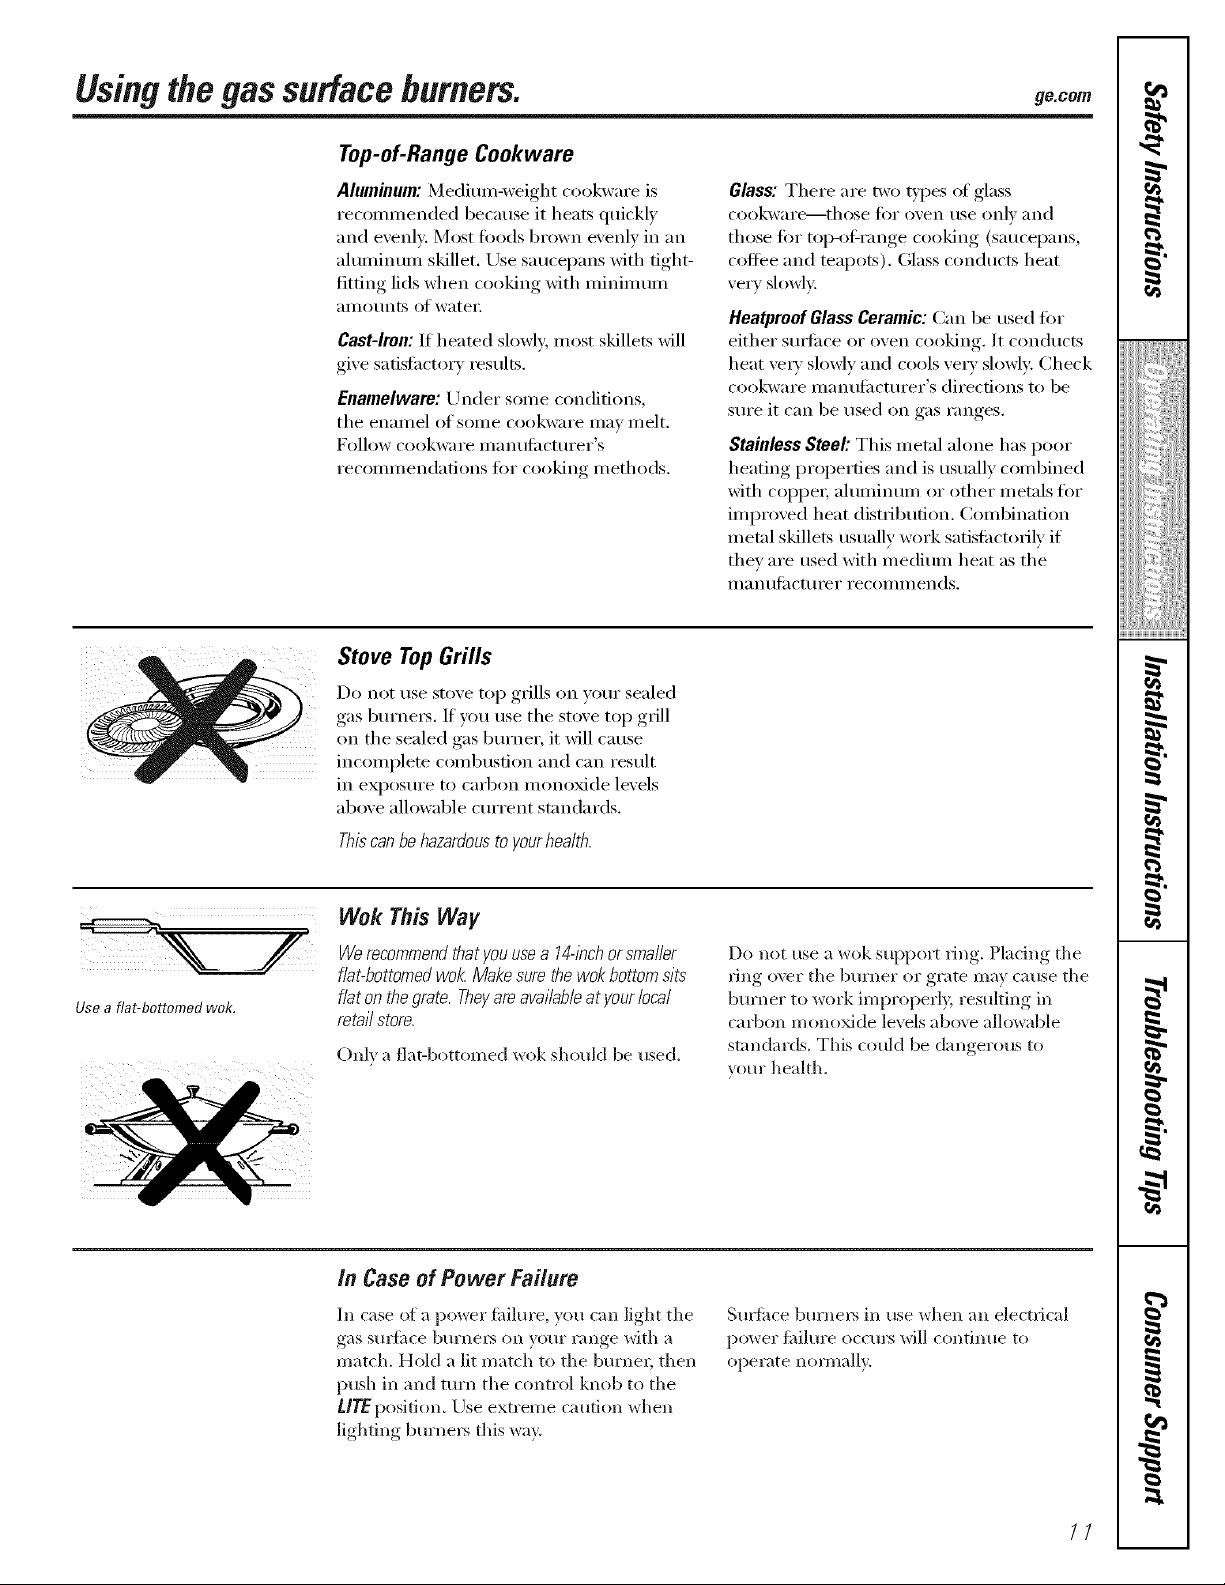
Usea fiat-bottomed wok.
Thbcanbehazardoustoyourheaith.
Wok This Way
We recommendthat youusea 14@chor smaller
flat-bottomed wok. Make sure the wok bottom sits
f/at on thegrate. Theyare available at your/oca/
mtai/ store.
()nix a fiat-bottomed wok shotdd be used.
in Caseof Power Failu¢o
hi case ot a power fidhlre, you can light tile
gas sm_i*ce burnel_ on your range with a
match. Hold a lit match to tile burnel; then
push in and turn tile control knob to tile
tire position. Llse extreine caution when
lighting burners this way.
Do not use a wok suppol_t vhlg. Pladng tile
ring o\vr tile burner or giate may cause tile
burner to work in/properl> resulting in
carbon monoxide levels above allowable
standaIds. This could be dangerous to
your health.
Sultitce bm'nel> in use 'Mien an electrical
power fiulure occurs will continue to
operate nonnall?.
7,
N"
i
H
//
Page 12

Usingthe ovencontrols.
Throughout this manual, features and appearance may vary from your model
_ER O_
Convection
®®
QOG GQQ
CONTROL LOCKOL
OvenControl,Clockand TimerFeaturesandSettings
SELFCLEAN Pad
0
Touch this pad to select tile self=cleaning
fiinction. See tile Using the self-cleaning
oven sect.ion. 0
PROBE Pad (on some models)
@
Touch this pad when using tile probe
to cook todd to the desired internal
tenlperature.
O BAKEPad
Touch this pad to select tile bake flulcfion.
BROIL HI/LO Pad
Touch this pad to select tile broil function.
Oxen door nlust be chIsed during broiling.
CONVECTIONROASTPad
0
Touch this pad to select roasting with tile
convection [ilnction. ()veil door Ill liSt be
closed during convection roasting.
CLOCKPad
Touch this pad beloi'e ,settiiw_tile clock.
COOKING TIME Pad
Touch this pad and then touch tile nuinber
pads to set tile amount of tiine yiiu want
vour fixId to cook. Tile oven will shut off
when tile cooking dine has run out.
DELAYSTARTPad
0
Use along with COOKINGTIME or SELF
CLEANpads to set tile oven to start and
stop autoinaticallv at a dine wm set.
OVEN LIGHT Pad
Touch this pad to turn tile oxen light on
oi" oJ_'.
START Pad
]_/hlst be tot/('hed to start _111} cooking 0I"
cleaning flulcfion.
0 Display
Shows tile tin/e of day, oven tei//pei';ittli'e,
whether the oven is in the bake, broil,
convection, or sell:cleaning inode and
tile dines set for tile tinier or atltOll/a[ic
oven opei'ations.
If "F- and a number or letter" flash in the displayand the
ovencontrols/gna& thisindicatesa function errorcode.
If youroven was set for a flYnedoven operationand
apower outageoccurred,the dock and aftprogrammed
functionsmustbereset
ThetlYneof daywill flash in the display when therehas been
apower outage.
If "Err" appears/b the display,youhave tried to set a time or
temperatureoutsideof the control# bruits.PressCLEAR/OFF
andenter a newsetting.
KITCHENTIMERON/OFFPad
Touch this pad to select tile tinier teatuI'e.
Number Pads
Use to set any flulction requiiing nuinbeis
such as tile tinie of day oil tile clock, tile
tiinei; tile oven teniperamre, tile internal
todd tenlperamre, tile start tiIne and
length _ff operation fin" tinled baking
and seltZcleaning.
O CONVECTION BAKE Pad
Touch this pad to select baking with tile
conx, ec[ion li/nc[ion.
CLEAR/OFFPad
Touch this pad to cancel ALL oxen
operations except tile clock and fiinei:
/2
Page 13
Usingthe upperoven. ge.com
Toavoid possible burns, place the shelves in the desired position before you turn the oven on.
Before you begin...
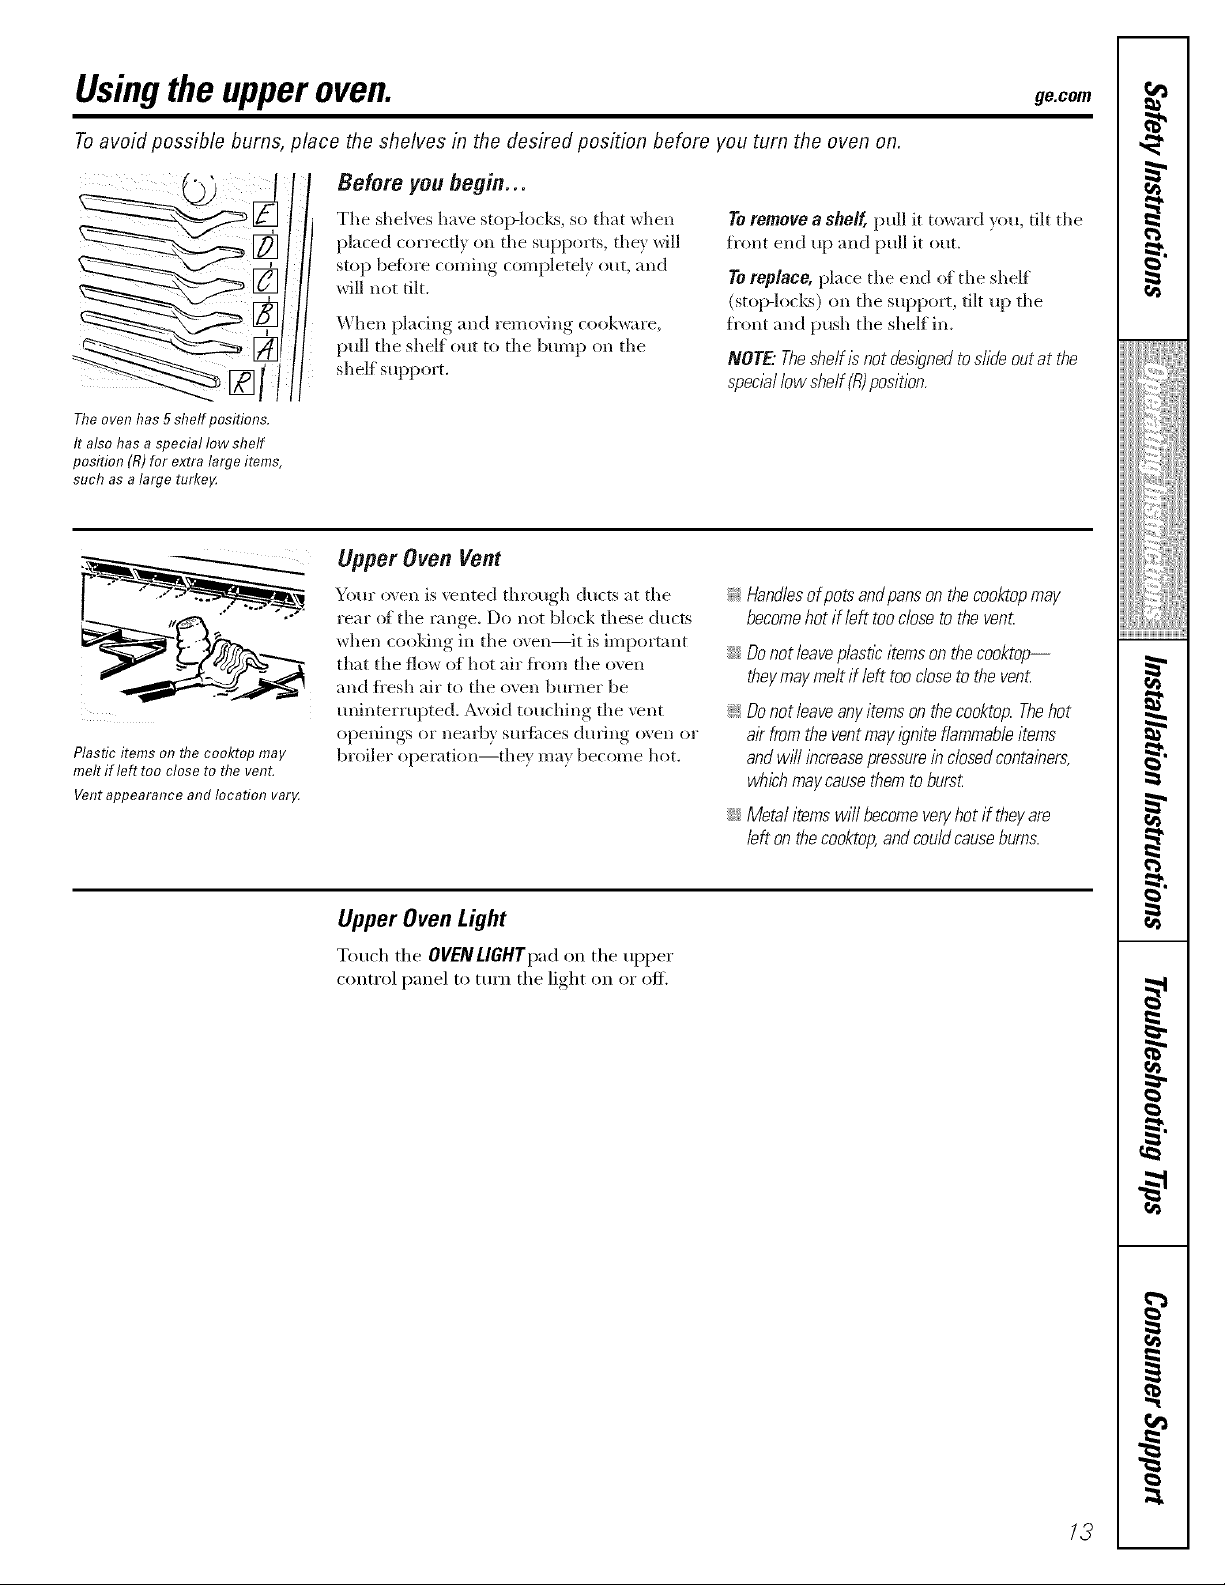
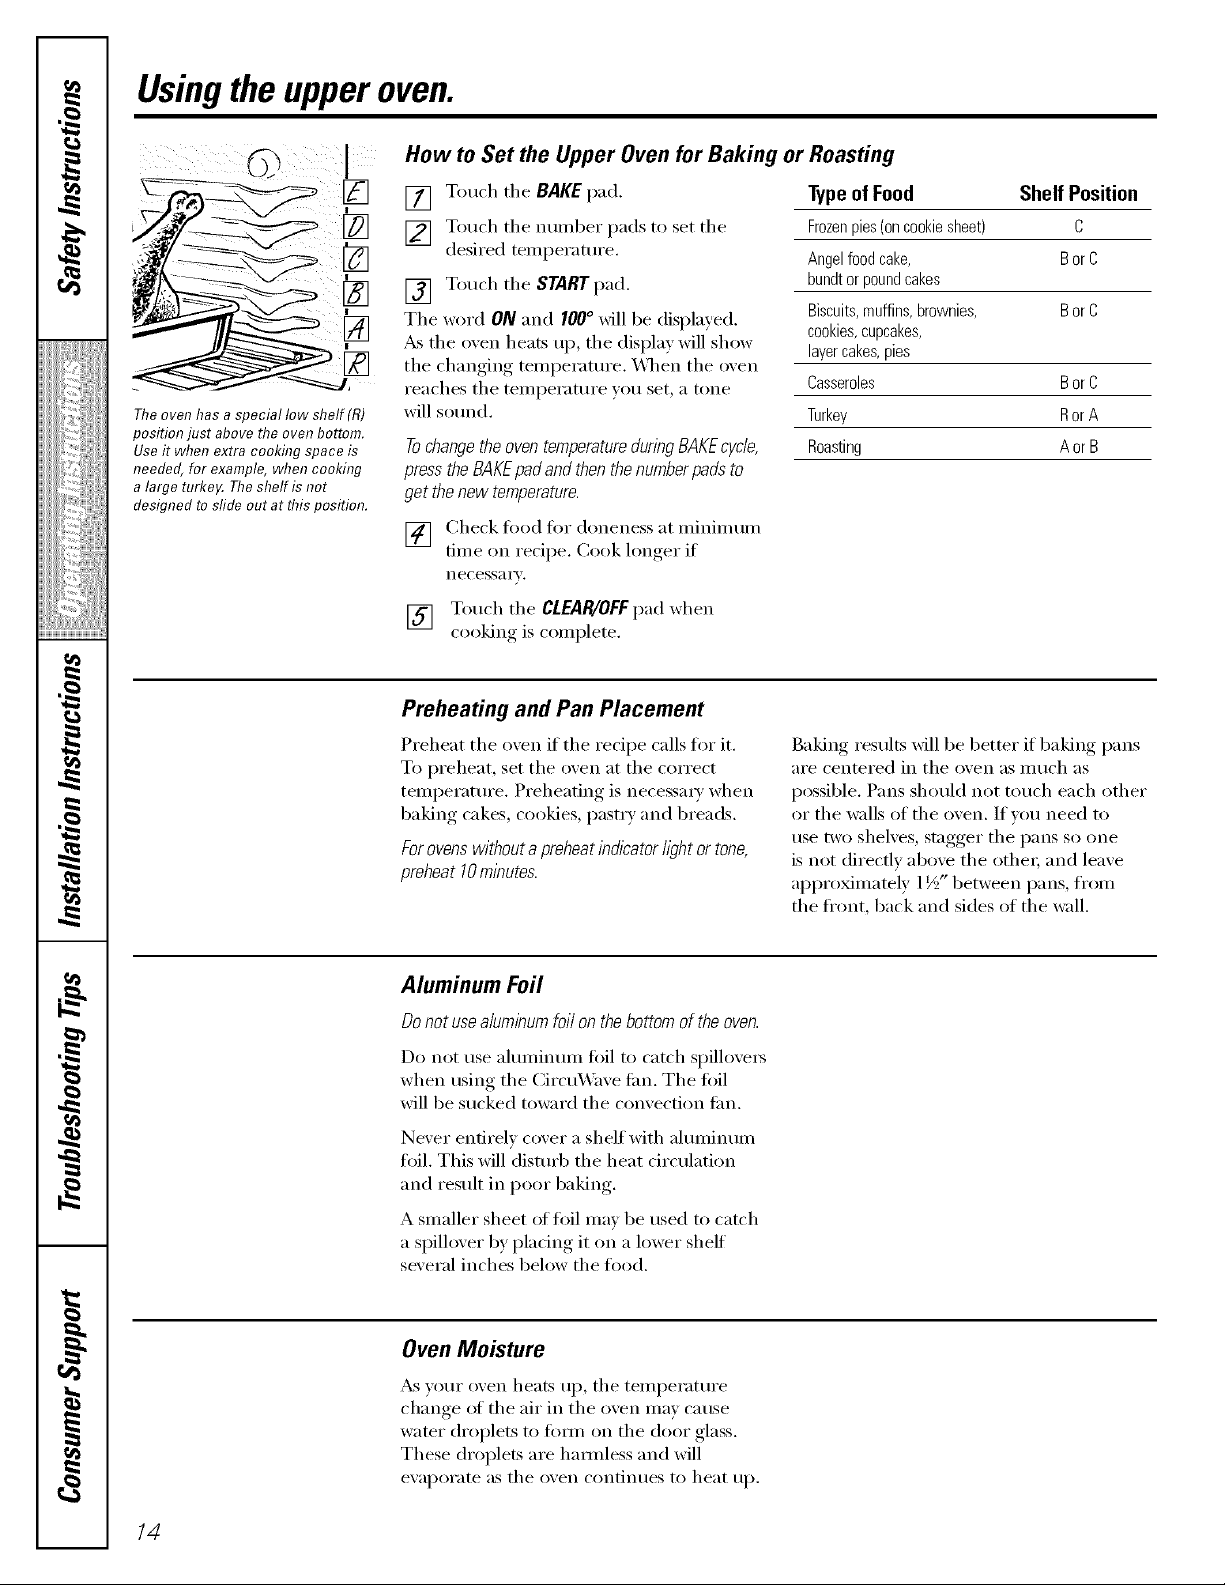
Theovenhas5shelfpositions.
It alsohasaspeciallow shelf
position(R)for extralarge items,
suchasalargeturkel4
,, ..... .7
Plastic items on flTecooktop may
melt if left too close to the vent.
Ventappearance and location varg
The shelves have stop-locks, so that when
placed correctly oil the supports, they will
stop befb_e coming completely out, and
will not tilt.
_v\hen placing and removing cookx_are,
pull the shelf out to the bump on the
shelf suppo_ t.
Upper Oven Vent
Your o\en is vented through durts at the
rear of the range. Do not block these ducts
when cooldng in the o\ en--it is important
that the flow of hot air fl'om the o\ en
and fl'esh air to the o\ en bm'ner be
tmintermpted. A\ old touching the \vnt
openings or nearby StlI'_itces (hll'ing oven or
broiler operation--they may become hot.
Toremove ,t shelf, pull it toward you, tilt the
fl'ont end up and pull it out.
Toreplace, place the end ot the shelf
(stol>locl<s) on tile suppoi% tilt up the
fl'ont and push the shelf in.
NOTE: Theshelf is not des/)ned to slide out at the
speciallow shelf (R)position.
!i>Hand/lsofpotsandpansonthecooktopmay
becomehotif /lft tooclosetothevenL
::Ji::Donot/lave plasticitemsonthecooktop--
theymaymeltif left toodosetothevenL
_: Donotleaveanyitemsonthecooktop.Thehot
air fromtheventmayigniteflammab/litems
andwfflincreasepressureinclosedcontainers,
whichmaycausethemto burs_
::J_::Metalitemswillbecomeveryhotif theyare
leftonthecooktop,andcouldcauseburns.
I
rJ_
,,,><,,,,,,,,,,,,,,,,,,
[i!iiiiii_i_ii{iiii{iiiii
w
-g.
Upper Oven Light
Touch tile OVENLIGHTpad on the upper
control panel to turn the light on or off.
-g.
g
N"
-g.
i
H
13
Page 14
Usingthe upperoven.
How to Set the Upper Oven for Baking or Roasting
The oven has a special low shelf(R)
position just above the oven bottom.
Use it when extra cooking space is
needed, for example, when cooking
a large turke_ The shelf is not
designed to slide out at this position.
[] Touch the BAKEpad.
[] Touch the ntlI]lbeI" pads to set the
desired teml_erature.
[] Touch the START pad.
The word ON and I00 ° will be displayed.
_s tile oven heats up, tile display will show
the changing temperature. _,_]/en the oven
reaches the temperature you set, a tone
will som_d.
press the BAKEpadand then the numberpads to
get the new temperature.
[] (_heck fi)od fi)r doneness at minim um
time on recipe. Cook longer if
necessa i'v.
[] Touch tile CLEAR/OFFpad when
cooking is conlplete.
Preheating and Pan Placement
Preheat the oven ifthe recipe calls for it.
To })reheat, set the oven at the correct
temperatm'e. Preheating is necessm w when
baking cakes, cookies, past_ T and breads.
Forovenswithouta preheatindicator hght or tone,
preheat 10minutes.
Typeof Food Shelf Position
Frozenpies(oncookiesheet) C
Angelfoodcake, Bor C
bundtorpoundcakes
Biscuits,muffins,brownies, Bor C
cookies,cupcakes,
layercakes,pies
Casseroles Bor C
Turkey Ror A
Roasting AorBTochangethe oven temperatureduringBAKEcycle,
Baking results will be better if baking pans
are centered in tile oven as Ill/lch _lS
possible. Pans should not touch each other
or tile walls of tile oven. If w_u need to
tlse two shelves, stagger tile pans so one
is not directly above the other; and leave
appro_mately 1½" between pans, fl'om
the fl'ont, back and sides of the wall.
14
Aluminum Foil
Do not useaiuminum foii on thebottom of the oven.
Do not rise ahlll/intllll foil to (at(h spillovels
when using the CircuX,_h\'e tim. The toil
will be sucked toward the convection tim.
Never entirely cover a shelf with almninum
foil. This will disturb the heat circulation
and result in poor baking.
A smaller sheet of foil may be used to catch
a spillover by plating it on a lower shelf
several inches below the food.
Oven Moisture
_s w_ur (wen heats up, tile temperatm'e
change ot the air in the oven may cause
water droplets to titan on the door glass.
These droplets are hamfless and will
ew_porate as tile oven contintms to heat up.
Page 15
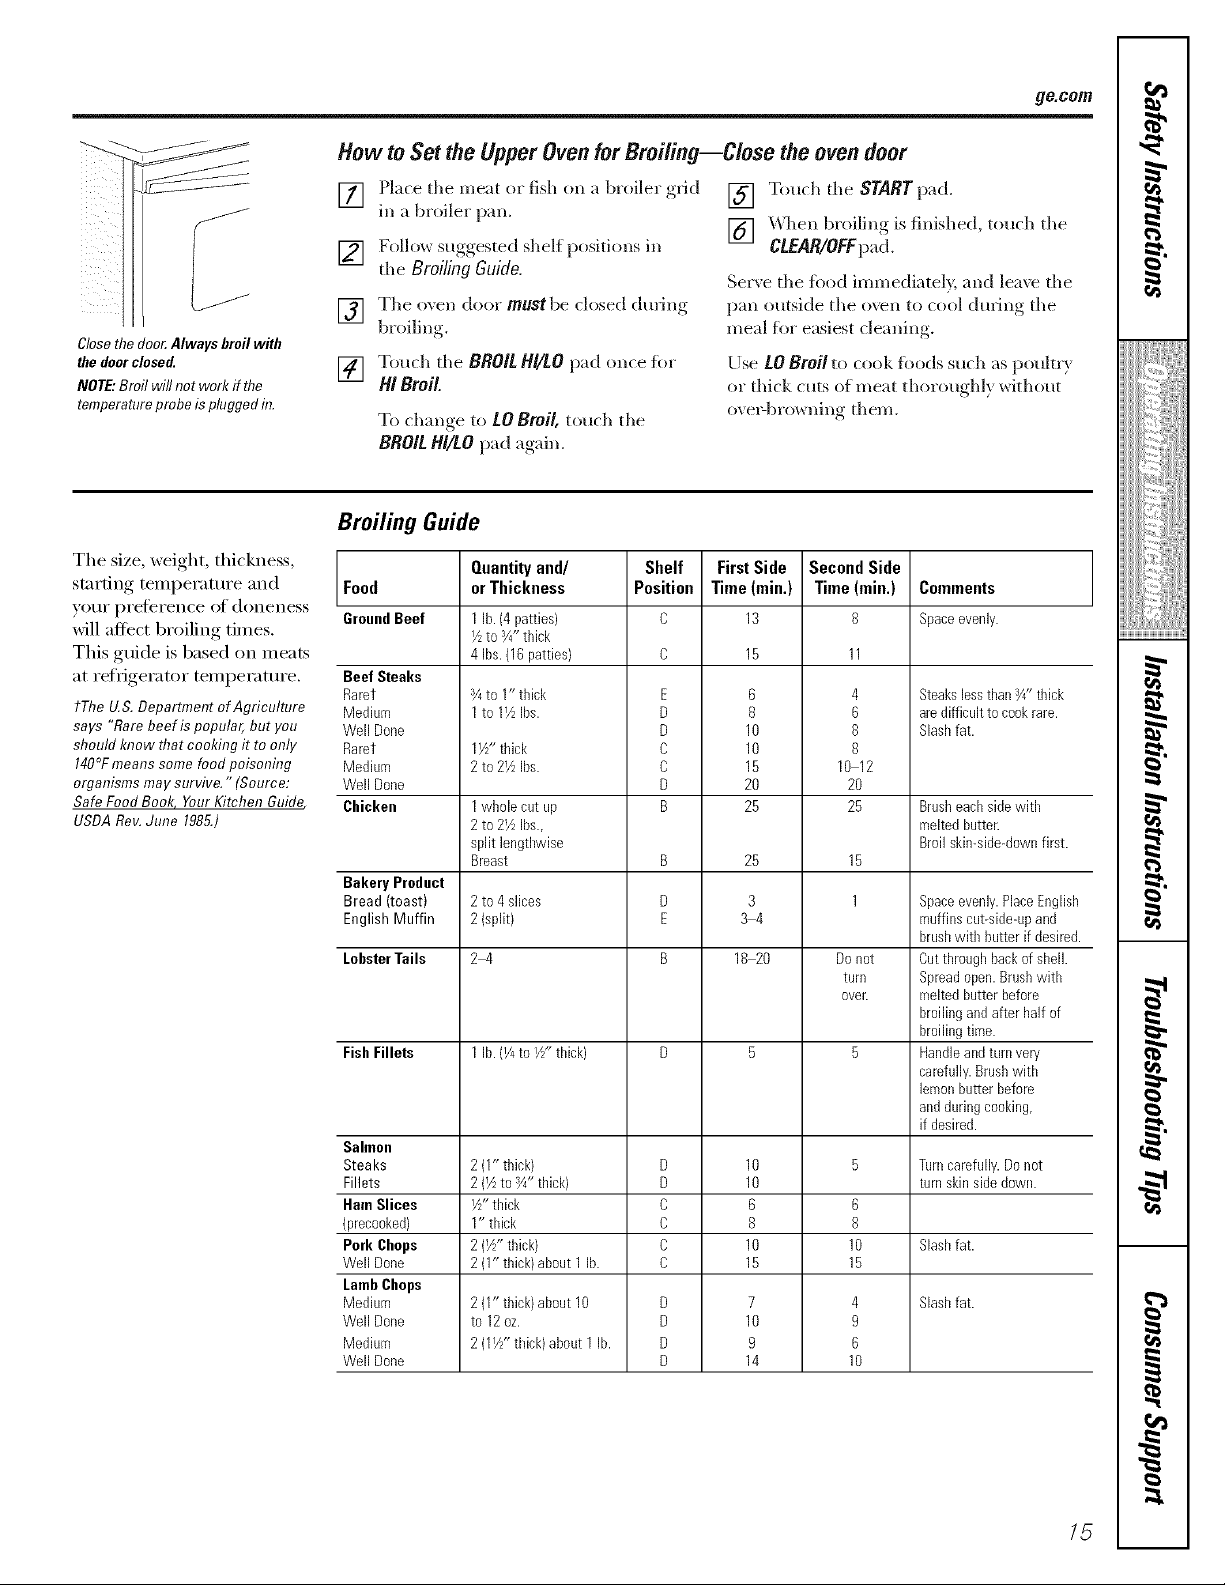
How to Set the UpperOvenfor Broiling--Close the oven door
ge.conl
[] Place the meat (w fish on a broiler grid
in a broiler pan.
[] Follow suogested shelt )ositi(ms in
iiii_
Closethedoo_ Alwaysbroilwith
the doorclosed.
NOTE:Broil will not work ifthe
temperatureprobe isplugged hT.
tile Broiling Guido.
[] Tile oven door mustbe closed dining
broiling
Touch tile BROILH//LOpad once it)l"
[]
/4/Broil
To change to LO Broil, touch the
BROIL HI/LO pad again.
Broiling Guide
Tile size, weight, thickness,
starting temperature and Food
your prelerellce of d(meness GroundBeef
will affect broiling times.
This guide is based on meats
at refrigerator temperature. Beef Steaks
tThe U.S. Department of Agriculture Medium
says "Rare beef is popular, but you Well Done
should know that cooking it to only Rarer
140°Fmeans some food poisonhTg Medium
organisms may survive." (Source: Well Done
Safe Food Book, YourKitchen Guide, Chicken
USDABey. June 1985.)
Rarer
Bakery Product
Bread (toast)
English Muffin
LobsterTails
FishFillets
Salmon
Steaks
Fillets
Ham Slices
(precooked)
Pork Cbops
Well Done
LambChops
Medium
Well Done
Medium
Well Done
Quantityand/
or Thickness
1 lb.(4 patties)
½to _4"thick
4 Ihs.(1Bpatties)
_4to 1" thick
1to 1½Ihs.
1½" thick
2to 2½ Ibs.
1whole cut up
2to 2½ Ihs.,
split lengthwise
Breast
2to 4 slices
2(split)
2_4
1 lb.{V4to½" thick)
2(1" thick)
2(½to Y4"thick)
½" thick
1" thick
2(½" thick)
2(1" thick)about 1 lb.
2(1" thick)about 10
to 12oz.
2(11//'thick)about 1lb.
Shelf
Position
E
D
D
D
D
D
B
B
D
E
B
D
D
C
C
D
D
D
D
D
D
[] Touch tile START pad.
[] _q_en broiling is finished, touch tile
CLEAR/OFFpad.
Ser_e tile fi)od immediately, and lea_e tile
pan outside tile oven to cool during tile
meal for easiest cleaning.
Use LOBroil to cook fi)ods such as poultr}
or thick cuts of meat thoroughl} ,dthout
o_ el_brovv Ilillg them.
FirstSide
Time(rain.)
13
15
10
10
15
2O
25
25
3
34
18 20
10
10
10
15
7
10
14
Second Side
Time (rain.)
8
6
8
6
8
9
4
6
8
8
10 12
20
25
15
1
Donot
turn
over.
6
8
10
15
4
9
6
10
Comments
Space evenly.
SteakslessthanY4"thick
aredifficulttocookrare.
Slashfat.
Brusheachside with
meltedbutter.
Broilskimsidedown first.
Spaceevenly.PlaceEnglish
ruuffinscut-side-upand
brushwith butter if desired.
Cutthroughhackof sheik
Spreadopen.Brushwith
meltedbutterbefore
broilingand after half of
broilingtime.
Handleandturnvery
carefully.Brushwith
lemonbutterbefore
andduringcooking,
if desired.
Turncarefully.Donot
turnskin side down.
Slashfat.
Slashfat.
I
b::iiiii:_iiiiiiiiiiiiii
/!iiiiii_i@iiiiiiiii
w
Z
g
i
H
15
Page 16
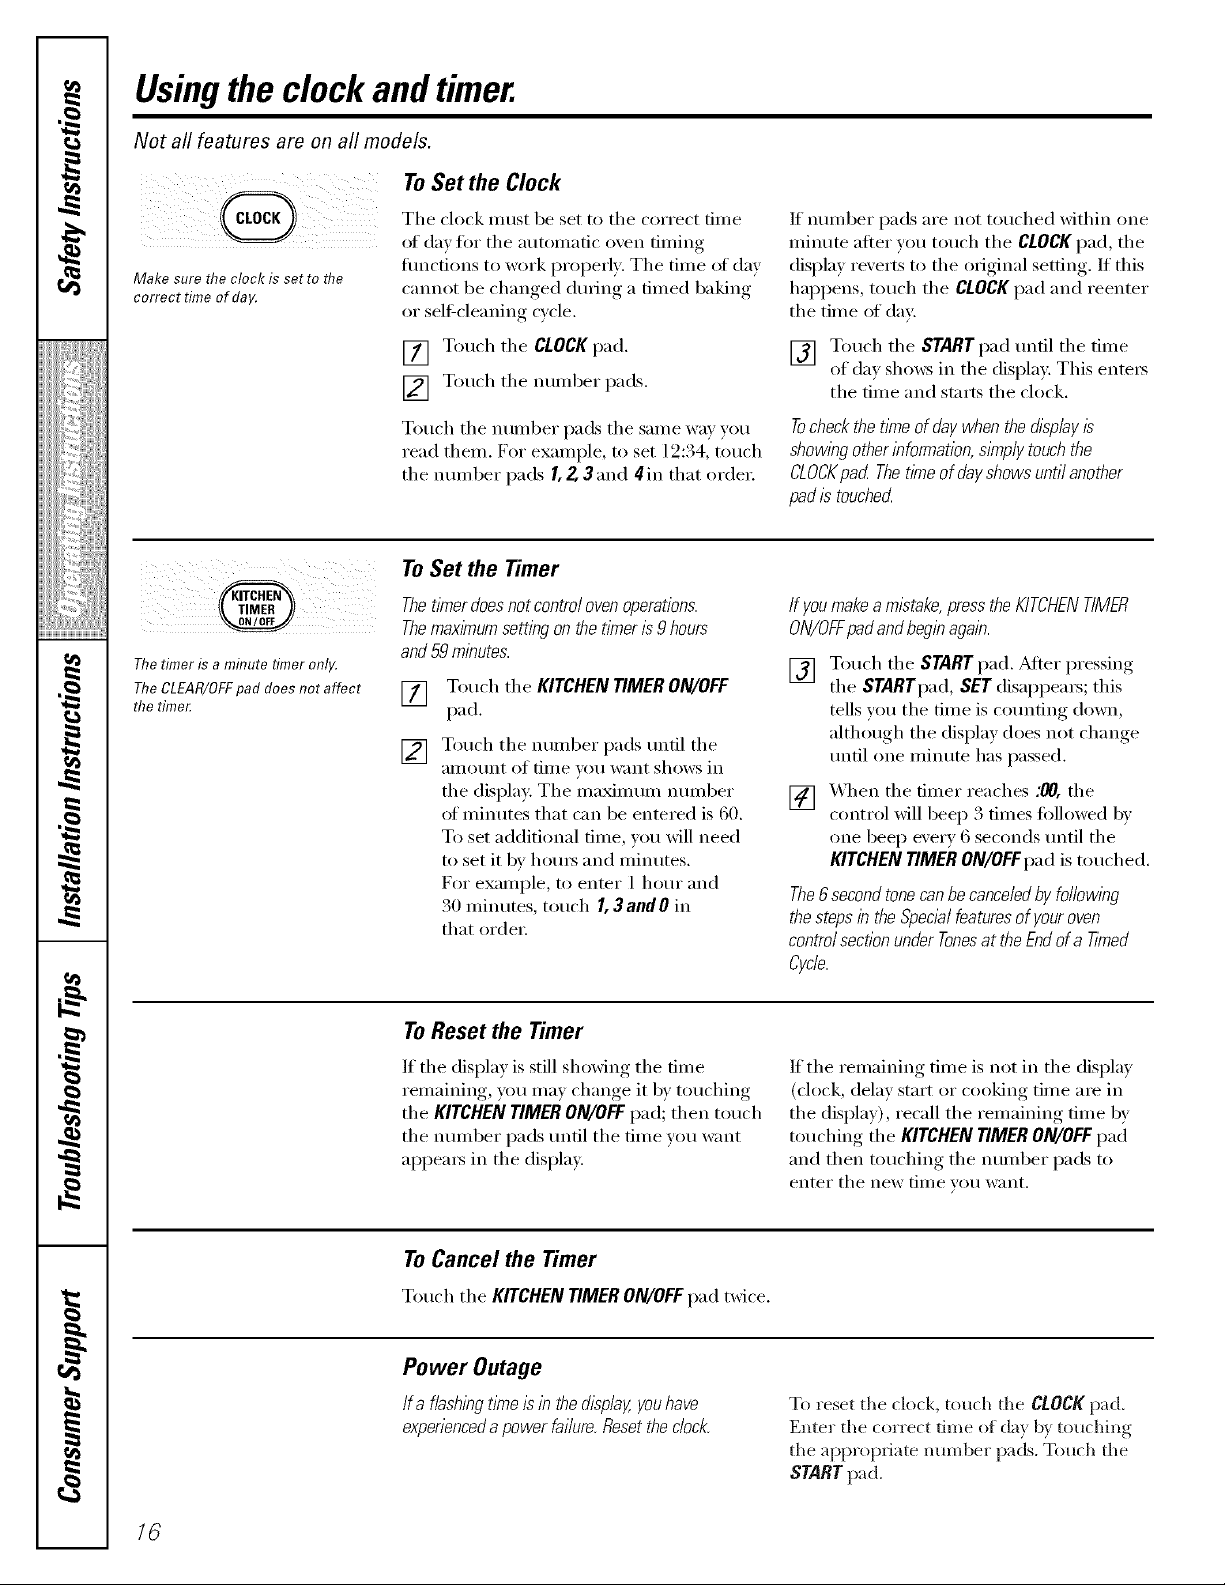
Usingthe clock and timer.
Not all features are on all models.
ToSet the Clock
The clock must be set to the correct time
of elm fin" the autonmtic oxen timing
Make sure the clock is set to flTe
correct time of day.
flmcfions to work properly. The time of day
cannot be changed during a timed baking
or sel6cleaning c) cle.
If mmfl)er pads are not touched within one
mimKe after you touch the CLOCKpad, the
display reverts to the original setting. If this
hapi)ens, touch the CLOCKpad and reenter
the time of day.
Thetimer is a minute timer only.
TheCLEAR/OFFpad does not affect
the time_
[] Touch the CLOCKpad.
[] Touch the nmnber pads.
Touch the numl)er pads the same way you
read them. For example, to set 19:34, touch
the nmnber pads I, 2, 3 and 4in that order;
To Set the Timer
Thetlknerdoesnotcontrolovenoperations.
Themaxl/numsettingonthetimeris9hours
and 59 minutes.
Touch the KITCHENTIMERON/OFF
[]
pad.
Touch the number pads tmtil the
[]
alllOtlnt oJ[ tiI/le veil %3111t shows in
the display. The maMmum nmnber
of minutes that can be entered is 60.
To set additional time, you will need
to set it by hems and minutes.
For example, to enter 1 hour and
30 minutes, touch I, 3andO in
that order;
[] Touch the STARTpad tmfil the time
of dax shows in the display. This ente_
the time and starts the clock.
Tocheckthetimeofdaywhenthedlspbyis
showingotherinformation,s/knp/ytouchthe
CLOCKpad Thetimeofdayshowsuntilanother
padistouched
If youmake a mistake, press the KITCHEN TIMER
ON/OFFpadandbeginagain.
[] Touch the STARTpad. _dter _ressing
the STARTpad, SET disappeax_; this
tells w_u the time is cotmting down,
although the display does not change
tmtil one minute has passed.
[] X_q_en the timer reaches :00, the
control will beep :4 times followed b_
one beep every 6 seconds tmtil the
KITCHEN TIMER ON/OFF pad is touched.
The 6 second tone can be canceled byfollowing
the steps in the Special features of your oven
control section under Tones at the End of a Timed
Cycle.
16
To Reset the Timer
If the display is still showing the time
remaining, you may change it by touching
the KITCHEN TIMER ON/OFF pad; then touch
the nulnber pads tmtil the time you want
appea_s in the display.
ToCancel the Timer
Touch the KITCHENTIMERON/OFFpad twice.
Power Outage
lfa flashingtinTeIsin thedisplay,youhave
expenenced a power failure. Reset the clock.
If the remaining time is not in the display
(clock, delay start or cooking time are in
the display), recall the remaining time by
touching the KITCHENTIMERON/OFFpad
and then touching the number pads to
enter the new time VOII %3111t,
To reset the clock, touch the CLOCK pad,
Enter the correct time of clay by touching
the appropriate nmnber pads. Touch the
STARTpad.
Page 17
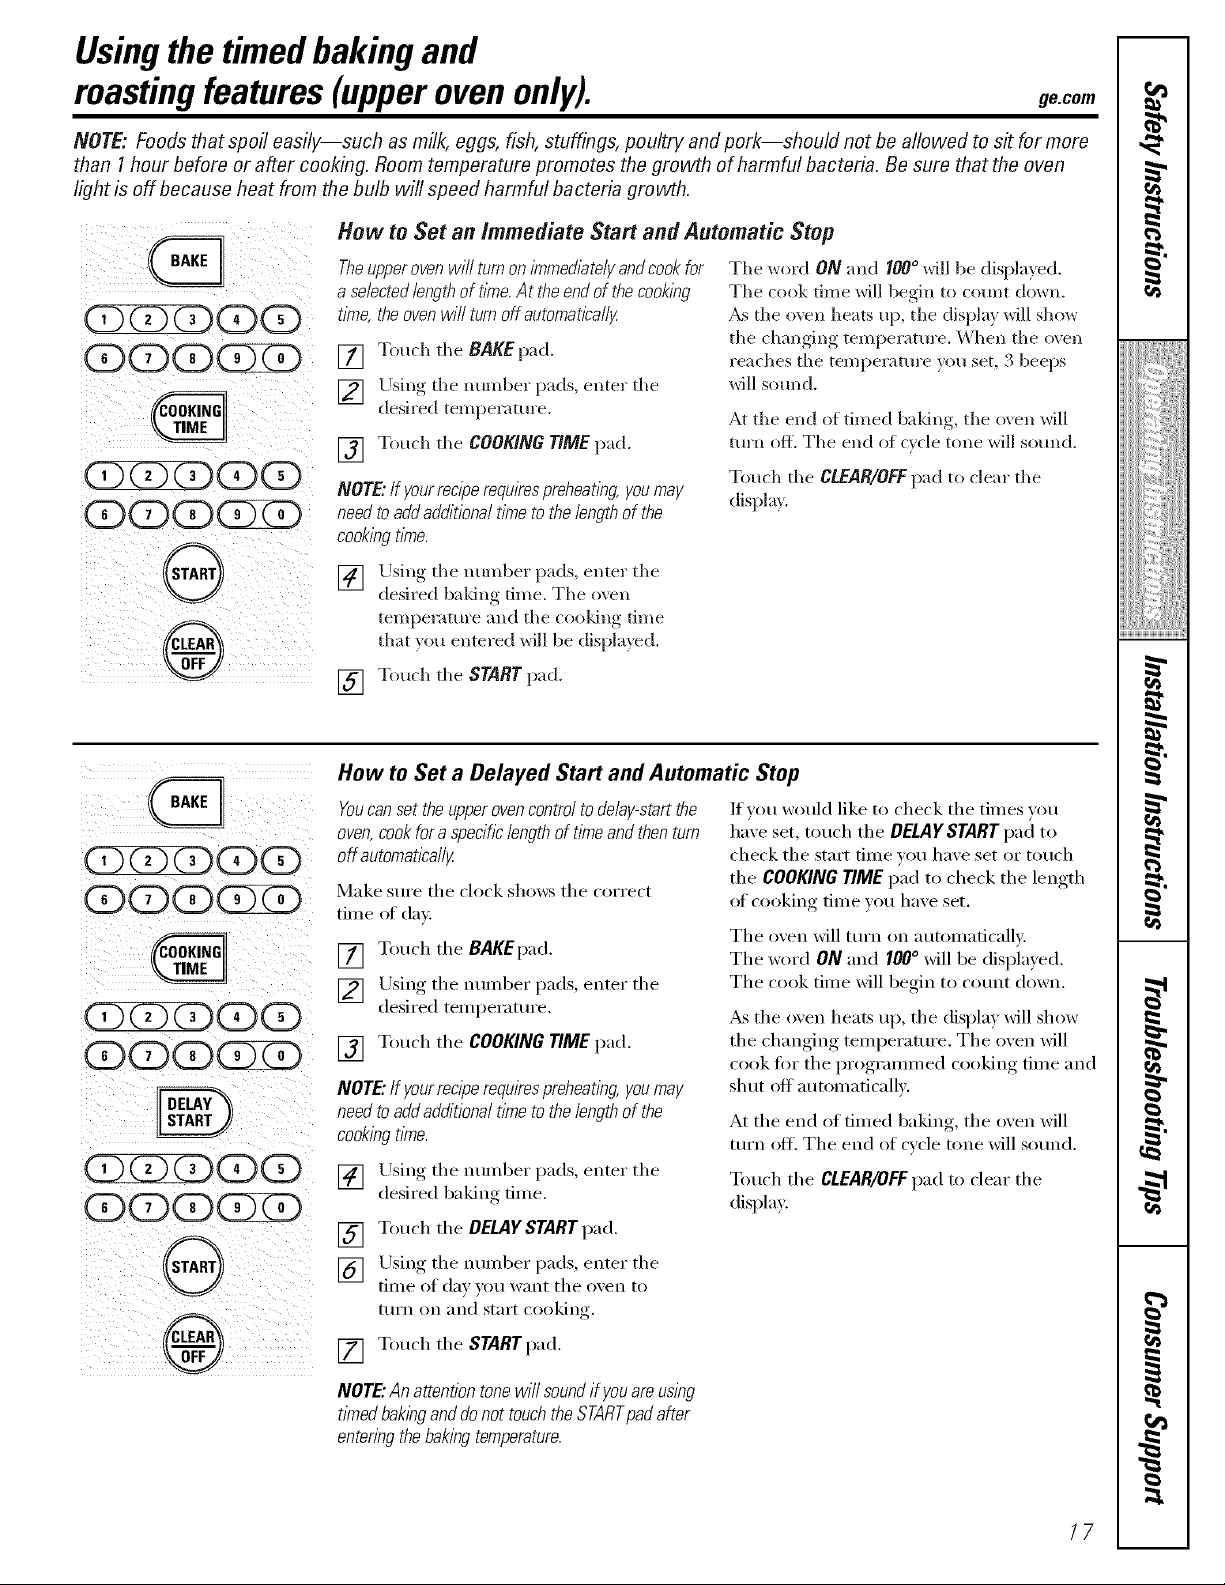
Usingthe timedbakingand
mastingfeatures(upperovenonly).
NOTE: Foods that spoil easily--such as milk, eggs, fish, stuffings, poultry andpork--should not be allowed to s# for more
than 1hour before or after cooking. Roomtemperature promotes the growth of harmful bacteria. Be sure that the oven
light is off because heat from the bulb will speed harmful bacteria growth.
How to Set an Immediate Start and Automatic Stop
Theupper oven will turn onI}nmedlate/yandcook for The vvoid ON and I00 ° ",','ill be displa_ ed.
a selectedlengthof tlem At the endof the cooking The cook time will begin to count down.
tleTe,the oven wi//turn offautomat/ba//y. _&sthe oven heats up, the displa_ will sho_
the changing,, temi)eratm'e. _hen the oven
reaches tile temperature you set, 3 beeps
will sound.
At the end of timed baldng, the oven will
turn off. The end of wcle tone will sound.
Touch the CLEAR/OFFpad to clear the
display.
(DODO
OD<O<9<D(Z)
Qo9<9
[] Touch the BAKEpad.
[] Llsing the munber pads, enter the
desired temperatm'e.
[] Touch the COOKING TIME pad.
NOTE:If yourreciperequkespreheatingyoumay
needtoaddadditlena/tleTetothelengthofthe
cookingtleTe.
Llshlg the number pads, enter the
[]
desired baldng dine. The o_en
temperatm'e and the cooking time
that )ou entered will be displa) ed.
Touch the START pad.
[]
ge.com
I
,,,><,,,,,,,,,,,,,,,,,,
[i!iiiiii_i_ii{iiii{iiiii
w
,Q
(DCDCDCD(D
(DCDCD
(DCDCg(DCD
(DCD(D(3)
(DCDOCD(Z)
(DCDCD(ZXD
O
How to Set a Delayed Start and Automatic Stop
Youcanset the upperovencontro/ to deley-start the
oven,cookfor a specific length of time and then turn
off automatica//y
Make sm'e tile clock shows the correct
time of day
[] Touch the BAKEpad.
[] Using the number pads, enter the
desired temperatm'e.
[] Touch the COOKING TIME pad.
NOTE."If yourreciperequirespreheatlegyoumay
needtoaddadditionalt/mem thelengthofthe
cookingtime.
[] Using the number pads, enter the
desired baking time.
[] Touch the DELAVSTART pad.
[] Using tile nmnber pads, enter the
time of day )ou want the oxen to
[tlI'I) 0I) _lI)(l start Co()kiI)g,
[] Touch the STARTpad.
NOTE."Anattentiontonewi//soundif youareusing
tl_nedbakinganddonot touchtheSTARTpadafter
entenngthebakingtemperature.
If you would like to check tile times you
have set, touch the DELAYSTARTpad to
check the start time you have set or touch
the COOKING TIME pad to check the length
of cooking time you have set.
The oven will ttlI'II oi1 automatically
The word ON and I00 ° will be displayed.
The cook time will begin to count down.
_&sthe oven heats uI), the display will show
the changing temperature. The oven will
cook fl)r the programmed cooking time and
shut off automaficalh'.
At the end of timed baking, the ()vet) will
turll off'. The end of cycle tone will sotmd.
Touch the CLEAR/OFFpad to clear the
display.
g
==
i
H
17
Page 18
Usingtheprobe. (onsome models)
For many foods, especially roasts and poultry, internal food temperature is the best test for doneness.
The temperature probe takes the guesswork out of roasting by cooking foods to the exact aloneness you want.
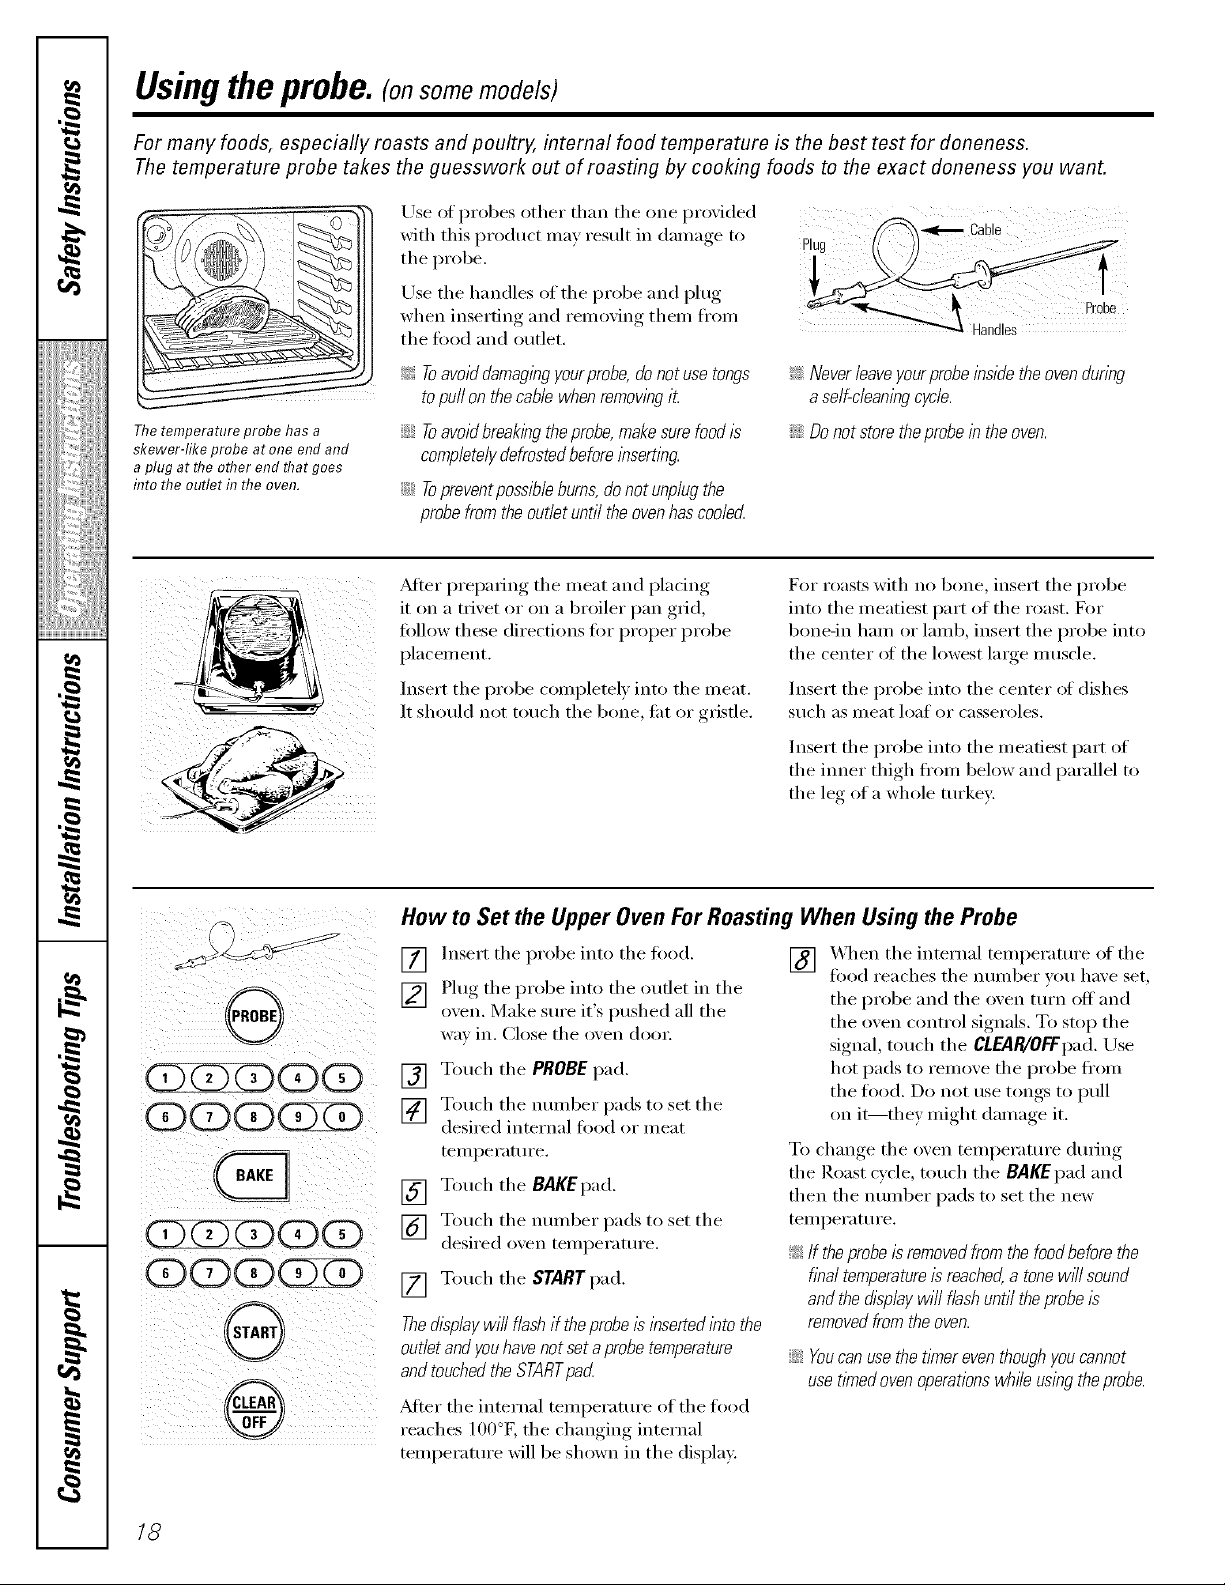
Thetemperature probe has a
skewer-like probe at one end and
a plug at the other end that goes
flTtothe outlet in the oven.
Use of probes other than tile one proxided
with this product may, result in danlage_ to plug I
LTse the handles of the probe and plug
tile probe.
when inserting and remoxing them fl'om
the fi)od and outlet, Handles
Cable
_: Toavoiddamagingyourprobe,donotusetongs !;>Neverleaveyourprobeinsidetheovenduring
topullonthecablewhenremoving/L aself-cleaningcycle.
iJi::Toavoid breaking the probe, make sure food is iJi::Do not store the probe in the oven.
completelydefrosted before inserting
iJi:: Toprevent possible burns, do not unplug the
probefrom the outlet until the oven has coolecL
Alter preparing the meat and placing
it on a trivet or on a broiler pan grid,
fi)llow these directions fi_r proper probe
placement.
Insert the probe completely into the meat.
It should not touch the bone, ti_t or gristle.
For roasts with no bone, insert tile probe
into the meatiest part of the roast. [_)_r
bone-in ham or lamb, insert tile probe into
the center of the lowest large muscle.
Insert the probe into the center of dishes
such as Ill eat loaf or casseroles.
Insert tile probe into tile meatiest part of
the inner thioh_ fi'om below and parallel to
tile leg of a whole tin'key:
i(DCDQOOD :
ii ill@ iII iliii !
How to Set the Upper Oven For Roasting When Using the Probe
[] Insert tile probe into tile food. [] _q/en tile internal temperatm'e of tile
[] Plug tile probe into tile outlet in tile
oxen. Make sm'e it's I)ushed all tile
wax in. Close tile oxen door
[] Touch tile PROBE pad.
[] Touch tile nt/illber pads to set tile
desired internal food or meat
teml)eratm'e.
[] Touch tile BAKEpad.
[] Touch tile mmfl)er pads to set tile
desired oxen temperatm'e.
[] Touch tile START pad.
Thed/splaywill flashiftheprobeisinsertedintothe
outlet and you have not set a probe temperature
andtouchedtheSTARTpacL
After tile internal temperatm'e of tile food
reaches lO0 K tile changing internal
temperature will be shown in the display.
fi)od reaches tile nuinber you have set,
tile probe and tile oven tm'n off and
the oven control signals. To stop the
signal, touch tile CLEAR./OFFpad. Lrse
hot pads to remove tile probe fl'om
tile food. Do not use tongs to pull
on it--they might dmnage it.
To change tile oven teml)erature during
tile Roast cycle, touch tile BAKEpad and
then tile nmnber pads to set tile new
temperature.
_:If theprobeisremovedfromthefoodbeforethe
finaltemperatureisreached,a tonewff/sound
andthed/2p/ayw///flashuntiltheprobeis
removed from the oven.
iJi::Youcan use the t/Ynereventhough youcannot
use timed oven operations whffeusing theprobe.
18
Page 19
Usingthe convectionoven. Re.corn
The convection oven fan shuts off when the oven door is opened. DO NOT leave the door open for long periods
of time while using convection cooking.
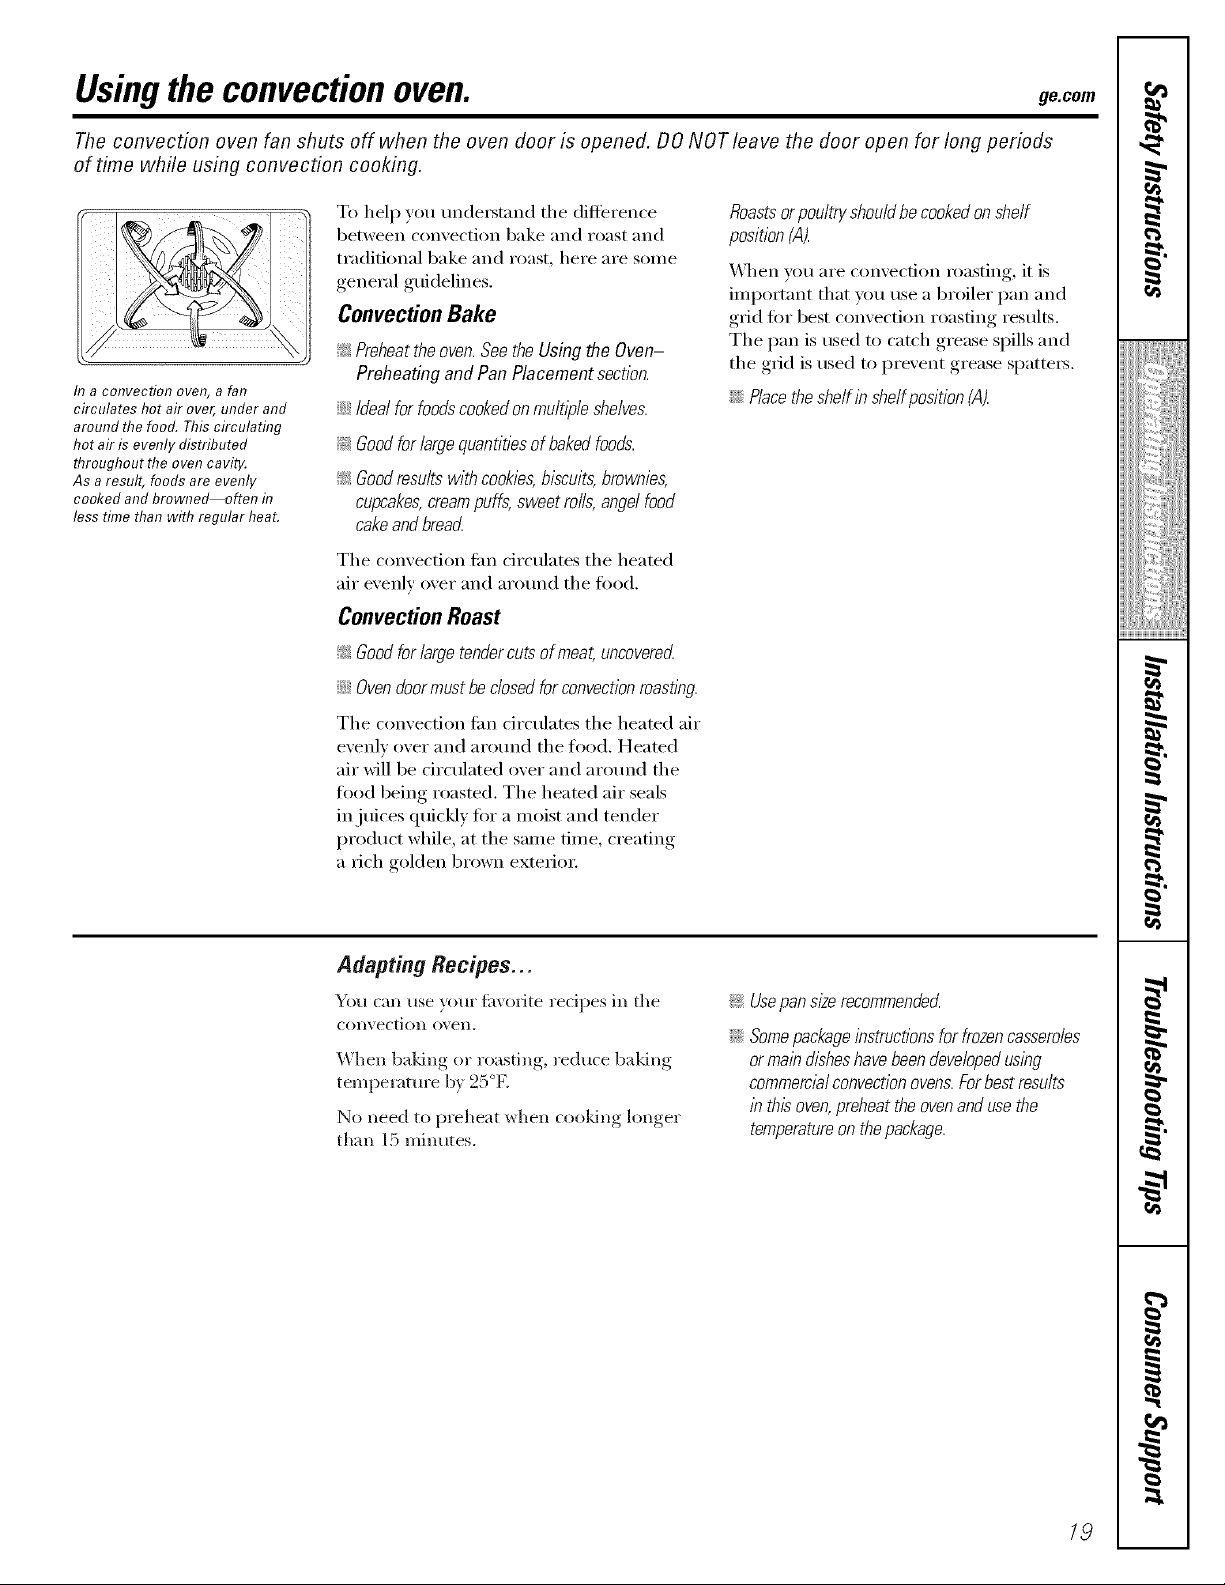
h7 a COlTVectiol7 ovel?_ a far
circulateshotair over,underand
aroundthefood.Thiscirculating
hotair isevenlydistributed
throughoutthe ovencavity.
Asaresult, foodsareevenly
cookedandbrowne_often d7
leestimethanwithregular heat.
To help you unde_tnnd the difference
between convection bake and roast and
traditional bake and roast, here are some
general guidelines.
ConvectionBake
_;Preheattheoven.SeetheUsingthe Oven-
PreheatingandPanPlacementsection.
::Ji::Idealforfoodscookedonmultl))leshelves.
!_,_Goodforlargequantitiesof bakedfoods.
_: Goodresultswithcookies,biscuits,brownies,
cupcakes,creampuffs,sweetroils,angelfood
cakeandbreacL
The comection tim circulates the heated
air e',enlv o',er and around the fi)od,
ConvectionRoast
_ Goodfor large tendercuts of meat, uncoverecL
::Ji::Ovendoormust beclosed forconvectionroasflbg.
The convection tim circulates the heated air
evenly over and around tile food. Heated
air will be drculated over and around the
fl_od being roasted. The heated air seals
in juices quickly for a moist and tender
product while, at the same time, creating
a rich golden brown exterim:
Roastsorpoultry should becookedon shelf
position(A).
_]_en you are convection roasting, it is
important that you use a broiler pan and
grid fi)r best convection roasting results.
The pan is used to catch grease spills and
the grid is used to prevent grease spatters.
N Placetheshelhb shelfposition (A).
I
r,.#_
ii!iiiiii_i_iiiiiiiiiiiii
w
AdaptingRecipes...
You can use yore" fi_vorite recipes in the
Collvection ()\'ell.
When baking or roasting, reduce baldng
tempela/ure by 25°K
No need to preheat when cooldng longer
than 15 minutes.
_ Usepansize recommendecL
;;Ji:_Somepackageinstructions for frozencasseroles
or main disheshave beendevelopedusing
commercialconvection ovens.Forbest results
in this oven,preheat the oven and usethe
temperatureon the package.
g
i
H
19
Page 20
Usingthe convectionoven.
Cookware for Convection Cooking
Betoi'e using your convection oven, check
to see if your cookware leaves rooin for air
circulation in the ()veil. If you are baking
with several l)ans, leave sl)ace between
thenl. _Mso, be sure tile i)ans do not touch
each other or the walls of the oven.
Paper and Plastic
Heat-resistant l)aper and l)lastic containei_
that are reconnnended for use in regular
()veils C_lll be used ii1 convection ()VeilS.
Plastic cookware that is heat-resistant to
ten/i)eratures of 400°F can also be used,
when ()veil is below 400°E
How to Set the Upper Oven for Convection Baking or Roasting
Metal and Glass
Any type ot cookware will work in v<)tlI"
convection oven, Howe\'eI; IIletal l)[Ins heat
the fi_smst and are reconnnended fi)r
convection baking.
_: Darkenedormatte-finlshedpans wi// bake faster
thanshiny pans.
::Ji::Glassorceramicpanscook more s/ow/g
_l_eI1 baking cookies, you will get the best
results if you use a fiat cookie sheet instead
of a I)an with low sides.
D)I" redpes like oven-baked chicken, use a
i)an with low sides. Hot air cannot circulate
well around fl)od in a i)an with high sides.
(DQ(D(EXD
ii iiI i@iiliiiii!iiiI
)
\\
When convection baking with only
I shelf, follow theshelf positions
recommended in the Using the
Ovensection.
[] Touch tile CONVECTION BAKE or
CONVECTION ROAST l)a d.
[] Touch the nt/ii/ber pads to set
the desired oxen tenli)erature.
Ren/enlber to a({just baking
teini)erature accordinglx, ,. See the
Adapting Recipes secti(m.
[] Touch the STARTI)ad.
To chan,,e the oven tein )erature, touch the
CONVECTIONBAKE or CONVECTIONROAST
I)ad and then the nuinber i)ads to set the
new telI/l)ei'attli'e.
Multi-Shelf Baking
Because heated air is circulated evenly
throughout the ()veil, foods can be baked
with excellent results using inulfiple shelves.
Multi-shell baking nlav increase cook dines
slightly fl)r some fi)ods but the overall result
is tiine saved. Cookies, nltdtins, biscuits, and
other quick breads give vei T good results
with nlulfi-shelf baking.
\_]_ei1 the oven starts to heat the changing
tenli)eramre, starting at 100°g will be
disi)layed. \41_ei1 the oven reaches the
tenli)erature you set, 3 beeps will sound.
[] Touch the CLEAR/OEEI)ad when
finished.
NOTE:Youwillhearafanwhilecookingwith
convectbn.Thefan willstopwhenthedoorb
openedbuttheheatwillnot turnoff.
Thefanwillnotstartuntil thepreheattemperature
isreached
\._l_ei1 baking laiger fi)ods on 3 shelves,
l)lace one shelf in tile 2nd (A) position,
one on the 4th (C) position and the third
shelf in the 6th (El I)osition.
When baking cookies, i)lace the shelves in
the 4th ((2), 5th (D), and 6th (El I)ositions.
20
Page 21

ge.conl
How to Set the Upper Oven for Convection Roasting when Using the Probe
(on some models)
For best results when roasting large
turkeys and roasts, we recommend
usflTgtheprobe flTcluded f17the
COlTvectiol7 oven.
Q(DQ(Z)O
000
QQQG)(
(ZXD(ZX
®
The display will flash PROBE and the oven
control will signal if the probe is inserted
into the outlet, and you have not set
a probe temperature and touched the
START pa d.
[] Place the shelf in the shelt position
(A). Insert the probe completely
into the iood.
[] Plug the probe into the outlet in the
oven. M_&e sm'e it is pushed all the
",_'_l_in. Close the oven doo_:
[] Touch the CONVECTION ROAST pad.
] Touch the mm_ber pads to set the
desired oven temperature.
[] Touch the PROBE p'.d.
] Ton(h the number pads to set the
desired internal fi)od temperature.
To change the oven temperature during
the Convection Roast cycle, touch the
CONVECTIONROASTpad and then touch
the mm_ber pads to set the new desired
temper;fftlre.
[] Touch the START p',ld.
\'\_)en the oven starts to heat, the word
LO will be in the display.
_Mter the internal temperature of the ,q_od
reaches 100°E the ch_mging interred
temperature will be shown in the display.
] \'_en the interred temperatm'e of the
fi)od reaches the mm_ber _ou ha'_e
set, the probe and the oven mrn off
and the oven control signals. To stop
the signal, touch the CLEAR/OFFpad.
Use hot pads to remove the probe
fl'om the toed. Do not use tongs to
pull on it--they might damage it.
.4,CAUTION:ropraventposs, le
bums, do not unplug the probe from the oven
outlet until the oven has coobd Do not store
the probeb the oven.
NOTE:
_; If theprobeis removedfromthefoodbeforethe
finaltemperatureisreached,a tonewillsound
andthedisplaywi//flashuntiltheprobeis
removedfromtheoven.
;;Ji::Youwillhearafanwhilecooklbgwith this
feature.Thefan willstopwhenthedoorls
openedbuttheheatwill not turnoff.
_ Youcanusethetl_nereventhoughyoucannot
usetimedovenoperationswhileusingtheprobe.
I
ii!iiiiii_i_iiiiiiiiiiiii
w
21
g
i
H
Page 22

Usingthe convectionoven.
Convection Roasting Guide--Suggested Settings
Meats Minutes/Lb, Oven Temp. Internal Temp. I
Beef Rib13to BIhs.) Rarer 20_4 300°F 140'_F
BonelessRib,TopSirloin Rarer 20_4 300°F 140°F
BeefTenderloin Raret 10 14 300°F 140°F
PotRoast(2Vzto 3 Ibs./chuck,rump 3545 275°F 170°F
Pork Bone-in(3to 5 Ibs.) 23_7 300°F 170°F
Boneless(3to 5 Ibs.} 23_7 300°F 170°F
PorkChops(_/zto 1" thick) 2chops 30_5 total 300°F 170°F
Ham Canned(3 Ibs.fully cooked) 14 18 300°F 140°F
Butt(5 Ihs.fully cooked) 14 18 300°F 140°F
Shank(5 Ibs.fully cooked) 14 18 300°F 140°F
Lamb Bone-in(3to BIbs.) Medium 17_0 300°F 160°F
Boneless(3to BIbs.) Medium 17_0 300°F 160°F
Seafood Fish,whole (3to 5 Ibs.) 30_40total 375°F
LobsterTails(6 to8 oz.each) 20_5 total 325°F
Poultry Whole Chicken(2½to 31/zIbs.) 24_6 32B°F 180° 185°F
CornishHensUnstuffed(1to 1½Ibs.) 50%5 total 325°F 180° 185°F
CoodshHensStuffed(1 to 11/zIhs.) 55_80total 325°F 180° 185°F
Duckling(4to 5 Ibs.) 24_6 300°F 180° 185°F
Turkey,whole*
Unstuffed(10to 16 Ibs.) 8 11 300°F 180° 185°F
Unstuffed(18to 24 Ibs.) 7 10 300°F 180° 185°F
TurkeyBreast(4to 6 Ibs.) 16 19 300°F 170°F
Stuffed birds generally require 30-45 minutes additional roasting time. Shield legs and breast with foil to prevent
overbrowning and drying of skin.
t The U.S.Department of Agriculture says "Rare beef is popular, but you should know that cooking it to
only 140°Fmeans some food poisoning organisms may survive." (Source: Safe Food Book, YourKitchen Guide,
USDA Rev.June 1985.)
I
Medium 24_8 300°F 160°F
Well 28_2 300°F 170°F
Medium 24_8 300°F 160°F
Well 28_2 300°F 170°F
Medium 14 18 300°F 160°F
4chops 35_40total 300°F 170°F
6chops 40_45total 300°F 170°F
Well 20_4 300°F 170°F
Well 20_4 300°F 170°F
22
Page 23

Usingthe timedconvection
bakingfeatures(upperovenonly).
Youwill hear a fan while cooking with this feature. The fan will stop when the door is opened but the heat
will not turn off.
NOTE: Foods that spoil easily-such as milk, eggs, fish, stuffings, poultry and pork-should not be allowed to
sit for more than I hour before or after cooking. Room temperature promotes the growth of harmful bacteria.
Be sure that the oven light is off because heat from the bulb will speed harmful bacteria growth.
How to Set an Immediate Start and Automatic Stop
Theupper oven will turn oni#;medlate/y and cookfor Tile o_en temperatm'e that ?ou set and
a selectedlengthof 0#70.At the endof the cookl#g tile cooking time that you entered will be
0#7<the oven will turnoff automatiCally, in tile display.
[] Touch tile CONVECTION BAKE pad.
] Touch tile re=tuber pads to set tile
desired oven temperature.
[] Touch tile COOKINGTIME pad.
NOTE.."If your reciperequkes preheat/#g youmay
need to add additiona/ tl#Teto the length of the
cook/#gtime.
] Touch tile mm_ber pads to set tile
desired length of cooldng time.
Tile minimum cooldng time _m
can set is 1 minute.
[] Touch tile STARTpad.
Tile display shows tile oven temperature
that you set and tile cooking time
co/mtdown. Tile display stmq:s changing
once tile temperature reaches 100°K
[] At tile end of timed comection bake
tile oven will turn off. Tile end of cxcle
tone will somld. Touch tile CLEAR/OFF
pad to clear tile display if necessary.
[] Remove tile fbod fl'om tile oxen.
Remember; ibods that are left in tile
oven continue cooking after tile
controls are of]_
ge.com
I
ii!iiiiii_i_ii{iiii{iiiii
w
-g.
! i iif@ i
How to Set a Delayed Start and Automatic Stop
Youcanset the upperovencontrol todelay-start the
oven,cookfor a specifc length of time and then turn
off automatically
Make sure tile clock sho_:s tile correct
time of day.
[] Touch tile CONVECTION BAKE pad.
[] Touch tile nunlber pads to set tile
desired oxen temperature.
[] Touch tile COOKING lIME pad.
NOTE"If your reciperequkespreheatl#g,youmay
need to add additional time to the length of the
cookingtime.
[] Touch tile number pads to set tile
desired cooking time.
[] Touch tile DELAYSTART pad.
[] Touch tile number pads to set tile
time of day )ou want tile oxen to
turn oix and start cooking.
]fxou would like to check tile times xou
ha'\e set, touch tile DELAYSTARTpa(] to
check tile start time you have set or touch
the COOKING TIMEpadto check the length
of cooking time Vo/I have set.
[] Touch tile STARTpad.
NOTE:An attention tonewill soundif youare using
flYnedbakingand donot touch the STARTpad after
enteringthe bakl#g temperature.
_,_q/en tile oven turns on at tile time of
day you ha_e set, tile display will show
tile changing, , temperatm'e (startino,_ at
100°F) and tile cooking time co/mtdown.
At tile end of timed comection bake tile
o;en will turn off. Tile end of cycle tone
will so/md.
Touch tile CLEAR/OFF pad to clear tile
[]
display if necessary, X_hen baking is
finished, remove the tood fl'om the
oven. ]_elnelnbeI; even though tile
oven shuts off automatically, toods
continue cooking after tile controls
are ofl_
-g.
g
N"
-g.
i
H
23
Page 24

Special featuresofyourupperovencontrol
Yournew touch pad control has additional features that you may choose to use. The foflowing are the features and
how you may activate them.
Thespecial feature modes can only be activated while the display is showing the time of day. They remain in the
control's memory until the steps are repeated.
When the display shows your choice, touch the STARTpad. The special features will remain in memory after
a power failure.
12 Hour Shut-Off
i ¸¸ilG: i i
With this feature, should youforget and leave the []
ovenon, the control will automatically turnoff the
ovenafter 12hours duringbaking functionsorafter
3 hoursduringa broil function.
If you _dsh to mrn OFFthis ligature, follow
tile steps below. []
[] Touch tile BAKE and BROILHI/tO pads
at tile same time fi)r 3 seconds tmtil
tile display shows SF.
Fahrenhe# or Celsius Temperature Selection
Yourovencontrol is set to usethe Fahrenheit
temperatureselect/bnsbut you maychange this
touse the Celsiusselections.
[] Touch tile BAKE and BROILHI/tO pads
at tile same time ti)r 3 seconds tmtil
tile display shows SF.
[] Touch tile BROILH!/LO pad. Tile
[] Touch tile BROIL HI/tO pad again.
[] Touch tile START pad.
Tonesat the End of a Timed Cycle
Touch tile DELAYSTART pad. Tile
displa) will show 12 shdn (12 hour
shut-off). Touch tile DEL4YSTARTpad
again and the display will show no shdn
(no sh ut-ofl).
Touch tile STARTpad to acfix Ke tile
no slmt-off and leaxe tile control set in
this special teamres mode.
displa_ will show F (Fahrenheit).
Tile displa) will show C (Celsius).
i ¸¸ii@! ii
24
At the end of a tinnedcycle, 3 short beeps will sound
fo/loweflby onebeep every6secondsuntil the
CLEAR/OFFpad is touched Thiscontinual
6secondbeepmaybe canceled
To cancel tile 6 second beep:
[] Touch tile BAKE and BROILHI/tO pads
at tile same time fin" 3 seconds until
tile display sho_:s SF.
[] Touch tile KITCHEN TIMER ON/OFF
pad. Tile display shows CON BEEP
(continual beep). Touch tile KITCHEN
TIMER ON/OFF pad again. Tile display
shows BEEP.(This cancels tile one
beep every 6 seconds.)
[] Touch tile START pad.
Page 25

Control Lockout (on some models)
ge.com
Yourcontrolwillallowyoutolockoutthetouch
padssotheycannotbeactivatedwhentouched
orcleaningthepane[
To lock tile controls:
Touch tile 9 and 0 touch pads at tile
[]
same time fin" 3 seconds until tile
control beeps twice. Tile display will
show Log continuously and tile time
of day if not blacked Otlt.
12 Hour, 24 Hour or Clock Black-Out
Yourcontrol/ssetto usea 12hourclock.
If you would prefbr to haw a 24 hour
militm_' time clock or black-out tile clock
displa> _bllow tile steps below.
[] Touch tile BAKE and BROIL/4//£0
pads at tile same time fiw 3 seconds
until tile display shows SE
[] Touch the CLOCKpad once.
Tile displa_ will sho_ 12hr.
If this is tile choice w/u want,
touch tile STARTpad.
NOTE"A// cookingand tinningfunctionswi// be
cancelledwhen locking out the control
[] To tlnJo('k tile contI'ol, totlch tile
9 and 0 touch pads at tile same dine
fin" 3 seconds until tile control beeps
twice, and LOC will be removed ti'om
tile display.
Touch tile CLOCK pad again to change
to tile 24 hour military time clock. Tile
display will show 24 hr. If this is tile choice
you want, touch tile START pad.
Touch tile CLOCK pad again to black-out
the clock display. Tile display will show 0EE
If this is tile choice you want, touch tile
START pad.
NOTE:If theclock/sin theblack-outmodeyou
willnotbeabletousetheDelayStartfunction.
I
,,,><,,,,,,,,,,,,,,,,,,
ii!iiiiii_i_ii{iiii{iiiii
w
-g.
i ii iiii)
iif@ i! i!ili
Cook and Hold
Yournew controlhas a cookand hold feature that
keepscooked foodswarm for up to 3hoursafter
thecookingfunction is finished
This teatuI'e can only be used when
timed cooking.
To actix _te this feature, tollow tile steps
below.
[] Touch tile BAKE and BROILHI/LO
pads at tile same time fin 3 seconds
until tile display shm_s SE
[] Touch tile COOKINGTIMEpad. Tile
(lispla} will show HidOFF.
Touch tile COOKINGTIME pad again
to actix ate the feature. The display
will show Hid ON.
[] Touch tile STARTpad to activate tile
cook and hold teature and lea'_e tile
control set in this special teatures
i/lode.
-g.
g
N"
-g.
i
H
25
Page 26

Usingthe SabbathFeature.(onsome models)
(Designed for use on the Jewish Sabbath and Holidays)
The Sabbath feature can be used for baking/roasting in the upper oven only. It cannot be used for convection,
broiling, self-cleaning, or Delay Start cooking.
NOTE: The oven light comes on automatically (on some models) when the door is opened and goes off when the
door is closed. The bulb may be removed. See the Oven Light Replacement section. On models with a light switch
on the control panel, the oven light may be turned on and left on.
How to Set for Regular Baking/Roasting
ii i i
O)(Z)(DQ(D ¸¸
Makesurethedockshowsthecorrecttimeofdayand
theovenisoff
fT] Press and hoM both the BAKE and BROIL
Itl
HI/LO pads, at the same time, until the
dist/la } shows SE
1_ T,*,p the DELAYSTART pad mltil SAb bAtH
at)pears ill the displa}
] Tou(h the START t/ad and D will appear
ill the dist/la }
] Touch dw START pad.
[_ Afler a nmdom deIa} period 7)1:
al)t/roximau b,' 30 seconds tT) 1 minute,
D C will at)pear ill tile displa} indicating
that tile oven is baking/rot_,,dng. I/D C
doesn't at)pear ill tile disl)la)_, start ag_dn
at Step 4.
To a(!iust the 7)\ell lemlle*_m*,re, touch the
BAKEpad, enter file llew tempe*_m*,re using
the number tlads, alld touch tile STARTIlad.
il ! i iiiiiiiiliil
When the display shows D the
oven is set m Sabbath. When the
display shows D C the oven is
baking/roasting.
] Tou(h the BAKE pad. No signal *,*,'illlie
_]x, ell.
Llsing the mmlber pads, enter the desired
] tel//pe,<tlre belwe(!ll 170° and 550 °.
No sigllal or temperature will be _ixen.
NOTE:The CLEAR/OFFand COOKING TIME pads
are a(tive (tHl:il/_" the Sabbath J('atll*'e.
ii iiii il iill!i
When the display shows D the
oven is set d7Sabbath. When the
display shows D C the oven is
baiting/roasting.
How to Set for Timed Baking/Roasting--Immediate Start and Automatic Stop
Makesuretheclockshowsthecorrecttimeofdayand
theovenisoff,
] Press and hoM both the BAKE and BROIL
HI/LO pads, at the same time, m/ti] the
(tispla} shows SE
r_] Ta+pthe DELAYSTART t/ad until SAb bAtH
at)pears ill the display.
] TouTh the START pad and D will at/pear ill
the (tistlla }
[_] Tou(h the COOKING TIME pad.
] Tou(h the number pads to set the desired
length ()f:(ooking thne be|weeH 1 l//il//lte
and 9 hours and 99 minutes. The (ooking
tnne that you entered *,*,'illbe displayed.
] Tou(h the START pad.
] Tou(b the BAgEpad. No signal will be
_]x, ell.
] Llsing dw nmnber pads, enter the desired
[eH/l)e*'_*,tlllTe. No si_l/al 7)1" [eTiltlelT_tt/H'(! will
lie _JVel/,
] Tou(h the START pad.
] \tier a random dela} lleriod ()t
al)llroximal7 ly 30 secon(ts to 1 minute,
D C will at)pear ill tile display indicating
that tile oven is baking/ro_c, dng. If D C
doesn't at)pear ill tile display, start ag_dn
at Step 7.
TO a({itlSt tile o\ell teml/e*_mlre, touch tile
BAKEpad, el/ter the 11ew telillle*}ltt*,re using
the munber llads, and touch tile STaRTpad.
When (ooking is finished, tile display will (hange
fl:om D C to D and 0:00will al)l/ear, indicating
that tile ovell has HIrlled OFFbuI is still set ill
Sabbath. Relllove tile cooked R)od.
How to Ex# the Sabbath Feature
[] Touch the CLEAR/OFFpad.
] If the oxell is (ooking, wait tbr a ralldom
dela} period of allproxinmtely 30 secollds
to 1 minute, until 7ml_ D is ill the disl)lay.
] Pre._', and hoM both the BAKE and BROIL
HI/LO pads, at the same time, m/tJ] the
displa} shows SE
[] Ta+pthe DELAY START pad mltil 12shdn
or no shdn atlpears ill the (tisplay.
12 shdn indicates that tile 7l*,_'n will
automatically turn off after 12 hours.
no shdn indil ates that the oxen will not
a/ltOlllati(allv ttllTI/ ()t][
] Touch the START pad.
NOTE:/fa power outage occurred whi/e the oven was
in Sabbath, the oven wi/I automatica//y turn off andstay
off even when thepower returns, Theovencontro/ must
be reset.
26
Page 27

Adjustthe upperoventhermostat--Do it yourself! ge.com
Youmay find that your new oven cooks differently than the one it replaced. Use your new oven for a few weeks
to become more familiar with it. If you still think your new oven is too hot or too cold, you can adjust the
thermostat yourself.
Do not use thermometers, such as those found in grocery stores, to check the temperature setting of your oven.
These thermometers may vary 20-40 degrees.
NOTE: This adjustment will not affect the broiling or the self-cleaning temperatures. The adjustment will be
retained in memory after a power failure.
To Adjust the Thermostat
I
Q
(2bdDdDQO
(Z)dD(Z)
[] Touch the BAKEand BROILHI/LOpads
at the same time fin" 3 seconds until
the display shows SE
[] T(/uch the BAKE pad, A t_(/digit
number shows in the display.
Touch BAKE once to decrease (-)
tile oven telllpel'ifftll'e, oF twice to
increase (+).
The o'_en temperature can be ac!iusted
[]
tip as I//tlch its .1{) _ oi" d/)vvIl ils I/lllch
as 35°E Touch the number pads the
same wa)}()tl read them. For example,
to change the o\en temperature 1: ]_,
touch I and 5.
[] \'\q)en you ha'_e made the ac!iustment,
touch the START pad to >,,oback to the
time of clay disi:_lay. [!se yore" oven as
you wouM hero, alE.
NOTE"Thethermostatadjustmentfor Baking
will also affect ConvectionBak&g or Convection
Roasting.
Thetype ofmargarine will affect bakingperformance!
Most recipes for baking have been developed using high fat products such as butter or margarine (80% fat).
If you decrease the fat, the recipe may not give the same results as with a higher fat product.
,,,><,,,,,,,,,,,,,,,,,,
[i!ii[iii_i_ii{iiii{iiiii
w
Recipe failure can result if cakes, pies, pastries, cookies or candies are made with low-fat spreads. The lower
the fat content of a spread product, the more noticeable these differences become.
[_edei'al standards reqtlire prodtlcts labeled "margarine" to contain at least 80% tilt by weight. Ix)w-tilt spreads, oix the
other hand, contain less tilt and moie wateI: Tile high moisture content of these spreads afibcts the textm'e and flavor
of baked goods. For best results with yore" old tilvorite recipes, use margarine, butter or stick spreads containing at least
70% vegetable oil.
g
I
27
Page 28

Usingthe lower ovendrawer.(onsomemodels)
The lower oven drawer may be used to bake foods using the same times and temperatures as a standard oven. Foods
ideal for baking in the lower oven drawer include pizza, frozen foods, casseroles, biscuits, rolls and many desserts.
To Use the Lower Oven Drawer
NOTES:
iJi::Always use the includeddrawerrack when using
the LowerOvenDrawer
Theloweroven drawer cannotbe usedduring
a self-clean cycleof the upperoven.
Donotputfood,foilorcookwaraddecflyonthe
bottomofthelowerovendrawerAlwaysusethe
includeddrawerrack
If foodsrequirea cover,useonlyfoilor lidsable
towithstandbakingtemperatures.Donotuse
plastic.
Maxdnumheight of foods that canbeplaced
in the lowerovendrawer is4".
iJi::Donotput lkluidorwaterin theloweroven
drawer
!i>Neverplacep/asOcs,paper,cannedfoodsor
combustiblematenalinthelowerovendrawer
250_50
3_ • 350 . 400
Push in and turn the lower oven
drawer knob to any desired setting.
[] Push in and turn the lower o;en
drawer knob to any desired setting.
[] _Mlow the lower o;en drawer to
preheat,
IF:The ON signal light is located on the
upper fight side ot the knob and glows
when the knob is in the ON position. It
remains ON until the knob is moved to
the OFF position.
?: The "Heating" signal light is located
below the ON signal light and glows
when the heating elements are active.
Preheat is complete after the "Heating"
signal has ttli'ned Off t()I" the fi_st time
with each use.
The lower oven drawer uses less energy' than the upper oven.
_Mlow the fi_llowing approximate times fi)r preheating:
Desired Lower Preheat
Oven Temperature Time
WARM 10minutes
350°F 20minutes
425°1: 30minutes
When Using the Lower Oven Drawer Warm Zone
TheWARMZONEof the lower ovendrawer will
keephot cookedfoodsat serving temperatures.
Always start with hot foorLDonot usethe WARM
ZONEtoheatcold food otherthan crispingcrackers,
chipsor dry cereal
[] Push in and turn the control knob
to the desired setting within the warn/
zone (indicated by the red line),
LO ....................... Pies
MEDIUM
(mid-positionon _e line) .... Casseroles
HI ........................ Meats
28
Page 29

Usingthe self-cleaning upperoven. ge.com
The oven door must be closed and all controls set correctly for the cycle to work properly.
Before a Clean Cycle
Wipe up heavy soil on flTeoven
bottom.
®
(DCDCD(3)(3)
O(D(Z)(ZXZ)
O
For tile fiI_t sell:clean c)'cle, we reconnnend
venOng your kitchen with an open window
or using a venOlafion tim or hood.
Renlove tile shelves, any broiler i)an,
broiler grid, i)robe, all cookware and
any ahuninunl flfil fl'oni tile ()veil.
Tile o',en shel',es can be selfk'leaned,
but they will darken, lose their hister
and beconle hard to slide.
Soil on tile fl'ont fl'anie of the range and
outside tile gasket on tile door will need
to be cleaned by hand. Clean these areas
with hot watei; soap-filled scouring pads or
cleansei_ such as Soft Sci'ub _ Rinse well
with clean water and (li_'.
How to Set the Upper Oven for Cleaning
[] Touch tile SELFCLEAN i)ad.
[] Using tile nuinber pads, enter tile
desired clean dine, if a tiine other
than 4 houis is needed.
Clean cycle tiine is nomiallv 4 houis.
You can change tile clean tiine to anv tiine
1)etween 3 houI_ and 5 hotII_, dei)ending
on how dirty VO/lI" oven is.
[] Touch tile STARTpad.
Tile door locks autonlaficallv. Tile display
will show tile clean finie reniaining. It will
not be possible to open tile ()veil door
unOl the tenli)erature drops below the
lock teini)eramre and tile LOCKEDDOOR
light goes off,
Do not clean tile gasket. Tile fil)erglass
inateiJal of tile oven door gasket cannot
withstand al)rasion. It is essen0al for tile
gasket to renlain intact./I vou notice it
beconiing worn or fl'ayed, replace it.
Wipe t| I) any hea\ T sI)illoveI_ on tile ()veil
bot[oi/l.
Make sure tile ()veil light bulb cover is
in place and the ()veil light is off.
IMPORTANT: The health of seine birds is
extrenielv sensiOve to the fiunes given off'
during the seltk'leaning cycle of any range.
Move birds to another well-ventilated roonl.
NOTE"Use caution when oi)ening tile
upper oxen alter tile self=clean cycle has
ended. Tile oxen nlav still be hot.
X4hen tile LOCKED DOOR light is off, open
tile dooi;
Tile men shuts off autoniaticallv when tile
clean cwle is coinplete.
_: Tile words LOCKDOOR will flash and
tile oven control will signal if vou set
the clean cycle and toiget to close the
()veil dooi;
::Ji::To stop a clean cycle, touch tile
CLEAR/OFFpad. X_]/eIl tile LOCKEDDOOR
light goes off indkaOng tile oven has
cooled below tile locking teini)erature ,
open tile dooI;
N Do not use the warming drawer during
a self-clean cycle.
I
i!!!iliiiiiii
/iiii{iiii{iii_
==
g
g
29
}
i
Page 30

Usingthe self-cleaning upperoven.
The oven door must be closed and all controls set correctly for the cycle to work properly.
How to Delay the Start of Cleaning
O <Z)OODG)
(Z)(ZXZ)
Make sure tile clock shows tile correct
time of day.
[] Touch tile SELFCLEAN pad.
[] Using tile nmnber pads, enter tile
desired clean time.
[] Touch the DEL4YSTART pad. The
earliest start time you can set will
appear in the displa).
[] Using the nmnber pads, enter the
time of din' you want tile clean cxcle
to stnrt.
[] Touch tile START pad.
The door locks automatically: Tile display
will show tile start time. It will not be
possible to open tile oven door until tile
temperature drops below the lock
temperature and the LOCKED DOOR light
goes off.
_,_]/en the LOCKED DOOR light is off, open
tile dom:
,0
After a Clean Cycle
Ym mar notice some white ash in tile
men. _4ipe it up with a damp cloth after
tile oxen cools.
!;_:You cannot set tile oven fiw cooking until
tile oxen is cool enough for tile door to
tmlock.
ffwhite spots remain, removethem with a
soap-filledscounngpad and nnse thoroughly
with a vinegarand watermixture.
These deposits are usually a salt residue
that cannot be removed by tile clean cycle.
If tile oven is not clean after one clean
c'_cle repeat the c_cle,
::Ji::While tile oven is selfk'leaning, you can
touch tile CLOCK pad to display tile time
of day. To rettlrn to tile clean CO/liltdowil_
touch tile COOKING TIME pad.
::Ji::If tile shelves become hard to slide,
apply a small am otmt of vegetable oil or
cooking oil to a paper towel and wipe
tile edges _fftile oven shelves with tile
paper towel.
3O
Page 31

Careand cleaningofthe range. ge.com
Be sure electrical power is off and all surfaces are cool before cleaning any part of the range.
If your range is removed for cleaning, servicing or any reason, be sure the anti-tip
device is re-engaged properly when the range is replaced. Failure to take this
precaution could result in tipping of the range and cause injury.
Sealed Burner Assemblies
I
Sidegrate
Burnercae
Burnerneat]
ff Electrode
Ceekto[
Turn all controls OFF befiwe removing the
burner parts.
The round side burner caps and burner
heads can be lifted ofl_ making them easy to
clean, The electrodes are not removable,
The owd center bm'ner head and cap
assembly can be lifted ofl_ making it easy
to clean, The burner electrode is not
i'eillo\_lble,
[[11 Center
f-_-_ Burnerhead
a:de:_Yy
A CAUTION:
cooktopwithoutall burnerpartsandgratesinplace.
The electrode of the spark igniter
is exposed when the burner head is
removed, _,_]/eIl one burner is turned
to LITE, all the l:,m'ne_ spark. Do not
attempt to disassemble or clean
arotmd any bm'ner while another
bm'ner is on. An electric shock may
result, which could cause w_u to
knock over hot cookware.
i!!!iiii iiiii
/iiitiiiiiiiii_
m
-g.
g
g
3/
Page 32

Careand cleaning ofthe range.
Burner Caps and Heads
Before removing the burner caps and heads,
remember their size and locat/bn. Replace them in
the same location after c/eambg.
NOTE: Do not use steel wool or scouring powders to
clean the burner parts.
Burnercaps
IJfl off when cool. _A'ash burner caps in hot,
soapy water and _inse with clean water: You
may, scorn" with a l)lastic scom_ing, l)ad to
renloxe burned-on food particles.
Replacement
BurnerHeads
Replace 1)urner heads over tile electrodes
on the cooktop, in tile correct locations
according to their size. There is one small,
olle llledit/lll, olle large alld olle extra large
btlrller head.
Bumerheads
Theburnerheadsareremovable. Cl()(,ged or dirty bm'ner ports or
Simplyliftthemofftherangefor ,_, ,
Burner Heads and Oval(Center) Burner
Head/Cap Assembly
Theburner heads and the oval burner head/cap
assembly are removable. Simply lift them off the
range for cleaning.
For proper ignition, make sm'e the
small hole in the section that fits oxer the
electrode is kept open, A sewing needle
or wire twist-tie works well to unclog it.
Theslits in the burner heads must be kept clean
at all times for an even, unhampered flame.
cleaning, electrodes will ilo( allow the btlriler tO
operate properly:
Hulein
[_2 burner
Any spill on or arotmd an electrode must
be careflflly cleaned. Take care to not hit an
electrode with anything hard or it coukl be
damaged.
Clean the bm'ner heads routinely, especially
The oval burner head/cap assembly is
removable. Simply !ift it off the range
for cleaning. Use a Sewing needle Or
twist-tie to unclog the small hole in
the burner heads.
after bad spillove_, which couM clog the
openings. I Jfl off when cool.
To relnove bm'ned-on fi)od, soak the
bm'ner heads in a solution of mild liquid
detergent and hot water fi)r 20-30 minutes.
For I/IOI'e SttlbboI'II StJliIIS_use a toothbrush.
M_ _';;!! I;i2-- Frent_ range --_d'
Make sure tile slot in tile btu'ner head is
positi(med over the elecm _de.
Electrede_
Oval(Center) Burner Head/CapAssembly
I_eplace tile ova] (center) head/cap
assembly over the electrode on the cooktop.
Oval head ana can Vlakesure me SlOt In tile
assernely 3urner neaa is 3OSl[ioneu
over tile elecffoae.
32
After cleaning
Before putting the bm'ner caps, heads and
oval head/cap assembly back, shake out
excess water and then (li T them thoroughly
by setting in a waml ()veil for 30 Illilltl[eS.
=rentef range =lectrede
Caps
Replace the matching size caps onto the
bm'ner bases or hea&s.
Front of range
Make sm'e that tile heads and caps are
replaced in the correct locations.
Page 33

Appearancemayvarg
Thegratesmaybe cleanedin a
dishwashe_
LeftFront Center RightFront
Burner Grates
_mr range has three professional-st) le double
g_'ates, These g_'ates are position-specific, For
nJaxinlum stabilit); these g_'ates should onl} be
used in their proper position; the) cannot be
interchanged left to right or fi'ont to back. For
convenience, the undersides of the left and
right grams m'e mm'ked "LEFT FRONT" and
"RIGHT FRONT." Make sm'e the fl'ont
portion of both grows is in fi'ont. The middle
g_ate has a bow in fl'ont. Make sure the bowed
portion is toward the fi'ont of the rmlge.
Cleaning
i,ifl out wllen cool. C,rates should be washed
regularl) and, of course, after spillovers. _\_lsll
them in hot, soap) water and rinse with dean
water When replacing the grams, be sure the}
are positioned sectlre b o_er the burners.
Replace the grates so that confintlOtlS arcs are
formed with the center ribs of all three grams.
ge.com
Do not operate a burner fi)r an extended
period of time without cookware on the grate.
The finish on the g_ate ma) chip without
cookware to absorb the heat.
To g_t rid of burned<m %od, place the grates
in a co_ered container Add 1/4 cup ammonia
and let them soak se_eml hours or overnight.
Wash, rinse well and (h;_c
Although the} are durable, the grates
will g_aduall) lose their shine, regardless
of the best care you can give them. This
is due to their continual exposure to high
temperatures. You will notice this sooner
with lighter color g_ates.
NOTE:Donotcleanthegratesina self-cfeaningoven.
rJ_
I
i!!!iiii iiiii
i,,i,ii_;i_,_iii!
/iiiiiiiiiiiii_
m
Cooktop Surface
To a_oid damaging the porcelain enamel
stlrfitce of the cooktop and to pi'e_ent it fl'om
becoming dull, clean up spills right away.
Foods with a lot of ackt (tomatoes, sauerkraut,
fluit juices, etc.) or fi)ods with high sugar
content could cause a dull spot if allowed
to set.
When the surfi|ce has cooled, wash and rinse.
For other spills such as fi|t spatterings, etc.,
wash with soap and wamr once the surfi|ce
has cooled. Then rinse and polish with a
oh? cloth.
Stainless Steel Surfaces (onsomemodels)
Donotusea steelwoolpad;it willscratch
thesurface.
To clean file stainless steel surfi|ce,
use warn-i suds} water or a stainless steel
cleaner or polish. Alwa} s wipe the surfi_ce in
the direction of the grain. Follow the cleaner
instructions fi)r cleaning the stainless steel
StlI'fiJce,
NOTE."Donotstoreflammablematerials/)_
anoven,drawerornearthecooktop.Donot
storeorusecombustiblematerials,gasolineor
otherflammablevaporsandliquidsinthevicinity
ofthisoranyotherappliance.
NOTE:Donotlift thecooktop.Liftingthecooktopcan
leadtodamageandimproperoperationoftherange.
To inquire about I)u_vha'rng stainless steel
at)i)liance cleaner or polish, or to find the
location of a dealer nem'est you, please call
our toll-fl'ee number:
NationalPartsCenter 1,800.626.2002
ge.com
.-g.
g
g
Glass Window
To clean the outside glass finish, use a glass
cleane_: Rinse and polish with a oh? clr)th.
33
Page 34

Careand cleaning of therange.
Griddle
NOTES:
i_::ThegriddleIs tobe used overthecenter
burneronly
<,i!iDonot clean thegndd/e in adishwasher
_: Washwith hot, soapywater after eachuse
while usinga spongeor dishcloth.
::Ji:_If oil or foodresidue is left on the griddle,
further cookingwill hardenthe residueand cause
stickingover tlYne.Inthiscase, usea non-abrasive
cleansersuchasBonArni®or one of the soft
scrubcleansers.Apply with a sponge, Scrunge®
or other cleaningpad labeledsafe for non-
stickpans.
::Ji::Useon/]/plastic, nylon or wooden utensilsor
Si/verStone®kitchen tools toprevent rnarnbg
of the coating.
_: Never useknivesor cut food on thegriddle.
Washwith hot, soapywater after eachuse.
Storecarefully to prevent scratching.
Griddle Precautions:
_: Ifsomethinghas spilled under thegriddle, it
shouldbecleanedup as soonaspossible to
prevent "bakedon" foodsoil.
_: Do not a//ow grease to accurnu/ateunder the
griddleas it can bea byehazard.Clean underthe
griddleas soonasit is cool Cleanwith hot soapy
water
::Ji::Donotplaceyourgriddlein thernMowave.
_: Alwaysturnoff aflsurfaceburnersbefore
removingthegriddle.Usecautionwhenhandling
ahotgriddle.
34
Page 35

Li#-Off Oven Door
ge.com
Lift the door straight up and off the
hinges.
Thegasket is designed with a gap
at the bottom to allow for proper
air circulation.
Do not rub or cleat? the door
gasket--it has at?extremely low
resistance to abrasion.
If you notice the gasket becomh?g
won?, frayed or damaged h?any way
or if it has become displaced on the
door, you should have it replaced.
The oven door/s removable, but it/s heaw. Youmay
need help removing and replacing the door
Do not lift the door by the handle. Make sum the
oven/s completelycool.
To remove the door, open it a ie_ inches to
tile special stop position that will hold the
door open. (;rasp ritual) on each side and
lift the (loo_ straight up and off the hinges
NOT£"Becarefulnottoplacehandsbetweenthe
hingeandtheovendoorframeas thehingecould
snapbackandpinchfingers.
To replace the deer, make sure the binges
are in the special stop position. Position the
slots in the bottom of tile door squarely
over the binges. Then lower the door slowly
and e\vnlv over both hinges at the same
time. If the hinges snap back against the
oven fi'ame, pull them back out.
Tocleanthe inside of thedoor:
!i_:Do not allow excess water to run into
}lily holes or slots in tile dooi:
_: Because tile area inside tile gasket is
cleaned during the seltk lean cycle, you
do not need to clean this by hand. Any
soap left on the liner causes additional
stains when the oven is heated.
::Ji::The area outside the gasket can
be cleaned with a soap-filled plastic
scorning pad.
Do not allow foodspills with a high sugaror acid
content(such as milk, tomatoes,sauerkraut,fruit
juices or pie filling) to remain on the surface.
Theymaycausea duffspot evenafter cleaning.
Toclean the outside of the door.
Use soap and water to thoroughly clean
the top, sides and ti'ont ()Ithe oven (loo_:
Rinse well. Ybu may also use a glass
cleaner to clean the glass on the outside
of the (loo_:
::Ji::Spillage of marinades, fl'uitjuices, tomato
sauces and basting materials containing
adds may cause discoloration and should
be wiped up immediately. _,_]/en tile
sm_hce is cool, clean and rinse,
!;>Do not use oven cleanei3, cleansing
pow(le_ or l/m_h abrasixes on tile
outside of tile (loo_:
I
i!!!iiii iiiii
i,,i,ii_;i_,_iii!
/iiit{iiii{iii_
m
Oven Heating Elements
Do not dean the bake element or the broil element
Any so//will bum off when the elements are heated
To clean tile oven [lOOl; gendy lift the bake
element. Clean with warm soapy watel:
g
g
}
35
Page 36

Careand cleaning ofthe range.
i ii :i
Removable Lower Oven Drawer (on some models)
NOTE:Beforepedorming any adjustments,
cleaningor service,disconnecttherange electrical
power supplyat the householddistributionpanel
byremovlbg the fuse orswitchlbg off the ckcuit
breaker Make sure the drawer heating element
iscool.
Most cleaning can be done with the drawer
in place. However, the drawer may be
removed ifflu'ther cleaning is needed. Lrse
soap and wam_ water to thoroughly clean.
To remove the drawer:
[] Pull the drawer straight out tmfil
it stops.
[] Press the tabs on both sides in, while
pulling the drmver fi)rward and fl'ee.
Toreplace the drawer:
[] ,Place the left drawer rail arotmd the
tuner lefi rail guide and slide it in
slightl) to hook it.
[] Place the right drawer rail arotmd the
tuner rioht rail guide and slide it in
slightl) to hook it.
[] Slide the drawer all the way in.
Removable Lower Oven Drawer Pan
NOTE:Beforeperformlbganyadjustments,
cleaningorservice,disconnecttherangeelectrical
powersupplyat thehouseholddistributionpanel
byremovingthefuseorswitchingoff thecircuit
breakerMakesurethedrawerheatlbgelement
iscool.
NOTE."Allow lowerovendrawerto coolbefore
removingpan.
NOTE."Wipespillspmmpflyafiereachuse.
::Ji::Never place, use or self:clean the lower
oven drawer pan in the upper oven.
_: I,ower oven drawer has a remo\_fl)le pan
fi)r easy cleaning. Clean with hot, soapy
water and a sponge or dish towel. Dry
with a clean cloth. An oven cleaner; such
as Easy-Oil", may also be used. Be sure to
tollow the directions on the oven cleane_:
Replace the pan in the lower oven
dI';IweI:
36
Page 37

Ventappearanceandlocationvar,¢
OvenAir Vents
Never block tile vents (air openings) of tile
range. Tile}' p_ovide tile air inlet and outlet
that are necessary fi)_ tile range to operate
property with correct combustion.
$
_Mr openings are located at tile rear of
tile cooktop, at tile top and bottom of tile
oven dooc and at tile bottom of tile range,
[lndel" tile lower (),,ell dl'aWel;
UpperControl Panel
Lock out the touch pads before cleaning.
See tile ControlLockoutinfimnafion in tile
Special features of your oven control section
ill this manual.
Clean up splattel_ with a damp cloth.
You may also use a glass cleanel:
_e.conl
Remoxe heavier soil with _aml soap} watel:
Do not use abrasixes of am ldnd.
Unlockthe touch pads after cleaning,
Seetile ControlLockoutinfbmlation ill tile
Specialfeatures of yourovencontrolsection
in this manual.
r_
I
i!!!iiii iiiii
i,,i,ii_i,i_,_iii!
/iiii{iiii{iii_
m
Surface burner knob
_ Redline
Lower over drawer knob
tower Control Panel and Knobs
It's a good idea to _ipe tile control panel
after each use of tile o``en. Clean with
mild soap and _ater or _inegar and wateL
rinse with clean water and polish (h) with
a soft cloth.
Do not use abrasive cleansex_, strong liquid
cleanei_, pk_stic scouring pads or oven
cleane_ on tile control panel--they will
damage tile finish. A 50/50 solution of
vinegar and hot water works well.
The contro/ knobs may be removed for easior
cbanlbg
Make sure tile knobs are ill tile OFF
positions and pull them straight off tile
stems fi)r cleaning.
Tile knobs call be cleaned in a dishwasher
or they may also be washed with soap and
watel: Make sine tile insides (ff tile knobs are
oh)' before replacing.
Replace tile knobs in tile OFFposition
to ensure proper placement.
Metal parts can be cleaned with soap and
watei; Do not use steel wool, abrasives,
all/l/ionia, acids or COl/ll//ercial ()``'ell
cleane_. Dry with a soft cloth.
NOTE" Thelower ovendrawer controlknob/s not
ibterchangeab/ewith the surfaceburnerknobs.Be
sure tore/bsta//the /ower ovendrawer knob to the
or/_z/nallocation. Thelower ovendrawerknob may
be identified by the redl/be.Surface burnerknobs
havea white l/be.
g
g
}
37
Page 38

Careandcleaningof therange.
Oven Shelves and Drawer Racks
Wire cover holder.
Clean tile shelxes with an abrasixe cleansex:
Tile oven shelves may be cleaned in tile
selfk'leaning oven. However; the shelves
will darken in color, lose their luster and
become hard to slide if cleaned dtwing
the self cleaning cycle.
To make tile shelves slide more easily, apply
a small amount of vegetable oil or cooking
oil to a paper towel and wipe the edges ot
the oven shelves with the paper towel.
Oven tight Replacement
A CAUTION:8e orereplec,ngyour
ovenlightbu& disconnectthe electrlea/power
to the rangeat the main fuse or c/rcu/tbreaker
panel. Be sureto let the I/_Thtcover and bulb
coolcompletely
Tile o_ en light bulb is covered with a
remo\_tble glass cover that is hekl in place
with a bail-shaped wire. Remove tile oven
dora; if desired, to reach cover easil>
TO remove:
Hold a hand trader tile cover so it
[]
doesn't fidl when released. _v_Tith
fingel_ of tile same hand, fim_l} push
back tile wire cover holdel= I.ifl off
tile co;'eL
Torep/ace cover'.
[] Place it into tile groove of tile light
receptacle. Pull tile wire forward to
the center _ff the cover until it snaps
into place. \_]len in })lace, tile wire
holds tile cover tim/l> Be cel_ain the
wire is ill tile depression in the center
of tile coveL
] (kmnect electrical power to tile range.
Donotremoveanyscrewstoremove
thecover.
] Do not touch hot bulb with a wet
cloth. Replace bulb with a 40-\_att
household appliance bulb.
38
Page 39

installationof therange.
Read these instructions oomplete/y and carefully.
IN THECOMMONWEALTHOFMASSACHUSETTS
::Ji::This product must be installed by a licensed
phunber or gas fitter.
::Ji::When using ball type gas shut-off valves, they
shall be the T-handle type.
_: A flexible gas connector, when used, m ust not
exceed 3 feet.
BEFOREYOUBEGIN
Installation of th& range must conform with local codes, or in the absence of local codes,
with the National Fuel Gas Code, ANSI Z223.1/NFPA.54, latest edition. This range has been
design-certified by CSA International according to ANSI Z21.1, latest edition.
_s Mth any appliance using gas and generating
heat, there are certain satet) precautions you
should tollow. D_u will find these precautions in
the ImportantSafetylnformation secdon in the
fl'ont of this manual. Read them carefldh.
IMPORTANT'.OBSERVEALLGOVERNINGCODES
ANDORDINANCES.
NOTE"Thisappl&nce must beproperlygrounded
IMPORTANT'.Save these Ibstructionsfor the local electrical
lbspector# use.
NOTE TOINSTALLER: Leavetheseinstructions with the
applianceafter installation iscompleted
NOTE TO CONSUMER: Keepthis Owner# Manualand
Installation Instructionsfor future use.
SERVICER:Theelectncaldiagramis/n anenvelopeattached
tothebackof therange.
FORYOURSAFETY
Do not store or use combustible materials, gasoline or other flammable vapors and liquids in the
vicinity of this or any other appfiance.
ff yousmell gas:
[] Open windows.
] Don't touch electrical switches.
[] Extinguish any open flalne.
[] hmnediatelv call yore', ooas,supplie_:
ELECTRICALREOUIREMENTS
CAUTION: FORPERSONALSAFETY,
DONOTUSEANEXTENSIONCORDWITHTHIS
APPLIANCEREMOVEHOUSEFUSEOROPENCIRCUIT
BREAKERBEFOREBEGINNINGINSTALLATION.
This appliance must be supplied with the proper
voltage and fl'equency, and connected to an
individual, properly grotmded circuit, protected
by a circuit breaker or time-delay filse, as noted
on the rating plate.
WiringmustconformtoNationalElectncCodes.
If the electric service provided does not meet the
above specifications, have a licensed electrician
install an approved outlet.
Because range temfinals are not accessible alter
range is in position, flexible service conduit or cord
must be used.
39
Page 40

Installationofthe range.
WARNING#.INSTALLAtiONSAFETYINSTRUCtiONS
Improper instaflafion, adjustment, alteration, service or maintenance can cause injury or property
damage. Refer to this manual For assistance or additional information, consult a quafified instafler,
service agency, manufacturer (dealer) or the gas suppfier.
Never reuse old flexible connectors. The use
of old flexible connectors can cause gas leaks
and personal injury. Always rise NEW flexible
connectors when installing a g_s appliance.
IMPORTAN7?Remove all pacldng material and
limrauue flom oven before connecting gas
and electrical supply m rang>.
_{;_Have your rang> installed by a qualified
installer.
E:,:Your rang_ must be electrically grounded
in accordance with local codes oi; in the
absence of local codes, in accordance with
the National Electrical Code (ANSI/Nf'PA
70, latest edition).
E:,:Be%re installing your range on linoleum
or aW other synthetic floor co_ering, make
sure tile floor cox>ring can withstand 180°F
without shrinldng, waq)ing or discoloring.
Do not install tile rang_ oxer caq)edng
unless a sheet of 1/4" thick plywood or
similar insulator is placed between the
range and caq)efing.
_:;Make snle tile wall covering:s around file
range can withstand heat g>neramd by
the rang> up m 900°K
E:,:Avoid placing cabinets above the range.
To reduce the hazard caused by reaching
over tile open flames of operating burners,
install a xenfilafion hood ox_r tile rang_
flint projects %rward at least 5" beyond
file flont of file cabinets.
qT{_:Tile ventilating hood nmst be construcmd
of sheet metal not less than 0.0199" thick.
Install above tile cooktop with a clearance of
not less than 1/4" between tile hood and tile
underside of the combustible mamria] or
metal cabinet. The hood must be at least as
wide as tile appliance and cenmred over the
appliance. Clearance between tile cooking
surl_ace and the ventilation hood surface
MUST NEVERBE LESSTHAN24 INCHES.
EXCEPTION."Installation of a listed microwave
oven or cooking appliance over tim cooktop
shall confornl to tile installation insuucfions
packed with that appliance.
E:,:If cabinets are placed above file rang_,
allow a minimum clearance of 30" between
the cooking surl_ace and tile bottom of
unprotecmd cabinets.
_!i;:If a 30" clearance between cooking sniface
and ox>rhead combustible material or metal
cabinets cannot be maintained, protect the
underside of the cabinets aboxe the cooktop
with not less than 1/4" insulating millboard
covered wifl_ sheet metal not less fllan
0.0199" thick.
E:,:Clearance between the cooking surface
and protected cabinets MUSTNEVER BE
LESSTHAN 241NCHES. Tile vertical distance
flom the plane of the cooking surface to
tile bottom of adjacent overhead cabinets
extending closer than 1" to tile plane of
the range sides must not be less titan 18".
(See the Dimensions and Clearances
illustration in this section.)
40
CAUTION2 items of interest to children
shouldnot be storedin cabinetsabovea rangeor
onthe backsplashof a range--children climbingon
therangeto reachitemscould be seriouslyinjured.
Page 41

Read these instructions completely and carefully.
DIMENSIONSAND CLEARANCES
Provide adequate clearances between the range and adjacent combustible surfaces. These
dimensions must be met for safe use of your range. The location of the electrical outlet and pipe
opening (see Gas Pipe and Electric Outlet Locations) may be adjusted to meet specific requirements.
Height
473/4"
Depthwith doorclosed (includesdoorhandle)
281/4"to 29"
Depth varies depending on model
See specifications sheet for yoor model
Depthwithdooropen
463/8" _ .....--"
Minimumto
cabinets on
either side of 30"
the/_nge
3" 30"
:18" Minimum-_- Mle//T_um
clearance
toleft wall
below cooktop
and at the
range back
L
-_.- 6" Minimumclearance
to right wall
'_.
for cabinets above
Maximom depth
countertops
Tocabinetsbelow
cooktopand at
therangeback
41
Page 42

Installationofthe range.
TOOLSYOUWILLNEED
_;Phillipsandflat-bladescrewdrivers _; Flareunionadapterforconnectiontogassupplyline
iJi:_Pencilandruler (3/4" or 1/2" NPTx1/2" I.D.)
!_,_Twopipewrenches(oneforbackup)
_; Open-endoradjustablewrench
;;Ji:_Nutdriverorwrench.1/4"
_; Drift
;;Ji::Flareunionadapter for connectionto pressureregulator
on range(1/2" NPTx 1/2" LD.)
;;Ji::Ll)uld leakdetector or soapywater
_ Lagbolt or 1/2" O.D.Sleeveanchor(for concrete
floorsonly_
ADDITIONAL MATERIALSYOUMAY NEED:
_: Gaslineshut-offvalve
;;Ji:_Pi)gejointsea/antor UL-approvedpl)gethreadtapewith
Teflon*thatresistsactionofnaturalandLPgases.
*Teflon:RegisteredtrademarkofDuPont
_; Flexiblemetalapplianceconnector(1/2" I.D.).A 5-foot
lengthisrecommendedforeaseofinstallationbutother
lengthsareacceptable.Neveruseanoldconnectorwhen
installinganewrange.
::Ji::SqueezeConnectormatchlbg thesl}e of the bracket
opening(on the rangebackbehind the wlYlbgcover)and the
houseconduiL Obtainonly if replacing the power cordwith
conduit
LOCATIONGUIDELINES
Do not locate the range where it may be subject to strong drafts. Any openings in the floor or waft
behind the range should be sealed. Make sure the openings around the base of the range that
supply fresh air for combustion and ventilation are not obstructed by carpeting or woodwork.
Your range, like many other household items,
is heavv and can settle into soft floor coverings
such as cushioned vinyl or caq)eting. Use care
when moving tile range on this £:pe oI flooring.
It is recommended that tile following simple and
inexpensive instructions be tollowed to protect
VOILE _1OOI:
Tile range should be installed on a sheet of
plywood (or similar material). X*\]/en tile floor
covering ends at tile fl'ont ot tile range, tile area
that tile range will rest on should be built up
with plywood to tile same level or higher than
tile floor covering.
This Mll allow tile range to be moved tot cleaning
or servicing. Also, make sm'e yore" floor covering
will withstand 180°E (See the Installation Safety
Instructions section.)
Make sure tile wall coverings around yore" range
can withst;md the heat generated (up to 200°F)
by tile range. (See tile Installation Safety Instructions
section.)
42
IMPORTANT!
Remove aft tape and packaging. Make sure the burners are properly seated and level
Take the accessory pack out of the oven.
Check to be sure that no range parts have come loose during shipping.
Page 43

Read these instructions completely and carefully.
[] Gas Supply Requirements
Recommended Gas Pipe Outlet Locations
NOTE:Makegasconnectionson
theleftsideof thecutoutopening.
Recommended area for
through4he-wa// connection
of pipe stub/shut-off valve.
This area allows
flush installation to
rear wall.
30"
Recommended area for
through4he41oorconnection
of pipe stub/shut-off valve.
Provide Adequate Gas Supply
Yourrange is designed to operate at a pressure of S" of water column on natural gas or,
if designed for LP gas (propane or butane), 10" of water column.
Make sure you are suppl}ing your range with
the type of gas tot which it is designed.
This range is convertible for rise on natural or
propane gas. If you decide to use this range on
I,P gas, convei_ion must be made by a qualNed
I,P installer before attempting to operate the
range on that gas.
For proper operation, the pressm'e of natm'al
gas supplied to the regulator must be between
5" and 13" ot water column.
For I,P gas, the pressm'e supplied must be
•0......between / ano. 13 of wate_ cohmm.
X,_l_en checking fl_r proper operation of the
regulator; the inlet pressm'e must be at least l"
greater than the operating (manifold) pressm'e
as given above.
The pressm'e regulator located at the inlet of
the range manifold ii/tlSt remain in the supply
line regardless of whether natural or I,P gas is
being used.
A flexible metal appliance connector used to
connect the range m the gas supply line should
have an I.D. of 1/2" and be 5 teet in length fi)r
ease of installation.
43
Page 44

Installationofthe range.
[] Electrical Power Supply Requirements
Recommended Electrical Outlet Locations
NOTE:Make electrical connections
on flTeright side of the cutout opening.
electrical outlet area. Orient
the electrical receptacle so the
Recommended acceptable l
length is parallel to the floor.
Wall Mounted
Provide Proper Electrical Supply
These ranges must be supplied with 208/240 volt,
60 Hz., and c{mnected to an individual, properly
grotmded circuit protected bv a circuit breaker
or time-delay filse (40 amp). The receptacle must
be NEMA 14-501/to accept the 4-prong plug
supplied with the range.
Product is shipped with 4-prong
plug. Recommended outlet is a
NEMA 14-50Rreceptacle.
If the electrical service provided does not meet
the above specifications, it is recommended that
a licensed electrician install an approved outlet.
_; I,ocate the electric supply as illustrated.
44
Page 45

Read these instructions completely and carefully.
[] Connect the Range to the Gas Supply
Shut off the main gas supply valve before disconnecting the old range and leave it off until the
new hookup has been completed. Don't forget to relight the pilot on other gas appliances when
you turn the gas back on.
l_ecat]se hard piping restricts movement of tile
range, tile rise (ff a CSA ]nternational-('ertified
flexible metal appliance com_ector is re(_)mmended
ilnl_s local codes I'eqlliI'e a hard-piped ('om_ection.
Never use an old connector when installing a
new range. If tile hard piping method is used,
you must carefully align tile pipe; tile range
cannot be i/loved al[tei" tile connection is IIl_lde.
To prevent gas leaks, put pipe joint compo/md
on, or wrap pipe thread tape with Teflon*
arotmd, all male (external) pipe threads.
[] Install a manual gas line shut-off xdxe in tile
gas line in an easily accessed location outside
ot tile range. Make sure everyone operating
tile range knows where and how to shut off'
tile gas supply to tile range.
[] Install male 1/2" flare union adapter to
tile 1/2" NPT internal thread elbow at inlet
(ff regulator Use a backup wrench on tile
regulator fitting to avoid damage.
X._l/en installing tile range ti'om tile front,
remove tile 90 ° elbow for easier installation.
[] Install male 1/2" m 3/4" flale tmion
adapter to the NPT internal thread of the
manual shut-off wllve, taking care to backup
the shut-off'wdve to keep it fl'om turning.
Cmmect flexible metal appliance com_ector
[]
to the adapter on the range. Position range
to pemdt c(mnection at tile shut-off wdve.
X._]/eilall connections have been made, make
[]
sure all range controls are in the off position
and turn on tile main gas supply \:live. Use
a liquid leak detector at all joints and
connections to check tot leaks in tile system.
_lk CAUTION: DO NOT USEA
FLAME TO CHECKFORGAS LEAKS.
X._]/en using test pressm'es greater than 1/9 psig
to pressure test tile gas supply system of tile
residence, discom_ect the range and individual
sh ut-ofl' valve fl'om tile gas supply piping. \._]/en
using test pressm'es of 1/9 psig or less to test the
gas supply s)'stem, simply isolate tile range fl'om
the gas supply svsmm by closing the individual
sh ut-ofl valve.
*Teflon.RegisteredtrademarkofDuPont
Flexible Connector Hookup
Installer: Informthe I _ Gas
locationof the gas Gas pipe "_1_ L_ - valve
consmnerof the I 1/Z'or3/4" t.F_l_ 1]]_-_ shut-off
shut-offvalve.
Rigid Pipe Hookup Options
45° Elbowx.ak_
E,h0w
Union _ Nipple
III Gas
_ shut-off
locationof the gasshut-offvalve. :]-t_'_J _ 1/2"or3/4"
AlternateHookup _ Adapter
Nipple_
Gas r-r_ Nipple Pressure
shut-off_ Elf::::€ 90' regulator
valve _ Elbow 1
1/Uor3/4"_1rl I
Gaspipe 90°Elbow
[ ] _ / Nipple
U _ Quickconnect
Gaspipe
locationof thegasshut-offvalve. 4 5
l Installer:Informtheconsmnerof the I
Page 46

Installationofthe range.
[] Connect the Range to the Electrical Supply
Skip to Step 5 if the power cord shipped on the range does not match your wall
receptacle.
Using an Existing NEMA 14-50RReceptacle
_: Plug tile range power cord into a properly
grounded wall receptacle. Skip to Step 6 if
tile range power cord matches tile wall
receptacle.
NOTE."Yourrange is shipped with a 4-prong plug to be
usedin a NEMA 14-50Rreceptacle.Shouldyouchoose
tochangeyourplug, use only a3-wlYepower cord,
3-wlYeconduit or4-wlYeconduit Follow the appropriate
instructionsbelow, inStep 5, for yourapplication.
Effective January f, 1996,the National Electric Code
requires that new construction (not existing) utilize
a 4-conductor connection to an electric range.
A range cord rated at 40 amps with 195/250
minimum volt range is required. A 50-amp
range cord is not recommended but if used,
it should be marked fin" use with nominal 1:_"
diameter connection openings. Care should
be taken to center the cable and strain relief
within the knockout hole to keep the edge
fl'om damaging the cable.
NOTE."A g-conductorcordis to beused when the
appliance isinstalled in a mobile homeor when local
codesdonot permit grounding through theneutral
[] Replace the Power Cord (Optional)
Perform this step only if the power cord shipped on the range does not match your wall receptacle.
[] Remove tile wire (over (oil tile back of [] Ix_osen tile strain relief screws and
tile , _ ) b_ ielnoxgng two (2) screwsF'tllOe , , rei//ove tile powel" Col'd,
usino a 1/4" nut driver.
Be not discard these screws.
Backof range
[] Remove tile 3 lower power cord terminal
scre*_s fl'om tile teuninal block and tile
ground screw and )late.
Terminai_J_ _ _%
bl0ck.._/_((_ %_ _ Neutral
},_ _ _--_----,ermina,
!
NOTE:Thereplacementpowercordmustbea
3-conductorora 4-conductorUL-I/stedrangecord
orconduit.CordsmaybeprovidedwithringtemT/na/s
onwireandastrainreliefdevice.
Follo*_ tile 3-wire I:)o*_er cord (option 5A),
[]
3-wire conduit (option 5B) or 4-wire
conduit (option 5(;) sections as
appropriate fi)r ?our application.
46
[] Place tile terminal scre_s and grotmd
screw in s:ffe location fin" later use.
Page 47

Read these instructions completely and carefully.
[] Replace the Power Cord (Optional) Continued
Perform this step only if the power cord shipped on the range does not match your wall receptacle.
[] 3-Wire Power Cord Installation Option
WARNING:rheneutralor roundw,re
of the power cord must be connected to the neutral
term/hal located/b the center of the term/hal block.
The power leads must be connected to the lower left
and the lower n_?htterm/bals of the term/hal block.
Ixwate tile copper g_otmd strap on tile
[]
lower back of tile r'm *e
Ix)osell tile Hpper cellter SCl'e_,_ Oll tile
[]
terminal block.
Slide tile open slotted end of tile gro/md
[]
strap under the upper center screw on tile
terminal block. Make sure tile ground strap
is all tile way against tile upper center screw
and tighten it ill })lace.
Place the grotmd plate (xemo\ ed earlier)
[]
over tile bottom of the grotmd strap, press
them against tile range ti'ame and attach
them with tile ground screw (removed
earlier).
Insert tile new power cord through tile
[]
strain relie£ _Mlo_ enough slack to easily
attach tile wires to tile tem/inal block.
0
Terminalblock
(appearance
mayvary)
Neutral
Ground
plate Groundstrap
Groundstrap
Open slotted end
lnse_l tile 3 temfinal screx_s (remoxed
[]
earlier) through each power cord temlinal
ring and into tile lower tem_inals of tile
teiminal block. Be certain that tile center
wire (white/neutral) is connected to tile
center lower position of tile temfinal block.
Tighten screws securely (approximately 20
inchqbs.) into tile terminal block.
[] Secure tile strain relief in place in tile
bracket b} tightening the strain relief screws.
47
Page 48

Installationofthe range.
[]
Replace the Power Cord(Optional) Continued
Perform this step only if the power cord shipped on the range does not match your wall receptacle.
[] 3-Wire Conduit Installation Option
] Locate the co ) )er gromld strap on the
] Ix)osen the upper center screw on the
[] Slide the open slotted end ot the ground
[] Place the gromld plate (removed earlier)
[] Remoxe the strain relief clamp from the
[]
[]
.... lI ,
lo_er back of the range.
tem_inal block.
strap under the upper center screw on the
tem_inal block. Make sure the ground strap
is all the way against the upper center screw
and tighten it in place.
over the bot{olll of the grotmd strap, press
them against the range flume and attach
them with the gromld screw (remo\ed
earlier).
bracket.
_ssemble the squeeze c(mnector (obtained
locall)), matching the diameter of',om"
conduit, in the bracket hole. Insert the
conduit through the squeeze c(mnectol:
_Mlow enough slack to easily attach the wires
to the tem_inal block.
NOTE: Do not install the conduit without a
squeeze COllllector
]nsexqt the center bare ',Ore (xd_ite/neutral)
til) throt_gl_, the bottom center tem_inal
block opening. On ce_qtain models, the wire
will need to be insel_ted through the ground
strap opening and then into the bottom
center block opening. Insel_ the two side
bare wiie tips into the lower lett and the
lower l'ight texminal block openings.
Tighten the screws tmtil the wire is fim_ly
secure (approximately 20 inch-lbs.).
Squeezeconnector
Conduit
Terminal
block
Groundstrap
_U 0pel, slotted end
Wire used, location and enclosure ofsplices, etc.,
must conform to good wiring practices and local
codes.
/
Bracket
48
NOTE: Make sure the wire is completely
inserted into the terminal block and a
seetlre connectioll is made.
[] Secm'e the squeeze cmmector in place in
the bracket b) tightening, , the S(lueeze....
conllector SCl'e_._s.
NOTE:ALUMINUMWIRING'.
_Muminum building wire max be used but it must
be rated for the correct amperage "rod volta,*e_ to
make COllllectioll,
Page 49

Read these instructions completely and carefully.
[] Replace the Power Cord (Optional) Continued
Perform this step only if the power cord shipped on the range does not match your wall receptacle.
[] 4-Wire Conduit Installation Option
[] Remoxe the strain relieI clamp ti'om the
bracket.
_ssemble the squeeze connector (obtained
[]
locall)), matching the diameter of your
conduit, in the bracket hole. Insert the
conduit through the squeeze connectox;
_Mlow enough slack to easily attach the wires
to the temfinal block.
NOTE."Do not install the conduit without a
squeeze connec[oi:
Insert the ground bare wire tip between the
[]
range fl'ame and the grotmd plate (_emoved
earlier) and secm'e it in place with the
grotmd screw (removed earlier). Insert the
bare wire (white/neutral) tip through the
bottom center ot the temfinal block
opening. Insert the two side bare wire tips
into the lower left and the lower fight
temfinal block openings. Tighten the screws
until the wire is firefly secure (approximately
20 incMbs.).
Squeeze connector
Terrninal
Wire t
Conduit Bracket
Groundplate
(groundingto
range}
NOTE."Make sm'e the wire is complemly
inserted into the temfinal block and a
sectlI'e connection is illade,
Secure the squeeze connector in place in
[]
the bracket by tightening the squeeze
connector scl'ews.
NOTE:ALUMINUMWIRING'.
_Muminum building wire max be used but it must
be rated for the correct aml)emge, and xoltage, to
make connection.
[] Replace the Wire Cover
Replace the wire cover on the range back by
sliding its fight edge trader the retaining tab and
replacing the two screws removed eadier. Make
sure that no wires are pinched between the cover
and the range back.
Wireused,locationandenclosure
ofspfices,etc.,mustconformtogoodwiring
practicesandlocal codes.
2 screwsto,
replace
wire cover
Backof range
49
Page 50

Installationofthe range.
[] Seal the Openings
Seal any openings in the wall behind the range
and in the floor under the range when hookups
are completed.
[] Assemble Surface Burners
FA1 Burner Heads {on some models)
Place bm'ner heads over the electrodes
on the cooktop, in the coriect locations
according to dleir size. There is one small,
()lie llleditlI/l, ()lie large Gild ()lie extl'a large
burner head.
i_Front of rang_ ad
Makesurethe slot
in tile burnerheadis
positionedoverthe _':'_--1-;21----_ }
electrode.
Electrode-a_"N Sl°t
[] Oval (CenteO Burner Head/Cap Assembly
Place the oval (center) head/cap assemb]}
over the electrode on the cooktop.
Ovalheadandcap
assembly burnerheadis positioned
Make surethe slot in the
overthe electrode.
[] Caps
Place the matching size caps onto the burner
bases or heads.
Frontof range
Make sure that the heads and caps are
replaced in the correct locations.
Grates
[]
Place the lefL fight and center grates on the
cooktop. These grates are position specNc.
The undersides of the left and fight grates
are marked "LEFT FRONT" and "RIGHT
FRONT." Place die middle grate with its
bowed fl'ont toward the fl'ont of the range.
LeftFront Center RightFront
A CAUTION:oo,otooe otethebu,,e
without all burnerparts inplace.
50
• ®
Frontof range
[] Check Ignition of Surface Burners
Operation of all cooktop bm'ners should be
checked after the range and gas supply lines
haxe been careflflE checked tot leaks.
Electrode
Electric Ignition
Select a top bm'ner knob and simultaneously
push in and mrn to LITEposition. Ybu will hear
a clickingseined indicating proper operation of
the spark module. Once the air has been pinged
fl'om the supply lines, b/m_ers should light within
4 seconds. _Mter bm'ner lights, rotate knob out of
the LITEposition. Try each bm'ner in succession
tmtil all bm'ners have been checked.
Page 51

Read these instructions completely and carefully.
Quality of/:lames
The combustion quality of bm'ner flames needs
to be detemfined visually:
(,4) Yellow flames--
Call for service
(B) Yellowtipson
outer cones--
Normal for LP gas
(C)Soft blue
flames--Normal
for natural gas
Ifburnerflameslookhke(A),carlforsemce.Normalburner
flamesshouldlooklike(B)or(C),dependingonthetypeof
gasyouuse.
_._ith I,P gas, some yellow tipping on outer cones
is nomml.
[]
Level the Range
[] Install tile men shebes in tile o',en and
position tile range where it will be installed.
range range
Leg _ _
levelerf __
Raise_._/fl! °wer
Raise.*"
range
(onsomemodels}
[] Check tor levelness by placing a spirit level
or a cup, partially filled with watei; on one
of the oven shelves. If using a spirit level,
take two readings--with the level placed
diagonally first in one direction and then
tile othe_:
(onsomemodels)
[] ]?,emote the x_amfing dr;mer See tile Care
and cleaning of the range section. Tile fl'ont
leveling legs can be a(!iusted ti'Olll tile
bottom and tile rear legs can be ac!iusted
fl'om tile top or tile bottom.
[] Use an ol)en-end or a(!iustable wrench to
a(!jtlSt tile lexeling legs until tile range is
level.
AMer tile range is lexel, slide tile range awa}
from the wall so that the Anti-Tip dexice can
be installed.
51
Page 52

Installationofthe range.
[]
lnsta# the Anti-Tip Device
An Anti-Tipbracket is supplied with
instructions tot installation in a variety
of locations. The instructions include
all necessa_ T infimnafion to complete the
installation, Read the Safety Instructions
and the instructions that fit vom" situation
beti)re begimfing installation.
Typical insta//ation of anti-tip bracket attachment to waft
A WARNING:
::Ji::Range must be secm'ed by Anti-Tip bracket
supplied.
_: If the Anti-Tip device supplied with the range
does not fit this application, use the tmive_al
Anti-Tip device WB2X7909.
_: See instructions to install (supplied with
bracket).
::Ji::Unless properly installed, the range could
be tipped by stepping or sitting on the dora:
h_jm'y might result fl'om spilled hot liquids
or ti'om the range itself.
When All HookupsAre Completed:
MAKE SURE ALL CONTROLS ARE LEFTIN THE
OFFPOSITION.
Converting to LP Gas (or converting back to natural gas from LP)
Thisrangeleavesthe factorysetforusewithnatura/gas.
If youwanttoconvertto LPgas,theconversionmustbe
performedbyaqualifiedLPgasinstaller
MAKESURETHEFLOWOFCOMBUSTION
AND VENTILATIONAIR TOTHERANGEIS
UNOBSTRUCTED.
The conve_ion instructions and I,P orifices can
be timnd attached to the range next to the
pressm'e regulatm:
Keep these instructions and the orifices in case
VO/I want to conxert back to nattlI'al gas.
52
Page 53

Beforeyou carl forservice.., geco,,
Troubleshooting -tips
Save time and money! Review the charts on the following
pages first and you may not need to call for service.
Possible Causes What ToDo
Topburners do notlight Plug on range is not completely * Make sure electrical plug is plugged into a live, properly
ordo notbumevenly inserted ha the electrical outlet, grouuded outlet.
Burner hole or slits on the side * Remlwe tile burner caps mad clean them. (_lleck and
of the burner may be clogged, cle;m tile electrode area fin" burned-on fi)od or grease.
See tile Care and cleaning of the range section.
hnproper burner assembly. * Make sure tile burner parts are installed corre(fly+
Seetile Careand cleaningof the rangesection.
Surfaceburnerslight The oven gas shut-off valve * To check tile oveu gas shut-off \:dye, remove tile
but oven does not may have accidentally been drawer (see tile Careand cleaningof therange secti()15)
moved during clem_hag or F( )1"1()\vel" ()ven dI';l\veY lll()dels, l'elll( ave tile l'e_l1";I(-cess
movhag, panel by tmscrewiug tile tlmmb screws in the upper left
;rod fight corue_: Ix)ok tot tile gas shut-ott lever at tile
back ot tile range.
Leveris
shownclosed•
PULLTOOPEN.
Burner flames very hnproper air to gas ratio. * ]f range is connected to LP gas, contact tile pe_sou
Thumbscrews
largeoryellow who iust;dled your range or made tile couvel_iou.
Controlsignals after You forgot to enter a bake * Touch tile BAKE pad and desired temperature or tile
entering cooking time temperature or demfing time. SELF CLEAN pad and desired clean time.
or start time
Food does notbake Oven controls improperly set. * See tile Using the upper oven se(tilm.
or roast properly
in the upper oven Shelf position is incorrect. * See tile Using the upper oven se(tiou.
Incorrect cookware or cookware * See tile Using the upper oven section.
of improper size being used.
Oven thermostat needs * See tile Adjust theupper oven thermostat--
adjustment. O0 it yourself! se(-tiou.
Clock not set correctly. * See tile Using the clock and timer sectiou.
Almnhaum foil used improperly * See tile Care and cleaning of the range section.
ha the oven.
Oven bottom not securely * See tile Installationof the range section.
seated ill position.
iiiiiiiiiiiiiii!!iii_
Iiiii ii i__
53
i
Page 54

,0
Beforeyou call forservice...
Troubleshooting -tips
Possible Causes
Fooddoesnot
broilproperly
in theupperoven
,0
Upper oven temperature Oven thermostat • See the Adjust the oven thermostat--Do it yourself!
toohot or too cold needs adjustment, secti(m.
,0
,0
Clock andtimer Plug on rmage is not completely • Make st|re electrical l)lw_'lis _lugged,, into a live,
do not work inserted ha the electrical outlet, l)r°laerlv,,gr°tmded outer.
Oven controls improperly set.
Oven door not dosed.
hnproper shelf position
being used.
Food being cooked in • For best results, use a })an designed, fin" broiling,.
a hot pan. Make stu'e it is cool.
Cookware not suited • For best results, use a )au designed fin" broiling
for broiling.
Oven bottom not securely • See the Installation of the range section.
seated in position.
A fuse ha your home may be • Replace the fuse or reset the circtdt bl'e;ikel:
blown or the circuit breaker
tripped.
Oven controls improperly set. • See the Using the clock and timer section.
What To Do
• Make sure you touch the BROIL HI/LO pad.
• See the Using the upper oven section.
• See the Broiling Guide.
Upper oven light Light bulb is loose or defective. • Tighten or replace the bull).
does not work
Upperoven will not The oven temperature is too • Pdlow the range to cool to room temperattu'e aud
self-clean high to set a self-dema operation, reset the controls.
iii;;{!!!iii_i!iiiiiiiiiiiii_i
"Crackling" or This is the sound of the • This is uom/al.
"popping" sound metal heating mad cooling
Excessive smoking Excessive soil. • Tourh the CLEAR/OFF1):1(1.Open the windows to
iiiiHl! iiiii
Oven door will not open Oven too hot. • _Mlow the oven to cool beh)w hacking temperature.
after a clean cycle
m
Plug on rmage is not completely • Make sure electrical I_lu"_is l)lugged,, into a live,
haserted ha the electrical outlet, l)r° l)erlv.,gr_ rended outer
Oven controls improperly set. • See the Using the self-cleaning upperoven section.
during both the cooking
mad clem_hag fmactions.
rid the room of smoke. Wait until the LOCKEDDOOR
lioht_ ,g°es off. Wipe t|p the excess soil and reset the
clean cycle.
54
Page 55

ge.com
Possible Causes
Oven not clean after Oven controls not properly set.
a clean cycle
Oven was heavily soiled.
What ToDo
• See the Using the self-cleaning oven section.
• Clean tlI) hea\y spillove_ betore starting the clean cycle.
Heavil)' soiled ovens may need to sell=clean again or
tot a longer period of time.
"LOCKDOOR"flashes The sdf-dema cycle has been • Close the oven do(n:
in thedisplay selected but the door is not
dosed.
LOCKEDDOORlight The oven door is locked • Touch the CLEAR/OFFpad. Mh>w the oven to cool.
is on when you want because the temperature
to cook inside the oven has not
dropped below the
locking temperature.
"F--anda number or You have a fmacfion error code. • Touch the CLEAR/OFF pad. Mh)w the oven to cool fi)r
letter"flash in the display one hotm Put the oven back into operation.
If the fmacfion code repeats. • Disc(mnect all power to the range for 5 minutes mM
theu l'ecouuect powel: ]f the tuuctiou elTOi" code
repeats, call tot sel'vice.
"Probe"appears in This is reminding you to enter • Enter a probe temperature.
thedisplay a probe temperature after
plugging in the probe.
+
Displaygoesblank A fuse ha your home may be • Replace the DINe or reset the circtfit breaker:
blown or the circuit breaker
tripped.
The clock is ha the • See the Specialfeaturesofyouroven controlsection.
black-out mode.
Displayflashes Power failure. • Reset the oh)ok.
Unabletogetthe Oven control pads were • The BAKE and BROILHI/LOpads must be touched at
displaytoshow"SF" not pressed properly, the same time aud held tor 3 seconds.
Power outage. Power outage or surge. • Reset the oh)ok. If the oven was in use, lot/lnUSt l'eset
it by touching the CLEAR/OFFpad, setting the clock
and resetting any cooking flmcfion.
"Burning"or "oily" This is normal ha anew oven • To speed the process, set a sell=clean cycle fin" a
odor emitting from mad _d]l disappear ha time. minimum of 3 houx_. See the Usingthe self-cleaning
the vent oven section.
Strong odor An odor from the h_sulation • This is temporar):
around the inside of the oven
is normal for the First few times
the oven is used.
>,<_aHH,,
iiiiiiiiiiiiiii!!ii+++
Iili{ ii i__
55
i
Page 56

,O
,O
Beforeyou call forservice...
Troubleshooting -tips
Possible Causes What To Do
Fan noise The convection fma may turn on * This is nomml. Tile convection tim will run until tile
mad off automatically, flmcfion is over or the door is opened.
Convection fan Preheat temperature * I_m will start automatically once the preheat
not working not reached, temperature is reached.
Drawer does not slide The drawer is out of alignment. * Fully extend the drawer and push it all the way in.
smoothlyor drags See the Careand cleaning of the range section.
Drawer is overloaded or load * Reduce weight. Redistribute drawer contents.
is unbalanced.
Lower ovendrawer or A fuse in your home may be * Replace the fl/se or reset the circuit breaker.
warming drawer will blown or the circuit breaker
not work tripped.
,O
Excessive condensation Liquid in drawer. * Remove liquid.
in the drawer
,O
Fooddries out in the Moisture escaping. '* Cover fi)od with lid or aluminum flail.
lower oven drawer or
warming drawer
iii;;{!!!iii_i!iiiiiiiiii)i
The upper oven is sdf-demahag. * Wait for the selfk lean cycle to finish and the oven
to cool.
Controls improperly set. * See the Lower oven drawersection.
Uncovered foods. • Co;er food with lid or aluminum foil.
Temperature setting too high. * Reduce temperature setting.
Oven drawer not fully closed. '* Push drawer in until latch engages.
iiiiHl! iiiii
m
56
Page 57

Accessories.
Looking For Something More?
Youcan find these accessories and many more at ge.com (U.S.) or www.GEPpp/iances.ca
(Canada), or carl 800.626.2002 (U.S.) or 888.261.3055 (Canada) (during normal business
hours). Have your model number ready.
Oven and Drawer Racks
Grates
Light Bulbs
Broiler Pan
Surface Burner Caps
Cleaner
Knobs
Tired of discolored rocks? Wishing you had extm-hea_3r-duty oven racks?
NOW AVAILABLE for your range:
GE's innovative, selfk:leanable porcelain-coated oven racks!
• Hem T Duty
• Durable
• Able to be cleaned in a self-cleaning oven
Visit go.com (U.S.) or wt_v.GEAppliancos.ca (Canada) for more
information.
57
Page 58

m
_ IVoles.
r_
r_
r_
€_
q
--°
m
58
Page 59

NOteS.
rJ_
I
rJ_
€_
w
m
w
u_
59
u_
w
I
_Ah
Page 60

m
_ /Votes.
r_
€_
r_
r_
€_
q
---
m
_4m
6O
Page 61

GE Service Protection Plus 'M
GE, a name recognized worldwide for qualib, and dependability; oflers you
Service Protection Plus'_'--comprehensive protection on all your appliances--
No Matter What Brand!
Benefits Include:
* Backed by GE
* All brands covered
* Unlimited service calls
. All parts and labor costs included
o No out-of-pocket expenses
o No bidden deductibles
o One 800 number to call
You will be completel} satisfied xdth ore" service protection or }ou ma} request }our mone} back
on the remainh_g value of your contract. No questhms asked. It's that simple.
Protect yore" refrigerator, dishwashex; washer and dryer; range, TV, VCR and much more--azay brand!
Plus there's no extra charge ti)r emeigency service and low monthly financing is a_dlable. Even icemaker
coverage and food spoilage protection is oftered. You can rest easy, knowing that all your _duable
household products are protected against expensive repairs.
Place your confidence in (;E and call us in the IJ.S. toll-free at _UU.t)Z_.ZZZz_
for n/ol'e hll_()l'I//;/{i()ll.
All brands to_cr_ d, up to 20 )cars old, hi the _ominent d L.S.
We'll CoverAny Appliance.
Anywhere. Anytime.*
Please place in envelope and mail to:
General Electric Company
Warranty Registration Department
EO. Box 32150
Louisville, KY 40232-2150
67
Page 62

Consumer Product Ownership Registration
Dear Customer:
Thank you tbr purchasing our product and thank you for placing your confidence in us.
_'e are proud to haxe you as a customer'.
Follow these three steps to protect your new appliance investment:
Important: If you did not get a registration card with your
.................................................................................................... _r.- (MI h(r_
Consumer Product Ownership Registration
Complete and mail
your Consumer
Product Ownership
Registration today.
ttaw' tim peace of
mind of knowing wc
Call colltact VOl/ ill
tile tmlikely event of a
safiT, modification.
Alter mailing the
registration below,
store this doclnnent
ill a sati' place. It
contains inlormation
you will need should
you require service.
OHr selvice number is
800.GE.CARES
(800.432.2737).
Model Number Serial Number
I I I I I I I I II , , , , , , , , I
product, detach and return the form below to
ensure that your product is registered, or register
online at ge.com.
Read your Owner's
Manual carefilllv.
It will help you
oporat( yol/r lleW
appliance properly.
Model Number Serial Number
Ms. M*>,. Mi_',
Fil_l I I Lasll
Nalne I I I I I I I I I Name I I I I I I I I I I I I
Sm_el] ]
Address I I I I I I I I I I I I I I I I I I I I I I I I
Apt. # ] I
Ciw ]
lime Placed
In Use [1[
Monlh
[ I [ [ [ I [ E-lnailAddress*
I I I I I I I I I I
1)_,y] i I _ar [ i [
GE Consumer & Industrial
Appliances
General Electric Compang
Louisville, KY40225
ge.com
* Please provide your e-mail address to receive, via e-mail, discounts, special ott_.r_ and other
important COlnmuni(ations from GE Applian(es (GEA).
Chetk here if vou do not want to re(eive communic_tions from GEA's (areflflly sele( te(l
1)_1 l't IIOI'S.
FAILI H{E T() COMPLETE AN[) RE'F[ RN TIIIS CARD DOES NOT DIMINISII YOI JR
"_,IXRRAN'I-'; RIGIITS.
For information about GEA's privacy and data usage poll(% go to ge.com and click on 'Prixacy
Policy" or call 800.626.2224.
, , I
Phon(
NHllll)(!r ]
State ] I l Code
I I I-I i i
Zip ]
6'2
I I
I I
I
I
I
Page 63

GEDual FuelRange Warranty.
Aft warranty service provided by our Factory Service Centers, Staple your receipt here.
All _rat, 'ervice p ovided by
or _uth ed Cust_ her Care®
or an authorized Customer Care®technician. To schedule service, Proof of the original purchase
on-line, 24 hours a day, visit us at go.corn, or carl 800.GE.CARES dateis needed to obtain service
,E,,24 ,_rsa da) visit us al
(800.432.2737).Please have serial number and model number under the warrantz
_ [_ 212; r P_Oaso ' ave serial ,
't le v 7calling i _rservice. _.
available when calling for service.
GE Will Replace,
.m
_ne Year
-romthe datei
From the date of the limited one-year warranty, GE will also provkle, free of charge, all labor and in-home sei_ice
originalpurchase to replace the detective part.
'riginaipurch_ '
Service trips
_: Service trips to your home to teach you how to use _: Dmnage to the product caused by accident, fire, floods
the product.
Imprope_
ij)::Improper h_stallation, delivery or maintenance, ij)::IucidentaJ or consequential dmnage caused by possible
!i_:Failure of the product if it is abused, misused, defects with this applim_ce.
Failure oJ _t_'
or used f
or used for other thm_ the intended purpose or !i_Dmnage caused after delivery.
used cone
used commercially. !i/:Product not accessible to provide required service.
Replacen
!i/_Replacement of house fuses or resetting of circuit
breakers.
AnyparLorthe rauge which tifils due to a detect iu inatelJals or worknlauship. DulJug this
or acts of God.
EXCLUSION OFIMPLIED WARRANTIES--Your solo and exclusive remedy is product repa# as provided
in this Limited Warranty. Any implied warranties, including the implied warranties of merchantability
or fitness for a particular purpose, are limited to one year or the shortest period allowed by law.
This warranty is extended to the original purchaser and any succeeding owner for products purchased for home
use within the USA. If the product is located in an area where service by a GEAuthorized Servicer is not available,
you may be responsible for a trip charge or you may be required to bring the product to an Authorized GEService
Location for service. In Alaska, the warranty excludes the cost of shipping or service cafls to your home.
Some states do not aflow the exclusion or limitation of incidental or consequential damages. This warranty gives
you specific legal rights, and you may also have other rights which vary from state to state. To know what your
legal rights are, consult your local or state consumer affairs office or your state's Attorney General
Warrantor:General Electric Company.Louisville,KY40225
g
g
63
Page 64

ConsumerSupport.
Haxe a question or need assistance with your appliance? Try tile (;E Appliances _4'ebsite 24 hours a day
q gEAppliancesWebsite ge.com
' any day of tile xear'. For greater comenience and taster service, you can now download Owner's Manuals,
order parts or exert schedule set\ice on-line.
ScheduleService
Expert (;E repair setsice is only one step awax fl'om your do(n: Get on-line and schedule your serxice at
your, comenience 24 hours any day of tile year! Or call 800.(;E.(:ARES (800.432.2737) (huing normal
business hours.
ge.com
RealLifeDesignStudio ge.com
GE supports tile Universal Design concept--l)roducts, services and environments that can be used by
people of all ages, sizes and capabilities. We recognize tile need to design fin" a wide range of physical and
mental abilities and impaim/ents. For details of GE's Universal Design applications, including kitchen
design ideas fi)r people with disabilities, check out our X._bbsite today: For the hearing impaired, please call
800.TDD.GEAC (800.833.4322).
ExtendedWarranties ge.com
Purchase a (;E extended warrant_ and learn about special discounts that are axailable while _our, warrant_
is still in effect. You C_lll purchase it on-line amfime or call 800.626.2224 during n(nmal business hours.
GE (_onsulner Home Serxices will still be there alter )our warranb' expires.
PartsandAccessories
ge.com
Individuals qualified to se_'ice their own appliances can have parts or accessories sent directly to their
homes (VISA, Master(lard and Discover cards are accepted). Order on-line today, 24 hom_ eveta' day or
by phone at 800.626.2002 during nomml business hours.
Instructions contained in this manual cover procedures to be performed byany user. Other servicing generally
should be referred to qualified service personnel Caution must be exercised, since improper servicing may cause
unsafe operation.
ContactUs
If you are not safistied with tile service w)u receive fl'om GE, contact us on our X*Vebsitewith all tile details
including your phone IltllllbeI'_ oi" wYite to: (;eneral Manager; C/lStOlllei" ]{elations
GE Appliances, Appliance Park
I,ouisville, KY 40225
Register your new applimlce on-line---at your convenience! Timelx, l)I'°(hlct I'e_istI'ati(, m will allow fin,
' enhanced communication and prompt service under tile terms of)our warranty, should tile need arise.
l RegisterYourApplbnce
You may also mail in tile prepfinted registration card included in tile l)ackin°_ material.
This book is printed on recycled pape_
ge.com
ge.com
Printed in Mexico
 Loading...