

Page 1
www.GEAppfiances.com
©
©
©
0
0
©
0
oq
Safi47 Im_uctior_ ....... 2-_'_
Operating" lnstr_di_ns
Com_ecfion O_n ...... 18-22
Roasting Guide .......... 21
Timed Convection Baki_]g..22
Gas SuI fSce Burners ..... 9, 1{)
()ve_] ................ l 1-26
Ahm_in um Foil .......... 13
Baking or Roasting ....... 13
Broiling C_ide .......... t4
Clock and Timer. ........ 1:5
tCY_ei_Controls ........... l 1
Pi>heafing .............. 13
Probe ............... 17, 20
Sabbath Feami> ......... 25
Self=Cleaning ......... 29, 30
Special Feami>s ...... 23, 24
Timed Baking and
Roastii_g Feam i>s ........ l 6
Thermostat .............. 26
xA_rming Drawer . ...... 27, 28
Care and Cleaning
Broiler Pan and (,ild ...... :,4
gumei Assembly .......... 31
Burner Grates ........... oo,OD
Burner Heads and Caps .... 32
Control Panel and K1]obs . . .a6°
Cooktop Suriime ......... oo
ISt-Off O_en Door . ....... a4
O_en Air VeI]ts o -
O_en Heating Elements .... 34
(>,en Light Replaceme_]t .. _'_
Oxen Shehes ............ .a/°_
Staii]less Steel Surf:aces .... oo,OD
Self=Cleaning .......... 29, 3{)
xA_uming Drax_er . ......... 35
,DD
o
Installation
Indrucdons . ......... .:,8-:,1_"r_
Anti-Tip Device ........... 51
Check Igniti(m of
Surfi_ce Bmners ....... 49, :5{)
Compeer Range
to Electric ............ 43, 4:5
Connect Range to Gas...42, 44
Dimensions and
Clearances ............... 4()
Electrical Connecfloi]s ...4{b48
Le_wl the Range .......... 50
I£)cati(m Guidelines ....... 41
LP ...................... :51
Safety instructioi]s ...... 38, 39
Accessories. ............... 5{;
Troubleshooting Tips..52-55
ConsumerSupport
Co_stm_er
Support .......... Back Co_er
Prodtmt Registration] .... 57, 58
_A2-wra_]tv . ............... 59
]2s9 5
×
Write the model and serial
numbers here:
Model #
Serial #
You can find them on a label on
the front ot the range behind the
warming (lrawe_:
...................................................................
18305580P159
49-_5072 O1-04Jfl
Page 2
IMPORTANTSAFETYINFORMATION.
READALLINSTRUCTIONSBEFOREUSING.
WARNING!
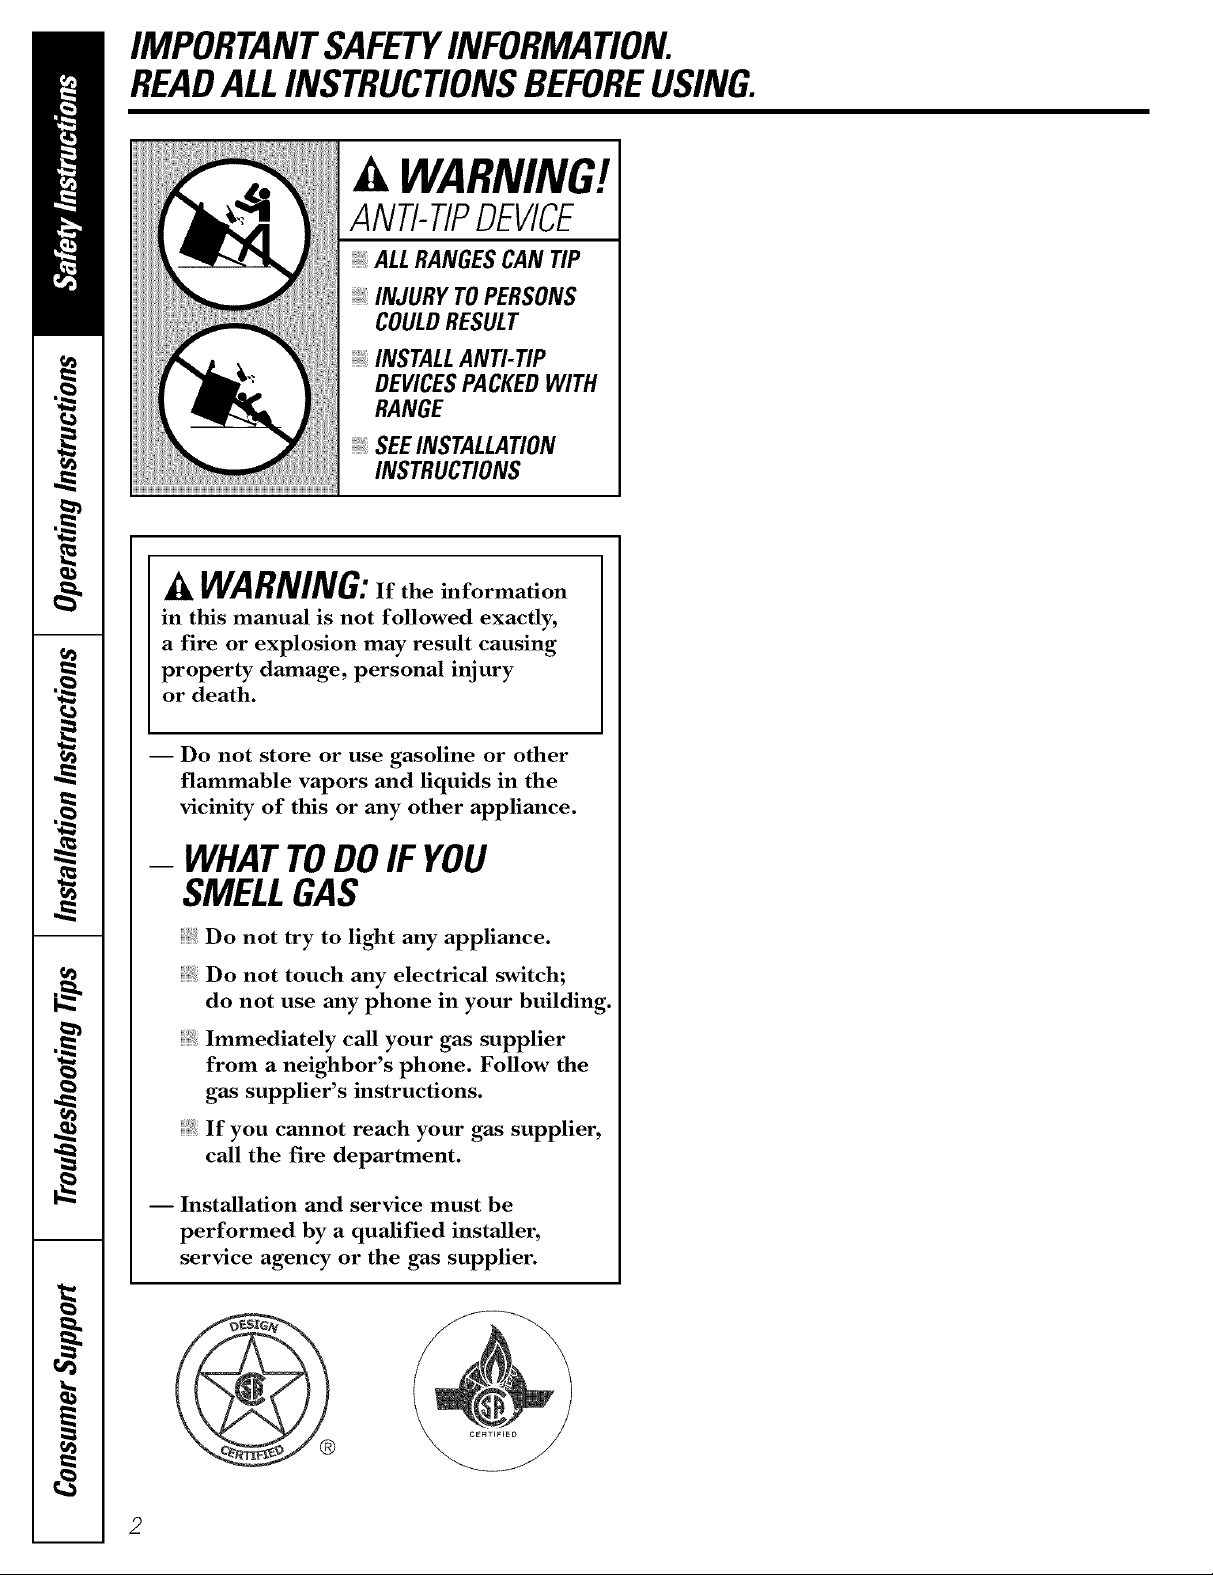
ANTI-TIPDEVICE
, ALLRANGESCAN TIP
INJURY TOPERSONS
COULDRESULT
INSTALLAN_ TIP
DEVICESPACKEDWITH
RANGE
SEEINSTALLAtiON
INSTRUCtiONS
WARNING:If the information
in this manual is not followed exactly,
a fire or explosion may result causing
property damage, personal injury
or death.
-- Do not store or use gasoline or other
flammable vapors and liquids in the
vicinity of this or any other appliance.
- WHATTODOIFYOU
SMELLGAS
Do not try to light any appliance.
Do not touch any electrical switch;
do not use any phone in your building.
Immediately call your gas supplier
from a neighbor's phone. Follow the
gas supplier's instructions.
If you cannot reach your gas supplier,
call the fire department.
-- Installation and service must be
performed by a qualified installer,
service agency or the gas supplier.
Page 3
www.GEAppliances.com
WARNING!
For your safety;,the information in this manual must be followed to minimize the risk of fire or explosion,
electric shock, or to prevent property damage, personal injury, or loss of life.
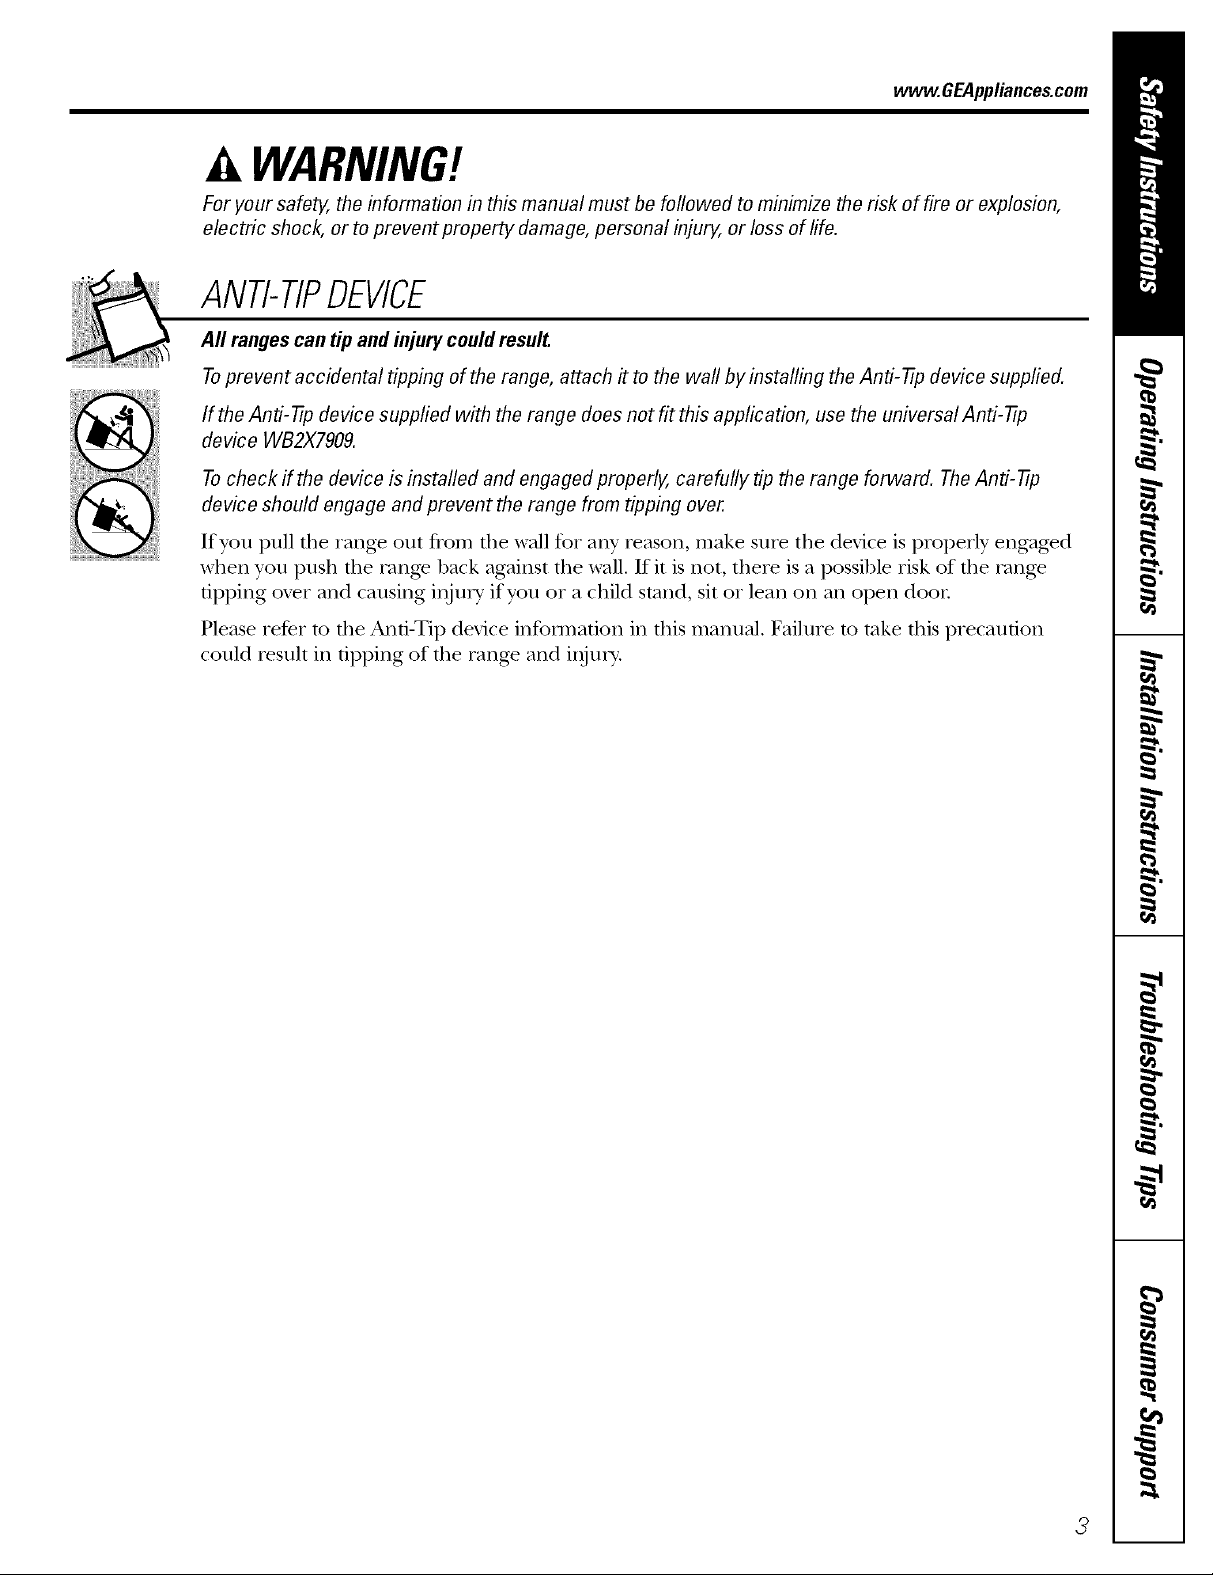
ANTI-TIPDEVICE
All rangescan tip and injury could result
Toprevent accidental tipping of the range, attach it to the wall by installing the Anti--tip device supplied.
If the Anti--tip device supplied with the range does not fit this application, use the universal Anti--fip
device WB2X7909.
Tocheck if the device is installed and engaged properly, carefully tip the range forward. TheAnti--tip
device should engage and prevent the range from tipping over.
If you pull die range out flom die wall t_r any reason, make sure the device is properly engaged
when you I)ush tim range back against tile wall. If it is not, there is a possible risk of the rang>
fii)i)ing ox_r and causing illjtl]_i if you or a child stand, sit or lean on all oI)en door
Please refer m file And-Tip device information ill this manual. Failure m take fills precaution
could iesult ill fiI)I)ing of the rang_ and il)jm>
3
Page 4
IMPORTANTSAFETYINFORMATION.
READALLINSTRUCTIONSBEFOREUSING.
WARNING!
IMPORTANTSAFETYNOtiCE
The Califomb Safe Drinking Water and ToxicEnforcement Act requires the Governor of Califomb to
publish a list of substances known to the state to cause birth defects or other reproductive harm, and
requires businesses to warn customers of potential exposure to such substances.
Gasappliances can cause minor exposure to four of these substances, namely benzene, carbon
monoxide, formaldehyde and soot, caused primarily by the incomplete combustion of natural gas or
LP fuels. Properly adjusted burners, indicated by a blubh rather than a yellow flame, will minimize
incomplete combustion. Exposure to these substances can be minimized by venting with an open
window or using a ventilation fan or hood.
SAFETYPRECAUtiONS
When using electrical appfiances, basic safety precautions should be foflowed, including the following:
Use dfis appliance only %r its irrtended
pui])ose as described in this Owner's
Manual.
Be sure your appliance is properly installed
and g]ounded by a qualified technician in
accordance with the provided irrstallation
irrstrnctions.
iiiiiiiiiiii_iii
Do not attempt to repair or replace arty
part of your range unless it is specifically
recommended in this manual. All other
servicing should be refetTed to a qualified
technician,
iiiiiiiiiiii_iii
Before performing any service, disconnect
tire range power supply at tire household
disuibudon panel by removing the fllse or
switching off"the circuit breaken
Do rant leax> children alone--children
should not be left alone or unatmnded in
an area where an appliance is in use. They
should nex>r be allowed to sit or stand on
arty part of the appliance.
Do not allow arp_'one to climb, stand or hang
on the door, storage diawet, or cooktop.
They could damage tire rang_ arrd ex_n tip
it ox_l; causing sex,re personal injm T.
Do not store flammable materials in an ox>n
or near the cooktop.
CAUTION:Itemsofinteresttochildren
shouldnot be storedin cabinetsabovea rangeor
on thebacksplashofa range--children climbingon
tberangeto reachitems couldbe seriouslyinjured.
SAFETYPRECAUtiONS
Have the installer show you the location of the range gas shut-off valve and how to shut it off if necessary.
Haxe your range irrstalled and properly
grounded by a qualified irrstallei, in
accordance with the Installaoon Instrncuons.
Any adjusunent arrd service should be
perforated only by qualified gas rang_
irrstallers or service technicians.
4
Do not attempt to repair or replace arty
part of your range unless it is specifically
recommended in this manual. All other
service should be referred to a qualified
technician.
Page 5
SAFETYPRECAUTIONS
vvww.GEAppl_nce_com
Locate the rang.e out of kitchen traffic path
and out of drafty locations to pre_.ent i)ooi `
air circulation.
Be snre all packaging materials are
removed from file rang.e before operating it
to prevent fire or smoke damag.e should the
packaging material ignite.
Be sure your range is correctly adjusmd by
a qualified service mchnician or installer for
the type of gas (natural or I,P) that is m be
used. Your range can be com.erted for use
with either type of gas. See the Installation of
the range section.
.4,WARNING:theseadjustments
mustbemadebya qualifiedservicetechnician
b accordancewith themanufacturer'sbstructions
andaft codesandrequirementsof the authority
havingjurisdiction.Failureto follow these
fastructionscouldresult faseriousinjuryor property
damage.Thequalifiedagencyperformingthis
work assumesresponsibilityfor the conversion.
After prolong.ed use of a range, high floor
temperaulres may result and ma W floor
cox.elJng_ will not withstand this kind of use.
Nex.er install the rang.e ox.er viw1 tile or
linoleum that cannot withstand such type
of use. Nex.er install it directly ox.er inmrior
kitchen caq)eting.
Do not lem.e children alone or unatmnded
where a range is hot or in operation. They
could be seriously burned.
Do not allow anyone to climb, stand or hang
on the ox.en dooi; storag.e drawei; wamfing
drawer or cooktop. They could damag.e the
rang.e and even tip it ove_; causing sex.ere
personal i,ljniy'.
CAUTION:Itemsofinteresttochildren
shouldnot be storedin cabinetsabovea rangeor
on thebacksplashof a range--children climbingon
therangeto reachitems couldbe seriouslyinjured.
For your safew, ne_.er use your appliance
for wmlning or heating the room.
Large scratches or impacts to glass doors
can lead to broken or shattered glass.
Nex.er wear loose-fitting oi hanging gai_nents
while using the appliance. Be careflfl when
reaching for items stored in cabinets ox.er the
rang.e. Flammable matedal could be ignited
if brougtlt in contact with flame oi hot o_.en
surfi_ces and may cause sex,ere bnl_/lS.
Do not store flammable mamrials in an
ox.en, a range storage drawei; a wai_ning
drawer or near a cooktop.
Do not store or use combustible mateiJals,
gasoline or other flammable vapors and
liquids in the viciniw of this or any other
appliance.
Do not let cooking grease or other
flammable mateiials accunnflate in oi
near the rang.e.
Do not use water on grease fires. Nex.er
pick up a flaming pan. T/IIII the controls off.
Smother a flaming pan on a surfi_ce burner
by co\.eiJng file pan complemly with a
well-fitting lid, cookie sheet or fiat tray.
Use a mulfi-puq)ose d_T chemical or
foam-type fire extinguishen
Flaming gi.ease outside a pan can be put
out by covering it with baking soda oi;
if available, by using a mulfiq)ml)ose d_T
chemical or foam-type fire exdnguishen
Flame in tim ox.en oi wamfing drawer can be
smothered completely by closing the ox.en
door or drawer and turning the control to
off or by using a muldq)uq)ose dU chemical
oi foam-type fiI.e extinguisher
let fl)e burner grates and other snrfaces
cool befoI.e touching them or leaving them
where children can 1.each them.
Nex.er block flae \`ents (air openings) of the
rang.e. They provide the air inlet and outlet
flint are necessai T tbr the range to operate
properly with coixect combustion. Air
openings are locamd at the rear of the
cooktop, at file top and bottom of the oven
dooi; and at the bottom of the range under
the wamaing drawei; storag.e drawer or
kick panel.
Do not lift the cooktop. Lifting the cooktop
can lead to damag.e and improper operation
of the rang.e.
Page 6
IMPORTANTSAFETYINFORMATION.
READALLINSTRUCTIONSBEFOREUSING.
A WARNING!
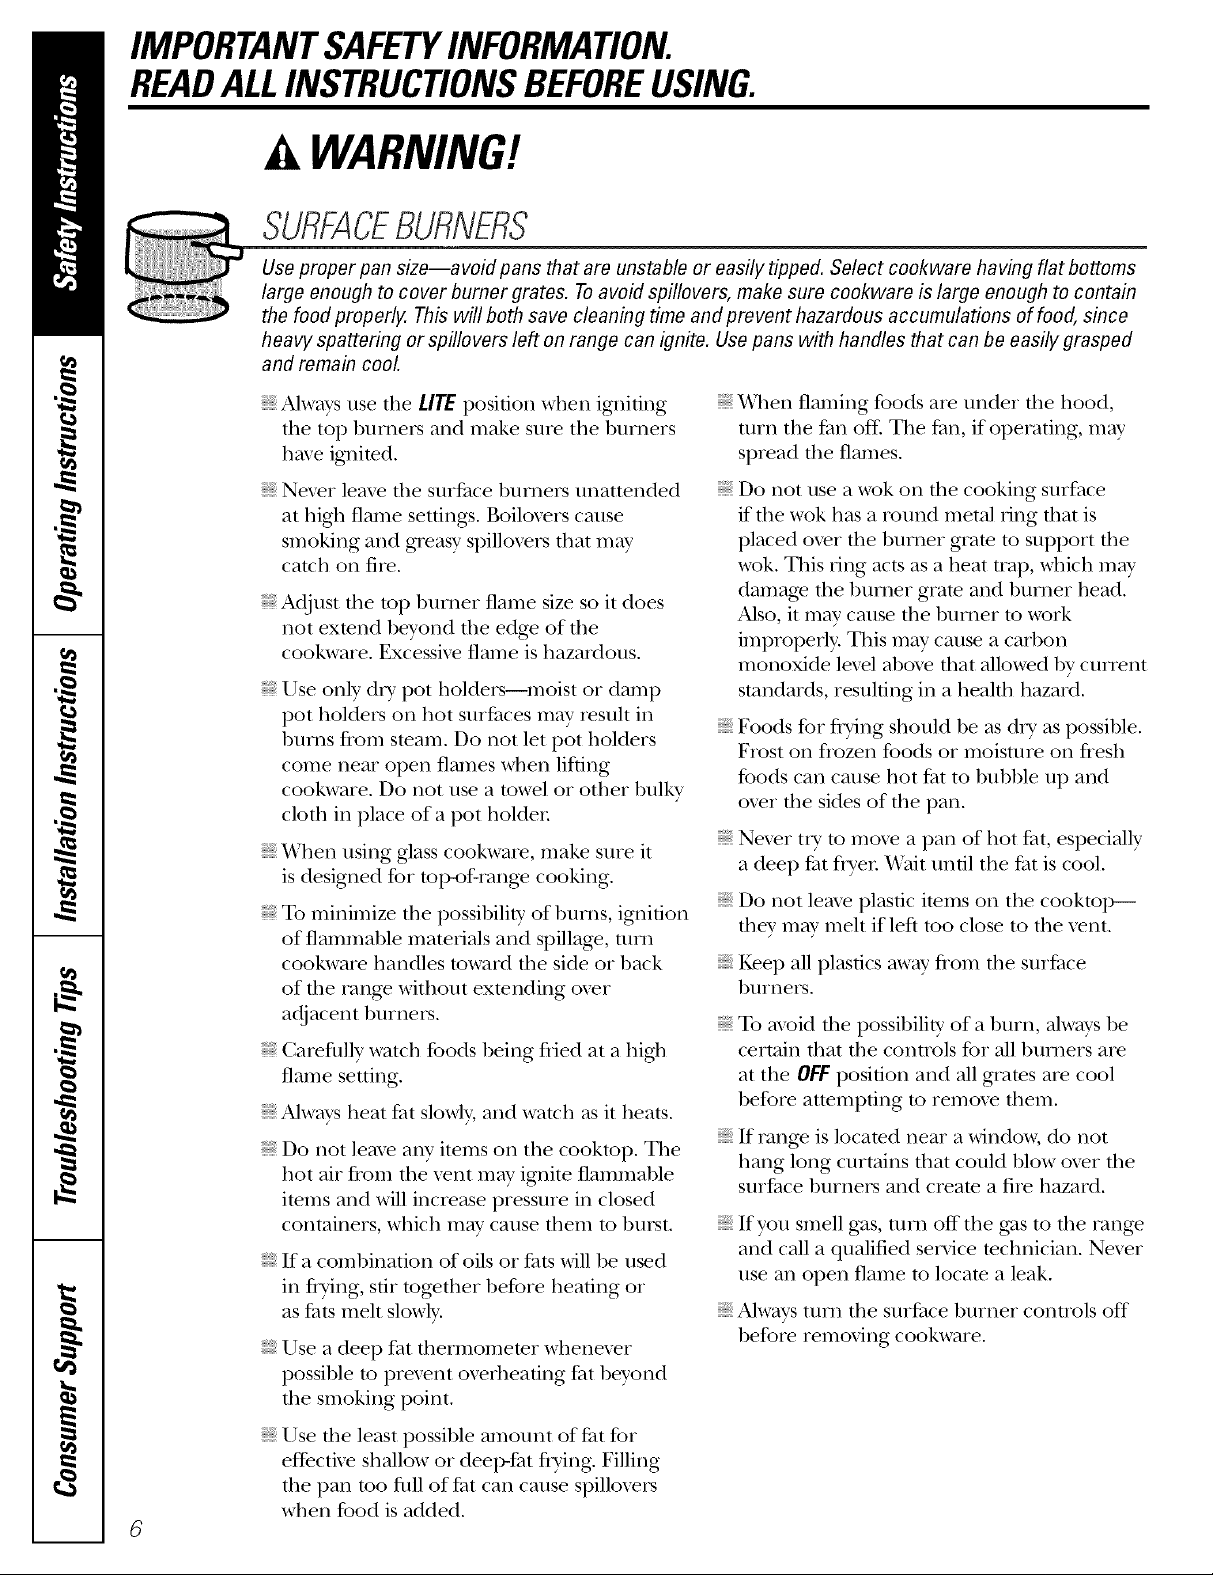
SURFACEBURNERS
Use proper pan size--a void pans that are unstable or easily tipped. Select cookware having flat bottoms
large enough to cover burner grates. Toavoid spillovers, make sure cookware is large enough to contain
the food properly. This will both save cleaning time and prevent hazardous accumulations of food, since
heavy spattering or spillovers left on range can ignite. Use pans with handles that can be easily grasped
and remain cool.
Alwavs use tim LITE position when igniting
die top burners and make sme the burners
have ignited.
Nexer leave file smJ_ace bunlers unattended
at hi0r flame setting:s. Boilox>rs cause
smoking arrd gieasy spillox>rs tilat m W
catch on file.
'Adjust fire top burner flame size so it does
not extend beyond tile edge of the
cookware. Excessixe flame is hazardous.
Use only d U pot holders--moist or damp
pot holders on hot sniiCaces may Iesult in
bm_ls flom steam. Do not let pot holders
come near open flames when lifting
cookware. Do not use a towel or other bulky
clotir in place of a pot holder
When using gtass cookware, make sure it
is designed for toi>of-rang> cooking.
To minimize tile possibility of l)m_rs, ignition
of flammable materials arrd spillage, turn
cookware handles toward tile side or back
of fire rang> without extending ox>r
adjacent hurners.
Careflflly watch fbods heing fl{ed at a higtl
flame seuing.
Alwavs heat tilt slowl> arrd watch as it heats.
Do not leme any items on tire cookmp. Tile
hot air from die xent m W ignite flammable
items arrd will increase pressure ira closed
corrtainers, which mav cause tilem to burst.
If a coml)ination of oils or rifts will be used
in flTing, stir togetiler 1)efore heating or
as tilts melt slowly.
Use a deep fat thermometer whenex_r
possihle to prex_nt oveflleafing laatheyond
file smoking point.
When flaming foods are under tire hood,
turn tire fan off: Tile t_an, if operating, mav
spread tile flames.
Do not use a wok on the cooking surface
if tile wok has a round metal ring that is
placed oxer tim burner grate to support tire
wok. Tiffs ring acts as a heat trap, which m W
damage the humer grate and humer head.
Also, it may cause tire burner to work
improperly. Tills may cause a carbon
monoxide lex>l above that allowed by cunent
standards, resuking in a heahh hazard.
Foods for flTing should be as d U as possible.
Frost on flozen foods or moisture on flesh
foods can cause hot t_atto hubble/l I) arrd
ox>r tile sides of tile pan.
Nex>r tIT to mow a pan of hot t_at, especially
a deep fat flTer V(ait until tile fat is cool.
Do not leme plastic items on tile cooktop--
riley m W melt if left too close to tile xent.
Kee I) all plastics awav flom tile sniP, tce
bnrners.
To axoid tile possibility' of a burn, always be
certain tilat tile controls for all humers are
at tile OFF position arrd all grates are cool
before attempting to remox_ them.
If rang_ is located near a windo_, do not
hang long curtains that could hlow oxer tile
smlZace hurners arrd create a fire hazard.
If you smell gas, turn off tire gvts to tire rang_
arrd call a qualified service technician. Never
use an open flame to locate a leak.
Always tunl tire surface burner cormols off
before removing cookware.
Use fire least possible amount of J_atfor
effective shallow or deeI>fat flTing. Filling
tire pan mo flfll of t_atcan cause spillox>rs
when food is added.
Page 7

ELECTRICWARMINGDRAWER
vvww.GEAppliances.com
The purpose of the warming drawer is
to hold hot cooked foods at serving
temperanlre. Always start wifll hot food;
cold food cannot be heamd or cooked in
the wal_ning drawer
Do not use the wmaning drawer to d U
newspapers. If o_erheated, they can catch
OIl fife.
Do not lem> paper products, cooking
utensils or food in the warming drawer
when not in use.
Never leave jars or cans of fat dripping:s in
or near your wanning drawer
Always kee I) wooden and plastic utensils
and canned food a safe distance away flom
your warming drawer
Do not w:u_n food in tile warming drawer
for more than two hours.
Do not touch theheating element or the
interior surface of the warming drawer.
These snifi_ces may be hot enougil to burn.
REMEMBER:The inside suriZace of the
wallning drawer may be hot when the
drawer is opened.
Use care when opening the drawer Open
the drawer a crack and let hot air or steam
escape before iemoving or rep]acing food.
Hot air or smam which escapes can cause
bums m hands, face and/or eyes.
Do not use aluminum foil to line file
drawer Foil is an excellent heat insulator
and will trap heat beneath it. This will upset
the perforn/ance of the drawer and it could
damag> the inmlior finish.
Page 8
IMPORTANTSAFETYINFORMATION.
READALLINSTRUCTIONSBEFOREUSING.
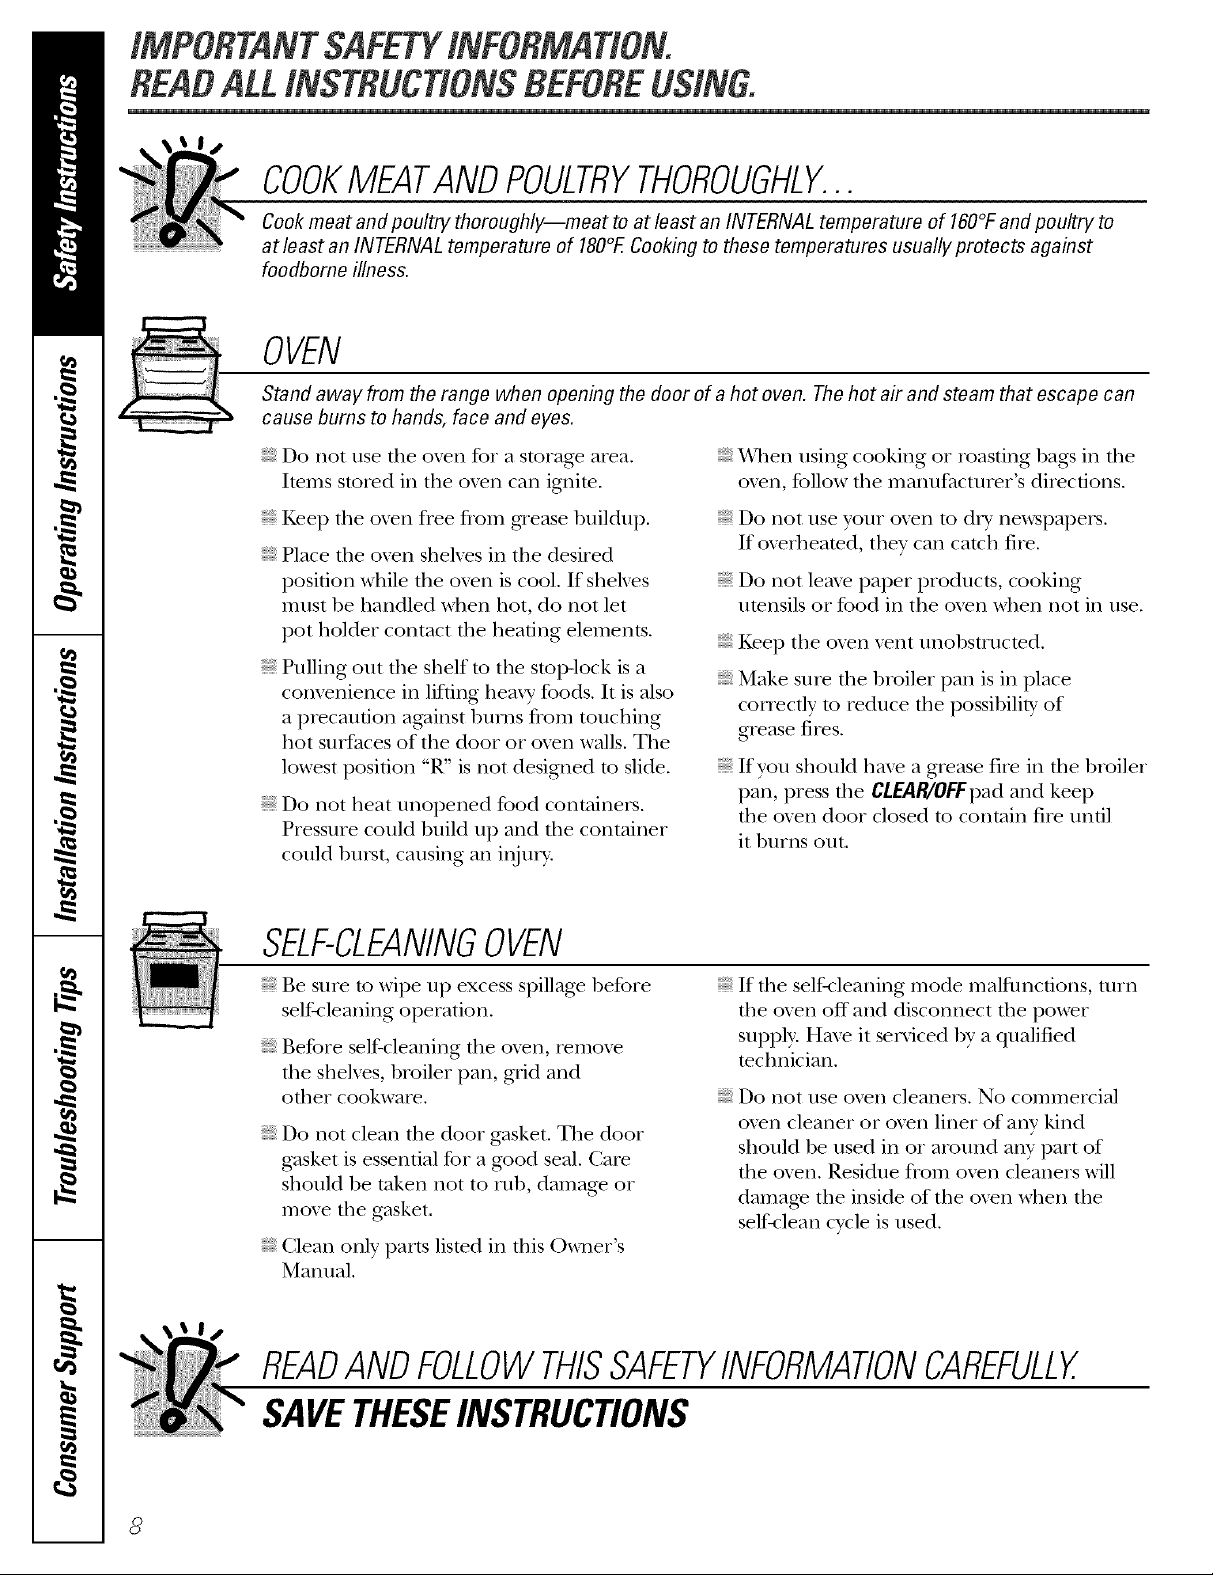
COOKMEATANDPOULTRYTHOROUGHLY...
Cook meat and poultry thoroughly--meat to at least an INTERNAL temperature of 160°/:and poultry to
at least an INTERNAL temperature of 180°ECooking to these temperatures usually protects against
foodbome illness.
OVEN
Stand away from the range when opening the door of a hot oven. The hot air and steam that escape can
cause bums to hands, face and eyes.
Do not use tim oven for a storage area.
Imms stored in the oxen can ignim.
Kee I) the oven free flom glease buildup.
Place the oven shehes in the desired
position while the oven is cool. If shehes
must be handled when hot, do not let
pot holder contact rite heating elements.
Pulling out the shelf to the stop-lock is a
convenience in lifting heaxy' foods. It is also
a piecanfion against btn_s flom touching
hot surfaces of the door or oven walls. The
lowest position "R, is not designed to slide.
Do not heat unopened food containers.
Pressure could build up and the container
could burst, causing an i,ljtn>
SELF-CLEANINGOVEN
Be sure to wipe up excess spillage before
selt_leaning operation.
Before self-cleaning the oxen, remoxe
the shehes, broiler pan, grid and
other cookware.
Do not clean the door gasket. The door
gasket is essential for a g_od seal. Care
should be token not to rub, damage or
move the gasket.
Clean only parts lismd in this Owner's
Manual.
XA]len using cooking or roasting bags in the
oxen, follow the manufacturer's directions.
Do not use your oxen to dlT newspapers.
If oxerheated, they can catch fire.
Do not leme paper products, cooking
utensils or food in the oxen when not in use.
Kee I) the oxen xent unobstructed.
Make S/lie the broiler pan is in place
conecflv to _educe the possibility of
g,ease fires.
If you should ha_e a g_ease rite in the broiler
pan, press the CLEAg"OFFpad and kee I)
rite oven door closed to contain fire until
it burns out.
If the self-cleaning mode malflmctions, turn
the oxen off" and disconnect the power
supply. Haxe it serviced by a qualified
technician.
Do not use oven cleaners. No commercial
oxen cleaner or oxen liner of any ldnd
should be used in or around any part of
the oven. Residue from oxen cleaners will
damage the inside of the oxen when the
seltklean cycle is used.
READANDFOLLOWTHISSAFETYINFORMATIONCAREFULLY.
SAVETHESEINSTRUCTIONS
Page 9
Usingthe gas surfaceburners, www.GEAppliances.com
Throughout this manual, features and appearance may vary from your model.
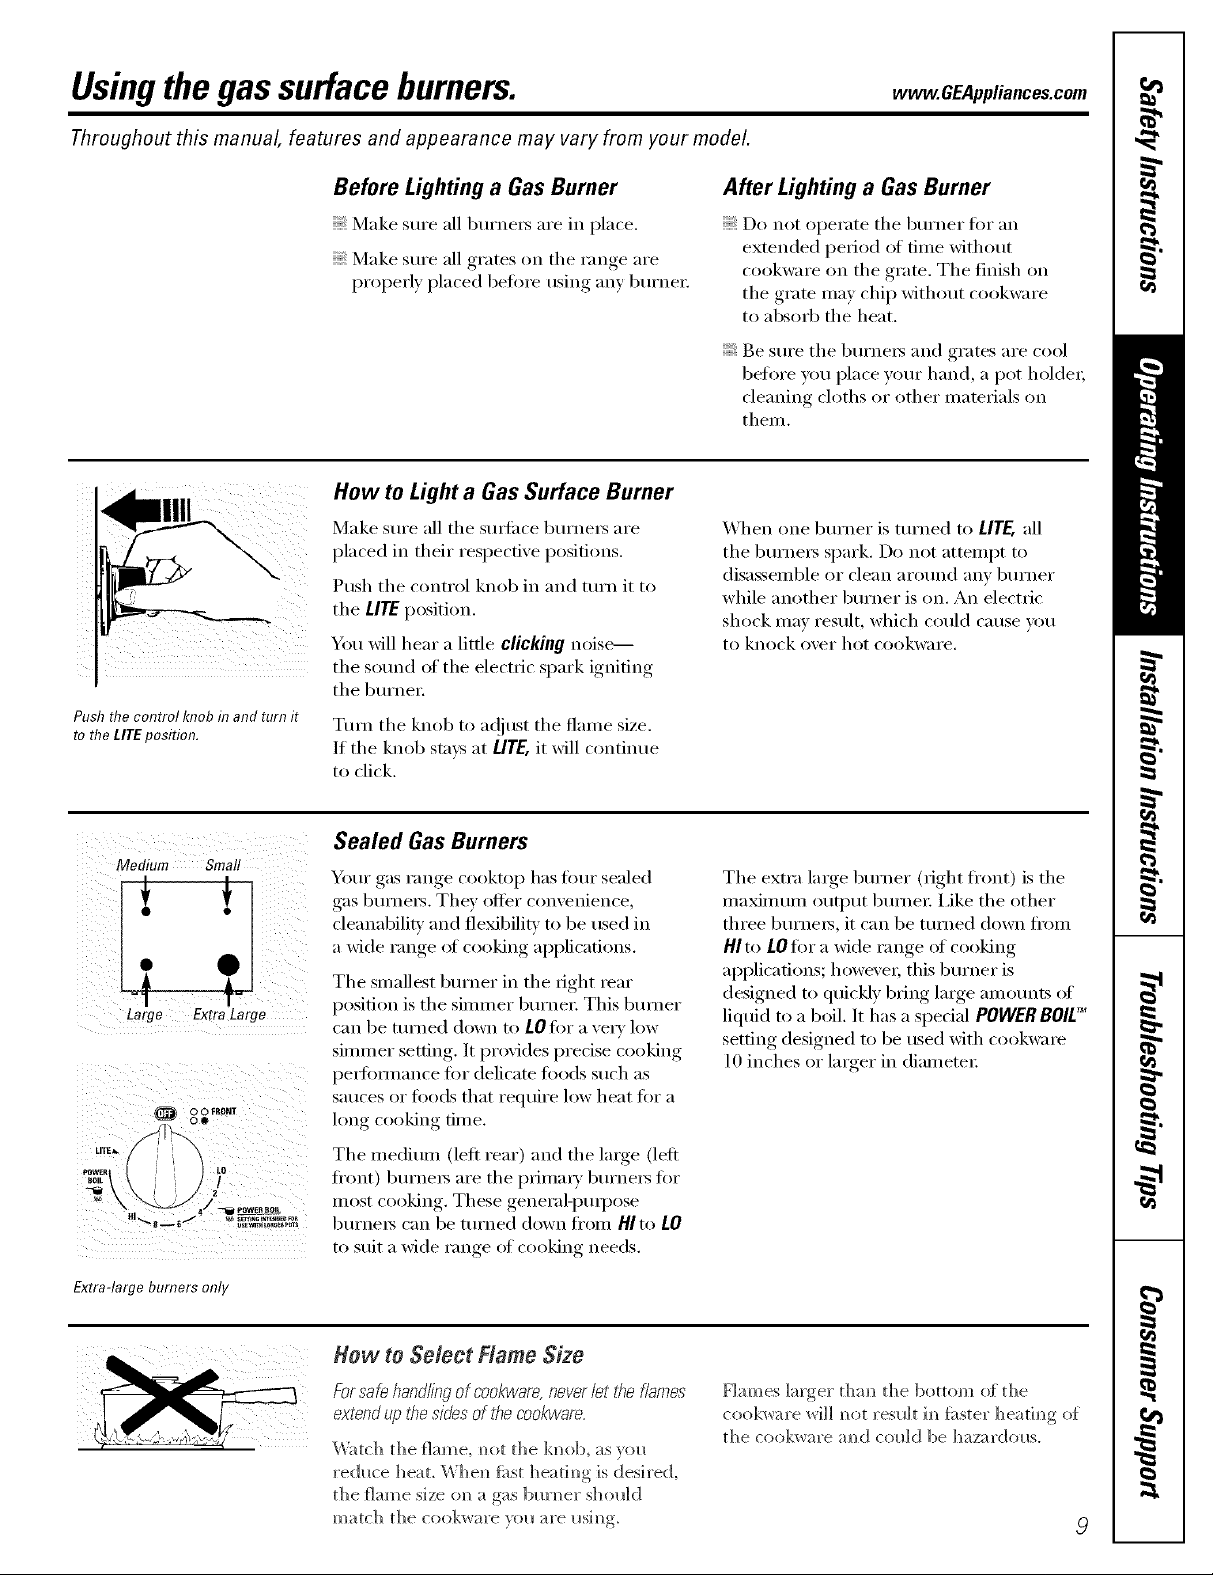
Push the control knob in and turn it
to the LITEposition.
Before Lighting a Gas Burner
Make sure all burne_ are in place.
Make sure all grates on the range are
properly placed befine using any burne_:
How to Light a Gas Surface Burner
Make sm'e ;111the stu_ilce burne_ are
placed in their respective positions.
Push the control knob in and mrn it to
the LITE position.
You will hear a little clicking noise--
the sotmd/ff the electric spark igniting
the burne_:
Ttm_ the knob to a(!iust the flame size.
If the knob stays at L/TE,it will continue
to click.
After Lighting a Gas Burner
Do not operate the burner for an
extended period of time without
cookware on the grate. The finish on
the grate may chip without cookware
to absorb the heat.
Be sure the burners and grates are cool
before you place yore" hand, a pot holder;
cleaning cloths or other mamrials on
them.
When one burner is turned to LITE,all
the burners spark. Do not attempt to
disassemble or clean arotmd any bm'ner
while another bm'ner is on. An electric
shock may result, which could cause you
to knock over hot cookware.
Medium Small
Large Extra Large
Extra-large burners only
Sealed GasBurners
Yore" gas range cooktop has fimr sealed
gas burne_. They offer convenience,
cleanabilitv and fle_bilitv to be used in
a wide range ot cooking applications.
The smallest bm'ner in the fight rear
position is the simmer burne_: This btm_er
can be turned down to LOfor a vec_' low
simmer setting, It provides precise cooking
perlommnce ,for delicam toods such as
Satlces or foods that reqtlire low heat fin" a
long cooking time.
The medium (left rear) and the lmge (left
fl'ont) bm'ne_s are the i)rhnmT burners tot
inost cooking. These general-i)tul)ose
burners can be turned down fl'om HIto LO
to suit a wide range of cooking needs.
How to Select Flame Size
Forsafe handlingof cookware,neverlet t¢_ef/ames
extend up t¢_esides of the cookwam.
Watch the flame, N)ot the kin)b, as vol_
red_ce ]]eat. Whe_ first heatim]g is desired,
the flame size on_ a gas bm'm_er s]]oldd
match the cookware }011 are IISim)_
The extra lmge bm'ner (right fl'ont) is the
n]axinluln o]ltl)tlt bunlei: I,ike the other
three burners, it can be turned down fl'om
HI to LOfin" a wide range ot cooking
applications; howe\'ex; this burner is
designed to quic!dy bring large amotmts of
liquid to a boil. It has a spedal POWER BOlE_
setting designed to be used with cookwme
10 inches or larger in diameter:
Flames larger t]]am_ the bottom of the
cookware will m_ot result im_f_ster ]]eatim_g of
the cookware m_d co_dd be hazardo_s.
Page 10
Usingthe gas surfaceburners.
Top-of-Range Cookware
Aluminum: Medium-weight cookware is
recommended because it heats quickly
and evenl'_. Most fi)ods brown e',enlv in an
altmfintml skillet. Use saucepans with tioht-
fitting lids when cooking with minimmn
_lIIl O/lntS of _V_lteI:
Cast-Iron: If heated slowly, most skillets will
give satisfi_ctorv results.
Enamelware: Under some conditions,
tile enai/lel of SOIlle ('ookw;iYe ill}iv I//elt.
Follow cookware inanufilcturer's
i'ecoil/illendations tor cooking nlethods.
Stove Top Grills
Do not use stove top grills on your sealed
gas burnex_. If you use tile stove top grill
on tile sealed gas burnex, it will cause
incomplete combustion and can result
in expos/lI'e to C_li'bon i/lonoxide levels
above allowable cmTent standards.
Glass:There are two types of glass
cookware--those for oven/ise only and
those for toi>olXrange cooking (saucepans,
coffee and teapots). Glass conducts heat
very slowly.
HeatproofGlass Ceramic: Can be used fi)r
either surfi_ce or oven cooking. It conducts
heat very slowly and cools very slowly: Check
cookware I/l_lIltlIilCttlI'eI"S directions to be
sure it can be used on gas ranges.
Stainless Steel: This metal alone has poor
heating properties and is usually combined
with coppe_; alunfinuln or other metals fin.
improved heat distribution. Combination
metal skillets usually work satisti_ctorilv if
they are used with medium heat as the
I/l_l ntl[il Cttli'ei" i'ecolilli/ends.
Use a fiat-bottomed wok.
Thiscanbehazardoustoyourhealth.
Wok This Way
Werecommendthat youusea 14-inchor smaller
fiat-bottomed wok. Make sure the wok bottomsits
fiat on thegrate. Theyareavailableat your local
retail store.
Onl) a fiat-bottomed wok should be used.
In Case of Power Failure
In case of a power fifilure, you can light tile
gas sm'fi_ce burners on )_mr range with a
match. Hold a lit match to tile burne_; then
push in and tm'n tile control knob to tile
LITEposition. Use extreme caution when
lighting burnexs this way.
Do not rise a flat-bottoilled wok Oil a
support ring. Placing tile ring over tile
burner or grate may cause tile bm'ner
to work improperly, resulting in carl)on
monoxide levels above allowable standards.
This could be dangerous to veto" health.
Surfi_ce bm'nets in use when an electrical
power fifilm'e occms will continue to
operate noiillallv:
/0
Page 11
Usingthe ovencontrols, www.GEAppliances.com
Throughout this manual, features and appearance may vary from your model.
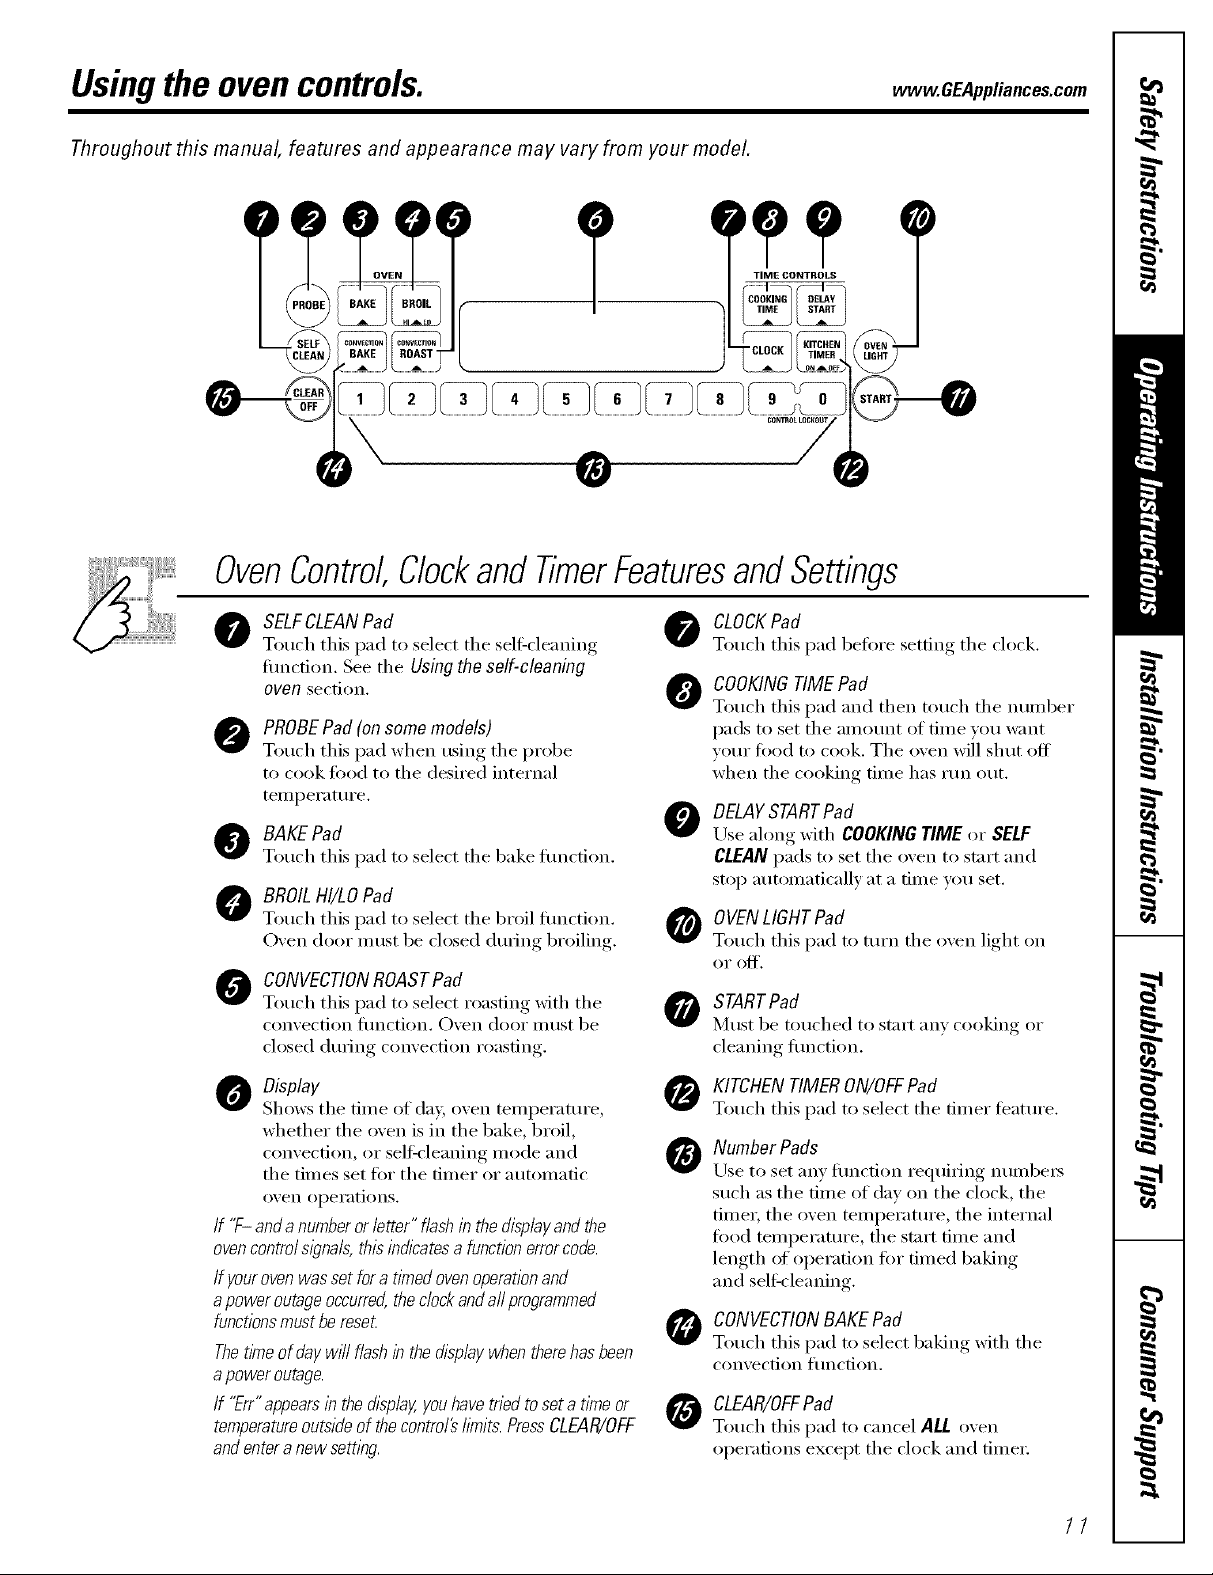
OvenControl,Clockand TimerFeaturesandSettings
SELFCLEAN Pad
0
Touch this pad to select tile selFcleaning
filnction. See tile Using the self-cleaning
oven section. 0
PROBE Pad (on some models)
0
Touch this pad when using tile probe
to cook toed to tile desired internal
temperature.
BAKEPad
Touch this pad to select tile bake flmction.
BROIL HI/LO Pad
Touch this pad to select the broil flmction.
O\en door Imlst be closed during broiling.
CONVECTIONROASTPad
0
Touch this pad to select roasting with tile
convection flmction. Oven door inust be
closed during convection roasting.
O Display
Shows the time of day, oven temperature,
whether tile oven is in tile bake, broil,
convection, or self_'leaning mode and
tile times set fin" tile timer or automatic
oven opei'ations.
If "F- and a number or letter" flash in the displayand the
ovencontrol slgna& thisindicates a function error code.
If yourovenwasset for a timed ovenoperationand
apower outage occurred,the dock andaft programmed
functionsmust bereset
Thetlkneof daywHIflash inthe display when therehas been
apower outage.
If "Err" appearslb the display,youhave tried to set a tlYneor
temperatureoutside of the control# bruits.PressCLEAR/OFF
andenter anew settlbg.
CLOCKPad
v
Touch this pad before ,setfim,_tile clock.
COOKING TIME Pad
Touch this pad and then touch tile number
pads to set tile amount of time you want
w)ur fi_od to cook. Tile oven will shut off
when the cooking time has run out.
DELAY START Pad
0
Use along with COOKINGTIME or SELF
CLEANpads to set tile oven to start and
stop automatically at a time you set.
OVEN LIGHT Pad
Touch this pad to turn tile o'_en light on
OI" OleO.
START Pad
mtlst be touched to start }lily ('ooking oI"
cleaning flmction.
KITCHEN TIMER ON/OFF Pad
Touch this pad to select tile timer feature.
Number Pads
0
Use to set any function requiring numbers
such as tile dine of day on tile clock, tile
timeI; tile oven temperature, tile internal
food temperature, tile start time and
length ,':,foperation fin" timed baking
and selFcleaning.
CONVECTIONBAKE Pad
Touch this pad to select baking with tile
con'_ection ltinction.
CLEAR/OFFPad
Touch this pad to cancel ALL oxen
operations except tile clock and timei:
//
Page 12
Usingthe oven.
Toavoid possible bums, place the shelves in the desired position before you turn the oven on.
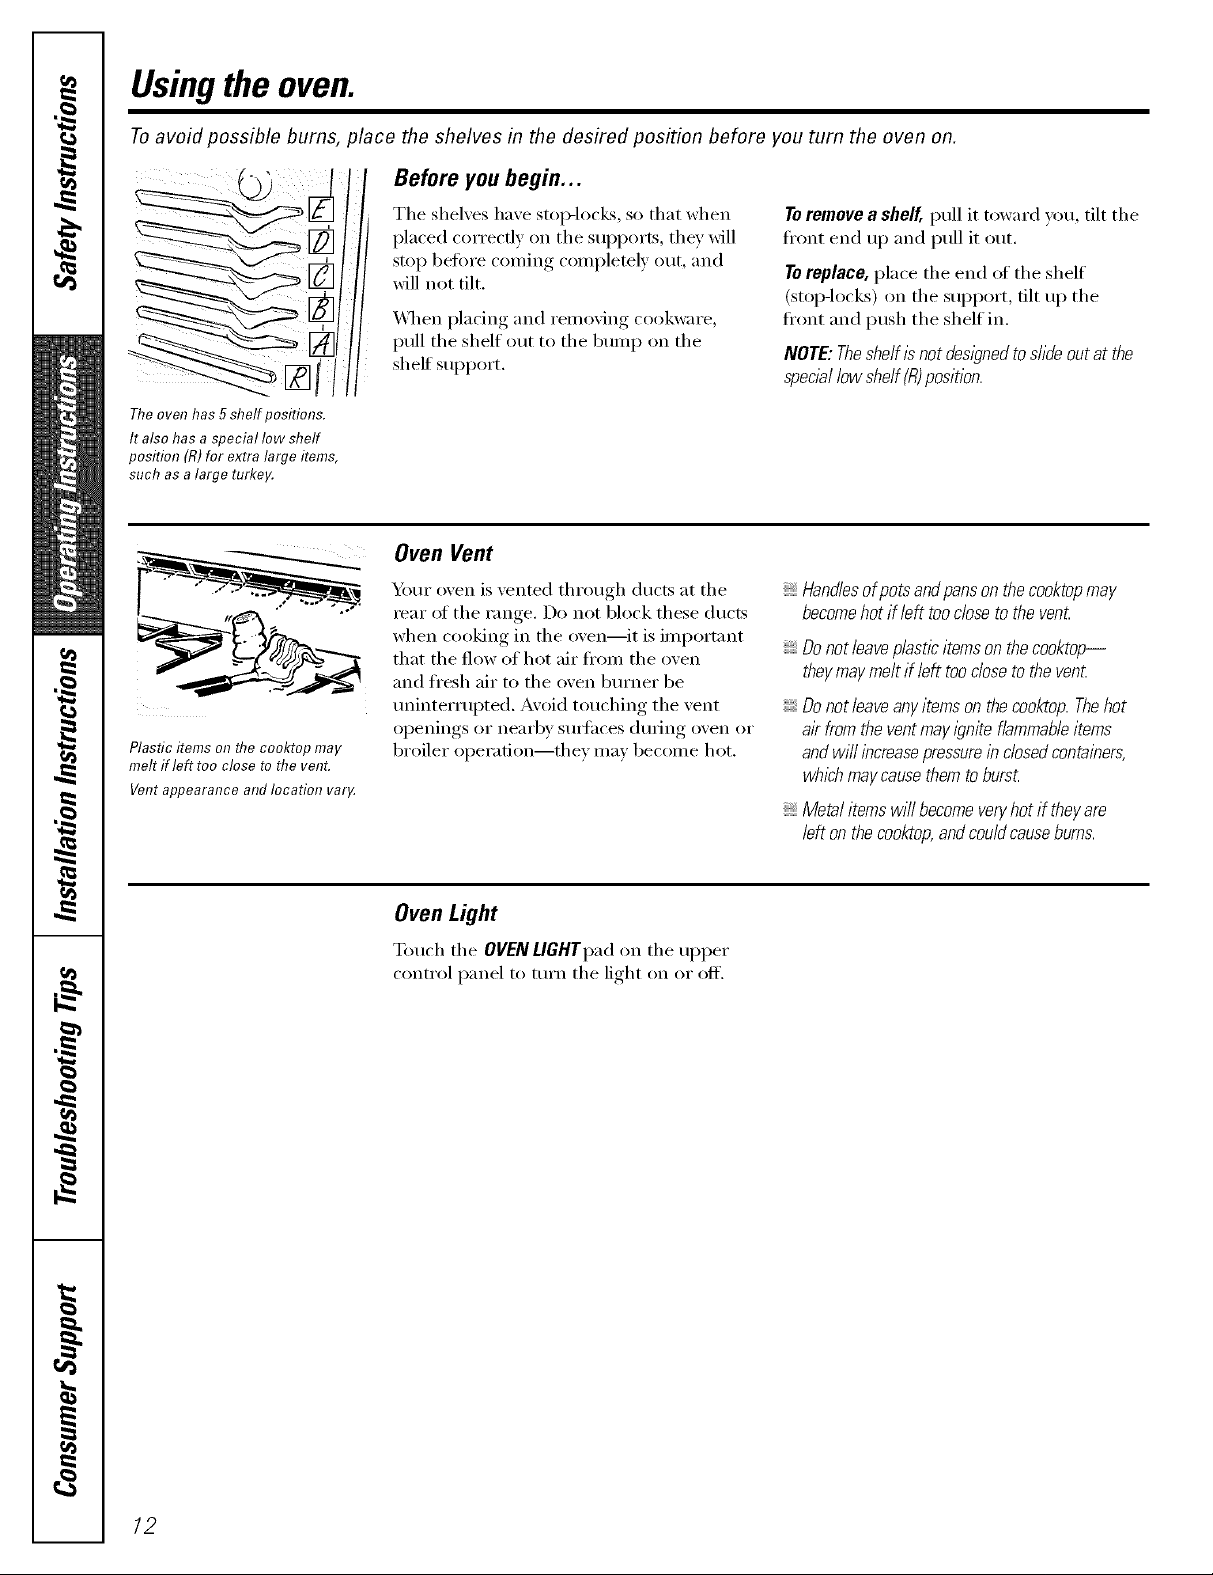
Before you begin...
Theoven has 5 shelf positions.
It also has a special low shelf
position (R)for extra large items,
such as a large turkey.
Plastic items on the cooktop may
melt if left too close to the vent.
Vent appearance and location varg
The shelves have stop-locks, so that when
placed correctly on the supports, they will
stop before coming complemly out, and
will not tilt.
_A'hen placing and removing cookware,
pull the shelf out to the bump on the
shelf support.
Oven Vent
Your oven is vented through ducts at the
rear _ff the range. Do not block these ducts
when cooking in the oven--it is important
that the flow of hot air fi'om the oven
and fl'esh air to the oven burner be
uninterrupted. Avoid touching the vent
openings or nearby surfhces during oven or
broiler operadon--they may become hot.
Toremove a shelf, ptdl it toward you, tilt the
ti'ont end up and pull it out.
Toreplace, place the end (ff the shelf
(stop-locks) on the support, tilt up the
ti'ont and push the shelf in.
NOTE: Theshelf/s not des/)ned to s/ida out at the
special low shelf (R)position.
Handlesofpotsandpansonthecooktopmay
becomehotif left tooclosetothevent
Donotleaveplasticitemsonthecooktop--
theymaymeltif lefttoodoseto thevent
Donotleaveanyitemsonthecooktop.Thehot
air fromtheventmayigniteflammableitems
andwi//increasepressureindosedcontainers,
whichmaycausethemtoburst
Metalitemswi//becomeveryhotif theyare
leftonthecooktop,andcouldcauseburns.
Oven Light
Touch the OVEN LIGHTpadon the upper
control panel to turn the light on or off.
12
Page 13
www.GEAppliances.com
(5) ]
The oven has a special low shelf (R)
position just above the oven bottom.
Use it when extra cookflTg space is
needed, for example, when cooking
a large turkey. The shelf is not
designed to sfide out at this position.
How to Set the Oven for Baking or Roasting
[] Touch tile BAKEpad.
[] Touch the nt/I/lbeI" pads to set the
desired teml_erature.
[] Touch tile START pad.
Tile word ON and I00 ° will be displayed.
_s tile oven heats up, tile display will show
tile changing teinl)erature. When tile oven
reaches tile temperature you set, a tone
will sound.
Tochange the oven temperature during BAKE cycle,
press the BAKE pad and then the number pads to
get the new temperature.
[] (_heck fi_od fiw doneness at minim um
time on recipe. Cook longer if
necessa i'v.
[] Touch tile CLEAR/OFFpad when
cooking is coinplete.
Preheating and Pan Placement
Typeof Food Shelf Position
Frozenpies (on cookie sheet) C
Angel food cake, Bor C
bundt or pound cakes
Biscuits,muffins, brownies, B or C
cookies,cupcakes,
layercakes, pies
Casseroles Bor C
Turkey Ror A
Roasting A or B
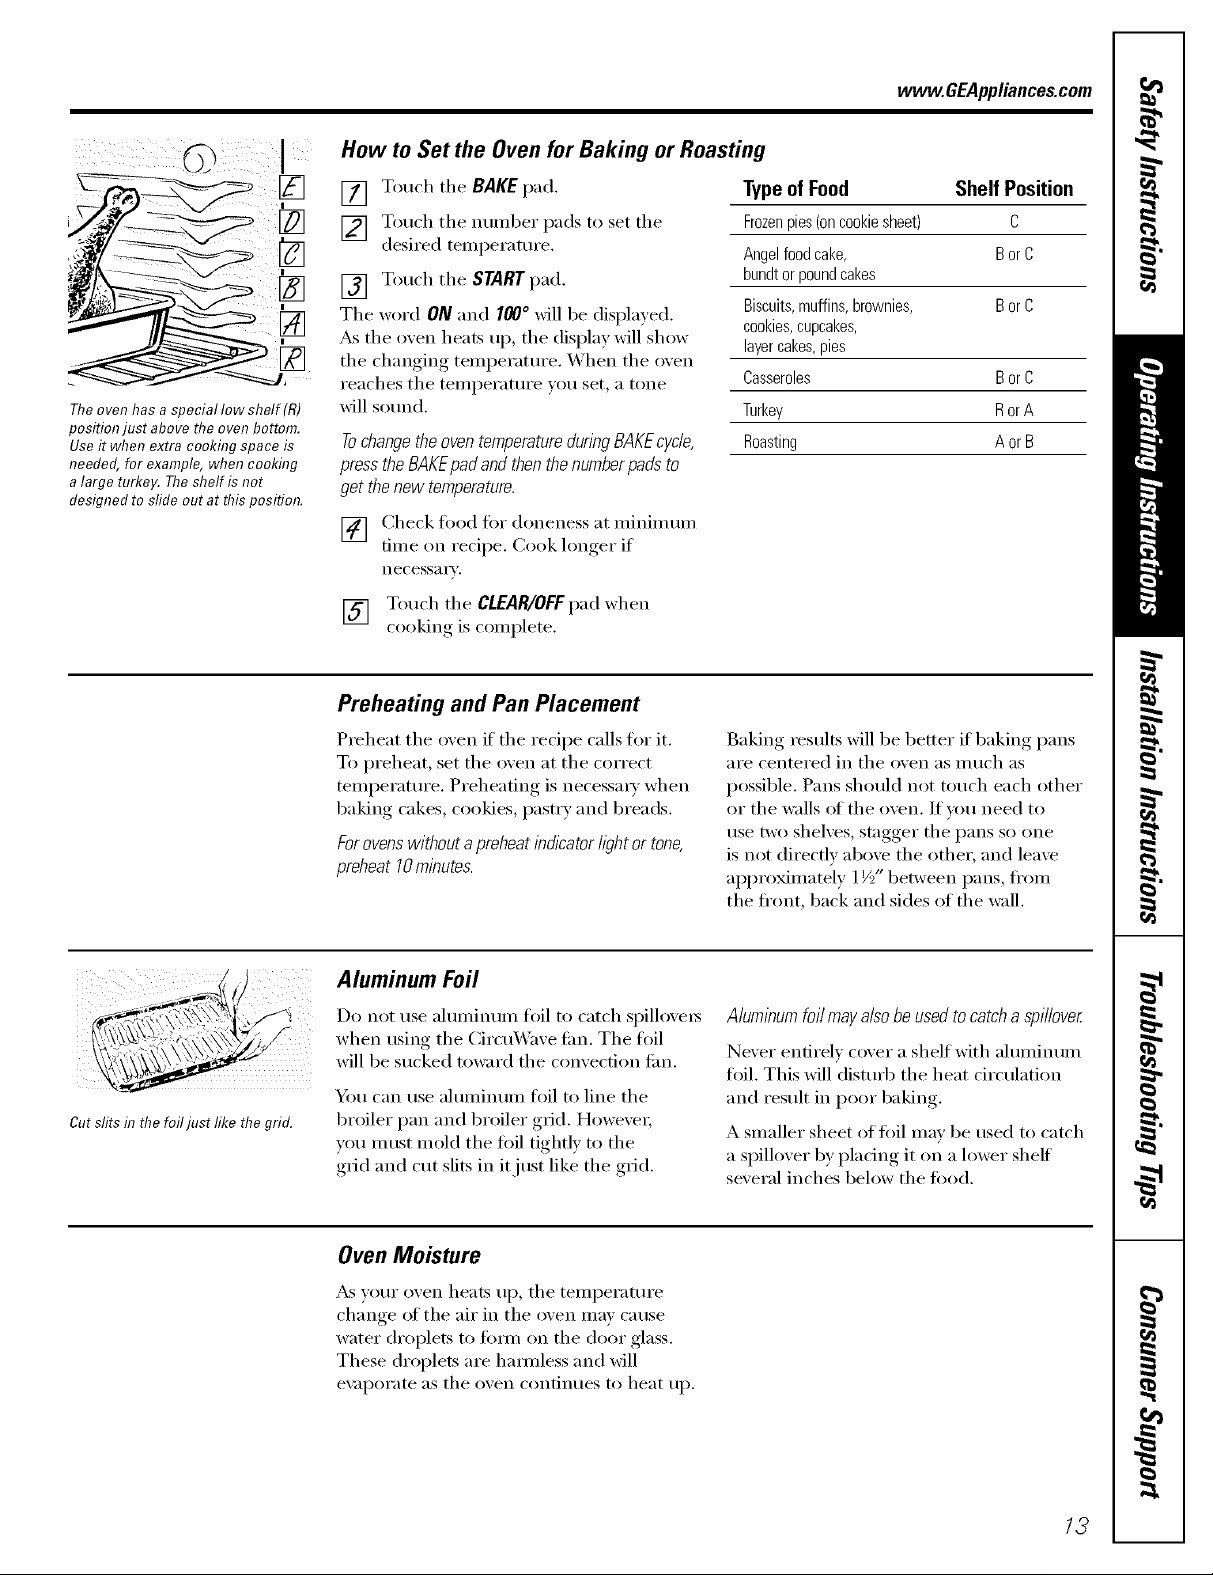
Cut slits in the foiljust like the grid.
Preheat the oven if' the recipe calls for it.
To preheat, set the oven at the correct
temperatm'e. Preheating is necessm w when
baking cakes, cookies, past_ T and breads.
For ovens without a preheatindicatorhghtor tone,
preheat 10 minutes.
Aluminum Foil
Do not use ahmfinum foil to catch spilloxe_s
when using tile Circu_Vaxe tim. Tile foil
will be sucked toward tile comection tim.
You can use aluminum flfil to line tile
broiler pan and broiler grid. However;
vou must mold tile fi)il tightly to tile
grid and cut slits in it just like the grid.
Oven Moisture
_s vour oven heats up, tile temperature
change of tile air in tile oven may Catlse
water droplets to tirol/ on tile door glass.
These droplets are hmmless and will
e\;ll)Oi'ate as tile ()veil contintles to heat up.
Baking results will be better if baking pans
aye centei'ed in tile oven as i/ltlch as
possible. Pans should not touch each other
or tile walls oI tile oven. If you need to
rise two shelves, stagger tile pans so one
is not directly above the other; and leave
approMmamly 1 I/_)"between pans, ti'om
the front, back and sides of the wall.
Aluml)_um foilmay also be used to catch a spi//ove_
Never entirely cover a shelf with ahmfinum
foil. This will disturb the heat circulation
and result in poor baking.
A smaller sheet of foil may be used to catch
a spillover by plating it on a lower shelf
several inches below tile food.
13
Page 14
Usingthe oven.
i ¸ •
Always use the broiler pan and grid
that came with your oven. It is
designed to minimize smoldng and
spattering by trapping juices h7the
shielded lower part of thepan.
How to Set the Oven for Broiling--Close the oven door
[] Place the meat or fish on the broiler
grid in the broiler pan.
[] Follow suggested shelf positions in
the Broiling Guido.
[] The o_en door mustbe closed during
1)r_filing
Touch the BROILHI/LOpad once for
[]
HI BroiL
To change_to LOBroil, touch the
BROILHI/LOpad again.
Broiling Guide
The size, weight, thickness,
stnrting, temi_eratm'e, and Food
_Ot/I" px'el[_x'ence ()_ doneness
• GroundBeef
will affect broiling times.
This guide is based on meats
at reflJgerator temperatm'e. Beef Steaks
tThe U.S. Oepartment of Agriculture Medium
says "Rare beef is popular, but you Well Done
should know that cookflTgit to only Rarer
140°Fmeans some food poisoning Medklm
organisms may survive." (Source: Well Done
Safe FoodBook Your Kitchen Guide Chicken
USDARev. June 1985.)
Raret
Bakery Product
Bread (toast)
English Muffin
LobsterTails
Fish Fillets
Salmon
Steaks
Fillets
Ham Slices
(precooked)
Pork Cbops
Well Done
LambChops
Medium
Well Done
Medklm
Well Done
Quantityand/
orThickness
1 lb.(4 patties)
Vzto _4"thick
4 Ibs.(12 patties)
Y4to 1" thick
1to 11/Llbs.
11/Ethick
2to 21/LIbs.
1whole cut up
2to 21/zIbs.,
splitlengthwise
Breast
2to 4slices
2(split)
2-4
1 lb. (I/4 to Y/' thick)
2(1" thick)
2{I/zto 3/Y"thick)
Y/' thick
1" thick
2(i//, thick)
2(1" thick)about 1 lb.
2(1" thick)about 10
to 12 oz.
2(11//'thick)about1 lb.
Shelf
Position
E
D
D
C
C
D
B
B
D
E
B
D
D
C
C
C
C
D
D
D
D
[] Touch the START pad.
[] X,_hen broiling is finished, touch the
CLEAR/OFF pad.
Ser\e the food immediatel); and lea',e the
pan outside the oxen to cool dtwino_ the
meal fiw easiest cleaning.
Use LO Broil to cook fi_ods such as poultx?
or thick cuts of meat thoroughly without
o_ e_4)rowning them.
FirstSide
Time(rain.)
13
15
10
10
15
2O
25
25
34
18 20
10
10
10
15
10
14
Second Side
Time (rain.)
8
6
8
3
B
8
7
9
4
6
8
8
10 12
2O
25
15
1
Donot
turn
OVer•
6
8
10
15
4
9
6
10
Comments
Spaceevenly.
Steakslessthan¼" thick
aredifficultto cookrare.
Slashfat.
Brusheachside with
meltedbutter.
Broilskin-side-downfirst•
Spaceevenly•PlaceEnglish
muffinscut-side-upand
brashwith batter if desired•
Cutthroughbackof shell.
Spreadopen•Brushwith
meltedbutterbefore
broilingand after half of
broilingtime•
Handleandturnvery
carefully.Brushwith
lemonbutterbefore
anddaringcooking,
if desired•
Turncarefully.Do not
turnskin sidedown•
Slashfat.
Slashfat.
14
Page 15
Usingtheclock and timer, vvvvw.GEAppliances.com
Not all features are on all models.
ToSet the Clock
Make sure the clock is set to the
correct time of da,¢
The timer is a minute timer only.
The CLEAR/OFFpad does not affect
the time_
Tile clock II/ust be set to tile correct tinle
of day fin" tile automatic oxen tinting
tractions to work properly. Tile time ot day
cmmot be changed during a timed baking
or self:cleaning cycle.
[] Touch tile CLOCK pad.
[] Touch tile nmnber pads.
Touch tile number pads tile sanle way }ou
read them. For example, to set 12:. 4, touch
tile nmnber pads I, S, 3 and 4[in that ordex:
_3
To Set the Timer
Thetlknerdoesnotcontro/ovenoperations.
Themaxlknumsettingonthetimeris9 hours
and59minutes.
Touch tile KITCHENTIMERON/OFF
[]
pad.
Touch tile ntlillber pads tliltil tile
[]
[lIl/O[lnt of tiIlle _O1l _V[lIlt shows in
tile display. Tile maximmn number
of minutes that can be entered is 60.
To set additional time, you will need
to set it by hom_ and minutes.
For example, to enter 1 hour and
30 minutes, touch I, 3andO in
that order:
If number pads are not touched within one
minute after you touch tile CLOCKpad, tile
display reverts to the original setting. If this
happens, touch tile CLOCKpad and reenter
tile time _ff day:
[] Touch tile STARTpad tmtil tile time
of da)shows in tile display. This ente_
tile time and st;ms tile clock.
TocheckthetimeofdaywhenthedisplayIs
showingotherinformation,s/knp/ytouchthe
CLOCKpad Thetimeofdayshowsunti/another
padistouched
If youmakeamistake,presstheKITCHENTIMER
ON/OFFpadandbeginagain.
[] Touch tile START pad. M'ter _ressim,
the STARTpad, SET disappeaxs; this
tells wm the time is counting down,
although tile display does not change
tmtil one minute has passed.
[] _,\q/en tile timer reaches .'/70,tile
control will beep 3 times fi_llowed by
one beep every 6 seconds until tile
KITCHENTIMERON/OFFpadis touched.
The 6 second tone can be canceled by following
thestepsin the Specialfeaturesofyouroven
control section under Tones at the End of a Timed
Cyc/e.
To Reset the Timer
If tile display is still showing tile time
remaining, you may change it by touching
tile KITCHENTIMERON/OFFpad; then touch
tile number pads tmtil tile time you want
appea_s in the display.
ToCancel the Timer
Touch tile KITCHENTIMERON/OFFpad twice.
Power Outage
lf a flashingtl?neis in thedisp/ay,)/ouhave
exper/enced a power failure. Reset #_e dock
If tile remaining time is not in tile display
(clock, delay start or cooking time are in
tile display), recall tile remaining time by
touching tile KITCHEN TIMER ON/OFFpad
and then touching tile ntli//ber pads to
enter tile new tii//e veil l_'_lilt,
To reset the clock, tol_ch the CLOCK Dad.
E_ter tile correct time of (lay by tol_chh_g
the appropiJate mm)ber pads. Tolmh the
STARTpad.
15
Page 16

Usingthetimedbaking andmasting features.
NOTE,"Foods that spoil easily--such as milk, eggs, fish, stuffings, poultry and pork--should not be allowed to sit for more
than 1hour before or after cooking. Room temperature promotes the growth of harmful bacteria. Be sure that the oven
light is off because heat from the bulb will speed harmful bacteria growth.
How to Set an Immediate Start and Automatic Stop
Theoven will turn onimmediately and cook fora
selectedlength of tkne.At theend of the cooklhg
bYnethe ovenwill turn off automaflca//y
[] Touch tile BAKEpad.
[] Using the nmnber pads, enter the
desired teinperature.
[] Touch tile COOKING TIME pad.
NOTE."If yourreciperequirespreheating, youmay
needto add additional time to the lengthof the
cookingtime.
The word ON and 100° will be displayed.
Tile cook time Mll begin to co/mt down.
_s tile oven heats uI), tile display will show
tile changing temperature. When the oven
reaches tile temperature you set, 3 beeps
will sound.
At tile end of timed baking, tile oven will
tm'n off. Tile end of cycle tone will sound.
Touch tile CLEAR/OFFpad to clear tile
display
[] de i,edU i" tl/e..mbe,l,.d.e.te,tl/eb. . time.Tl/e.,e.
temperature and tile cooking time
that you entered will be displayed.
[] Touch tile STARTpad.
How to Set a Delayed Start and Automatic Stop
Youcanset the ovencontrol todelay-start the oven,
cookfor a specifk length of time and thenturnoff
automatically
Make stlre tile clock shows tile correct
time of day.
[] Touch tile BAKEpad.
[] ILrsing the number pads, enter the
desired temperatm'e.
[] Touch tile COOKINGTIMEpad.
NOTE."If yourreciperequirespreheatl#g, youmay
needto add additional time tothelength of the
cookingt/me.
[] Lrsing tile number pads, enter tile
desired baking time.
Touch tile DELAYSTART pad.
[]
Using the nmnber pads, enter tile
[]
time of day you want tile oven to
turn on and start cooking.
Touch tile START pad.
[]
If you w_mld like to check tile times you
have set, touch tile DELAYSTART pad to
check tile start time w_u have set or touch
tile COOKINGTIME pad to check tile length
of cooking time you have set.
Tile oven will tm'n on automatically.
Tile _x)rd ON and I00 ° will be displayed.
Tile cook time will begin to count down.
_s tile oven heats up, tile display will show
the changing temperature. The oven will
cook fin" tile programmed cooking time and
shut off a utomaticallv.
At tile end of timed baking, tile oven will
mrn off. The end of cycle tone will so/md.
Touch tile CLEAR/OFF pad to clear tile
display;
/6
NOTE."An attention tone will soundif youare using
tknedbahhg and do not touchthe STARTpad after
entenw thebakl#g temperature.
Page 17

Usingtheprobe.(onsome models) www.aEApplia.ces.com
For many foods, especially roasts and poultry, internal food temperature is the best test for doneness.
The temperature probe takes the guesswork out of roasting by cooking foods to the exact doneness you want.
Use of probes other than the one provided
with this product ma) result in dmnage to /_ Cable
the probe, plug[( )} _)t
when inserting and removing them fl'om ; Handles
the fl)od and outlet.
Thetemperature probe has a
skewer-like probe at one end and
a plug at the other end that goes
hTtothe outlet h7the oven.
Toavoiddamagingyourprobe,donotusetongs
topuffonthecablewhenremovingit
Toavoidbreak/bgtheprobe,makesurefoodis
Neverleaveyourprobeinside the ovendunbg
aself-cleaning cycle.
Do not store theprobein the oven.
completelydefrostedbeforeinserting.
Topreventpossibleburns,donotunplugthe
probefromtheoutletuntil theovenhascoolecL
_Mter preparing the meat and placing it
on a trivet or on the broiler pan grid,
fi)llow these directions for proper probe
placement.
Insert the probe completely into the meat.
It should not touch the bone, ti_t or gristle.
For roasts with no bone, insert the probe
into the meatiest part of the roast. For
bone-in ham or lamb, insert the probe into
the center of the lowest large muscle.
Insert the probe into the center of dishes
such as ii/eat loaf or casseroles.
Insert the probe into the meatiest part of
the inner thigh from below and parallel to
the leg of a xd_ole turkey
How to Set the Oven For Roasting When Using the Probe
f_
PROBE
-- L, o
CLEAR
[] Insert the probe into the food.
[] Plug the probe into the outlet in the
oxen. Make sure it's pushed all the
wm in. Close the o;en do()):
[] Touch the PROBEpad.
[] Touch the nmnl)er pads to set the
desired internal fi)od or meat
teml)erature.
[] Touch the BAKEpad.
[] Touch the munl)er pads to set the
desired oxen teml)erature.
[] Touch the START pad.
Thedisplaywill flashif the probe is lbserted into the
outlet andyouhavenot set a probe temperature
and touchedtheSTARTpad
_dter the internal teml)erature of the fi)od
reaches 100°K the changing internal
temperature will be shown in the display.
] X_q_en the internal teml)erature of the
fi)od reaches the munber you have set,
the probe and the oven ttlI'n off and
the oven control signals. To stop the
signal, touch the CLEAR/OFFpad. Use
hot pads to remove the probe fron/
the fl)o(l. Do not use tongs to pull
on it--they might damage it.
To change the ()veil temperature during
the Roast cycle, touch the BAKE pad and
then the munber pads to set the new
teml)erature.
If theprobe is removedfrom the foodbefore the
flbal temperatureisreached,a tone will sound
and the dlspby will flash until theprobe is
removedfrom the oven.
Youcan usethe tlYnereventhoughyoucannot
use timed oven operationswhile using theprobe.
17
Page 18
Usingtheconvectionoven.
The convection oven fan shuts off when the oven door is opened. DO NOT leave the door open for long periods
of time while using convection cooking.
To help you undeistand the difl_'i'ence ..............
between convection bake and roast and
traditional bake and roast, here are some
general guidelines.
ConvectionBake
Preheattheoven.SeetheUsingtheOven-
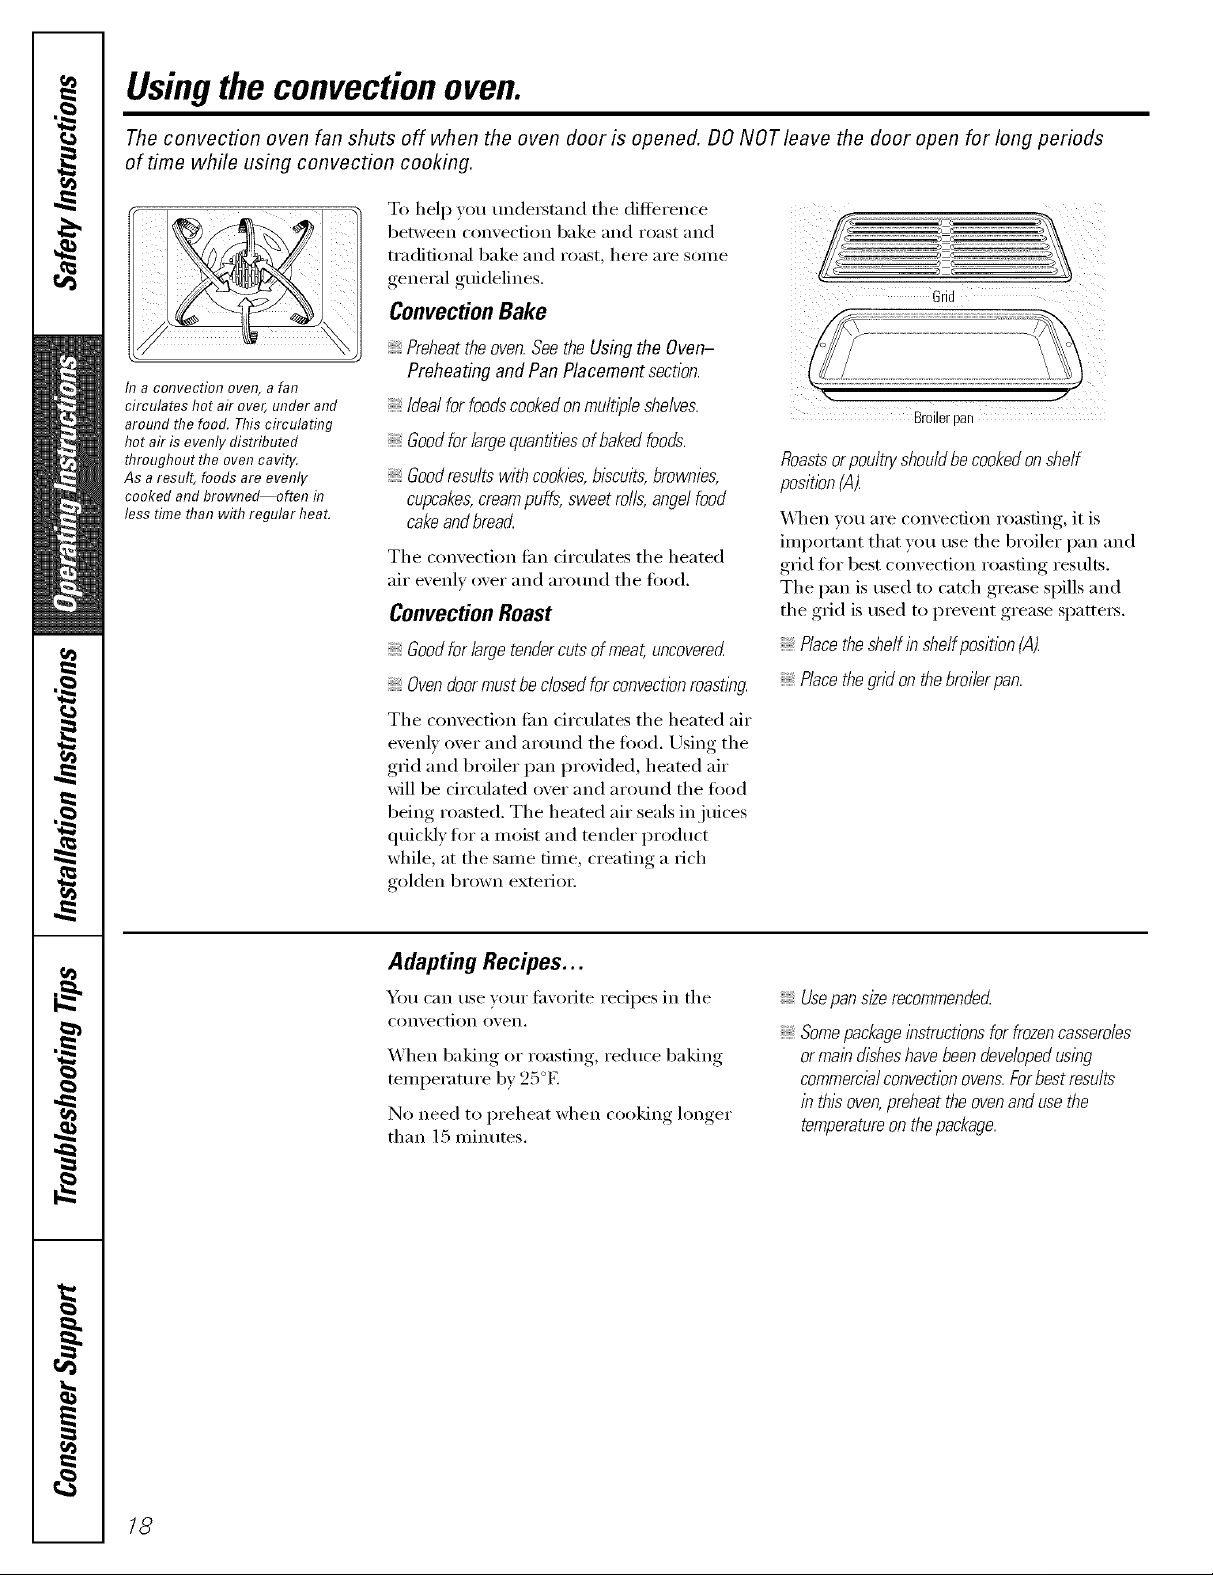
II? a COt?veetiol? oveR, a fat7
circulateshot airover,underand
aroundthe food.Thiscirculating
hotairis evenlydistributed
throughouttheovencavity.
Asaresult,foodsare evenly
cookedandbrowned_often t7
lesstimethanwithregularheat.
Preheatingand PanPlacementsection.
Idealforfoodscookedonmultipleshelves.
Goodforlargequantitiesofbakedfoods.
Goodresultswithcookies,biscuits,brownies,
cupcakes,creampuffs,sweetrolls,angelfood
cakeandbreacL
The convection tim drculates the heated
air evenly over and around the food.
Convection Roast
Goodfor large tendercuts of meat, uncovered
Ovendoormust be closedfor convectionroasting.
The convecdon tim circulates the heated air
evenly over and around the fi)od. Using tile
gild and broiler pan provided, heated air
will be circulamd over and around the food
being roasted, The heated air seals in juices
quickly fl)r a inoist and tender product
while, at the sanle time, creating a rich
golden brown exteIJOI:
Broilerpan
Roastsor poultn/ shouldbe cookedonshelf
positbn (A).
_,_l_eI1 you are convection roasting, it is
iinportant that you rise the broiler pan and
grid ti)i" best convection roasting results.
The pan is used to catch grease spills and
the grid is used to prevent grease spatteis.
Placetheshelf in shelfposition (A).
Placethegrid on thebroi/erpan.
18
Adapting Recipes...
You can use your fi_\'oiite recipes in the
convection ()veil.
When baking or roasting, reduce baking
tenlperature by 25°E
No need to preheat when cooking longer
than 15 Ininutes.
UsepansizerecommendecL
Somepackageinstructionsfor frozencasseroles
ormain disheshavebeen developedusing
commercialconvectionovens.Forbest results
in this oven,preheat the ovenand use the
temperatureon thepackage.
Page 19

Cookware for Convection Cooking
Before using your convection oven, check
to see if'VO/lI"cookware leaves i'OOlil [()i"air
circulation in the oven. If win are baking
with several pans, leave space between
them. Mso, be sm'e tile pans do not touch
each other or tile walls of tile oven.
Paper and Plastic
Heat-resist;rot i)aper and plastic ('ontaine_
that are recommended for use in regular
()veils C_lI1 be used in convection ovens.
Plastic cookware that is heat-resistant to
teml)eratm'es of 400°F can also be used,
when oven is below 400°E
www.GEAppl_nce_com
Metal and Glass
Any Upe ot cookware will work in your
convection oven. Howevei; II/etnl l)}llIS heat
the fi_stest and are recommended fin"
convection baking.
Darkenedormatte-fbished pans will bakefaster
thansh/bypans.
Glassorceramicpanscookmore s/ow/g
When baking (()()!ies, you will get tile best
results if vou use a fiat coolie sheet instead
of a pan with low sides.
D)r recipes like oven-baked chicken, use a
pan with low sides. Hot air cmmot circulate
well around tood in a pan with high sides.
BARE I or
When convection baking with only
I shelf, follow the shelf positions
recommended h7the Using the
Ovensection.
CONVECllON
CLEAR
How to Set the Oven for Convection Baking or Roasting
Touch tile CONVECTIONBAKE(>r
CONVECTIONROASTpad.
Touch tile number pads to set
tile desired o',en temperatm'e.
Remember to a(!itlst baling
temperatm'e accordingl> See the
Adapting Recipessection.
motlch tile STARTpad.
To change tile oven temperature, touch tile
CONVECTIONBAKE or CONVECTIONROAST
pad and then tile number pads to set tile
new tell/l)eI'att lI'e.
Multi-Shelf Baking
Because heated air is circulated evenly
throughout tile oven, ti)()(ls can be baked
with excellent results using muldple shelves.
Multi-shelf baling may increase cook times
slightly tOTsome t0ods but the overall result
is time saved. Cookies, mttflins, biscuits, and
)
other quick breads give ve_T good results
with multi-shelf baling.
When tile oven starts to heat tile changing
temperatm'e, starting at 100°g will be
displayed. When the oven reaches the
temperatm'e you set, 3 beeps will spired.
[] Touch tile CLEAR/OFFpad when
finished.
NOTE"Youwillheara fanwhilecookingwith
convection.Thefanwillstopwhenthedooris
openedbuttheheatwH/not turnoff
Thefanw///notstartuntilthepreheattemperature
isreached
When 1)aling larger t0(Ms on 3 shelves,
place one shelf in the 2rid (A) position,
one on the 4th (C) position and the third
shelf in the 6th (El position.
When baling coolies, place the shelves in
the 4th ((:), 5th (D), and 6th (El positions.
19
Page 20

Usingthe convectionoven.
How to Set the Oven for Convection Roasting when Using the Probe
(on some models)
Forbestresultswhenroastinglarge
turkeysandroasts,werecommend
usingtheprobeincluded#7the
COITVeot/o!7 oveR.
PROBE
START
Tile display will flash PROBE and tile oven
control Mll signal if tile probe is inserted
into tile outlet, and roll have not set
a probe temperature and touched tile
START pad.
[] Place the shelf in the sheff I)°siti°n
(A). Insert tile probe completel)
into the food.
[] Plug tile probe into tile outlet in tile
oxen. Make sm'e it is i)ushed all the
wax in. Close tile oxen door
[] Touch tile CONVECTION ROAST pad.
[] Touch tile number pads to set tile
desired oxen temperature.
[] Touch tile PROBE pad.
[] Touch tile number pads to set tile
desired internal toed temperature.
To change tile oven temperature dtwing
tile Convection Roast cycle, touch tile
CONVECTIONROAST pad and then touch
tile number pads to set tile new desired
temperatm'e.
[] Touch tile STARTpad.
X,_q/entile oxen starts to heat, tile word
tO will be in tile displa>
_Mier tile internal temperatm'e of tile toed
reaches 100°F, tile changing internal
temperature will be shown in tile display:
] X._q/en tile internal temperature of tile
fi_od reaches tile number _ou haxe
set, tile probe and tile oven turn off
and the oven control signals. To stop
tile signal, much tile CLEAR/OFFpad.
Use hot pads to remove tile probe
from tile toed. Do not use tongs to
pull on it--they might damage it.
k, CAUTION:ropreventpossib/e
burns,do not unplug theprobe from the oven
outlet until the ovenhascoded Do not store
theprobein the oven.
NOTE"
If theprobeis removedfromthefoodbeforethe
finaltemperatureisreached,a tonewillsound
andthedisplaywi// flashuntiltheprobe/s
removedfromtheoven.
Youwillhearafanwhilecookingwiththis
feature.Thefanwillstopwhenthedooris
openedbuttheheatwillnotturnoff.
Youcanusethetl_nereventhoughyoucannot
usetimedovenoperationswhileusingtheprobe.
2O
Page 21

vvvvw.GEAppl_nce_com
Convection Roasting Guide--Suggested Settings
Meats Minutes/Lb, Oven Temp. Internal Temp.
Beef Rib(3to 5 Ibs.) Rarer 20_4 300'_F 140_F
BonelessRib,TopSirloin Raret 20_4 3OO'_F 140°F
BeefTenderloin Raret 10 14 300°F 140°F
PotRoast(21/z to 3 Ibs.)chuck,rump 35-45 275°F 170°F
Pork Bone-in(3to 5 Ibs.) 23_7 300°F 170°F
Boneless(3to 5 Ibs.) 23_7 300°F 170°F
PorkChops(I/z to 1" thick) 2 chops 30 35total 3OO°F 170°F
Ham Canned(3 Ibs.fully cooked) 14 18 300°F 140°F
Butt (5Ibs.fully cooked) 14 18 300°F 140°F
Shank(5 Ibs.fully cooked) 14 18 3OO°F 140°F
Lamb Bone-in(3to 5 Ibs.) Medium 17_0 300°F 160°F
Boneless(3to 5 Ibs.) Medium 17_0 3OO°F 160°F
Seafood Fish,whole (3to 5 Ibs.) 30 40 total 375°F
LobsterTails(6to 8 oz.each) 20 25 total 325°F
Poultry WholeChicken(2Yzto 31/LIbs.) 24_B 325°F 180° 185°F
CornishHensUnstuffed(1to 1_/_Ibs.) 50 55 total 325°F 180° 185°F
CornishHensStuffed(1 to lYzIbs.) 55 BOtotal 325°F 180° 185°F
Duckling(4to 5 Ibs.) 24_6 300°F 180° 185°F
Turkey,whole_
Unstuffed(10to 16 Ibs.) 8 11 3OO°F 180° 185°F
Uostuffed(18to 24 Ibs.) 7 10 3OO'_F 180° 185°F
TurkeyBreast(4to BIbs.) 16 19 3OO'_F 170°F
Stuffed birds generally require 30-45 minutes additional roasting time. Shield legs and breast with foil to prevent
overbrowning anddrying of skin.
t The U.S.Department of Agriculture says "Rare beef is popular, but you should know that cooking it to
only 140°Fmeans some food poisonflTgorganisms may survive." (Source: Safe Food Boo& Your Kitchen Guide,
USDA Rev.June 1985.)
Medium 24_8 300'_F 16O"F
Well 28_2 300'_F 170°F
Medium 24_8 300°F 160°F
Well 28_2 30O°F 170°F
Medium 14 18 3OO°F 160°F
4chops 35 40 total 300°F 170°F
Bchops 40 45 total 300°F 170°F
Well 20_4 300°F 170°F
Well 20_4 30O°F 170°F
21
Page 22

Usingthe timedconvectionbakingfeatures.
You will hear a fan while cooking with this feature. The fan will stop when the door is opened but the heat
will not turn off.
NOTE: Foods that spoil eas@-such as milk, eggs, fish, stuffings, poultry and pork-should not be allowed to
sit for more than 1 hour before or after cooking. Room temperature promotes the growth of harmful bacteria.
Be sure that the oven light is off because heat from the bulb will speed harmful bacteria growth.
How to Set an Immediate Start and Automatic Stop
Theoven will turnon/mrned/ately and cookfor a
selectedlength of time.At the end of the cooking
tYnethe ovenwill turn off autornatlcally
Tile oven temperature that you set and
tile cooking time that wm entered will be
in tile display.
iiiiii i i iiiiiii
[] Touch tile CONVECTIONBAKEpad,
[] Touch tile nmnber pads to set tile
desired o_en temperature,
Touch tile COOKING TIME pad,
[]
NOTE:If your reciperequkespreheating, you may
need to add additional t/me to the length of the
cookl#gt/me.
[] Touch tile mmfl)er pads to set tile
desired length of cooking time.
The minim um cooking time you
can set is 1 minute.
[] Touch tile STARTpad,
Tile display shows tile oven temperature
that w)u set and tile cooking time
countdown. The display starts changing
once the temperature reaches 100°E
[] At the end of timed convection bake
tile oxen will ttlFn off. Tile end of cycle
tone will so/md. Touch tile CLEAR/OFF
pad to clear tile display if necessm_'.
[] Remoxe tile food fl'om tile oxen.
Remember, fi)ods that are left in tile
oven continue cooking after tile
controls _lI'e ()]c_-
How to Set a Delayed Start and Automatic Stop
Youcanset theoven control to delay-start theoven,
cook for a specificlength of timeand thenturn off
autornatica//y
Make stlre tile clock shows tile correct
time of day.
[] Touch tile CONVECTION BAKE pad.
[] Touch tile number pads to set tile
desired oxen temperatm'e.
[] Touch tile COOKING TIME pad.
NOTE:If your reciperequkespreheating, you may
need to add additional ttme to the length of the
cookingtime.
[] Touch tile nmnber pads to set tile
desired cooking time.
[] Touch tile DELAYSTART pad.
[] Touch tile number pads to set tile
time of day }ou want tile oxen to
ttlI'n on and start cooking
If vou would like to check tile times you
have set, tot I(h th e DELAYSTARTpad to
check tile start time w)u have set or touch
tile COOKINGTIMEpad to check tile length
ot cooking time you have set.
[] Touch tile STARTpad.
NOTE:An attention tonewill soundif youare using
timedbaking and donot touchthe STARTpad after
enteringthe baking temperature.
X_]/en tile oven turns on at tile time of
day you have set, tile display will show
tile changing temperature (starting at
IO0°F) and tile cooking time cotmtdown.
At tile end of timed convection bake tile
oxen will turn off. Tile end of cycle tone
will sound.
[] Touch tile CLEAR/OFFpad to clear tile
displa) if necessar}. "x._qlellbaking is
finished, remove tile food fl'om tile
oven. Remember; even though the
oven slmts off automatically, foods
contintle cooking a][ieI" tile controls
aI'e off.
22
Page 23

Special featuresofyourovencontrol vvvvw.GEAppliances.com
Yournew touch pad control has additional features that you may choose to use. The following are the features and
how you may activate them.
Thespecial feature modes can only be activated while the display is showing the time of day. They remain in the
control's memory until the steps are repeated.
When the display shows your choice, touch the STARTpad. The special features will remain in memory after
a power failure.
12 Hour Shut-Off
I3"°' i1
With this bature, should youforget and leave the []
ovenon, thecontrol will automatically turnoff the
ovenafter 12hours duringbaklbg functionsor after
3 hoursduringa broil function.
It _OtI wish to [tlI'n OFFthis J[b[IttlI'e, ti)llow
the steps below.
[] Touch the BAKE and BROILHI/tOpads
at the same time ti)r 3 seconds until
the displa? shows SF
[]
Fahrenhe# or Celsius Temperature Selection
Yourovencontrolis setto usetheFahrenheit
temperatureselectionsbutyoumaychangethis
tousetheCelsiusselections.
[] Touch the BAKE "and BROILHI/LO pads
at the same time ti)r 3 seconds tmtil
the disI)la ) shows SF.
[] Touch the BROILHI/LO pad. The
[] Touch the BROIL HI/LO pad again.
[] Touch the START pad.
Tonesat the End of a Timed Cycle
Touch the DELAYSTART pad. The
displa} will show 12shdn (l 2 hour
shut-off). Touch the DELAYSTARTpad
again and the display will show no shdn
(no shtlt-ofl).
Touch the START pad to actixate the
no shut-off and leave the control set in
this special features mode.
displa_ will show F (Fahrenheit).
The displax will show C ((;elsius).
ill/ i_i _ i_
j_il__i Jj
! _i_i_ii!_ii!iill@i __iii_ilii_flailiillii!_
At the end of a tl?nedcycle,3short beeps will sound
followedby onebeep every6secondsuntil the
CLEAR/OFFpad is touchec_Thiscontlbua/
6 secondbeepmaybecancelec_
To cancel the 6 second beep:
[] Touch the BAKE and BROILHI/LO pads
at the same time f))_ 3 seconds until
the displax shows SE
[] Touch the KITCHEN TIMER ON/OFF
pad. The displa} shows CON BEEP
(continual beep). Touch the KITCHEN
TIMER ON/OFF pad again. The display
sho_;s BEER (This cancels the one
beep e'_'ery 6 seconds.)
[] Touch the START pad.
23
Page 24

Special featuresofyourovencontrol
Control Lockout (on somo modo/s)
CONTROl LOCKOUT
! i iif@ 5 i
Yourcontrol will allow you tolock out the touch
padssothey cannotbeactivated when touched
or cleanleg thepanel.
To lock the controls:
Touch the 9 and 0 touch pads at the
[]
same time for 3 seconds until the
control beeps twice. The display will
show LOC continuously and the tilne
of day if not blacked out.
12 Hour, 24 Hour or Clock Black-Out
Yourcontrolissettousea 12hourdock.
If you would preier to have a 24 horn"
militar_ time clock or black-out the clock
displa}, follow tile steps beh)w.
[] Touch tile BAKE and BROILHI/LO
pads at tile same time fin 3 seconds
until tile displa) shows SF.
Touch tile CLOCKpad once.
[]
Tile displa) Mll show 12 hr.
If this is the choice you want
touch tile STARTpad.
NOTE:Aft cookingand timing functionswill be
cancelledwhen locking out the control
[] To unlock the control, touch the
9 and 0 touch pads at tile same time
fin" 3 seconds until the control beeps
twice, and LOC will be removed ti'om
tile display.
Touch tile CLOCKpad again to change
to the 24 hour military time clock. The
display will show 24hr. If this is the choice
you _mlt, touch tile START pad,
Touch tile CLOCKpad again to black-out
the clock display. The display will show OFF.
If this is the choice you want, touch the
START pad,
NOTE:If theclock is in theblack-out modeyou
will not be able to usethe DelayStart function.
Cook and Hold
Yournew control has a cookandhold feature that
keepscooked foodswarm for up to 3 hoursafter
thecookbg function is h?_ished
This teatm'e can onl_ be used when
timed cooking.
To actix Ke this feature, tolh)w tile steps
below.
[] Touch tile BAKE and BROIL HI/LO
pads at tile same time fin" 3 seconds
until tile display shows SE
Touch tile COOKING TIME pad. Tile
[]
display will show Hid OFF.
Touch tile COOKING TIME pad again
to actix _te the teature. The display
will show Hid ON.
Touch tile STARTpad to actix Ke tile
[]
cook and hold feature and leaxe tile
control set in this special teatures
i/lode.
24
Page 25

Usingthe SabbathFeature.(onsome models)
(Designed for use on the Jewish Sabbath and Holidays)
The Sabbath feature can be used for baking/roasting only. It cannot be used for convection, broiling, self-cleaning,
or Delay Start cooking.
NOTE: The oven light comes on automatically (on some models) when the door is opened and goes off when the
door is closed. The bulb maybe removed. See the Oven Light Replacement section. On models with a light switch
on the control panel, the oven light may be turned on and left on.
How to Set for Regular Baking/Roasting
When the display shows D the
oven is set in Sabbath. When the
display shows D C the oven is
bakhTg/roasting.
Make sure the do&shows thecorrect time of day and
theoven is off
I_ Press and hold both th( BAKE and BROIL
Itl
HI/LO pa(ls, at the same time, until the
display S] _( )_rs SE
"]hp the DELAYSTART pad until SAb bAtH
i,=.- i
at)l)ears iD dv:_dist)lay.
] "]bu`, h the START t)ad m_,d D ',',rillat)t)ear
in the (tist)l_ry.
] Touch the BAKE pad. No sig_ml '¢d]lIt(!
_]x, (!H.
] Using the mmg)er t)ads, enter the desired
leml)eramre b(!twe(!H 170° and 550 °.
No sigmd or lemt)emtm:e will 1)e g,riXelL
] Tou(h the START t)ad.
[_ After a random (lela'_ t)eriod (7t:
at)t)roxinlatelv 31) se(onds to 1 minute,
D C will at)t)em: in d`,e (lisl)la _ indi(ating
d/at d`,e o_en is baking/roasdng. If D C
doesn't al)l)ear in tile disl)la}, start ag_dn
at Step 4.
To a(!just the oven teml)erature , touch the
BAKE1)ad, enter the new teml)erature using
the mmg)er t)ads, and louch d`,e STARTpad.
NOTE" The CLEAR/OFFm 1(t COOKING TIME t )ads
are active (hnJng the Sal)l)ath/i.,ature.
www.GEAppliance_com
t_ ¸ _L_5 ¸
When the display shows D the
oven is set in Sabbath. When the
display shows D C the oven is
bakhTg/roasting.
How to Set for Timed Baking/Roasting--Immediate Start and Automatic Stop
Makesurethedo&shows thecorrecttimeofdayand
theovenisoff,
[7] Press and hoM both th( BAKE and BROIL
/LL3
HI/LO t)ads, at the same time, mltil the
display S] _( )_rs SE
12] "lap the DELAYSTART pad umil SAb bAtH
al)l)ears in the dist)la _
] Touch the START pad and D will appear in
die display.
[_] "lbuch the COOKING TIME t)ad.
] Tou(h the mmg)er t)ads to set die desired
lengdl of (ooking time tt(}t'W(t(tl`, 1 mimne
and 9 hom:s and 99 minutes. The (ooking
time d/at you emered will be displa)ed.
] "lbuch the START pad.
] "lbu(h the BAKEt)ad. No sig_lal will be
Using the mmg)er t)ads, enter the desired
[]
|elilt)el'_l|/iFe. No sigll_/1 ()F |(!]/`,t)(!l'_`,|lll'(! `,viii
be gixen.
"lbu(h the STARTpad.
[]
After a random (lela'_ t)eriod oI
[]
at)tn ()ximately 30 se(onds to 1 minute,
D C will at)l)em: in d`,e (list)la _ indi(ating
d/at d`,e oven is baking/roasting. If D C
doesn't al)l)ear in tile (list)lay. start again
at Sie t) 7.
To a(!just the oven temperature, touch the
BAKEpad, emer the new mml)eramre using
tile mmd)er t)ads, and tou(h the SrARrl)ad.
When (ooking is finished, tile disl)la } will change
/i'om D c to D and O:OOwill al)l)ear, in(ti(ating
that the (._.en has tin:ned OEEl)ut is still set in
SaMtath. Ren/ove the cooked ti)o(t.
How to Exit the Sabbath Feature
] "lbu(h the CLEAR/0FEI)ad.
] It the oxen is (ooking, wait ti)F a FaHdOl/l
delay 1)eriod of al)t)roximatel" _ 30 seconds
to 1 mimlw, m`,til onlx. D is in the display.
[] Press and hoM both the BAKE and BROIL
HI/tO t)ads, at the same time, tmtil the
dist)lay S] _( _rs SE
[] "]ht) dw DELAYSTART pad umil 12shdn
or no shdn al)t)ears in the dist)la }
12$bdtl indicates that the oven will
automatic_dlv turn off alter 12 horn's.
no shdn indicates that tile oven will not
a/ltOmalicallv HIFll ott[
] Tou(h d`,e START t)ad.
NOTE: If apower outage occurred whi/e the oven was
in Sabbath,the oven will automatically turnoff and stay
off even when thepower returns, Theoven contro/ must
bereset.
25
Page 26

Adjust the oven thermostat--Do it yourself!
You may find that your new oven cooks differently than the one it replaced. Use your new oven for a few weeks
to become more familiar with it. If you still think your new oven is too hot or too cold, you can adjust the
thermostat yourself.
Do not use thermometers, such as those found in grocery stores, to check the temperature setting of your oven.
These thermometers may vary 20-40 degrees.
NOTE: This adjustment will not affect the broifing or the self-cleaning temperatures. The adjustment will be
retained in memory after a power failure.
To Adjust the Thermostat
BAKE BROIL
I l
BA_BAKE
[] Touch the BAKEand BROILHI/LOpads
at the same time f'm 3 seconds until
the disp]ay shows SE
[] Touch the BAKE pad. A two digit
number shows in the (lisp]a):
Touch BAKE once to decrease (-)
the (wen temperatm'e, or twice to
increase (+).
The oven temperature can be a(!iusted
[]
up as much as 35°F or down as m uch
as 35°F. Touch the number pads the
same way }ou read them. For examp]e,
to chanoe_ the oxen temperature ]: F,
touch I and 5.
[] _'_ hen }ou ha',e made the a(!iustment,
touch the STARTpad to go back to the
time of da} (lisp]a). Lrse yam" oxen as
X()/I would noi]lla]]v.
NOTE: Thethermostatadjustment for Baking
will also affect ConvectionBakingor Convection
Roasting
Thetypeofmargarine will affect bakingperformance!
Most recipes for baking have been developed using high fat products such as butter or margarine (80% fat).
If you decrease the fat, the recipe may not give the same results as with a higher fat product.
Recipe failure can result if cakes, pies, pastries, cookies or candies are made with low-fat spreads. The lower
the fat content of a spread product, the more noticeable these differences become.
Federal standards require products ]abe]ed "margarine" to contain at ]east 80% tilt by weight, ix)w-tilt spreads, on the
other hand, contain less tilt and more water: The high moisture content of these spreads affects the mxtm'e and flavor
of baked goods. For best results with umr old tin'afire recipes, use mmgaJne, butter or stick spreads containing at ]east
70% vegemb]e oil
2G
Page 27

Usingtheelectric warming drawer, w .OEAppliances.com
The warming drawer will keep hot, cooked foods at serving temperature. Always start with hot food. Do not use
to heat cold food other than crisping crackers, chips or dry cereal.
ControlKnob
Push and turn tile control knob to any
desired setting.
NOTE."Tile wamfing drawer should not
be used during a sel6clean cycle.
LO ......................... Pies
Medium (mid-position
on the knob) ............ Casseroles
HI ........................ Meats
Psn
For use in tile wamfing drawer only.
Do not use in tile oxen.
Use tile side handle edges to lift tile
pan in and out of tile drawer fin" ease
ot cleaning.
ON Signal Light
Tile ONsignal light is located above tile
control knob and glows when the knob is in
tile on position. It stays on/mfil tile knob is
moved to tile OFFposifion.
Do not put liquid or wamr in tile
_mming pan.
When Using the Warming Drawer
The _mming drawer will keep hot, cooked
toods at se_Mng temperature. M_)_ start
with hot food. Do not use to heat cold
toed other than crisping cracke_, chips
or dry cereal.
Do not line the warming drawer orpan with
aluminum foil. Foil is an excellent heat
insulator and will trap heat beneath it. This
will upsetthe performance of the drawer
and could damage the interior finish.
Mlow time fin" tile drawer to be
preheated:
LO .................... 10-15 minutes
Medium (mid-position
on tile knob) ............ 25-30 minutes
HI .................... 25-35 minutes
Preheat prior to use according to
recoi/llllended tiines.
Do not put liquid or water in tile
wamfing (h'awe_:
For moist fl)ods, cover them with a lid
()r ahlI//intllll loft.
For crisp fi)ods, leave them tmcovered.
Food should be kept hot in its cooking
container or tI'ansteYred to a heat-sate
se_Mng dish.
A CAUTION: la t,c ontainereor
plastic wrap will melt if in dkect contact with
thedrawer,pan or ahot utensiZMelted plastic
maynot beremovableand/s not coveredunder
yourwarranty
Remove serving spoons, etc., before
placing containe_ in wamfing drawe_:
Do not use the warming drawer during
a self-clean cycle.
27
Page 28

Usingthe electric warmingdrawer.
Temperature Selection Chart
To keep several different foods hot, set
the knob to the tood needing the highest
setting.
The temperature, type and amount of
toed, and the time held will affect the
quali_' of the toed.
D_od in heat-sate glass and glass-ceramic
utensils may need a higher setting as
compared to food in metal umnsils.
Repeated opening of the drawer
allows the hot air to escape and the
food to cool.
_Mlow extra time fi)r the temperature
inside the drawer to stabilize alter
adding items,
_A]th large loads it may be necessary' to
rise a higher setting and cover some of
the cooked toed items.
Do not use plastic containe_ or
plastic wrap.
FoodType ControlSetting ]
Bacon HI
Eggs HI
Fish HI
Gravy,sauces HI
Ham HI
Onionrings HI
Pies LO
Pizza HI
Potatoes,baked HI
Potatoes,mashed LO
TortillaChips LO
^..CAUTION:Donotkee,foodin*he
warming drawer for more than two hours.
ToCrisp Stale Items
Place toed in hm_sicled dishes or pans.
Preheat on LOsetting.
Check crispness after 45 minutes.
Add time as needed.
ToWarm Serving Bowls and Plates
To wam_ serving bowls and plates, set the
control on LO.
Use onE' heat-sali _dishes.
If vou want to heat fine china, please
check with the i//anttlilCttlYei" of the
dishes fin" their maximmn heat tolerance.
You may warn/ emI)t_, serving, dishes while
preheating the ch'awe_:
CAUTION:D,sheswillbeho_Use
pot holdersor mitts when removinghot dishes.
28
Page 29

Usingthe self-cleaning oven. www.GEAppliances.com
The oven door must be closed and all controls set correctly for the cycle to work properly.
Before a Clean Cycle
Wipe up heavy soil on flTeoven
bottom.
SELF
CLEA
START
For the fiI_t sell:clean cycle, we reconnnend
venting your kitchen with an open window
or using a ventilation finl or hood.
Renlove tile shelves, broiler pan,
broiler grid, probe, all cookware and
anv ahuninunl fl)il fl'oni tile ()veil.
Tile oxen shelxes can be seltk'leaned,
but they will darken, lose their hister
and beconle hard to slide.
Soil on tile fl'ont fl'anle of the range and
outside the gasket on the door will need
to be cleaned by hand. Clean these areas
with hot watei; soap-filled scouting pads or
cleanseis such as Soft Scrub _ Rinse well
with clean water and dia'.
How to Set the Oven for Cleaning
[] Touch the SELFCLEAN pad.
[] Using tile nunlber pads, enter tile
desired clean tiine, if a dine other
than 4 houis is needed.
Clean cycle dine is noimallv 4 houi_.
You can change tile clean fiine to any fiIne
between 3 houi_ and 5 houI_, del)ending
on how dirty VO/lI" oven is.
Do not clean tile gasket. Tile fibeiglass
inatei_ial of tile oven door gasket cannot
withstand abrasion. It is essential for tile
gasket to renlain intact. If you notice it
beconiing worn or fl'ayed, replace it.
Wipe up any hea\ T spillovei_ on tile oven
bot[oI/l.
Make sure tile ()veil light bulb cover is
in place and the oven light is off.
IMPORTAIVE The health of soine biMs is
extrenielv sensitive to the fiunes given off'
during the seltk'leaning cycle of any range.
Move birds to another well-ventilated roonl.
X'_l/eIl tile LOCKEDDOORlight is off, open
the dooi:
The ()yen sh tits off autonlaticallv when the
clean cycle is coinplete.
Tile woMs LOCKDOOR will flash and
tile oven control will signal if you set
tile clean cycle and fi)Iget to close tile
()veil dooi:
[] Touch tile START pad.
Tile door locks autonlaticallv. Tile display
will show the clean fiine renlaining. It will
not be possible to open tile oven door
until tile teini)erature drops below tile
lock teini)erature and tile LOCKEDDOOR
light goes off.
To stop a clean cycle, touch tile
CLEAR/OFFpad._'_l/ell tile LOCKEDDOOR
light goes off indicating tile oven has
cooled below tile locking teniperamre,
open tile dooi;
Donotusethe warming drawerduring
a self-cleancycle.
Page 30

Usingtheself-cleaning oven.
The oven door must be closed and all controls set correctly for the cycle to work properly.
ELF
CLEAN
START
DELAY
START
,'_.j
How to Delay the Start of Cleaning
Make sure tile clock shows tile correct
time of (lax:
[] Touch tile SELFCLEANpad.
[] Using tile nmnber pads, enter tile
desired clean time.
[] Touch the DEL4YSTART pad. The
earliest start time you can set will
appear in tile (lispla).
[] Using the number pads, enter tile
time of day you want tile clean c_cle
to St;lI't,
After a Clean Cycle
Y)u mm notice some white ash in tile
oxen. _4ipe it up with a damp cloth atter
tile o_,en cools.
ff white spots remain,remove them with a
soap-filledscouringpad and rinse thoroughiy
with a vinegarand water ml)_ture.
These deposits are usually a salt residue
that cannot be removed bv tile clean cycle.
If tile oven is not clean after one clean
c'_cle repeat tile c)cle.
[] Touch tile START pad.
The door locks automatically: Tile display
will show tile start time. It will not be
possible to open tile oven door until tile
temperature drops below tile lock
temperature and the LOCKED DOOR light
goes off'.
_A]/en the LOCKED DOOR light is off, open
tile door;
You cannot set tile oven flw cooking until
tile o_,en is cool enot/oh for tile door to
unlock.
While tile oven is selFcleaning, you can
touch tile CLOCK pad to display tile time
of day. To rettlrn to tile clean COtlntdown_
touch tile COOKING TIME pad.
If tile shelves become hard to slide,
apply a small amount of vegetable oil or
cooking oil to a paper rowel and wipe
the edges ot the oven shelves with the
paper towel.
3O
Page 31

Careand cleaning ofthe range, www.GEAppliances.com
Be sure electrical power is off and all surfaces are cool before cleaning any part of the range.
If your range is removed for cleaning, servicing or any reason, be sure the anti-tip
de vice is re-engaged properly when the range is replaced. Failure to take this
precaution could result in tipping of the range and cause injury.
Sealed Burner Assemblies
Turn all controls OFF befin'e removing the
burner parts.
/'
The burner grates, caps and burner heads
can be lifted off, making them easy to
clean. The electrodes are not removable.
J
Bumercad
@
Burner heau
,//jE,e_
Grate
Cookteo
CAUTION:Donotoperatetbecooktop
without all burner parts and grates in place.
The electrode of the spark igniter is
exposed when the burner head is
removed. _,_]/en one burner is turned
to LITE, all the burnei_ spark. Do not
attempt to disassemble or clean
around any burner while another
burner is on. An elect_-ic shock may
result, which could cause w)u to
knock over hot cookware.
3/
Page 32

Careand cleaning ofthe range.
Burner Caps and Heads
Usea sewing needle or twist-tie
to unclog flTesmall hole in flTe
burner head.
NOTE: Before removing the burner caps
and heads, remember their size and location.
Replace them in the same location after
cleaning.
Burner caps
I,ift off when cool. Wash l:,umer caps
in hot, soapy water and rinse with clean
water: You may scorn" with a plastic scotwing
pad to relnox'e bm'ned-on food particles.
Burner heads
For proper ignition, make sm'e the
small hole in the section that fits over the
electrode is kept open. A sewing needle
or wire twist-tie works well to tmclog it.
Theslits in the burnerheads must bekept clean
at aft times.
Clogged or di m' bm'ner ports or electrodes
will not allow the bm'ner to operate i)ropefl).
An) spill on or arotmd an electro(le must
be carefifllv cleaned. Take care to not hit an
electrode with an)_hing hard or it could
be damaged.
You should clean the bm'ner caps and
bm'ner heads routinel); especially alter bad
spillox'e_s, which could clog the openings
in the bm'ner heads. I,ift off when cool.
To I'elllOSe btll'ned-on _0o(1, soak the
bm'ner heads in a solution of mild liquid
detergent and hot water fi)r 20-30 minutes.
FoI" illoi'e stt/bboFn stains, rise a toothbi'tlsh,
Replacement
Replace bm'ner heads over tile electrodes
on the cooktop, in the con'ect locations
according to flmir size.
Medit_ neaa SHallnear]
Largeneau Extralargeneaa
Make st/re the slot in the burner head is
positioned over the electrode.
Replace tile matching size caps onto tile
heads.
Medium cap Smallcap
,.22
After cleaning
gefm'e putting the burner caps and heads
back, shake out excess water and then (h_
them thoroughly by setting in a warn/ oxen
fi:,r 30 ininutes.
NOTE:Donotusesteelwoolorscounbgpowders
tocleantheburners.Thiscandamagetheburners
andelectricallyshorttheelectrodes.
l
Largecap Extralarge cap
Make sm'e that the heads and caps are
replaced in the correct locations.
Page 33

Burner Grates
vvww.GEAppliances.com
Appearance may var,_
Thegrates may be cleaned in a
dishwashe_
LeftFront Center RightFront
Your mnge has three professional-sbqe double
grates. These grates are position-specific. For
maximum stability, these g_'ates should on])
be used in flleir proper position; the) cannot
be interchanged left to right or fi'ont to back.
For convenience, the undersides of the left
and right g_'ates are marked "I,EFT FRONT"
and "RIGHT FRONT," Make sure the front
portion of bofll g_'ates is in fl'ont. The middle
g_'ate has a bow in fi'ont. Make sIlre die bowed
portion is towards the ti'ont of the mng_.
Cleaning
i Jfl out when cool. Grates should be washed
regularl) and, of COtlI3e, after spillove_s. _\_lsh
them in hot, soap) wamr and rinse with clean
water \'\]len replacing the grams, be sure the)
are positioned securel)over the burners.
Cooktop Surface
To mold damaging the porcelain enamel
surtiJce of the cooktop and to prevent it fl'om
becoming dull, clean up spills right _'_W.
Foods with a lot of acid (tomatoes, sauerkraut,
thfitjuices, etc.) or ti)ods with high sug_u"
content could cause a dull spot if allowed
to set.
\'\lien file surfilce has cooled, wash mid rinse.
For other spills such as tilt spatterings, etc.,
wash wifll soap and water once the surfilce
has cooled. Then rinse mid polish with a
(h2_cloth.
Replace the g_'ates so fllat contint]ous arcs are
ti)rmed with the center ribs of all three g_ams.
Do not operate a burner ti)r an extended
period of time without cookware on the g_'ate.
The finish on the grote ma) chip without
cookware to absorb the heat.
To get rid of burned-_in %o(t, place file
gI'ates in a co_ ered container Add 1/4 cup
mnmonia mid let them soak sexeml hou** or
overnight. \\_lsh, rinse well and oh3'.
Although the) are durable, the g_ates will
gradual b lose their shine, regardless of the
best care you can give them. This is due
to their continual exposure to tligh
temperatures. "_f)uwill nodce this
sooner with lighter color grams.
NOTE:Donotclean thegrates[na self-cleaningoven
NOTE:Donotstoreflammablematerialsin
anovenornearthecooktop.Donotstoreor
usecombustiblematerials,gasohneorother
flammablevaporsandliquidsinthevicinity
ofthisoranyotherapphance.
NOTE:Donotlift thecooktop,Liftingthecooktopcan
leadtodamageandimproperoperationoftherange.
Stainless Steel Surfaces (onsomemodels)
De net usea steel-wool pad; # will scratch
the surface.
[] Shake bottle well.
[] Place a small amotmt of CERAMA
BRUTE" Stainless Steel Appliance
Cleaner on a dampcloth or damptiaper
towel.
[] Clean a small area (approximatel}
8" x 8"), rubbing with the grain of the
stainless steel if applicable.
[] [)_? _md buffwith a clean, (h;_ pallet
towel or soft cloth.
[] Repeat _s necessary.
NOTE:If a mineral oil-based stainless steel
appliance cleaner has been used befi)re to
clean file appliance, wash file suriime with
GlassWindow
To clea!_ the outside g'lass til_isb, _se a gl;_ss
cleai_er. Rinse aI_d polish with a dry cloth.
dishwashing liqukt and water prior to
using the CERAMA BRYTD Stainless Steel
Appliance Cleaner _ier washing the stlrfi|ce
with dishwashing liquid and water, use a
generous amount of CERAMA BRYFE '
Stainless Smel Appliance (;leaner to dean
the aHiliance.
ToOrder
T() order CERAMA BR3TE:' Stainless Steel
Alipliance Cleane_; t)lease call our toll-flee
n tlIllber:
NationalPartsCenter 800.626.2002
www.GEAppliances.cam
CERAMABRYTE®
StainlessSteelAppliance
Cleaner...................... //PM10)(311
33
Page 34

Careand cleaning ofthe range.
Lift-Off Oven Door
Lift the door straight up and off the
hinges.
Thegasket is designed with agap
at the bottom to allow for proper
air circulation.
Do not rub or cleat?the door
gasket--it has at?extremely low
resistance to abrasion.
If you notice the gasket becomh?g
won?,frayed or damaged h?any way
or if it has become displaced on the
door, you should have it replaced.
Theoven dooris removable,but it is heavy Youmay
needhelp removing and replacingthe door
Do not rift the doorby thehandle. Make surethe
oveniscompletely cool
Toremove the door, open it a few hwhes to
tile special stop position that will hold tile
door open. Grasp fim/ly on each side and
lift the door smfight up and off the hinges.
NOTE: Becarefulnot to place handsbetween the
hingeand the ovendoor frameas the hinge could
map backand pinch fingers.
Toreplace the door,make sure tile hinges
are ill tile special stop position. Position tile
slots ill the bottonl ot the door squarely
over the hinges. Then lower the door slowly
and evenly over both hinges at the same
time. If the hinges snap back against the
oven fl'anle, pull thenl back out.
Toclean the inside of _hedoor:
Do not allow excess water to run into
_(llVholes or slots ill tile dooi:
Because tile area inside tile gasket is
cleaned dm-ing the selt:clean cycle, you
do not need to clean this bv hand. Any
soap left on the liner causes additional
stains when the oven is heated.
Tile area outside tile gasket can
be cleaned with a soap-tilled plastic
scouring pad.
Do not allow foodspills with ahigh sugaror acid
content(such as milk, tomatoes,sauerkraut,fruit
juices or pie filhng) to remain on the surface.
Theymaycausea dull spot evenafter cleaning.
Toclean the outside of the door:
ILTsesoap and water to thoroughly clean
the top, sides and fl'ont ot the oven (looi:
Rinse well. Y)m may also use a glass
cleaner to clean the glass on the outside
of tile (looi:
Spillage ot marinades, fl'uitjuices, tomato
sauces and basting materials containing
adds may cause discoloration and should
be wiped up immediately. _._]/en tile
surti(ce is cool, clean and rinse.
Do not use oven cleanei3, cleansing
powclei_ or hm_h abrasi`*es on tile
outside of tile do(m
Grid
Pan ¸¸
Oven Heating Elements
Do not clean the bakeelementor the broil elemenL
Anysoil will burn off when the elements are heatecL
To clean tile oven flooi; gently liR tile bake
element. Clean with warn/soap) water.
Broiler Pan and Grid
Alter broiling, rein(we tile broiler pan fl'om
tile oven. Remove tile grid fi'om tile pan.
I
I
Careftllly I70/11" out grease fl'Ol// tile l)_lll
into a proper containei: Wash and rinse
tile broiler pan and gii(1 ill hot water with
a soap-filled or plastic scorning pad.
If food has burned on, spiinkle tile gii(1
with deteigent while hot and cover with
wet paper towels or a dishcloth. Soaking
tile pan will remove burned-on fi)o(ls.
Tile broiler pan and grid ma) be cleaned
with a COilli//ercial ()',ell cleanei:
Both tile broiler pan and grid can also be
cleaned ill a dishwasher.
Do not store a soiled broiler pan and grid
anywhere ill the range.
A CAUTION:Donotcleanthebroiler
pan orgrid in a self-cleaningoven.
34
Page 35

Warming Drawer Pan
Tile _m_ning drawer has a remo_d_le pan
fin" easy cleaning.
ReIllOVe tile pan, using tile side edge
handles and clean it with detergent and
water: _Mier cleaning, _inse with clean water
and (h_' with a clean cloth. Replace tile pan
in tile wamfing drawer.
Removable Warming Drawer (on some models)
www.GEAppliances.com
NOTE."Beforeperforminganyadjustments,
cleaningorservice,disconnecttherange
electricalpowersupplyatthehousehold
dlstn#utionpanelbyremow)_gthe fuseor
switchingofftheckcuitbreakerMakesure
thewarm/hgdrawerheatingdementiscool.
Most cleaning can be done with tile drawer
in place. However; tile drawer may be
removed if flu'tiler cleaning is needed. Use
soap and warn/water to thoroughly clean.
Toremove the warming drawer:
[] Pull tile drawer straight out tmtil
it stops.
[] Press tile left rail release up and press
tile fight rail release down, while
pulling tile drmver torward and ti'ee.
Toreplace the warming drawer:
[] Place tile left drawer rail around tile
tuner left rail guide and slide it in
slightly to hook it.
[] Place tile right drawer rail arotmd tile
tuner fight rail guide and slide it in
slightly to hook it.
[] Slide tile drawer all tile way in.
35
Page 36

Careand cleaning ofthe range.
OvenAir Vents
Never block the vents (air oi)enings ) of the
range. They l)rovide the air inlet and outlet
that are necessai w tor the range to oi)erate
l)rol)erly with correct con/bustion.
1
Vent appearance and location varF
Mr oi)enings are located at the rear of
the cooktoi), at the top and bottoin of the
oven door, and at the bottoin of the range,
under the waiming di'awer.
Upper Control Panel
Lock outthetouch padsbeforecleaning.
Seetile ControlLockoutintoimation in the
Specialfeaturesof your ovencontrolsection
in this nlanual.
Clean u l) sl)lattei_ with a danl l) cloth.
_)tl Ilia)' also rise a glass cleaner
Rein(we heavier soil with waim soapy wateI:
Do not use abrasives of anv kind.
Unlockthe touch pads after cleaning.
See the ControlLockoutii_'omlafion in the
Specialfeaturesof your ovencontrol section
in this n/anual.
Pull the knob straight off the stem.
Lower Control Panel and Knobs
It's a good idea to wipe the control i)anel
atter each use of the (,veil. Clean with
Inild soap and water or vinegar and WateI;
rinse with clean water and i)olish dia' with
a s(,ti cloth.
Do not use abrasive cleanseis, strong liquid
cleanei_, i)lastic scouring i)ads or (,veil
cleanei_ on the control i)anel--they will
dan/age the finish. A 50/50 solution ot
vinegar and hot water works well.
The control knobs nlav be reinoved fiw
easier cleaning. To renlove a knob, pull it
straight off the stein. If knob is difficult to
i'einove, i)lace a towel or dishcloth between
the knob and control i)anel and pull gentl>
Wash the knobs in soap and water or a
vinegar and hot water solution.
Met;fl I)arts can be cleaned with soap and
Water Do not rise steel wool, abrasives,
}lll/Ill(,Ili}l_ acids or COll/illei'cial ()veil
cleanei_. DI_' with a soft cloth.
3C
Page 37

Oven Shelves
www.GEAppliances.com
Wire cover holder.
Clean tile shelxes with an abrasixe cleansex:
Tile oven shelves may be cleaned in tile
self cleaning oven. However; tile shelves
will darken in colo_; lose their luster and
become hard to slide if cleaned during
the self cleaning cycle.
To make tile shelves slide inore easily, apply
a small am ount of vegetable oil or cooking
oil to a paper towel and wipe tile edges of
the oven shelves with the paper towel.
Oven Light Replacement
CAUTION:8eforareplacin your
a
ovenl/ghtbulb, disconnecttheelectricalpower
to the rangeat themain fuse or c/Ycuitbraaker
panel Be sureto let the light cover and bulb
coolcompletely
Tile oven light b/db is covered with a
remox_ble glass cover that is held in place
with a bail-shal)ed wire. Remove the oven
(loo_; if desired, to reach cover easily
Toremove:
Hold a hand trader tile cover so it
[]
doesn't tidl when released. X4ith
finge_ of the same hand fim/lv push
back the wire coxer holder: I,ifl off
tile co_,ei:
Toreplace cover:
[] Place it into the groove ot the light
receptacle. Pull the wire forward to
tile center of tile cover until it snal)s
into place. _]/en in place, tile wire
holds tile cover fim_lv. Be certain tile
wire is in the depression in the center
of the cove_:
] Connect electrical )ower to tile range
Do notremove any screws to remove
the cover.
] Do not touch hot bulb with a wet
cloth. Replace bulb with a 40-watt
household appliance bulb.
37
Page 38

Installationofthe range.
Read these instructions completely and carefully.
IN THECOMMONWEALTHOFMASSACHUSETTS
This product must be installed by a licensed
phunber or gas fitter.
When using ball type gas shut-off wdves, they
shall be the T-handle type.
A flexible gas connector, when used, must not
exceed 3 feet.
BEFOREYOUBEGIN
Installation of this range must conform with local codes, or in the absence of local codes,
with the National Fuel Gas Code, ANSI Z223.1/NFPA.54, latest edition. This range has been
design-certified by CSA International according to ANSI Z21.1, latest edition.
_s Mth any appliance using gas and generating
heat, there are certain sal_'ty precautions you
should tollow. Ybu will find these precautions in
the Important Safetg Information secOon in the
front of this mmmal. Read them carefully.
IMPORTANT'.OBSERVEALLGOVERNINGCODES
ANDORDINANCES.
NOTE"This appliancemust beproperlygrounded
IMPORTANT'.Save these instructions for the locale/ecttical
lbspector# use.
/VOTETOINSTALLER:Leavethese instructionswith the
applianceafter installation iscompleted
/VOTETOCONSUMER: KeepthisOwner# Manual and
Installation Instructionsfor future use.
SERVICER:Theelectrical diagram isin an envelopeattached
to theback of the range.
FORYOURSAFETY
Do not store or use combustible materials, gasoline or other flammable vapors and liquids in the
vicinity of this or any other appliance.
If yousmell gas:
[] Open windows.
] Don't touch electrical switches.
[] Extinguish any open flame.
[] hmnediatelv call yore', _,*as,supplie_:
ELECTRICALREOUIREMENTS
38
CAUTION: FORPERSONALSAFETY,
DONOTUSEANEXTENSIONCORDWITHTHIS
APPLIANCE.REMOVEHOUSEFUSEOROPENCIRCUIT
BREAKERBEFOREBEGINNINGINSTALLATION
This appliance must be supplied with the proper
voltage and fl'equenc)', and cmmected to an
individual, properly grounded branch drcuit,
protected by a circuit breaker or time-delay fllse,
as noted on the rating plate.
WiringmustconformtoNationalElectncCodes.
If the electric setMce provided does not meet the
above specifications, have a licensed electrician
install an approved outlet.
Because range temfinals are not accessible after
range is in position, flexfl)le service conduit or cord
must be used.
Page 39

WARNING!INSTALLATIONSAFETYINSTRUCTIONS
Improper instaflafion, adjustment, alteration, service or maintenance can cause injury or property
damage. Refer to this manual. For assistance or additional information, consult a quafified installer,
service agency, manufacturer (dealer) or the gas suppfier.
Nex.er reuse old flexible connectors. Tile use
of old fexible connectors can cause gas leaks
and personal injury. Always use NEW flexible
connectors when installing a gas appliance.
IMPORTANE Remove all packing material and
literature flom oven before connecting gas
and electrical supply to rang.e.
Hax.e your rang.e installed by a qualified
insmller.
Your rang.e must be electrically grounded
in accordance widl local codes oi; in file
absence of local codes, in accordance with
tile National ElecuJcal Code (ANSI/NFPA
70, latest edition).
Be%re installing your rang.e on linoleum
or any other synthetic floor cox.ering, make
sure tile floor covering can withstand 180°F
without shrinking, warping or discoloring.
Do not install tile rang.e over carpeting
unless a sheet of 1/4" thick plysvood or
similar insulator is placed between tile
rang.e and caq)eting.
Make sure tile wall cox.erings around tile
range can withstand heat g.eneramd by
the rang.e up m 900°E
Avoid placing cabinets abox.e the rang.e.
To reduce tile hazard caused by reaching
ox.er tile open flames of operafng builders,
install a x.endladon hood ox.er fl_e rang.e
that projects forward at least 5" beyond
tile flont of tile cabinets.
Tile x.enfilafing hood must be consnucmd
of sheet metal not less fl/an 0.0192" flfick.
Install abox.e tile cooktop wifl_ a clearance of
not less than 1/4" between tile hood and tile
underside of tile combustible mamrial or
metal cabinet. Tile hood must be at least as
wide as tile appliance and cenmi.ed ox.er tile
appliance. Clearance between tile cooking
surface and tile ventilation hood surface
MUST NEVERBE LESSTHAN 24 INCHES.
EXCEPTION:Installation of a listed microwm.e
ox.en or cooldng appliance ox.er tile cooktop
shall conform to tile installation insuucfions
packed with that appliance.
If cabinets are placed abox.e the range,
allow a minimmn clearance of 30" between
tile cooking surthce and tile bottom of
unpromcted cabinets.
If a 30" clearance between cooking surthce
and ox.efllead combustible mamrial or metal
cabinets cannot be maintained, promct fl_e
underside of tim cabinets abox.e tile cooktop
with ,lot less than 1/4" insulating millboard
cox.ered with sheet metal ,lot less fllan
0.0199" thick.
Clearance between file cooking surfi_ce
and protected cabinets MUSTNEVER BE
LESSTHAN24 INCHES. Tile x.erfical distance
fron_ the plane of tile cooldng surthce to
file bottom of adjacent ox.erhead cabinets
exmnding closer fllan l" m tile plane of
file rang.e sides must ,lot be less fllan 18".
(See tile Dimensions and Clearances
illnstrafion in this sect.ion.)
CAUTION:Itemsofinteresttocbildren
shouldnot be storedin cabinetsabovea rangeor
onthe backs#ashof a range--children climbingon
therangeto reachitems couldbeseriouslyinjured.
39
Page 40

Installationofthe range.
Read these instructions completely and carefully.
DIMENSIONSAND CLEARANCES
Provide adequate clearances between the range and adjacent combustible surfaces. These
dimensions must be met for safe use of your range. The location of the electrical outlet and pipe
opening (see Gas Pipe and Electric Outlet Locations) may be adjusted to meet specific requirements.
Height
473/4"
•_ Depth varies depending on model
See specifications sheet for yoor model
'_inimuff/to
cabinets on
eithel side of
the range
18"
Tocabinets
below cooktop
and at the
range back
Depthwithdooropen _
46%" \ ."""'"
N N .......,...""'" """ """ "'" "'"
%
forcabinetsabove
Maximomdepth
countertops
3" Towalloneitherside
Tocabinetsbelow
cooktopandat
therangeback
40
Page 41

TOOLSYOUWILLNEED
Phillipsand flat-blade screwdrivers
Penciland ruler
Twopipe wrenches(one for backup)
Open-endoradjustable wrench
Nutdriver or wrench. 1/4"
DnTl
ADDITIONAL MATERIALSYOUMAY NEED:
Gaslineshut-off valve
Flareunionadapterforconnectiontogassupplyline
(3/4" or 1/2" NPTx1/2" LD.)
Flareunionadapterforconnectiontopressureregulator
onrange(1/2" NPTx 1/2" LD.)
Liquidleakdetectororsoapywater
Lagboltor 1/2" O.D.Sleeveanchor(forconcrete
floorsonly).
SqueezeConnectormatchingthesloeofthebracket
opening(ontherangebackbehindthewkingcover)andthe
houseconduitObtainonlyif replacingthepowercordwith
conduit
Pipejolbt sealantor UL-approvedpipe threadtape with
Teflon*that resistsaction ofnatural and LPgases.
*Teflon.Registeredtrademarkof DuPont
Flexiblemetal apphanceconnector(1/2" LD.).A 5-foot
lengthis recommendedforeaseof installation but other
lengthsare acceptable.Neverusean o/dconnector when
lbstalhbga new range.
LOCATIONGUIDELINES
Do not locate the range where it may be subject to strong drafts. Any openings in the floor or waft
behind the range should be sealed. Make sure the openings around the base of the range that
supply fresh air for combustion and ventilation are not obstructed by carpeting or woodwork.
Your range, like many other household items,
is heavv and can settle into soft floor coverings
such as cushioned vinyl or caq)eting. Use care
when moving tile range on this t,ipe of flooring.
It is recommended that tile following simple and
inexpensive instructions be followed to protect
VO/II" _100I;
Tile range should be installed on a sheet _ff
plywood (or similar material). When tile floor
covering ends at tile fl'ont of tile range, tile area
that tile range will rest on should be built up
with plywood to tile same level or higher than
tile floor covering.
This Mll allow tile range to be moved t_r cleaning
or servicing. _Mso, make sm'e yam" floor covering
will withstand 180°E (See the Installation Safety
Instructions section.)
Make sure tile wall coverings arotmd your range
can withstand the heat generated (up to 200°F)
bv tile range. (See tile Installation Safety Instructions
section.)
IMPORTANT!
Remove aft tape and packaging. Make sure the burners are properly seated and level.
Take the accessory pack out of the oven.
Check to be sure that no range parts have come loose during shipping.
41
Page 42

Installationofthe range.
Read these instructions completely and carefully.
[] Gas Supply Requirements
Recommended Gas Pipe Outlet Locations
Recommendedareafor
through4he-wa// connection
ofpipestub/shut-offvalve.
Thisarea allows for flush |1_
rangeinstallation withthe
rearwall.
71/2 "
Recommended area for
through-the41oorconnection
of pipe stub/shut-off valve.
Provide Adequate Gas Supply
Yourrange is designed to operate at a pressure of 4" of water column on natural gas or,
if designed for LP gas (propane or butane), 10" of water column.
Make sure you are supplying your range with
the type of gas ti:,r which it is designed.
This range is convertible for tlse on natural or
propane gas. If you decide to use this range on
I,P gas, convelsion inust be inade by a qualified
I,P installer betore attenq)ting to operate the
range on that gas.
For proper operation, the pressure of natural
gas supplied to the regulator must be bet_ven
4" and 13" of wamr column.
For I,P gas, the pressure supplied must be
between 10" and 13" of wate_ column.
When checking tor proper operadon of the
regulator; the inlet pressure must be at least 1"
greater than the operating (manifold) pressure
as given above.
The pressure regulator located at the inlet of
the range manifold m list remain in the supply
line regardless of whether natural or I,P gas is
being used.
A flexible metal appliance connector used to
connect the range to the gas supply line should
have an I.D. of 1/2" and be 5 teet in length tot
ease ot installation.
42
Page 43

[] Electrical Power Supply Requirements
Recommended Electrical Outlet Locations
Recommended acceptable
electrical outlet area. Orient
the electrical receptacle sothe
length is parallel to the floor.
\
Wall Mounted
Product is shipped with 4-prong
plug. Recommended outlet is a
NEMA 14-50Rreceptacle.
Provide Proper Electrical Supply
These ranges must be supplied with 208/240 volt,
60 Hz., and c{mnected to an individual, properly
grotmded branch circuit protected bv a circuit
breaker or time-delay fllse (40 amp). The
receptacle must be NEMA 14-50R to accept
the +prong plug supplied with the range.
If the electrical service provided does not meet
the above spedficafions, it is recommended that
a licensed electrician install an approved outlet.
I,ocate the electric supply as illustrated.
43
Page 44

Installationofthe range.
Read these instructions completely and carefully.
[] Connect the Range to the Gas Supply
Shut off the main gas supply valve before disconnecting the old range and leave it off until the
new hookup has been completed. Don't forget to relight the pilot on other gas appliances when
you turn the gas back on.
Because hard piping restricts moven_ent of tile
range, tile rise ot a CSA International-certified
flexible metal appliance com_ector is re_)mmended
mfless local codes require a hard-piped com_ection.
Never use an old connector when installing a
new range. If tile hard piping method is used,
you must carefully align tile pipe; tile range
cannot be i/loved atier tile connection is nlade.
To prevent gas leaks, put pipe joint compotmd
on, or wrap pipe thread tape with Tetlon'::
aro/md, all male (external) pipe threads.
[] Inst;fll a manual gas line shut-off x flxe in the
gas line in an easily accessed location outside
ot the range. Make sure e\'e_wone operating
the range knows where and 1low to shut off
the gas supply to the range.
[] Install male _"
the 1/2" NPT internal thread elbow at inlet
of regulatm: Use a backup wrench on tile
regulator fitting to avoid damage.
X4]/en installing the range fl'om the fl'ont,
remove tile 90 ° elbow fin" easier installation.
[] Install male 1/2" o_ 3/4" flare ration
adapter to the NPT internal thread of the
1/2 flare union adapter to
manual shut-offwflve, taking care to backup
tile sh m-off valve to kee I) it fl'om turning.
[] (_onnect flexible metal appliance com_ector
to tile adapter on tile range. Position range
to pemfit cmmection at tile shut-offwflve.
[] _,_q/en all connections haxe been made, make
sm'e all range controls are in tile off position
and tm'n on the main gas supply \;live. Use
a liquid leak detector at all joints and
connections to check fin" leaks in tile s\stem.
CAUTION: DO NOT USE A
FLAME TO CHECKFOR GAS LEAKS.
X_]/en using test pressm'es greater than l/2 psig
to pressm'e test tile gas supply system of tile
residence, discom_ect the range and individual
shut-ofl'wflve fl'om tile gas supply piping. _4]/en
using test pressm'es of 1/9 psig or less to test the
gas supply s):stem, simply isolate tile range fl'om
the gas supply sysmm by closing the individual
sh ut-ofl wflve.
*Teflon.RegisteredtrademarkofOuPont
Flexible Connector Hookup
Installer: Informthe ] ]_ Gas
consmnerof the 1/U or3/4" _V_P [U_.i sbuboff
location of thegas Gaspipe"II_ _ - valve
shut-off valve.
44
Rigid Pipe Hookup Options
45° Elbow,__
__:_[]_ __'-_1 I 90° Elbow
re u,ater | O.,en
Union _ Nipple
!11 Gas
_L _ shut-off
Installer: lnform the o°nsmner of the I J 1(711-- valve
locationof thegas shut-offvalve, _-t_ _1 _ l/Z" or3/4"
Alternate Hookup _ Adapter
Gaspipe
M ..N,pple
Nipple_ ,_
uas I_pp_e
shut-off_ _ _ / 90'_ regulator
valve _ _ t_ Elbow k
Gaspipe 90`>Elbow "_ _
Installer:Informthe consmnerofthe
locationof thegas shut-offvalve,
I[ _ Quickcon,,e<
_/or union
_ _ _€ ,, Pressure
Adapter
Page 45

[] Connect the Range to the Electrical Supply
Skip to Step 5 if the power cord shipped on the range does not match your wall
receptacle.
Using an Existing NEMA 14-50RReceptacle
Plug the range power cord into a properly
grounded wall receptacle, Skip to Step 6 if
the range power cord matches the wall
receptacle,
NOTE: Yourrangeis shipped with a 4-prongplug to be
usedin a NEMA 14-50Rreceptacle.Shouldyou choose
tochangeyour plug, useonly a 3-wke power cord,
3-wke conduitor 4-wke condui_Follow the appropriate
instructionsbelow, in Step 5, foryourapplication.
Effective January I, 1996,the National Electric Code
requires that new construction (notexisting) utilize
a 4-conductor connection to an electric range.
[] Replace the Power Cord (Optional)
Perform this step only if the power cord shipped on the range does not match your wall receptacle.
[] Remo'_'e the wire cover ((m the back o{ [] Loose]_ the straim_ re]ie{ screws amid
the r;mge) by remox'im_g two (2) screws remove the power cord.
I_sim__ a 1/4" m_t driver.
Be net dNcard those screws,
A range cord rated at 40 amps with 195/250
minimum volt range is required. A 50-amp
range cord is not recommended but if used,
it should be marked fin" use with nominal 1'¼"
diameter connection openings. Care should
be taken to center the cable and strain relief
within the knockout hole to keep the edge
ti'om damaging the cable.
NOTE."A 4-conductorcord istobe usedwhen the
applianceis installed in amobile homeor when local
codesdo not permit groundlng through theneutral
!
Backof range
] ]_{emove the 3 lower power cord termim)a]
screws fl'om tile termim_a] block amid the
g]'oHm_d screw amid )]ate_
Terrninal_/_-7 _ _%
block/_'f_=((_ _12_ _ Neutral
_,,_ ,_ _termi,,a]
___,_ _u _f Igreu,,di,,gto
_' _ _ ......Groundplate
Wire cover
!
NOTE."Thereplacementpowercordmustbea
3-conductorora4-conductorUL-/istedrangecord
orconduit:Cordsmaybeprovidedwithnngterminals
onwireanda strainreliefdevice.
Follow the S-wire power cord (optio]_ 5A),
[]
3-wire c(m&dt (opti(m 5B) or 4-wire
co]_(]uit (()pd(m 5(i;) secti(ms as
_ _ _[_6_1"o ,' o range)
[] Place the termim_al screws m_d groined
45
Page 46

Installationofthe range.
Read these instructions completely and carefully.
[] Replace the Power Cord (Optional) Continued
Perform this step only if the power cord shipped on the range does not match your wall receptacle.
[] 3-Wire Power Cord Installation Option
WARNIN& Theneu ,./or roun,wire
of the power cord must be connected to the neutral
t_rmba/ located b tile center of the term/)_a/ b/ock.
The power/eads must be conned_d to the b_vvr bft
and the lower dghttermba/s of the terminal b/ock.
[]
]_wer ba ck of t]_e ];_m_ge.
I x}ose]/ the iq)per ce]/ter screw ore) the
[]
termim_] block.
Slide t]_e ope_ slotted e]l(;[ of t]_e grom]d
[]
st_:q) raider the iq)per ce]_ter sc_"e_r ()_ the
termh_a] block Make slate the groined strop
is a]] the way agaim]st the Iq)per cel_ter screw
amid tighte]_ it h_ place.
Place the grom]d plate (remo',ed eaHier)
[]
over the bottom o{ the groined st_q:), press
them agaim_st the _:mge Jt}:m_e m_d attach
t]_e]'_ _,_it]_ the gl'o_H_d sere'>, (rei'_oved
h]sert the _ew [)ower cord thro_tg]], the
[]
st];d_ re]ieL _]]ow e_ough slack to easi]}
attach the wires to the termim_] block.
hlsert the 3 termiml] screws (removed
[]
earlier) thro_@_ each power cord termim_]
_J_g a_d h_to the lower tem_hm]s o[ the
termh_a] block Be certah_ that the ce]_ter
_ire (*_hite/_eut_:d) is com_ected to the
ce]_ter ]o_aer positio]_ of the termh_a] block
Tightel_ scre_s secm'e]y (approximately 20
h_ch-]bs.) i_to d_e tem_hm] block
Terlrfinalblock
(appearance
mayvary)
Neutral
Ground
plate Groundstrap
Power
Groundstrap
"X _ Openslottedend
46
[] Secm'e the strai_] relief i_l [)]ace i_l the
bracket b} tighte_i_g the st]:_i_ re]ie{ screws.
Page 47

[] Replace the Power Cord (Optional) Continued
Perform this step only if the power cord shipped on the range does not match your wall receptacle.
[] 3-Wire Conduit Installation Option
[] I,ocate tile copper ground strap on tile
lower back of tile range.
] I,oosen tile upper center screw on tile
temfinal block.
[] Slide tile open slotted end of tile ground
strap under tile upper center screw on tile
temfinal block. Make sure tile gro/md strap
is all tile way against tile upper center screw
and tighten it in place.
Squeezeconnector
[] Place tile gro/md plate (remoxed earlier)
over tile bottom of tile groined strap, press
them against tile range ti'ame and attach
them with tile gro/md screw (removed
ealtier).
[] Remo_e tile smfin relief clamp fl'om tile
bracket.
,_ssemble tile squeeze connector (obtained
[]
locally) matching tile diameter of yore"
conduit, in tile bracket hole. Insert the
conduit through tile squeeze connector:
Allow enough slack to easily attach tile wires
to tile temfinal block.
NOTE:Do not install tile conduit without a
squeeze connectoi:
Insert tile center bare wire (white/neutral)
[]
fi ) throuoh tile bottom center temfinal
block opening. On certain models, the wire
will need to be inserted through tile grotmd
strap opening and then into tile bottom
center block opening. Insert tile two side
bare wire tips into tile lower left and tile
lower fight tem/inal block openings.
Tighten the scrmvs tmfil the wire is firefly
secm'e (approximately 20 inch-lbs.).
Conduit /
Bracket
Wire tips _['_'-'m
Bracket
_----- Conduit
Groundstrap
Openslottedend
'I
Wire used, location and enclosure of spfices, etc.,
must conform to good wiring practices and local
codes.
NOTE: Make sm'e the wire is completely
inserted into the temfinal block and a
sec/lI'e connection is made.
[] Secm'e tile squeeze connector in place in
tile bracket by, tightening, , tile S(lueeze....
connector sci'ews.
NOTE:ALUMINUM WIRING:
,Muminmn building wire may be used but it must
be rated for tile correct ami)erage, and xoltage, to
i/lake connection.
47
Page 48

Installationofthe range.
Read these instructions completely and carefully.
[] Replace the Power Cord (Optional) Continued
Perform this step only if the power cord shipped on the range does not match your wall receptacle.
[] 4=Wire Conduit Insta#atien Option
[] Remo_e the strain relief damp ti'om the
bracket.
_&ssemble the squeeze connector (obtained
[]
locally) matching the diameter of rot:u"
conduit, in the bracket hole. Insert the
conduit through the squeeze connector:
_Mlow enough slack to easily attach the wires
to the temfinal block.
NOTE:Do not install the conduit without a
squeeze connectoi _.
Insert the ground bare wire tip between the
[]
range fl'ame and the grotmd plate (removed
eadier) and secure it in place with the
ground screw (removed eadier). Insert the
bare wire (white/neutral) tip through the
bottom center _ffthe temfinal block
opening. Insert the two side bare wire tips
into the lower left and the lower right
temfinal block openings, Tighten the screws
until the wire is fimflv secure (approximately
20 inch-lbs,),
NOTE:Make sm'e the wire is completely
inserted into the temfinal block and a
sectlI'e connection is i/l_lde.
Squeeze connector
Terminal
block
Wire tips
Ground
screw
Conduit
/
Bracket
Ground plate
(grounding to
range}
\
[] Secure the squeeze connector in place in
the bracket by tightening the squeeze
connector screws.
NOTE:ALUMINUMWIRING:
AJuminum building wire max be used but it must
be rated for the correct ami}erage, and xoltnge, to
make connection,
[] Replace the Wire Cover
Replace the wire cover on the range back by
sliding its fight edge trader the retaining tab and
replacing the two scre_:s removed earlier: Make
Stli'e that no wires are pinched between the cover
and the range back.
Wireused,locationandenclosure
ofsplices,etc.,mustconformtogoodwiring
practicesandlocal codes.
2 screwsto •
replace
wire cover
X Backof range
48
Page 49

[] Seal the Openings
Seal any openings in the wall behind the range
and in the floor under the range when hookups
are completed.
[] Assemble Surface Burners
_ssemble bm'ner as shown.
Grate
Bumer cap
Burnerhead
Electrode
Coektop
CAUTlON:oono operatecook op
withoutallburnerpartsandgratesinplace.
Place bm'ner heads o',er tile electrodes (m tile
cooktop, in the COlTect locations according to
their size.
Medklm head Small head
Large head Extralarge head
Make sure tile slot in tile burner head is
positioned oxer the electrode.
Place tile matching size caps onto tile heads.
Mediumcap Smallcap
[] Check Ignidon of Suriace Burners
Operation of all c(_oktop bm'ne_ should be
checked alter tile range, and ,gas suii,) )lx lines
haxe been careflfllv checked fin" leaks.
Frontof range /
Largecap Extralargecap
Make sure that tile heads and caps are placed in
the correct locations.
Electric Ignition
Select a top bm'ner knob and simultaneously
push in and tm'n to LITEposition. Y)u will hear
a clickingso/md indicating proper operation of
tile spark module. Once tile air has been pm'ged
fl'om the supply lines, bm'ne_s should light within
4 seconds. _Mter bm'ner lights, rotate knob out of
tile LITE position. Try each b/m_er in succession
tmtil all bm'ne_ have been checked.
49
Page 50

Installationofthe range.
Read these instructions completely and carefully.
Quality of Flames
The combustion quali b' of burner flames needs
to be detemfined visually:
(,41 Yellow flames--
(B) Yellowtipson
outer cones--
(C)Softblue
flames--Normal
Ifburner flameslook like(A),carl for service.Normalburner
flamesshould look like (B)or (C),dependlbgon the type of
gas you use.
With LP gas, some yellow dpping on outer cones
is nomml.
Call for service
Normal for LP gas
for natural gas
[] Level the Range
[] ]nstnll the oxen shehes in the oxen and
position the range where it will be instnlled.
•-\ )._range
Leg _ _ ,/_
levelerf _,.4P'
]____ Raise_! °wet
range
{on some models) {on some models)
Check fin" levelness by placing a spirit level
[]
or a cup, partially filled with water; on one
of the oven shelves. If using a spirit level,
rake two readings--with the level placed
diagonally fi_st in one direction and then
the other:
Lower range range
[] Remove the wamfing drawer See the Care
and cleaning of the range secdon, The fl'ont
leveling legs can be a(!i usted fl'om the
bottom and the rear legs can be a(!justed
fl'om the top or the bottom.
[] Use an open-end or a(!justnble wrench to
a(!iust the leveling legs tmtil the range is
level.
[] _'ter the range is level, slide the range away
from the wall so that the Anti-Tip device can
be instnlled,
50
Page 51

[] InstMt the Anti-Tip Device
An Anti-Tip bracket is supplied with
instructions tor installation in a variety
of locations. The instructions indude
all necessary infimnafion to complete the
installation, Read the Safety Instructions
and the instructions that fit yam" situation
heft)re begimfing installation.
Typicalinstallationof anti4ip bracketattachmentto wall
A WARNING:
Range must be secm'ed by Anti-Tip bracket
supplied.
If the Anti-Tip device supplied with the range
does not fit this application, rise the tmi\'e_sal
Anti-Tip device X_'B2X7909.
See instructions to install (supplied with
bracket).
Unless properly installed, the range could
be tipped by stepping or sitting on the dam:
Iqj m7 might result ti'om spilled hot liquids
or from the range itselL
When All Hookups Are Completed'.
MAKE SURE ALL CONTROLS ARE LEFT IN THE
OFFPOSITION.
Converting to LP Gas (or converting back to natural gas from LP)
Thisrangeleavesthe factoryset for use with naturalgas.
If youwant toconvertto LPgas, the conversionmustbe
performedbya quafified LPgas installer
MAKESURETHEFLOWOFCOMBUSTION
AND VENTILATIONAIR TOTHERANGEIS
UNOBSTRUCTED.
The conve_ion instructions and I,P orifices can
be fi_tmd attached to the range next to the
pressure regulator:
Keep these instructions and the orifices in case
VOII want to convert back to nattli'al gas.
5/
Page 52

Before Fouca# for service...
Troubleshooting -tips
Save time and money! Review the charts on the following
pages first and you may not need to call for service.
! PossibleCa.ses
Topburnersdonotlight
ordonotburnevenly
Surface burnerslight The oven gas shut-off valve • To check the oven gas shut-off \:dye, l'elllove the
but oven does not may have accidentally been wamfiug drawer (see the Care and cleaning of the
Plug on rmlge is not completely * Make sure electrical plug is plugged into a lixe, properly
inserted ha the electrical outlet, grounded outlet.
Burner hole or slits on the side
of the burner may be clogged.
hnproper burner assembly. • Make sure the burner parts are installed correctly.
moved during clemlhag or range section) and look fin" the gas shut-off lever
movhag, at the back of the r;mge.
What To Do
• Relnove the burlaer heads and caps and clean theln
with a sewing needle or twist-tie. Make sure you do not
enlarge the holes. Check and clean the electrode area
fin" btu'ned-on load or grease. See the Care and cleaning
of the range section.
See the Care and cleaning of the range secdou.
Leveris
showncloset
PULLTOOPEN.
Bumerflames very hnproper air to gas ratio. • If range is connected to I,P gas, c(>utnct the l)e_(>u
largeoryellow who iustnlled yotu" range or made the conversion.
Controlsignals after You forgot to enter a bake • Touch the BAKEpad :rod desired teluperatm'e or the
entering cooking time temperature or cleaning time. SELF CLEAN pad and desired clean time.
or start time
Food does not bake Oven controls improperly set. * See the Usingthe ovensection.
Shelf position is incorrect. • See the Usingthe oven section.
Incorrect cookware or cookware • See the Usingthe oven secti_)u.
of improper size being used.
Oven thermostat needs • See the Adjust the oventhermostat--Do it yourself!
adjustment, secti_ )u.
Clock not set correctly. • See the Using theclock and timer sectiou.
Aluminum foil used improperly * See the Care and cleaningof the range sectiou.
in the oven.
Oven bottom not securely * See the Installationofthe range section.
seated ha position.
52
Page 53

www.GEAppliances.com
Possible Causes
Food does not Oven controls improperly set. * Make sure you touch the BROIL HI/LO pad.
broil properly Oven door not closed. * See the Using the oven section.
Improper shelf position * See tile Broiling Guide.
being used.
Food being cooked in * Use the broiling pan and grid that came with
a hot pan. your range. Make sure it is cool.
Cookwaxe not suited * Use the broiling pan and grid that came with
for broiling, your ran ,e
Alumhmm foil used on the * See the Using the oven section.
the broiling pan mad grid has
not been fitted properly mad
slit as recommended.
Oven bottom not securely * See the Installation of the range section.
seated ha position.
Oven temperature Oven thermostat * See the Adjust the oven thermostat--Do it yourself!
too hot or too cold needs adjustment, secti(m.
Clock and timer Plug on range is not completely * Make sure electrical lalug is ph/gged into a live,
do not work inserted ha the electrical outlet, lar_perly gr_ rended outlet.
A fuse ha your home may be * Rel)lace the thse or reset the circtfit bl'eakel;
blown or the circuit breaker
tripped.
What To Do
Oven controls improperly set. * See the Using the clock and timer section.
Oven light does not work Light bulb is loose or defective. * Tighten or rel)lace the 1)ulb.
Plug on range is not completely * Make sure electrical plug is plugged into a live,
inserted ha the electrical outlet, l)rol)erly gr_muded outlet.
Oven will not self-clean The oven temperature is too * ?dlow the range to cool to room teml)erattu'e and
high to set a self-clean operation, reset the controls.
Oven conecols improperly set. * See the Using the self-cleaning oven secfi_m.
"Crackling"or This is the sound of the * This is nominal.
"popping" sound metal heating mad cooling
during both the cooking
mad clem_hag functions.
Excessive smoking Excessive soil. * Touch the CLEAR/OFF1):1(1.Open the windows to
rid the room of smoke. Wait until the LOCKEDDOOR
light goes off'. Wipe tl1) the excess soil and reset the
clean cycle.
Oven door willnot open Oven too hot. • ?dlow the oven to cool beh>w hat!dug temperature.
after a clean cycle
53
Page 54

Befere Feuca# [or semice...
Troubleshooting -tips
!
Oven not clean after
a cleancycle
"LOCKDOOR_"flashes
in thedisplay
LOCKEDDOORlight
is on when you want
to cook
"F--and a number or You have a ftmction error code. • Touch the CLEAR/OFF pad. _Mlow the oven to cool fin.
Possible Causes
Oven conlTols not properly set.
Oven was heavily soiled.
The self-cleaa_ cycle has been
selected but the door is not
closed.
The oven door is locked
because the temperature
inside the oven has not
dropped below the
locking temperature.
If the fmaction code repeats. • Disc(mnect all power to the range fin" 5 mimKes and
What To Do
• See the Using the self-cleaning oven section.
• Clean tip hea\ T spillovei_ befin'e starting the clean cycle.
Heavily soiled ovens lnav need to selFclean again or
fi:,r a longer period of time.
• Close the oven door.
• Touch the CLEAR/OFFpad. _Mlow the oven to cool.
one houi; Put the (/',eu back into operatiolL
then reconnect powei; If the flmction error code
repeats, call fi)r service.
,Probe, appealsin This is reminding you to enter • Enter a probe telnperature.
thedisplay a probe temperature after
plugging in the probe.
Displaygoes blank A fuse in your home may be • Replace tile fuse or reset tile circuit breakei;
blown orthe drcuit brea_ker
tripped.
The clock is in the • See tile Specialfeatures ofyouroven controlsection.
black-out mode.
Oisplayflashes Power failure. • Reset the clock.
Unable to get the Oven control pads were • The BAKEand BROILHI/LOpads mustl)e touched at
displaytoshow,SF not pressed properly, tile same time and held fin" 3 seconds.
Powerontage, Power outage or surge. • Reset tile clock. If the oven was in use, you Inust reset
it b) touching tile CLEAR/OFFpad,,setfim,_ tile clock
aud resettiug all) cookiug flulctiou.
"Burning, or "oily" This is normal in a new oven • To speed tile process, set a selFclean c) cle fill" a
odoremittingfrom mid will disappeax hi time. Ufilfiumm of_4 holilY. See tile Usingthe self-cleaning
the vent ovensection.
Strong odor An odor from the h_sulation • This is telnporary.
around the inside of the oven
is normal for the first few times
the oven is used.
54
Page 55

www.GEAppliances.com
Possible Causes What To Do
Fan noise The convection fan may tttnl on * This is nom_al. Tile convection tim will run until tile
mad off automatically, flmcfion is over or tile door is opened.
Convection fan Preheat temperature * Fan will start automatically once tile preheat
not working not reached, temper;Kure is re:wheal.
Drawer does not slide The drawer is out of aligmnent. * Ftdlv extend the drawer and push it :dl the w:lv in.
smoothlyor drags See the Care and cleaning of the range section.
Drawer is overloaded or load • Reduce weight. Redistribute drawer contents.
is unbalanced.
Warming drawer A fuse in your home may be • Replace the fllse or reset the circuit breakel:
will not work Blown or the circuit Breaker
tripped.
The oven is self-clem_hlg. • _'ait fin" the selfk lean cycle to finish :rod tile oven
Controls improperly set. • See the Electric warming drawersection.
Excessive condensation Liquid in warmhlg drawer. • Reinove liquid.
in the warming drawer Uncovered foods. • (_over food with lid or aluminmn foil.
Temperature setting too high. • Reduce temper:mire setting.
Food dries outin the Moisture escaping. • Cover food with lid or aluminmn foil.
warming drawer
to cool.
g5
Page 56

Accessories.
Looking For Something More?
You can find these accessories and many more at www.GEAppliances.com (U.S.) or
www.GEAppliances.ca (Canada), or call 800.626.2002 (U.S.) or 888.261.3055 (Canada)
(during normal business hours). Have your model number ready.
Warming Drawer Pan Grates
OvenRacks Broiler Pan Cleaner
Light Bulbs Knobs
Surface Burner Caps& Heads
5G
Tired of discolored rocks? Wishing you had extra-hearT-duty oven racks?
NOW AVAILABLEfor your range:
(;E's innovative, self-cleanable porcelain-coated oven racks!
• Hem T Duty
• Durable
• Able to be cleaned in a self-cleaning oven
Visit www.GEAppliances.com (U.S.) or www.GEAppliances.ca (Canada)
f_r more inf_)nnation.
Page 57

GE Service Protection Plus F_'
GE, a imme recog_3ized wovldwkle for qmdity ai_d depei_dabilit), offers )o_t
Serxke Protectioi_ Ph_s'"--comprehei_six;e protectioH oi_ aH yore app_iai_ces--
No Matter What Brand!
Benefits Include:
o Backed by GE
o All brands covered
o UnIinfited service calls
o All parts and labor costs mclnded
o No ont°of_pocket expenses
o No lfidden deductibles
o One 800 number to call
YoH wi]] be complete]) satisfied with om _service protectio_ or'_ol_ ma} reql_est }olaf mo_ev back
o_ the remaim_im_g x'ab_e of)olw tom, tract. No qlmstiom_s asked. It's that simple.
Protect vol_r re_'igerato_; dishwasher; washer a_d d_ye_; ravage, TV, VCR a_d m_ch more--any brand!
Pb_s there's m) extra charge {or emerge_cy service m_d low mo_th]y fi_a_ci_g is available. Even_ icemaker
coverage a_d food spoilage protectio_ is o{ti_red. Yo_ ca_ rest eas}, k_owi_g that all vo_r vabmb]e
ho_seho]d pro(b_cts are protected agai_st expe_sive repairs.
: 5_[} hl{IDds c )v(l{!(t, tip lit _{} }( !1"s o}(I, i/3 l]3e CODtl/]{ I]t_}] _,_,
WoTICoverAnyAppl&nce.
Angwhoro. Anflfmo.
_Ctl_ hel<
Please place in envelope and mail to:
gonoral Electric Company
Warranty Registration Department
P.O. Box 3215{)
Louisville, KY 40232-2150
57
Page 58

Consumer Product Ownership Registration
Dear Customer:
Thank you for purchasing our product and thank you for placing your confidence in us.
_A/eare proud to haxe you as a customer'.
Follow these three steps to protect your new appliance investment:
Important: If you did not get a registration card with your
................................................................................................... _,,,b (Mr here
Consumer Product Ownership Reg
Complete and mail
your Consumer
Product Ownership
Registration today.
tlaw' tim peace of
mind of knowing wc
call colltact VOl/ ill
tile tmlikely event of a
satiAy modification.
Atter mailing tile
registration below,
store this docmnent
ill a sati' place. It
contains inlbrmation
you will need should
you require service.
Our selwice number is
800.GE .CAP.E S
(800.432.2737).
Model Number Serial Number
I I I I I I I I II , , , , , , , , I
product, detach and return the form below to
ensure that your product is registered, or register
online at www.GEAppliances.com.
Read your Owner's
Manual carefhllv.
It will help you
operate yol/r lie', _,
appliance properly.
Model Number Serial Number
@
_vl_ Ms. M*>,. Mix_,
Fip_ti I Lasll
Nmm I I I I I I I I I Name I I I I I I I I I I I I
SI 1-( (!1 I
Addr(';s I I I I I I I I I I I I I I I I I I I I I I I I
Apt. # I I I
(;i,,I , I
l )ale Placed
hi Use III
Month
0
GE Consumer & Industrial
General Electric Company
£oui_iKe, Kentucky
owwz6EAppt_n_os.com
I I I I I I E-lnailAddress,_:
I I I I I I I I I I I I st_,t,,I , I (:ode ,
* Please provide your e-mail address to receive, via e-mail, discounts, special ottk,p, and other important
communications h-ore GE Appliances (GEA).
GEAppliances
Check here if you do not want to receixe communications ti-om GEA's carefiflly selected partners.
FAILI JRE TO COMPI.ETE AND RE'F[ RN Tt tIS CARD DOES NOT DIMINISII YOI JR
x,\(kRRAN'[X RI(;IITS.
For intormation about GEA's prixacy and data usage poliQ; go to _a_av.GEAppliances.com and click
on "Prixacv Pollux" or call 800.626.2224.
Zip I
I I
I I
I
I
58
Page 59

GEDual FuelRange Warranty.
All warranty service provided by our Factory Service Centers,
or an authorized Customer Care® technician. Toschedule service,
on-line, 24 hours a day, visit us at www.GEAppliances.com, or
call 800.GE.CARES(800.432.2737).
Staple your receipt here.
Proof of the original purchase
date is needed to obtain service
under the warrantF
GE Will Replace:
Any parrot the range which fifils due to a defect in materials or workmanship, During this
Fromthedateof the
originalpurchase
Service trips to your home to teach you how to use
the product.
hnproper h_staJlation, delivery or maintenance.
FaJhtre of the product if it is abused, misused,
or used for other thm_ the intended purpose or
used commercially.
Replacement of house fuses or resetting of circuit
breakers,
full one-year warranty, GE will also provide, free of charge, all labor and in-home service to
replace the (leiecti\'e part,
Dmnage to the product caused by accident, fire, floods or
acts of God.
IncidentaJ or consequential dmnage caused by possible
defects with this applim_ce.
Dmnage caused after delivery.
This warranty is extended to the original purchaser and any succeeding owner for products purchased for home
use within the USA. In Alaska, the warranty excludes the cost of shipping or service calls to your home.
Some states do not aflow the exclusion or limitation of incidental or consequential damages. This warranty gives
you specific legal rights, and you may also have other rights which vary from state to state. Toknow what your
legal rights are, consult your local or state consumer affairs office or your state's Attorney General
Warrantor."General Electric Company.Louisville,KY40225
59
Page 60

ConsumerSupport.
gEAppliancesWebsite www.GEAppliances.com
Have a question or need assistance with your appliance? Try the GE Appliances X.Vebsite 24 hom_ a day,
any day of the year'. For greater convenience and faster service, you can now download Owner's Manuals,
order parts, catalogs, or even schedule service ondine. You c[In [llso "Ask Oily Wean/of EN)erts .....
your questions, and so much more...
ScheduleService
Expert (;E repair se_Mce is onlx one step away fl'om xour doo_: Get on-line and schedule your service at
_our conxenience 24 hotu_ any (la_ of the year! Or call 800.GE.(:ARES (800.432.2737) during nom_al
business hou_.
www.GEAppliances.com
RealLifeDesignStudio www.GEAppliances.com
GE SUl_ports the Uni\'e_al Design concept--l_roducts, services and environments that can be used by
people of all ages, sizes and capabilities. We recognize the need to design fin" a wide range of physical and
mental abilities and impaimmnts. For details of GE's Universal Design applications, including kitchen
design ideas for people with disabilities, check out our Website today For the heating impaired, please call
800.TDD.GEAC (800.833.4322).
ExtendedWarranties www.GEAppliances.com
Purchase a (;E extended warrant_ and learn about special discounts that are axailable while your warranty
is still in effect. You can purchase it on-line an) time, or call 800.626.2224 dtwing nom_al business horus.
GE Consumer Home Serxices will still be there after your warran_ expires.
PartsandAccessories www.GEAppliances.com
Indi\'iduals qualified to service their own appliances can have parts or accessories sent directly to their
homes (VISA, Master(:ard and Discover cards are accepted). Order on-line today, 24 hom_ evei'v day or
by phone at 800.626.2002 ducing nom_al business horus.
Instructions contained in this manual cover procedures to be performed by any user. Other servicing generally
should be referred to qualified service personnel Cautionmust be exercised, since improper servicing may cause
unsafe operation.
ContactUs www.GEAppliances.com
If you are not satisfied with the service you receive tl"om GE, contact us on our _.Vebsite with all the details
including your phone numbe_; or wcite to: General Manage_; Customer Relations
GE Appliances, Appliance Park
I,ouisville, KY 40225
RegisterYourAppliance www.GEAppliances.com
Register your new applimlce on-line--at your convenience! Tilnel) product registration will allow for
enhanced communication and prompt service tln(lei" the terms of }Otli" WalTantv should the need arise.
You may also mail in the preprinted registration card included in the l)ackin_*_material.
Printed in Mexico
This book is printed on recycled pape_
 Loading...