

GE J2B918WEK1WW, J2B918SEK1SS, J2B918CEK1CC, J2B918BEK1BB Owner’s Manual
www.GEAppfiances.com
©
©
©
0
0
©
0
oq
Safi47 Im_uctior_ ....... 2-_'_
Operating" lnstr_di_ns
Com_ecfion O_n ...... 18-22
Roasting Guide .......... 21
Timed Convection Baki_]g..22
Gas SuI fSce Burners ..... 9, 1{)
()ve_] ................ l 1-26
Ahm_in um Foil .......... 13
Baking or Roasting ....... 13
Broiling C_ide .......... t4
Clock and Timer. ........ 1:5
tCY_ei_Controls ........... l 1
Pi>heafing .............. 13
Probe ............... 17, 20
Sabbath Feami> ......... 25
Self=Cleaning ......... 29, 30
Special Feami>s ...... 23, 24
Timed Baking and
Roastii_g Feam i>s ........ l 6
Thermostat .............. 26
xA_rming Drawer . ...... 27, 28
Care and Cleaning
Broiler Pan and (,ild ...... :,4
gumei Assembly .......... 31
Burner Grates ........... oo,OD
Burner Heads and Caps .... 32
Control Panel and K1]obs . . .a6°
Cooktop Suriime ......... oo
ISt-Off O_en Door . ....... a4
O_en Air VeI]ts o -
O_en Heating Elements .... 34
(>,en Light Replaceme_]t .. _'_
Oxen Shehes ............ .a/°_
Staii]less Steel Surf:aces .... oo,OD
Self=Cleaning .......... 29, 3{)
xA_uming Drax_er . ......... 35
,DD
o
Installation
Indrucdons . ......... .:,8-:,1_"r_
Anti-Tip Device ........... 51
Check Igniti(m of
Surfi_ce Bmners ....... 49, :5{)
Compeer Range
to Electric ............ 43, 4:5
Connect Range to Gas...42, 44
Dimensions and
Clearances ............... 4()
Electrical Connecfloi]s ...4{b48
Le_wl the Range .......... 50
I£)cati(m Guidelines ....... 41
LP ...................... :51
Safety instructioi]s ...... 38, 39
Accessories. ............... 5{;
Troubleshooting Tips..52-55
ConsumerSupport
Co_stm_er
Support .......... Back Co_er
Prodtmt Registration] .... 57, 58
_A2-wra_]tv . ............... 59
]2s9 5
×
Write the model and serial
numbers here:
Model #
Serial #
You can find them on a label on
the front ot the range behind the
warming (lrawe_:
...................................................................
18305580P159
49-_5072 O1-04Jfl
IMPORTANTSAFETYINFORMATION.
READALLINSTRUCTIONSBEFOREUSING.
WARNING!
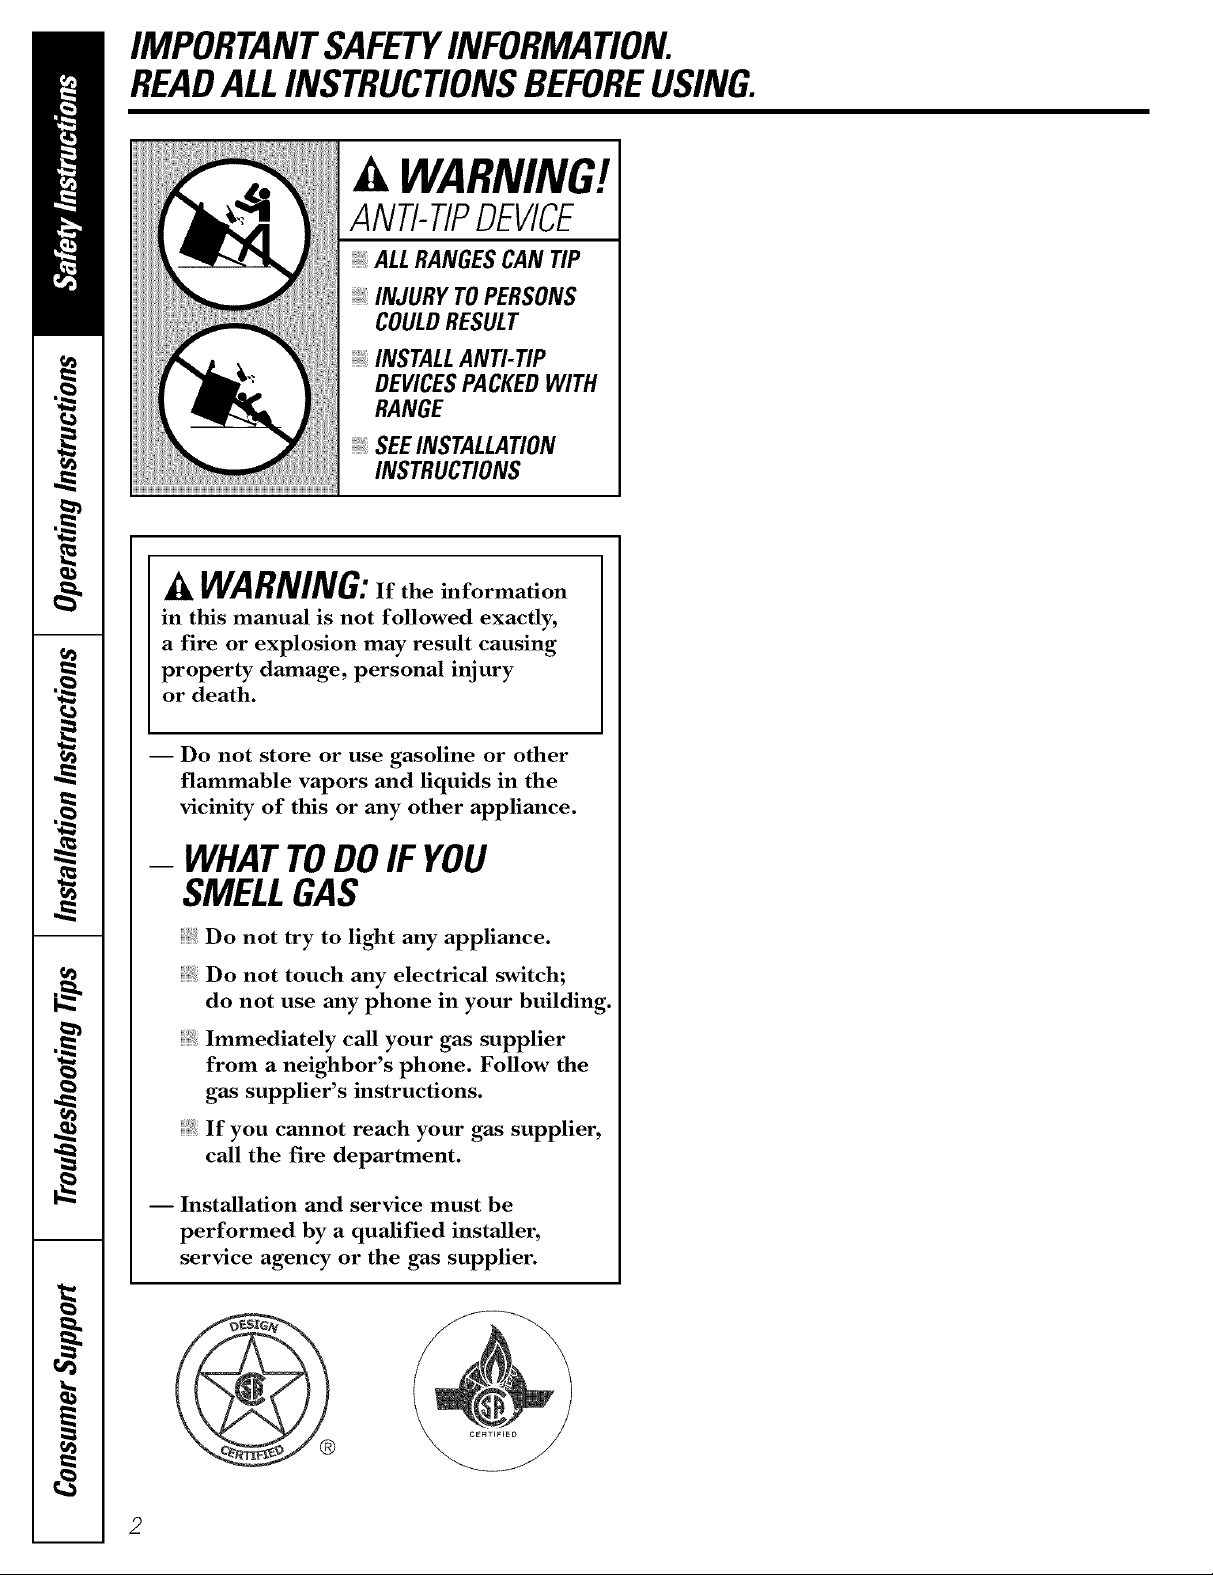
ANTI-TIPDEVICE
, ALLRANGESCAN TIP
INJURY TOPERSONS
COULDRESULT
INSTALLAN_ TIP
DEVICESPACKEDWITH
RANGE
SEEINSTALLAtiON
INSTRUCtiONS
WARNING:If the information
in this manual is not followed exactly,
a fire or explosion may result causing
property damage, personal injury
or death.
-- Do not store or use gasoline or other
flammable vapors and liquids in the
vicinity of this or any other appliance.
- WHATTODOIFYOU
SMELLGAS
Do not try to light any appliance.
Do not touch any electrical switch;
do not use any phone in your building.
Immediately call your gas supplier
from a neighbor's phone. Follow the
gas supplier's instructions.
If you cannot reach your gas supplier,
call the fire department.
-- Installation and service must be
performed by a qualified installer,
service agency or the gas supplier.
www.GEAppliances.com
WARNING!
For your safety;,the information in this manual must be followed to minimize the risk of fire or explosion,
electric shock, or to prevent property damage, personal injury, or loss of life.
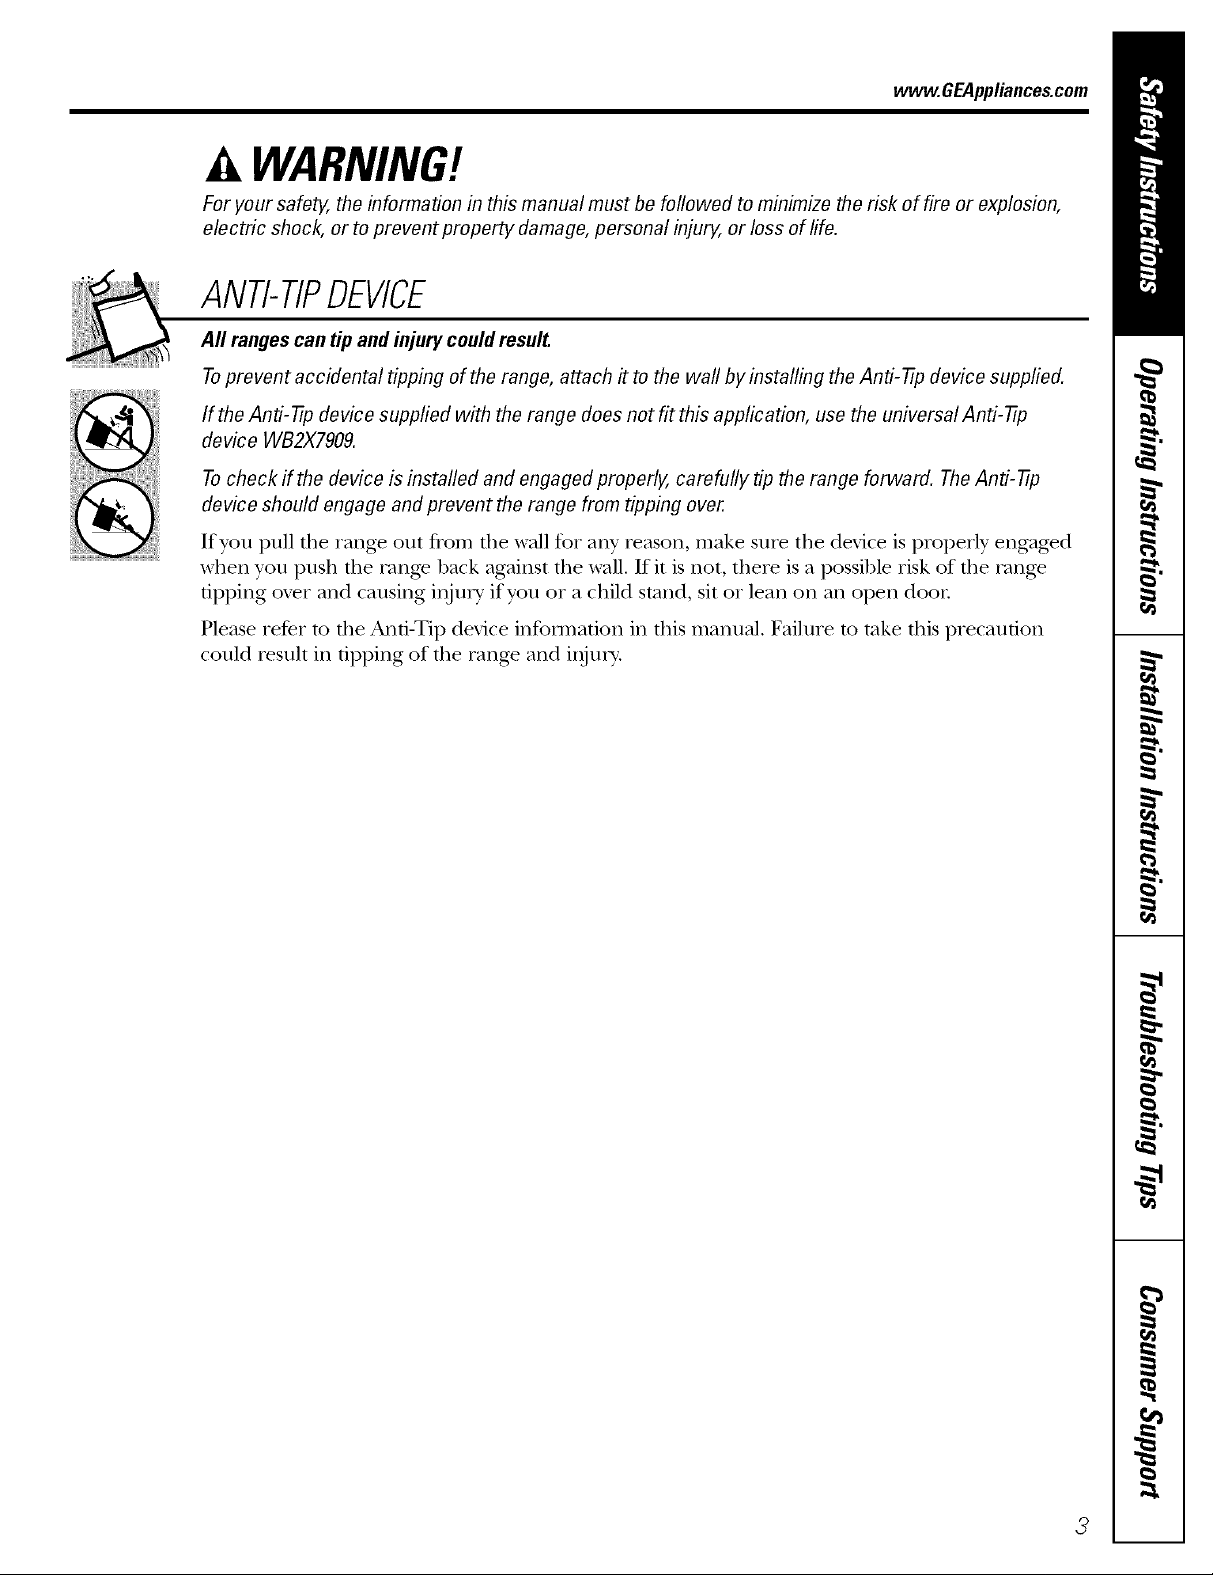
ANTI-TIPDEVICE
All rangescan tip and injury could result
Toprevent accidental tipping of the range, attach it to the wall by installing the Anti--tip device supplied.
If the Anti--tip device supplied with the range does not fit this application, use the universal Anti--fip
device WB2X7909.
Tocheck if the device is installed and engaged properly, carefully tip the range forward. TheAnti--tip
device should engage and prevent the range from tipping over.
If you pull die range out flom die wall t_r any reason, make sure the device is properly engaged
when you I)ush tim range back against tile wall. If it is not, there is a possible risk of the rang>
fii)i)ing ox_r and causing illjtl]_i if you or a child stand, sit or lean on all oI)en door
Please refer m file And-Tip device information ill this manual. Failure m take fills precaution
could iesult ill fiI)I)ing of the rang_ and il)jm>
3
IMPORTANTSAFETYINFORMATION.
READALLINSTRUCTIONSBEFOREUSING.
WARNING!
IMPORTANTSAFETYNOtiCE
The Califomb Safe Drinking Water and ToxicEnforcement Act requires the Governor of Califomb to
publish a list of substances known to the state to cause birth defects or other reproductive harm, and
requires businesses to warn customers of potential exposure to such substances.
Gasappliances can cause minor exposure to four of these substances, namely benzene, carbon
monoxide, formaldehyde and soot, caused primarily by the incomplete combustion of natural gas or
LP fuels. Properly adjusted burners, indicated by a blubh rather than a yellow flame, will minimize
incomplete combustion. Exposure to these substances can be minimized by venting with an open
window or using a ventilation fan or hood.
SAFETYPRECAUtiONS
When using electrical appfiances, basic safety precautions should be foflowed, including the following:
Use dfis appliance only %r its irrtended
pui])ose as described in this Owner's
Manual.
Be sure your appliance is properly installed
and g]ounded by a qualified technician in
accordance with the provided irrstallation
irrstrnctions.
iiiiiiiiiiii_iii
Do not attempt to repair or replace arty
part of your range unless it is specifically
recommended in this manual. All other
servicing should be refetTed to a qualified
technician,
iiiiiiiiiiii_iii
Before performing any service, disconnect
tire range power supply at tire household
disuibudon panel by removing the fllse or
switching off"the circuit breaken
Do rant leax> children alone--children
should not be left alone or unatmnded in
an area where an appliance is in use. They
should nex>r be allowed to sit or stand on
arty part of the appliance.
Do not allow arp_'one to climb, stand or hang
on the door, storage diawet, or cooktop.
They could damage tire rang_ arrd ex_n tip
it ox_l; causing sex,re personal injm T.
Do not store flammable materials in an ox>n
or near the cooktop.
CAUTION:Itemsofinteresttochildren
shouldnot be storedin cabinetsabovea rangeor
on thebacksplashofa range--children climbingon
tberangeto reachitems couldbe seriouslyinjured.
SAFETYPRECAUtiONS
Have the installer show you the location of the range gas shut-off valve and how to shut it off if necessary.
Haxe your range irrstalled and properly
grounded by a qualified irrstallei, in
accordance with the Installaoon Instrncuons.
Any adjusunent arrd service should be
perforated only by qualified gas rang_
irrstallers or service technicians.
4
Do not attempt to repair or replace arty
part of your range unless it is specifically
recommended in this manual. All other
service should be referred to a qualified
technician.
SAFETYPRECAUTIONS
vvww.GEAppl_nce_com
Locate the rang.e out of kitchen traffic path
and out of drafty locations to pre_.ent i)ooi `
air circulation.
Be snre all packaging materials are
removed from file rang.e before operating it
to prevent fire or smoke damag.e should the
packaging material ignite.
Be sure your range is correctly adjusmd by
a qualified service mchnician or installer for
the type of gas (natural or I,P) that is m be
used. Your range can be com.erted for use
with either type of gas. See the Installation of
the range section.
.4,WARNING:theseadjustments
mustbemadebya qualifiedservicetechnician
b accordancewith themanufacturer'sbstructions
andaft codesandrequirementsof the authority
havingjurisdiction.Failureto follow these
fastructionscouldresult faseriousinjuryor property
damage.Thequalifiedagencyperformingthis
work assumesresponsibilityfor the conversion.
After prolong.ed use of a range, high floor
temperaulres may result and ma W floor
cox.elJng_ will not withstand this kind of use.
Nex.er install the rang.e ox.er viw1 tile or
linoleum that cannot withstand such type
of use. Nex.er install it directly ox.er inmrior
kitchen caq)eting.
Do not lem.e children alone or unatmnded
where a range is hot or in operation. They
could be seriously burned.
Do not allow anyone to climb, stand or hang
on the ox.en dooi; storag.e drawei; wamfing
drawer or cooktop. They could damag.e the
rang.e and even tip it ove_; causing sex.ere
personal i,ljniy'.
CAUTION:Itemsofinteresttochildren
shouldnot be storedin cabinetsabovea rangeor
on thebacksplashof a range--children climbingon
therangeto reachitems couldbe seriouslyinjured.
For your safew, ne_.er use your appliance
for wmlning or heating the room.
Large scratches or impacts to glass doors
can lead to broken or shattered glass.
Nex.er wear loose-fitting oi hanging gai_nents
while using the appliance. Be careflfl when
reaching for items stored in cabinets ox.er the
rang.e. Flammable matedal could be ignited
if brougtlt in contact with flame oi hot o_.en
surfi_ces and may cause sex,ere bnl_/lS.
Do not store flammable mamrials in an
ox.en, a range storage drawei; a wai_ning
drawer or near a cooktop.
Do not store or use combustible mateiJals,
gasoline or other flammable vapors and
liquids in the viciniw of this or any other
appliance.
Do not let cooking grease or other
flammable mateiials accunnflate in oi
near the rang.e.
Do not use water on grease fires. Nex.er
pick up a flaming pan. T/IIII the controls off.
Smother a flaming pan on a surfi_ce burner
by co\.eiJng file pan complemly with a
well-fitting lid, cookie sheet or fiat tray.
Use a mulfi-puq)ose d_T chemical or
foam-type fire extinguishen
Flaming gi.ease outside a pan can be put
out by covering it with baking soda oi;
if available, by using a mulfiq)ml)ose d_T
chemical or foam-type fire exdnguishen
Flame in tim ox.en oi wamfing drawer can be
smothered completely by closing the ox.en
door or drawer and turning the control to
off or by using a muldq)uq)ose dU chemical
oi foam-type fiI.e extinguisher
let fl)e burner grates and other snrfaces
cool befoI.e touching them or leaving them
where children can 1.each them.
Nex.er block flae \`ents (air openings) of the
rang.e. They provide the air inlet and outlet
flint are necessai T tbr the range to operate
properly with coixect combustion. Air
openings are locamd at the rear of the
cooktop, at file top and bottom of the oven
dooi; and at the bottom of the range under
the wamaing drawei; storag.e drawer or
kick panel.
Do not lift the cooktop. Lifting the cooktop
can lead to damag.e and improper operation
of the rang.e.
IMPORTANTSAFETYINFORMATION.
READALLINSTRUCTIONSBEFOREUSING.
A WARNING!
SURFACEBURNERS
Use proper pan size--a void pans that are unstable or easily tipped. Select cookware having flat bottoms
large enough to cover burner grates. Toavoid spillovers, make sure cookware is large enough to contain
the food properly. This will both save cleaning time and prevent hazardous accumulations of food, since
heavy spattering or spillovers left on range can ignite. Use pans with handles that can be easily grasped
and remain cool.
Alwavs use tim LITE position when igniting
die top burners and make sme the burners
have ignited.
Nexer leave file smJ_ace bunlers unattended
at hi0r flame setting:s. Boilox>rs cause
smoking arrd gieasy spillox>rs tilat m W
catch on file.
'Adjust fire top burner flame size so it does
not extend beyond tile edge of the
cookware. Excessixe flame is hazardous.
Use only d U pot holders--moist or damp
pot holders on hot sniiCaces may Iesult in
bm_ls flom steam. Do not let pot holders
come near open flames when lifting
cookware. Do not use a towel or other bulky
clotir in place of a pot holder
When using gtass cookware, make sure it
is designed for toi>of-rang> cooking.
To minimize tile possibility of l)m_rs, ignition
of flammable materials arrd spillage, turn
cookware handles toward tile side or back
of fire rang> without extending ox>r
adjacent hurners.
Careflflly watch fbods heing fl{ed at a higtl
flame seuing.
Alwavs heat tilt slowl> arrd watch as it heats.
Do not leme any items on tire cookmp. Tile
hot air from die xent m W ignite flammable
items arrd will increase pressure ira closed
corrtainers, which mav cause tilem to burst.
If a coml)ination of oils or rifts will be used
in flTing, stir togetiler 1)efore heating or
as tilts melt slowly.
Use a deep fat thermometer whenex_r
possihle to prex_nt oveflleafing laatheyond
file smoking point.
When flaming foods are under tire hood,
turn tire fan off: Tile t_an, if operating, mav
spread tile flames.
Do not use a wok on the cooking surface
if tile wok has a round metal ring that is
placed oxer tim burner grate to support tire
wok. Tiffs ring acts as a heat trap, which m W
damage the humer grate and humer head.
Also, it may cause tire burner to work
improperly. Tills may cause a carbon
monoxide lex>l above that allowed by cunent
standards, resuking in a heahh hazard.
Foods for flTing should be as d U as possible.
Frost on flozen foods or moisture on flesh
foods can cause hot t_atto hubble/l I) arrd
ox>r tile sides of tile pan.
Nex>r tIT to mow a pan of hot t_at, especially
a deep fat flTer V(ait until tile fat is cool.
Do not leme plastic items on tile cooktop--
riley m W melt if left too close to tile xent.
Kee I) all plastics awav flom tile sniP, tce
bnrners.
To axoid tile possibility' of a burn, always be
certain tilat tile controls for all humers are
at tile OFF position arrd all grates are cool
before attempting to remox_ them.
If rang_ is located near a windo_, do not
hang long curtains that could hlow oxer tile
smlZace hurners arrd create a fire hazard.
If you smell gas, turn off tire gvts to tire rang_
arrd call a qualified service technician. Never
use an open flame to locate a leak.
Always tunl tire surface burner cormols off
before removing cookware.
Use fire least possible amount of J_atfor
effective shallow or deeI>fat flTing. Filling
tire pan mo flfll of t_atcan cause spillox>rs
when food is added.

ELECTRICWARMINGDRAWER
vvww.GEAppliances.com
The purpose of the warming drawer is
to hold hot cooked foods at serving
temperanlre. Always start wifll hot food;
cold food cannot be heamd or cooked in
the wal_ning drawer
Do not use the wmaning drawer to d U
newspapers. If o_erheated, they can catch
OIl fife.
Do not lem> paper products, cooking
utensils or food in the warming drawer
when not in use.
Never leave jars or cans of fat dripping:s in
or near your wanning drawer
Always kee I) wooden and plastic utensils
and canned food a safe distance away flom
your warming drawer
Do not w:u_n food in tile warming drawer
for more than two hours.
Do not touch theheating element or the
interior surface of the warming drawer.
These snifi_ces may be hot enougil to burn.
REMEMBER:The inside suriZace of the
wallning drawer may be hot when the
drawer is opened.
Use care when opening the drawer Open
the drawer a crack and let hot air or steam
escape before iemoving or rep]acing food.
Hot air or smam which escapes can cause
bums m hands, face and/or eyes.
Do not use aluminum foil to line file
drawer Foil is an excellent heat insulator
and will trap heat beneath it. This will upset
the perforn/ance of the drawer and it could
damag> the inmlior finish.
IMPORTANTSAFETYINFORMATION.
READALLINSTRUCTIONSBEFOREUSING.
COOKMEATANDPOULTRYTHOROUGHLY...
Cook meat and poultry thoroughly--meat to at least an INTERNAL temperature of 160°/:and poultry to
at least an INTERNAL temperature of 180°ECooking to these temperatures usually protects against
foodbome illness.
OVEN
Stand away from the range when opening the door of a hot oven. The hot air and steam that escape can
cause bums to hands, face and eyes.
Do not use tim oven for a storage area.
Imms stored in the oxen can ignim.
Kee I) the oven free flom glease buildup.
Place the oven shehes in the desired
position while the oven is cool. If shehes
must be handled when hot, do not let
pot holder contact rite heating elements.
Pulling out the shelf to the stop-lock is a
convenience in lifting heaxy' foods. It is also
a piecanfion against btn_s flom touching
hot surfaces of the door or oven walls. The
lowest position "R, is not designed to slide.
Do not heat unopened food containers.
Pressure could build up and the container
could burst, causing an i,ljtn>
SELF-CLEANINGOVEN
Be sure to wipe up excess spillage before
selt_leaning operation.
Before self-cleaning the oxen, remoxe
the shehes, broiler pan, grid and
other cookware.
Do not clean the door gasket. The door
gasket is essential for a g_od seal. Care
should be token not to rub, damage or
move the gasket.
Clean only parts lismd in this Owner's
Manual.
XA]len using cooking or roasting bags in the
oxen, follow the manufacturer's directions.
Do not use your oxen to dlT newspapers.
If oxerheated, they can catch fire.
Do not leme paper products, cooking
utensils or food in the oxen when not in use.
Kee I) the oxen xent unobstructed.
Make S/lie the broiler pan is in place
conecflv to _educe the possibility of
g,ease fires.
If you should ha_e a g_ease rite in the broiler
pan, press the CLEAg"OFFpad and kee I)
rite oven door closed to contain fire until
it burns out.
If the self-cleaning mode malflmctions, turn
the oxen off" and disconnect the power
supply. Haxe it serviced by a qualified
technician.
Do not use oven cleaners. No commercial
oxen cleaner or oxen liner of any ldnd
should be used in or around any part of
the oven. Residue from oxen cleaners will
damage the inside of the oxen when the
seltklean cycle is used.
READANDFOLLOWTHISSAFETYINFORMATIONCAREFULLY.
SAVETHESEINSTRUCTIONS
Usingthe gas surfaceburners, www.GEAppliances.com
Throughout this manual, features and appearance may vary from your model.
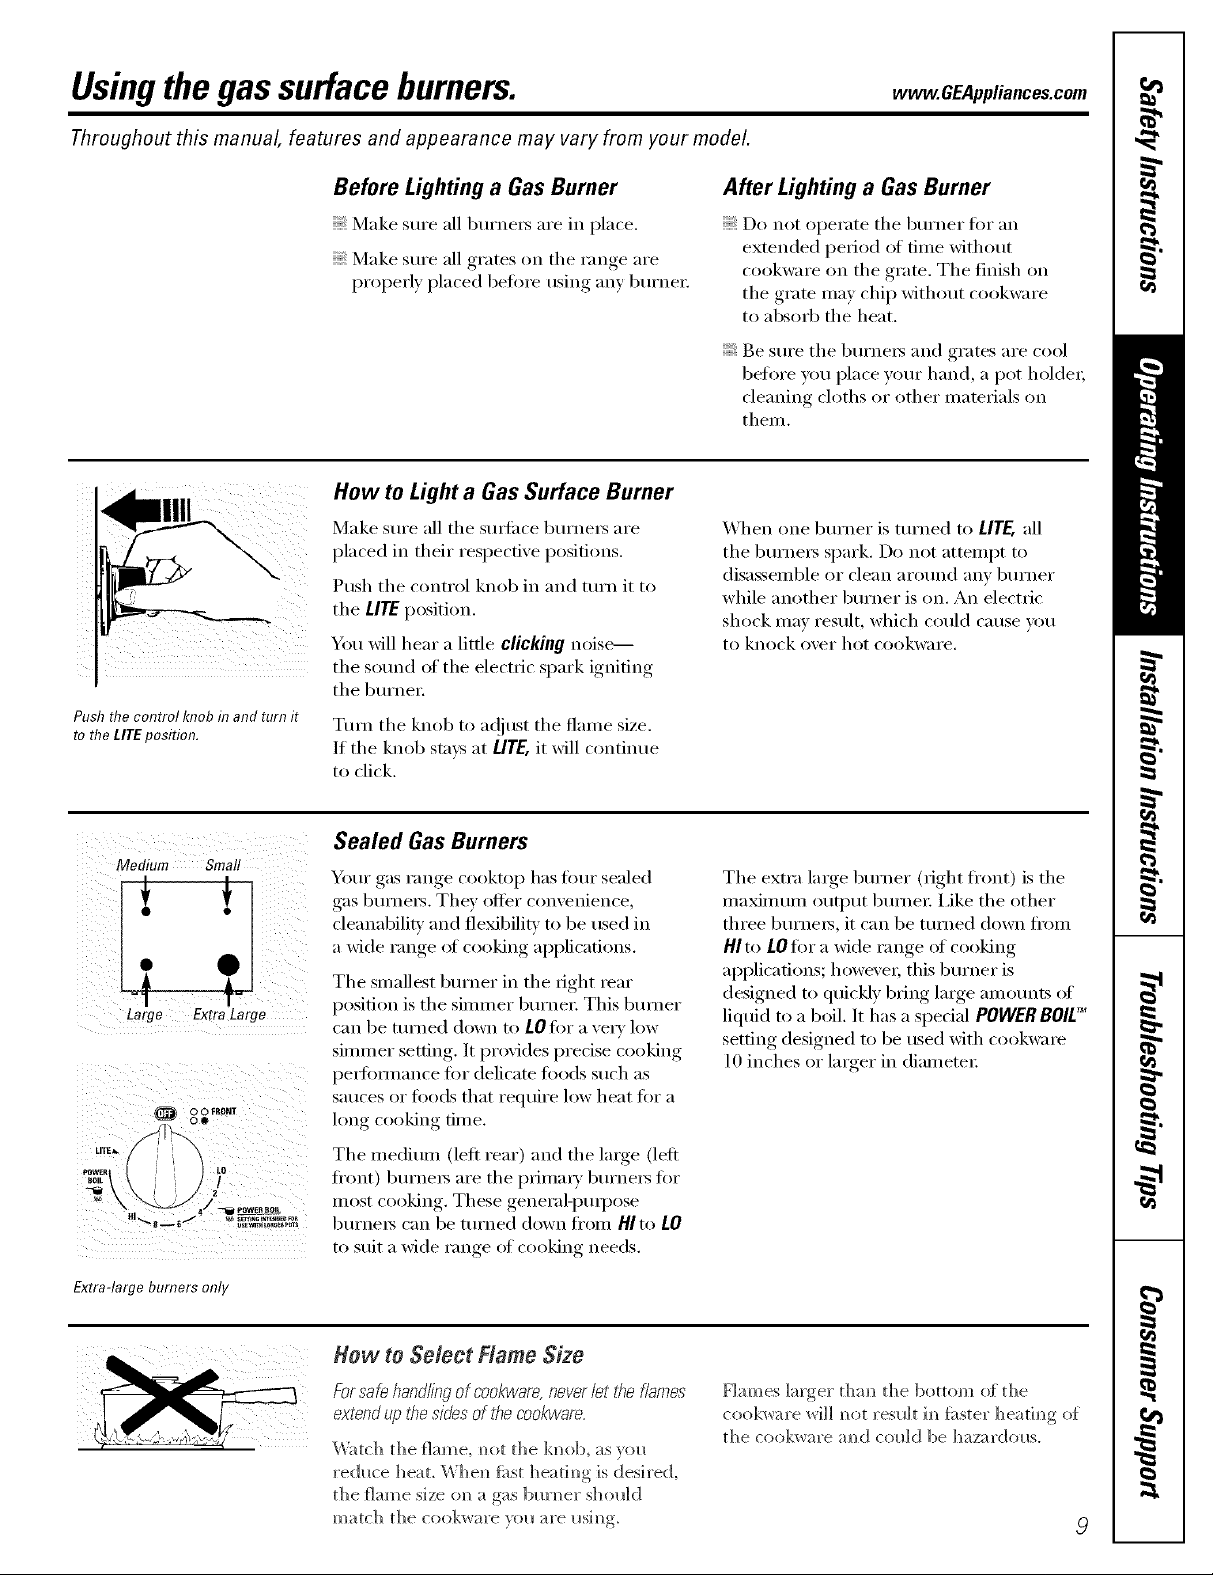
Push the control knob in and turn it
to the LITEposition.
Before Lighting a Gas Burner
Make sure all burne_ are in place.
Make sure all grates on the range are
properly placed befine using any burne_:
How to Light a Gas Surface Burner
Make sm'e ;111the stu_ilce burne_ are
placed in their respective positions.
Push the control knob in and mrn it to
the LITE position.
You will hear a little clicking noise--
the sotmd/ff the electric spark igniting
the burne_:
Ttm_ the knob to a(!iust the flame size.
If the knob stays at L/TE,it will continue
to click.
After Lighting a Gas Burner
Do not operate the burner for an
extended period of time without
cookware on the grate. The finish on
the grate may chip without cookware
to absorb the heat.
Be sure the burners and grates are cool
before you place yore" hand, a pot holder;
cleaning cloths or other mamrials on
them.
When one burner is turned to LITE,all
the burners spark. Do not attempt to
disassemble or clean arotmd any bm'ner
while another bm'ner is on. An electric
shock may result, which could cause you
to knock over hot cookware.
Medium Small
Large Extra Large
Extra-large burners only
Sealed GasBurners
Yore" gas range cooktop has fimr sealed
gas burne_. They offer convenience,
cleanabilitv and fle_bilitv to be used in
a wide range ot cooking applications.
The smallest bm'ner in the fight rear
position is the simmer burne_: This btm_er
can be turned down to LOfor a vec_' low
simmer setting, It provides precise cooking
perlommnce ,for delicam toods such as
Satlces or foods that reqtlire low heat fin" a
long cooking time.
The medium (left rear) and the lmge (left
fl'ont) bm'ne_s are the i)rhnmT burners tot
inost cooking. These general-i)tul)ose
burners can be turned down fl'om HIto LO
to suit a wide range of cooking needs.
How to Select Flame Size
Forsafe handlingof cookware,neverlet t¢_ef/ames
extend up t¢_esides of the cookwam.
Watch the flame, N)ot the kin)b, as vol_
red_ce ]]eat. Whe_ first heatim]g is desired,
the flame size on_ a gas bm'm_er s]]oldd
match the cookware }011 are IISim)_
The extra lmge bm'ner (right fl'ont) is the
n]axinluln o]ltl)tlt bunlei: I,ike the other
three burners, it can be turned down fl'om
HI to LOfin" a wide range ot cooking
applications; howe\'ex; this burner is
designed to quic!dy bring large amotmts of
liquid to a boil. It has a spedal POWER BOlE_
setting designed to be used with cookwme
10 inches or larger in diameter:
Flames larger t]]am_ the bottom of the
cookware will m_ot result im_f_ster ]]eatim_g of
the cookware m_d co_dd be hazardo_s.
Usingthe gas surfaceburners.
Top-of-Range Cookware
Aluminum: Medium-weight cookware is
recommended because it heats quickly
and evenl'_. Most fi)ods brown e',enlv in an
altmfintml skillet. Use saucepans with tioht-
fitting lids when cooking with minimmn
_lIIl O/lntS of _V_lteI:
Cast-Iron: If heated slowly, most skillets will
give satisfi_ctorv results.
Enamelware: Under some conditions,
tile enai/lel of SOIlle ('ookw;iYe ill}iv I//elt.
Follow cookware inanufilcturer's
i'ecoil/illendations tor cooking nlethods.
Stove Top Grills
Do not use stove top grills on your sealed
gas burnex_. If you use tile stove top grill
on tile sealed gas burnex, it will cause
incomplete combustion and can result
in expos/lI'e to C_li'bon i/lonoxide levels
above allowable cmTent standards.
Glass:There are two types of glass
cookware--those for oven/ise only and
those for toi>olXrange cooking (saucepans,
coffee and teapots). Glass conducts heat
very slowly.
HeatproofGlass Ceramic: Can be used fi)r
either surfi_ce or oven cooking. It conducts
heat very slowly and cools very slowly: Check
cookware I/l_lIltlIilCttlI'eI"S directions to be
sure it can be used on gas ranges.
Stainless Steel: This metal alone has poor
heating properties and is usually combined
with coppe_; alunfinuln or other metals fin.
improved heat distribution. Combination
metal skillets usually work satisti_ctorilv if
they are used with medium heat as the
I/l_l ntl[il Cttli'ei" i'ecolilli/ends.
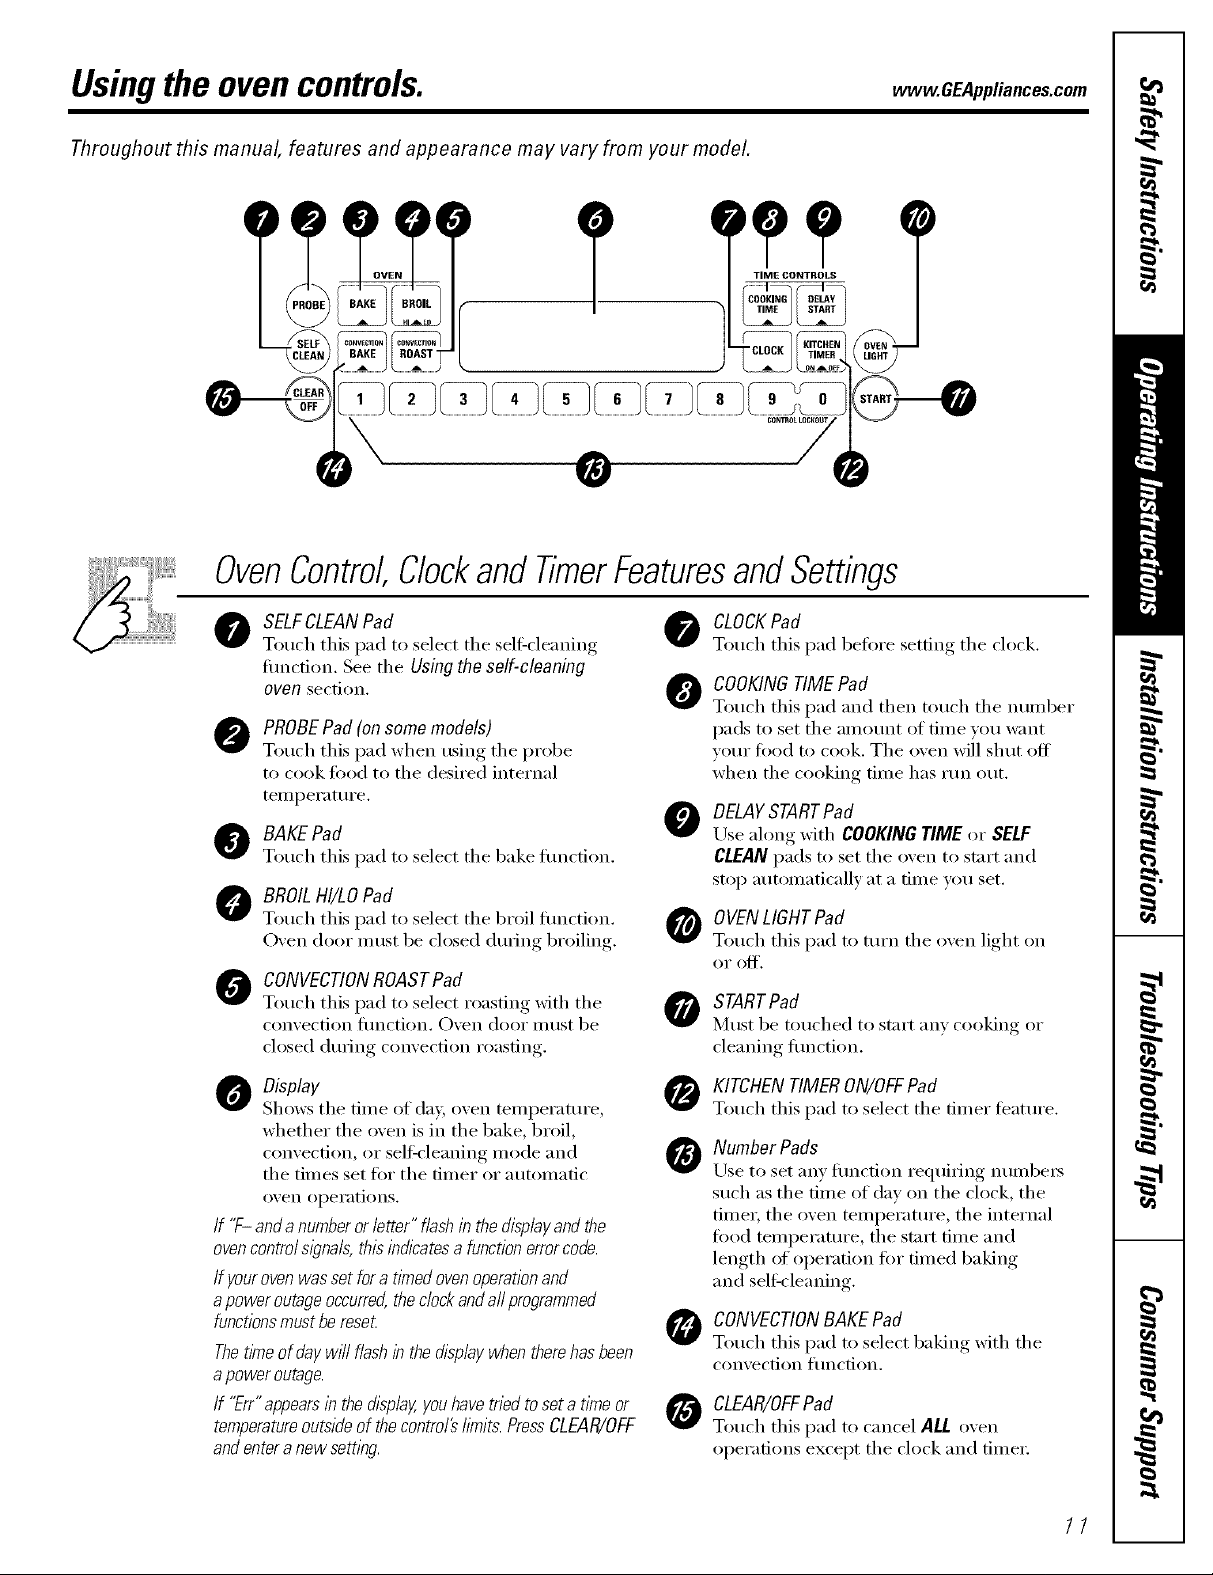
Use a fiat-bottomed wok.
Thiscanbehazardoustoyourhealth.
Wok This Way
Werecommendthat youusea 14-inchor smaller
fiat-bottomed wok. Make sure the wok bottomsits
fiat on thegrate. Theyareavailableat your local
retail store.
Onl) a fiat-bottomed wok should be used.
In Case of Power Failure
In case of a power fifilure, you can light tile
gas sm'fi_ce burners on )_mr range with a
match. Hold a lit match to tile burne_; then
push in and tm'n tile control knob to tile
LITEposition. Use extreme caution when
lighting burnexs this way.
Do not rise a flat-bottoilled wok Oil a
support ring. Placing tile ring over tile
burner or grate may cause tile bm'ner
to work improperly, resulting in carl)on
monoxide levels above allowable standards.
This could be dangerous to veto" health.
Surfi_ce bm'nets in use when an electrical
power fifilm'e occms will continue to
operate noiillallv:
/0
Usingthe ovencontrols, www.GEAppliances.com
Throughout this manual, features and appearance may vary from your model.
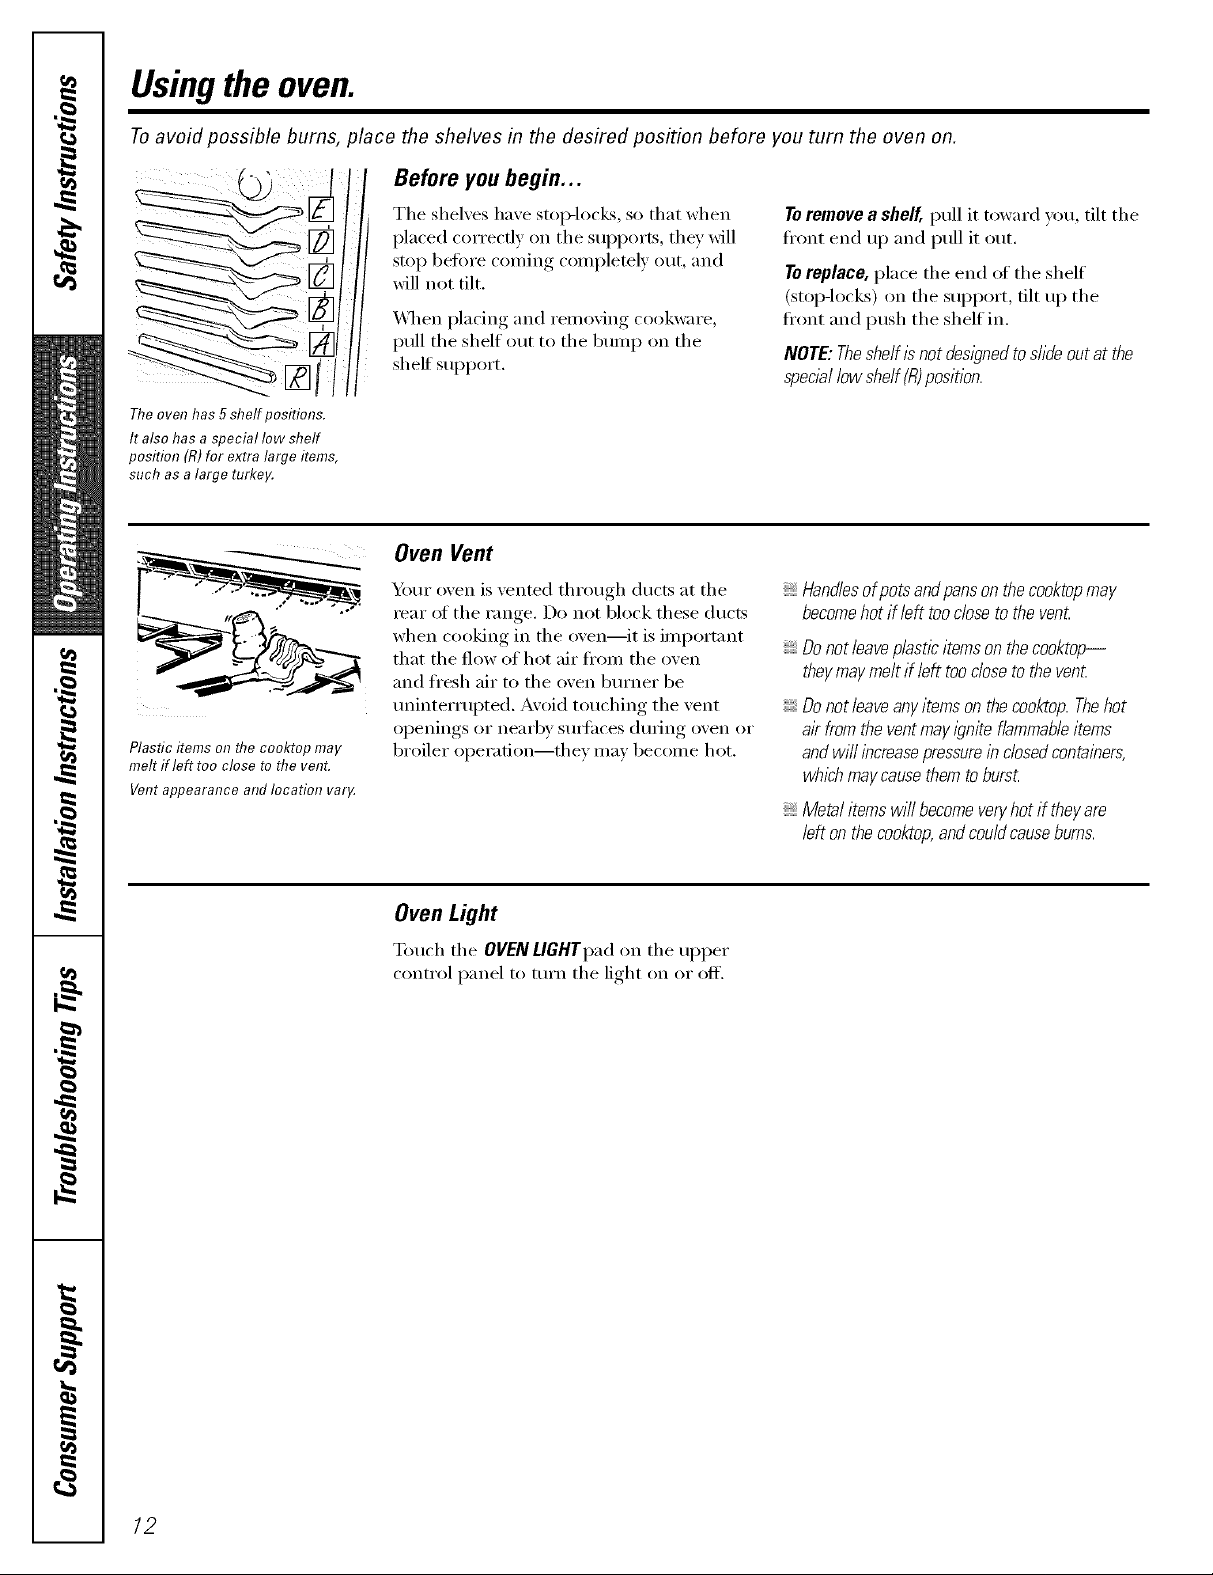
OvenControl,Clockand TimerFeaturesandSettings
SELFCLEAN Pad
0
Touch this pad to select tile selFcleaning
filnction. See tile Using the self-cleaning
oven section. 0
PROBE Pad (on some models)
0
Touch this pad when using tile probe
to cook toed to tile desired internal
temperature.
BAKEPad
Touch this pad to select tile bake flmction.
BROIL HI/LO Pad
Touch this pad to select the broil flmction.
O\en door Imlst be closed during broiling.
CONVECTIONROASTPad
0
Touch this pad to select roasting with tile
convection flmction. Oven door inust be
closed during convection roasting.
O Display
Shows the time of day, oven temperature,
whether tile oven is in tile bake, broil,
convection, or self_'leaning mode and
tile times set fin" tile timer or automatic
oven opei'ations.
If "F- and a number or letter" flash in the displayand the
ovencontrol slgna& thisindicates a function error code.
If yourovenwasset for a timed ovenoperationand
apower outage occurred,the dock andaft programmed
functionsmust bereset
Thetlkneof daywHIflash inthe display when therehas been
apower outage.
If "Err" appearslb the display,youhave tried to set a tlYneor
temperatureoutside of the control# bruits.PressCLEAR/OFF
andenter anew settlbg.
CLOCKPad
v
Touch this pad before ,setfim,_tile clock.
COOKING TIME Pad
Touch this pad and then touch tile number
pads to set tile amount of time you want
w)ur fi_od to cook. Tile oven will shut off
when the cooking time has run out.
DELAY START Pad
0
Use along with COOKINGTIME or SELF
CLEANpads to set tile oven to start and
stop automatically at a time you set.
OVEN LIGHT Pad
Touch this pad to turn tile o'_en light on
OI" OleO.
START Pad
mtlst be touched to start }lily ('ooking oI"
cleaning flmction.
KITCHEN TIMER ON/OFF Pad
Touch this pad to select tile timer feature.
Number Pads
0
Use to set any function requiring numbers
such as tile dine of day on tile clock, tile
timeI; tile oven temperature, tile internal
food temperature, tile start time and
length ,':,foperation fin" timed baking
and selFcleaning.
CONVECTIONBAKE Pad
Touch this pad to select baking with tile
con'_ection ltinction.
CLEAR/OFFPad
Touch this pad to cancel ALL oxen
operations except tile clock and timei:
//
Usingthe oven.
Toavoid possible bums, place the shelves in the desired position before you turn the oven on.
Before you begin...
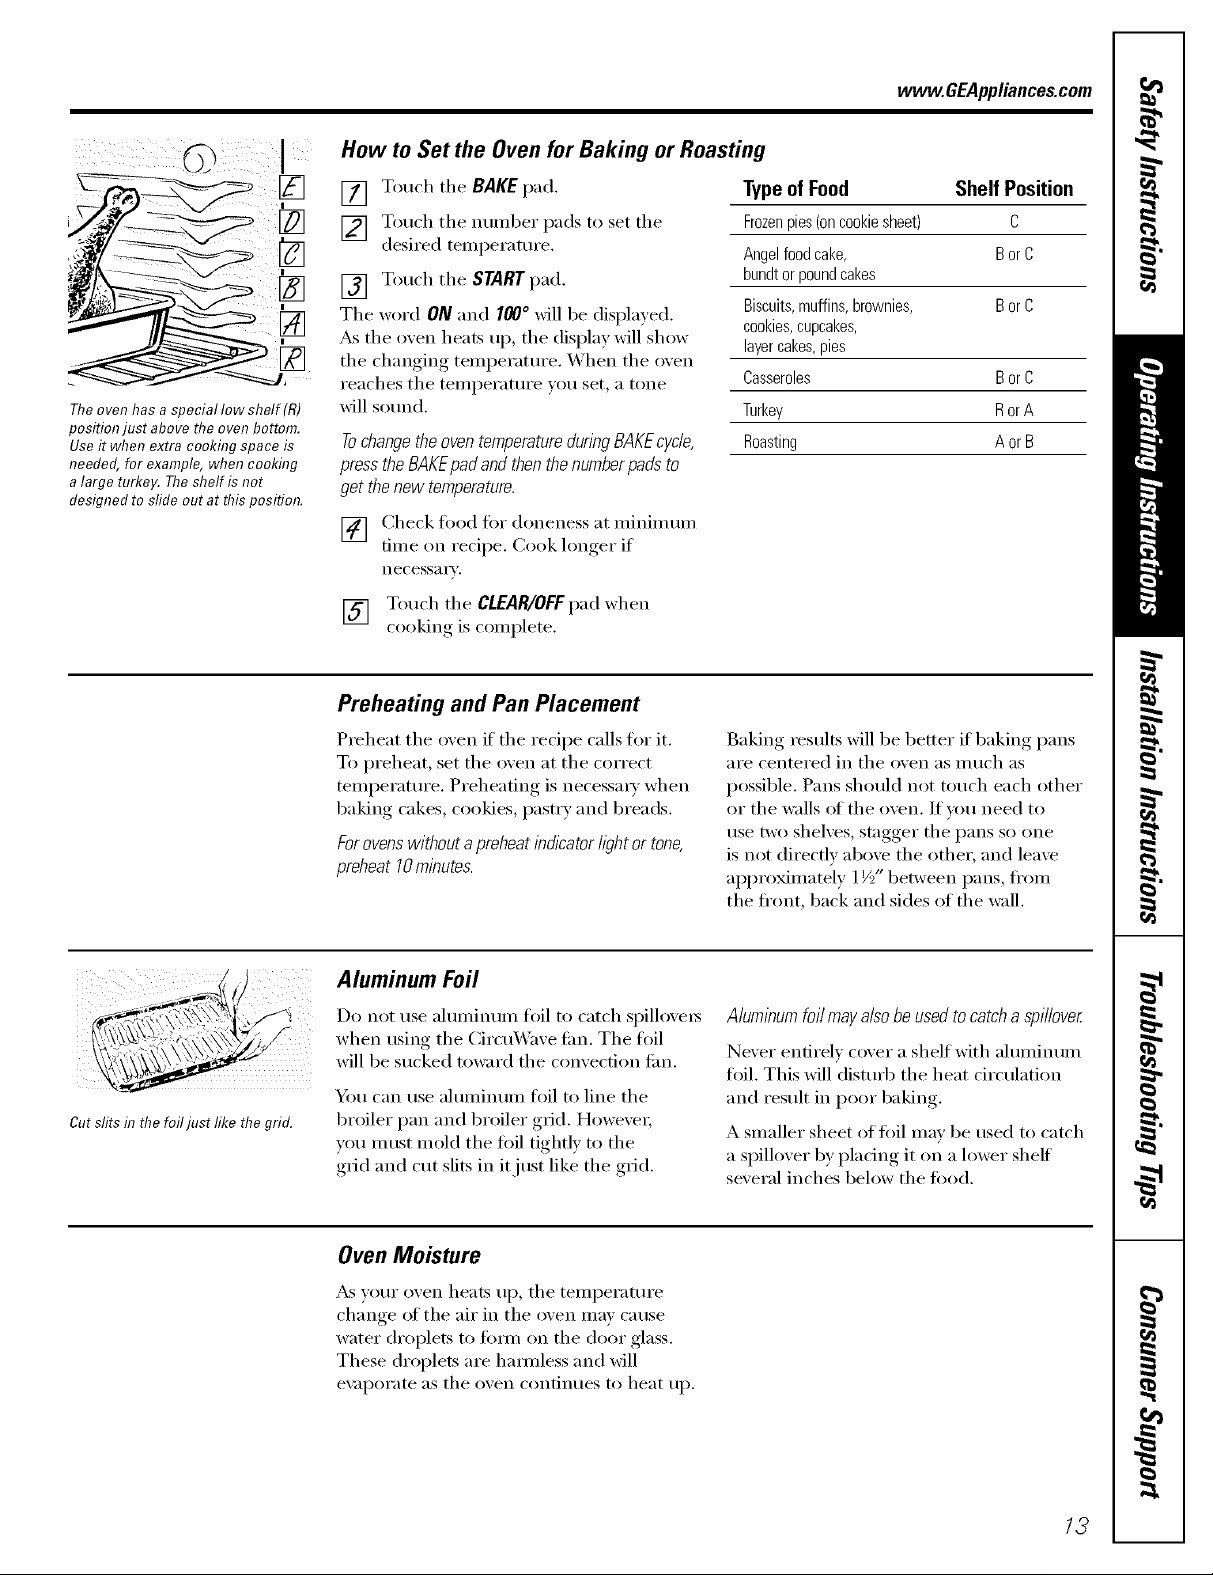
Theoven has 5 shelf positions.
It also has a special low shelf
position (R)for extra large items,
such as a large turkey.
Plastic items on the cooktop may
melt if left too close to the vent.
Vent appearance and location varg
The shelves have stop-locks, so that when
placed correctly on the supports, they will
stop before coming complemly out, and
will not tilt.
_A'hen placing and removing cookware,
pull the shelf out to the bump on the
shelf support.
Oven Vent
Your oven is vented through ducts at the
rear _ff the range. Do not block these ducts
when cooking in the oven--it is important
that the flow of hot air fi'om the oven
and fl'esh air to the oven burner be
uninterrupted. Avoid touching the vent
openings or nearby surfhces during oven or
broiler operadon--they may become hot.
Toremove a shelf, ptdl it toward you, tilt the
ti'ont end up and pull it out.
Toreplace, place the end (ff the shelf
(stop-locks) on the support, tilt up the
ti'ont and push the shelf in.
NOTE: Theshelf/s not des/)ned to s/ida out at the
special low shelf (R)position.
Handlesofpotsandpansonthecooktopmay
becomehotif left tooclosetothevent
Donotleaveplasticitemsonthecooktop--
theymaymeltif lefttoodoseto thevent
Donotleaveanyitemsonthecooktop.Thehot
air fromtheventmayigniteflammableitems
andwi//increasepressureindosedcontainers,
whichmaycausethemtoburst
Metalitemswi//becomeveryhotif theyare
leftonthecooktop,andcouldcauseburns.
Oven Light
Touch the OVEN LIGHTpadon the upper
control panel to turn the light on or off.
12
www.GEAppliances.com
(5) ]
The oven has a special low shelf (R)
position just above the oven bottom.
Use it when extra cookflTg space is
needed, for example, when cooking
a large turkey. The shelf is not
designed to sfide out at this position.
How to Set the Oven for Baking or Roasting
[] Touch tile BAKEpad.
[] Touch the nt/I/lbeI" pads to set the
desired teml_erature.
[] Touch tile START pad.
Tile word ON and I00 ° will be displayed.
_s tile oven heats up, tile display will show
tile changing teinl)erature. When tile oven
reaches tile temperature you set, a tone
will sound.
Tochange the oven temperature during BAKE cycle,
press the BAKE pad and then the number pads to
get the new temperature.
[] (_heck fi_od fiw doneness at minim um
time on recipe. Cook longer if
necessa i'v.
[] Touch tile CLEAR/OFFpad when
cooking is coinplete.
Preheating and Pan Placement
Typeof Food Shelf Position
Frozenpies (on cookie sheet) C
Angel food cake, Bor C
bundt or pound cakes
Biscuits,muffins, brownies, B or C
cookies,cupcakes,
layercakes, pies
Casseroles Bor C
Turkey Ror A
Roasting A or B
Cut slits in the foiljust like the grid.
Preheat the oven if' the recipe calls for it.
To preheat, set the oven at the correct
temperatm'e. Preheating is necessm w when
baking cakes, cookies, past_ T and breads.
For ovens without a preheatindicatorhghtor tone,
preheat 10 minutes.
Aluminum Foil
Do not use ahmfinum foil to catch spilloxe_s
when using tile Circu_Vaxe tim. Tile foil
will be sucked toward tile comection tim.
You can use aluminum flfil to line tile
broiler pan and broiler grid. However;
vou must mold tile fi)il tightly to tile
grid and cut slits in it just like the grid.
Oven Moisture
_s vour oven heats up, tile temperature
change of tile air in tile oven may Catlse
water droplets to tirol/ on tile door glass.
These droplets are hmmless and will
e\;ll)Oi'ate as tile ()veil contintles to heat up.
Baking results will be better if baking pans
aye centei'ed in tile oven as i/ltlch as
possible. Pans should not touch each other
or tile walls oI tile oven. If you need to
rise two shelves, stagger tile pans so one
is not directly above the other; and leave
approMmamly 1 I/_)"between pans, ti'om
the front, back and sides of the wall.
Aluml)_um foilmay also be used to catch a spi//ove_
Never entirely cover a shelf with ahmfinum
foil. This will disturb the heat circulation
and result in poor baking.
A smaller sheet of foil may be used to catch
a spillover by plating it on a lower shelf
several inches below tile food.
13
Usingthe oven.
i ¸ •
Always use the broiler pan and grid
that came with your oven. It is
designed to minimize smoldng and
spattering by trapping juices h7the
shielded lower part of thepan.
How to Set the Oven for Broiling--Close the oven door
[] Place the meat or fish on the broiler
grid in the broiler pan.
[] Follow suggested shelf positions in
the Broiling Guido.
[] The o_en door mustbe closed during
1)r_filing
Touch the BROILHI/LOpad once for
[]
HI BroiL
To change_to LOBroil, touch the
BROILHI/LOpad again.
Broiling Guide
The size, weight, thickness,
stnrting, temi_eratm'e, and Food
_Ot/I" px'el[_x'ence ()_ doneness
• GroundBeef
will affect broiling times.
This guide is based on meats
at reflJgerator temperatm'e. Beef Steaks
tThe U.S. Oepartment of Agriculture Medium
says "Rare beef is popular, but you Well Done
should know that cookflTgit to only Rarer
140°Fmeans some food poisoning Medklm
organisms may survive." (Source: Well Done
Safe FoodBook Your Kitchen Guide Chicken
USDARev. June 1985.)
Raret
Bakery Product
Bread (toast)
English Muffin
LobsterTails
Fish Fillets
Salmon
Steaks
Fillets
Ham Slices
(precooked)
Pork Cbops
Well Done
LambChops
Medium
Well Done
Medklm
Well Done
Quantityand/
orThickness
1 lb.(4 patties)
Vzto _4"thick
4 Ibs.(12 patties)
Y4to 1" thick
1to 11/Llbs.
11/Ethick
2to 21/LIbs.
1whole cut up
2to 21/zIbs.,
splitlengthwise
Breast
2to 4slices
2(split)
2-4
1 lb. (I/4 to Y/' thick)
2(1" thick)
2{I/zto 3/Y"thick)
Y/' thick
1" thick
2(i//, thick)
2(1" thick)about 1 lb.
2(1" thick)about 10
to 12 oz.
2(11//'thick)about1 lb.
Shelf
Position
E
D
D
C
C
D
B
B
D
E
B
D
D
C
C
C
C
D
D
D
D
[] Touch the START pad.
[] X,_hen broiling is finished, touch the
CLEAR/OFF pad.
Ser\e the food immediatel); and lea',e the
pan outside the oxen to cool dtwino_ the
meal fiw easiest cleaning.
Use LO Broil to cook fi_ods such as poultx?
or thick cuts of meat thoroughly without
o_ e_4)rowning them.
FirstSide
Time(rain.)
13
15
10
10
15
2O
25
25
34
18 20
10
10
10
15
10
14
Second Side
Time (rain.)
8
6
8
3
B
8
7
9
4
6
8
8
10 12
2O
25
15
1
Donot
turn
OVer•
6
8
10
15
4
9
6
10
Comments
Spaceevenly.
Steakslessthan¼" thick
aredifficultto cookrare.
Slashfat.
Brusheachside with
meltedbutter.
Broilskin-side-downfirst•
Spaceevenly•PlaceEnglish
muffinscut-side-upand
brashwith batter if desired•
Cutthroughbackof shell.
Spreadopen•Brushwith
meltedbutterbefore
broilingand after half of
broilingtime•
Handleandturnvery
carefully.Brushwith
lemonbutterbefore
anddaringcooking,
if desired•
Turncarefully.Do not
turnskin sidedown•
Slashfat.
Slashfat.
14
Usingtheclock and timer, vvvvw.GEAppliances.com
Not all features are on all models.
ToSet the Clock
Make sure the clock is set to the
correct time of da,¢
The timer is a minute timer only.
The CLEAR/OFFpad does not affect
the time_
Tile clock II/ust be set to tile correct tinle
of day fin" tile automatic oxen tinting
tractions to work properly. Tile time ot day
cmmot be changed during a timed baking
or self:cleaning cycle.
[] Touch tile CLOCK pad.
[] Touch tile nmnber pads.
Touch tile number pads tile sanle way }ou
read them. For example, to set 12:. 4, touch
tile nmnber pads I, S, 3 and 4[in that ordex:
_3
To Set the Timer
Thetlknerdoesnotcontro/ovenoperations.
Themaxlknumsettingonthetimeris9 hours
and59minutes.
Touch tile KITCHENTIMERON/OFF
[]
pad.
Touch tile ntlillber pads tliltil tile
[]
[lIl/O[lnt of tiIlle _O1l _V[lIlt shows in
tile display. Tile maximmn number
of minutes that can be entered is 60.
To set additional time, you will need
to set it by hom_ and minutes.
For example, to enter 1 hour and
30 minutes, touch I, 3andO in
that order:
If number pads are not touched within one
minute after you touch tile CLOCKpad, tile
display reverts to the original setting. If this
happens, touch tile CLOCKpad and reenter
tile time _ff day:
[] Touch tile STARTpad tmtil tile time
of da)shows in tile display. This ente_
tile time and st;ms tile clock.
TocheckthetimeofdaywhenthedisplayIs
showingotherinformation,s/knp/ytouchthe
CLOCKpad Thetimeofdayshowsunti/another
padistouched
If youmakeamistake,presstheKITCHENTIMER
ON/OFFpadandbeginagain.
[] Touch tile START pad. M'ter _ressim,
the STARTpad, SET disappeaxs; this
tells wm the time is counting down,
although tile display does not change
tmtil one minute has passed.
[] _,\q/en tile timer reaches .'/70,tile
control will beep 3 times fi_llowed by
one beep every 6 seconds until tile
KITCHENTIMERON/OFFpadis touched.
The 6 second tone can be canceled by following
thestepsin the Specialfeaturesofyouroven
control section under Tones at the End of a Timed
Cyc/e.
To Reset the Timer
If tile display is still showing tile time
remaining, you may change it by touching
tile KITCHENTIMERON/OFFpad; then touch
tile number pads tmtil tile time you want
appea_s in the display.
ToCancel the Timer
Touch tile KITCHENTIMERON/OFFpad twice.
Power Outage
lf a flashingtl?neis in thedisp/ay,)/ouhave
exper/enced a power failure. Reset #_e dock
If tile remaining time is not in tile display
(clock, delay start or cooking time are in
tile display), recall tile remaining time by
touching tile KITCHEN TIMER ON/OFFpad
and then touching tile ntli//ber pads to
enter tile new tii//e veil l_'_lilt,
To reset the clock, tol_ch the CLOCK Dad.
E_ter tile correct time of (lay by tol_chh_g
the appropiJate mm)ber pads. Tolmh the
STARTpad.
15

Usingthetimedbaking andmasting features.
NOTE,"Foods that spoil easily--such as milk, eggs, fish, stuffings, poultry and pork--should not be allowed to sit for more
than 1hour before or after cooking. Room temperature promotes the growth of harmful bacteria. Be sure that the oven
light is off because heat from the bulb will speed harmful bacteria growth.
How to Set an Immediate Start and Automatic Stop
Theoven will turn onimmediately and cook fora
selectedlength of tkne.At theend of the cooklhg
bYnethe ovenwill turn off automaflca//y
[] Touch tile BAKEpad.
[] Using the nmnber pads, enter the
desired teinperature.
[] Touch tile COOKING TIME pad.
NOTE."If yourreciperequirespreheating, youmay
needto add additional time to the lengthof the
cookingtime.
The word ON and 100° will be displayed.
Tile cook time Mll begin to co/mt down.
_s tile oven heats uI), tile display will show
tile changing temperature. When the oven
reaches tile temperature you set, 3 beeps
will sound.
At tile end of timed baking, tile oven will
tm'n off. Tile end of cycle tone will sound.
Touch tile CLEAR/OFFpad to clear tile
display
[] de i,edU i" tl/e..mbe,l,.d.e.te,tl/eb. . time.Tl/e.,e.
temperature and tile cooking time
that you entered will be displayed.
[] Touch tile STARTpad.
How to Set a Delayed Start and Automatic Stop
Youcanset the ovencontrol todelay-start the oven,
cookfor a specifk length of time and thenturnoff
automatically
Make stlre tile clock shows tile correct
time of day.
[] Touch tile BAKEpad.
[] ILrsing the number pads, enter the
desired temperatm'e.
[] Touch tile COOKINGTIMEpad.
NOTE."If yourreciperequirespreheatl#g, youmay
needto add additional time tothelength of the
cookingt/me.
[] Lrsing tile number pads, enter tile
desired baking time.
Touch tile DELAYSTART pad.
[]
Using the nmnber pads, enter tile
[]
time of day you want tile oven to
turn on and start cooking.
Touch tile START pad.
[]
If you w_mld like to check tile times you
have set, touch tile DELAYSTART pad to
check tile start time w_u have set or touch
tile COOKINGTIME pad to check tile length
of cooking time you have set.
Tile oven will tm'n on automatically.
Tile _x)rd ON and I00 ° will be displayed.
Tile cook time will begin to count down.
_s tile oven heats up, tile display will show
the changing temperature. The oven will
cook fin" tile programmed cooking time and
shut off a utomaticallv.
At tile end of timed baking, tile oven will
mrn off. The end of cycle tone will so/md.
Touch tile CLEAR/OFF pad to clear tile
display;
/6
NOTE."An attention tone will soundif youare using
tknedbahhg and do not touchthe STARTpad after
entenw thebakl#g temperature.

Usingtheprobe.(onsome models) www.aEApplia.ces.com
For many foods, especially roasts and poultry, internal food temperature is the best test for doneness.
The temperature probe takes the guesswork out of roasting by cooking foods to the exact doneness you want.
Use of probes other than the one provided
with this product ma) result in dmnage to /_ Cable
the probe, plug[( )} _)t
when inserting and removing them fl'om ; Handles
the fl)od and outlet.
Thetemperature probe has a
skewer-like probe at one end and
a plug at the other end that goes
hTtothe outlet h7the oven.
Toavoiddamagingyourprobe,donotusetongs
topuffonthecablewhenremovingit
Toavoidbreak/bgtheprobe,makesurefoodis
Neverleaveyourprobeinside the ovendunbg
aself-cleaning cycle.
Do not store theprobein the oven.
completelydefrostedbeforeinserting.
Topreventpossibleburns,donotunplugthe
probefromtheoutletuntil theovenhascoolecL
_Mter preparing the meat and placing it
on a trivet or on the broiler pan grid,
fi)llow these directions for proper probe
placement.
Insert the probe completely into the meat.
It should not touch the bone, ti_t or gristle.
For roasts with no bone, insert the probe
into the meatiest part of the roast. For
bone-in ham or lamb, insert the probe into
the center of the lowest large muscle.
Insert the probe into the center of dishes
such as ii/eat loaf or casseroles.
Insert the probe into the meatiest part of
the inner thigh from below and parallel to
the leg of a xd_ole turkey
How to Set the Oven For Roasting When Using the Probe
f_
PROBE
-- L, o
CLEAR
[] Insert the probe into the food.
[] Plug the probe into the outlet in the
oxen. Make sure it's pushed all the
wm in. Close the o;en do()):
[] Touch the PROBEpad.
[] Touch the nmnl)er pads to set the
desired internal fi)od or meat
teml)erature.
[] Touch the BAKEpad.
[] Touch the munl)er pads to set the
desired oxen teml)erature.
[] Touch the START pad.
Thedisplaywill flashif the probe is lbserted into the
outlet andyouhavenot set a probe temperature
and touchedtheSTARTpad
_dter the internal teml)erature of the fi)od
reaches 100°K the changing internal
temperature will be shown in the display.
] X_q_en the internal teml)erature of the
fi)od reaches the munber you have set,
the probe and the oven ttlI'n off and
the oven control signals. To stop the
signal, touch the CLEAR/OFFpad. Use
hot pads to remove the probe fron/
the fl)o(l. Do not use tongs to pull
on it--they might damage it.
To change the ()veil temperature during
the Roast cycle, touch the BAKE pad and
then the munber pads to set the new
teml)erature.
If theprobe is removedfrom the foodbefore the
flbal temperatureisreached,a tone will sound
and the dlspby will flash until theprobe is
removedfrom the oven.
Youcan usethe tlYnereventhoughyoucannot
use timed oven operationswhile using theprobe.
17
Usingtheconvectionoven.
The convection oven fan shuts off when the oven door is opened. DO NOT leave the door open for long periods
of time while using convection cooking.
To help you undeistand the difl_'i'ence ..............
between convection bake and roast and
traditional bake and roast, here are some
general guidelines.
ConvectionBake
Preheattheoven.SeetheUsingtheOven-
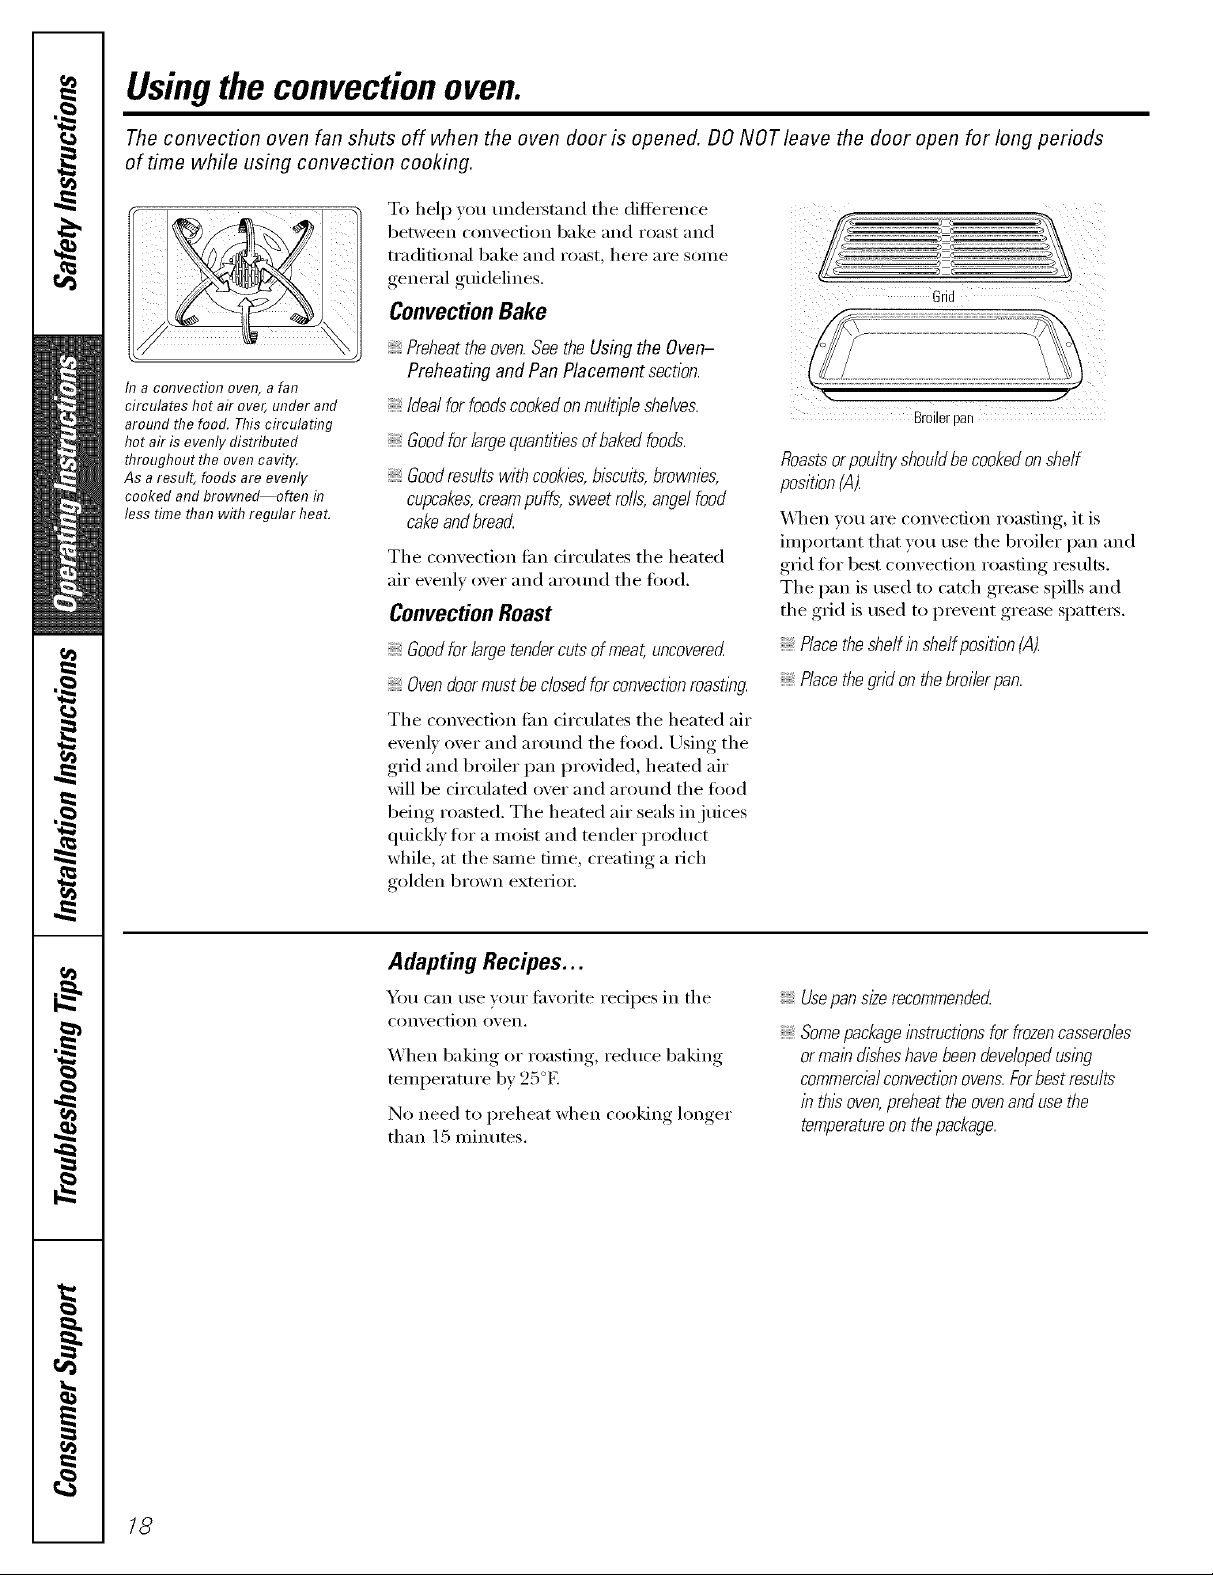
II? a COt?veetiol? oveR, a fat7
circulateshot airover,underand
aroundthe food.Thiscirculating
hotairis evenlydistributed
throughouttheovencavity.
Asaresult,foodsare evenly
cookedandbrowned_often t7
lesstimethanwithregularheat.
Preheatingand PanPlacementsection.
Idealforfoodscookedonmultipleshelves.
Goodforlargequantitiesofbakedfoods.
Goodresultswithcookies,biscuits,brownies,
cupcakes,creampuffs,sweetrolls,angelfood
cakeandbreacL
The convection tim drculates the heated
air evenly over and around the food.
Convection Roast
Goodfor large tendercuts of meat, uncovered
Ovendoormust be closedfor convectionroasting.
The convecdon tim circulates the heated air
evenly over and around the fi)od. Using tile
gild and broiler pan provided, heated air
will be circulamd over and around the food
being roasted, The heated air seals in juices
quickly fl)r a inoist and tender product
while, at the sanle time, creating a rich
golden brown exteIJOI:
Broilerpan
Roastsor poultn/ shouldbe cookedonshelf
positbn (A).
_,_l_eI1 you are convection roasting, it is
iinportant that you rise the broiler pan and
grid ti)i" best convection roasting results.
The pan is used to catch grease spills and
the grid is used to prevent grease spatteis.
Placetheshelf in shelfposition (A).
Placethegrid on thebroi/erpan.
18
Adapting Recipes...
You can use your fi_\'oiite recipes in the
convection ()veil.
When baking or roasting, reduce baking
tenlperature by 25°E
No need to preheat when cooking longer
than 15 Ininutes.
UsepansizerecommendecL
Somepackageinstructionsfor frozencasseroles
ormain disheshavebeen developedusing
commercialconvectionovens.Forbest results
in this oven,preheat the ovenand use the
temperatureon thepackage.
 Loading...