

GE GXCF03KWW Series Owner's Manual
gO, COrn
Cold and
Safety Instructions ............. 9, 3
Usit(g the Water Dispenser
Assembling tile Base .............. 4
Features and Parts i,ist ............ 4
i,oading tile Dispenser . ........... 4
Specifications .................... 6
Care and Cleaning ............ 5, 6
lYoubleshooting Tips ............ 6
Consumer Support
Consuiner Support ....... Back Cover
WaHanty ............... Back Cover
Fran{'ais
Informations en matibre
de s&uritd ................... 7, 8
Utilisation du distributeur d'eau
Caract&'istiques et liste de pibces .... 9
Camct&'istiques techniques ....... 11
Chargement du distributeur . ...... 9
Montage de la base ............... 9
Entretien et netCoyage ........ 1o, 11
Conseils de d_pannage .......... 11
Soutien du consommateur
Garantie ...................... 12
So/Itiell dtl COllSOl//ll/ate/lI" . ....... ]
Room Temperature
Water Dispenser
GXCFO3E
(;X(J 03K _
Distributeur d'eau ffoide
et fi tempdrature ambiante
La section fran_aise commence a la page 7
Dispensador de agua fffa
y de temperatura ambiente
La secci6n en espa_ol empieza en la pagina 13
*ENERGY STAR ® qualified produ(t.
Espmiol
Informaci6n de seguridad .... 13, 14
Como utilizar el dispensador
de agua
C6mo cargar el dispensador . ...... 15
Cdmo ensemblar la base .......... 15
Especificaciones ................. 17
i,ista de partes y caracteristicas ..... 15
Cuidado y limpieza .......... 16, 17
Solucionar problemas ........... 18
Servicio al consumidor
Garantfa ....................... ]9
Servicio al consumidor . .......... 19
As an ENERGY STAR® partner; (;E
has deteHnined that this product
meets tile ENERGY STAR <_guidelines
fi)r ener_' efficiency.
215C1002P039 49-50223 02-07Jfl
iMPORTANTSAFETYiNFORMATiON.
READALLiNSTRUCTiONSBEFOREUSING.
A WARNING!
Usethisappliance onlyfor its intendedpurposeas describedin thisOwner'sManual
SAFETYPRECAUTIONS
Whenusingelectrical appliances,basicsafetyprecautions should be followed,includingthe following."
_:This _va|er dispenser must be t)roperly inslalled
and lo(aled in a((ordan(e wilh lhese insu'u(dons
tleti)re il is used.
::_'_1)o not allow children to climb, stand or hang
on tile outside of tile dist)enseJ; or on the shelves
inside the storage cabinet (on some models).
I'h() could tip the dispenser O_t('_"and damag('
it and seriously ii!jure themselves.
i,!:?Do not store or use gasoline or ()tiler flammat/le
vapors _md liquids ill the vi(inil) of this or ally
other appliance.
::_':Unplug the water dispenser belin'e cleaning or
making ret)airs.
NOTE: GEdoes not support any servicing of the
dispense/: We strongly recommend that you do not
attempt to service the dispenser yourself.
i_:I)(/n(/l use lhis dispenser o dis t ense my hing
i,_:!Do not plug ill tile t)ower cord or turn on the
::_':Wipe up ally water spills immediatel} alier loading
(/|her |hall w_l|er.
power s/dt(hes \vhen tile water dispenser is emply.
or unloading water boules.
Illi(To/)iolog-i('_lll} [[I/S_lt(' or ot tlnkno\\rn (ttlilli|'} ,,
CAUTION:Children should be supervised
1V a parent when using this product.
PROPERINSTALLATIONANDLOCATION
ii _\llc'w a[ least 1" (2.5 cm) of space/)elween tile
back of tlle water dispenser and the wall to allow
lor t)rot)er air circulation.
i_:Do not install the water dispenser where the
temperature will go bel(_\_r 50OF (10°C) or
ab(_vc 100°F (38°(;).
i,!:?Install tile water dispenser on a level floor or
counter strong enough to support it when fldly
loaded. Do not install where it will be subject to
direct starlight, heat or moisture,

6ROUNDINGINSTRUCTIONS
WARNING-Improperuse of the grounding
This at_pliana_ musl be grounded. In d_e _r_l_l ()_ _I_
ele(tri(al shorl (ircuil, grounding reduces the risk of
el,:x u'i( sho(k.
This appliance is equipped with a power cord having
a grounding wire with a grounding plug, The plug
must be plugged into an outlet that is properly
installed and grounded.
Consult a qualified electrician itthe grounding
insmutions are not completely understood, or if
doubt exists as to whed/er tile apt)liance is properly
grounded.
If tile outlet is a standard 2-prong wall outlet, it is
your personal responsibility and obligation to have
it ret)laced with a t)roperl_ grounded 3lining
wall outlet.
plug can result in a risk of electric shock.
Do ll(/t HI/(ler ;4I/}" (ir(tllllstall(es Ctl[ or relllO\_' the
third (ground) prong ti'om tile power cord.
Do not use an adapter ph N with this appliance.
Do not use an extension cord with this appliante.
If the power cord is u)o short, have a qualified
electrician install an outlet near the appliance.
For best ot)eration, t)lug the appliance into its own
electrical outlet on a dedicated circuit to t)re\_'nt
flickering of lights, 1)lowing of Rise or tripping of
circuit breaker:
PROPERDISPOSALOFTHEWATERDISPENSER
Refrigerant Disposal
reti'igerant in its (ooling system. These reti'igerants
are believed to harm stratospheric ozone. Ifynt are
throwing awa} your old dispenser make sure the
reti'igerant is re/noved and re(overed ti)r proper
disposal by an EP,\-certified technician. ]fy)u
iHtentiolmlly release this reli'igeraHt, you call/)e
sul)iect to fiI/eS and imprisonment ullder provisions
of environmental legislation.
READANDFOLLOWTHISSAFETYINFORMATIONCAREFULLY.
SAVETHESEINSTRUCTIONS
3

Usingthe water dispenser.
Features and Parts List
0 Bottle Support Collar (WS28X10046)
0 Separator (WS28X10020)
Cold Water Tank
Cold (Blue) Faucet
Rome Temperature (White) Faucet
Dispenser Drip Tray (WS28X10021) and
Grille (WS28X10022)
Base
0
(Top Cover- WS30X10006)
(Back Side - WS30X10007)
(Bottom Cover- WS30X10008)
(Front Side- WS30X10009)
Seetheback page of thismanual
fororderinginstructions.
@
0
NOTE:The top (3) and bottom (4)
pieces can be found in the top and
bottom of the carton packaging foam.
Assembling the Base
1. ,\lign tile ti'ollt and back pieces of the
base (pieces labeled 1 and 2), with "UP"
pointing up, and snap togethe:: If it does
notgo together, make sure "UP" is in the
0
same direction on both pie(es.
2. Place the top cover (piece 3) on top of
pieces 1 and 2 (li'ont and back). Press
down firmly until it snaps into place.
3. Turn the assemlfly ()_r_'l_and place tile
bottom cover (pie(e 4) on top of pieces
1 and 2 (li'ont and back). Press down
firmly until it snaps into place.
4. Turn base over and place the dispenser
on top of tile base.
Loading the Dispenser
Sanitize the dispenser water tank prior to
installing a full bottle of water for the first time
(see "Cleaning and Sanitizing the Water Tank").
IMPORTANT: Make sure the dispenser is
unplugged. Before placing the water bottle on
the dispenser, wash hands and wipe the top of
the bottle with a clean cloth, Avoid touching the
part of the bottle that will be in contact with the
water dispenser.
Make sure the water level in the top of the
dispenser is low enough to allow for proper
bottle installation, Failure to do so may cause
the dispenser to overflow.
1. Peel the label ti'om tile top cover of the
bottle (ifpresem). Do notremove the
entire bottle cap.
2. Place the bottle on top of tile dispenser
as shown, aligning the dispensing vah_'
probe to the center of the water bottle
cap. Press down until the probe
penetrates the bottle cap, allotting the
bottle to :x'st on the support calla::
3. IMPORTANT: Press both dispense levers
until water runs from both taps.
4. Plug in thu dispenser.
5. Allow 30 minutes liar water to reach cold
telllperat tires,
Contact a local water bottle distributor to
purchase water bottles,
Careand cleaningofthedispenser.
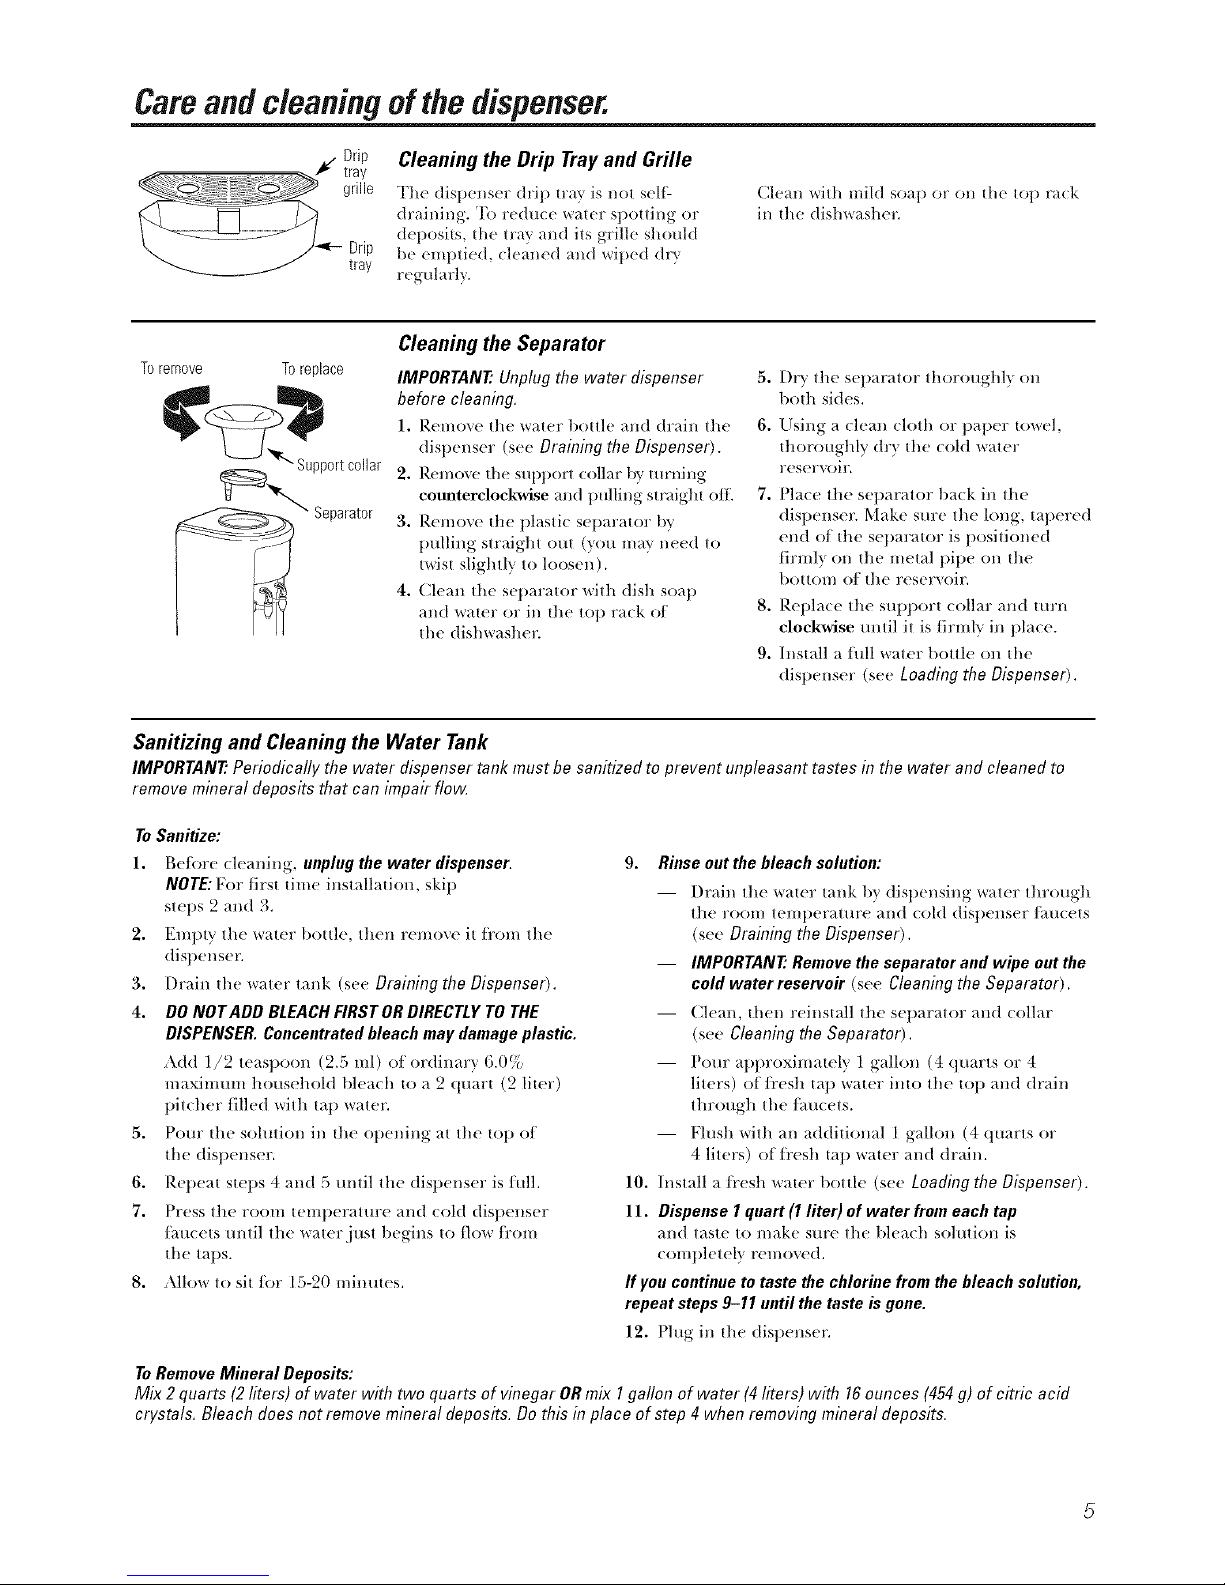
Cleaning the Drip Tray and Grille
_--_.- ,_:_ _ .__,,>._-,4...--c tray
Toremove To replace
Drip
The dispenser drip tray is i/o[ sell:
draining. 'I}) redHce water spotting or
deposiis, the tray and ils grille sh(mld
grille
be _ mptied, (leaned and wiped dry
r_ g_flarly.
Cleaning the Separator
IMPORTANT: Unplug the water dispenser
before cleaning,
1. Ilemoxe the water boule and drain die
dispenser (see Draining the Dispenser).
2. I)-emove the SUliport collar by turning
eountereloeM_se and pulling straight olt'.
3. Remove the plastic separator b}
pulling straight ()tit (you may need to
twist slightly to loosen).
4. Clean the separator with dish soap
and water or ill die top rack of
the dishwasher.
(]lean with mild soap or oil th_ top rack
ill the dishwasher.
5. [)r_ the separator thoroughly oil
both sides.
6. Using a clean cloth or paper towel,
dioroughly dry the cold water
reser_)ir.
7. Place the separator back in the
dispenser. Make sure die long, tapered
end of tlie separator is positioned
tirmly on die metal pipe on die
bouom of the reser_oil:
8. Replace die support collar and turn
clockwise until it is/irmly in place.
9. Install a flfll water bottle oil the
dispenser (see Loading the Dispenser).
Sanitizing and Cleaning the Water Tank
IMPORTANT_ Periodically the water dispenser tank must be sanitized to prevent unpleasant tastes in the water and cleaned to
remove mineral deposits that can impair flow
To Sanitize:
1. Delete cleaning, unplug the water dispenser.
NOTE: For first dine installation, skip
steps 2 and 3.
2. l{mply the water bottle, then remove it ti'om the
dispensel:
3. Drain the water tank (see Draining the Dispenser).
4. DO NOT ADD BLEACH FIRST OR DIRECTLY TO THE
DISPENSER. Concentrated bleach may damage plastic.
Add 1/2 teaspoon (2.5 ml) at ordinary 6.0%
maxinmm household bleach to a 2 quart (2 liter)
pitcher/illed with tap watel:
5. Pour the solution ill the opening at the top of
the dispenser.
6. Repeat steps 4 and 5 m/til the dispenser is full.
7. Press the room temperature and cold dispenser
tkmcets until the water just begins to flow/?'()m
the taps.
8. Allow to sit lor 15-90 minutes.
9. Rinse out the bleach solution:
-- l)l'_lill Ill{ I _r_l[{I_" tank by dispensing W_ll('r through
the r()om temperature and cold dispenser lhucets
(see Draining the Dispenser).
-- IMPORTANT: Remove the separator and wipe out the
cold water rese_oir (see Cleaning the Separator).
-- Clean, then reinstall the separator and collar
(see Cleaning the Separator).
-- Pour at)pr()ximately 1 gallon (4 quarts or 4
liters) ofli'esh tap water into the top and drain
through the/aucets.
-- Flush with all additional 1 gallon (4 quarts or
4 liters) ofti'esh tap water and drain.
10. Install a li'esh water bottle (see Loading the Dispenser).
11. Dispense I quart (1 liter) of water from each tap
and tasW to make sm'e the bleach solmion is
coml)h'wly reIiloved.
If you continue to taste the chlorine from the bleach solution,
repeat steps 9-11 until the taste is gone.
12. Plug in the dispenser.
ToRemoveMineral Deposits:
Mix 2 quarts (2 liters) of water with two quarts of vinegar ORmix I gallon of water (4 liters) with 16ounces (454g) of citric acid
crystals, Bleach does not remove mineral deposits. Do this in place of step 4 when removing mineral deposits.
Careand cleaningof thedispenser.
Cleaning the Outside and Storage Cabinet (onsomemodels)
IMPORTANT" Unplug the water dispenser before cleaning,
The inside alld otHside of the (abine[ can be washed wi[h
mild soap and water. Rinse thoroughly with clear water.
Never use commercial cleaners or abrasive scouring
powders.
Draining the Dispenser
The dispenser should be drained betore _leaning the tank and
be[bre lea_ing tbr long _acafions or absences.
Preparing for Vacation
I_'()r loIl_ _a(a[i()lls or al)seIl(es.
1. L'nl_lllg the _aler (]ispenseT_
2. Remo_e the ualer bottle.
3. Drain the water tank (see Draining the Dispenser).
4. Dr} tim separator lhorouglfly on both the top a_:Edbotlom
(see Cleaning the Separator).
Specifications
ChillingRate:at)t)rox. 0.5 gallons (2 I ) t)er hour
Capacity:3 or 5 galhm bollle
Sweep away or vactmm any d usI fi'om the condenser coils
on the ba(k of the trait. For best results, use a brush
specially designed lor this purpose. It is available at most
appliance stores.
Drain x_ater through d_elimcets into a containel:
After returningfromvacation,makesure tosanitizethewater
tankbeforeusingthedispenser(see Cleaningand Sanitizing
the WaterTank).
Power Consumption: 114W max.
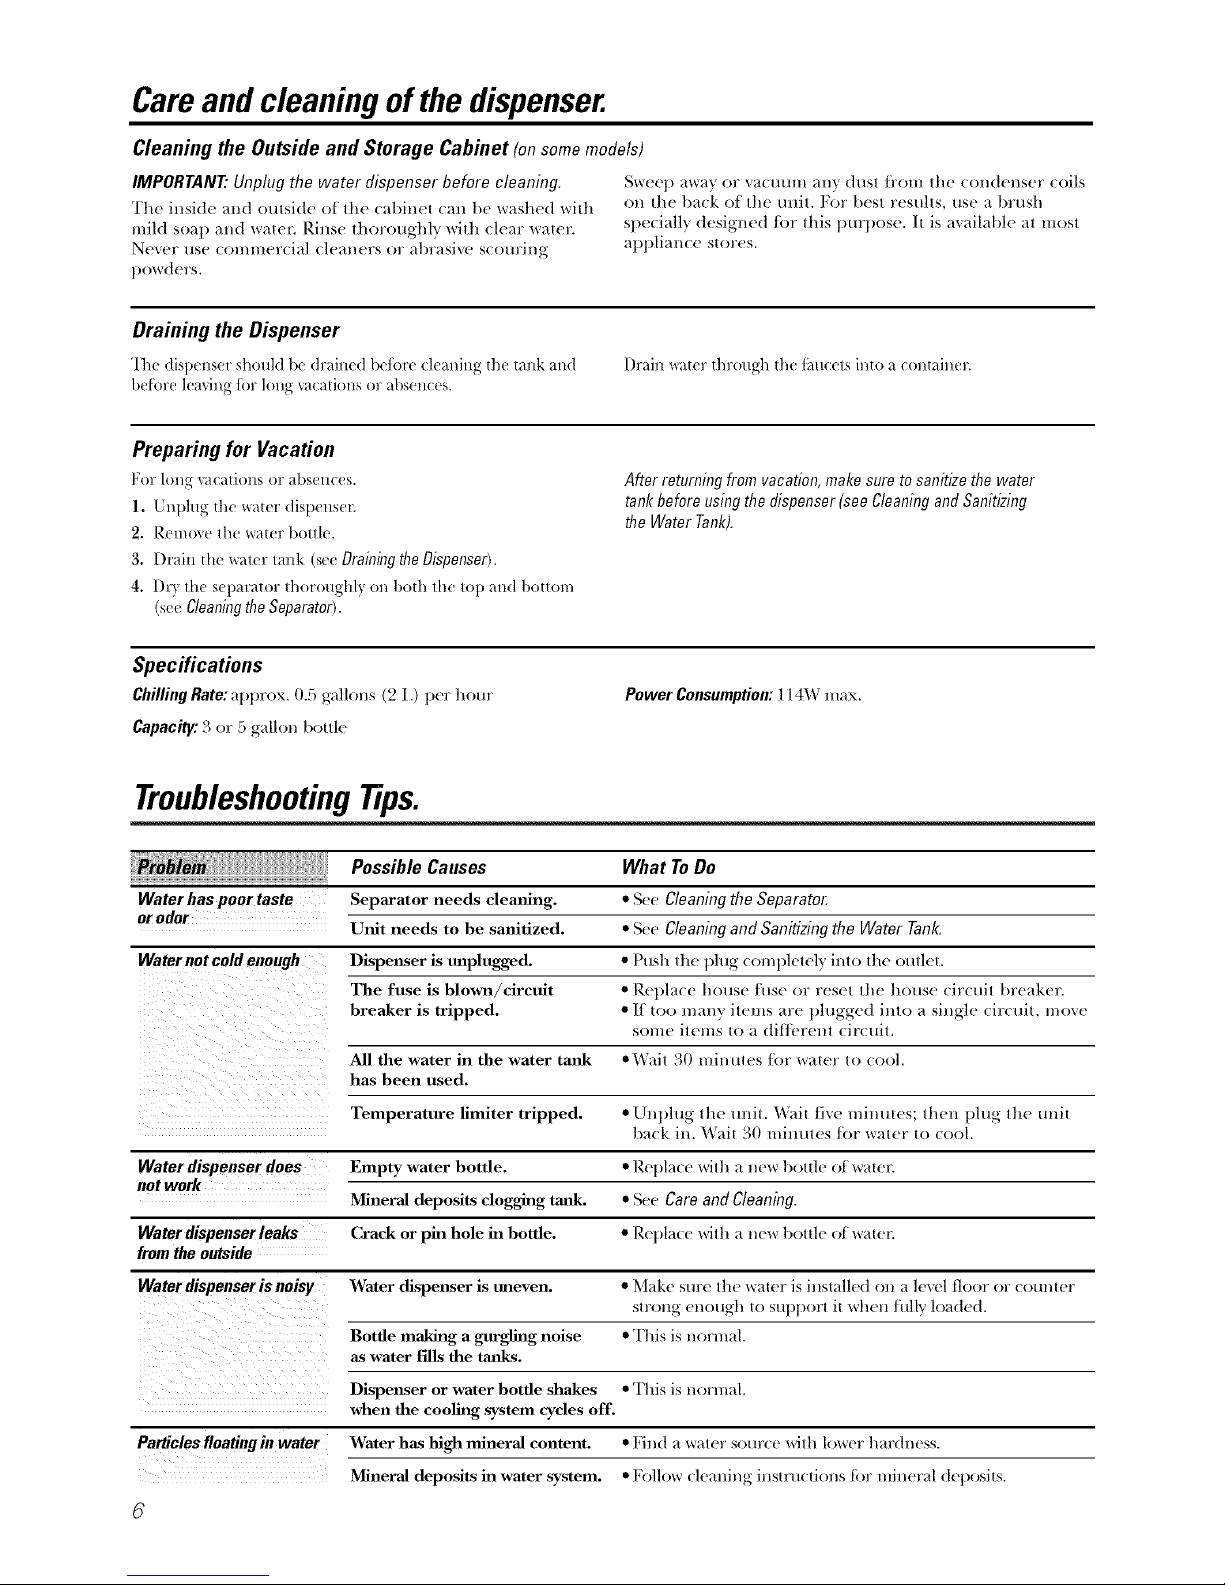
TroubleshootingTips.
PossibleCauses What ToDo
Water has poor taste Separator needs clemfing. • S('(" Cleaning the Separato_
or odor
Water not cold enough Dispenser is tmphigged. • Push lhe plug COml)h'lely inlo lhe oulleL
Water dispenser does Empty water bottle. • Re t)lacc ailh a new boule of watcl:
not work
Water dispenser leaks Crack or pin hole in bottle. • Replace _ilh a new 1)ouh' of waW_:
from the outside
Water dispenser is noisy Water dispenser is ilneven, e ]_'lak(" stlre lhe \valer is Jtlslalled eli a h'_cl tloor or COtll/l(T
Unit needs to be sanitized. • Scc Cleaning and Sanitizing the Water Tank.
The fuse is blown/circuit • Replace I)ousc [use or rcsel lhe hottse circuil breaker.
breaker is tripped. • If too many ilems arc t)lugged inlo a single circuiL move
some ilems 1o a ditli'rem circuil.
All the water in the water tank •Wail 30 minulus tar water 1o cool.
has been used.
Temperature limiter tripped. • Uniting lhe trail. Wail live milmtes; lhcn t)lug the unit
back ill. Wail 30 /Ill/lilies /()l" water 1o cool.
Mineral deposits cloggh N tank. • Scc Care and Cleaning.
slrong enough to SUl)porl il when hdly loaded.
Bottle maldng a gurglhlg noise • This is nor1 hal.
as water tilts the tmflcs.
Dispenser or water bottle shakes • 'Iqds is normal.
when the eoolit_g system cycles off.
Particles floating in water Water has high mineral content. • I;ind a waler source wilh l()_Ar('rhardm'ss.
Mineral deposits hi water system. • I;ollow cleaning i_lswuclions tin" mineral deposits.
6
 Loading...