

Page 1
GEAppliances.com
-0
Safety Instructions .... 2-7
Operating Instructions
Aluminum Foil ................. 13
Clock and Timer ........... 15, 16
Gas/Control Lockout .......... 25
Lower Oven Drawer ........... 29
Oven ...................... 11-31
Baking and Roasting ......... 13
Broiling, Broiling Guide ....... 14
Convection ............... 19-23
Oven Control ................ 11
Power Outage ............... 12
Preheating .................. 13
Probe ........................ 18
Racks ....................... 12
Sabbath Feature ......... 26, 27
Self-Cleaning ............. 30, 31
Special Features ......... 24, 25
Thermostat .............. 28, 29
Timed Baking
and Roasting ................ 17
Timed Convection Baking ..... 23
Surface Cooking ............ 8-10
Griddle ...................... 10
Care and Cleaning
Burner Assemblg .......... 32, 33
Burner Grates ................. 34
Control Panel and Knobs ...... 35
Cooktop ...................... 35
Door Removal ................. 37
Drawer ....................... 38
Griddle ........................ 34
Oven Bottom .................. 37
Oven Light Replacement ...... 38
Oven Vents ................... 35
Racks ......................... 37
Self-Cleaning .............. 30, 31
Stainless Steel Surfaces ....... 36
Installation
Instructions ........... s9-so
Air Adjustment ................ 49
Anti-Tip Device ............ 42, 50
Assemble Surface Burners ..... 47
Checking Burner
Ignition ....................... 48
Connecting the Range
to Gas .................... 43-45
Dimensions and Clearances ...41
Electrical Connections ..... 46, 47
Leveling the Range ............ 49
LP ............................ 50
Troubleshooting
Tips ...................... Sl-S4
Accessories ............... S7
Consumer Support
Consumer Support ...Back Cover
Ownership Registration
for Customers in
Canada onlg .............. 55, 56
Warrantg for Customers
in Canada ..................... 59
Warrantg for Customers
in the U.S.A................... 58
CGS980
In Canada contact us at:
www.GEAppliances.ca
Write the model and serial
numbers here:
Model #
Serial #
You can find them on a label
on the front of the range behind the
lower oven drawer.
183D5580P241
49-85159-1 04-09JR
Page 2
IMPORTANT SAFETY INFORM/AT/ON.
READ ALL INSTRUCTIONS BEFORE USING.
WARNING!
For gour safetg, the information in this manual must be followed to minimize the risk of tim or
explosion, electric shock, or to prevent property damage, personal injury, or loss of life.
_k WARNING: Iftheinformation
in this manual is not followed exactlg,
a fire or explosion mag result causing
®
propertg damage, personal injurg
or death.
Do not store or use gasoline or other
flammable vapors and liquids in the
vicinitg of this or ang other appliance.
- WHAT TO DO IF YOU
SMELL GAS
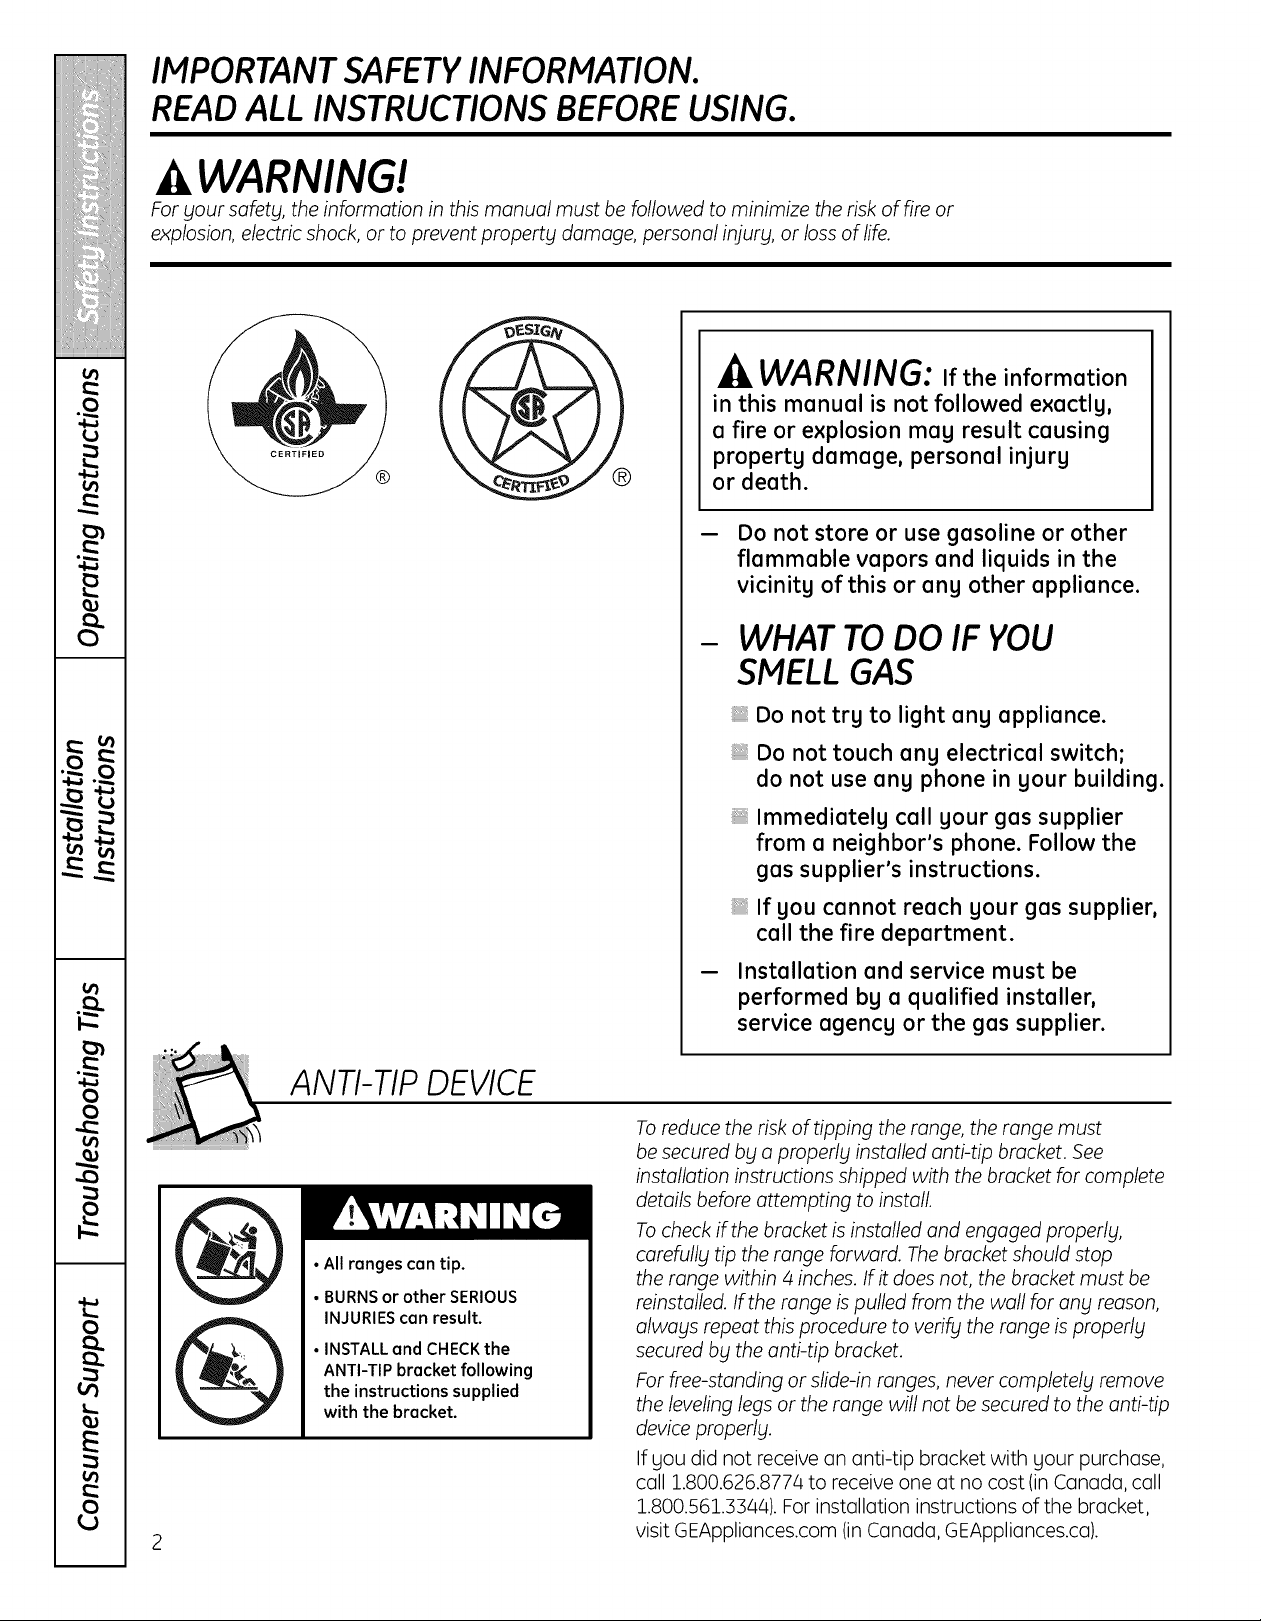
ANTI-TIP DEVICE
• All ranges can tip.
• BURNS or other SERIOUS
INJURIES can result.
• INSTALL and CHECK the
ANTI-TIP bracket following
the instructions supplied
with the bracket.
.... Do not trg to light ang appliance.
.... Do not touch ang electrical switch;
do not use ang phone in gour building.
Immediatelg call gour gas supplier
from a neighbor's phone. Follow the
gas supplier's instructions.
.... If gou cannot reach gour gas supplier,
call the fire department.
- Installation and service must be
performed bg a qualified installer,
service agencg or the gas supplier.
Toreduce the risk of tipping the range, the range must
be secured bg a properl_l installed anti-tip bracket. See
installation instructions shipped with the bracket for complete
details before attempting to install.
Tocheck if the bracket is installed and engaged properlg,
carefullg tip the range forward. The bracket should stop
the range within 4 inches. Ifit does not, the bracket must be
reinstalled. Ifthe range ispulled from the wall for ang reason,
alwags repeat this procedure to verifg the range isproperlg
secured bg the anti-tip bracket.
For flee-standing or slide-in ranges, never completelg remove
the leveling legs or the range will not be secured to the anti-tip
device properlg.
If you did not receive an anti-tip bracket with your purchase,
cull 1.800.626.8774 to receive one at no cost (in C(_nc_da,cull
1.800.561.3344). For instalk_tion instructions of the bracket,
visit GEAppliances.com (in C(_nc_da,GEAppliances.ca).
Page 3
GEAppliances.com
WARNING!
IMPORTANT SAFETYNOTICE
The California Safe Drinking Water and Toxic Enforcement Act requires the Governor of California
to publish a list of substances known to the state to cause birth defects or other reproductive harm,
and requires businesses to warn customers of potential exposure to such substances.
Gas appliances can cause minor exposure to four of these substances, namely benzene, carbon
monoxide, formaldehyde and soot, caused primarily by the incomplete combustion of natural gas
or LP fuels. Properly adjusted burners, indicated by a bluish rather than a yellow flame, will minimize
incomplete combustion. Exposure to these substances can be minimized by venting with an open
window or using a ventilation fan or hood.
SAFETY PRECAUTIONS
Have the installer show you the location of the range gas shut-off valve and how to shut it off if necessary.
Have your range installed and properly Plug your range into a 120-volt grounded
grounded by a qualified installer, in
accordance with the Installation Instructions.
Any adjustment and service should be
performed only by qualified gas range
installers or service technicians.
Do not attempt to repair or replace any
part of your range unless it is specifically
recommended in this manual. All other service
should be referred to a qualified technician.
outlet only. Do not remove the round
grounding prong from the plug. If indoubt
about the grounding of the home electrical
system, it is your personal responsibility and
obligation to have an ungrounded outlet
replaced with a properly grounded,
three-prong outlet in accordance with
the National Electrical Code. Do not use
an extension cord with this appliance.
Page 4
IMPORTANT SAFETY INFOR/V/AT/ON.
READ ALL INSTRUCTIONS BEFORE USING.
SAFETYPRECAUTIONS
Locate the range out of kitchen traffic path
and out of drafty locations to prevent poor
air circulation.
Be sure all packaging materials are
removed from the range before operating
it to prevent fire or smoke damage should
the packaging material ignite.
Be sure your range is correctly adjusted by
a qualified service technician or installer for
the type of gas (natural or LP)that is to be
used. Your range can be converted for use
with either type of gas. See the Installation
of the range section.
WARNING:Theseadjustments
must be made by o qualified service
technician in accordance with the
manufacturer's instructions and all codes
and requirements of the authority having
jurisdiction. Failure to follow these instructions
could result in serious injury or property
damage. The qualified agency performing
this work assumes responsibility for the
conversion.
After prolonged use of a range, high floor
temperatures may result and many floor
coverings will not withstand this kind of use.
Never install the range over vinyl tile or
linoleum that cannot withstand such type
of use. Never install it directly over interior
kitchen carpeting.
Do not leave children alone or unattended
where a range is hot or in operation.
They could be seriously burned.
Do not allow anyone to climb, stand or
hang on the oven door, lower oven drawer or
cooktop. They could damage the range and
even tip it over, causing severe personal injury.
CAUTION: Itemsofinterest
to children should not be stored in cabinets
above o range or on the bocksplosh
of a rangeichildren climbing on the range
to reach items could be seriously injured.
Never wear loose fitting or hanging garments
while using the appliance. Becareful when
reaching for items stored in cabinets over the
range. Flammable material could be ignited if
brought in contact with flame or hot oven
surfaces and may cause severe burns.
Do not store flammable materials in an oven,
o range drawer or near o cooktop.
Do not store or use combustible materials,
gasoline or other flammable vapors and
liquids in the vicinity of this or any other
appliance.
Do not let cooking grease or other flammable
materials accumulate in or near the range.
Do not use water on grease fires. Never pick
up a flaming pan. Turn the controls off.
Smother o flaming pan on o surface burner
by covering the pan completely with
o well-fitting lid, cookie sheet or flat troy.
Use o multi-purpose dry chemical or
foam-type fire extinguisher.
Flaming grease outside a pan can be put
out by covering it with baking soda or,
if available, by using a multi-purpose dry
chemical or foam-type fire extinguisher.
Flame in the upper oven or lower oven drawer
can be smothered completely by closing the
oven door or drawer and turning the control
to off or by using a multi-purpose dry
chemical or foam-type fire extinguisher.
Let the burner grates and other surfaces cool
before touching them or leaving them where
children can reach them.
Never block the vents (air openings) of the
range. They provide the air inlet and outlet
that are necessary for the range to operate
properly with correct combustion. Air openings
are located at the rear of the cooktop, at the
top and bottom of the oven door, and at the
bottom of the range under the lower oven
drawer.
Large scratches or impacts to glass doors
can lead to broken or shattered glass.
WARNING: NEVERuse
this appliance as o space heater to heat
or warm the room. Doing so may result
in carbon monoxide poisoning and
overheating of the oven.
4
Page 5
GEAppliances.com
WARNING!
SURFACEBURNERS
Use proper pan sizelavoid pans that are unstable or easily tipped. Select cookware having flat
bottoms large enough to cover burner grates. Toavoid spillovers, make sure cookware is large enough
to contain the food properly. This will both save cleaning time and prevent hazardous accumulations
of food, since heavy spattering or spillovers left on range can ignite. Use pans with handles that can
be easil_lgrasped and remain cool.
Always use the L/TE position when igniting
the top burners and make sure the burners
have ignited.
Never leave the surface burners unattended
at high flame settings. Boiloverscause smoking
and greasy spillovers that may catch on fire.
Adjust the top burner flame size so it
does not extend beyond the edge of the
cookware. Excessive flame is hazardous.
Use only dry pot holders- moist or damp pot
holders on hot surfaces may result in burns
from steam. Do not let pot holders come near
open flames when lifting cookware. Do not use
a towel or other bulky cloth in place of a pot
holder.
When using glass cookware, make sure
it is designed for top-of-range cooking.
To minimize the possibility of burns, ignition
of flammable materials and spillage, turn
cookware handles toward the side or back
of the range without extending over adjacent
burners.
Do not flame foods on the cooktop. If you
do flame foods under the hood, turn the
fan on.
Do not use a wok on the cooking surface
if the wok has a round metal ring that is
placed over the burner grate to support the
wok. This ring acts as a heat trap, which may
damage the burner grate and burner head.
Also, it may cause the burner to work
improperly. This may cause a carbon
monoxide level above that allowed by current
standards, resulting in a health hazard.
Foods for frying should be as dry as possible.
Frost on frozen foods or moisture on fresh
foods can cause hot fat to bubble up and
over the sides of the pan.
Never try to move a pan of hot fat, especially
a deep fat fryer. Wait until the fat is cool.
Do not leave plastic items on the cooktop-
they may melt if left too close to the vent.
Keep all plastics away from the surface
burners.
Carefully watch foods being fried at a high
flame setting.
Always heat fat slowly, and watch as it heats.
Do not leave any items on the cooktop. The
hot air from the vent may ignite flammable
items and will increase pressure in closed
containers, which may cause them to burst.
If a combination of oils or fats will be used
in frying, stir together before heating or
as fats melt slowly.
Use a deep fat thermometer whenever
possible to prevent overheating fat beyond
the smoking point.
Use the least possible amount of fat for
effective shallow or deep-fat frying. Filling the
pan too full of fat can cause spillovers when
food is added.
To avoid the possibility of a burn, always be
certain that the controls for all burners are
at the OFF position and all grates are cool
before attempting to remove them.
If range is located near a window, do not hang
long curtains that could blow over the surface
burners and create a fire hazard.
If you smell gas, turn off the gas to the range
and call a qualified service technician. Never
use an open flame to locate a leak.
Always turn the surface burner controls off
before removing cookware.
Do not lift the cooktop. Lifting the cooktop can
lead to damage and improper operation of
the range.
When disabling Gas/Control Lockout, make
sure the surface controls are set to the OFF
position. This will preclude gas flow when the
range isturned on
Page 6
IMPORTANT SAFETY INFORMATION.
READ ALL INSTRUCTIONS BEFORE USING.
LOWEROVEN DRAWER
The purpose of the warm setting of the lower
oven drawer is to hold hot cooked foods at
serving temperature. Always start with hot
food; cold food cannot be heated or cooked
using the warm setting of the lower oven
drawer.
Do not use the drawer to dry newspapers.
If overheated, they can catch on fire.
Do not leave paper products, plastics, canned
food or combustible materials in the drawer.
Never leave jars or cans of fat drippings in
or near your drawer.
Do not warm food in the drawer for more
than two hours.
Never place, use or self-clean the lower oven
drawer pan in the upper oven.
Do not touch the heating element or
the interior surface of the drawer. These
surfaces may be hot enough to burn.
REMEMBER:The inside surface of the drawer
may be hot when the drawer is opened.
Use care when opening the drawer. Open the
drawer a crack and let hot air or steam
escape before removing or replacing food.
Hot air or steam which escapes can cause
burns to hands, face and/or eyes.
Do not use aluminum foil to line the lower
oven drawer. Foil is an excellent heat insulator
and will trap heat beneath it. This will upset
the performance of the drawer and it could
damage the interior finish.
COOK HEATAND POULTRYTHOROUGHLY...
Cook meat and poultry thoroughly-meat to ot least on INTERNALtemperature of 160°F and poultry
to ot least on INTERNALtemperature of 180°K Cooking to these temperatures usually protects against
foodbome illness.
SELF-CLEANING THE UPPER OVEN
Be sure to wipe off excess spillage before
self-cleaning operation.
Before self-cleaning the oven, remove any
broiler pan, broiler grid, all cookware,
probe and any aluminum foil.
Never place, use or self-clean the lower oven
drawer pan in the upper oven.
The gray porcelain-coated oven racks may be
cleaned in the oven during the self-clean cycle.
Clean only parts listed in this Owner's Manual.
6
Do not clean the door gasket. The door gasket
isessential for a good seal. Care should be
taken not to rub, damage or move the gasket.
If the self-cleaning mode malfunctions,
turn the oven off and disconnect the power
supply. Have it serviced by a qualified
technician.
Do not use oven cleaners. No commercial
oven cleaner or oven liner of any kind should
be used in or around any part of the oven.
Residue from oven cleaners will damage the
inside of the oven when the self-clean cycle
is used.
Page 7
GEAppliances.com
UPPEROVEN
Stand away from the range when opening the door of a hot oven. The hot air and steam that escape
can cause burns to hands, face and eyes.
Do notuse theoven fora storagearea.
Itemsstoredintheoven can ignite.
Keep theoven freefromgreasebuildup.
Placetheoven racksinthedesiredposition
whiletheoven iscool.
Pulling out the rack to the stop-lock is a
convenience in lifting heavy foods. It is also
a precaution against burns from touching hot
surfaces of the door or oven walls. The lowest
position is not designed to slide.
Do not heat unopened food containers.
Pressure could build up and the container
could burst, causing an injury.
WARNING: NEVERcoverany
slots, holes or passages in the oven bottom
or cover an entire rack with materials such
as aluminum foil. Doing so blocks air flow
through the oven and may cause carbon
monoxide poisoning. Aluminum foil linings
may also trap heat, causing a fire hazard.
Do not use aluminum foil anywhere in the
oven except as described in this manual.
Misuse could result in a fire hazard or damage
to the range.
When using cooking or roasting bags in the
oven, follow the manufacturer's directions.
Do not use your oven to dry newspapers.
If overheated, they can catch fire.
Use only glass cookware that is recommended
for use in gas ovens.
Always remove any broiler pan from range as
soon as you finish broiling. Grease left in the
pan can catch fire if oven is used without
removing the grease from the broiler pan.
When broiling, if meat is too close to the flame,
the fat may ignite. Trim excess fat to prevent
excessive flare-ups.
Hake sure any broiler pan isin place correctly
to reduce the possibility of grease fires.
If you should have a grease fire in a broiler
pan, press the CLEAR/OFF pad, and keep
the oven door closed to contain fire until
it burns out.
For safety and proper cooking performance,
always bake and broil with the oven door
closed.
Never place, use or self-clean the lower oven
drawer pan in the upper oven.
READAND FOLLOWTHISSAFETYINFORMATIONCAREFULLY.
SAVETHESEINSTRUCTIONS
Page 8
Using thegas surface burners.
Throughout this manual, features and appearance may vary from your model.
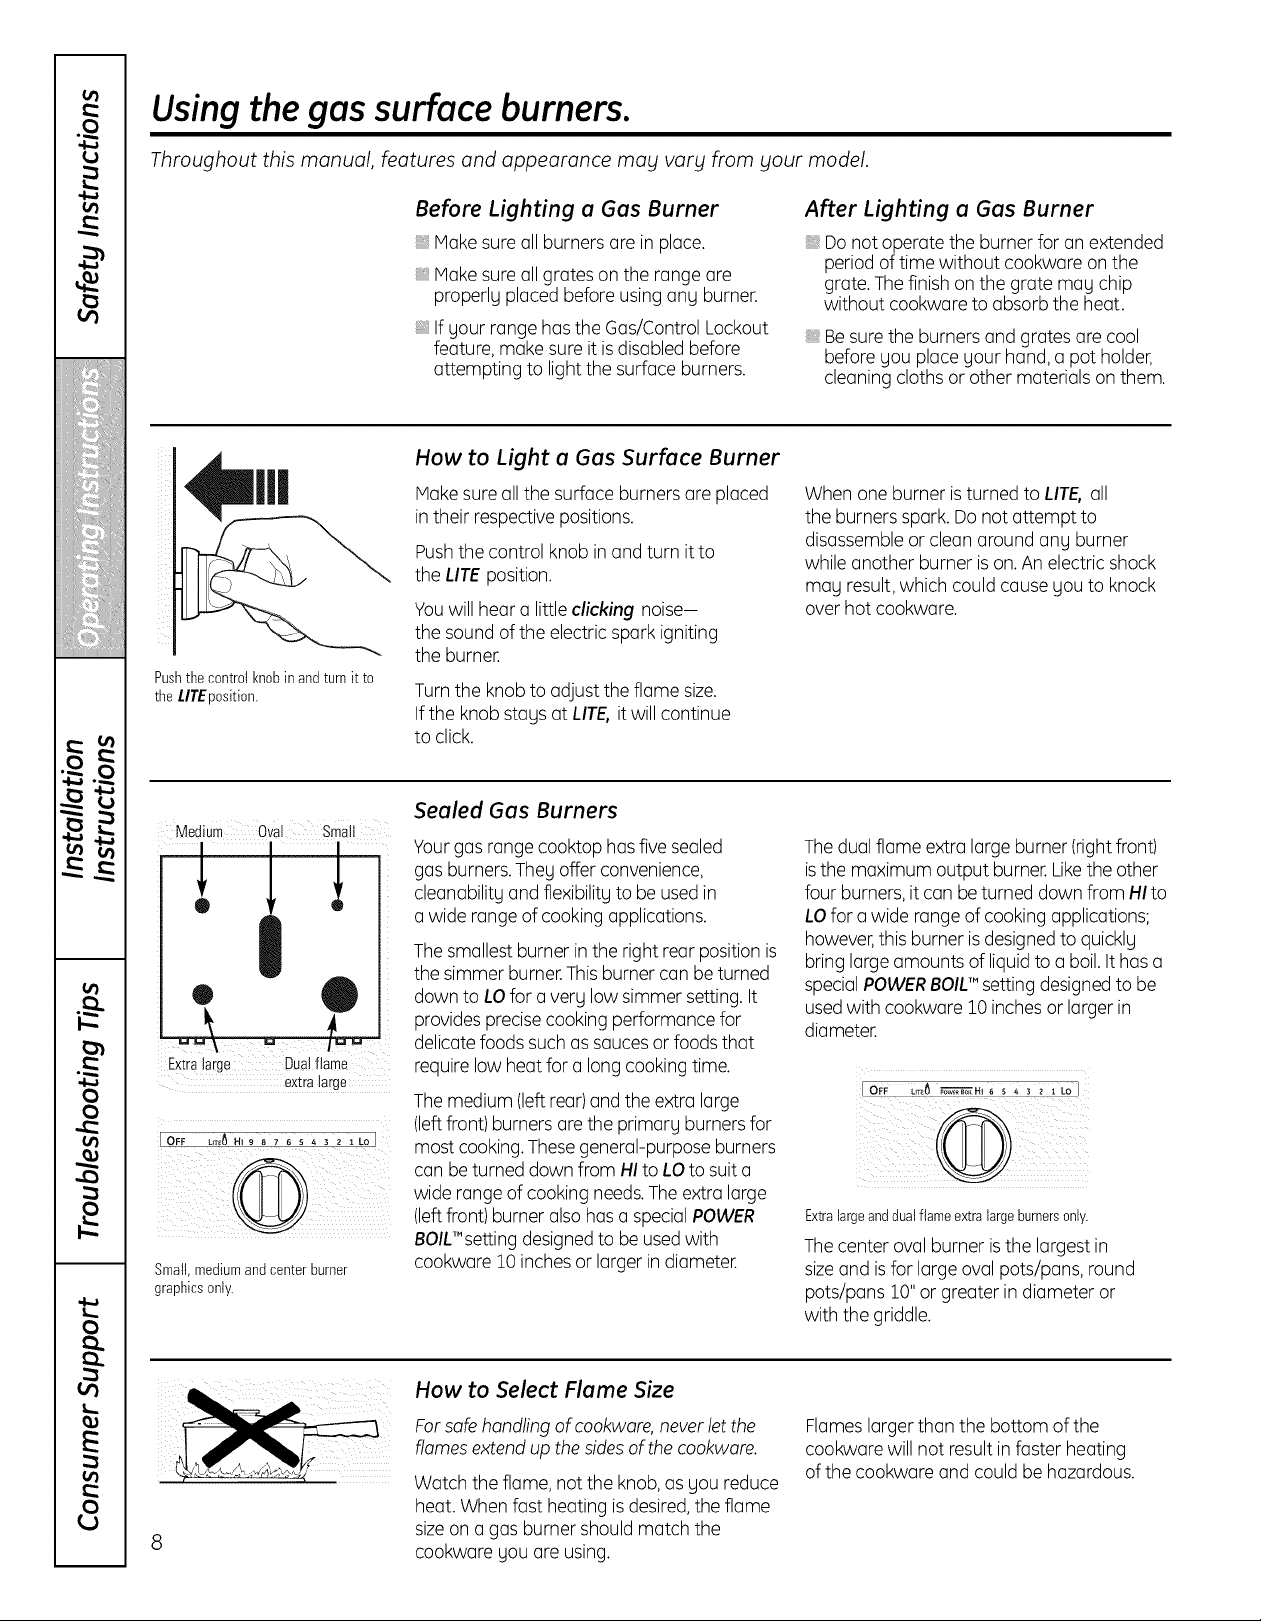
Pushthe controlknobinandturn it to
theI.ITE position.
Before Lighting u Gus Burner
Makesureallburnersareinplace.
Makesureallgrateson therangeare
properlgplacedbeforeusingang burner,
IfgourrangehastheGas/ControlLockout
feature, make sure itisdisabled before
attempting to lightthe surface burners.
How to Light u Gus Surfuce Burner
Make sure allthe surface burners are placed
in their respective positions.
Push the control knob in and turn itto
the LITE position.
Youwillhear a little clicking noise-
the sound of the electric spark igniting
the burner.
Turnthe knobto adjust the flame size.
If the knob stagsat LITE,it will continue
to click.
After Lighting a Gas Burner
Donot operate the burner for on extended
period of time without cookware on the
grote.Thefinish on the grote may chip
without cookware to absorb the heat.
Besurethe burners and grates ore cool
before gou place gour hand, a pot holder,
cleaning cloths or other materials on them.
When one burneristurned to LIT& all
the burners spark. Donot attempt to
disassemble or cleon around ang burner
while another burner is on.Anelectric shock
ma9 result,which could cause gou to knock
over hot cookware.
Medium oval small
®
Extralarge Dualflame
extralarge
Small,mediumand centerburner
graphicsonly.
Seuled Gus Burners
Your gasrange cooktop hasfivesealed
gasburners.Theg offer convenience,
cleanabilitg and flexibilitgto be usedin
a wide range of cooking applications.
Thesmallestburner inthe right rear position is
the simmer burner.Thisburnercon be turned
down to LOfor a very low simmer setting. It
providesprecisecooking performance for
delicatefoods such as saucesorfoodsthat
require low heat for alongcookingtime.
Themedium (left rear)and the extra large
(leftfront) burnersorethe prima% burnersfor
most cooking.Thesegeneral-purpose burners
con beturned down from HIto LOto suit a
wide rangeof cooking needs.The extra large
(leftfront) burner also hasaspecialPOWER
BOIL'"setting designedto be usedwith
cookware 10 inchesor larger in diameter.
How to Select Flume Size
Thedualflame extra largeburner(rightfront)
isthe maximum output burner.Likethe other
four burners,it con be turned down from HI to
LOfor awide range of cooking applications;
however,this burner isdesignedto quicklg
bring large amounts of liquidto a boil.Ithas a
specialPOWERBOIL'"settingdesigned to be
usedwith cookware 10 inches or larger in
diameter.
IoFF L,T_6_H, 6 s43 2 IL01
Extralargeanddualflameextralargeburnersonly.
Thecenter oval burner is the largest in
sizeand isfor large oval pots/pans, round
pots/pans 10"or greater in diameter or
with the griddle.
Forsafe handling of cookware, never let the
flames extend up the sides of the cookware.
Watch the flame, not the knob, as gou reduce
Flameslargerthan the bottom of the
cookware will not result in foster heating
of the cookware and could behazardous.
heat. When fast heating isdesired,the flame
8
sizeon a gas burner should match the
cookware you ore using.
Page 9
Top-of-Range Cool(ware
GEAppliances.com
Aluminum: Medium-weight cookware is
recommended because it heats quickly
and evenly. Mostfoods brown evenly in an
aluminum skillet. Usesaucepans with tight-
fitting lidswhen cooking with minimum
amounts of water.
Cast-Iron: Ifheated slowly, most skilletswill
give satisfactory results.
Enamelware: Under some conditions,
the enamel of some cookware may melt.
Follow cookware manufacturer's
recommendations for cooking methods.
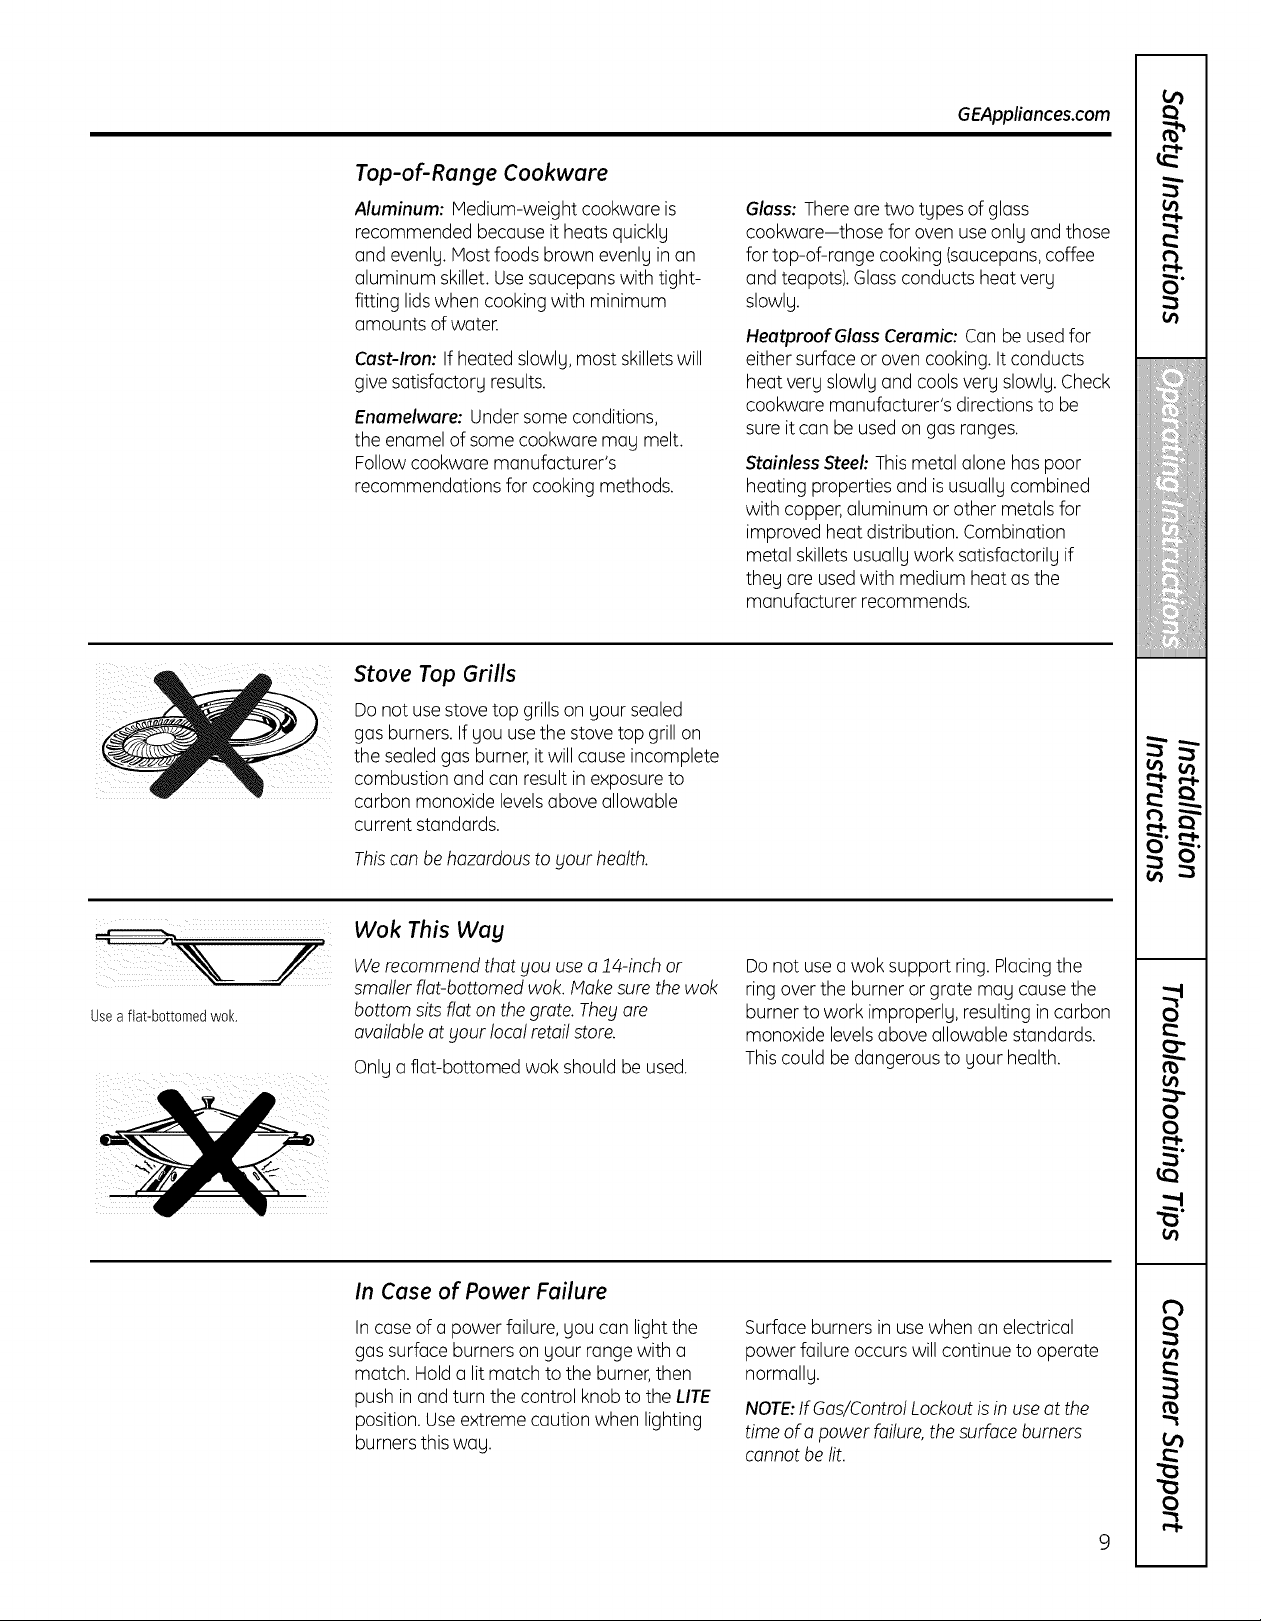
Stove Top Grills
Do not usestove top grills on your sealed
gas burners. If you usethe stove top grillon
the sealedgas burner,itwill cause incomplete
combustion and can result in exposureto
carbon monoxide levelsabove allowable
current standards.
Glass: There are two types of glass
cookware-those for oven use only and those
for top-of-range cooking (saucepans,coffee
and teapots).Glassconducts heat very
slowly.
HeatproofGlass Ceramic: Can be used for
either surface or oven cooking. Itconducts
heat very slowly and cools very slowly.Check
cookware manufacturer's directionsto be
sure it can be usedongas ranges.
Stainless Steek Thismetal alone has poor
heating properties and isusuallycombined
with copper,aluminum orother metals for
improved heat distribution. Combination
metal skilletsusually work satisfactorily if
they are usedwith medium heat asthe
manufacturer recommends.
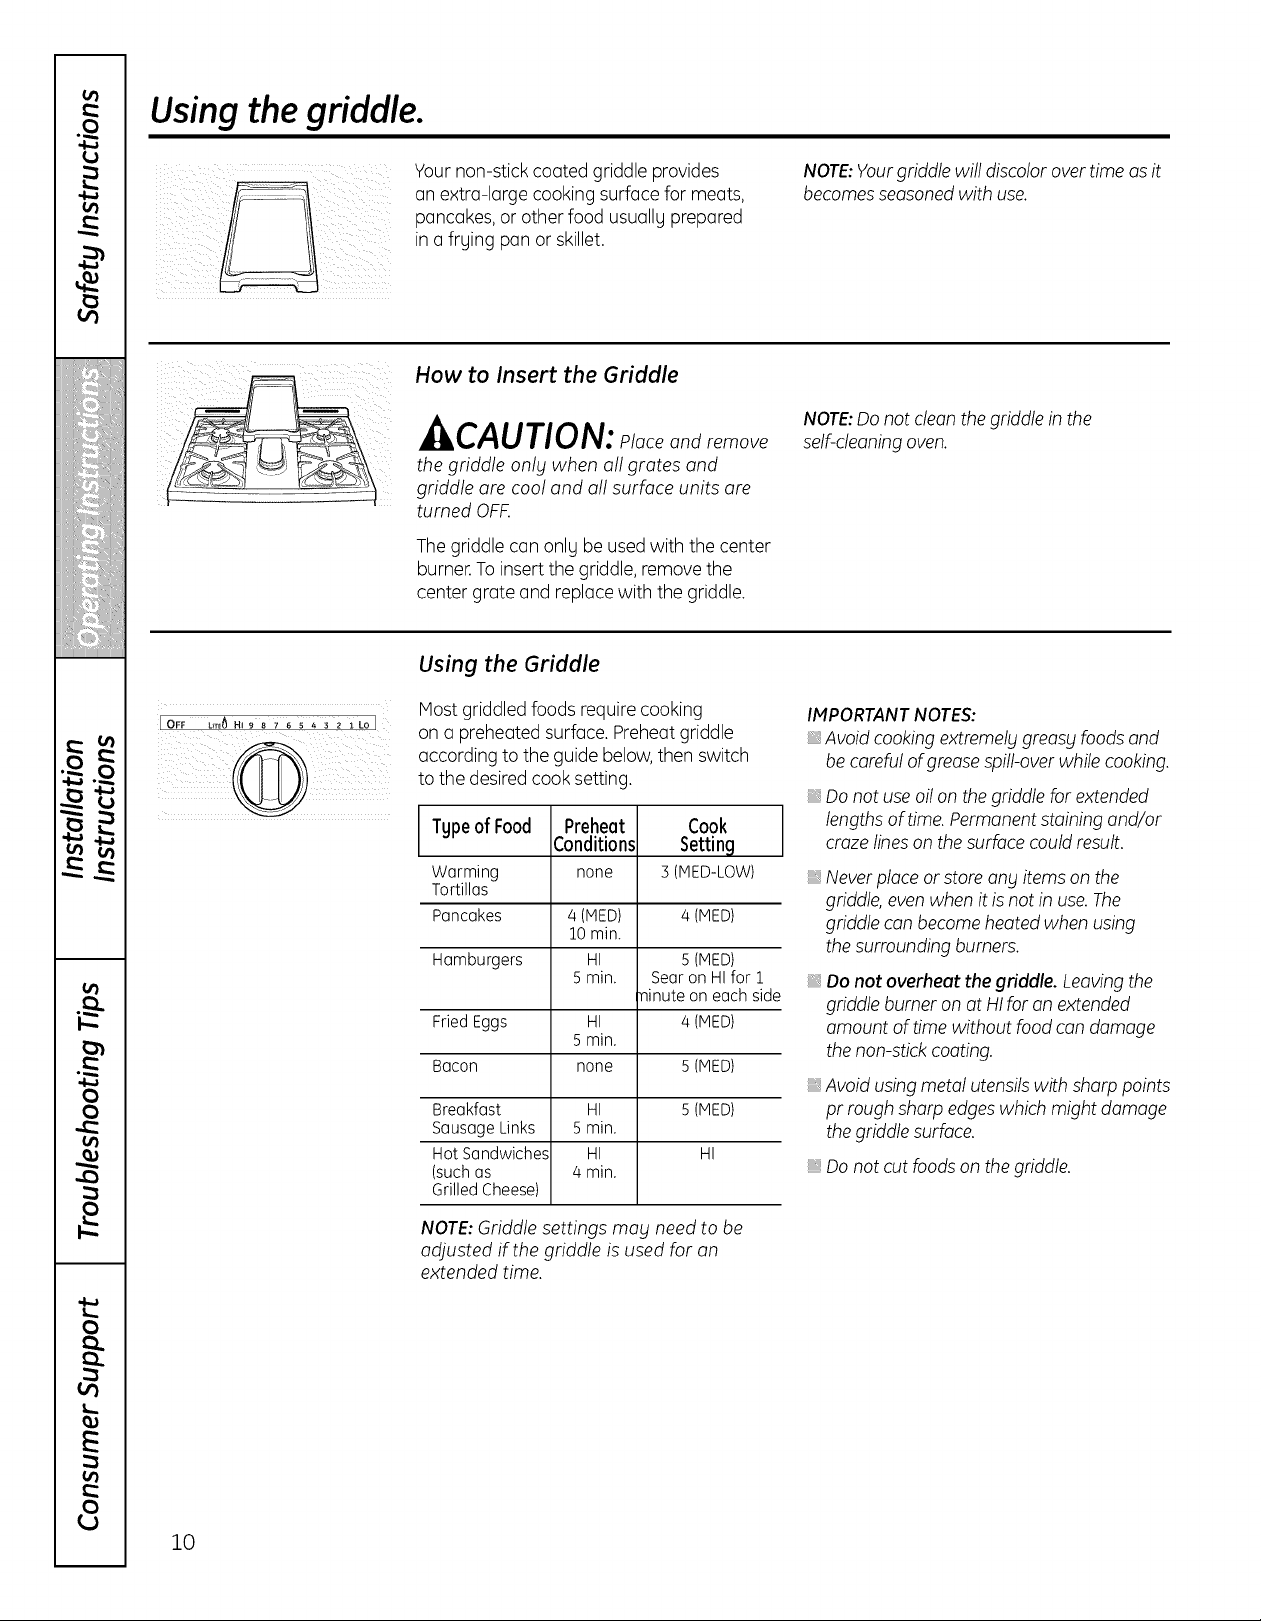
Usea flat-bottomedwok.
Thiscon be hazardous to gout health.
Wok This Way
-
We recommend that you use o 14-inch or
smaller riot-bottomed wok. Ploke sure the wok
bottom sits flat on the grote. They ore
availableat your localretail store.
Only a flat-bottomed wok should be used.
In Case of Power Failure
Incaseof a power failure, you can lightthe
gas surface burners on your range with a
match. Hold a lit match to the burner,then
push in and turn the control knob to the LITE
position.Useextreme caution when lighting
burners this way.
Donot useawok support ring. Placingthe
ring overthe burner orgrate may causethe
burner to work improperly, resulting in carbon
monoxide levelsabove allowable standards.
Thiscould be dangerous to your health.
Surface burners in usewhen an electrical
power failure occurs will continue to operate
normally.
NOTE:If Gas/Control Lockout is in use at the
time of o power failure, the surface burners
cannot be lit.
Page 10
Usingthe griddle.
[ OFF L_T_ HI 9 8 7 6 5 _ 3 2 ! LOO]
@
Your non-stick coated griddle provides
an extra-large cooking surface for meats,
pancakes, or other food usuallg prepared
in a frging panor skillet.
How to Insert the Griddle
^r'^l J1"l AI
JtL!.,I'IU I IUIV." place and remove
the griddle onlF when all grates and
griddle are cool and all surface units are
turned OFF.
Thegriddlecan onlg be usedwith the center
burner.To insert the griddle,removethe
center grate and replacewith the griddle.
Using the Griddle
Most griddled foods requirecooking
on a preheated surface. Preheatgriddle
according to the guide below,then switch
to the desiredcook setting.
TgpeofFood Preheat Cook
Warming none 3 (MED-LOW)
Tortillas
Pancakes 4 (MED) 4 (MED)
Hamburgers HI 5 (MED)
Fried Eggs HI 4 (MED)
Bacon none S (MED)
Breakfast HI 5 (MED)
SausageLinks 5 min.
Hot Sandwiches HI HI
(suchas 4 min.
Grilled Cheese)
Conditions Setting
10 min.
5 min. Sear on HI for 1
ininute on each side
5 min.
NOTE:Yourgriddle will discolor overtime asit
becomesseasoned with use.
NOTE: Do not clean thegriddlein the
self-cleaningoven,
IMPORTANTNOTES:
_,Avoidcooking extremely greasy foodsand
be careful ofgreasespill-over while cooking.
_,Do not useoilonthe griddle for extended
lengths of time. Permanent staining and/or
craze linesonthe surfacecould result.
Never placeorstoreany itemson the
griddle,evenwhen it is not in use.The
griddle con become heated when using
the surrounding burners.
Donot overheat the griddle. Leavingthe
griddle burner on at HI for an extended
amount of time without food con damage
thenon-stickcoating.
Avoid using metal utensilswith sharp points
pr rough sharp edgeswhich might damage
thegriddlesurface.
Do not cut foods on the griddle,
10
NOTE:Griddlesettings ma£Ineed to be
adjusted if the griddle is used for an
extended time.
Page 11
Using the upper ovencontrols.
(Throughout this manual, features and appearance may vary from your model.) GEAppliances.com
o o,
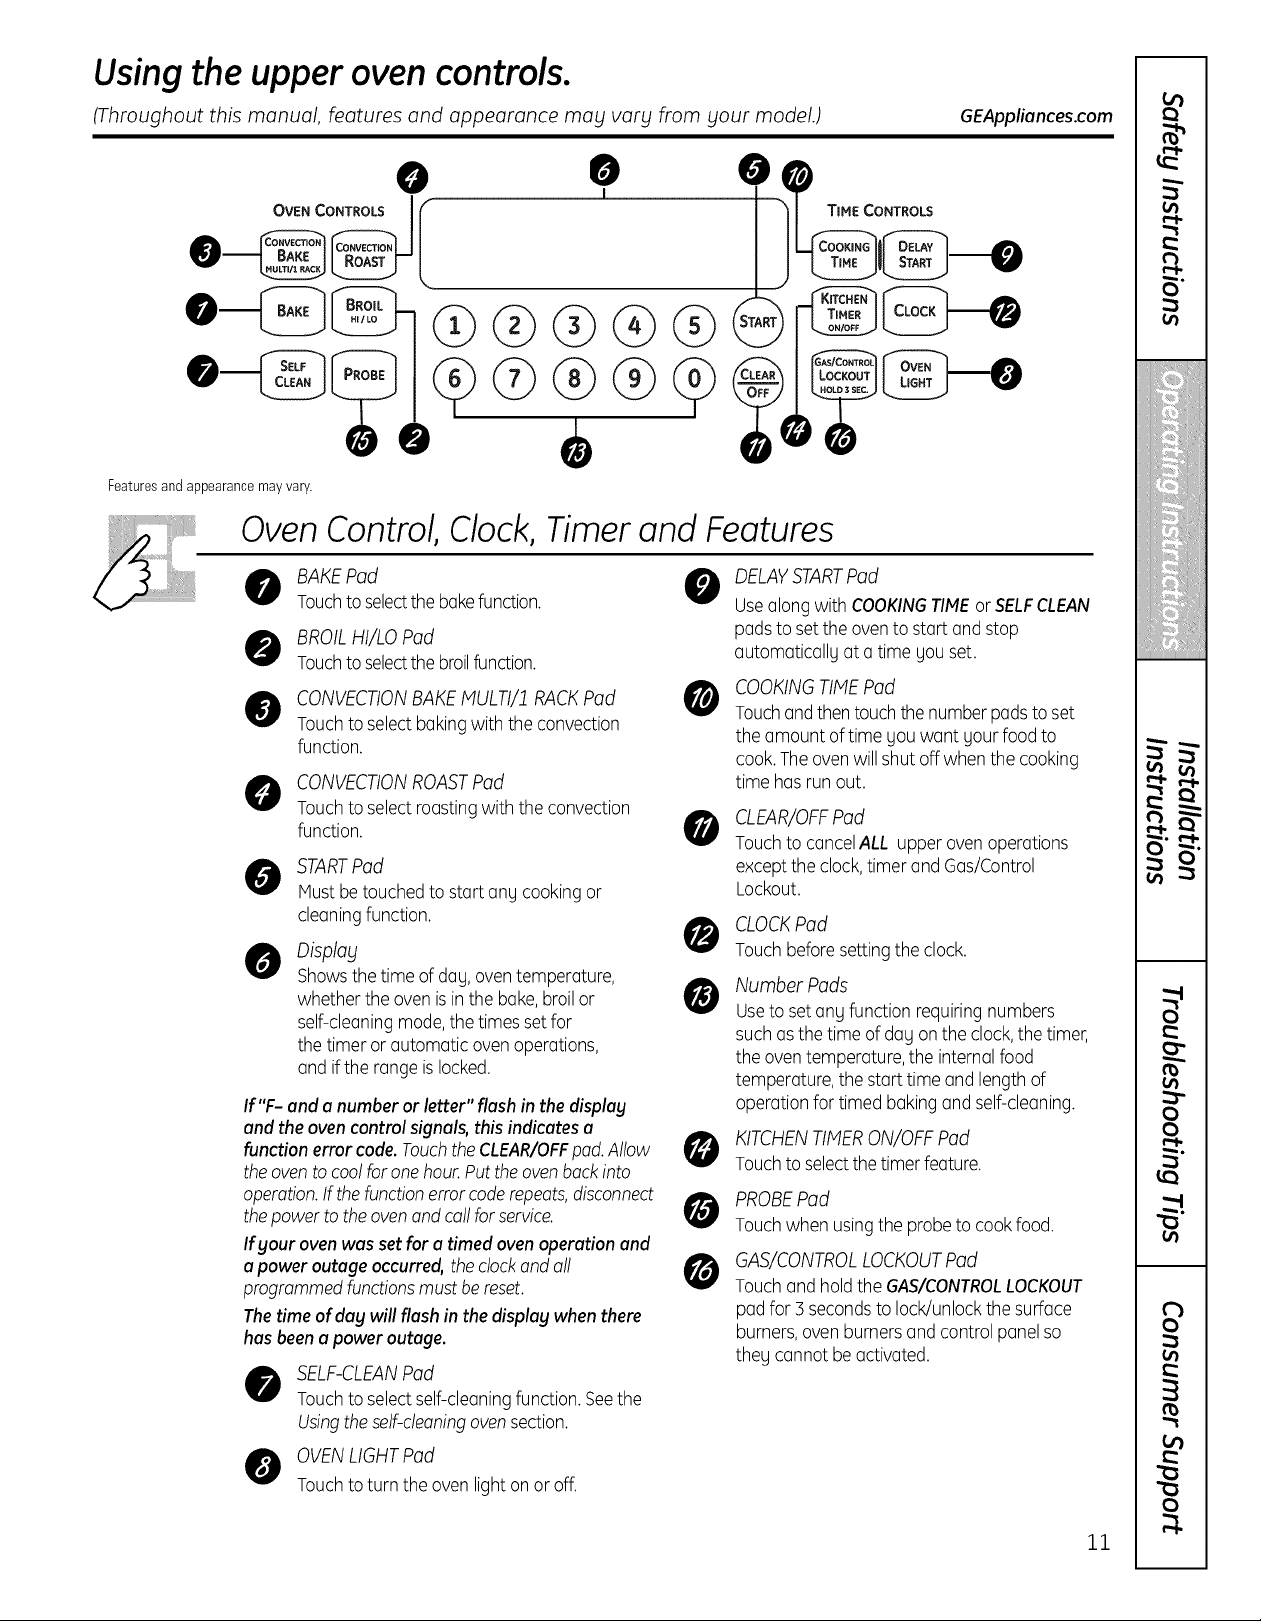
OVEN CONTROLS I
--o
Features and appearance may vary.
Oven Control, Clock,Timer and Features
BAKEPad 0
Touchtoselectthebakefunction.
BROILHI/LO Pad
Touchtoselectthebroilfunction.
CONVECTIONBAKEMULTI/1 RACKPad 0
Touchtoselectbakingwith the convection
function.
CONVECTIONROASTPad
Touchtoselectroastingwith theconvection
function. 0
STARTPad
Mustbe touchedto start any cookingor
cleaningfunction.
Disp!a_l
Showsthe time of dau,oventemperature,
whether the ovenisinthe bake,broilor
self-cleaningmode,the timesset for
the timer or automatic oven operations,
and iftherange islocked.
If"F- and a number orletter" flash inthe displag
and theovencontrolsignals, thisindicates a
function errorcode.Touchthe CLEAR/OFFpad.Allow _,
theoventocoolfor onehour.Puttheovenbackinto
operation.If thefunctionerrorcoderepeats,disconnect
thepower totheovenand callforservice.
If your ovenwas setfor u timedoven operation end
a power outage occurred, the clock and all
programmed functions must be reset.
Thetime of day willflash in the display when there
has been a power outage.
SELF-CLEANPad
Touchtoselectself-cleaningfunction.Seethe
Usingtheself-cleaningovensection.
DELAYSTARTPad
Usealong with COOKINGTIMEor SELFCLEAN
padsto set theovento startandstop
automaticallUat a time Uouset.
COOKINGTIMEPad
Touchandthentouch thenumberpadsto set
the amount of time gouwant gourfood to
cook.The ovenwill shut off whenthe cooking
time hasrun out.
CLEAR/OFFPad
Touchto cancelALL upper ovenoperations
excepttheclock,timer and Gas/Control
Lockout.
CLOCKPad
Touchbeforesettingtheclock.
Number Pads
Useto setanUfunctionrequiringnumbers
such asthe time of daUonthe clock,thetimer,
the oventemperature,the internalfood
temperature,thestart time and lengthof
operationfor timed bakingand self-cleaning.
KITCHENTIMERON/OFFPad
Touchto selectthetimerfeature.
PROBEPad
Touchwhen usingthe probeto cookfood.
GAS/CONTROLLOCKOUTPad
Touchand holdthe GAS/CONTROLLOCKOUT
padfor 3 secondsto lock/unlockthe surface
burners,ovenburners andcontrol panelso
theUcannot beactivated.
OVENLIGHTPad
Touchtoturn the ovenlightonor off.
11
Page 12
Using the upper oven.
To avoid possible burns, place the racks in the desired position before gou turn the oven on.
Before you begin...
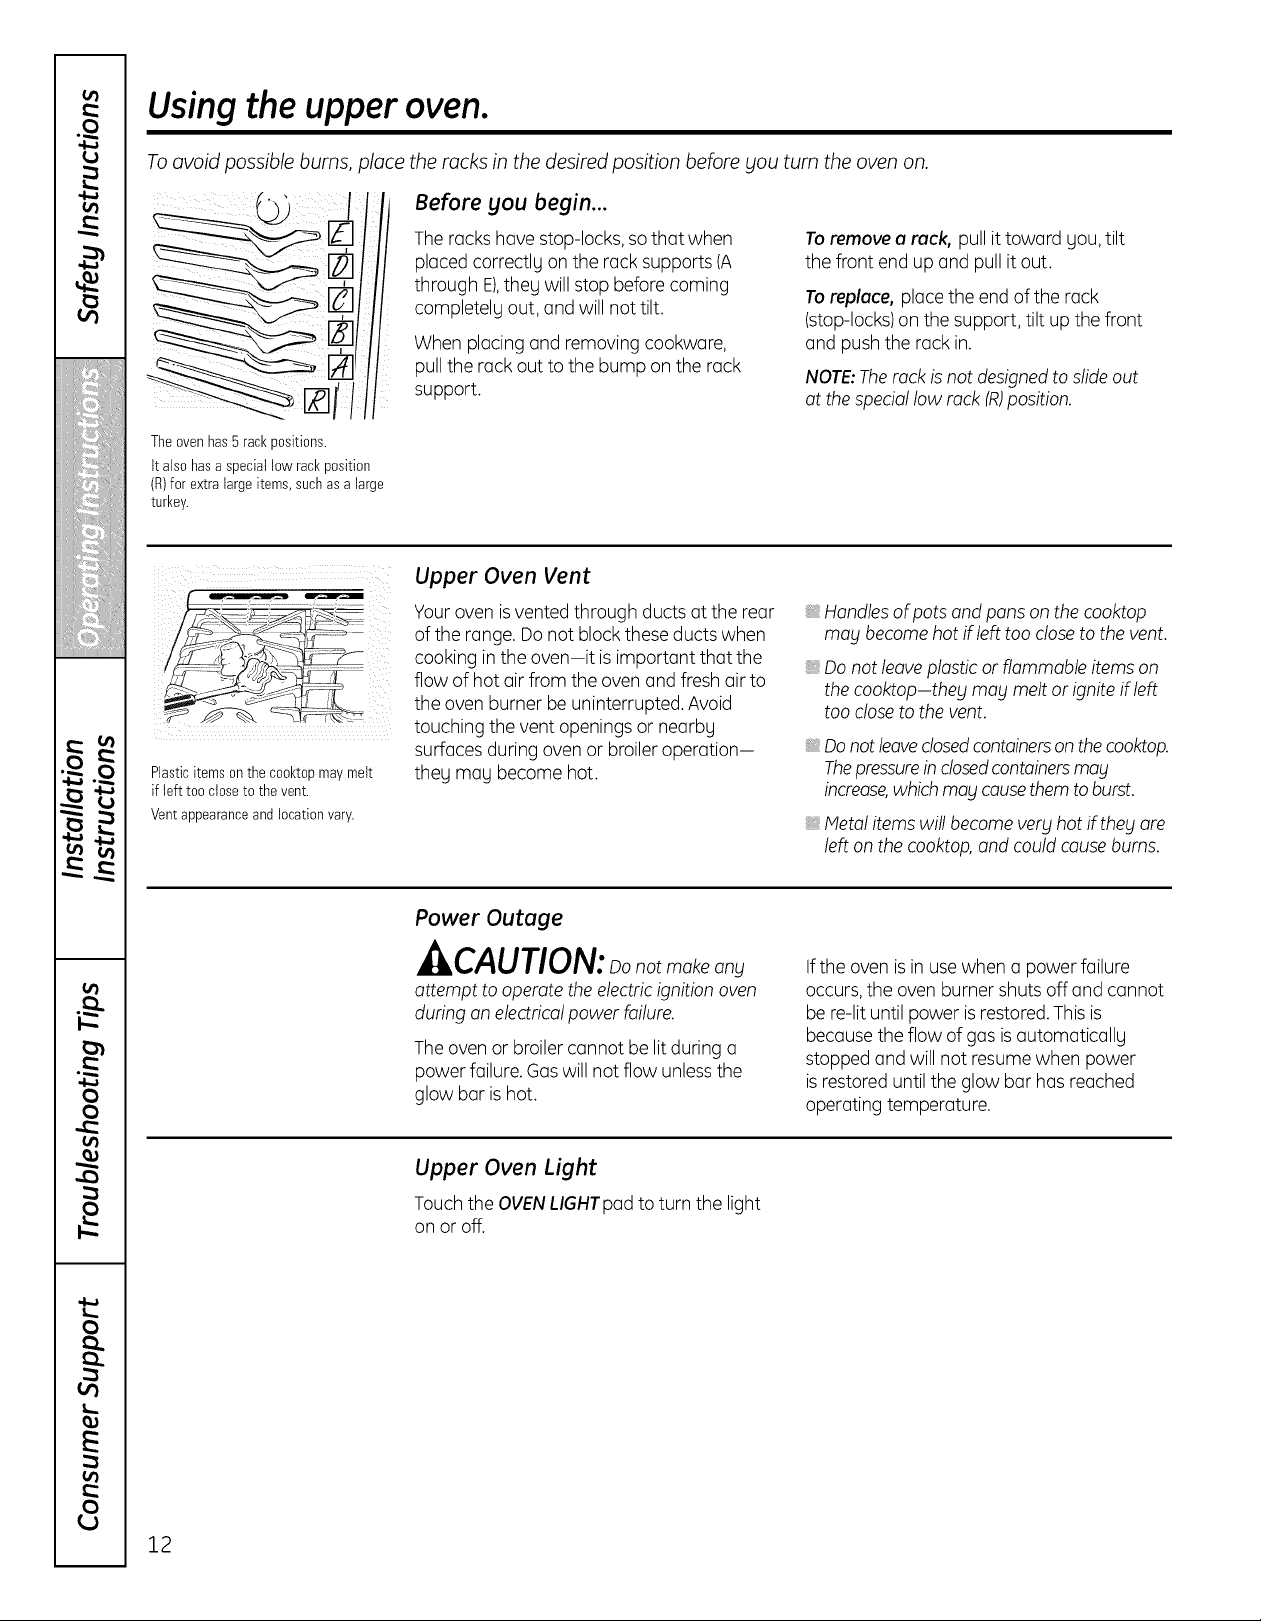
Theovenhas5rackpositions.
Italso hasa speciallow rackposition
(R)for extra largeitems,such asa large
turkey.
......................
..........W¸
Plasticitems onthecooktopmaymelt
if left too closeto the vent.
Vent appearance and location vary.
The rocks hove stop-locks, so that when
placed correctlg on the rock supports (A
through E),theg will stop before coming
completelg out, and will not tilt.
When placing and removing cookwore,
pull the rockout to the bump on the rock
support.
Upper Oven Vent
Youroven isventedthrough ducts at the rear
of the range. Donot block these ducts when
cooking in the oven-it is important that the
flow of hot airfrom the oven and fresh air to
the oven burner be uninterrupted. Avoid
touching the vent openings or nearbg
surfaces during oven or broileroperation-
theg mag become hot.
Toremove a rock, pull it toward gou, tilt
the front end up and pull it out.
Toreplace, placethe end of the rock
(stop-locks)on the support, tilt up the front
and push the rock in.
NOTE:Therack isnot designedtoslide out
at the speciallow rack IR)position.
_,Handlesof pots and pans onthe cooktop
mog become hot ifleft too closeto the vent.
_,Donot leaveplastic or flammable items on
thecooktop-theg mog melt or ignite if left
too closeto the vent.
Do not leave closed containers on the cooktop.
Thepressure in closed containers m%l
increase,which mog cause them to burst.
_,Metalitemswill become verg hot iftheg are
left on the cooktop,and could causeburns.
Power Outage
CAUTlON: Donotmakeany
attempt to operatethe electricignition oven
during on electricalpower failure.
The oven or broiler cannot be lit during a
power failure. Gas will not flow unless the
glow bar ishot.
Upper Oven Light
Touch the OVENLIGHTpad to turn the light
on or off.
Ifthe oven is in usewhen a power failure
occurs,the oven burner shutsoff and cannot
be re-lit until power is restored.This is
because the flow of gas is automaticallg
stopped and will not resume when power
is restored until the glow barhas reached
operating temperature.
12
Page 13
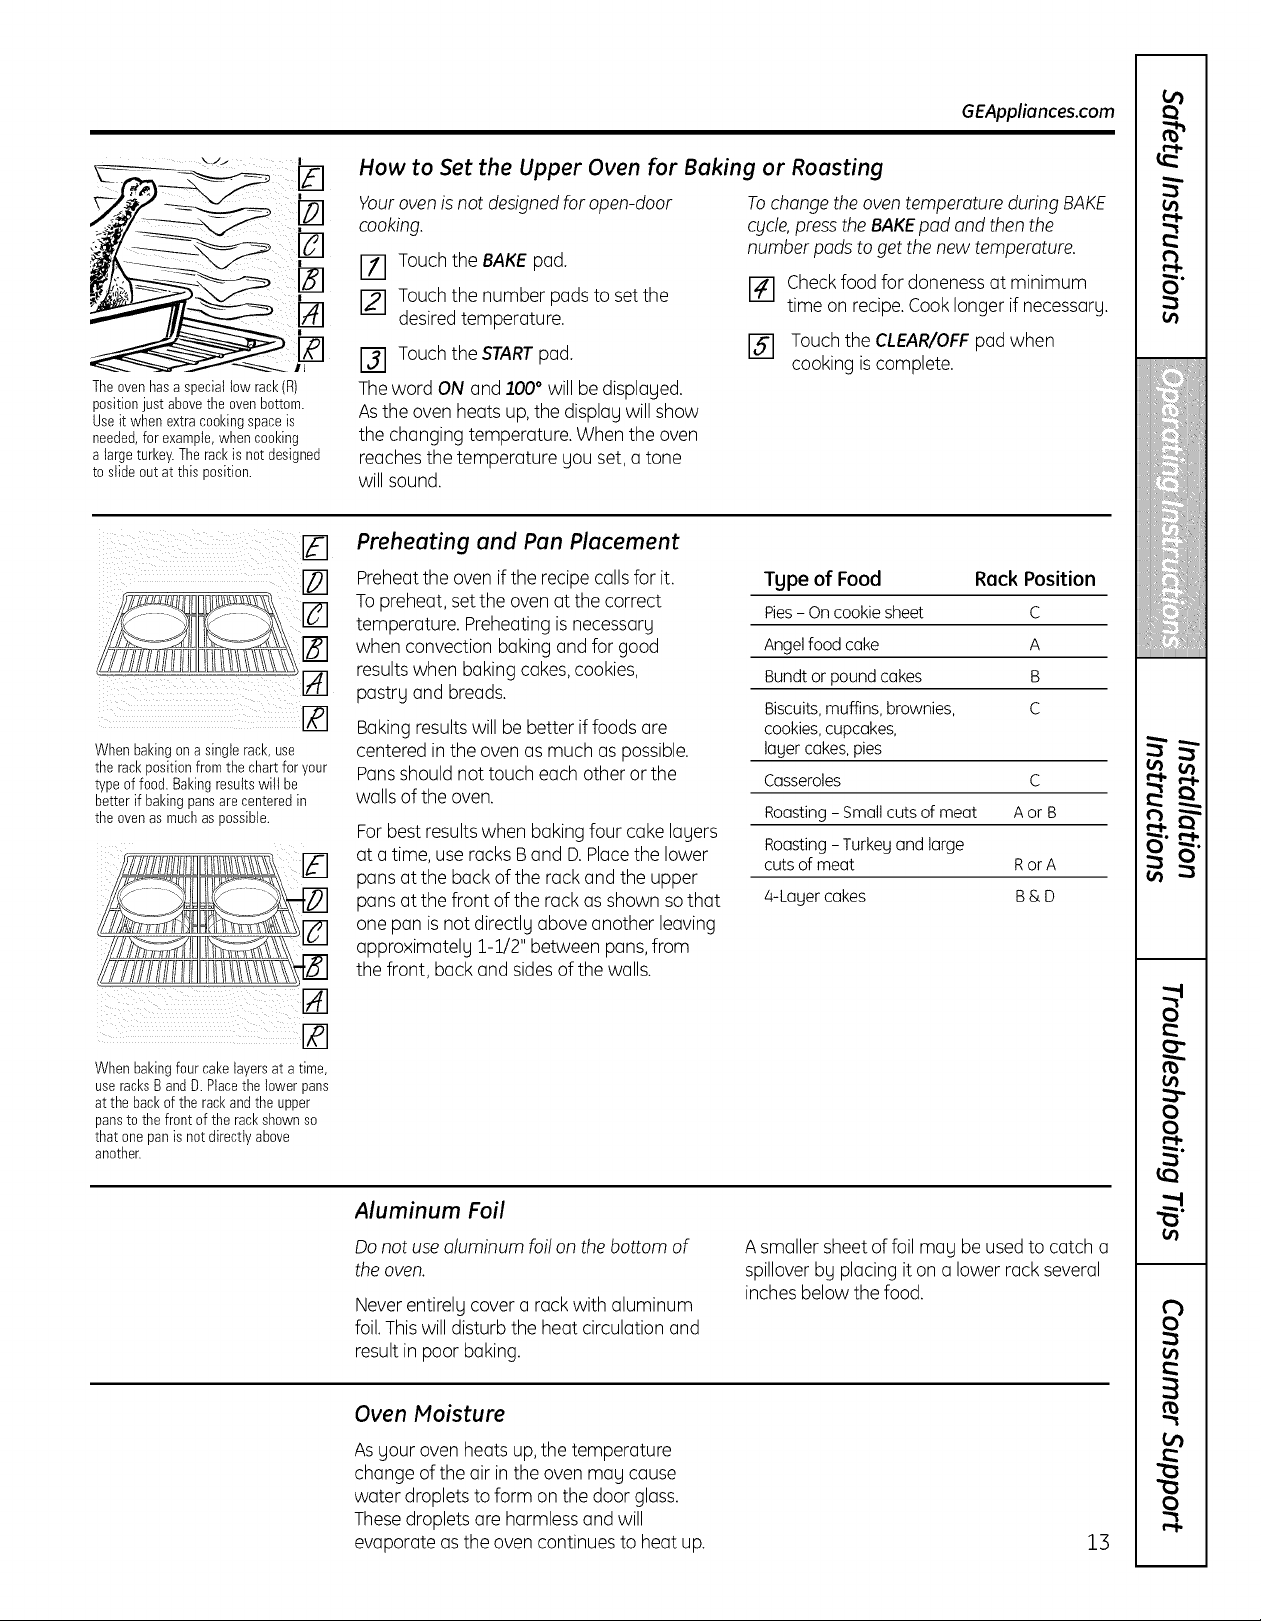
Theovenhasa speciallow rack(R)
positionjust abovetheovenbottom.
Useit when extracookingspaceis
needed,for example,whencooking
a largeturkey.The rackis not designed
to slideoutat this position.
When bakingona singlerack,use
the rackpositionfromthe chartforyour
type offood. Bakingresultswill be
better if bakingpansarecenteredin
theovenas muchas possible.
How to Set the Upper Oven for Baking or Roasting
Your oven isnot designed for open-door
cooking.
To change the oven temperature during BAKE
cblcle,press the BAKEpod and then the
number pads to get the new temperature.
[] Touch the BAKEpad.
I_] Touch the number padsto set the
desiredtemperature.
I_] Touch the STARTpad.
[] Checkfood for doneness at minimum
time on recipe.Cooklonger if necessary.
[] Touch the CLEAR/OFFpadwhen
cooking iscomplete.
Theword ON and 1.OO° will bedisplayed.
Asthe oven heats up, the displaywill show
the changing temperature. When the oven
reaches the temperature you set, a tone
will sound.
Preheating and Pan Placement
Preheatthe oven if the recipe callsfor it.
To preheat, set the ovenat the correct
temperature. Preheatingis necessary
when convection baking and for good
resultswhen baking cakes,cookies,
pastryand breads,
Baking resultswill be better iffoods are
centered in the oven asmuch aspossible.
Pansshould not touch each other or the
Type of Food Rack Position
Pies - On cookie sheet C
Angelfoodcake A
Bundtorpoundcakes B
Biscuits, muffins, brownies, C
cookies,cupcakes,
lagercakes,pies
Casseroles C
walls of the oven.
Roasting- Smallcutsof meat Aor B
Forbestresultswhen baking four cake layers
at a time, use racks Band D.Placethe lower
Roasting-Turkeyandlarge
cutsof meat RorA
pans atthe back of the rack and the upper
pans at the front of the rack as shown so that
4-Lager cakes B & D
one pan is not directly above another leaving
approximately 1-1/2" between pans,from
the front, back and sidesof the walls.
GEAppliances.com
When bakingfour cakelayersat a time,
use racksBand D.Placethe lowerpans
at thebackof the rackandthe upper
pansto the front ofthe rackshownso
that onepan is notdirectlyabove
another.
Aluminum Foil
Do not use aluminum foilon the bottom of
the oven.
Neverentirely cover a rackwith aluminum
foil.Thiswill disturb the heat circulation and
result in poor baking.
Oven Moisture
Asyour oven heats up,the temperature
change of the air in the oven may cause
water droplets to form on the door glass.
These droplets are harmless and will
evaporate asthe oven continues to heat up.
A smaller sheet of foil may be used to catch a
spillover by placingit on a lower rack several
inches below the food.
13
Page 14
Using the upper oven.
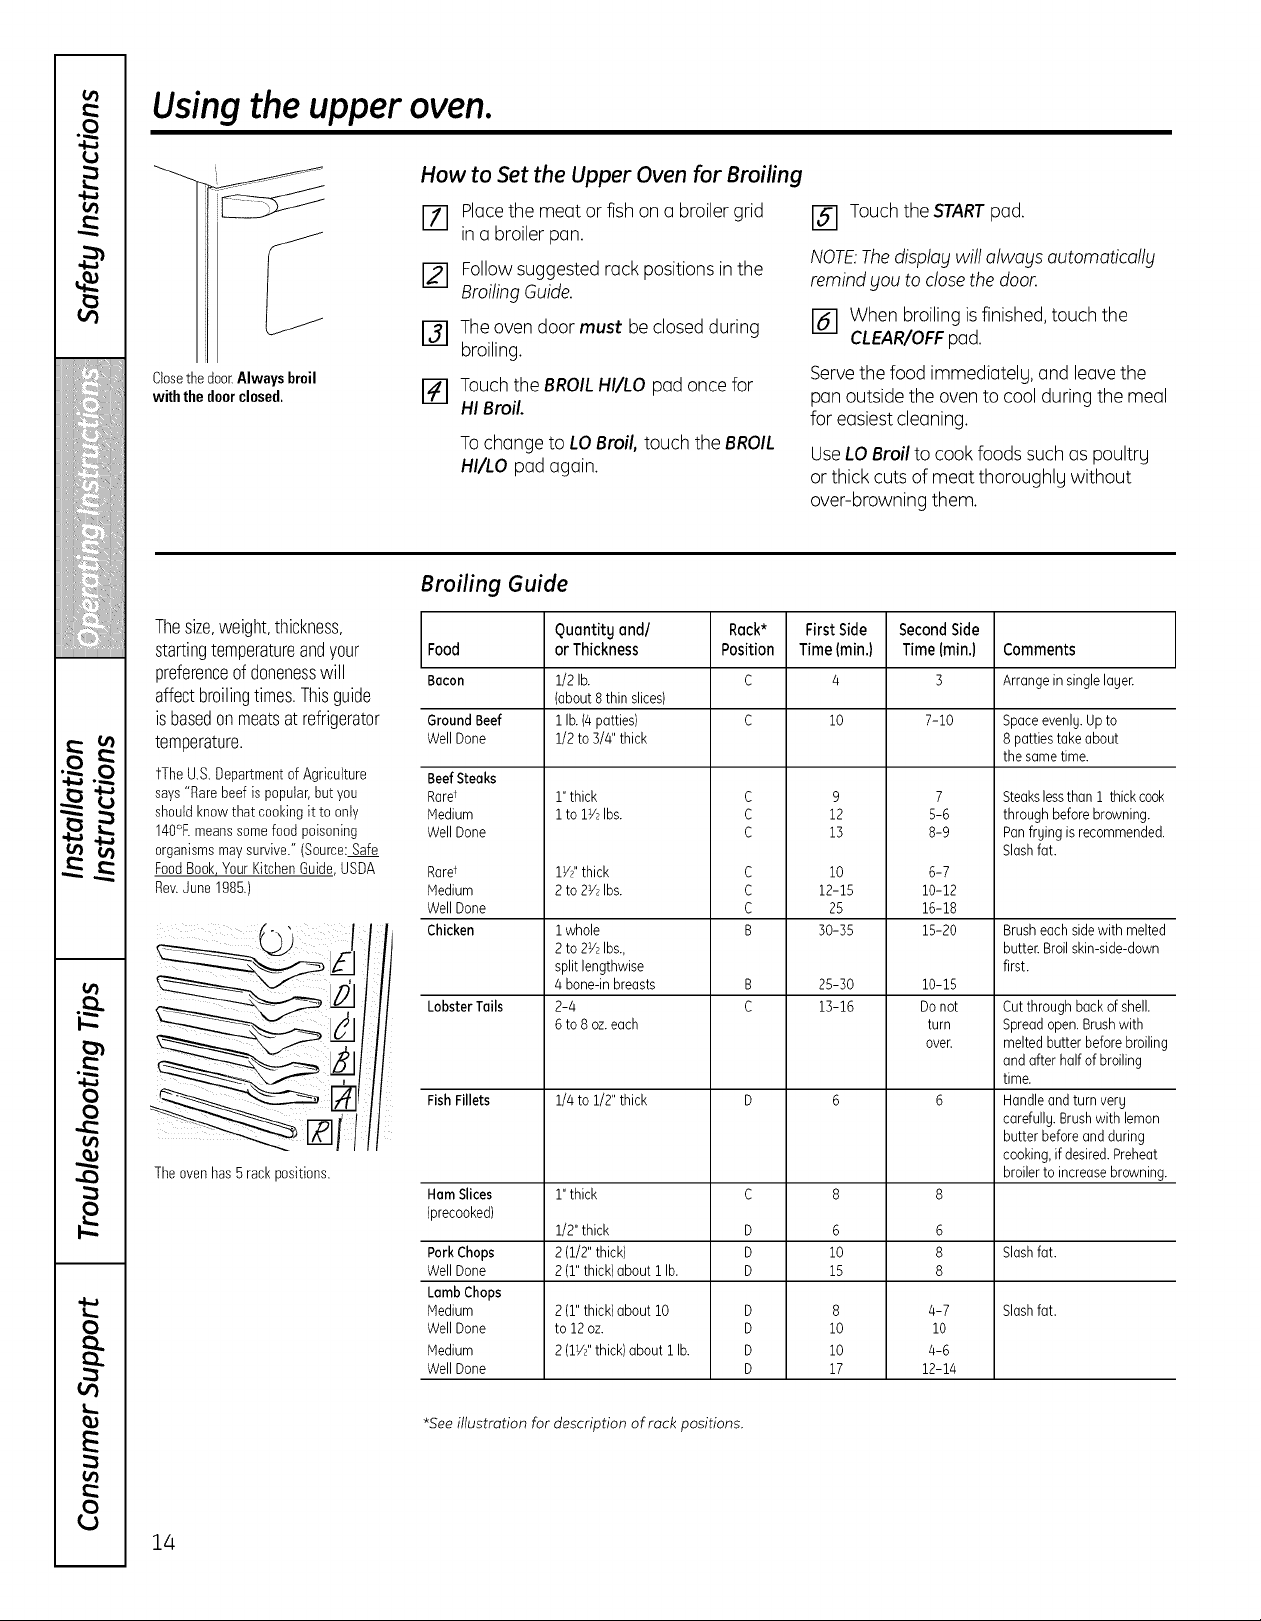
How to Set the Upper Oven for Broiling
J
Closethedoor Always broil
withthe doorclosed.
Thesize,weight,thickness,
startingtemperatureandyour
preferenceofdonenesswill
affectbroilingtimes.Thisguide
isbasedonmeatsatrefrigerator
temperature.
fThe U.S.DepartmentofAgriculture
says"Rarebeef is popular,but you
shouldknowthat cookingit to only
140°Emeanssomefoodpoisoning
organismsmaysurvive."(Source:Safe
FoodBook YourKitchenGuide USDA
Rev.June1985.)
Theovenhas 5rackpositions.
F71 Placethe meat or fish on a broiler grid
in a broiler pan.
[] Followsuggested rack positions in the
Broiling Guide.
_] Theoven door must beclosedduring
broiling.
[_] Touch the BROILHI/LO pad once for
HI Broil.
Tochange to LOBroil, touch the BROIL
HI/LO padagain.
Broiling Guide
Rock*
Position
c
c
c
c
c
c
B
B
C
C
D
D
D
D 17
Food
Bacon
Ground Beef
Well Done
BeefSteaks
Rarer
Medium
WellDone
Rarer
Medium
WellDone
Chicken
Lobster Tails
Fish Fillets
HornSlices
(precooked)
PorkChops
WellDone
Lomb Chops
Hedium
WellDone
Medium
WellDone
Quontitg and/
or Thickness
1/2Ib
(about8thin slices)
i Ib (4patties)
1/2to 3/4"thick
1"thick
i to lY_Ibs.
1W' thick
2 to 2Y_Ibs.
i whole
2to 2Y2Ibs.,
splitlengthwise
4bone-inbreasts
2-4
6to 8 oz.each
1/4to 1/2"thick
1"thick
1/2"thick
2(1/2"thick)
2(1"thick)about i Ib
2(1"thick)about 10 D 8
to 12oz. D 10
2(1V;'thick)about 1lb. D 10
[_] Touch the STARTpad.
NOTE:Thedisplay will always automatically
remindyou to closethe door.
[] When broilingisfinished, touch the
CLEAR/OFFpad.
Servethe food immediatelu, and leavethe
pan outside the oven to cool during the meal
for easiestcleaning.
UseLOBroil to cook foods such as poultry
or thick cuts of meat thoroughly without
over-browning them.
FirstSide
Time(min.)
lO
9
12
13
10
12-15
25
30-35
25-30
13-16
8
6
10
15
SecondSide
Time(min.)
7-10
7
5-6
8-9
6-7
10-12
16-18
15-20
10-15
Do not
turn
oven
8
6
8
8
4-7
i0
4-6
12-14
Comments
Arrangein singlelayer.
Space evenly. Up to
8 patties take about
the same time.
Steakslessthan 1 thickcook
throughbeforebrowning.
Panfryingisrecommended.
Slashfat.
Brusheachsidewith melted
butter.Broilskin-side-down
first.
Cutthroughback ofshell.
Spreadopen.Brushwith
meltedbutterbeforebroiling
andafter halfof broiling
time.
Handleandturnvery
carefully.Brushwithlemon
butterbeforeand during
cooking,ifdesired.Preheat
broilerto increasebrowning.
Slashfat.
Slashfat.
14
*See illustration for description of rack positions.
Page 15
Using the clockand timer. GEAppliances.com
Not all features are on all models.
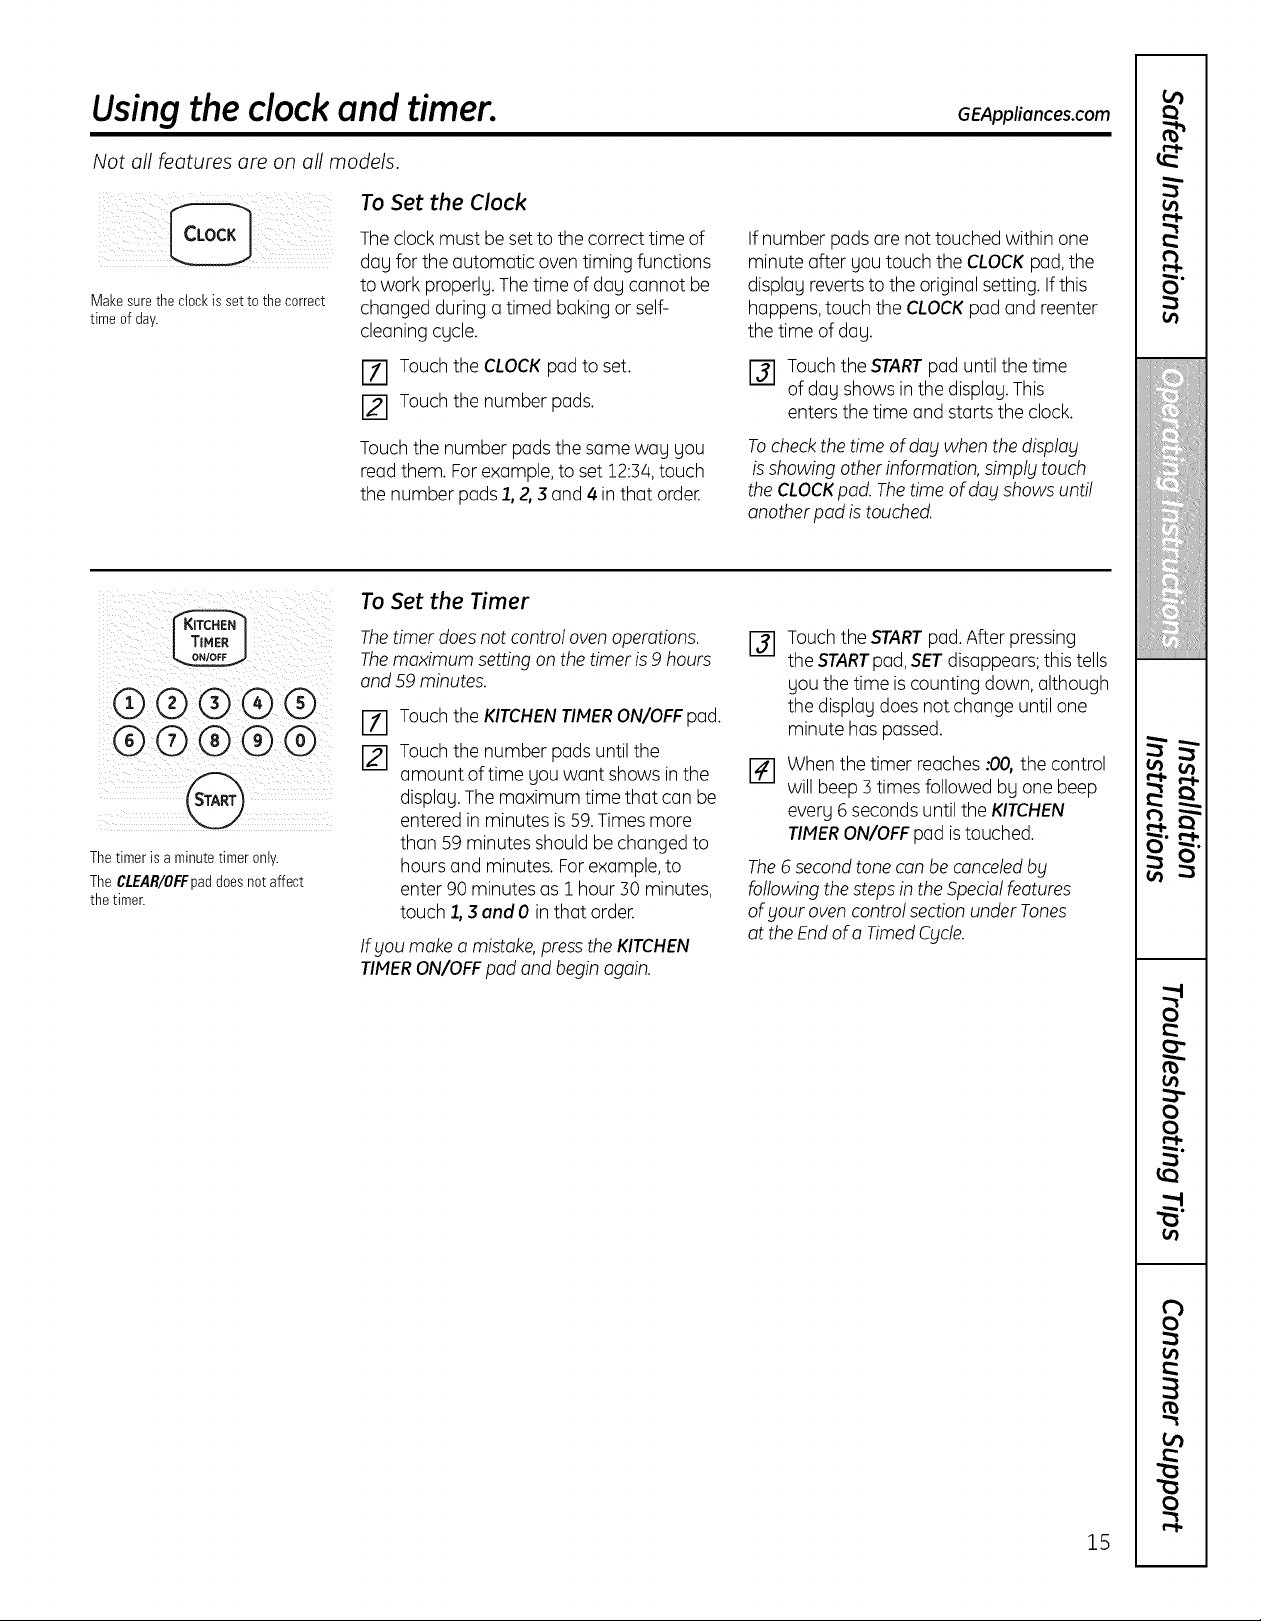
To Set the Clock
Makesure theclockissetto the correct
time ofday.
®®®®®
®®®®®
Thetimer isa minutetimer only.
The C/.EAR/OFFpaddoesnotaffect
thetimer.
The clock must besetto the correct time of
day for the automatic oven timing functions
to work properly.Thetime of day cannot be
changed during atimed baking or self-
cleaning cycle.
i-71 Touch the CLOCKpad to set.
[] Touch the number pads.
Touch the number pads the same way you
read them. Forexample,to set 12:54,touch
the number pads1,2, 3 and 4 in that order.
To Set the Timer
The timer does not control oven operations.
The maximum setting on the timer is9 hours
and 59 minutes.
Touch the KITCHEN TIMER ON/OFF pad.
[Z]
Touch the number pads until the
amount oftime you want shows in the
display.Themaximum time that can be
entered in minutes is59.Timesmore
than 59minutes should be changed to
hours and minutes.Forexample, to
enter 90 minutes as 1 hour 50 minutes,
touch 1,3 and 0 in that order.
Ifyou make a mistake, press the KITCHEN
TIMERON/OFFpad and begin again.
If number padsare not touched within one
minute after you touch the CLOCKpad, the
display revertsto the original setting. If this
happens,touch the CLOCKpad and reenter
the time of day.
r-_ Touch the STARTpad until the time
of day shows in the display.This
enters the time and starts the clock.
Tocheck the time of day when the display
is showing other information, simply touch
the CLOCKpad. The time of day shows until
another pad istouched.
Touch the STARTpad.After pressing
%
the STARTpad,SETdisappears;thistells
you the time is counting down, although
the display does not change until one
minute has passed.
When the timer reaches :00othe control
[]
will beep 3times followed by one beep
every 6 seconds until the KITCHEN
TIMERON/OFFpad is touched.
The 6 second tone can be canceled by
following the steps in the Special features
of your oven control section under Tones
at the End of a Timed Cycle.
t_
e,,i.
MiiiiiiiiiJiiiiiii
iiiiii_ii_iiiijiii_iii
i/ii_iiiiiii_iiiiiiiiiiii_ii
iii_iiii!ii,,_iiiiiiiiii!
r U
_ P
15
v
to
0
0
e,,i.
0
to
0
.
Page 16
Using the clockand timer.
To Reset the Timer
Ifthe display isstillshowing the time
remaining, you may change it by touching
the KITCHENTIMERON/OFF pad,then touch
the number pads until the time you want
appears inthe display.
To Cancel the Timer
Touchthe KITCHENTIMERON/OFFpadtwice.
Power Outage
If o floshing time is in the displog,gou hove
experiencedo power foilure.Resetthe clock.
If the remaining time is not inthe display
(clock,delay start orcooking time are in
the display), recallthe remaining time by
touching the KITCHENTIMERON/OFFpad
and then touching the number pads to enter
the newtime gouwant.
Touch the CLOCKpadto reset.Enter
the correct time of day bg touching the
appropriate number pads.Touch the
STARTpad.
16
Page 17
Usingthetimedbakingandmasting features.(upper oven only) GEAppliances.com
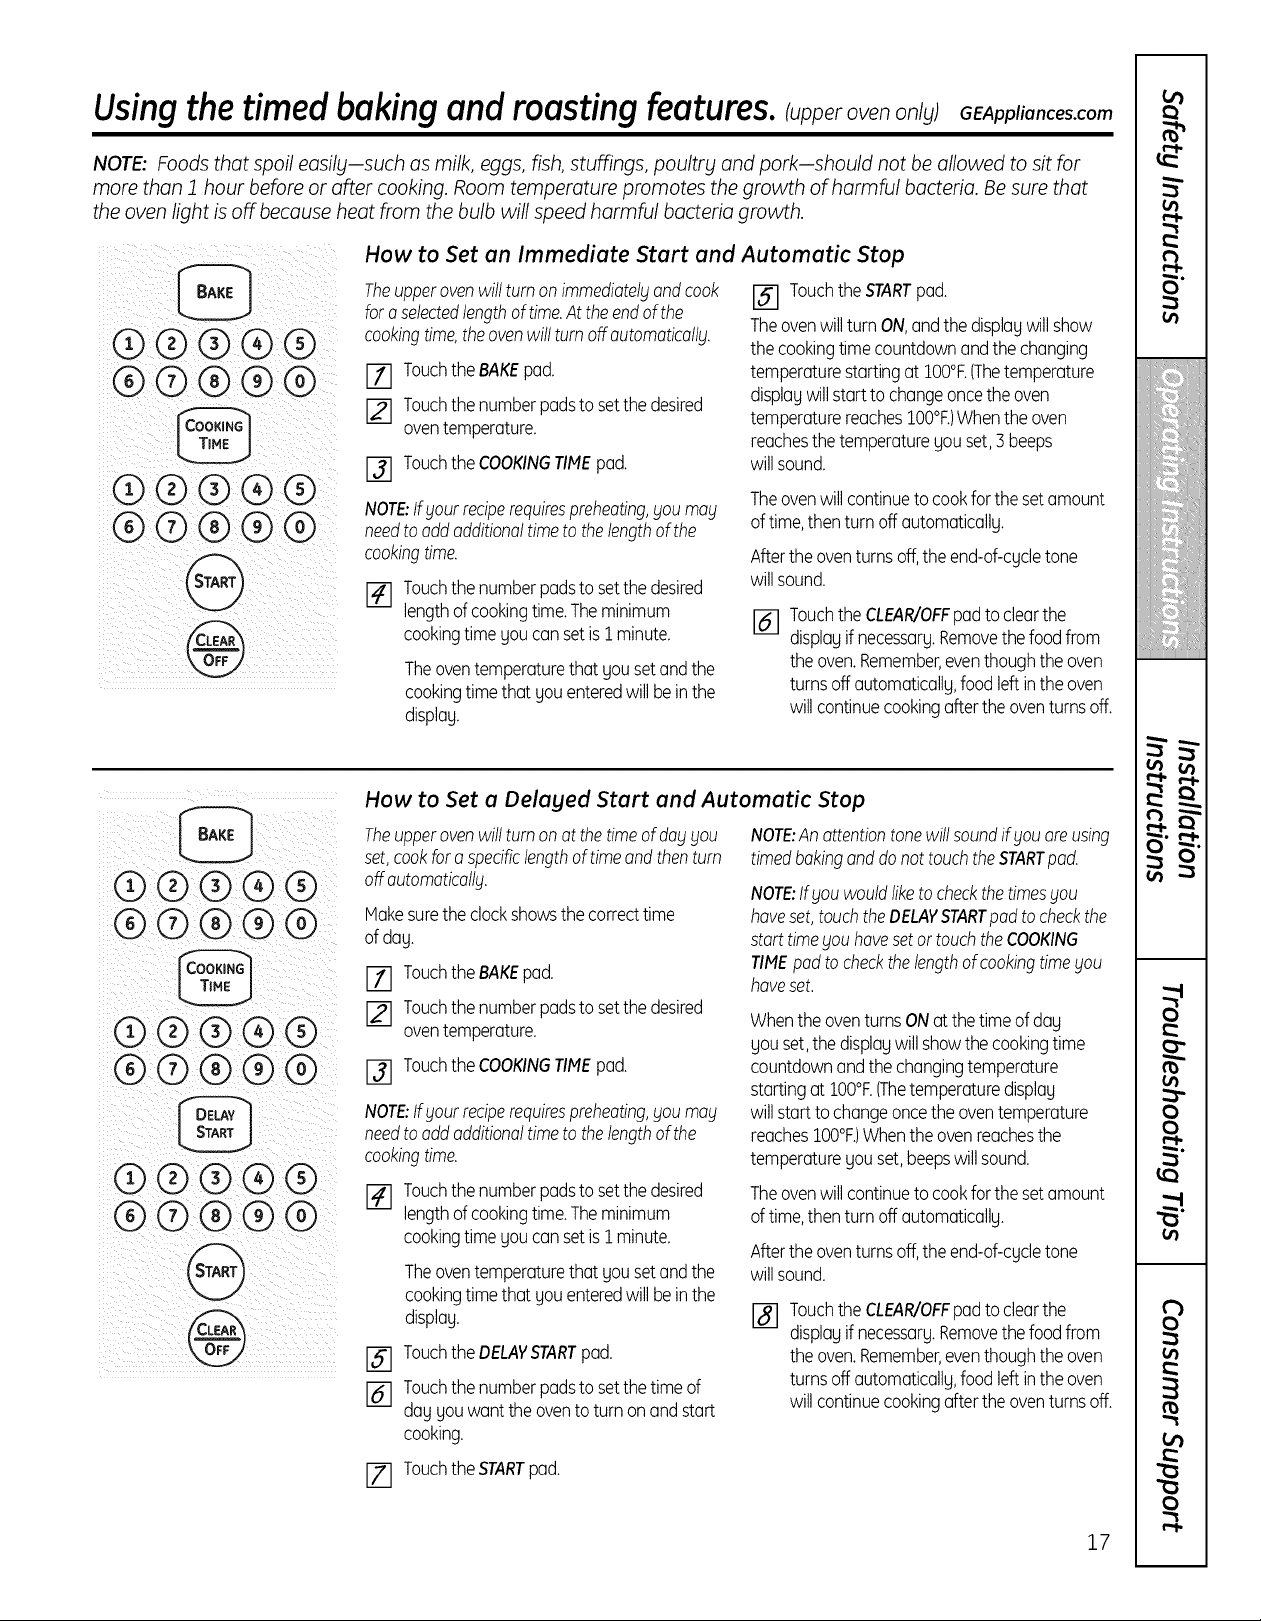
NOTE: Foods that spoil easilbl-such as milk, eggs, fish, stuffings, poultry and porkishould not be allowed to sit for
more than 1 hour before or after cooking. Room temperature promotes the growth of harmful bacteria. Be sure that
the oven light isoff because heat from the bulb will speed harmful bacteria growth.
C ¸ / L
i i i!
®®®® ®
®® ®®®
®®®®®
®® ®®®
@
@
How to Set an Immediate Start and Automatic Stop
Theupperovenwillturn onimmediatelyandcook
foraselectedlengthoftime.Atthe endofthe
cookingtime,theovenwillturnoffoutomoticollbl.
E_] TouchtheBAKEpad.
[] Touchthenumberpadstosetthe desired
oventemperature.
E_] TouchtheCOOKINGTIMEpad.
NOTE:Ifyourreciperequirespreheating,blOUmay
needtooddadditionaltimetothelengthofthe
cookingtime.
[] Touchthenumberpadstosetthe desired
lengthofcookingtime.Theminimum
cookingtime youcan setis1minute.
Theoventemperaturethatyousetandthe
cookingtimethat youenteredwillbeinthe
display.
How to Set a Delayed Start and Automatic Stop
[] TouchtheSTARTpad.
TheovenwillturnON,andthe displaywillshow
thecookingtimecountdownandthechanging
temperaturestartingat IO0°F.(Thetemperature
displaywillstartto changeoncetheoven
temperaturereachesIO0°F.)Whentheoven
reachesthetemperatureyouset,Bbeeps
willsound.
The oven will continue to cook forthe set amount
of time, then turn off automatically.
After the oven turns off,the end-of-cycle tone
will sound.
_-1 TouchtheCLEAR/OFFpadto clearthe
displayifnecessary.Removethefoodfrom
theoven.Remember,eventhoughthe oven
turnsoffautomatically,food leftinthe oven
willcontinuecookingafterthe oventurnsoff.
Miiiiiiiiiiiiiiiii
iiiiii_ii_iiii4iiii_iii
i/ii_iiiiiii_iiiiiiiiiiii_ii
iii_iiii!ii,,_iiiiiiiiii!
r U
_ P
@®®®®
®®®®®
@
®®®®®
®®®®®
@
®®®®®
®®®®®
@
@
Theupperovenwillturn onatthetimeof doggou
set,cookforaspecificlengthoftimeandthenturn
offautomaticallg.
Hakesuretheclockshowsthecorrecttime
ofday.
[] TouchtheBAKEpad.
Touchthenumberpadstosetthe desired
oventemperature.
[] TouchtheCOOKINGTIlE pad.
NOTE:lfblourreciperequirespreheating,youmobl
needtooddadditionaltimetothelengthofthe
cookingtime.
Touchthenumberpadstosetthe desired
lengthofcookingtime.Theminimum
cookingtime youcan setis1minute.
Theoventemperaturethatyousetandthe
cookingtimethat youenteredwillbeinthe
display.
TouchtheDELAVSTARTpad.
[-_ Touchthe numberpadstosetthetime of
day youwantthe ovento turnonandstart
cooking.
NOTE:An attentiontonewill soundifyouareusing
timedbakinganddonottouchtheSTARTpod.
NOTE:lfblouwouldliketo checkthetimesyou
haveset,touchtheDELAVSTARTpodtocheckthe
starttimeyou havesetortouchtheCOOKING
TIMEpadto checkthelengthofcookingtimeyou
haveset.
WhentheoventurnsONat thetimeof day
youset,thedisplaywillshowthecookingtime
countdownandthechangingtemperature
startingat IO0°F.(Thetemperaturedisplay
willstart tochangeoncethe oventemperature
reachesIO0°F.)Whentheovenreachesthe
temperatureyouset,beepswill sound.
The oven will continue to cook forthe set amount
of time, then turn off automatically.
Aftertheoventurnsoff,theend-of-cycletone
willsound.
[] TouchtheCLEAR/OFFpadto clearthe
displayifnecessary.Removethe foodfrom
theoven.Remember,eventhoughthe oven
turnsoffautomatically,food leftinthe oven
willcontinuecookingafterthe oventurnsoff.
v
0
0
.
0
t_
IZ] Touchthe STARTpad.
0
17
Page 18
Usingthe probe.
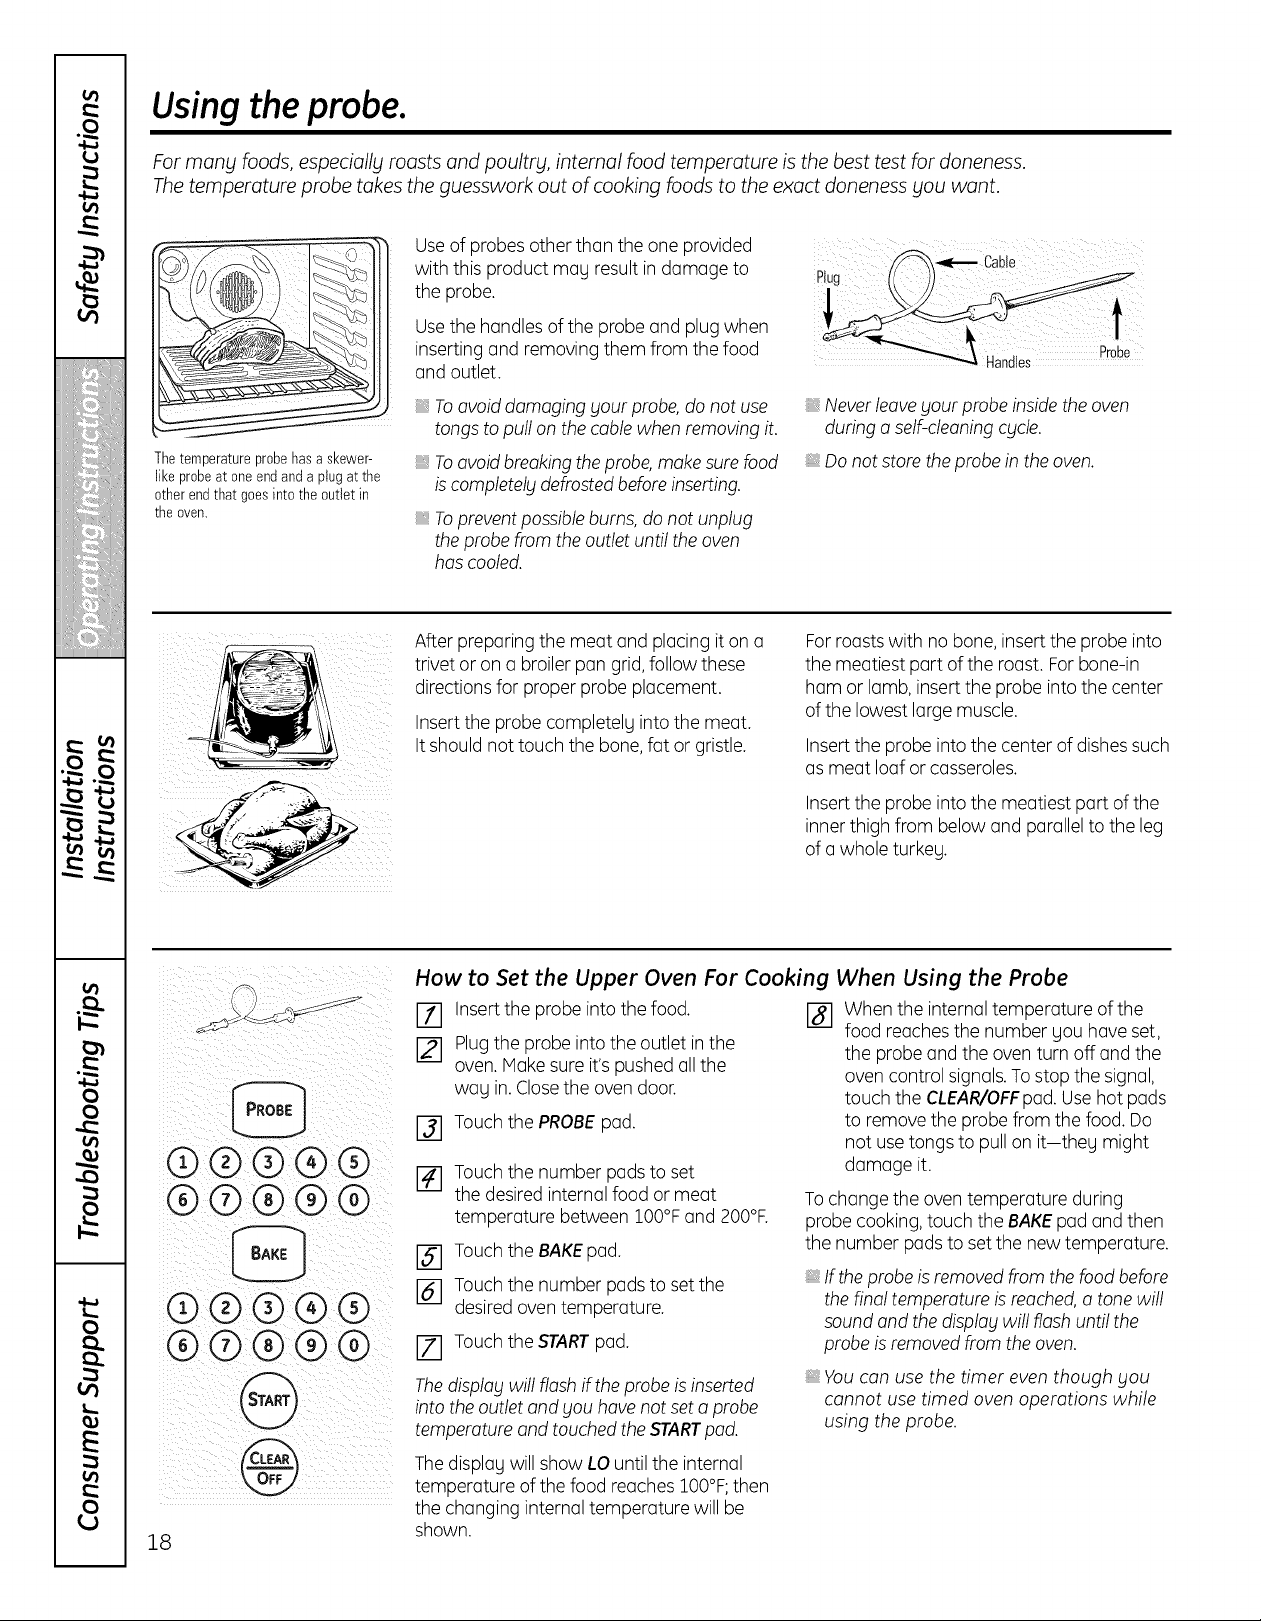
For many foods, especially roasts and poultrbl, internal food temperature is the best test for doneness.
The temperature 9robe takes the guesswork out of cooking foods to the exact doneness gou want.
Thetemperatureprobehasa skewer-
like probeat oneendanda plugatthe
otherendthat goesinto theoutlet in
theoven.
Useof probesother than the one provided
with this product may result in damage to
the probe.
Usethe handlesof the probeand plug when
inserting and removing them from the food
and outlet.
_,Toavoid damaging blourprobe,donot use
tongs to pull onthe cablewhen removing it.
Toavoid breakingtheprobe,make surefood
iscompletelbldefrostedbefore inserting.
_,Toprevent possibleburns,donot unplug
theprobe from the outlet until theoven
hascooled.
After preparing the meat and placing it ona
trivet or ona broiler pan grid,follow these
directionsfor proper probe placement.
Insertthe probe completely into the meat.
Itshould not touch the bone,fat or gristle.
cable
Plu
_ Handles
Neverleaveyour probe insidethe oven
during a self-cleaningcblcle.
_,Donot store the probeinthe oven.
Forroasts with no bone, insert the probeinto
the meatiest part of the roast. Forbone-in
ham orlamb, insert the probe into the center
of the lowest large muscle.
Insertthe probe into the center of dishessuch
as meat loaf or casseroles.
Insertthe probe into the meatiest part of the
inner thigh from below and parallelto the leg
of a whole turkeg.
®®®®®
®®®®®
®®®®® @
®®®®®
@
@
18
How to Set the Upper Oven For Cooking When Using the Probe
Insertthe probe into the food.
%
Plugthe probe intothe outlet in the
[]
oven. Make sureit'spushed allthe
way in.Closethe oven door.
Touchthe PROBEpad.
Touchthe number padsto set
the desired internal food or meat
temperature between 100°Fand 200°F.
Touchthe BAKEpad.
Touchthe number padsto set the
desiredoven temperature.
Touchthe STARTpad.
Thedisplag will flash if the probe isinserted
into the outlet and gou have not seta probe
temperature and touchedtheSTARTpod.
Thedisplagwill show LO untilthe internal
temperature of the food reaches100°F;then
the changing internal temperature will be
shown.
[] When the internal temperature of the
food reachesthe number Uouhave set,
the probeandthe oven turn off and the
oven control signals.Tostopthe signal,
touch the CLEAR/OFFpad.Usehot pads
to remove the probe from the food. Do
not usetongs to pull on it-they might
damage it.
Tochange the oven temperature during
probe cooking,touch the BAKEpadand then
the number pads to set the new temperature.
If theprobeisremoved from the food before
thefinal temperature isreached,a tone will
sound and thedisplablwill flash until the
probe isremovedfrom the oven.
_,Youcan use the timer even though blou
cannot use timed oven operations while
using the probe.
Page 19

Using the convection oven. GEAppliances.com
Theconvection oven fan shuts off when the oven door is opened. DONOTleave the door open for long periods of time
while using convection cooking.
I ¸¸ - _L..
I__ ii i
Ina convectionoven,a fancirculates
hotair over,underandaroundthe food.
Thiscirculatinghot air is evenly
distributedthroughoutthe ovencavity.
Asa result,foodsare evenlycookedand
browned--often in lesstime than with
regularheat.
NOTE:Tomaximizecookingevenness,
thefan isdesignedto rotate in both
directionswith a pauseinbetween.
Thisis normal.
To help gou understand the difference
between convection bake and roast and
traditional bakeand roast, here are some
general guidelines.
Convection Bake
Preheat the oven. See the Using the Oven-
Preheating and Pan Placement section.
Idealfor foods cooked on multiple racks.
Good for large quantities of baked foods.
Good results with cookies, biscuits,
brownies, cupcakes, cream puffs, sweet
rolls,angel food cakeand bread.
The convection fan circulates the heated
air evenlg over and around the food.
Convection Roast
Good for large tender cuts of meat,
uncovered.
The convection fun circulates the heated air
evenlg over and around the food. Meat and
poultrg are browned on all sides as iftheg
were cooked on a rotisserie. Heated air will
be circulated over, under and around the
food being roasted. The heated air seals in
juices quicklg for a moist and tender product
while, at the same time, creating a rich
golden brown exterior.
Roasts or poultry should be cooked on rack
position IA).
When gouoreconvection roosting,it is
important that gou useo broiler pan and grid
for bestconvection roosting results.The pan
isusedto catch greasespills and the grid is
usedto prevent greasespotters.
Placethe rack in rack position (A).
fl//
19
Page 20

Usingthe convectionoven.
Cookware for Convection Cooking
@@(9@@
(9(9@@@
@
@
Beforeusing your convection oven,check
to see ifyour cookware leavesroom for air
circulation inthe oven.Ifyou are baking with
several pans, leavespacebetween them.
Also,be surethe pans do not touch each
other or the walls of the oven.
Paper and Plastic
Heat-resistant paper and plastic containers
that are recommended for use in regular
ovens can be usedin convection ovens.
Plasticcookware that is heat-resistant to
temperatures of 400°Fcan also be used,
when oven isbelow 400°F.
Metal and Glass
Any type of cookware will work inyour
convection oven. However,metal pans heat
the fastest and are recommended for
convection baking.
Darkenedor matte-finished pans will bake
fasterthan shing pans.
Glassor ceramic pans cook more slowlg.
When baking cookies, you will get the best
results if you usea flat cookiesheetinstead
of a panwith low sides.
Forrecipeslikeoven-baked chicken,
usea pan with low sides. Hot air cannot
circulate well around food in a pan with
high sides.
How to Set the Upper Oven for Convection Baking or Roasting
Touchthe CONVECTIONBAKEMULTI/
%
1 RACKpad once for multi-rack
convection baking.This mode isusedfor
cooking food items on more than one
rack (i.e.,2,3 or more racks)at the same
time in convection bake. Seethe Multi-
RackBaking section for more
information. Touch the CONVECTION
BAKEMULTI/1RACKpadtwice for one
rack convection baking.This mode is
usedfor cooking food items on only one
rack in convection bake.
Touch the CONVECTIONROASTpad
for convection roasting.
[] Touchthe number padsto set the
desiredoven temperature.
r-_ Touchthe STARTpad.
Tochange the oven temperature, touch
the CONVECTIONBAKEMULTI/1 RACKor
CONVECTIONROASTpadand then the
number padsto set the newtemperature.
Whenthe ovenstartsto heat, the changing
temperature, starting at 100°F,will be
displayed.When the oven reachesthe
temperature you set, 3 beeps will sound.
[] Touch the CLEAR/OFFpad when
finished.
NOTE:Youwill hear a fan while cookingwith
convection.Thefan will stop when thedoor
isopenedbut the heat will not turn off.
Thefan will not start until the preheat
temperature is reached.
NOTE:When convection baking, the oven
temperature will be 25°F(.14°CIlower than
the set temperature. SeeAuto RecipeTM
Conversion in the Special Features section
for more information. When convection
roasting, oven temperature will not auto
convert.
Whenconvectionbakingwith only
1 rack,follow the rackpositions
recommendedin theUsingthe
Ovensection.
20
Multi-Rack Baking
Thenumber of racksprovided depends on
your model.
Becauseheated air iscirculated evenly
throughout the oven, foods can bebaked
with excellent resultsusing multiple racks.
Multi-rack baking may increasecooktimes
slightly for some foods but the overall result
istime saved. Cookies,muffins, biscuits and
other quick breads givevery good results
with multi-rack baking.
Tocookfood on more than one rack in
convection bake, useCONVECTIONBAKE
MULTI.
When baking larger foods on 3racks,place
one rack in the 2nd (A)position,oneon the
4th (C)position and the third rack in the 6th (E)
position.
When baking cookies,placethe racks in the
3rd (B),4th (C)and6th (E)positions.
Page 21

GEAppliances.com
How to Set the Upper Oven for Convection Roasting when Using the ProOe
Forbestresultswhen roastinglarge
turkeysandroasts,we recommendusing
theprobe includedinthe convection
oven.
@®®@@
®®®®@
@
®®®®®
®®@®@
@
@
Thedisplaywill flash PROBEandthe oven
control will signal if the probe isinserted into
the outlet, and you have not set a probe
temperature andtouched theSTARTpad.
[] Placethe rack in the rack position(A).
Insert the probe completely into the
food.
[] Plugthe probe into the outlet in the
oven. Makesure it is pushed all the wag
in.Closethe oven door.
[] Touch the CONVECTIONROASTpad.
r-_ Touch the number padsto setthe
desiredoven temperature.
[] Touch the PROBEpad.
[] Touch the number pads to setthe
desiredinternal food temperature.
To change the oven temperature during
the Convection Roastcycle, touch the
CONVECTIONROASTpad and then touch
the number pads to set the new desired
temperature.
IZ] Touchthe STARTpad.
When the oven starts to heat, the word
LO will be inthe display.
CAUTlONt Topreventpossib/e
burns, do not unplug the probe from the oven
outlet until the oven hascooled.Do not store
the probe in theoven.
NOTE:
Ifthe probe is removed from the food
before the final temperature is reached, a
tone willsound and the displag will flash
until the probe is removed from the oven.
Youwill hear a fan while cooking with this
feature.Thefan will stop when the dooris
opened but the heatwill not turn off.
You can use the timer even though gou
cannot use timed oven operations while
using the probe.
t_
e_
o
Miiiiiiiiiiiiiiiii
iiiiii_ii_iiiijiii_iii
!::11_!i!::_?!i!
i/ii_iiiiiii_iiiiiiiiiiili
iii_iiii!ii,,_iiiiiiiiii!
r U
_ P
After the internal temperature of the food
reaches IO0°F,the changing internal
temperature will be shown in the display.
When the internal temperature of the
[]
food reaches the number you have set,
the probe andthe oven turn off and the
oven control signals.Tostopthe signal,
touch the CLEAR/OFFpad. Usehot
pads to remove the probe from the
food. Do not usetongs to pullon it-
they might damage it.
v
to
0
0
e_
o
0
to
21
0
Page 22

Usingthe convectionoven.
Convection Roasting Guide
Meats Minutes/Lb, OvenTemp, Internal Temp,
Beef Rib(3to 5 Ibs.) Raret 20-24 325°F 140°F
BonelessRib,TopSirloin Raret 20-24 325°F 140°F
BeefTenderloin Raret 10-14 325°F 140°F
PotRoast(21/2to 3 Ibs.)chuck,rump 35-45 300°F 170°F
Pork Bone-in(3to 5 Ibs.) 23-27 325°F 170°F
Boneless(3 to5 Ibs.) 23-27 325°F 170°F
PorkChops(½to 1"thick) 2chops 30-35 total 325°F 170°F
Ham Canned(3Ibs.fully cooked) 14-18 325°F 140°F
Butt(5Ibs.fully cooked) 14-18 325°F 140°F
Shank(5Ibs.fully cooked) 14-18 325°F 140°F
Lamb Bone-in(3to 5 Ibs.) Medium 17-20 325°F 160°F
Boneless(3 to5 Ibs.) Medium 17-20 325°F 160°F
Seafood Fish,whole (3to 5 Ibs.) 30-40 total 400°F
LobsterTails(6to 8 oz.each) 20-25total 350°F
Poultry WholeChicken(21½to 31½Ibs.) 24-26 350°F 180°-185°F
CornishHensUnstuffed(1 to 1½ Ibs.) 50-55total 350°F 180°-185°F
CornishHensStuffed(1to 1½ Ibs.) 55-60total 350°F 180°-185°F
Duckling(4to 5 Ibs.) 24-26 325°F 180°-185°F
Turkey,whole_
Unstuffed(10to 16Ibs.) 8-11 325°F 180°-185°F
Unstuffed(18to 24Ibs.) 7-10 325°F 180°-185°F
TurkeyBreast(4to6 Ibs.) 16-19 325°F 170°F
* St_!/,]_¢dbirds g'(¢_erall_' r(¢quir(¢ 30-45 "minute, s additional ma.sti_Tg time. Shieht l(_:s and br(¢a.st withJbil to pr(¢vent
ow_rbrowni_Tg and d_)'i_Tg'oJ._kin.
t 7;% U.S. l)epartme_t o/Ag+ri_ultur_ ._(0'._"llar_ beq/i._ popular; but you ._hould know that _ooki_Tg it to only' 140 °F "m_(m._
.some /ood po_soni_Tg o_;q'ani.sm.s may .su_J#e. "(Source: _S'c{/_¢Food Book. Four Kit_he_ Guide. USDA I¢_.,/u_e 1985.)
Medium 24-28 325°F 160°F
Well 28-32 325°F 170°F
Medium 24-28 325°F 160°F
Well 28-32 325°F 170°F
Medium 14-18 325°F 160°F
4chops 35-40 total 325°F 170°F
6chops 40-45 total 325°F 170°F
Well 20-24 325°F 170°F
Well 20-24 325°F 170°F
22
Page 23

Using the timed convectionbaking features. GEApUionces.com
You will hear a fan while cooking with this feature. Thefan will stop when the door isopened but the heat will not turn off.
NOTE: Foods that spoil easil_l-such as milk, eggs, fish, stuffings, poultry and porkishould not be allowed to sit for
more than 1 hour before or after cooking. Room temperature promotes the growth of harmful bacteria. Be sure that
the oven light isoff because heat from the bulb will speed harmful bacteria growth.
How to Set an Immediate Start and Automatic Stop
Theupperovenwillturn onimmediatelyandcook r-_ Touchthenumberpadsto setthedesired
foraselectedlengthoftime.At theendofthe lengthof cookingtime.Theminimum
® ® ® ®@
@® ® ® ®
®®® ®®
i
@
cookingtime,the ovenwill turnoffautomatically, cookingtime youcanset is 1minute.
[] Touch the CONVECTIONBAKEMULTI/ Theoventemperaturethat you setand the
1 RACKpad once for multi-rack cookingtimethat youenteredwill beinthe
convection baking. This mode is used
for cooking food items on more than
i ¸
one rack (i.e.,2,3or more racks)at the
same time in convection bake.Seethe
Multi-RackBaking section for more
information. Touch the CONVECTION
BAKEMULTI/1RACKpad twice for one
rack convection baking. This mode is
used for cooking food items on only
one rack in convection bake.
Touch the CONVECTIONROASTpad
for convection roasting.
[] Touchthenumberpadsto setthedesired
oventemperature.
[] TouchtheCOOKINGTIMEpad.
NOTE:Ifyour reciperequirespreheating,you may
needtooddadditionaltimeto thelengthof the
cookingtime.
display.
[] TouchtheSTARTpad.
Theovenwillturn ON,andthedisplaywillshow
thecookingtimecountdownandthe changing
temperaturestartingat 10001:.(Thetemperature
displaywillstarttochangeonceoventemperature
reacheslO0°E)Whentheovenreachesthe
temperatureyouset,3beepswillsound.
Theovenwillcontinueto cookforthesetamount
oftime,thenturnoff automatically.
Afterthe oventurnsoff,theend-of-cycletone
willsound.
[] TouchtheCLEAR/OFFpadto clearthe
displayif necessary.Removethefood
from theoven.Remember,eventhoughthe
oventurnsoffautomatically,food left inthe
ovenwill continuecookingaftertheoven
turns off.
@@
®®®@®
@®@®@
@
®®®®®
@®®®@
@
®®®®®
@®@®@
@
@
How to Set a Delayed Start and Automatic Stop
Theupperovenwillturnonattimeofdo!lyouset,
cookfora specificlengthoftimeandthenturnoff
automaticall[I.
Hakesurethe clockshowscorrecttime ofday.
TouchtheCONVECTIONBAKEMULTI/
1RACKpadoncefor multi-rackconvection
baking.Thismodeis usedfor cookingfood
itemson morethanonerack(i.e.,2,3or
moreracks)atthesametimeinconvection
bake.SeetheMulti-RackBakingsectionfor
moreinformation.TouchtheCONVECTION
BAKEMULTI/1RACKpadtwicefor onerack
convectionbaking.Thismodeisusedfor
cookingfooditemsononlyonerackin
convectionbake.
TouchtheCONVECTIONROASTpad
for convectionroasting.
Touchthenumberpadsto setthe desired
oventemperature.
TouchtheCOOKINGTIMEpad.
NOTE:Ifyour reciperequirespreheating,you may
needtooddadditionaltimeto thelengthof the
cookingtime.
[] Touchthenumberpadsto setthedesired
lengthof cookingtime.Theminimum
cookingtimeyou canset is 1minute.
Theoventemperaturethat you setand the
cookingtimethat you enteredwillbe inthe
display.
TouchtheDELAYSTARTpad.
_-I Touchthenumber padsto settimeof day
youwantoventoturn onand startcooking.
[Z] TouchtheSTARTpad.
NOTE:Ifyou wouldliketo checkthetimesyou
haveset,touchtheDELAYSTARTpadto checkthe
starttime[Iouhavesetor touchtheCOOKING
TIMEpadtocheckthelengthof cookingtimeyou
haveset.
Whenthe oventurnsONatthetime ofday
youset,the displaywill showthe cookingtime
countdownandthechangingtemperature
startingat ZOO°F.(Thetemperaturedisplay
willstarttochangeoncethe oventemperature
reachesZOO°F.)Whenthe ovenreachesthe
temperatureyouset,3beepswillsound.
Theovenwillcontinueto cookforthesetamount
oftime,thenturnoff automatically.
Afterthe oventurnsoff,theend-of-cycletone
willsound.
[] TouchtheCLEAR/OFFpadto clearthe
displayif necessary.Removethefood
from theoven.Remember,eventhoughthe
oventurnsoffautomatically,food left inthe
ovenwill continuecookingaftertheoven
turns off.
23
Page 24

Special features of your upper oven control.
Your new touch pad control has additional features that blOUmay choose to use. The following are the features
and how blOUmay activate them.
The special feature modes can only be activated while the display isshowing the time of day. They remain
in the control's memory until the steps are repeated.
When the displag shows your choice, touch the STARTpad. Thespecial features will remain in memor_l after
a power failure.
12-Hour Shut-Off
Withthis feature,shouldgou forgetand leave []
theovenon,thecontrolwill automaticallgturn
off theovenafter 12 hoursduringbaking
functionsor after3 hoursduringa broilfunction.
If you wish to turn OFF this feature, follow
the steps below, r3]
[] Touch the BAKE and BROILHI/LO pads
at the same time for 3 seconds untilthe
displagshows SF.
Touch the DELAYSTARTpad.The
displauwill show 12shdn (12-hour
shut-off).Touchthe DELAYSTARTpad
again and the displagwill show no shdn
(noshut-off).
Touch the STARTpad to activate the no
shut-off and leave the control set in this
specialfeatures mode.
Fahrenheit or Celsius Temperature Selection
Yourovencontrolisset to usethe Fahrenheit
temperature selectionsbut gou mag change
this to use the Celsiusselections.
Touch the BAKE and BROILHI/LO pads
at the same time for 3 seconds untilthe
displagshows SF.
Touch the BROILHI/LO and COOKING
TIMEpads at the same time.The displag
will show F (Fahrenheit).
F-_ Touch the BROILHI/LO and COOKING
TIMEpads again at the same time.
Thedisplaywill show C (Celsius).
[] Touch the START pad.
Tones at the End of a Timed Cycle
At the end of a timed cgcle,3 shortbeepswill
soundfollowed bg one beep everg 6 seconds
until the CLEAR/OFFpad istouched. This
continual 6-second beepmag becanceled.
Tocancelthe 6-second beep:
Touch the BAKE and BROILHI/LO pads
at the same time for 3 seconds untilthe
displagshows SF.
Touch the KITCHENTIMERON/OFF
r2q
pad.Thedisplag shows CONBEEP
(continual beep)and BEEP.Touch the
KITCHENTIMERON/OFF pad again.
The displag shows BEER(Thiscancels
the one beepeverg 6 seconds.)
Touch the START pad.
@
24
Page 25

Gas/Control Lockout Ionsome models)
GEAppliances.com
II ii:iiii
Yourcontrol will allow blouto lockout the
surfaceburners,ovenburnersand control
panel sothey cannot beactivated.
To lock/unlock the controls:
I11 Turn all surface burners off.
[] Touch and hold the GAS/CONTROL
[] To unlock the control, touch and hold
12-Hour, 24-Hour or Clock Blackout
Your control is set to use a 12-hour clock.
Ifyou would prefer to have a 24-hour
military time clock or blackout the clock
display,follow the stepsbelow.
r-_ Touchthe BAKEand BROILHI/LO
LOCKOUTpad for 5 seconds untilthe
display shows LOC.
the GAS/CONTROLLOCKOUTpad for
3 seconds until LOCdisappearsfrom
the display.
pads at the same time for 3 seconds
until the display shows SF.
Touchthe CLOCKpad once.The display
will show 12 hr. Ifthis is the choice you
want, touch the STARTpad.
When this feature isonand the touch pads
are touched,the control will beep and the
display will show LOC.
Thecontrollock-out mode affects all
controls. Nocontrols will work when this
feature isactivated.
Theadjustmentwill beretained in memory
after o power failure.
Touchthe CLOCKpad again to change
to the 24-hour military time clock.The
display will show 24 hr. Ifthis is the choice
you want, touch the STARTpad.
Touchthe CLOCKpad again to black out
the clock display.Thedisplay will show OFF.
Ifthis is the choice you want, touch the
STARTpad.
NOTE:Ifthe clockisin the black-outmode,
you will not be able to use the Delay Start
function.
Auto Recipe TM Conversion
Youcan use your favorite recipesinthe
convection oven.
When using CONVECTIONBAKE,the oven
will automatically convert the oven
temperature from regular baking to
Convection Baketemperatures.
Thedisplay will show the actual converted
(reduced)temperature. Forexample, if you
enter o regular recipetemperature of350°F
(177°C)and touch the STARTpod, the display
will show CONand the converted
temperature of 325 °F(263°C).
NOTE:Thisfeature only converts cooking
temperatures, not cooking times. When
convection roosting, the oven temperature
will not auto convert.
Toturn off this feature:
[] Touch the BAKEandBROILHI/LO pads
at the same time for 5 seconds until
the display showsSF,
Touch the CONVECTIONBAKEMULTI/
1 RACKpad.Thedisplay will show
CONON.Touch the CONVECTIONBAKE
MULTI/1RACKpad again.The display
will show CONOFF.
Touch the STARTpad.
%
Toturn on this feature, repeat steps 1-5
above but touch the STARTpad when
CONON isinthe display.
Use pan size recommended in the recipe.
Some package instructions for frozen
casseroles, main dishes or baked goods
have been developed using commercial
convection ovens. For best results in this
oven, preheat the oven and use the
temperature, for regular baking, on the
package.
25
Page 26

Using the Sabbath Feature.
(Designed for use on the Jewish Sabbath and Holidays)
TheSabbath feature can be used for baking/roasting in the upper oven onl£. Itcannot be used for convection,
broiling, self-cleaning or Dela£ Start cooking.
NOTE;The oven light comes on automaticallg when the door is opened and goes off when the door is closed.
The bulb ma£ be removed. See the Oven Light Replacement section.
How to Set for Regular Baking/Roasting
? / ii i i!
® ® ® ®@
® ® ®® @
Whenthedisplay showsD theoven
is set inSabbath.Whenthe display
showsm c the ovenis
baking/roasting.
@@@@@
@®@®@
@
Whenthedisplay showsD theoven
is set inSabbath.Whenthe display
showsm c the ovenis
baking/roasting.
Make suretheclockshows the correcttime
of dog andthe oveniso£
F11 Pressand holdboth the BAKEand
BROILHI/LO pads, at the same time,
until the display shows SF.
[] Tapthe DELAYSTARTpad until
SAbbat/-/appears in the display.
r-_ Touch the STARTpad and D will appear
in the display.
[] Touch the BAKEpad. Nosignal will
be given.
[] Usingthe number pads,enter the
desiredtemperature between 170°
and 550°.Nosignal or temperature
will be given.
How to Set for Timed Baking/Roasting-Immediate Start and Automatic Stop
Makesurethe clockshows the correcttime
of dog and the oveniso£
F-fl Pressand hold both the BAKEand
BROILHI/LO pads,at the same time,
until the display shows SF.
Tap the DELAYSTARTpad until
SAb bat/-/appears in the display.
[] Touch the STARTpad and D will appear
in the display.
[_ Touch the COOKINGTIME pad.
Touch the number pads to set
%
the desired length of cooking time
between 1 minute and 9 hours and
99 minutes.The cooking time that you
entered will be displayed.
Touch the STARTpad.
@
Touch the BAKEpad. Nosignalwill
D
be given.
[] Touch the STARTpad.
1-71After a random delay period of
approximately ]0 secondsto i minute,
D c will appear in the displa9 indicating
that the oven is baking/roasting.IfD c
doesn't appear in the display, start
again at Step4.
Toadjust the oven temperature, touch
the BAKEpad,enter the new temperature
usingthe number pads,and touch the
STARTpad.
NOTE:TheCLEAR/OFFand COOKINGTIME
pads are active during the Sabbath feature.
r_ using the number pads,enterthe
desiredtemperature. No signalor
temperature will be given.
Touch the STARTpad.
%
After a random delay periodof
[]
approximately ]0 secondsto i minute,
D c will appear in the displag indicating
that the oven isbaking/roasting.IfD c
doesn't appear in the displag,start again
at Step 7.
Toadjustthe oven temperature, touch
the BAKEpad,enter the new temperature
usingthe number pads,and touch the START
pad.
When cookingisfinished, the displag will
change from D c to D and 0:00will appear,
indicating that the oven has turned OFF
but is still set in Sabbath. Removethe cooked
food.
26
Page 27

How to Exit the Sabbath Feature
GEAppliances.com
@
[-_ Touchthe CLEAR/OFFpad.
[] If the oven is cooking,wait for a random
delay period of approximately 30
secondsto 1 minute, until onlg m isin
the displog.
[_ Pressand hold both the BAKE and
BROILHI/LO pads,at the same time,
until the displag shows SF.
Tapthe OELAVSTARTpad until
[]
12shdn or no shdn appears in the
displag.12shdn indicates that the oven
will automaticallg turn off after 12
hours,no shdn indicates that the oven
will not automaticallg turn off.
[] Touch the START pad.
NOTE:Ira power outage occurred while
the oven was in Sabbath, the oven will
automaticallg turn off and stag off even
when the power returns. The oven control
must be reset.
27
Page 28

Adjust the upper oven thermostat--Do it yourself!
You may find that your new oven cooks differently than the one it replaced. Use your new oven for a few weeks to become
more familiar with it. If bloustill think your new oven istoo hot or too cold, you can adjust the thermostat yourself.
Do not use thermometers, such as those found in grocerbl stores, to check the temperature setting of blour oven.
These thermometers mabl varb120-40 degrees.
NOTE; This adjustment will not affect the broiling or the self-cleaning temperatures. The adjustment will be retained
in memory after a power failure.
To Adjust the Thermostat
(9@@@@
@®@@@
@
[] Touch the BAKE and BROILHI/LO pads
at the same time for 3 seconds untilthe
display shows SF.
r_ Touch the BAKE pad.Atwo digit
number shows inthe display.
Touch BAKEonceto decrease(-)
the oventemperature, or twice to
increase(+).
Theoven temperature can be adjusted
%
up as much as 35°Kor down as much
as35°F.Touchthe number pads the
same way you read them. For example,
to change the oventemperature 15°F,
touch 1 and 5.
r_ When you have made the adjustment,
touch the STARTpadto go back to the
time of day display.Use your oven as
you would normally.
NOTE:Thethermostat adjustmentfor Baking
will also affect ConvectionBaking or
ConvectionRoasting.
Thetype of margarine will affect baking performance!
Most recipes for baking have been developed using high fat products such as butter or margarine (80% fat). If blou
decrease the fat, the recipe mabl not give the same results as with a higher fat product.
Recipe failure can result if cakes, pies, pastries, cookies or candies are made with low fat spreads. Thelower the fat
content of a spread product, the more noticeable these differences become.
Federalstandards require products labeled "margarine" to contain at least 80% fat by weight. Lowfat spreads,on the
other hand,contain lessfat and more water.The high moisture content of these spreadsaffects the texture and flavor
of baked goods. Forbestresultswith your old favorite recipes,use margarine, butter or stickspreadscontaining at least70%
vegetable oil.
28
Page 29

Using the lower oven drawer. GEAppliances.com
The lower oven drawer mag be used to bake foods using the same times and temperatures as a standard oven. Foods
ideal for baking in the lower oven drawer include pizza, frozen foods, casseroles, biscuits, rolls and monbl desserts.
roft w_zoo*4o%?3_o%o'4oI
Pushin andturn thelower ovendrawer
knobto anydesiredsetting.
To Use the Lower Oven Drawer
[] Pushin and turn the lower oven drawer
knob to ang desiredsetting.
[] Allowthe lower oven drawer to preheat.
TheONsignallight islocatedon the upper
right side ofthe knoband glows when the
knob is inthe ONposition.It remains ON
untilthe knobismoved to the OFFposition.
The"Heating"signal light is located below
the ON signal light and glows when the
heating elements are active. Preheatis
complete after the "Heating" signalhas
turned offfor the first time each use.
The lower oven drawer useslessenergy than the upper oven.
Allowthe following approximate times for preheating:
Desired Lower Preheat
Oven Temperature Time
WARM 10 minutes
350°F 20 minutes
NOTES:
_,Alwablsusethe includeddrawer rack when
using the lower oven drawer.
The lower oven drawer cannot be used
during a self-clean cgcle of the upper oven.
Do not put food, foilor cookware directly
on the bottom of the lower oven drawer.
Always use the included drawer rack.
_,If foods requirea cover,use onlblfoil or lids
able to withstand baking temperatures.Do
not use plastic.
Maximum height of foods that can be
placed in the lower oven drawer is 4.
Do not put liquid or water in the lower
oven drawer.
Neverplaceplastics,paper,cannedfoodsor
combustiblematerialinthelowerovendrawer
425°F 30minutes
Adjust the oven thermostat--Do it yourselfl.
You mag find that gour new oven cooks differentlg than the one it replaced. Use gour new oven for a few weeks to
become more familiar with it. If gou still think gour new oven is too hot or too cold, gou can adjust the thermostat
gourself.
Do not use thermometers, such as those found in grocerg stores, to check the temperature setting of gour oven.
These thermometers mag varg 20-/40 degrees.
NOTE:This adjustment will not affect the broiling temperatures.
Backof LowerOvenKnob
(Appearancemayvary.)
Pullthe OVENCONTROLknob off
the range and lookat the back side.
Tomakean adjustment, loosen
(approximately one turn), but do not
completely remove,the two screws
on the backof the knob.
With the back of the knob facing gou,
hold the outer edge of the knob with one
hand and turn the front of the knob with
the other hand.
Toraisethe oven temperature, move the
top screw toward the right. You'llheara
clickfor each notch gou move the knob.
Tolower the temperature, move the top
screw toward the left.
Eachclickwillchange the oven temperature
approximatelg lO°E (Rangeis_+60°Rfrom
the arrow.)We suggestthat gou make the
adjustment one clickfrom the original setting
and checkoven performance beforemaking
ang additional adjustments.
[] After the adjustment ismade, retighten
screws sotheg are snug, but be careful
not to overtighten.
[] Re-installknobon range and check
performance.
29
Page 30

Usingthe self-cleaning upper oven.
Theovendoor must beclosedand all controlsset correctly forthe cycle to work properly.
Before a Clean Cycle
Wipe upheavysoil onthe ovenbottom.
Forthefirst self-cleancycle,we recommend
venting your kitchenwith an openwindow
or usinga ventilation fan or hood.
Removeany broiler pan, broiler grid, all
cookware, probe and any aluminum foil
from the oven-they cannot withstand
the highcleaning temperatures.
NOTE:
Thegray porcelain-coated oven racks
may be left in the oven during the
self-clean cycle.
Soilon the front frame of the range and
outside the gasket on the door will needto
be cleaned by hand.Cleanthese areas with
hot water, soap-filled scouring pads or
cleanserssuchas SoftScrub? Rinsewell
with clean water and dry.
Do not cleanthe gasket. The fiberglass
material of the oven door gasket cannot
withstand abrasion. It isessentialfor the
gasketto remain intact. If you notice it
becoming worn or frayed, replaceit.
Wipe up any heavy spillovers on the oven
bottom.
Make surethe oven light bulb cover
isin place and the oven light isoff.
IMPORTANT:The health of some birds
isextremely sensitiveto the fumes given
off during the self-cleaningcycle of any
range. Hove birdsto another well ventilated
room.
NOTE:Usecaution when opening theupper
ovenoffer the self-cleancyclehas ended.
Theoven may still be hot.
@
@
@(9@@@
@(9@@@
@
How to Set the Upper Oven for Cleaning
Turnallsurfaceburners off.
L-%---I
NOTE:The surface burners will not
function during self-clean cycle.
[] Touch the SELFCLEAN pad.
[] Usingthe number pads, enter the
desiredclean time, if a time other than
4 hours isneeded.
Cleancycle time isnormally 4 hours.Youcan
change the cleantime to any time between
3 hours and 5 hours,depending on how dirty
your oven is.
r_ Touchthe STARTpad.
Thedoor and control will lock automatically.
Thedisplay will show the clean time
remaining. It will not be possibleto open
the oven door until the temperature drops
below the lock temperature andthe LOCKED
DOORlight goes off.
Theoven shuts off automatically when
the clean cycle iscomplete.
[] When the LOCKEDDOORlight isoff,
the doorwill unlock automatically.
ThewordsLOCKDOORwill flash and
the oven control will signal if you set
the clean cycle and forget to close the
oven door.
,To stop a clean cycle, touch the
CLEAR/OFFpad. When the LOCKEDDOOR
light goes off indicating the oven has
cooled below the locking temperature,
you may open the door.
Do not usethe lower oven drawer during
a self-cleancycle,
ThewordsERRand TURNSURFACE
BURNERSOFFwill flash and the control
will signal if you set the cleancycle and
forget to turn the surface burnersoff.
30
Page 31

The oven door must be closed and all controls set correctly for the cycle to work properly.
How to Delay the Start of Cleaning
@
®®®®®
®®®®®
@
®®®®®
®®®®®
@
Make surethe clockshows the correct time
of day.
[] Touch and hold the GAS/CONTROL
LOCKOUTpad for 3 secondsto turn
it off.
NOTE:The surface burners must be
turned off priorto the self-cleanstart
time.
Touch the SELFCLEAN pad.
[]
Usingthe number pads,enter the
@
desiredclean time.
[] Touch the DELAVSTARTpad.The
earliest start time you can set will
appear in the display.
[] Usingthe number pads,enter the time
of day you want the clean cycle
to staft.
Thedoor locks automatically. Thedisplay will
show the start time. It will not bepossibleto
open the oven door until the temperature
drops belowthe lock temperature and the
LOCKEDDOORlight goes off.
Theoven shuts off automatically when the
clean cycle iscomplete.
IZ] When the LOCKEDDOORlight isoff,
the doorwill unlock automatically.
ThewordsLOCKDOORwill flash andthe
oven control will signalif you set the clean
cycle and forget to close the oven door.
To stop a clean cycle, touch the
CLEAR/OFFpad. When the LOCKEDDOOR
lightgoes off indicating the oven has
cooled below the locking temperature,
you may openthe door.
GEAppliances.com
pl
r',,p
o
Miiiiiiiiiiiiiiiii
iiiiii_ii_iiiijiii_iii
i/ii_iiiiiii_iiiiiiiiiiii_ii
iii_iiii!ii,,_iiiiiiiiii!
[] Touch the STARTpad.
After a Clean Cycle
You may notice some white ash in the oven.
Wipe it up with a damp cloth after the
ovencools.
Ifwhite spots remain,remove them with a
soap-filled scouring pad and rinsethoroughly
with a vinegar and water mixture.
Thesedepositsare usually a salt residue
that cannot be removed by the cleancycle.
Ifthe oven is not clean after one cleancycle,
repeatthe cycle.
Youcannot set the oven for cooking until
the oven iscool enough for the door to
unlock.
Whilethe oven isself-cleaning,you can
touch the CLOCKpad to displaythe
time of day. Toreturn to the clean
countdown, touch the COOKINGTIME
pad.
Ifthe racksbecome hardto slide,apply a
smallamount of vegetable oilor cookingoil
to a paper towel andwipethe edgesof the
ovenrackswith the paper towel.
r U
_ P
v
to
0
0
o
0
to
0
Page 32

Careand cleaning of the range.
Be sure electrical power is off and all surfaces are cool before cleaning any part of the range.
WARNING: Ifyourrangeisremovedforcleaning,servicingoranyreason,
be sure the anti-tip device is re-engaged properlg when the range is replaced. Failure to
take this precaution could result in tipping of the range and cause injurg.
FrontrightBurner
%
3urnercap ( )
Burnerhead
Ebctrode__
Burnerbase
Makesuretheholeinthe Burnerheadis
eoskioneuovertheebctroaeandthat
theburnerheadisfutlyinsertedinside
theburnerbase.A smatlgapee_veen
rneBaseanuheadisnormal.
Frontleft burner,backrightburne"
anaBaCKleft burner
Burnercap z2_l _-. \
Sealed Burner Assemblies
Turn ollcontrols OFF before removing the
burner ports.
The round side burner cops and burner
headscon be lifted off, making them eosg
to cleon.Theelectrodes ore not removable.
Theoval center burner head andcop
ossemblgcon be lifted off, making it eosg
to cleon.Theburner electrode isnot
removable.
/_ Burnerhead
&__._ and Cap
f,_ assembly
t_'U_ E!ec!r°!_
Ar.^* *-r,_Ai
JtI _.,I'IU l lUlV: Do not operate the
cooktop without ell burner ports end grates
in piece.
Electrode
Frontleft,back right
and backleft burner
The electrode of the spark igniter is
exposedwhen the burnerhead is
removed.When one burner is turned to
LIT& oil the burners spark. Donot
attempt to disassemble or cleon around
ong burner while another burner ison.
An electricshock may result,which
could cause you to knock over hot
cookwore.
Burnerhead i
Electrode
Burnerbase
Frontrightburner
Stability_r ]
neeale or
twmt-tle to
unclogthe
small ROle I[1
Burnerbase nea6
Makesurethe sloti- theBurnerhead
is3ositionedovermeelectroue.
Ebctroae
theburner
32
Page 33

Burnercapis BurnercapisNOT
properly seated, properly seated.
Frontrightburner
Burnercap
Burnerhead _
Electrode-
Burnerbase
Makesuremeholeinthe burne"headis
3ositionecovertheelectroaeandthat
thebLmerheadisfutt',insertedinside
meburnerbase.A smallgapeetween
thebaseandheadisnormal.
Frontleft Burner.Backrightburner
anuBaCKleft burner
Burner Caps and Heads
Beforeremovingthe burnercaps and heads,
remember theirsizeand location.Replacethem
in the same locationafter cleaning.
NOTE:Donotusesteelwoolorscouringpowders
tocleontheburnerports.
Burner caps
Liftoffwhencool.Washburnercapsin hot,soapy
waterandrinsewithcleanwater.Youmayscour
witha plasticscouringpadto removeburned-on
foodparticles.
Burner Heads and Oval (Center)Burner
Head/Cap Assembly
Theburnerheadsandtheovalburnerhead/cap
ossemblbloreremovable.5imptblliftthemoffthe
rangeforcleaning.
Forproperignition,makesurethesmallhole
inthesectionthatfits overtheelectrodeiskept
open.Asewingneedleor wiretwist-tieworks
wellto unclogit.
Theslitsin theburnerheadsmustbekeptcleon
atoiltimesforoneven,unhamperedflame.
Cloggedordirtyburnerportsorelectrodeswill
notallowtheburnerto operateproperly.
Anyspillonor aroundanelectrodemust
becarefullycleaned.Takecareto nothitan
electrodewith anythinghardoritcouldbe
damaged.
Cleanthe burnerheadsroutinely,especiallyafter
badspillovers,whichcouldclogtheopenings.Lift
off whencool.
GEAppliances.com
Replacement
Burner Heads
Replaceburnerheadsovertheelectrodeson
thecooktop,inthe correctlocationsaccordingto
theirsize,Thereisonesmall,onemedium,one
extralargeandonedualflameextralargeburner
head.
E,iilr !@ E,iiiiiii
Slot
Frontleft,backright Frontrighthead
andbackleftheads
Oval (Center) Burner Head/Cap AssemOly
Replacetheoval(center)head/capassembly over
theelectrodeonthecooktop.
Oval headandcap Make surethesloi in the
a_se_mmbly burner headis P0siti0n#dOver
Stabitt '- Lt_ng
chamber [WlSt-tleto
Burnerbase Electroae qeaa
MaKesuretheslot inthe burnerheac
isuositionedovertheelectrode.
Theova! burnerhead/capassembly
is removab!e.Simply lift it off Ihe range.........
for cleaning.Usea sewingneedleor
twist-t!e to unclogthesmal!ho!e inthe
burnerheads.
neeclle Ol
sma [1018I[1
Jnclog the
theburner
Toremoveburned-onfood,soaktheburnerheads
ina solutionof mildliquiddetergentandhot water
for20-B0minutes.Formorestubbornstains,usea
toothbrush.
After cleaning
Beforeputtingthe burnercaps,headsandoval
head/capassemblyback,shakeoutexcesswater
andthendrythemthoroughlyby settingina
warmovenforBOminutes.
Frontof range Electrode
Caps
Replacethe matching sizecaps onto the burner
bases or heads.
j
ExtralargeCap Dualflameextra
Fr0ntOfrange !argecap
Hakesurethattheheadsandcapsarereplaced
inthecorrectlocations.
33
Page 34

Careand cleaning of the range.
Griddle
Appearance may vary.
Thegratesmaybecleanedm
a dishwasher.
Outside Center Outside
grate grate grate
_° i_ ¸
Theovenhas 5rackpositions.
Placethe grayporcelain-coatedracks
in positions"R", "B" and "D" for
self-cleaningthegrates. Placeone
grateeachon theovenracksfrom side
toside.
34
NOTES:
Thegriddle is to beusedover the center
burner only.
Donot cleanthegriddleinoself-cleaningoven.
Oonot dean thegriddlein o dishwasher.
Wash with hot, soapy water after each
usewhile usingo sponge or dishcloth.
Ifoil or food residueis left on thegriddle
further cookingwill hardenthe residueand
causesticking overtime.Inthiscase useo
non-abrasivecleansersuchas BanAmP or
oneof thesoft scrub cleansers.Apply with
o sponge Scrunge®orother cleaningpod
labeledsafe for non-stickpans
, Useonly plastic, nylon or wooden utensils
or SilverStone®kitchentools to prevent
marring ofthe coating.
Burner Grates
Yourrange hasthree professional-styledouble
grates.Thesegratesareposition-specific.
Formaximum stability,thesegratesshould
only be used in their proper positions.For
convenience,the undersidesof the sidegrates
are marked "OUTSIDE."Hake surethe front
portion of both grates isinfront.Thecenter
grate can be interchangedfront to back.
Cleaning Grates--Soup and Water
Liftgrates out when cool. Grates should be
washed regularly and, of course,after
spillovers.Wash them in hot,soapy water
and rinsewith clean water. When replacing
the grates, be surethey are positioned
securely over the burners.Replacethe grates
sothat straight lines are formed
with the center ribsof all three grates.
Cleaning Grates--Self-Clean Oven
To get rid of burned-on food, you may use
the self-clean cycle of your range. Remove
any burnt-on food particlesthat you can
prior to placing the grates in the oven. Place
the gray porcelain-coated racks in positions
"R","B"and "D".
NOTE:Donot dean thegriddle in the
self-cleaningoven.
Placeonegrate each on the oven racks
from sideto side.Followthe instructions
for how to set the upperoven for cleaning.
NOTE:Use caution when removing the grates
from the oven offer the self-cleon cyde has
ended. The grates may still be hot.
For heavily-soiled grates, you may notice
some white ash on the grate. Wipe it off
with a damp cloth after the grate cools.
Neveruseknivesor cut food on the griddle.
Wash with hot, soapy water aftereach use.
Storecarefully to prevent scratching.
Griddle Precautions:
Ifsomething has spilled under the griddle it
should be deaned up as soon as possible to
prevent "baked on" food soil.
Donot allow grease to accumulate under
thegriddleas it can be o firehazard.Clean
under thegriddleas soonas it is cool.Cleon
with hot soapy water.
Donot placeyour griddle in the microwave.
, Always turn off oilsurface burnersbefore
removing thegriddle. Usecaution when
handling o hotgriddle.
If white spots remain, remove them
with a soap-filled scouring pad and rinse
thoroughly with a vinegar and water mixture.
Thesedepositsare usually a salt residuethat
cannot be removed by the clean cycle.
Cleaning Grates--Dishwasher
The grates may be cleaned in the dishwasher.
Remove any burnt-on food particles that you
can prior to placing the grates in the
dishwasher. Place them on the lowest rack of
the dishwasher and run ona "heavy duty"
cycle.
Do not operate a burner for an extended
period oftime without cookware on the grate.
Thefinishonthe grate may chip without
cookware to absorb the heat.
Although the grates are durable, they will
gradually losetheir shine, regardlessof the
best care you can givethem. This isdue
to their continual exposureto high
temperatures and abrasion by the cookware.
Support Bumpers
If one or more of the circular silicone grate
support bumpers inthe cooktop are missing
or damaged, replacement parts can be
obtained by calling 1.800.GE.CARES.
Toinsertthe new bumpers,simply insert the
cone shaped end and push down while
gently twisting or rockingthe bumper.
Page 35

Cooktop Surface
i i
Toavoid damaging the stainlesssteel surface
ii i ¸
iiiiiii__iiiiiiii!iill
!iiiiiii__ ii_ii!_iii
of the cooktop and to prevent itfrom
becoming dull,clean up spillsright away.
Foodswith a lot of acid (tomatoes,
sauerkraut, fruit juices,etc.)or foods with
high sugar content could cause a dull spot
if allowed to set.
When the surface hascooled,wash and
rinse. Forother spillssuch as fat spatterings,
etc.,wash with soap and water once the
surface has cooled.Then rinseand polish
with a dry cloth.
GEAppliances.com
NOTE: Do not store flammable materials
in on oven, drawer or near the cooktop.
Do not store or use combustible materials,
gasolineorother flammable vapors and
liquidsinthe vidnitg ofthisor ang other
appliance.
NOTE:Do not lift the cooktop. Lifting the
cooktop con lead to damage and improper
operation of the range.
iil . _i i ii_
................
Ventappearanceandlocationvary.
Surfaceburnerknob
Oven Air Vents
Neverblock the vents (airopenings)of the
range.They provide the airinlet and outlet
that are necessary for the rangeto operate
properly with correct combustion.
Upper Control Panel
Seethe Gas/ControlLockout information in
the Specialfeaturesof gout oven control
section in this manual.
Cleonupsplatters with a damp cloth.
Youmay also use a gloss cleaner.
Lower Control Panel (Front Manifold
It'sa good idea to wipe the control panel
after each useof the oven.Usea damp cloth
to clean or rinse.Forcleaning, usemild soap
and water or a50/50 solution of vinegar and
water. For rinsing,useclean water. Polishdry
with a soft cloth.
Donot useabrasivecleansers,strong liquid
cleaners,plastic scouring pods or oven
cleaners on the control panel-they will
damage the finish.
Donot try to bend knobs by pulling them up
or down or by hanging a towel or other such
loads.Thiscon damage the gas valve shaft.
Thecontrol knobs may beremoved
for easier cleaning.
Air openings ore located at the rear of
the cooktop, at the top and bottom of the
oven door, and at the bottom ofthe range,
under the lower cooking drawer.
Removeheavier soilwith worm soapy water.
Donot use abrasives of any kind.
Unlock the touch pads after cleaning.
Panel)and Knobs
Makesurethe knobs ore inthe OFFpositions
and pull them straight off the stems for
cleaning.
Theknobscon be cleaned in a dishwasher
or they may also bewashed with soapand
water.Makesure the insidesof the knobs ore
dry before replacing.
Replacethe knobs inthe OFFposition
to ensureproper placement.
Metal ports con becleaned with soap and
water. Do not use steelwool, abrasives,
ammonia, acidsor commercial oven
cleaners.Drywith asoft cloth.
NOTE:Thelower ovendrawer control knob is
not interchangeable with the surfaceburner
knobs.Besure to reinstallthe lower oven
drawer knob to theoriginal location. Thelower
ovendrawer knob mag be identified by the
increasingnumbers from "WM"to "/450."
35
Page 36

Careand cleaning of the range.
Stainless Steel Surfaces (onsomemodels)
Protecting
STAINLESSSTEELhas a reputation for
withstanding tough abuse for years.This isa
key reasonwhy it is sopopular with the food
service industry.
However,stainlesssteel appliances con have
surface imperfections,discolorationsor
blemishesthat consumerswith a critical eye
notice and find unattractive inthe home.
Thesediscolorations or blemishes can be
caused by something as simple as leaving
fingerprint smudges on the stainlesssteel
surface overnight.
Forstainless steel appliances where
blemishesareproneto show on the surface,
we recommend APPLYINGA COATOFCERAMA
BRYTE®StainlessSteelCleaningPolish&
Conditioner (purchasedseparately-follow
instructions).
Thiswill help you to maintain the brightness
and appearance of your stainlesssteel
appliance.
Cleaning
Do not use a steel wool pad; it will scratch
the surface.
In order to avoid any discolorations and/or
greasestains,we recommend cleaning
and removing any spills,spots and grease
from the range after use.
It isimportant to usea soft cloth or paper
towel every time the range is cleanedto
avoid any scratches.
Readcarefully the instructions on the back
of the Brightener (includedwith your range)
for better results.
I-_ Apply Cerama Bryte®StainlessSteel
Brightener(followinstructions).
[] Repeatsteps 2-/4as many times
as needed.
[] Putgrates backin place.
Followthese instructions for any Stainless
Steelsurface on your range.
DO NOTUSEthe following products for
cleaningthe Cooktop or Stainless Steel
parts:
• Caustic Lye(SodiumHydroxide)orcleaners
containing this chemical
• Hard or SteelWool Pads
• Abrasive Materialsor Chemicals
Toinquireabout purchasing stainlesssteel
appliance cleaneror polish,or to find the
location of a dealernearest you, pleasecall
our toll-free number:
National Parts Center 800.626.2002(U.S.)
800.661.1616(Canada)
GEAppliances.com (U.S.)
www.GEAppliances.ca (Canada)
36
Cleaning Instructions:
171 Removegrates.
I-2-1Wash usingwarm, soapy water:
Wet soft cloth or paper towel (avoid
usingexcessivewater).
Wipe the surface inthe direction of the
grain (following the steellines).
Rinseand wring out a soft cloth or paper
towel and dry the range.
r-_ Apply a degreaser that does not contain
sodium hydroxide or StainlessSteel
Cleaner(follow instructions).
Page 37

Lift thedoorstraight upandoff
thehinges,
Thegasketis designedwith a gap
at thebottomto allow for properair
circulation.
Donot rubor cleanthe doorgasket--
it hasan extremelylow resistanceto
abrasion.
If younoticethegasketbecomingworn,
frayedor damagedin anywayor if it
hasbecomedisplacedonthedoor,you
shouldhaveit replaced.
Lift-Off Oven Door
Theoven door isremovable,but it isheavy.
Youmay need help removing and replacing
the door.
Toremove the door, openit a few inches
to the specialstop positionthat will hold the
door open.Graspfirmly on each sideand lift
the door straight up and off the hinges.
NOTE:Becarefulnot toplace hands between
the hinge and the ovendoor frame as the
hinge couldsnap back and pinch fingers.
Toreplace the door, makesurethe hinges
are in the specialstop position. Positionthe
slots inthe bottom of the door squarely over
the hinges.Then lowerthe door slowly and
evenly over both hinges at the same time. If
the hinges snap back against the oven frame,
pull them back out.
Toclean the inside of the door:
Donot allow excesswater to run into
any holes or slots in the door.
Becausethe area insidethe gasket is
cleaned during the selfclean cycle, you do
not need to clean this by hand.Any soap
left on the linercausesadditional stains
when the oven is heated.
6EAppliances.com
Thearea outside the gasket can be
cleanedwith asoap-filled plastic
scouring pad.
Toclean the outside of the door:
Usesoap and water to thoroughly clean
the top, sidesand front of the oven door.
Rinsewell.You may also usea glass
cleanerto cleanthe glasson the outside
ofthe door.
Spillageof marinades,fruitjuices, tomato
saucesand basting materials containing
acids may cause discoloration and should
be wiped up immediately. When the
surface is cool,clean and rinse.
Donot useoven cleaners,cleansing
powders or harsh abrasiveson the
outside of the door.
Oven Bottom
Theoven bottom has a porcelain enamel
finish.To make cleaning easier,protect the
oven bottom from excessivespilloversby
placing a cookiesheetonthe rack belowthe
rack you are cooking on.Thisisparticularly
important when baking a fruit pieor other
foods with a high acid content. Hot fruit
fillings or other foodsthat are highly acidic
(suchastomatoes, sauerkraut and sauces
with vinegar or lemonjuice) may cause
pitting and damage to the porcelain enamel
surface and should be wiped up immediately.
Oven Racks and Drawer Racks
Thegray porcelain-coated racks may be
cleanedin the oven during the self-clean
cycle.
We don't recommend usingaluminum foilon
the oven bottom. It can affect air flow if the
holesareblockedand it can concentrate heat
at the bottom of the oven, resultingin poor
baking performance.
Toclean up spillovers,usesoap and water, an
abrasive cleaner or soap-filled scouring pad.
Rinsewell to remove any soap before self-
cleaning.
They may also be cleaned by using an
abrasive cleanser.After cleaning, rinse the
rackswith cleanwater and dry with a clean
cloth. Ifthe racksever become hard to slide,
wipe the rack edges or oven racksupports
with vegetable oil.
37
Page 38

Careand cleaning of the range.
Oven Light Replacement
ii(i:iiiii:iiiiii !i!:iji!:ijii
Wire coverholder.
CAUTlON: eforereplacingyour
ovenlight bulb,disconnectthe electricalpower
to the range at the main fuseor circuitbreaker
panel.Besureto let the light cover and bulb
coolcompletel£.
Theoven light bulbiscovered with o
removable gloss cover that isheld in place
with o boil-shaped wire. Removethe oven
door,if desired,to reach cover easily.
To remove:
Hold o hand under the cover so it
%
doesn't foil when released.With fingers
of the some hand, firmlg push back the
wire cover holder. Lift off the cover.
Removable Lower Oven Drawer
NOTE:Beforeperforming any adjustments,
cleaningorservice,disconnectthe range
electricalpower supplg at the household
distributionpanelbgremovingthe fuseor
switching off thecircuitbreaker.Makesure
drawer heating elementis cool.
Mostcleaning con bedonewith the drawer
in place. However,the drawer may be
removed if further cleaning isneeded.Use
soap and worm water to thoroughlg cleon.
Toremove the drawer:
Do not remove any screws to remove
the cover.
[] Donot touch hot bulb with o wet cloth.
Replacebulb with o 40-watt household
appliance bulb.
Toreplace cover:
Placeit into the groove of the light
%
receptacle.Pullthe wire forward to the
center of the cover until it snaps into
place.When in place, the wire holdsthe
cover firmly. Becertain the wire
isinthe depression in the center of the
cover
Connect electricol power to the ronge.
Toreplace the drawer:
[] Placethe left drawer rail around the
inner left rail guide and slideit in
slightlg to hook it.
Placethe right drawer railaroundthe
inner right rail guide and slide it in
slightly to hook it.
[] Slidethe drawer oil the wag in.
38
Pullthe drawer straight out until
F-_ it stops.
Pressthe tabs on both sides in while
pulling the drawer forward and free.
Removable Lower Oven Drawer Pan
NOTE:Beforeperforming any adjustments,
cleaningorservice,disconnectthe range
electricalpower supplg at the household
distributionpanelbg removingthe fuseor
switching off thecircuitbreaker.Makesure
drawer heating elementis cool.
NOTE:Allow lower ovendrawer to cool
beforeremovingpan.
NOTE:Wipespillspromptlg after each use.
Neverploce, useor self-cleonthe lower
oven drawer pan in the upper oven.
Loweroven drower hos o removoble pon
for eosycleoning.Cleonwith hot soopy
woter ond o sponge or dish towel. Drg with
o cleon cloth.Anoven cleoner,such os
Eosg-OfP,mog olso be used. Besureto
follow the directionson the oven cleoner.
Replacethe pan inthe lower oven drawer.
Page 39

Installation
Instructions
Range
I_ uestions? Call 800.GE.CARES (800.432.2737) or visit our Website at: GEAppliances.com
In Canada, call 1.800.561.3344 or visit www.GEAppliances.ca
In the Commonwealth
of Massachusetts
• This product must be installed by a licensed plumber
or gas fitter.
• When using ball type gas shut-off valves, they shall
be the T-handle type.
• A flexible gas connector, when used, must not exceed
3 feet.
FOR YOUR SAFETY
Do not store or use combustible materials, gasoline or
other flammable vapors and liquids in the vicinity of
this or ang other appliance.
If you smell gas:
O Open windows.
O Don't touch electrical switches.
Extinguish any open flame.
Immediately call your gas supplier.
BEFORE YOU BEGIN
Read these instructions completely and carefully.
Installation of this range must conform with local
codes, or in the absence of local codes, with the
National Fuel Gas Code, ANSI Z223.1/NFPA.54, latest
edition. In Canada, installation must conform with the
current Natural Gas Installation Code, CAN/CGA-
B149.1 or the current Propane Installation Code,
CAN/CGA-B149.2, and with local codes where
applicable. This range has been design-certified by
CSA International according to ANSI Z21.1, latest
edition and Canadian Gas Association according
to CAN/CGA-I.1 latest edition.
As with any appliance using gas and generating heat,
there are certain safety precautions you should follow.
You will find these precautions in the Important Safety
Information section inthe front of this manual. Read
them carefully.
TOOLS YOU WILL NEED
Phillipsscrewdriver
Flat-bladescrewdriver 0pen-endor
adjustablewrench
_-c_ _-_>'_ ..................................
Pencilandruler
Level
Pipewrenches(2)
(onefor backup) Drill,awlornail
I
• IMPORTANT- Savetheseinstructions
for local electrical inspector's use.
• IMPORTANT- Observe all governing
codes and ordinances.
• Note to Installer - Leave these instructions
with the appliance after installation is completed.
• Note to Consumer - Keepthis Owner's Manual
and Installation Instructions for future reference.
• Note - This appliance must be properly grounded.
• Servicer - Theelectrical diagram isinan envelope
attached to the back of the range.
• Skill level- Installation of this appliance requires
basic mechanical skills.
• Proper installation is the responsibility of the installer.
• Product failure due to improper installation is not
covered under the Warranty.
MATERIALS YOU MAY NEED
• Gaslineshut-off valve
• pipejoint sealant or UL-approved pipe thread tape with
Teflon*that resistsaction of natural and LPgases
• Flexiblemetal appliance connector (1/2" I.D.)
A g-foot length isrecommended for ease of installation
but other lengths are acceptable. Neverusean old
connector when installing a new range.
• Flareunion adapter for connection to gas supply line
(3//4"or 1/2" NPTx 1/2" I.D.)
• Flareunion adapter for connection to pressure regulator
on range (1/2" NPTx 1/2" I.D.)
• Liquidleak detector or soapy water.
• Lag bolt or 1/2" O.D.sleeveanchor (forconcrete floors
only),
*Teflon: Registeredtrademark of DuPont
39
Page 40

Installation Instructions
- WARNING!
INSTALLATION SAFETY
INSTRUCTIONS
Read these instructions completelg and carefullg.
Improper installation, adjustment, alteration,
service or maintenance can cause injurg or propertg
damage. Refer to this manual. For assistance or
additional information, consult a qualified installer,
service agencg, manufacturer (dealer) or the gas
supplier.
Never reuse old flexible connectors. The use
of old flexible connectors con couse gos leoks ond
personol injury. Alwoys use NEW flexible connectors
when instolling o gos opplionce.
IMPORTANT - Remove ollpockingmoteriol
ond literoturefromovenbeforeconnectinggos ond
electricol supply to ronge.
-&CAUTION - DOnot ottempt to operote
the oven of this ronge during o power foilure (Electric
Ignition models only).
• Hove your ronge instolled by o quolified instoller.
• Your ronge must be electricolly grounded in
occordonce with Iocol codes or,in the obsence
of Iocol codes, in occordonce with the Notionol
Electricol Code (ANSI/NFPA70, Iotest edition).
In Conodo, electricol grounding must be in
occordonce with the current CSAC22.ZConodion
Electricol Code Port 1 ond/or Iocol codes. See
Electricol Connections in this section.
• Before instolling your ronge on linoleum or ony other
synthetic floor covering, moke sure the floor covering
con withstond 180°Fwithout shrinking, worping or
discoloring. Do not instoll the ronge over corpeting
unless o sheet of 1/4" thick plywood or similor
insulotor is ploced between the ronge ond corpeting.
• Moke surethewollcoveringsoroundtherongecon
withstondheotgenerotedby therongeup to 200°F.
Avoid plocing cobinets obove the ronge. To reduce
the hozord coused by reoching over the open flomes
of operoting burners, instoll o ventilotion hood over
the ronge thot projects forword ot leost 5" beyond
the front of the cobinets.
The ventiloting hood must be constructed
of sheet metol not lessthon 0.0122" thick.
Instoll obove the cooktop with o cleoronce of not less
thon 1/4" between the hood ond the underside of the
combustible moteriol or metol cobinet. The hood
must be ot leost os wide os the opplionce ond
centered over the opplionce. Cleoronce between the
cooking surfoce ond the ventilotion hood surfoce
MUSTNEVERBELESSTHAN 24 INCHES.
EXCEPTION:Instollotion of o listed microwove oven or
cooking opplionce over the cooktop sholl conform to
the instollotion instructions pocked with thot opplionce.
If cobinets ore ploced obove the ronge, ollow o
minimum cleoronce of 30" between the cooking
surfoce ond the bottom of unprotected cobinets.
If o 30" cleoronce between cooking surfoce ond
overheod combustible moteriol or metol cobinets
connot be mointoined, protect the underside of the
cobinets obove the cooktop with not less thon 1/4"
insuloting millboord covered with sheet metol not less
thon 0.0122" thick. Cleoronce between the cooking
surfoce ond protected cobinets MUST NEVERBE LESS
THAN 24 INCHES.
• The verticol distonce from the plone of the cooking
surfoce to the bottom of odjocent overheod cobinets
extending closer thon 1"to the plone of the ronge
sides must not be lessthon 18".(Seethe Dimensions
ond Cleoronces illustrotion in this section.)
• -4LCAUTION - Items of interest to
children should not be stored in cobinets obove
o ronge or on the bocksplosh of o ronge-children
climbing on the ronge to reoch items could be
seriously injured.
4O
Page 41

Installation Instructions
DIMENSIONS AND CLEARANCES
Provide adequate clearances between the range and adjacent combustible surfaces. These dimensions must be
met for safe use of your range. The location of the electrical outlet and pipe opening (see Gas Pipe and Electric
Outlet Locations) may be adjusted to meet specific requirements.
The range may be placed with 0" clearance (flush) at the back wall.
Minimum to
18"
cabinets on
either side
of the range
Minimum
clearance
toleft wall
_J
30"
30"
Minimum
6" Minimum
clearanceto
rightwall
Maximumdepth
forcabinets
above
countertops
Height
37-1/4"
3i_/4"
Depthwith doorclosed(includesdoorhandle)
....... ........,,,-._29-3/4"
30" ........ -... Depthvariesdependingonmodel.
ii Seespecificationssheetfor your model.
_- 0"
Tocabinetsbelow
cooktopandat the
rangeback
36-1/4" + 1/4"
41
Page 42

Installation Instructions
-AWARNING!
ANTI-TIP DEVICE
• All ranges can tip.
• BURNS or other SERIOUS
INJURIES can result.
• INSTALL and CHECKthe
ANTI-TIP bracket following
the instructions supplied
with the bracket.
To reduce the risk of tipping the range, the range
must be secured by a properly installed anti-tip
bracket. See installation instructions shipped
with the bracket for complete details before
attempting to install.
To check if the bracket is installed and engaged
properly, carefully tip the range forward. The
bracket should stop the range within 4 inches.
If it does not, the bracket must be reinstalled.
If the range is pulled from the wall for any reason,
always repeat this procedure to verify the range
is properly secured by the anti-tip bracket.
LOCATION
Do not locate the range where it mag be subject to
strong drafts. Ang openings in the floor or wall behind
the range should be sealed. Make sure the openings
around the base of the range that supply fresh air for
combustion and ventilation are not obstructed by
carpeting or woodwork.
Your range, like many other household items, is
heavy and con settle into soft floor coverings such as
cushioned vinyl or carpeting. Use core when moving the
range on this type of flooring. It is recommended that
the following simple and inexpensive instructions be
followed to protect your floor.
The range should be installed on o sheet of plywood
(or similar material). When the floor covering ends at the
front of the range, the area that the range will rest on
should be built up with plywood to the some level or
higher than the floor covering.
This will allow the range to be moved for cleaning
or servicing. Also, make sure your floor covering will
withstand 180°F.(Seethe Installation Safety Instructions
section.)
Moke surethewollcoveringsoroundyourrongecon
withstondtheheotgeneroted(upto200°F)by the
range. (Seethe Installation Safety Instructions section.)
For free standing or slide in ranges, never
completely remove the leveling legs or the range
will not be secured to the anti-tip device properly.
If you did not receive an anti-tip bracket with
your purchase, call 1.800.626.8774 to receive
one at no cost (In Canada, call 1.800.561.33441
For installation instructions of the bracket,
visit: GEAppliances.com (In Canada,
GEAppliances.caJ
IMPORTANT!
Remove all tape and packaging. Make sure the
burners are properlg seated and level.
Take the accessorg pack out of the oven and/or
drawer.
Check to be sure that no range parts have come loose
during shipping.
42
Page 43

Installation Instructions
iTI PROVIDE ADEQUATE GAS SUPPLY
Your range is designed to operate at a pressure of 5" of
water column on natural gas or, if designed for LP gas
(propane or butane), 10" of water column.
Make sure you are supplying your range with the type of
gas for which it is designed.
This range isconvertible for use on natural or
propane gas. If you decide to use this range on LPgas,
conversion must be made by a qualified LPinstaller
before attempting to operate the range on that gas.
For proper operation, the pressure of natural gas supplied
to the regulator must be between 5" and 13" of water
column.
For LPgas, the pressure supplied must be between 10"
and 13" of water column.
When checking for proper operation of the regulator,
the inlet pressure must be at least 1" greater than the
operating (manifold) pressure as given above.
The pressure regulator located at the inlet of the range
manifold must remain in the supply line regardless of
whether natural or LPgas is being used.
A flexible metal appliance connector used to connect the
range to the gas supply line should have an I.D.of 1/2"
and be 5 feet in length for ease of installation. In Canada,
flexible connectors must be single wall metal connectors
no longer than 6 feet in length.
[] CONNECT THE RANGE TO GAS
Shut off the main gas supplg valve before
disconnecting the old range and leave it off until the
new hook-up has been completed. Don't forget to
relight the pilot on other gas appliances when gou
turn the gas back on.
Because hard piping restricts movement of the range,
the use of a CSAInternational-certified flexible metal
appliance connector is recommended unless local codes
require a hard-piped connection.
Never use an old connector when installing a new range.
If the hard piping method is used, you must carefully
align the pipe; the range cannot be moved after the
connection is made.
To prevent gas leaks, put pipejoint compound on, or wrap
pipe thread tape with Teflon* around, all male (external)
pipe threads.
A. Install a manual gas line shut-off valve in the gas line
in an easily accessed location outside of the range.
Make sure everyone operating the range knows where
and how to shut off the gas supply to the range.
a.
Install male 1/2" flare union adapter to the 1/2" NPT
internal thread at inlet of regulator. Use a backup
wrench on the regulator fitting to avoid damage.
When installing the range from the front, remove the
90° elbow for easier installation.
C.
Install male 1/2" or 5/4" flare union adapter to the NPT
internal thread of the manual shut-off valve, taking
care to back-up the shut-off valve to keep it from
turning.
D.
Connect flexible metal appliance connector to the
adapter on the range. Position range to permit
connection at the shut-off valve.
E. When all connections have been made, make sure
all range controls are in the off position and turn on the
main gas supply valve. Use a liquid leak detector at all
joints and connections to check for leaks in the system.
WARNING: DONOTUSE
A FLAME TO CHECK FOR GAS LEAKS.
When using test pressures greater than 1/2 psig to
pressure test the gas supply system of the residence,
disconnect the range and individual shut-off valve from
the gas supply piping. When using test pressures of 1/2
psig or less to test the gas supply system, simply isolate
the range from the gas supply system by closing the
individual shut-off valve.
*Teflon: Registered trademark of DuPont
43
Page 44

Installation Instructions
GAS PIPE AND ELECTRICAL OUTLET LOCATIONS
I
i
I
0"
13-1/2"
8q/2"
Recommendedareafor 120V
outlet onrear watl andareafor
through-the-wall connection
of pipestub andshut-off valve.
21-I
Recommendedareafor through-the-floor
connectionof pipestub andshut-off valve.
44
Page 45

Installation Instructions
FLEXIBLE CONNECTOR HOOKUP
Installer:Inform
the consumerofthe
location ofthe gas
shut-offvalve.
RIGID PIPE HOOKUP OPTIONS
45° Elbow ._ o
:4;:B___- 90Elbow
W/X; o.,o. •,.,
"_.V_ _r'_ Pressure _ ,
regulator _ _ Union
fl -,,_--- Nippb
Installer: Inform _ Gas
the consumer of the I |_3_e_" shut-off
location of the gas _ l_lt/ valve
shut-off valve, llI_bj_ 1/2"or3/4"
1/2"or3/4" _--- shut-off
Gaspipe_ L_ valve
Alternate Hookup
Installer: Inform the I
Gaspipe
consumer of the location
of the gas shut-off valve.
Gas
. Adapter
g0oElbow--"_" _'__..i g0 Elbow
Nipple-_- j_"
has _ I _ _pp_e , .
shut-off _ 1[_ _ / .%° regulator
valve il_ _'_,,IF_. _ _1_.b°w 1
I J _ / Nipple
l J _ Quickconnect
_/or union
_ j_:_i¢ Pressure
/,
1/20r3/4 _ '90°Elbow _
Gaspipe Adapter
I
45
Page 46

Installation Instructions
131ELECTRICAL CONNECTIONS
Electrical Requirements
120-volt, 60 Hertz,properly grounded dedicated circuit
protected by a 1S-amp or 20-amp circuit breaker or time
delay fuse.
Extension Cord Cautions
Because of potential safety hazards associated
with certain conditions, we strongly recommend against
the use of an extension cord. However, if you still elect to
use an extension cord, it is absolutely necessary that it
be a UL-listed, 3-wire grounding-type appliance extension
cord and that the current carrying rating of the cord
in amperes be equivalent to, or greater than, the
circuit rating.
Grounding
IMPORTANT--IPlease read carefully)
FORPERSONALSAFETY,THISAPPLIANCE MUSTBE
PROPERLYGROUNDED.
Preferred Method
ELECTRICAL CONNECTIONS ICONT.)
A. Usage Situations where Appliance Power Cord will
be Disconnected Infrequently.
An adapter may be used only on a 1S-amp circuit.
Do not use an adapter on a 20-amp circuit. Where
local codes permit, a TEMPORARYCONNECTION
may be made to a properly grounded two-prong wall
receptacle by the use of a UL-listed adapter, available
at most hardware stores. The larger slot in the adapter
must be aligned with the larger slot in the wall receptacle
to provide proper polarity in the connection of the
power cord.
Temporary Method
(Adapterplugsnotpermittedin Canada}
Align large prongs/slots
Ensureproperground
andfirm connection
beforeuse
Ensure proper ground
existsbefore use
The power cord of this appliance is equipped with a
three-prong (grounding) plug which mates with a
standard three-prong grounding wall receptacle to
minimize the possibility of electric shock hazard from
this appliance.
The customer should have the wall receptacle and
circuit checked by a qualified electrician to make sure
the receptacle is properly grounded.
Where a standard two-prong wall receptacle is
encountered, it is the personal responsibility and
obligation of the customer to have it replaced with
a properly grounded three-prong wall receptacle.
DO NOT, UNDERANY CIRCUMSTANCES,
CUTOR REMOVETHE THIRD IGROUND) PRONG FROM
THE POWERCORD.
A word about GFCI°s- GFCI°sare not required or
recommended for gas range receptacles.
Ground Fault Circuit Interrupters (GFCI's)are
devices that sense leakage of current in a circuit and
automatically switch off power when a threshold leakage
level isdetected. These devices must be manually reset
by the consumer. The National Electrical Code requires
the use of GFCI'sin kitchen receptacles installed to serve
countertop surfaces. Performance of the range will not
be affected if operated on a GFCI-protected circuit
but occasional nuisance tripping of the GFCI breaker
is possible.
-ACAUTION: Attaching the adapter
ground terminal to the wall receptacle cover
screw does not ground the appliance unless
the cover screw is metal, and not insulated,
and the wall receptacle is grounded through
the house wiring. The customer should have
the circuit checked by a qualified electrician to
make sure the receptacle is properly grounded.
When disconnecting the power cord from the adapter,
always hold the adapter with one hand. If this is not done,
the adapter ground terminal isvery likely to break with
repeated use. Should this happen, DO NOT USEthe
appliance until a proper ground has again been
established.
46
Page 47

Installation Instructions
[] ELECTRICAL CONNECTIONS (CONT.)
B. Usage Situations where Appliance Power Cord will
be Disconnected Frequently.
Do not use an adapter plug in these situations because
disconnecting of the power cord places undue strain on
the adapter and leads to eventual failure of the adapter
ground terminal. The customer should have the two-
prong wall receptacle replaced with athree-prong
(grounding) receptacle bg a qualified electrician
before using the appliance.
The installation of appliances designed for mobile home
installation must conform with the Manufactured Home
Construction and Safety Standard, Title 24 CFR,Part 3280
(formerlg the Federal Standard for Mobile Home
Construction and Safety, Title 24, HUD, Part 280)or,
when such standard is not applicable, the Standard
for Manufactured Home Installations, latest edition
(Manufactured Home Sites, Communities and Set-Ups),
ANSIA225.1, latest edition, or with local codes. In Canada,
mobile home installation must be in accordance with the
current CAN/CSAZ240/MH Mobile Home Installation Code.
Electric Disconnect
• Locate disconnect plug on the range back.
I-rl ASSEMBLE SURFACE BURNERS (CONT.)
Frontright burner
Frontleft, backright andbackleft burners
Burnercap
head head
Burner_ Burner
Stability i de
chamber _
Burnerbase Electrode
Makesurethe stot inthe
burnerheadispositioned
overthe electrode.
[] Oval (Center) Burner Head/Cap Assembly
Place the oval (center) head/cap assemblg over the
electrode on the cooktop.
0vat headand cap
assembly headis positionedoverthe
Makesuretheholeintheburnerhead
assemblyispositionedovertheelectrode
andthattheburnerheadisfullyinsertedinside
theburnerbase.Asmallgapbetweenthebase
andheadisnormal.
Make sure the stot in the burner
electrode.
Burnercap
Burner
base
• Pinch sides of connector and pull out of range back.
[] SEAL THE OPENINGS
Sealang openings inthe wall behind the range and inthe
floor under the range when hookupsarecompleted.
[] ASSEMBLE SURFACE BURNERS
r_l Burner Heads
Placeburner heads overthe electrodes on the cooktop,
in the correct locations according to their size.Thereis
one small, one medium, one extra largeand one dual
flame extra large burnerhead.
Frontof range Electrode
[] Caps
Placethe matching sizecaps onto the burner bases
or heads.
Extralargecap L- _ _ Dual flameextra
Front of range large cap
Hake surethat the heads and caps are replaced inthe
correct locations.
[] Grates
Placethe side and center grates on the cooktop. These
grates are position specific.Theundersidesof the side
grates are marked "OUTSIDE."The center grate can be
interchanged front to back.
Mediumhead I I Smallhead
Extralargehead Dualflame
Frontof range extralargehead
Outsidegrate Centergrate Outsidegrate
-& CAUTION: Do not operate the burner
without all burner parts in place.
47
Page 48

Installation Instructions
161CHECK IGNITION OF SURFACE
BURNERS
Operation of all cooktop and oven burners should be
checked after the range and gas supplg lines have been
carefullg checked for leaks.
Electric Ignition Models
Select a top burner knob and simultaneouslg push
in and turn to LITE position. Youwill hear aclicking sound
indicating proper operation of the spark module. Once the
air has been purged from the supplg lines, burners should
light within/4 seconds. After burner lights, rotate knob out
of the LITE position. Trg each burner in succession until
all burners have been checked.
Qualitg of Flames
The combustion quality of burner flames needs to be
determined visuallg.
(A) Yellow flomes-
Call for service
(B) Yellow tips on
outer cones--
Normal for LP gas
[] CHECK IGNITION OF OVEN BURNER
Theoven isdesignedto operatequietlg and automaticallg.
Tooperatetheoven,pressthe BAKEpad and then pressthe
numberpadsuntil 350° appearsinthedisplay.Touchthe START
pad.After B0-90 seconds,the ovenburnerwill igniteandburn
untilthe settemperature isreached.Theovenburnerwill
continueto cycleonandoff as necessaryto maintainthe oven
atthe temperature indicatedbythe display.
Tocheckignitionofthe broil burner,touchthe BROILHI/LOpad
andthen the STARTpad.After B0-90 seconds,thebroilburner
willignite.
Electric ignition models requireelectricalpowerto operate.
Incaseof a poweroutage,the oven burnerson these models
cannot be lit manuallywith a match. Gaswillnot flow unless
the glow bar ishot.
Ifthe ovenis in usewhen a poweroutageoccurs,the burner
willshutoffand cannot be re-lit until power isrestored.
(C) Soft blue
flames--Normal
for natural gas
If burner flames look like (A), call for service. Normal
burner flames should look like (B) or (C), depending on
the tgpe of gas gou use.
With LPgas, some yellow tipping on outer cones
is normal.
48
Page 49

Installation Instructions
1-8-1ADJUST BROIL AND OVEN BURNER
AIR ADJUSTMENT SHUTTERS IF
NECESSARY
Air adjustment shutters for the top and bottom burners
regulate the flow of air to the flames.
The air adjustment shutter for the top (broil)burner is in
the center of the rear wall of the oven.
Air adjustment
shutter
I
The shutter for the bottom (oven)burner is near the back
wall behind the drawer. Remove the drawer. See the Care
ond cleoning of the ronge section.
To adjust the flow of air to either burner, loosen the
Phillips head screw and rotate the shutter toward open
or closed position as needed.
The flames for the top (broil) burner should besteady with
approximately 1 blue cones and should not extend out
over the edges of the burner baffle.
I-8-1ADJUST BROIL AND OVEN BURNER
AIR ADJUSTMENT SHUTTERS IF
NECESSARY (CONT.)
To
remove the oven bottom:
A.
Remove the screws holding down rear of the oven
bottom.
B.
Grasp the oven bottom at finger slots on each side.
C.
Lift the rear of the oven bottom enough to clear the lip
of the range frame, push it back, and then pull it up
and out.
i_ LEVELING THE RANGE
A. Install the oven rocks in the oven and position the
range where it will be installed.
J , _ Lower rangeRaise Lower
_ range range
range
(onsomemodels) (onsomemodels}
B.
Check for levelness by placing o spirit level or o cup,
partially filled with water, on one of the oven rocks.
If using ospirit level,take two readings-with the level
placed diagonally first in one direction and then the
other.
C.
Remove the drawer. See the Care ond cleoning of the
range section. The front leveling legs con be adjusted
from the bottom and the rear legs con beadjusted
from the top or the bottom.
D. Use on open-end or adjustable wrench to adjust the
leveling legs until the range is level.
E.After the range is level, slide the range away from the
wall so that the Anti-Tip device con be installed.
To determine if the bottom burner flames are burning
properly, remove the oven bottom. Flames should have
approximately 1 blue cones and, if range issupplied with
natural gas, should burn with no yellow tipping. (With
most LPgas, small yellow tips at the end of outer cones
are normal.) Flames should not lift off burner ports. If
lifting is observed, gradually reduce air shutter opening
until flames are stabilized.
49
Page 50

Installation Instructions
[] INSTALLING THE ANTI-TIP DEVICE
-AWARNING!
• Range must be secured with an approved Anti-Tip
device.
Unless properlg installed, the range could be
tipped bg gou or a child standing, sitting or leaning
on an open door.
After installing the Anti-Tip device, verifg that it is in
place bg carefullg attempting to tilt the range
forward.
• This range has been designed to meet all
recognized industrg tip standards for all normal
conditions.
The use of this device does not preclude tipping
of the range when not properly installed.
If the Anti-Tip Device supplied with the range does
not fit this application, use the Anti-Tip Device
WB02K10254.
A. Mark the wall where the RIGHTEDGE of the range
is to be located. Be sure to allow for the countertop
overhang if gou intend to install the range next
to cabinets.
INSTALLING THE ANTI-TIP DEVICE
ICONT.}
Wallboard
• Woodscrew
Install the sleeve anchor into the drilled hole and then
install the lag bolt through the device. The bolts must be
properlg tightened as recommended for the hardware.
E.Slidethe range against the wall, and check for proper
installation bg grasping the front edge of the cooktop
and carefullg attempting to tilt the range forward.
The bracket should stop the range within/4 inches.
If it does not, the bracket must be reinstalled.
Backof range
WHEN ALL HOOKUPS ARE COMPLETED
Meke sure ell controls ere left in the off position. Meke
sure the flow of combustion end ventiletion eir to the
renge is unobstructed.
Slottedhead
screw
Markededgeof range
B. Locate the outside edge of the device 2V8"toward the
center of the range from the marked edge of the range.
C. Using the device as a template, mark the position of
the hole for the screw.
D. For wood construction, drill a pilot hole at an angle of
20 degrees from the horizontal. A nail or awl mag be
used if a drill is not available.
Mount the Anti-Tip device with the screw provided.
For cement or concrete construction, gou will need
a 1/4" x 1_/2'' lag bolt and a 1/2" O.D.sleeve anchor, which
are not provided. Drillthe recommended size hole for the
hardware.
CONVERTING TO LP GAS Ior converting
beck to neturel ges from LP}
This renge leeves the fectory set for use with neturel
ges. If you went to convert to LPges, the conversion
must be performed by e quelified LPges insteller.
The conversion instructions and LPorifices can be found
attached to the range next to the pressure regulator.
Keep these instructions and the orifices in case gou want
to convert back to natural gas.
5O
Page 51

Beforeyou call for service... 6EAppliances.com
Troubleshooting Tips
Save time and moneg! Review the charts on the following
pages first and _lOUm%l not need to call for service.
Possible Causes What To Do
Topburners do not light
or do not burn evenly.
(Thefront right burneris Burner slits on the side of the • Removethe burners and clean them. Checkthe
designedto haveslightlg burner mag beclogged, electrode area for burned-on food or grease.See
smaller flames between the Care and cleaning of the range section.
the6and 9 o'clock
positions. ThisisnormalJ Improper burner assemblg. • Hake sure the burner parts are installed correctly.
Burner flames very Improper air to gas ratio. • If range is connected to LPgas, contact the person
large orgellow who installed your range or made the conversion.
Surface burners light The oven gas shut-off valve • To check the oven gas shut-off valve, remove the
but oven does not mag have accidentallg been drawer (seethe Care and cleaning of the range section).
Control signals after Youforgot to enter a bake • Touch the BAKE pad and desired temperature or
entering cooking time temperature or cleaning time. the SELFCLEAN pad and desired clean time.
or start time
Plugon range is not completely
inserted inthe electrical outlet.
moved during cleaning or Remove the rear access panel by unscrewing the
moving, thumb screws in the upper left and right corners.
• Hake sureelectrical plug isplugged into a live,properly
grounded outlet.
Seethe Care and cleaning of the range section.
Look for the gas shut-off lever at the back of the range.
Leveris
shownclosed.
PULLTOOPEN.
Fooddoes not bake or Ovencontrols improperlgset. • Seethe Usingtheupper oven section.
roast properlg in the
upper oven
Burnersdo not light Gas/Control Lockout feature • Allow the range to cool down andtouch and hold the
Rackposition is incorrect. • Seethe Usingthe upper ovensection.
Incorrect cookware or cookware • Seethe Usingthe upper oven section.
of improper size being used.
Oven thermostat needs • Seethe AdJust the upper oven thermostat Do it
adjustment, gourself! section.
Clock not set correctly. • Seethe Usingthe clockand timer section.
Aluminum foil used improperly • Seethe Care and cleaningof the range section.
in the oven.
Oven bottom not securely • Seethe Installation of the range section.
seated in position.
isactivated. GAS/CONTROLLOCKOUTpad (onsome models)for
3 secondsuntil LOCdisappears from the display.
Plug on range is not • Hake sure electrical plug is plugged into a live,properly
completely inserted in the grounded outlet.
electrical outlet.
Gas supply not connected • Seethe Installation Instructionsthat came with your
or turned on. range.
A fuse in your home may be • Replacethe fuse orresetthe circuit breaker.
blown or circuit breaker tripped.
Burner parts not replaced • Seethe Careandcleaningof the range section.
correctly.
51
Page 52

Before you call for service...
Troubleshooting Tips
Possible Causes What To Do
Gas/Control Lockout or
Control Lockout feature
is activated
"Close Door" scrolls in The displaywill always • This is a normal reminder to close the door when
the displog when BROIL automaticallg remind gou to broiling.
isset close the door.
Fooddoes not broil Oven controls improperlg set. • Hake sure Uoutouch the BROILHI/LO pad.
properlg in the upperoven Oven door not closed. • Seethe Usingthe upper ovensection.
Improper rack position • Seethe BroilingGuide.
being used.
Food being cooked • Forbest results,usea pan designed for broiling.
in a hot pan. Makesure it is cool.
Cookware not suited • Forbest results,usea pan designedfor broiling.
for broiling.
Oven bottom not securely • Seethe Installation of the range section.
seated in position.
Upper oven temperature Oven thermostat • Seethe Adjust the upper oventhermostat Doit
too hot or too cold needs adjustment, yourself! section.
Clockand timer Plug on range is not completelg • Hakesureelectrical plug is plugged into a live,properly
do not work inserted in the electrical outlet, grounded outlet.
A fuse in your home may be • Replacethe fuse or resetthe circuit breaker.
blown or the circuit breaker
tripped.
Oven controls improperly set. • Seethe Usingthe clockand timer section.
• IfLOCappears in the display, the range control is
locked. Turn this feature off to use the range. See
the Gas/Control Lockout section.
Upper oven light does Light bulb is loose or defective. • Tighten or replacethe bulb.
not work
Upper oven will not The oven temperature is too • Allowthe range to coolto room temperature and
self-clean high to seta self-cleanoperation, resetthe controls.
"Crackling" or This is the soundof the • Thisisnormal.
"popping"sound metal heating and cooling
52
Plug on range is not completelg • Hake sure electrical plug isplugged into a live,properly
inserted in the electrical outlet, grounded outlet.
Oven controls improperlgset. • Seethe Usingthe sell-cleaning upper oven section.
during both the cooking and
cleaning functions.
Page 53

GEAppliances.com
Possible Causes
Excessivesmoking
Ovendoorwill not open Oven too hot. • Allowthe ovento cool below locking temperature.
after a clean cgcle
Ovennot clean after a Oven controls not properlg set. • Seethe Usingthe self-cleaningupperoven section.
cleancgcle Oven was heovilgsoiled. • Cleonup heavy spilloversbeforestarting the cleon
"LOCKDOOR"flashes The self-cleoncgcle has been • Closethe oven door.
in thedisplag selectedbut the door is not
LOCKEDDOORlight Theoven door is locked • Touchthe CLEAR/OFFpad.Allow the ovento cool.
ison when you wont because the temperature
to cook inside the oven has not
"F--and a number or You hoveofunction error code. • Touch the CLEAR/OFFpad.Allowthe ovento cool for
letter"flash in thedisplag one hour.Putthe oven back into operation.
Excessivesoil.
closed.
droppedbelowthe
lockingtemperature.
If the function code repeats. • Disconnect all power to the range for 5 minutes
What To Do
• Touchthe CLEAR/OFFpad, Openthe windows to
rid the room of smoke,Wait until the LOCKEDDOOR
light goes off.Wipe up the excesssoiland reset the
clean cgcle.
cycle. Heavily soiled ovens may need to self-cleon
again or for a longer period of time.
and then reconnect power.Ifthe function error
code repeats, callfor service.
Ovenrocks are Thegrog porcelain-coated rocks •Applu a small amount of vegetable oil to a paper
difficult to slide were improperlg cleaned, towel and wipe the edges ofthe oven rackswith
the paper towel. Donot sprau with Pam®or other
lubricant spraus.
"Probe" appears in
thedisplag
LOCappears in The Gas/Control Lockout feature • Besure the surface burner controls ore turned OFE
thedisplag is activated. Turnthisfeature off to usethe range.Seethe
Thisis reminding gou to enter o • Entera probe temperature.
probe temperature offer plugging
in the probe.
Gas/ControlLockoutsection.
53
Page 54

Before you call for service...
Troubleshooting Tips
Possible Causes
A fuse in your home may be
blown or the circuit
breaker tripped.
The clock is in the • Seethe Special features of your oven control section.
black-out mode.
Power failure. • Reset the clock.
Oven control pads were • The BAKE and BROIL HI/LO pads must be touched at
display to show "SF" not pressed properly, the same time and held for 3 seconds.
Power outage, Power outage or surge. • Reset the clock. If the oven was in use, you must reset
clock flashes it by touching the CLEAR/OFFpad, setting the clock
"Burning" or "oily" This is normal in a new oven • To speed the process, set a self-clean cycle for a
odor emitting from and will disappear in time. minimum of 3 hours. Seethe Using the sell-cleaning
the vent oven section.
Strong odor An odor from the insulation • This is temporary.
around the inside of the oven
is normal for the first few times
the oven is used.
Fan noise The convection fan may turn on • This is normal. To maximize cooking evenness, the
and off automatically, fan isdesigned to operate in both directions with a
What To Do
• Replacethe fuse or resetthe circuit breaker.
and resetting any cooking function.
pause in between.
Convection fan not Preheat temperature • Fan will start automatically once the preheat
working not reached, temperature is reached.
Drawer does not slide The drawer is out of alignment. • Fully extend the drawer and push it all the way in.
smoothly or drags Seethe Care and cleaning of the range section.
Drawer is over-loaded or load • Reduce weight. Redistribute drawer contents.
is unbalanced.
Lower oven drawer A fuse in your home may be • Replace the fuse or reset the circuit breaker.
will not work blown or the circuit breaker
tripped.
The oven is self-cleaning. • Wait for the self-clean cycle to finish and the oven
Controls improperly set. • Seethe Lower oven drawer section.
Excessive condensation Liquid in drawer. • Remove liquid.
in the drawer
Uncovered foods. • Cover food with lid or aluminum foil.
Temperature setting too high. • Reduce temperature setting.
Food dries out in the Hoisture escaping. • Cover food with lid or aluminum foil.
lower oven drawer
Drawer not fully closed. • Push drawer in until latch engages.
to cool.
54
Page 55

Please place in envelope and mail to:
Veuillez mettre dans une enveloppe et envoyez _ :
OWNERSHIPREGJSTRATJOH
P.O. BOX1780
MISSJSSAUGA,OHTARJO
L4Y 4G1
(FORCAHADJAHCOHSUMERSOHLY)
55
Page 56

For Canadian
Customers
Pour les
Consommateurs
Canadiens
Pleaseregisteryourproductto enableustocontactyou VeuiUezenregistrervotreproduitafindenousperme_ede
intheremoteeventasafetynoticeisissuedforthisproduct communiqueravecvoussijamaisunavisdes6curit6concemant
andtoallowforefficientcommunicationundertheterms ceproduit6tait6misetdecommuniquerfacilementavecvousen
ofyourwarranty,shouldtheneedarise, vertudevol_egarantie,silebesoins'enfairse_r.
REGISTERON-UNE: v_ww.geappliances.ca MAILTO: P.O.BOX1788,MISSISSAUGA
ENREGISTREMENTSURINTERNETA:VW_N.electtomenaaersq#.ca POSTERA: ONTARIO,L4Y461
[] MR./M [] MRS./MME. FIRSTNAME/PRt_NOM ILASTNAME/NOM
z I
D MSS/MLLE.D MS.
STREETNO/N° RUE STREETNAME/RUE AP%NO/APR/RR#
tml
Z I
CITY/VILLE PROVINCE POSTALCODE/POST_
<I
LLll
Zl
-'ll
I
AREACODE/IND. REG.[TELEPHONE [E-MAIL
OOi
DIDYOUPURCHASEASERVICECON'rRACTFORTHISAPPLIANCE? YES/OUI [] IFYES/SIOUl:EXPIRATION
AVEZ-VOUSACHETEUN CONTRATDESERVICEPOURCETAPPAREIL? NO/NON []
Y/A M D/J
Zl
NAMEOF SELUNGDEALER/ NOMDU MARCHAND MODEL / MODELE
I
[
I--i
Z31
Y/A M D/J CORRESPONDENCE [] ENGUSH
INSTALLATIONDATE/DATED'INS_ALLAT1ON]
[] Ido notwishto receiveanypromotionaloffersregardingthisproduct.
[] Jenedesil_pasrecevoird'offrespromotionneUesconcernantceprodu_.
CORRESPONDANCE [] FRANCAIS SERIAL/SERIE
56
Page 57

Accessories. GEApp,ancescom
Looking For Something More?
You can find these accessories and many more at GEAppliances.com (U.S.)
or www.GEAppliances.ca (Canada), or call 800.626.2002 (U.S.)or 800.661.1616
(Canada) (during normal business hours). Have your model number ready.
Grates
Griddle OvenRacks OvenElements
SurfaceBurnerHeadsandCaps SurfaceElementsandDripPans
Knobs
LightBulbs
Experience these other great products to keep your kitchen looking greaff
StainlessSteel
Appliance
includescleaner, Wipes
scraperandpad
-__ CleaningKit: CleaningWipes AppliancePolish
_[[A_,_'_,_ CeramicCooktop _ CeramicCeoktop _ StainlessSteel _
WX10X117GCS WXIOX305 WX10X10001
Cleaner
PM10X311
Get the most out ofyour Broiler Pan! (Not for use with Broiler Drawer models.)
Useyour pan and grid cover to broil hamburgers, seafood,steaks,vegetables,bacon, chops and somuch
morel The pan below catches the excessfats and oils.
• GenuineGEPort
• EasyToCleon
• One-YearWarranty ..
Limited Time Offe!! Free Shipping!
When you order your broiler pan within 30 days of purchasing your GEcooking product.
Small
u.s.Part# WB/48XlO055
Canada Part # 222D2097GO01
Dimensions 8-3/4" W x I-I/4" H x 13-I/2"D
Price US$10.50 t
t Plus applicable state sales tax (PST/HSTand GST)
* The large (standard) broil pun does not fit in20"/24" ranges.
** The XLpan doesnot fit in 24"watt ovens,27" drop-ins or 20"/24" ranges.
12-3/4"Wxl-1/4"Hx16-1/2"D 17"Wxl-1/4"Hxlg-1/4"D
Large* XL**
WB48X1005 6 WB48X1005 7
222D2097G002 N/A
US$14.50 * US$16. 75 *
Toplace your order,call 800.626.2002(U.S.),800.661.1616 (Canada)or mail this form to:
Inthe U.S.:GEParts,PO.Box221027,Memphis, TN38122-1027. In Canada: GEParts,1 Factory Lane,Moncton, N.B.EIC 9M3
Broiler Pan Order Form
Veer
Part Number
Brand Date of Purchase
Last Name
State Zip Code
E-Mail
Credit Card #
Signature:
Quantity
Model Number
First Name
Address
city
Phone
Credit Card
Visa
Exp.Date: Month
MasterCard
Check
Serial Number
Money Order
Discover AmEx
57
Page 58

GE Gas Range Warrantg. (ForcustomersintheUnitedStates)
All warranty service provided by our Factory Service Centers
or an authorized Customer Care®technician. To schedule
service, visit us on-line at GEAppliances.com, or call
800.GE.CARES (800./432.2737). Please have serial number
and model number available when calling for service.
GE Will Replace:
Any part of the range which foilsdueto o defect in materials or workmanship. During this
From thedote Ofthe
original purchase
Service trips to gour home to teach gou how to use
the product.
limited one-year warranty, GEwill also provide,free of charge, oil lobar and in-home service
to replacethe defective port.
installation,deliverg or maintenance.
Failure of the product if it is abused, misused,
or used for other than the intended purpose or
used commerciallg.
Replacement of house fuses or resetting of circuit
breakers.
Staple Four receipt here.
Proof of the original purchase
dote is needed to obtain service
under the warrant F.
Damage to the product caused bg accident, fire, floods
or acts of God.
Incidental or consequential damage caused bg possible
defectswith this appliance.
Damage causedafter delivery.
Product notaccessibleto providerequiredservice.
EXCLUSION OF IMPLIED WARRANTIES--Your sole and exclusive remedy is product repair as provided
in this Limited Warranty. Any implied warranties, including the implied warranties of merchantability
or fitness for a particular purpose, are limited to one year or the shortest period allowed by law.
This warranty is extended to the original purchaser and any succeeding owner for products purchased for
home use within the USA. If the product is located in on area where service by o GE Authorized Servicer is
not available, you may be responsible for o trip charge or you may be required to bring the product to on
Authorized GE Service Location for service. In Alaska, the warranty excludes the cost of shipping or service
calls to your home.
Some states do not allow the exclusion or limitation of incidental or consequential damages. This warranty
gives you specific legal rights, and you may also have other rights which vary from state to state. To know
what your legal rights ore, consult your local or state consumer affairs office or your state's Attorney General.
Warranton General Electric Compang. Louisville, KV40225
58
Page 59

Service trips to gour home to teach gou how to use
the product.
Damage to the product caused bg accident, fire, floods
or acts of God.
Improper installation, deliverg or maintenance.
Failure of the product if it isabused, misused,
or used for other than the intendedpurpose or
used commerciallg.
Replacement of house fuses or resetting of circuit
breakers.
EXCLUSION OF IMPLIED WARRANTIES--Your sole and exclusive remedy is product repair as provided
in this Limited Warranty. Any implied warranties, including the implied warranties of merchantability
or fitness for a particular purpose, are limited to one year or the shortest period allowed by law.
This warrontg is extended to the original purchaser and ang succeeding owner for products purchased in Canada
for home use within Canada. In-home warrantbl service will be provided in areas where it is available and deemed
reasonable bbl Mabe to provide.
Some provinces do not allow the exclusion or limitation of incidental or consequential damages, so the above
exclusion mag not apply to you. This warrantg gives you specific legal rights, and you may also have other rights
which vary from province to province. To know what your legal rights are in your province, consult your local or
provincial consumer affairs office.
Incidental or consequential damage caused bg possible
defects with this appliance.
Damage caused after deliverg.
Product not accessibleto provide required service.
Warrantor: Mabe Canada Inc.,
Burlington, Ontario
59
Page 60

Consumer Support.
GEAppliances Website Inthe U.S.:GEAppliances.com
Havea question or needassistancewith your appliance?Try the GEAppliances Websiteany day of the year!
Forgreater convenience and faster service,you can now download Owner's Hanuals,order parts or even
schedule serviceon-line. In Canada: www,GEAppliances,ca
ScheduleService Inthe U.S.:GEAppliences.com
ExpertGErepair service isonly one step away from your door. Geton-lineand schedule your serviceat your
convenience any day of the year! Or call 800.GE.CARES(800.432.2737)during normal businesshours.
In Canada, cell1.800.561.3344
RealLife Design Studio Inthe us:GEAppliances.com
GEsupports the UniversalDesignconcept-products, services and environments that can be used by peopleof all
ages,sizesandcapabilities.We recognizethe needto designfor a wide range of physical and mental abilitiesand
impairments. Fordetails of GE'sUniversalDesignapplications, including kitchen designideas for people with disabilities,
check out our Website today. Forthe hearing impaired, pleasecall 800.TDD.GEAC(800.833.4322).
In Canada, contact: Manager,Consumer Relations,Mabe Canada Inc.
Suite310, 1 Factory Lane
Moncton, N.B.EIC 9M3
ExtendedWarranties
Purchasea GEextended warranty and learn about specialdiscountsthat are available while your warranty isstill
in effect. You can purchase it on-line anytime, or call 800.626.2224during normal businesshours.GEConsumer Home
Serviceswill still be there after your warranty expires.In Canada,cell 1.888.261.2133
Ports and Accessories
Individualsqualified to servicetheir own appliancescan have parts or accessoriessent directly to their homes
(VISA,HasterCard and Discovercards are accepted).Orderon-line today, 24 hours every day or by phone at
800.626.2002during normal businesshours.
Instructions containedin thismanuel coverproceduresto beperformed bYen&tuser.Otherservicinggenerallyshould be
referredtoquolified servicepersonnel.Caution must be exercised,sinceimproper servicingmeg causeunsafeoperation.
Customersin Canada should consult the yellow pages for the nearest Habe service center,or call 1.800.661.1616.
Contact Us
Ifyou are not satisfiedwith the service you receivefrom GE,contact uson our Website with allthe details including
your phone number,or write to: General Manager,Customer Relations
GEAppliances,Appliance Park
Louisville,KY40225
In Canada: www.GEAppliances.ca, or write to: Director,Consumer Relations,MabeCanada Inc.
Suite310, 1 Factory Lane
Moncton, N.B.EIC 9M3
In the U.S.: GEAppliances.com
In the U.S.: GEAppliances.com
In the U.S.: GEAppliances.com
Register your new appliance on-line--at your convenience! Timely product registration will allow for enhanced
Register YourAppliance IntheU.S.:GEAppliances.com
communication and prompt serviceunder the terms of your warranty, should the need arise.Youmay also mail
in the pre-printed registration card included in the packing material. InCanada: www,GEAppliances,ca
Printed in Mexico
This book is printed on recycled paper.
 Loading...