

Page 1
ge.com
C]
(1)
U
or)
Safety Instructions .... 2-7
Operating Instructions
Aluminurn Foil ................. 13
Clock and Timer ........... 15, 16
Gas/Control Lockout .......... 25
Lower Oven Drawer ........... 29
Oven ...................... ii-31
Baking and Boasting ......... 13
Broiling, Broiling Guide ....... 14
Convection ............... 19-25
Oven Control ................ 11
Power Outage ............... 12
Preheating .................. 13
Probe ........................ 18
Sabbath Feature ......... 26, 27
Self-Cleaning ............. 30, 31
Shelves ...................... 12
Special Features ......... 24, 25
Thermostat .............. 28, 29
Timed Baking
and Roasting ................ 17
Timed Convection Baking ..... 23
Surface Cooking ............ 8-10
Griddle ...................... 10
Care and Cleaning
Burner Assemblg .......... 32, 33
Burner Grates ................. 34
Control Panel and Knobs ...... 35
Cooktop ...................... 35
Door Removal ................. 37
Griddle ........................ 34
Oven Bottom .................. 37
Oven Light Replacement ...... 38
Oven Vents ................... 35
Self-Cleaning .............. 30, 51
Shelves ....................... 57
Stainless Steel Surfaces ....... 36
Drawer ....................... 58
Installation
Instructions ........... 39-50
Air Adjustment ................ 49
Anti-Tip Device ............ 42, SO
Assemble Surface Burners ..... 47
Checking Burner
Ignition ....................... 48
Connecting the Range
to Gas .................... 43-45
Dimensions and Clearances ...41
Electrical Connections ..... 46, 47
Leveling the Range ............ 49
LP ............................ S0
Troubleshooting
Tips ...................... Sl-$4
Accessories ............... 57
Consumer Support
Consumer Support ...Back Cover
Product Registration ....... 55, 56
Warrantg for Customers
in Canada ..................... 59
Warrantg for Customers
in the U.S.A................... 58
CGS980
Write the model and serial
numbers here:
Model #
Serial #
You can find them on a label
on the front of the range behind the
lower oven drawer.
In Canada contact us at:
www.GEAppliances.ca 183D5580P213 49-85129-1 01-08 JR
Page 2
IMPORTANTSAFETYINFORMATION.
READALL INSTRUCTIONSBEFOREUSING.
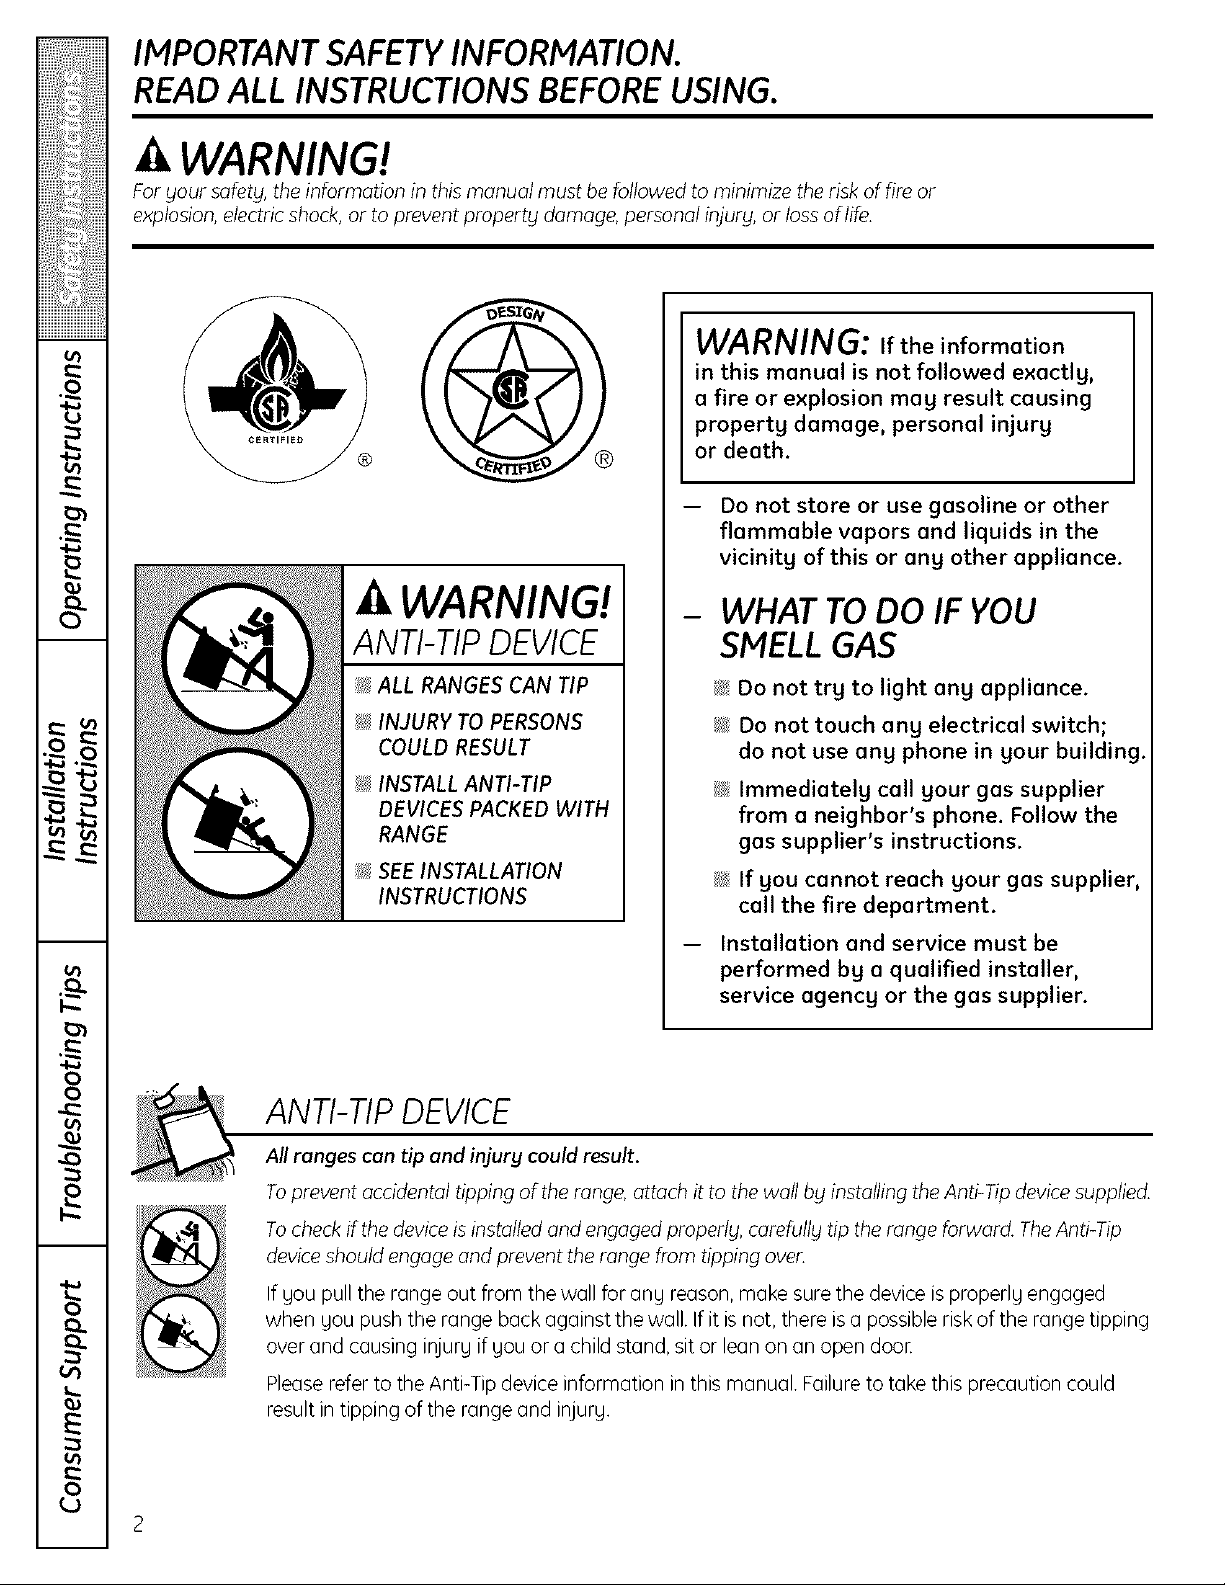
WARNING!
For your safety, the information in this manual must be followed to minimize the risk of fire or
explosion, electric shock, or to prevent propertg damage, personal injury, or loss of life.
WARNING: Iftheinformation
in this manual is not followed exactly,
a fire or explosion may result causing
property damage, personal injury
or death.
Do not store or use gasoline or other
flammable vapors and liquids in the
vicinitg of this or ang other appliance.
WARNING!
ANTI-TIPDEVICE
ALL RANGES CAN TIP
_ INJURY TO PERSONS
COULD RESULT
_ INSTALL ANTI-TIP
DEVICES PACKED WITH
RANGE
SEE INSTALLATION
INSTRUCTIONS
ANTI-TIP DEVICE
All ranges can tip and injurg could result.
WHAT TODO IF YOU
SMELL GAS
_, Do not trg to light ang appliance.
_ Do not touch ang electrical switch;
do not use ang phone in gour building.
_, Immediatelg call gour gas supplier
from a neighbor's phone. Follow the
gas supplier's instructions.
_ If gou cannot reach gour gas supplier,
call the fire department.
Installation and service must be
performed bg a qualified installer,
service agencg or the gas supplier.
Toprevent accidental tipping of the range, attach it to the wall bg installing the Anti-Tip device supplied.
Tocheck if the device is installed and engaged properlg, carefullg tip the range forward. The Anti-Tip
device should engage and prevent the range from tipping over.
If UOUpull the range out from the wall for anu reason, make sure the device is properlu engaged
when UOUpush the range back against the wall. If it is not, there is a possible risk of the range tipping
over and causing injuru if Uou or a child stand, sit or lean on an open door.
Please refer to the Anti-Tip device information in this manual. Failure to take this precaution could
result in tipping of the range and injuru.
Page 3
ge.com
A WARNING!
IMPORTANTSAFETY NOTICE
The California Safe Drinking Water and Toxic Enforcement Act requires the Governor of California to
publish a list of substances known to the state to cause birth defects or other reproductive harm, and
requires businesses to warn customers of potential exposure to such substances.
Gas appliances can cause minor exposure to four of these substances, namely benzene, carbon
monoxide, formaldehgde and soot, caused primarilg bg the incomplete combustion of natural gas or
LP fuels. Prapeflg adjusted buraers, indicated by a bluish rather than a gellow flame, will minimize
incomplete combustion. Exposure to these substances can be minimized bg venting with an open
window or using a ventilation fan or hood.
SAFETYPRECAUTIONS
Have the installer show gou the location of the range gas shut-off valve and how to shut it off if necessarg.
_ Have your range installed and properly
grounded by a qualified installer, in
accordance with the Installation Instructions.
Any adjustment and service should be
performed only by qualified gas range
installers or service technicians.
_ Do not attempt to repair or replace any
part of your range unless it is specifically
recommended in this manual. All other service
should be referred to a qualified technician.
i_}Plug your range into a 120-volt grounded
outlet only. Do not remove the round
grounding prong from the plug. If in doubt
about the grounding of the home electrical
system, it is your personal responsibility and
obligation to have an ungrounded outlet
replaced with a properly grounded,
three-prong outlet in accordance with
the National Electrical Code. Do not use
an extension cord with this appliance.
3
Page 4
IMPORTANTSAFETYINFORMATION.
READALL INSTRUCTIONSBEFOREUSING.
SAFETYPRECAUTIONS
_, Locate the range out of kitchen traffic path
and out of drafty locations to prevent poor
air circulation.
i_ Be sure all packaging materials are
removed from the range before operating it
to prevent fire or smoke damage should the
packaging material ignite.
w, Be sure your range is correctly adjusted by
a qualified service technician or installer for
the type of gas (natural or LP)that is to be
used. Your range can be converted for use
with either type of gas. See the Installation
of the range section.
WARNING: These adjustments must
be made by a qualified service technician
in accordance with the manufacturer's
instructions and all codes and requirements
of the authority having jurisdiction. Failure
to follow these instructions could result in
serious injury or property damage. The
qualified agency performing this work
assumes responsibility for the conversion.
_ After prolonged use of a range, high floor
temperatures may result and many floor
coverings will not withstand this kind of use.
Never install the range over vinyl tile or
linoleum that cannot withstand such type
of use. Never install it directly over interior
kitchen carpeting.
_ Do not leave children alone or unattended
where a range is hot or in operation.
They could be seriously burned.
_ Do not allow anyone to climb, stand or
hang on the oven door, lower oven drawer or
cooktop. They could damage the range and
even tip it over, causing severe personal injury.
_ CAUTION: Items of interest to children
should not be stored in cabinets above a
range or on the backsplash of a range-
children climbing on the range to reach items
could be seriously injured.
i_}Never wear loose fitting or hanging garments
while using the appliance. Be careful when
reaching for items stored in cabinets over the
range. Flammable material could be ignited if
brought in contact with flame or hot oven
surfaces and may cause severe burns.
i_}Do not store flammable materials in an oven,
a range drawer or near a cooktop.
!:,_iDonot store or usecombustible materials,
gasoline orother flammable vapors and
liquidsin the vicinity of this or any other
appliance.
_ Do not let cooking grease or other flammable
materials accumulate in or near the range.
_ Do not use water on grease fires. Never pick
up a flaming pan. Turn the controls off.
Smother a flaming pan on a surface burner
by covering the pan completely with
a well-fitting lid, cookie sheet or flat tray.
Use a multi-purpose dry chemical or
foam-type fire extinguisher.
Flaminggrease outsidea pan can be put
out by covering itwith bakingsoda or,
ifavailable,by using a multi-purpose dry
chemical or foam-type fire extinguisher.
Flame in the upper oven or lower oven drawer
can be smothered completely by closing the
oven door or drawer and turning the control
to off or by using a multi-purpose dry
chemical or foam-type fire extinguisher
!:,_iLet the burner grates and other surfaces cool
before touching them or leaving them where
children can reach them.
¢_;_Never block the vents (air openings) of the
range. They provide the air inlet and outlet
that are necessary for the range to operate
properly with correct combustion. Air openings
are located at the rear of the cooktop, at the
top and bottom of the oven door, and at the
bottom of the range under the lower oven
drawer.
!:,_iLarge scratches or impacts to glass doors
can lead to broken or shattered glass.
WARNING: NEVERusethis
appliance as a space heater to heat or
warm the room. Doing so may result
in carbon monoxide poisoning and
overheating of the oven.
Page 5
ge.com
WARNING!
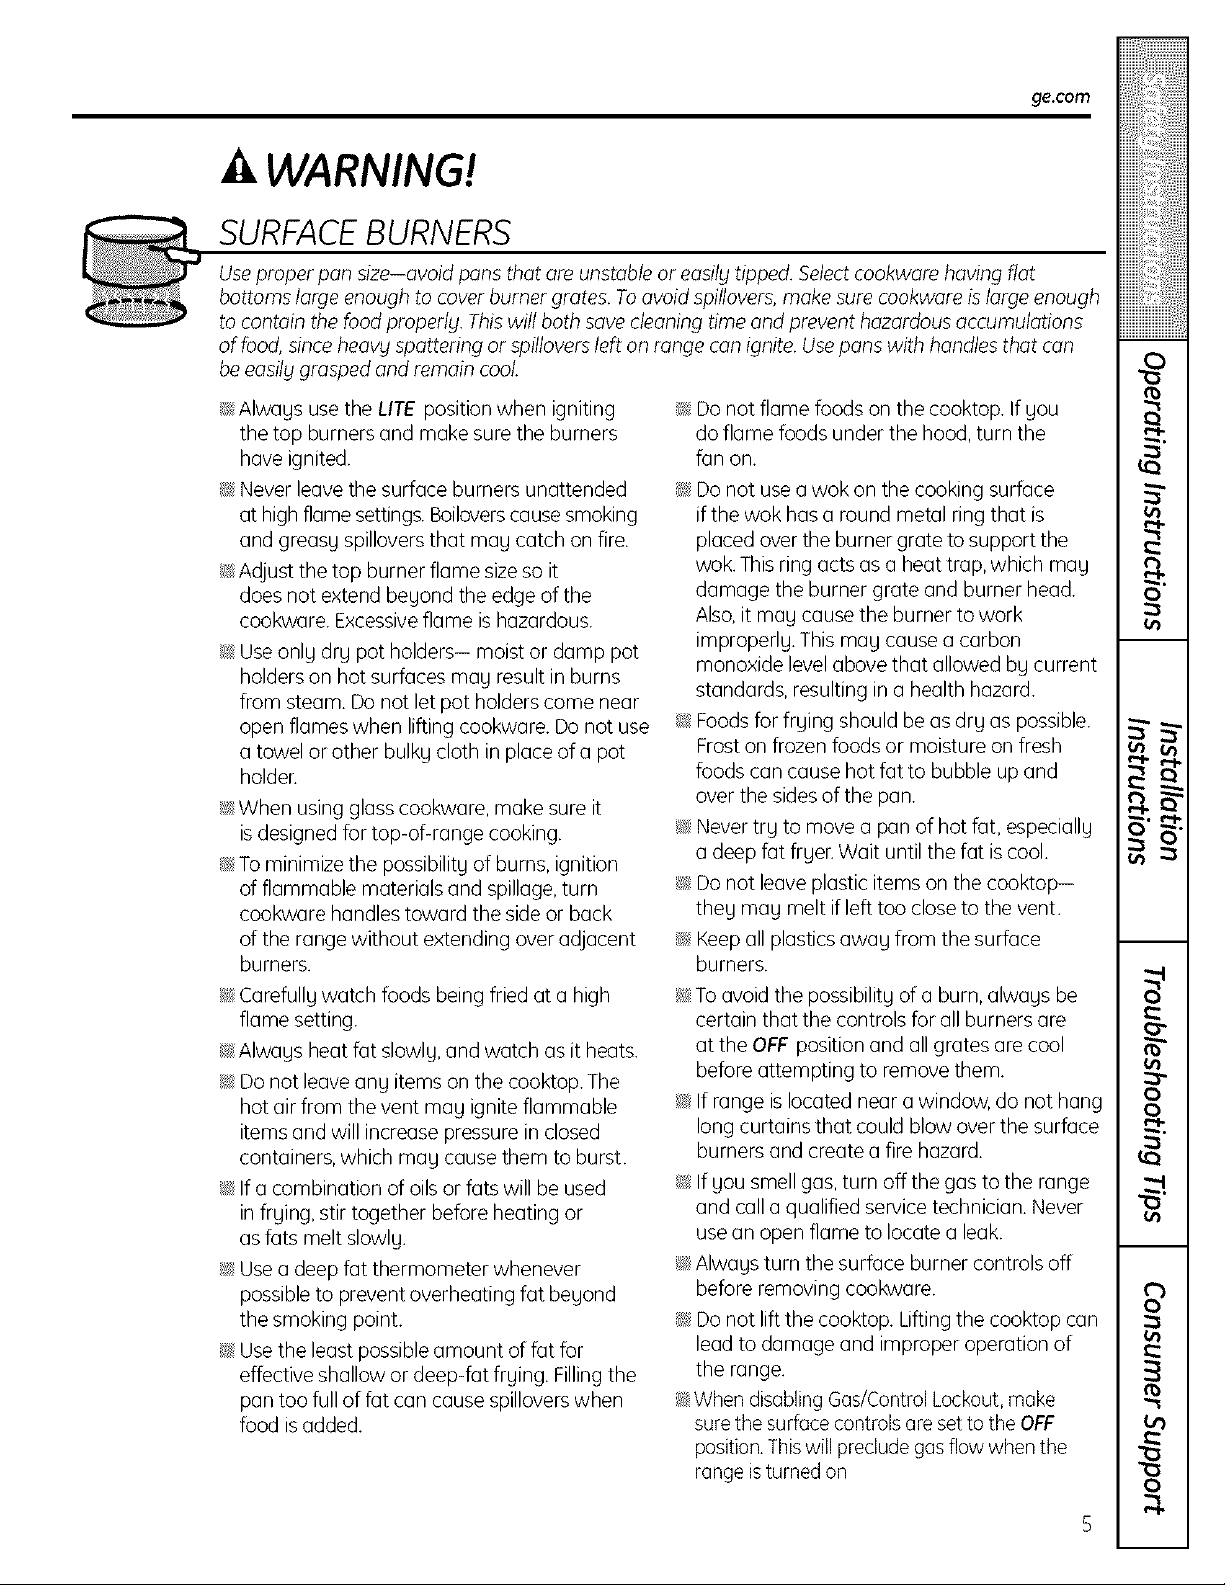
SURFACEBURNERS
Use proper pan size--ovoid pans that ore unstable or easilg tipped. Select cool<wore having fiat
bottoms large enough to cover burner grates. Toovoid spillovers, make sure cool<wore is large enough
to contain the food properlg. This will bath save cleaning time and prevent hazardous accumulations
of food, since heav_l spattering or spillovers left on range can ignite. Use pans with handles that con
be eosilg grasped and remain cool
!:;_iAlways use the LITE position when igniting
the top burners and make sure the burners
have ignited.
!:;_iNever leave the surface burners unattended
at high flame settings. Boilovers cause smoking
and greasy spillovers that may catch on fire.
_ Adjust the top burner flame size so it
does not extend beyond the edge of the
cookware. Excessive flame is hazardous.
_ Useonly dry pot holders- moist or damp pot
holders on hot surfaces may result in burns
from steam. Do not let pot holders come near
open flames when lifting cookware. Do not use
a towel or other bulky cloth in place of a pot
holder.
i!:_When using glass cookware, make sure it
isdesigned for top-of-range cooking.
!:;_iTo minimize the possibility of burns, ignition
of flammable materials and spillage, turn
cookware handles toward the side or back
of the range without extending over adjacent
burners.
_ Carefully watch foods being fried at a high
flame setting.
_ Always heat fat slowly, and watch as it heats.
_ Do not leave any items on the cooktop. The
hot air from the vent may ignite flammable
items and will increase pressure in closed
containers, which may cause them to burst.
i!:_If a combination of oils or fats will be used
in frying, stir together before heating or
as fats melt slowly.
i_:_Use a deep fat thermometer whenever
possible to prevent overheating fat beyond
the smoking point.
_¢Use the least possible amount of fat for
effective shallow or deep-fat frying. Filling the
pan too full of fat can cause spillovers when
food is added.
!:;_iDo not flame foods on the cooktop. If you
do flame foods under the hood, turn the
fan on.
!:;_iDo not use a wok on the cooking surface
if the wok has a round metal ring that is
placed over the burner grate to support the
wok. This ring acts as a heat trap, which may
damage the burner grate and burner head.
Also, it may cause the burner to work
improperly. This may cause a carbon
monoxide level above that allowed by current
standards, resulting in a health hazard.
_ Foods for frying should be as dry as possible.
Frost on frozen foods or moisture on fresh
foods can cause hot fat to bubble up and
over the sides of the pan.
i_ Never try to move a pan of hot fat, especially
a deep fat fryen Wait until the fat is cool.
i_ Do not leave plastic items on the cooktop--
they may melt if left too close to the vent.
!:;_iKeep all plastics away from the surface
burners.
_To avoid the possibility of a burn, always be
certain that the controls for all burners are
at the OFF position and all grates are cool
before attempting to remove them.
_ If range is located near a window, do not hang
long curtains that could blow over the surface
burners and create a fire hazard.
_ If you smell gas, turn off the gas to the range
and call a qualified service technician. Never
use an open flame to locate a leak.
i_ Always turn the surface burner controls off
before removing cookware.
!:;_iDo not lift the cooktop. Lifting the cooktop can
lead to damage and improper operation of
the range.
_;When disabling Gas/Control Lockout, make
sure the surface controls are set to the OFF
position. This will preclude gas flow when the
range is turned on
5
Page 6
IMPORTANTSAFETYINFORMATION.
READALL INSTRUCTIONSBEFOREUSING.
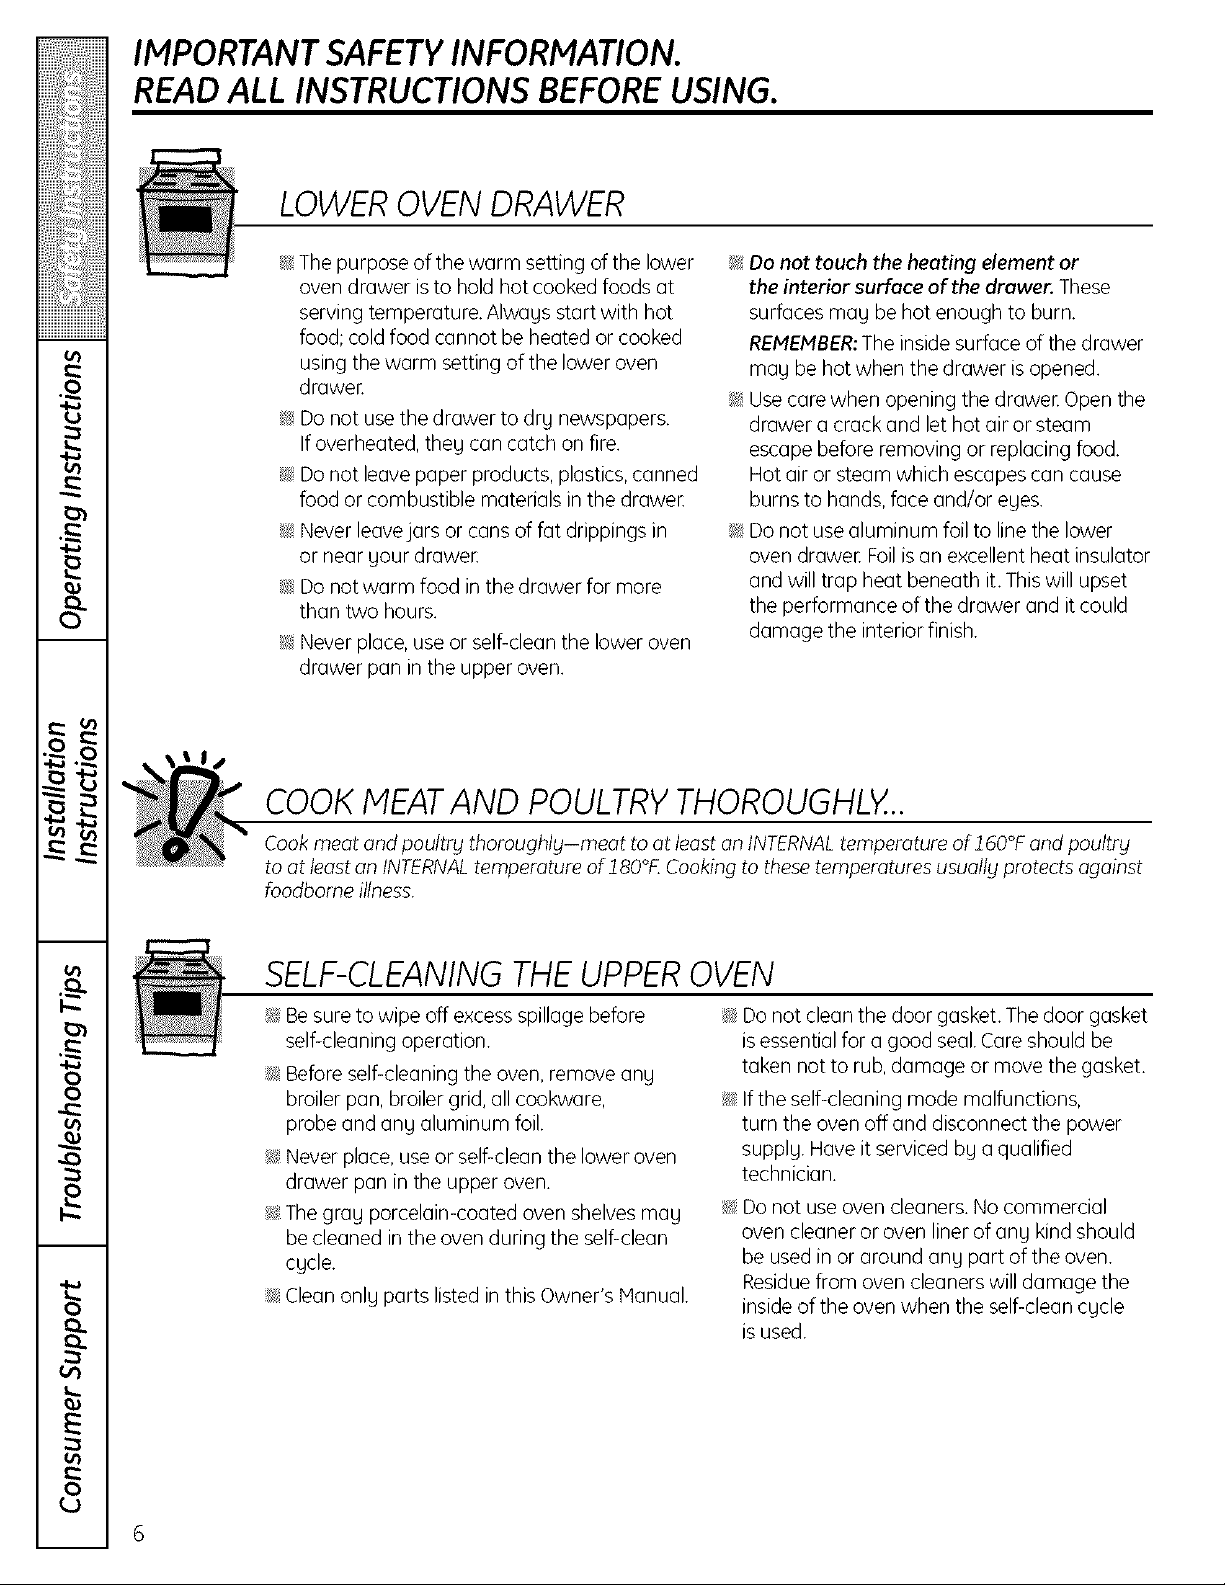
LOWEROVEN DRAWER
¢_The purpose of the warm setting of the lower
oven drawer is to hold hot cooked foods at
serving temperature. Alwaus start with hot
food; cold food cannot be heated or cooked
using the warm setting of the lower oven
drawer.
¢_4Do not use the drawer to dry newspapers.
If overheated, theu can catch on fire.
_ Do not leave paper products, plastics, canned
food or combustible materials in the drawee
_ Neverleavejars or cans of fat drippings in
or near uour drawee
_ Do not warm food in the drawer for more
than two hours.
i!_}Never place, use or self-clean the lower oven
drawer pan in the upper oven.
_ Do not touch the heating element or
the interior surface of the drawer. These
surfaces mau be hot enough to burn.
REMEMBER;The inside surface of the drawer
mau be hot when the drawer is opened.
_ Use care when opening the drawer. Open the
drawer a crack and let hot air or steam
escape before removing or replacing food.
Hot air or steam which escapes can cause
burns to hands, face and/or eues.
KsDo not use aluminum foil to line the lower
oven drawee Foil is an excellent heat insulator
and will trap heat beneath it. This will upset
the performance of the drawer and it could
damage the interior finish.
COOKMEATAND POULTRYTHOROUGHLY...
Cook meat and poultry thoraughlg-meot to at least on INTERNALtemperature of J60°F and poultrg
to at least an INTERNALtemperature of J80°K Cooking to these temperatures usuollg protects against
foodbome illness.
SELF-CLEANINGTHEUPPEROVEN
?_Be sure to wipe off excess spillage before
self-cleaning operation.
_ Before self-cleaning the oven, remove ang
broiler pan, broiler grid, all cookware,
probe and anu aluminum foil.
_, Never place, use or self-clean the lower oven
drawer pan in the upper oven.
_, The gray porcelain-coated oven shelves may
be cleaned in the oven during the self-clean
cycle.
_ Clean only parts listed in this Owner's Manual.
i_ Do not clean the door gasket. The door gasket
isessential for a good seal. Care should be
taken not to rub, damage or move the gasket.
_ Ifthe self-cleaning mode malfunctions,
turn the oven off and disconnect the power
supply. Have it serviced by a qualified
technician.
i_}Donot useoven cleaners.No commercial
oven cleaner or oven liner of any kindshould
beused in or around any part of the oven.
Residuefrom oven cleanerswill damage the
insideof the oven when the self-cleancycle
isused.
Page 7
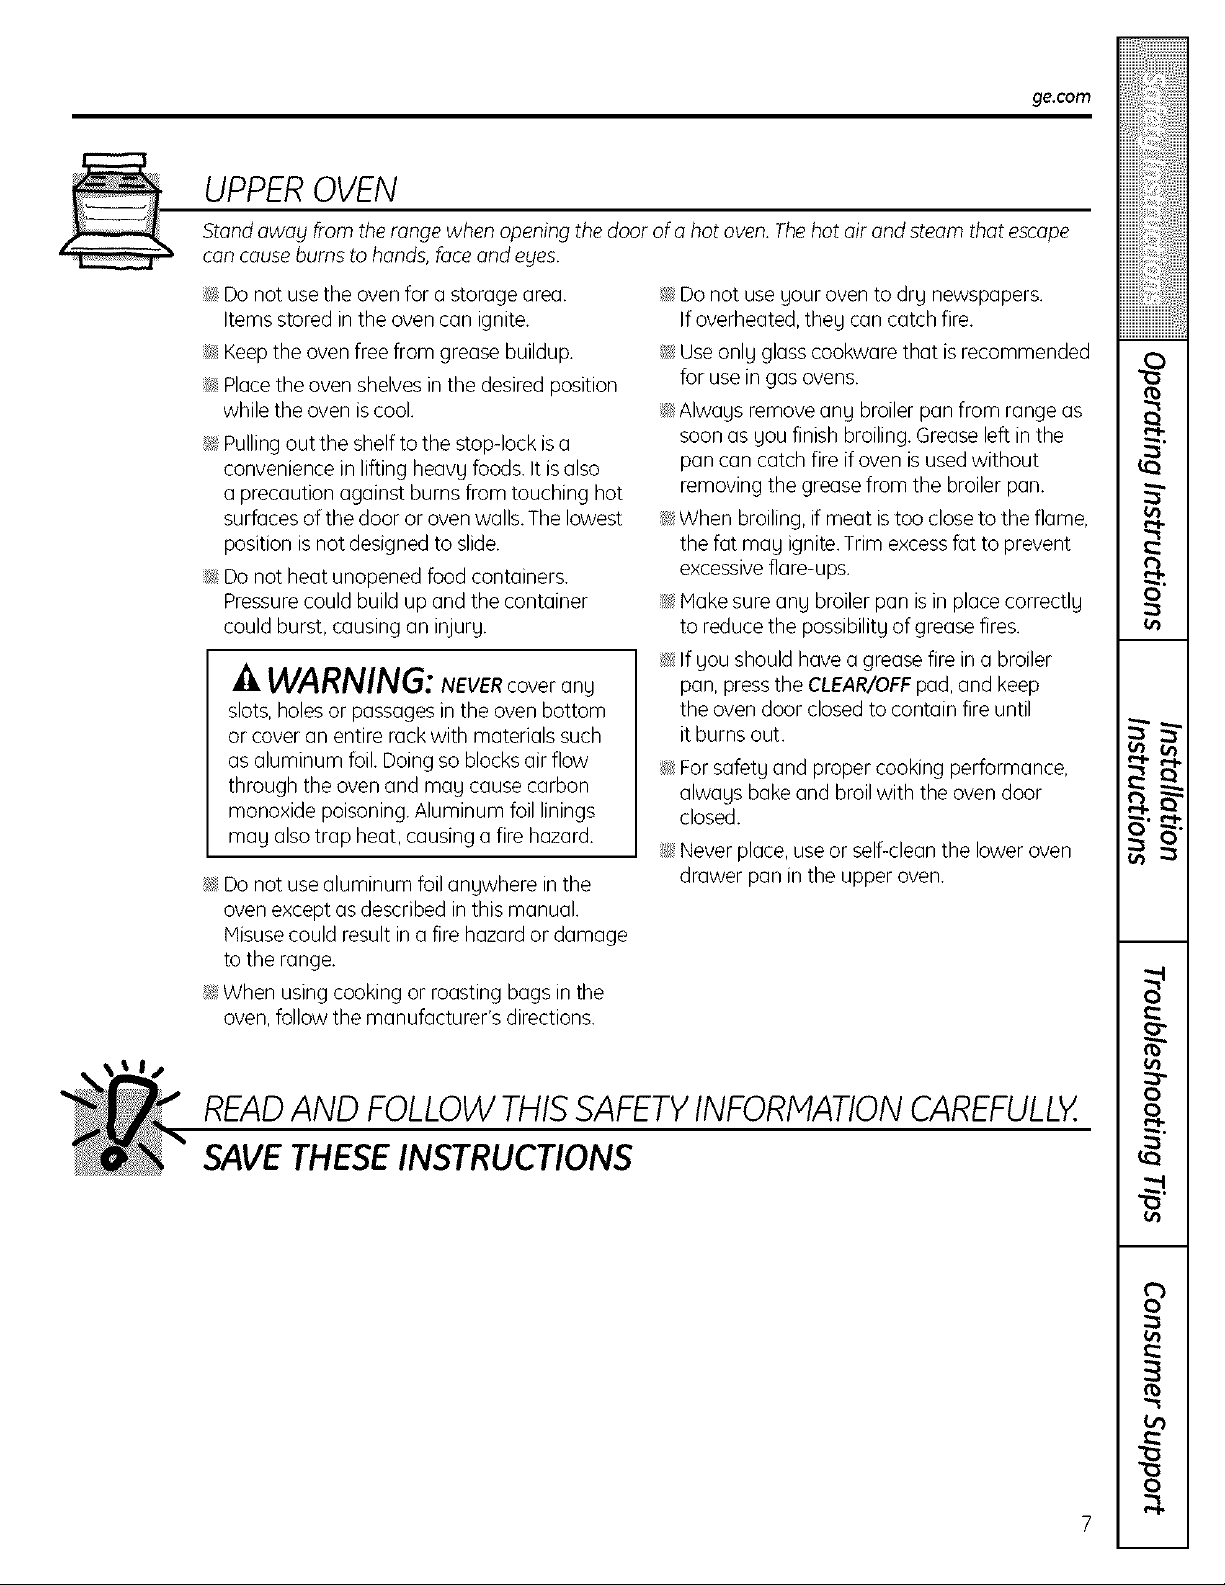
UPPEROVEN
Stand owog from the range when opening the door of a hot oven. The hot air and steam that escape
,_.. con cause burns to hands, face and eges.
ge.com
KsDo not use the oven for a storage area.
Items stored in the oven can ignite.
_ Keep the oven free from grease buildup.
_ Place the oven shelves in the desired position
while the oven iscool.
?_Pulling out the shelf to the stop-lock is a
convenience in lifting heavy foods. It is also
a precaution against burns from touching hot
surfaces of the door or oven walls. The lowest
position is not designed to slide.
_ Do not heat unopened food containers.
Pressure could build up and the container
could burst, causing an injury.
WARNING: NEVERcoverany
slots, holes or passages in the oven bottom
or cover an entire rack with materials such
as aluminum foil. Doing so blocks air flow
through the oven and may cause carbon
monoxide poisoning. Aluminum foil linings
may also trap heat, causing a fire hazard.
_ Do not use aluminum foil anywhere in the
oven except as described in this manual.
Hisuse could result in a fire hazard or damage
to the range.
?_When using cooking or roasting bags in the
oven, follow the manufacturer's directions.
_ Do not use your oven to dry newspapers.
If overheated, they can catch fire.
_ Useonly glass cookware that is recommended
for use in gas ovens.
i!:_Always removeany broiler pan from range as
soon as you finishbroiling.Greaseleft in the
pan can catch fire if oven isusedwithout
removingthe greasefrom the broiler pan.
!:,_iWhen broiling, if meat istoo close to the flame,
the fat may ignite. Trim excess fat to prevent
excessive flare-ups.
@
Hake sure any broiler pan isin place correctly
to reduce the possibility of grease fires.
If you should have a grease fire in a broiler
pan, press the CLEAR/OFF pad, and keep
the oven door closed to contain fire until
it burns out.
i!:_For safety and proper cooking performance,
always bake and broil with the oven door
closed.
¢_;4Never place, use or self-clean the lower oven
drawer pan in the upper oven.
READAND FOLLOWTHISSAFETYINFORMATIONCAREFULLY.
SAVETHESEINSTRUCTIONS
7
Page 8
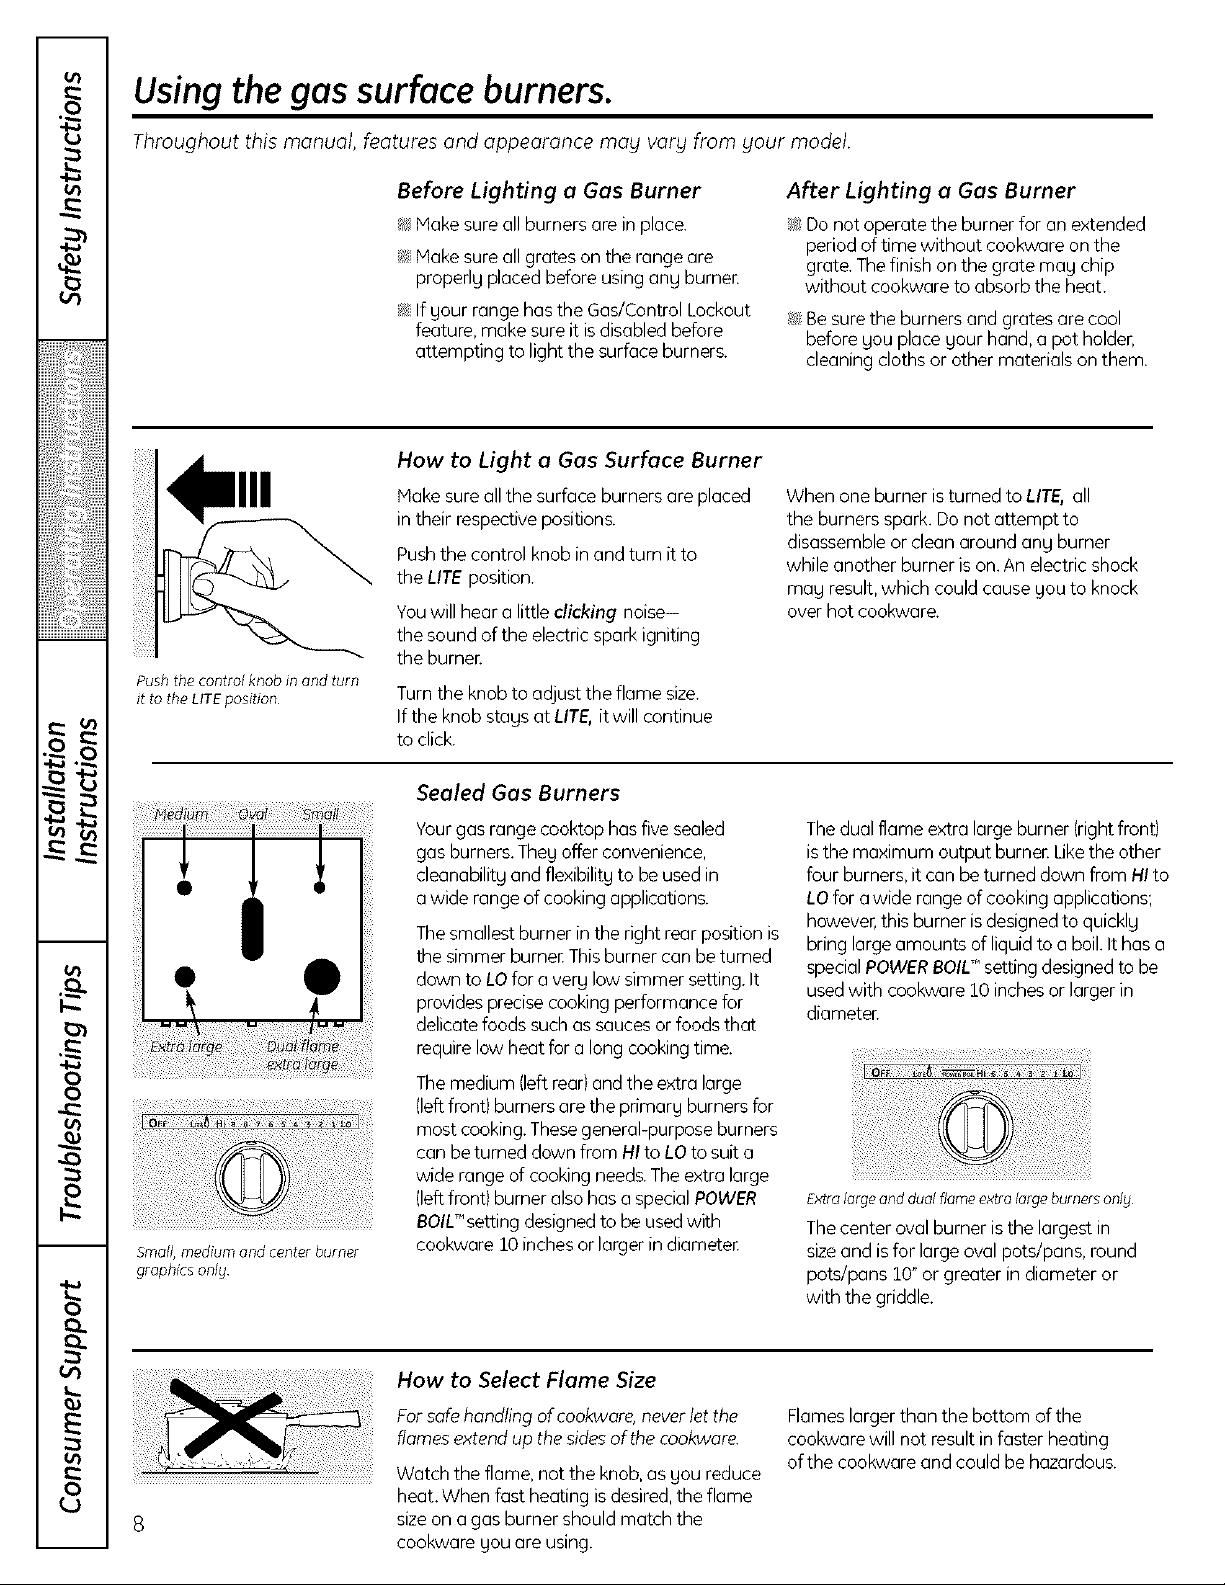
Usingthe gas surface burners.
Throughout this manual, features and appearance may varLj from your model.
Push the control knob in and turn
it to the LITE position
Before Lighting a Gas Burner
_!_Makesure all burners are in place.
_t Hake sure all grates on the range are
properlg placed before using ang burner.
_t If gaur range has the Gas/Control Lockout
feature, make sureit isdisabled before
attempting to light the surface burners.
How to Light o Gas Surface Burner
Hake sureallthe surface burners are placed
in their respectivepositions.
Pushthe control knob in and turn it to
the LITE position.
Youwill bear a little clickingnoise-
the sound of the electric spark igniting
the burner.
Turnthe knob to adjust the flame size.
If the knob stags at LITE, it will continue
to click.
After Lighting a Gas Burner
_';$Do not operate the burner for an extended
period of time without cookware on the
grate. The finish an the grate may chip
without coakware to absorb the heat.
i_iBesurethe burners and grates are cool
before gou place gour hand. a pot holder.
cleaning cloths or other materials on them.
When one burner isturned to LITE, all
the burners spark. Donot attempt to
disassembleor clean around ang burner
while another burner ison. An electric shock
mag result,which could cause gou to knock
over hot cookware.
• •
Small,mediumand centerburner
graphicsonly
Sealed Gas Burners
Yourgas range cooktop has five sealed
gas burners.Theg offer convenience,
cleanabilitg and flexibilitgto be used in
awide range of cooking applications.
Thesmallest burner in the right rear position is
the simmer burne, Thisburner can be turned
down to LOfor a verg low simmer setting.It
providesprecisecooking performance for
delicatefoods such assauces or foods that
requirelow heatfor a long cooking time.
Themedium (left rear)and the extra large
(leftfront) burners are the primarg burnersfor
most cooking.Thesegeneral-purpose burners
can beturned down from HIto LOto suit a
wide range of cooking needs.The extra large ...................................................................................
(leftfront) burner alsohas a special POWER Extralargeanddualflameextralargeburnersonb
BOIU"setting designedto be used with The center oval burner isthe largest in
cookware 10 inchesor larger in diamete, sizeand isfor large oval pots/pans, round
The dual flame extra large burner (right front)
is the maximum output burnen Likethe other
four burners, it can be turned down from HI to
LO for awide range of cooking applications;
however, this burner is designed to quicklg
bring large amounts of liquid to a boil. It has a
special POWER BOILT"setting designed to be
used with cookware 10 inches or larger in
diameten
pots/pans 10"or greater in diameter or
with the griddle.
How to Select Name Size
Farsafehandling af cookware,neverlet the
flamesextend up thesidesof thecookware.
Watch the flame,not the knob.as gou reduce
heat. When fast heating is desired,the flame
sizeon a gas burner should match the
cookware gou are using.
Flameslarger than the bottom of the
coakware will nat result in faster heating
of the cookware and could be hazardous.
Page 9
Top-of-Range Cookware
ge,com
Aluminum: Medium-weight cookware is
recommended because it heats quicklg
and evenlg.Mastfoods brown evenlg in an
aluminum skillet.Use saucepans with tight-
fitting lidswhen cooking with minimum
amounts of water.
Cast-Iron: If heated slowlg, most skilletswill
give satisfactarg results.
Enamelware: Undersome conditions,
the enamel of some cookware mag melt.
Follow cookware manufacturer's
recommendations far cooking methods.
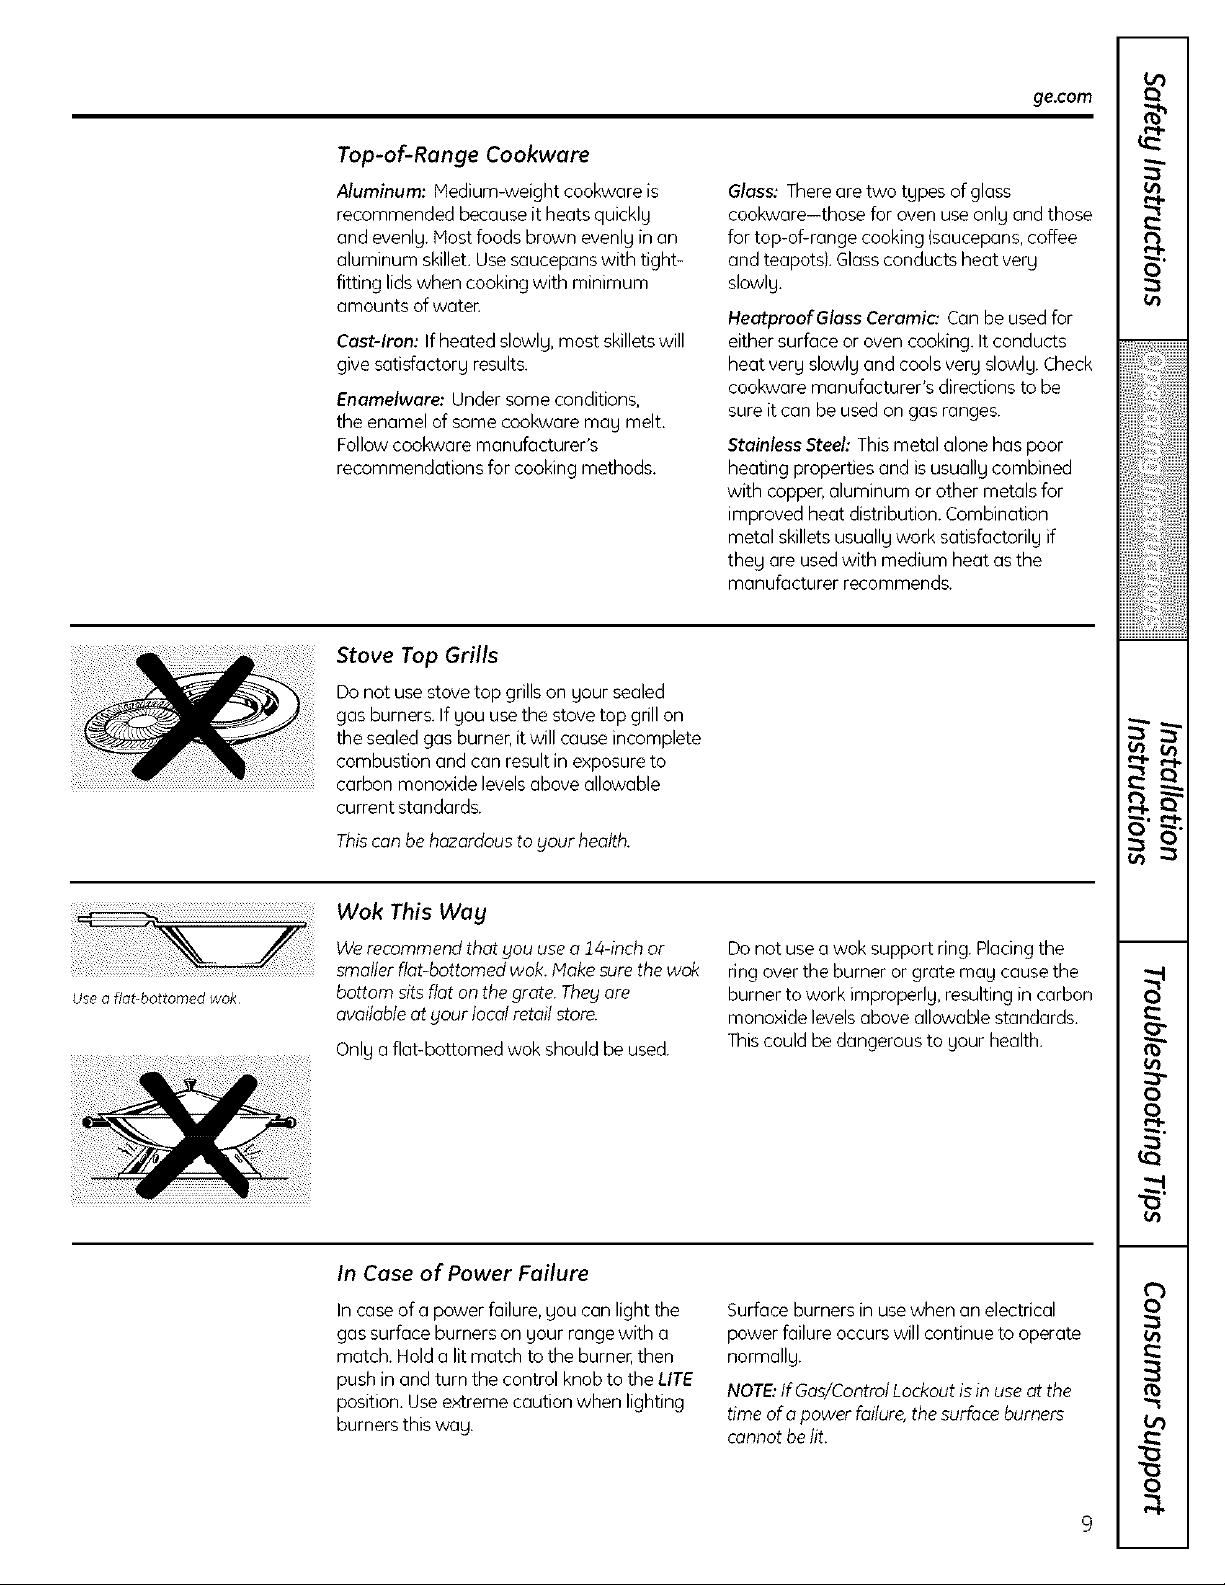
Stove Top Grills
Donot use stovetop grills on gour sealed
gas burners.If gou usethe stove top grill on
the sealed gas burner, itwill cause incomplete
combustion and can result in exposureto
carbon monoxide levelsabove allowable
current standards.
Glass: Thereare two tgpes of glass
cookware-those far oven useonlg and those
for top-of-range cooking (saucepans,coffee
and teapots).Glassconducts heat verg
slowlg.
HeatpraofGlass Ceramic: Canbe usedfor
either surface or oven cooking. It conducts
heat verg slowlg and cools verg slowlg. Check
cookware manufacturer's directionsto be
sure it can be usedon gas ranges.
Stainless Steel: Thismetal alone has poor
heating properties and is usuallgcombined
with copper,aluminum or other metals for
improved heat distribution. Combination
metal skilletsusuallg work satisfactorilg if
theg are usedwith medium heat asthe
manufacturer recommends.
Use a flabbottorned wok
Thiscan be hazardous to gour health.
Wok This Wag
Werecommend that you usea14-inch or
smaller fiat-bottomed wok. lake sure the wok
bottom sitsflat on the grate. They are
availableat gour local retailstore.
Onlg a flat-bottomed wok should be used.
In Case of Power Failure
In case of a power failure,gou can light the
gas surface burners on gour rangewith a
match. Holda lit match to the burner,then
push in and turn the control knob to the LITE
position. Useextreme caution when lighting
burners this wag.
Do not usea wok support ring. Placingthe
ring over the burner or grate mag causethe
burner to work improperlg, resulting in carbon
monoxide levelsabove allowable standards.
Thiscould be dangerous to gour health.
Surface burners in use when an electrical
power failure occurs will continue to operate
normallg.
NOTE:IfGas/ControlLockout isin use at the
time ofapower failure,the surfaceburners
cannot belit.
9
Page 10
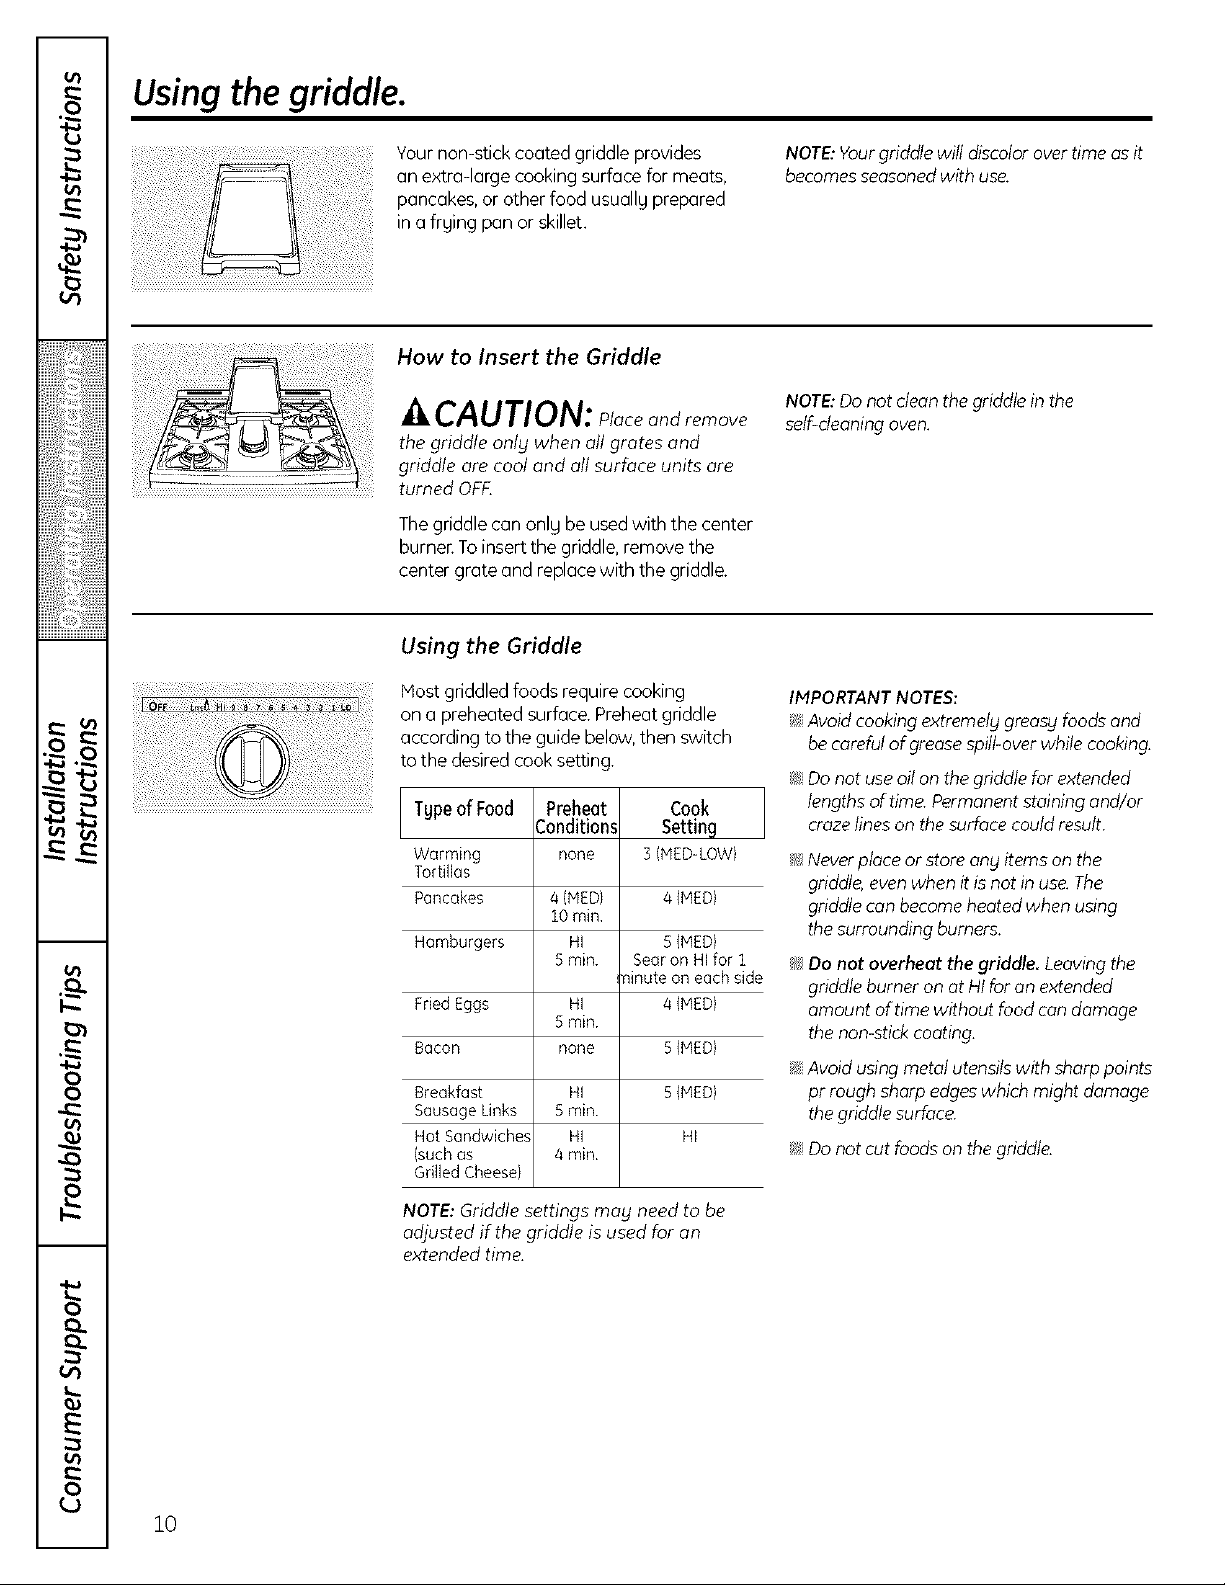
Using the griddle.
Yournon-stick coated griddle provides
an extra-large cooking surface for meats,
pancakes, or other food usuallg prepared
in a frging pan or skillet.
How to Insert the Griddle
A CAUTION: Placeandremove
the griddle onlg when all grates and
griddle are cool and all surface units ore
turned OFF.
Thegriddle can onlg be usedwith the center
burnenToinsert the griddle, remove the
center grate and replacewith the griddle.
Using the Griddle
Most griddled foods require cooking
on a preheated surface. Preheatgriddle
according to the guide below,then switch
to the desired cook setting.
Type of Food Preheat Cook
Warming none 3(NED-LOW)
Tortillas
Pancakes 4 {MEDI 4 {MED)
Hamburgers HI S {NED)
Fried Eggs HI 4 (NED)
Bacon none 5 {MED)
Breakfast HI 5 {MED)
SausageLinks 5 min
Hot Sandwiches HI HI
{suchas 4 min.
Grilled Cheese}
Conditions Setting
10 rain.
5rain. Searon HI for 1
ninute on each side
Srain
NOTE:Yourgriddle will discolor overtime asit
becomesseasonedwith use.
NOTE:Do notclean the griddlein the
self-cleaningoven.
IMPORTANTNOTES:
_4Avoidcookingextremelygreasy foodsand
be careful of greasespill-over while cooking.
_IDo not useoil on the griddle for extended
lengths of time Permanent staining and/or
crazelines on the surfacecould result.
_!:Neverplace or store any items on the
griddle,even when it is not in use The
griddle can become heated when using
the surrounding burners.
_!_Do not overheat the griddle, Leavingthe
griddle burner on at HI foran extended
amount of time without food con damage
the non-stickcoating.
_IAvoid usingmetalutensilswith sharppoints
pr rough sharp edgeswhich might damage
the griddle surface.
_I Do not cut foods on the griddle.
10
NOTE:Griddle settings may need to be
adjusted if the griddle is used for an
extended time.
Page 11
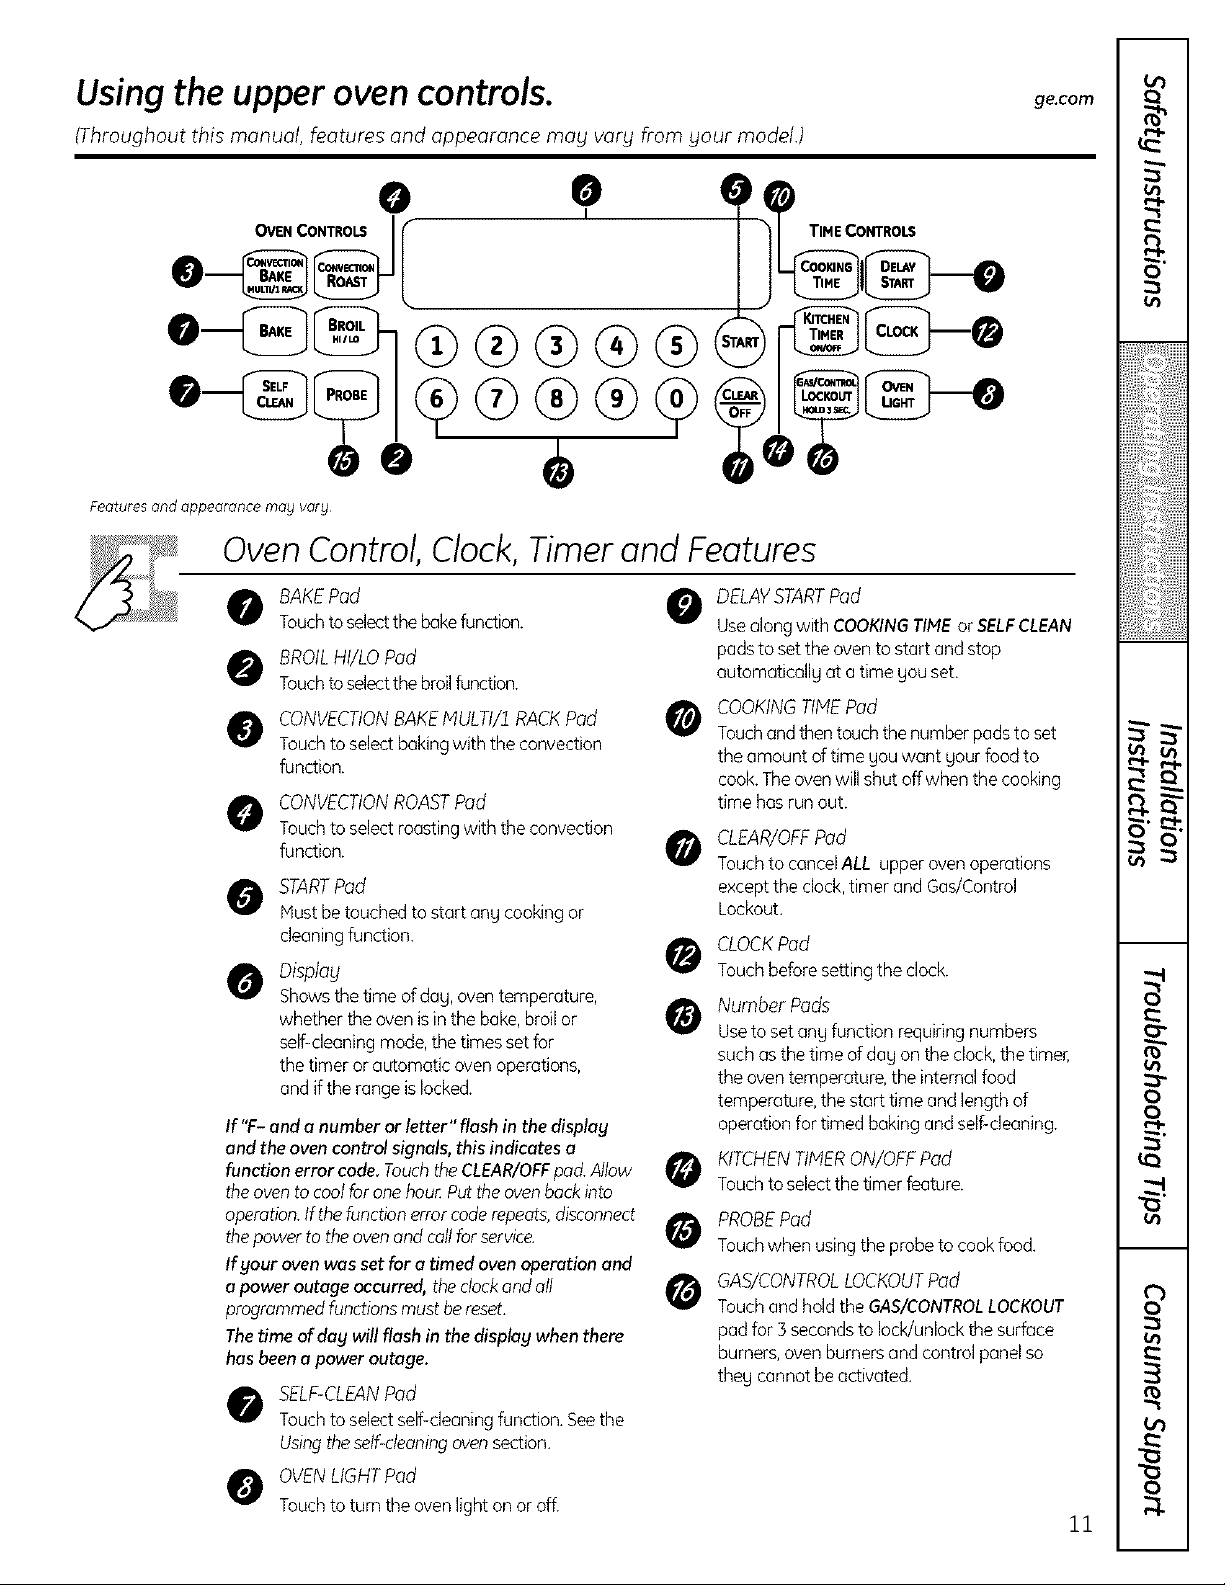
Using the upper oven controls.
(Throughout this manual, features and appearance may vary from your model.)
OVEN CONTROLS 0 I_
Features and appearance may vary
Oven Control, Clock, Timer and Features
BAKEPad 0
Touchtoselectthebakefunction.
BROILHI/LO Pad
Touchtoselectthebroilfunction.
CONVECTIONBAKENULTI/1 RACKPad
Touchto select bakingwith the convection
function.
CONVECTION ROAST Pod
Touch to select roasting with the convection
function. 0
STARTPad
Mustbe touchedto start angcookingor
cleaningfunction.
Display
Showsthetime of dag,oven temperature,
whether theoven isin the bake,broilor
self-cleaningmode,the timessetfor
the timer or automatic oven operations,
andif the range islocked.
If "F- and a number orletter"flash in the display
and the ovencontrolsignals,this indicates a
function errorcode.TouchtheCLEAR/OFFpad.Allow
theoven tocool foronehou_Putthe ovenbackinto
operation.If thefunction errorcoderepeats,disconnect
thepower totheovenandcallfor service.
If your oven was setfor a timed ovenoperation and
a power outageoccurred, the clockandall
programmedfunctionsmustbereset.
Thetime of day will flash in thedisplay when there
hasbeena power outage.
SELF-CLEANPad
Touchto selectself-cleaningfunction.Seethe
Usingtheself-cleaningovensection.
OVENLIGHTPad
Touch to turn the oven light on or off.
DELAYSTARTPad
Use along with COOKING TIME or SELFCLEAN
pads to set the oven to start and stop
automaticallg at a time gou set.
COOKING TIME Pod
0
Touch and then touch the number pads to set
the amount of time gou want gour food to
cook. The oven will shut off when the cooking
time has run out.
CLEAR/OFFPad
Touchto cancelALL upper ovenoperations
exceptthe clock,timer and Gas/Control
Lockout.
CLOCKPad
Touchbeforesetting theclock.
Number Pads
0
Usetoset ang function requiringnumbers
such asthe time of dag onthe clock,the timer,
the oventemperature,the internalfood
temperature,thestart time and lengthof
operationfor timed bakingandself-cleaning.
KITCHENTIMERON/OFFPad
Touchto selectthe timerfeature.
PROBEPad
Touchwhen usingthe probeto cookfood.
GAS/CONTROLLOCKOUTPod
@
Touchand holdthe GAS/CONTROLLOCKOUT
pad for 5 secondsto lock/unlockthe surface
burners,ovenburnersand control panelso
theg cannot beactivated.
ge.com
11
9•
[[
i
r
)))}:}'_
;]
i)
i;;;;ii_iiiiliiiii
0
0
€/>
0
m.
Page 12
Using the upper oven.
To avoid possible burns, place the shelves in the desired position before you turn the oven on.
Before you begin...
The oven has 5 shdf positions
It also has a special low shelf
position {R)for extra large items,
such as a large turkey
Plastic items on the cooktop may
melt if left too close to the vent
Vent appearance and location vary
Theshelves have stop-locks, so that when
placed correctly on the shelf supports (A
through E),they will stop beforecoming
completely out, and will not tilt.
When placing and removing cookware,
pull the shelf out to the bump on the shelf
support.
Upper Oven Vent
Your oven is vented through ducts at the rear
of the range. Do not block these ducts when
cooking in the oven-it is important that the
flow of hot air from the oven and fresh air to
the oven burner be uninterrupted. Avoid
touching the vent openings or nearby
surfaces during oven or broiler operation-
theg mag become hot.
Toremove o shelf, pull it toward gou,tilt the
front end up and pull it out.
Toreplace, placethe end of the shelf(stop-
locks}on the support, tilt upthe front and
push the shelf in.
NOTE:Theshelf isnot designedto slideout at
the speciallow shelf(R)position.
_ Handles of pots and pans on the eooktop
mog becomehot if left too dose to the vent.
_, Do not leaveplastic or fbmmoble items on
thecooktop-theg may melt or ignite if left
too closeto the vent.
_I Do not leave closed containers on the coo!<top.
Thepressure in closed containers may
increase which may cause them to burst.
_ Metal items will become very hot if they are
left on the cooktop,and couldcause burns.
Power Outage
CAUTION:Do notmake any attempt to
operate the electricignition ovenduring an
electricalpower failure.
Theoven or broiler cannot belit during a
power failure. Gaswill not flow unlessthe
glow bar is hot.
Upper Oven Light
Touchthe OVENLIGHTpad to turn tile light
on or off.
If the oven is in usewhen a power failure
occurs, the oven burner shuts off and cannot
be re-lit until power isrestored. This is
because the flow of gas isautomaticallg
stopped and will not resume when power is
restored untilthe glow bar has reached
operating temperature.
12
Page 13
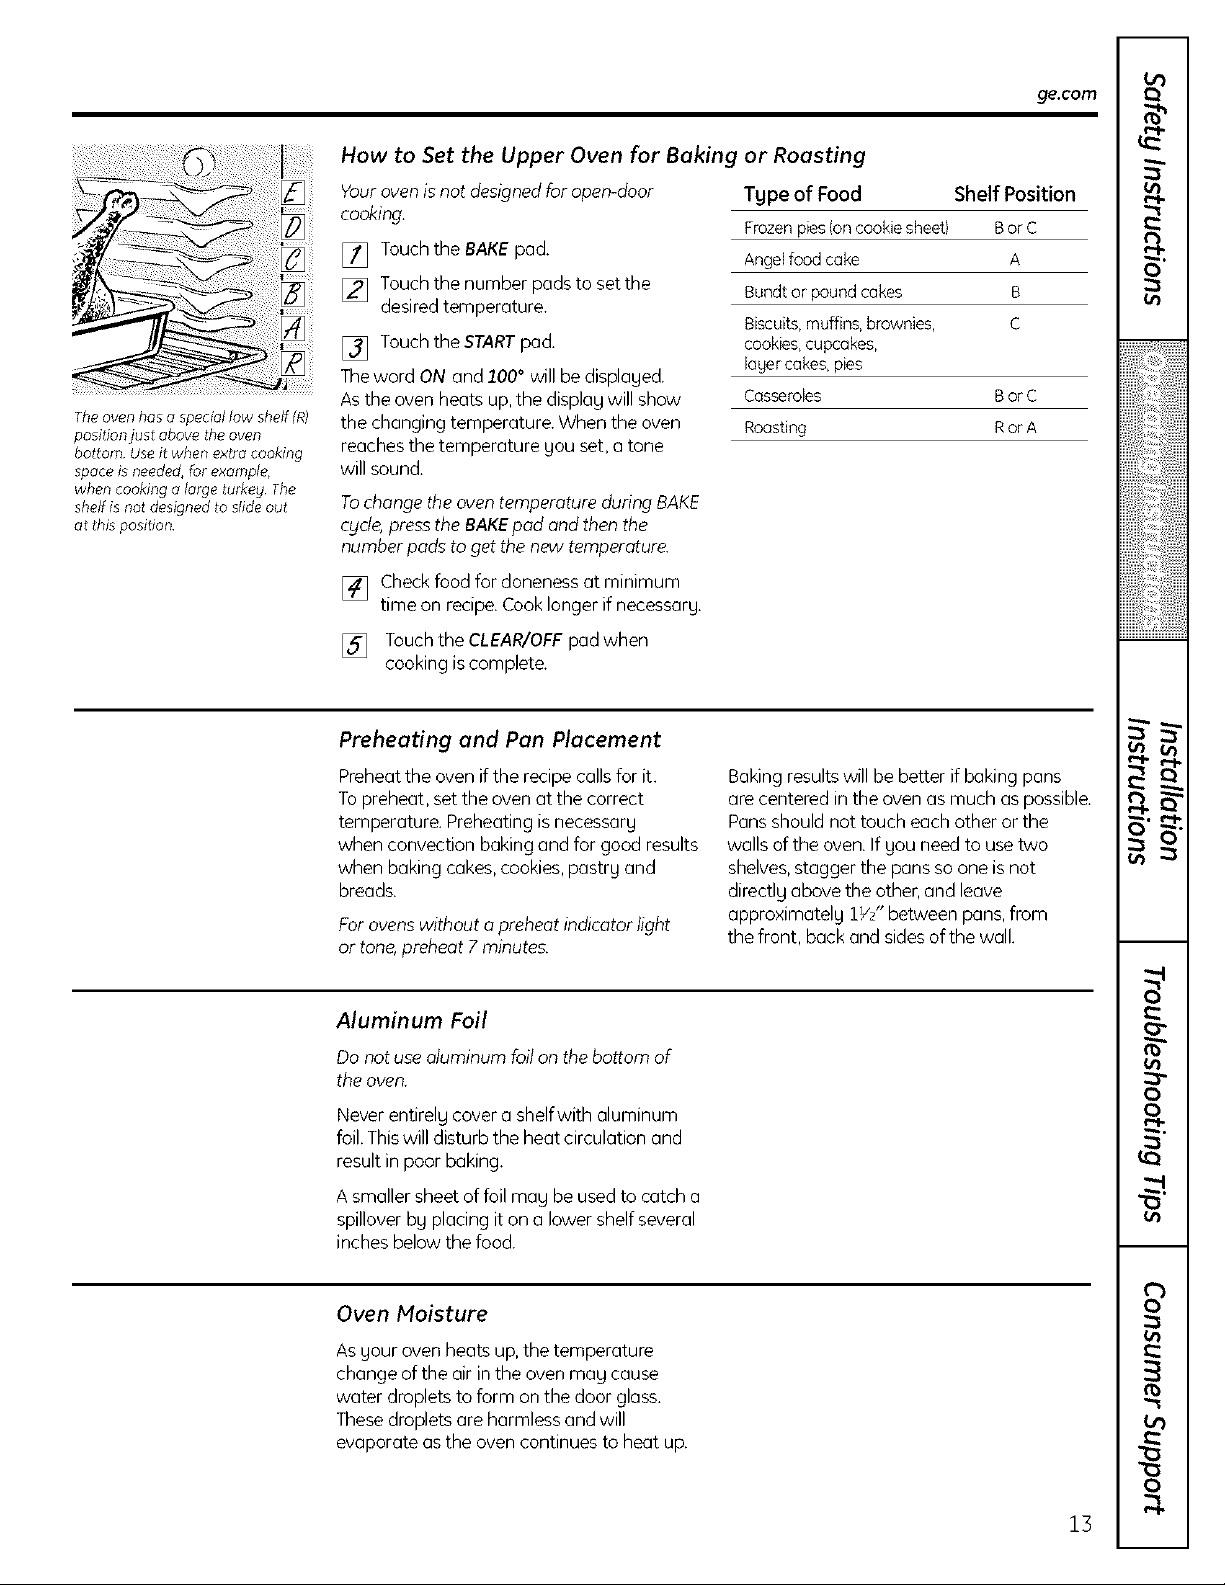
How to Set the Upper Oven for Baking or Roasting
ge.com
The oven has a special low sheff (R)
position just above the oven
bottom Use it when extra cooking
space is needed, for example,
when cooking o large turkeg The
shelf is not designed to slide out
at this position
Your oven is not designed for open-door
cooking.
[] Touchthe BAKEpad.
[] Touchthe number padsto set the
desiredtemperature.
[] Touchthe STARTpad.
Theword ON and 100° will be displaged.
Asthe oven heats up,the displag will show
the changing temperature. When the oven
reaches the temperature gau set, a tone
will sound.
Tochange the oven temperature during BAKE
cycle, press the BAKE pod and then the
number pads to get the new temperature.
[] Check food for doneness at minimum
time on recipe.Cooklonger if necessarg.
[] Touchthe CLEAR/OFFpadwhen
cooking iscomplete.
Preheating and Pan Placement
Preheatthe oven if the recipe callsfor it.
Topreheat, set the oven at the correct
temperature. Preheatingis necessarg
when convection baking and for good results
when baking cakes,cookies,pastrg and
breads.
Forovenswithout o preheat indicator light
or tone,preheat 7 minutes.
Tgpe of Food Shelf Position
Frozenpies{on cookie sheet) Bor C
Angelfood cake A
Bundt or pound cakes B
Biscuits,muffins, brownies, C
cookies,cupcakes,
lager cakes,pies
Casseroles Bor C
Roasting Ror A
Bakingresults will be better if baking pans
are centered in the ovenas much aspossible.
Pansshould not touch each other or the
walls of the oven. If gou need to usetwo
shelves,stagger the pansso one isnot
directlg above the other,and leave
approximatelg 1W' between pans, from
the front, back and sidesof the wall.
0
i , , ,iii ;;iiiiiiiii!i!i!iiiiiij
[iiiiiiiiiii!! iii i!iiiiii!
L
P"IP
Aluminum Fail
Do not use aluminum foilon thebottom of
the oven.
Never entirelg cover a shelfwith aluminum
foil.Thiswill disturb the heat circulation and
result in poor baking.
A smaller sheet of foil mag be usedto catch a
spillover bg placingit on a lower shelfseveral
inches below the food.
Oven Moisture
Asgour oven heats up,the temperature
change of the air in the oven mag cause
water droplets to form on the door glass.
Thesedroplets are harmless and will
evaporate asthe oven continues to heat up.
0
0
V)
0
tH-
13
Page 14
Using the upper oven.
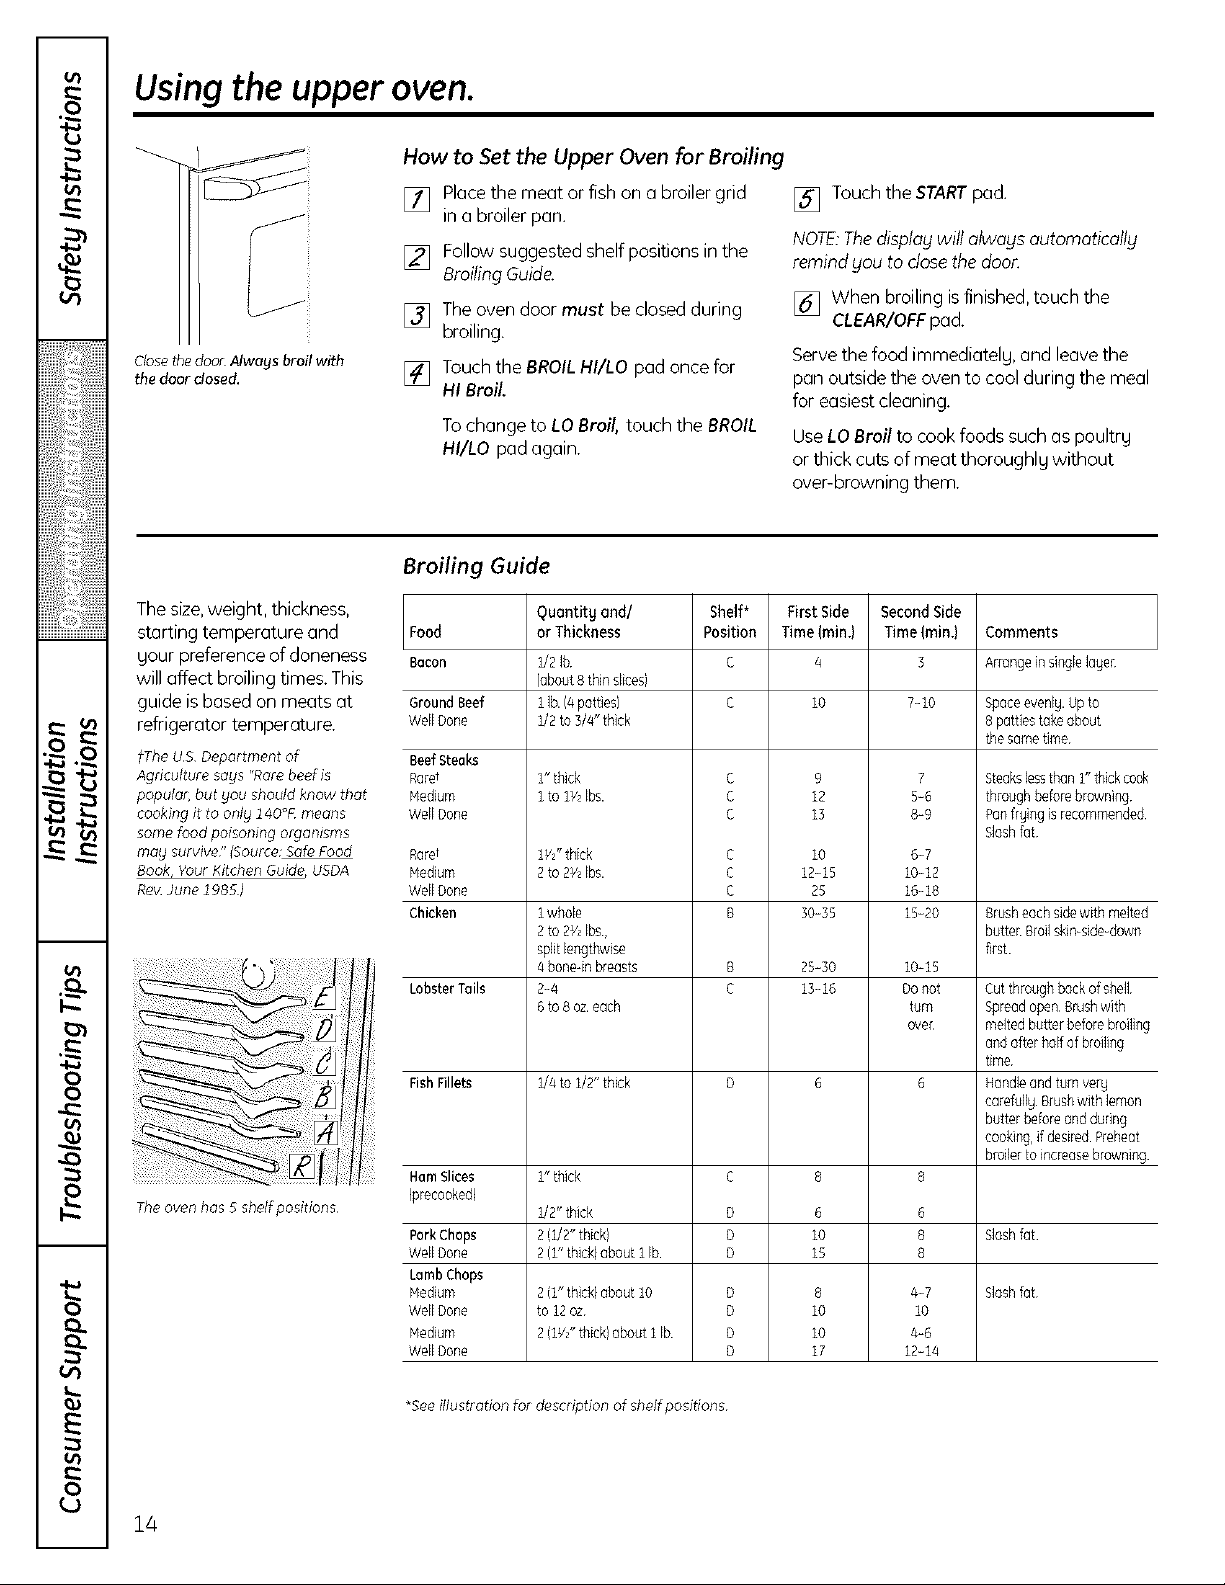
How to Set the Upper Oven for Broiling
Closethedoor Alwags broil with
the door closed.
Thesize,weight, thickness,
starting temperature and
sour preference of doneness
will affect broiling times.This
guide isbased on meats at
refrigerator temperature.
fThe US Deportment of
Agriculture sags "Ram beef is
popular, but you should know that
cooking it to onlg 140°K means
some food poisoning orgamsms
mag survive" (Source: Safe Food
Book, 'Four Kitchen Guide, USDA
Re_4June 2985)
The oven has 5 shelf positions
[] Placethe meat or fish on a broiler grid
in a broiler pan.
[] Follow suggested shelf positions in the
Broiling Guide.
[] The oven door must be closed during
broiling.
[] Touch the BROIL HI/LO pad once for
Ht Broil,
To change to LO Broil, touch the BROIL
HI/LO pad again.
Broiling Guide
Food
Bacon
GroundBeef
WellDone
BeefSteaks
Rare t
Medium
WellDone
Raret
Medium
WellDone
Chicken
LobsterTails
FishFillets
Ham Slices
)recooked)
PorkChops
WellDone
Lamb Chops
Medium
WellDone
Medium
WellDone
Quantitg and/ Shelf* FirstSide
or Thickness Position Time(min.)
1/2]b
)about8thin slices)
1lb.(4patties)
1/2to 3/4" thick
1" thick
i to 1_/2Ibs.
1W'thick
2to 2Y,Ibs.
iwhole
2to 2Y,Ibs,
splitlengthwise
4bone-inbreasts
2-4
6to 8oz.each
1/4to 1/2" thick
i"thick C 8
1/2" thick D 6
2!1/2" thick) D i0
2(1"thick)about 1lb. D 15
2(l'thick}aboutlO D 8
to 12oz D 10
2(1vz"thick)about i Ib D iO
c
c
c
c
c
c
B
D 17
[] Touch the START pad.
NOTE:Thedisplay will always automaticollg
remindSou to closethe door.
[] When broiling is finished,touch the
CLEAR/OFFpad.
Servethe food immediatelg, and leavethe
pan outsidethe oven to cool during the meal
for easiest cleaning.
UseLOBroil to cook foods such as poultrg
or thick cuts of meat thoroughlg without
over-browning them.
SecondSide
10
9
12
13
io
12-15
2S
30-35
25-30
13-16
Time(rain.)
7-10
7
5-6
8-9
6-7
10-12
16-18
15-20
10-15
Donot
turn
over
8
6
8
8
4-7
i0
4-6
12-14
Comments
Arrangein single]age_
Spaceevenlg.Upto
8pattiestake about
thesometkne
Steakslessthan1"tbickcook
throughbeforebrowning
Panfrgingisrecommended
Sloshfat
Brusheachsidewith melted
butter Broilskin-side-de,_n
first.
Cutthroughbackof shell
Spreadopen Brushwith
meltedbutterbeforebroilinc
andofferhalf ofbroiling
time
Handleandturnverg
curefullg Brushwith lemon
butterbeforeand during
cooking,ifdesired.Preheat
broilerto increasebrowning
Slashfat
Sbshfat
14
*See illustration for description of shelf positions
Page 15

Using the clockand timer.
Not oil features are on oil models.
To Set the Clock
ge.com
Make sure the clock is set to the
correct time of day
The timer is a minute timer only
The CLEAR/OFF pad does not effect
the timer
Theclock must be set to the correct time of
da9 for the automatic oven timing functions
to work properly. Thetime of day cannot be
changed during a timed baking or self-
cleaning cycle.
[] Touch the CLOCKpad to set.
[] Touch the number pads.
Touchthe number pads the samewag gou
read them. Forexample, to set 12:54,touch
the number pads 1,2, 3 and 4 in that order.
To Set the Timer
Thetimer doesnot control oven operations.
Themaximum settingon thetimer is9 hours
and 59 minutes.
Touch the KITCHENTIMERON/OFFpad.
[]
Touch the number pads until the
[]
amount of time gou want shows in the
displag.Themaximum time that can be
entered in minutes is 59.Times more
than 59 minutes should be changed to
hours and minutes. Forexample, to
enter 90 minutes as i hour30 minutes,
touch 1, 3and 0 in that order.
Ifgou make a mistake,pressthe KITCHEN
TINIERON/OFFpad and begin again.
If number padsare not touched within one
minute after gou touch the CLOCKpad, the
displag reverts to the original setting. If this
happens,touch the CLOCKpad and reenter
the time of dag.
[] Touch the STARTpad until the time
of dag shows in the displag.This
enters the time and starts the clock.
Tocheck thetime of day when thedisplag is
showing other information, simply touch the
CLOCKpad. Thetime of dog shows until
another pad istouched.
Touch the STARTpad. After pressing the
[]
STARTpad,SETdisappears;this tells
gou the time is counting down, although
the displag does not change until one
minute has passed.
When the timer reaches:00,the control
[]
will beep Stimes followed bg one beep
everg 6 seconds until the KITCHEN
TINERON/OFFpad istouched.
The6 secondtone can becanceledby
following the stepsin the Specialfeatures of
gour ovencontrolsectionunder Tonesat the
Endof a Timed@de.
t_
0
_i!iii ¸ iiiii_
i!,:_%_iiiiiiiiiil
!i:!iiii!i: iiiiiiiiii
i_::i!i!iiiiiiiii
!i iii !iiiiiiii'i'i'i
L--
F
b
E
15
0
0
0
Page 16

Usingtheclockand timer.
To Reset the Timer
If the display isstill showing the time
remaining, you may change it by touching
the KITCHENTIMERON/OFF pad,then touch
the number pads until the time you want
appears in the display.
To Cancel the Timer
Touchthe KITCHENTIMERON/OFFpad twice.
Power Outage
Ira flashing time is in the display,you have
experienceda power failure.Resetthe dock.
If the remaining time isnot in the display
(clock,delay start or cooking time are in
the display}, recallthe remaining time by
touching the KITCHENTIMERON/OFFpad
and then touching the number padsto enter
the newtime you want.
Touch the CLOCKpad to reset. Enter
the correct time of day by touching the
appropriate number pads. Touchthe
STARTpad.
16
Page 17
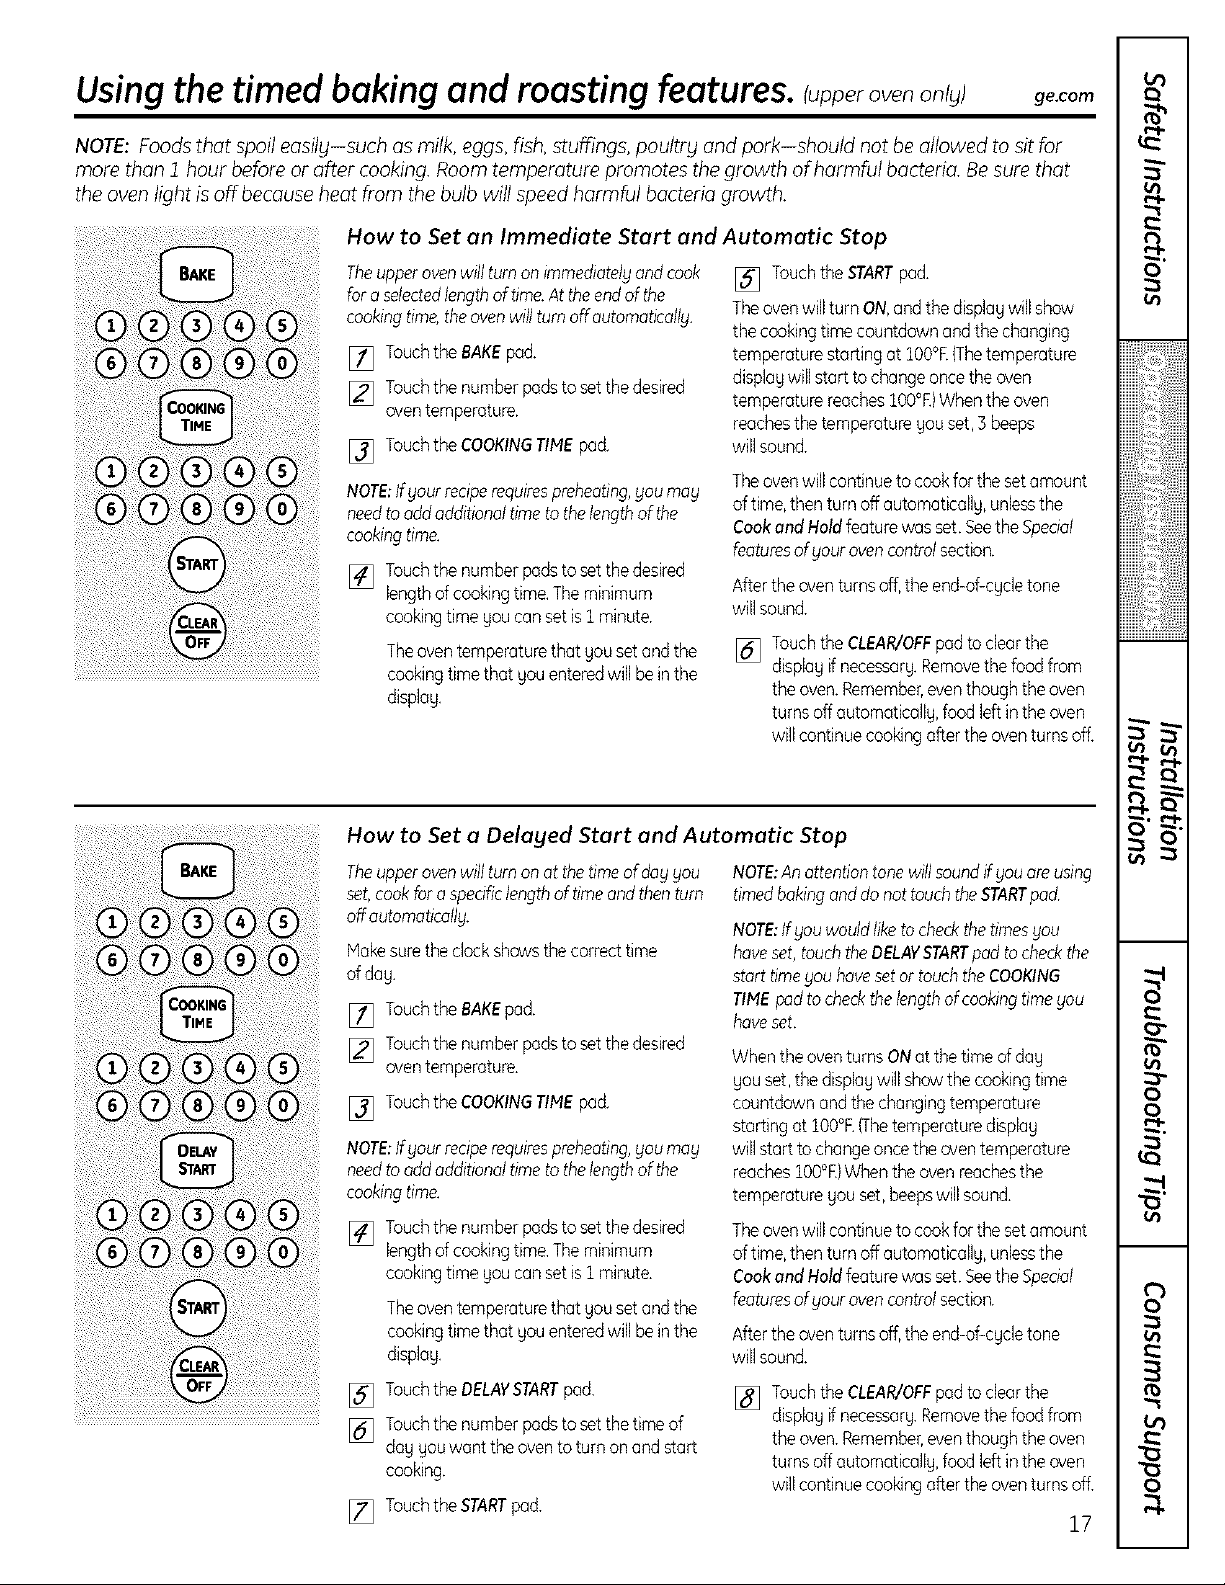
Using the timed baking and roasting features. Iupperovenon yl ge.com
NOTE: Foods that spoil easily-such as milk, eggs, fish, stuffings, poultry and pork-should not be allowed to sit for
more than 1 hour before or after cooking. Room temperature promotes the growth of harmful bacteria. Be sure that
the oven light is off because heat from the bulb will speed harmful bacteria growth.
How to Set an Immediate Start and Automatic Stop
Theupperovenwillturnonimmediatdgandcook
foraselectedlengthoftime.At theendof the
cookingtime,theovenwillturnoffoutomaticdlg.
[] TouchtheBAKEpad.
[] Touchthenumberpadstosetthedesired
oventemperature.
[] TouchtheCOOKINGTIMEpad.
NOTE:Ifyourreciperequirespreheating,youmay
needtoaddadditionaltimeto thelengthofthe
cookingtime.
[] Touch the number pads to set the desired
length of cooking time. Theminimum
cooking time you can set is ] minute.
Theoven temperature that you set and the
cooking time that you entered will be in the
display.
[] TouchtheSTARTpad.
Theovenwillturn ON,andthedisplaywillshow
thecookingtimecountdownandthechanging
temperaturestartingat IO0°R(Thetemperature
displaywiilstartto changeoncetheoven
temperaturereachesIOO°R)Whentheoven
reachesthe temperatureyouset,] beeps
willsound.
Theovenwillcontinuetocookforthesetamount
oftime,thenturn off automatically,unlessthe
CookandHoldfeaturewasset.SeetheSpecial
featuresofyour ovencontrolsection.
Aftertheoventurnsoff,theend-of-cycletone
willsound.
[] TouchtheCLEAR/OFFpadtoclearthe
displayifnecessary.Removethe foodfrom
theoven.Remember,eventhoughthe oven
turnsoffautomatically,food leftintheoven
willcontinuecookingaftertheoventurnsoff.
I-t-
r-I-
0
u_
_i!iii ¸ iiiii_
i!,:_!;;_iiiiiiiiiil
!i:!iiii!i: iiiiiiiiii
i_::i!i!iiiiiiiii
L--
F _
r _
L _
How to Set a Delayed Start and Automatic Stop
Theupperovenwillturnonat thetimeof dayyou
set,cookforaspecificlengthof timeandthenturn
offautomatically.
Hakesurethe dockshowsthecorrecttime
ofday.
[] TouchtheBAKEpad.
[] Touchthenumberpadstosetthedesired
oventemperature.
[] TouchtheCOOKINGTIMEpad.
NOTE:Ifyourreciperequirespreheating,youmay
needtooddadditionaltimeto thelengthofthe
cookingtime.
Touch the number pads to set the desired
[]
length of cooking time. Theminimum
cooking time you can set is i minute.
Theoven temperature that you set and the
cooking time that you entered will be in the
display.
TouchtheOELAVSTARTpad.
[]
Touchthenumberpadstosetthetimeof
[]
day youwanttheoventoturnonandstart
cooking.
TouchtheSTARTpad.
[]
NOTE:Anattentiontonewillsoundif youareusing
timedbakinganddonot touchtheSTARTpad.
NOTE:Ifyouwouldliketo checkthetimesyou
hoveset,touchtheDELAYSTARTPadtocheckthe
starttimeyou hovesetor touchtheCOOKING
TIMEpadto checkthelengthofcookingtimeyou
haveset.
Whenthe oventurnsONatthe timeofday
youset,thedisplaywillshowthecookingtime
countdownandthechangingtemperature
startingat lO0°R(Thetemperaturedisplay
willstart tochangeoncethe oventemperature
reacheslO0°R)Whentheovenreachesthe
temperatureyouset,beepswillsound.
Theovenwillcontinuetocookforthesetamount
oftime,thenturn off automatically,unlessthe
CookandHoldfeaturewasset.SeetheSpecial
featuresofyour ovencontrolsection.
Aftertheoventurnsoff,theend-of-cycletone
willsound.
[] TouchtheCLEAR/OFFpadtoclearthe
displayifnecessary.Removethe foodfrom
theoven.Remember,eventhoughthe oven
turnsoffautomatically,food leftintheoven
willcontinuecookingaftertheoventurnsoff.
E
0
0
0
17
Page 18
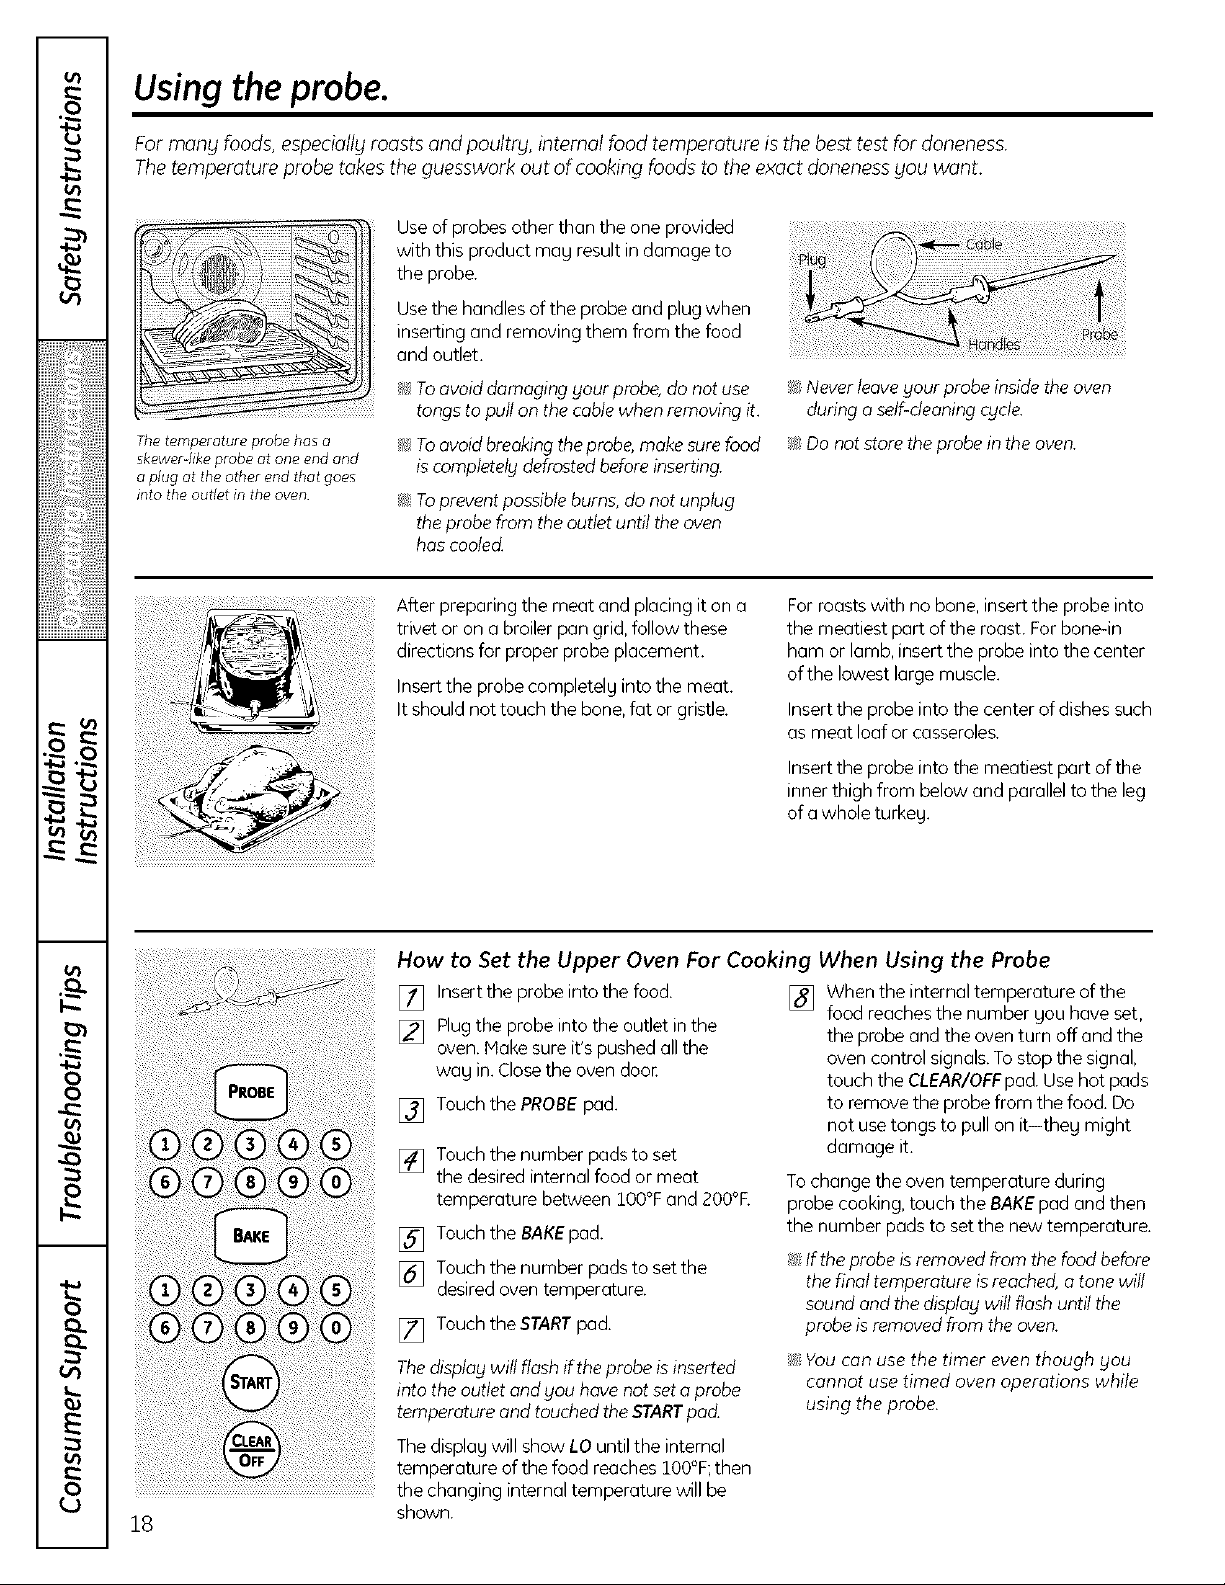
Using the probe.
For mang foods, especially roasts and poultr_l, internal food temperature is the best test for doneness.
The temperature probe takes the guesswork out of cooking foods to the exact alonenessyou want.
Use of probes other than the one provided
with this product mag result in damage to
the probe.
Usethe handlesof the probe and plug when
inserting and removing them from the food
and outlet.
The temperature probe has o
skewer like probe at one end and
o plug at the other end that goes
into the outlet in the oven
_!_Toavoid damaging gour probe,do not use
tongs to pull on the cable when removing it.
_!¢Toovoid breakingtheprobe,make sure food
iscompletely defrostedbeforeinserting.
i;I Toprevent possibleburns, do not unplug
theprobe from the outlet until the oven
hascooled.
After preparing the meat and placing it on a
trivet or on a broiler pan grid, follow these
directions for proper probe placement.
Insert the probe completelg into the meat.
It should not touch the bone, fat or gristle.
How to Set the Upper Oven For Cooking
_ Never leavegourprobeinsidethe oven
during a self-cleaningcycle.
;_ Do not store the probe in the oven.
Forroasts with no bone,insert the probe into
the meatiest part of the roast. Forbone-in
ham or lamb, insert the probe into the center
of the lowest large muscle.
Insertthe probe into the center of dishessuch
as meat loaf or casseroles.
Insertthe probe into the meatiest part of the
inner thigh from below and parallelto the leg
of a whole turkeg.
When Using the Probe
18
[] Insert the probe intothe food.
Plug the probe into the outlet in the
[]
oven. Hake sure it's pushed all the
wag in. Close the oven door
Touch the PROBE pad.
[]
[] Touchthe number padsto set
the desired internal food or meat
temperature between 100°Fand 200°F.
[] Touchthe BAKEpad.
[] Touchthe number padsto set the
desiredoven temperature.
[] Touchthe STARTpad.
Thedisplag will flash if the probe is inserted
into the outlet and gou hove not seto probe
temperature and touched theSTARTpad.
Thedisplag will show LO untilthe internal
temperature of the food reaches ]_00°F;then
the changing internal temperature will be
shown.
[] Whentheinternaltemperatureofthe
food reaches the number gou have set,
the probe and the oventurn off and the
oven control signals.To stop the signal,
touch the CLEAR/OFFpad.Usehot pads
to remove the probe from the food. Do
not usetongs to pull on it-theg might
damage it.
To change the oven temperature during
probe cooking, touch the BAKE pad and then
the number pads to set the new temperature.
i_ If the probe is removed from the food before
the final temperature isreached,a tone will
sound and the display will flash until the
probe isremoved from the oven.
;_You can use the timer even though gou
cannot use timed oven operations while
using the probe.
Page 19

Usingthe convectionoven.
ge.com
The convection oven fan shuts off when the oven door is opened. DO NOTleove the door open for long periods of time
while using convection cooking.
r-,I-
In o convection oven, Ofort
circulates hot air over, under and
around the food This circulating
hot air is evenlg distributed
throughout the oven cavity As a
result, foods are evenlg cooked and
browned-often in less time than
with regular heat
NOTE:Tomaximize cooking
evenness, the fan is designed to
rotate in both directions with o
pause in between Thisis normal
Tohelp gnu understand the difference
between convection bake and roast and
traditional bake and roast, here are some
general guidelines.
Convection Bake
i_ Preheatthe oven.Seethe Usingthe Oven-
Preheatingand Pan Placement section.
_!Ideal for foodscookedonmultipleshelves.
_!Goodfor large quantitiesof bakedfoods.
i_ Goodresults with cookies,biscuits,
brownies, cupcakes,creampuffs, sweet
rolls, angd food cake and bread.
Theconvection fan circulates the heated
air evenlg over and around the food.
Convection Roast
_ Good for large tender cuts of meat,
uncovered.
Theconvection fan circulates the heated air
evenly over and around the food. Heat and
poultry are browned on all sidesas if theg
were cooked on a rotisserie.Heated air will
be circulated over,under and around the
food being roasted.The heated air sealsin
juices quickly for a moist and tender product
while, at the same time, creating a rich
golden brown exterior
Roastsor poultry should be cooked on shelf
position (A).
When gou are convection roasting, it is
important that gou usea broiler pan and grid
for best convection roasting results.Thepan
isused to catch grease spillsand the grid is
usedto prevent greasespatters.
_!_Placethe shelfin shelfposition (A).
0
ii!iiiiii;ii;iiii[ii_
_i!iii ¸ iiiii_
ii:_!;;_iiiiiiiiiil
!i:!iiii!i: iiiiiiiiii
i_::i!i!iiiiiiiii
L--
F I11
r _
Auto Recipe" Conversion
Youcan use your favorite recipes in the
convection oven.
When using CONVECTIONBAKE,the oven
will automatically convert the oven
temperature from regular baking to
Convection Baketemperatures.
[] Using the number pads, enter
the temperature recommended
in the recipe.
[] Touch the STARTpad.
Thedisplag will show the temperature
gou entered from gour recipe.The
oven will automaticallg convert it to
the convection cooking temperature.
[] Touch the CLEAR/OFFpad when
baking is finished.
_!_Use pan size recommended in the recipe.
_1Somepackage instructions for frozen
casseroles,main dishesor baked goods
have been developed using commercial
convection ovens.Forbest results in this
oven,preheat the oven and usethe
temperature, for regular baking, on the
package.
19
E
0
0
0
e_e
Page 20

Usingthe convectionoven.
Cookwore for Convection Cooking
Beforeusing your convection oven,check
to see ifyour cookware leavesroom for air
circulation in the oven. If you are baking with
several pans, leavespace between them.
Also,be surethe pans do not touch each
other or thewalls of the oven.
Paper and Plastic
Heat-resistant paper and plastic containers
that are recommended for usein regular
ovens can be usedin convection ovens.
Plasticcookware that isheat-resistant to
temperatures of 400°Fcan also be used,
when oven is below 400°F.
How to Set the Upper Oven for Convection Baking or Roasting
Touchthe CONVECTIONBAKEMULTI/
[]
1 RACKpad once for multi-rack
convection baking. Thismode is usedfor
cooking food items on more than one
rack (i.e.,2,Sor more racks}at the same
time in convection bake. Seethe Multi-
ShelfBaking section for more
information. Touch the CONVECTION
BAKEMULTt/1RACKpad twice for one
rack convection baking.This mode is
usedfor cooking food items on only one
rack in convection bake.
Touch the CONVECTIONROASTpad
for convection roasting.
[] Touchthe number padsto set the
desiredoven temperature.
[] Touchthe STARTpad.
Metal and Glass
Any type of cookware will work in your
convection oven. However,metal pans heat
the fastest and are recommended for
convection baking.
_ Darkened or matte-finished pans will bake
faster than shiny pans.
_;Glossor ceramic pans cook more slowly.
When baking cookies,you will get the best
resultsif you useaflat cookie sheet instead
of a pan with low sides.
Forrecipes like oven-baked chicken,
usea pan with low sides.Hotaircannot
circulate well around food in a pan with
high sides.
Tochange the oven temperature, touch
the CONVECTIONBAKEMULTI/1RACKor
CONVECTIONROASTpad and then the
number padsto set the new temperature.
When the oven starts to heat, the changing
temperature, starting at IO0°F,will be
displaged.When the oven reaches the
temperature gou set, Sbeeps will sound.
[] Touchthe CLEAR/OFFpad when
finished.
NOTE:Youwill hear a fan while cookingwith
convection.The fan will stop when the door
isopened but the heat will not turn off.
Thefan will not start until the preheat
temperature is reached.
Inconvection bake modes, for maximum
cooking evenness,the fanis designedto rotate
in both directionswith apause in between.
Thisisnormal.
Whenconvectionbakingwith only
1.shelf,follow theshdf positions
recommendedin the Usingthe
Ovensection
20
Multi-Shelf Baking
Thenumber of shelvesprovided depends on
your model.
Because heated air is circulated evenly
throughout the oven, foods can be baked
with excellent resultsusing multiple shelves.
Hulti-shelf baking may increase cook times
slightly for some foods but the overall result
istime saved.Cookies,muffins, biscuitsand
other quick breads give very good results
with multi-shelf baking.
To cook food on more than one shelf in
convection bake, use CONVECTION BAKE
MULTI.
When baking larger foods on 5 shelves,place
one shelf in the 2nd (A)position,one on the
4th (C}position and the third shelf in the 6th (E}
position.
When baking cookies,place the shelvesin the
5rd (B},4th (C)and6th (E)positions.
Page 21

ge,com
How to Set the Upper Oven for Convection Roasting when Using the Probe
r-,I-
For best results when masting large
turkeys and masts, we recommend
using the probe included in the
convectJor} over
i
i !ii ii!iii ;16!iiiiii!i !i
iii iii!i
ii!i i!ii !iliblii ii!ii il
Thedisplagwill flash PROBEand the oven
control will signal ifthe probe isinsertedinto
the outlet, and gou have not set a probe
temperature and touched theSTARTpad.
[] Place the shelf in the shelf position (A).
Insertthe probe completelg into the
food.
[] Plug the probe into the outlet in the
oven. Make sure it is pushed all the wag
in. Close the oven doa[
[] Touchthe CONVECTIONROASTpad.
[] Touchthe number padsto set the
desiredoven temperature.
[] Touchthe PROBEpad.
[] Touchthe number padsto set the
desiredinternal food temperature.
To change the oven temperature during
the Convection Roast cgcle, touch the
CONVECTION ROAST pad and then touch
the number pads to set the new desired
temperature.
CAUTION:Topreventpossibleburns,do not
unplug theprobe from theoven outlet until
the oven hascooled.Donot store the probe
in theoven.
NOTE:
_!_If theprobe is removed from the food
beforethe finaltemperature isreached,a
tone will sound and the displog will flash
until the probe isremovedfrom the oven.
i;_,Youwill hear a fan while cookingwith this
feature.Thefan will stop when the door is
opened butthe heat will not turn off.
i;_Youcanusethe timer even though gou
cannot usetimed ovenoperations while
usingthe probe.
t_
0
_i!iii ¸ iiiii_
i!,:_!;;_iiiiiiiiiil
!i:!iiii!i: iiiiiiiiii
i_:)!i!iiiiiiiii
L--
F I11
r _
[] Touchthe STARTpad.
When the oven starts to heat, theword
LO will be inthe displag.
After the internal temperature of the food
reaches IO0°F, the changing internal
temperature will be shown in the displag.
When the internal temperature of the
[]
food reaches the number gou have set,
the probe and the oventurn off and the
oven control signals.To stop the signal,
touch the CLEAR/OFFpad. Usehot
pads to remove the probe from the
food. Do not usetongs to pull on it-
theg might damage it.
r _
0
0
21
0
Page 22

Usingthe convectionoven.
ConvectionRoastingGuide
Meats Minutes/Lb. OvenTemp. Internal Temp.
Beef Rib(3 to5Ibs.) Raret 20 24 325°F 140"F
BonelessRib,TopSirloin Raret 20 24 325°F 140°F
BeefTenderloin Raret 10 14 325°F 140"F
PotRoast(27zto 3 Ibs.)chuck,rump 35 45 300°F 170°F
Perk Bone-in(3to 5 Ibs.) 23 27 325':F 170°F
Boneless(3to 5 Ibs.) 23 27 325°F 170°F
PorkChops(½to 1" thick} 2chops 3075 total 325°F 170"F
Ham Canned(3ibs.fully cooked) 1_18 325°F 140"F
Butt (5ihs.fully cooked) 1_18 325°F 140F
Shank(5ihs.fully cooked) 1_18 325°F 140"F
Lamb Bone-in(3to 5 Ibs.) Mediun/ 17 20 325°F 160"F
Boneless(3to 5 Ibs.) Medium 17 20 325°F 1BO"F
Seafood Fish,whole(3to 5 Ibs.) 3040 total 400°F
LobsterTails(6to 8 oz.each) 20_5 total 350°F
Poultry Whole Chicken(2½to 3½ Ibs.) 2_2B 350°F 180" 185"F
CornishHensUnstuffed(1to 1½Ibs.) 50 55 total 350_F 180° 185°F
CornishHensStuffed(1to 172Ihs.) 55 00 total 350':F 180° 185°F
Buckling(4to 5 Ibs.) 2_26 325°F 180° 185°F
Turkey,whole*
Unstuffed(IOto 16Ibs.) 8 11 325°F 180° 185°F
Unstuffed(18to 24 Ibs.) 7 10 325':F 180° 185°F
TurkeyBreast(4to6 Ibs.) 16 19 325°F 170"F
Medium 24_28 325°F 160"F
Well 28 32 325°F 170°F
Medium 2_28 325°F 160°F
Well 28 32 325°F 170"F
Medium 144 8 325°F 160"F
4chops 3540 total 325°F 170"F
6chops 4045 total 325°F 170°F
Well 20 24 325°F 170"F
Well 20 24 325°F 170°F
22
"t'7"hz U.S. l )_'p_t¢_m nt oj _qv'ic_ltt_, s(os °l¢an" /,_,_jis p@_d_z_; h_tt yogi shmdd k_low that coohh_y" it _o mll_ 140°F mmn_
Page 23

Using the timed convectionbaking features.
You will hear a fan while cooking with this feature. The fan will stop when the door isopened but the heat will not tum of_
NOTE:Foods that spoil easily-such as milk, eggs, fish, stuffings, poultry and pork-should not be allowed to sit for
more than 1 hour before or after cooking. Room temperature promotes the growth of harmful bacteria. Be sure that
the oven light is off because heat from the bulb will speed harmful bacteria growth.
go.cam
el}
How to Set an Immediate Start and Automatic Stop
Theupperovenwillturn on immediatelyandcook
fora selectedlengthof time.At theendof the
cookingtime,theovenwill turnoffoutomoticollg.
1_ Touch the CONVECTIONBAKEMULTI/
1 RACKpad once for multi-rack
convection baking. Thismode is used
for cooking food items on more than
one rack {i.e.,2,3 or more racks} at the
same time inconvection bake. Seethe
Multi-ShelfBaking section for more
information. Touch the CONVECTION
BAKEMULTI/.?.RACKpad twice for one
rack convection baking. This mode is
used for cooking food items on onlg
one rack in convection bake.
Touch the CONVECTION ROAST pad
for convection roasting.
Touch the number padsto set the desired
[]
over temperature.
Touch the COOKINGTIME pod.
NOTE:If goutreciperequirespreheating,youmay
needtooddadditionaltimetothelengthofthe
cookingtime.
[] Touchthe numberpadsto setthedesired
lengthof cookingtime.Theminimum
cookingtime youcan set is1minute.
Theoventemperaturethatyou setandthe
cookingtimethat youenteredwil{beinthe
display.
[] Touchthe STARTpad.
Theovenwillturn ON,andthedisplaywillshow
thecookingtimecountdownandthechanging
temperaturestartingatlO0°R(Thetemperature
displaywiil startto changeonceoventemperature
reacheslO0°R)Whentheovenreachesthe
temperatureyouset,Zbeepswillsound.
Theovenwillcontinueto cookfor the setamount
oftime,thenturn off automatically,unlessthe
Cookend Holdfeaturewasset. SeetheSpecial
featuresofyour ovencontrolsection.
Afterthe oventurns off,the end-of-cycletone
will sound.
Touch the CLEAR/OFFpad to clear the
display if necessary. Removethe food
from the oven. Remember, even though the
oven turns off automatically, food left in the
ovenwill continue cooking after the oven
turns off.
O
i , , ,iii i;iiiiiiiii!i!i!iiiiiij
iiiiiiiiiiii!! iii i!iiiiii!
How to Set a Delayed Start and Automatic Stop
Theupperovenwillturnonat timeofdoggouset,
cookfora specificlengthof timeandthenturn off
outomoticallg.
Makesurethe clockshowscorrecttimeof day.
1_ TouchtheCONVECTIONBAKEMULTI/
1RACKpadoncefor multi-rackconvection
baking.Thismodeisusedforcookingfood
itemson morethanone rack{i.e.,2,3or
moreracks}atthe sametime inconvection
bake.SeetheMulti-ShelfBakingsectionfor
moreinformation.TouchtheCONVECTION
BAKEPiULTI/1RACKpadtwicefor onerack
convectionbaking.Thismodeisusedfor
cookingfood itemsononly one rackin
convectionbake.
TouchtheCONVECTIONROASTpad
for convectionroasting.
[] Touchthe numberpadsto setthe desired
oventemperature.
[] Touchthe COOKINGTIMEpad.
NOTE:If yourreciperequirespreheating,youmay
needtooddadditionaltimetothelengthofthe
cookingtime.
[] Touchthe numberpadsto setthe desired
lengthof cookingtime.Theminimum
cookingtime youcanset is1minute.
Theoventemperaturethat you setand the
cookingtimethat youenteredwil{beinthe
display.
[] Touchthe DELAYSTARTpad.
[] Touchthe numberpadsto settime ofday
youwant oventoturn onand startcooking.
[] Touchthe STARTpad.
NOTE:If gouwouldliketocheckthetimes
youhaveset,touchtheDELAYSTARTpad to
cheekthestarttimeyouhovesetor touchthe
COOKINGTIMEpodto checkthelengthof
cookingtimeyou hoveset.
Whenthe oventurnsONatthetimeofday
youset,thedisplaywill showthecookingtime
countdownandthe changingtemperature
startingat lO0°E(Thetemperaturedisplay
will start tochangeoncethe oventemperature
reaches100 F.)Whentheoven reachesthe
temperatureyou set,Z beepswillsound.
Theovenwillcontinueto cookfor the setamount
oftime,thenturn off automatically,unlessthe
Cookend Holdfeaturewasset. SeetheSpecial
featuresofgour ovencontrolsection.
Afterthe oventurns off,the en&ofreycietone
will sound.
[] Touchthe CLEAR/OFFpadto clearthe
displayif necessary.Removethefood
fromtheoven.Remember,eventhoughthe
oventurnsoff automatically,foodleftinthe
ovenwill continuecookingaftertheoven
turnsoff.
E
0
0
o
0
23
Page 24

Special features of your upper oven control.
Your new touch pad control has additional features that you may choose to use. The following are the features and
how ##oumay activate them.
The special feature modes can onl##be activated while the display is showing the time of do##.The##remain in the
control's memory until the steps are repeated.
When the displa##shows _jour choice, touch the STARTpad. Thespecial features will remain in memor##after
a power failure.
12 Hour Shut-Off
, ii!iiiiii!i!!!
:l TIME
_(i_il;ii!i_!ii!i
Withthis feature,shouldyou forgetand leave []
the ovenon,the controlwilloutomcticallgturn
offthe ovenafter 12 hoursduringbaking
functionsor after 3 hoursduringo broilfunction.
If you wish to turn OFF this feature, follow
the steps below. 13]
[] Touch the BAKEand BROILHI/LO pads
at the same time for 3 seconds until the
displagshows SF.
Fahrenheit or Celsius Temperature Selection
Youroven control is set to use the Fahrenheit
temperature selectionsbut you may change
this to usethe Celsiusselections.
[] Touch the BAKEand BROILHI/LO pads [] Touchthe BROILHI/LO and COOKING
at the same time for 3 seconds until the TIMEpads again at the same time.
displagshows SF. Thedisplag will show C (Celsius}.
Tones at the End of a Timed Cycle
At the end of o timed cgde,3 short beepswill
sound followed by one beep every 6 seconds
until the CLEAR/OFFpod istouched.This
condnuol6-secondbeep may be canceled
Tocancel the 6-second beep:
[] Touch the BAKE and BROIL HI/LO pads
at the same time for 3 seconds until the
displagshows SF.
Touchthe DELAYSTARTpad. The
displagwill show 12shdn (12 hour
shut-off).Touch the DELAYSTARTpad
again and the displag will show no shdn
(noshut-off}.
Touch the START pad to activate the no
shut-off and leave the control set in this
special features mode.
[] Touchthe BROILHI/LO and COOKING
TIMEpads at the same time. Thedisplag
will show F (Fahrenheit}.
[] Touch the START pad.
[] Touchthe KITCHENTIMERON/OFF
pad.The displag shows CONBEEP
(continual beep}and BEEP.Touchthe
KITCHENTIMERON/OFFpad again.
Thedisplag shows BEER(Thiscancels
the one beep everg6 seconds.}
[] Touch the START pad.
24
Page 25

Gas/Control Lockout (on some models)
ge,com
Your control willallow gou to lock out the
surface burners, oven burners and control
panel so theg cannot be activated
ToIocWunlockthe controls:
Turn all surface burners off.
[]
Touchand hold the GAS/CONTROL
[]
LOCKOUTpadfor 3 seconds untilthe
displag shows LOC.
Tounlock the control, touch and hold
[]
the GAS/CONTROLLOCKOUTpad for
3 seconds until LOCdisappears from
the displag.
12-Hour, 24-Hour or Clock Blackout
Yourcontrol isset to useo 12-hour clock.
If gou would preferto have a 24-hour
militarg time clock or black out the clock
displag,follow the stepsbelow.
[] Touchthe BAKEand BROILNI/LO
pads at the same time for 3 seconds
until the displag showsSF.
[] Touchthe CLOCKpad once.Thedisplag
will show 12 hr. If this is the choice gou
want, touch the STARTpad.
When this feature ison and the touch pads
are touched, the control will beep and the
displag will show LOC.
i_IThecontrol lock-out modeaffects oil
controls. Nocontrols will work when this
feature is activated.
_!_The adjustment will be retained in memory
after o power failure.
Touch the CLOCK pad again to change
to the 24-hour militarg time clock. The
display will show 24 hr. Ifthis is the choice
gou wont, touch the START pad.
Touchthe CLOCKpad again to black out
the clock displag.Thedisplagwill show OFF.
If this isthe choice gou want, touch the
STARTpad.
NOTE:Ifthe clockisin the black-outmode,
gou will not be able to use the Delay Start
function.
O
i iii i;iiiiiiiii!i!i!iiiiiij
i{iiiiiiiiii!! iii i!iiiiii!
Cook and Hold
Yournew control has o cook and hold feature
that keepscookedfoods warm for up to 5
hours after the cooking function isfinished.
"rM
STA_ , cooking.
Thisfeature can onl9 be usedwhen timed
Toactivate this feature,follow the steps
below.
[] Touchthe BAKEand BROILHI/LO pads
at the same time for ] seconds until the
displag shows SF.
[] Touchthe COOKINGTIMEpad.The
displagwill show Hid OFF.
Touchthe COOKINGTIMEpad again
to activate the feature. Thedisplagwill
show Hid ON.
[] TouchtheSTART pad to activate the
cook and hold feature andleave the
control set inthis specialfeatures mode.
E
to
0
0
o_
to
0
25
Page 26

Usingthe Sabbath Feature.
(Designed for use on the Jewish Sabbath and Holidays)
The Sabbath feature can be used for baking/roasting in the upper oven only. It cannot be used for convection, broiling,
self-cleaning or Doing Start cooking.
NOTE:The oven light comes on automatieallg when the door is opened and goes off when the door is closed. The bulb
mag be removed. See the Oven Light Replacement section.
Make surethe clockshows the correct time [] Touch the STARTpad.
of dog and the oven isoff.
How to Set for Regular Baking/Roasting
Ilq Pressandhold both the BAKEand ZLLJapproximatelg 30 secondsto i minute,
After random
r_q
a
delag period
of
(_ (_ _ BROILHI/LO pads, atthesametime, DC willappearinthedisplagindicating
Whenthedisplay showsD the be given. NOTE:TheCLEAR/OFFand COOKINGTIME
oven is set in Sabbath When the
displag shows D C the oven is
baking/roasting
.......... ..................I_ Pressand hold both the BAKEand temperature will be given.
until the displag shows SF. that the oven isbaking/roasting.IfD C
[] WaptheDELAVSTARTpaduntil again at Step&
SAbbAtH appears in the displag.
I_] Touch the STARTpad and D will appear
in the displag, usingthe number pads,and touch the
[] Touch the BAKEpad. No signal will STARTpad.
r_q
Usingthe number pads,enter the padsare active during the Sabbath feature.
desired
and 550°.No signal or temperature
will be given.
of doyMakesureandthetheClOCkovenshoWSisoff. thecorrect time [] desiredtemperature. Nosignal or
temperature
between 170°
doesn't appear in the displag, start
them°adjust the oven temperature,touchBAKEpad,enter the new temperature
Usingthe number pads,enter the
How to Set for Timed Baking/Roasting-Immediate Start and Automatic Stop
until the displag showsSF.
I_ Tap the OELAYSTARTpad until [] After a random delag periodof
-- BROILHI/LO pads, at the same time, [] Touch the STARTpad.
-- SAbbAtH appears in the displag. D C will appear in the displagindicating
[_ WouchtheSTARTpad andDwillappear
in the displag, atStep 7.
approximatelg50 secondsto $ minute,
that the oven is baking/roasting.IfD C
doesn'tappear in the displag,start again
When the display shows D the
oven is set in Sabbath When the
displag shows D c the oven is
baking/roasting
26
[]TouchtheCOOKINGTIMEpad Toad,usttheoventemperaturetouch
[] Touchthe number padsto set using the number pads,and touch the START
the desired length of cooking time pad.
between i minute and 9 hours and
99 minutes.Thecooking time that gou
enteredwill be displaged.
[] Touchthe STARTpad.
[] Touchthe BAKEpad. Nosignal will
be given.
the BAKEpad,enter the new temperature
When cooking isfinished, the displag will
change from D c to D and 0:00will appear,
indicating that the oven hasturned OFF
but isstill set in Sabbath. Removethe cooked
food.
Page 27

How to Exit the Sabbath Feature
ge.com
[] Touch the CLEAR/OFFpad.
[] If the oven iscooking,wait for a random
delag period of approximatelg 30
secondsto i minute, until onlg D isin
the displag.
[] Pressand hold both the BAKEand
BROILNI/LO pads,at the some time,
untilthe displag showsBF.
[] Tapthe DELAYSTARTpad until
12shdn or no shdn appears inthe
displag.12shdn indicates that the oven
will automaticallg turn off after 12
hours,no shdn indicatesthat the oven
will not automaticallg turn off.
[] Touchthe STARTpad.
NOTE:Ifapower outage occurred while
the oven was in Sabbath,the oven will
automatically turn off and stay off even
when the power returns. Theovencontrol
must be reset.
i",,,,I-
0
i iii i;iiiiiiiii!i!i!iiiiiij
iiiiiiiiiiii!! iii i!iiiiii!
27
0
0
0
Page 28

Adjust the upper oven thermostat--Do it yourself!
You mag find that your new oven cooks differently than the one it replaced. Use your new oven for a few weeks to become
more familiar with it. If you still think your new oven istoo hot or too cold, you can adjust the thermostat yourself
Do not use thermometers, such as those found in grocery stores, to check the temperature setting of your oven.
These thermometers may vary 20-80 degrees.
NOTE: This adjustment will not affect the broiling or the self-cleaning temperatures. The adjustment will be retained
in memory after a power failure.
To Adjust the Thermostat
BAK
[] Touchthe BAKEand BROILNI/LO pads
at the same time for 3 seconds until the
displag shows SF.
[] Touchthe BAKEpad.A two digit
number shows in the displag.
TouchBAKEonce to decrease(-)
theoven temperature, or twice to
increase (+).
Theoven temperature can be adjusted
[]
up as much as 35°F.or down asmuch
as35°F.Touchthe number pads the
same wag gou read them. Forexample,
to change the oventemperature :]_5°F,
touch 3.andS.
[] When gou have made the adjustment,
touch the STARTpadto go back to the
time of dag displag. Usegour oven as
gou would normallg.
NOTE: The thermostat adjustment for Baking
will also affect Convection Baking or
Convection Roasting.
Thetypeof margarine will affect bakingperformance!
Most recipes for baking have been developed using high fat products such as butter or margarine (80% fat). If you
decrease the fat, the recipe may not give the same results as with a higher fat product.
Recipe failure can result if cakes, pies, pastries, cookies or candies are made with low fat spreads. The lower the fat
content of a spread product, the more noticeable these differences become.
Federalstandards require products labeled "margarine" to contain at least 80% fat bg weight. Lowfat spreads,on the
other hand,contain lessfat and more water. The high moisture content of these spreads affects the texture and flavor
of baked goods. Forbestresultswith Four old favorite recipes,use margarine, butter or stick spreads containing at least 70%
vegetable oil.
28
Page 29

Using the lower oven drawer.
ge.com
The lower oven drawer mug be used to bake foods using the same times and temperatures as a standard oven. Foods
ideal for baking in the lower oven drawer include pizza, frozen foods, casseroles, biscuits, rolls and mang desserts.
To Use the Lower Oven Drawer
[OFF _q-2_l_;ol_o_M'_0_40q
NOTES:
knobto ang desiredsetting.
[] Pushin and turn the lower oven drawer
[] Allow the lower oven drawer to preheat.
TheON signallight islocated on the upper
right sideof the knob and glowswhen the
knob is in the ON position.Itremains ON
until the knob ismoved to the OFFposition.
_"The"Heating"signallight islocated below
the ON signallight and glows when the
heating elements are active.Preheatis
complete after the "Heating" signalhas
turned off for the first time eachuse.
_!¢Always use the included drawer rack when
usingthe lower oven drawer.
_!_The lower oven drawer cannot be used
during o self-cleon cycle of the upper oven.
}_!_Do not put food, foil or cookware directly
on the bottom of the lower oven drawer
Always use the included drawer rock.
_!_If foods require o cover, use only foilor lids
able to withstand baking temperatures. Do
not use plastic.
}_!_Maximum height of foodsthat can be
placed in the lower oven drawer is4 't
Push in and turn the lower oven
drawer knob to any desired
setting
_!_Do not put liquid or woter in the lower
oven drawer
_!_Never placeplastics, paper,canned foodsor
combustible materid inthe lower oven drawer
t-,I-
t_
0
_i!iii ¸ iiiii_
i!,:_!;;_iiiiiiiiiil
!i:!iiii!i: iiiiiiiiii
i_!i!i!ii[[ii[[[
The lower oven drawer uses less energg than the upper oven.
Allow the following approximate times for preheating:
Desired Lower Preheat
Oven Temperature Time
WARH 10 minutes
350° F 20 minutes
425° F .30minutes
Adjust the oventhermostat--Do it yourself!
You mag find that gour new oven cooks differentlg than the one it replaced. Use gour new oven for a few weeks to
become more familiar with it. If gou still think gour new oven is too hot or too cold, gou can adjust the thermostat
gourself.
Do not use thermometers, such as those found in grocerg stores, to check the temperature setting of gour oven.
These thermometers mag varg 20-40 degrees.
NOTE:This adjustment will not affect the broiling temperatures.
Back of Lower Oven Knob
(Appearance mug vorg )
Pullthe OVENCONTROLknob off
[]
the range and lookat the back side.
Tomake an adjustment, loosen
(approximatelg one turn), but do not
completelg remove,the two screws
on the back of the knob.
With the back of the knob facing gou,
[]
hold the outer edge of the knobwith one
hand and turn the front of the knob with
the other hand.
To raise the oven temperature, move the
top screw toward the right. You'll hear a
click for each notch gou move the knob.
To lower the temperature, move the top
screw toward the left.
Eachclickwill changethe oven temperature
approximatelg lO°R(Rangeis_+60°Rfrom
the arrow.}We suggest that gou make the
adjustment one clickfrom the original setting
and check oven performance before making
ang additional adjustments.
[] After the adjustment is made, retighten
screws so theg are snug, but be careful
not to overtighten.
[] Re-installknob on range and check
performance.
29
F I11
P _
E
to
o_
0
0
o_
o_
to
0
L--
Page 30

Usingthe self-cleaning upper oven.
The oven door must be closed and oil controls set correctly for the cycle to work properly.
Before o Clean Cgcle
i;iiiiii iii!iii! i iii@ i : 'ii!!iiii!!i!ii iii!ii !iiiii!ii ! !!
Wipe up heavy soil on the oven
bottom
Forthe first self-cleancgcle,we recommend
venting gour kitchenwith an open window
or usinga ventilation fan or hood.
Removeang broiler pan,broiler grid, all
cookware, probe and ang aluminum foil
from the oven--theg cannot withstand
the high cleaningtemperatures.
NOTE:
i4 Thegrag porcelain-coated oven shelves
mag be left in the oven during the
self-clean cgcle.
Soilon the front frame ofthe range and
outside the gasket on the door will need to
be cleaned bg hand.Clean these areaswith
hot water, soap-filled scouring pads or
cleanserssuch as SoftScrub_ Rinsewell
with clean water and dry.
Do not cleanthe gasket. The fiberglass
material of the oven door gasket cannot
withstand abrasion. It is essentialfor the
gasketto remain intact. If gou notice it
becoming worn or fraged, replace it.
Wipe up ang heavg spilloverson the oven
bottom.
Hake surethe oven light bulb cover
isin placeand the oven light is off.
IMPORTANT:Thehealth of some birds
isextremelg sensitiveto the fumes given
off during the self-cleaningcgcle of ang
range, love birds to another well ventilated
room.
NOTE:Usecaution when opening the upper
ovenafter theself-dean cycle has ended.
Theoven may still behot.
_!iiii!ii!ii_i_iii!_ili!i!iii_ii!ilil;!!_!ii!i_i!iii!i!!!i!!i¸ !iiiiii!!i!iiiii!ii!iiiiiiiii!iiiiiiii!ii:iii!_!!_i_:!
HOLD$S
_LEI_
How to Set the Upper Oven for Cleaning
I_ Touchand hold the GAS/CONTROL
LOCKOUTpadfor 5 secondsto turn
it off. Seethe Gas/ControlLockout
section.
NOTE:Thesurfaceburners must be
turned off prior to theself-dean start
time.
[] Touchthe SELFCLEANpad.
[] Using the number pads, enter the
desiredclean time, if a time other than
4 hoursis needed.
Cleancgcle time is normallg 4 hours.Youcan
change the clean time to ang time between
3 hoursand 5 hours,depending on how dirtg
gour oven is.
[] Touch the START pad.
Thedoor locksautomaticallg. The displag
will show the cleantime remaining. Itwill
not be possibleto open the oven door
until the temperature drops below the lock
temperature and the LOCKEDDOOR light
goesoff.
Theoven shuts off automaticallg when the
cleancgcle iscomplete.
[] When the LOCKEDDOOR light isoff,
the door will unlock automaticallg.
_4!¢Thewords LOCKDOORwill flash and
the oven control will signal ifgou set
the clean cgcle and forget to close the
oven door.
_4!¢Tostop a clean cgcle,touch the
CLEAR/OFFpad.When the LOCKEDDOOR
light goes off indicating the oven has
cooled below the locking temperature,
gou mag open the door.
Do not usethe lower ovendrawer during
a self-clean cgcle.
3O
Page 31

The oven door must be closed and oil controls set correctly for the cgcle to work properly.
How to Delay the Start of Cleaning
Hake surethe clock shows the correct time
of dag.
Ilq Touchand hold the GAS/CONTROL
LOCKOUTpadfor 3 seconds to turn
it off.
NOTE:Thesurfaceburners must be
turned off prior to the self-cleanstart
time.
Touchthe SELFCLEAN pad.
[]
Using the number pads,enter the
[]
desiredclean time.
Touchthe DELAYSTARTpad. The
[]
earliest start time gou can set will
appear in the displag.
Using the number pads,enter the time
[]
of dag gou want the clean cgcle
to start.
Thedoor locksautomaticallg. The displagwill
show the start time. Itwill not be possibleto
open the oven door until the temperature
dropsbelow the lock temperature and the
LOCKEDDOORlight goes off.
Theoven shuts off automaticallg when the
cleancgcle iscomplete.
[] When the LOCKEDDOORlight is off,
the door will unlock automaticallg.
;'_!Thewords LOCKDOORwill flash and the
oven control will signal if gou set the clean
cgcle and forget to close the oven door
_'_!To stop a clean cgcle, touch the
CLEAR/OFF pad. When the LOCKED DOOR
light goes off indicating the oven has
cooled below the locking temperature,
gou mag open the door
ge,co_
t_
0
ii!iiiiii;ii;iiii[ii_
_i!iii ¸ iiiii_
i!,:_!;;_iiiiiiiiiil
!i:!iiii!i: iiiiiiiiii
i_::)!i!iiiiiiiii
r;
[] Touch the START pad.
After a Clean Cycle
Youmag notice some white ash in the oven.
Wipe it up with a damp cloth after the
ovencools.
If white spots remain,remove them with a
soap-filled scouring pad and rinsethoroughlg
with o vinegarand water mixture.
Thesedeposits are usuallg a salt residue
that cannot be removed bg the clean cgcle.
Ifthe oven is not clean after one clean cgcle,
repeatthe cgcle.
/_/Youcannot setthe oven for cooking until
the oven is cool enough for the door to
unlock.
i_ While the oven is self-cleaning, gou can
touch the CLOCK pad to displag the
time of dag. To return to the clean
countdown, touch the COOKING TIME
pad.
i_ Ifthe shelvesbecome hard to slide,applg a
smallamount of vegetableoilor cookingoil
to a paper towel and wipe the edgesof the
ovenshelveswith the papertowel.
F _
r _
E
0
0
L_
31
0
e_e
Page 32

Care and cleaningof the range.
Be sure electrical power is off and all surfaces are cool before cleaning any part of the range.
If your range is removed for cleaning, servicing or any reason, be sure the anti-tip
device is re-engaged properly when the range is replaced. Failure to take this
precaution could result in tipping of the range and cause injury.
Sealed Burner Assemblies
Turn all controls OFF before removing the
burner parts.
The round side burner caps and burner
headscan be lifted off, making them easy
to clean.Theelectrodes are not removable.
Theoval center burner head and cap
assembly can be lifted off, making it easy
to clean.Theburner electrode is not
removable.
iiii¸iiliii¸¸ii_i__ii_ __il__iiB__@iiiiifill;illill;!ill;¸i
ii!!b!B ¸ill¸
!i! i!i
iamberf-_ _@ _
4b
CAUTION: notoperatethe
cooktop without all burner parts and grates
/n _/oce.
Electrode Burner head@
Electrode -_
Front left, back Burner
right and back left base
burner Aont right burner
Theelectrode of the spark igniter is
exposedwhen the burner head is
removed.When one burner is turned to
LITE,all the burners spark. Do not
I
attempt to disassemble or clean around
any burner while another burner is on.
An electricshock may result,which
could cause you to knock over hot
cookware.
....
32
Page 33

Burner Caps and Heads
Beforeremovingtheburnercapsandheads,
remembertheirsizeandlocation.Replosethem
in thesomelocationaftercleaning.
NOTE:Donotusesteelwoolorscouringpowders
tocleontheburnerports.
!!i! ii iii!iiii!i!il!i ili !i i!iiii!iBurnercaps
Liftoffwhencool.Washburnercapsinhot,soapg
Burnercapis BurnercopisNOTwaterandrinsewithcleanwater.Youmag scour
propedgs_ated properlyseated• witho plasticscouringpodto removeburned-on
foodparticles.
Burner Heads and Oval [Center)Burner
Head/Cap Assembly
Theburnerheadsandtheovalburnerhead/cap
assembly ore removable.Simplgliftthem off the
range fordeoning.
Forproperignition,makesorethe smallhole
inthesectionthatfitsovertheelectrodeiskept
open.Asewingneedleorwiretwist-tieworks
wellto unclogit.
go.con1
Replacement
Burner Heads
Replaceburnerheadsovertheelectrodeson
thecooktop,inthecorrectlocationsaccordingto
theirsize.Thereisonesmall,onemedium,one
extralargeandonedualflameextralargeburner
head.
I
Makesuretheslot(onfront left,backrightand
backleftheads}andthehole(frontrighthead}in
theburnerheadispositionedovertheelectrode.
e,,I-
el}
e-,i-
¢3
0
_i!iii ¸ ii}iiiiiiii
!i:!iiii!i: iiiiiiiiii
i_:i!i!iiiiiiiii
r;
Theslitsin theburnerheadsmustbekeptcleon
atoil timesforoneven,unhamperedflame.
Cloggedordirtgburnerportsor electrodeswill
notallowtheburnerto operateproperlg.
Angspillonor aroundanelectrodemust
becarefullgcleaned.Takecareto nothit an
electrodewith angthinghardor itcouldbe
damaged.
Cleantheburnerheadsroutinelg,especialigafter
badspillovers,whichcouldclogtheopenings.Lift
offwhencool.
Toremoveburned-onfood,soaktheburnerheads
ina solutionof mildliquiddetergentandhotwater
for20-30 minutes.Formorestubbornstains,usea
toothbrush.
After cleaning
Beforeputtingtheburnercops,headsandoval
head/capassemblgback,shakeoutexcesswater
andthendrgthem thoroughlgbgsettingina
warmovenfor 30minutes.
Oval [Center) Burner Head/Cap Assembly
Replacethe oval (center)head/cap assemblg over
the electrode on the cooktop.
i
.|o
Caps
Repiacethe matching s_e capsontothe burner
basesorheads.
,. #-.i.
0
0
I
Makesurethattheheadsand capsorereplaced
inthecorrectlocations.
33
to
O_
0
Page 34

Careand cleaning of therange.
Gdd_e
Appearance mag varg
The grates mag be cleaned in o
dishwasher.
The oven has 5 shelf positions.
Place the grog porcelain-coated
rocks in positions "R","B" and "D"
for self-cleaning the grates Place
one grate each on the oven racks
from side to side
34
NOTES:
!_;:.Thegriddle is to be usedover the center
burner only.
i_4Do notcleanthegriddleina sdf-deaningoven.
_#_:Donot dean the griddle in a dishwasher
_L}_Washwith hot, soapy water offer each
usewhile usingosponge or dishdoth.
#_i_Ifoilor foodresidueisleft on the griddle,
further cookingwill hardentheresidue and
causesticking overtim& In this case,useo
non-abrasivedeansersuchas BanAmi®or
oneof the soft scrub deansers.Apply with
asponge,Scrunge®or othercleaning pad
labeledsafefor non-stickpans
_!_Useonlg plastic,nglon or wooden utensils
or SilverStone¢ kitchen tools to prevent
marring of the coating.
Burner Grates
Yourrange hasthree professional-stgledouble
grates.Thesegrates are position-specific
Formaximum stabilitg,thesegrates should
onlg be usedin their proper positions.For
convenience,the undersidesof the side grates
are marked "OUTSIDE."Hake surethe front
portion of both grates isin front.Thecenter
grate can be interchangedfront to back.
Cleaning Grates--Soap and Water
Liftgrates out when cool. Grates should be
washed regularlg and, of course, after
spillovers. Wash them in hot, soapg water
and rinse with clean wate_ When replacing
the grates, be sure theg are positioned
securelg over the burners. Replace the grates
so that straight lines are formed
with the center ribs of all three grates.
Cleaning Grates--Self-Clean Oven
To get rid of burned-on food, gou mag use
the self-clean cgcle of gour range. Remove
ang burnt-on food particles that gou can
prior to placing the grates in the oven. Place
the grog porcelain-coated racks in positions
"R","B"and "D".
NOTE:Do notclean thegriddlein the
self-deaning oven.
Placeone grate each on the oven racks
from sideto side.Followthe instructions
for how to set the upper oven for cleaning.
NOTE:Use caution when removing the grates
from the oven after the self-cleon cycle has
ended Thegrates mag still be hot.
Forheavilg-soiled grates, gou mag notice
some white ash on the grate. Wipe it off
with a damp cloth after the grate cools.
_'_Neveruseknivesor cut foodon the griddle.
Wash with hot, soapy water after each use.
Storecorefullg to prevent scratching
Griddle Precautions:
i_ If something has spilledunder thegriddle, it
should be deaned up assoon aspossibleto
prevent "bakedon" foodsoil.
_'_Do not allow grease to accumulate under
the griddle as it con be o fire hazard. Clean
under thegriddleas soonasit iscool.Clean
with hot soopg water
_'_"Do notplace gour griddle in the microwave.
_!Alwags turn off all surface burnersbefore
removing thegriddle.Usecaution when
handing a hot griddle.
Ifwhite spots remain, remove them
with a soap-filled scouring pad and rinse
thoroughlg with a vinegar and water mixture.
Thesedepositsare usuallga salt residue that
cannot be removed bg the clean cgcle.
Cleaning Grates--Dishwasher
The grates mag be cleaned in the dishwashe_
Remove ang burnt-on food particles that gou
can prior to placing the grates in the
dishwashe_ Place them on the lowest rack of
the dishwasher and run on a "heavg dutg"
cgcle.
Do not operate a burner for an extended
period of time without cookware on the grate.
The finish on the grate mag chip without
cookware to absorb the heat.
Although the grates are durable, theg will
graduallg losetheir shine, regardlessof the
best care gou can give them.Thisisdue
to their continual exposure to high
temperatures and abrasion bg the cookware.
Support Bumpers
If one or more of the circular silicone grate
support bumpers in the cooktop are missing
or damaged, replacement parts can be
obtained bg calling 1.800.GECARES.
Toinsert the new bumpers,simplg insert the
cone shaped end and push down while
gentlg twisting or rocking the bumper.
Page 35

Cooktop Surface
ge.com
Toavoid damaging the stainlesssteelsurface
of the cooktop and to prevent it from
becoming dull,clean up spillsright awag.
Foodswith a lot of acid (tomatoes,
sauerkraut, fruit juices,etc.)or foods with
high sugar content could cause a dull spot
if allowed to set.
When the surface has cooled,wash and
rinse.Forother spillssuch as fat spatterings,
etc.,wash with soap and water once the
surface has cooled.Then rinseand polish
with a drg cloth.
)!ii!(1))_!()i_ _ _i))!))i(_(!iii!!i
iii_ili&_ _ii!!:_!!i_ii_)iii?
iiiii iiiii!iiiii!iiiiii!!il
ii!!i i!ili!iii!!iiii!ili!!ii!i!ilili!iiiiiii!i
Vent appearance and location vaq]
Oven Air Vents
Never block the vents (airopenings)of the
range Theg provide the air inlet and outlet
that are necessarg for the range to operate
properlg with correct combustion
Upper Control Panel
Seethe Gas/ControlLockout information in
the Specialfeaturesof gour oven control
section in this manual
Cleanup splatters with a damp cloth
NOTE:Do not stare flammable materials
in an oven, drawer or nearthe cooktop
Donot store or use combustiblematerials,
gasolineor other flammable vapors and
liquidsin the vicinitg ofthis or ong other
appliance.
NOTE:Donot lift the cooktop Lifting the
cooktop can lead to damage and improper
operation of therange
Air openings are located at the rear of
the cooktop, at the top and bottom of the
oven door,and atthe bottom ofthe range,
under the lower cooking drawer.
Removeheavier soilwith warm soapg water.
Donot use abrasivesof ang kind.
Unlockthe touch pads after cleaning
O
iiii i;iiiiiiiii!i!i!iiiiiij
i{iiiiiiiiii!! iii i!iiiiii!
Surfaceburnerknob
Youmag alsouse a glass cleaner
Lower Control Panel (Front Manifold Panel) and Knobs
It'sagood idea to wipe the control panel
after each use of the oven. Usea damp cloth
to clean or rinse.For cleaning, usemild soap
and water or a 50/50 solution of vinegar and
water. For rinsing,usecleanwater. Polishdrg
with a soft cloth.
Donot use abrasive cleansers,strong liquid
cleaners,plastic scouring pads oroven
cleaners on the control panel-theg will
damage the finish.
Donot trg to bend knobs bg pulling them up
or down or bg hanging a towel or other such
loads.Thiscan damage the gas valve shaft.
Thecontrol knobs mag be removed
for easier cleaning.
Hake surethe knobs are in the OFFpositions
and pull them straight off the stems for
cleaning
Theknobs can be cleanedin a dishwasher
or theg mag alsobe washed with soapand
water.Hake sure the insidesof the knobs are
drg before replacing.
Replacethe knobsin the OFF position
to ensure proper placement
Hetal parts can be cleanedwith soap and
waten Do not use steel wool, abrasives,
ammonia, acids or commercial oven
cleaners.Drg with a soft cloth.
NOTE:Thelower ovendrawer control knob is
not interchangeable with the surface burner
knobs Besure to reinstall the lower oven
drawer knob to the original location Thelower
ovendrawer knob may be identified bg the
increasing numbers from "W_"to "450"
E
0
0
o
f_
0
35
Page 36

Careand cleaning of therange.
Stainless Steel Surfaces (onsomemodels)
Protecting
STAINLESSSTEELhas a reputation for
withstanding tough abuse for years.This isa
key reasonwhy it isso popular with the food
service industry.
However,stainlesssteel appliances can have
surface imperfections, discolorations or
blemishesthat consumers with a critical eye
notice and find unattractive in the home.
Thesediscolorations or blemishescan be
caused by something as simple as leaving
fingerprint smudges on the stainless steel
surface overnight.
Forstainlesssteel appliances where
blemishesare prone to show on the surface,
we recommend APPLYINGACOATOFCERAHA
BRYTE®StainlessSteelCleaningPolish&
Conditioner (purchased separately-follow
instructions).
Thiswill help you to maintain the brightness
and appearance of your stainlesssteel
appliance.
Cleaning
Do not use a steel wool pad; it will scratch
the surface.
r_!_Inorder to avoid any discolorations and/or
greasestains,we recommend cleaning
and removing any spills,spots and grease
from the range after use.
i_1It is important to use a soft cloth or paper
towel every time the range is cleaned to
avoid any scratches.
Readcarefully the instructions on the back
of the Brightener (includedwith your range)
for better results.
[] Apply Cerama Bryte ®Stainless Steel
Brightener (follow instructions).
[] Repeatsteps 2-4 as many times
asneeded.
[] Putgrates back in place.
Followthese instructionsfor any Stainless
Steelsurface on your range.
DO NOTUSEthe following products for
cleaning the Cooktop or Stainless Steel
parts:
• Caustic Lye(Sodium Hydroxide)or cleaners
containing this chemical
• Hardor SteelWool Pads
• Abrasive Materialsor Chemicals
Toinquire about purchasing stainlesssteel
appliance cleaneror polish,or to find the
location of a dealer nearest you, pleasecall
our toll-free number:
National Parts Center 800.626.2002IU.S.)
888.261.3055(Canada)
ge.com (U.S.)
www.GEAppliances.ca(Canada)
36
Cleaning Instructions:
[] Removegrates.
[] Wash usingwarm, soapy water:
Wet soft cloth or paper towel (avoid
using excessivewater).
Wipe the surface in the direction of the
grain (following the steellines).
Rinseand wring out a soft cloth or paper
towel and dry the range.
[] Apply a degreaser that does not contain
sodium hydroxide or StainlessSteel
Cleaner(follow instructions).
Page 37

Lift the door straight up and off
the hinges.
The gasket is designed with a gap
at the bottom to allow for proper
air circulation
Do not rub or clean the door
gasket-it has an extremely low
resistance to abrasion
If gou notice the gasket becoming
worn, fraged or damaged in ang
wag or ifit has become displaced
on the door, gou should have it
replaced
Lift-Off Oven Door
Theoven door isremovable, but it isheovg.
Youmog need helpremoving and replacing
the doo_
Toremove the door, open it a few inches
to the specialstop position that will hold the
door open.Graspfirmly on each sideand lift
the door straight up and off the hinges.
NOTE: Becareful notto place handsbetween
the hinge and the ovendoor frame as the
hinge could snap back and pinch fingers.
Toreplace the door, make sure the hinges
are in the specialstop position. Positionthe
slots in the bottom of the door squarely over
the hinges.Then lowerthe door slowl9 and
evenly over both hinges at the same time. If
the hinges snap back against the oven frame,
pull them back out.
Toclean the inside of the door:
Donot allow excesswater to run into
any holesor slotsin the doon
_'s!Becausethe area inside the gasket is
cleaned during the self clean cycle, gou do
not need to clean this by hand. Any soap
left on the liner causesadditional stains
when the oven isheated.
ge.com
;'s!Thearea outside the gasket can be
cleaned with a soap-filled plastic
scouring pad.
Toclean the outside of the door:
i_ Usesoap and water to thoroughlg clean
the top, sidesand front of the oven doon
Rinsewell. You mag also use a glass
cleaner to clean the glass on the outside
of the door.
i_ Spillageof marinades,fruit juices, tomato
sauces and basting materials containing
acids may cause discoloration and should
be wiped up immediately. When the
surface iscool,clean and rinse.
%_Do not useoven cleaners,cleansing
powders or harsh abrasiveson the
outside of the doon
t_
O
i , , ,iii i;iiiiiiiii!i!i!iiiiiij
i{iiiiiiiiii!! iii i!iiiiii!
Oven Bottom
Theoven bottom has a porcelainenamel
finish.To make cleaning easier,protect the
oven bottom from excessivespillovers by
placing a cookie sheet on the shelf below the
shelf you are cooking on. Thisis particularly
important when baking a fruit pie or other
foods with a high acid content. Hot fruit
fillings or other foods that are highly acidic
(suchas tomatoes, sauerkraut and sauces
with vinegar or lemonjuice) may cause
pitting and damage to the porcelainenamel
surface and should be wiped up immediately.
Oven Shelves and Drawer Racks
Thegray porcelain-coated shelvesmay be
cleaned in the oven during the self-clean
cycle.
We don't recommend usingaluminum foil on
the oven bottom. Itcan affect air flow ifthe
holesare blocked and it can concentrate heat
at the bottom of the oven, resulting in poor
baking performance.
Toclean up spillovers,usesoap and water, an
abrasive cleaner or soap-filled scouring pad.
Rinsewell to remove any soap before self-
cleaning.
Theg may also be cleaned bg using an
abrasive cleansenAfter cleaning, rinsethe
shelveswith cleanwater and dry with a
clean cloth. Ifthe shelvesever become hard
to slide,wipe the shelf edges or oven shelf
supports with vegetable oil.
E
0
0
o
0
37
Page 38

Careand cleaning of therange.
Oven Light Replacement
Wire cover holder
CAUTION: BeForereplacing gour oven light
bulb, disconnect the electrical power to the
range at the main fuse or circuit breaker
pond. Be sure to let the light cover and bulb
cool completdg.
Theoven light bulb iscoveredwith a
removable glass cover that is held in place
with a bail-shaped wire. Removethe oven
door,if desired,to reach cover easilg.
To remove:
I_ Holda hand under the cover so it
doesn't fallwhen released.With fingers
of the same hand, firmly push back the
wire cover holder.Lift off the cover.
Removable Lower Oven Drawer
NOTE:Beforeperforming ang adjustments,
cleaningor service,disconnectthe range
electricalpower supplg at the household
distributionpanel by removing the fuseor
switching off thecircuitbreaker Hake sure
drawer heating elementiscool.
Host cleaning can be done with the drawer
in place. However,the drawer mag be
removed if further cleaning isneeded. Use
soap and warm water to thoroughlg clean.
To remove the drawer:
Do not remove ang screws to remove
the cover
[] Donot touch hot bulb with a wet cloth.
Replacebulb with a 4B-watt household
appliance bulb.
To replace cover:
[] Place it into the groove of the light
receptacle. Pull the wire forward to the
center of the cover until it snaps into
place. When in place, the wire holds the
cover firmlg. Be certain the wire
is in the depression in the center of the
cover
[] Connect electrical power to the range.
To replace the drawer:
[] Placethe left drawer rail around the
inner left rail guide and slide it in
slightlg to hook it.
[] [_lacethe right drawer rail around the
inner right rail guide and slideit in
slightlg to hook it.
[] Slidethe drawer all the wag in.
38
[] Pullthe drawer straight out until
it stops.
[] Pressthe tabs on both sides inwhile
pulling the drawer forward and free.
Removable Lower Oven Drawer Pan
NOTE:Beforeperforming ong adjustments,
cleaningor serdce, disconnectthe range
electricalpower supply at thehousehold
distributionpanel by removing the fuseor
switching off thecircuitbreaker Hake sure
drawer heatingelementis cool.
NOTE:Allow lower ovendrawer to cool
beforeremoving pan.
NOTE: Wipe spillspromptlg after each use.
i4 Never place, use or self-clean the lower
oven drawer pan in the upper oven.
_4!_Lower oven drawer hasa removable pan
for easg cleaning. Cleanwith hot soapg
water and a sponge or dish towel. Drgwith
a cleancloth. An oven cleaner,such as
Easg-OfP,mag also be used.Besureto
follow the directions on the oven cleaner
Replacethe pan in the lower oven drawer
Page 39

Installation
Instructions
nge
In the Commonwealth
of Massachusetts
• This product must be installed bg a licensed plumber
or gas fitten
• When using ball tgpe gas shut-off valves, theg shall
be the T-handle type.
• A flexible gas connector, when used, must not exceed
3 feet.
BEFOREYOU BEGIN
Read these instructions completelg and carefullg.
Installation of this range must conform with local
codes, or in the absence of local codes, with the
National Fuel Gas Code, ANSI Z223.2/NFPA.54, latest
edition. In Canada, installation must conform with the
current Natural Gas Installation Code, CAN/CGA-
B249.2 or the current Propane Installation Code,
CAN/CGA-B149.2, and with local codes where
applicable. This range has been design-certified bg
CSA International according to ANSI Z22.1, latest
edition and Canadian Gas Association according
to CAN/CGA-I.1 latest edition.
Aswith ang appliance using gas and generating heat,
there are certain safetg precautions gou should follow.
You will find these precautions in the Important Safety
Information section in the front of this manual. Read
them carefullg.
FOR YOUR SAFETY
Do not store or use combustible materials, gasoline or
other flammable vapors and liquids in the vicinity of
this or any other appliance.
If you smell gas:
0 Open windows.
Don't touch electrical switches.
Extinguish ang open flame.
Immediatelg call gour gas supplier.
TOOLS YOU WILL NEED
Phillips screwdriver
Flat-blade screwdriver
Pencil and ruler
Pipewrenches (2)
(one for backup)
Open-end or
adjustable wrench
Level
Drill, awl or nail
• IMPORTANT - Savetheseinstructions
for local electrical inspector's use.
• IMPORTANT - Observea,,governing
codes and ordinances.
• Note to Installer - Leave these instructions
with the appliance after installation is completed.
• Note to Consumer- Keep this Owner's Hanual
and Installation Instructions for future reference.
• Note - This appliance must be properlg grounded.
• Servicer - The electrical diagram is in an envelope
attached to the back of the range.
• Skill level - Installation of this appliance requires
basic mechanical skills.
• Proper installation is the responsibilitg of the installen
• Product failure due to improper installation is not
covered under the Warrantg.
MATERIALS YOU MAY NEED
• Gasline shut-off valve
• Pipejoint sealant or UL-approved pipe thread tape with
Teflon*that resistsaction of natural and LPgases
• Flexiblemetal appliance connector (1/2" I.D.)
A 5-foot length isrecommended for easeof installation
but other lengths are acceptable. Neveruse an old
connector when installing a new range.
• Flareunion adapter for connection to gas supplg line
(3/4" or :]/2" NPTx 1/2" I.D.)
• Flareunion adapter for connection to pressureregulator
on range 11/2" NPTx 1/2" I.D.)
• Liquidleak detector or soapgwater.
• Lag boltor 1/2" O.D.sleeve anchor {for concrete floors
onlg).
*Teflon:Registeredtrademark of DuPont
39
Page 40

Installation Instructions
-&WARNING!
INSTALLATION SAFETY
INSTRUCTIONS
Read these instructions completely and carefully.
Improper installation, adjustment, alteration,
service or maintenance can cause injury or property
damage. Refer to this manual. For assistance or
additional information, consult a qualified installer,
service agency, manufacturer (dealer) or the gas
supplier.
Never reuse old flexible connectors. The use
of old flexible connectors carl cause gas leaks and
personal injurg. Alwags use NEW flexible connectors
when installing a gas appliance.
IM PO RTANT - Removeallpacking material
and literaturefrom ovenbeforeconnectinggasand
electricalsupplgtorange.
CAUTION- Do not attempt to operate the
oven of this range during a power failure {Electric
Ignition models onlg}.
• Have gour range installed bg a qualified installer.
• Your range must be electricallg grounded in
accordance with local codes or,in the absence
of local codes, in accordance with the National
Electrical Code (ANSI/NFPA70, latest edition).
In Canada, electrical grounding must be in
accordance with the current CSAC2Z1 Canadian
Electrical Code Part 1 and/or local codes. See
Electrical Connections in this section.
• Before installing gour range on linoleum or ang other
sgnthetic floor covering, make sure the floor covering
can withstand 180°Fwithout shrinking, warping or
discoloring. Do not install the range over carpeting
unless a sheet of 1/4" thick plgwood or similar
insulator is placed between the range and carpeting.
• Make sure the wall coverings around the range can
withstand heat generated bg the range up to 200°F.
• Avoid placing cabinets above the range. To reduce
the hazard caused bg reaching over the open flames
of operating burners, install a ventilation hood over
the range that projects forward at least 5" begond
the front of the cabinets.
• The ventilating hood must be constructed
of sheet metal not less than 0.0122" thick.
Install above the cooktop with a clearance of not less
than 1/4" between the hood and the underside of the
combustible material or metal cabinet. The hood
must be at least as wide as the appliance and
centered over the appliance. Clearance between the
cooking surface and the ventilation hood surface
MUST NEVER BE LESS THAN 24 INCHES.
EXCEPTION:Installation of a listed microwave oven or
cooking appliance over the cooktop shall conform to
the installation instructions packed with that appliance.
• If cabinets are placed above the range, allow a
minimum clearance of 30" between the cooking
surface and the bottom of unprotected cabinets.
• If a 50" clearance between cooking surface and
overhead combustible material or metal cabinets
cannot be maintained, protect the underside of the
cabinets above the cooktop with not less than 1//4"
insulating millboard covered with sheet metal not less
than 0.0122" thick. Clearance between the cooking
surface and protected cabinets MUSTNEVERBE LESS
THAN 2/4INCHES.
• The vertical distance from the plane of the cooking
surface to the bottom of adjacent overhead cabinets
extending closer than 1"to the plane of the range
sides must not be less than 18". (Seethe Dimensions
and Clearances illustration in this section.)
CAUTION - Itemsof interest to children
should not be stored in cabinets above a range or on
the backsplash of a range-children climbing on the
range to reach items could be seriouslg injured.
4O
Page 41

Installation Instructions
DIMENSIONS AND CLEARANCES
Provide adequate clearances between the range and adjacent combustible surfaces. These dimensions must be
met for safe use of your range. The location of the electrical outlet and pipe opening (see Gas Pipe and Electric
Outlet Locations) may be adjusted to meet specific requirements.
The range mag be placed with 0" clearance (flush} at the back wall.
depth for
cabinets above
Maximum
countertops
6" Hinimum
clearance to
right wall
Front edge of
the range side
panel forward
flom cabinet
_E- 0"
To cabinets
below cooktop
and at the
range back
Height
37-114"
Depth with door open:
46-3/4"
Depth with door closed (includes door handle}
29-3/4"
Depth w]ries depending on model
See specifications sheet for your model
36-114" --.114"
\\
41
Page 42

Installation Instructions
kWARNING!
ANTI-TIP DEVICE
All ranges can tip and injurg could
result.
@
To prevent accidental tipping of the range,
attach an approved Anti-Tip device to the
wall. (See Installing the Anti-Tip Device in
®
• For gour safet9, never use gour range for warming or
heating the room. Your oven and cooktop are not
designed to heat gour kitchen. Top burners should
not be operated without cookware on the grate. Such
abuse could result in fire and damage to gout range
and will void gout warrantg.
• Do not store or use combustible materials,
gasoline or other flammable vapors and liquids
in the vicinitg of this or ang other appliance.
Explosions or fires could result.
• Do not use oven for a storage area. Items stored
in the oven can ignite.
• Do not let cooking grease or other flammable
materials accumulate in or near the range.
this section.) To check if the device is
installed and engaged properly, carefully
tip the range forward. The Anti-Tip device
should engage and prevent the range from
tipping over.
If gou pull the range out from the wall for
ang reason, make sure the Anti-Tip device
is engaged when gou push the range back
against the wall.
LOCATION
Do not locate the range where it mag be subject to
strong drafts. Ang openings in the floor or wall behind
the range should be sealed. Make sure the openings
around the base of the range that supplg fresh air for
combustion and ventilation are not obstructed bg
carpeting or woodwork.
Your range, like mang other household items, is
heavg and can settle into soft floor coverings such as
cushioned vingl or carpeting. Use care when moving the
range on this tgpe of flooring. It is recommended that
the following simple and inexpensive instructions be
followed to protect gour floor.
The range should be installed on a sheet of plgwood
(or similar material). When the floor covering ends at the
front of the range, the area that the range will rest on
should be built up with plgwood to the same level or
higher than the floor covering.
This will allow the range to be moved for cleaning
or servicing. Also, make sure gour floor covering will
withstand 180°F.(Seethe Installation Safety Instructions
section.)
Make sure the wall coverings around gour range can
withstand the heat generated (up to 200°F) bg the
range. ISeethe Installation Safetg Instructions section.I
IMPORTANT!
Remove all tape and packaging. Make sure the
burners are properlg seated and level.
Take the accessorg pack out of the oven and/or
drawer.
Check to be sure that no range parts have come loose
during shipping,
42
Page 43

Installation Instructions
[] PROVIDE ADEQUATE GAS SUPPLY
Your range is designed to operate at a pressure of S" of
water column on natural gas or, if designed for LP gas
{propane or butane), 10" of water column.
Hake sure gou are supplging gour range with the tgpe of
gas for which it isdesigned.
This range is convertible for use on natural or
propane gas. If gou decide to use this range on LPgas,
conversion must be made bg a qualified LPinstaller
before attempting to operate the range on that gas.
For proper operation, the pressure of natural gas supplied
to the regulator must be between 5" and 13"
of water column.
For LP gas, the pressure supplied must be between 10"
and 13" of water column.
When checking for proper operation of the regulator,
the inlet pressure must beat least 1" greater than the
operating (manifold} pressure as given above.
The pressure regulator located at the inlet of the range
manifold must remain in the supplg line regardless of
whether natural or LPgas is being used.
A flexible metal appliance connector used to connect the
range to the gas supplg line should have an I.D.of 1/2"
and be 5 feet in length for ease of installation. In Canada,
flexible connectors must be single wall metal connectors
no longer than 6 feet in length.
[] CONNECT THE RANGE TO GAS
Shut offthe main gas supplg valve before
disconnecting the old range and leave it off until the
new hook-up has been completed. Don't forget to
relight the pilot on other gas appliances when you
turn the gas back on.
Because hard piping restricts movement of the range,
the use of a CSAInternational-certified flexible metal
appliance connector is recommended unless local codes
require a hard-piped connection.
Never use an old connector when installing a new range.
If the hard piping method is used, gou must carefullg
align the pipe; the range cannot be moved after the
connection is made.
Toprevent gas leaks, put pipejoint compound on, or wrap
pipe thread tape with Teflon* around, all male {external}
pipe threads.
A. Install a manual gas line shut-off valve in the gas line
in an easilg accessed location outside of the range.
Make sure evergone operating the range knows where
and how to shut off the gas supplg to the range.
B. Install male 1/2" flare union adapter to the 1/2" NPT
internal thread at inlet of regulator. Use a backup
wrench on the regulator fitting to avoid damage.
When installing the range from the front, remove the
90° elbow for easier installation.
C. Install male 1/2" or 3/4" flare union adapter to the NPT
internal thread of the manual shut-off valve, taking
care to back-up the shut-off valve to keep it from
turning.
D. Connect flexible metal appliance connector to the
adapter on the range. Position range to permit
connection at the shut-off valve.
E.When all connections have been made, make sure
all range controls are in the off position and turn on the
main gas supplg valve. Use a liquid leak detector at all
joints and connections to check for leaks in the sgstem.
WARNING: DO NOT USE A FLAME TO
CHECK FOR GAS LEAKS.
When using test pressures greater than 1/2 psig to
pressure test the gas supplg sgstem of the residence,
disconnect the range and individual shut-off valve from
the gas supplg piping. When using test pressures of 1/2
psig or less to test the gas supplg sgstem, simplg isolate
the range from the gas supplg sgstem bg closing the
individual shut-off valve.
*Teflon: Registered trademark of DuPont
43
Page 44

Installation Instructions
GAS PIPE AND ELECTRICAL OUTLET LOCATIONS
Recommended area for 120_,
outlet on rear wall and area for
through-the-wall connection of
pipe stub and shut-off valve
Recommendedareafor
through-the-floor connection
of pipestub and shut-offvalve
44
Page 45

Installation Instructions
FLEXIBLE CONNECTOR HOOKUP
Pressure
regulator
Adopter Flex
connector
(6 ft max)
_ _,,I_ Adapter
Installer: Inform
the consumer of
the locution of the
gas shut-off vu re.
RIGID PIPE HOOKUP OPTIONS
45° Elbow ._
_'_]_ _,_,1_ 90 ° Elbow
Nipple U n
"_m_/j" _ Pressure F-,I
regulator I_ _ Un_on
1/2" or 3/4" _ shut-off
Gas pipe "-_'' I_ valve
Gas
Alternate Hookup
Gas _ _ _ N_pple o regulator
shut-off
Adapter
/ NippleNipple _ Quickconnect
_iSor union Pressure
Installer: Inform _ Gas
the consumer of ] I_L_I__ shut-off
the locution of the ) I_i / valve
gas shut-off valve, 1,11
i- 1-4t_ Nipple
U.J-ql--.-_ 1IZ' or 3/4"
Gas pipe
Gas pipe
Installer: Inform the
consumer of the
location of the gas
shut-off valve.
45
Page 46

Installation Instructions
[]ELECTRICAL CONNECTIONS
Electrical Requirements
120-volt, 60 Hertz, properlg grounded dedicated circuit
protected bg a 1S-amp or 20-amp circuit breaker or time
delag fuse.
Extension Cord Cautions
Because of potential safetg hazards associated
with certain conditions, we stronglg recommend against
the use of an extension cord. However, if gou still elect to
use an extension cord, it is absolutelg necessarg that it
be a UL-listed, 3-wire grounding-tgpe appliance extension
cord and that the current carrging rating of the cord
in amperes be equivalent to, or greater than, the
circuit rating.
Grounding
IMPORTANT--(Please read carefullg)
FOR PERSONAL SAFETY, THIS APPLIANCE MUST BE
PROPERLY GROUNDED.
Preferred Method
[] ELECTRICAL CONNECTIONS (CONT.)
A. Usage Situations where Appliance Power Cord will
be Disconnected Infrequentlg.
An adapter mag be used onlg on a 15-amp circuit.
Do not use an adapter on a 20-amp circuit. Where
local codes permit, a TEMPORARYCONNECTION
mag be made to a properlg grounded two-prong wall
receptacle bg the use of a ULdisted adapter, available
at most hardware stores. The larger slot in the adapter
must be aligned with the larger slot in the wall receptacle
to provide proper polaritg in the connection of the
power cord.
Temporarg Method
(Adapterplugsnot permitted inCanada(
Align large prongs/slots
Ensure proper
ground and firm
connection before
use
Ensure proper ground
exists before use
The power cord of this appliance is equipped with a
three-prong (grounding) plug which mates with a
standard three-prong grounding wall receptacle to
minimize the possibilitg of electric shock hazard from
this appliance.
The customer should have the wall receptacle and
circuit checked bg a qualified electrician to make sure
the receptacle is properlg grounded.
Where a standard two-prong wall receptacle is
encountered, it is the personal responsibilitg and
obligation of the customer to have it replaced with
a properlg grounded three-prong wall receptacle.
DO NOT, UNDERANYCIRCUMSTANCES,
CUTOR REMOVETHE THIRD (GROUND)PRONG FROM
THE POWERCORD.
A word about GFCI's - GFCI's are not required or
recommended for gas range receptacles.
Ground Fault Circuit Interrupters (GFCI's)are
devices that sense leakage of current in a circuit and
automaticallg switch off power when a threshold leakage
level is detected. These devices must be manuallg reset
bg the consumer. The National Electrical Code requires
the use of GFCI'sin kitchen receptacles installed to serve
countertop surfaces. Performance of the range will not
be affected if operated on a GFCI-protected circuit
but occasional nuisance tripping of the GFCIbreaker
is passible.
CAUTION: Attaching the adapter
ground terminal to the wall receptacle cover
screw does not ground the appliance unless
the cover screw is metal, and not insulated,
and the wall receptacle is grounded through
the house wiring. The customer should have
the circuit checked bg a qualified electrician to
make sure the receptacle is properlg grounded.
When disconnecting the power cord from the adapter,
alwags hold the adapter with one hand. If this is not done,
the adapter ground terminal is verg likelg to break with
repeated use. Should this happen, DO NOT USE the
appliance until a proper ground has again been
established.
46
Page 47

Installation Instructions
[] ELECTRICAL CONNECTIONS (CONT.)
B. Usage Situations where Appliance Power Cord will
be Disconnected Frequently.
Do not use an adapter plug in these situations because
disconnecting of the power cord places undue strain on
the adapter and leads to eventual failure of the adapter
ground terminal. The customer should have the two-
prong wall receptacle replaced with a three-prong
(grounding) receptacle by a qualified electrician
before using the appliance.
The installation of appliances designed for mobile home
installation must conform with the Manufactured Home
Construction and Safety Standard, Title 24 CFR,Part 5280
(formerly the Federal Standard for Mobile Home
Construction and Safety, Title 24, HUD, Part 280) or,
when such standard is not applicable, the Standard
for Manufactured Home Installations, latest edition
(Manufactured Home Sites,Communities and Set-Ups),
ANSIA225.1, latest edition, or with local codes. In Canada,
mobile horne installation must be in accordance with the
current CAN/CSAZ240/MH Mobile Home Installation Code.
Electric Disconnect
• Locate disconnect plug on the range back.
[] ASSEMBLE SURFACE BURNERS (CONT.)
Front left, back right and back left burners
Burner cap
stability Electrode
chamber_i_dg___J
Burner base
Hake sure the slot in
the burner head is
positioned over the
electrode
[] Oval (Center) Burner Head/Cap Assembly
Placethe oval (center)head/cap assembly over the
electrode on the cooktop.
Oval head and cap
assembly
Makesurethe hole in the burnerh_
assemblyispositionedover theelectrode
andthat the burner h_ isfully inserted
insidethe burner base,A smallgap
between the baseand head is normal
Front right burner
Burner cap
head
Burner @
Electr
Make sure the slot in the
burner head is positioned
over the electrode
Burner
base
• Pinch sides of connector and pull out of range back.
Sealany openingsinthe wall behind the range and inthe
[_ SEAL THE OPENINGS
floor under the range when hookups are completed.
[] ASSEMBLE SURFACE BURNERS
[] Burner Heads
Placeburner heads over the electrodes on the cooktop,
in the correct locations according to their size.Thereis
one small,one medium, one extra large and one dual
flame extra large burner head.
I
I
%
Front of range
I_]caps
Placethe matching sizecapsontothe burnerbases
orheads.
Hedium cap I Small cap
f- Q_
E tral |° o° extro
Front of range large cap
Hake sure that the headsand caps are replaced in the
correct locations.
[] Grates
Place the side and center grates on the cooktop. These
grates are position specific. The undersides of the side
grates are marked "OUTSIDE." The center grate can be
interchanged front to back.
Electrode
Extra }arge _ _ _ Dual flame
head Front of range extra large head
Outside grate Center grate Outside grate
CAUTION: Do not operate the burner
without all burner parts in place.
47
Page 48

Installation Instructions
[] CHECK IGNITION OF SURFACE
BURNERS
Operation of all cooktop and oven burners should be
checked after the range and gas supply lines have been
carefully checked for leaks.
Electric Ignition Models
Select a top burner knob and simultaneousl 9 push
in and turn to LITE position. You will hear a clicking sound
indicating proper operation of the spark module. Once the
air has been purged from the supply lines, burners should
light within 4 seconds. After burner lights, rotate knob out
of the LITE position. Try each burner in succession until
all burners have been checked.
Quality of Flames
The combustion qualitg of burner flames needs to be
determined visuallg.
(A) Yellow flames--
Call for service
(B) Yellow tips on
outer cones--
Normal for LP gas
[] CHECK IGNITION OF OVEN BURNER
Theoven isdesignedto operatequietlgand automaticallg.
Tooperate theoven, pressthe BAKEpad and then pressthe
numberpads until 350°appearsin thedisplay,Touchthe START
pa& After 30-90 seconds,the ovenburnerwill igniteandburn
untilthe settemperature is reached.Theoven burnerwill
continueto cycle on and off asnecessaryto maintainthe oven
at the temperature indicatedby the display.
Tocheck ignitionof the broilburner,touch the BROILHI/LOpad
andthen the STARTpad.After30-90 seconds,the broil burner
will ignite.
Electric ignition models requireelectrical powerto operate.
Incaseof a poweroutage,the ovenburnersonthese models
cannot be lit manuallywith a match.Gaswill notflow unless
theglow bar is hot.
If theoven isinusewhen apoweroutageoccurs,the burner
will shut off and cannot be re-lituntil poweris restored.
(C)Soft blue
flames--Normal
for natural gas
If burner flames look like IA), call for service. Normal
burner flames should look like (B)or (C),depending on
the type of gas you use.
With LPgas, some gellow tipping on outer cones
is normal.
48
Page 49

Installation Instructions
[] ADJUST BROIL AND OVEN BURNER
AIR ADJUSTMENT SHUTTERS IF
NECESSARY
Air adjustment shutters for the top and bottom burners
regulate the flow of air to the flames,
The air adjustment shutter for the top (broil} burner is in
the center of the rear wall of the oven.
Jstment
shutter
[] ADJUST BROIL AND OVEN BURNER
AIR ADJUSTMENT SHUTTERS IF
NECESSARY {CONT.}
To remove the oven bottom:
A. Remove the screws holding down rear of the oven
bottom.
B. Grasp the oven bottom at finger slots on each side.
C. Lift the rear of the oven bottom enough to clear the lip
of the range frame, push it back, and then pull it up
and out.
[] LEVELING THE RANGE
A. Install the oven shelves in the oven and position the
range where it will be installed.
| Lower range -ange
range
Raise Lower
The shutter for the bottom (oven) burner is near the back
wall behind the drawer. Remove the drawee See the Core
and cleaning of the range section.
To adjust the flow of air to either burner, loosen the
Phillips head screw and rotate the shutter toward open
or closed position as needed.
The flames for the top (broil}burner should be steadg with
approximatelg 1" blue cones and should not extend out
over the edges of the burner baffle.
Todetermine if the bottom burner flames are burning
properly, remove the oven bottom. Flames should have
approximatelg 1" blue cones and, if range is supplied with
natural gas, should burn with no gellow tipping. (With
most LP gas, small gellow tips at the end of outer cones
are normal.} Flames should not lift off burner ports. If
lifting is observed, graduallg reduce air shutter opening
until flames are stabilized.
Leg
leveler
Raise
range
{on some models} (on some models)
B.Check for levelness by placing a spirit level or a cup,
partially filled with water, on one of the oven shelves.
If using a spirit level,take two readings-with the level
placed diagonall 9 first in one direction and then the
othen
C. Remove the drawee See the Core and cleoning of the
range section. The front leveling legs can be adjusted
from the bottom and the rear legs can be adjusted
from the top or the bottom.
D. Use an open-end or adjustable wrench to adjust the
leveling legs until the range is level.
E.After the range is level, slide the range away from the
wall so that the Anti-Tip device can be installed.
49
Page 50

Installation Instructions
[] INSTALLING THE ANTI-TIP DEVICE
AWARNING!
• Range must be secured with an approved Anti-Tip
device.
• Unless properlg installed, the range could be
tipped bg gou or a child standing, sitting or leaning
on an open door.
• After installing the Anti-Tip device, verifg that it is in
place bg carefullg attempting to tilt the range
forward.
• This range has been designed to meet all
recognized industrg tip standards for all normal
conditions.
• The use of this device does not preclude tipping
of the range when not properlg installed.
A. Hark the wall where the RIGHTEDGE of the range
is to be located. Besure to allow for the countertop
overhang if gou intend to install the range next
to cabinets.
[] INSTALLING THE ANTI-TIP DEVICE
ICONT.)
Wallboard
Wood SCreW
Install the sleeve anchor into the drilled hole and then
install the lag bolt through the device. The bolts must be
properlg tightened as recommended for the hardware.
E.Slide the range against the wall, and check for proper
installation bg grasping the front edge of the cooktop
and carefullg attempting to tilt the range forward.
Back of range
WHEN ALL HOOKUPS ARE COMPLETED
Make sure all controls are left in the off position. Make
sure the flow of combustion and ventilation air to the
range is unobstructed.
Marked edge of range
B. Locate the outside edge of the device 21/8" toward the
center of the range from the marked edge of the range.
C. Using the device as a template, mark the position of
the hole for the screw.
D. For wood construction, drill a pilot hole at an angle of
20 degrees from the horizontal. A nail or awl mag be
used if a drill is not available.
Mount the Anti-Tip device with the screw provided.
For cement or concrete construction, gou will need
a 1/4" x 1V/' lag bolt and a 1/2" O.D.sleeve anchor, which
are not provided. Drill the recommended size hole for the
hardware.
CONVERTING TO LP GAS (or converting
back to natural gas from LP)
This range leaves the factorg set for use with natural
gas. If gou want to convert to LP gas, the conversion
must be performed bg a qualified LPgas installer.
The conversion instructions and LP orifices can be found
attached to the range next to the pressure regulator.
Keep these instructions and the orifices in case gou want
to convert back to natural gas.
5O
Page 51

Before you call for service.., ge.com
Troubleshooting Tips
Save time and moneg! Review the charts on the following
pages first and you may not need to call for service.
__i_:_ii _!_i_ Possible Causes What To Do
Plug on range is not completelg • Hake sureelectrical plug is plugged into a live,properlg
inserted in the electrical outlet, grounded outlet.
Burner slits on the side of the • Removethe burners and cleanthem. Checkthe
burner mag be clogged, electrode area for burned-on food or grease.See
_i_ T_i_is _i_ Improper burner assemblg. • Hake sure the burner parts are installed correctlg.
Improper air to gas ratio. • If range is connected to LPgas, contact the person
The oven gas shut-off valve
rnag have accidentallg been
moved during cleaning or
moving.
the Care and cleaning of the range section.
Seethe Care and cleaning of the range section.
who installed gour range or made the conversion.
• To check the oven gas shut-off valve, remove the
drawer (see the Care and cleaning of the range section).
Remove the rear access panel bg unscrewing the
thumb screws in the upper left and right corners.
Look for the gas shut-off lever at the back of the range.
t
PULLTOOPEN
Thumbscrews
You forgot to enter a bake • Touch the BAKE pad and desired temperature or
temperature or cleaning time. the SELFCLEAN pad and desired clean time.
Oven controls improperlg set. • Seethe Using the upper ovensection.
Shelf position is incorrect. • Seethe Using theupper oven section.
Incorrect cookware or cookware • Seethe Using theupper oven section.
of improper size being used.
Oven thermostat needs • See the Adjust the upper oven thermostat--Do it
adjustment, gourself! section.
Clock not set correctlg. • Seethe Using the dock and timer section.
Aluminum foil used improperlg • Seethe Coreanddeoning of the range section.
in the oven.
Oven bottom not securelg • Seethe Installation of the range section.
seated in position.
Gas/Control Lockout feature • Allow the range to cool down and touch and hold the
isactivated. GAS/CONTROLLOCKOUTpad (on some models)for
5 secondsuntil LOCdisappearsfrom the displag.
Plug on range is not • Hake sure electrical plug is plugged into a live,properlg
completelg inserted inthe grounded outlet.
electrical outlet.
Gas supplg not connected • Seethe Installation Instructions that came with gour
or turned on. range.
A fuse in gour home mag be • Replacethe fuse or reset the circuit breaker.
blown or circuit breaker tripped.
Burner parts not replaced • Seethe Careand deaning of the range section.
correctlg.
51
Page 52

Before you call for service...
Trou61eshooting Tips
Possible Causes What To Do
Thedisplay will always • Thisis a normal reminder to close the door when
automaticall u remind you to broiling.
close the door.
Oven controls improperly set. • Hake sureyou touch the BROILHI/LO pad.
Oven door not closed. • Seethe Usingthe upper oven section.
Improper shelf position • Seethe Broiling Guide.
being used.
Food being cooked * Forbest results, use apan designedfor broiling.
in a hot pan. Hake sureit is cool.
Cookware not suited • Forbest results, use a pan designedfor broiling.
for broiling.
Oven bottom not securely • Seethe Installation of the range section.
seated in position.
• If LOCappears in the display, the range control is
locked. Turn this feature off to use the range. See
the Gas/Control Lockout section.
Oven thermostat • Seethe Adjust the upper oventhermostat--Do it
needs adjustment, yourself! section.
Plug on range is not completely • Hake sureelectrical plug isplugged into a live,properly
inserted in the electrical outlet, grounded outlet.
A fuse in your home may be • Replacethe fuse or resetthe circuit breaker.
blown or the circuit breaker
tripped.
Oven controls improperly set. • Seethe Usingthe dock and timer section.
Light bulb is loose or defective. • Tighten or replacethe bulb.
Plug on range is not completely • Hake sureelectrical plug isplugged into a live,properly
inserted inthe electrical outlet, grounded outlet.
The oven temperature is too • Allowthe range to coolto room temperature and
]eif-_i#_ high to set a self-clean operation, reset the controls.
Oven controls improperly set. • Seethe Usingthe self-cleaning upper oven section.
This is the sound of the • Thisisnormal.
metal heating and cooling
during both the cooking and
cleaning functions.
52
Page 53

Possible Causes What To Do
ge.com
Excessivesoil. • Touchthe CLEAR/OFFpad.Open the windows to
rid the room of smoke.Wait until the LOCKEDDOOR
light goes off.Wipe up the excesssoiland reset the
clean cgcle.
Oven too hot. • Allow the ovento cool below locking temperature.
Oven controls not properlg set. • Seethe Usingthe self-cleaningupperoven section.
Oven was heavily soiled. • Cleanup heavg spillovers beforestarting the clean
cgcle.Heavilg soiled ovens mag need to self-clean
again or for a longer period of time.
The self-clean cgcle has been • Closethe oven doon
selected but the door is not
closed.
The oven door islocked • Touchthe CLEAR/OFFpad.Allowthe oven to cool.
because the temperature
inside the oven has not
dropped below the
locking temperature.
You have a function error code. • Touchthe CLEAR/OFFpad.Allowthe oven to coolfor
one hour.Put the oven back into operation.
If the function code repeats. • Disconnect all power to the range for 5 minutes
and then reconnect power.If the function error
code repeats, callfor service.
The grag porcelain-coated shelves • Applg a small amount of vegetable oil to a paper
were improperlg cleaned, towel and wipe the edges ofthe oven shelveswith
the paper towel. Do not spragwith PaT®or other
lubricant sprags.
#_ This is reminding gou to enter a • Entera probe temperature.
probe temperature after plugging
in the probe.
The Gas/Control Lockout feature
is activated.
• Besure the surface burner controls are turned OFE
Turnthis feature offto usethe range. Seethe
Gas/ControlLockoutsection.
53
Page 54

Before you call for service...
Troubleshooting Tips
Possible Causes What To Do
A fuse in gour home mag be ° Replacethe fuse or reset the circuit breaker
blown or the circuit
breaker tripped.
The clock is in the * See the Special features of your oven control section.
black-out mode.
Power failure. • Reset the clock.
Oven control pads were ° The BAKE and BROILHI/LO pods must be touched at
! i ! : i i
iB_rni_: This is normal in a new oven • Tospeed the process, set a self-clean cgcle for a
" " not pressed properlg, the same time and held for 3 seconds.
Power outage or surge. * Reset the clock. If the oven was in use, gou must reset
it bg touching the CLEAR/OFFpad, setting the clock
and resetting ang cooking function.
and will disappear in time. minimum of 3 hours. See the Using the stir-cleaning
oven section.
th _
An odor from the insulation * This is temporarg.
around the inside of the oven
is normal for the first few times
the oven is used.
The convection fan mag turn on • This is normal. Tomaximize cooking evenness, the
and off automaticallg, fan isdesigned to operate in both directions with a
pause in between.
Preheat temperature • Fan will start automaticallg once the preheat
not reached, temperature is reached.
The drawer is out of alignment. ° Fullg extend the drawer and push it all the wag in.
See the Care and cleaning of the range section.
Drawer is over-loaded or load • Reduce weight. Redistribute drawer contents.
is unbalanced.
A fuse in gout home mag be • Replace the fuse or reset the circuit breaker.
blown or the circuit breaker
tripped.
The oven is self-cleaning. • Wait for the self-clean cgcle to finish and the oven
to cool.
Controls improperlg set. ° See the Lower oven drawer section.
Liquid in drawer. ° Remove liquid.
Uncovered foods. ° Cover food with lid or aluminum foil.
54
Temperature setting too high. ° Reduce temperature setting.
Moisture escaping. • Cover food with lid or aluminum foil.
Drawer not fullg closed. * Push drawer in until latch engages.
Page 55

GE Service Protection Plus_"
GE, a name recognized worldwide for quality and dependability, offers you
Service Protection PlusT"-comprehensive protection on all your appliances-
No Hatter Whet Brand!
Benefits Include:
• Becked bg GE
• Allbrands covered
• Unlimited servicecells
• Allpartsend Ioborcosts included
• No out-of-pocketexpenses
• No hidden deductibles
• One 800 number to cell
You will be completelg satisfied with our service protection or gou mag request gour moneg back
on the remaining value of gour contract. No questions asked. It's that simple.
Protect gour refrigerator, dishwasher, washer and drger, range, TV,VCRand much more-ang brandJ
Plusthere's no extra charge for emergencg service and low monthlg financing is available. Even icemaker
coverage and food spoilage protection is offered. You can rest easg, knowing that all gour valuable household
products are protected against expensive repairs.
Place gour confidence in GEand call us in the U.S.toll-free at 800.626.2224
for more information.
*ALLbrands covered, up to 20 gears old, in the continental US
We'll Cover Ang
Appliance. Angwhere.
Angtime.*
__,i.,_ Cut here
Please place in envelope and mail to:
General Electric Company
Warrantg Registration Department
P.O.Box 32150
Louisville, KY40232-2150
55
Page 56

Consumer Product Ownership Registration
Dear Customer:
Thank you for purchasing our product and thank you for placing your confidence in us.
We ore proud to hove you us a customer!
Follow these three steps to protect your new appliance investment:
Complete and mail
your Consumer
Product Ownership
Registration today.
Hove the peace of
mind of knowing we
con contact you in the
unlikely event of a
safety modification
After mailing the
registration below,
store this document
in a safe place It contains
information you will need
should you require
service Our service
number is 800 GECARES
(8004322737)
Model Number Serial Number
I I I I I I I I I I I IIIIIIII
Important: If gou did not get a registration card with gour
product, detach and return the form below to
ensure that gour product is registered, or register
online at ge.com.
Consumer Product Ownership Registration
Read your Owner's
Nanual carefully
Itwill help you
operate your new
appliance properly
__,._ Cut here
I I I I I I I I I I I I I I I I I I
Model Number Serial Number
MriJ MsiJ MlsiJ Miss
FirstI LastI
Name I I I I I I I I I Name I I I I I I I I I I I I
Street I
Address I I I I I I I I I I I I I I I I I I I I I I I
Apt # I I I I I I I I E-mailAddress*
CityI I I I I I I I I I I I I I StateI I Code I I I
GE Consumer & Industrial
Appliances
General Electric Company
Louisville, KY40225
ge.com
Year _ Phone
* Pleaseprovide your e-mail address to receive, via e-mail, discounts, spedaI offers and other important
communications from GE Appliances {GEA)
Check here if you do not want to receive communications from GEA'scarefu,y selected partners
FAILURE TO COP1PLETE AND RETURN THIS CARD DOES NOT DIPIINISH YOUR
WARRANTY RIGHTS
For information about GEA'sprivacy and data usage policy, go to gecom and click on "Privacy Policy"or
call 800626222/4
Number _-I I I I I I
z_pI
56
Page 57

Accessories. ge.com
Looking For Something More?
You can find these accessories and mang more at ge.com (U.S.)or
www.GEAppliances.ca (Canada), or call 800.626.2002 (U.S.)or 888.261.3055 (Canada)
(during normal business hours). Have gour model number read_l.
Grates Surface Burner Caps
Oven and Drawer Rocks Broiler Pan Cleaner
Light Bulbs Knobs
Tired of discolored racks? Wishing you had extra-heavy-duty oven racks?
NOW AVAILABLEfor your range:
GE's innovative, self-cleanable porcelain-coated oven racks[
• Heavy Duty
• Durable
• Able to be cleaned in a self-cleaning oven
Visit ge.com (U.S.)or www.GEAppliances.ca (Canada) for more information.
57
Page 58

GE Gas Range Warranty. IForcustomersintheUnitedStates)
All warranty service provided by our Foctor_l Service Centers,
or an authorized Customer Core _ technician. To schedule
service, on-line, visit us at go.cam, or call 800.GE.CARES
(800./432.2737}. Please have serial number and model number
available when coiling for service.
GE Will Replace:
Any part of the range which failsdueto a defect in materials or workmanship. During this
limited one-year warranty, GEwill also provide,free of charge, all labor and in-home service
to replacethe defective part.
_!_Servicetrips to gour home to teach gou howto use
the product.
_IImproper installation,deliverg or maintenance.
_ Failure of the product if it is abused, misused,
or used for other than the intended purpose or
used commerciallg.
_!_Replacement of housefuses or resetting of circuit
breakers.
Staple your receipt here.
Proof of the original purchase
dote is needed to obtain service
under the warranty.
r_!_Damage to the product caused bg accident, fire, floods
or acts of God.
_,Incidental or consequential damage caused bg possible
defects with this appliance.
_,Damage caused after deliverg.
r_!¢Product not accessible to provide required service.
EXCLUSION OF IMPLIED WARRANTIES--Your sole and exclusive remedy is product repair as provided
in this Limited Warranty. Any implied warranties, including the implied warranties of merchantability
or fitness for a particular purpose, are limited to one year or the shortest period allowed by law.
I
This warranty is extended to the original pumhaser and any succeeding owner for products purchased for
home use within the USA. If the product is located in an area where service by o GEAuthorized Servicer is
not available, you may be responsible for o trip charge or you may be required to bring the product to an
Authorized GE Service Location for service. In Alaska, the warranty excludes the cost of shipping or service
calls to your home.
Some states do not allow the exclusion or limitation of incidental or consequential damages. This warranty
gives you specific legal rights, and you may also have other rights which vor_l from state to state. To know
what your legal rights are, consult your local or state consumer affbirs office or your state's Attorney General.
Warrantor: General Electric Company. Louisville, KY 40225
58
Page 59

GE Gas Range Warranty. IForcu=omersinCano al
All warranty service provided by our Factory Service Centers
or on authorized Customer Core ®technician. For service,
call 1.800.561.3344. Please have serial number and model
number available when calling for service.
Mabe Will Replace:
Any part of the range which fails due to a defect in materials or workmanship. Duringthis
limited one-year warranty, Habe will alsoprovide,free of charge, all labor and in-home service to
replace the defective part.
_s!_Service trips to gour home to teach gou how to use
the product.
_!_Improper installation, deliverg or maintenance.
_I Failure of the product if it is abused, misused,
or used for other than the intended purpose or
used commerciallg.
i_ Replacement of house fuses or resetting of circuit
breakers.
I Staple your receipt here.
Proof of the original purchase
date is needed to obtain service
under the warranty.
_!_Damage to the product caused bg accident, fire, floods
or acts of God.
r_!_Incidental or consequential damage caused bg possible
defects with thisappliance.
_',Damage caused after deliverg.
_',Product not accessible to provide required service.
EXCLUSION OF IMPLIED WARRANTIES--Your sole and exclusive remedy is product repair as provided
in this Limited Warranty. Any implied warranties, including the implied warranties of merchantability
or fitness for a particular purpose, are limited to one year or the shortest period allowed by law.
I
WARRANTOR IS NOT RESPONSIBLE FOR CONSEQUENTIAL DAMAGES. ]
Warrantor: MABE CANADA INC. ]
II
59
Page 60

Consumer Support.
k._______i
GEAppliancesWebsite
Have a question or need assistancewith gour appliance?Trg the GEAppliancesWebsite ang dag of the gear!
Forgreater convenience and faster service,gou can now download Owner's Manuals,order parts or even
schedule serviceon-line. In Canada:www.GEAppliances.ca
Inthe U.S.:ge.com
ScheduleService Inthe U.S.:ge.com
Expert GErepair service is only one step away from your doon Geton-line and schedule your service at your
convenience 24 hours ang dog of the year! Or call800.GE.CARES(800.432.2737)during normal business hours.
In Canada, call 1.800.561.3344
Real Life Design Studio
GEsupports the Universal Designconcept-products, services and environments that can be usedbg people of all
ages,sizesand capabilities.We recognize the need to designfor a wide range of phgsical and mental abilitiesand
impairments. Fordetails of GE'sUniversalDesignapplications, including kitchen designideas for people with disabilities,
check out our Website todag. Forthe hearing impaired, pleasecall 800.TDD.GEAC(800.833.4322).
In Canada, contact Manager,Consumer Relations,Habe Canada Inc.
Suite310, 1 Factory Lane
Moncton, N.B.EIC 9M3
ExtendedWarranties
In the U.S.:ge.com
In the U.S.:ge.com
Purchasea GEextendedwarrantg and learn about special discounts that are available while gour warrantg is still
in effect. Youcan purchase it on-line angtime, or call800.626.2224during normal businesshours. GEConsumer Home
Serviceswill still be there after gour warrantg expires.In Canada, call 1.888.261.2133
Partsand Accessories
Individualsqualified to service their own appliances can have parts or accessoriessent directlg to their homes
(VISA,HasterCard and Discovercards are accepted}.Orderon-line todag, 24 hours everg dog or bg phone at
800.626.2002during normal businesshours.
Instructions containedinthis manual coverproceduresto beperformed byany user.Other servicinggenerally shouldbe
referredto qualified servicepersonnel.Cautionmust beexercised,sinceimproper servicingmay causeunsafeoperation.
Customersin Canada should consult the yellow pages for the nearest Mabeservice center,or call 1.888.281.3055.
Contact Us
If gou are not satisfied with the service gou receive from GE,contact us on our Website with all the details including
gour phone number, or write to: General Manager, Customer Relations
GEAppliances, Appliance Park
Louisville, KY 40225
In Canada: www.GEAppliances.ca,or write to: Director,ConsumerRelations,Mabe Canada Inc.
Suite310, 1 Factorg Lane
Moncton, N.B.EIC 9M3
In the U.S.:ge.com
In the U.S.:ge,com
RegisterYourAppliance
Register gour new appliance on-line--at gour convenience! Timelg product registration will allow for enhanced
communication and prompt serviceunder the terms of gour warrantg, should the need arise.Youmag also mail
in the pre-printed registration card included in the packing material. In Canada: www.GEAppliances.ca
This book is printed on recgded papal
In the U.S.:ge,com
Printed in Mexico
 Loading...