

GE Appliances Quickset III, Appliances Quickset IV, Quickset III, Quickset IV Owner's Manual
k_.
14_
U
_m
k._
U
Iii
GEAppliances.com
Safety Instructions ......... 2-e
Operating Instructions
Clock and Timer ................... 16
Control Lock Out .................. 18
Energy Saver IVlode ............... 18
Oven .......................... 11-22
Adjust the Oven Thermostat ..... 18
Aluminum Foil ................... 13
Broiling, Broiling Guide .......... 14
Controls .......................... 11
Convection Oven ................ 15
Power Outage ................... 12
Sabbath Feature ................. 19
Self-Cleaning ................. 20, 21
Special Features ................. 18
Steam Cleaning .................. 22
Timed Baking .................... 17
Surface Units .................... 7-9
Care and Cleaning
Coil Surface Units ................. 29
Control Knobs .................... 23
Drip Pans ........................ 29
Glass Cooktop ................ 27, 28
Lift-Off Oven Door................ 25
Lift-Up Cooktop ................... 29
I
Light ............................. 26
Oven Heating Elements ........... 25
Racks ............................ 25
Standard-Clean Oven Interior .... 24
Vent .............................. 24
Troubleshooting Tips..... 30-33
Accessories ................... 34
Consumer Support
Consumer Support ...... Back Cover
Warranty ......................... 35
Quickset III and
Quickset IV Models
For a Spanish version of this
manual, visit our Website at
GEAppliances.com.
Para consultar una version
en espa_ol de este manual de
instrucciones, visite nuestro sitio
de internet GEAppliances.com.
In Canada contact us at:
www. GEAppliances.ca
Write the model and serial
numbers here:
Model #
Serial #
You can find them on a label
behind the drawer or behind the
lower oven door on the front of
the range frame.
Printed on
Recycled Paper
49-80632 03-11 GE
IMPORTANT SAFETY INFORMATION.
READ ALL INSTRUCTIONS BEFORE USING.
[A WARNING I
Read all safety instructions before using the product. Failure to follow these instructions may result in fire, electric shock,
serious injury or death.
ANTI-TIP DEVICE
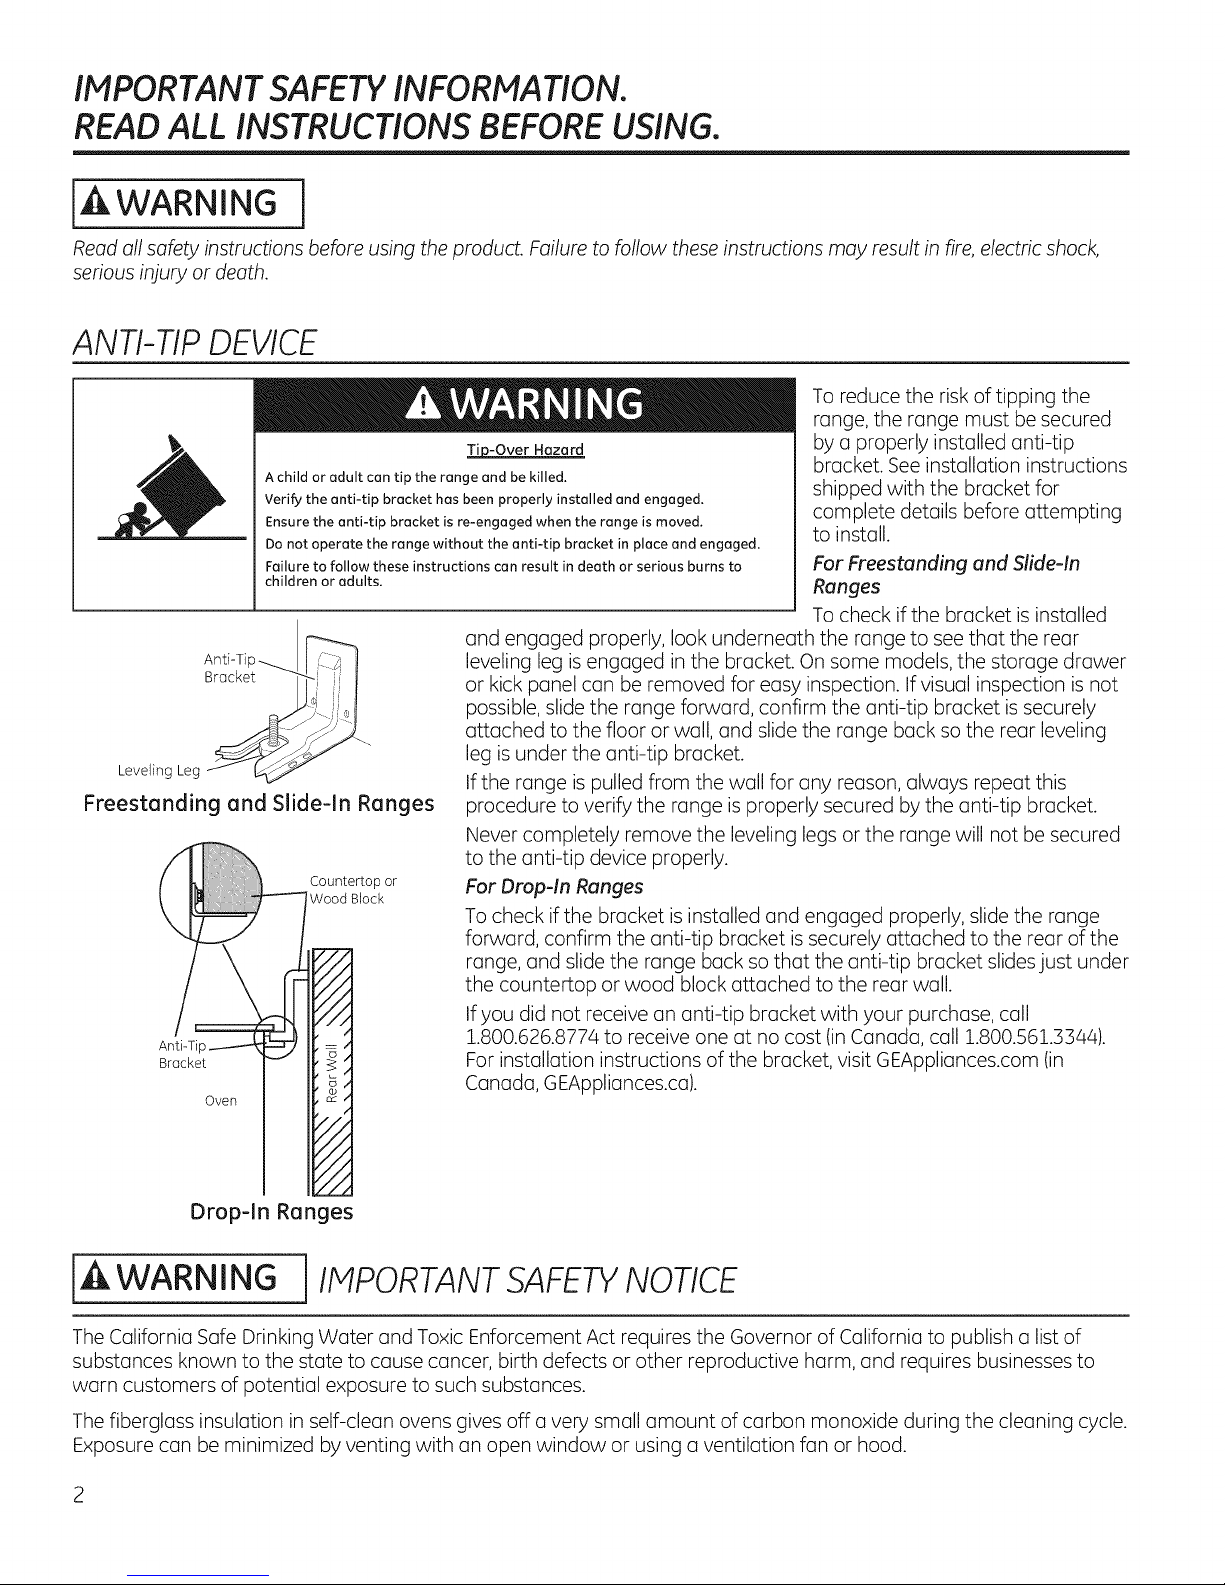
To reduce the risk of tipping the
range, the range must be secured
by a properly installed anti-tip
bracket. See installation instructions
shipped with the bracket for
complete details before attempting
to install.
For Freestanding and Slide-In
Ranges
To check if the bracket is installed
A child or adult can tip the range and be killed.
Verify the anti-tip bracket has been properly installed and engaged.
Ensure the anti-tip bracket is re-engaged when the range is moved.
Do not operate the range without the anti-tip bracket in place and engaged.
Failure to follow these instructions can result in death or serious burns to
children or adults.
AntPTip _
Bracket -'_--- ; !
LevelingLeg__
Freestanding and Slide-ln Ranges
Countertop or
Wood Block
Anti-T
Bracket
Oven
Tji0-Over Hazard
and engaged properly, look underneath the range to see that the rear
leveling leg is engaged in the bracket. On some models, the storage drawer
or kick panel can be removed for easy inspection. If visual inspection is not
possible, slide the range forward, confirm the anti-tip bracket is securely
attached to the floor or wall, and slide the range back so the rear leveling
leg is under the anti-tip bracket.
If the range is pulled from the wall for any reason, always repeat this
procedure to verify the range is properly secured by the anti-tip bracket.
Never completely remove the leveling legs or the range will not be secured
to the anti-tip device properly.
For Drop-In Ranges
To check if the bracket is installed and engaged properly, slide the range
forward, confirm the anti-tip bracket is securely attached to the rear of the
range, and slide the range back so that the anti-tip bracket slides just under
the countertop or wood block attached to the rear wall.
If you did not receive an anti-tip bracket with your purchase, call
1.800.626.8774 to receive one at no cost (in Canada, call 1.800.561.3344).
For installation instructions of the bracket, visit GEAppliances.com (in
Canada, GEAppliances.ca).
Drop-ln Ranges
[A WARNING i IMPORTANT SAFETYNOTICE
The California Safe Drinking Water and Toxic Enforcement Act requires the Governor of California to publish a list of
substances known to the state to cause cancer, birth defects or other reproductive harm, and requires businesses to
warn customers of potential exposure to such substances.
The fiberglass insulation in self-clean ovens gives off a very small amount of carbon monoxide during the cleaning cycle.
Exposure can be minimized by venting with an open window or using a ventilation fan or hood.
[A WARNING ] GENERAL SAFETYINSTRUCTIONS
GEAppliances.com
Use this appliance for its intended purpose as described
in this Owner's Manual.
Be sure your appliance is properly installed and
grounded by a qualified installer in accordance with the
provided installation instructions.
Do not attempt to repair or replace any part of your
range unless it is specifically recommended in this
manual. All other servicing should be referred to a
qualified technician.
Before performing any service, unplug the range
or disconnect the power supply at the household
distribution panel by removing the fuse or switching off
the circuit breaker.
Do not leave children alone-children should not be left
alone or unattended in on area where on appliance is in
use. They should never be allowed to climb, sit or stand
on any part of the appliance.
CAUTION : Do not store items of interest to
children above a range or on the backguard of a
range-children climbing on the range to reach items
could be seriously injured.
Use only dry pot holders-moist or damp pot holders on
hot surfaces may result in burns from steam. Do not let
pot holders touch hot surface units or heating elements.
Do not use a towel or other bulky cloth in place of pot
holders.
iiiil}i
Do not touch the surface units, the heating elements
or the interior surface of the oven. These surfaces may
be hot enough to burn even though they are dark in
color. During and after use, do not touch, or let clothing
or other flammable materials contact the surface units,
areas nearby the surface units or any interior area of
the oven; allow sufficient time for cooling first. Other
surfaces of the appliance may become hot enough
to cause burns. Potentially hot surfaces include the
cooktop, areas facing the cooktop, oven vent opening,
surfaces near the opening and crevices around the
oven door.
iiiiiiili_
Do not heat unopened food containers. Pressure could
build up and the container could burst, causing an
injury.
iiiiiiili_
Donot use aluminum foil to line drip pans or anywhere
inthe oven,except as described in this manual. Foilcan
trap heat or melt, resulting indamage to the product
and a shock or fire hazard.
iiiiiiili_
Avoid scratching or impacting glass doors, cook tops or
control panels. Doing so may lead to glass breakage. Do
not cook on a product with broken glass. Shock, fire or
cuts may occur.
iiiiiiili_
Cook meat and poultry thoroughly-meat to at least an
internal temperature of 160°F and poultry to at least
an internal temperature of 180°F. Cooking to these
temperatures usually protects against foodborne illness.
Never use your appliance for warming or heating the
room.
iA WARNING
1KEEPFLAMMABLE MATERIALSAWAY FROM
THERANGE.
Do not store or use flammable materials in an oven or
near the cooktop, including paper, plastic, pot holders,
linens, wall coverings, curtains, drapes and gasoline or
other flammable vapors and liquids.
Never wear loose-fitting or hanging garments while
using the appliance. These garments may ignite if they
contact hot surfaces causing severe burns.
Do not let cooking grease or other flammable materials
accumulate in or near the range. Grease in the oven or
on the cooktop may ignite.
Clean ventilating hoods frequently. Grease should not
be allowed to accumulate on the hood or filter.
IMPORTANT SAFETY INFORMATION.
READ ALL INSTRUCTIONS BEFORE USING.
i
WARNING j IN THEEVENTOFA FIRE,TAKETHEFOLLOWINGSTEPS
TOPREVENT THEFIREFROM SPREADING:
*:, Do not use water on grease fires. Never pick up a
flaming pan. Turn the controls off. Smother a flaming
pan on a surface unit by covering the
pan completely with a well-fitting lid, cookie sheet or flat
tray. Use a multi-purpose dry chemical or foam-type fire
extinguisher.
*:, If there is a fire in the oven during baking, smother the
fire by closing the oven door and turning the oven off or
by using a multi-purpose dry chemical or foam-type fire
extinguisher.
If there is a fire in the oven during self-clean, turn the
oven off and wait for the fire to go out. Do not force
the door open. Introduction of fresh air at self-clean
temperatures may lead to a burst of flame from the
oven. Failure to follow this instruction may result in
severe burns.
iA WARNING j COOKTOPSAFETYINSTRUCTIONS
Never leave the surface units unattended at medium or
high heat settings. Boilovers cause smoking and greasy
spillovers that may catch on fire.
Never leave oil unattended while frying. If allowed to
heat beyond its smoking point, oil may ignite resulting
in fire that may spread to surrounding cabinets. Use a
deep fat thermometer whenever possible to monitor oil
temperature.
To avoid oil spillover and fire, use a minimum amount of
oil when shallow pan-frying and avaid caaking frazen
foads with excessive amounts of ice.
Useproper pan size--select cookware having flat
bottoms largeenough to cover the surface heating
element.The use of undersizedcookware will expose
a portion of the surface unit to direct contact and may
resultin ignition of clothing. Properrelationship of
cookware to surface unit will also improve efficiency.
iiiiiil
Onlycertain typesof glass,glass/ceramic, earthenware
orother glazed containers are suitablefor cooktop
service;others may break because of the sudden
change intemperature.
iiiiiiili_
To minimize the possibility of burns, ignitian of
flammable materials and spillage, the handle of a
container should be turned toward the center of the
range withaut extending aver nearby surface units.
iiiiiiili_
When preparing flaming foods under a hood, turn the
fan on.
iiiiiiili_
If power is lost to an electric cooktop while a surface
unit is ON, the surface unit will turn back on as soon
as power is restored. In the event of power loss, failure
to turn all surface unit knobs to the OFF position may
result in ignition of items on or near the cooktop, leading
to serious injury or death.
IA WARNING 1RADIANT COOKTOP SAFETYINSTRUCTIONS
(Some models)
GEAppliances.com
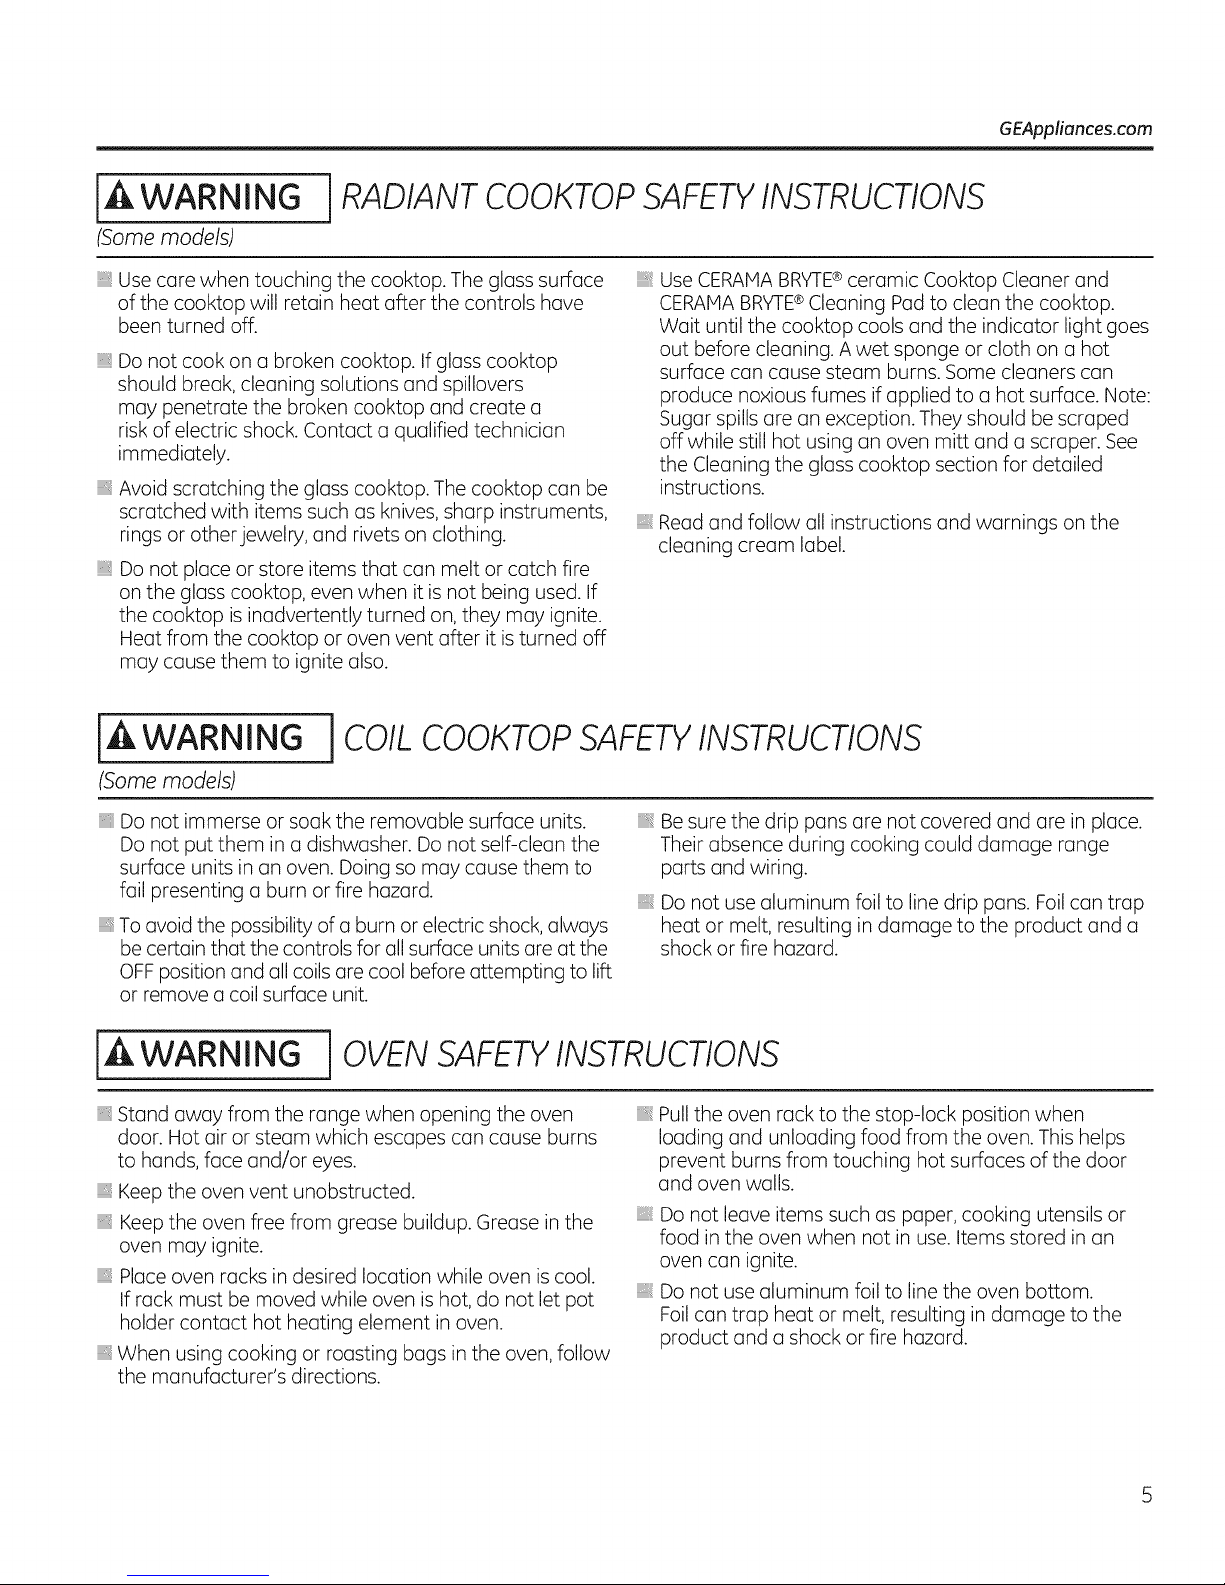
Use care when touching the cooktop. The glass surface
of the cooktop will retain heat after the controls have
been turned off.
Do not cook on a broken cooktop. If glass cooktop
should break, cleaning solutions and spillovers
may penetrate the broken cooktop and create a
risk of electric shock. Contact a qualified technician
immediately.
Avoid scratching the glass cooktop. The cooktop can be
scratched with items such as knives, sharp instruments,
rings or other jewelry, and rivets on clothing.
Do not place or store items that can melt or catch fire
on the glass cooktop, even when it is not being used. If
the cooktop is inadvertently turned on, they may ignite.
Heat from the cooktop or oven vent after it is turned off
may cause them to ignite also.
[A WARNING
(Some models)
Do not immerse or soak the removable surface units.
Do not put them in a dishwasher. Do not self-clean the
surface units in an oven. Doing so may cause them to
fail presenting a burn or fire hazard.
To avoid the possibility of a burn or electric shock, always
be certain that the controls for all surface units are at the
OFFposition and all coils are cool before attempting to lift
or remove a coil surface unit.
i COIL
COOKTOPSAFETYINSTRUCTIONS
iiiil}i
Use CERAHA BRY1-E®ceramic Cooktop Cleaner and
CERAHA BRYTE®Cleaning Pad to clean the cooktop.
Wait until the cooktop cools and the indicator light goes
out before cleaning. A wet sponge or cloth on a hot
surface can cause steam burns. Some cleaners can
produce noxious fumes if applied to a hot surface. Note:
Sugar spills are an exception. They should be scraped
off while still hot using an oven mitt and a scraper. See
the Cleaning the glass cooktop section for detailed
instructions.
iiiiiiili_
Read and follow all instructions and warnings on the
cleaning cream label.
Be sure the drip pans are not covered and are in place.
Their absence during cooking could damage range
ports and wiring.
Do not use aluminum foil to line drip pans. Foil can trap
heat or melt, resulting in damage to the product and a
shock or fire hazard.
iA WARNING 1OVEN SAFETYINSTRUCTIONS
Stand away from the range when opening the oven
door. Hot air or steam which escapes can cause burns
to hands, face and/or eyes.
} Keep the oven vent unobstructed.
Keep the oven free from grease buildup. Grease in the
oven may ignite.
Place oven racks in desired location while oven is cool.
If rack must be moved while oven is hot, do not let pot
holder contact hot heating element in oven.
When using cooking or roasting bags in the oven, follow
the manufacturer's directions.
iiiil}i
Pull the oven rack to the stop-lock position when
loading and unloading food from the oven. This helps
prevent burns from touching hot surfaces of the door
and oven walls.
_:, Do not leave items such as paper, cooking utensils or
food in the oven when not in use. Items stored in an
oven can ignite.
_:, Do not use aluminum foil to line the oven bottom.
Foil can trap heat or melt, resulting in damage to the
product and a shock or fire hazard.
IMPORTANT SAFETY INFORMATION.
READ ALL INSTRUCTIONS BEFORE USING.
[_ WARNING
(Some models)
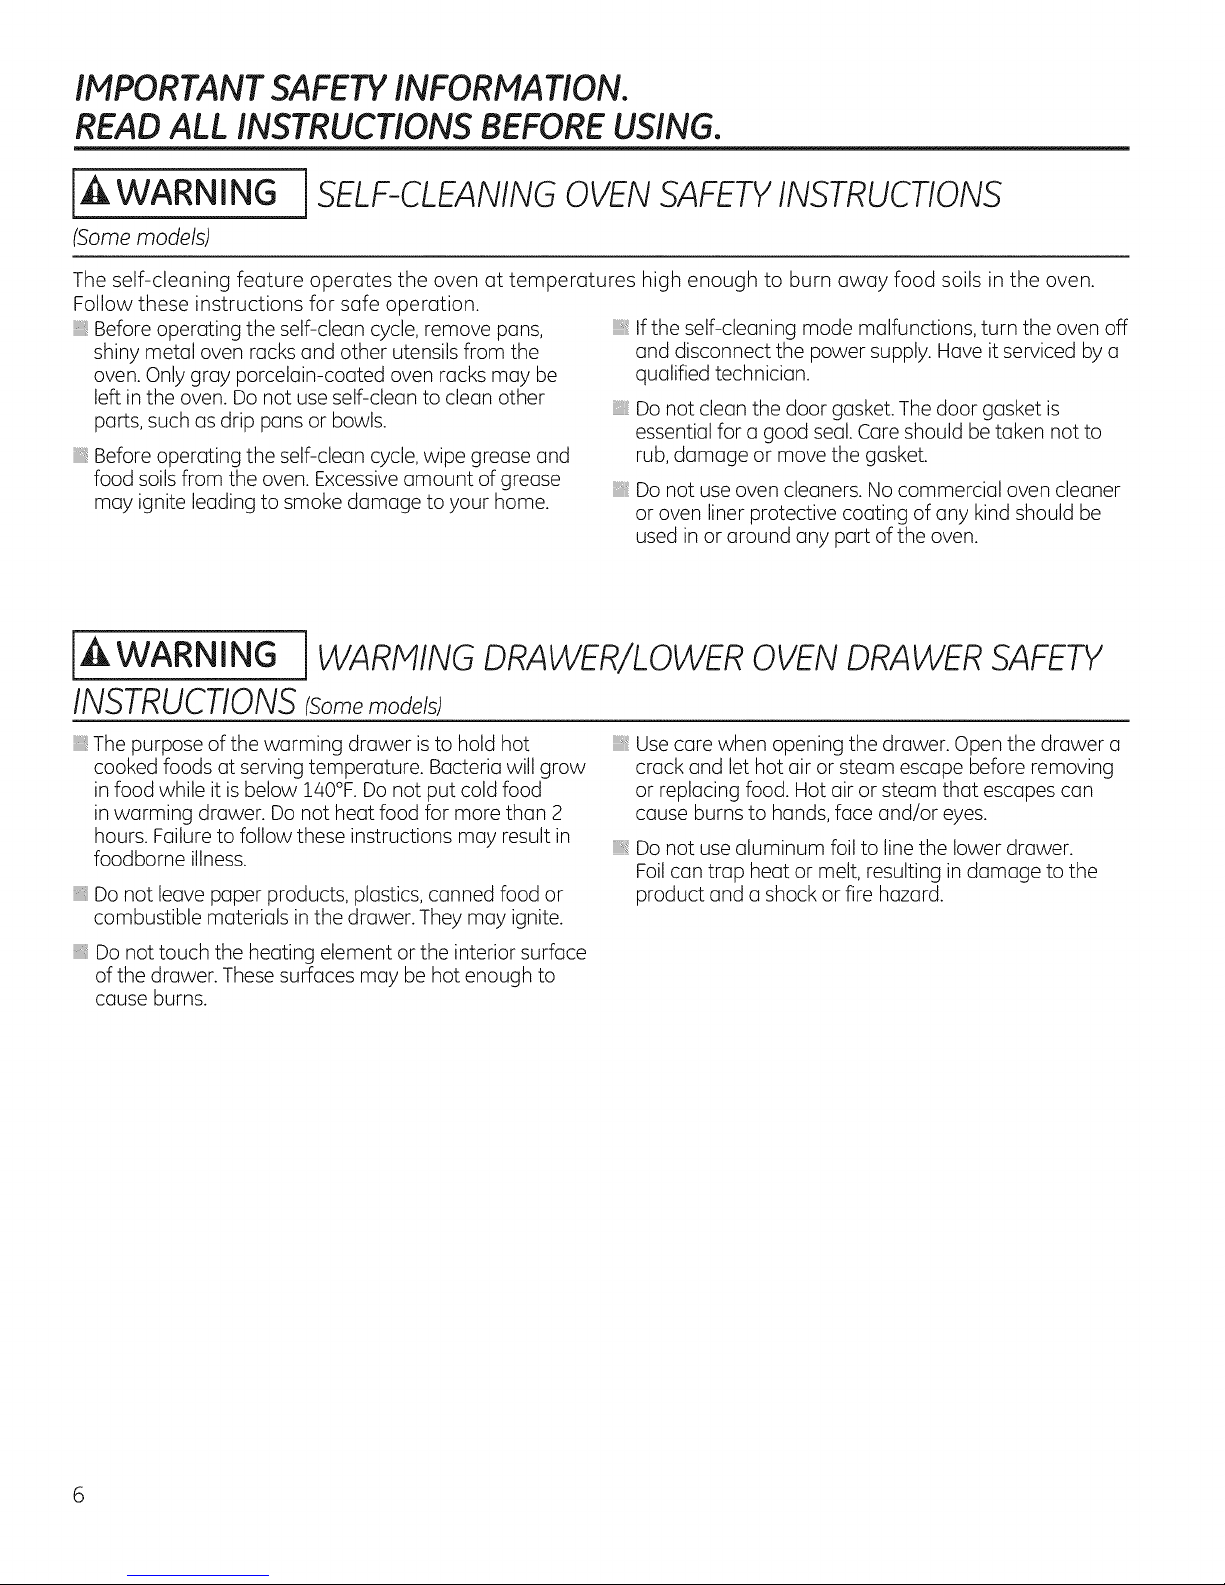
The self-cleaning feature operates the oven at temperatures high enough to burn away food soils in the oven.
Follow these instructions for safe operation.
Before operating the self-clean cycle, remove pans,
shiny metal oven racks and other utensils from the
oven. Only gray porcelain-coated oven racks may be
left in the oven. Do not use self-clean to clean other
parts, such as drip pans or bowls.
Beforeoperating the self-clean cycle,wipe grease and
food soilsfrom the oven.Excessiveamount of grease
may ignite leadingto smoke damage to your home.
JSELF-CLEANINGOVENSAFETYINSTRUCTIONS
If the self-cleaning mode malfunctions, turn the oven off
and disconnect the power supply. Have it serviced by a
qualified technician.
Do not clean the door gasket. The door gasket is
essential for a good seal. Care should be taken not to
rub, damage or move the gasket.
iiiiiil
Do not use oven cleaners. No commercial oven cleaner
or oven liner protective coating of any kind should be
used in or around any part of the oven.
[A WARNING i WARIVllNG DRAWER/LOWER OVEN DRAWER SAFETY
INSTRUCTIONS (Somemodels)
_:,The purpose of the warming drawer is to hold hot
cooked foods at serving temperature. Bacteria will grow
in food while it is below 140°F. Do not put cold food
in warming drawer. Do not heat food for more than 2
hours. Failure to follow these instructions may result in
foodborne illness.
Do not leave paper products, plastics, canned food or
combustible materials in the drawer. They may ignite.
Use care when opening the drawer. Open the drawer a
crack and let hot air or steam escape before removing
or replacing food. Hot air or steam that escapes can
cause burns to hands, face and/or eyes.
Do not use aluminum foil to line the lower drawer.
Foil can trap heat or melt, resulting in damage to the
product and a shock or fire hazard.
Do not touch the heating element or the interior surface
of the drawer. These surfaces may be hot enough to
cause burns.
Using the surface units, ionsomemode_sI GEApUionces.com
jA WARNING FIREHAZARD: Never leave the range unattended with the cooktop on medium or highsettings. Keep flammable items away from the cooktop. Turn off all controls when
done cooking. Failure to follow these instructions can result in fire, serious injury or
death.
Throughout this manual, features and appearance may vary from your model.
JFF
i ii:>_ i_, ¸
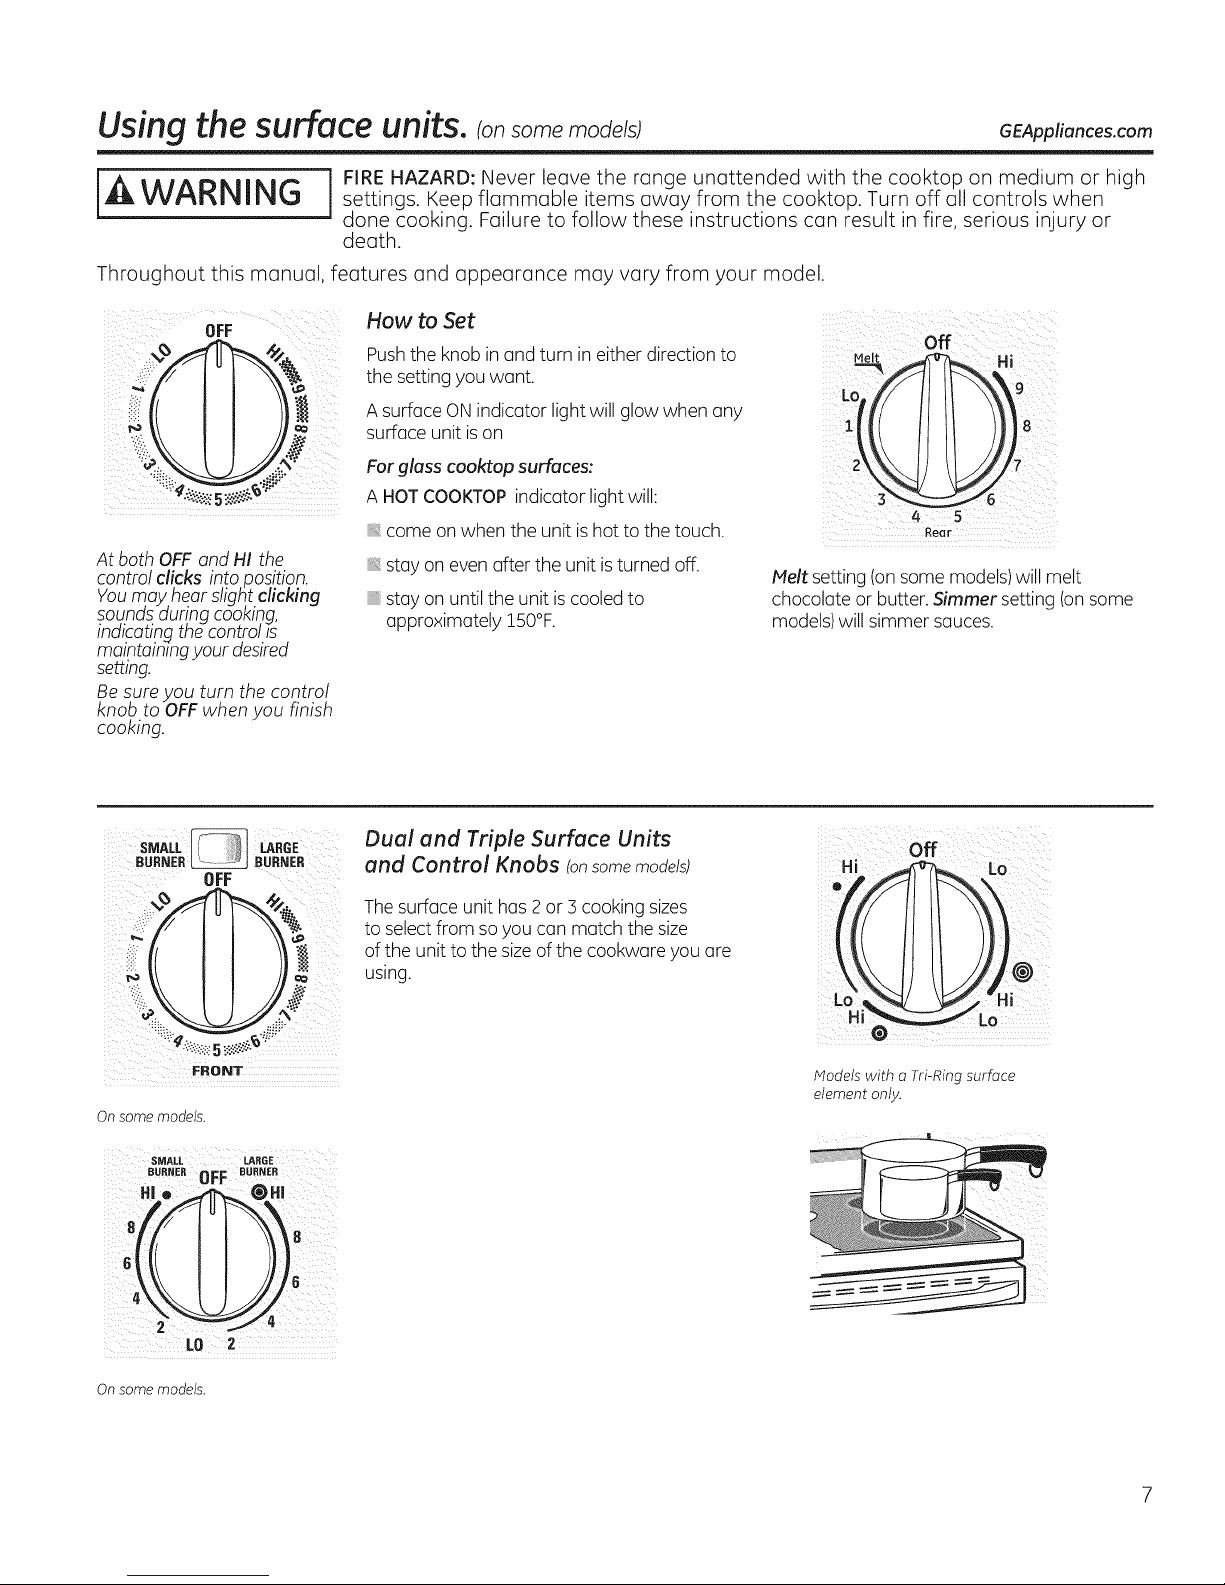
At both OFF and HI the
control clicks into position.
Youmay hear slight clicking
sounds dur!ng cooking,
indicating the controlss
maintainingyour desired
setting.
Be sure you turn the control
knob to OFFwhen you finish
cooking.
iiZ_,x ) f
How to Set
Pushthe knob in and turn in either direction to
the setting you want.
A surface ON indicator light will glow when any
surface unit is on
Forgloss cooktop surfaces:
A HOTCOOKTOPindicator light will:
come on when the unit ishot to the touch.
stay on even after the unit isturned off.
stay on until the unit is cooled to
approximately 150°F.
Dual and Triple Surface Units
and Control Knobs (onsomemodels)
The surface unit has2or 3 cooking sizes
to select from so you can match the size
of the unit to the size of the cookware you are
using.
iill iilk ii ii
Rear
Melt setting (on some models)will melt
chocolate or butter. Simmer setting (on some
models)will simmer sauces.
Hi _ Lo
O
!_ii!!_¸
FBONIF
Onsomemodels.
SMALL LABGE
BUe.EROFF ....E.
8
LO 2
Onsomemodels.
Models with a Tri-Ring surface
element only.

Using the surface units,
Throughout this manual, features and appearance may vary from your model.
Warming Zone
Using the Warming Zone (on some models)
Forbest results,all foods on the WARMING
IAWARNING
FOODPOISONHAZARD:Bacteriamay grow in
food at temperatures below 140°F.
Always start with hot food. Donot use warm
setting to heat cold food.
Donot use warm setting for more than
2 hours.
Failureto follow these instructions may result in
foodborne illness.
The WARMINGZONE,located in the back
center of the glass surface,will keephot, cooked
food at serving temperature. Always start with
hot food. Do not useto heat cold food. Placing
uncooked or coldfood on the WARMINGZONE
could result in foodborne illness.
Pushand turn the control knob to any desired
setting.
ZONEshould be covered with a lid or aluminum
foil.When warming pastriesor breads,the
cover should be vented to allow moisture to
escape.
Usethe lowest setting for breads and pastries.
Usea medium setting for vegetables, sauces,
stews,cream soups, butter and chocolate. Use
the highest setting for soups (liquid)and hot
beverages.Theseinitial suggested settingsare
for reference only.Thetemperature, type and
amount of food, type of pan, and the time held
will affect the quality of the food.
Always use pot holders or oven mitts when
removing food from the WARMINGZONE,
since cookware and plates will be hot.
NOTE:Thesurface warmer will not glow red
likethe cooking elements.
Home Canning Tips
Be surethe canner iscentered over the surface
unit.
Make surethe canner isflat on the bottom.
Toprevent burns from steam or heat, use
caution when canning.
Use recipesand procedures from reputable
sources.Theseare availablefrom
manufacturers such as Ball®and Kerr®and the
Department of Agriculture Extension Service.
Flat-bottomed canners are recommended. Use
of water bath canners with rippled bottoms
may extend the time required to bring the
water to a boil.
8
GEAppliances.com
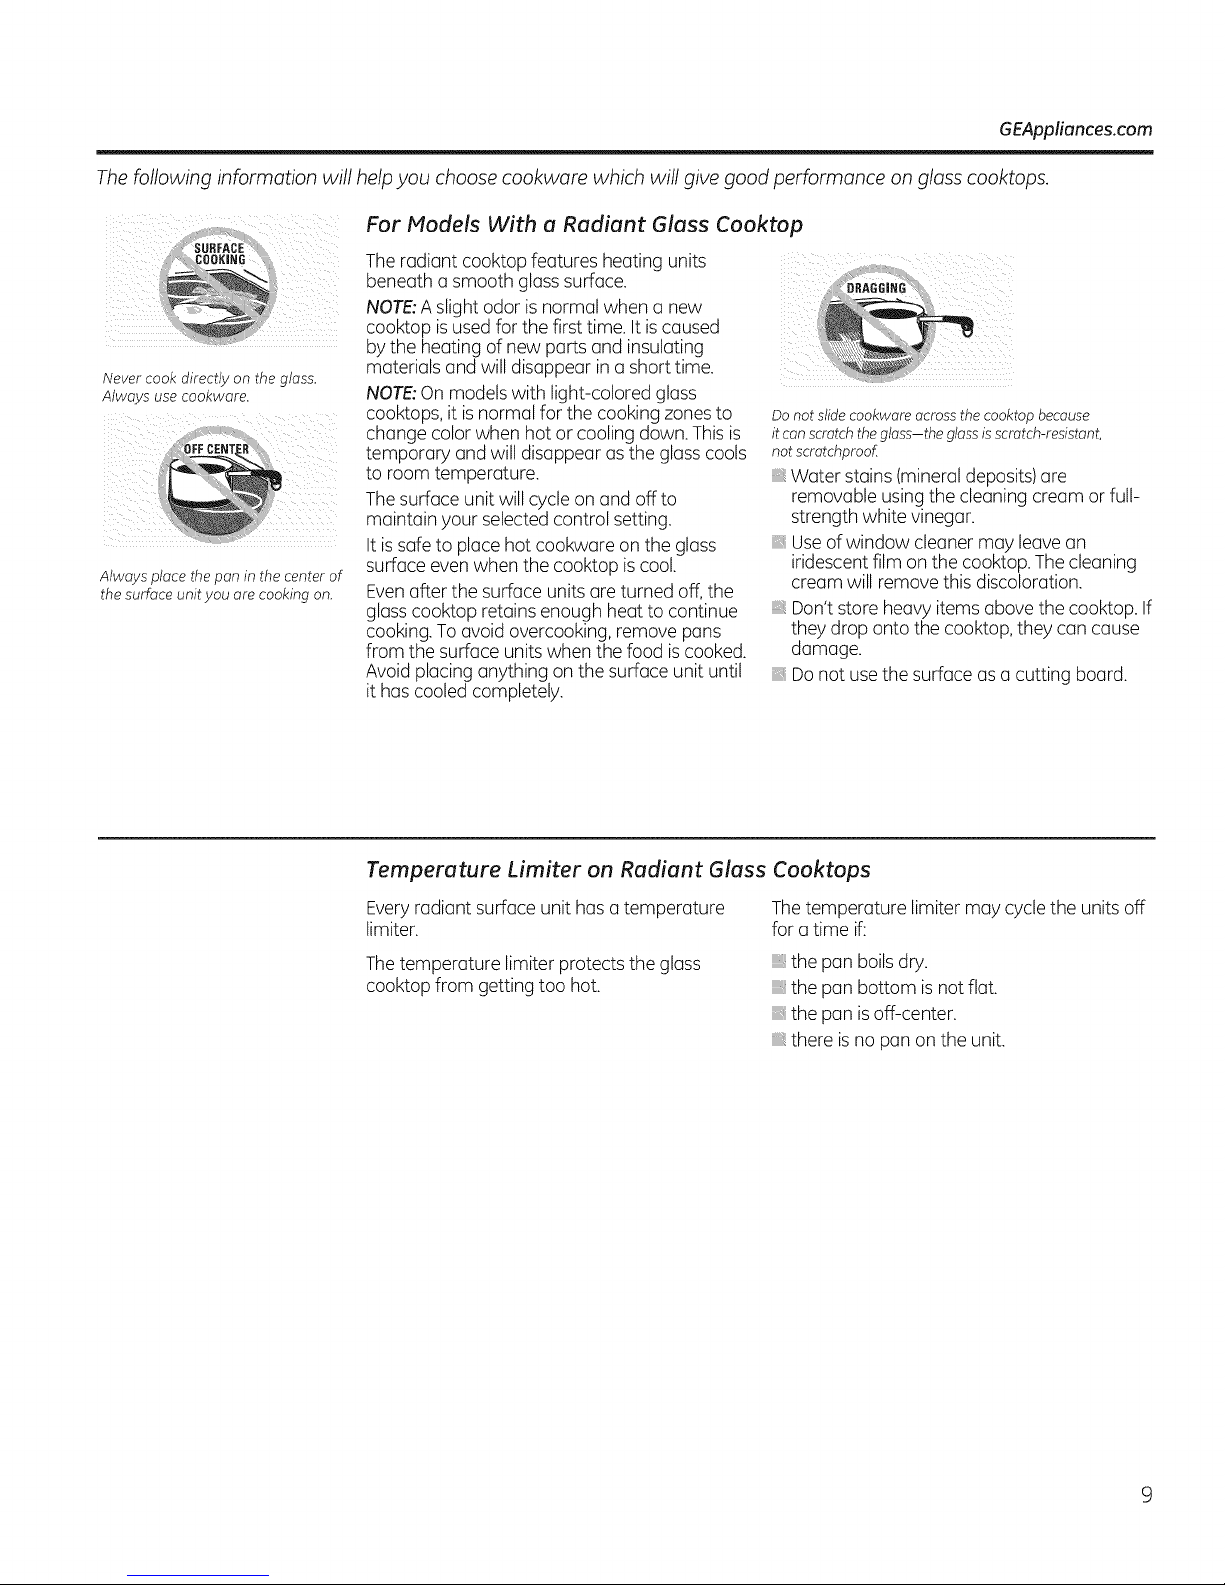
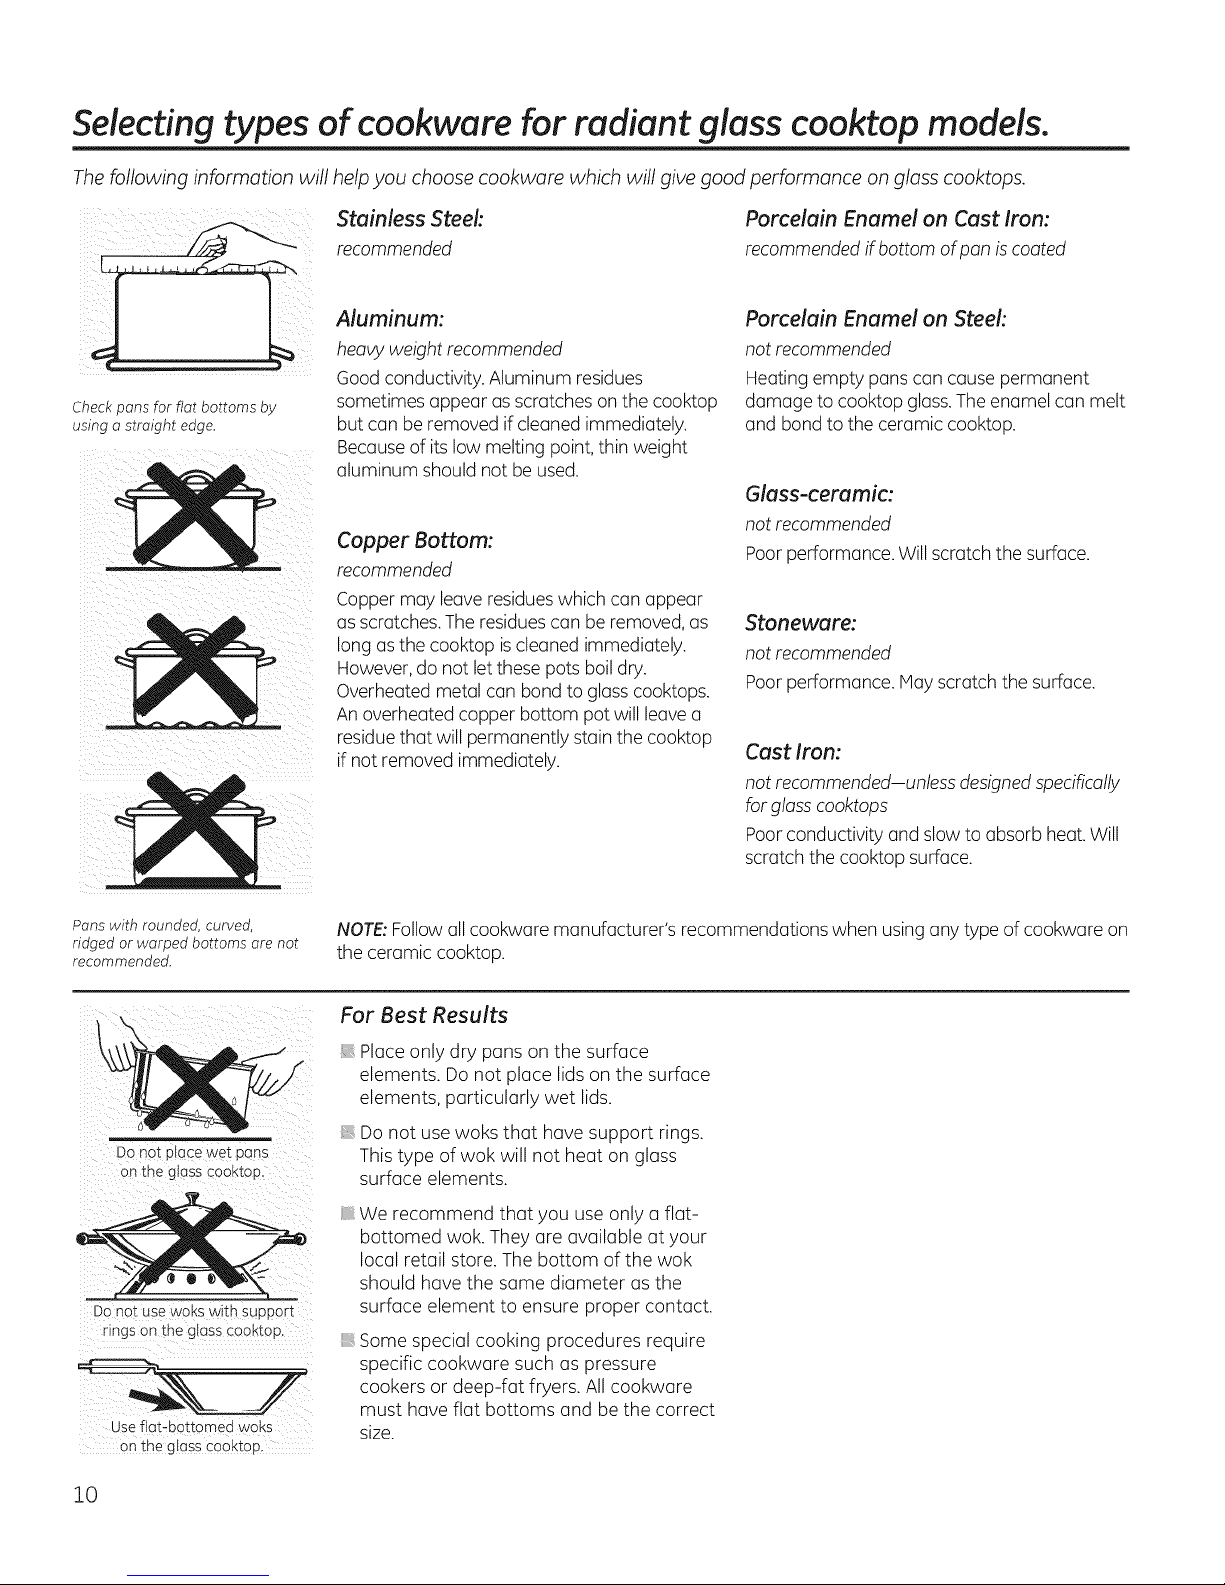
The following information will help you choose cookware which will give good performance on glass cooktops.
For Models With a Radiant Glass Cooktop
The radiant cooktop features heating units
beneath a smooth glass surface.
cooktop isused for the first time. It iscaused
NOTE:Aslight odor is normal when a new _
bythe heating of new parts and insulating
I\lever COOK OlreC[ly on [ne g ass.
AIvi oys use COOKWOFe.
Always place the pan in the center of
the surface unit you are cooking on.
materials and will disappear in a short time.
NOTE:Onmodels with light-colored glass
cooktops,it is normal for the cooking zonesto
change color when hot or cooling down. This is
temporary and will disappear as the glass cools
to room temperature.
Thesurface unit will cycle on and off to
maintain your selectedcontrol setting.
It issafe to place hot cookware on the glass
surface even when the cooktop is cool.
Evenafter the surface units are turned off, the
glasscooktop retains enough heat to continue
cooking.To avoid overcooking, remove pans
from the surface units when the food is cooked.
Avoid placing anything on the surface unit until
Do not slide cookware across the cooktop because
it can scratch the glass-the glassis scratch-resistant,
not scratchproof
,, Water stains (mineraldeposits) are
removable using the cleaning cream or full-
strength white vinegar.
,, Useofwindow cleaner may leavean
iridescent film on the cooktop. The cleaning
cream will remove this discoloration.
Don'tstore heavy items above the cooktop. If
they drop onto the cooktop, they can cause
damage.
Donot usethe surface asa cutting board.
it has cooled completely.
Temperature Limiter on Radiant Glass
Everyradiant surface unit has a temperature
limiter.
Thetemperature limiter protects the glass
cooktop from getting too hot.
Cooktops
Thetemperature limiter may cycle the units off
for a time if:
the pan boils dry.
the pan bottom isnot flat.
the pan isoff-center.
there isno pan on the unit.
Selecting types of cookware for radiant glass cooktop models.
The following information will help you choose cookware which will give good performance on glass cooktops.
Check pans for flat bottoms by
using o straight edge.
Stainless Steel:
recommended
Aluminum:
heavy weight recommended
Good conductivity. Aluminum residues
sometimes appear asscratches on the cooktop
but can be removed ifcleaned immediately.
Becauseof its low melting point, thin weight
aluminum should not be used.
Copper Bottom:
recommended
Copper may leaveresidueswhich can appear
as scratches.The residuescan be removed,as
long asthe cooktop is cleaned immediately.
However, do not let these pots boil dry.
Overheated metal can bond to glass cooktops.
An overheated copper bottom pot will leavea
residuethat will permanently stain the cooktop
if not removed immediately.
Porcelain Enamel on Cast Iron:
recommended if bottom of pan is coated
Porcelain Enamel on Steel:
not recommended
Heating empty pans can cause permanent
damage to cooktop glass.Theenamel can melt
and bond to the ceramic cooktop.
Glass-ceramic:
not recommended
Poor performance. Willscratch the surface.
Stoneware:
not recommended
Poor performance. May scratch the surface.
Cast Iron:
not recommended-unless designedspecifically
for glass cooktops
Poor conductivity and slow to absorb heat.Will
scratch the cooktop surface.
Pans with rounded, curved,
ridged or warped bottoms are not
recommended.
Do not place wet pans
Do not use woks with SUppo[t
Use flat-bottomed woks
Onthe glass cooktop.
10
NOTE:Followall cookware manufacturer's recommendations when using any type of cookware on
the ceramic cooktop.
For Best Results
i Placeonly dry pans on the surface
elements. Do not place lids on the surface
elements, particularly wet lids.
Do not use woks that have support rings.
This type of wok will not heat on glass
surface elements,
: We recommend that you use only a flat-
bottomed wok. They are available at your
local retail store. The bottom of the wok
should have the same diameter as the
surface element to ensure proper contact.
Some special cooking procedures require
specific cookware such as pressure
cookers or deep-fat fryers. All cookware
must have flat bottoms and be the correct
size.
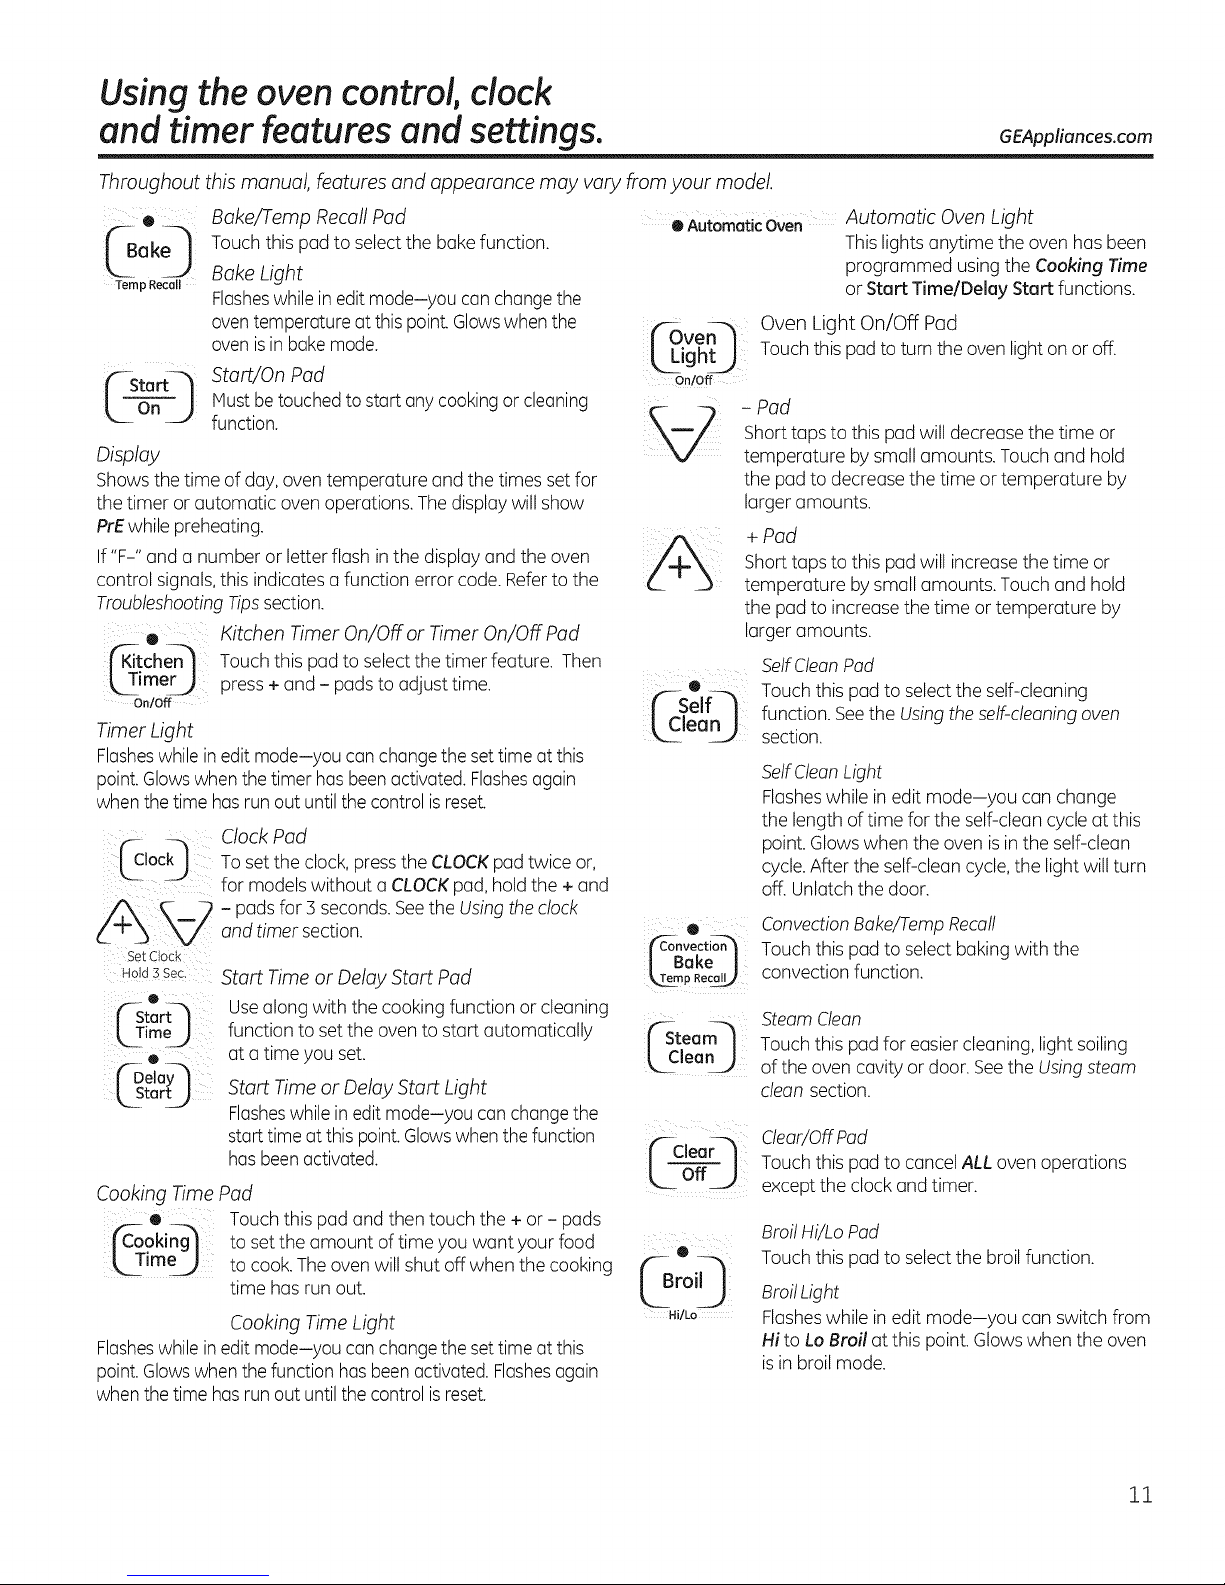
Using the oven control clock
and timer features and settings. GEApplionces.com
Throughout this manual, features and appearance may vary from your model.
®
_a k0
Temp Recall
Display
Shows the time of day, oven temperature and the times set for
the timer or automatic oven operations. Thedisplay will show
PrEwhile preheating.
If "F-" and a number or letter flash in the display and the oven
control signals,thisindicates a function error code. Referto the
TroubleshootingTipssection.
• Kitchen Timer On/Offor Timer On/OffPad larger amounts.
_tch_q Touch this pad to select the timer feature. Then
_ mer__ press + and - padsto adjust time. O
oo/off _"- Self-"l
Timer Light _lean_
Flasheswhile inedit mode-you can changethe settime at this
point.Glowswhenthe timer has beenactivated.Flashesagain
when the time hasrunout untilthe control isreset.
Set Clock
Hold 3 Sec,
O
('--Start_
_ Time__
o
CDelayq
L2to U
Cooking Time
k TimeJ
Flasheswhile inedit mode-you can changethe settime at this
point.Glowswhenthe function hasbeen activated.Flashesagain
when the time hasrunout untilthe control isreset.
Bake/Temp Recall Pad
Touch this pad to selectthe bakefunction.
Bake Light
Flasheswhile in editmode-you can changethe
oventemperature at this point.Glowswhenthe
ovenis in bakemode.
Start/On Pad
Mustbetouched to start any cookingor cleaning
function.
Clock Pad
Toset the clock, pressthe CLOCKpad twice or,
for models without a CLOCKpad, hold the +and
- padsfor 3 seconds.Seethe Using the clock
and timer section. •
o AutomaticOven Automatic Oven Light
['_0ven_ Oven Light On/Off Pad
_ight_ Touch this pad to turn the ovenlight on or off.
OnfOff
d;ovocti
Start Time or Delay Start Pad _TempRecel_
Usealong with the cooking function or cleaning
function to set the oven to start automatically f-Steam--'j
at a time you set. _lean _
Start Time or Delay Start Light
Flasheswhile in editmode-you can changethe
starttime atthis point.Glowswhen the function ["-CleaQ
hasbeenactivated. L off J
Pad
Touch this pad and then touch the + or - pads
to set the amount of time you want your food
to cook.The oven will shut off when the cooking
time has run out.
Cooking Time Light
I Bake I
:0
ro,0
Hi/Lo
Thislights anytime the oven has been
programmed using the Cooking Time
or Start Time/Delay Start functions.
Shorttaps to this pad will decrease the time or
- Pad
temperature by small amounts. Touch and hold
the pad to decrease the time or temperature by
larger amounts.
+ Pad
Shorttaps to this pad will increasethe time or
temperature bysmall amounts. Touch and hold
the pad to increase the time or temperature by
SelfClean Pad
Touch this pad to selectthe self-cleaning
function. Seethe Usingtheself-cleaningoven
section.
SelfClean Light
Flasheswhile in edit mode-you can change
the length of time for the self-clean cycle at this
point. Glowswhen the oven is inthe self-clean
cycle.After the self-clean cycle,the light will turn
off. Unlatchthe door.
ConvectionBake/Tamp Recall
Touch this pad to select bakingwith the
convection function.
Steam Clean
Touch this pad for easier cleaning, light soiling
of the oven cavity or door. Seethe Usingsteam
clean section.
Clear/Off Pad
Touch this pad to cancel ALL oven operations
except the clock and timer.
Broil Hi/Lo Pad
Touch this pad to selectthe broil function.
Broil Light
Flasheswhile in edit mode-you can switch from
Hi to Lo Broil at this point. Glows when the oven
isin broil mode.
11
 Loading...