

Page 1
Iron Safety
Iron
IMPORTANT SAFEGUARDS
When using your flatiron, basic safety precautions should alw'ays be followed, including
the following:
1. Use iron only for its intended use.
2. To protect against risk of electric shock, do not immerse the iron in water or other liquids.
3. The iron should always be turned to OFF before plu^ng or unplugging from outlet.
Never yank cord to disconnect from outlet; instead, grasp plug and pull to disconnect.
4. Do not allow cord to touch hot surfaces. l.et iron cool completely before putting away.
5. Always disconnect iron from electrical outlet when Ailing with water or emptying and when
not in use.
6. Do not operate iron with a damaged cord or if the iron has been dropped or damaged. To
avoid the lisk of electric shock, do not disassemble the iron. Contact an authorized service
facility for information on examination and repair. Incorrect reassembly can cause a risk of
electric shock when the iron is used.
7. Close super\ision is necessary for any appliance being used by or near children. Do not
leave iron unattended while connected or on an ironing boaiti.
8. Bums can occur from touching hot metal parts, hot \vater, or steam. Use caution when you
turn a steam iron upside down - there may be hot water in the reservoir.
^ READ ALL INSTRUCTIONS BEFORE USING
SPECIAL INSTRUCTIONS
1. To avoid a circuit overload, do not operate another high wattage appliance on the same circuit
2. If an extension cord is absolutely necessary, a 10-ampere cord should be used. Cords rated
for less amperage may overheat Care should be taken to arrange the cord so that it cannot
be pulled or tripped over.
SAVE THESE INSTRUCTIONS!
Item Stock Number
GE168943
UPC:
681131689434
Iron Safety
Know Your Iron
Using Your Iron
...........................................
...................................
...................................
For Customer Assistance Piease Call: 1-877-207-0923
Consumer Safety Information
This product is intended for household
use only.
This appliance is equipped with a polarized
plug. This type of plug has one blade wider
than the other. The plug will fit into an
electrical outlet only one way. This Is a safety
feature intended to help reduce the risk of
1
2
3
Caring For Your Iron
Customer Assistance
www.gehousewares.com
............................
..........................
840070600
10
11
electrical shock. If you are unable to insert
the plug into the outlet, try re\'ersing the
plug. If the plug should still fail to fli, contact
a qualified electrician to replace the obsolete
outlet Do not attempt to defeat the safety
purpose of the polarized plug by modifying
the plug in any way.
Use the iron on an ironing board. Ironing on
any other surface may damage that surface.
Page 2

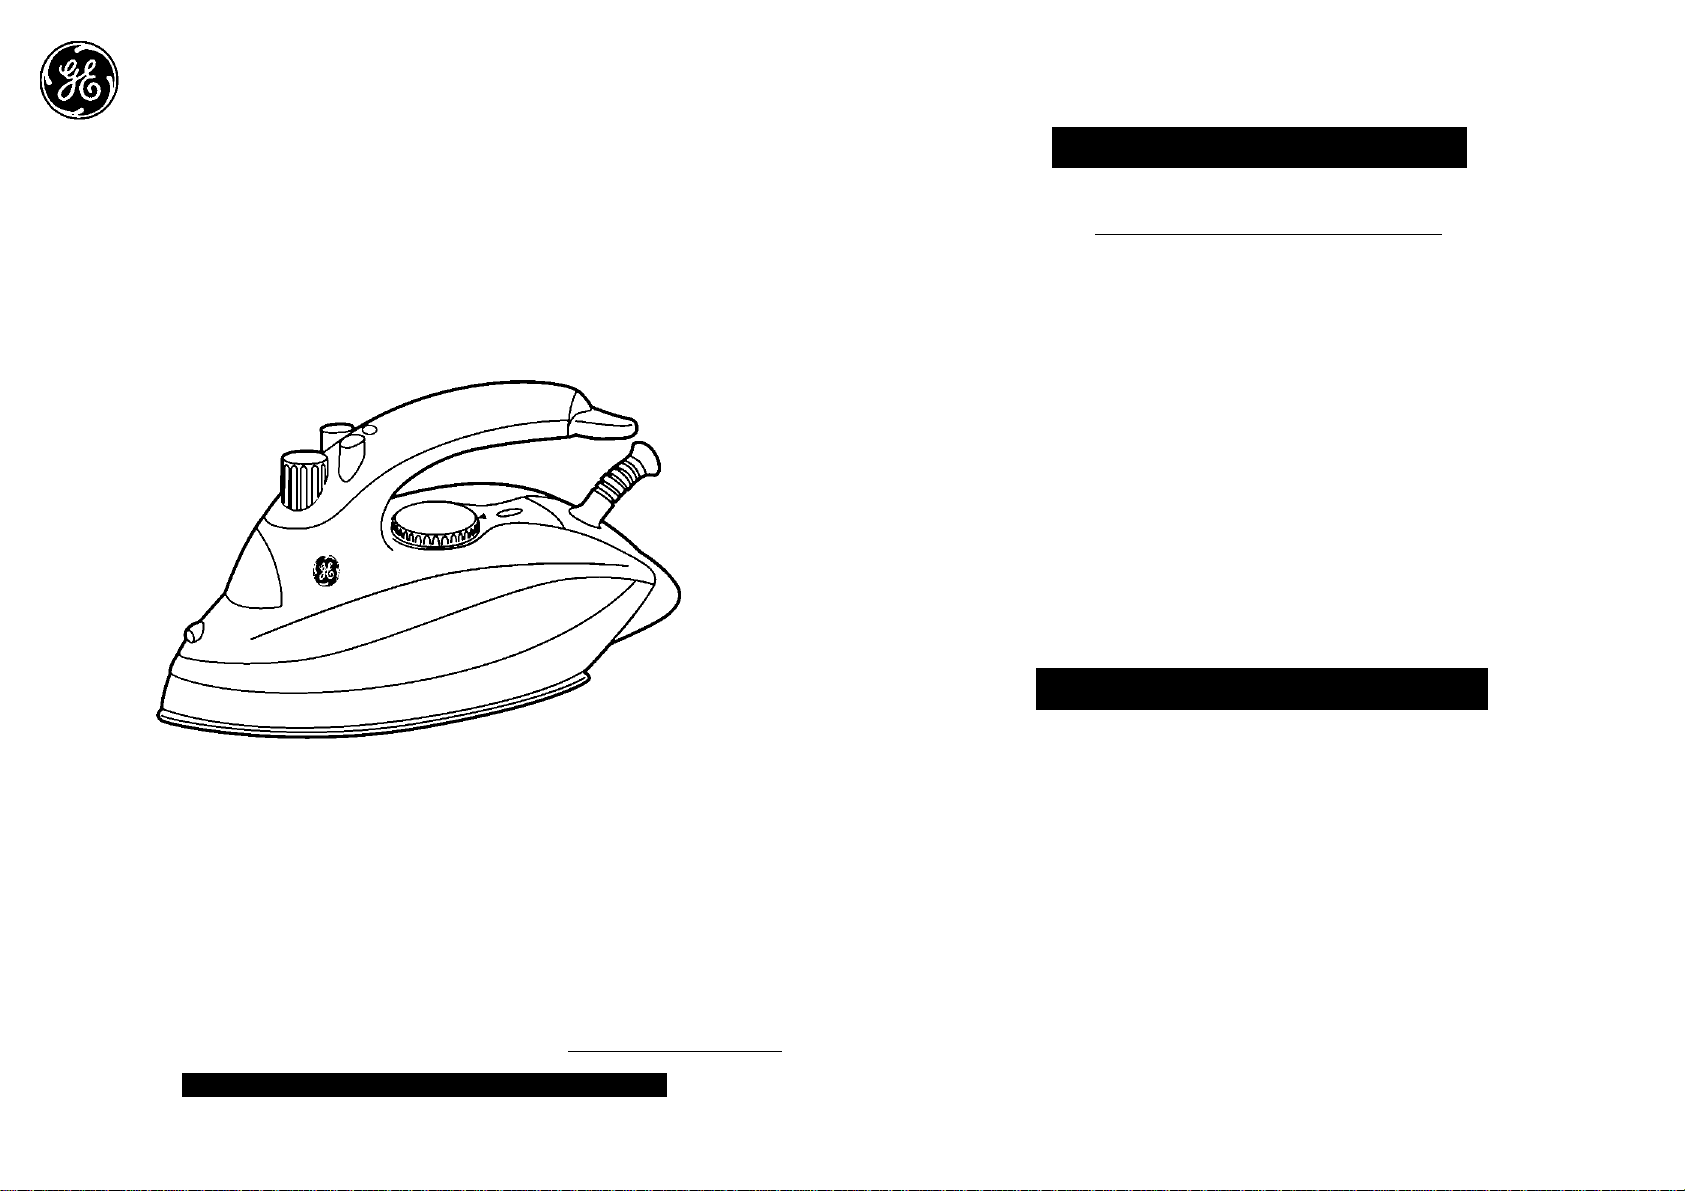
Know Your Iron
Parts and Features
Automatic Shutoff Reset
H
Button / Power Light
[2I Spray
|~3] Burst of Steam Button
|~4l Variable Steam Dial
fs] Fill Cover
fsl Spray Nozzle
m Water Tank
|~8l Soleplate
Ready Light
[1^ Temperature Control Dial
Heel Rest
USING YOUR IRON
Note: Before you use your iron for the first time, you should flush the
soleplate steam vents to ensure that no stain is transferred onto fabric
from residue possibly left in the vents from the manufacturing process.
Fabric туре Temperature dial Temperature range Steam Ironing
Synthetic (e.g. acetate,
acrylic, viscose,
polyamide, polyester.)
Silk
Wool
MIN
1
•
1
1
••
70-I20T
DRY
"OFF"
100-160T
1
Cotton
Linen
•••
1
MAX
140-210T
180-260T
For best results, check garment labels for the temperature and steam
setting recommended by the fabric manufacturer, or if instrustions
are missing from the garment, use the table above for proper
temperature setting.
STEAM
To prevent damaging garments from too hot of an iron; it is best to
first iron garments that require a low temperature. If you should need
to switch from a high setting to a lower temperature, for example “••• ”
to “ • ”, allow the iron about 5 minutes to reach the lower temperature.
Tips: If you are unsure of a garment’s fabric content, start on a low
setting and test the iron on an area of the garment that does not show,
such as a seam. Gradually increase the heat setting until wrinkles
remove without damaging the fabric.
To prevent shine, iron dark garments or those made of silk, acetate or
rayon inside out.
Page 3

USING AS A DRY IRON
The iron can be used on the dry setting with or without water in the
tank, however it is best to avoid having the tank too full of water while
dry ironing.
1. Position temperature control dial to “OFF”.
2. Turn the variable steam switch to “OFF’(no steam).
3. Stand the iron on its heel in an upright position on an iron-safe
surface and plug it in.
4. Turn the temperature control dial to the desired setting.
5. When the ready light turns on, the iron has reached the desired
temperature.
6. To prevent water spotting during Dry Ironing, the burst of steam
feature should not be used.
7. When finished, turn temperature control dial to “OFF’, and
unplug. Allow the iron to cool before cleaning the
exterior or storing.
Note: During ironing, the ready light may turn off again which
indicates that the iron is heating up to maintain the proper temperature.
Caution: If the iron has been used for a long time and is hot,
DO NOT fill it with water.
USING AS A STEAM IRON
When using as a steam iron, be sure the temperature setting on the
control dial is within the “steam” range to avoid water spotting on a
garment.
1. Position temperature control dial to “OFF”.
2. Position the variable steam dial to “OFF’(No steam).
3. With the unit UNPLUGGED, fill the iron with water.
4. Stand the iron on its heel in an upright position on an iron-safe
surface and plug in.
5. Turn the temperature control dial to the desired setting.
6. Allow approximately 2 minutes for the iron to reach the desired
temperature. Ready light will illuminate.
7. Turn the variable steam dial to “steam” for steam. As soon as the
iron is held horizontally, steam will flow through the vents. If the
iron fails to steam, gently tap the soleplate on the ironing surface.
Placing the iron on its heel in an upright position interrupts the
flow of steam.
8. When finished, turn temperature control dial and variable
temperature dial to “OFF” and unplug. Allow cooling before
cleaning the exterior of the iron or storing.
Caution: Avoid coming in contact with escaping steam.
IRONING WITH EXTRA STEAM
For a penetrating burst of steam to iron faster and to smooth difficult
wrinkles, firmly depress and release the burst of steam button “
Pause for at least 5 seconds to let the iron reheat for maximum
additional steam. If water drops escape as you use the burst of steam,
turn the temperature control dial to a slightly warmer setting and wait
for a moment.
Page 4

Caution: Avoid coming in contact with escaping steam.
8. When finished, turn temperature control dial to “OFF” and
unplug. Allow iron to cool before cleaning the exterior or storing.
USING THE SPRAY BUTTON
For a mist of water to moisten dry and difficult fabrics such as linen,
cotton or wool, or to handle stubborn wrinkles, press the spray button
The spray function is also handy to moisten creases accidentally
ironed into the fabric.
Note: you may have to pump the spray button several times the first
time you use the iron in order to start the spraying action.
Using The Vertical Steam Function
The vertical steam feature allows you to eliminate wrinkles from
drapes without having to take them off the rod or freshen the
appearance of clothing while on the hanger.
1. Position temperature control dial to “OPT^’.
2. Turn the variable steam dial to “OFF’.
3. With the unit UNPLUGGED, fill the iron with water.
4. Stand the iron on its heel in an upright position on an iron-safe
surface and plug in.
5. Turn the temperature control dial to “MAX” .
6. Allow approximately 2 minutes for the iron to reach the desired
temperature. Ready light will illuminate.
7. Turn the variable steam dial to “steam” for vertical steam. Hold
the iron in a vertical position 2 to 6 inches from fabric and slowly
guide along wrinkled area. For extra steam, press the burst of steam
button.
Note : Do not pour water into the steam valve hole.
HLUNG THE WATER TANK
1. Unplug the iron before filling.
2. Turn the variable steam dial to “OFF”.
3. Hold the iron upright but tripped slightly forward and open the fill
cover.
4. Using a measuring cup, slowly pour water into the water fill hole
opening. Do not pour more than 8 ounces of water into the water
tank,
5. Check see-through water reservoir to see if iron is filled to
maximum fill line. Close the fill cover. Avoid over filling.
Page 5

EMPTYING THE WATER TANK
The water tank should be emptied after each use. To do so:
1. Unplug iron from the electrical outlet.
2. Open the fill cover and turn the iron upside down to allow water to
flow from the fill hole.
3. Gently shake the iron to loosen any water drops that may be
trapped, the warmth of the iron should dry out any remaining water.
Note: If you empty the water tank after the iron has cooled, set the
iron in an upright position on its heel, plug it in and set the
temperature dial to maximum heat for 2 minutes. Then unplug the
iron and let it cool before storing it.
CLEANING / FLUSHING
Flushing the iron is advised after every 5th use to prevent harmful
mineral build-up that can clog the iron and prevent it from heating and
steaming properly. To flush the iron:
8. Pass the iron over a damp cloth to clean the soleplate.
9. When finished, turn temperature control dial to “OFF’ and
unplug, allow iron to cool before cleaning the exterior of the iron
or storing. Use a cloth to wipe off exterior of iron before storing.
AUTOMATIC SHUT-OFF
The auto shut-off function is provided to turn off electrical power to
the iron if you leave it plugged into an outlet for more than 60
minutes.
The power/reset light comes on when the iron is first plugged in.
After one hour, the iron will shut off and the light will go out.
Push the reset button to turn iron back on.
1. Position temperature control dial to “OFF’.
2. Turn variable steam dial to “OFF”.
3. Fill the iron’s water tank to its maximum fill line.
4. Plug the iron in and set the temperature control dial to its maximum
setting “ ••• ” linen. Let it heat until the ready light illuminates
(approximately 2 minutes).
5. Turn the variable steam dial to “clean”.
6. Place a hand towel over the ironing surface.
7. Hold the iron horizontally 2 inches above the towel allowing steam
to flow through the vents until the water tank is emptied, you may
also depress the burst of steam button several times remembering to
pause about 5 seconds between bursts to allow the iron to reheat.
Page 6

CLEANING AND CARE
Caution: unplug the iron from the electrical outlet before cleaning the
exterior of the iron and storing. Never immerse an appliance in water.
To protect the soleplate from scratching, avoid ironing over snaps,
zippers, metal buttons, etc. also, do not place the iron on metal or
rough surfaces. Slight scratches in stainless steel soleplate do not
affect performance of the iron,
NOTE: Do not put any chemical cleaning agents or solvents in the
water tank.
IMPORTANT: Any servicing that requires disassembly must be
performed by an authorized service center.
CARING EOR YOUR IRON
STORING THE IRON
Remove the cord from the outlet by grasping the plug rather than
pulling the cord, and allow iron to cool. EMPTY the water tank after
each use.
Customer Assistance
If you have a claim under this w-arrant)’, plea.se call our Castomer Assistance
Number. For fitster service please have model, series, and tvpe numbers ready Ibr
operaioi’ to assist you. These mmilx‘rs can lx‘ found on the heel rest of your iron.
MODEL
_________________
Customer Assistance Number 1-877-207-0923
Keep this number lor luture reference!
Two-Year Limited Warranty
What does your warranty cover?
• .\ny dcicct in material or workiiuinslii|).
For how long after the original purchase?
• Two years.
Wliat will W4; do?
• Provide you with a new unit.
• The exchange nnii is warranied for ihe
remainder of your product’s original
two-year wairantv’ period.
How do you make a warranU' claim?
• i’roperly park your unit. We recommend
using the original ctirton and packing
materials.
• Include in the package a copy of the .sales
receipt or other evidence of date ol’
original purchase. If the unit \«is a gift,
proviile a siaiemeiu specifving Uie date
received. Also print your name and
address and a description of the delect.
• Return the product to your nearest
\V.VI.*NL\RT store or call Customer
Assistance at 1-877-207-0923.
TYPE:____________________ SERIES;__________________
What docs your warranty not cover?
• (kmimeixial use or any other ti.se not
found in printed direeiions.
• Damage to articles of clothing due lu
misuse of iron.
• ProrlucLs purchased or serviced outside
Ihe USA.
How docs state law relate to this warrant?
• litis vvarntnty gives yon sj)eeific legal righi.s,
and you may also have other rights which
vaiy from state to state.
• WAL*MART expressly disclaims all responsi
bility for consequential damages or
incidental losses raiised hv iLse of this
appliance. Some siates do noi allow this
e.xclusion or limitation ofinctdenuil or
consequential losses so the Ibregoing
disclaimer may not apply to you.
The warranty fs valid only in Ihe country of
purchased. Plea.se follow the warranty claim
procedures a.s noted.
• Follow the shipping directions provided
lor warrantv ciaiiiLs.
For products piirehased ont.side ihe United
Slates and Canada, see dealer for vvarraniy.
W,\L*MART Stores, Inc.
Bcmonvillc, .\R 72716
flip IS a trademark of
General Electric Company
and is used under license by
WAL*MART Stores. Inc.
Bentonville. AR 72716
84007060G
10
WAL*MART Stores. Inc.
Bentonville, AR 72716
11
6ЛЮ
 Loading...