

Page 1
CHANGING ACTIVATION SEHINGS
PROBLEM: Lamp does not turn off.
On the bottom of the Sensor housing, there is a small rectangular
plug which covers the ACTIVATION SETTINGS switches. Remove
the rectangular plug and adjust your settings according to the
following combinations:
OPERA TE LAM P:
LAMP ON DUR ATI ON:
TROUBLESHOOTING TIPS
Night only
1 min "on"
Night only 24hr 24hr
<( A * II II A ‘II II 4 f\ * II I
10 mm on 1 mm on 10 mm on
SUGGESTIONS:
1. Confirm there is no motion in the detection zone.
2. Check battery orientation in the Sensor or try replacing the 9-Volt
battery.
3. See "CHANGING ACTIVATION SETTINGS".
IMPORTANT: This Motion Sensing Light Adapter is a sensitive electrical
product and the following precautions should be followed:
• Do not drop the unit.
• Do not place the unit close to a source of direct heat.
• Do not use rechargeable batteries.
Motion-Sensing Adapter
Tur ns l ights on whe n mo tion is d etec ted
User's Manual
Note: Allow the Sensor to reset for 10 minutes after trying the suggested
tips below.
PROBLEM: Light does not go on when there is motion in front of the Sensor.
SUGGESTIONS:
1. Confirm that alert light has power and the light switch is on.
2. Make sure bulb and Socket Adapter are screwed in properly.
3. Be sure the Socket Adapter cord is plugged into the jack on the bottom
of the Sensor housing.
4. Aim Sensor at a more focused activity area.
5. Replace bulb.
6. Check battery orientation in the Sensor or try replacing the 9-volt battery.
• Use only Alkaline battery.
SPECIFICATIONS
Detection Range..................................................................................Up to 50' x 120°
Rated Voltage......................................................................AC110/120VAC, 50/60 Hz
Maximum Wattage
Battery................................................................................................9-Volt Alkaline
Sensor........................................................................Auto Shut-off-1 or 10 minutes
........................................................
150W Tungsten per socket
A WARNING
Risk of electric shock
• Turn power off before inspection,
installation or removal
• Do not use in wet locations
PROBLEM: Light does not go on during the day.
SUGGESTIONS:
1. See "CHANGING ACTIVATION SEHINGS."
If you have questions or need further assistance, please call 1-800- GE LIGHT,
GE Home Electric Product, Inc., Nela Park, Cleveland, Ohio 44112
c(^us
LISTED
Risk of fire
• Do not exceed electrical ratings
Risk of burn
• Allow lamp to cool before handling
Questions? Call 1-800-GE LIGHT
Made in China for
GE Home Electric Products, Inc.
Nela Park, Cleveland, OH 44112
Desc.:PIR612S-2M
Motion
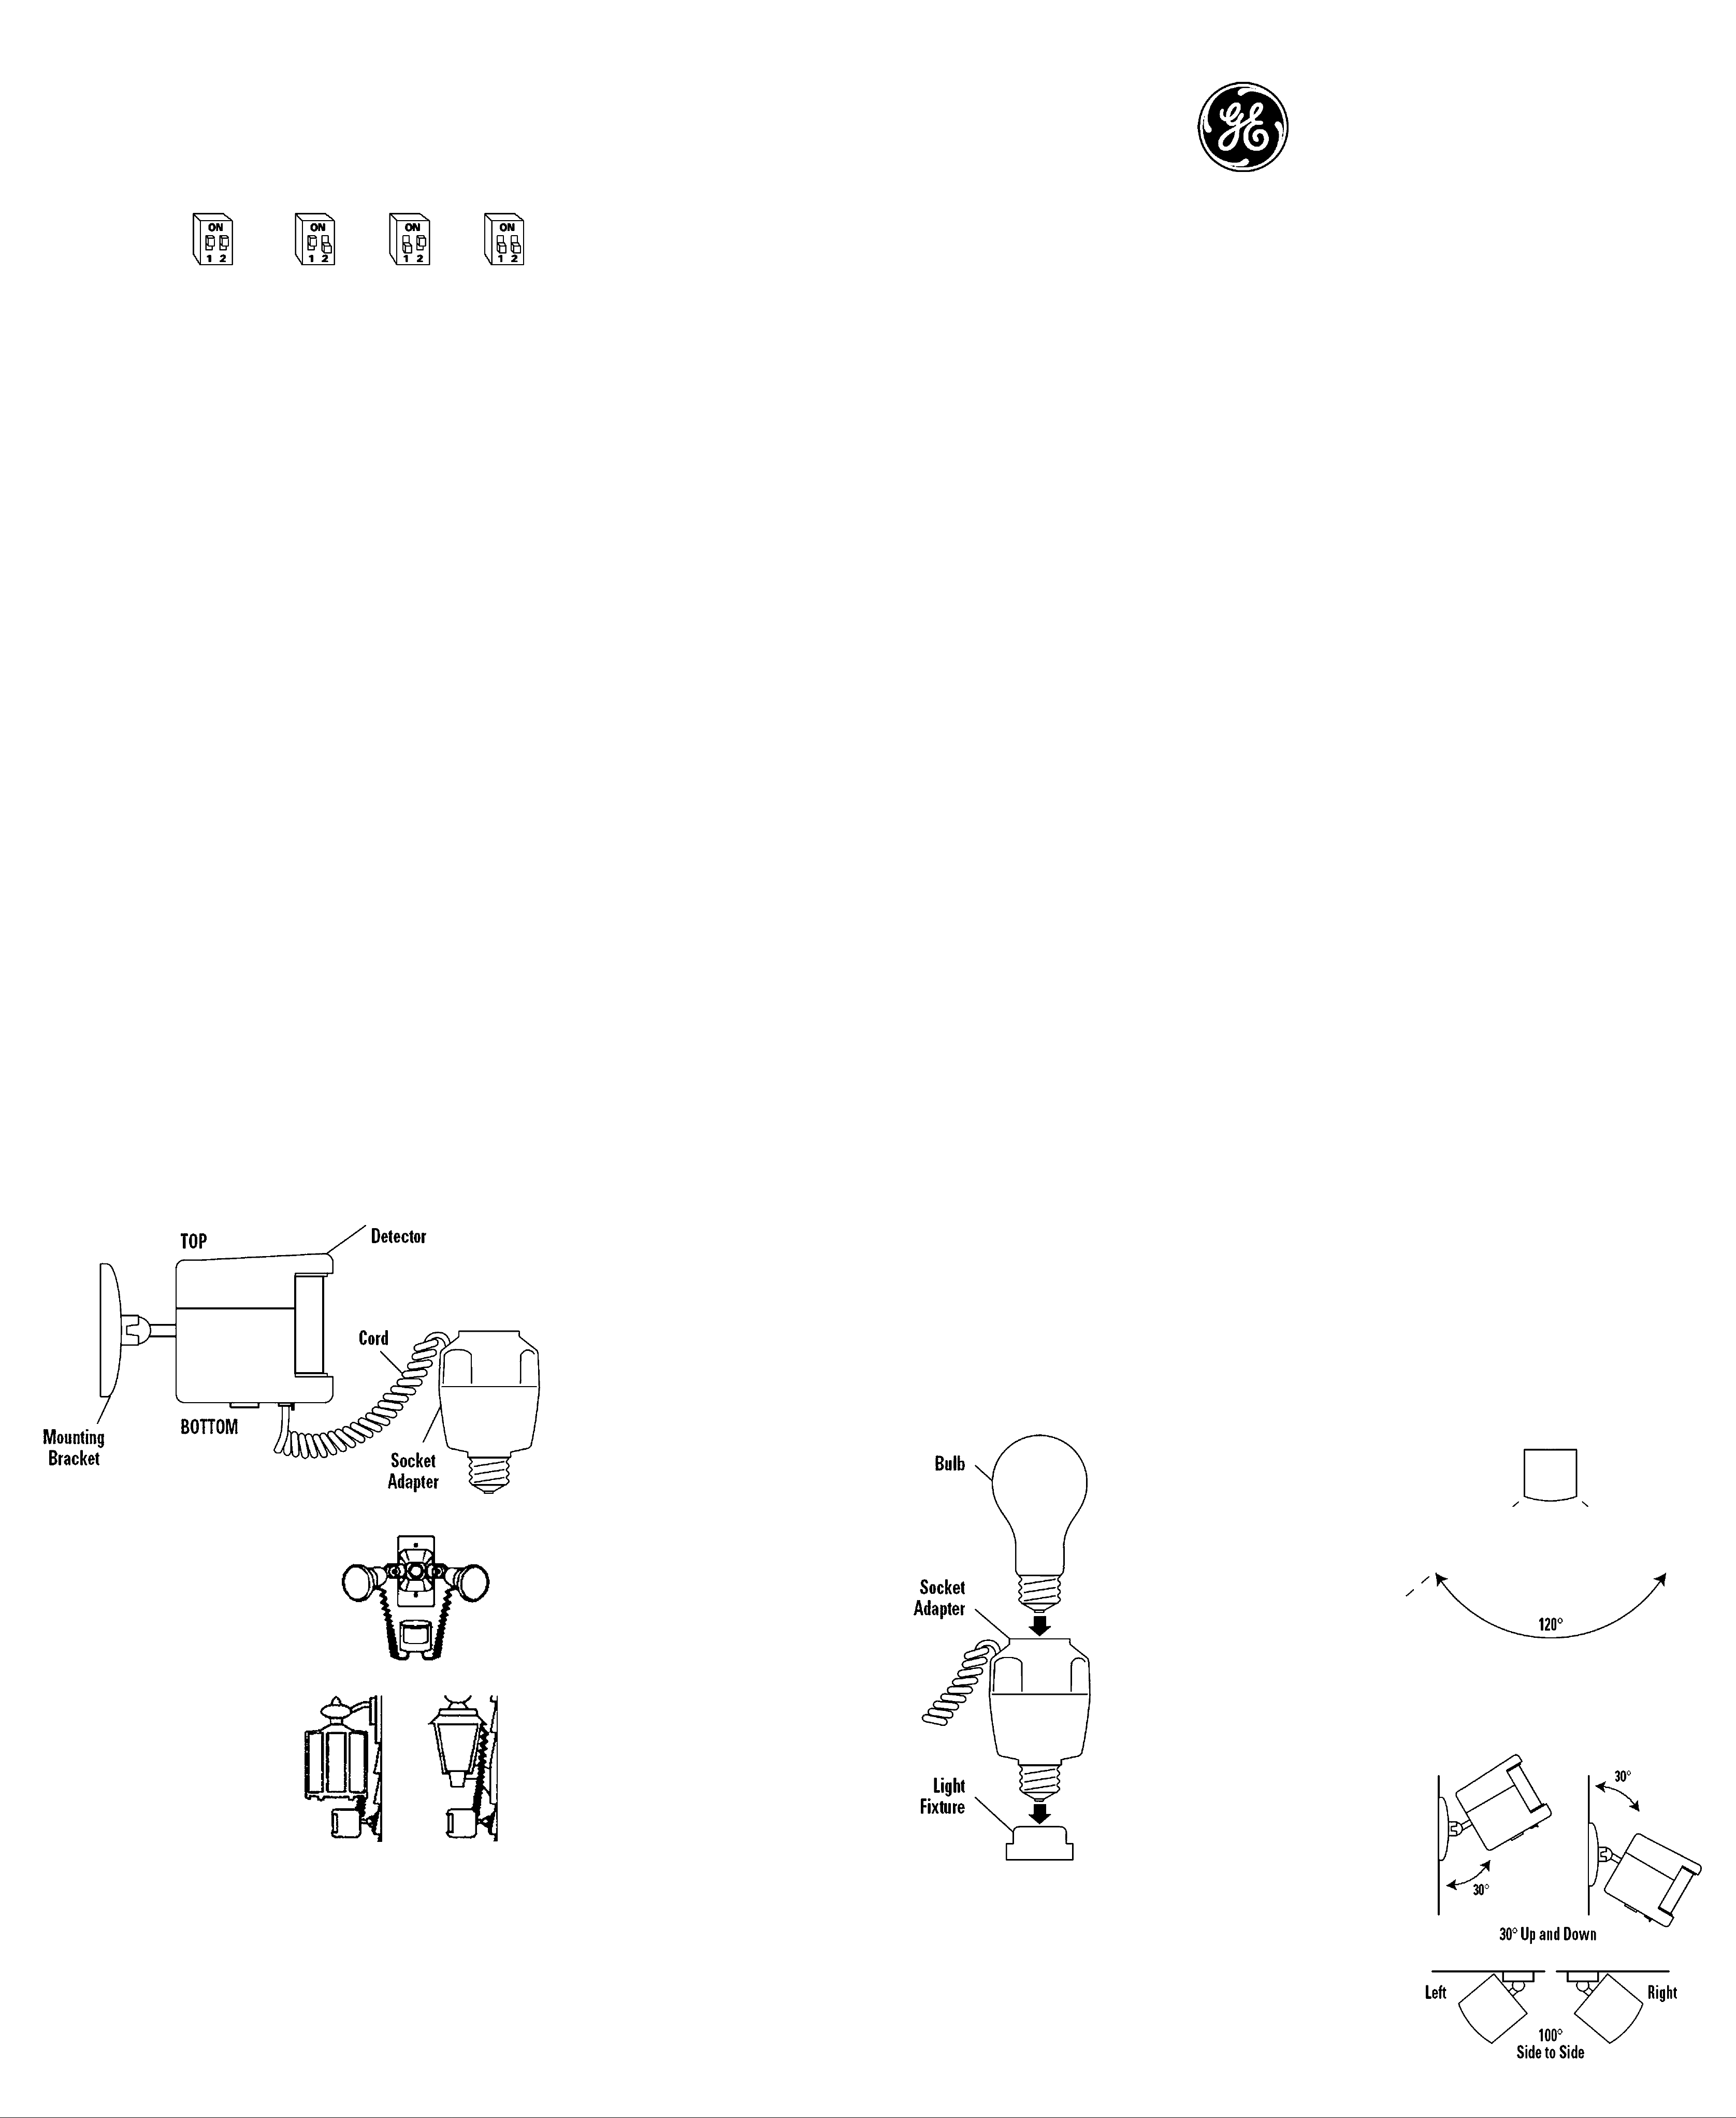
MOTION SENSOR INSTALLATION
1. Turn off power at light switch.
2. Allow sufficient time for the bulb to cool. Then remove the bulb
from the light socket.
3. Attach the Mounting Bracket to the wall or ceiling using the screws
provided. Make sure to mount the Motion Sensor
within 3-4 inches of the light fixture you want to
control (Alert Light).
For easier mounting: Unplug Socket
Adapter and/or move Sensor head to
7. Leave unattended for 10 minutes.
Note: No motion must be detected for at least 10 minutes to allow the
Sensor to set itself to a "ready" mode. Cover Motion Sensor if necessary.
8. After 10 minutes, turn on power switch to the light fixture. Wave your
hand in front of the Motion Sensor to activate. Light should turn on.
Note: Light will stay on for 1 or 10 minutes after all motion
has stopped. See below to
COVERAGE AREAchange activation settings.
DETECTION ZONE
Top View
Motion is detected in a 50' x 120°
ENCLOSED YOU WILL FIND
• Motion Sensor
• Mounting Bracket (attached)
• Socket Adapter with Cord
•Screws
TOOLS NEEDED
• Screwdriver
BAHERY NEEDED (not included)
• 9-Volt alkaline battery
allow better access to screw holes.
4. Screw the Socket Adapter into the
empty light socket and then screw
light bulb into Socket Adapter.
Note: Maximum bulb wattage
is 150W per socket.
5. If the Socket Adapter was
unplugged in Step 3, plug the phone-
type connector back into the jack
at the bottom of the Sensor housing.
6. Aim Sensor in the direction of activity
range. The adjustable mounting
bracket can be angled within a
30° vertical detection zone and
100° horizontal detection zone.
Note: As with most motion
detection devices, pets may
activate the unit. Also
walking in a straight line
towards the Sensor may
reduce the operational range.
Walking across the
detection field provides
/ \
/ \
\
/ \
MOUNTING BRACKET
ADJUSTMENT
50‘
N
\
\
BAHERY INSTALLATION
1. Remove battery cover from the bottom of the sensor.
2. Install one 9-Volt alkaline battery into the battery compartment. Be sure
the battery (+) and (-) terminals match (+) and (-) contacts on battery cap.
3. Replace battery cover.
Note: The 9-Volt battery supplies power to the sensor only, not the light itself.
you wish to detect. The Sensor has
a wide detection angle, so precise
aiming is not critical.
Note: When aiming Sensor, avoid direct
exposure to automobile headlights, which might be interpreted as sunlight
and therefore prevent light from coming on.
maximum operational range.
ACTIVATION SEHINGS
Sensor is factory set for
day/night operation and
for the light to stay on for
1 minute after no motion
is detected.
 Loading...