

Page 1

We bring goodthings to life.
Page 2
• Important Info ti0 L
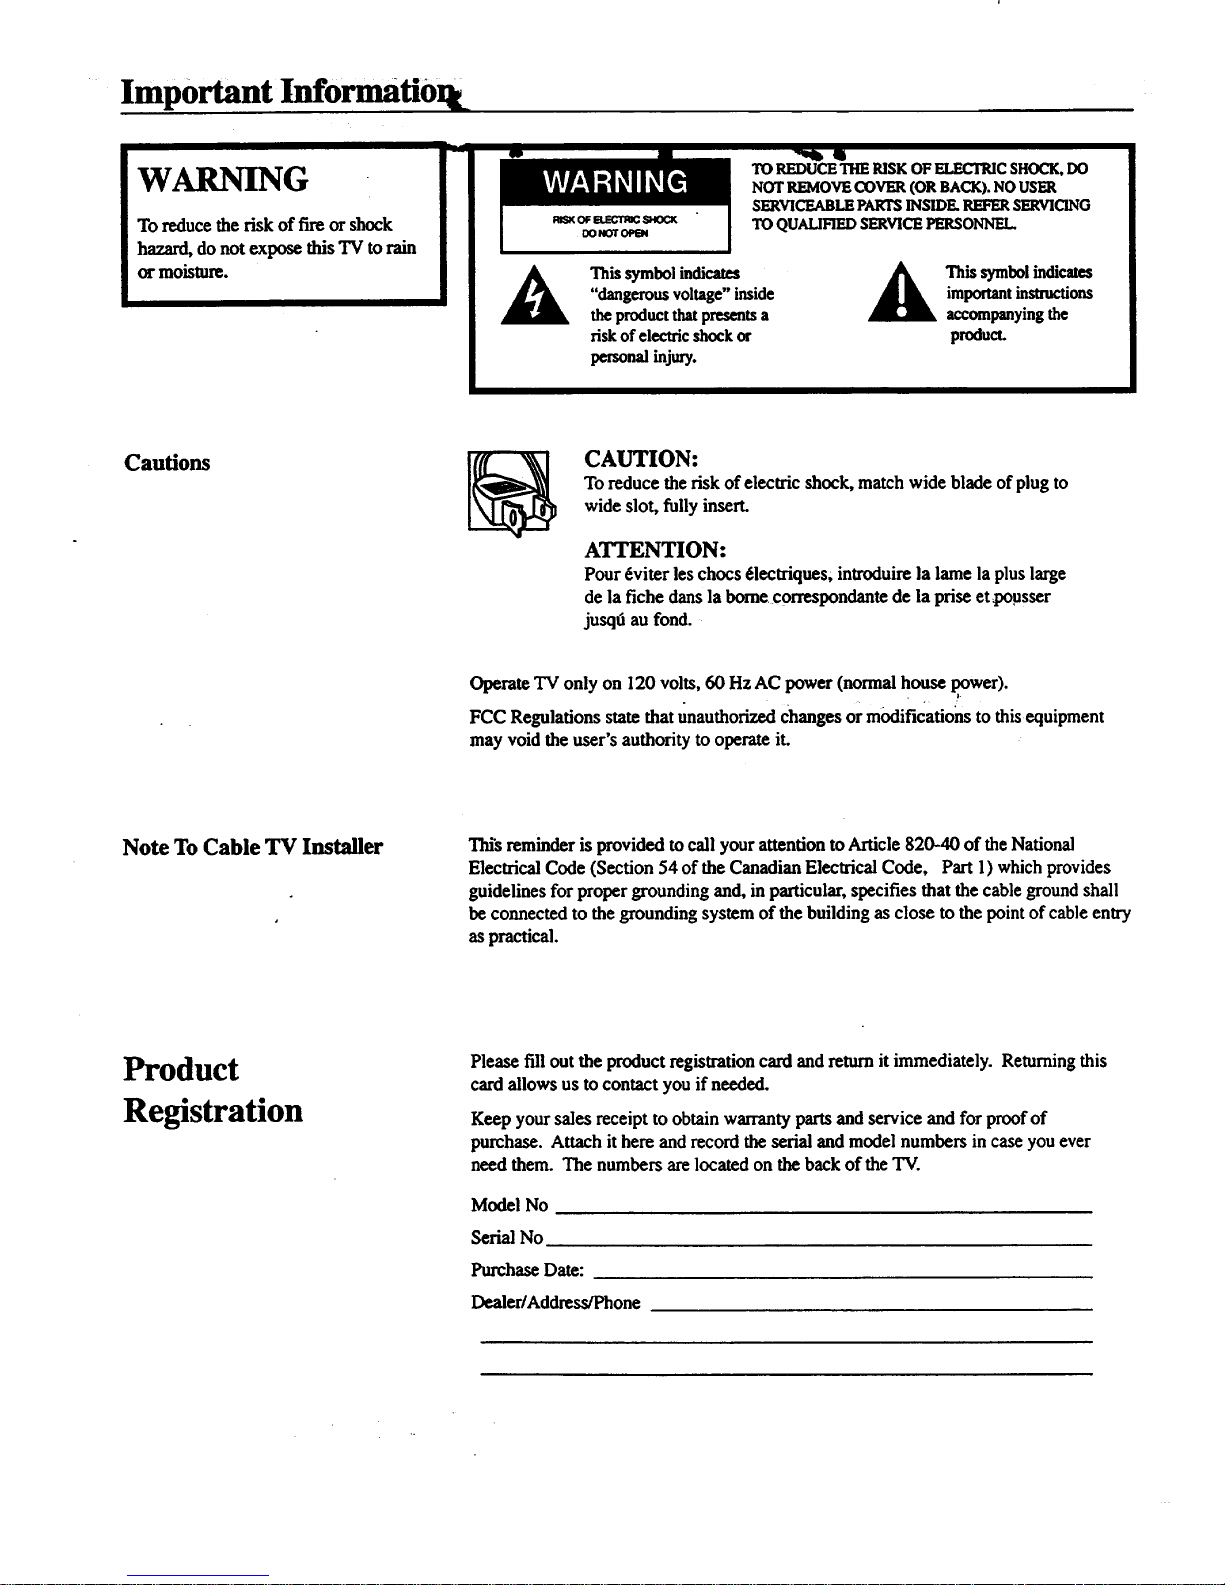
WARNING
To reduce the risk of fire or shock
hazard, do not expose this TV torain
or moisture.
_kla. _t
TO REDUCE THE RISK OF ELECIT,-JCSHOCK, DO
NOT REMOVE COVER (OR BACK). NO USER
SERVICEABLE PARTS INSIDE. REFER SERVICING
TO QUALIFIED SERVICE PERSONNEL.
A This symbol indicates A Thissymbolindicates
"dangerous voltage" inside _ importantinsu'uctions
the product that presents a accompanying the
risk of electric shock or product.
personal injury.
Cautions
CAUTION:
To reduce the risk of electric shock, match wide blade of plug to
wide slot, fully insert.
ATTENTION:
Pour _viter les chocs 61ectriques; introduirela lame la plus large
de la fiche dans la borne correspondante de la prise et pocsser
jusqt3au fond.
Operate TV only on 120 volts, 60 Hz AC power (normal house power).
FCC Regulations state thatunauthorized Changesor modifications to this equipment
may void the user's authority to operate it.
Note To Cable TV Installer This reminder is provided tocall your attention toArticle 820-40 of the National
Electrical Code (Section 54 of the Canadian Electrical Code, Part l) which provides
guidelines for proper grounding and, in particular, specifies that the cable ground shall
be connected to the grounding system of the building as close to the point of cable entry
as practical.
Product
Registration
Please fill out the product registration card and return it immediately. Returningthis
card allows us to contact you if needed.
Keep your sales receipt to obtain warranty parts and service and for proof of
purchase. Attach it here and record the serial and model numbers in case you ever
need them. The numbers are located on the back of theTV.
Model No
Serial No
Purchase Date:
Dealer/Address/Phone
Page 3
Introduction
Thank you for choosing GE
Yourtelevision is designed for long
life and superior operation. Despite its
sophistication, your new TV is
amazingly simple to operate because it
has so many automatic features.
Table of Contents
Getting Started
First-Tnne Operation .................................................................. 2-3
Controlling Your TV
Front Panel ..................................................................................... 4
On-Screen Displays ....................................................................... 5
Remote Operation .......................................................................... 6
Operating Features
VIDEO Menu................................................................................. 7
Closed Captioning ......................................................................... 8
Languages (English, French, Spanish) .......................................... 8
SETUP Menu ................................................................................. 9
Sleep Timer Operation ................................................................. l 0
Alarm Timer Operation ............................................................... l 1
Autoprogramming Channel Memory .......................................... 12
Editing Channel Memory ............................................................. 12
Connecting Your TV
Antenna/Cable Information 13
Dipole Antenna Connection ......................................................... 13
Home Antenna Connections ........................................................ 14
Cable-TV Connections ................................................................ 15
Cable-TV Operation .................................................................... 16
Accessories
Accessories .................................................................................. 17
Order Form ............................................................................. 17-18
Caring for Your TV
Cleaning & Care .......................................................................... 19
Trouble Checks ......................................................................... 20
Limited Warranty .................................................................... 21
Page 4

Getting Started
First-Time Operation
The steps below will help you get your TV connected and working quickly.
Page numbers are also listed for more details.
1. Unpack TV and accessories.
Shown below are the accessories that
came packed with your TV.
_ ntennaAda_er
Replacea_ter on_with
stock #193983
V_V
:
Remote Control and
Two Batteries
DipoaeAntenna
7
2. Place batteries in remote.
!. Turnthe remote control face down.
2. Press down on the ridged areaof the
battery cover and slide it off.
3. Place two "AAA" batteries as shown
matching the + and - end of each
battery in the compartment.
4. Replace the cover.
3. Connect antenna or cable-TV
system.
Most antenna or cable-TV systems can
be connected as shown here.
lacomla| Cable fromAntenna or
C_Ie-TV System
Back of
"IV
• Details for connecting ahome antenna
toyour TV are on page 14.
• Details for connecting a cable-TV
system to your TV are on pages 15-16.
4. Plug in the TV.
Plug in the TV, matching the wide and
small blade of the plug with the outlet.
2
Page 5
GettingStarted
F'n'st-TimeOperation
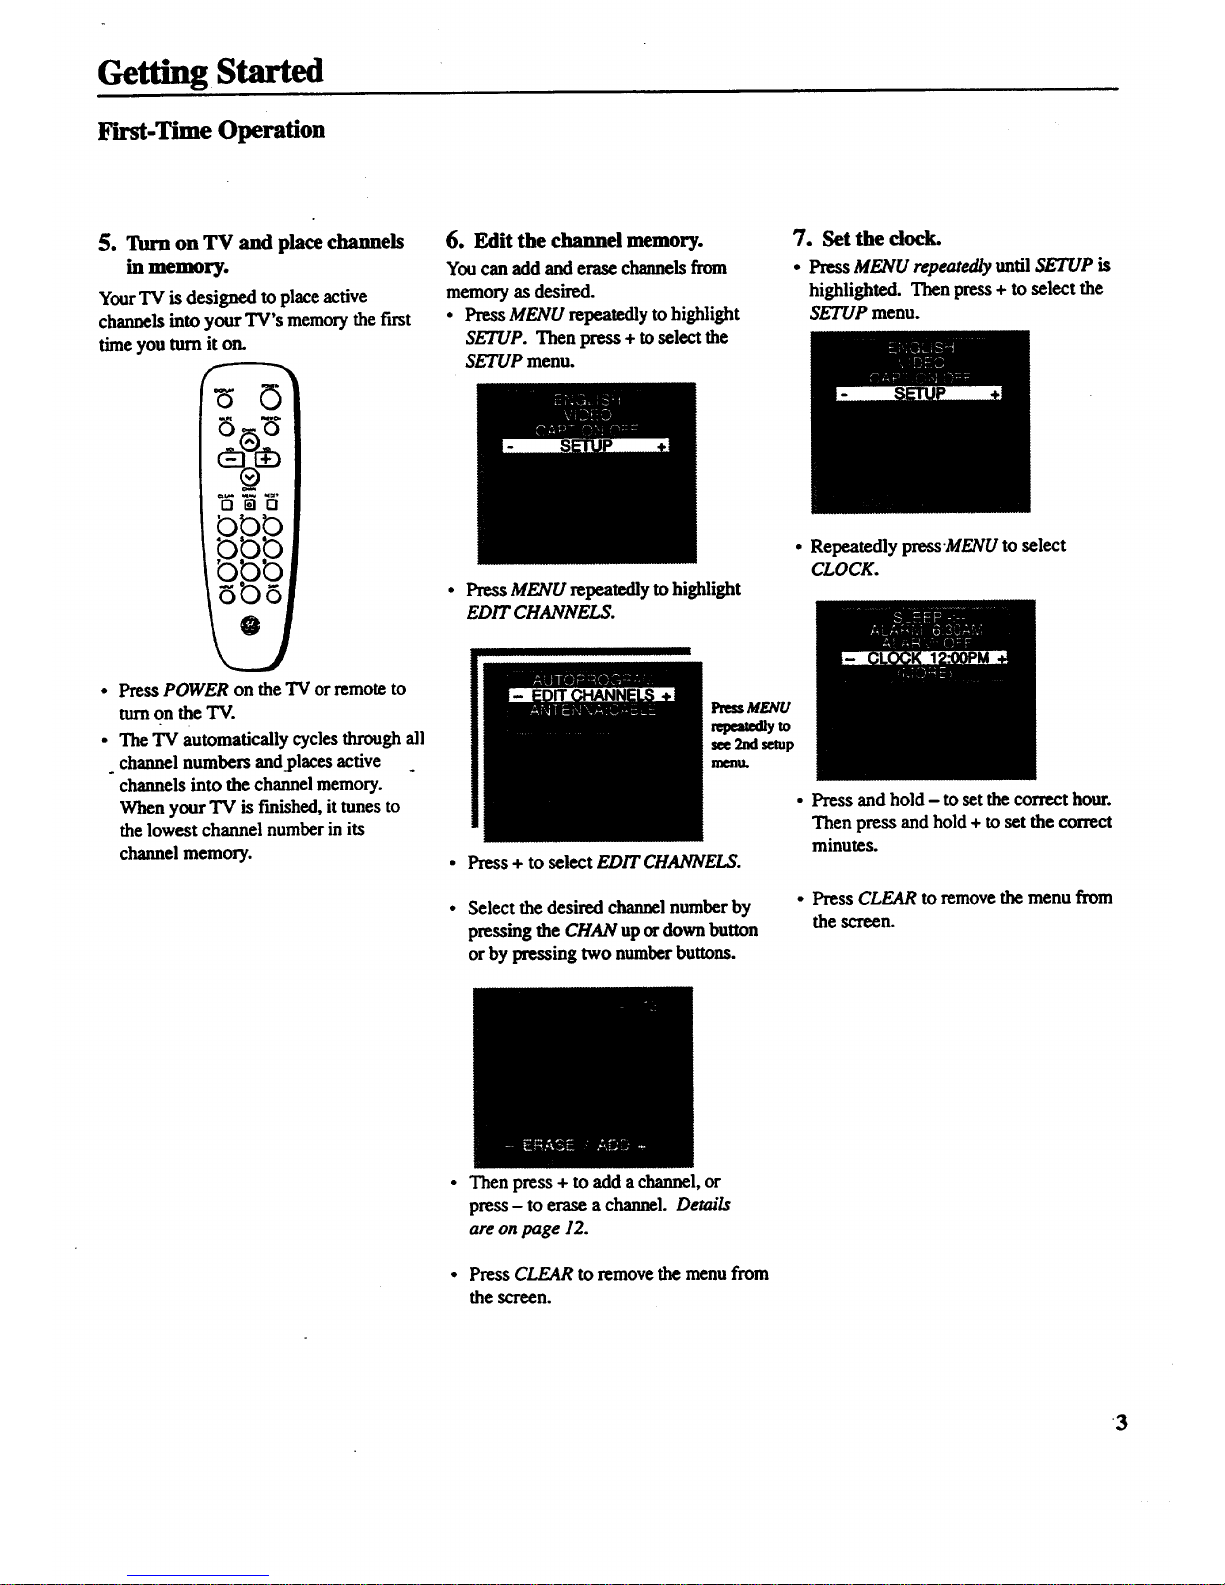
5. TurnonTVandplacechannels
inmemory.
YourTV is designed to placeactive
channelsinto your"lV'smemorythefirst
time you turnit on.
OmO
• Press POWER on the TV or remote to
turnon the TV.
• The TV automatically cycles through all
channel numbers and.places active
channels into the channel memory.
When your TV is finished, it tunes to
the lowest channel number in its
channel memory.
6. Editthe channel memory.
You can add and erase channels from
memory as desired.
• Press MENU repeatedly to highlight
SETUP. Then press + to select the
SETUP menu.
• Press MENU repeatedly to highlight
EDIT CHANNELS.
I
PressMENU
repem_yto
see 2nd setup
n
Press + to select EDIT CHANNELS.
Select the desired channel number by
pressing the CHAN up ordown button
or by pressing two number buttons.
7. Set the dock.
• Press MENU repeatedly until SETUP is
highlighted. Then press + to select the
SETUP menu.
• Repeatedly press'MENU to select
CLOCK.
• Press and hold - to set the correct hour.
Then press and hold + to set the correct
minutes.
• Press CLEAR to remove the menu from
the screen.
• Then press + to add a channel, or
press - to erase a channel. Details
are on page 12.
• Press CLEAR to remove the menu from
the screen.
3
Page 6
Controlling Your TV
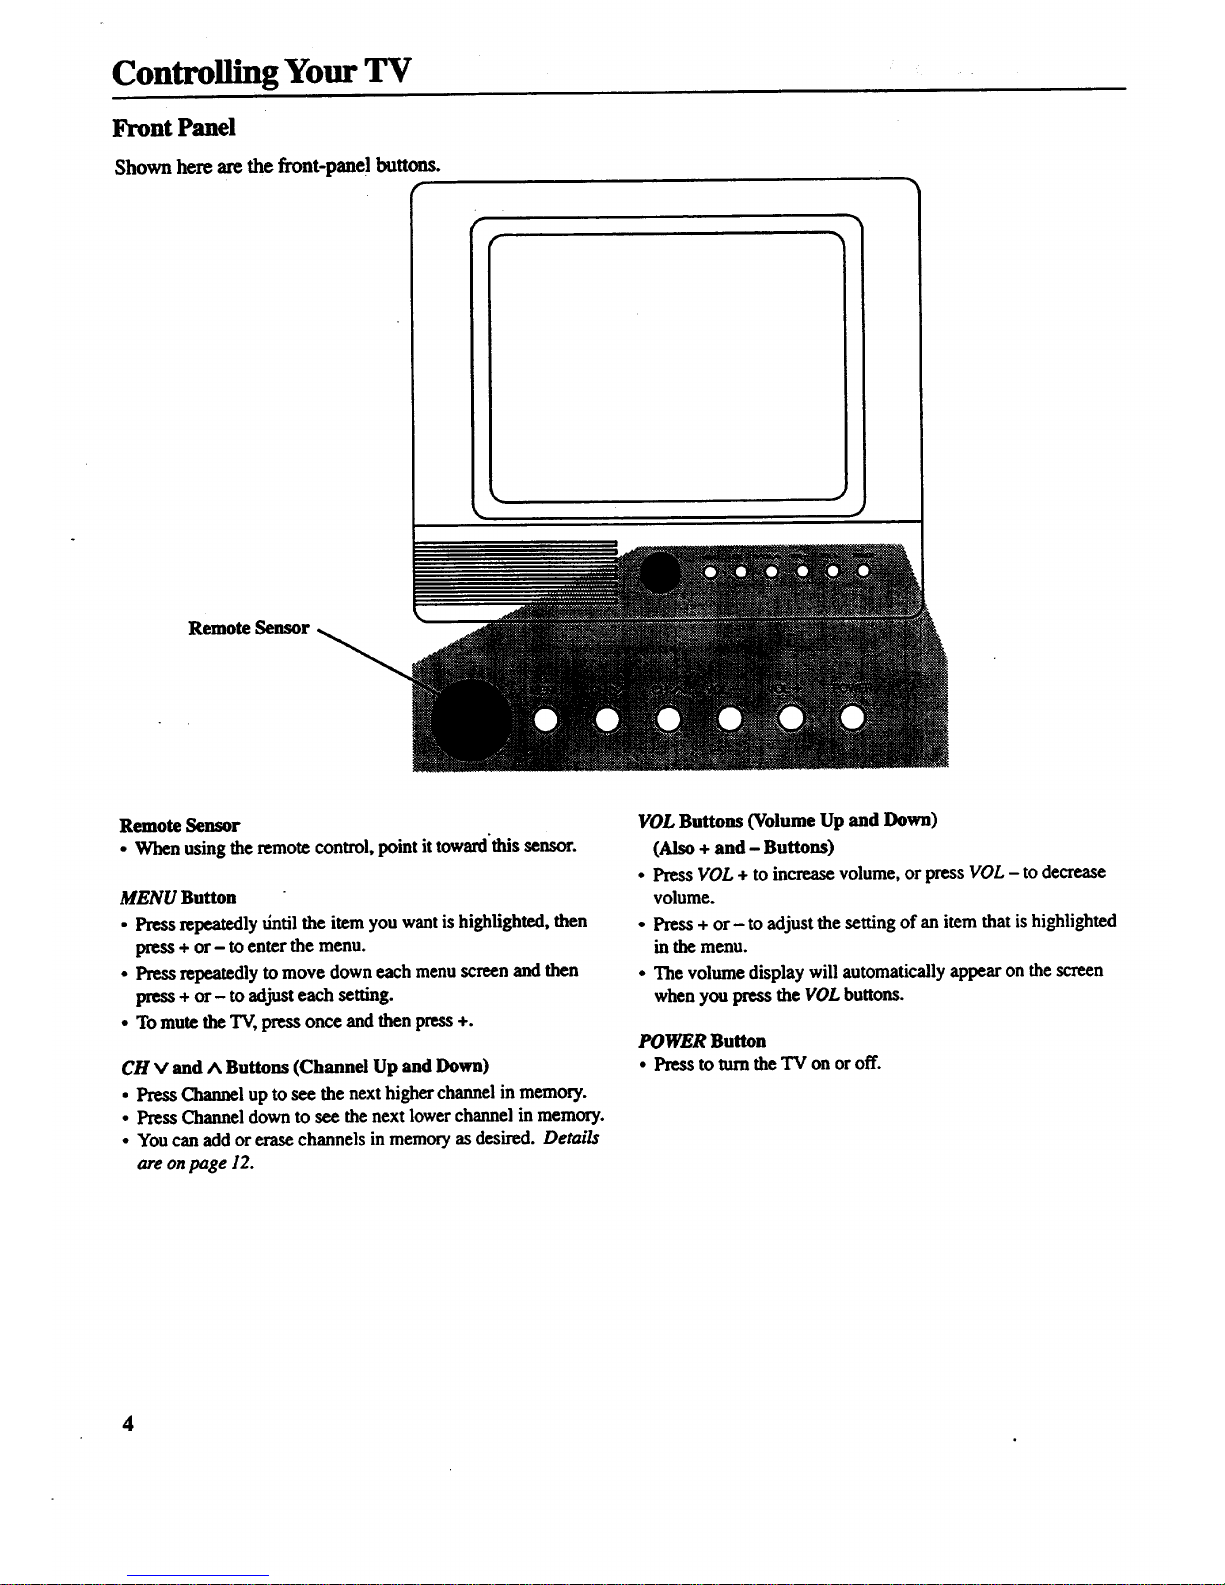
Front Panel
Shown here are the front-panel buttons.
r
Remote Sensor
Remote Sensor
• When using the remote control, point it toward'this sensor.
MENU Button
• Press repeatedly dntil the item you want is highlighted, then
press + or- to enter the menu.
• Press repeatedly to move down each menu screen and then
press + or- to adjusteach setting.
• To mute the TV, press once and then press +.
CH V and A Buttons (Channel Up and Down)
• Press Channel up to see the next higher channel in memory.
• Press Channel down to see the next lower channel in memory.
• You can add or erase channels in memory as desired. Details
are on page 12.
VOL Buttons (Volume Up and Down)
(Also + and - Buttons)
• Press VOL + to increase volume, or press VOL - to decrease
volume.
• Press + or- to adjust the setting of an item that is highlighted
in the menu.
• The volume display will automatically appear on the screen
when you press the VOL buttons.
POWER Button
• Pressto rumthe TV onoroff.
4
Page 7

Controlling Your TV
On-Screen Displays
Q Alarm Timer
(_) Channel Number
(_) T'nne
Q MUTE
(_) Sleep Timer
This display appears when the sleep timer has been set.
Details are onpage 10.
(_ Time
This display appears after the clock is set whenever you
change channels or press DISPLAY.
Q larm Timer
This display appearswhen the alarm timer has been set.
Details are on page 1i.
Channel Number
"t This display appears whenever you change channels or press
DISPLAY.
Q MUTE
This display appearswhen the TV's sound is muted. Press
MUTE on the remote. Details are on page 6.
5
Page 8
Controlling Your TV
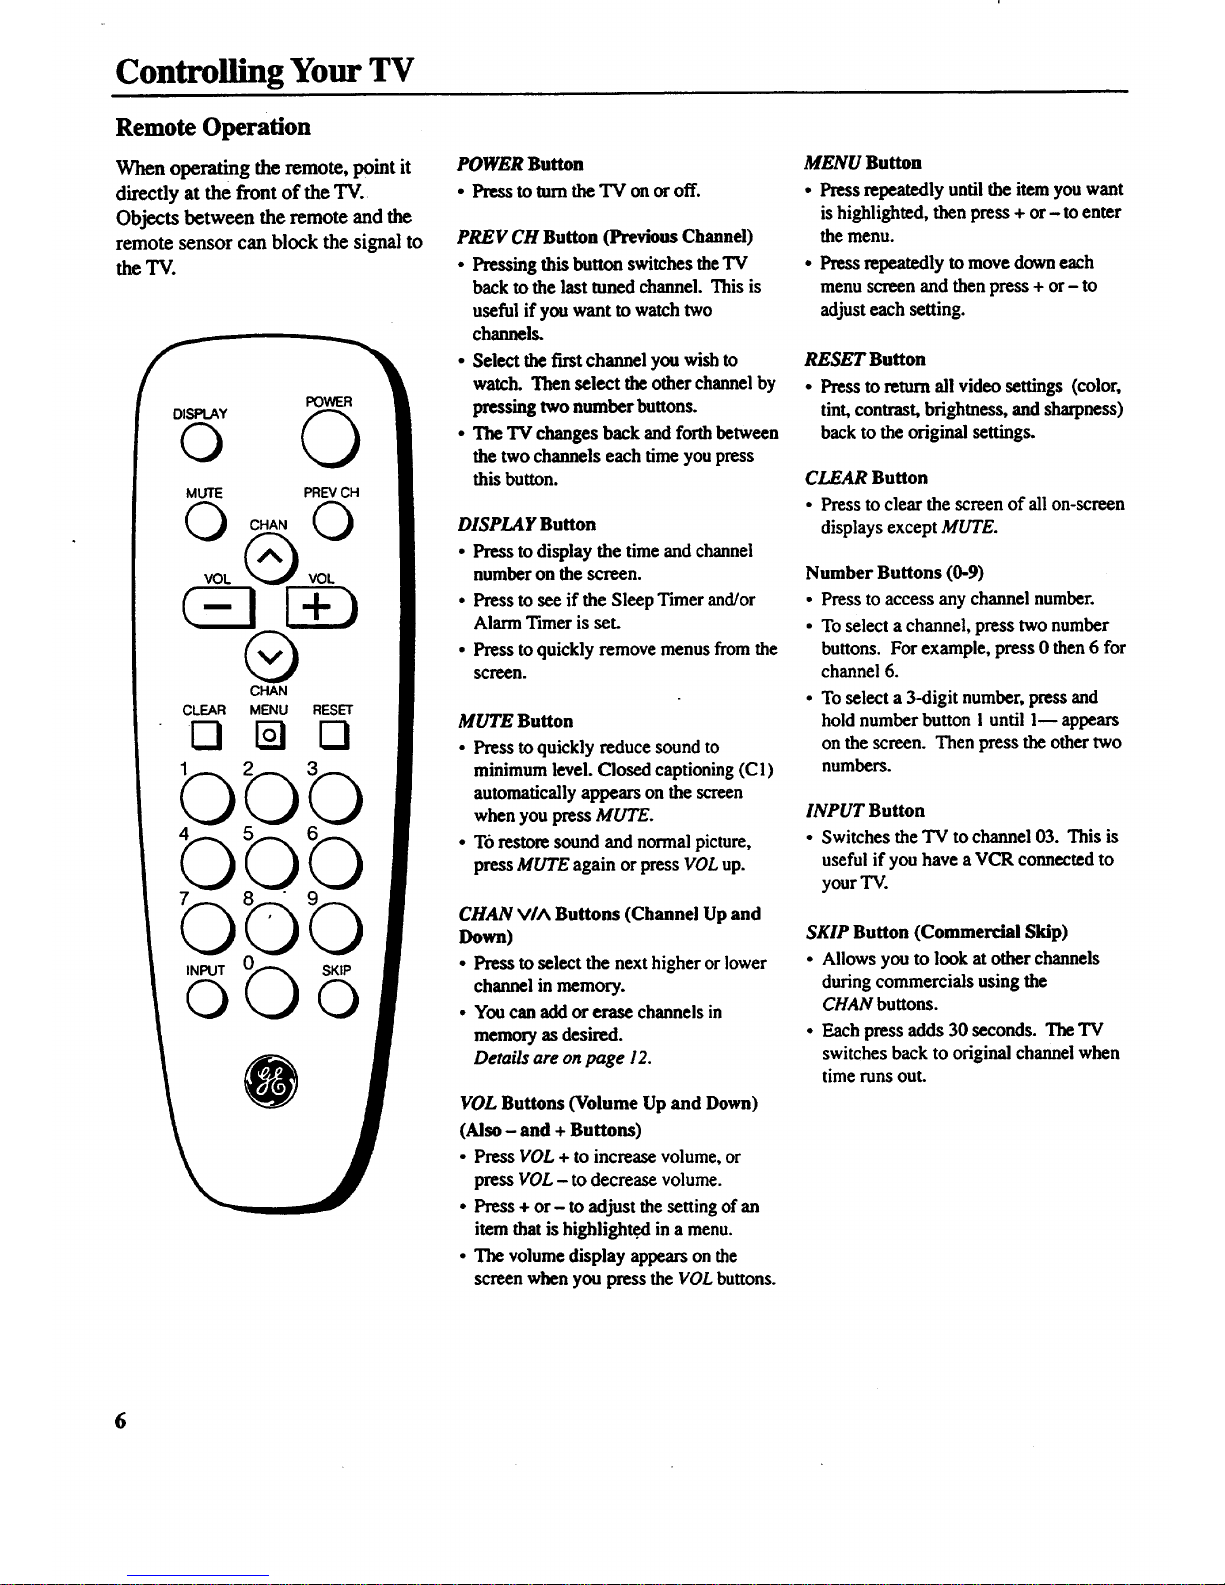
Remote Operation
Whenoperatingtheremote,pointit
directlyatthe frontof the TV.
Objects betweenthe remote andthe
remotesensor canblockthe signalto
the TV.
DISPLAY
POWER
o 0
MUTE PREV CH
®
CHAN
CLEAR MENU RESET
KI N Cl
bbb
bbb
b
INPUT
©
b
SKIP
O
POWER Button
• Press to mm the TV ou or off.
PREV CH Button (Previous Channel)
• Pressing this button switches the TV
back to the last toned channel. This is
useful if you want to watch two
channels.
• Select the first channel you wish to
watch. Then select theother channel by
pressing two number buttons.
• The TV changes back and forthbetween
the two channels each time you press
this button.
DISPLAY Button
• Press to display the time and channel
number on the screen.
• Press to see if the Sleep Timer and/or
Alarm Timer is set.
• Press to quickly remove menus from the
scr_n.
MUTE Button
• Press to quickly reduce sound to
minimum level. Closed captioning (C l)
automatically appears on the screen
when you press MUTE.
• T6 restore sound and normal picture,
press MUTE again orpress VOL up.
CHAN V/^ Buttons (Channel Up and
Down)
• Press to select the next higher or lower
channel in memory.
• You can add or erase channels in
memory as desired.
Details are on page 12.
VOL Buttons (Volume Up and Down)
(Also - and + Buttons)
• Press VOL + to increase volume, or
pressVOL - to decreasevolume.
• Press + or- to adjust the setting of an
item that is highlighted in a menu.
• The volume display appears on the
screen when you press theVOL buttons.
MENU Button
• Press repeatedly until the item you want
is highlighted, then press + or- toenter
the menu.
• Press repeatedly to move down each
menu screen and then press + or- to
adjust each setting.
RESET Button
• Press to returnall video settings (color,
tint, contrast, brightness, and sharpness)
back to the original settings.
CLEAR Button
• Press to clear the screen of all on-screen
displays except MUTE.
Number Buttons (0-9)
• Press to access any channel number.
• To select a channel, press two number
buttons. For example, press 0 then 6 for
channel 6.
• To select a 3-digit number, press and
hold number button 1 until 1--appears
on the screen. Then press the other two
numbers.
INPUT Button
• Switches the TV to channel 03. This is
useful if you have a VCR connected to
your TV.
SKIP Button (Commercial Skip)
• Allows you to look at other channels
during commercials using the
CHAN buttons.
• Each press adds 30 seconds. TheTV
switches back to original channel when
time runs out.
6
Page 9

Operating Features
VIDEO Menu
Press MENU until VIDEO is highlighted. Then press + to select the
VIDEO menu. Press MENU to move down the menu and + and - to
adjust each function.
Press
MENU to
select
VIDEO
FTes$+
for1st
VIDEO
Menu
Screen
The VIDEO RESET function changes all the video functions (color, tint,
contrast, brightness, sharpness) back to the factory settings. Press + or-to
reset the video functions. RESET appears on the TV screen momentarily
while the functions are being adjusted.
The COLOR function adjusts the amount of color in the picture. Press + or
select COLOR, then press + to increase orpress - to decrease color.
Press
MENU
untilthe
second
VIDEO
Menu
appears
The T/NT function adjusts the color of flesh tones. Press + or- to select
T/N/:. Press + to add more green tint or press- to add more red tint.
The CONTRAST function adjusts the overall brightness and conlrast of
the picture. Press + or- to select CONTRAST Press + to increase or
press - to decrease contrast.
The BRIGHTNESS function adjusts the brightness of the dark portions
of the picture. Press + or- to select BRIGHTNESS. Press + to increase
or press - to decrease brightness.
The SHARPNESS function adjusts picture sharpness. Press + or- to
select SHARPNESS. Press + to increase or press - to decrease.
These functions are displayed individually at the bottom of the screen
once they have been selected. The setting can be adjusted at that time by
pressing either the + or- button.
7
Page 10

Operating Features
Languages
The on-screen displays in this TV can
be displayed in three languages:
English, French, and Spanish. When
you select a language, most of the
displays will be shown on the screen
in your preferred language.
SelecangaLanguage
1. PressMEnU once to bring up the
main menu and highlight ENGLISH.
. Press + or- to select FRANCAIS
(French), ESPANOL (Spanish),
or ENGLISH.
Closed Captioning
Closed captioning lets you display the
audio portionof a program as text on
the TV screen. This is useful to the
hearing impaired or anyone who wants
to watch a program without the sound.
There are two types of closed
captioning available: C1 (Caption 1)
and C2 (Caption 2). CI displays the
full translation of the primary lan-
guage in your area. C2 may be used
as a source for secondary languages,
simplified English, or other transla-
tions transmitted in your area.
The closed captioning feature in this
TV does not support a Text Mode.
Typically, the Text Mode consists of
program information, weather
bulletins, local activities, etc.
Closed captioning is not available on
all channels or at all times. Only
specific programs are encoded with
closed captioning information (CC).
Setting Closed Captioning
1. Press MENU until CAPTION
OFF is highlighted.
2. Press+ or-to select OFF,Cl, or C2.
3. The screen displays theTV program's
audio portion as text if the program
has closed captioning.
8
Page 11

Operating Features
SETUP Menu
Press MENU until SETUP is highlighted. Then press + to select the
SETUP menu. Press MENU to move down the menu and + and- to
adjust each function.
Press
MENU
to select
SETUP
1st
SETUP
Menu
Screen
By setting the Sleep function, you program your TV to turnitself off after a
certain period of time. This is useful whenever you want to watch TV for an
hour or so before going to sleep. Press the + or- button to select the length
of time you want the "IVto stay on. Details are on page 10.
You can program your TV to turn itself on at a specific time by setting the
ALARM time function and turning the ALARM: ON/OFF function ON. "
Details are on page II.
The ALARM: ON/OFF function lets you turnthe alarm on or off by pressing
+ or- button. Detm'lsare on page ] 1.
After Setting the CLOCK function, the time is displayed on the"IVscreen
whenever you change channels or press DISPLAY. Press and hold - to Set
the correct hours and + to set the correct minutes. Details are on page 3.
Press
MENU
until the
second
SETUP
Menu
appears
When you press + or - to start the AUTOPROGRAM function, theTV cycles
through all channels andplaces only the active channels for yourarea in its
channel memory. The channel memory is the list of channels theTV stops on
when you press CHAN up or down. Details are on page 12.
The EDIT CHANNELS function allows you to edit the channel memory by
adding or erasing channels. Details are on page 12.
The ANTENNA: CABLE/AIR function tells your TV whether you have cable
or a home antenna connected to it. The TV adjusts this function for you
when you startthe AUTOPROGRAM function. If you wish to adjust it
manually, press + or- to switch between the CABLE and AIR Setting.
9
Page 12

Operating Features
Sleep Timer Operation
By setting the Sleep Timer, you can
program your TV to turn itself off
after a certain period of time (up to
four hours). This is useful whenever
you want to watch TV for an hour or
so before going to sleep.
Setting the Sleep Timer
1. Press MENU until SETUP ishigh-
lighted. Then press + to select the
SETUP menu.
4. When the Sleep Tuner is turned on, the
letters SLP appear on the screen
whenever you change channels or
stations or press DISPZAY.
2. Press + to select the length of time you
want the TV to stay on. Each press of
the + huron adds 30 minutes. Each
press of the - button subtracts 30
minutes.
5. Repeat step I to see the amount of time
remaining before the TV shuts itself off.
32 minute_
remaining
3. When finished, the display disappears
from the screen in a few seconds. To
make it disappear more quickly, press
CLEARon the remote.
6. When the Sleep Timer counts down to
one minute, theSleep Timer display
appearson the screen. When this
display appears, press CLEAR to cancel
the Sleep Timer if you want the "IVto
remain on.
Cancelling Sleep Timer
Press MENU untilSETUP is highlighted.
Then press+ to select the SETUP menu.
Press the - button until the screen
shows "-:- -".
#
10
Page 13

Operating Features
Alarm Timer Operation -
TheTVcanbeprogrammedtoturn
itself on at a specific time within a 24-
Setting the Alarm Timer
1. Press MENU until SETUP is high-
4. When the Alarm Tuner is turnedon,
hour period by setting the Alarm
Timer. This is useful for using the TV
as an alarm clock. Instead of waking
up to a buzz, wake up to a favorite TV
program. You may also set the timer
for a special program that you might
otherwise forget.
lighted. Then press + to select the
SETUP menu.
Once you set the Alarm Timer, the TV
turns on at the preset time, stays on for
one hour, and then shuts off. You may
need to adjust the channel and volume
level before activating the Alarm
Timer. The Alarm Timer turns on the
TV to the "IV channel station and the
volume level that was selected the last
time the TV was on.
2. Press MENU untilALARM is high-
lighted. Press - to select the correct
hour and press + to select the correct
minutes.
o
o
the letters ALM appearon the screen
whenever you change channels or press
DISPLAY.
The TV turnson at the preset time and
automatically sets the Sleep Ttmer to I "
hour (60 minutes). Itoperates for 60
minutes then shuts off.
To turn the TV off before the 60
minutes is up, just press POWER on
the TV or the remote. If you wish to
watch TV longer than 60 minutes, then
cancel the Sleep Timerby setting it
to "-:--". Details are on page 10.
D
After you set the ALARM time, press
MENU to selectALARM: ON/OFF.
Press + or- to switch this setting to the
ON position.
Turning the Alarm On and Off
1. Press MENU until the ALARM:
ONIOFF function is selected.
2. Press + or- to switch between ON and
OFF.
11
Page 14

Operating Features
AutoProgramming Channel Memory
The Channel Memory is the list of TV
channel numbers your "IV will stop on
when you press the CHAN up or down
button. You can program any list of
channels into the channel memory
although your TV is so automatic that
you will probably never need to
manually operate this feature. If you
do, follow the instructions at the right.
1. Connect home anteuna(s) or cable to
your set.
2. Press MENU until SETUP is
highlighted. Press + to select the
SETUP menu.
Editing Channel Memory
Follow these instructions to erase and add
channels.
1. Press MENU until SETUP is high
lighted. Press + to select the SETUP
menu.
The first time you turn on the TV, it
cycles through all channels and places
active channels into the channel
memory. You can then add or erase
channels as desired by following the
instructions in the "Editing Channel
Memory" section at the right.
3. Repeatedly press MENU until
A UTOPROGRAM is highlighted.
I III
o
Repeatedly press MENU until ED/T
CHANNELS is highlighted. Press + to
select EDIT CHANNELS.
Notes:
• Signals from scrambled cable channels and
some cable channels having unusual signal
conditions may not be autoprogrammed.
• To prevent theTV from losing its channel
memory, make sure the outlet you plug your
TV into is "on" all the time. Do not plug
the 'IV into an outlet that can be turned on
and off by a wall switch. Also do not plug
the TV into an outleton the back of another
device (such as a cable-TV converter box)
that is turned off when the device is turned
off.
• If there is an extended power failure, your
TV will automatically reprograrn active
channels the firsttime you turn iton after
the power failure.
2rid
SETUP
Menu
4. Press + to begin AutoProgramming.
- The TV cycles through all channels
and places only active channels into
memory.
5. When the TV finishes cycling, you can
check the channels in memory by
pressing CHAN up or down.
2ad
SETUP
Menu
3.
Select the channel number by pressing
CHAN up ordown or two number
buttons on the remote.
When "+"appears next to the channel
number,the channel is in the channel
list. Press- to erase the channeL
When "--"appears next to the channel
number, the channel is not in the
channel list. Press + to add the
channel.
4. Press - to erase or press the + to add.
12
Page 15

Connecting Your TV
Antenna/Cable Information
Most modem TV antennas receive both
VHF (Very High Frequency) and UHF
(Ultra High Frequency) channels. Chan-
nels 2-13 are V]-IFchannels, and channels
14-69 are UHF channels.
Typ_aJ
Indoor
Antenna
Typ_aJ
Outdoor
Antenna
In most situations you will get better
picture quality if you use an outdoor
antenna or connect your TV to a cable-TV
system. If this is not possible, connect the
indoor antenna supplied with your TV.
Cable-TV delivers both VHF and UHF
channels andother channels not available
from your antenn&
Shown below are two basic types of
antenna cables. Signals from a home
antenna may be conducted through either
type. Cable-TV signals, however, are
always conducted through round, 75-ohm
coaxial cable.
Types of Antenna Cables
Flat300-ohm
twin-leadcable
Round 75-ohm
coaxial cable
Slip-on End
Screw-on End
Use theconnector shown below to connect
your antenna or cable-TV system to the
back of the TV. _Washer
Antenna _
Connector_ Nut
IMPORTANT NOTE: Antenna
connector, nut, and washer must be
in place when TV is in use.
* Follow the instructions below if you
intend to connect the indoor antenna
supplied with your TV.
-or-
* Follow the instructions on page 14 if
you intend to connect an indoor or
outdoor antenna to your "IV.
-Or-
* Follow the instructions on page 15 if-
you intend to connect a cable- TV
system to your TV.
Dipole Antenna Connection -
Follow the steps to connect the indoor antenna supplied with
your TV (only if you do not connect an outdoor antenna or a
eable-TV system).
0)
Insert the antenna base into the pocketed slot on the back
of yo_ set. Stand at the backof your set with the antenna
twin-lead facing you, and press the base of the antenna
into the slot until it locks in place.
Q Connect the ends of the twin-lead to the Antenna Adapter
(supplied).
Q onnect the Antenna Adapter to the ANTENNA connector
on the back of the TV.
®
Later, after you've turned on the TV, adjust the length and
position of the antenna rods for best reception.
• For viewing VHF channels, extend the rods fully.
• For viewing UHF channels, shorten the rods for best
reception.
Dipole Antenna (Supplied)
Slot
_" Base
Antenna Adapter
(Suppled) N_
®
@
ANTENNA
Twin Lead
13
Page 16

Connecting Your TV
Home Antenna Connections
Follow one of the steps below to connect an indoor or outdoorantenna to your TV (not a cable-TV system).
A If the antennacable coming from your home antenna is a 75-ohm round coaxial cable that carries only VI-IF(channels 2-13),
only UHF (channels 14-69), orVHF and UHF channels, connect it to your set like this:
Cable Amm_
Home F I of
TV
Antenna VHF or UHF Only
or
VHF/UHFCombination
-OR-
B If the antenna cable from home antenna is a 300-ohm fiat twin lead that carries only VHF (channels 2-13),
coming
your
only UHF (channels 14-69), orVHF and UHF channels, connect itto your set like this:
C
D
From ......... Push on Back
Home ; of
Antenna TY
VHF or UHF Only
or Adapter
VHFIUHF Combination (supplied)
-OR-
If the antenna cables coming from your home antenna(s) are a75-ohm round coaxial cable that carriesVHF (channels 2-13)
and a 300-ohm flat twin-lead cable for UHF (channels 14-69), connect them to your set like this:
UHF
Cables
From and
Home
Antenna(s) VHF L
Push on
Note: Be sure to connect the UHF antenna cable to the
UHF screws on the Antenna Mixer and the VHF antenna
cable to the screws marked VHF.
Antenna Mixer"
Transformer" (use only #193984)
(such as #AH011)
-OR-
If the antenna wires coming from your home antenna(s) are two 300-ohm flat twin-lead cables as shown here, connect them
to your set likethis:
Push on
Cables UHF | ........ ,_i..,
From of
Home and _ - _ _ _ _"
Antenna(s) VHF I[ _=_:_ _ _ _ _"
TV
--_E_-- AntennaMixer"
(useonly#193984)
Note: Be sure to connect the UHF antenna cable to the UHF screws on theAntenna
Mixer and the VHF antenna cable to the screwsmarked vI-rF.
14
Optional accessory available from your dealer. Only use Antenna Mixer (Stock #193984).
Page 17

Connecting Your TV
Cable-TV Connections
Follow one of these steps to connect a cable-TV system to your "IV instead of a home antenna. Since cable-TV systems
vary, you may wish to consult your local cable-TV company for additional information.
A Follow this diagram if your cable company does not requirea cable box (no scrambled channels):
m
Back
Incoming _ I _'['_!, of
Cable _ ::-UJ TV
B Follow this diagram if your cable company requires a cable box that can be controlled by remote control:
m
Incoming _ @ BaCkof
Cable ,,v TV
Rememberto tune yourTV tothe
outputchannel of thecablebox(usually
2, 3, or4) when selectingchannelsvia
thecable box.
OUT
CABLEBOX
C Follow this diagi'amif your cable'company requires a cable box that cannot be controlled by remote control:
©
,n om,n
Cable
© m Back
® © ® ot
TV
Note: These optional accessories (2-way
splitter(_ A/B switch(_), and three coaxial
cables (c)) are available as a kit under
#AH041BL.*
CABUEBO_
The "A" position on the A/B switch lets you select all
non-scrambled channels by the TV's remote.
The "B'"position allows you to select scrambled channels
via the cable box. Remember to tune yourTV to the
output channel of the cable box (usually 2, 3, or 4)
when selecting channels via the cable box.
* V
Optionalaccessoriesarea ailablefrommostdealersorelectronicssupply stores.
15
Page 18

Connecting Your TV -
Cable-TV Operation
Your new TV is designed to receive up
to 181 TV channels, including 125
non-scrambled cable channels (see
chart below). To use this TV on a
cable-TV system, confirm that the
cable-TV system is properly
connected to your TV. Since cable
systems vary, you may wish to consult
your local cable-TV company for
additional information.
If your cable-TV company follows
EIA/NCTA channel-identification
standards, most of the channels
offered by your cable company will be
identified by channel numbers that are
identical to those on your TV. For
example, if your cable-TV system has
programs on cable channel 20, you can
choose this channel by selecting
channel 20 on your TV.
Some cable-TV companies do not
follow the EIA/NCTA standards and
instead assign their own channel
identification. For example, some use
the standard broadcast channel
numbers (2-13) for channels 2-13, but
identify their other channels with
letters. If your cable company does
not follow the EIAJNCTA standards,
ask them for a cross reference that
shows to which channels you should
tune your TV to receive their cable-
TV channels.
Scrambled Cable-TV Channels
Some cable companies offer
"premium-pay" channels in which the
signal is scrambled. Descrambling
these signals for normal viewing may
require the use of a cable box which is
generally provided by the cable
company.
How you connect the cable box to
your TV depends upon whether or not
the cable box can be controlled by
remote control. If your cable box is
remote controllable, you will want to
connect it as shown in Diagram B on
the previous page.
If your cable box cannot be controlled
by remote control, you will still be
able to remotely control
"unscrambled" channels with the
connection shown in Diagram C on
the previous page.
The chartbelow lists the "total" channel andcable capability count.
• Low VHF A-8 (Channel 01)
• VHF (Channels 2-13) * 12 *
• UHF (Channels 14-69) 56
• Low Midband A-5 throughA- 1 (Channels 95-99)**
• Midband (Channels 14-22 or A-I)
• Superband (Channels 23-36 or J-W)
• Hyperband (Channels 37-64 or W+l to W+28)
• Ultraband (Channels 65-94 and 100-125 or m
W+29 to W+84)
Total* 68 125
1
12"
5**
9
14
28
56
* VHF is only counted once in total channel count because you can receive channels 2-13 on
both"off-air" and "cable" channels. Therefore the total channel count for "off-air" and
"cable" is 181 channels (68+125-12-181).
** Channels 95, 96, and 97 are not applicable in Canada. Therefore, the total number in Canada
is 178.
16
Page 19

Accessories
Remote Control
This istim remote thatcame packed
with your TV. You can use the
order form to order it directby mail
if desired.
OptionalRemote
Thisremote notonlycontrolsyour
TV but canalso controlmostbrands
ofremote-controllableVCR's,cable
boxes, and audio equipment.
_E5
_o_O
RCUI00
i)es_lakB
Transformer
Cleauer/Polisl_
Screw-onAntennaCableOft)
A/BSwitch
CableCmmecfioaKit
Gold-TippedAntannaCable(6-_)
Gold-'rippedA.tennaCab_ (10ft)
OptionalRemoteCont_
Dipole Antenna
Antenna Adapter
Antenna Mixer
Replacement Remote Control (CRK20AI)
Accessory Order Form
Book No. 2024822A
StockNo.
AH011
AH035
AH037
AH041
AH041BL
AH065G
AH066G
RCUI00
156265
193983
193984
226725
$ 6.95
$ 3.95
$14.95
$19.95
$ 6.99
$ 8.99
$34.95
$20.30
s 9.86
$1o.73
$34.95
Total
Dipole Antenna
Designed to attach io the back of
your'lT. Can be used for both VHF
and UHF channels.
156265
Antenna Cables
Screw-on Antenna Cable
Attaches to the roundantenna
connectors (called 75-ohm F-type)
on the back of your VCRor TV. The
ends screw onto the connectors for a
secure connection.
AH037(3-R)
Push-on Antenna Cable
Attaches to the round antenna
connectors (called 75-ohm F-type)
on the back of your VCR orTV.
Ends push on fora quick
connection.
AH06._ (6-a)
AH066G(10-tt) o
Note: All specificationsanddescriptionsof accessories are
subjectto changewithoutnotice. _3
Pricesaresubjecttochangewithoutnotice.
TotalMerchandise($10 MinimumOrder) ........
SalesTax ............................................................
Wearerequiredbylawtocollecttheappropriate
sales tax for each individual state, county, and
locality to which the me_handise is being sent.
Shipping,Handling,andInsurance...................
TotalAmountEnclosed.....................................
Use VISA or MastetCard weferably. Money order
or check must be in U.S. currency only. No COD
or CASH.
All accessories me subjectto availability.
Whereapplicable,we will ship a supersedingmodel.
17
Page 20

Accessories
Charge yourorderon your VISA
orMaslerCardby
filling in below
USE YOUR CREDIT CARl)
IMPORTANT: Copy complete account number
from your VISA card
IIII II"]"T7 I"T'T"]["I"N
pl= V-VIV-VI
IMPORTANT: Copy complete account number
from your MasterCard
I I I I II I I I I[[---[--N[-]"-[--N
yc Vl--1V-r--!
above your expires:
rlalT_ on
MasterCard
AUTHORIZED SIGNATURE
Prices are subject to change without notice.
PLEASE
Print or type your name and
address clearly. This will be your
mailing label.
A complete and correct orderwill
save you days of waiting.
Name;
Street:
City:
State:
Apt:
Zip:
J
United States and Canada Orders
Orderby phone using yourVisa or MasterCard. Call the toll-free
number listed below between 8AM and 8PM Eastern Standard
Time. Use this number only to place an order for accessory
items listed on this order form.
1-800-338-0376
Most orders are shipped UPS within 72 hours of receipt. If it is
not possible to ship within 30 days, we will notify you.
For mail order, detach and mail the completed orderform with
creditcard information, money order, or check in U.S. currency
(made payable to Thomson Consumer Electronics) to the
following address:
Video Accessories
P.O. Box 8419
Ronks, PA 17573
For more information on these accessories write to the
following address:
Video Accessories Customer Service
Thomson Consumer Electronics
Distributor & Special Products
2000 Clements Bridge Rd
Deptford, NJ 08096-2088
o
¢j
e_
C3
International Orders
This offer is valid only in the 50 United States and Canada. For
international orders, please send your request for quotation (not
an order) to:
International Customer Service
Thomson Consumer Electronics
Distributor & Special Products
2000 Clements Bridge Rd
Deptford, NJ 08096-2088 USA
18
Please make surethat both sides of this form have
been filled out completely.
Page 21

Caring for.-YourTV
Cleaning and Care
Dust TV as required, using a soft cloth or the dusting
attachment of your vacuum cleaner. Occasionally vacuum
the ventilation slots in the cabinet to help assure adequate
ventilation. Take care not to scratch the plastic surfaces.
If your TV's cabinet has a textured finish, do not use
furniture polish. Because textured finishes are porous,
using furniture polish will mar their appearance. They can
be easily cleaned with a damp, soft cloth.
To clean the screen, you can wipe it with a damp, soft cloth.
Then dry it with a soft cloth. (A mild soap may be used on
the screen if it is extremely dirty.) Be sure to turnoff the
TV before cleaning the screen, and do not allow liquid to
run down the screen and inside the TV.
A special antistatic cleaning and polishing solution
(AH035) is available for use on most TV screens and non-
textured cabinets. This non-abrasive formula imparts
brilliance, repels static, and resists fingerprints. Lint-free
polishing cloths are included.
19
Page 22

Trouble Checks
I TV Trouble
"IVwill not turn on
Controls don't work
Intermittent orno remote
Turnsoff while playing
Checks and Adjustments
• Check to make sure it is plugged in.
• Check the wall receptacle (or extension cord) to make sure it is "live" by plugging in
something else.
• Maybe batteries in remote are "dead". Try using the POWER button on TV.
• Maybe remote control was not aimed atremote sensor.
• Try unplugging set for 15 minutes and then turning it on again.
• Maybe something is between theremote and the remote sensor.
• Maybe batteries in remote are weak or dead. Try replacing batteries.
• Maybe batteries are installed incorrectly. Try replacing batteries correctly.
• Remove batteries and hold down one or more buttons for several seconds. Install the
batteries and try remote.
• Sleep Timer function may be activated.
• If TV turned on because of alarm, it will automatically turnoff after one hour.
• Electronic protection circuit may have been activated because of a power surge. Wait
30 seconds and then turn on again. If this happens frequently, the voltage in your
house may be abnormally high.
Turns on unexpectedly • Alarm function may be turned on.
Blank screen • Try another channel.
No sound, picture okay • Maybe sound is muted. Try pressing VOL up button to restore sound.
• If headphones are connected, sound from TV speakers will be muted.
Can't select certain channel
No picture, no sound
Sound okay, picture poor
Pictureokay,sound poor
Improper color in one or more areas of
the picture
Closedcaptioning doesn'twork
• Channel may not be in channel memory. Try using number buttons.
• If using VCR, check to make sure TV/VCR switch on VCR is in correct position.
• To select cable-TV channels over 99 (up to 125), press and hold number button 1 until
1-- appears on the screen. Then press the other two numbers.
• If watching VCR (connected through antenna input), make sure TV is tuned to channel
3 or 4-same as CH3/CH4 switch on VCR. Also check to make sure TV/VCR switch
on VCR is in correct position.
•Checkantenna connections.
•Try adjusting SHARPNESS function to improve weak signals.
•Try another channel.
•Try unplugging set for a minimum of 15 minutes and then turning it on again. For
best results you should place the set in the position you will be watching it before you
plug it back in.
• Make sure closed captioning is turned on to either €1 or C2.
•Closed captioning appears on the screen only if the program being broadcast has
closed captioning.
I
20
Page 23

Limited Warranty
What your warranty covers:
• Any defect in material or workmanship.
For how long after your purchase:
• 90 days for labor charges.
• One year for parts.
• Two years for picture tube.
The warrantyperiod for rental units begins with the first rental.
What we will do:
• Pay any Authorized GE Television Servicenter the labor charges to repairyour
television.
• Pay any Authorized GE Television Servicenter for the new or, at our option, rebuilt
replacement partsand picture tuberequired to repairyour television.
How you get service:
• For screen sizes of 20" and smaller:.
Take your GE television to any Authorized GE Television Servicenter.
• For screen sizes larger than 20":
Request home service from any Authorized GE Television Servicenter.
• To identify your nearest Authorized GE Television Servicenter, ask your Dealer, look
in the Yellow Pages, or call 1-800-447-1700.
• Show the service technician your evidence of purchase date.
°
What your warranty does not cover:
• Customer instruction. (YourOwner's Manual clearly describes how to install, adjust,
and operate your television. Any additional information should be obtained from your
Dealer.)
• Installation and related adjustments.
• Signal reception problems not caused by your television.
• Damage from misuse or neglect.
• Remote control batteries.
• A television thathas been modified or incorporated into other products or used for
institutional or other commercial purposes.
• A television purchased or serviced outside the USA.
• Acts of God, such as but not limited to lightning damage.
Product Registration:
• Please complete and mail the Product Registration Card packed with your TV. It will
make iteasier to contact you should it ever be necessary. The returnof the card is not
required for warranty coverage.
How state law relates to this warranty:
• This warrantygives you specific legal rights, andyou may also have other rights that
vary from state to state.
What if you purchased your product outside of the United States:
• This warranty does not apply. See your dealer for warranty information.
21
Page 24

If you would like aCopy of this manual in French, please follow the instructions below.
Si un livret d'instructions en franqaisn'est pas inclus avec votre appamil, vous pouvez
en obtenir un (INDIQUER LE NUMERO DE MODE_LE,VOTRE NOM, ET VOTRE
ADRESSE) en vous adressant A-
Thomson l_lectronique Grand Public du Canada
Service des donnees techniques
6540 Tomken Road
Mississauga, Ontario, Canada
LST 2E9
If your TV needs service, please contact your dealer or the nearest servicenter. Please do
not send any products to the Indianapolis address listed below or on the box. This only
adds delays for service of your TV. For service information refer to the warranty page.
O,,_INOIIMH CONSImBRBLI[gTiIOIm_
10330 N. Meridian SL
Iftdianapolis, IN 46290
°1995 ThomsonConsumerElectronics,Inc.
Trademark(s)°Registered
Printed in the U.S.A.
TOCOM# 2024822A
 Loading...