

Page 1
I
I
.
__ .- -._. -_
-.... _
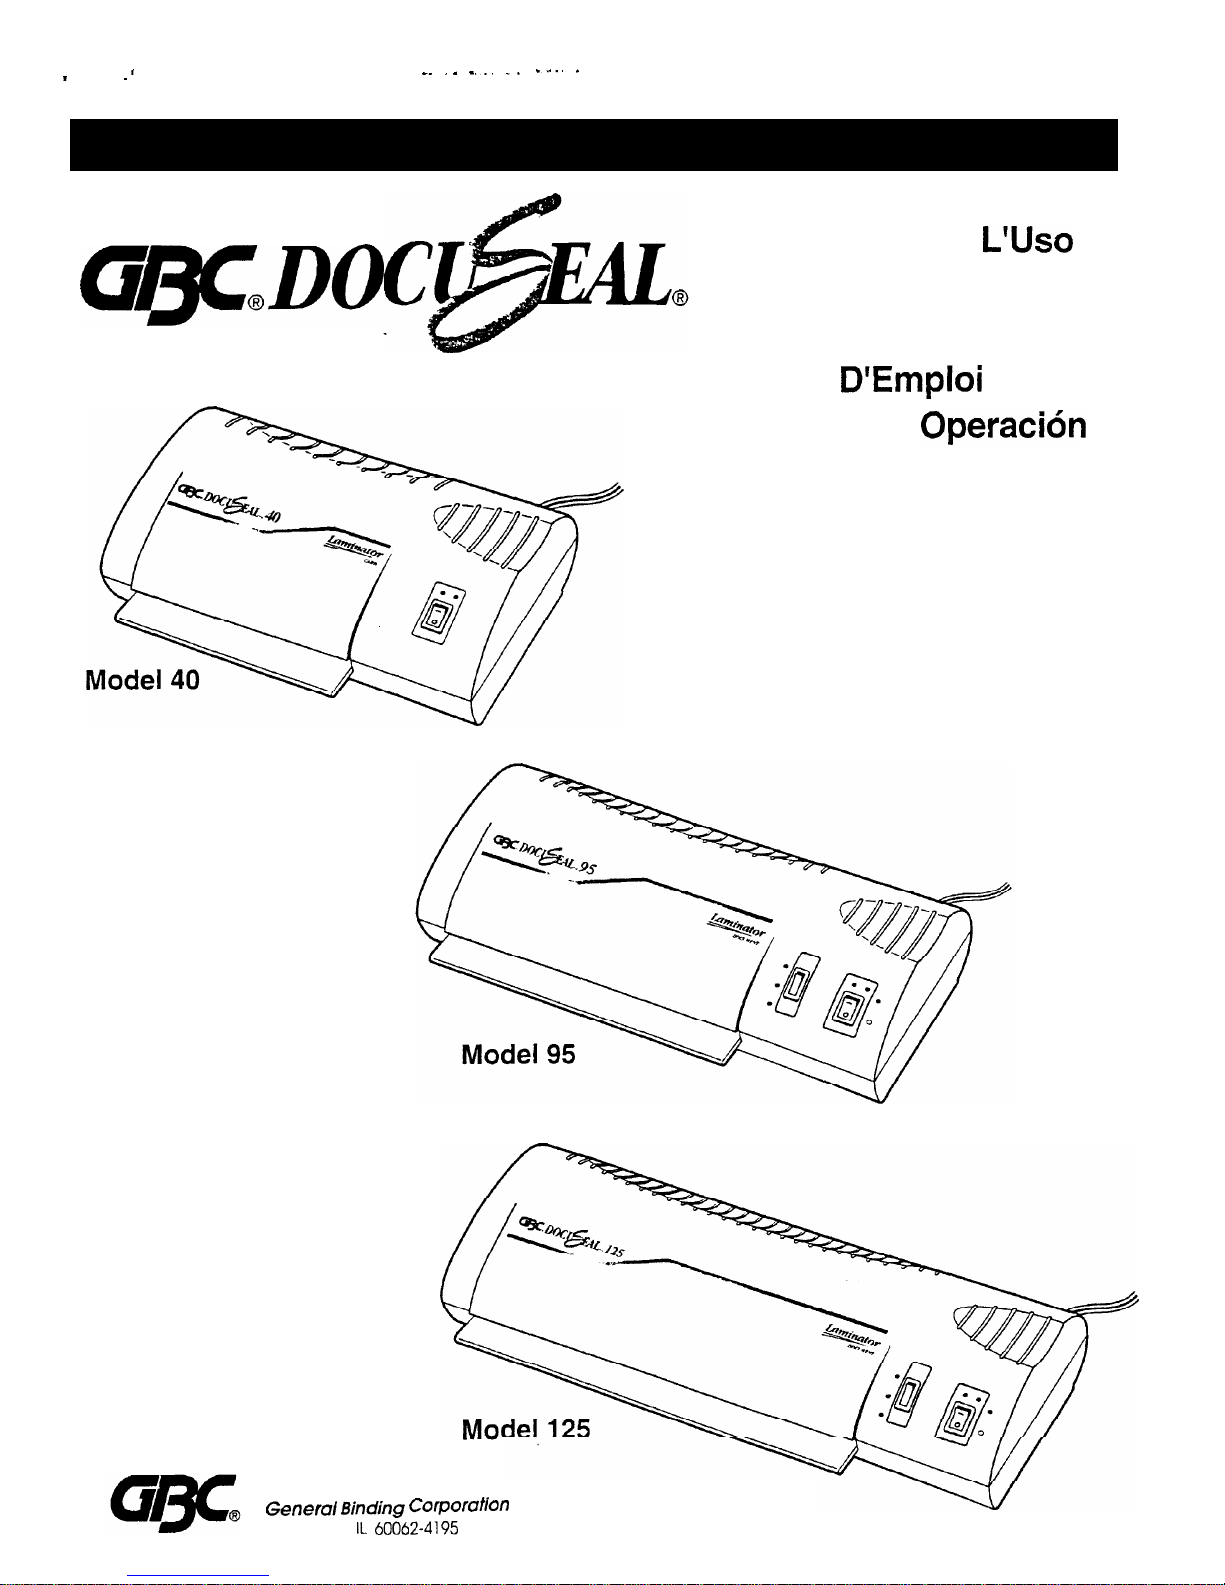
G-DO
Operating Instructions
Instruzioni Per
L’Uso
Bedienungsanleitung
Gebruiksaanwijzing
Mode
D’Emploi
Manual De
Operacih
General Binding
cofporation
Northbrook. IL
60062-4195
Page 2
YOUR SAFETY AS WELL AS THE SAFET
OF OTHERS IS IMPORTANT TO GBC. IN
THIS INSTRUCTION MANUAL AND ON
THE PRODUCT ARE IMPORTANT SAFET
MESSAGES. READ THESE MESSAGES
CAREFULLY.
A
THE SAFETY ALERT SYMBOL
PRECEDES EACH SAFETY
MESSAGE IN
THIS
INSTRUCTION
MANUAL. THIS SYMBOL INDICATES A
POTENTIAL PERSONAL SAFETY
HAZARD THAT COULD HURT YOU
OR
OTHERS, AS WELL AS CAUSE PRODUCl
DAMAGE OR
PROPERTY DAMAGE.
THE FOLLOWING WARNING IS FOUND
ON THE
BOITOM
OF THE PRODUCT.
1 A
WARNING
1
This safety message means that
you
could be seriously hurt or
killed
if you
open the
product
and expose yourself to
hazardous voltage.
The following ISO and
IEC Symbols
appear on this
product,
and their
meaning is as follows:
0
Off
Cold
Run or
Cold
Laminate
Run or Hot Laminate
0
Ready
I
Power
o Rm
8
0
,p- Foil
c-
r-
I
.
LA
VOSTRA SICUREZÄ i
IMPORTANTE
PER GBC. IN QUESTO MANUALE SONO
CONTENlJTl IMPORTANTI
MESSAGGI
PEf
LA
SICUREZZA, RIPORTATl
ANCHE
SULLA MACCHINA. LEGGETELI
Al7ENTAMENTE.
-_.
“-
..<
--
., _ ., -.
‘,
:
-
.
A
QUESTO SIMBOLO PRECEDE OGNI
MESSAGGIO
PER LA
SICUREZZA
SUI
MANUALE.
ESSO INDICA UN
POlENZlALE
RISCH10
PER
LiNCOLUMlTh
VOSTRA E
DEGLI AL+
COSI
COMiZ PbfENZlAU DANN1
PER LA
~-
--,. ,‘.?, .
.- . -2;.
IL SE6”E.il-k
AWERTIMENTO SI TROVA
Stil
FCfNDO
DELLA MACCHINA.
_]*
.~.
auesto messaggio significa
ehe
potreste
r’manere
gravemente
ferito
0 ucciso se
Sprite Ia
macchina e vi esponete
al
ischio
di
alte
voltaggio.
seguenti simboli ISO e
IEC
compaiono
;ulla
macchina; il loro significato
6:
0~
spento
=R-
’
plastificazione a freddo
0
plastificazione a
caldo
0.
pronto
1 ‘iotenza
SOWOHL IHRE ALS AUCH DIE
SICHERHEIT ANDERER PERSONON IST
FÜR GBC VON
GROßER
BEDEUTUNG. IN
DIESER BEDIENUNGSANLEITUNG UND
AM PRODUKT SIND WICHTIGE
SICHERHEITS - INFORMATIONEN.
BllTE
LESEN SIE DIESE INFORMATIONEN
AUFMERKSAM DURCH.
A
DAS SICHERHEITS - WARNUNGS
-
SYMBOL LEITET IN DIESER
BEDIENUNGSANLEITUNG JEDEN
SICHERHEITSHINWEIS EIN. DIESES
SYMBOL DEUTET EINE POTENTIELLE
SICHERHEITSGEFAHR AN, DURCH DIE
SIE ODER ANDERE PERSONEN VERLETZT
WERDEN KÖNNTEN. WEITERHIN KÖNNTE
EINE BESCHÄDIGUNG DES GERÄTES
ODERANDERERGEGENSTÄNDE
VERURSACHT WERDEN.
DIE FOLGENDE WARNUNG FINDEN SIE
4UF
DEM BODEN DES PRODUKTES.
Iieser
Sicherheitshinweis
bedeutet,daß
Sie
ernsthaft verletzt oder getötet werden
cönnten,
falls Sie das Gerät öffnen und
sich
der gefährlichen Stromspannung
Iussetzen.
Xe
nachstehend aufgeführten ISO und
EC Symbole sind auf dem Produkt
angebracht und haben die folgende
3edeutung:
0
Aus
8-
1
Kaltlamination
8-
1 !ri
Heißlamination
0
Bereit
I
Stiom
Page 3
-I-u.e.-~c--
- ---.~
-----___-
_---
~-~~.--.---_.-_--_~--~---
-
~-. --
_-. - _ .____
- -1 _..-
j
_
.‘, -
.:.. ; .z ‘.-:
i 11
.? ,t--.--: .
.I ‘-..
:
-....-
-, i .: -I 1 _ ::...<
..: .< :::
DE
VbKiiiElD
VAN UZELF EN
AhEREN
I~‘BELANGRIJK~\iOOR 6BC: IEj’DEZE .’ .k’
GEBRUIl&AANWIJZlNG
EN
;oP
HET _ _
:.
PRODUKT ZELF STAAN
BELhGRljKE
-7
AANWIJZINGEN VOOR VEILIG GEBRUJK.
LEES DUE MNw JZINGEN
‘:;;+$$i- ?- ;+ :-
JOTRE !&CURIT&
COMME CELLE DES
WTRES, EST IMPORTANTE POUR G8C.
ZES
INSTRUCTIONS CONTIENNENT
I’IMPORTANTS MESSAGES
RELATIFS a
,A
SECURITE.
MERCI DE LES LIRE TRliS
IlTENTlVEMENT.
CE SYMBOLE “AITENTION
SECURITE”
PR&Cl?DE,
DANS CE
AANUEL
D’UTILISATION, CHAQUE
AESSAGE CDNCERNANT LA
SiCURITi.
:E
SYMBOLE
INDIQUE
UN
RISQUE
‘OTENTIEL DE BLESSURE POUR VOUS
)U
D’AUTRES
PERSONNE%
OU UN
IISQUE DE DOMMAGE POUR LA
AACHINE
OU DES BIENS PERSONNELS.
.‘AVERTISSEMENT
SUIVANT EST
SOTIFIi SUR LA PARTIE
INFERIEURE
DE
.‘APPAREIL:
Ze
message signifie
que
vous pourriez
ltre trks skrieusement blesse
si vous
entiez d’ouvrir
I’appareil
en
vous
sxposant
ainsi 6 un risque de
choc
‘lectrique.
,es
Symboles ISO et
IEC mentionnes ci-
pr&s
sont
bgalement
visibles sur
appareil et ont Ia signification suivante:
3
Hors tension
6
1)
Plastification a froid
55
’ it!
Plastification a
chaud
*
I
3
Pret
I
Alimentation
8
’ Marche
e
??’ Feuille m&al
. .~
SU SEGURIDAD ES
IMPORThTE
PARA
GBC. EN ESTE MANUAL HAY
. . .
IMPORTANTES MEDIOAS PARA
LA-
~.
SEGURIDAD, INDICADAS EN
LA
MhlINA.
LEER AT’ENTAMENTE. .
-EL
SiMBOLO PREtiEDE
CADA
-S
MENSAJE
PARA iA
SEGUkItiÄ6~
DE LA MAQUINA. ESTE INDICA UN-
,,;.;
~T
. --
-
POTENCIAL RIESGO PARA VUESTRA:$?
SEGURIDAD Y LA DE
OTROS;TAM&ijc
hoja
Page 4
a
WARNING:
FOR
YOUR
PROTECTION DO NOT
CONNECI
THE
G8C
DOCUSEAL POUCH
LAMINATOR TO ELECTRICAL POWER
UNTIL YOU READ THESE
INSTRUCTIONS COMPLETELY.
KEEP
THESE
INSTRUCTIONS
IN A
CONVENIENT
LOCATION
FOR FUTURE
REFERENCE. TO GUARD AGAINST
INJURY,
THE FOLLOWING BASIC
SAFETY PRECAUTIONS MUST BE
OBSERVED IN THE SET-UP AND USE
OF THIS PRODUCT.
l Use the GBC
DocuSeal pouch
laminator only for its intended purpose
of laminating documents according
to
the indicated specifications.
m
DO not
place
anything in the throat
opening of the machine other than
carriers with pouches/documents.
p
Place
unit on a secure, stable work
area to prevent the
machine falling
and possibly causing personal
injury
and darnage to the unit.
b
Turn unit off when not in
use
for an
extended period of time.
b Follow
all warnings and instructions
marked on the
product.
B
This appliance has a polarized
plug(one
blade is wider than the other).
b
To reduce the risk of
electric shock,
this
plug is intended to fit in a polarized
outlel
only
one way.
If
the plug does notfit
fully
in the
outlet,
reverse the plug.
If
it still does not fit, contact a qualified
electrician.
)
DO not modify
the plug
in any way.
c
p~Sfl~CÄ~I&
ALUTRETE ‘-f$ ‘-;; ._ ;‘.
ELF-RICA FlNCHi N’JN
AVRETE
1’:
LETTO.IL PRESENTE MANUALE ::-.-.- ‘b
COMPL~AMENTE.‘TENEkE
bUEST0
MANUALE A
PORTATA~DI MAN6
PER
*
WRE Cor(tCJj~fA&,JI. LE ‘*, $; ;;:;J.?-;;
..__ _.
.
. . .
..--.
SEGUENTI PRECAü&ONI DEVij’Ng :‘;;;‘
ESSERE OSSERVÄk’NEL-b4
$ESSA IN
**, .,-. -yt _ . --.. -..- ,>; _.,-s.‘.
-7. ‘y‘;’
Usare
la’~~fä%ficatic& 20
cön fö
,dt
scopo di
plaMicare
documenti jn
base alle specifiche indicate. Evitare
I’uso improprio. ..
Non inserire oggfkti
neila macchina
ehe
non siano documenti da
plastificare.
Posizionare
Ia macchina su un
Piano
di lavoro stabife e sicuro per
prevenime Ia caduta con conseguenti
danni
alla
stessa o alle persone.
Spegnere Ia macchina quando non
Ia
usate per un
lungo
periodo.
Seguire Ie istruzioni e gli
awertimenti
sulla
macchina.
a
WARNUNG: ZU IHRER EIGENEN
SICHERHEIT
SCHLIEBEN
SIE
DEN GBC DOCUSEAL
TASCHENKASCHIERER
ERST AN DAS
STROMNEIZ
AN, WENN SIE DIESE
ANLEITUNG VOLLSTÄNDIG GELESEN
HABEN.
BEWAHREN SIE DIE
ANLEITUNG AN EINEM GEEIGNETEM
ORT IN DER NÄHE DES GERÄTES AUF,
DAMIT SIE AUCH IN ZUKUNFT NACHSCHLAGEN KÖNNEN. UM SIE VOR
VERLETZUNGEN ZU BEWAHREN,
MÜSSEN DIE FOLGENDEN GRUNDLEGENDEN SICHERHEITSVORKEHRUNGEN BEIM AUFBAU DIESES
PRODUKTES BEFOLGT WERDEN.
l Benutzen Sie den GBC
DocuSeal
Taschenkaschierer nur für seinen
vorgesehenen Zweck, d.h. zur
Lamination von Dokumenten gemäß
den beigefügten Angaben.
. Stecken Sie außer dem Carrier
(Transporttasche) mit
Pouch
(Folientasche)
und
Dokument nichts
anderes in die Offnung des Gerätes.
l Steilen Sie das Gerät auf einen
stabilen Arbeitsplatz, so daß es nicht
herunterfallen kann und das Gerät
oder Personen in Mitleidenschaft
gezogen werden können.
l Schalten Sie das Gerät aus, wenn es
nicht benötigt wird.
l
Befolgen Sie alle Warnungen und
Hinweise, die auf dem Produkt
angebracht sind.
Page 5

a
AlTENTION:
PAR MESURE DE
ShXRIT&
NE BRANCHE2 PAS
LA PLASTIFIEUSE A
POCHETTES G8C
DOCUSEAL AVANT
D’AVOIR
LU EN
TOTALITI!
CES INSTRUCTIONS.
CONSERVEZ
LES DANS
UN
ENDROIT
APPROPRIE
AFIN DE POUVOIR VOUS
I
REFERER
SI
NiCESSAIRE.
AFIN
D’EVITER
TOUTE BLESSURE, LES
PRECAUTIONS
DE BASE SUIVANTES
DOIVENT
ETRE OBSERVEES A
L’INSTALLATION
ET LORS
DE
L’UTILISATION
DE CET
APPAREIL.
N’utilisez Ia plastifieuse A
pochettes
GBC
DocuSeal
que pour
Ia
plastification de
documents
en vous
conformant aux spkcifications
indiqukes.
N’introduisez pas dans Ia fente
d’alimentation de Ia machine autre
Chose
que des transporteurs
contenant des pochettes et des
documents.
Installez Ia
machine en skcurite sur un
emplacement stable pour eviter
qu’elle
ne tombe;
cela
pourrait
I’endommager et causer
d’&entuelles
blessures corporelles aux utilisateurs.
Coupez I’alimentation si vous n’utilisez
pas I’appareil.
Conformez vous aux avertissements
et aux instructions mentionnks sur
I’appareil.
-.1-- r . _. _
“i&.
r.
2* ~j.;$.
..--. ;..:+.*-,+.:,.
2’,:‘T . . . . 1.: ,.:iit ^‘-:( “:rr.
..’ “.‘i .\
?-.’
:..y i .-t+.-i..t 2, ,~, .: ,fi __ ),, -. _
; .-.-
-.
.v
A
ATENChN:
NO
ENkHükAk.‘&
PIÄSTIRCADORA
A ti
FiED ;;’
ELECTRICA
HASTA
NO HABER
LEIDO
TOTALMENTE ESTE MANUAL. TENER
ESTE MANUAL +
MAN0 PARA “:&.;_‘-:-
FUTURAS CöNSU&TA$ &AS
;<-:f;;:.;-$;
.-. _.
SIGljIENTfjS PRECAUC@NES DEBEN. :’
,G.-. ,..> ”
SER LEIDAS y A MAN0 LU&‘j--%+$~;
APLICADÄS
EN.fi unüiAaoti-d$z&
Page 6

The pouch laminator must be
connected to a supply voltage
corresponding to the electrical rating
oi
the
machine
as indicated.
Unplug the pouch laminator before .
moving it, or when it is not in use for
an extended period of time.
DO not operate with a damaged supply
cord
or plug,
after
it
malfunctions,
or
after it has been damaged in any
manner.
DO not overload electrical outlets
beyond their capacity as this
tan
result
in fire or electrical
shock.
DO not alter attachment plug. Plug is
configured for the appropriate
electrical supply.
The unit is intended for indoor use
only.
Never push
objects
into this product
through cabinet
Slots.
DO not
Spill
liquid of any kind on this product.
1
DO not
attempt to
setvice or repair the
pouch laminator yourself. Unplug the
unit and contact an authorized GBC
Service
representative for any required
repairs.
.~
_: .
-.
--..:
l
Collegare
Ia macchina a un voltaggio
‘corrispondente ä quanto indicato
sulla
stessa. 1
._
_.
-.
l
Staccare Ia
Spina della
macchina
prima di.muoverla o quando non
vienc
utiliuata per un certo
periodo
di
_. !...: - . -. :.:: ‘:. _
.
l Non
k&ire oggeki nella macchinaY’.
Non
k$are
liquidi di
alcun
tipo
sulla
.
_-.
e
Non eseguire lavori di manutenzione o
di riparazione da
Soli.
Staccare
IA
Spina
e contattare un tecnico
autoriuato GBC.
CAUTION: Unplug this product
before
cleaning.
1
Wipe exterior only with a damp cloth.
DO not use detergents or solvents.
ATTENZIONE: togliere Ia
Spina
prima di
procedere alla
pulizia
della
macchina.
l
Pullre Ia
scocca
solo con un panno
umido.
Non usare detergenti o
Der Taschenkaschierer darf nur an
eine Steckdose angeschlossen
werden, die entsprechend dem
Typenschildaufdruck abgesichert ist.
Ziehen Sie den Stecker heraus, bevor
das Gerät transportiert wird oder wenn
es über einen längeren Zeitraum nicht
benutzt wird.
Betreiben Sie das Gerät nicht mit
einem beschädigten Stromkabel oder
Stecker nach einer Funktionsstörung
oder nachdem das Gerät in anderer
Weise beschädigt wurde.
Vermeiden Sie die Überlastung des
elektrischen Anschlusses, da dadurch
ein Kurzschluß oder Feuer entstehen
kann.
Verändern Sie nichts an der
Stromverbindung. Der Anschluß ist auf
die entsprechende Stromversorgung
ausgerichtet.
Betreiben Sie das Gerät nur in
trockenen Innenräumen.
Stecken Sie niemals Gegenstände
durch die Öffnungen des Gehäuses in
das Gerät. Schütten Sie keine
Flüssigkeit auf das Gerät.
1
Versuchen Sie nicht, das Gerät selber
zu reparieren oder zu warten. Wenn
das Gerät repariert werden muß,
ziehen Sie den Stecker heraus und
setzen Sie sich mit dem autorisierten
Service Personal von GBC in
Verbindung.
ACHTUNG: Ziehen Sie den
Stecker vor der Reinigung aus
der Steckdose heraus.
Wischen Sie das Gerät von außen mit
einem feuchten Tuch ab. Vetwenden
Sie keine Reinigungs- oder
Lösungsmittel.
Page 7

-. --u--_cI
--
-.-.-_ -__ -__-_-e----e
-_- ____-_
._ ____.-......_
-
-._- _
____
___._ _-_-..I-“.--. I. *
-
.
l
De’plsstificeermachine
dient te
“::--
.
1. worden’ aangeslotenop ‘ein strocmrie~
met het voltage
dat
op de machine is
c:
aan&geven.
_ T “1
. .
--L-.
‘.‘-’
l
@äl voordat u de GBC%x!$eal - -“.
verplaatst,
of
indien u
de’machine
Gen
..w:
. .
-
Jange-tijd
niet
&bfl;iktI de
stekker uit
.
m -Probeer
niet
zelf
de GBC
DocuSei
te
repareren. Haal de stekker uit het
Stopkontakt en neem kontakt op met
een geautoriseerde GBC sewice
-
monteur voor alle reparaties.
--I
. .
: ._
_ ;
. .
._
,
: ”
i ._..
.
..’ ^
-:, *L
i,,- ..,;.
. . . -1.
.
LET OP! Haal de stekker uit het
Stopkontakt voordat u het apparaat
gchoonmaakt.
1
Maak het apparaat
schoon
met een
.vochtige doek. Gebruik geen
: :
l La plastifieuse ne doit
etre branchee
que sur une
Prise
de courant dont
Ie
voltage correspond ti
celui indique sur
Ia Plaque
d’identification de
Ia
machine.
l
Debranchez Ia plastifieuse avant de
Ia
deplacer
ou en cas de non utilisation
prolongee.
l
Ne I’utilisez pas
avec
une
Prise
ou
un
cordon endommages, apres un
mauvais fonctionnement ou
apres
tout
dommage quel qu’il
soit.
l
Ne surchargez pas I’alimentation
electrique au-dela
de ses capacites.
II
pourrait en
resulter un incendie ou
une
electrocution.
b
Ne modifiez pas Ia
Prise
de courant.
Elle a
etc prevue
pour
I’alimentation
appropriee.
1
N’utilisez pas Ia plastifieuse
&
I’exterieur des locaux.
1
N’introduisez pas d’objet dans Ia fente
d’alimentation. Veillez k ne pas
renverser de liquide sur Ia machine.
*
N’essayez pas de reparer
vous-meme
Ia plastifieuse a pochettes.
Debranchez I’appareil et contactez Ie
Service Apres-Vente de GBC ou de
votre fournisseur pour toute
reparation.
ATTENTION: debranchez
I’appareil avant de Ie nettoyer.
1
Essuyez I’exterieur
avec
un
Chiffon
humide. N’utilisez pas de detergents
ou de solvants.
,: :: ,,-~,~: ; -p ..,.-. ‘:
1 ._.I
,: -‘Z~s, ;
;.;;.,.- :- .‘. . ,
-.
3: -
,---i:.,
;.:. ed.;.‘.*‘..- -r - ,‘., . _
., : L7. “‘” .-*
. . .,
l
..:
,,BnchufarJa maquina
alQöft$je”‘~
i?J”,
adecuado al
indicado en
,Ia, rn$,$a: ,,-;I:~\
-i -‘.;T\ ;c.,;:* ,._ 7. y” _.
.
_~-
.i. ;
l
Extraer el enchufe de ia-maquina de 1s
_ rod &5cthc~‘ant& de
moverla
6
.! 41
,.. .-
cuando no
vti’a serutilizada
en un’
:’
: 1
,f.,i “x:.
:V,...<r,: _. . -.
”
No
“Ga”; b; >.
+g:,<-, i
reailzar reparscion&*por
cuenta
’
propia. Desenchufar Ia clavija y
‘~‘1”. .”
contactar con ün
tecnicö autorizado d
” ATENCICN:
quitar
el enchufe-‘f
an& de
proceder a Ia limpieza
Page 8

.
__ ._._ .
_ - - - ----
_._ . .._. -
___. -----.-
-.---
Carrier
Required
Zonnect
power
cord
to
ippropriate
power Source.
;BC DocuSeal40/95/125
pouch
aminators are designed to run
louches
using a LEADERED or
SEWN-EDGE
carrier. Always
un
pouches with a carrier
to
lrevent
pouch adhesive from
lozing
onto the
rollers.
Failure
o use the correct carrier
will
‘esult
in poor lamination on the
eading edge of the
document,
)r Cause
possible darnage
to
he machine.
1.
GBC
DocuSeal40:
Push the
switch to
“Hat-Run”.
GBC
DocuSeal
951125: Slide
the
mode switch to “Laminate”
and the
rocker
switch
to
“Run”.
The “ready” LED will
illuminate in approximately
two to seven minutes
after
the machine is
turned
on.
?.
Center the item to be
laminated into a GBC
laminating pouch, so that the
borders are even on all sides.
3. Insert
the
pouch with the
item, sealed-edge first into the
leadered carrier that is included
with
each carton
of GBC
DocuSeal
pouches. Position
the sealed edge of the pouch
against the inside
foldedl
sewn edge of
the
carrier.
4.
Insert the carrier and
its
contents straight into the
machine,
leading
with the
folded/sewn
edge.
Handle
carriers carefully so that they
tan
be reused.
5.
The laminated item will
automatically
exit
the rear of
the pouch laminator. After the
pouch has stopped moving,
place
the carrier on a
flat
surface to cool for one
minute before removing the
finished pouch.
5. If
you are finished laminating,
then move
the
switch to the
“off”
Position.
Page 9

----
-w--e
.-
____-_
.--.---
..__.
.---
__--__
---..-
_____._~_..~_~
__...
------
--
__ _.__
____.
-..-
-
~-
I
.
Stecken Sie das Stromkabel in die
entsprechende Stromquelle ein,
Die
Taschenkaschierer
GBC
DocuSeal
40/95/125
wurden
entwickelt, um Pouches zu
verarbeiten, die einen “verlän-
gerten” Carrier (Transporttasche:
verwenden. Benutzen Sie immer
Pouches mit Carrier. um zu
vermeiden, daß der Leim des
Pouches auf die Rollen quillt.
Sollte kein Carrier benutzt
werden, kann dies zu schlechten
Laminationsergebnissen
oder
zu möglichen
Beschädigungnen
am Gerät führen.
1. GBC
DocuSeal40:
Schalter
auf
“Hat-Run”
stellen. GBC
DocuSeal
95’125:
Betriebsartschalter suf “Laminate”
und Wippen-Schalter auf
“Run” stei!en.
Ca. zwei bis
sieben Minuten nach Einschalten des Gerätes leuchtet
die
“Ready”-
Anzeige auf.
2.
Legen Sie das zu
laminierende Dokument mittig
in den Pouch ein. so daß der
Abstand zum Rand an allen
Seiten gleich groß ist.
3. Legen Sie den Pouch mit
dem zu laminierenden Dokument mit der geschlossenen
Seite nach vorne zeigend in
den Carrier ein. so daß die
geschlossene Seite
des
Pouch
an die geschlossene Seite
des Carriers stößt. in jeder
Verpackung der GBC
Docu
Seal Pouches befinden sich
zwei “Verlängerte ’
Carner.
1.
Legen Sie den Carrier mit
seinem Inhalt gerade in das
Gerät ein. wobei die geschlossene Seite des Carriers
zum Gerät zeigt. Gehen Sie
sorgsam mit den Carriern
um. damit sie mehrmals
verwendet werden können.
5. Das laminierte Dokument
läuft automatisch durch das
Gerät durch und wird im
hinterem
Teil
ausgegeben.
Bevor Sie das fertig
laminerte
DoKument
aus dem Carrier
entnehmen, sollten Sie eine
Minute
Inrarten,
damit sich
das laminierte Dokument
abkühlen kann.
5.
Wenn Sie mit der Arbeit fertig
sind, stellen Sie den Schalter
auf die Position
“off”.
De
GBC
DocuSeal40/9~/125’
hoeslaminators
zijn gernakt ‘1
voor het
atibruik
van
Dötiches
.
doorvoerhoes
voorzieti @@ ~0
beginsJö&~ uoer +pou+.
attijd met een
dooTryoerhoesPm;m;
d80iae’~~~ilee~achine OIT
te
@$of$n
dat 6;
~esr66lten
lijni’.bp
de
rollen
komt.
jndien-
u
ni& &jd&g döo~gefiotj~>c~f.
$&$kt a h&t‘iesultaat ‘slechi
rijn%%&i i?r
schade
aan
,cJe. ‘=
machirie6&&aan.
.
:*, 2;,
g. *;..~+$:~,&y :
. . .C
”
,4 ‘(. y .i_ _
- d sc* ,.,
1.
~BCDocuSeal40:
Schakel’
?&$@“Hot-Run”, GBC ‘:;:!
.:
DocuSeal
95/125: Schuif
de
“* bed@nings knop op .’ yfi?
YLaminate”
en de
schakelaal
op
“Run”.
De
“ready”
LED
gaat binnen twee a zeven
minuten nadat het apparaat
aangetet
is, branden.
;-...~
_.-
2.
Cent%er
het ie plastificeren
papier
in
een GBC
plastificeerhoes
en zorg
etvoor dat de
randen
overai
even breed zijn.
3.
Steck
de hoes met
het
papier in de doorvoerhoes
die in elke doos met GBC
DocuSeal plastificeerhoezen
zit, met de dichte kant naar
voren.
Positioneer de hoes
met de
dichtgelaste rjide
tegen de rand van de
doorvoerhoes.
1. Steek de doorvoerhoes, met
de vouwrand eerst, recht in
de machine. Wees zuinig
met uw
doonroerhoes zodat
u ze meerdere malen kunt
gebruiken.
5.
Het geplastificeerde item
komt automatisch uit de
achterzijde van de machine.
Nadat de doorvoerhoes is
mitgevoerd
kunt u
deze op
een
platte
ondergrond
leggen
om een minuut af te
koelen voordat u het
eindresultaat eruit haalt.
5.
Indien u met plastificeren
klaar bent zet u de
schakelaar op
“off”.
Branchez
Ia
Prise
sur
une
Source
de courant
appropriee.
Les plastifieuses a
pochettes
GBC DocuSeal
40/95/125
sont
concues
pour fonctionner
avec
des transporteurs a bord
plie
et
surpique.
Utilisez toujours
un
transporteur
afin
d’eviter
que Ia
tolle
de Ia
pochette n’adhere
aux rouleaux de Ia plastifieuse.
L’utilisation d’un
transporteur
non
approprie
pourrait entrainer
une
mauvaise
qualite
de
plastification sur Ie bord
d’attaque du
document ou
endommager
Ia machine.
1. GBC
DocuSeal40:
Positionner Ie commutateur
sur “Plastification ti chaud”.
GBC DocuSeal
95/125:
Faire
glisser Ie commutateur sur
“Plastification” et positionner
I’interrupteur sur “Marche”.
Le voyant
“PRET”
s’allume
environ 2 ti 7 minutes
apres
Ia mise en fonctionnement.
2. Centrez Ie
document a
plastifier dans une
pochette
GBC de
facon 2
ce que
les
bords soient
alignes
de
chaque cot&
3.
Ins&ez
Ia
pochette
contenant
Ie document, cöt6 ferm6
en
Premier.
dans Ie
transporteur
fourni
avec chaque
boite de
pochettes
GBC DocuSeal.
Positionnez bien Ie
töte
ferme de Ia
pochette &
I’interieur
et
contre
Ie
töte
plie
du
transporteur.
4.
Introduisez Ie
transporteur
et
son
contenu
dans
Ia
plastifieuse.
cötk plie
en
Premier.
Manipulez Ie
transporteur avec
precautions
afin de pouvoir Ie
reutiliser.
5.
Le
document plastifie ressort
automatiquement a
I’arriere
de Ia plastifieuse.
Des qu’il
est
arr&,
retirez Ie
transpofteur
et laissez
Ie
refroidir
une minute
sur une
surface
plane avant
d’oter Ie
document plastifie.
5.
Si vous avez
termin
votre
plastification, positionnez
Ie
commutateur sur
“Off” (arret).
3. Colocar el pouch
completa
con el documento en
el
carrier
incluido en
todas
las
cajas
de
pouches
GBC.
Colocar el lado
soldado
del
pouch
contra el lado
soldado
del interior
del
carrier.
4. Colocar el
carrier
y su
contenido
en Ia
maquina
de
Ia
Parte
del lado soldado.
Manejar los carriers con
cuidado para
poder
ser
utilizados
nuevamente.
5.
El documento plastificado
saldr$t automaticamente
por
Ia Parte
posterior de
Ia
maquina.
Una vez haya
salido, colocar el carrier
sobre una
superficie plana
para
que se enfrie antes de
mover
el pouch.
6. Si se ha acabado de
plastificar, colocar
el
interruptor en “off”.
Page 10

CREATIVE
FOIL
GBC DocuSeal40:
Push the
switch to
“Gold-Run”.
GBC
DocuSeal 95/125: Slide
the
mode switch to
“Gold”
and the
rocker
switch to
“Run”.
The
“ready” LED will illuminate when
the
machine is turned on.
Follow
the instructions included
with your
GBC
No-Heat
Laminate or other
pressure-
sensitive,
non-thermal
laminating pouch.
1.
Slide the mode switch
to
“Feil”
and the
rocker
switch
to “Run”.
The ready LED will
illuminate in approximately
two to seven minutes after
the machine is turned on.
2. Trim and
place
GBC Creative
Foil on toner-printed areas as
desired.
Foii
should be
placed color
side
up.
Secure
with adhesive dots provided
if necessaty.
3. Cover the document and foil
with a sheet of the
Paper
that
is
included in
the feil package
between the sheets of foil.
4.
Place the
document,
foil
and
Paper
into the
Paper
carrier
that is also provided with the
foils.
5.
Insert
the carrier
and
its
contents straight into the
machine.
6. The item will automatically
exit the rear of the pouch
laminator.
After the pouch
has stopped moving, remove
it from the machine and
allow
it to cool for
about
30
seconds. This cooling
insures
that the foil is
securely affixed to the
document. Remove the
document from the carrier.
Slowly
peel off the foil.
DocuSeal40 GBC: Premere
I’interruttore su
“Gold-Run”
(Esegui a freddo).
DocuSeal
95/125 GBC:
Spostare
I’interruttore di modo su “Cold
(Freddo) e
quelle
a
bilanciere
su
“Run”
(Esegui). li LED
“ready” (pronto)
si
illuminera -
all’atiensi6ri&
della mätihina.
Seguire
Ie~inttiZoni
fornite
con
Ie
pouches ,GBC
No-Heat
-:“; ..
Laminate oppure
con
altre non
termiche:sensibili alla .- .r
, : F&
&?la& l,i&;r&fio-&i’
modo
su.“Foil”
(Foglio ‘- :.
.‘-
_metalli~ato)
e
quelloa
Y
. . -bilankiere su Wun” (Esegui).
II
LED
Irekdy” (pronto),si _ .- ’
illumiri& &ntro
due-sette
““’
minuti circa dall’accensione
della
macchina.
..: :.;;;. -.::.
^ I,>~-&‘:“;;;;,. ; ‘,c,’ ‘, yd‘,.. -,
., ‘i-+’
2.. Tagliare ‘il Creät/ve
Foil
GBk
e posizionario
come
.
-b”:.i::. .:
desiderato
sulle
aree-
.:.
stampate con il
toner.
Fare
attenzione ehe il
foglio
~“metällizzato
abbia il lato
..-
colorato rivolto
Verso I’alto. ‘-1
Allo’correnza;fissarfo ion -gli
adesivi
circolafi fornj$ a.tale
$copo. -.;- -:‘:-‘l,;J/.’ -;:iey.<$:
;.v ..i .:.:; --‘;.r-yaj
im.:_ - “1.; ’
3.
Coprire il documktö-i il
foglio metallizzato con uno
.-
dei fogli di
carta‘contenuti_. - 1::.
nella.corife5one
e
ehe _ ‘--“-” -‘.
.
+:
servono .ä S&arare
tra
lö%‘
Page 11

--.,--._--p.-
__-
-
._.-.._
--.-.----..
.._..
-
_
.
i(
GBC
DocuSeal40:
Schalter auf
“Gold-Run”
stellen. GBC
DocuSeal 95/125:
Betriebsartschalter auf
“Gold”
und Wippenschalter auf
“Run”
stellen. Nach Einschalten des
Gerätes leuchtet die
“Ready”-
Anzeige auf. Befolgen Sie die
Bedienungsanleitung, die Ihrem
GBC oder einem anderen
Kaltlaminations -
Pouch
beiliegt.
1.
Betriebsartschalter auf
“Feil”
und Wippenschalter auf
“Run”
stellen. Ca. zwei bis
sieben Minuten nach
Einschalten des Gerätes
leuchtet die
“Ready”-
Anzeige auf.
2. Schneiden Sie die GBC
Creative
Foil wie gewünscht
zu und legen Sie sie auf die
mit Toner bedruckten
Fiächen.
Die Farbseite des
Film muß nach oben zeigen.
Befestigen Sie den Film ggf.
mit den mitgelieferten
Klebepunkten,
3. Legen Sie das Papierblatt,
das sich in der Filmpackung
zwischen den Filmen
befindet. auf das Dokument
und den Film.
4. Legen Sie Dokument, Film
und Papier in den
Papier-
Carrier, der ebenfails mit den
Filmen mitgeliefert wird.
5.
Legen Sie den Carrier mit
seinem Inhalt gerade in das
Gerät ein.
6. Der Carrier und sein Inhalt
werden automatisch im
hinteren Teil des
Pouchlaminators
ausgegeben. Wenn sich der
Pouch
nicht mehr bewegt,
nehmen Sie ihn
aus dem
Gerät heraus
und lassen Sie
ihn etwa 30 Sekunden lang
abkühlen, damit der Film fest
am Dokument haften bleibt.
Nehmen Sie das dokument
aus dem Carrier und ziehen
Sie den Film langsam ab.
GBC
DocuSeal40: Schake1
over
op
“Gold-Run”.
GBC
DocuSeal95/125: Schuif
de
bedienings knop naar
“Gold”
er
de schakelaar op
“Run”.
De
“ready” LED gaat branden als
het apparaat aangezet
wordt.
Volg de bij uw GBC No-Heat
Laminate of andere
druk-
gevoelige, niet-thermische
plastificeerhoezen,
bijgeleverde instructies.
1.
Zet de bedienings knop op
“Feil” en de schakelaar op
“Run”.
De
“ready” LED gaat
binnen twee a zeven
minuten nadat het apparaat
aangezet is, branden.
2. Maak de GBC Creative Foil
op
maat
en plaats het naar
keuze op de met toner
bedrukte
oppervlakten.
De
gekleurde zijde dient
bovenop te liggen.
Maak bei
zo nodig vast met de
plakpuntjes.
3. Bedek
het document en de
kleutfolie met een blad
papier dat bij het pak
kleurfolie tussen
de bladen
zit.
4.
Plaats het document, de
kleurfolie
en het
papier
in de
carrier die ook bij de
kleurfolie
bijgeleverd’wordt.
5.
Voer de carrier met inhoud
recht in het apparaat.
5.
Het
amkel
komt‘automatisch
.” @t
de
achterkant
van het
apparaat. Als de carrier niet
meer beweegt, dient het van
het apparaat genomen te
worden en dient gedurende
ongeveer 30 seconden af te
koelen. Dit afkoelen helpt
“‘om
de foelie secuur aan het
:.docuemnt te hechten.
Neem
1
het document uit de
cerrier
Positionner Ie commutateur sur
“Plastification a froid”.
GBC
DocuSeal 95/125:
Faire glisser
Ie commutateur sur “Froid” et
positionner I’interrupteur sur
“Marche”. Le voyant
“PRET”
s’allume
des
Ia mise en
fonctionnement. Se
conformer
aux instructions fournies
avec
les
pochettes
de plastification
a
froid/non
thermiques ou encore
sensibles a Ia Pression.
1.
Faire glisser Ie commutateur
sur
“Feuille metal”
et
positionner I’interrupteur
suf
“Marche”.
Le voyant
“PRET”
s’allume
environ 2 a 7
secondes apres Ia mise en
fonctionnement.
2.
Decouper une
feuille
de
creation metal
et
Ia
positionner aux endroits
imprimos
souhaites. La
feuille
metal
doit
etre posee
cot6
couleur sur Ie dessus
(Vers
I’exterieur) et peut
etre
fixee
avec
des pastilles
adhosives
si
necessaire.
3. Recouvrir Ie document et Ia
feuille metal avec
une des
feuilles de
papier intercalees
entre les feuilles
metal a
I’interieur de Ia boite.
4. Placer
Ie document, Ia
feuille
metal
et Ie feuille de
papier
dans Ie transporteur
ogalement
fourni
avec
les
feuilles
metal.
5.
Introduire Ie
transporteur
et
son
contenu
dans Ia
plastifieuse.
j.
L’ensemble ressort
automatiquement a
I’arriere
de Ia plastifieuse
a
pochettes.
Des I’arret,
retirer
Ie tout et laisser refroidir
environ 30 secondes afin
d’assurer une
bonne
adhesion de Ia feuille
metal
sur Ie document. Sortir
Ie
document du
transporteur
et
docoller dolicatement Ia
feuille
metal.
GBC
DocuSeal40:
Poner
el
interruptor a
“Gold-Run”
(Ejecutar frio). GBC DocuSeal
951125:
Mover el interruptor de
modo a
“Gold”
(Frio) y
el
interruptor oscilante a “Run”
(Ejecutar).
El LED “ready” (listo
se
encendera
cuando se
conecte Ia
maquina.
Siga las
instrucciones que se incluyen
en su GBC Laminado no
caliente
y otras de Ia bolsa de
laminacion
no t&mica, sensible
3 Ia
presion.
.”
-.
__
1.
Mover el
interruptor
de modo
a “Foil” (Hoja de aluminio) y
el
interruptor oscilante a
“Run”
(Ejecutar). El
LED
“ready”
(listo) se
encendera
en unos dos a siete minutos
despues
de
hacer
conectado
Ia
maquina.
!.
Recortar y colocar Ia Hoja de
alumini0
Creativa GBC en
-zonas
impresas
por
tbner
segtin se desee. La hoja de
alumini0 se
colocara
con Ia
cara coloreada hacia arriba.
Asegurar con
los
puntos
adhesivos facilitados si es
necesario.
f.
Recubrir el documento y hoja
de alumini0 con una hoja de
Papel
que se incluye en
el
paquete de las hojas de
alumini0 entre las mismas.
1.
Colocar el documento, hoja
de
alumini0
y
Papel
en
el
pottapapeles facilitado
tarnbien
con las hojas de
aluminio.
;. Colocar el
portapapeles y
su
contenido directamente en Ia
maquina.
.
Page 12

SPECIFICATIONS:
Cl
NL
TECHNISCHE
GEGEVENS:
GBC TtacuSeal40
GEC OocuScat
95
GEC OacuSeal125
GBC
OocuSeat
49 GBC OocuSeal95 GBC OacuSeal125
Electrical:
1’2OV.
60 Hz
1
ZJV. 60
Hz
12OV. 60
Hz
Elektrische
220~240V.
50 Hz
220-24OV. 50
Hz 120V. 60 Hz
220-24OV. 50
Hz
220~240V
50 Hz
220-240V. 50 Hz
Gegevenr:
220-240’~’
50 Hz
Machme
7.7’
(L) x 5.T (W) x 2.7
(H) 14 6’
(Li x
i-1’
(W) x
3.6’
(Hl
17.S(L) x i.l’(WI x 3.6’(H\
Almetingen:
196mm x 136mm x 69mm
370mm x 92mm
x 180mm
J45mm x
92mm x
18Omm
Olmensions: 196mm x 136mm x P9mm 370mm x
92mm x
180mm
J45mm Y 92mm x 180mm
Gewicht:
0.9 kg.
2.3 kg.
2.9 kg.
Machine
Weiqht:
2
Ibs. :
0.9
kg.
5 Ibs. : 2.3 kg.
6.3
Ib% :
2 9 kg.
Maximaie
102 mm
229
mm
305
mm
Maximum Pouch ,
J”102mm
9’:
229
mm
12’ ’
305
mm
Invaerbreedle:
Width:
Maximaie
125 mlcron
125
mrcron
125
mlcron
Marimum Pouch5 mll/
125
rnlcron
5
mll/
125 mlcron 5
mfl /
125 mlcron
Hoesdikte:
mickness:
Opwarmtijd:
2
- 4
mmutes 5 - 7 mmutes
5 - 7 mmules
Warm-Up
Time:
2 .
4 mmutes
5 - 7
mmures
5 - 7
mmutes
Zl
I
SPECIFICHE:
a
F
SPECIFICATIONS:
GBC OocuSeal40
GBC OocuSeal95
GBC OacuSeal125
GBC DacuSeal40 GBC OocuSeal95
GBC DacuSeall25
Impianto Elettrico: 12OV. 60
Hz
12OV.
60 Hz
120V. 60 Hz
Alimentation:
12OV.
60 Hz
12OV. 60
Hz
12OV.
60 Hz
ZZO-240V.
50 Hz
220-24OV.
50 HZ
220-24OV.
50 Hz
220~240V.
50 Hz
Olmensloni
della
196mm x 136mm
x
69mm
370mm x
92mm
x
18Omm
445mm x
92mm x
180mm
Oimensions:
196mm x 136mm
x
69mm
370mm x
92mm x
180mm 445mm x
92mm x
180mm
Macchlna:
Poids: 0.9 kg.
2.3
kg.
2.9 kg.
Peso della 0.9 kg. 2.3 kg. 2.9 kg.
Largeur Maxi da 102 mm
229 mm
305 mm
Maccnlna:
Ia
Pochette:
Larghena
102
mm
229 mm
305
mm
125
mrcrons
125
microns
Masstma
della
Epaisreur
Maxi 125
mrcrons
Pouch:
de Ia Pochette:
Speitore Massimo 125
micron
125 mlcron 125 micron
Temps de
2 - 4
mmufes
5 - 7
mmres
5 - 7
mmes
della Pouch:
Prechauttage:
Tempo di
2 - 4
mmutt
5 - 7
mmutr
5 - 7
mmurl
Riscaldamento:
Cl
D
TECHNISCHE DATEN:
a
E
ESPECIFICACIONES:
GBC BocuSeal40 GBC OocuSeal95
G8C OocuSeal125
GBC
UacuSeal40
GBC
DocuSeai
95
GBC
DocuSeal
125
Stromversorgung:
220~24OV.
50 Hz
220-24OV.
50 HZ
12OV.
60 Hz
Instalacion
12OV.
60 Hz
12OV.
60 Hz
12ov. 60
HZ
220-240’1.50 HZ
Electrica:
220-24OV.
50 Hz
Abmessungen:
196mm x 136mm x 69mm
370mm
x
92mm
x
18Dmm
145mm x 92mm
x
180mm
Dimensiones de
196mm x 136mm
x
69mm
370mm x
92mm x
160mm
J45mm
x 92mm x
180mm
Maschinengewicht:
0.9
kg.
2.3
kg.
2.9 kg.
Ia
Maquma:
Maximale
102
mm
229
mm
305
mm
Peso
de Ia
2 Ibs.
i
0.9 kg.
5
Ibs. :
2.3
kg.
2.9 kg.
Pouchbreile:
Maquina:
Maximale
5
mil /
125
mlcron
5
mll/
125 micron
5
mil/
125 micron
Ancho Maxima
102mm
229
mm
305
mm
Pouchslärke:
del Pouch:
5 - 7 Minuten
5 - 7 Minuten
Espesor Maxima
125 micron
125
mlcron
125 micron
Autwärrnzed:
2
- 4 Mmuten
del
Pouch:
Tiempo
de
2 - 1
minutos
5 - 7
mmutos
5 - 7
mmutos
Calentamienla:
Printed in U.S.A.
P.N.
6000118
 Loading...