

Page 1
SPARTAN LAMINATOR
OPERATION & MAINTENANCE
MANUAL
Part Number: 930-073 Rev: A Rev . Date: 6-9-04
© 2004 GENERAL BINDING CORPORA TION. ALL RIGHTS RESERVED.
Do not duplicate without written permission.
R
E
A
D
Y
E
H
C
U
R
O
P
M
U
A
E
O
S
G
S
U
A
E
G
R
P
T
A
N
I
M
A
L
General Binding Corporation
One GBC Plaza
Northbrook, IL 60062-4195
Page 2

The information in this publication is provided for reference and is
believed to be accurate and complete. GBC is not liable for errors in this
publication or for incidental or consequential damage in connection with
the furnishing or use of the information in this publication, including, but
not limited to, any implied warranty of fitness or merchantability for any
particular use.
GBC reserves the right to make changes to this publication and to
the products described in it without notice. All specifications and
information concerning products are subject to change without notice.
Reference in this publication to information or products protected
by copyright or patent does not convey any license under the rights of
GBC or others. GBC assumes no liability arising from infringements of
patents or any other rights of third parties.
This publication is copyrighted © 2004 by GBC. All rights
reserved. The information contained in this publication is proprietary and
may not be reproduced, stored, transmitted, or transferred, in whole or in
part, in any form without the prior and express written permission of
GBC.
Page 3

Spartan Operation and Maintenance Manual
Table of contents
1.0 Safety
1.1 Explanation of symbols 1-1
1.2 General Rules of safety 1-1
1.3 Primary function 1-2
1.4 Safety decals 1-2
Figure 1.4.1 Safety label placement 1-3
2.0 Warranty
2.1 Limited warranty 2.1
2.2 Exclusions to the warranty 2-1
3.0 Specifications
3.1 Consumable 3-1
3.2 Function 3-1
3.3 Electrical 3-1
3.4 Dimensions and weights 3-1
Figure 3.4.1 Dimensions 3-2
4.0 Installation
4.1 Pre-installation 4-1
4.2 Suggested floor layout 4-2
Figure 4.2.1 Suggested floor layout example 4-2
4.3 Know your laminator 4-3
4.4 Unpacking 4-4
5.0 Operations
5.1 Control panel 5-1
5.2 Roller pressure handle 5-2
6.0 Applications
6.1 Pouch boards 6-1
6.2 Mounting boards 6-2
6.3 Lamination pouches 6-3
6.4 Helpful Hints 6-4
7.0 Maintenance
7.1 Cabinets, cover and stand 7-1
7.2 Rollers 7-1
7.2.1 Stains/ dust on rollers 7-1
7.2.2 Adhesive on rollers 7-2
© 2004 General Binding Corporation
Page I
Page 4

Spartan Operation and Maintenance Manual
Page II
© 2004 General Binding Corporation
Page 5
Spartan Operation and Maintenance Manual
1.0 Safety
CAUTION: Do not attempt to operate your
SP ART AN Laminator until you completely read and
understand this Operations and Maintenance
Manual.
Your safety, as well as the safety of others, is important to
General Binding Corporation (GBC). This section
contains important safety information which must be
adhered to while operating, cleaning and performing basic
maintenance in and around the machine.
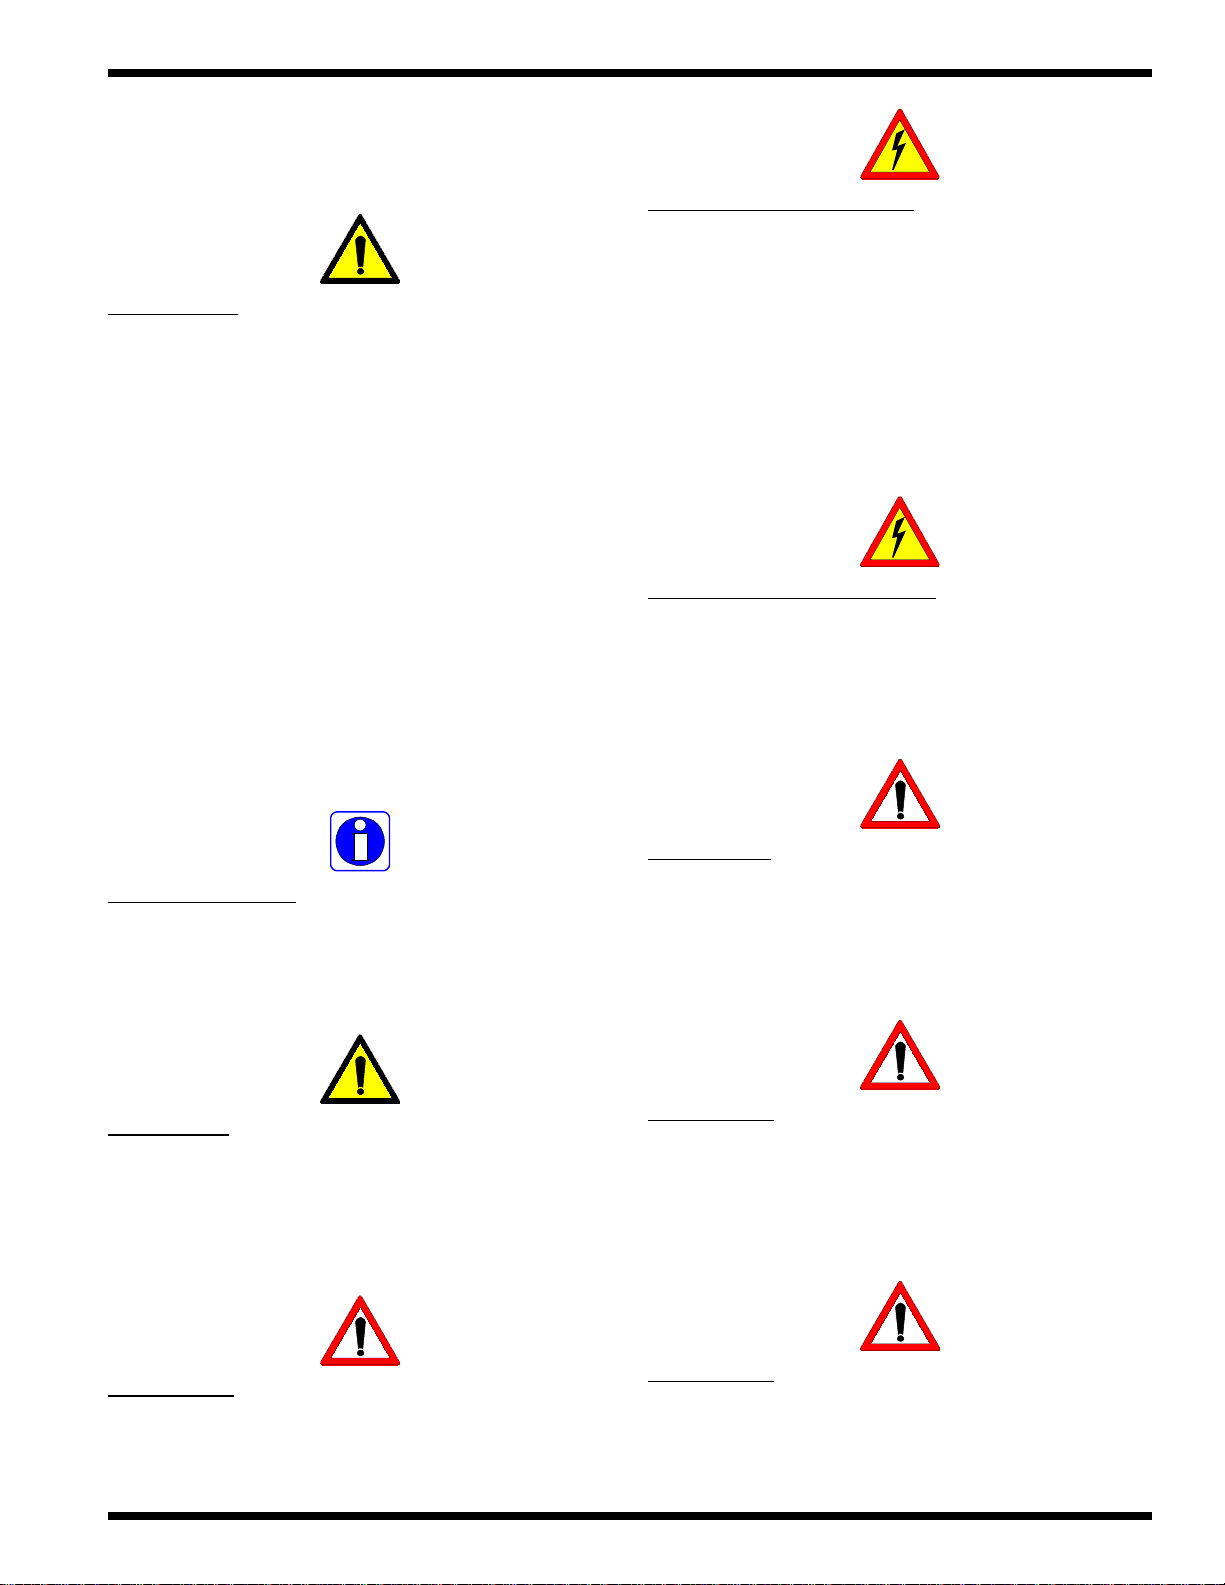
ELECTRICAL HAZARD: [This symbol is used prior
to a step. The information following this symbol is to
prevent an electrical shock condition that may be
caused by an operator’ s action or machine function..]
1.2 General rules of safety
ELECTRICAL HAZARD: Do not operate the
laminator if power cord is damaged or frayed. Y ou
can be severely shocked, electrocuted or cause a
fire.
1.1 Explanation of symbols
INFORMATION: [This symbol is used prior to,
during and/ or after a step. Following this symbol is
important information pertaining to current subject.]
CAUTION: [This symbol is used prior to a step. The
information following this symbol is to inform you of
how to avoid harm to you, others around you or to
the equipment.]
WARNING: Do not operate this machine if your are
not physically, psychologically or emotionally fit. Do
not operate this machine until you have been trained
and have read this manual in its entirety .
WARNING: Do not wear ties, loose fitting clothes
or dangling jewelry while operating or servicing the
laminator . These items can get caught in the nip and
choke you or you can be crushed or burned.
WARNING: [This symbol is used prior to a step. The
information following this symbol is to inform you of
how to avoid a dangerous situation.]
© 2004 General Binding Corporation
WARNING: Never tamper with the safety devices
to increase the laminator’s production capacity . In
the event a safety device should fail, never attempt
to bypass it for operation. Consult a service
representative immediately .
Page 1-1
Page 6
Spartan Operation and Maintenance Manual
1.3 Primary function
WARNING: Never use this machine for any other
purpose than its intended design and function.
The Spartan laminator is to be used only as a mounting
and laminating machine. Only use acceptable materials
when mounting and laminating with this machine.
All acceptable materials may be purchased from GBC.
For your convenience, acceptable materials are listed
below with product code numbers for fast and easy
ordering.
Pouches ( 25 per box )
Sign 3745595 clear 5 mil (W)18.5 x (L)24.5
Poster 3745596 clear 5 mil (W) 25 x (L) 37
Display 3745597 clear 5 mil (W) 37 x (L) 49
Mounting Boards ( 10 per box )
Poster (white) 3745571 (W) 25 x (L) 37
Poster (black) 3745575 (W) 25 x (L) 37
Display (white) 3745572 (W) 37 x (L) 49
Display (black) 3745576 (W) 37 x (L) 49
Pouchboards - clear ( 10 per box )
Poster (white) 3745579 (W) 25 x (L) 37
Poster (black) 3745583 (W) 25 x (L) 37
Display (white) 3745580 (W) 37 x (L) 49
Display (black) 3745584 (W) 37 x (L) 49
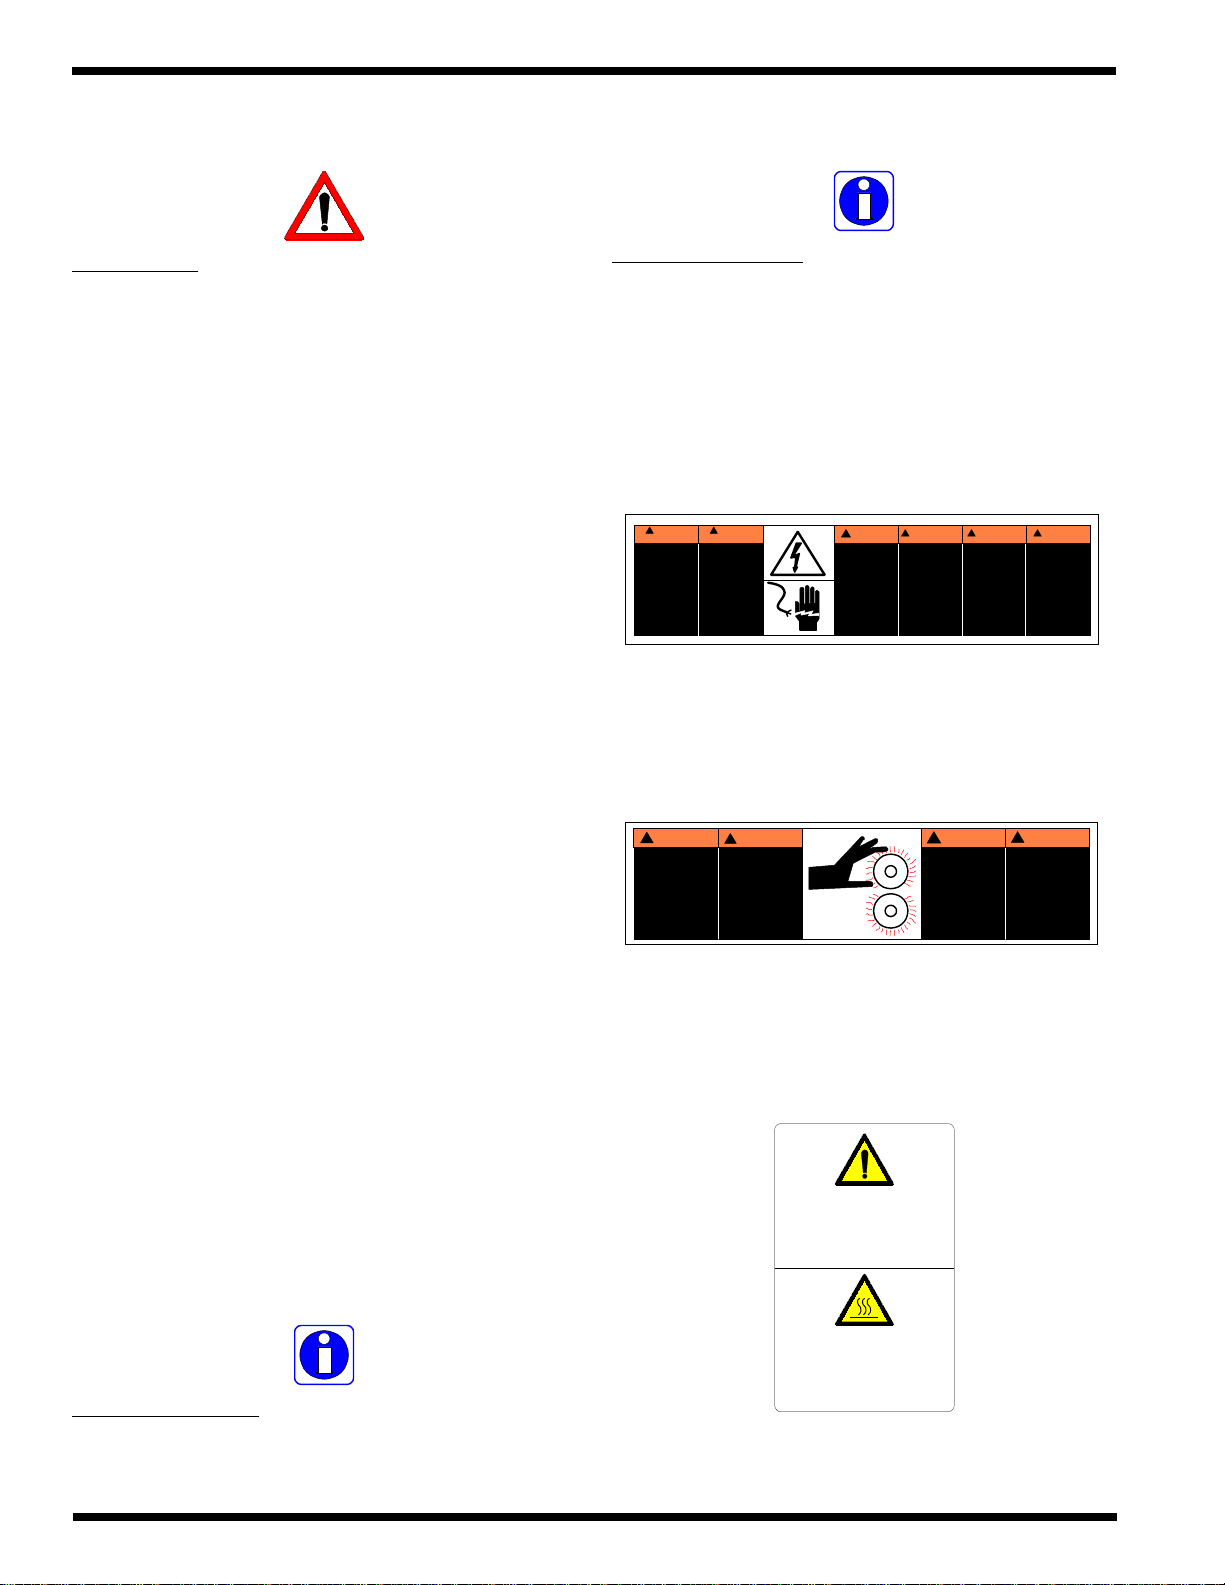
1.4 Safety decals
INFORMATION: Always observe all warning
labels placed at various points on the laminator . If
you do not completely understand a label, consult
your manager for assistance.
– Electrical Shock: Electrical shock hazard.
Electrical voltage behind panel.
!
Riesgo de
choque
electrico
No abra
Adentro, no hay
piezas
reparables
para el usuario.
Mantenimiento
solamente para
personal
calificado
away. You may be crushed and or burned.
!
RODILLOS
CALIENTES.
PUNTO DE
PINCHAMIENTO.
Mantener manos y
ropa a distancia.
fingers away. You may be crushed and or burned.
!
MUCHO
CUIDADO
MUCHO
CUIDADO
Risque de
secousse
electrique.
Ne pas ouvrir.
Pas de pieces
reparables par
l'utilisateur.
Entretien par
personnel
qualifie.
WARNING!WAARSCHUWING!ATTENZIONE!WARNUNG
Electrical shock
hazard.
Do not open.
No user
serviceable
parts inside.
Refer servicing to
qualified service
personnel.
Kans op
elektrische
schok.
Niet openen
Bevatgeen door
gebruik te
repareren
onderdelen.
Door bevoegd
service
personeel
laten repareren
Pericolo di
scarica
elettrica.
Nessuna parte
riparabile
dall' utente.
Chiamare un
servizio
di riparazioni
qualificato.
SpannungsfUhren
de
Teile.
Nicht offnen.
Enthalt keine vom
Enduerbraucher zu
wartende Teile.
Fur service bitte an
qualifiziertes
Service-Personal
wenden.
!
– Roller Pinch Point: Keep hands and fingers
CUIDADO
ATTENTION
!
ROULEAUX
CHAUDS.
POINT DE
PINCEMENT.
Tenir mains et
vetements a l'ecant.
CAUTION
!
HOT ROLLS.
PINCH POINT.
Keep hands and
clothing away.
WARNUNG
!
HEISSE
ROLLEN
Klemmgefahr
zwischen Rollen
Hande und
Kleidung ferhalten
– Keep clear/ Hot Surface: Keep hands and
Pouchboards - sand ( 10 per box )
Poster (white) 3745587 (W) 25 x (L) 37
Poster (black) 3745591 (W) 25 x (L) 37
Display (white) 3745588 (W) 37 x (L) 49
Display (black) 3745592 (W) 37 x (L) 49
INFORMATION: If similar products are used,
results may differ since temperature and speed is
set for optimal results using GBC products.
Page 1-2
WARNING
Serious injury may result.
Keep hand, clothing and loose
articles away from the rollers
and heaters.
CAUTION
Hot surface
Avoid contact
Refer to Figure 1.4.1 Safety Label Placement
© 2004 General Binding Corporation
Page 7
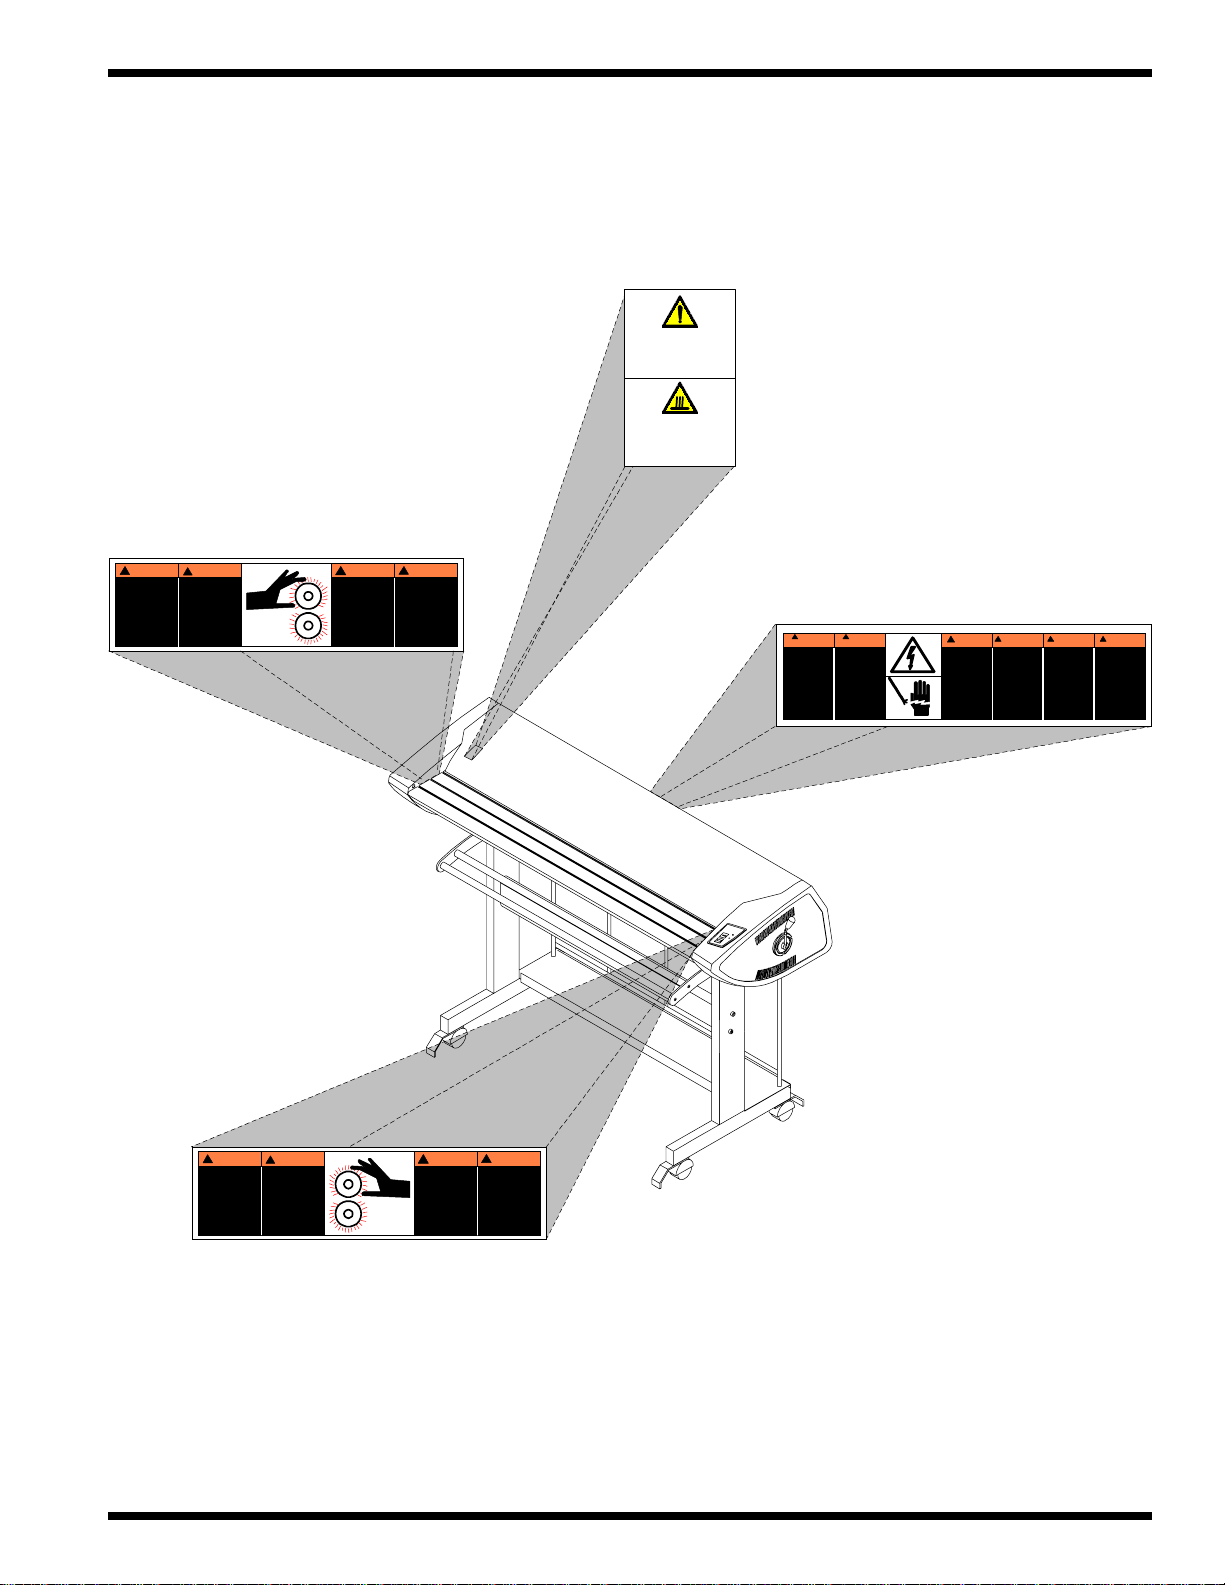
Spartan Operation and Maintenance Manual
Figure 1.4.1 Safety Label Placement
WARNING
Serious injury may result.
Keep hand, clothing and loose
articles away from the rollers
and heaters.
CAUTION
Hot surface
Avoid contact
!
CUIDADO
RODILLOS
CALIENTES.
PUNTO DE
PINC HAMI ENT O.
Mantener manos y
ropa a distancia.
ATTENTION
!
ROULEAUX
CHAUDS.
POINT DE
PINCEMENT.
Tenir mains et
vetements a l'ecant.
!
CAUTION
HOT ROLLS.
PINC H POIN T.
Keep hands and
clothing away.
WARNUNG
!
HEIS SE
ROLLEN
Klemmgefahr
zwischen Rollen
Hande und
Kleidung ferhalten
!
!
MUCHO
MUCHO
CUIDADO
CUIDADO
Riesgo de
Risque de
choque
secousse
electrico
electrique.
No abra
Ne pas ouvrir.
Adentro, no hay
Pas de p ieces
piezas
reparables par
reparables
l'utilisateur.
para el usuario.
Entretien par
Mantenimiento
personnel
solamente para
qualifie.
personal
calificado
R
E
A
D
Y
H
C
U
O
E
P
R
M
A
U
E
O
S
G
S
U
A
E
R
G
P
T
A
N
I
M
A
L
WARNING!WAARSCHUW ING!ATTEN ZIONE!WARNUNG
Kans op
Electrical shock
elektrische
hazard.
schok.
Do not open.
Niet openen
No user
Bevatgeen door
serviceable
gebruik te
parts inside.
repareren
Refer servicing
onderdelen.
to
Door bevoegd
qualified service
service
personnel.
personeel
laten repareren
Pericolo di
scarica
elettrica.
Nessuna parte
riparabile
dall' utente.
Chiamare un
servizio
di riparazioni
qualificato.
!
SpannungsfUhren
de
Teile.
Nicht offnen.
Enthalt keine vom
Enduerbraucher zu
wartende Teile.
Fur service bitte an
qualifiziertes
Service-Personal
wenden.
!
CUIDADO
RODILLOS
CALIENTES.
PUNTO DE
PINC HAMI ENT O.
Mantener manos y
ropa a distancia.
ATTENTION
!
ROULEAUX
CHAUDS.
POINT DE
PINCEMENT.
Tenir mains et
vetements a l'ecant.
!
HOT ROLLS.
PINC H POIN T.
Keep hands and
clothing away.
CAUTION
!
WARNUNG
HEIS SE
ROLLEN
Klemmgefahr
zwischen Rollen
Hande und
Kleidung ferhalten
© 2004 General Binding Corporation
Page 1-3
Page 8

Spartan Operation and Maintenance Manual
Page 1-4
© 2004 General Binding Corporation
Page 9

Spartan Operation and Maintenance Manual
2.0 Warranty
GBC Films Group warrants the equipment to be free from
defects in material and workmanship for a period of 90
days for parts and labor from the date of installation.
This warranty is the only warranty made by GBC Films
Group and cannot be modified or amended.
GBC Films Group’s sole and exclusive liability and
the customer’s sole and exclusive remedy under this
warranty shall be, at GBC Films Group’s option, to
repair or replace any such defective part or product.
These remedies are only available if GBC Films
Group’s examination of the product discloses to
GBC Films Group’s satisfaction that such defects
actually exist and were not caused by misuse,
neglect, attempt to repair , unauthorized alteration
or modification, incorrect line voltage, fire, accident,
flood or other hazard.
DAMAGE OR PERSONAL INJURY ( UNLESS
PRIMARIL Y CAUSED BY ITS NEGLIGENCE ),
LOSS OF PROFIT OR OTHER INCIDENT AL OR
CONSEQUENTIAL DAMAGES ARISING OUT
OF THE USE OR INABILITY TO USE THE
EQUIPMENT.
2.2 Exclusions to the Warranty
This warranty specifically does not cover;
1. Damage to the laminating rolls caused by
knives, razor blades, other sharp objects or
failure caused by adhesives.
2. Damage to the machine caused by lifting, tilting
and/or any attempt to position the machine other
than rolling on the installed castors on even
surfaces.
2.1 Limited Warranty
This warranty specifically does not cover damage to the
laminating rollers caused by knives, razor blades, other
sharp objects, failure caused by adhesives or improper
use of the machine. Warranty repair or replacement does
not extend the warranty beyond the initial 90 day period
from the date of installation.
CAUTION: Unauthorized customer alterations will
void this warranty.
THE WARRANTY MADE HEREIN IS IN LIEU
OF ALL OTHER WARRANTIES, EXPRESSED
OR IMPLIED, INCLUDING ANY WARRANTY
OR MERCHANT ABILITY OR FITNESS FOR A
P ARTICULAR PURPOSE. GBC FILMS GROUP
WILL NOT BE LIABLE FOR PROPERTY
3. Improper use of the machine.
4. Damage due from unqualified person(s) servicing the
machine.
Qualified;
• Any engineer that has experience with electrical
and mechanical design of lamination equipment. The
engineer should be fully aware of all aspects of safety
with regards to lamination equipment.
• Any commissioning or service engineer must be
of competent nature, trained and qualified to GBC Films
Group standards to fulfill that job. This person will have
completed and passed the full service training course from
GBC Films Group.
• Any GBC Technician, GBC Specialist, and / or
GBC Films Group Technician that has been through the
GBC Films Group service training course.
© 2004 General Binding Corporation
Page 2-1
Page 10

This page intentionally left blank.
Spartan Operation and Maintenance Manual
Page 2-2
© 2004 General Binding Corporation
Page 11

Spartan Operation and Maintenance Manual
3.0 Specifications
Description:
Entry level laminator for encapsulation and mounting of
poster size prints. The Spartan is a self standing laminating
unit.
Features:
Simple one touch operation
Applications:
Mounting of poster size prints
Encapsulation of poster size prints
3.1 Consumable
Material Types:
Thermal mount boards
Thermal pouch boards
Thermal pouches
3.3 Electrical
Laminator Rating:
240V, 60 Hz, 2500 W
Requirements:
230-240 VAC, 60 Hz, single phase 15 amps.
BTU Output:
8,535 BTU/Hour
Heater W attages:
2100 watts
Amperage Draw:
Drive motor: 1 amp
Heaters: 9 amps
DC voltage used:
36 VDC motor voltage
Material Widths:
38” maximum
3.2 Function
Speed:
Preset for GBC materials
Motor:
DC gear motor
Heating:
Preset for GBC materials
Controls:
Operations control panel
Roll Design:
High release silicone
AC voltage used:
230 VAC (minimum)
3.4 Dimensions and weight
Weight:
Out of box: 250 lbs. (114 kg.)
boxed: 260 lbs. (118 kg.)
Dimensions:
Refer to Figure 3.4.1 Dimensions
assembled: 42 in. (H) x 53 in. (W) x 18.5 in. (D)
105 cm (H) x 132 cm (W) x 46 cm (D)
boxed: 18 in. (H) x 60 in. (W) x 25 in. ( D)
45 cm (H) x 150 cm (W) x 62.5 cm (D)
© 2004 General Binding Corporation
Max W orking Nip Opening:
3/16 in. (5 cm)
Page 3-1
Page 12

Figure 3.4.1 Dimensions
Spartan Operation and Maintenance Manual
53 in.
(132 cm)
42 in.
(105 cm)
RE
A
D
Y
H
E
C
R
U
O
P
U
M
E
A
O
S
G
U
S
A
E
G
R
P
T
A
N
I
M
A
L
18.5 in.
(46 cm)
Page 3-2
© 2004 General Binding Corporation
Page 13

Spartan Operation and Maintenance Manual
4.0 Installation
GBC Films Group is committed to a program of ongoing
product improvement. As a result, we are providing these
instructions so that you can insure that your new Spartan
Laminator is properly and securely unpacked, moved and
installed.
Before a Spartan Laminator can be installed, there are a
few requirements that must be met. Make certain that
each of the requirements listed in the following preinstallation checklist are met before beginning installation.
CAUTION: Failure to follow the pre-installation
check list can result in damage to the laminator .
4.1 Pre-installation
WARNING: The operating environment must be
free of dust, flammable liquids and vapors. Y ou can
be injured by inhaling chemical vapors.
WARNING: Vapor build up or stored flammable
liquids can cause a fire. Excessive dust can damage
the laminator .
CAUTION: Do not locate the laminator where air
can blow directly on the machine. The air flow can
cool the rollers unevenly and result in poor quality
output.
Are the doorways and hallways wide enough for
the laminator to be moved to the installation site?
Is there ample room for the laminator?
A work area must be established that allows for
unrestricted movement around the laminator and
provides space for efficient material flow. Figure
4.1.4 and Figure 4.1.5 illustrates a typical machine
area layout.
Is the environment appropriate for the laminator?
The laminator requires a clean, dust and vapor
free environment to operate properly. It must not
be located where there is air blowing directly on
the machine.
Have you contacted a certified electrician to install
a receptacle for the laminator ensuring that
adequate power is being supplied and correct
circuit breaker?
US and Canada: The laminator requires 230-
240 vac, 60 Hz, 15 amps, single phase
Figure 4.1.1 Connections-Spartan US
NEM A 6 - 15RNEM A 6 - 15P
Europe: The laminator requires 230-240, 50 Hz
16 amps, single phase
Figure 4.1.2 Connections-Spartan Europe
16 receptacle
© 2004 General Binding Corporation
16 plug
Page 4-1
Page 14

4.2 Suggested floor layout
A safe work area constitutes enough room to work with
the materials at hand while being free to move around the
laminator without interference from the laminator. Refer
to the figure below for a suggested floor layout example.
Figure 4.2.1 Suggest floor layout example
8 ft
( 240 cm )
Spartan Operation and Maintenance Manual
4 ft. x 6 ft.
(101.6 x 152 cm)
Work table on wheels
18ft.
( 540 ) cm
8 ft
( 240 cm )
Back
3 ft
( 90 cm )
Front
4 ft. x 6 ft.
(101.6 x 152 cm)
Work table on wheels
13 ft
( 390 cm )
Page 4-2
© 2004 General Binding Corporation
Page 15

Spartan Operation and Maintenance Manual
4.3 Know your laminator
Before performing any procedure within this manual, it is
recommended that you take time to know your laminator.
Sides of the laminator
Drive side
Rear
R
E
A
D
Y
H
C
U
O
P
E
R
M
U
A
E
O
S
G
S
U
A
E
G
R
P
T
A
N
I
M
A
L
Under the cover
Cover
raised
Rollers
Top Roll
Sensor
Nip
Hinge
R
E
A
D
Y
H
C
U
O
P
E
M
R
A
U
E
O
S
G
U
S
E
A
R
G
P
T
A
N
I
M
A
L
Power cable
Power
switch
Front
Parts on the laminator
Cover
Table
Pouch rack
Stand
Cabinet
R
E
A
D
Y
Control side
H
C
U
O
P
E
R
M
A
U
E
O
S
G
S
U
A
E
G
R
P
T
A
N
I
M
A
L
Board rack
Castors
Control Panel
SPARTAN
READY
Roller pressure control
Board mount position
E
R
U
E
S
G
U
S
A
E
G
R
P
T
A
IN
M
A
L
GBC
Roller release position
© 2004 General Binding Corporation
Pouch Position
Page 4-3
Page 16

4.4 Unpacking
INFORMATION: All shipments are ex-works. At
our docks, title passes to the buyer. Please review
your insurance coverage prior to shipment, as you
are responsible for all subsequent freight charges
and risks.
INFORMATION: Before signing the Bill of Lading,
be sure to inspect the crate, box and/ or pallet for
signs of damage or missing items. If applicable, make
note of this on the Bill of lading.
Spartan Operation and Maintenance Manual
WARNING: Do not attempt to move the laminator
across anything other than a flat level surface alone.
Y ou can be crushed or seriously injur ed.
WARNING: Do not turn the laminator sideways, up
side down or vertical when moving. This will disrupt
the alignment of internal moving parts.
1. Inspect the machine for any obvious shipping damages
upon receipt.
2. Carefully unwrap the shrink wrap from around the
laminator.
CAUTION: Do not use a knife or other sharp object
to remove any shrink wrap from around the
laminator . Y ou can cause irr eparable damage to the
rollers!
3. With another person, carefully remove the contents
and assemble the laminator.
4. With assistance, carefully move the laminator to the
desired location.
Page 4-4
© 2004 General Binding Corporation
Page 17

Spartan Operation and Maintenance Manual
5.0 Operations
WARNING: Do not wear ties, loose fitting clothes
or dangling jewelry while operating or servicing the
laminator . These items can get caught in the nip and
choke you or you can be crushed or burned.
CAUTION: Do not block the Top Roll Sensor. If
the sensor becomes obstructed, over heating may
occur and cause irreparable damage to the rollers
or a fire.
RUN – When pressed, engages the motor that
drives the rollers.
INFORMATION: The laminator only operates in
one direction, forward. There is no reverse function
on this machine. Stop the roller and release roller
pressure to manually move the product backwards.
STOP – When pressed, stops the roller by
removing power to the motor.
READY – When illuminated, represents the rollers
are up to operating temperature.
INFORMA TION: The laminator will only run when
the roller cover is in the down (closed) position.
5.1 Control Panel
The control panel is located on the right hand side from
the front operating position of the laminator. From the
control panel, the operator is able to control the motor
run and motor stop function.
Figure 5.1.1 Control panel
SPARTAN
READY
Run switch
GBC
Ready indicator
Run indicator
INFORMA TION: Do not run material until READY
is illuminated. Attempting to run prior to this will
result in poor output quality .
RUN – when illuminated, represents the motor
engaged and the rollers are turning.
INFORMATION: The motor will only engage if the
cover is in the lowered position.
Stop switch
© 2004 General Binding Corporation
WARNING: Never attempt to bypass the cover
safety switch to operate the laminator . This can result
in serious injury to you or others.
Page 5-1
Page 18

Spartan Operation and Maintenance Manual
5.2 Roller pressure handle
The roller pressure handle sets the roller nip opening for
the desired application with the material being used.
INFORMATION: Never attempt to alter the
factory preset settings for the nip opening or speed.
Contact your local service representative if you feel
the roller pressure handle requires calibrating.
Roller release position
Laminating position
– Use this position when running film pouch type materials.
The is the minimum nip opening position. This nip opening
and speed is preset for GBC materials.
5.3 ON/ OFF power switch
– Use this position when the laminator is not in use or no
nip pressure is required. This is the maximum nip opening
position.
Foam pouch position
The power ON/ OFF turns your laminator on. When the
laminator is on, the rollers begin heating automatically.
(–) This is the ON position for the laminator.
(O) This is the OFF position for the laminator.
CAUTION: During long periods of no use, 30
minutes or greater , you should turn power off to the
laminator . This will prevent hot spots from forming
on the rollers.
– Use this position when using board type materials through
the laminator. This nip opening and speed is preset for
GBC materials.
Page 5-2
© 2004 General Binding Corporation
Page 19

Spartan Operation and Maintenance Manual
6.0 Applications
The Spartan laminator will accommodate GBC mounting
boards and lamination pouches. This section will describe
how each process is run on the laminator.
INFORMATION: The leading edge will always be
the edge which is sealed. The opposite edge is
referred to as the trailing edge.
CAUTION: When changing from one application to
another (example: lamination pouch to pouch
boards), allow the machine to run for approx. 20 min
after setting pressure handle to let the roller
tempurature reach correct operating tempurature.
The top roll sensor only reads the top roll and the
bottom roll may not be the correct tempurature.
5. Press RUN.
+
6. Align the leading edge of the pouch board slightly off
center of the table.
7. Gently slide the pouch board into the roller nip until
you feel the rollers catch the board.
8. Support the board as it exits the rear of the laminator.
6.1 Pouch boards
Turn the laminator on.
1.
2. Center the image on the board under the film.
Film
Image
Board
3. Set the pressure handle to the foam pouch position.
9. Press STOP and set the pressure handle to the roller
release position.
+
10. Peel the clear protective layer off the board and trim
to desired size.
4. Wait for READY to illuminate.
© 2004 General Binding Corporation
Clear protective layer
Page 6-1
Page 20

Spartan Operation and Maintenance Manual
6.2 Mounting boards
1.
Turn the laminator on.
2. Center the image on the board under the protective
sheet.
Protective sheet
Image
Board
3. Set the pressure handle to the foam pouch position.
7. Gently slide the mounting board into the roller nip until
you feel the rollers catch the board.
8. Support the board as it exits the rear of the laminator.
9. Press STOP and set the pressure handle to the roller
release position.
+
4. Wait for READY to illuminate.
5. Press RUN.
+
6. Align the leading edge of the mounting board slightly
off center of the table.
10. Pull the protective layer off the board and trim to
desired size.
Protective layer
Page 6-2
© 2004 General Binding Corporation
Page 21

Spartan Operation and Maintenance Manual
6.3 Lamination pouches
INFORMA TION: T r eat the pouch carriers carefully
as they may be reused until you see wrinkles in the
lamination.
1. Turn the laminator on.
2. Center the lamination pouch between the two sheets
of the pouch carrier.
Pouch carrier
Lamination
pouch
6. Wait for READY to illuminate.
7. Press RUN.
+
8. Align the leading edge of the pouch carrier containing
the lamination pouch and image slightly off center of the
table.
3. Fold the top sheet of the pouch carrier and the
lamination pouch over.
4. Center the image on the lamination pouch and carefully
lay the top sheets back over the image.
Pouch carrier
Lamination pouch
Image
5. Set the pressure handle to the lamination position.
9. Gently slide the pouch carrier into the roller nip until
you feel the rollers catch the pouch carrier.
10. As the pouch carrier nears its end, be prepared to
catch the pouch carrier as it exits the rear of the laminator.
11. Press STOP and set the pressure handle to the roller
release position.
© 2004 General Binding Corporation
+
Page 6-3
Page 22

Spartan Operation and Maintenance Manual
12. Remove the laminated image from the pouch carrier
and trim to desired size.
Pouch carrier
Laminated
image
6.4 Helpful Hints
The following hints will help you get the best possible output
from your Spartan laminator:
Pouch Boards:
• It is critical that at the leading edge, the film is evenly
secured to the board. If the corners are dented or
chrushed, cut the damaged part off to prevent wrinkles
and waves.
• If switching from lamination pouches to pouch boards,
wait for the bottom roller to cool before running boards
(approx. 20 min). A hot bottom roller will bubble the
back of the board. To speed the cooling process, a
scrap board may be run through the machine 2-3 times
to help cool the bottom roller.
• Laminated pouch output has a tendency to become
wavy when excess film to film lamination is left on the
outer parameter of the image being laminated. When
trimmed to the edge of the sheet, the output should be
flat. As the amount of film to film lamination increases,
the qualitiy of the output decreases.
Laminating Pouches:
• To reduce waving affect, match the size of the pouch as
close to the image size as possible. This will allow the
stresses on the envelope to be more even, resulting in a
smoother laminated image.
• Some substrates will be affected by the heat and stress
of the laminating pouch to different degrees. Trimming
the image as close to the edge as possible can reduce
waving in the image.
• It is recommended to prepare the envelope on a
separate table away from the heated rollers as the image
can be damaged if the front edge is heated before all
parts of the envelope are smoothed out.
Page 6-4
© 2004 General Binding Corporation
Page 23

Spartan Operation and Maintenance Manual
7.0 Maintenance
GBC Films Group laminators require minimal maintenance.
However, regular maintenance is essential to keep any
piece of precision machinery at peak performance. A
maintenance schedule and a section of procedures are
included in this section.
WARNING: Do not wear ties, loose fitting clothes
or dangling jewelry while operating or servicing the
laminator . These items can get caught in the nip and
choke you or you can be crushed or burned.
7.1 Cabinets, cover and stand
ELECTRICAL HAZARD: Remove power from the
laminator before cleaning. You can be severely
shocked, killed or cause a fire.
1. Use a damp ( use water only to dampen the cloth )
white terry cloth towel to wipe dust from the cabinets,
cover and stand.
7.2 Rollers
INFORMA TION: Impr oper maintenance can result
in poor output quality.
GBC offers Cleaning kits ( P/N 1711515 ) as well as
Extended Maintenance Agreements.
The only maintenance required by the operator is to
maintain clean and adhesive free nip rollers and overall
cleanliness of the laminator itself.
ELECTRICAL HAZARD: Do not use liquid or
aerosol cleaners on the laminator . Do not spill liquid
of any kind on the laminator. You can be severely
shocked, killed or cause a fire. Use only a damp cloth
for cleaning unless other wise specified.
CAUTION: Never clean the rollers with sharp or
pointed objects. Y ou may put irr eparable cuts into
the rollers.
INFORMATION: Power is required to rotate the
rollers which means heat will be present as well.
7.2.1 Stains/ dust on rollers
CAUTION: The following procedure is performed
while the laminator is HOT! Use extreme caution!
© 2004 General Binding Corporation
Page 7-1
Page 24

Spartan Operation and Maintenance Manual
1. Set the pressure handle to the roller release position
and raise the cover.
R
E
A
D
Y
H
C
U
O
E
P
R
M
U
E
A
O
S
G
S
U
A
E
G
R
P
T
A
N
I
M
A
L
2. Use a damp ( use water only to dampen the cloth )
white terry cloth towel to wipe dust from the upper roller.
3. For the lower roller, close the cover, press RUN to
rotate the lower roller to a new area to clean.
1. Set the pressure handle to the roller release position
and raise the cover.
R
E
A
D
Y
H
C
U
O
E
P
R
M
U
E
A
O
S
G
S
U
A
E
G
R
P
T
A
N
I
M
A
L
2. With a rubber cement eraser or Scotch Brite
rub the adhesive on the roller.
TM
gently
4. Repeat the steps above until the lower roller is cleaned
7.2.2 Adhesive on rollers
CAUTION: Hardened adhesive deposits on the
rollers can cause damage to the rollers.
CAUTION: Do NOT pick or pull heat activated
adhesive off the rolls when they are cold. You can
cause irreparable damage to the laminating rolls.
CAUTION: Excessive pressure can destroy the
silicone layer by pressing too hard or scrubbing too
long in one spot.
3. Use a damp (water only) white terry cloth towel to
wipe adhesive beads off the roller.
4. For the lower roller, close the cover, press RUN to
rotate the lower roller to a new area to clean.
5. Repeat the steps above until the lower roller is cleaned
CAUTION: The following procedure is performed
while the laminator is HOT! Use extreme caution!
Page 7-2
© 2004 General Binding Corporation
Page 25

Page 26

General Binding Corporation
One GBC Plaza
Northbrook, IL 60062-4195
 Loading...