

Page 1

Docking your Solo 9300 for the first
time
The first time you connect your Solo 9300 notebook to its docking station,
you may need to make several adjustments to system settings. Complete the
following tasks in order:
■ Install docking station drivers
■ Restore video resolution (in Windows 95)
■ Adjust audio settings
Important Do not install a PC Card or PCI card in the dockin g station
until after you complete this first-t ime setu p. Howev er, if a
PCI card has already been installed by Gateway, do not
remove it.
Installing docking station drivers
Y ou must install the docking station’ s modem, network, and other drivers the
first time you dock your notebook.
To install docking station drivers:
1 Tu rn on and set up your notebook as shown in the setup poster, without
attaching it to the docking station.
2 Turn off your notebook, then disconnect the power cord.
3 Connect the power cord to the docking stat ion, then dock your notebook
as shown in the user’s guide.
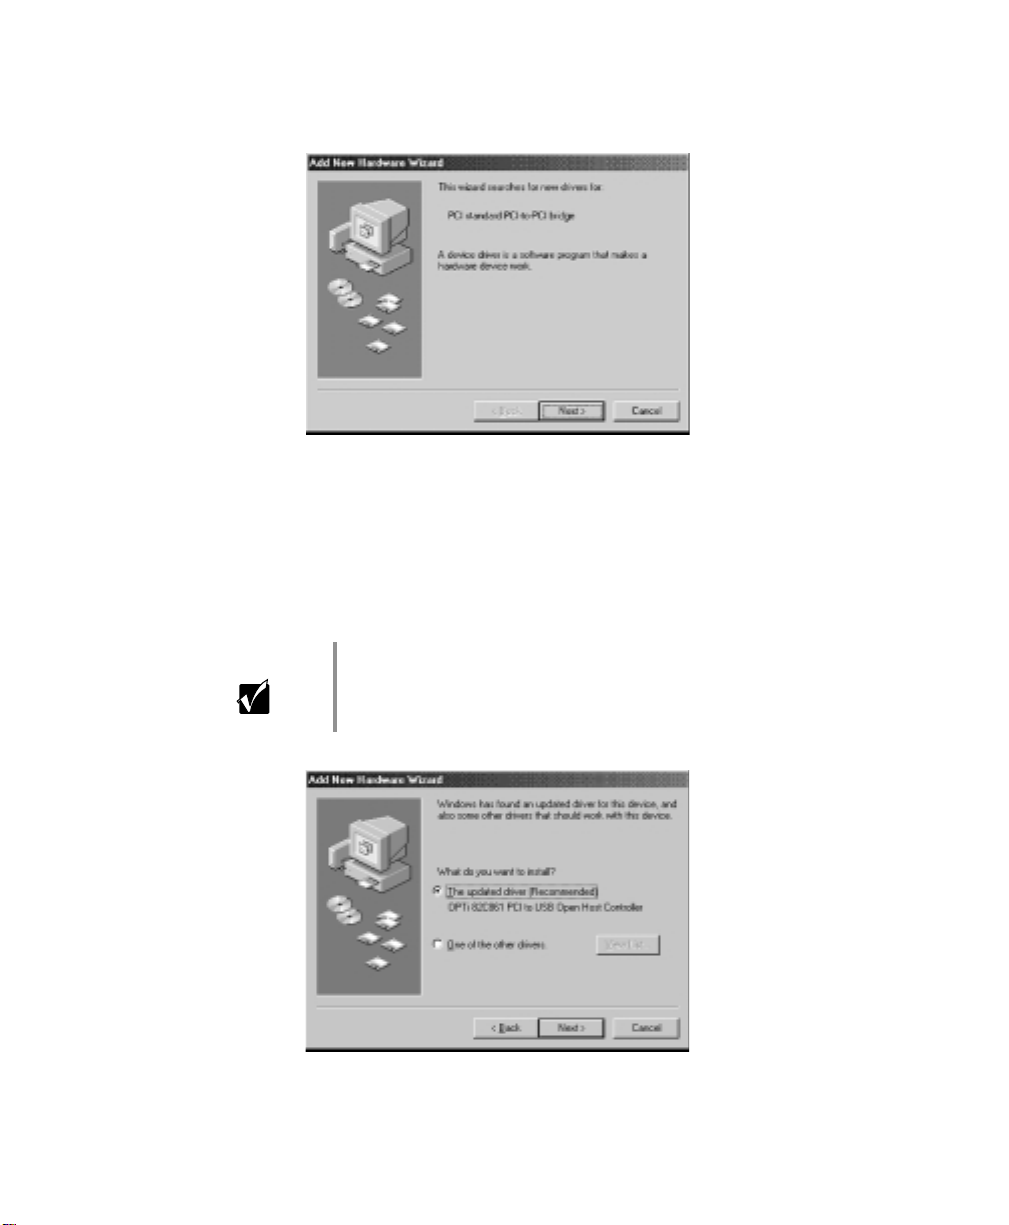
4 Turn on your notebook. Windows starts and the New Hardware Found
(PCI Bridge) dialog box opens.
Page 2
5 Select Search for the best driver for your device (recommended), then click
Next until the driver finishes installing.
6 Click Finish, then click No when you are prompted to restart the
computer. The PCI bridge driver is now installed.
7 When the New Hardware Found (USB Open Host Controller) dialog box
opens, click Next.
8 Select The updated driver (Recommended), then click Next.
2
Important Whenever the setup wizard detects an old driver on your
system and asks “What do you want to install?”, sele ct The
updated driver (Recommended).
Page 3
Click Next until the driver finishes installing, then click Finish.
9
10 If the New Hardware Found (PCI Ethernet Controller) dialog box opens,
Next. Otherwise, go to Step 16.
click
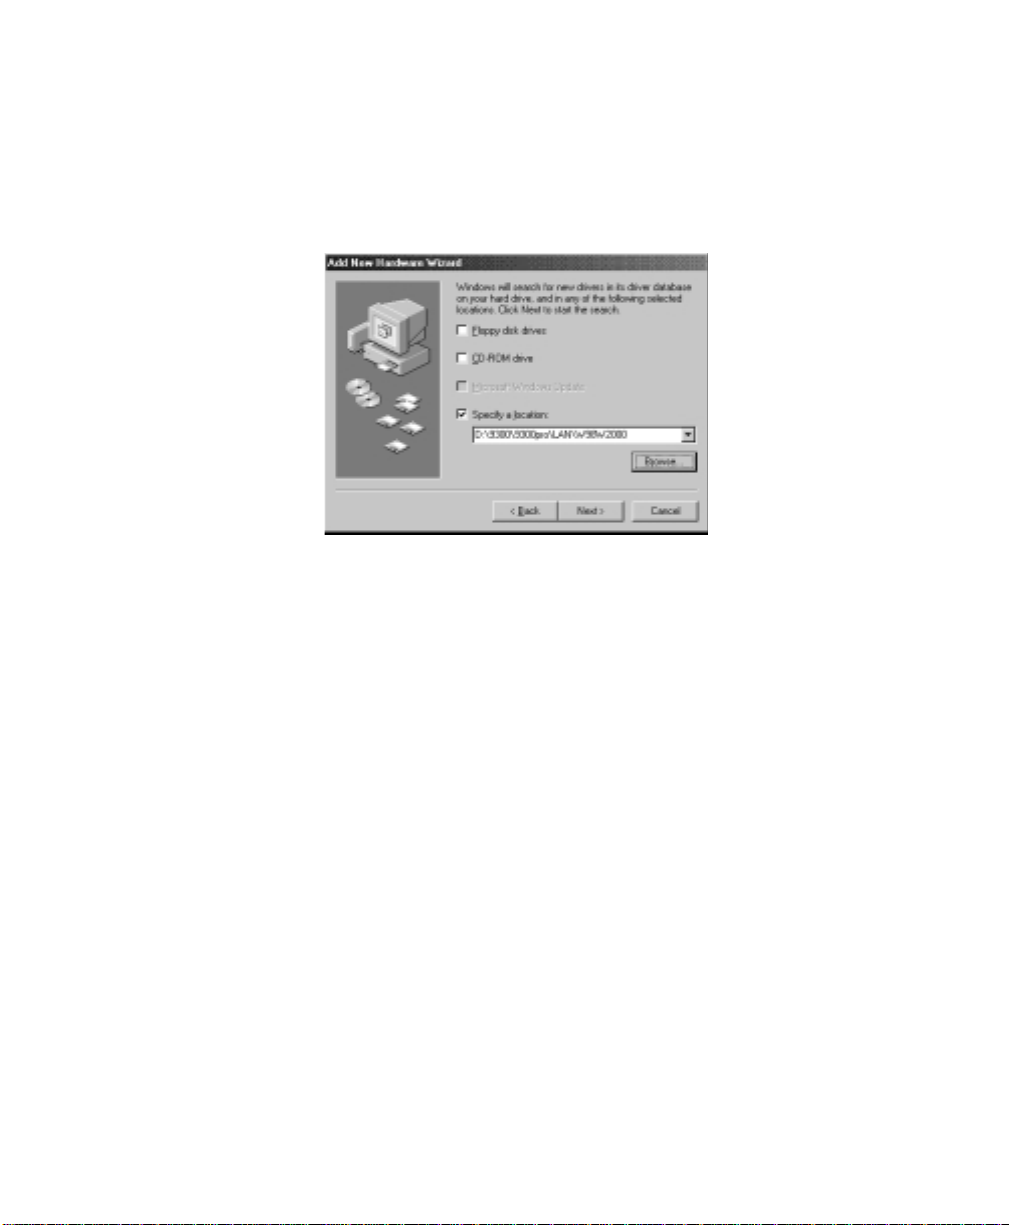
11 Clear the Floppy disk drives check box, then select the Specify a location
check box.
12 Insert the Portable System Restoration CD into the CD/DVD drive, then
Browse. If the Portable System Restoration CD program autostarts,
click
close it.
13 If your notebook uses Windows 98, select the path
d:\9300\9300pro\lan\w98w2000\, then click OK.
- OR If your notebook uses Windows 95 or Windows NT, select the path
d:\9300\9300pro\lan\w95nt40\, then click OK.
14 Click Next until the driver finishes installing.
15 Click Finish, then click No when you are prompted to restart the
computer.
16 If the New Hardware Found (Modem) dialog box op ens, click Next.
Otherwise, go to Step 22.
Docking your Solo 9300 for the first time 3
Page 4

17 Clear the Floppy disk drives check box, then select the Specify a location
check box.
18 If the Portable System Restoration CD is not already in the drive, insert it
into the CD/DVD drive, then click
Restoration CD pro gram autostarts, close i t.
Browse. If the Portable System
19 If a PCI Ethernet controller was previously detected, select the path
d:\9300\9300pro\modem\win95-98\, then click OK.
- OR -
4
If a PCI Ethernet controller was not previously detected, select the path
d:\9300\win95-98\modem\, then click OK.
20 Click Next until the driver finishes installing.
21 Click Finish, then click No when you are prompted to restart the
computer.
22 If additional “New Hardware Found” dialog boxes open, comp lete the
wizards by following the on-screen instructions. All necessary drivers are
installed.
23 Restart your notebook.
Page 5

Restoring video resolution
If your notebook uses Windows 95, the video resolution will change to
640 × 480 the first time you dock. You must restart the notebook to restore
the resolution.
To restore the video resolution in Windows 95:
Caution Do not restore the resolution by changing Display
Properties settings. If y ou attemp t to restore the resol ution
by changing Display Properties, the system will freeze
while restarting. You can continue to restart the notebook
by pressing the power button for five seconds, pressing it
again, then selecting Normal mode before Windows 95
loads.
1 Restart your notebook by clicking Start, then selecting Shut Down. The
Shut Down dialog box opens.
2 Select Restart the Computer, then click Yes.
Your computer restarts. When Windo ws 95 finishes loading, the original
display resolution is restored.
Docking your Solo 9300 for the first time 5
Page 6

Adjusting audio settings
Y our c omputer is configured to use only its internal aud io ports and sp eakers,
even while docked. To enable the docking station’s external speakers and
audio ports, you must change audio settings. You can also configure the
notebook’s internal speakers (analog audio) to pass through the digital audio
port to the docking station.
To enable the docking station’s external speakers and audio ports:
1 Start your notebook, right-click the My Computer icon, then select
Properties from the pop-up menu.
2 Click the Device Manager tab, then double-click Sound, video and game
controllers
. A list of controllers appears.
6
3 Double-click Maestro Wave / WaveTable Synthesis Devices, then click the
Dock Settings tab.
4 Select Use my dock’s audio ports and external speakers while docked, then
OK. The docking stati on’s audio ports and external speakers are
click
enabled.
Page 7

To route analog audio through the digital audio port:
1 Right-click the My Computer icon, then select Properties from the pop- up
menu.
2 Click the Device Manager tab, then double-click Sound, video and game
controllers
3 Double-click Maestro Wave / WaveTable Synthesis Devices, then click the
Dock Settings tab.
4 Select the Use my notebook’s audio ports and internal speakers while docked
check box, then click
5 Open the Audio Properties dialog box again, then click the Audio Se ttings
tab.
6 Select the Direct all audio output to the digital audio port (Optical or S/PDIF)
check box, then click
audio port.
. A list of controllers appears.
OK.
OK. All audio is now passed through the digital
Adjusting audio settings 7
Page 8

8
MAN SYS US SL9300/E DCK UPD R0 11/99
8505549
 Loading...