


BEDIENUNGSANLEITUNG
DESIGN ESPRESSO MASCHINE ADVANCED S
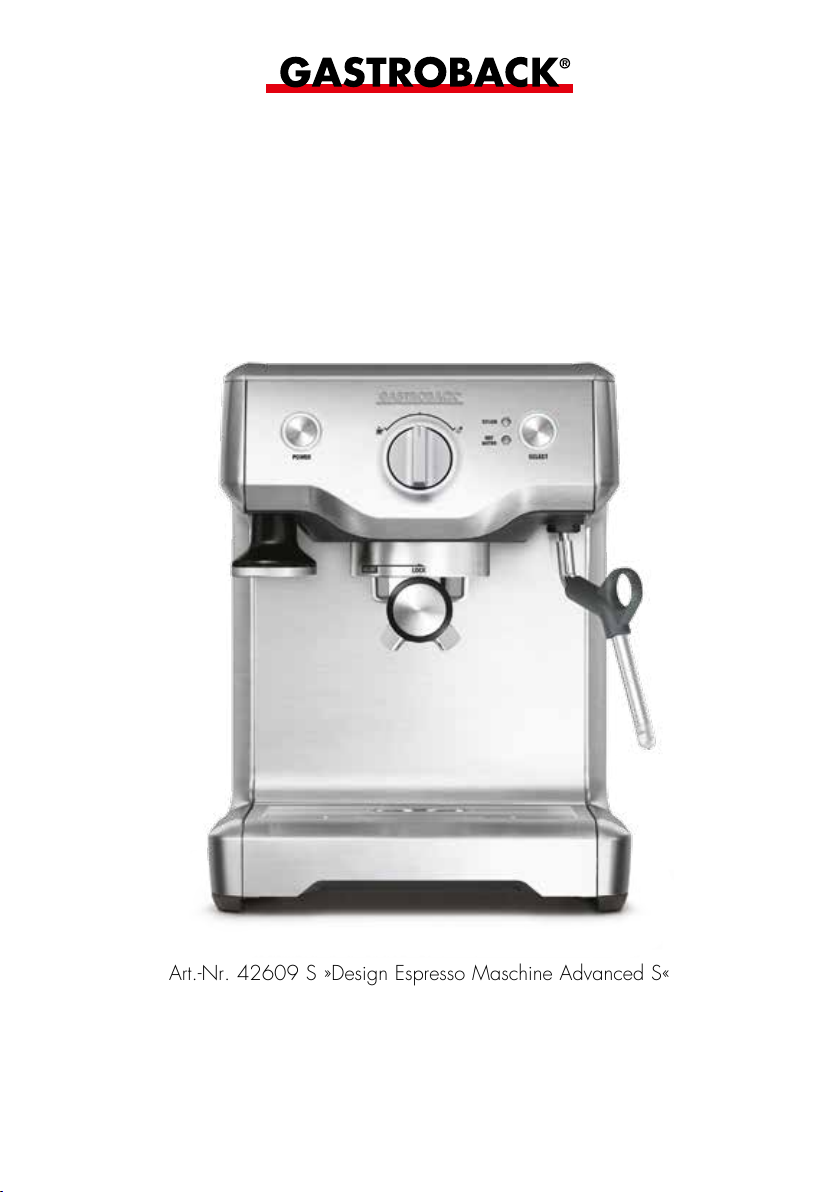
Art.-Nr. 42609 S »Design Espresso Maschine Advanced S«
Bedienungsanleitung vor Gebrauch unbedingt lesen!
Modell- und Zubehöränderungen vorbehalten!
Nur für den Hausgebrauch!

Wir legen viel Wert auf Ihre Sicherheit. Deshalb bitten wir Sie, alle Hinweise
und Anleitungen, die mit dem Gerät geliefert werden, sorgfältig und voll-
ständig durchzulesen, bevor Sie das Gerät in Betrieb nehmen.
Dadurch lernen Sie auch alle Funktionen und Eigenschaften Ihres Gerätes
kennen. Bitte befolgen Sie sorgfältig alle Sicherheitshinweise!
INHALTSVERZEICHNIS
IHRE DESIGN ESPRESSO MASCHINE ADVANCED S KENNENLERNEN .............. 4
WICHTIGE SICHERHEITSHINWEISE ............................................................... 5
Allgemeine Hinweise zur Sicherheit ............................................................ 5
Wichtige Sicherheitshinweise für alle Elektrogeräte ........................................ 9
Hohe Temperaturen - Verbrennungsgefahr ................................................. 10
TECHNISCHE DATEN ................................................................................ 11
BEDIENUNG ............................................................................................ 12
Das Gerät zusammensetzen .................................................................... 12
Einen Kaffee zubereiten ......................................................................... 12
Den Wassertank auffüllen ....................................................................... 13
Den Kaffee vorbereiten .......................................................................... 13
Das Kaffeepulver andrücken .................................................................... 14
Den Brühkopf spülen .............................................................................. 14
Die Tasse vorwärmen ............................................................................ 15
Den Filterhalter einsetzen ........................................................................ 15
Den Kaffee aufbrühen ............................................................................ 15
Die Vorbrühfunktion ............................................................................... 16
Den Filterhalter ausleeren ........................................................................ 16
Milch für Cappuccino oder Latté aufschäumen ........................................... 16
Die Dampf- und Heißwasserfunktion verwenden.......................................... 17
Milch schäumen ................................................................................... 17
Mit der Heißwasserfunktion arbeiten ......................................................... 19
NÜTZLICHE TIPPS ...................................................................................... 20
PFLEGE UND REINIGUNG .......................................................................... 22
STÖRUNGEN BESEITIGEN ......................................................................... 27
LAGERUNG .............................................................................................. 30
ENTSORGUNGSHINWEISE ........................................................................ 30
INFORMATION UND SERVICE .................................................................... 30
GEWÄHRLEISTUNG/GARANTIE .................................................................. 31
KAFFEE – REZEPTE ..................................................................................... 33

SEHR GEEHRTE KUNDIN, SEHR GEEHRTER KUNDE!
Herzlichen Glückwunsch zu Ihrer neuen »Design Espresso Maschine Advanced S« von
Gastroback. Mit dem strapazierfähigen Gehäuse und der professionellen Funktionalität
sowie der hervorragenden Leistung und einfachen Bedienung ist die »Design Espresso
Maschine Advanced S« bestens geeignet für wahre Kaffee-Genießer. Die Informationen
in diesem Heft werden Ihnen die unglaubliche Vielseitigkeit unserer Espresso-Maschine
rasch erschließen und Sie erhalten ganz schnell und einfach einen hervorragenden Kaffee.
Die Informationen in dieser Anleitung werden Ihnen die unglaubliche Vielseitigkeit des
Gerätes rasch vermitteln.
Entdecken Sie mit der »Design Espresso Maschine Advanced S« die Welt des Kaffees
und die Kunst der Barista.
Ihre Gastroback GmbH
3

IHRE DESIGN ESPRESSO MASCHINE ADVANCED S
KENNENLERNEN
Aktiv beheizte Brühgruppe
Der elektronische PID-Regler
überwacht grad genau die
Temperatur
Auto Purge Funktion
nach dem Milchaufschäumen wird das
Thermo-Block-Heizsystem
automatisch wieder auf
die optimale Temperatur
für die Espresso
Extraktion gekühlt
Integrierter
abnehmbarer Tamper
Auswahlschalter
für Espresso (rechts),
Standby (mitte)
und Dampf (links)
Wassertank
Extragroße Wärmplatte
Das Aroma und die Crema
können sich nur in einer
warmen Tasse richtig
entfalten
Heißwasser- &
Dampftaste
360° schwenkbare
Heißwasser- und
Milchschaumdüse
für vielfältige
Kaffeevariationen
mit Milchschaum
Tropfschale
abnehmbar,
1 Liter Fassungs-
vermögen und
Füllstandsanzeige
mit Zubehörfach
hinter der Tropfschale
herausnehmbar,
1,8 Liter
4
Edelstahl-Milchschaumbecher, Reinigungswerkzeug, Sieb und 3 Filtereinsätze
Zubehörfach hinter der
Tropfschale, zur Aufbewahrung des Zubehörs

WICHTIGE SICHERHEITSHINWEISE
Lesen Sie bitte vor dem Gebrauch des Gerätes alle Hinweise und Anleitungen, die mit dem Gerät geliefert werden, sorgfältig und vollständig durch
und bewahren Sie die Anleitungen gut auf. Verwenden Sie das Gerät ausschließlich in der darin angegebenen Weise, zu dem beschriebenen Zweck
(bestimmungsgemäßer Gebrauch). Ein bestimmungswidriger Gebrauch und
besonders Missbrauch können zu Sachschäden sowie zu schweren Personenschäden durch gefährliche elektrische Spannung, Feuer und bewegliche
Bauteile führen. Jegliche Benutzung für andere Zwecke ist seitens des Herstellers untersagt und zu unterlassen. Für Schäden, die auf nicht sachgemäßen
Gebrauch zurückzuführen sind, übernehmen wir keinerlei Haftung und sind
auch nicht regresspflichtig. Führen Sie ausschließlich diejenigen Arbeiten am
Gerät durch, die in dieser Anleitung beschrieben sind. Lassen Sie das Gerät
im Betriebszustand nicht unbeaufsichtigt. Das Gerät entspricht den Richtlinien,
die für die CE-Kennzeichnung verbindlich sind.
Diese Anleitung ist ein wichtiger Bestandteil des Gerätes. Geben Sie das
Gerät nicht ohne diese Anleitung an Dritte weiter. Bestehen Unklarheiten oder
sollten weitere Informationen erforderlich sein, bitten wir Sie, sich vor Inbetriebnahme der Maschine mit Ihrem autorisierten Fachhändler oder unserem
Kundendienst in Verbindung zu setzen.
Reparaturen und technische Wartung am Gerät dürfen nur von dafür autorisierten Fachwerkstätten durchgeführt werden. Wenden Sie sich gegebenenfalls bitte an Ihren Händler. Fragen zum Gerät beantwortet: Gastroback
GmbH, Gewerbestr. 20, D-21279 Hollenstedt, Telefon: (04165) 22250
ALLGEMEINE HINWEISE ZUR SICHERHEIT
• Die Espresso-Maschine dient zum Aufbrühen von Kaffee. Daher werden
einige Bauteile, wie z. B. der Brühkopf und die Dampfdüse beim Betrieb
sehr heiß und heißes Wasser oder Dampf treten aus.
• Niemals das Gerät oder die Bauteile des Geräts in der Spülmaschine
reinigen. Niemals das Gerät oder das Netzkabel mit Flüssigkeiten übergießen oder in Flüssigkeiten stellen oder tauchen.
• Nachdem Sie die richtige Menge Kaffeepulver in den Filter gefüllt haben,
müssen Sie das Kaffeepulver möglichst gleichmäßig andrücken. Das Kaffeepulver muss ziemlich fest angedrückt werden.
5

• Wischen Sie eventuell auf dem Rand des Filters verschüttetes Kaffeepulver
sorgfältig ab. Der Rand muss unbedingt ganz sauber sein, damit der Filter
am Brühkopf druckdicht abschließt.
• Die Restfeuchtigkeit des Kaffeesatzes im Siebträger, die sich auf Grund
der speziellen Brühtechnik der Maschine ergibt, stellt keinesfalls eine Fehlfunktion der Maschine dar.
• Nur für den Betrieb in Innenräumen und nur für die Verwendung im Haushalt. Verwenden und lagern Sie das Gerät an einem sauberen, frostfreien
Ort, an dem es vor Feuchtigkeit, Nässe und übermäßiger Belastung
geschützt ist. Nicht im Freien verwenden oder lagern. Das Gerät ist nicht
für die Verwendung in fahrenden Fahrzeugen oder auf Booten geeignet.
Bewahren Sie das Gerät und alle Bauteile stets an einem für kleine Kinder unzugänglichen Ort auf.
• Prüfen Sie das Gerät und das Netzkabel regelmäßig auf Beschädigungen. Niemals das Gerät verwenden, wenn das Gerät oder Teile
davon beschädigt oder undicht sind, übermäßigen Belastungen ausgesetzt waren (Beispiel: Sturz, Schlag, Überhitzung oder eingedrungene
Feuchtigkeit) oder nicht mehr erwartungsgemäß arbeiten. Verwenden Sie
das Gerät nicht mehr, wenn sich während des Betriebs Wasser unter
dem Gerät sammelt. Ziehen Sie dann sofort den Netzstecker aus der
Steckdose und lassen Sie das Gerät in einer Fachwerkstatt überprüfen.
• Verwenden Sie nur Bauteile, Werkzeuge, Ersatzteile und Zubehöre für
das Gerät, die vom Hersteller für diesen Zweck vorgesehen und empfohlen sind. Beschädigte oder ungeeignete Bauteile können während des
Betriebs brechen, das Gerät beschädigen und/oder zu schweren Verletzungen oder Sachschäden führen.
• Vergewissern Sie sich, dass das Gerät richtig und vollständig zusammengesetzt ist, bevor Sie den Netzstecker in die Steckdose stecken und das
Gerät einschalten. Vergewissern Sie sich vor jeder Verwendung, dass
der Filter richtig am Brühkopf eingesetzt und gesichert ist. Das Gerät steht
während des Betriebs unter Überdruck! Drehen Sie den Auswahlschalter
immer zuerst in die Bereitschaftsposition (mittlere Position), bevor Sie den
Filter abnehmen.
• Stellen Sie das Gerät auf einer gut zugänglichen, ebenen, trockenen
6

und ausreichend stabilen sowie wärme- und feuchtigkeitsbeständigen
Arbeitsfläche auf. Verwenden Sie das Gerät nicht in feuchten oder nassen Bereichen. Stellen Sie das Gerät nicht an den Rand oder die Kante
der Arbeitsfläche. Achten Sie darauf, dass das Netzkabel nicht über die
Tischkante herunterhängt und dass niemand das Gerät am Kabel vom
Tisch ziehen kann.
• Legen Sie keine Tücher, Servietten oder ähnliche Materialien unter oder
auf das Gerät, um eine Überhitzung und eine Gefährdung durch Feuer
und elektrischen Schlag zu vermeiden. Legen Sie niemals harte, scharfkantige oder schwere Gegenstände auf das Gerät um die Wärmplatte
oder das Rost nicht zu beschädigen.
• Niemals das Gerät oder Teile des Geräts in die Nähe von starken Wärmequellen und heißen Oberflächen (Beispiel: Heizung, Ofen, Grill) stellen oder legen. Achten Sie darauf, dass sich während des Betriebs keine
wertvollen oder feuchtigkeits- oder hitzeempfindlichen Gegenstände in der
Nähe des Geräts befinden, um Schäden durch heißen Dampf und Wasser
zu vermeiden. Das Gerät muss von vorn frei zugänglich bleiben. An den
Seiten müssen mindestens 15 cm Platz frei bleiben.
• Lassen Sie besonders kleine Kinder niemals unbeaufsichtigt, wenn das
Gerät oder Geräteteile für sie zugänglich sind. Lassen Sie kleine Kinder
niemals mit dem Gerät, den Bauteilen oder dem Reinigungswerkzeug
spielen. Kinder und gebrechliche Personen müssen Sie bei der Handhabung von Elektrogeräten stets besonders beaufsichtigen. Das Gerät von
Kindern fernhalten und lassen Sie nicht zu, das Kabel nach unten hängt.
• Dieses Gerät kann von Kindern ab 8 Jahren und älter, Personen mit eingeschränkten physischen, sensorischen oder geistigen Fähigkeiten oder
mangelnder Erfahrung und Wissen, nur verwendet werden wenn sie
dabei beaufsichtigt werden oder eine ausführliche Anleitung zur Benutzung des Geräts in einer sicheren Weise erhalten haben und die damit
verbundenen Gefahren verstehen. Halten Sie das Gerät und seine Kabel
außerhalb der Reichweite von Kindern unter 8 Jahren.
• Kinder dürfen nicht mit dem Gerät spielen.
• Reinigung und Wartung durch den Benutzer darf nicht von Kindern ohne
Aufsicht durchgeführt werden.
7

• Füllen Sie zum Betrieb immer nur kaltes, sauberes Leitungswasser in den
Wassertank. Verwenden Sie niemals andere Flüssigkeiten. Verwenden
Sie zum Entkalken keine scharfen Chemikalien und Entkalker. Verwenden
Sie ausschließlich Essigwasser für diesen Zweck (siehe ›Den Wassertank entkalken‹). Niemals das Gerät einschalten, wenn der Wassertank
leer ist. Achten Sie beim Einsetzen des gefüllten Wassertanks und beim
Herausnehmen der vollen Tropfschale darauf, das enthaltene Wasser
nicht zu verschütten.
• Niemals das Gerät unbeaufsichtigt lassen, wenn der Netzstecker eingesteckt ist. Schalten Sie das Gerät immer zuerst aus (Ein/Aus-Taste
POWER), ziehen Sie den Netzstecker aus der Steckdose und lassen Sie
das Gerät abkühlen, wenn Sie das Gerät nicht verwenden, bewegen
oder reinigen.
• Lassen Sie keine Nahrungsmittelreste auf dem Gerät oder den Bauteilen
des Geräts eintrocknen. Reinigen Sie das Gerät nach jeder Verwendung
(siehe ›Pflege und Reinigung‹).
• Niemals das Gerät oder die Bauteile mit Scheuermitteln, harten Scheuerhilfen (Beispiel: Topfreiniger) scharfen Putzmitteln oder ätzenden Chemikalien (Desinfektionsmittel, Entkalker) reinigen. Niemals harte oder scharfkantige Gegenstände für die Arbeit mit dem Gerät oder zum Reinigen
verwenden.
• Niemals das Gerät, die Zubehöre oder die Bauteile des Geräts in der
Spülmaschine reinigen!
• Wenden Sie bei der Arbeit mit dem Gerät keine Gewalt an, um die Bauteile nicht zu beschädigen.
• Immer das Gerät vor der Reinigung abkühlen lassen und den Stecker
ziehen.
• Um das Gerät zu reinigen, wischen Sie das Gehäuse mit einem feuchten
Tuch und trocknen Sie es mit einem sauberen, trockenen Tuch ab. Tauchen Sie nie den das Gerät in Wasser für die Reinigung!
8

HINWEIS ZUM MILCHAUFSCHÄUMEN
Etwa 1/3 der Milchschaumdüse muss in die Milch eintauchen.
Hinweis:
Wenn bereits Dampf aus der Dampfdüse austritt und die Düse noch nicht
in die Milch eintaucht, dann könnte der entweichende Dampf die Milch
aus dem Becher spritzen.
WICHTIG: Achten Sie darauf, dass die Milch nicht über den oberen Rand
des Schaumbechers läuft.
WARNUNG: Nehmen Sie niemals die Dampfdüse aus der Milch heraus,
so lange noch Dampf austritt. Andernfalls kann heiße Milch aus dem Becher
spritzen. Schalten Sie den Auswahlschalter immer zuerst in die Bereitschaftsposition (mittlere Schalterposition) zurück, bevor Sie den Schaumbecher von
der Dampfdüse weg nehmen. Etwa 5 Sekunden nach dem Ausschalten der
Dampffunktion tritt ein kurzer Dampfstoß aus der Dampfdüse. Achten Sie
darauf, sich nicht am heißen Dampf zu verbrühen.
WICHTIGE SICHERHEITSHINWEISE FÜR ALLE ELEKTROGERÄTE
• Stellen Sie das Gerät in der Nähe einer passenden Wandsteckdose auf
und schließen Sie das Gerät dort direkt an. Das Gerät darf nur an die
ordnungsgemäß abgesicherte Schukosteckdose einer geeigneten Stromversorgung (Wechselstrom; 220 - 240 V, ~50 Hz) mit Schutzleiter angeschlossen werden. Die Steckdose muss für 16 A einzeln abgesichert sein.
Verwenden Sie keine Verlängerungskabel oder Tischsteckdosen, um eine
Gefährdung durch Feuer und Elektrizität zu vermeiden. Außerdem sollte
die Steckdose über einen Fehlerstromschutzschalter abgesichert sein, dessen Auslösestrom nicht über 30 mA liegen sollte. Wenden Sie sich im
Zweifelsfall an Ihren Elektriker.
• Niemals Wasser oder andere Flüssigkeiten über oder unter das Gehäuse
laufen lassen.
• Niemals das Netzkabel oder das Gehäuse in Wasser oder andere Flüssigkeiten tauchen oder stellen. Sollte während der Arbeit Wasser oder
eine andere Flüssigkeit über das Gehäuse gelaufen sein, dann schalten
Sie das Gerät sofort aus, ziehen Sie den Netzstecker und trocknen das
9

Gerät mit einem sauberen Tuch ab. Ziehen Sie sofort den Netzstecker
aus der Steckdose, wenn Bauteile des Geräts undicht sind und/oder sich
während des Betriebes Wasser unter dem Gerät sammelt.
• Wickeln Sie das Kabel vor der Verwendung des Geräts immer vollständig ab.
• Niemals am Kabel ziehen oder reißen oder das Kabel knicken, einklemmen, quetschen oder verknoten. Achten Sie darauf, dass das Netzkabel
nicht über die Tischkante herunterhängt. Achten Sie darauf, dass niemand in Kabelschlaufen hängen bleiben kann oder das Gerät am Kabel
von der Arbeitsfläche reißen kann. Fassen Sie immer am Gehäuse des
Steckers an, wenn Sie den Stecker ziehen.
• Wenn das Netzkabel beschädigt wird, muss dieses durch den Hersteller
oder seinen Kundendienst oder eine ähnlich qualifizierte Person ersetzt
werden, um eine Gefahr zu vermeiden.
HOHE TEMPERATUREN – VERBRENNUNGSGEFAHR
• Die Espresso-Maschine dient zum Aufbrühen von Kaffee. Daher werden
einige Bauteile beim Betrieb sehr heiß und heißes Wasser oder Dampf
treten aus.
• Vergewissern Sie sich immer zuerst, dass die Bauteile nicht mehr heiß
sind, bevor Sie Bauteile (Beispiel: Filtereinsatz, Dampf-düse) abnehmen.
• Fassen Sie während des Betriebs und kurz danach niemals auf heiße
Bauteile (Brühkopf, Filtereinsatz, Dampfdüse und anderes). Auch nach
dem Ausschalten sind das Gerät und die entsprechenden Bauteile noch
einige Zeit sehr heiß.
• Aus dem Brühkopf und aus der Dampfdüse kann heißer Dampf austreten oder heißes Wasser tropfen. Halten Sie niemals Ihre Hände, andere
Körperteile oder feuchtigkeits- und/oder hitzeempfindliche Gegenstände
(Beispiel: Eislöffel) an Filtereinsatz, Brühkopf, Dampfdüse oder darunter,
wenn das Gerät eingeschaltet ist.
• Warten Sie immer, bis das ganze Gerät auf Raumtemperatur abgekühlt
ist und leeren Sie den Wassertank und die Tropfschale aus, bevor Sie
das Gerät bewegen oder reinigen. Fassen Sie das Gerät immer auf bei-
10

den Seiten unten am Gerätesockel (nicht an der Tropfschale!), wenn Sie
das Gerät bewegen wollen.
ENERGIESPARFUNKTION
Die »Design Espresso Maschine Advanced S« verfügt über eine Energiesparfunktion. Im Energiesparmodus verbraucht das Gerät keinen Strom. Wird das
Gerät 15 Minuten nicht benutzt, schaltet es automatisch in den Energiesparmodus.
TECHNISCHE DATEN
Modell: Art.-Nr.: 42609 »Design Espresso Maschine Advanced S«
Stromversorgung: 220 - 240 V Wechselstrom, ~50 Hz
Leistungsaufnahme: 1.500 - 1.750 Watt
Länge des Netzkabels: ca. 112 cm
Gewicht: ca. 8,6 kg
Abmessungen: ca. 280 mm x 305 mm x 320 mm (Breite x Tiefe x Höhe)
Prüfzeichen:
11

BEDIENUNG
DAS GERÄT ZUSAMMENSETZEN
Vor der ersten Verwendung:
Wenn Sie das Gerät auspacken, dann sind Tropfschale, Zubehörfach und Wassertank bereits richtig eingebaut. Die Tropfschale steckt im Gerätesockel und wird nach
vorn herausgezogen. Das Zubehörfach steckt ebenfalls im Gerätesockel und kann erst
herausgezogen werden, nachdem Sie die Tropfschale herausgenommen haben. Der
Wassertank sitzt in der Gerätesäule über der Tropfschale und wird ebenfalls nach vorn
herausgezogen. Die Edelstahlfilter (Einfach-Filter, Doppel-Filter und Pad-Filter), Reinigungswerkzeug, Filterhalter und Schaumkrug stecken in der Schaumstoffverpackung.
Vergewissern Sie sich, dass die Bauteile und Zubehöre vollständig und unbeschädigt
sind, bevor Sie die Verpackung entsorgen. Im Zubehörfach bewahren Sie am besten
das Reinigungswerkzeug und die Filtereinsätze auf. Dadurch können diese Zubehöre
nicht verloren gehen.
1. Fassen Sie von vorn in die Griffmulde des Wassertanks und ziehen Sie den Was-
sertank heraus. Spülen Sie den Wassertank dann sorgfältig aus. Spülen Sie vor
der ersten Verwendung auch Filtereinsätze, Filterhalter und Schaumbecher in etwas
warmer Spülmittellösung. Arbeiten Sie dabei nach der Anleitung im Kapitel ›Pflege
und Reinigung‹.
2. Schieben Sie den Wassertank über der Tropfschale in die Rückwand des Geräts.
Die vordere Wand des Wassertanks muss mit den Seitenwänden der Gerätesäule
glatt abschließen und darf nicht herausstehen.
Vor der ersten Verwendung sollten Sie das Gerät einmal ohne Kaffeepulver arbeiten
lassen. Dadurch werden die inneren Bauteile des Geräts ausgeheizt und gespült.
Arbeiten Sie dazu nach der Anleitung im folgenden Absatz (Einen Kaffee zubereiten).
Entfernen Sie alle Verpackungs- und Werbematerialien.
EINEN KAFFEE ZUBEREITEN
WARNUNG: Niemals kleine Kinder mit dem Gerät oder den Bauteilen des Geräts
unbeaufsichtigt lassen! Vergewissern Sie sich immer, dass das Gerät richtig und vollständig zusammengesetzt ist, bevor Sie den Netzstecker in die Steckdose stecken und das
Gerät einschalten.
Drehen Sie den Auswahlschalter immer zuerst in die Bereitschaftsposition (mittlere Position), schalten Sie das Gerät an der Ein/Aus-Taste (POWER) aus, ziehen Sie den Netzstecker und warten Sie, bis das Gerät abgekühlt ist, bevor Sie Wassertank, Tropfschale
oder Zubehörfach herausnehmen/einsetzen oder das Gerät reinigen.
Halten Sie den Arbeitsplatz sauber und trocken. Lassen Sie keine Flüssigkeiten über oder
unter das Gerät laufen und legen Sie keine Tücher, Servietten oder ähnliche Materialien
12

unter oder auf das Gerät. Sollte während der Arbeit Flüssigkeit über das Gerät gelaufen
sein, dann schalten Sie das Gerät sofort aus und ziehen Sie den Netzstecker. Trocknen
Sie das Gerät nach der Anleitung im Kapitel ›Pflege und Reinigung‹.
DEN WASSERTANK AUFFÜLLEN
1. Nehmen Sie den Filterhalter vom Brühkopf. Fassen Sie den Filterhalter dazu am
schwarzen Griff und drehen Sie ihn gegen den Uhrzeigersinn. Fassen Sie die
Dampfdüse am Kunststoffgriff und schwenken Sie die Dampfdüse zur Außenseite des
Geräts.
2. Fassen Sie in die Griffmulde am Wassertank und ziehen Sie den Wassertank nach
vorn aus dem Gerät. Füllen Sie den Wassertank mit klarem kaltem Leitungswasser.
Wenn Sie den Wassertank herausgezogen haben, dann klappt unter dem Geräte-
dach ein dunkles Rohr nach vorn. Dieses Rohr wird beim Einlegen des Wassertanks
automatisch wieder eingeklappt. Versuchen Sie nicht, das Rohr herauszuziehen.
ACHTUNG: Achten Sie beim Betrieb des Geräts immer darauf, dass der Füllstand
im Wassertank (erkennbar am Füllstandsanzeiger) zwischen den Füllmarken 500 und
MAX liegt. Überprüfen Sie den Wasserstand vor jedem Einschalten und füllen Sie rechtzeitig frisches Wasser ein. Niemals das Gerät einschalten, wenn zu wenig Wasser im
Wassertank ist (unter der Füllmarke 500). Verwenden Sie immer nur Leitungswasser für
das Gerät. Füllen Sie weder Mineralwasser noch destilliertes (demineralisiertes) Wasser
ein. Überfüllen Sie nicht den Wassertank. Der Inhalt darf höchstens die Füllmarke MAX
erreichen.
3. Schieben Sie den gefüllten Wassertank vorsichtig wieder in das Gerät.
WICHTIG: Achten Sie beim Einsetzen des Wassertanks darauf, das Wasser nicht zu
verschütten.
DEN KAFFEE VORBEREITEN
4. Legen Sie den Einfach-Filter (für 1 Tasse) oder den Doppel-Filter (für zwei Tassen) in
den Filterhalter ein und drücken Sie den Filter an.
Der Filter wird im Filterhalter von einer Feder gehalten. Der Rand des Filters muss auf
dem Rand des Filterhalters aufliegen.
Der flachere Einfach-Filter ist für 1 Tasse, der etwas tiefere Doppel-Filter ist für 2 Tas-
sen gedacht. Wenn Sie etwas mehr Kaffee aufbrühen wollen (Beispiel: Für einen
Becher), dann verwenden Sie immer den Doppel-Filter.
Filtern Sie mit dem Doppel-Filter höchstens 60 ml. Wenn Sie größere Mengen wün-
schen, dann füllen Sie zuerst heißes Wasser in die Tasse und filtern Sie dann den
Kaffee dazu (siehe: ›Mit der Heißwasserfunktion arbeiten‹).
13

Wenn Sie nur eine Tasse Kaffee filtern wollen, dann verwenden Sie den Einfach-
Filter, um das optimale Aroma zu erhalten. Filtern Sie damit nur etwa 30 ml.
5. Füllen Sie den Filtereinsatz gestrichen mit Espresso-Kaffeepulver auf. Verwenden Sie
immer nur die richtige Menge Pulver für die beiden Filter, da die Poren der Filter
genau die richtige Größe haben, um bei der vorbestimmten Pulvermenge den richtigen Druck zu erreichen (siehe: ›Hinweise zum Kaffeepulver‹).
DAS KAFFEEPULVER ANDRÜCKEN
6. Verteilen Sie den Kaffee gleichmäßig im Filter und drücken Sie das Kaffeepulver an
(siehe: ›Einige nützliche Tipps‹).
7. Wischen Sie eventuell auf dem Rand des Filters verschüttetes Kaffeepulver sorgfältig
ab. Der Rand muss unbedingt ganz sauber sein, damit der Filter am Brühkopf druckdicht abschließt.
DEN BRÜHKOPF SPÜLEN
WARNUNG: Aus dem Brühkopf treten heißes Wasser und Dampf aus. Niemals die
Hand oder andere Körperteile an den Brühkopf oder darunter halten, wenn das Gerät
eingeschaltet ist.
8. Bevor Sie den Filter am Brühkopf einsetzen, sollten Sie etwas Wasser durch den
Brühkopf leiten, um den Brühkopf zu spülen.
9. Drehen Sie den Auswahlschalter auf Bereitschaft (mittlere Position) und stecken Sie
den Netzstecker in die Steckdose. Drücken Sie auf die Ein/Aus-Taste (POWER), um
das Gerät einzuschalten.
Der Rand der Ein/Aus-Taste leuchtet auf, sobald das Gerät eingeschaltet ist. Das
Gerät macht ein Pumpgeräusch; dann blinkt die Heizkontrolllampe (HEATING) rot.
Sobald die richtige Temperatur erreicht ist, verlischt die Heizkontrolllampe wieder
und die Dampftaste (STEAM) leuchtet auf. Während die Espresso-Maschine arbeitet, leuchtet die Heizkontrolllampe (HEATING) immer wieder kurzzeitig auf. Dadurch
wird angezeigt, dass der Thermoblock des Brühkopfs die erforderliche Temperatur
einhält.
10. Stellen Sie eine leere Tasse oder einen Becher unter den Brühkopf auf das Rost der
Tropfschale.
14

11. Drehen Sie den Auswahlschalter kurz nach rechts auf die Espresso-Position (ohne den
Filterhalter). Das Gerät erzeugt ein Pumpgeräusch und Dampf tritt aus dem Brühkopf.
Schalten Sie danach wieder auf die Bereitschaftsposition (Mitte).
DIE TASSEN VORWÄRMEN
12. Sobald das Gerät eingeschaltet ist, wird auch die Wärmplatte oben auf dem
Gerätedach beheizt. Stellen Sie Ihre Tassen auf die Wärmplatte, um die Tassen
vorzuheizen. Dadurch kühlt der Kaffee nicht aus, wenn er in die Tasse läuft.
DEN FILTERHALTER EINSETZEN
13. Fassen Sie den Filterhalter mit dem gefüllten Filter am schwarzen Griff und halten Sie
den Filterhalter unter den Brühkopf. Der Griff muss dabei etwa im 45° Winkel schräg
nach links vorne zeigen.
14. Drehen Sie den Filterhalter nach rechts (gegen den Uhrzeigersinn), so dass der Griff
etwa rechtwinklig nach vorne weist. Der Filterhalter wird dadurch druckdicht am
Gerät verriegelt.
DEN KAFFEE AUFBRÜHEN
Sobald das Gerät die richtige Temperatur erreicht hat, verlischt die rote Heizkontrolllampe (HEATING).
15. Vergewissern Sie sich, dass die Tropfschale und das Rost richtig eingelegt sind.
16. Stellen Sie eine oder zwei vorgewärmte Tassen unter den Filterhalter.
17. Drehen Sie den Auswahlschalter nach rechts auf die Espresso-Position. Nach ein
paar Sekunden läuft der Kaffee automatisch aus dem Filterhalter. Ein Pumpgeräusch
ist dabei zu hören.
18. Drehen Sie den Auswahlschalter wieder zurück in die Bereitschaftsposition, sobald
die gewünschte Menge in die Tasse gelaufen ist. Dadurch wird der Brühvorgang
beendet.
Solange das Gerät eingeschaltet ist, bleibt das Gerät betriebsbereit für den Brüh-
vorgang und hält eine konstante Temperatur im Brühkopf. Sobald die Temperatur im
Brühkopf abnimmt, schaltet sich die Heizung automatisch wieder ein und die Heizkontrolllampe leuchtet auf.
19. Wenn Sie keinen weiteren Kaffee aufbrühen wollen, dann drücken Sie auf die Ein/
Aus-Taste, um das Gerät auszuschalten und ziehen Sie den Netzstecker. Warten
Sie, bis das Gerät abgekühlt ist, bevor Sie das Gerät nach der Anleitung im Kapitel
›Pflege und Reinigung‹ reinigen.
15

DIE VORBRÜH-FUNKTION
Wenn der Auswahlschalter auf der Espresso-Position steht, dann fördert die 15-bar-Pumpe zunächst etwas Wasser, macht dann eine kurze Pause und pumpt danach weiteres
Wasser durch den gemahlenen Kaffee im Filterhalter. Das Kaffeepulver wird durch dieses Verfahren zuerst mit etwas Wasser angefeuchtet, bevor der eigentliche Brühvorgang
beginnt. Dadurch quillt das Kaffeepulver und im Brühkopf kann ein größerer Druck aufgebaut werden. Auf diese Weise werden die Öle und Aromastoffe des Kaffees besser
an das Wasser abgegeben.
DEN FILTERHALTER AUSLEEREN
WARNUNG: Die Metallteile des Filters und Filterhalters sind nach dem Gebrauch
noch einige Zeit sehr heiß. Fassen Sie den heißen Filterhalter nur am schwarzen Griff
an. Kühlen Sie den Filterhalter und den Filter zuerst in kaltem Wasser, bevor Sie die
Metallteile anfassen.
1. Nehmen Sie den Filterhalter vom Brühkopf ab. Fassen Sie den Filterhalter dazu am
schwarzen Griff und drehen Sie den Filterhalten nach links (im Uhrzeigersinn) bis die
Verriegelung gelöst ist.
2. Leeren Sie den Filterhalter dann über einer Schüssel oder Spüle aus. Das gebrauchte
Kaffeepulver geben Sie am besten in den Hausmüll oder zu den kompostierbaren
Küchenabfällen. Spülen Sie das Kaffeepulver NICHT in den Ausguss, da andernfalls
der Abfluss verstopft werden könnte.
3. Die Filter werden von einer Feder im Filterhalter gehalten. Heben Sie den Filter an
den Aussparungen an den Seiten des Filterhalters an, um ihn aus dem Filterhalter zu
nehmen.
4. Spülen Sie den Filter und Filterhalter mit klarem Wasser aus und lassen Sie diese
Bauteile danach trocknen.
MILCH FÜR CAPPUCCINO ODER LATTÉ AUFSCHÄUMEN
WARNUNG: Die Dampfdüse sind nach dem Gebrauch noch einige Zeit sehr heiß.
Vergewissern Sie sich immer zuerst, dass diese Bauteile abgekühlt sind, bevor Sie die
Dampfdüse anfassen.
Die Espresso-Maschine ist mit einer schwenkbaren Dampfdüse zum Aufschäumen von
Milch ausgerüstet. Damit können Sie schnell und problemlos Milchschaum herstellen.
Wenn Sie nur wenig Milchschaum brauchen, dann nehmen Sie Dampfdüse ab und
schäumen die Milch nur mit der Düse auf.
16

DIE DAMPF- UND HEISSWASSERFUNKTION VERWENDEN
Die Dampftaste leuchtet automatisch auf, sobald das Gerät die richtige Temperatur
erreicht hat. Das Gerät schaltet automatisch immer in die Dampffunktion, wenn es zum
ersten Mal eingeschaltet wird. Sie können die beiden Funktionen (Dampf und heißes
Wasser) nicht zusammen verwenden.
• Wenn Sie Dampf erzeugen wollen: Drücken Sie die Dampftaste (Steam). Die Taste
leuchtet auf. Drehen Sie dann den Auswahlschalter nach links in die Dampfposition.
• Wenn Sie heißes Wasser brauchen: Drücken Sie die Heißwassertaste. Die Taste
leuchtet auf. Drehen Sie dann den Auswahlschalter nach links in die Dampfposition.
Solange die Espresso-Maschine eingeschaltet ist, bleibt die zuletzt gewählte Funktion
aktiv.
MILCH SCHÄUMEN
WARNUNG: Aus der Dampfdüse tritt heißer Dampf aus. Halten Sie niemals Ihre
Hände oder andere Körperteile an die Dampfdüse oder darunter, wenn der Auswahlschalter auf der Dampfposition steht. Halten Sie ein geeignetes Gefäß unter die Dampfdüse, bevor Sie den Auswahlschalter in die Dampfposition drehen.
1. Vergewissern Sie sich, dass ausreichend Wasser im Wassertank ist (zwischen den
Füllstandsmarken 500 und MAX).
2. Drücken Sie auf die Ein/Aus-Taste (POWER), um das Gerät einzuschalten.
3. Bereiten Sie einen kleinen Espresso vor (siehe ›Einen Kaffee zubereiten‹).
4. Drücken Sie die Dampftaste; der Rand der Dampftaste muss aufleuchten. Schwenken
Sie die Spitze der Dampfdüse über die Tropfschale.
5. Füllen Sie den mitgelieferten Schaumbecher aus Edelstahl etwa zu 1/3 mit frischer
kalter Milch auf.
Hinweis:
Die besten Ergebnisse erhalten Sie mit fettreduzierter frischer Milch.
6. Drehen Sie den Auswahlschalter nach links in die Dampfposition. Die Heizkontroll-
lampe blinkt und zeigt dadurch an, dass der Thermoblock zur Dampferzeugung
beheizt wird. Zunächst treten eventuell ein paar Tropfen Wasser aus der Dampfdüse
aus. Sobald die Heizkontrolllampe verlischt, tritt Dampf aus der Dampfdüse aus.
Hinweis:
Bei der Dampferzeugung ist ein Pumpgeräusch zu hören.
17

7. Drehen Sie den Auswahlschalter kurz in die Bereitschaftsposition zurück, um die
Dampfentwicklung zu unterbrechen. Halten Sie dann sofort den Schaumbecher unter
die Dampfdüse und drehen Sie den Auswahlschalter zurück in die Dampfposition.
Etwa 1/3 der Dampfdüse muss in die Milch eintauchen.
Hinweis:
Wenn bereits Dampf aus der Dampfdüse austritt und die Düse noch nicht in die Milch
eintaucht, dann könnte der entweichende Dampf die Milch aus dem Becher spritzen.
8. Halten Sie die Dampfdüse zum Aufschäumen an den Rand des Schaumbechers.
Durch den austretenden Dampf bewegt sich die Milch im Kreis durch den Becher.
WARNUNG: Aus der Dampfdüse tritt heißer Dampf aus. Das Bauteil wird sehr heiß.
Achten Sie stets darauf, sich nicht am heißen Dampf zu verbrühen. Fassen Sie niemals
während der Dampferzeugung auf die Dampfdüse. Fassen Sie die Dampfdüse während
des Betriebs nur an dem dunklen Kunststoffgriff an.
Hinweis:
Sie können die Dampfdüse nach Wunsch schwenken, um bequem arbeiten zu
können. Fassen Sie die Dampfdüse dazu ausschließlich am dunklen Kunststoffgriff an.
9. Wenn das Volumen der Milch im Becher zunimmt, dann halten Sie die Dampfdüse
etwas tiefer in die Milch, um die Milch gut durchzuheizen. Halten Sie den Schaumbecher dabei mit einer Hand am Griff fest.
WICHTIG: Achten Sie darauf, dass die Milch nicht über den oberen Rand des Schaum-
bechers läuft.
WARNUNG: Nehmen Sie niemals die Dampfdüse aus der Milch heraus, so lange
noch Dampf austritt. Andernfalls kann heiße Milch aus dem Becher spritzen. Schalten Sie
den Auswahlschalter immer zuerst in die Bereitschaftsposition (mittlere Schalterposition)
zurück, bevor Sie den Schaumbecher von der Dampfdüse weg nehmen.
Etwa 5 Sekunden nach dem Ausschalten der Dampffunktion tritt ein kurzer Dampfstoß aus
der Dampfdüse. Achten Sie darauf, sich nicht am heißen Dampf zu verbrühen.
10. Sobald der Boden des Schaumbechers zu heiß zum Anfassen wird, drehen Sie den
Auswahlschalter zurück in die Bereitschaftsposition. Dadurch wird die Dampferzeugung beendet. Nehmen Sie erst danach den Becher nach unten von der Dampfdüse.
WICHTIG: Reinigen Sie die Dampfdüse nach jeder Verwendung, damit die feinen
Poren für den Dampf nicht verstopfen (siehe: ›Pflege und Reinigung‹).
11. Gießen Sie die heiße Milch in Ihren Kaffee und geben Sie den Milchschaum mit
dem Löffel darüber.
18

Folgende Mischungsverhältnisse werden empfohlen:
• Cappuccino: 1/3 Espresso, 1/3 heiße Milch, 1/3 Milchschaum
• Latté wird traditionell in einem Glas serviert: 1/3 Espresso, überschichtet mit 1/3
heißer Milch und einer etwa 1 cm dicken Schicht Milchschaum.
Hinweis:
Wenn Sie direkt nach der Verwendung der Dampffunktion weiteren Kaffee aufbrühen
wollen, dann spülen Sie zuerst den Brühkopf mit etwas Wasser. Dadurch wird verhindert, dass das Kaffeepulver durch den überhitzten Dampf verbrannt wird, da der
Thermoblock nach der Dampferzeugung noch zu heiß für die Zubereitung des Kaffees
ist. Aus diesem Grund sollte nach der Verwendung der Dampffunktion zuerst eine kleine Menge Wasser in die Tropfschale abgegeben werden. Ihr Kaffee wird dadurch
immer mit der optimalen Temperatur zubereitet.
MIT DER HEISSWASSERFUNKTION ARBEITEN
Die Espresso-Maschine verfügt über eine eigene Heißwasserfunktion, mit der Sie Tee,
heiße Schokolade oder andere Heißgetränke zubereiten können. Das heiße Wasser tritt
dabei aus der schwenkbaren Dampfdüse aus.
WARNUNG: Die Dampfdüse ist nach dem Gebrauch sehr heiß. Vergewissern Sie
sich immer zuerst, dass die Dampfdüse nicht mehr heiß ist, bevor Sie sie anfassen.
1. Vergewissern Sie sich, dass die Dampfdüse nicht mehr heiß ist.
2. Drücken Sie die Heißwasser-Taste (HOT WATER). Die Taste leuchtet auf, wenn die
Heißwasserfunktion ausgewählt ist.
3. Halten Sie eine Tasse unter die Dampfdüse.
4. Drehen Sie den Auswahlschalter nach links auf die Dampfposition.
5. Sobald genug heißes Wasser in die Tasse gelaufen ist, drehen Sie den Auswahl-
schalter zurück auf die Bereitschaftsposition, um die Heißwasserproduktion abzuschalten.
Hinweis:
Entnehmen Sie niemals mehr als 2 Liter Wasser in einem Durchlauf. Die EspressoMaschine ist nicht für die Zubereitung von größeren Mengen Kaffee oder Tee (Kannen)
geeignet. Je mehr Wasser Sie entnehmen, um so kälter wird das Wasser.
19

WICHTIG: So lange die Espresso-Maschine eingeschaltet bleibt, ist die zuletzt ver-
wendete Funktion ausgewählt und die entsprechende Taste bleibt erleuchtet. Wenn Sie
zur Dampffunktion umschalten wollen, dann drücken Sie einfach auf die Dampftaste
(STEAM). Wenn Sie danach den Auswahlschalter auf die Dampfposition stellen, dann
tritt heißer Dampf aus der Dampfdüse.
NÜTZLICHE TIPPS
Einen guten Kaffee zuzubereiten, ist eine Kunst, die leicht zu erlernen ist. In diesem Kapitel finden Sie einige Tipps für Ihren perfekten Kaffee.
Hinweis: Um einen wirklich aromatischen Kaffee zu genießen, sollten Sie nicht mehr
als 30 ml (mit dem Einfach-Filter) oder – für einen doppelten Espresso – nicht mehr als
60 ml (mit dem Doppel-Filter) zubereiten.
Hinweis:
Den Geschmack Ihres Kaffees sollten Sie nach Ihren eigenen Vorlieben wählen. Hier
spielt die Kaffeesorte eine große Rolle sowie die Art, in der der Kaffee gemahlen wird
(fein oder grob). Außerdem können Sie den Geschmack durch das Andrücken im Filter beeinflussen. Experimentieren Sie am besten, um Ihre persönliche Note zu finden.
DIE KAFFEESORTE
Bewahren Sie den Kaffee (Pulver, ganze Bohnen) in einem luftdicht schließenden
Behälter an einem kühlen, trockenen Ort auf. Sie sollten den Kaffee allerdings nicht in
den Kühlschrank oder das Tiefkühlfach stellen.
Sie können fertig gemahlenen Kaffee verwenden. In diesem Fall sollten Sie das Kaffeepulver im Laufe einer Woche verbrauchen, da sich das Aroma mit der Zeit verflüchtigt.
Wir empfehlen ganze Kaffeebohnen zu kaufen und direkt vor der Zubereitung zu mahlen. Kaffeebohnen sollten nicht länger als 1 Monat gelagert werden.
DAS WASSER
Beim Aufbrühen des Kaffees sollten Sie darauf achten, dass das Wasser mit der richtigen
Geschwindigkeit durch das Pulver gepresst wird.
• Wenn das Wasser zu langsam fließt, wird der Kaffee sehr dunkel und bitter. Der
Schaum auf dem Kaffee wird fleckig.
20

• Wenn das Wasser zu schnell fließt, bleibt ein großer Teil der Aromastoffe im Kaf-
feepulver zurück und der Kaffee wird wässrig, fade und schaumlos. Sie können die
Wasserströmung beeinflussen, indem Sie das Kaffeepulver beim Einfüllen mehr oder
weniger fest andrücken. Eventuell können Sie den Kaffee auch gröber oder feiner
mahlen.
HINWEISE ZUM KAFFEEPULVER
Wenn Sie fertig gemahlenen Kaffee verwenden, dann vergewissern Sie sich, dass das
Kaffeepulver für Espresso/Cappuccino-Maschinen geeignet ist. Wenn Sie den Kaffee
selbst mahlen, dann sollte das Pulver nicht zu grob und nicht zu fein sein. Dadurch beeinflussen Sie die Geschwindigkeit, mit der das Wasser durch das Pulver gepresst wird und
bestimmen letztendlich die Qualität Ihres Kaffees.
• Wenn der Kaffee zu fein gemahlen ist (das Kaffeepulver gleicht Puderzucker und
fühlt sich zwischen den Fingern an wie Mehl) dann kann das Wasser auch unter
Druck nicht durch das Pulver fließen. Der Kaffee wird dadurch dunkel und bitter und
der Schaum wird fleckig.
• Wenn der Kaffee zu grob gemahlen ist, dann fließt das Wasser zu schnell durch
und die Aromastoffe bleiben im Kaffeepulver zurück. Der Kaffee wird wässrig und
fade.
DEN KAFFEE ANDRÜCKEN
Nachdem Sie die richtige Menge Kaffeepulver in den Filter gefüllt haben, müssen Sie
das Kaffeepulver möglichst gleichmäßig andrücken. Das Kaffeepulver muss ziemlich fest
angedrückt werden.
• Wenn Sie das Kaffeepulver zu fest andrücken, dann fließt das Wasser zu langsam
durch das Pulver. Der Kaffee wird dunkel und bitter.
• Wenn Sie das Kaffeepulver zu wenig andrücken, dann fließt das Wasser zu schnell
durch und die Aromastoffe bleiben im Kaffeepulver zurück. Der Kaffee wird wässrig
und fade.
21

PFLEGE UND REINIGUNG
WARNUNG: Brühkopf, Filterhalter, Filter und Dampfdüse werden beim Betrieb sehr
heiß. Außerdem kann bei eingeschaltetem Gerät heißes Wasser oder Dampf austreten.
Schalten Sie das Gerät immer zuerst aus (Auswahlschalter in die mittlere Bereitschaftsposition drehen, dann Ein/Aus-Taste drücken), ziehen Sie den Netzstecker aus der Steckdose, warten Sie bis das Gerät abgekühlt ist und leeren Sie den Wassertank und die
Tropfschale aus, wenn Sie das Gerät nicht benutzen, das Gerät bewegen, oder reinigen
wollen.
Niemals das Gerät oder die Bauteile des Geräts in der Spülmaschine reinigen. Niemals
das Gerät oder das Netzkabel mit Flüssigkeiten übergießen oder in Flüssigkeiten stellen
oder tauchen.
Niemals das Gerät oder die Bauteile des Geräts mit scharfen Reinigern oder irgendwelchen Chemikalien (Bleiche, Desinfektionsmittel, Entkalker) reinigen. Niemals das Gerät
oder die Bauteile mit Scheuermitteln oder harten Scheuerhilfen (Beispiel: Topfreiniger)
reinigen. Niemals harte oder scharfkantige Gegenstände für die Arbeit mit dem Gerät
oder zum Reinigen verwenden.
Wenden Sie bei der Arbeit mit dem Gerät keine Gewalt an, um die Bauteile nicht zu
beschädigen.
Das Reinigungswerkzeug enthält eine spitze Nadel. Achten Sie darauf, sich nicht an der
Nadel zu stechen. Lassen Sie kleine Kinder niemals mit den Bauteilen und Zubehören
des Geräts oder dem Reinigungswerkzeug spielen.
DIE DAMPFDÜSE REINIGEN
Reinigen Sie die Dampfdüse jedes Mal, nachdem Sie Milch aufgeschäumt haben, da
Eiweiß und Fett in der Milch sonst feste Krusten bilden, durch die die Düse verstopft werden kann.
1. Vergewissern Sie sich unbedingt zuerst, dass der Auswahlschalter in der Bereit-
schaftsposition (mittlere Position) steht und die Dampfdüse nicht mehr heiß ist.
2. Vergewissern Sie sich, dass die kleinen Öffnungen auf jeder Seite der Dampfdüse
offen sind. Wenn die Öffnungen verstopft sind, dann nehmen Sie das Reinigungswerkzeug und stechen Sie die Öffnungen mit der Nadel des Reinigungswerkzeug
frei.
3. Wischen Sie die Dampfdüse mit einem feuchten Tuch ab. Schwenken Sie danach
die Dampfdüse über die Tropfschale und nehmen Sie die Hand von der Düse.
4. Drücken Sie die Heißwassertaste (HOT WATER) und schalten Sie den Auswahlschalter
auf die Dampfposition. Dadurch werden Rückstände der Milch aus der Düse gespült.
5. Schalten Sie den Auswahlschalter zurück auf die Bereitschaftsposition und drücken
Sie die Ein/Aus-Taste (POWER), um das Gerät auszuschalten. Ziehen Sie den Netz-
22

stecker und lassen Sie das Gerät abkühlen.
6. Wenn die Dampfdüse durch Ablagerungen verstopft ist, dann stechen Sie die Düse
mit der Nadel im Reinigungswerkzeug frei.
7. Wenn die Dampfdüse auch dadurch nicht durchgängig wird, dann nehmen Sie die
Spitze der Dampfdüse ab. Schieben Sie dazu die Sechskantöffnung in der Mitte des
Reinigungswerkzeugs über die Spitze der Dampfdüse und schrauben Sie die Spitze
dann ab.
8. Weichen Sie die Düsenspitze etwa 10 Minuten in warmer Spülmittellösung ein und
öffnen Sie dann die Bohrung in der Düsenspitze mit der Nadel im Reinigungswerkzeug. Achten Sie dabei darauf, sich nicht mit der Nadel zu stechen.
9. Schrauben Sie die Düsenspitze wieder auf die Dampfdüse und ziehen Sie die
Düsenspitze mit dem Reinigungswerkzeug leicht fest.
ACHTUNG: Wenden Sie beim Festschrauben der Düsenspitze keine Gewalt an, um
das Gewinde nicht zu überdrehen. Die Düsenspitze muss nur leicht angezogen werden,
so dass keine Lücke zwischen dem Düsenrohr und der Düsenspitze bleibt.
FILTER, FILTERHALTER UND BRÜHKOPF REINIGEN
1. Spülen Sie den verwendeten Filter und den Filterhalter direkt nach jeder Verwendung
mit klarem Wasser. Entfernen Sie dabei alle Reste des Kaffeepulvers. Wenn die
Poren im Filter verstopft sind, dann können Sie die Nadel im Reinigungswerkzeug
verwenden, um die Poren zu öffnen.
2. Die Innenseite des Brühkopfs wischen Sie am besten mit einem feuchten Tuch aus,
um die Reste des Kaffeepulvers zu entfernen.
3. Spülen Sie den Filterhalter und den Brühkopf regelmäßig durch. Setzen Sie dazu
den Filterhalter mit einem der Filter (ohne Kaffeepulver!) am Gerät ein und lassen Sie
etwas Wasser durchlaufen, um Reste des Kaffeepulvers aus den Poren zu spülen.
DAS GEHÄUSE UND DIE WÄRMPLATTE REINIGEN
Das Gehäuse des Geräts und die Wärmplatte wischen Sie am besten mit einem weichen, feuchten Tuch ab. Trocknen Sie das Gerät danach sorgfältig mit einem sauberen
Tuch ab.
ACHTUNG: Verwenden Sie niemals Scheuermittel oder harte Scheuerhilfen (Beispiel:
Topfreiniger) zur Reinigung des Geräts oder der Bauteile.
23

TROPFSCHALE UND ZUBERHÖRFACH REINIGEN
1. Ziehen Sie die Tropfschale nach vorn aus dem Gerät heraus und leeren Sie die
Tropfschale aus (spätestens nach einem Tag oder wenn die Füllstandsanzeige
anzeigt, dass die Tropfschale voll ist). Besonders wenn die Tropfschale sehr voll ist,
müssen Sie darauf achten, den Inhalt beim Herausziehen nicht zu verschütten.
WARNUNG: Wenn Flüssigkeiten über oder unter das Gerät gelaufen sind, dann
ziehen Sie sofort den Netzstecker und trocknen die Flüssigkeit mit einem sauberen Handtuch ab, bevor Sie das Gerät wieder in Betrieb nehmen.
Für eine gründliche Reinigung der Tropfschale können Sie den Füllstandsanzeiger aus der
Tropfschale herausnehmen. Der Füllstandsanzeiger ist einfach festgeklammert.
2. Nehmen Sie das Rost und bei Bedarf den Füllstandsanzeiger aus der Tropfschale
heraus. Sie können den Füllstandsanzeiger nach oben herausheben, in dem Sie mit
dem Finger in die Öffnungen an den Längsseiten des Füllstandsanzeigers fassen.
3. Nachdem Sie die Tropfschale aus dem Gerät gezogen haben, können Sie das
Zuberhörfach herausnehmen.
4. Reinigen Sie Tropfschale, Rost, Füllstandsanzeiger und Zubehörfach mit einem wei-
chen feuchten Tuch und etwas warmer Spülmittellösung. Trocknen Sie die Bauteile
danach gut ab.
5. Setzen Sie nach der Reinigung gegebenenfalls den Füllstandsanzeiger wieder ein.
Dazu müssen die Ränder des Füllstandsanzeigers rechts und links in die Führungen
eingeführt werden. Drücken Sie den Füllstandsanzeiger dann ganz nach unten, bis
er hörbar einrastet.
DAS GERÄT ZUSAMMENSETZEN
Arbeiten Sie nach folgender Anleitung, um alle Bauteile nach der Reinigung wieder richtig am Gerät einzusetzen.
1. Im Zubehörfach können Sie die Filtereinsätze und das Reinigungswerkzeug auf-
bewahren. Setzen Sie das Zubehörfach bei ausgebauter Tropfschale von vorn in
den Gerätesockel und schieben Sie das Zubehörfach dann ganz nach hinten.
2. Legen Sie das Edelstahlrost auf die Tropfschale. Fassen Sie die Tropfschale dann an
ihrem Griff und schieben Sie die Tropfschale an der Vorderseite des Geräts in den
Gerätesockel.
3. Fassen Sie den Wassertank an der Griffmulde und schieben Sie den Wassertank über
der Tropfschale in die Rückwand des Geräts. Die vordere Wand des Wassertanks muss
mit den Seitenwänden der Gerätesäule glatt abschließen und darf nicht herausstehen.
24

ENTKALKEN DER MASCHINE
Verkalkungen vorbeugen:
Bei normalem Gebrauch des Geräts können sich Kalkablagerungen im Wassertank und
in der Maschine sammeln und so die Leistung der Maschine beeinträchtigen und die
Qualität des Kaffees beeinflussen.
Der Entkalkungsvorgang:
Ihre Espressomaschine sollte regelmäßig unter Berücksichtigung des Härtegrades Ihres
Wassers entkalkt werden. Hierbei ist die Verwendung schonender Entkalkungsmittel
wichtig, die kein Metall angreifen. Bitte verwenden Sie zum Entkalken ausschließlich
den Gastroback Premium Entkalker (Art.-Nr.: 98175). Dieser Entkalker enthält spezielle
metallschonende Additive und ist auf die in unseren Maschinen verwendeten Bauteile
abgestimmt.
Bei dem Gastroback Premium Entkalker verwenden Sie eine Mischung aus 100 ml Entkalker und max. 2000 ml Wasser. Aufgrund der unterschiedlichen Wasserhärten und
Benutzungen können wir hier keine genauen Vorgaben über die Häufigkeit machen.
Die folgende Tabelle ist eine unverbindliche Empfehlung und dient nur zur Orientierung.
Härtebereich Empfohlene Häufigkeit Liter oder Wochen
weich alle 150 Liter alle 16 bis 24 Wochen
mittel alle 90 Liter alle 8 bis 10 Wochen
hart alle 60 Liter alle 4 Wochen oder wenn ›Clean Me‹ leuchtet
1. Die Vorbereitung:
• Drehen Sie den Auswahlschalter in die Bereitschaftsposition, drücken Sie auf die
POWER-Taste, um das Gerät auszuschalten.
• Entfernen Sie den Siebträger.
• Füllen Sie die Mischung aus 2000 ml Wasser und 100 ml Gastroback Premium
Entkalker in den Wassertank.
• Stellen Sie einen ausreichend großen Behälter unter den Brühkopf und die Dampf-
düse.
• Sobald das Gerät die richtige Temperatur erreicht hat, erlischt die Heizkontrolllampe.
2. Die Entkalkung:
• Drehen Sie den Auswahlschalter in die Espresso-Position und lassen Sie etwa die
Hälfte des Entkalker/Wassergemischs durch den Brühkopf laufen.
25

• Aktivieren Sie die „Hot Water-Taste“ und drehen Sie den Auswahlschalter in die
Dampffunktion. Lassen Sie die andere Hälfte des Entkalker/Wassergemischs
durch die Dampfdüse laufen.
• Sobald der Wasserstand bis unter die Marke 500 ml gesunken ist, schalten Sie
den Schalter in die Bereitschaftsposition zurück.
• Drücken Sie die Ein-/Aus-Taste, um das Gerät AUSzuschalten und ziehen Sie den
Netzstecker aus der Steckdose.
3. Der Spülvorgang:
• Entnehmen Sie den Wassertank und spülen Sie ihn mit klarem Wasser durch.
Anschließend füllen Sie ihn erneut mit frischem Wasser und setzten ihn wieder ins
Gerät ein.
• Stellen Sie ein ausreichend großes Gefäß unter den Brühkopf und die Dampfdüse.
• Drehen Sie den Auswahlschalter in die Dampfposition und lassen Sie die andere
Hälfte des Entkalker/Wassergemischs durch die Dampfdüse laufen.
• Sobald der Wasserstand bis unter die Marke 500 ml gesunken ist, schalten Sie
den Schalter in die Bereitschaftsposition zurück.
• Entfernen Sie nach dem Entkalken den Wassertank erneut und spülen Sie ihn
gründlich aus und füllen ihn mit frischem, kaltem Leitungswasser auf.
• Das Gerät ist jetzt einsatzbereit.
Hinweis:
Geräteschäden, die durch Kalkablagerungen in und am Gerät verursacht werden,
sind nicht Teil der Gewährleistung. Falls Sie Ihr Gerät zu einer technischen Überprüfung einsenden möchten, legen Sie bitte keine Anbauteile wie z. B. Filterträger und
Wasserauffangschale bei.
WARNUNG: Der Wassertank sollte während des Entkalkens nicht entfernt oder
komplett geleert werden.
26

STÖRUNGEN BESEITIGEN
Problem Mögliche Ursache Die einfache Lösung des Problems
Der Kaffee läuft nicht
durch.
Der Kaffee läuft zu
schnell durch.
Der Kaffee läuft an der
Außenseite des Filterhalters
herunter.
Das Gerät ist nicht eingeschaltet oder hat keinen
Strom.
Der Wassertank ist leer. Füllen Sie ausreichend Wasser ein.
Der Auswahlschalter steht
nicht auf der EspressoPosition.
Der Kaffee ist zu fein
gemahlen.
Der Kaffee ist zu fest angedrückt.
Der Filter ist verstopft Reinigen Sie den Filter. Sie können die Poren des Filters mit
Der Kaffee ist zu grob
gemahlen.
Sie haben zu wenig Kaffee
eingefüllt.
Der Kaffee ist nicht fest
genug angedrückt.
Der Filterhalter ist nicht richtig
am Brühkopf eingesetzt.
Auf dem Filterrand ist Kaffeepulver verschüttet.
Zu viel Kaffeepulver im Filter.
Das Kaffeepulver ist zu fest
angedrückt.
Falscher Filter für die verwendete Kaffeemenge.
Prüfen Sie: Ist der Netzstecker eingesteckt und das
Geräteingeschaltet (Ein/Aus-Taste leuchtet)?
Drehen Sie den Auswahlschalter nach rechts auf die
Espresso-Position.
Verwenden Sie ein Kaffeepulver, das für Espresso-Maschinen geeignet ist; siehe ‚Nützliche Tipps’.
Drücken Sie das Kaffeepulver nicht zu fest in den Filter;
siehe ‚Nützliche Tipps’.
dem Reinigungswerkzeug durchgängig machen; siehe ‚Pflege
und Reinigung’.
Verwenden Sie ein Kaffeepulver, das für Espresso-Maschinen geeignet ist; siehe ‚Nützliche Tipps’.
Füllen Sie eine ausreichende Menge an Kaffeepulver ein;
siehe ‚Einen Kaffee zubereiten’.
Drücken Sie das Kaffeepulver fester in den Filter; siehe
‚Nützliche Tipps’.
Setzen Sie den Filterhalter richtig ein. Siehe: ‚Den Filterhalter einsetzen’.
Wischen Sie verschüttetes Kaffeepulver sorgfältig vom
Rand des Filters ab, bevor Sie den Filterhalter am Gerät
einsetzen.
Verwenden Sie die richtige Menge Kaffee für den richtigen
Filter. Drücken Sie das Kaffeepulver nicht so fest an.
Verwenden Sie die richtige Menge Kaffee für den richtigen
Filter.
27

Problem Mögliche Ursache Die einfache Lösung des Problems
Der Kaffee tropft nur spärlich aus dem Filter.
Das Gerät macht ein ungewöhnliches Sauggeräusch.
Der Kaffee ist zu schwach
oder wässrig.
Der Kaffee ist zu kalt. Das Gerät wurde nicht vor-
Kein Schaum Der Kaffee ist nicht fest
Zu wenig Wasser im Wassertank.
Das Kaffeepulver ist zu fein
gemahlen.
Die Wasserkanäle im Gerät
und/ oder die Filterporen
sind verstopft.
Der Wassertank ist leer. Füllen Sie ausreichend Wasser in den Tank.
Der Wassertank ist nicht rich-
tig eingesetzt.
Das Kaffeepulver ist zu grob
gemahlen.
geheizt.
Die Tassen wurden nicht vorgewärmt.
Die Milch ist nicht heiß
genug (für Cappuccino oder
Latté).
genug angedrückt.
Das Kaffeepulver ist zu grob
gemahlen.
Das gemahlene Kaffeepulver
war schon zu alt.
Die Filterporen sind verstopft.
Füllen Sie den Wassertank auf.
Verwenden Sie Kaffeepulver, das für die Espresso-Maschine
geeignet ist. Fertig gemahlenes Kaffeepulver ist entsprechend gekennzeichnet.
Entkalken Sie das Gerät und öffnen Sie die Poren des Filters mit der Nadel des Reinigungswerkzeugs.
Setzen Sie den Wassertank richtig am Gerät ein. Die Vorderseite des Wassertanks muss mit den Seiten der Gerätesäule glatt abschließen und darf nicht hervorstehen.
Verwenden Sie Kaffeepulver, das für die Espresso-Maschine
geeignet ist. Fertig gemahlenes Kaffeepulver ist entsprechend
gekennzeichnet.
Warten Sie vor dem Aufbrühen des Kaffees immer, bis
die rote Heizkontrolllampe verlischt. Erst dann hat das
Gerät die richtige Temperatur erreicht.
Die Wärmplatte (auf dem Gerätedach) wird beheizt,
sobald Sie das Gerät einschalten. Stellen Sie Ihre Tassen
einige Zeit dort ab, bevor Sie den Kaffee aufbrühen.
Verwenden Sie den Schaumbecher zur Zubereitung des
Milchschaums und halten Sie die Hand dabei unter den
Boden des Krugs. Wenn der Boden des Krugs zu heiß
zum Anfassen wird, dann hat die Milch die richtige Temperatur.
Drücken Sie das Kaffeepulver etwas fester an; siehe ‚Das
Kaffeepulver andrücken’.
Verwenden Sie Kaffeepulver, das für Espresso-Maschinen
geeignet ist. Siehe: ‚Hinweise zum Kaffeepulver’.
Bewahren Sie gemahlenen Kaffee nicht länger als 1
Woche in einem luftdicht schließenden Gefäß auf.
Durchstoßen Sie die Filterporen mit der Nadel am Reinigungswerkzeug. Siehe ‚Filter, Filterhalter und Brühkopf
reinigen’.
28

Problem Mögliche Ursache Die einfache Lösung des Problems
Das Gerät macht pulsierende, pumpende
Geräusche während des
Brühvorgangs oder beim
Aufschäumen der Milch.
Das Gerät erzeugt weder
Dampf noch heißes
Wasser.
Die Milch lässt sich nicht
aufschäumen.
Das Gerät arbeitet nicht. Das Gerät ist eingeschaltet,
Dies sind die normalen
Arbeitsgeräusche des Geräts.
Das Gerät ist nicht eingeschaltet.
Der Wassertank ist leer. Füllen Sie den Wassertank auf.
Der Auswahlschalter steht
nicht auf der Dampfposition.
Die Dampfdüse ist verstopft. Lassen Sie die Dampfdüse abkühlen und versuchen Sie
Das Gerät entwickelt nicht
genug Dampf.
Die Milch ist nicht frisch oder
nicht kalt genug.
arbeitet aber nicht.
-/-
Vergewissern Sie sich, dass das Gerät Strom hat und eingeschaltet (Ein/Aus-Taste) ist.
Drehen Sie den Auswahlschalter in die Dampfposition.
Wenn Sie Dampf brauchen, dann drücken Sie die Dampftaste (STEAM); für heißes Wasser drücken Sie die Heißwassertaste (HOT WATER).
die Dampfdüse mit dem Reinigungswerkzeug zu öffnen.
Wenn dies nicht gelingt, dann nehmen Sie die Dampfdüse ab und reinigen Sie die Dampfdüse nach der Anleitung
im Abschnitt ‚Die Dampfdüse reinigen’.
Die Dampfdüse könnte verstopft sein. Siehe: ‚Die Dampfdüse reinigen’.
Die Milch muss frisch und kalt sein. Siehe: ‚Milch schäumen’.
Die automatische Sicherheitsabschaltung der Heizung
könnte angesprochen haben, weil die Pumpe überhitzt
ist. Schalten Sie das Gerät aus und warten Sie etwa
1/2 bis 1 Stunde, bevor Sie das Gerät wieder einschalten.
29

LAGERUNG
Setzen Sie das Gerät nach der Reinigung wieder zusammen. Die Zubehöre des Geräts
bewahren Sie am besten im Zubehörfach auf. Bewahren Sie das Gerät an einem für kleine Kinder unzugänglichen Ort auf, an dem es vor übermäßigen Belastungen geschützt
ist. Legen Sie niemals harte, scharfkantige oder schwere Gegenstände auf das Gerät
um die Wärmplatte oder das Rost nicht zu beschädigen.
ENTSORGUNGSHINWEISE
Gerät und Verpackung müssen entsprechend den örtlichen Bestimmungen zur
Entsorgung von Elektroschrott und Verpackungsmaterial entsorgt werden. Informieren Sie sich gegebenenfalls bei Ihrem örtlichen Entsorgungsunternehmen.
Entsorgen Sie elektrische Geräte nicht im Hausmüll, nutzen Sie die Sammelstellen der
Gemeinde. Fragen Sie ihre Gemeindeverwaltung nach den Standorten der Sammelstellen. Wenn elektrische Geräte unkontrolliert entsorgt werden, können während der
Müllverbrennung oder Verwitterung gefährliche Stoffe in die Luft und ins Grundwasser
und damit in die Nahrungskette gelangen, und die Flora und Fauna auf Jahre vergiftet
werden. Wenn Sie das Gerät durch ein neues ersetzen, ist der Verkäufer gesetzlich verpflichtet, das alte mindestens kostenlos zur Entsorgung entgegenzunehmen.
INFORMATION UND SERVICE
Weitere Informationen erhalten Sie im Internet unter www.gastroback.de.
Wenden Sie sich mit Problemen, Fragen und Wünschen gegebenenfalls an:
GASTROBACK Kundenservice, Tel.: 04165/2225-0
oder per E-Mail: info@gastroback.de
30

GEWÄHRLEISTUNG/GARANTIE
Wir gewährleisten für alle Gastroback-Elektrogeräte, dass sie zum Zeitpunkt des Kaufes
mangelfrei sind. Nachweisliche Fabrikations- oder Materialfehler werden unter Ausschluss weitergehender Ansprüche und innerhalb der gesetzlichen Frist kostenlos ersetzt
oder behoben. Ein Gewährleistungsanspruch des Käufers besteht nicht, wenn der Schaden an dem Gerät auf unsachgemäße Behandlung, Überlastung und/oder Installationsfehler zurückgeführt werden kann. Ohne unsere schriftliche Einwilligung erfolgte,
technische Eingriffe von Dritten, führen zum sofortigen Erlöschen des Gewährleistungsanspruchs. Der Käufer muss zur Geltendmachung des Anspruchs den Original-Kaufbeleg
vorlegen und trägt im Gewährleistungsfall die Kosten und das Risiko des Transportes.
Hinweis:
Kunden aus Deutschland und Österreich: Für die Reparatur- und Serviceabwicklung
möchten wir Sie bitten, Gastroback Produkte an folgende Anschrift zu senden: Gastroback GmbH, Gewerbestr. 20, 21279 Hollenstedt.
Kunden anderer Länder: Bitte kontaktieren Sie Ihren Händler
Bitte haben Sie dafür Verständnis, dass unfreie Sendungen nicht angenommen werden
können. Einsendung von Geräten: Bitte verpacken Sie das Gerät transportsicher, ohne
Zubehör und legen Sie den Garantiebeleg sowie eine kurze Fehlerbeschreibung bei.
Die Bearbeitungszeit nach Wareneingang des defekten Gerätes beträgt ca. 2 Wochen;
wir informieren Sie automatisch. Bei defekten Geräten außerhalb der Garantie senden
Sie uns das Gerät bitte an die angegebene Adresse. Sie erhalten dann einen kostenlosen Kostenvoranschlag und können dann entscheiden, ob das Gerät zu den ggf. anfallenden Kosten repariert, unrepariert und kostenlos an Sie zurück gesendet oder vor Ort
kostenlos entsorgt werden soll.
Das Gerät ist ausschließlich für den Privatgebrauch bestimmt und ist nicht für den gewerblichen Betrieb ausgelegt. Verwenden Sie das Gerät nur wie in dieser Gebrauchsanleitung
beschrieben. Jede andere Verwendung gilt als nicht bestimmungsgemäß und kann zu
Sachschäden oder sogar zu Personenschäden führen. Der Hersteller übernimmt keine
Haftung für Schäden, die durch nicht bestimmungsgemäßen Gebrauch entstanden sind.
31

KAFFEESPEZIALITÄTEN
EINFACHER ESPRESSO
Intensiv und aromatisch. Für einen Espresso (oder
kleinen Schwarzen) brauchen Sie 7 g Kaffeepulver.
Brühen Sie etwa 30 ml auf und servieren Sie in
einem kleinen Glas oder einer Tasse.
GROSSER SCHWARZER
Ein großer Schwarzer wird für gewöhnlich zunächst
als Standard-Espresso hergestellt. Danach wird
nach Geschmack heißes Wasser zugegeben.
FLACHER WEISSER
Ein einfacher Espresso wird in einer Tasse oder
einem Glas mit heißer Milch überschichtet. Mengenverhältnis: ½ Kaffee, ½ heiße Milch.
KLASSISCHER KAFFEE LATTÉ
Dies ist der traditionelle Morgenkaffee in Italien und
Frankreich. Der Kaffee wird typischerweise in einem
Glas serviert. Dazu wird ein Täfelchen Schokolade
oder süßes Gebäck gereicht.
Zubereitung: Zunächst wird ein einfacher Espresso aufgebrüht. Dann wird die selbe Menge heiße
Milch langsam am Innenrand der Tasse hinunter
gegossen, um eine kremige Beschaffenheit und
eine schöne Schaumschicht zu erreichen.
MOCHA FRAPPE (ZWEI PORTIONEN)
Diese herrliche Erfrischung ist im Handumdrehen
fertig und wird die Genießer von Kaffee und Schokoladen-Drinks gleichermaßen begeistern. Schmelzen Sie zwei gehäufte Teelöffel einer geraspelten
Qualitätsschokolade in zwei doppelt starken kleinen
Espressos. Geben Sie eine halbe Tasse kalte Milch
dazu und 9 Eiswürfel. Mixen Sie das Ganze in
einem Mixer bei langsamer Geschwindigkeit durch,
bis die Mischung eine glatte, samtige Beschaffenheit hat. Verteilen Sie die Mischung auf 2 Gläser
und servieren Sie sofort.
ESPRESSO AFFOGATO
Diese süße Versuchung ist einfach unwiderstehlich
und besteht aus einer Kugel Premium-Vanilleeis in
Espresso. Eventuell können Sie auch einen Schuss
von Ihrem Lieblings-Likör dazu geben. Für die Optik
servieren Sie diese Köstlichkeit in einem MartiniGlas mit zwei Mürbeteig-Keksen.
CON PANNIA
Con Pannia bedeutet: Mit Sahne. Dies ist eine
schicke Variante des althergebrachten Wiener Kaffees. In einer Tasse für 90 bis 120 ml wird ein
doppelter Espresso gefüllt und mit einem Schlag frischer kremig geschlagener Sahne garniert. Mit Zimt
bestäuben und sofort servieren.
CAPPUCCINO
Der echte Cappuccino wird sehr leicht und lauwarm serviert. Dazu werden 1/3 einfacher Espresso mit 1/3 heißer Milch aufgefüllt und mit 1/3
Milchschaum überschichtet. Für die perfekte Optik
halten Sie ein Blatt Papier über eine Hälfte der Tasse während Sie etwas geraspelte Schokolade über
die andere Hälfte streuen.
MACCHIATO
Ein kleiner Espresso wird in eine 70-ml-Tasse gefüllt
und mit einem Löffel feinem Milchschaum garniert.
32

DESSERTS
VANILLEPUDDING MIT FRISCHEN
HIMBEEREN AUF MOKKA-BASIS
Für 6 Personen
Zutaten:
» 750 ml Sahne
» ¾ Tasse feiner Kandis
» 2 Vanilleschoten, längs aufgeschnitten
» 1 Esslöffel Gelatine
» ¾ Tasse starker, abgekühlter Espresso
» 1 Körbchen frische Himbeeren
» 1 Esslöffel zusätzlicher feiner Kandis oder
Rohrzucker
Zubereitung:
1. Mischen Sie Sahne, Zucker und Vanilleschoten
in einem Topf. Rühren Sie bei mittlerer Hitze
bis die Mischung gerade aufkocht. Nehmen
Sie dann die Vanilleschoten heraus.
2. Geben Sie die Gelatine dazu und rühren Sie
mit einem Holzlöffel weiter, bis die Gelatine
aufgelöst ist. Nehmen Sie den Topf vom Herd
und warten Sie bis die Mischung abgekühlt
ist.
3. Verteilen Sie die Mischung gleichmäßig auf
sechs 150-ml-Gläser und stellen Sie die Gläser mindestens 3 Stunden in den Kühlschrank
oder bis die Mischung stockt.
4. Verteilen Sie die Himbeeren in einer mittel-
großen Schüssel, streuen Sie Zucker darüber
und zerdrücken Sie die Beeren mit der Gabel.
5. Mischen Sie den kalten Kaffee unter die Bee-
ren, decken Sie die Mischung ab und stellen
Sie die Schüssel in den Kühlschrank.
6. Verteilen Sie die Fruchtmischung auf den Vanil-
lepuddings und servieren Sie mit frischem Kaffee.
TIRAMISU
Für 4 Personen
Zutaten:
» 1½ Tassen Mascarpone oder
» Doppelrahmfrischkäse
» 1¼ Tassen Sahne
» 2½ Esslöffel Puderzucker
» ½ Tasse starker Espresso, abgekühlt
» ½ Tasse Tia Maria oder Amaretto
» 16 Biskuitstäbchen
» Kakaopulver zum Bestäuben
Zubereitung:
1. Mischen Sie Mascarpone, Sahne und Puderzucker in einer großen Schüssel. Schlagen Sie
die Mischung mit dem Schneebesen auf, bis
sie eine kremige Beschaffenheit erreicht. Stellen Sie die Mischung dann kalt.
2. Mischen Sie den Kaffee und den Likör in einer
Schüssel. Tauchen Sie die Biskuitstäbchen kurz
in die Kaffee/Likör-Mischung. Legen Sie die
Hälfte der Biskuitstäbchen in einer Schale aus.
Der Boden der Schale muss vollständig mit Biskuitstäbchen bedeckt werden.
3. Schichten Sie die Hälfte der MascarponeCreme über die Biskuitstäbchen. Legen Sie
dann die restlichen Biskuitstäbchen über der
Creme-Schicht aus.
4. Schichten Sie danach die restliche Mascarpone-Creme darüber.
5. Stäuben Sie Kakao darüber und stellen Sie
das Dessert bis zum Servieren mindestens ½
Stunde kalt.
6. Servieren Sie mit frischen Früchten (Beispiel:
Himbeeren) und frischem Kaffee.
33

KAFFEE-ZIMT-WALNUSS-MUFFINS
Für 12 Personen
Zutaten:
» 2½ Tassen Mehl
» 2 Teelöffel Backpulver
» 1 Teelöffel gemahlener Zimt
» ¾ Tassen feiner Kandis
» 1 Tasse Saure Sahne
» 2 Eier
» 1 Teelöffel fein geriebene Schale einer unge-
spritzten Zitrone
» ½ Tasse Olivenöl
» ¾ Tassen starker, abgekühlter Espresso
» 1 Tasse grob gehackte Walnüsse
Zubereitung:
1. Sieben Sie Mehl, Backpulver und Zimt zusammen in eine Schüssel und mischen Sie den
Zucker unter.
2. Mischen Sie Saure Sahne, Eier, Zitronenschale, Olivenöl und Espresso in einer mittelgroßen
Schüssel gut durch.
3. Kneten Sie diese Mischung unter die Mehlmischung. Rühren Sie dabei nicht zu stark durch.
4. Geben Sie den Teig in 12 leicht gefettete und
am Boden mit Backpapier ausgelegte MuffinFörmchen. Die Förmchen sollten bis zu 2/3
gefüllt sein.
5. Stellen Sie die Muffins in den auf 180°C vorgeheizten Ofen und backen Sie die Muffins
etwa 12 bis 15 Minuten bis die Muffins innen
gar sind.
6. Servieren Sie die noch warmen Muffins mit
etwas Puderzucker überstreut. Reichen Sie
dazu einen Cappuccino oder Café Latté.
GEHALTVOLLER KAFFEE-AUFSTRICH
Zutaten:
» 2 Tassen gesiebter Puderzucker
» 1 Esslöffel schaumig geschlagene Butter
» ¼ Tasse starker, heißer Espresso
Zubereitung:
Mischen Sie die Hälfte des Kaffees, Puderzucker
und Butter in einer Schüssel. Rühren Sie gut durch
und geben Sie den restlichen Kaffee nach und
nach dazu bis Sie eine streichfähige Masse erhalten.
34

353637

OPERATING INSTRUCTIONS
DESIGN ESPRESSO MASCHINE ADVANCED S
Art.-Nr. 42609 S »Design Espresso Maschine Advanced S«
Read all provided instructions before first use!
Model and attachments are subject to change!
For household use only!

We attach a certain importance to your safety. Thus, we ask you to read all
provided instructions and information in this booklet carefully and complete-
ly, before you start running the appliance. This will help you to know all
functions and properties of your new appliance. We especially ask you to
adhere strictly to the safety information mentioned in these instructions.
TABLE OF CONTENTS
KNOWING YOUR DESIGN ESPRESSO MASCHINE ADVANCED S .................. 40
IMPORTANT SAFEGUARDS ......................................................................... 41
General Safety Instructions ...................................................................... 41
Notes for Texturing Milk ......................................................................... 44
Important Safeguards for Electrical Appliances ........................................... 45
High Temperatures—Risk of Burns ............................................................ 46
TECHNICAL SPECIFICATIONS ..................................................................... 47
OPERATING ............................................................................................. 48
Making the Espresso Machine Ready for Operation .................................... 48
Making Coffee ..................................................................................... 50
Filling the Water Tank and Preparing the Machine for Operation .................. 50
Pre-Warming the Cups ........................................................................... 51
Preparing the Coffee Powder .................................................................. 51
Dosing and Tamping the Coffee Powder ................................................... 51
Trimming the Dose ................................................................................ 52
Preparing the Group Head ..................................................................... 52
Assembling the Portafilter ........................................................................ 53
Starting the Brewing Cycle ..................................................................... 53
Pre-Infusion........................................................................................... 53
After Extraction—Emptying the Portafilter .................................................... 54
TEXTURING MILK—STEAM FUNCTION ......................................................... 54
HOT WATER ............................................................................................. 56
TIPS FOR BEST RESULTS .............................................................................. 57
CARE AND CLEANING .............................................................................. 58
SOLVING PROBLEMS ................................................................................. 65
STORING ................................................................................................. 69
NOTES FOR DISPOSAL ............................................................................... 70
INFORMATION AND SERVICE .................................................................... 70
WARRANTY .............................................................................................. 71
38

DEAR CUSTOMER!
This Espresso Machine will bring professional features and top-grade performance to
your coffee making. The durable housing and easy handling will assist you every day
in getting your daily coffee delight without effort.
These instructions for use will inform you about the various functions and features,
which make it easy to take pleasure in your new »Design Espresso Maschine
Advanced S«.
We hope that you will enjoy your new »Design Espresso Maschine Advanced S«.
Your Gastroback GmbH
39

KNOWING YOUR DESIGN ESPRESSO MASCHINE
ADVANCED S
Group head
with electronic PID
temperature control for
increased temperature
stability
Integrated removable
tamper
for level tamping:
magnetically fixed at the
group head to be always
at hand
Control dial
for selecting espresso
(left), standby (centre),
and steam (right).
Water tank
removable, 1.8 litres,
filled from the top,
with integrated water
filter
Extra-large warming tray
for heat-resistant cups
Extra-large warming tray
for heat-resistant cups
360° Swivel
steam wand
easily turned to the
desired position for
milk texturing
and pouring
hot water
Drip tray
removable,
including filling
level indicator
40
Stainless steel milk jug,
cleaning tool, strainer
and filter
Storage tray located
behind the drip tray for
storage of accessories
and tools

IMPORTANT SAFEGUARDS
Carefully read all instructions before operating this appliance and save for
further reference. Do not attempt to use or treat this appliance in any other
way or for any other than the intended use, then described in these instructions. Any unintended use and especially misuse may cause severe injuries
and damage due to electric shock, fire, and heat. Any utilization for any
other purpose than described in this booklet are forbidden by the manufacturer. There is no warranty claim of the purchaser or liability to recourse of the
manufacturer, if any damage and injuries are caused by unintended use or
improper treatment. Do not leave the appliance unattended while connected
to the power supply. The appliance is manufactured in compliance to the CE
certification guidelines.
These instructions are an essential part of the appliance. Do not
pass the appliance without this booklet to third parties. If there are
any uncertainties or additional information is required before use,
please feel free to contact an authorized service centre or the Gastroback Customer Care Center (phone: +49 (0)4165/22 25-0
e-mail: info@gastroback.de).
Any operation, repair and technical maintenance of the appliance or any
part of it (e.g. housing, power cord, or water tank) other than described in
these instructions may only be performed at an authorised service centre.
Please contact your vendor.
GENERAL SAFETY INSTRUCTIONS
• The espresso machine is designed for brewing coffee. Thus, some parts
(e.g. group head, portafilter, steam wand) will get very hot during operation and hot steam and water escape.
• Do not place the espresso machine or any of its parts or accessories in an
automatic dishwasher. DO NOT pour or spill any liquids on or under the
appliance or power cord. Do not immerse the appliance, power cord,
or power plug in water or other liquids.
• After filling the coffee powder into the filter basket, it must be tamped
as evenly as possible. Use the provided tamper. Apply a pressure of
15-20kg.
41

• Carefully remove all coffee powder spilled on the rim of the portafilter.
The rim of the portafilter must be completely clean to ensure a leak-free
seal at the group head, thus avoiding that steam and hot water escapes
from the group head.
• The remaining humidity of the coffee grinds after brewing is a normal
outcome of the brewing technique and not the result of any malfunction.
• This appliance is for household use only and NOT intended for use in
moving vehicles. Always keep the appliance where it is dry, frost-free,
and clean, and where young children cannot reach it. Operate and store
the appliance, where it is protected against humidity, moisture and inadmissible strain. Do not operate or store the appliance outdoors.
• Check the entire appliance regularly for proper operation—especially the
power cord. Do not operate the appliance, when the appliance or any
part of it is likely to be damaged or leaking, or has been subject to inadmissible strain (e.g. overheating, mechanical or electric shock, moisture in
the housing). The appliance or its parts are likely to be damaged, if the
appliance is not working properly. Do not use the appliance any more
when water is accumulating under the appliance. In this case, immediately unplug the appliance and get in contact with an authorized service
centre for examination and/or repair.
• Any use of accessories, attachments, tools, or spare parts that are not
recommended by the manufacturer or damaged in any way may result
in injuries to persons and/or damage.
• Always ensure that you have assembled the appliance completely and
correctly according to the instructions in this booklet before connecting
the appliance to the power supply and operating the appliance. Do not
use violence to avoid damage. Before each use, always ensure that you
have assembled and locked the portafilter correctly at the group head.
The appliance generates high pressure! Always ensure to turn the
control dial back to the central standby position, before removing the
portafilter.
• Operate the appliance on a well accessible, stable, level, dry, and suita-
ble large table or counter that is resistant against heat and moisture. Do
not operate the appliance in wet or moist areas. Do not place the appli-
42

ance on the edge of the table or counter. Do not let the plug or power
cord hang over the edge of the table or counter. Ensure that no one will
pull the appliance by the power cord.
• Do not place any clothes or tissues or similar materials on or under
the appliance during operation, to avoid overheating, fire and electric
shock. Do not place any heavy and/or sharp-edged foreign objects on
or in the appliance or any of its parts (e.g. warming plate or drip tray
rack), to avoid damage.
• Do not place the appliance or any part of it on a range, or on or near
hot surfaces (e.g. burner, heater, or oven). During operation keep the
appliance in an appropriate distance to any sensitive objects of at least
15 cm on each side, to avoid damage due to heat and moisture. Ensure
free access to the operating elements at the front of the appliance and
the water tank at the rear.
• Children must always be supervised to ensure that they do not play with
the appliance or any parts or accessories of the appliance or the packaging. Always keep the appliance where it is dry, frost-free, and clean,
and where young children cannot reach it. Do not leave the appliance or
any part of it unattended, when in reach of young children. Persons with
reduced physical, sensory or mental capabilities or lack of experience
and knowledge, including children, always need close supervision when
using electrical appliances.
• This appliance can be used by persons with reduced physical, sensory
or mental capabilities or lack of experience and knowledge, including
children aged from 8 years and above, if they have been given supervision or instruction concerning use of the appliance in a safe way and
understand the hazards involved. Always keep the appliance and the
power cord out of reach of young children younger than 8 years. Even
care and cleaning shall not be performed by children without supervision.
• For operation, only fill cold, clear tap water in the water tank. Do not fill
in any other liquids. For de-scaling do not use corrosive or toxic chemicals
or de-scalers. Only use the recommended solutions (see: >De-Scaling the
Machine<). Do not operate the appliance while the water tank is empty.
Avoid spilling water, when filling the water tank, inserting the filled water
tank, and removing the filled drip tray.
43

• Allow the espresso machine to cool for 2 minutes between each coffee
making cycle. Do not remove the portafilter during the extraction as the
machine is under pressure.
• Do not leave the appliance unattended while connected to the power
supply. Always turn the control dial to the central standby position, switch
off (press the POWER button), then unplug the appliance, and leave the
appliance cool down, before moving, or cleaning the appliance, or
when the appliance is not in use.
• Keep the appliance and its parts and accessories clean. Regularly de-
scale the appliance. Clean and de-scale the appliance according to
the instructions in chapter >Care and Cleaning< and >De-Scaling the
Machine<.
• Do not use any abrasive cleaners, cleaning pads (e.g. metal scouring
pads), or any corrosive cleaners (e.g. disinfectants, de-scalers). Do not use
any hard or sharp-edged objects for operating or cleaning the appliance.
• Do not place the appliance or any of its parts or accessories in an auto-
matic dishwasher.
• Do not use violence to avoid damage to the appliance and any of its
parts. Do not immerse the appliance in water or any other liquid!
NOTES FOR TEXTURING MILK
For texturing milk, immerse the steam wand into the milk. The seal above the
steam wand tip must be covered.
Note:
If steam is given off, while the steam wand is not immersed in the milk, the
milk could splash out of the milk jug.
IMPORTANT: Ensure that the milk will not run out of the milk jug
during texturing.
WARNING: Do not take the steam wand out of the milk while steam is still
coming out. Otherwise, hot milk could splash out of the milk jug. Always
switch the control dial back to the central standby position, before removing
the milk jug from the steam wand. Approximately 5 seconds after switching
44

off the steam function, the appliance will give off a short flash of steam. Keep
your hands and arms in appropriate distance to the steam wand and group
head to avoid scalds.
IMPORTANT SAFEGUARDS FOR ELECTRICAL APPLIANCES
The appliance is driven electrically. Place the appliance near a suitable wall
power socket to connect the appliance directly to a protected mains power
supply with protective conductor (earth/ground) connected properly. Ensure
that the voltage rating of your mains power supply corresponds to the voltage requirements of the appliance (220 - 240 V, ~50 Hz, AC, rated for at
least 16 A). The power outlet socket must be installed separately from other
power outlet sockets to avoid interference with other appliances. Do not use
any desk top multi socket outlet, external switching device, or remote control
systems, or extension cord to avoid risk of overheating, fire, or electric shock.
The installation of a residual current operated circuit breaker (r.c.c.d.) with a
maximum rated residual operating current of 30 mA in the supplying electrical circuit is strongly recommended. If in doubt, contact your electrician for
further information.
In various foreign countries, the specifications for power supplies are subject
to incompatible norms. Therefore it is possible that power supplies in foreign
countries do not meet the requirements for safe operation of the appliance.
Thus, before operating the appliance abroad, ensure that safe operation is
possible.
45

• DO NOT pour or spill any liquids on or under the appliance or power
cord. Do not immerse the appliance, power cord, or power plug in water
or other liquids. When liquids overflowed or are spilled on the housing
or power cord, do not touch the appliance but immediately unplug the
appliance. Thereafter, dry the appliance and let it dry naturally for at
least 1 day. Always immediately unplug the appliance, if the appliance
is likely to be leaking (liquid accumulates under the appliance).
• Always completely unwind the power cord before use.
• Power cords may never be knotted, twisted, pulled, strained or squee-
zed. Do not let the plug or power cord hang over the edge of the table
or counter. Ensure that no one will pull the appliance by the power cord.
Take care not to entangle in the power cord. Always grasp the plug to
disconnect the power cord.
• If the power cord is likely to be damaged, it must be replaced by an
authorized person to avoid hazards. Do not attempt to repair the power
cord!
HIGH TEMPERATURES—RISK OF BURNS
Your new »Design Espresso Maschine Advanced S« is designed for brewing
coffee. Thus, some parts will get very hot during operation and hot steam
and water escape.
• Before removing any parts (e.g.: portafilter, filter basket, steam wand tip)
always ensure that the parts cooled down to room temperature. Do not
touch hot parts.
• Only use the dedicated handles for moving hot parts (e.g. group head,
portafilter, steam wand) during operation and shortly thereafter to avoid
scalds. Even after operation these parts may be still hot.
• Hot water and hot steam can escape from the group head, portafilter,
and steam wand. Do not hold your hands and arms or any delicate
objects under or near these parts, while the appliance is still hot. Always
ensure that the steam wand points to the drip tray, when not in use.
• Before moving or cleaning the appliance, always wait until the appli-
ance cooled down completely, then empty the water tank and drip tray.
46

Always grasp the appliance at both sides at the bottom of the housing
for moving the appliance. Do not hold the appliance at the drip tray for
moving it.
ENERGY SAVING FUNCTION
The »Design Espresso Maschine Advanced S« features an energy saving
function. When being idle for approx. 10 minutes, the appliance will switch
back to an idle mode automatically with the POWER button flashing slowly.
After another 10 minutes of being idle, the appliance will shut off completely.
Simply press the POWER button to re-assume normal operation.
TECHNICAL SPECIFICATIONS
Model: Art.-Nr.: 42609 »Design Espresso Maschine Advanced S«
Power supply: 220-240 V AC, ~50 Hz
Maximum power consumption: 1.500 - 1.750 W
Length of power cord: approx. 90 cm
Weight: approx. 6.1 kg
Dimensions:
approx. 260 x 305 x 335 mm
(W x D x H)
Certificates:
47

OPERATION
WARNING—RISK OF CHOKING! Always ensure that young children do not play
with any packaging material of the appliance! Do not leave young children without
supervision with the appliance, any part of it, or the packaging in reach.
WARNING—RISK OF BURNS! During operation, some parts of the appliance get
very hot. Additionally, the appliance is designed to produce hot water and hot steam
under high pressure. Always ensure to assemble the appliance completely and correctly
before connecting the appliance to the power supply. Always switch OFF (press POWER
button), unplug and wait until the appliance cooled down, before cleaning or moving
the appliance.
Always keep the workspace clean and dry. Do not pour or spill any liquids on or under
the appliance. Do not place clothes or similar materials on or under the appliance during operation. If any liquid has been spilled on the appliance, immediately switch OFF
and unplug the appliance. Thereafter clean the appliance according to the instructions
in chapter >Care and Cleaning<.
Always turn the control dial to the central standby position, press the POWER button
to switch off, then unplug the appliance, and wait until the appliance cooled down,
before assembling or disassembling the water tank, drip tray, or storage tray, and before
moving or cleaning the appliance.
MAKING THE ESPRESSO MACHINE READY FOR OPERATION
Before first use
Remove all packaging and promotional materials. For shipping, the drip tray, storage
tray (behind the drip tray) and the water tank are installed correctly. The drip tray and
storage tray are mounted at the bottom of the housing and may be pulled out to the
front. However, the tool storage tray is hidden behind the drip tray. You must pull out
the drip tray first. The water tank is mounted at the rear of the appliance and can be
pulled upwards and out. The filter baskets (single-walled filter basket, double-walled filter basket), portafilter, milk jug, and tamper are fixed within the packaging. Ensure you
have found all parts and accessories before discarding the packaging. Check, whether
all parts are undamaged. We recommend to store the cleaning tools and filter baskets
not in use within the storage tray. This way these accessories will not get lost. Do not
immerse the housing, power cord or power plug in water or any other liquid.
1. The water tank is located at the back of the machine. At the rear rim of the water
tank, pull the silver-grey lid upwards for opening the water tank. Then grasp the
water tank at the handle and lift it upwards and out. Remove the water filter lying
within the water tank. Take it out, before rinsing the water tank.
2. Rinse the filter baskets, portafilter, tamper, and milk jug using some warm dish water.
Adhere to the hints in chapter >Care and Cleaning<.
48

3. Wipe the outer housing, drip tray, and storage tray with a soft damp cloth and dry
thoroughly.
Conditioning and Assembling the Water Filter
4. Take out the water filter from the water tank.
5. Disassemble the filter holder by pressing both flaps on the filter base simultaneously
while pulling the top and base of the filter holder apart. Soak the white filter pack in
a cup of water for 5 minutes. Then rinse the filter pack under cold running water.
6. Rinse the stainless steel mesh in the filter base with cold water. Lay the filter pack into
the filter top and re-assemble top and base of the filter holder.
7. To install the water filter, push it down into the water tank bottom to lock it into place
in the centre of the water tank. Ensure that the water filter is securely fitted inside the
tank.
8. Slide the water tank into position and push it down slightly. The outer walls and lid
of the water tank must be in straight line with the outer walls of the housing.
Flushing the Espresso Machine
9. Place the appliance onto a sufficient surface. Fill the water tank with up to 1.8 litres
of clear tap water. Then plug in the power plug.
10. Press the POWER button to switch on the appliance. A pumping sound will be heard
and the POWER button will be flashing. As soon as the machine reaches operating
temperature, it will go to standby mode and the POWER button will be illuminated
continuously.
11. It is recommended to perform several flushing cycles, without ground coffee, to ensure the machine has been conditioned. For this, with the machine in standby mode,
run the following 2 steps.
WARNING: When activating the coffee function or steam/hot water function, hot
water and steam are produced, escaping from the group head and/or steam wand.
Always keep your hands and arms in appropriate distance to avoid scalds.
12. Assemble the portafilter without coffee powder to the group head (see: >Making
Coffee<) and ensure that the steam wand is positioned with the tip facing to the drip
tray.
13. Turn the control dial to the left coffee position for 30 seconds. Then turn the control
dial to the right steam position to activate steam for 10 seconds. Repeat this cycle
several times.
49

MAKING COFFEE
WARNING: Do not leave the appliance or any part of it unattended, when in reach
of young children. Always ensure that you have assembled the appliance completely
and correctly according to the instructions in this booklet before connecting the appliance
to the power supply and operating the appliance. When activating the coffee function
or steam function, hot water and steam are given off under pressure, escaping from the
group head and/or steam wand. Always keep your hands and arms in appropriate
distance to avoid scalds.
Keep the workspace clean and dry. Do not allow any liquids run on or under the appliance. Do not place any clothes or tissues on or under the appliance during operation. If
liquids run out or are spilled in the housing, immediately unplug the appliance. Always
wipe off spilled liquids immediately and dry the appliance according to the instructions
in chapter >Care and Cleaning<.
FILLING THE WATER TANK AND PREPARING THE MACHINE FOR
OPERATION
CAUTION:
Always ensure that the filling level within the water tank is between the MIN
(250 ml) and MAX (1800ml) marking line before operating the appliance. Check the
filling level before each use and fill in clear tap water in time.
We do not recommend the use of highly filtered, de-mineralized or distilled water as this
may affect the taste of the coffee and how the espresso machine is designed to work.
Use clear tap water or low-mineral table water.
Note:
Check the water level before use and replace the water daily. The water tank should
be filled with fresh, cold tap water before each use. Do not use de-mineralised or distilled water or any other liquid.
IMPORTANT: Ensure not to spill the water when re-assembling the water tank.
1. Open the water tank lid and carefully fill the water tank with cold tap water to the
MAX marking on the side of the tank.
2. Plug the power plug into the power outlet.
3. Press the POWER button. The POWER button surround will flash, while the machine
is heating. When the correct temperature has been reached, the POWER button and
SELECT button on the control panel will illuminate continuously.
50

PRE-WARMING THE CUPS
WARNING: Only use heat-resistant cups and glasses. Other materials could crack,
burst, or melt. This way, splinters or other particles could get into your coffee, causing
severe injuries.
4. As soon as the appliance is switched on, the warming tray on top of the housing is
activated. Place your cups onto the warming tray for pre-heating. A warm cup will help
maintaining the coffee’s optimal temperature.
PREPARING THE COFFEE POWDER
IMPORTANT:
If you wish to utilize ready-to-use espresso pads, make sure to choose the
dedicated pad filter basket labelled with „pod“ at the bottom. Do not use usual coffee
pads, as these are too large for fitting into the pad filter basket. When using espresso
pads, simply place only one single espresso pad into the pad filter basket, ensuring that
the rim of the filter basket is not covered by the paper filter of the espresso pad.
1. First, insert the desired filter basket into the portafilter. The filter basket is fixed within
the portafilter via a spring. Press the filter basket into the portafilter until it settles. The
rim of the filter basket must lie flat against the rim of the portafilter.
If you wish to use coffee powder, proceed as described below.
DOSING AND TAMPING THE COFFEE POWDER
When using whole bean coffee, ground directly before extracting. In this case, it is
TIP:
best to use the single wall filter basket. If using pre-ground coffee, you should use the dual
wall filter basket. However, for optimal flavour when using a 1 CUP filter, you should
extract approx. 30ml. When using a 2 CUP filter, you should extract approx. 60ml. If
you wish to brew somewhat more coffee (e.g. filling a coffee mug) you should use the
dual wall filter basket. In this case, fill the appropriate amount of water into the mug via
the hot water function (see: >Hot Water<). Then add the coffee.
2. Fill the filter basket with ground coffee, level the surface. When using the 1 CUP
filter basket, fill in 1 level measuring spoon full of coffee powder. For the 2 CUP filter basket, you may need twice as much. The filter mesh is adjusted to develop the
correct pressure for the extraction when filled with the required amount. Thus, it is
essential to use the correct amount (see: >Tips for Best Results<).
3. Using the provided tamper, tamp down the coffee powder firmly, applying approx.
15-20kg of pressure. It’s important to apply consistent pressure every time.
51

Note:
As a guide to dose, the top edge of the metal cap on the tamper should be level with
the top of the filter basket AFTER the coffee has been tamped. This will minimise under
or over dosing the coffee.
TIP: After usage, you may store the tamper below the group head. For this, at the left
side of the group head there is an opening where the tamper will be held in place via
a magnet.
4. If required, use the Razor™ precision tool for trimming the coffee powder to the cor-
rect level for a consistent extraction (see below: >Trimming the Dose<).
5. Thoroughly wipe excess coffee from the rim of the filter basket to ensure that a proper
seal in the group head is achieved.
TRIMMING THE DOSE
The Razor™ precision dose trimming tool allows you to trim the puck of coffee powder
to the correct level for a consistent extraction.
Fill the portafilter with freshly ground coffee and tamp down applying 15-20kg of pressure.
Insert the Razor™ precision tool into the filter basket until its shoulders rest on the rim of
the filter basket. The blade of the dosing tool should penetrate the surface of the tamped
coffee a little.
Rotate the Razor™ precision tool back and forth while holding the portafilter on an angle
over a bowl. This way, trim off excess coffee. Thereafter, your coffee filter basket is filled
properly with the correct amount of coffee powder.
PREPARING THE GROUP HEAD
WARNING: Hot steam and water will escape from the group head during operati-
on. Do not hold your hand or any other part of your body under or directly near the
group head while the appliance is switched on.
Before placing the portafilter into the group head, for purging run a short flow of water
through the group head.
6. Ensure that the control dial is turned to the central standby position. Then plug in
the appliance and press the POWER button to switch on the appliance. A pumping
noise will be heard and the POWER button will be flashing until the appropriate
temperature is reached. The POWER and SELECT buttons and the STEAM indicator
will be illuminated continuously, when the machine is ready for operation.
52

7. Ensure that the drip tray is in correct position. Turn the control dial for approx. 10
seconds to the left coffee position. A pumping noise is heard and some steam and
hot water will escape from the group head. During operation, the STEAM indicator
will flash.
8. Turn the selector knob back to the central standby position.
ASSEMBLING THE PORTAFILTER
9. Align the portafilter handle with the INSERT position on the group head.
10. Lift the portafilter to insert it into the group head and rotate the handle towards the
LOCK position. With the handle facing at right angle to the front of the appliance,
the portafilter will be locked tightly at the group head.
STARTING THE BREWING CYCLE
With the POWER button and SELECT button illuminated continuously, the appliance has
reached the required temperature for brewing coffee.
11. Ensure that the drip tray and the rack of the drip tray are inserted in correct position.
Place one or two pre-warmed cups below the portafilter spouts.
12. Then turn the selector to the left coffee position. It may last some seconds until coffee
is given off with a pumping noise.
13. When a sufficient amount of coffee has flowed into the cup, turn the control dial to
the central standby position to stop the coffee extraction. We recommend approx.
30 seconds of extraction. The appliance will keep the group head at the correct temperature for brewing coffee. However, when being idle for more than 10 minutes,
the appliance will shut off the heating elements automatically to save energy. The
POWER button will flash slowly for another 10 minutes. Thereafter, the machine will
switch off completely.
14. If you do not wish to brew another cup of coffee, press the POWER button to switch
off the appliance. Then unplug the appliance. Leave the appliance cool down, then
clean the appliance according to the instructions in chapter >Care and Cleaning<.
Note:
If the machine is run continuously for 30 minutes, allow the machine to cool for approx.
5 minutes before each use. However, make a break of 2 minutes after each extraction.
PRE-INFUSION
With the control dial switched to the left coffee position, the low pressure pre-infusion
gradually increases water pressure to gently expand grinds for an even extraction before
53

increasing to full pressure. This way the coffee powder gently expands, giving a more
even extraction. This will enable top-quality extraction of the oils and flavours of the coffee powder leading to the optimum taste.
AFTER EXTRACTION—EMPTYING THE PORTAFILTER
WARNING: The metal parts of the portafilter will be very hot during use and there-
after. Only touch the portafilter by the black handle. Cool the portafilter in cold water
before touching the portafilter or filter basket with your hands.
15. After the extraction, first remove your filled vessel from the drip tray and place it on
the warming plate.
16. Remove the portafilter from the group head. For this, hold the portafilter by the black
handle, ensuring not to touch the metal parts. Rotate the portafilter to the INSERT
position to unlock it and lower it down from the group head.
17. Empty the portafilter by holding it upside down and hitting the coffee grinds out. Dis-
pose of the coffee grinds in domestic waste or degradable organic waste. Do not
dispose of the grinds in the sink to avoid clogging the outlet pipe.
18. The filter basket is locked within the portafilter via a spring. To remove the filter
basket from the portafilter, lift the filter basket by the notch at the side of the portafilter.
19. Rinse the filter basket and portafilter with clear tap water, wipe dry, and leave dry
naturally.
TEXTURING MILK—STEAM FUNCTION
WARNING—RISK OF BURNS! Shortly after operation, the steam wand will be
very hot and hot steam and hot water could escape from the steam wand. Do not hold
your hands near the steam wand tip. Always ensure that the steam wand points to the
drip tray, when not in use. Children must always be supervised when they are
near the espresso machine.
Note:
For optimum milk texturing performance it is critical that the hole in the steam wand tip
is clear. A blocked hole may affect the ability of the steam wand to produce a satisfactory amount of froth. Prior to texturing milk, always purge the steam wand by shortly
turning the control dial to the right steam position. Keep a clean, damp cloth at hand
to wipe the steam wand after usage.
54

Note:
If the machine is run continuously for 30 minutes, allow the machine to cool for 5
minutes before each use. Always start with fresh, cold milk.
There are two phases to texturing milk. The first is stretching the milk to aerate it and the
second is swirling the milk to make it silky smooth. These two operations should blend
into one.
1. Ensure that the water tank is filled with a sufficient amount of water (at least 250 ml,
MIN marking). If required, switch on the appliance by pressing the POWER button.
2. For texturing milk, fill the jug just below the V at the bottom of the spout with fresh,
cold milk. At a minimum, there should be enough milk to cover the steam wand up
to at least 2 cm to prevent the milk from splashing out.
TIP: It may take a few seconds until steam appears. A pumping noise will be heard
during steam generation. This is normal.
Fat-reduced milk will give the best results. However, different brands and types of milk
and milk alternatives will texture differently. Additionally, the freshness of the milk will
have high influence.
Note:
The auto-purge function ensures the coffee will not be burnt by the initial water flow
from the Thermocoil being too hot after steam generation. The water is automatically
released internally into the drip tray ensuring that the Thermocoil is at optimal temperature for extracting espresso. Your espresso will always be extracted at the optimal
temperature ensuring only the best flavours are extracted. However, according to the
auto-purge function, a short flow of steam could escape from the group head after
steam generation.
3. Before inserting the steam wand into the milk, it is recommended to purge the steam
wand. For this, first ensure that the steam wand points to the drip tray. Then turn the
control dial to the right steam position. The STEAM indicator will flash, indicating
that the Thermocoil is heated for producing steam.
4. After some steam is given off, pause the steam by returning the control dial back to
the central standby position. This will avoid the milk splashing out of the jug. The
steam will pause for some seconds. Then a short steam flow will escape from the
group head, due to the auto-purge function.
5. Insert the steam tip 1-2cm below the surface of the milk close to the right hand side
of the jug at the 3 o’clock position. Turn the control dial to the right steam position
again to texture the milk.
6. Keep the steam wand tip just under the surface until the milk is spinning, producing
a vortex (whirlpool effect).
55

7. With the milk spinning, slowly lower the jug. This will bring the steam tip to the sur-
face of the milk and start to introduce air into the milk. You may have to gently break
the surface of the milk with the tip to get the milk spinning fast enough.
8. Keep the tip at or slightly below the surface to continue maintaining the vortex. Tex-
ture the milk until sufficient volume is obtained.
9. For heating the milk, lower the tip beneath the surface, but keep the vortex of milk
spinning. The milk is at the correct temperature (60-65°C) when the jug is hot to
touch.
WARNING: Do not touch the steam wand as they will be hot! Do not
remove the steam wand from the milk as long as steam is still generated to avoid hot
milk from splashing vigorously. Always switch the control dial back to the central standby
position, before removing the milk jug.
10. To stop the steam, turn the control dial back to the central standby position. Wait a
moment until the auto-purge function has produced some steam at the group head.
Then, lift the steam wand by the handle and remove the milk jug.
11. Wipe the steam wand immediately with a damp cloth. Then turn the steam wand
back to facing the drip tray.
12. To purge the steam wand, press the SELECT button to activate the HOT WATER func-
tion. Turn the control dial to the right steam position. After some hot water is given
off, turn the control dial back to the standby position.
TIP: Consume textured milk, before the milk begins to separate.
13. Pour the hot milk into your coffee and spoon the froth on top.
We recommend the following mixture:
• Cappuccino: 1/3 espresso, 1/3 hot milk, 1/3 milk froth
• Traditionally, latté is served in a high glass: 1/3 espresso with a layer of 1/3 hot
milk above, and a top layer of approx. 1 cm milk froth.
HOT WATER
WARNING—RISK OF BURNS! Even after operation, hot steam and hot water
could escape from the steam wand. Additionally, the metal parts of the steam wand will
be very hot. Do not hold your hands near the tip of the steam wand. Do not touch the
metal parts of the steam wand, with the machine switched on and some time thereafter.
The HOT WATER function can be used to preheat cups and the portafilter or give off
hot water manually for a mug of coffee, tea, hot chocolate etc. Via the SELECT button,
you can toggle steam function and hot water function as you like.
56

Note:
The machine will automatically default to the steam function when the appliance
is first switched on and after turning the control dial back to the central standby
position. The various functions, (espresso, steam, and hot water) cannot be operated
at the same time.
To use the hot water function:
1. Press the SELECT button. The HOT WATER indicator will illuminate.
2. Direct the steam wand towards the drip tray or into your heat-resistant vessel.
3. Turn the control dial to the right steam position. Hot water will be coming out of the
steam wand.
4. To stop the hot water flow, turn the control dial back to the central standby position.
Note:
Do not take more than 1 litre of hot water in a cycle. The machine is not intended for
producing large amounts of hot water, for filling a pot of coffee or tea. The water will
decrease in temperature, when taking too large amounts.
TIPS FOR BEST RESULTS
Preparing perfect coffee is an art you will learn quite easily using your new espresso
machine. This chapter will give you good advice for your perfect coffee delight.
For optimal flavour when using a 1 CUP filter, you should extract approx. 30ml. When
using a 2 CUP filter, you should extract approx. 60ml.
The taste of your coffee should be adapted to your individual liking. The type of coffee beans is crucial as well as the grind size (fine or coarse). Additionally, the pressure
applied when tamping the coffee in the filter basket will have an influence. Thus, you
should give it a try.
SELECTION AND STORAGE OF COFFEE BEANS
Store coffee beans, coffee powder, or espresso pads in an air-tight and dry container on
a cold, dark place. Vacuum seal if possible. However, you should not place the coffee
into the refrigerator or freezer.
Buy coffee beans in small batches to reduce the storage time.
It is best to grind directly before the extraction to maximise flavour. Consume coffee beans
within a month. Consume pre-ground coffee within a week to avoid loss of flavour.
57

THE EXTRACTION
The extraction time is essential for your perfect coffee. Try to achieve 25 to 35 seconds.
If the water flows too slowly, the espresso will be over extracted, dark and bitter with
inhomogeneous crema.
If the water flows too quickly, the espresso will be under extracted, weak and watery in
taste, possibly without crema.
Adapt tamping pressure and grind size to get the optimum water flow.
THE GRIND
When purchasing pre-ground coffee, ensure that the coffee is suited for espresso
machines.
When grinding coffee beans, the grind size should be fine but not too fine. The grind
size will affect the rate at which the water flows through the coffee powder, thus influence the taste of the espresso.
If the grind is too fine (looks like powder and feels like flour when rubbed between
fingers), the water will not flow through the coffee when under pressure. The resulting
espresso will be dark in colour and bitter in flavour. The crema will get inhomogeneous.
If the grind is too coarse the water will flow through the ground coffee too quickly. The
resulting espresso will be poor in colour and flavour and without crema.
TAMPING THE COFFEE POWDER
After filling in the correct amount of coffee powder, the puck of coffee must be tamped
as even as possible. For this, use the provided tamper. It is essential to apply a sufficient
high pressure of approx. 15-20 kg.
However, with too high pressure the water will flow too slowly. The resulting espresso
will be dark and bitter.
If the tamping pressure, is too low the water will flow too quickly leading to an espresso
with lack of flavour and colour.
CARE AND CLEANING
WARNING: Always ensure that the appliance is out of reach of young children.
Group head, portafilter, filter basket, and steam wand will get very hot during operation.
Steam and hot water may escape from the group head, steam wand, and portafilter
during operation and shortly thereafter. Handle with care to avoid scalds.
58

Always switch OFF the appliance (turn the control dial to standby, press POWER button), then unplug the appliance, and leave the appliance cool down, before moving or
cleaning the appliance. Do not attempt to move the appliance or disassemble any parts
during operation.
Do not clean the appliance, or power cord, or any of the parts or accessories in an
automatic dishwasher! Do not immerse the housing, or power cord in water or any other
liquid, to avoid hazards due to electric shock and damage. Do not spill or drip any
liquids on the housing and power cord to avoid risk of overheating, fire, and electric
shock.
Do not use any abrasive cleaners or cleaning pads (e.g. metal scouring pads) for cleaning the appliance or any parts of it, to avoid damage to the surfaces. Do not use any
hard or sharp-edged objects for cleaning. Do not use any violence.
The steam wand tool holds a fine pin. Handle with care to avoid pricking anyone. Do
not leave little children play with any part or accessory of the appliance including the
cleaning tools.
REPLACING THE FILTER PACK AND CLEANING THE WATER TANK
The water filter helps to prevent the accumulation of scale within the inner parts of the
machine, as this can affect the performance of your machine over time, potentially causing blockages and heating problems. Replacing the filter pack of the water filter every
two months with the designated filter pack will reduce the mineral build-up in the machine (see: >De-Scaling the Machine<). If you live in a hard water area, we recommend
to change the water filter more frequently.
Note:
Visit www.gastroback.de or call your vendor to purchase the designated filter packs
for the water filter. Please contact your vendor for further reference.
1. Remove the filter pack from the plastic bag, and soak the filter pack in a cup of water
for 5 minutes.
2. Lift the water tank up and out of the machine. Empty the water tank.
3. Pull the water filter out of the water tank by the top ring. Disassemble the filter holder
by pressing the two flaps at the base of the filter holder simultaneously while pulling
the two parts of the filter holder apart. Dispose of the exhausted filter pack in domestic waste. Wash the stainless steel mesh in the base of the filter holder with water.
4. Rinse the new, soaked filter pack under cold running water for some seconds. As
a memory aid, you may set the white date dial on top of the filter holder 2 months
ahead.
59

5. Reassemble the filter holder with the new filter pack. Rinse the water tank thoroughly.
6. To install the water filter, push it down in the water tank to lock it into place above
the central water outlet.
TIP: The water filter may be removed from the water tank during operation, if the hard-
ness of water is extremely low.
7. Hold the water tank upright at both sides with the flat side facing to you. Then slide
the water tank down at the back of the appliance. The sides of the water tank and
top of the lid must be in straight line with the housing of the machine.
CLEANING THE STEAM WAND
WARNING—RISK OF BURNS! During use and even shortly thereafter, hot water
and steam could escape from the steam wand and the steam wand will be hot. Do not
hold your hands or any delicate objects at the steam wand tip while the steam wand is
still hot. Ensure that the steam wand always points to the drip tray, when not in use.
IMMEDIATELY AFTER USE
Note:
After every use, thoroughly wipe the steam wand and tip with a damp cloth, then purge immediately. Otherwise, the milk texturing performance may be affected due to
blockage of the steam nozzle within the steam wand tip.
1. Ensure that the control dial is in the central stand by position.
2. After each usage, carefully wipe the steam wand tip using a soft damp cloth, taking
care not to touch the metal parts of the steam wand with your skin. Thereafter, by
the handle move the steam wand over the drip tray.
3. Press the SELECT button to select the hot water function. Then, while ensuring to keep
your hands away from the steam wand, turn the control dial to the right steam position. The appliance will give off hot water via the steam wand, thus purging residues
of milk from the nozzle (a small hole) in the steam wand tip.
4. Ensure to turn the control dial back to the central standby position.
Note:
If the water only drips from the steam wand, the nozzle in the steam wand tip may
be clogged. Proceed according to the following instruction to remove the obstacle.
60

5. Ensure that the control dial is in the central standby position. Be
aware that the steam wand could still be hot. By the handle, lift the
steam wand to an upper position.
6. Insert the pin of the steam wand tool carefully into the nozzle of the steam wand tip
to remove any obstacles.
7. Press the SELECT button to select the hot water function. Then, while ensuring to keep
your hands away from the steam wand, turn the control dial to the right steam position to purge the nozzle in the steam wand tip.
8. Turn the control dial back to standby position.
REMOVE OBSTACLES FROM THE NOZZLE OF THE STEAM WAND
NOTE:
Even a partially blocked nozzle may affect the ability of the steam wand to pro-
duce a sufficient froth volume when texturing milk.
9. Ensure that the control dial is in the central standby position, switch off (press the
POWER button), and unplug the appliance. Leave the appliance cool down.
10. Unscrew the steam wand tip. For this, you may put on the central hole of the steam
wand tool to the steam wand tip and then turn the steam wand tip by the steam
wand tool. (The steam wand tip is mounted via a right-hand thread as almost any
other threaded nut).
11. Soak the steam wand tip, using some warm dishwater. Thereafter try to remove the
obstacle in the nozzle via the pin of the steam wand tool again. Rinse the steam
wand tip thoroughly.
CAUTION: Do not over tighten the steam wand tip, to avoid damage to the seal.
However, for operation, there may be no gab between the steam wand tip and steam
wand pipe.
12. Screw the steam wand tip back onto the steam wand pipe by hand.
Tip: When not in use, the steam wand may be left immersed in the milk jug filled with
clear water to reduce the risk of blockages.
CLEANING THE FILTER BASKET, PORTAFILTER, AND GROUP HEAD
1. Periodically run water through the machine with the portafilter and filter basket in
place, but without any ground coffee, to rinse out any residual coffee particles.
2. The filter basket and portafilter should be rinsed under hot water after each coffee
making session to remove all residual coffee grinds and oils.
3. If the holes in the filter basket become blocked, soak the filter basket and portafilter in
61

hot dishwater over night. Rinse thoroughly. However, you may use a fine needle or
pin for carefully opening blocked holes. Doing so, ensure not to damage the mesh.
Hold the filter basket up to the light to see, whether the holes are clear.
4. Use the provided nylon brush to remove any particles from the mesh of the shower
screen within the group head. Then wipe the interior of the group head using a soft
damp cloth to remove any further residues of coffee powder from the shower screen.
5. Thereafter, switch on the appliance and turn the control dial to the left coffee positi-
on for purging the group head. Let the water flow for approx. 20 seconds to remove any particles left. Then turn the control dial back to the central standby position.
Before proceeding in cleaning, switch off and unplug the appliance. Wait for the
appliance to cool down.
CLEANING THE HOUSING AND WARMING PLATE
IMPORTANT:
Do not use abrasive cleansers, pads or cloths, which could scratch the
surfaces.
The outer housing and cup warming tray can be cleaned with a soft, damp cloth. Polish
with a soft, dry cloth.
CLEANING THE DRIP TRAY AND STORAGE TRAY
WARNING: If liquids are spilled within the housing, always immediately unplug the
appliance. Thoroughly wipe dry the appliance and leave dry naturally for at least 1/2
hour, before connecting the appliance to the power supply again.
The drip tray should be removed, emptied and cleaned after each use or, at the latest,
when the filling level indicator is showing “Empty Me!”.
IMPORTANT: Do not use abrasive cleansers, pads or cloths, which can scratch the
surfaces. Avoid spilling water in the housing of the appliance, when removing the drip
tray. This holds especially when the drip tray is full up.
1. Carefully pull the drip tray out of the housing. Remove the rack from the drip tray.
Empty the drip tray in the sink.
2. Take out the filling level indicator by pulling it upwards. There will be some resi-
stance when doing so. Dispose of residues of coffee powder in domestic waste.
3. With the drip tray removed, you can take out the storage tray. Take out the items in
the storage tray.
4. Wash the drip tray, drip tray rack, filling level indicator, and storage tray in warm
soapy water. Wipe dry the storage tray and the drip tray.
62

5. Replace the filling level indicator. For this, hold the filling level indicator with the
inscription facing to the front side of the drip tray. Then insert the pins on the hinges
of the filling level indicator into the holders in the base of the drip tray and press the
filling level indicator firmly down until it settles with a click.
6. Replace any items, you wish to store in the storage tray. Then, insert the storage tray,
drip tray, and drip tray rack in the base of the housing.
DE-SCALING THE MACHINE
Avoiding the Deposition of Scale
After regular use, hard water can cause mineral build-up in and on many of the inter-
nal components, reducing the water flow and power of the machine, and affecting the
quality of your coffee.
We advise de-scaling the machine on a regular basis (every 2-3 months). Do not use
any corrosive chemicals as these could damage the metal and seals of the machine.
Instead you may use a mixture of white vinegar and water or, what‘s better, the Gastroback Premium De-Scaler (Art.-No.: 98175), containing special additives for preserving
the metal surfaces thus maintaining high performance of our machines. Mix 100ml of the
Gastroback Premium De-Scaler with up to 2000ml of clear water.
Because of the natural variations in water hardness and usage of the machine, we can
only give some guidelines for the frequency of de-scaling the machine. See the following
table as a rule of thumb:
Recommended frequency of de-scaling
Hardness Litres Weeks
low every 150 litres every 16 to 24 weeks
medium every 90 litres every 8 to 10 weeks
high every 60 litres up to 4 weeks
PREPARATIONS
1. Ensure that the control dial is in the central standby position. Switch off the machine
by pressing the POWER button and unplug the machine.
2. Remove the portafilter and water tank. Empty the water tank and remove the water
filter. Thereafter, re-assemble the water tank.
3. Pour the de-scaling mixture into the water tank.
4. Plug in the machine. Ensure that the control dial is in the central standby position and
press the POWER button to switch it on.
63

5. Place a sufficiently large container under both the group head and the steam wand.
When the appliance reaches the operating temperature, the POWER button will be
illuminated continuously. The machine is now ready for de-scaling.
THE DE-SCALING PROCESS
WARNING: Do not aspirate the vapours of any type of de-scaling solution to avoid
injuries to your respiratory tracts. Always ensure good ventilation during de-scaling.
CAUTION: During the de-scaling process, do not empty the water tank below the
250ml filling level (MIN marking). Do not remove the water tank with the appliance still
switched on.
6. Turn the control dial to the left coffee position and let half the de-scaler mixture run
through the group head (approx. 1 litre). Turn the control dial back to the central
standby position.
7. Press the SELECT button to select the hot water function. The HOT WATER indicator
will be illuminated. Then turn the control dial to the right steam position and allow
the liquid to run through the steam wand. While doing so, monitor the filling level in
the water tank. When the filling level drops below the 250ml MIN marking, set the
control dial back to the central standby position.
8. Press the POWER button to switch off the appliance.
PURGING THE MACHINE
9. Remove the water tank and rinse it thoroughly. Then re-assemble the water tank and
fill it with fresh cold water. Empty the container utilized for de-scaling and place it
back under the group head and steam wand.
10. To rinse the machine, press the POWER button and wait until the POWER button is
illuminated continuously (not flashing).
11. Turn the control dial to the left coffee position and run half the water through the
group head. Then run the water through the steam wand via the hot water function
(see above). While doing so, again monitor the filling level in the water tank. When
the filling level drops below the 250ml MIN marking, set the control dial back to
the central standby position.
12. Press the POWER button to switch off the appliance. Then remove the water tank
and rinse it thoroughly again. Re-assemble and fill the water tank with fresh cold
water. Remove the container from the drip tray and discard the water. The machine
is ready for use now.
64

Note:
The manufacturer will not be liable for any damage to the appliance caused by excessive build-up of scale. If you wish to send the appliance to the Customer Care Center
for examination, please do not add any attachments or accessories (e.g. portafilter
and drip tray).
SOLVING PROBLEMS
Problem Possible Reason The Solution
The coffee does not flow
from the group head.
Machine is not live, not
turned on, or did not reach
operating temperature.
Ensure the machine is plugged in and the POWER button
is illuminated continuously (not flashing). Allow time
for the machine to reach operating temperature. The
POWER button will stop flashing, when the machine is
ready-to-use.
The water tank is empty. Fill a sufficient amount of water into the water tank.
Avoid emptying the water tank below the 250ml MIN
marking.
The control dial is not turned
Turn the control dial left to the stop.
to the left coffee position.
The coffee powder is too
fine.
Too much coffee powder
and/or the coffee powder is
tamped too firmly.
Use coffee powder suited for espresso machines. See:
>Tips for Best Results<.
To press the coffee powder into the filter basket, apply a
pressure of 15-20kg via the provided tamper. See: >Tips
for Best Results< and >Trimming the Dose<.
The filter basket is clogged. Clean the filter basket. You may open clogged holes in the
filter mesh via a needle or fine pin. See: >Care and Cleaning<.
The water tank is not
inserted correctly.
Push the water tank down at the back of the appliance
until the outer sides of the water tank lie in straight line
with the housing of the appliance.
65

Problem Possible Reason The Solution
The coffee flows out too
quickly.
Coffee runs out around the
edge of the portafilter.
The coffee only drips
from the portafilter spouts
(restricted flow).
The coffee powder is too
coarse.
There is too little coffee powder in the filter basket.
You applied too little pressure when tamping the coffee
powder.
The portafilter is not inserted
in the group head correctly.
Particles of coffee powder are
on the filter basket rim.
Too much coffee powder in
the filter basket.
The coffee powder is tamped
too firmly.
You have selected an
unsuited filter basket.
Not enough water in the
water tank.
The coffee powder is too fine. Use coffee powder suited for espresso machines. See:
Too much coffee in the filter
basket.
The water system within the
machine or the filter basket
are clogged.
Use coffee powder with a grind size suited for espresso
machines. See: >Tips for Best Results<.
Use the measuring spoon to measure the sufficient amount
of coffee powder. Use the Razor™ precision tool after
tamping to get the correct amount. See: >Trimming the
Dose<.
To press the coffee powder into the filter basket, apply a
pressure of 15-20kg via the provided tamper. See: >Tips
for Best Results<.
Ensure that the handle of the portafilter is rotated to the
right until it is facing in right angle to the front of the appliance. See: >Preparing the Group Head<.
Clean excess coffee powder from the rim of the filter basket before assembling the portafilter to the group head to
ensure a proper seal.
Ensure to use the correct amount with the appropriate filter
basket. Use the Razor™ precision tool to get the correct
amount (see: >Trimming the Dose<).
Apply the correct pressure (15-20kg) when tamping the
coffee powder. See: >Tips for Best Results<.
Ensure to use the correct amount with the appropriate filter
basket. Use the 1 CUP filter basket for 1 cup of coffee and
the 2 CUP filter basket for 2 cups of coffee. See: >Tips for
Best Results<.
Fill the water tank. The filling level must be between
250ml (MIN) and 1800ml (MAX).
>Tips for Best Results<. Pre-ground coffee powder is labelled accordingly.
Ensure to use the correct amount with the appropriate filter
basket. Use the Razor™ precision tool to get the correct
amount (see: >Trimming the Dose<).
De-scale the machine. Clean the filter basket. You may use
a needle or fine pin to open clogged holes in the filter basket mesh. See: >Care and Cleaning<.
66

Problem Possible Reason The Solution
The machine is making an
unusual loud and continuous pumping noise.
The coffee is week and
watery.
The coffee is too cold. The machine did not reach
No crema. The coffee powder is not
The appliance is making
pulsing and pumping noises during operation.
Not enough water in the
water tank.
The water tank is not
inserted correctly.
The coffee powder has been
ground too coarsely.
the correct operating temperature.
You did not pre-heat the
cups.
The milk is not hot enough
(if making cappuccino or
latté etc).
tamped firmly enough.
The coffee powder is too
coarse.
The coffee powder is stale. Use freshly ground coffee beans. Store coffee powder in
The filter basket is clogged, Clean the filter basket. You may open clogged holes in
This is normal and no reason for concern.
Fill the water tank. The filling level must be between
250ml (MIN) and 1800ml (MAX).
Push the water tank down at the back of the appliance
until the outer sides of the water tank lie in straight line
with the housing of the appliance.
Use coffee powder suited for espresso machines. See: >Tips
for Best Results<. Pre-ground coffee powder is labelled
accordingly.
Before starting an extraction, always wait until the
POWER button is illuminated continuously (not flashing).
Rinse the cups via the hot water function, or place your
cups onto the warming plate on top of the machine,
before starting an extraction. Try to pre-heat the portafilter as well via the hot water function.
Use the provided milk jug for texturing milk. During operation, hold your hand on the milk jug to feel the temperature. The milk is sufficiently hot, when the bottom of
the milk jug gets too hot for touching it.
Apply the correct pressure (15-20kg) when tamping the
coffee powder. See: >Tips for Best Results<.
Use coffee powder suited for espresso machines. See:
>Tips for Best Results<. Pre-ground coffee powder is
labelled accordingly.
an airtight container. However, do not store it for more
than 1 week.
the filter mesh via a needle or fine pin. See: >Care and
Cleaning<.
No action required.
67

Problem Possible Reason The Solution
No steam, no hot water. The machine is not live, not
turned on, or did not reach
operating temperature.
The water tank is empty. Fill the water tank. The filling level must lie between
The control dial is not in the
right steam position.
The steam wand is clogged. Turn the control dial to standby, switch off the appliance,
Not enough milk texture. The steam wand is blocked. Clean the steam wand. See: >Cleaning the Steam
The milk is not fresh and/or
not cold enough.
Different brands and types
of milk and milk alternatives
will texture differently.
The machine is ‘on’ but
ceases to operate.
Possibly, the overheat protection is active.
Ensure the machine is plugged in and the POWER button
is illuminated continuously (not flashing). It may take
some seconds until steam is brought forth.
250m (MIN) and 1800ml (MAX).
Turn the control dial to the right (clockwise) to the stop.
let the steam wand cool down. Try to open the nozzle
(small hole in the tip of the steam wand) using the pin
of the steam wand tool. If the problem persists, clean
the steam wand as described in chapter >Cleaning the
Steam Wand<.
Wand<.
Use refrigerated and really fresh milk for texturing. See:
>Texturing Milk<.
You may need to vary your texturing method. Give it a
try. See: >Texturing Milk<.
Turn the machine off. Wait for 60 minutes. Then try
again. If the problem persists, call an authorized Service
Centre.
68

STORING
WARNING: Young children must be supervised that they do not play with
the appliance or any part or accessory of it.
always switch off (turn the control dial to standby, press the POWER button), and unplug
the appliance. Always leave the appliance cool down, before cleaning or storing the
appliance. Only store the appliance where it is protected against inadmissible strain
(e.g. moisture, electric or mechanic shock, frost, direct sunlight) and out of reach of
young children.
When the appliance is not in use,
CAUTION:
power cord for moving. Always grasp the appliance at both sides at the bottom of the
housing for moving it.
1. Clean the appliance and all parts and accessories before storage (see: >Care and
Cleaning<).
2. Remove and empty the water tank completely. Remove the filter pack from the water
filter. Then replace the filter holder and lock the water tank back into position. Lay
the power cord loosely around the appliance. The power cord may not be knotted,
squeezed, or bent. Do not pull or strain the power cord.
3. Ensure to store the appliance in upright position where it is clean and dry. Do not
place any hard or heavy foreign objects on or in the appliance or any part of it.
IMPORTANT: Do not use any parts or accessories of the appliance for any other pur-
pose than operating the appliance. It is good advice to store the parts and accessories
of the appliance with the appliance.
Do not grasp the appliance at the group head, drip tray, water tank, or
69

NOTES FOR DISPOSAL
Dispose of the appliance and packaging must be effected in accordance with
the corresponding local regulations and requirements for electrical appliances
and packaging. Please contact your local disposal company. Do not dispose
of electrical appliances as unsorted municipal waste, use separate collection
facilities. Contact your local government for information regarding the collection systems
available. If electrical appliances are disposed of in landfills, dumps, or refuse incineration, hazardous substances can leak into the groundwater or can be emitted into air, thus
getting into the food chain, and damaging your health and well-being. When replacing
old appliances with new once, the retailer is legally obligated to take back your old
appliance for disposal at least for free of charge.
INFORMATION AND SERVICE
Please check www.gastroback.de for further information. For technical support, please
contact Gastroback Customer Care Center by phone: +49 (0)4165/22 25-0 or e-mail
info@gastroback.de.
70

WARRANTY
We guarantee that all our products are free of defects at the time of purchase. Any
demonstrable manufacturing or material defects will be to the exclusion of any further
claim and within 2 years after purchasing the appliance free of charge repaired or
substituted. There is no Warranty claim of the purchaser if the damage or defect of the
appliance is caused by inappropriate treatment, over loading or installation mistakes.
The Warranty claim expires if there is any technical interference of a third party without
a written agreement. The purchaser has to present the sales slip in assertion-of-claim and
has to bear all charges of costs and risk of the transport.
The appliance is intended for household and occasional commercial use.
Do not attempt to use this appliance in any other way or for any other
purpose than the intended use, described in these instructions. Any other
use is regarded as unintended use or misuse, and can cause severe injuries or damage. There is no warranty claim of the purchaser if any injuries or damages are caused by unintended use.
The warranty period will be reduced to 1 year, if the appliance is used commercially.
Note:
Customers from Germany and Austria: For repair and service, please send Gastroback
products to the following address: Gastroback GmbH, Gewerbestr. 20, D-21279
Hollenstedt, Germany.
Customers from other countries: Please contact your dealer.
Please agree that we cannot bear the charge of receipt. Submission of appliances:
Please ensure packing the appliance ready for shipment without accessories. Add the
sales slip and a short fault description. The processing time after receipt of the defective
appliance will be approx. 2 weeks; we will inform you automatically. After the warranty period, please send defective appliances to the given address. You will get a free
quotation and, thereafter, can decide, whether we shall repair the appliance to the costs
possibly accrued, send back the defective appliance for free of charge, or dispose of
the appliance for free of charge.
The appliance is intended for household use only and not suited for commercial, industrial or trade usage. Do not attempt to use this appliance
in any other way or for any other purpose than the intended use, described in these instructions. Any other use is regarded as unintended use or
misuse, and can cause severe injuries or damage. There is no warranty
claim of the purchaser if any injuries or damages are caused by unintended use.
71

GASTROBACK GmbH
Gewerbestraße 20 . 21279 Hollenstedt / Germany
Telefon + 49 (0) 41 65 / 22 25 - 0 . Telefax + 49 (0) 41 65 / 22 25 -29
info@gastroback.de . www.gastroback.de
20170327
 Loading...