

Page 1
GASTROBACK
Operating Instructions
and
Ricepes
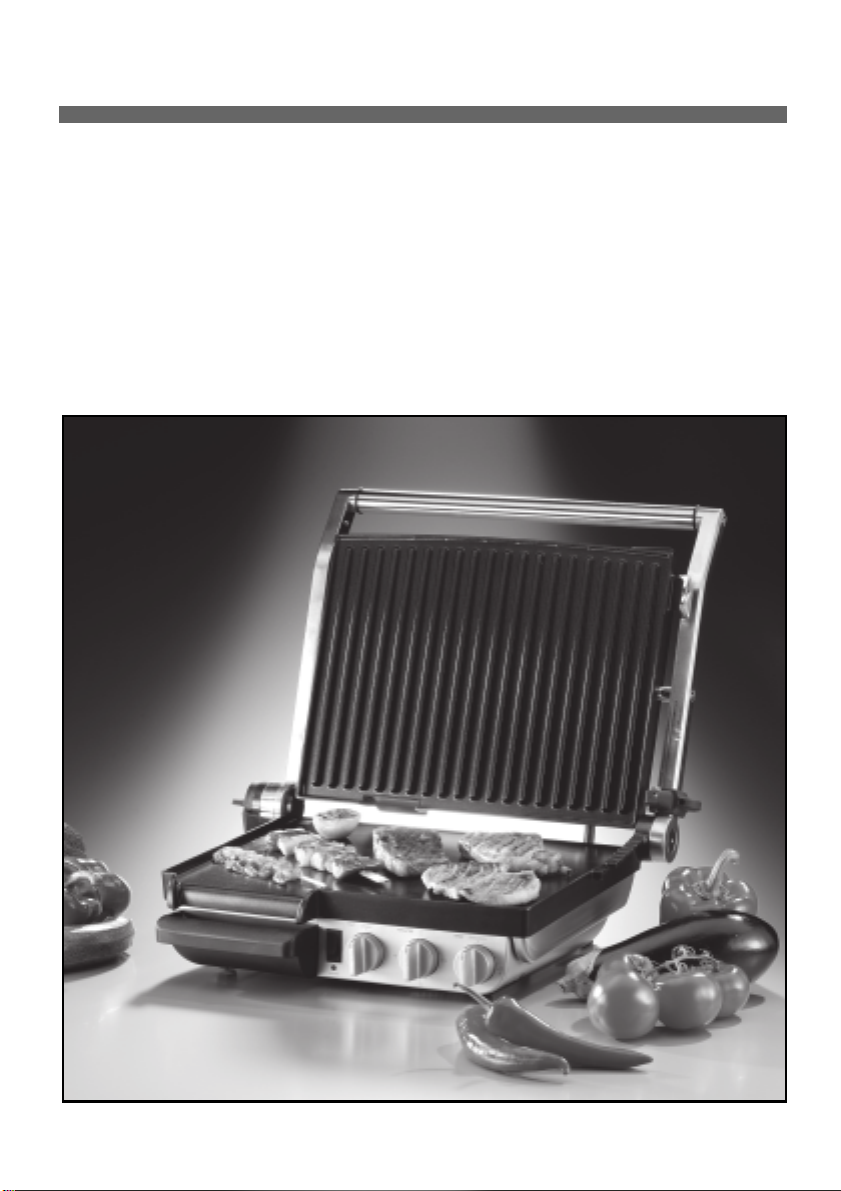
DESIGN GRILL-BARBECUE ADVANCED
®
Art.-No. 42504
Page 2

Important Safeguards
Carefully read all instructions before operating this appliance and save for further reference. Do not attempt to use this appliance for any other than the intended use, described in
these instructions. Any other use, especially misuse, can cause severe injuries or damage by
electric shock, heat or fire.
Any operation, repair and technical maintenance of the appliance or any part of it other than
described in these instructions may only be performed at an authorised service centre. Please
contact your vendor.
• Do not attempt to operate the appliance if the appliance or any parts are likely to be damaged or subject to inadmissible strain (i.e. mechanical or electric shock, overheating, moisture
in the interior). Before use, always check the appliance and each part of it on impeccable operation. The pins of the power plug must be tidy, smooth and clean. Any use of accessories,
attachments or spare parts not recommended by the manufacturer may result in fire, electric
shock and injuries to persons. If the appliance or any part of it is likely to be defective or not
operating in the intended way, immediately unplug from power supply and return the entire
appliance to an authorised service centre for examination and repair.
• Any maintenance, repair and operation other than described in these instructions must be
performed at an authorised service centre to avoid risk of electric shock, fire or injuries to persons. Do not operate the appliance with any parts or accessories not recommended by the
manufacturer.
• Close supervision is necessary when the appliance is used near young children. Do not let
young children play with any parts of the appliance. The appliance is not intended for use by
children or infirm persons without supervision.
• Take care that no one will pull the appliance by the power cord, especially when young children are near. For storage always keep the entire appliance dry and clean and where young
children cannot reach it. Do not place any hard and/or heavy objects on the appliance or
any part of it.
• Always place the appliance on a stable, level, dry and heat-resistant surface (i.e. glass,
ceramics or stone). Do not place the appliance on or near plastic parts, plastic-coated surfaces or any objects of value. Do not place the appliance near the edge of the table or counter.
Do not place any cloth or tissue below the appliance to avoid any risk of fire and electric
shock. Always keep the table or counter clean and dry and immediately wipe off spilled
liquids.
• During operation keep the appliance in appropriate distance of at least 20 cm on each side
to furniture, walls, boards, curtains and other objects. Leave at least 1 m of free space above
the appliance. When operating as an open grill, leave at least 50 cm of free space on the
rear of the appliance. Do not operate the appliance near any heat-sensitive materials or under
boards to avoid damage caused by steam, splashing hot fat or juices and condensate.
3
Page 3

• Do not move or tilt the appliance and, especially, do not lift it in the upright position
during operation, to avoid spilling of hot fat and juices causing injuries and damage. Always
switch off and unplug the appliance when not in use and before cleaning or moving or for
storage. Before moving or lifting the appliance by the handle, always allow the appliance to
cool down sufficiently, empty the drip pan, clean the appliance and ensure, that the adjustable grilling height control is in the LOCK position. Before attempting to open the grill, always
slide the grilling height control into the OPEN position to release the lock of the top plate.
Open and close the grill with care, never attempt to open the top plate with violence. Always
use the handle in front of the top plate for opening the grill.
• The appliance or any part of it may never touch hot surfaces. Do not place the appliance
and any part of it on or near hot surfaces (i.e. burner, heater or oven).
• This appliance is for household use only and NOT intended for use in moving vehicles, outdoors or in wet or humid areas.
Important Safeguards for Electrical Appliances
Care must be taken when using any electrical appliance. Please adhere to the following precautions.
• Ensure that the voltage rating of your mains power supply corresponds to the voltage requirements of the appliance (220/240 V, 50 Hz, AC, rated for 16 A). Always connect the appliance directly to a separately protected mains power supply wall socket with protective conductor (earth/ground) connected properly. The installation of a residual current safety switch
with a maximum rated residual operating current of 30 mA in the supplying electrical circuit
is recommended. If in doubt, contact your electrician for further information.
• Do not use any multiple socket outlet to avoid risk of fire or electric shock.
• It is recommended not to use any extension cords. Nevertheless, if you wish to use an extension cord, it must be connected properly with live, neutral and protective ground conductor
and a permanent loading range of at least 15 A (core diameter: at least 1 mm2).
• Never leave the appliance unattended while connected to the mains power supply. Always
switch off the appliance and unplug from the power outlet when not in use and before moving
or cleaning the appliance.
• Always handle the power cord with care. Always completely unwind the cord before use.
Do not place the appliance on a power cord. The power cord may never be knotted, twisted
or squeezed. Do not let the plug or power cord hang over the edge of the table or counter.
Do not pull or strain the power cord. Take care not to entangle in the power cord. Always
grasp the plug to disconnect the power cord from the power outlet. Do not touch the power
plug, with wet hands when the appliance is connected to the power supply.
4
Page 4

• Do not place or immerse the appliance or power cord in water or any other liquid. Do not
spill or drip any liquids on the power cord or exterior of the appliance. When liquids are spilled on the exterior of the appliance, immediately switch OFF and unplug the appliance and
dry it. Never place the appliance or power cord in an automatic dishwasher.
Hot Surfaces – Risk of Burns
The Grill Barbecue is designed for cooking a variety of foods and, therefore, the whole appliance will get hot during operation. Beware of steam and hot condensate, as well as splashing
fat and meat juices during operation and even some minutes after switching off, especially
when removing the drip pan and/or opening the top plate.
• Do not touch hot surfaces (cooking plates, exterior of the appliance, drip pan) with hands
and arms or any heat-sensitive objects while the appliance is in use or even some minutes
after switching off. Always use handles and knobs for moving and operating the appliance
and lifting the top plate.
• The appliance is heated by electric heating elements. To avoid damage and risk of fire: Do
not place any heat-sensitive or inflammable objects (i.e. charcoal, paper, plastics, clothes) or
inflammable liquids in or near the appliance during operation! Do not place hot drinks with
high alcoholic content (i.e. mulled wine, grog) near the appliance if the appliance is still hot.
Alcohol is highly volatile and the vapour is easy inflammable and could catch fire by any source of ignition (i.e. cigarette, candle, heating elements of the appliance) and therefore causing
severe injuries to persons and damage. Do not pour or drop any alcoholic liquor (e.g. flambé) or alcoholic foodstuffs on the appliance.
• Before switching ON, always ensure that there are no objects on the cooking plates to avoid
damage of the appliance and risk of fire. Do not leave any cooking utensils on the hot cooking plates.
• To avoid spilling of hot juices and fat causing injuries to persons and damage: Close supervision is important, when moving the appliance or any parts of it (i.e. the drip pan) immediately after switching off. Do not move or tilt the appliance during operation or when it is still
hot. Take care, that you do not upset the appliance, when opening the top plate during operation. Always switch OFF and unplug the appliance and let it cool down to room temperature before moving or cleaning the appliance or removing the drip pan.
Always adjust the tilt dial (ANGLE or FLAT) before placing any
food on the cooking plates. Do not turn the tilt dial in the ANGLE
position (inclined) with food on the cooking plate! Do not
attempt to operate the appliance when the drip pan is not correctly inserted and positioned firmly in place.
• Beware of steam and hot condensate, when operating the
appliance and especially when opening the grill. Prefer to
5
Page 5

operate the appliance with the top plate closed. Otherwise power consumption increases significantly. Ensure all persons stay in sufficient distance to the appliance during operation.
• Especially when opening the grill during operation or immediately after switching off,
always keep your hands and arm as well as any other objects in sufficient distance to the
appliance during operation to avoid scalds and damage.
Maintenance of the Quantanium Non-Stick Surfaces
Your Grill Barbecue features the special scratch resistant Quantanium non-stick coating.
Regardless of this fact, we recommend that care is taken with the non-stick coating. Do not
use hard or sharp objects for scratching or cutting inside the Grill Barbecue. Always remove
your foods from the cooking plate, before cutting. We will not be liable for damage to the
non-stick coating where metal utensils or similar objects have been misused.
Cooking on a non-stick surface minimises the need for oil, food can easily be removed and
does not stick and cleaning is easier. Before first use, wipe the non-stick surface with a little
amount of oil.
Any discolouration that may occur will only detract from the appearance of Grill Barbecue
and will not affect the cooking performance. When cleaning the non-stick coating, do not use
metal (or other abrasive) scourers. Wash in hot soapy water. Remove stubborn residue with
a non abrasive plastic scouring pad or nylon washing brush.
Please adhere to the following precautions:
• Do not use the grill, with the non-stick coating being scratched, cracked or detached due to
overheating.
• Avoid to use metal utensils or other hard and sharp objects with the appliance to avoid
scratching the non-stick surfaces. Only use wooden or heat-resistant plastic utensils to stir and
serve the food. Never use hard and sharp utensils to cut or scratch on the cooking plates.
• Never use abrasive cleaners, chemicals, cleaning pads or any sharp objects (i.e. metal
scouring pads) for cleaning. Carefully clean the appliance with a damped sponge or tissue
and warm washing-up liquid. If required, use a nylon washing brush. Do not leave any food
dry on the appliance. Always clean your grill after each use to prevent a build up of bakedon foods (see Care and Cleaning).
• Do not use spray-on non-stick coatings as this will affect or damage the non-stick surface
on the cooking plates.
6
Page 6
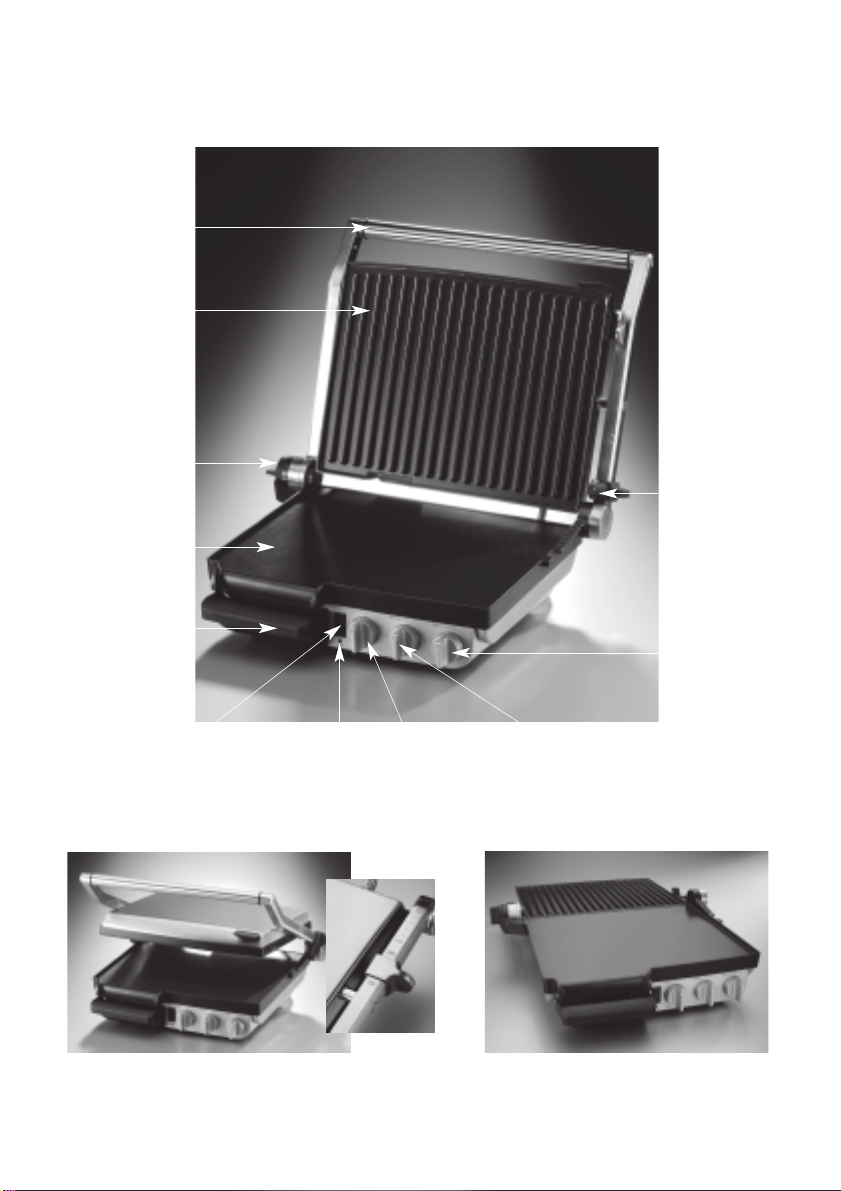
Features of Your Design Grill Barbecue
Heat-isolated handle
Non-stick ribbed top plate
Grill lock dial
Non-stick flat
base plate
Patented adjustable
grilling height control
with LOCK
and OPEN
feature
Removable drip pan
Power switch
Patented grilling height control of the top plate
Power indicator
Base plate tilt dial,
ANGLE – inclined,
FLAT – level
Grill Barbecue used as an open grill
7
Variable
temperature control
dial
15 minutes timer dial
Page 7
Base Plate Tilt Dial
Using the tilt dial (left hand dial), you can select the slope of the base plate according to your
requirements: optimum fat drainage on an inclined surface or a level cooking plate, so that
the foods do not run or slide off the grill. Simply set the required position (ANGLE or FLAT) on
the tilt dial.
WARNING: Always adjust the tilt dial (ANGLE or FLAT) before placing any food on the cooking plates. Do not turn the tilt dial in the ANGLE position with food on the cooking plate, to
avoid spilling of hot fat and meat juices causing scalds and damage.
• ANGLE: the base plate is in the inclined position. This position is suitable for achieving the
maximum fat drainage when using the appliance as a closed grill.
• FLAT: the base plate is in the level position. This position is ideal for cooking sausages, pancakes, eggs, and other foods when a flat plate is required so that the foods do not run or slide
off the grill.
IMPORTANT: Always select the FLAT position, when using the appliance as an open grill.
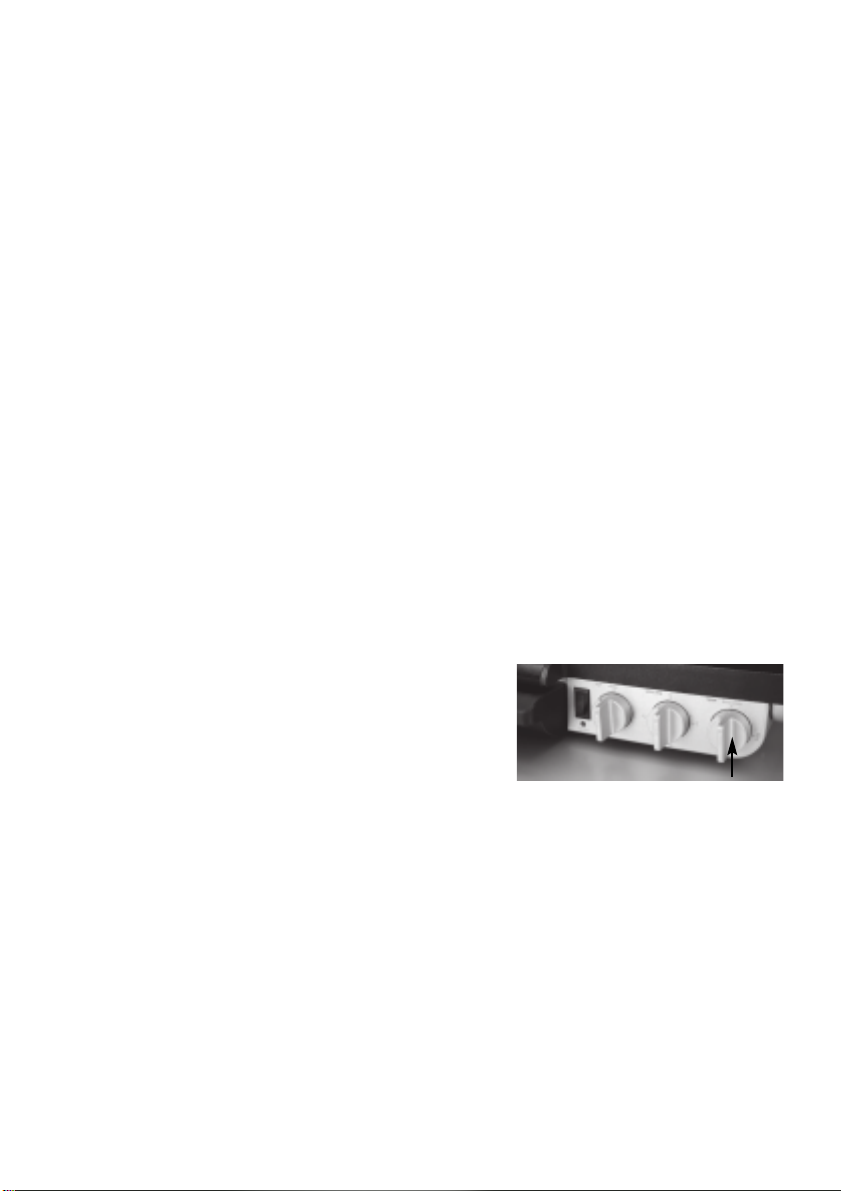
Variable Temperature Control Dial
The Grill Barbecue features a Variable Temperature Control dial (right hand dial), which
allows a variety of foods to be cooked. Just select a temperature suited to the foods which are
being cooked.
• With the dial set on SEAR, the temperature is correctly
suited to grilling meats or other foods.
• With the dial set on SANDWICH, the temperature is
correctly suited to toasting sandwiches.
Timer Dial
The Grill Barbecue features a 15 minute timer, which allows you to monitor the time elapsed
during preheating or cooking. The timer will ring once when the set time has elapsed.
IMPORTANT: The grill will not switch off, it will remain heating.
1. To set the timer, simply turn the dial clockwise completely (‘15’ position) and then anticlokkwise to select the desired minutes.
8
Page 8

Adjustable Grilling Height Control
Your Grill Barbecue features an adjustable grilling height control which allows you to fix the
top plate to a range of positions above the base plate (up to 9 cm in HIGH position).
Therefore, your Grill Barbecue can be used as an open toaster, ideal for
toasting open sandwich style ‘melts’. It can also be used to grill delicate
ingredients such as fish, vegetables and hamburger buns without squashing.
The grilling height control can be adjusted by sliding the slider forwards
or backwards along the right metal arm of the top plate.
IMPORTANT: The top plate can be locked to the base plate, using the slider of the grilling
height control (LOCK position). The LOCK position is intended only for moving and storage of
the appliance. Before use, always release the lock by sliding the grilling height control to the
OPEN position. Do not attempt to open the grill with violence.
Note: Allow the grill to preheat until the red heating light goes out with the top plate closed
and the grilling height control in the OPEN position to avoid excessive energy consumption.
It is best to adjust the grilling height control after placing the food on the cooking plates.
1. Before use, always slide the grilling height control on the right metal arm of the top plate
to the OPEN position.
WARNING: Risk of Burns! – Solely use handles and knobs for moving and operating the
appliance and lifting the top plate during operation. Even the top plate and exterior of the
appliance will get very hot during operation.
2. Use the handle to lift the top plate to the desired position above the base plate.
3. Slide the grilling height control backwards (to the hinge) as far as it will go without violence.
Note: To lower the top plate, hold on to the handle and slide the grilling height control forwards (to the front) as far as required.
4. Carefully release the handle. The top plate, will come to a stand in the selected position.
The top plate will radiate the desired heat to melt ingredients such as cheese or lightly grill
foods.
9
Page 9

Using Your Design Grill
First use
1. Carefully unpack the appliance and place it on a suitable heat-resistant, level surface (see
Important Safeguards).
2. Remove any promotional stickers and packaging materials before use. Do NOT remove
warning hints and the model label.
3. Slide the grilling height control on the right metal arm of the top plate to the OPEN position. Then lift the top plate by the handle and ensure, that there are no foreign objects on the
cooking plates.
WARNING! Switch off, unplug and allow to cool down, before moving or cleaning the appliance. Do not immerse the appliance or the power cord in water or other liquids or spill any
liquids on the appliance.
Do not place the appliance in an automatic dishwasher.
Note: Before first use and after a long period of storage, check that the cooking plates are
clean and free of dust. Wipe over with a damp cloth (see: Care and Cleaning).
4. Then dry thoroughly and wipe the non-stick coating of the cooking plates with a little
amount of oil. This is to prepare the non-stick coating for use.
Note: When using the Professional Grill for the first time you may notice a fine smoke haze.
This is caused by the first heating of some of the components. There is no need for concern.
To prevent smell and taste of your food from being affected, you should heat the appliance
on the SEAR position of the temperature dial for same minutes before placing any food on the
cooking plates.
1. Prepare the grill for use (see Operating Your Grill Barbecue). With the temperature dial on
the SEAR position, wait about 15 minutes.
2. Then select the required temperature dial setting and use the handle to lift the top plate to
the vertical position. If necessary, wait some minutes for the grill to cool down to the set temperature before placing your food on the cooking plates.
If the smoke haze persists on further use, switch OFF the grill, unplug, allow to cool down and
clean the appliance (see: Care and Cleaning). If the problem still persists, return the appliance to an authorised service centre for inspection.
You may use your Grill Barbecue as an open grill (with the top plate fold back) or as a closed grill. Prefer to keep the top plate closed for a shorter cooking time and to avoid an unnecessary high energy consumption.
10
Page 10

Operating Your Grill Barbecue
WARNING: Risk of Burns! Do not touch hot surfaces! – The exterior of the grill, especially the
top plate, will get hot during operation! Solely use handles and knobs for handling the appliance. Beware of hot condensate and steam, when opening grill.
You may use your Grill Barbecue as an open grill (with the top plate fold back) or as a closed grill. Prefer to keep the top plate closed for a shorter cooking time and to avoid an unnecessary high energy consumption.
1. Prepare the appliance for use:
Fully unwind the power cord from the cord storage. Place the appliance on a heat-resistant
stable surface (see Important Safeguards). If you want to use the appliance as an open grill,
you need at least 50 cm of free space on the rear for the appliance.
Slide the grilling height control on the right metal arm of the top plate to the OPEN position
to unlock the top plate (see Grilling height Control). Ensure, that the cooking plates are clean
and that there are no objects on the cooking plates.
Ensure the removable drip pan is correctly inserted and positioned
back into the appliance and snapped into place (see Features of
Your Design Grill Barbecue).
WARNING! Do not operate the appliance without the drip pan to avoid hot fat and juices spilling and causing scalds and damage. Solely use handles and knobs for handling the appliance (i.e. handle, dials, grilling height control). Do not touch the cooking plates or other hot
parts of the appliance during operation.
2. Insert the plug into a suitable power outlet (230/240V, AC, 50/60 Hz; see: Important
Safeguards for Electrical Appliances). Close the top plate for a more efficient preheating.
3. Turn the tilt dial to the required position: FLAT = level, ANGLE = inclined.
(see: Base Plate Tilt Dial)
It is important that the base plate is in the FLAT (level) position when using as an open grill.
4. Switch ON the power switch. The red HEATING power indicator will illuminate. Ensure the
grilling height control is in the OPEN position.
5. Turn the temperature dial to the required position for fast preheating. SEAR for meat and
similar foods. SANDWICH for sandwiches.
Note: The red heating light will cycle on and off during the cooking process indicating that
the correct temperature is being maintained.
11
Page 11

To Use as an Open Grill
IMPORTANT: Always turn the tilt dial to the FLAT position (level), when using as an open grill.
1. Prepare the grill for use as described in section Operating Your Grill Barbecue.
2. Ensure, that the tilt dial is in the required FLAT position.
3. Turn the temperature dial to the required position and
allow the grill to preheat until the red HEATING power
indicator goes out.
4. Close the top plate with the grilling height control in
the OPEN position. Turn the grill lock dial on the left side
of the hinge to the vertical position (OPEN grill).
5. Use the handle to fold the top plate carefully back into
the open position.
Note: Please keep in mind, that even the exterior of the top plate will become very hot during
operation. Ensure to touch the appliance only by the handles and knobs.
WARNING! During operation and especially on placing food on the preheated cooking plates or on opening the grill during operation, hot fat and juices could splash from the appliance. Always keep your hands and arms as well as any other objects in sufficient distance to
the appliance during operation to avoid scalds and damage. Ensure, that all persons stay in
sufficient distance to the appliance during operation. Always use the handle for opening the
grill. Take care, when folding back the top plate.
Note: The grill lock will automatically reset when the top plate is returned to the closed position.
6. Place meat or foods to be cooked on either or both of the cooking plates. Refer to Grilling
recipes or the guide for cooking times (see: Grilling Guide).
CAUTION! Do not use any sharp or hard objects for scratching or cutting on the cooking plates.
7. When the food is cooked, remove it using a wooden or heat-resistant plastic spatula.
Note: Use the timer to monitor the time elapsed during preheating or cooking (see: Timer
Dial). The timer will ring once when the set time has elapsed. The grill will not switch off, but
will remain heating.
12
Page 12

To Use as a Closed Grill
1. Prepare the grill for use as described in section Operating Your Grill Barbecue. Turn the
temperature dial to the required position and allow the grill to preheat until the red HEATING
power indicator goes out.
Temperatures and cooking times depend on the size, thickness and type of foods as well as
your special liking (see: Grilling Guide).
WARNING! During operation and especially on placing food on the preheated cooking plates or on opening the grill during operation, hot fat and juices could splash from the appliance. Always keep your hands and arms as well as any other objects in sufficient distance to
the appliance during operation to avoid scalds and damage. Ensure, that all persons stay in
sufficient distance to the appliance during operation. Always use the handle for opening the
grill. Take care not to upset the appliance, when lifting the top plate to the vertical position.
2. Allow the Professional Grill to preheat until the red HEATING power indicator goes out.
Then use the handle to carefully lift the top plate to the vertical position. The top plate will come
to a stand in this position.
3. Place meat or foods to be cooked on the base plate. Refer to grilling recipes or the Grilling
Guide in this booklet for cooking times.
CAUTION! Do not use any sharp or hard objects for scratching or cutting on the cooking plates.
4. When the food is cooked, remove it using a wooden or heat-resistant plastic spatula.
Note: Use the timer to monitor the time elapsed during preheating or cooking (see: Timer
Dial). The timer will ring once when the set time has elapsed. The grill will not turn off, but will
remain heating.
5. Use the handle to close the top plate. Only touch the top plate by the handles.
The top plate has a floating hinge system that is designed to press
down evenly on the food. The grilling height control on the right
metal arm of the top plate is used to adjust for the thickness of the
food (up to 8 cm). The top plate must be fully lowered to achieve
grill marks onto the food. To adjust the top plate, slide the grilling
height control to the desired position (see: Grilling height Control).
The grill can also be used to cook delicate ingredients such as fish
and hamburger buns without squashing. The levelling handle on the right front side of the
top plate of the grill may be used to even out the top plate.
6. When the food is cooked, use the handle to carefully lift the top plate until it stops in the
vertical position.
Cook your food to the desired doneness. If necessary, open the grill and make a check on the
results. Beware of hot steam and condensate when lifting the top plate.
7. Remove the food using a wooden or heat-resistant plastic spatula. There is no need for waiting for the appliance to re-heat before placing other food on the cooking plates.
13
Page 13

To Use as a Sandwich Press
Note: Use the timer to monitor the time elapsed during preheating or cooking (see: Timer
Dial). The timer will ring once when the set time has elapsed. The grill will not turn off, but will
remain heating.
1. Prepare the grill for use as described in section Operating Your Grill Barbecue. Turn the
temperature dial to the SANDWICH position and allow the grill to preheat until the red HEATING power indicator goes out.
2. Ensure the tilt dial is in the FLAT position (level).
3. During preheating, prepare the sandwiches.
WARNING! During operation and especially on placing food on the preheated cooking plates or on opening the grill during operation, hot fat and juices could splash from the appliance. Always keep your hands and arms as well as any other objects in sufficient distance to
the appliance during operation to avoid scalds and damage. Ensure, that all persons stay in
sufficient distance to the appliance during operation. Always use the handle for opening the
grill. Take care not to upset the appliance, when lifting the top plate to the vertical position.
4. Place the sandwiches onto the base plate. Always place sandwiches towards the rear of
the base plate.
5. Use the handle to carefully close the top plate.
The top plate has a floating hinge system that is designed to
press down evenly on the sandwich. The grilling height control
on the right metal arm of the top plate is used to adjust for the
thickness of the sandwich. The levelling handle on the right
front side of the top plate of the grill may be used to even out
the top plate.
6. Toasting should take approximately 5-8 minutes. Exact toasting time will be a matter of preference. It will also depend on the type of bread and filling used. If necessary, open the grill
and check the doneness of your food. Beware of hot steam and condensate when lifting the
top plate.
7. When the sandwich is cooked, use the handle to lift the top plate until it stops in the vertical position.
CAUTION! Do not use any sharp or hard objects for scratching or cutting on the cooking plates.
8. Remove the sandwich using a plastic spatula. Never use metal tongs or a knife as these
can cause damage to the non-stick coating of the cooking plates.
There is no need to wait for the appliance to re-heat, before placing other food on the cooking plates.
14
Page 14

After Use
WARNING! Do not leave the appliance unattended while connected to the mains power supply. Even some minutes after switching off, the appliance is still hot. Do not leave the appliance unattended near young children when the appliance is still hot.
1. Switch OFF the appliance and unplug from the power outlet.
2. Allow the appliance to cool before cleaning (see Care and Cleaning). Always clean the
appliance immediately after use. Never leave any food dry up on the appliance or any parts
of it.
Hints For Best Grilling Results
Recommended cuts:
Beef sirloin (New York), rump, rib eye (scotch fillet), fillet.
Lamb trim lamb leg steaks, fillet, eye of loin, cutlets and diced lamb.
Pork butterfly loin steaks, spare ribs, leg steaks, fillets, diced pork.
Chicken fillet, leg steaks
• For best grilling results use meat cuts which are thick enough to touch the top and base plate
when the grill is closed.
• Tougher cuts such as beef blade, topside steak, lamb forequarter or neck chops can be used.
To tenderise these cuts marinate them for a few hours or overnight in a marinade with wine
or vinegar to help break down the connective tissue.
• It is not recommended to cook items with thick bones such as T-bone steaks. If necessary,
remove the bones before cooking.
• Do not salt meat before cooking. Salt will draw out the juices toughening the meat.
• If using a marinade recipe or pre-marinated meats from your meat retailer, drain excess
marinade off and dab with kitchen paper before placing on the grill. Some marinades contain high sugar levels which can scorch on the grill plate when cooked.
• Do not over cook meat, some meats are better served pink and juicy.
• Do not pierce meat with a fork or cut meat while cooking. This will let the juices escape,
resulting in a tougher, dry steak. Use tongs instead.
• When removing fish pieces, use a flat heat-resistant plastic spatula to support the food.
• Parboiling sausages can alleviate the need to pierce sausages before cooking.
15
Page 15

Grilling Guidelines – Cooking Times and Temperatures
Contact Grilling is a healthy and efficient way to cook. Following cooking times are approximate due to variances in ingredient thickness and special liking.
Select a low temperature to defrost and re-heat food (SANDWICH position; see Variable
Temperature Control Dial). Use medium temperature settings to cook seafood and scallops.
Use high temperature settings (SEAR position) for meat and poultry.
Note: These times relate to when the grill is closed and on the contact position.
Ingredient
and Type Cooking Time Temperature
Beef minute steak 1-2 min. high
fillet 3 min. (rare to medium)
5-6 min. (cooked through)
Hamburger patties 4-6 min.
Pork fillet 4-6 min. high
loin steaks
Lamb loin 3 min. high
cutlets 4 min.
leg steaks 4 min.
Chicken breast fillet 6 min. (cooked through) high
leg steaks 4-5 min. (cooked through)
Sausages thin 3-4 min. high
thick 6-7 min.
Sliced fruits egg plant 3-5 min. high
and vegetables zucchini 3-5 min.
(up to 1.5 cm sweet potato 3-5 min.
thick) pineapple 3-4 min.
Sandwich 3-5 min. (golden on the outside) low
Foccacia
Hot Dogs 5 min. high
Seafood fish fillets 2-5 min.
and cutlets (depends on type and thickness) medium - high
octopus (cleaned) 3 min.
shrimps 2 min.
scallops 1 min.
Kebab 4-10 min. (depends on ingredients) medium - high
16
Page 16

Care and Cleaning
WARNING! Always switch OFF the appliance, unplug from power outlet and allow to cool
before moving or cleaning the appliance or removing the drip pan. Do not immerse the appliance or any part of it in water or other liquid.
Always clean the appliance after each use to prevent a build up of baked-on foods. Never
leave any food dry up on the appliance or any parts of it. The appliance is easier to clean
when slightly warm.
1. Switch OFF the appliance and unplug from power outlet.
2. Allow to cool sufficiently.
3. Use a plastic spatula to slide any residues off the cooking plate into the drip pan. Remove
stubborn residue with a non-abrasive scouring pad or nylon washing brush.
4. Pull out the drip pan.
The drip pan is engaged below the cooking plate and could stick, especially, when the appliance is new. Take care not to spill fat and juices when removing the drip pan.
CAUTION! Do not use any abrasive cleaners or cleaning pads. Do not use any chemicals or
corrosive liquids with the appliance as this could affect or damage the surfaces, especially the
non-stick coating.
WARNING! Do not place or immerse the appliance or power cord in any liquids. Do not spill
any liquids on the appliance. Do not place the appliance or power cord in an automatic
dishwasher or under a tap.
Note: Do not dispose fat and meat juices in the sewers. Dispose as compost or in a closed
vessel in the waste.
5. Empty the drip pan and wash the drip pan in warm, soapy water.
Do not use scouring pads or harsh detergents for cleaning the drip pan as this may damage
the surface.
Alternatively you may wash the drip pan in an automatic dishwasher.
CAUTION: Hold on to the handle of the top plate during cleaning of the cooking plates to
avoid damage of the hinge and avoid to upset the appliance.
6. Wipe the cooking plates with a soft cloth damped with warm, soapy water to remove food
residue. Ensure not to spill or drip any liquids on the exterior of the appliance.
If necessary, use a nylon washing brush for cleaning the cooking plates.
7. Wipe the cooking plates with clear water. Wipe the exterior of the appliance housing with
a soft cloth.
8. Thoroughly dry the appliance and all parts of it (i.e. drip pan).
17
Page 17

Storage
WARNING: Always switch OFF the appliance and unplug from power outlet when not in use
and before cleaning or moving or for storage. Before moving or lifting the appliance by the
handle, always allow the appliance to cool down sufficiently, empty the drip pan and clean
the appliance. Do not place any hard or heavy objects on the appliance.
1. Clean the appliance according to the instructions in section Care and Cleaning.
2. Ensure, that no objects are on the cooking plates.
3. Insert the drip pan (see Features of Your Design Grill Barbecue).
4. Hold the top plate by the handle and slide the grilling height control to the OPEN position.
Then close the top plate and slide the grilling height control to the LOCK position.
CAUTION: Before moving or lifting the appliance by the handle, always ensure, that the adjustable grilling height control is in the LOCK position so that the top and base plates are firmly locked together. Do not lift the appliance with released top plate lock, otherwise the hinge
could get damaged.
5. Lift the appliance by the handle and wrap the cord in the cord storage area in the bottom
of the appliance, but take care not to pull or strain the power cord.
Then you may store the appliance in an upright position.
Store the entire appliance (including the operating instructions) on a clean and dry, level and
stable surface, where it is safe from frost and inadmissible strain (mechanical or electric shock,
heat, moisture), where it is out of reach of young children and where it may not tilt or fall and
no other objects could fall on it.
Notes for disposal
Dispose of the appliance must be effected in accordance with the corresponding local regulations and requirements for electrical appliances. Please contact your local disposal company.
18
Page 18

Ricepes
AUSSIE BURGER
Serves 4
500g minced beef
1 cup fresh bread crumbs
1 small onion, peeled and finely chopped
1 teaspoon minced garlic
1 tablespoon chopped parsley
1 egg, lightly beaten
To cook and serve;
4 bacon rashers
4 hamburger buns or full grain rolls
1 250g tin beetroot slices, drained
2 roma tomatoes, thinly sliced
Tomato sauce
4 cheddar cheese slices
1⁄4 iceberg lettuce heart, shredded
Preheat Professional Grill until the Heating light turns off.
1. Combine all ingredients in a large mixing bowl and mix thoroughly.
Form mince into 4 patties. Set aside.
2. Place patties on grill and allow the top plate to rest on the patties.
Adjust the Grilling Height Control to the thickness of the patties.
Cook for 4-5 minutes or to your required doneness.
3. Place bacon on grill cook for 2 minutes. Lightly spread buns with butter or margarine.
4. Place a pattie on each bun and top with bacon, beetroot, tomato, tomato sauce and
cheese. Add lettuce to burgers and place reserved roll halves on top.
Serve immediately.
19
Page 19

TERIYAKI CHICKEN FILLETS
Serves 4
1 tablespoon mirin
2 tablespoons soy sauce
2 teaspoons caster sugar
2 teaspoons cooking sake
2 chicken breast fillets, halved lengthways
To serve;
Lemon wedges
Steamed rice
Salad of green leaves
Preheat Professional Grill until the Heating light turns off.
1. Combine mirin, soy sauce, sugar and sake. Place chicken in a stainless steel baking dish
and pour prepared marinade over. Allow to stand for 30 minutes before cooking.
2. Place chicken on grill and allow top plate to gently rest on chicken.
3. Cook for 4-5 minutes until chicken is cooked through.
4. Remove and allow to rest for 5 minutes before serving on a bed of steamed rice.
Garnish with lemon wedges and accompany with a salad of green leaves.
OREGANO LAMB KEBABS
Serves 4
1 tablespoon olive oil
1 tablespoon lemon juice
1 teaspoon chopped garlic
1 tablespoon dried oregano leaves
500g lamb loin, cut into 3 cm cubes
freshly ground black pepper
Wooden skewers, soaked in water
To serve;
Salad leaves
Black olives
Crumbled fetta cheese
Preheat Professional Grill until the Heating light turns off.
20
Page 20

1. Combine oil with lemon juice and garlic in a large mixing bowl. Add lamb and allow
to marinate for 30 minutes before threading onto 4 kebab skewers.
2. Season each kebab generously with pepper and place on grill.
3. Allow the top plate to rest lightly on lamb. Cook for 4-5 minutes.
4. Serve with crusty bread and a Greek salad of salad leaves, black olives and crumbled
feta cheese.
BABY OCTOPUS WITH CHILLI AND GARLIC
Serves 4
750g baby octopus, cleaned
2 tablespoons olive oil
2 tablespoon Thai style sweet chilli sauce
juice and zest of 1 lime
1 teaspoon minced garlic
To garnish;
Lime wedges
Coriander sprigs
To serve;
Lightly steamed vermicelli noodles
Preheat Professional Grill until the Heating light turns off.
1. In a large mixing bowl combine octopus with oil, chilli sauce, lime zest, juice and
garlic. Toss well to combine and season with pepper.
2. Place octopus on pre-heated grill and lower press. Allow to cook for 3 minutes.
3. Remove from grill and serve on top of vermicelli noodles, garnish with lime and
coriander.
MARINATED NEW YORK CUT STEAK
Serves 4
1 cup red wine
2 tablespoons olive oil
1 tablespoon Dijon style mustard
1 teaspoon minced garlic
4 New York cut steaks
To serve;
Creamy mashed potato
Crisp green salad
21
Page 21

Preheat Professional Grill until the Heating light turns off.
1. Combine wine, oil, mustard and garlic in a screw top jar and shake well. Place steaks
in a shallow dish, pour over marinade.
2. Allow to marinate at room temperature for 30 minutes to 1 hour.
3. Remove steaks from marinade and place on grill. Cook for 3 minutes for medium rare.
4. Serve with creamy mashed potato and a crisp salad.
ATLANTIC SALMON STEAK
WITH TARRAGON AND PEPPER CRUST
Serves 4
2 tablespoons olive oil
2 tablespoons dried tarragon leaves
freshly ground black pepper
4 Atlantic salmon steaks – weighing approx
180g each
To garnish;
Lime or lemon wedges
To serve;
Steamed baby potatoes
Preheat Professional Grill until the Heating light turns off.
1. Combine oil with tarragon and a generous and coarse grinding of black pepper.
2. Brush salmon on both sides with mixture and place on grill.
3. Adjust the grilling height control to just touch the top of the fish steak.
4. Allow to cook for 2 minutes for fish to be golden on the outside and ‘rosy’ pink
on the inside. Cook a further 2 minutes to cook through.
5. Remove from grill and serve immediately with the steamed potatoes.
RED WINE AND ROSEMARY LAMB STEAKS
Serves 8
8 125g lamb steaks
2 tablespoons rosemary leaves
1/3 cup red wine
freshly ground black pepper
1/4 teaspoon crushed garlic
To serve;
Steamed green beans
22
Page 22

Preheat Professional Grill until the Heating light turns off.
1. Place steaks in a shallow dish. Combine rosemary, wine, pepper and garlic and pour
over steaks. Allow to marinate for at least 20 minutes.
2. Turn the Base Plate Tilt Dial to flat, open the grill. Place prepared steaks onto ribbed grill
and cook for 3 minutes each side until cooked to your liking. Serve with steamed green
beans.
THAI GREEN CURRY LAMB CUTLETS
Serves 4
1 tablespoon Thai green curry paste
3 tablespoons coconut cream
1 tablespoon chopped coriander
12 lamb cutlets, trimmed
To serve;
Steamed rice and greens
Preheat Professional Grill until the Heating light turns off.
1. Combine curry paste, coconut cream and coriander. Spoon over cutlets and allow to
marinate for 20 minutes.
2. Turn the Base Plate Tilt Dial to flat, open the grill, place cutlets on ribbed grill and cook
for 3 minutes each side or until cooked to your liking. Serve with steamed rice and greens.
CHILLI BEEF SALAD WITH CASHEWS
Serves 4
500g rump or sirloin steak
3 mild red chillies, chopped
2 tablespoons soy sauce
1 teaspoon crushed ginger
1/2 teaspoon crushed garlic
Salad greens
To serve;
1/2 cup chopped cashew nuts
soy sauce
Preheat Professional Grill until the Heating lightturns off.
23
Page 23

1. Slice steak into thin strips and combine with chill, soy, ginger and garlic.
Allow to marinate for 20 minutes.
2. Place salad greens in individual serving bowls.
3. Turn the Base Plate Tilt Dial to flat, open the grill and cook beef on flat plate for
1-2 minutes each side.
4. Place on top of greens and sprinkle with cashew nuts and soy sauce.
GRILLED BABY BOK CHOY WITH OYSTER SAUCE
4 baby bok choy (50g each)
2 tablespoons soy sauce
1 tablespoon oyster sauce
2 tablespoons lemon juice
2 teaspoons brown sugar
Preheat Professional Grill until the Heating light turns off.
1. Discard outer leaves of bok choy and halve the bok choy, wash well.
Preheat Grill to medium heat.
2. Turn the Base Plate Tilt Dial to flat, open the grill and cook bok choy cut side down on
flat plate for 2 minutes or until tender.
3. To make oyster sauce combine soy, oyster sauce, lemon juice and sugar. Serve with the
sauce drizzled over bok choy.
LEMON AND HONEY CHICKEN SKEWERS
Serves 4
500g chicken breast fillets
2 tablespoons lemon juice
2 tablespoons honey
2 teaspoons sesame seeds
1 teaspoon grated ginger
Wooden skewers, soaked in water
To serve;
Steamed basmati rice
Steamed green vegetables
Preheat Professional Grill until the Heating light turns off.
24
Page 24

1. Slice chicken into thin strips and thread onto 8 skewers. Place skewers on pre-heated
lower grill and lower top plate. Allow to cook for 3 minutes or until cooked through.
2. While chicken is cooking combine lemon juice, honey, sesame and ginger.
Serve skewers on steamed rice and pour over the lemon and honey sauce. Serve with
steamed greens and steamed basmati rice.
GRILLED CHICKEN WITH LEMON THYME
Serves 4
4 chicken breast fillets
2 teaspoons olive oil
2 teaspoons crushed garlic
2 tablespoons lemon thyme leaves
1 teaspoon grated lemon rind
2 tablespoons lemon juice
cracked black pepper
To Serve; lemon wedges crisp green salad
Preheat Professional Grill until the Heating light turns off.
1. Place chicken breasts in large flat dish. Combine oil, garlic, lemon thyme, lemon
rind and juice and pepper and mix well. Pour over chicken breasts. Allow to marinate
for 15 minutes.
2. Turn the Base Plate Tilt Dial to flat, open the grill, place chicken on ribbed grill and cook
for 3 minutes each side or until cooked to your liking Slice breasts diagonally, serve with
lemon wedges and a green salad.
LEMON AND SOY MARINATED SALMON
Serves 4 as an entree
300g piece salmon fillet, skin removed
2 tablespoons soy sauce
1 teaspoon wasabi paste
2 tablespoons lemon juice
2 teaspoons sesame oil
To serve;
Pickled ginger
Sautéed spinach
25
Page 25

Preheat Professional Grill until the Heating light turns off.
1. Cut salmon into 1cm thick slices. Combine soy, wasabi, lemon juice and sesame oil.
Pour over salmon and allow to marinate for 20 minutes.
2. Turn the Base Plate Tilt Dial to flat, open the grill, place salmon on flat plate for 20-30
seconds each side or until seared. Serve salmon with spinach and ginger
HOT GINGERED PRAWNS
Serves 4
1 kg green king prawns, peeled with tails intact
1 teaspoon crushed garlic
1/4 cup soy sauce
1/4 cup dry white wine
1 tablespoon finely shredded ginger
350 ml Thai sweet chilli sauce
Wooden skewers, soaked in water
To serve;
Steamed jasmine rice
Sautéed chinese broccoli
Preheat Professional Grill until the Heating light turns off.
1. Thread prawns onto soaked wooden skewers approx 4 per skewer.
2. Combine remaining ingredients and mix well, pour over prawn skewers.
Place skewers on pre-heated grill and lower top plate, cook for 1 minute or until pink
and tender.
Serve with steamed rice and broccoli.
BAGEL WITH SMOKED SALMON AND CAPERS
Serves 4
4 bagels – split
4 tablespoons cream cheese
8 slices smoked salmon
6 shallots, peeled and sliced finely lengthwise
1 tablespoon capers, drained and chopped
1 lemon
freshly ground black pepper
Preheat Professional Grill on Sandwich setting until the Heating light turns off.
26
Page 26

1. Spread base of bagels with cream cheese. Lay salmon slices over, divide shallots
between the 4 bagels, sprinkle over capers and squeeze with lemon juice. Season with
pepper and place top on bagel.
2. Place in pre-heated grill and allow top plate to gently rest on bagels using the
adjustable height control.
3. Allow to toast for 1 1⁄2 minutes or until required doneness.
Remove from press and serve immediately.
BAGEL WITH SMOKED TURKEY
CRANBERRY AND CAMEMBERT CHEESE
Serves 4
4 bagels – split
butter or margarine
4 slices smoked turkey breast – cut in half
3 tablespoons cranberry sauce
1 cup snow pea sprouts
1 small camembert cheese, cut into fine slices
Preheat Professional Grill on Sandwich setting until the Heating light turns off.
1. Lightly spread bagels with butter or margarine. Arrange half the turkey slices in
bagels. Spread the cranberry sauce. Top with snow pea sprouts, then camembert
slices and finally remaining turkey.
2. Place in pre-heated grill and allow top plate to gently rest on bagels using the
adjustable height control.
3. Allow to toast for 11⁄2 minutes or until required doneness.
Remove from press and serve immediately.
LEG HAM AND SEEDED MUSTARD
ON WHOLE GRAIN BREAD
Serves 4
8 slices ‘large’ size wholegrain pre-sliced bread
butter or margarine
4 slices leg ham
3 tablespoons seeded mustard
1 avocado, peeled and sliced thinly and
squeezed with lemon juice
1 vine-ripened tomato, sliced
6-8 inner leaves of cos lettuce, roughly torn
27
Page 27

Preheat Professional Grill on Sandwich setting until the Heating light turns off.
1. Lightly spread bread with butter or margarine. Place ham on half the bread and
spread with mustard. Lay avocado slices over, then tomato and finally lettuce leaves.
2. Top with remaining bread slices and place in grill, allow press to gently rest on bread,
cook until golden brown.
3. Remove from press. Cut each sandwich in half and serve immediately.
SMOKED CHICKEN WITH BASIL
AND FRESH MANGO
Serves 4
8 slices ‘large’ wholegrain pre-sliced bread
butter or margarine
250g sliced smoked chicken – smoked chickens
are available from better delis and supermarkets
– char-grilled rotisserie chicken can be substituted
1 medium size ripe mango, peeled and sliced
3-4 tablespoons whole egg mayonnaise
1 1/2 cup basil leaves roughly torn
freshly ground black pepper
Preheat Professional Grill on Sandwich setting until the Heating light turns off.
1. Lightly spread bread with butter or margarine. Arrange chicken on half the bread, then
place mango slices over chicken. Spoon mayonnaise over the mango and scatter with basil
leaves. Season with pepper.
2. Top with remaining bread and place sandwiches in pre-heated grill.
Allow grill to gently rest on bread, cook until golden brown.
3. Remove from grill. Cut each sandwich in half and serve immediately.
LAVOSH ROLL WITH PRAWNS
LIME AN MAYONNAISE
Serves 4
4 slices lavosh bread
6 tablespoons mayonnaise
500g medium sized king prawns, shelled,
deveined and roughly chopped
28
Page 28

1 punnet alfalfa sprouts
6-8 inner leaves of cos lettuce, cut into strips
juice of 1 lime
freshly ground black pepper
Preheat Professional Grill on Sandwich setting until the Heating light turns off.
1. Place lavosh bread flat on work surface. Spread with mayonnaise (then keeping all
ingredients on one end of bread) divide prawns between lavosh and top with sprouts
and lettuce. Squeeze with lime juice and season with pepper.
2. Rolls lavosh firmly, but not too tightly. Place in pre-heated grill and allow top plate to rest
gently on bread.
3. Allow to cook until lavosh is a light golden brown.
4. Remove from grill and cut in half, wrap each half in a paper napkin and serve immediately.
ROAST CHICKEN ROLL WITH SEMI-DRIED
TOMATOES AND ROCKET
Serves 4
4 slices pita bread
6 tablespoons mayonnaise
250g sliced or chopped char-grill rotisserie chicken
1 cup semi-dried tomatoes, roughly chopped
1 bunch rocket leaves, roughly torn
freshly ground black pepper and sea salt
Preheat Professional Grill on Sandwich setting until the Heating light turns off.
1. Place pita bread flat on work surface. Spread with mayonnaise
(then keeping all ingredients on one end of bread) divide chicken between
pita and top with tomatoes and rocket.
2. Season generously and then roll pita firmly but not too tightly. Place in pre-heated grill
and allow top plate to rest gently on bread
3. Allow to cook until pita is a light golden brown.
4. Remove from grill and serve immediately as is or cut each pita in half and wrap in a
paper napkin to serve.
29
Page 29

PASTRAMI ON TURKISH
WITH MUSTARD MAYONNAISE
Serves 6
1 Turkish bread cut into 6 equal sections
butter or margarine
18 slices pastrami
6 tablespoons mustard mayonnaise
2 vine-ripened tomatoes, sliced
2 cups baby spinach leaves
12 slices Swiss style cheese
freshly ground black pepper
Preheat Professional Grill on Sandwich setting until the Heating light turns off.
1. Cut each section of Turkish bread through the centre and set aside top pieces. Lightly
spread Turkish bread with butter or margarine. Divide the pastrami between the Turkish
bread. Spread pastrami with mustard mayonnaise.
2. Arrange tomato slices over and then baby spinach leaves. Place cheese over each
Turkish bread and then top with reserved bread slices.
3. Place Turkish bread in pre-heated grill and allow grill to gently rest on bread
4. Allow to cook until Turkish bread is lightly browned and cheese has melted slightly.
TURKISH BREAD
WITH SALAMI, BOCCONCINI AND PESTO
Serves 6
1 Turkish bread cut into 6 equal sections
butter or margarine
18 slices Italian or Spanish salami
6 bocconcinni, sliced
1 punnet cherry tomatoes cut in half
1 cup pesto – available from better delis and supermarkets
Preheat Professional Grill on Sandwich setting until the Heating light turns off.
1. Cut each section of Turkish bread through the centre and set aside top pieces.
Lightly spread Turkish bread with butter or margarine. Divide the salami between the
Turkish bread. Arrange bocconcinni over and then cherry tomatoes.
2. Spoon pesto over and top with reserved bread slices.
3. Place in pre-heated grill and allow press to gently rest on bread.
4. Allow to cook until Turkish bread is lightly browned.
30
Page 30

GASTROBACK GmbH
Gewerbestraße 29
D-21279 Hollenstedt/Germany
http://www.gastroback.de
E-Mail: info@gastroback.de
 Loading...