

Page 1
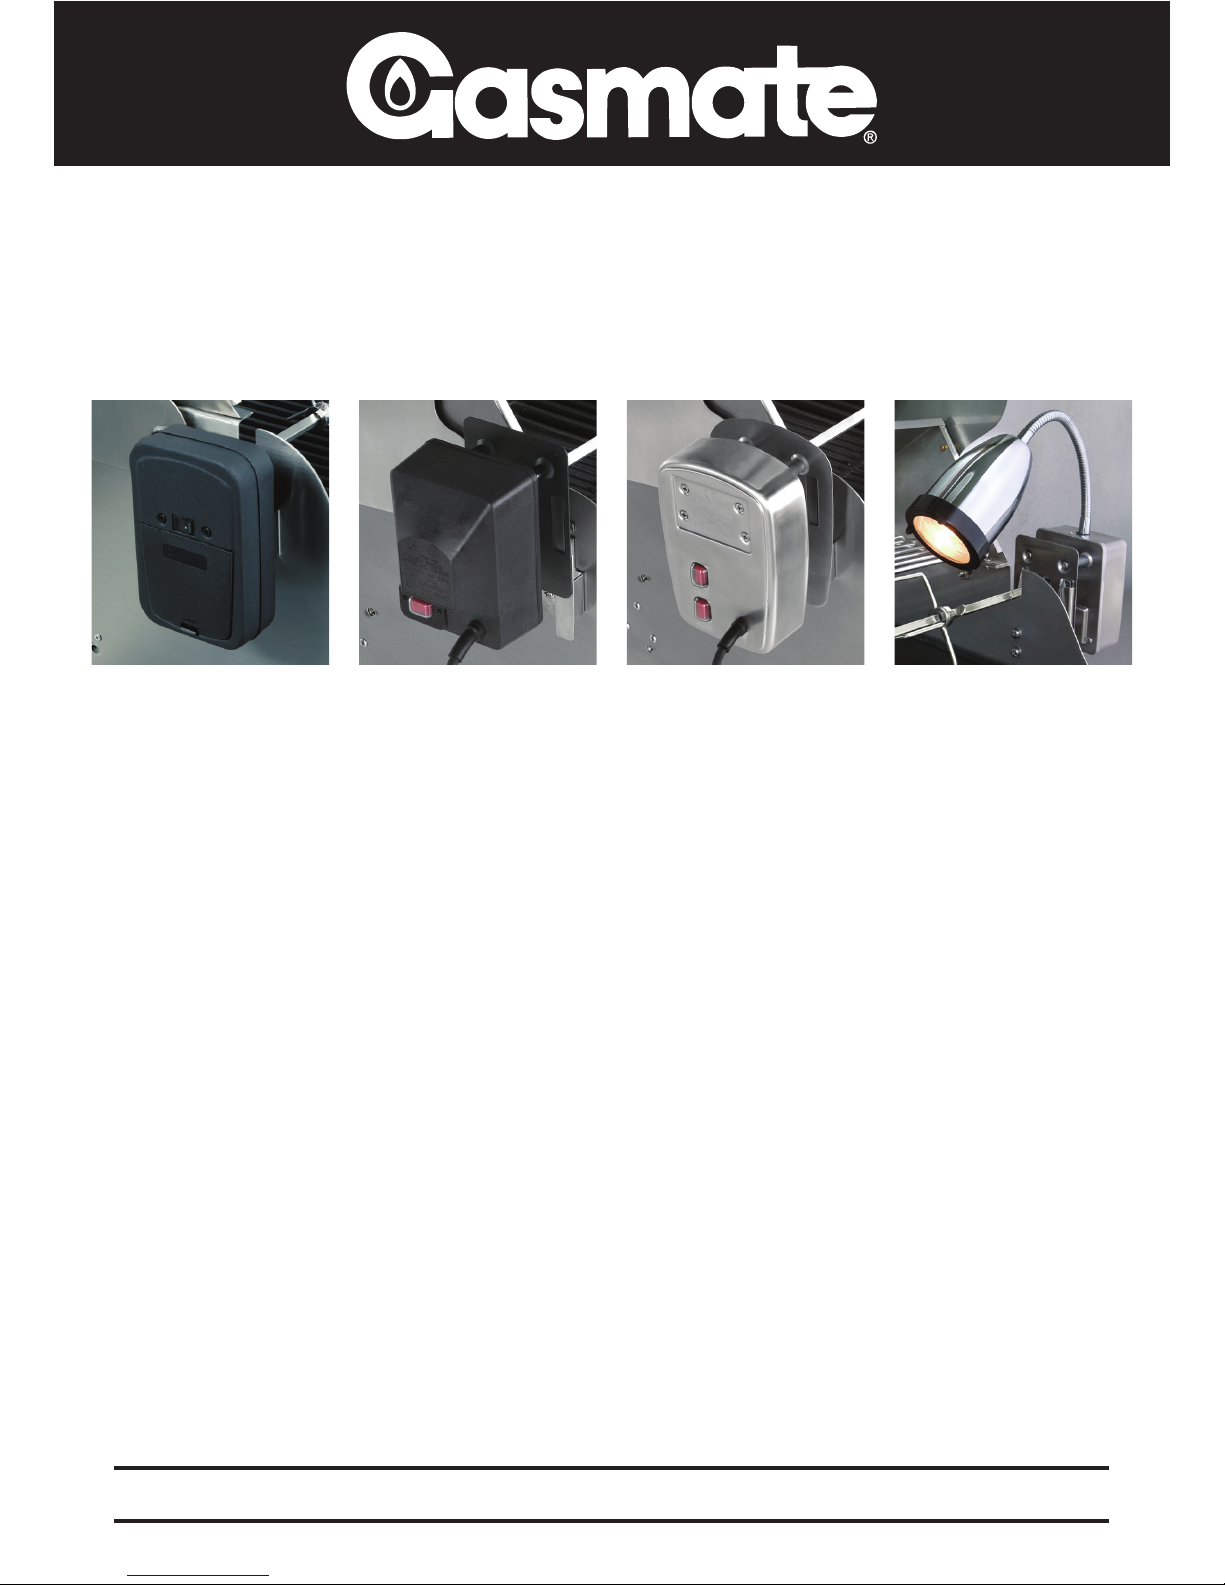
BBQ Rotisserie Kits
02157 12/06
Due to continual product development, the product you purchase may differ slightly from the one shown here.
Gasmate® is a registered trademark of Sitro Group Australia Pty. Ltd. www.sitro.com.au
and AberGas Ltd. Hamilton, N.Z. www.abergas.co.nz
FOR OUTDOOR USE ONLY
Important: Retain these instructions for future use.
• Uses 2 x “D” size
batteries
• The motor is DC 3V
• Suits Gasmate and
most barbecues with
roasting hoods, up
to 6 burners
• 2 x 4 prong forks
• 4 piece shaft
• Supplied with all
mounting hardware
• Operates on mains
electricity
•
The motor is
AC 240V
• Suits Gasmate and
most barbecues with
roasting hoods, up
to 6 burners
• 4 x 2 heavy duty
prong forks
• 4 piece shaft
• Supplied with all
mounting hardware
• Coun
terweight
Model No.
GRT2
• Operates on mains
electricity
•
The motor is AC 240V
• Suits Gasmate and
most barbecues with
roasting hoods, 4 to
6 burners
• 4 x 2 stainless steel
prong forks
• 4 piece stainless
steel shaft
• Supplied with all
mounting hardware
• Stainless steel
motor housing
• Coun
terweight
Model No.
GRT3
Model No.
GRT4
Model No.
GRT5
•
Convenient 20W light
• Operates on mains
electricity
•
The motor is AC 240V
• Suits Gasmate and
most barbecues with
roasting hoods, 4 to
6 burners
• 4 x 2 stainless steel
prong forks
• 4 piece stainless
steel shaft
• Supplied with all
mounting hardware
• Stainless steel
motor housing
• Coun
terweight
Page 2

• READ ALL INSTRUCTIONS.
• DO NOT touch hot surfaces. Use handles
or knobs.
• Close su
pervision is necessary when
appliance is used by or near children.
• The use
of accessory attachments
not recommended by the appliance
manufacturer may cause injuries.
• Extr
eme caution must be used when
moving an appliance containing hot oil or
other hot liquids.
• DO NOT use this appliance for anything other
than intended use.
• Model GRT2 - the mo
tor is DC 3V
(Battery Size “D”).
• Model GRT3 & GRT4 - the mo
tor is AC 240V
•
If using with a barbecue tted with a side
burner, do not use the side burner while the
rotisserie motor is tted to the same side. It
is recommended to t the rotisserie motor on
the opposite side to the side burner.
• DO NO
T place on or near a hot gas or electric
burner, or in a heated oven.
IMPORTANT SAFEGUARDS - Model GRT2 & GRT3
When using electrical appliances, basic safety precautions should always be followed, including the
following:
IMPORTANT SAFEGUARDS - Model. No GRT3 & GRT4
• The power supply must be supplied through a residual current device (RCD) having
a tripping current not exceeding 30mA.
• DO NOT use the rotisserie during inclement weather.
• Unplug and remove rotisserie when not in use.
• DO NOT operate the rotisserie with a damaged cord or plug, or if rotisserie
malfunctions, or has been damaged in any manner.
• To protect against electrical shock, DO NOT immerse cord, plug or motor in water or
expose to rain.
• Avoid contact of the electrical cord with hot barbecue surfaces and grease.
IMPORTANT SAFEGUARDS - Model. No GRT5
• Ensure that the light is disconnected from the mains supply when not in use, before
installing/changing globes, making changes and when changing accessories.
• DO NOT change globes or clean the light lens while light is on or plugged into the
mains power supply.
• Always use the correct type of globe.
• DO NOT use the light as a heater.
• DO NOT use the light as a dryer.
• DO NOT touch any part of the light while on. Hot surfaces may burn.
• Always keep light one (1m) from combustible materials or ammable gases.
• Always use extension cords intended for and marked ‘outdoor’ use.
Page 3

ROTISSERIE COOKING
Rotisserie cooking produces foods that are moist,
avourful and attractive, as the turning food self
bastes. Although the rotisserie is best for larger
pieces of meat or poultry, nearly anything can be
used if prepared properly.
Balancing the Food
The item that requires the most attention in
rotisserie cooking is balancing the food. The
rotisserie must turn evenly otherwise the
stopping and starting action will cause the food to
cook unevenly and possibly burn the heavier side.
The easiest foods to balance are those of uniform
shape and texture. To test if the food is balanced
correctly when secured, place the ends of the
rotisserie skewer loosely in the palms of your
hands. If there is no tendency to roll, give
the spit a quarter turn. If it’s still stable give
it a nal quarter turn. It should rest without
turning in each of these positions. It can then be
attached to the barbecue.
Poultry
When using poultry, truss the birds tightly so that
wings and drumsticks are close to the body of the
bird. The cavity of the bird maybe stuffed prior
to this if you wish. Pull the neck skin down and
using a small skewer x to the back of the bird.
Push the rotisserie skewer through lengthwise,
catching the bird in the fork of the wishbone.
Centre the bird and tighten with the holding
forks. Test the balance as described above.
Rolled Meat
A rolled piece of meat only requires the rotisserie
skewer to be inserted through the centre of
the length of meat then secured and balanced.
Unboned Meat
For meats which are unboned it is best to secure
the rotisserie skewer diagonally through the
meaty sections.
When to Use Foil
If protuding bones or wings brown too quickly
cover with pieces of foil.
SETTING UP THE BARBECUE
When rotisserie cooking the majority of heat will
come from an indirect souce. In other words the
burners at each end of the barbecue are lit and
the food is placed centrally with no direct heat
source underneath it.
Place the barbecue’s cooking pan in the central
location which will catch any drips from the food
above. This can then be used to make gravies
and other sauces to accompany the cooked meats.
Place the hood down over the food when you start
to cook.
For foods with little fat you may wish to cook
them directly over one or two burners depending
on the length of the food, to give a charred effect.
This should only be done towards the end of the
cooking for no longer than 10-15 minutes. Do
not attempt this with foods that are fatty as this
will cause are-ups and excessive smoke. If you
wish to cook foods directly open the hood of the
barbecue.
COOKING TIMES
This will vary according to the type and weight of
food you are cooking. Insert a meat thermometer
into the centre of the meat (avoiding bone) which
will provide a temperature guide for you.
The cooking times on a rotisserie will be
approximately the same as for oven cooking.
Parts List:
No. Description Qty
1 Motor Bracket 1
2 1/2” screw 4
3 Washers 4
4 Nuts 4
5 Half size spit rod 42.5cm 1
6 Half size spit rod 42.5cm 1
7 Skewer with thumbsrews 4
8 Collar with thumbscrew 1
9 Shaft Bush 1
10 Handle 1
11 AC/DC motor 1
12 Spit extension rod 1
13 Motor rod 1
14 Shaft bracket 1
15 Shaft spacer 1
Page 4
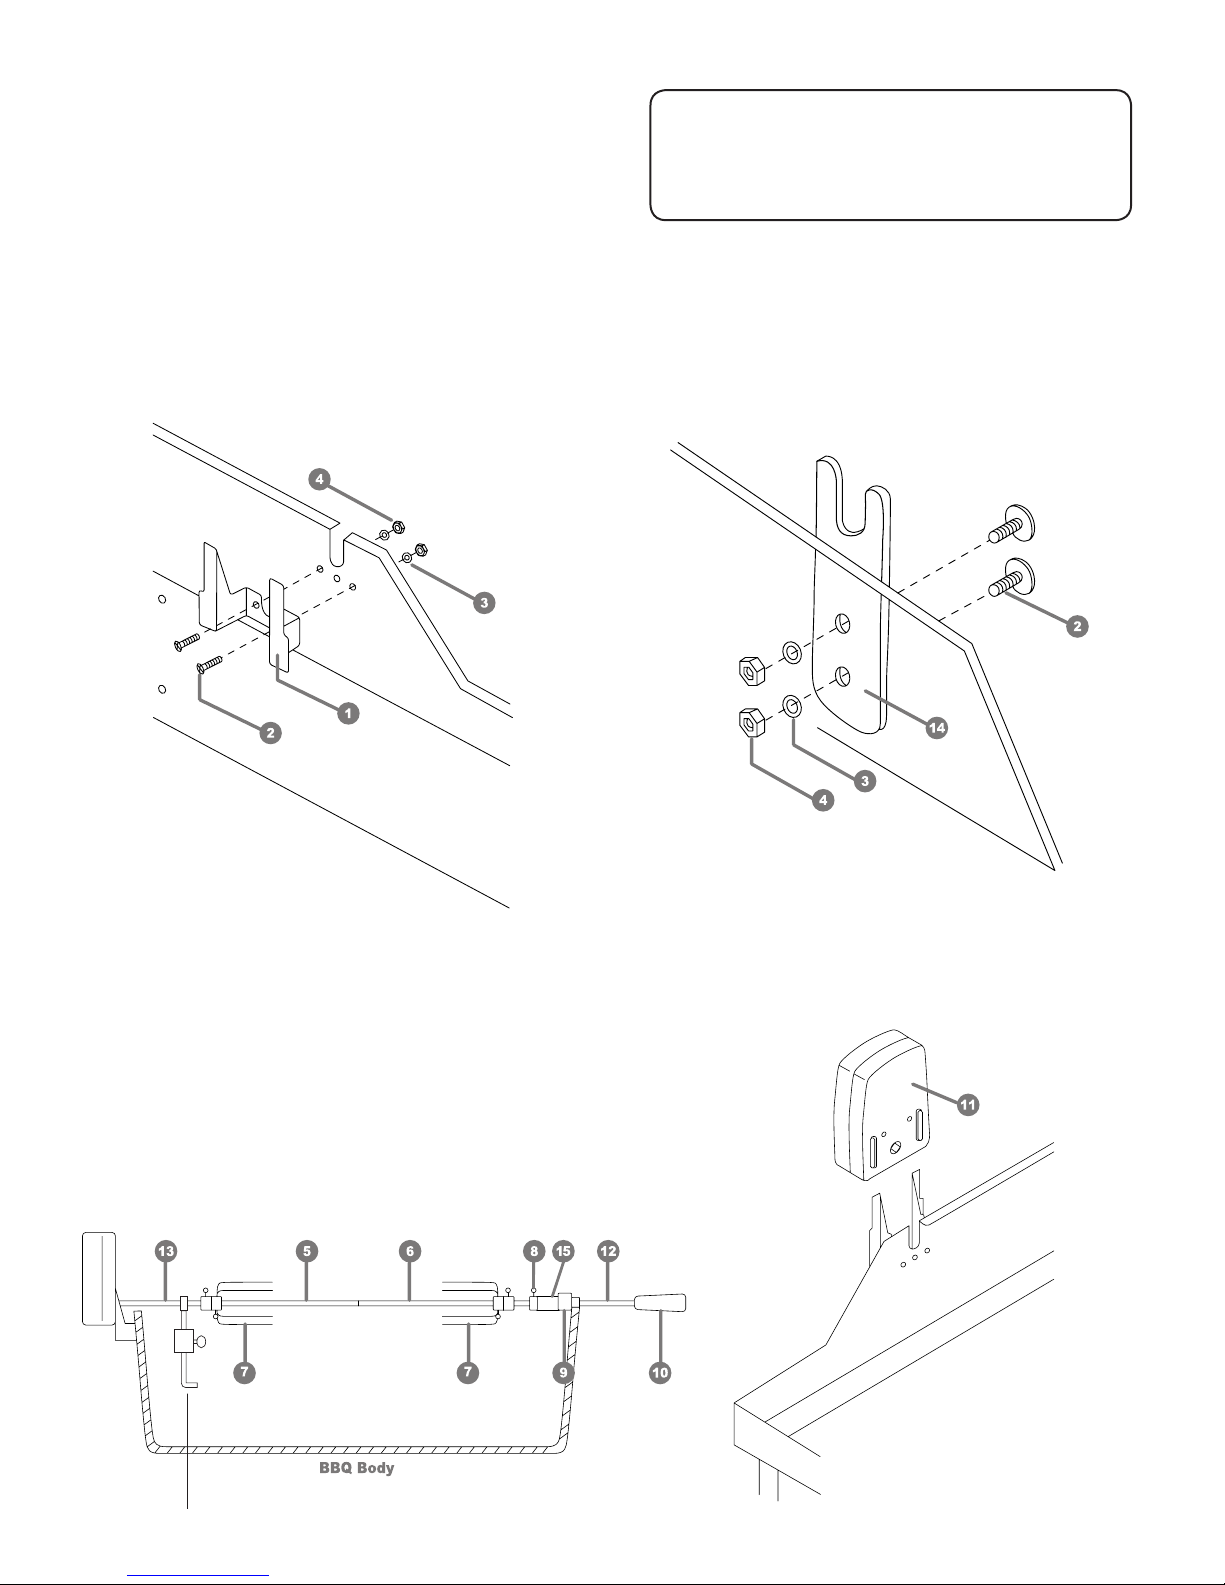
STEP 2.
Attach the shaft bracket (14) to the bbq body.
Align the two holes on the shaft bracket with the
holes on the bbq body. Tighten securely using
two 1/2“ screws (2), washers (3), and nuts (4)
provided.
ROTISSERIE ASSEMBLY
Tools Required:
Adjustable Wrench
Pliers
Screwdriver
STEP 1.
Attach the motor bracket (1) to the bbq body.
Align the two holes on the motor bracket with the
holes on the bbq body. Tighten securely using
two 1/2“ screws (2), washers (3), and nuts (4)
provided.
STEP 3.
Screw the threaded ends of the motor rod (13),
spit extension rod (12, if needed) and spit rod
halves (5 & 6) together. Tighten rmly with
wrenches. Slide skewers (7) on each end of spit
rods (5 & 6) and tighten the thumbscrews. Slide
on the collar with thumbscrew (8), shaft bush
(9) and tighten. The shaft spacer (15) may be
required if the collar with thumbscrew interferes
with the barbecue body. Screw the handle (10) to
the threaded end of the spit extension rod (12).
STEP 4.
Install the motor (11) to the motor bracket as
shown.
Note:
It is recommended that you remove the plastic
handle during use. Only use when removing
the rotisserie from the bbq.
Counterweight (GRT4 only)
 Loading...