

Garmin nuvi 1300 Series, NUVI 300 SERIES Quick Start Manual
•
GARMINe
nOvi®
quick
1300
start
series
manual
--~-:-~1300,1310
©
March
2009
2009
·th
for
use
Garmin
190-01050-01
these
WI
1340,1350,137
Ltd.orits
nOVi
mooelS:
subsidiaries
Rev.
A
1
lI..,P1'1~~
PrintedinTaiwan
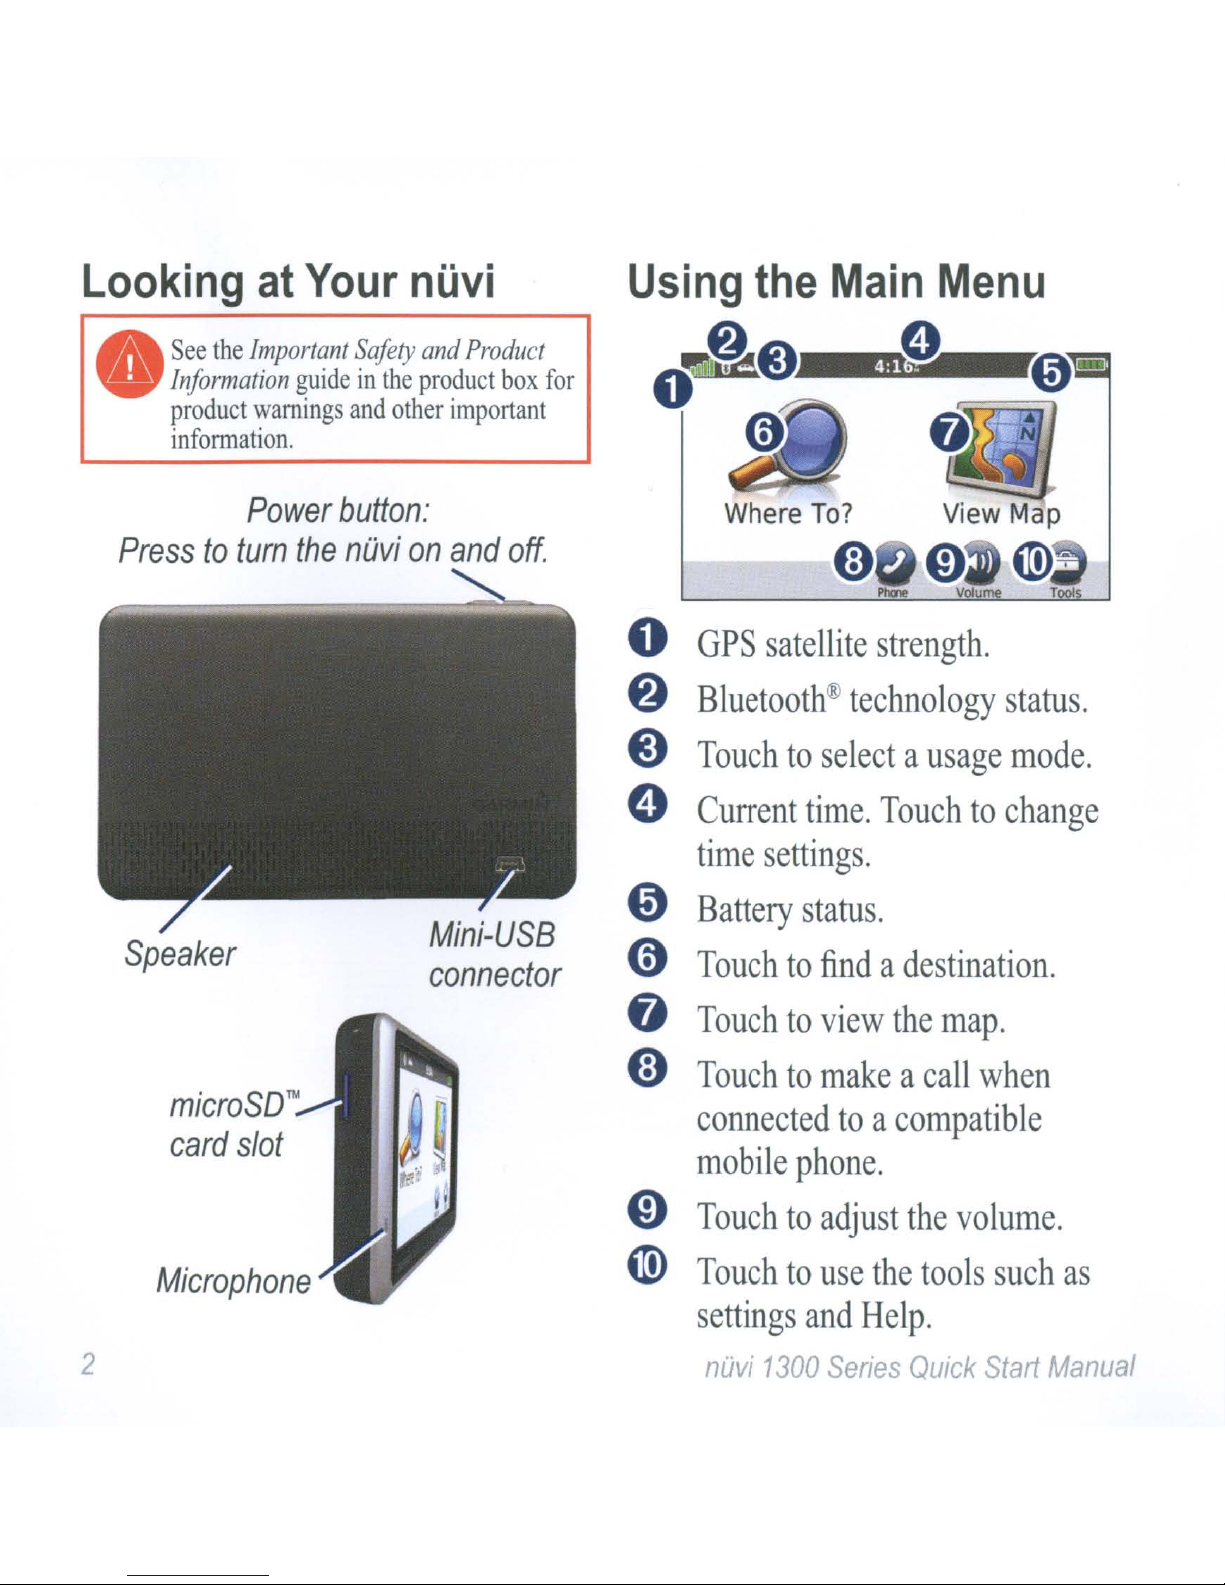
Looking
See
the
•
Information
product
information.
at
Your
Important
guideinthe
warnings
Safety
and
other
nuvi
and
Product
product
important
box
for
4:1
.
Power
Presstoturn
Speaker
microSD™
card
slot
button:
the
nOvionand
off.
Mini-USB
connector
o
8
@)
o
@)
o
o
o
Where
GPS
Bluetooth®
Touchtoselectausage
Current
time
Battery
To?
satellite
technology
time.
settings.
status.
strength.
status.
mode.
Touchtochange
Touchtofindadestination.
Touchtoview
Touchtomakeacall
connectedtoa
mobile
phone.
the
map.
when
compatible
Microphone
2
@)
@
Touchtoadjust
Touchtouse
settings
nOvi
and
1300
the
Help.
Series
the
volume.
tools
QUick
such
Start
as
Manual
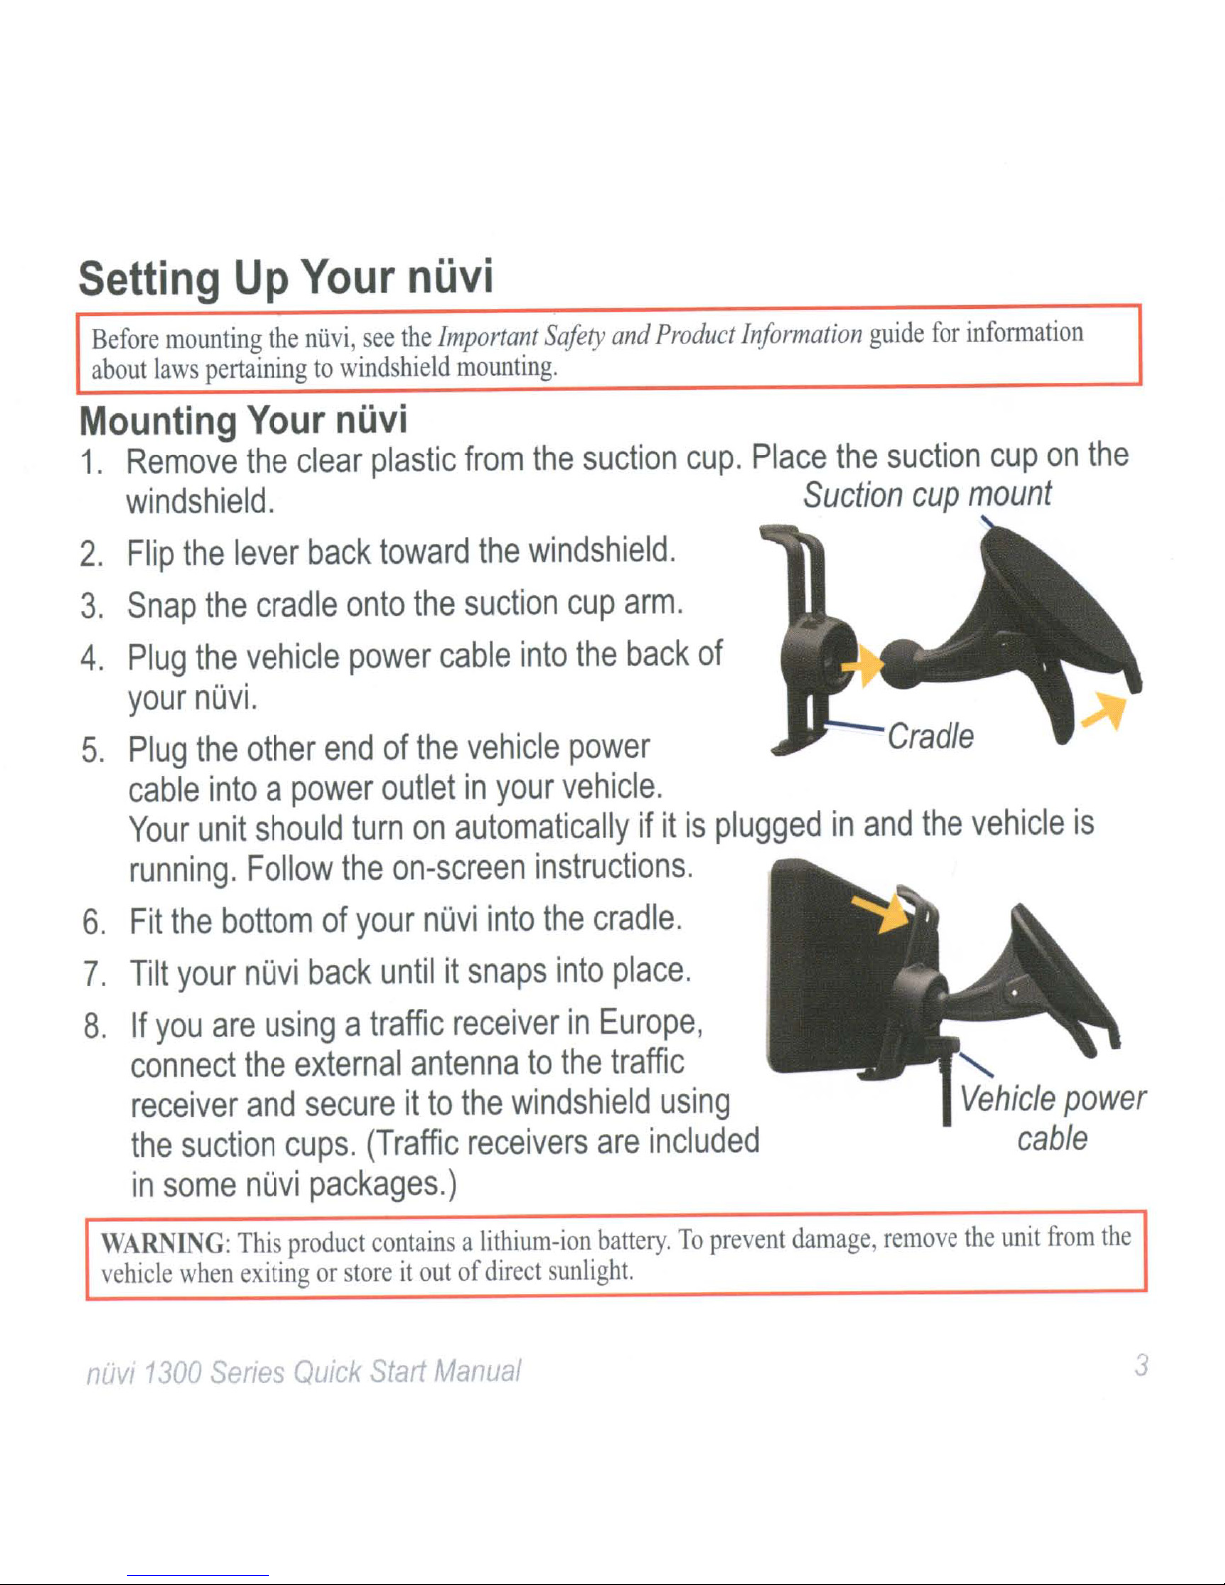
Setting
Up
Your
nuvi
Before
about
mounting
laws
pertainingtowindshield
Mounting
1.
Remove
windshield.
2.
Flip
the
3.
Snap
4.
Plug
your
5.
Plug
cable
Your
running.
the
the
nuvi.
the
intoapower
unit
the
Your
the
clear
lever
cradle
vehicle
other
should
Follow
ntivi,
see
the
nuvi
plastic
back
toward
onto
the
power
endofthe
outletinyour
turn
the
on
on-screen
Important
mounting.
from
Safety
the
and
Product
suction
Information
cup.
Place
guide
the
Suction
the
windshield.
suction
cable
vehicle
into
cup
arm.
the
back
power
of
vehicle.
automaticallyifitispluggedinand
instructions.
for
information
suction
cup
mount
Cradle
the
vehicle
cup
on
the
is
6.
Fit
the
7.
Tilt
your
8.
If
you
connect
receiver
the
suction
in
some
WARNING:
vehicle
nuvi
when
1300
bottomofyour
nuvi
are
the
and
back
usingatraffic
external
secureitto
cups.
nuvi
This
exitingorstoreitoutofdirect
Senes
packages.)
product
Quick
nuvi
untilitsnaps
receiverinEurope,
antennatothe
the
(Traffic
containsalithium-ion
Start
receivers
Manual
into
the
cradle.
into
windshield
are
battery.Toprevent
sunlight.
place.
traffic
using
included
damage,
remove
"-
Vehicle
cable
the
unit
power
from
the
3

Acquiring
1.
Go
outdoorstoan
2.
away
Turn
from
on
Satellites
tall
buildings
your
nOvi.
open
area,
and
trees.
Resetting
If
your
your
Power
niivi
niivi
button
stops
by
Your
functioning,
pressing
for
10
seconds.
nOvi
and
holding
reset
the
Acquiring
few
minutes.
satellite
of
the
barsisgreen,
acquired
Using
Press
and
satellite
The
strength.
satellite
the
quickly
buttontoview
•
Touch
•
screen
Touch
brightness.
Lock
accidental
signals
Il!IiIil
bars
Whenatleast
your
signals.
Power
release
additional
and
Screen
screen
to
touches.
can
take
indicate
niivi
has
Button
the
Power
options:
adjust
to
prevent
the
When
one
a
Finding
1.
Touch
Interest.
2.
Selectacategory
subcategory.
3.
Selectadestination,
Go!.
4.
If
necessary,
navigate
To
enter
name,
Interest>
touch
Points
Where
the
letters
Where
Spell
containedinthe
of
Interest
To?>Points
and
a
and
touch
route.
Start
To?>Points
arne.
of
touch
to
of
your
screen
•
Touch
nUvi.
niivi
Power
4
niivi
screenislocked,
backlight
Turn
You
by
can
pressing
button
Off
also
will
to
turn
tum
and
dim.
holding
for2seconds.
off
off
the
your
the
the
To
search
area,
touch
nuvi
foralocationina
Where
1300
To?
Sertes
>
QUick
different
ear.
Start
Manual

Following
Your
Route
Touchtoview
the
Tum
List
Your
line.
youtoyour
prompts,
routeismarked
As
you
travel,
destination
arrows
directionsatthe
depart
ntivi
Touch
different
A
speed
you
from
the
recalculates
and
drag
area
limit
travel
on
of
icon
major
withamagenta
your
on
the
top
of
the
original
the
route.
the
maptoview
the
map.
could
roadways.
ntivi
with
map,
guides
voice
and
map.Ifyou
route,
your
appear
a
as
page.
Touchtoview
page.
@)
Touch
and
Touchtoreturntothe
out.
<?
and
menu.
o
Touchtoview
Computer.
o
Touchtodisplayadifferent
field.
AddingaStop
the
=
the
Where
to
zoom
Main
Trip
Am
in
data
I?
o
nuvi
E
lSlst
SI
Arrival
7:49
0
0
Touchtoview
page
when
1300
or
the
available.
Senes
QUick
junction
the
Stalt
ext
Tum
view
Manual
page,
1.
While
~
>
2.
Search
3.
Touch
4.
Touch
add
destination.
navigatingaroute,
Where
for
Go!.
Add
this
the
as
stop
To?
extra
Via
before
Point
stop.
your
touch
to
final
5
 Loading...