

Page 1
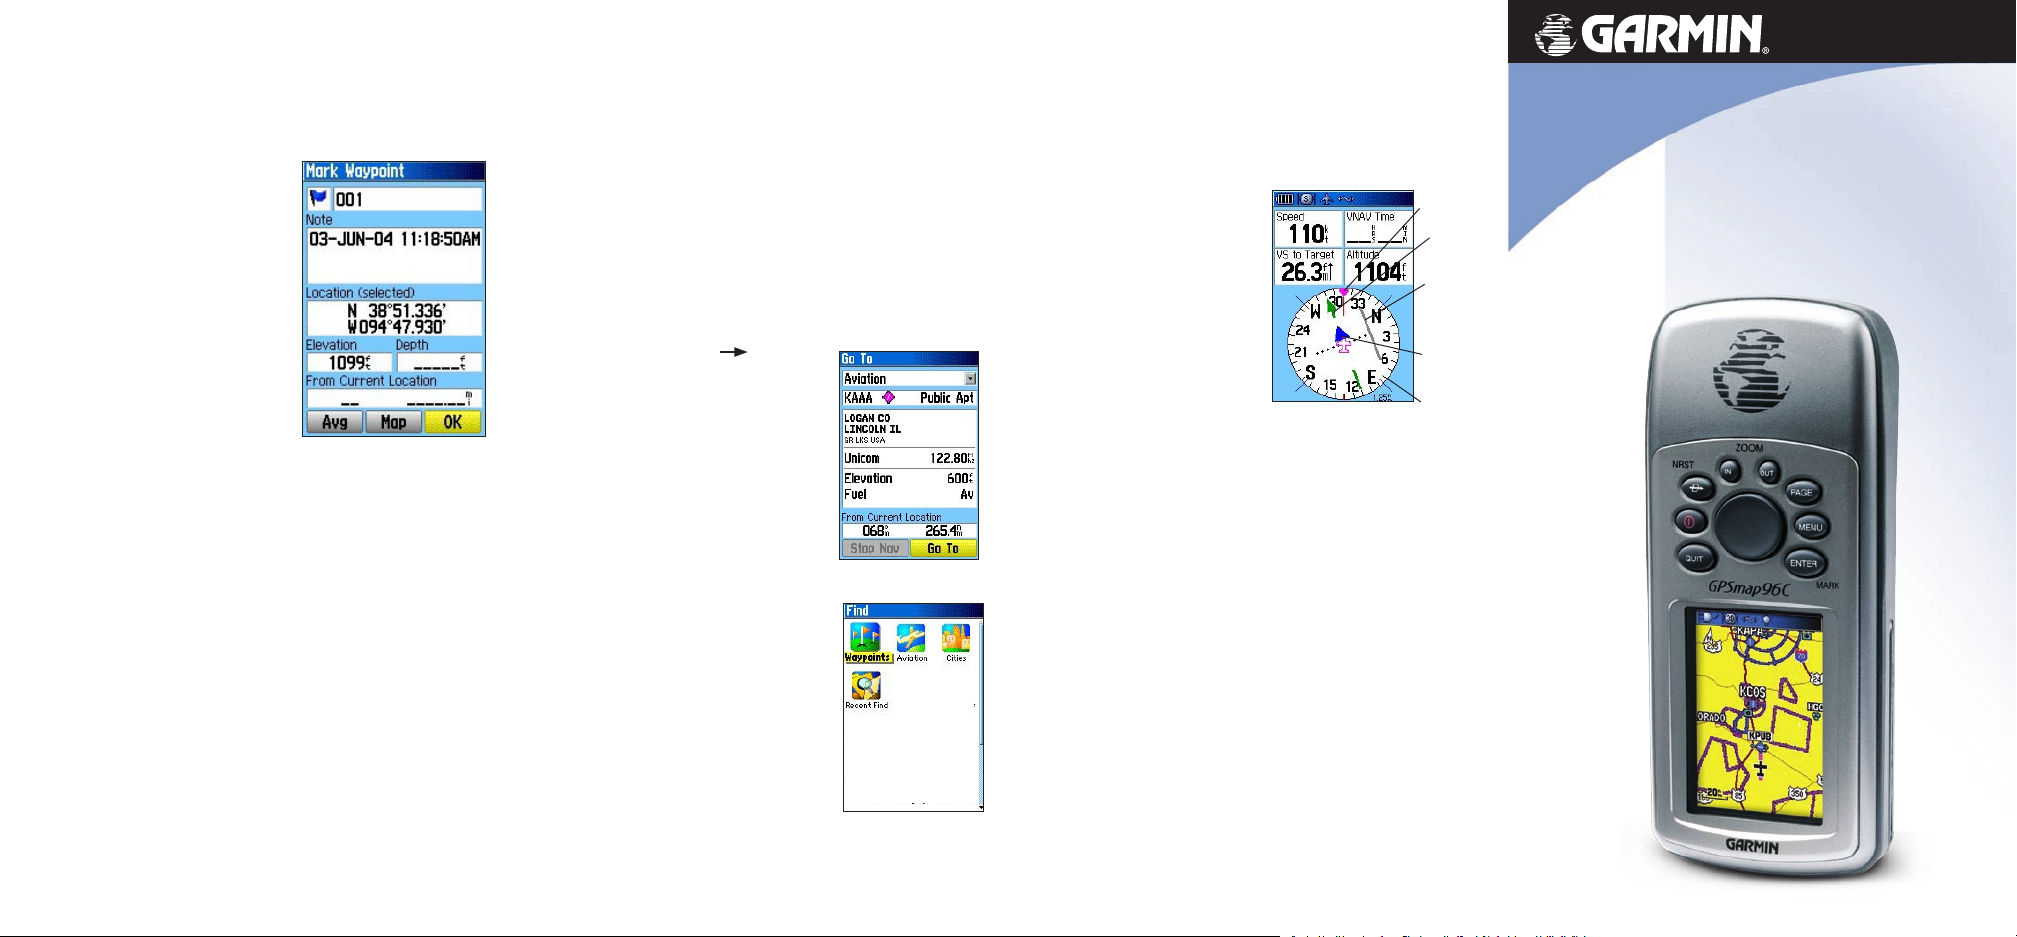
Marking Your Location as a Waypoint
A waypoint is a geographic location that you specify. It can
be your current location, a point on the Map Page, or any
item from the Find Feature database.
1. Press and hold ENTER/
MARK to show the Mark
Waypoint Page. Your
current position is assigned
a map symbol, a unique
identification number, a
date and time of recording,
location coordinates, and
if available, elevation, and
depth.
2. To save the waypoint to
the Waypoints List, press
ENTER.
Finding an Airport
You can search for a destination in each of the three operating
modes, Aviation, Automotive, and Marine. References to
Marine and Automotive modes, buttons, pages, and fields, are
in parentheses for this section. All operating modes use data
from the Jeppesen database and unit mapping database to find
and navigate to waypoints, airports, aviation navigation aids
like VOR, NDB, intersections, cities, and recent finds. To find
Points of Interest (such as restaurants, lodging, and museums)
and Marine Navigation Aids, you must download detailed
map data from Garmin MapSource®.
To personalize the Waypoint, refer to the “Using
Waypoints” section of the owner’s manual.
© Copyright 2004, 2006 Garmin Ltd. or its subsidiaries
Part Number: 190-00420-01 Rev. B Printed in Taiwan
1. Press DIRECT TO
Go To Page (Find Menu) or press
and hold DIRECT TO for the
Nearest Airport list (Recent Finds
list).
2. Use the ROCKER to select the
Airport Identifier field (Waypoints
icon), and then press ENTER.
The Nearest Page list shows only
those nearest to your current
location. Press MENU to view the
list of options.
3. Use the ROCKER to scroll through
the alphanumeric Identifier list until
the desired airport (waypoint) is
selected. Then press ENTER.
4. Use the ROCKER to select Go To
at the bottom of the page. Then
press ENTER to begin navigation
to the airport, navigation aid,
waypoint, or map item.
D
for the
Aviation Go To
Find Menu
Navigating to an Airport
When using Go To to navigate, the GPSMAP 96/96C creates
a direct to or course to the waypoint. The HSI Page uses the
Course Pointer, Bug Indicator, Compass Ring, and data fields
to direct your navigation efforts.
Course Pointer—indicates the
direction established in creating
the course. If you deviate from
the course, the center section
of the Course Pointer indicates
deviation from the course.
Bug Indicator—guides you
directly to your destination.
HSI Page
Compass Ring—rotates to
indicate directional orientation
when you begin to move.
Data Fields—contain selectable navigation information,
such as speed, distance to go, or elapsed time.
1. Press PAGE repeatedly to show the HSI.
2. Press QUIT to show the Map Page and see your
progress toward the waypoint. A course line appears
on the map, and the Aircraft Symbol moves as you
move.
3. Press QUIT again to move to the Position Page.
This page shows data, such as fuel and flight timers,
location, a trip odometer, and maximum speed.
4. To stop navigation, press MENU with the HSI or Map
Page shown. Select Stop Navigation, and press
ENTER.
Bug
Indicator
Course
Pointer
Course
Deviation
Indicator
To/From
Indicator
Compass
Ring
GPSMAP® 96/96C
portable aviation receiver
quick reference guide
Page 2
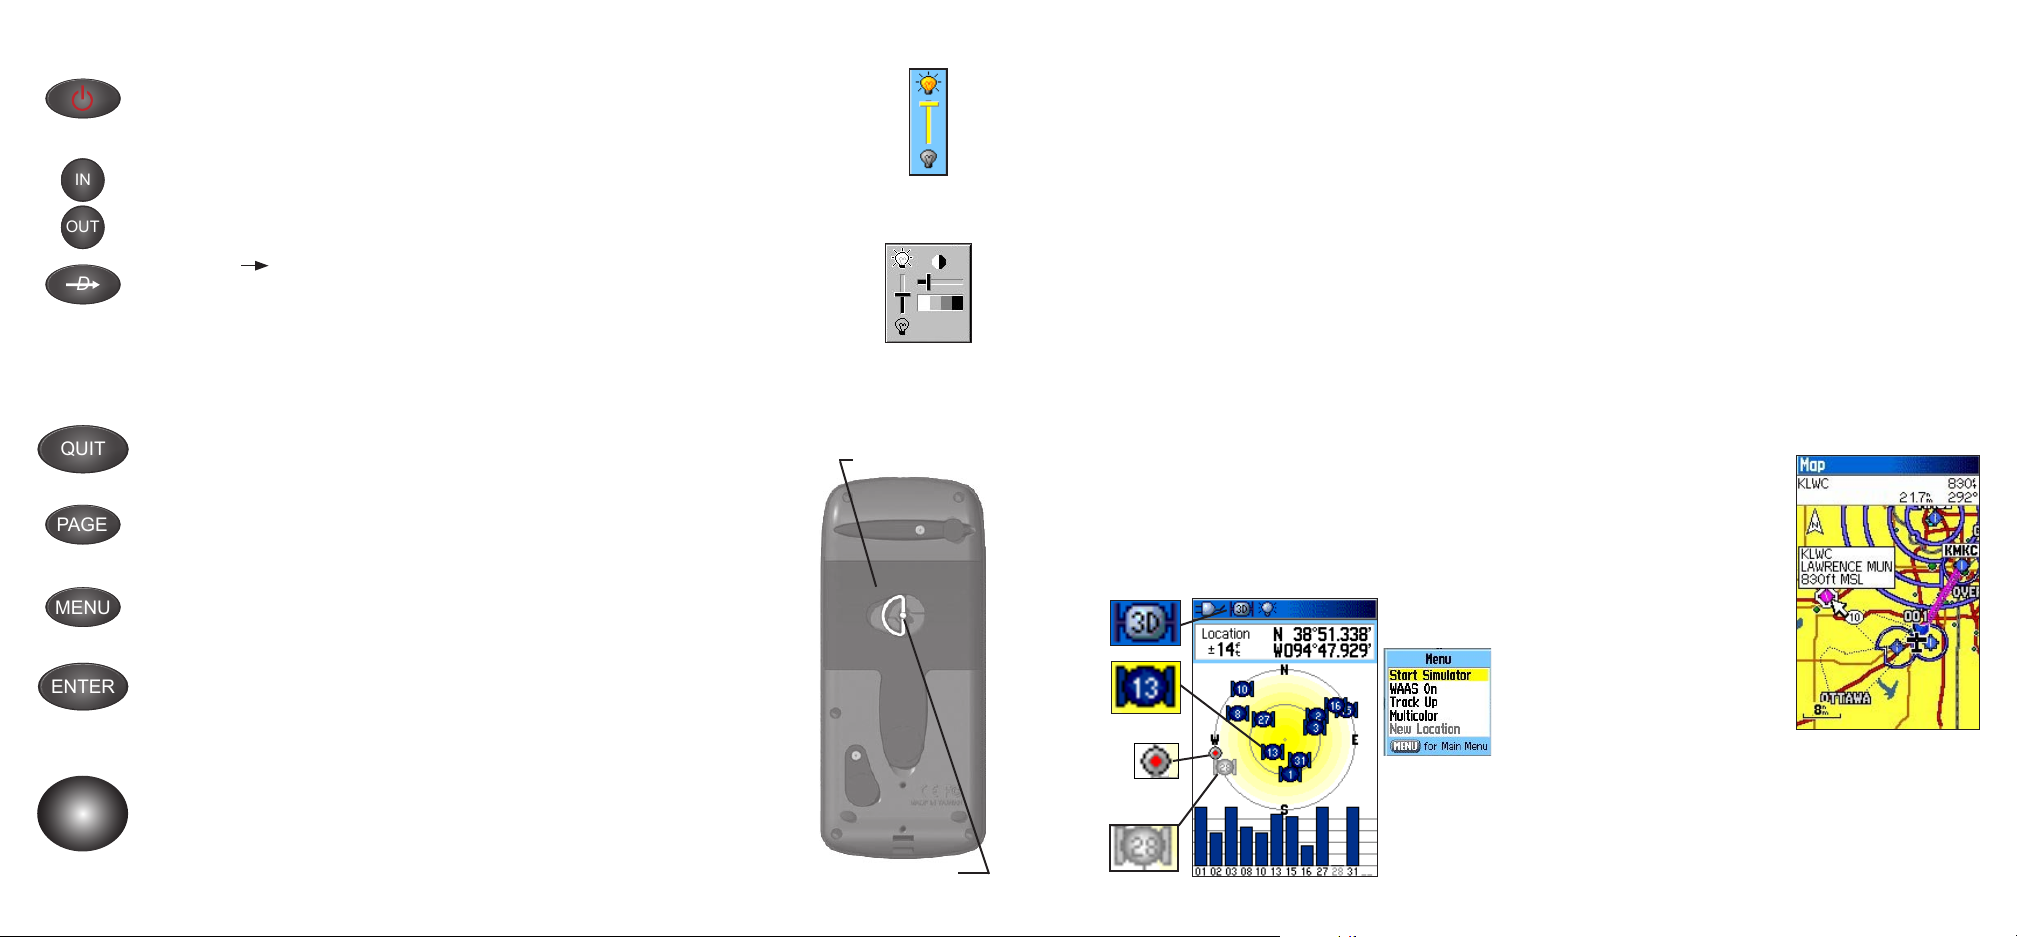
Using the Keypad Adjusting the Backlighting
D
ENTER
MENU
IN
OUT
PAGE
QUIT
POWER/BACKLIGHT Key—press and
hold to turn unit On or Off. Press and release
to adjust backlighting.
IN/OUT Zoom Keys
—from the Map Page,
press to zoom in or out. From any other page,
press to scroll up or down a list.
DIRECT TO
D/NRST Key—press and
release to view the Go To Page (Aviation) or
Find Menu Page (Automotive and Marine).
Press and hold for Nearest List (Aviation),
Recent Finds (Automotive), or MOB-Man
Overboard feature (Marine).
QUIT Key
—press and release to cancel data
entry or exit a page.
PAGE Key
—press to cycle through the main
pages. Press and hold to switch operating
modes.
MENU Key—press and release to view page
options. Press twice to view the Main Menu.
ENTER/MARK Key—press and release to
enter highlighted options, data, or to confirm
on-screen messages. Press and hold to mark
your current location as a waypoint.
ROCKER Key—move up, down, right, or
left to move through lists; highlight fields,
on-screen buttons, or icons; enter data; or
move the map panning arrow.
When lighting conditions make it difficult to
view the GPSMAP 96/96C screen, turn on
and adjust the backlighting (and contrast for
the GPSMAP 96).
To adjust the backlight and
contrast:
1. With the GPSMAP 96/96C turned on,
press and release the POWER key
to show the Backlight Adjustment
Slider.
2. Press and release the POWER key
to increase the brightness level. Use
the ROCKER to adjust the contrast
for the GPSMAP 96. Press ENTER to close.
Battery Cover
Battery Installation
The GPSMAP 96/96C requires two
AA batteries (not included), which
are located in the back of the unit
under the D-Ring. Alkaline or NiMH
batteries can be used (see the owner’s
manual for setting the battery type).
Stored data is not lost when batteries
are removed. Install the batteries,
observing the proper polarity. A
polarity diagram is molded into the
battery compartment. Extensive use
of backlighting, WAAS, and key beep
tones can significantly reduce battery
life.
GPSMAP
96C Backlight
Adjustment
GPSMAP 96
Backlight/Contrast
Adjustment
D-Ring
Start-Up and Satellite Acquisition
Find a location where you have a clear view of the sky. If you
are starting up for the first time, or you have moved over 600
miles since last using the GPSMAP 96/96C, it must initialize
(determine its location by searching for satellites that are in
position over your current location). Press MENU to use the
Location option from the Satellite Page Options Menu to
mark your approximate location on the Map Page. The unit
only looks for satellites above the indicated location.
1. Turn on the GPSMAP 96/96C by pressing and
releasing the POWER key. A Power Up Page briefly
appears followed by a Warning Page. Press ENTER to
acknowledge and move to the Satellite Page.
2. Observe the Satellite Page and the GPS status
messages as they appear at the top of the page.
• “Acquiring Satellites” message appears as the
GPSMAP 96/96C begins to search for satellites
overhead.
• Your location coordinates appears when four or
more satellites are fixed (enough to determine an
Status Bar
Received
Heading Bug
indicates your
approximate elevation and ground location).
3D GPS
indicator
Satellite
icon
direction of
movement
Satellite
not yet
received
Satellite Page
Options
Viewing the Main Pages
To view these pages, press PAGE repeatedly to cycle
from one to another. To switch operating modes (Aviation,
Automotive, or Marine), press and hold PAGE to show a
mode options window. Use the ROCKER to select a mode,
and then press ENTER. Many of the main pages change to
show data specific for each operating mode.
Using the Map Page
The Map Page shows a detailed map of the area around
your current location. You can view your progress when
moving or navigating to a chosen destination. The IN and
OUT keys allow you to change the map scale. Optional
user-defined data fields provide navigation information.
To use the Map Page:
1. Press PAGE to cycle
through the Main Pages
until the Map Page
appears.
2. Press MENU to view
options for the Map Page.
3. Use the ROCKER to
move the Map Pointer
to highlight a map item
or view more map area.
Refer to the owner’s
manual for more details.
 Loading...