

Page 1
D
GBFNLS
I
E
P
DK
GARDENA
®
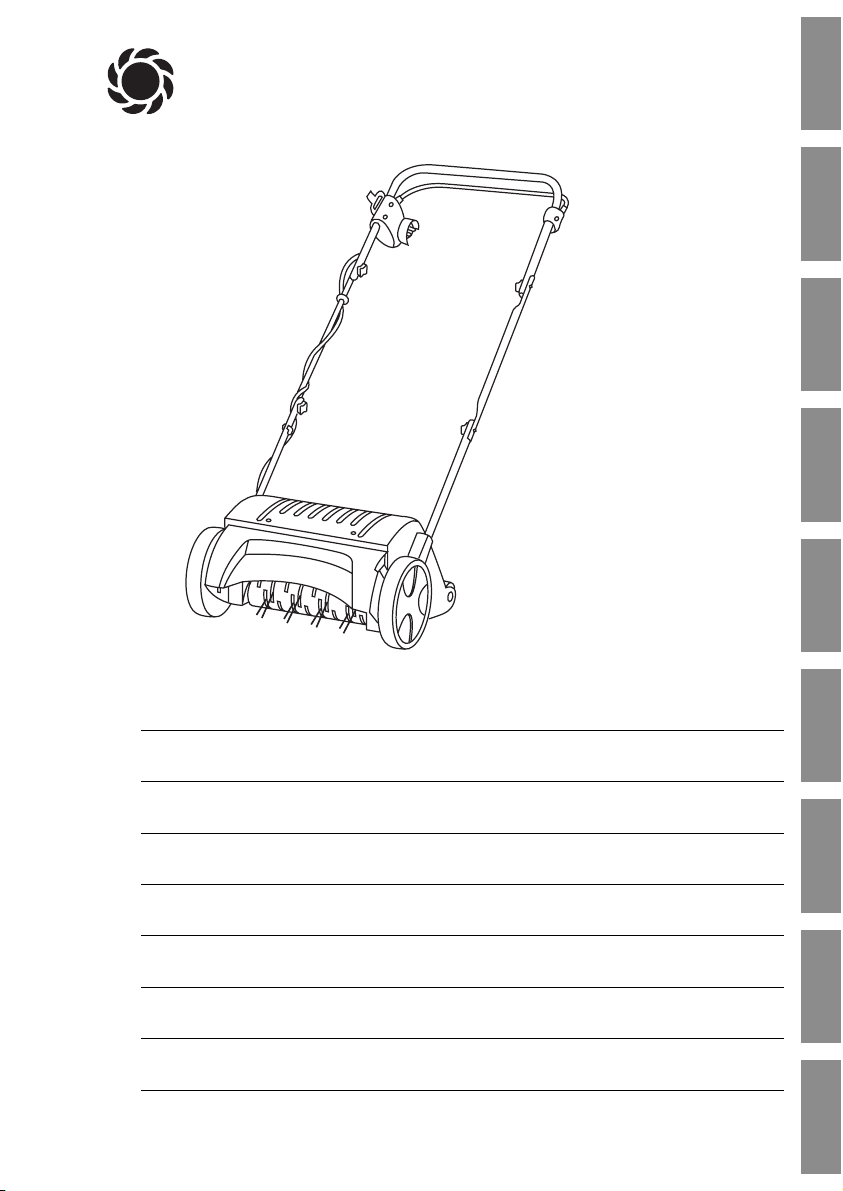
ES 500 Art. 4066
D Gebrauchsanweisung
Elektro-Rasenlüfter
GB Operating Instructions
Electric Lawn Rake
F Mode d’emploi
Aérateur électrique
NL Gebruiksaanwijzing
Elektrische gazonbeluchter
S Bruksanvisning
Elektrisk Gräsmatteluftare
I Istruzioni per l’uso
Arieggiatore elettrico
E Manual de instrucciones
Aireador de césped eléctrico
P Instruções de utilização
Arejador de relva eléctrico
DK Brugsanvisning
Elektrisk Plænelufter
Page 2
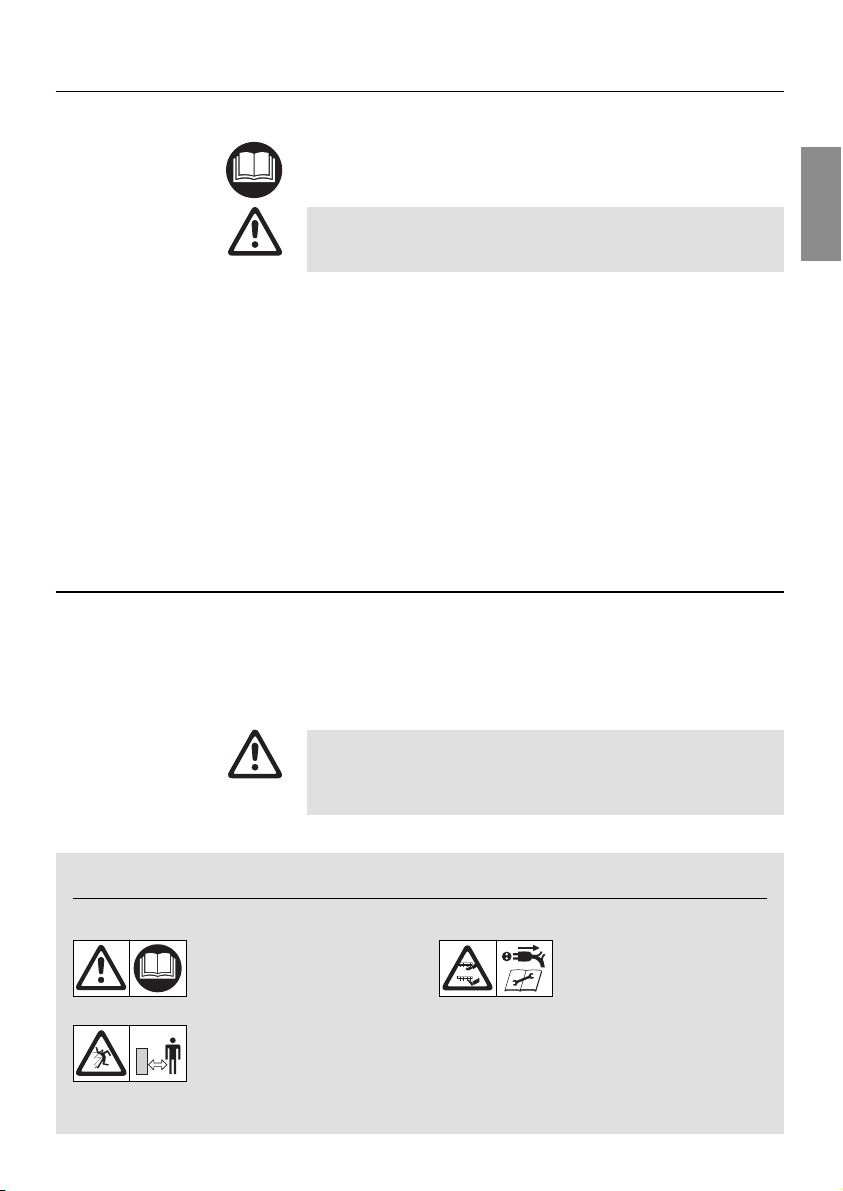
2. For Your Safety
v Please observe the notes on safety on the Electric Lawn Scarifier.
Warning !
V Read instruction
handbook!
Danger ! Risk of injury!
V Keep bystanders
away !
Sharp prongs can cause
injury !
V Unplug from the mains
before maintenance or
if the mains lead is
damaged.
V Keep mains connection
lead away from the
lawn scarifier.
Intended use
Please note
GARDENA Electric Lawn Aerator ES 500
Welcome to the Garden of GARDENA...
Please read these operating instructions carefully and observe
the notes given. Use these instructions to familiarise yourself with
the Electric Lawn Scarifier, its correct use and the notes on safety.
For safety reasons, children under the age of 16 as well as persons not familiar with these operating instructions should not
use this Electric Lawn Scarifier.
v Please keep these operating instructions in a safe place.
1. Where to Use Your GARDENA Electric Lawn Scarifier
. . . . . . 11
2. For Your Safety . . . . . . . . . . . . . . . . . . . . . . . . . . . . . . . . . . . . . . . . . . . . . . . 11
3. Function . . . . . . . . . . . . . . . . . . . . . . . . . . . . . . . . . . . . . . . . . . . . . . . . . . . . . . . 13
4. Assembly . . . . . . . . . . . . . . . . . . . . . . . . . . . . . . . . . . . . . . . . . . . . . . . . . . . . . 13
5. Operation . . . . . . . . . . . . . . . . . . . . . . . . . . . . . . . . . . . . . . . . . . . . . . . . . . . . . 14
6. Maintenance
. . . . . . . . . . . . . . . . . . . . . . . . . . . . . . . . . . . . . . . . . . . . . . . . . . 15
7. Trouble-Shooting . . . . . . . . . . . . . . . . . . . . . . . . . . . . . . . . . . . . . . . . . . . . . . 16
8. Storing Your Electric Lawn scarifier . . . . . . . . . . . . . . . . . . . . . . . . . . . 17
9. Accessories . . . . . . . . . . . . . . . . . . . . . . . . . . . . . . . . . . . . . . . . . . . . . . . . . . . 18
10. Technical Data . . . . . . . . . . . . . . . . . . . . . . . . . . . . . . . . . . . . . . . . . . . . . . . . 18
11. Service
. . . . . . . . . . . . . . . . . . . . . . . . . . . . . . . . . . . . . . . . . . . . . . . . . . . . . . . . 18
1. Where to Use Your GARDENA Electric Lawn Scarifier
The GARDENA Electric Lawn Scarifier ES 500 is designed for
aerating lawns and grassy areas in private domestic and hobby
gardens. It is not designed for use in public facilities, parks, sporting grounds, on roads, in agriculture or forestry.
Compliance with these instructions provided by GARDENA is a
prerequisite for using the Electric Lawn Scarifier correctly.
Attention! To prevent injury, the Electric Lawn Scarifier
must not be used for trimming bushes, hedges and shrubs.
In addition, the Electric Lawn Scarifier must not be used for
levelling irregularities in the soil.
Contents
11
GB
Page 3
12
GB
Checks before each use:
v Inspect the Electric Lawn Scarifier before
each use.
v Do not use the Electric Lawn Scarifier if
safety devices (starter lever, safety interlock, rear flap, housing) are damaged or
worn.
v Never operate the unit with the safety
devices by-passed or missing.
v Note: Ensure that all nuts, bolts and screws
are tight and that the Lawn Scarifier is in
good working order.
v Inspect the area to be aerated before be-
ginning work.
v Check the working area for foreign objects
(e.g. stones, branches, string) and remove
if necessary.
Proper use / Responsibility :
Danger ! Risk of injury!
The Lawn Scarifier can cause seri-
ous
injuries!
V Keep hands and feet away from the
aerator cylinder.
You are responsible for the safety of the working area.
v Only use the Electric Lawn Scarifier for the
purposes specified in these instructions.
v Only work when visibility is good.
v During use do not tip the unit and do not
open the rear flap.
v Familiarise yourself with the surroundings
of your working area. Check for possible
risks which might be not audible due to
the noise of the machine.
v Wear sturdy shoes and long trousers to
protect your legs.
v Ensure you keep your feet a safe distance
from the moving parts.
v Make sure that there are no other people
(especially children) or animals anywhere
near the working area.
v Always push the Lawn Scarifier at a walking
pace.
v Operating position: Ensure that you have a
secure foothold when working.
v Be particularly careful if you change
direction on a slope.
Attention! Take extra care when walking
backwards.You may stumble!
v Do not use the Lawn Scarifier if it is raining
or in moist, wet conditions.
v Do not work close to the edge of swimming
pools or garden ponds with the lawn
scarifier.
v Please observe any local restrictions relat-
ing to noise levels.
Electrical safety:
v Keep the extension cable away from the
aerator cylinder!
v Never use the Electric Lawn Scarifier when
it is raining.
v Please observe the prescribed local quiet
times.
v The connecting/ extension cable must be
checked regularly for damage and signs of
wear and tear.
v Disconnect the mains plug immediately if
the connecting /extension cable is damaged
or severed.
The coupling socket for the extension cable
must be waterproof for protection from water
splashes or the connection sockets for extension cables must be made of rubber or be
encased in rubber.
Extension cables must meet the requirements
of DIN VDE 0620.
v Only use approved extension cables with
an adequate cable cross-section. Ask your
electrician.
Attachment fittings must be used for extension
cables.
For portable units, which are used outdoors,
we recommend to use a residual-current
device having a residual-current rating
≤ 30 mA. In Switzerland use of a residualcurrent device is obligatory.
Page 4

13
GB
Interruptions of work:
Never leave the Electric Lawn Scarifier
unattended at the working area.
v If you interrupt your work store the unit in a
safe place. Disconnect the mains plug !
v When you interrupt work in order to go to
another working area, always switch off the
Electric Lawn Scarifier during transport. Put
the wear compensation lever in the transport position.
If you come into contact with an
obstruction during aerating:
1. Turn off the Electric Lawn Scarifier.
2. Remove the obstruction.
3. Check the Lawn Scarifier for damage and
have it repaired if necessary.
3. Function
The Lawn Scarifier can be used for removing matting and moss in
the lawn and thatch.
To maintain a well-cared-for lawn we recommend aerating every
4 - 6 weeks depending on the state of your lawn.
v First of all, mow your lawn to the length you require.
We particularly recommend this if the grass has grown tall
(e.g. while you were away on holiday).
Recommendation: the shorter you mow your lawn, the easier it
is to aerate, thus lessening the strain on the Lawn Scarifier and
increasing the lifetime of the aerator cylinder.
Staying too long in one place with the machine running or scarifying when the ground is wet or too dry can damage the turf.
v For good results, guide the Lawn Scarifier at an appropriate
speed in strips as straight as possible across your lawn.
To avoid leaving any gaps during aerating, the strips should touch.
v Always guide the Lawn Scarifier at an even speed depending
on the type of ground.
v When working on inclines always stand diagonally to the incline
in a sturdy, safe stance. Do not work on extremely steep slopes.
Danger of tripping !
To prevent tripping take particular care when moving back-
wards and when pulling the Lawn Scarifier.
When aerating areas of very mossy lawn we recommend re-sowing the lawn after aerating. This helps the areas of lawn which
were replaced by moss to regenerate quicker.
4. Assembly
V Do not place the connecting cable8under strain
A during assembly.
1. Insert the two lower sections of the upright
5
(with the end with
the round hole) in the mountings in the motor casing
6
and
secure with the crosshead screws
9
.
Correct aerating:
Assembling the handle:
Page 5

14
GB
2. Insert the two locking bolts 1from outside through the holes
in the two central sections
2
of the upright and secure to the
lower sections of the upright 5with two wing nuts 4.
3. Screw the upper part of the upright with starting handle
3
to
the central sections of the upright 2with two more locking
bolts 1and the wing nuts 4.
This completes the assembly of the hanle.
Warning: Fit the upper section of the upright with starting
handle3in such a way that the plug7with the power
cable8is on the right side (in direction of movement) (see
fig.).
4. Attach connection cable
8
to the handle with the two cable
clips 0.
5. Operation
1. Push connector of extension cable0on to the plug7.
2. Draw a loop of the extension cable
0
through the cable strain
relief device A1 and suspend in position 2.
This prevents inadvertent disconnection of the plug and socket
connection.
3. Insert extension cable 0into a mains socket.
Danger of injury if the Lawn Scarifier does not switch off
automatically!
V Do not
remove or bridge safety devices fitted to the Aera-
tor (e.g. by tying the starting lever to the upper handle)!
Danger ! The Scarifier does not stop immediately after
A the motor has been switched off:
V Never lift, tip or carry the Scarifier with the motor
running!
V Never start on solid ground (e.g. asphalt).
V Always maintain the safety distance between the
aerator cylinder and the user as defined by the
guide handle.
1. Place Lawn Scarifier on flat grass surface.
2. Keep safety interlock
B
pressed down and pull starting lever
C
on the upper handle 3.
The Lawn Scarifier starts.
3. Release safety interlock B.
When in operation, the extension cable0must always be
guided in the direction you are working and to the side of
the area to be worked on.
Always work away from the connection cable.
Connecting to power sypply:
Starting
Lawn Scarifier:
0 A
7
12
3
B
C
3
9
6
5
1
2
4
0
8
7
Page 6

15
GB
Blockage Protection: If the aerator cylinder is blocked, e.g.
by a foreign body, immediately release the starting lever. If the
blockage lasts longer than 10 seconds and the starting lever has
not been released, blockage protection is activated. In this case
immediately release the starting lever.The Lawn Scarifier can
be switched on again after cooling down for approx. 1 minute.
Danger of injury !
A If blockage protection is activated and the starting
lever is not released, the Lawn Scarifier starts again
automatically after approx. 1 minute.
6. Maintenance
Danger ! The aerator cylinder can cause injuries!
A V Prior to maintenance, unplug from the mains and
wait until the Scarifier drum has stopped.
V Wear working gloves for performing maintenance.
The Lawn Scarifier should be cleaned after each time it is used.
Risk of injury and physical damage!
A V Do not clean Lawn Scarifier under running water
(particularly under high pressure).
V Do not use hard or pointed objects for cleaning
the Lawn Scarifier.
v Remove grass and deposits from wheels, aerator cylinder
and housing.
The Lawn Scarifier is subject to wear in use due to the way in
which it works. The more intensively the Lawn Scarifier is used,
the greater the wear on the spring tines.
Hard or very dry ground accelerates wear as does excessive use
of the Lawn Scarifier.
If the results of your work with the Lawn Scarifier become increasingly worse due to wear of the spring tines, the aerator cylinder
can be adjusted twice.
The aerator cylinder has 4 adjustment positions:
• Transport position
• Aerating position 1 :
• Aerating position 2 :
If the springs are worn (the scarifier roller is lowered by 3 mm).
• Setting 3 :
Second setting for worn springs (the scarifier roller is lowered
by a further 3 mm).
Push wear compensation lever
D
gently away from the housing
and move to the position required.
Note: Wear adjustment is not used for height adjustment.
Adjustment of the aerator cylinder without visible wear can
cause damage to the aerator cylinder or overload the motor.
Cleaning Lawn Scarifier:
Adjusting for wear:
D
Page 7

16
GB
Replacing spring tines:
7. Trouble-Shooting
Danger ! The aerator cylinder can cause injuries !
A V Prior to rectifying faults, unplug from the mains
and wait until the aerator cylinder has stopped.
V Wear working gloves when rectifying faults.
If the aerator cylinder is not yet worn but individual springs have
broken, these must be replaced. Only original GARDENA replacement springs may be used.
• Replacement spring tines for Electric Aerator
GARDENA ES 500 Art. 4094
1. Unscrew two screws
E
on the underside of the housing.
2. Lift aerator cylinder
F
at an angle 1 and pull away the drive
shaft 2.
3. Pull bearing shell
G
off the aerator cylinder F.
4. Unscrew and remove screw
H
and draw out bearing boltI.
5. Remove cover plate
J
and spring elementsKfrom the spring
element holder
L
.
6. Push new spring elements
K
and cover plateJon the spring
element holder
L
.
The bores on the cover plateJand the spring element holder
L
must lie on top of each other.
7. Push in bearing boltIin such a way that all 3 bores (bearing
boltI, cover plateJand spring element holder L) are on
top of each other.
8. Screw in screw
H
.
9. Push aerator cylinder
F
on to the drive shaft.
10. Put bearing shell
G
on the aerator cylinder F.
11. Screw bearing shell
G
on to the lower side of the housing with
the screwEwithout tightening too much.
Problem Possible Cause Remedy
Abnormal noise. Foreign bodies on the aerator 1. Switch off the scarifier,
Clattering in the unit cylinder are hitting the Aerator. remove the mains plug from
Whistling sound Foreign bodies blocking
the socket and wait until the
the aerator cylinder.
cylinder has stopped rotating.
2. Remove foreign bodies.
3. Check Scarifier
immediately.
E
F
G
H
I
J
L K J
Page 8

17
GB
Problem Possible Cause Remedy
Whistling sound Cogged belt slipping. v Contact
GARDENA Service.
Motor will not start Faulty cable. v Check cable.
The conductor cross-section of v Contact your electrician.
the extension cable is possibly
too low.
Motor cuts out because Blocked by foreign bodies. 1. Switch off the motor, re-
blocking protection has move the mains plug from
been activated the socket and wait until
the Scarifier has stopped
rotating.
2. Remove foreign bodies.
3. After approx. 1 minute
switch on the Scarifier.
Aerating depth too large (aerator 1. Leave motor to cool down.
cylinder has been adjusted for 2. Set adjustment for wear
wear without wear to the knives). correctly.
The grass is too tall. v Mow the lawn before
aerating (see 3. Function
“Correct Aerating”
).
Aerating results are not Wear to the spring tines. v Adjust aerator cylinder
satisfactory (see Maintenance).
Cog belt faulty. v Contact
GARDENA Service.
Lawn has grown too tall. v Mow the lawn before using
the Aerator.
If you have any problem with your Electric Aerator, please contact our Customer Service.
8. Storing Your Electric Aerator
To save space the Lawn Scarifier can be folded up by
releasing the wing nuts.
Take care during this process that the cable does not
become trapped.
v Store the Aerator in a dry, closed room to which children
cannot gain access.
1. Switch off motor, unplug from the mains and wait until the
aerator cylinder stops.
2. Move the wear compensation to the transport position and
raise the aerator when transporting it over sensitive surfaces,
e.g. tiles.
The device must not be added to the normal household waste,
it must be disposed of in accordance with local regulations.
Storage:
Transport:
Disposal:
(in accordance with
RL2002/96/ EC)
Page 9

18
GB
9. Accessories
GARDENA Collecting bag for Electric Lawn Scarifier ES 500 Art. No. 4065
10. Technical Data
Motor power consumption 500 W
Mains voltage 230 V
Mains frequency 50/60 Hz
Working speed of the aerator cylinder 2,250 r.p.m.
Aerating width 30 cm
Wear adjustments 3 x 3 mm
Working area related emission characteristic value L
pA
1)
77 dB (A)
Working area related noise level L
WA
2)
89 dB (A)
Vibrations a
vhw
1)
≤ 2.5 m/s
2
Measuring method according to 1) EN 60335-1 2) Directive 2000/14/ EC
11. Service
GARDENA guarantees this product for 2 years (starting from the
date of purchase). This guarantee covers all serious defects of
the unit that can be proved to be material or manufacturing faults.
Under warranty we will either replace the unit or repair it free of
charge if the following conditions apply:
• The unit must have been handled properly and in keeping
with the requirements of the operating instructions.
• Neither the purchaser or a non-authorised third party have
attempted to repair the unit.
The wearing parts, scarifier springs, are excluded from the
warranty.
This manufacturer’s guarantee does not affect the user’s existing
warranty claims against the dealer/seller.
If a fault occurs with your Electric Aerator, please return the
faulty unit together with a copy of the receipt and a description
of the fault, with postage paid to one of the GARDENA Service
Centres listed on the back of these operating instructions.
Warranty
Page 10

D
Produkthaftung
Wir weisen ausdrücklich darauf hin, dass wir nach dem Produkthaftungsgesetz nicht für durch unsere Geräte hervorgerufene Schäden einzustehen haben, sofern diese durch unsachgemäße Reparatur verursacht
oder bei einem Teileaustausch nicht unsere Original GARDENA Teile oder
von uns freigegebene Teile verwendet werden und die Reparatur nicht
vom GARDENA Service oder dem autorisierten Fachmann durchgeführt
wird. Entsprechendes gilt für Ergänzungsteile und Zubehör.
G
Product Liability
We expressly point out that, in accordance with the product liability law,
we are not liable for any damage caused by our units if it is due to improper repair or if parts exchanged are not original GARDENA parts
or parts approved by us, and, if the repairs were not carried out by a
GARDENA Service Centre or an authorised specialist. The same applies
to spare parts and accessories.
F
Responsabilité
Nous vous signalons expressément que GARDENA n’est pas responsable des dommages causés par ses appareils, dans la mesure où ces
dommages seraient causés suite à une réparation non conforme, dans la
mesure où, lors d’un échange de pièces, les pièces d’origine GARDENA
n’auraient pas été utilisées, ou si la réparation n’a pas été effectuée par
le Service Après-Vente GARDENA ou l’un des Centres SAV agréés
GARDENA. Ceci est également valable pour tout ajout de pièces et d’accessoires autres que ceux préconisés par GARDENA.
N
Productaansprakelijkheid
Wij wijzen er nadrukkelijk op, dat wij op grond van de wet aansprakelijkheid voor producten niet aansprakelijk zijn voor schade ontstaan door onze
apparaten, indien deze door onvakkundige reparatie veroorzaakt zijn, of er
bij het uitwisselen van onderdelen geen gebruik gemaakt werd van onze
originele GARDENA onderdelen of door ons vrijgegeven onderdelen en de
reparatie niet door de GARDENA technische dienst of de bevoegde vakman uitgevoerd werd. Ditzelfde geldt voor extra-onderdelen en accessoires.
S
Produktansvar
Tillverkaren är inte ansvarig för skada som orsakats av produkten om
skadan beror på att produkten har reparerats felaktigt eller om, vid reparation eller utbyte, andra än Original GARDENA reservdelar har använts.
Samma sak gäller för kompletteringsdelar och tillbehör.
I
Responsabilità
Si rende espressamente noto che, conformemente alla legislazione sulla
del prodotto
responsabilità del prodotto, non si risponde di danni causati da nostri articoli se originati da riparazioni eseguite non correttamente o da sostituzioni
di parti effettuate con materiale non originale GARDENA o comunque da
noi non approvato e, in ogni caso, qualora l’intervento non venga eseguito
da un centro assistenza GARDENA o da personale specializzato autorizzato. Lo stesso vale per le parti complementari e gli accessori.
E
Responsabilidad
Advertimos que conforme a la ley de responsabilidad de productos no nos
de productos
responsabilizamos de daños causados por nuestros aparatos, siempre
y cuando dichos daños hayan sido originados por arreglos o reparaciones
indebidas, por recambios con piezas que no sean piezas originales
GARDENA o bien piezas autorizadas por nosotros, así como en aquellos
casos en que la reparación no haya sido efectuada por un Servicio Técnico GARDENA o por un técnico autorizado. Lo mismo es aplicable para
las piezas complementarias y accesorios.
P
Responsabilidade
Queremos salientar que segundo a lei da responsabilidade do fabricante,
sobre o produto
nós não nos responsabilizaremos por danos causados pelo nosso equipamento, quando estes ocorram em decorrência de reparações inadequadas
ou da substituição de peças por peças não originais da GARDENA, ou peças não autorizadas. A responsabilidade tornar-se-à nula também depois
de reparações realizadas por oficinas não autorizadas pela GARDENA.
Esta restrição valerá também para peças adicionais e acessórios.
K
Produktansvar
Vi gør udtrykkeligt opmærksom på at i henhold til produktansvarsloven
er vi ikke ansvarlige for skader forårsaget af vores udstyr, hvis det skyldes
uautoriserede reparationer eller hvis dele er skiftet ud og der ikke er anvendt originale GARDENA dele eller dele godkendt af os, eller hvis reparationerne ikke er udført af GARDENA-service eller en autoriseret fagmand.
Det samme gælder for ekstra udstyr og tilbehør.
Page 11

Bezeichnung des Gerätes: Elektro-Rasenlüfter
Description of the unit: Electric Lawn Rake
Désignation du matériel : Aérateur électrique
Omschrijving van het apparaat: Elektrische gazonbeluchter
Produktbeskrivning: Elektrisk Gräsmatteluftare
Descrizione del prodotto: Arieggiatore elettrico
Descripción de la mercancía: Aireador de césped eléctrico
Descrição do aparelho: Arejador de relva eléctrico
Beskrivelse af enhederne: Elektrisk Plænelufter
Typ : Art.-Nr.:
Type : Art. No.:
Type : Référence :
Typ : Art. nr.:
Ty p :
ES 500 Art.nr. : 4066
Modello: Art. :
Tipo: Art. Nº:
Tipo: Art. Nº:
Type : Varenr. :
EU-Richtlinien:
EU directives:
Directives européennes :
EU-richtlijnen:
EU direktiv:
Direttive UE:
Normativa UE:
Directrizes da UE:
EU Retningslinier:
Schall-Leistungspegel: gemessen / garantiert
Noise level: measured / guaranteed
Puissance acoustique : mesurée / garantie
Geluidsniveau: gemeten / gegarandeerd
Ljudnivå: uppmätt / garanterad
Livello rumorosità: testato / garantito
Nivel sonoro: medido / garantizado
Nível de ruido: medido / garantido
Lydtryksniveau: afmålt / garanti
89 dB(A)/91 dB (A)
Anbringungsjahr der CE-Kennzeichnung:
Year of CE marking :
Date d’apposition du marquage CE :
Installatiejaar van de CE-aanduiding:
CE-Märkningsår :
2004
Anno di rilascio della certificazione CE :
Colocación del distintivo CE:
Ano de marcação pela CE:
CE-Mærkningsår :
Peter Lameli
Ulm, den 01.07.2004 Technische Leitung
Ulm, 01.07.2004 Technical Dept. Manager
Fait à Ulm, le 01.07.2004 Direction technique
Ulm, 01-07-2004 Hoofd technische dienst
Ulm, 2004.07.01. Technical Director
Ulm, 01.07.2004 Direzione Tecnica
Ulm, 01.07.2004 Dirección Técnica
Ulm, 01.07.2004 Director Técnico
Ulm, 01.07.2004 Teknisk direktør
D
EU-Konformitätserklärung
MMaasscchhiinneennVVeerroorrddnnuunngg ((99.. GGSSGGVVOO)) // EEMMVVGG // NNiieeddeerrsspp.. RRLL
Der Unterzeichnete GARDENA Manufacturing GmbH, Hans-Lorenser-Str. 40,
D-89079 Ulm, bestätigt, dass die nachfolgend bezeichneten Geräte in der von
uns in Verkehr gebrachten Ausführung die Anforderungen der harmonisierten
EU-Richtlinien, EU-Sicherheitsstandards und produktspezifischen Standards
erfüllen. Bei einer nicht mit uns abgestimmten Änderung der Geräte verliert
diese Erklärung ihre Gültigkeit.
G
EU Certificate of Conformity
The undersigned GARDENA Manufacturing GmbH, Hans-Lorenser-Str. 40,
D-89079 Ulm, hereby certifies that, when leaving our factory, the units indicated
below are in accordance with the harmonised EU guidelines, EU standards
of safety and product specific standards. This certificate becomes void if the
units are modified without our approval.
F
Certificat de conformité aux directives européennes
Le constructeur, soussigné : GARDENA Manufacturing GmbH, Hans-LorenserStr. 40, D-89079 Ulm, déclare qu’à la sortie de ses usines le matériel neuf
désigné ci-dessous était conforme aux prescriptions des directives européennes énoncées ci-après et conforme aux règles de sécurité et autres règles
qui lui sont applicables dans le cadre de l’Union européenne. Toute modification portée sur ce produit sans l’accord express de GARDENA supprime la validité de ce certificat.
N
EU-overeenstemmingsverklaring
Ondergetekende GARDENA Manufacturing GmbH, Hans-Lorenser-Str. 40,
D-89079 Ulm, bevestigt, dat de volgende genoemde apparaten in de door ons
in de handel gebrachte uitvoering voldoen aan de eis van, en in overeenstemming zijn met de EU-richtlijnen, de EU-veiligheidsstandaard en de voor het product specifieke standaard. Bij een niet met ons afgestemde verandering aan
de apparaten verliest deze verklaring haar geldigheid.
S
EU Tillverkarintyg
Undertecknad firma GARDENA Manufacturing GmbH, Hans-Lorenser-Str. 40,
D-89079 Ulm, intygar härmed att nedan nämnda produkter överensstämmer
med EU:s direktiv, EU:s säkerhetsstandard och produktspecifikation. Detta
intyg upphör att gälla om produkten ändras utan vårt tillstånd.
I
Dichiarazione di conformità alle norme UE
La sottoscritta GARDENA Manufacturing GmbH, Hans-Lorenser-Str. 40,
D-89079 Ulm, certifica che il prodotto qui di seguito indicato, nei modelli da noi
commercializzati, è conforme alle direttive armonizzate UE nonché agli standard di sicurezza e agli standard specifici di prodotto. Qualunque modifica
apportata al prodotto senza nostra specifica autorizzazione invalida la presente
dichiarazione.
E
Declaración de conformidad de la UE
El que subscribe GARDENA Manufacturing GmbH, Hans-Lorenser-Str. 40,
D-89079 Ulm, declara que la presente mercancía, objeto de la presente declaración, cumple con todas las normas de la UE, en lo que a normas técnicas, de homologación y de seguridad se refiere. En caso de realizar cualquier
modificación en la presente mercancía sin nuestra previa autorización, esta
declaración pierde su validez.
P
Certificado de conformidade da UE
Os abaixo mencionados GARDENA Manufacturing GmbH, Hans-LorenserStr. 40, D-89079 Ulm, por este meio certificam que ao sair da fábrica o
aparelho abaixo mencionado está de acordo com as directrizes harmonizadas
da UE, padrões de segurança e de produtos específicos. Este certificado ficará
nulo se a unidade for modificada sem a nossa aprovação.
K
EU Overensstemmelse certificat
Undertegnede GARDENA Manufacturing GmbH, Hans-Lorenser-Str. 40,
D-89079 Ulm bekræfter hermed, at enheder listet herunder, ved afsendelse
fra fabrikken, er i overensstemmelse med harmoniserede EU retningslinier,
EU sikkerhedsstandarder og produktspecifikationsstandarder. Dette certifikat
træder ud af kraft hvis enhederne er ændret uden vor godkendelse.
98/37 /EG
89/336/EG
73/23 /EG
93/68 /EG
2000/14 /EG
Page 12

Deutschland
GARDENA Manufacturing GmbH
Service Center
Hans-Lorenser-Str. 40
89079 Ulm
Produktfragen: (07 31) 490-123
Reparaturen: (07 31) 490-290
Argentina
Argensem S.A.
Calle Colonia Japonesa s/n
(1625) Loma Verde
Escobar, Buenos Aires
Australia
Nylex Consumer Products
50-70 Stanley Drive
Somerton
Victoria, 3062
Austria
GARDENA Österreich Ges. m.b.H.
Stettnerweg 11-15
2100 Korneuburg
Belgium
MARKT (Belgium) NV/SA
Sterrebeekstraat 163
1930 Zaventem
Brazil
Palash Comércio e
Importação Ltda.
Rua Helena, 285 cjto 12
Vila Olimpia - 04552-050
São Paulo
Bulgaria
DENEX LTD.
2 Luis Ahalier Str.- 7th floor
Sofia 1404
Canada
GARDENA Canada Ltd.
100 Summerlea Road
Brampton, Ontario
Canada L6T 4X3
Chile
Antonio Martinic Y CIA. LTDA.
Gilberto Fuenzalida 185 Loc.
Las Condes - Santiago de Chile
Costa Rica
Compania Exim
Euroiberoamericana S.A.
Av. 12 bis Calle 16 y 18,
Bodegas Keith y Ramirez
San José
Cyprus
FARMOKIPIKI LTD
P.O. Box 7098
74, Digeni Akrita Ave.
1641 Nicosia
Czech Republic
GARDENA spol. s.r.o.
Шнpskб 20a, и.p. 1153
62700 Brno
Denmark
GARDENA Danmark A/S
Naverland 8
2600 Glostrup
Finland
Habitec Oy
Martinkyläntie 52
01720 Vantaa
France
GARDENA France
Service Après-Vente
BP 57080
95948 ROISSY CDG Cedex
Great Britain
GARDENA UK Ltd.
27- 28 Brenkley Way
Blezard Business Park
Seaton Burn
Newcastle upon Tyne NE13 6DS
Greece
Agrokip G. Psomadopoulos & Co.
33 A, Ifestou str. – 194 00
Industrial Area Koropi
Athens
Hungary
GARDENA Magyarország Kft.
Késmárk utca 22
1158 Budapest
Iceland
Heimilistaeki hf
Saetun 8
P.O. Box 5340
125 Reykjavik
Republic of Ireland
Michael McLoughlin & Sons
Hardware Limited
Long Mile Road
Dublin 12
Italy
GARDENA Italia S.p.A.
Via Donizetti 22
20020 Lainate (Mi)
Japan
KAKUICHI Co. Ltd.
Yamato Bldg., 5-3 -1, Kojimachi
Chiyoda-ku, Tokyo 102
Luxembourg
Magasins Jules Neuberg
Grand Rue 30
Case Postale No. 12
Luxembourg 2010
Netherlands
GARDENA Nederland B.V.
Postbus 50176
1305 AD ALMERE
Neth. Antilles
Jonka Enterprises N.V.
Sta. Rosa Weg 196
P.O. Box 8200
Curaçao
New Zealand
NYLEX
New Zealand Limited
22 Saleyards Road Otahuhu
Private Bag 94001
SAMC Manukau
Norway
GARDENA Norge A/S
Postboks 214
2013 Skjetten
Poland
GARDENA Polska Sp. z o.o.
Szymanów 9 d
05-532 Baniocha
Portugal
GARDENA Portugal Lda.
Recta da Granja do Marquês
Edif. GARDENA
Algueirão
2725-596 Mem Martins
Russia / Россия
АО АМИДА ТТЦ
ул. Моcфилмовcкая 66
117330 Моcква
Singapore
Hy - Ray Enterprises
Block 1002 Toa Payoh
Industrial Park
#07-1433/1435 /1451
Singapore 319074
Slowenia / Croatia
Silk d.o.o. Trgovina
Brodišče 15
1236 Trzin
South Africa
GARDENA South Africa (Pty.) Ltd.
P.O. Box 11534
Vorna Valley 1686
Spain
GARDENA IBÉRICA S.L.U.
C/ Basauri, nº 6
La Florida
28023 Madrid
Sweden
GARDENA Norden AB
Box 9003
20039 Malmö
Switzerland
GARDENA AG
Bitziberg 1
8184 Bachenbülach
Ukraine / Украина
АОЗТ АЛЬЦЕСТ
ул. Гайдара 50
г. Киев 01033
Turkey
GARDENA /Dost Diþ Ticaret
Mümessillik A.Þ.
Yeþilbaðlar Mah. Baþkent
Cad. No. 26
Pendik - Ýstanbul
USA
GARDENA
3085 Shawnee Drive
Winchester, VA 22604
4066- 20.960.03/ 0041
©
GARDENA Manufacturing GmbH
D- 89070 Ulm
http: //www.gardena.com
 Loading...