

Page 1
Page 2
TABLE OF CONTENTS
Controller Moves _ _ _ _ _ _ _ _ _ _2
Quick Start _ _ _ _ _ _ _ _ _ _ _ _ _3
The Story _ _ _ _ _ _ _ _ _ _ _ _ _ _4
Game Screens _ _ _ _ _ _ _ _ _ _ _ _5
Managing Your Games _ _ _ _ _ _ _6
Playing Thief: Deadly Shadows _ _ _8
Using the HUD _ _ _ _ _ _ _ _ _8
Moving Around _ _ _ _ _ _ _ _ _9
Looking Around _ _ _ _ _ _ _ _10
Using Weapons and Items _ _ _10
Firing Arrows and Projectiles _ _11
Fighting and Dying _ _ _ _ _ _ _12
Picking Locks _ _ _ _ _ _ _ _ _ _13
City Map _ _ _ _ _ _ _ _ _ _ _ _14
Finding and Selling Loot _ _ _ _16
Being Stealthy _ _ _ _ _ _ _ _ _17
Viewing Mission Objectives _ _18
Winning Missions _ _ _ _ _ _ _18
Tools of the Trade _ _ _ _ _ _ _ _ _19
The World
Missions _ _ _ _ _ _ _ _ _ _ _ _24
The City _ _ _ _ _ _ _ _ _ _ _ _24
Faction _ _ _ _ _ _ _ _ _ _ _ _ _25
Game Options _ _ _ _ _ _ _ _ _ _ _26
Game Credits _ _ _ _ _ _ _ _ _ _ _27
STEALTH TIPS ...
•
Avoid toe-to-toe combat. Guards are tough.
Use stealth to defeat them.
•
Hide in the shadows and avoid bright areas.
•
Use the Light Gem to see how visible you
are. If it appears dark, you’re practically
invisible to nearby opponents. If it’s bright,
you’re partially or fully visible.
Be silent! Your footsteps are quieter when
•
you move slowly and avoid loud surfaces like
metal. Avoid stumbling over boxes or barrels.
•
Observe your opponent’s patterns before
you move. To avoid being caught, move when
your enemy’s back is turned.
To assess stealthiness, listen closely to your
•
opponent. A suspicious person voices concern
and starts searching for you. Move carefully
away and find a good hiding spot. If you are
well-hidden, your opponent will give up the
search soon enough.
Opponents oblivious to your presence can
•
be knocked out with a single hit. Sneak up
behind the enemy, then attack with the
blackjack, dagger or broadhead arrow.
1
Page 3
GAMEPLAY
l-
L
TRIGGER
r-
TRIGGER
Y
B
A
X
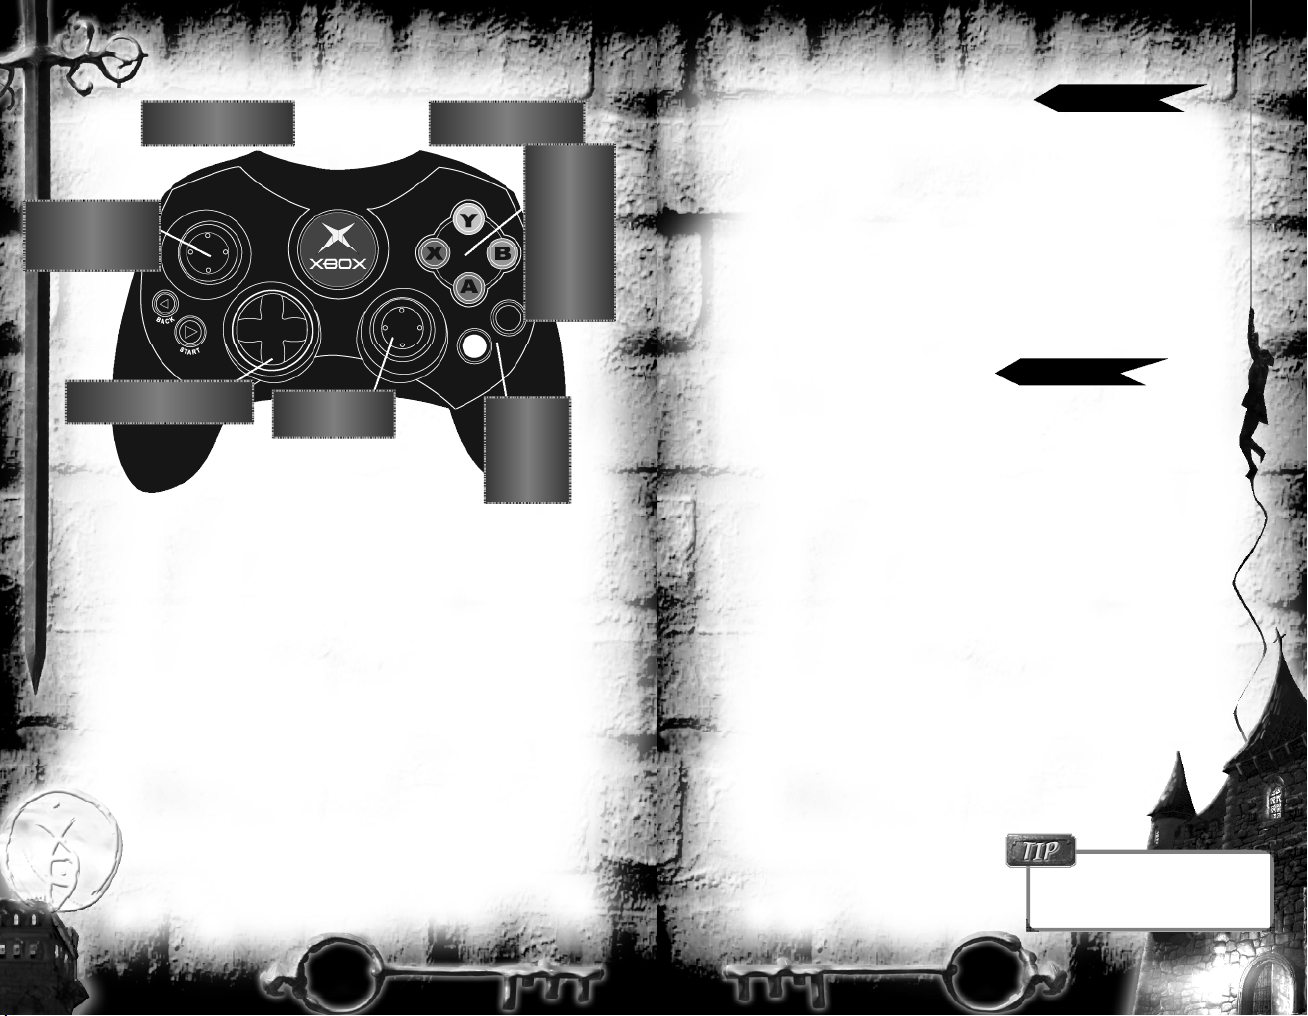
Move forward, backward or sideways.
L
15
D
Toggle wall flattening mode.
B
Return arrow to quiver.
Jump (press and hold to mantle).
Y
h
Page 9
Lean left or right.
Change highlighted menu item.
Crouch down.
X
Switch between first- and third-person view.
Close active menu.
D
R
CONTROLLER MOVES
Controls can perform multiple tasks (listed on multiple lines below).
Select next weapon. (To cycle, press bwhile moving L.)
b
Use selected weapon.
Equip dagger (if no weapon is selected).
r
Throw away worthless item.
Select next item. (To cycle, press cwhile moving L.)
c
Use selected inventory item.
Throw away worthless item.
l
Equip flash bomb (if no item is selected).
Use door/button/lever or pick up/drop item in your center view.
A
Drop body or worthless item.
Select highlighted menu item.
b
c
R
g
Rotate view or tilt camera angle.
Zoom mechanical eye view in/out.
37
D
Display Pause Menu (only in missions or the City).
Page 10
QUICK START
To select an option or button from a menu:
1. Press Dor moveLto highlight a choice.
2. Press Ato select the highlighted option.
• To use a slider, select it and press
• To scroll through lists, select the scroll arrows and press
To launch Thief: Deadly Shadows:
1. Insert the Thief: Deadly Shadows disc into the Xbox® video game system.
2. Press g, then select New Game.
3. (Optional after tutorial) Select Difficulty (p. 6) to change settings.
4. Read the Briefing, then select Start Mission.
• Follow the blue footsteps in the tutorial to learn the ropes.
• Press gto pause the game and
access options (p. 26).
• Save often (p. 7)!
D15
or Rto change settings.
D37
You can choose alternate
control layouts in the Options Screen.
(See p. 26).
.
2
3
Page 4
THE STORY OF THIEF: DEADLY SHADOWS
In Thief: Deadly Shadows, you play Garrett, a master thief in a dark, sprawling
metropolis known only as the City. Rarely seen and never caught. Garrett wo r ks
alone in the shadow of night, constantly trolling for info rmation and eyeing his
next p riz e. He can sneak past any guard, pick any lock with ease, and infi l t rate the
most ingeniously secured re s i d e n c e s .
Cynical and unenthusiastic about helping those in need, Garrett draws on his talents to lift from the wealthy solely for his own gain. To him, everyone is a
potential victim who can help line his pockets and fuel the underground
economy of the City. He’s a legend among his own kind, a reluctant anti-hero
who wants n o thing more than to be left alone to carry out his trade. But instead,
his actions seem to always draw him into greater confl i c t s .
The Keepers pull the strings behind the City, and lately, they’ve been paying
close attention to Garrett. Too close, in his opinion. This secret organization
drew Garrett into its fold early on, but he rejected their teachings at a young age
and scorned them for their reclusive meddling. He went on to become a skilled
thief — the best that ever was, in fact.
The Keepers have long recognized Garrett as the central figure in their glyph
book of prophecies, which warn of an awakening evil and an impending Dark
Age.They have come to Garrett in hopes that his steady nerves and legendary
talent can save the City from a dark, uncertain future. What the Keepers did not
foresee in this reluctant alliance is that Garrett has come dangerously close to
untangling the City’s darkest secrets.
“…the dreaded One may be peasant or noble, may be old
or young, may be man or woman. We know what the
One will do…we know it all too well. But we still know
nothing about who the One is…”
- Excerpt from the Archival Keeper Council Transcripts:
F.K. Modrian, Book VI, Chapter 3
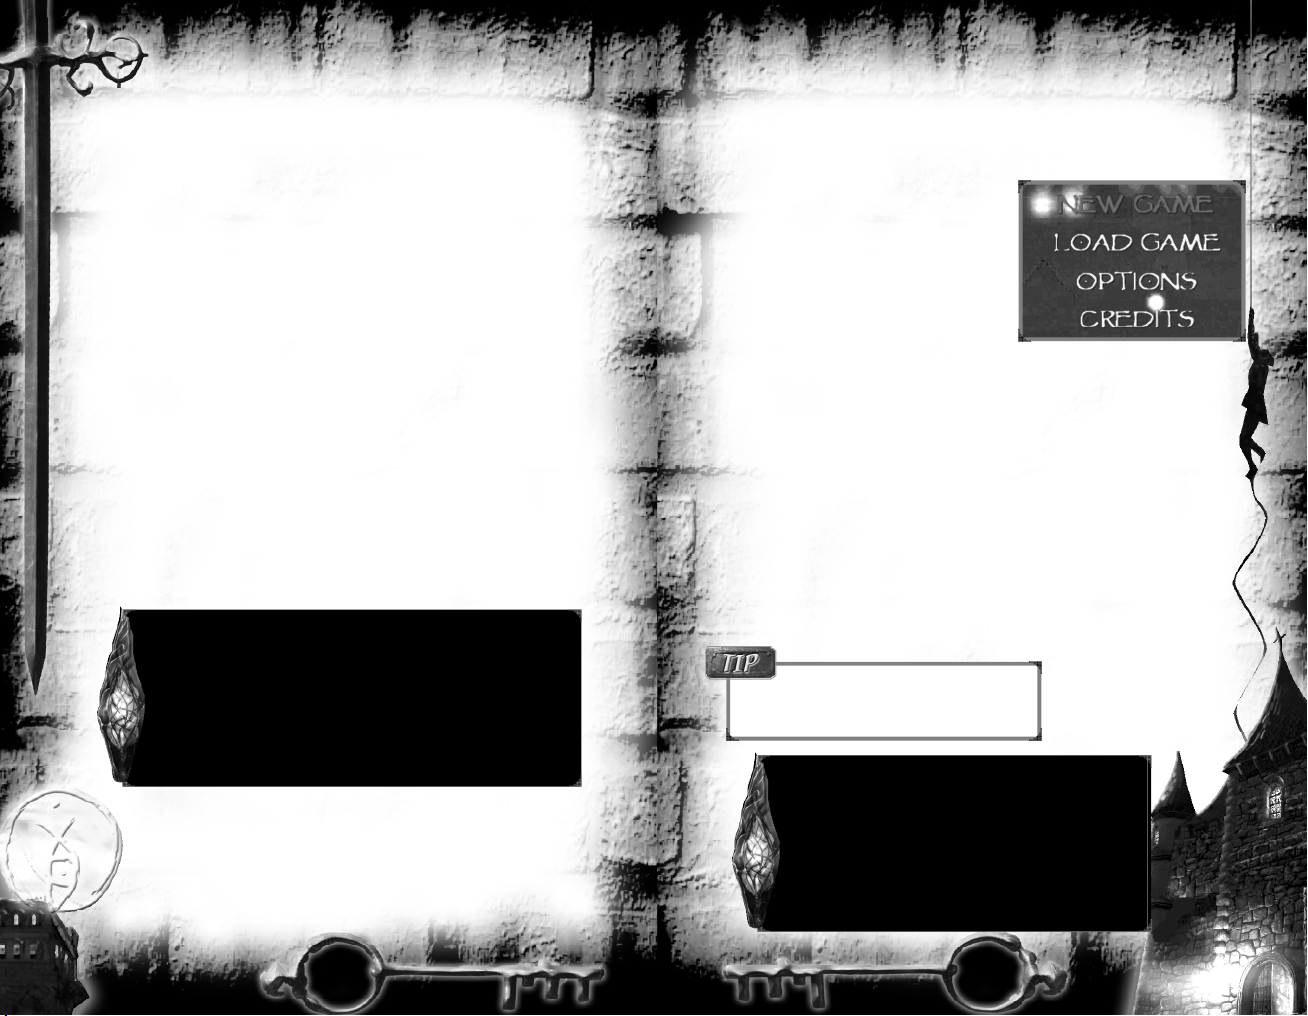
GAME SCREENS
You can access a number of non-gameplay screens before and after each mission. Some are also available whenever you pause gameplay by pressing g.
To return to the Title Menu once in game,
select Load or Save from the Pause Menu,
then select Quit in the lower left corner of the
screen. The Title Menu lets you create a new
game, load a saved game, change game
options or view credits.
Once you create a game, you view different
non-gameplay screens before, during and after
missions. See the page numbers below for
details on each screen.
Title Menu
New Game (p. 6)
Load Game (p. 7)
Options (p. 26)
Credits (p. 27)
Pause
Gear (p. 19)
Goals (p. 18)
Save (p. 7)
Load (p. 7)
Faction (p. 25)
Options (p. 26)
Missions default to the Normal
difficulty setting. However, you can change this
before each mission by selecting Difficulty.
“If it is to close your eyes that you seek, to
become deaf to the truth, to dismiss the obvious
— then you have succeeded most thoroughly.”
– Excerpt from a letter to the Keeper Council,
New Game / Pre-Mission
Briefing (p. 6)
Difficulty (p. 6)
Goals (p.18)
Gear (p. 19)
Mission Complete
Load (p. 7)
Debriefing (p. 18)
Mission Stats (p. 18)
Goals (p. 18)
Gear (p. 19)
author unknown
4
5
Page 5
MANAGING YOUR GAMES
Once you start a new game, you can save it by pressing gand selecting
Save. It’s important to save as you play — that way, if you die, you can restart
the mission from the last save point. Each saved game stores the mission status,
including current values for difficulty level, loot, health and goals.
Starting a New Game
From the Title Menu, select New Game to sta rt a fresh game. Read the bri e f i n g ,
then adjust the Difficulty level if desired. Select Sta r t Mission to sta r t play i n g .
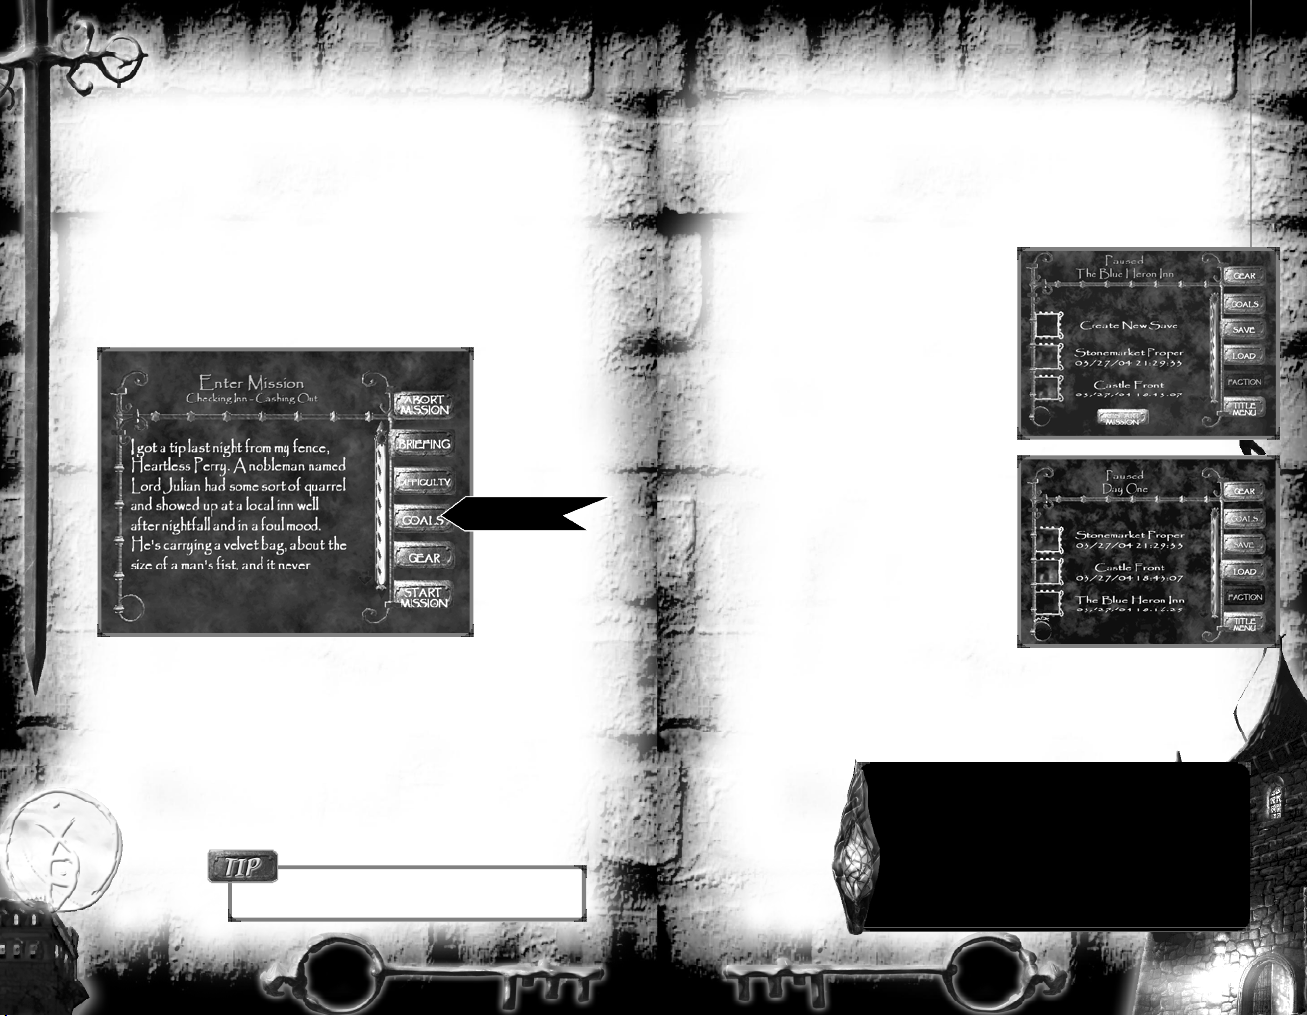
New Game Screen
Page 19
Abort Mission. Quits the current mission.
Briefing. Displays important text that describes the mission and outlines your
objectives.
Difficulty. Alters the mission difficulty (unavailable in the first tutorial mission). Select
Gear. Displays all items and weapons you have in your possession. Subscreens
show your loot and a sketched map of the area (p. 20).
Start Mission. Launches the current mission.
EASY/NORMAL/HARD/EXPERT
Later, you can view many of these screens by
pressing g to pause the game.
Saving and Loading Games
Save Game Screen
To display this screen during gameplay, press gand select Save. Saved
games store the current state of your game. Later, you can load it using the Load
Game screen.
To save a game:
1. Press gto pause the game, then select
Save.
2 Highlight a slot and press Ato save the
game. (You can save over occupied slots.)
To scroll through the list, highlight the
scroll bar and moveLor press
Note: Select Restart to replay the current
mission from the beginning.
Load Game Screen
To display this screen during gameplay, press
g
and select Load.
To load a game:
1. Launch the game and select Load.
(In a mission, press gto pause the
game, then select Load.
2. Highlight a saved game. To scroll the list,
highlight the scroll bar and move
D73
or press
3. Press Ato load the selected game.
• To reload the current game, select Restart.
(This option only appears when you pause the game and select Load.)
• To delete a game, highlight it and press X.
.
“Fiddle-dee dum and fiddle-dee dee
The old gray lady is after me
She wants my shoes and she wants my skin
D73
.
L
There’s none so small that she can’t fit in.”
– Children’s rhyme, unknown origin
6
7
Page 6

PLAYING THIEF: DEADLY SHADOWS
This section describes how to use the interface and perform different tasks in
the game. At any time while playing, press gto pause the game and view
available screens.
Using the Heads-Up Display (HUD)
Active Item
j
Select next
Use
l
j
Cycle
L
Health Gems
(Combat only) Bar indicator that shows how
healthy you are. If an
enemy strikes, you lose
health. If your health
drops to zero (except in
the tutorial), you die.
Light Gem
Gem that describes how
visible you are. The intensity
indicates your visibility: a
dark gem means yo u ’re we l l hidden, a slightly light one
means yo u’re partially visible, and a bright gem means
you are comp l etely visible.
Compass
Spinning device that points
n o r th, south, east and west.
Active Weapon
I
Select next
r
Use
I
Cycle
L
Moving Around
You’re a master thief, so maintaining secrecy and stealth is key. When moving,
stay in the shadows, and stay quiet!
q
L
D
B
X
Y
YL
Sneak/walk/run. The further you move the thumbstick, the faster
you move.
MoveLslightly to sneak, further to walk, and all the way to run.
Running creates noise and can alert guards or civilians of your presence. Moving over various surfaces creates different noises.
ko
Lean sideways. Leaning can help you hide, as well as peek around
corners. Stop leaning to resume your previous stance.
Flatten against walls. To hide from guards and citizens, flatten
your body against a wall. Once yo u’re flattened, creep along the wa l l
by looking left or right (R) and moving slowly fo rwa rd. To un-fl a t t e n
yourself, press Bagain.
Crouch. Duck down to move through small openings or to decrease
visibility.
Jump. You can jump over small items or onto boxes and small wa l l s .
q
Climb. To climb up a ladder, face the ladder, look up
(Rq), then move forward (L7)to climb up. To climb
down a ladder, carefully walk over it. Then, look down
(R3) and move forward (L7) to descend.
To climb a scalable wall, face that surface. Jump (Y) and
look up (R7), then move forward (L7) to climb.
Pause briefly at the top to listen for activity.
Jumping while climbing can make you fall.
Pull up/Mantle. A special type of climbing lets you pull yourself up
onto a ledge or other surface. With mantling, you press and hold
to pull yourself up. Releasing Ycauses you to drop back down.
“If thou hast eyes to see the glory of the Builder, but
do not, then pluck them out.
If thou hast ears to hear the words of the Builder,
but do not, then strike them off.”
Y
If you need to create shadows, use a
Water Arrow to extinguish torches or small fires.
8
– Opening prayer, Ironwright Temple
9
Page 7

Looking Around
h
R
D
G
Switch viewpoints. You can choose to see Garrett onscreen, or
play using the first-person “eyeball” view. For new players, third-person view (the default) is usually easiest.
Adjust view angle. Move
Rq m
Move
(See Look spring below to change how this works.)
qm Zoom view. Garrett has a mechanical eye with a built-in zoom
lens that gives you a close-up view.
Press Dqto zoom in and Dmto zoom out.
Control Options: Look spring. Option that maintains a straight,
forward view, even when you’re turning.
(You can still change your viewpoint while moving by moving R.
Release the stick to re-center your view.)
to angle your view or aim.
RK o
to rotate the camera.
Press Ato:
• Open or close unlocked doors. Stand back to allow the door to open. If
something blocks it, nudge it out of the way.
• Pick locked doors. To learn how, see Picking Locks, p. 13. Not all
doors can be picked — a few require you to press a nearby button or
lever.
• Pick up/drop bodies. Leaving dead or unconscious bodies in plain view
draws attention. Pick up bodies and hide them in shadows or alcoves.
• Pick up loot. If you see a vase, goblet, purse or other item highlighted in
blue when you face it, pick it up. The item’s name and value appear
briefly onscreen. The Gear screen (p. 19) shows what you’ve collected so
far in the current game. (Note that you can’t drop loot, only junk items.)
• Read letters or books. Books, plaques, letters, notes and scrolls hold a
wealth of information. Use these items to read them. To switch pages,
RK o
move
. To close the page, press B.
Using Weapons and Items
To use a weapon or item, select it, then use it.
I
Select next weapon.
I
Cycle through weapons.
L
r
Use selected weapon.
Page 19
Tools of the Trade (weapon and item details)
Gear Screen (viewing equipment and items)
L
Items in the World
To interact with something, center it in view
and press A. Anything you can use, press,
steal, or pick up is highlighted with a faint
aqua glow once you are in the correct position
to use it or pick it up.
• To drop worthless items or a body,
press A.
• To throw worthless items,
pull the lorrtrigger.
10
j
Select next item.
j
Cycle through items.
l
Use selected item.
If you pick up a body
or useless item, “Nothing”
appears in the item or weapon
slot on the interface. You can’t
select or use anything until
you drop or throw that item.
(Don’t worry — you can’t
drop loot or anything valuable,
just junk!)
Firing Arrows and Projectiles
When firing arrows or tossing explosives and flasks, aim at at a target by tilting
your view up or down. This alters the trajectory of whatever you’re throwing.
Look up to toss high and far, or look lower to throw low and close by.
Fi ring arrows. Select an arrow type. Pull and hold rto
enter aiming mode. Simulta n e o u s l y, move Rto position
the crosshairs slightly above the ta r g et. Release the tri g ge r
to fi re the arrow. (Be sure yo u ’re not too far away, or the
a rrow may fall short of its ta r get . )
Continuing to pull rfor any length of
time zooms in, but eventually causes your arm
to shake with fatigue. This upsets your aim.
Throwing flasks and explosives. Select a flask,
bomb or mine. MoveRand line Garrett’s head
up with the target.
Pull lfirmly to hurl the item.
(For mines, aim at the ground.)
To drop the
selected item at your feet,
gently pull l.
11
Page 8

Fighting and Dying
You have several different ways that you can deal with your opponents. If an
opponent hasn’t spotted you yet, try one of the three one-hit methods listed
below. Note that if your opponent suspects your presence or is pursuing you,
your cover is blown and you can’t kill with a single shot.
Blackjacking
If your victim hasn’t seen you, equip your blackj a c k and silently sneak up from behind. Center
the opponent’s back in view. Pull r to knock
that person out with a single blow. Your enemy
will remain unconscious for the rest of the
m i s s i o n .
Backstabbing
This works exactly like blackjacking, except that you use your dagger.
Backstabbing kills your opponent with a single blow, leaving behind a pool of
blood. Also, your victim’s screams can draw attention.
Sniping
To strike from afar and kill with one blow, fire
arrows at your opponent’s head or chest. This
only works with offensive arrows, not noisemakers and water arrows.
Picking Locks
Locks vary in craftsmanship and materials, so
some will be more difficult to pick than others.
To learn how to pick different types, purchase practice locks from fences. They’ll
help you learn the finer points of lockpicking. Any practice locks you buy appear
in your apartment in the City.
L o c k p i cking mode activates whenever you use a chest or door
that can be picked. Each lock has from three to six tumblers.
To pick it, you must find the weak spot on each tumbler.
Once you find the swe e t spot, pull
l
or rto qu i ckly spin the tumbler to the
u n l o cked position.
MoveRto check for
approaching guards or enemies
while you are cracking a lock.
Controller
vibration is on by
default (p. 26). The
harder the controller
vibrates, the closer
you are to the
“sweet spot.”
Look for elemental crystals in fireplaces, pipes, trees and
other obscure spots.
Escaping
Even if you’re forced into a corner, you should avoid fighting if you can. You
have several items and weapons that can help you escape. Try using the flash
bomb to blind and deafen enemies, or create an oil slick behind you by throwing
an oil flask. (You can set it on fire with a Fire arrow.) If you have wall-climb-
ing gloves, try scaling a climbable surface.
If you have to fight, you can use your hand weapons, or lay down
explosive mines. Gas arrows and bombs can also be a reliable way to
knock multiple opponents unconscious.
If someone kills you, the Load Game screen appears.
12
To pick a lock:
1. Use a locked door or chest.
2. MoveLto rotate the lock p i cks until yo u
find a spot that makes the tumbler shake .
(The controller will vibra t e . )
3. Hold Lsteady and wait to see if the shaking tumbler starts to
spin. If it does, a gap opens in the tumbler and spins to the far
right edge of the circle.
• If the gap doesn’t appear, gently moveLto maneuver the
picks around the shaky region of the tumbler. Your controller
will vibrate harder once you reach the sweet spot.
4. Repeat for all tumblers. When all of them have been picked,
the lock will open.
5. Use the newly picked door or chest to open it.
Tumblers
Align tumblers
(rings) by rotating
the lockpicks.
13
Gap
Unlocked tumblers
have gaps on
the right edge.
Page 9

Page 10

Finding and Selling Loot
Anytime you step close to an item that is
highlighted, you can use or pick up that
item. During a mission, pick up anything of
value — later, you can sell these items to fences for cash.
Keep your eyes open for exceptionally valuable or useful items. They sport a
reddish sheen and twinkle, and you should always pick them up!
Each mission has three pieces of special loot that sell for quite a bit more.
To see what you’ve picked
up so far, pause the game, select
Gear, then Loot.
Trading on the Black Market
In pockets of the City, you can sell loot for cash and replenish supplies. Look for
red handprints —the universal mark of thieving establishments.
Fences
A fence takes valuable loot off your hands, plus
gives you cash for whatever you’ve stolen.
However, each fence will only buy two of the
three main types of loot — gems, artwork and
metal. For instance, one fence may refuse art,
while another steers clear of gems. You’ll have to
visit multiple fences in the City to figure out who
buys what.
To sell items to fences:
1. Enter the Fence’s room and listen
to him or her.
2. Select Sell All, or select a specific item.
3. Select Yes to confirm the sale.
4. Select Back to exit the store.
maker an offerings of manfoolsy fleshes
“
drinker a sippings of manfooled bloods”
– Harvest song,
author unknown
Handprint (Fences/Stores)
To sell loot,
head west from your
apartment in the City
and find a fence.
Fences and Stores can
also be a good source of
information, sometimes
even hinting at thieving
jobs available in the city.
Stores
To buy items from thieving stores:
1. Enter the store and listen to the shopkeeper.
2. Select an item to buy.
• For sliders, press Ato select the slider.
Then, moveL,Ror Dto change
quantities. Press A(or B) to choose
that number.
3. Select Buy, then select Yes to confirm.
4. Select Back to exit the store.
Thievery Store
Being Stealthy
In order to be a successful thief, you can’t be caught by those who would rather
turn you in or see you dead. When maintaining stealth, rely on your light gem.
The brighter it is, the more easily others can see you.
What will get you caught if you aren’t careful:
• Moving through brightly lit areas.
• Moving in partial shadows after an enemy or civilian is aware of your pres-
ence.
• Running or walking over noisy surfaces, such as metal floors or tile.
• Bumping into items that move and make noise near an enemy or civilian.
• Leaving dead bodies in plain view.
• Using your dagger or arrows to kill victims. (Victims scream, and killing
them with these weapons creates a pool of blood.)
What helps you remain hidden:
• Waiting to move until your opponent isn’t looking.
• Sticking to the shadows and creeping slowly over loud surfaces.
• Extinguishing torches and fires to create additional shadows you
can use for cover.
• Crouching while hiding or moving.
• Flattening your body against a wall.
• Knocking out guards or civilians before they see you.
• Distracting guards (by throwing junk items or using a tool).
• Firing moss arrows (for stealth) or noisemaker arrows
(for distraction).
16
17
Page 11

Viewing Mission Objectives
As you play a mission, you can pause the
game and select Goals to view your current
objectives.
Goals Screen
Completed objectives are brown and marked with a checkmark, while
outstanding objectives are gray. Failed objectives appear in red text.
As you discover new information or use certain items, your objectives can
change. When this occurs, a message like “New Objective” pops up onscreen.
• Highlight the scroll arrows on the right and move
D73
or press
• To finish a mission, complete all objectives and find the exit point.
to browse through your objectives.
L
TOOLS OF THE TRADE:
WEAPONS, ITEMS AND UPGRADES
As a master thief, you’ll often find yourself in situations that require cunning
and advanced weapons and tools. You don’t have all of them at the start, but
you can find items or buy them with cash you earn.
Page 10
Trading on the Black Market (buying equipment)
Gear Screen
To view your current equipment and inventory items, pause the game (g)
and select Gear. This screen shows your current weapons, items and upgrades,
plus a rough map. You can also find out how much loot you’ve accumulated.
Using Weapons and Items (how to select and use)
Page 16
Winning Missions
After you successfully complete all mission objectives and exit the area, you can
view the Debriefing and Mission Stat Screens. They give you a quick debriefing
and provide feedback on how well you performed during the mission.
Select Continue to start the next mission.
Page 7
Debriefing Screen
The Debriefing screen appears when
you finish each mission. It advances
the plot and provides additional information based on what you discovered
while completing the mission.
Mission Stat Screen
This screen describes how well you performed in the mission. It displays your
difficulty level, time required to complete the mission and how much loot
you acquired. For encounters, it shows how often you were detected, as
well as the knockout and kill
count for the mission.
18
Active Items and Weapons
Select an icon to equip that
item (left) or weapon (right).
The active item is highlighted.
For stackable items, a number
shows how many remain.
Highlight icons to view more
information.
Gear Subscreens
Select buttons to view Items (open by
default), Loot or Map.
Page 18
Page 7
Page 25
Upgrades
Select Garrett to view thieving
tools (gloves, picks, etc.).
19
Page 12

Loot Subscreen
You can view how much wealth and loot yo u’ v e accumulated up to this point of
the game. Most no rmal loot is ge n e ric stuff you can sell for cash on the black
m a r ket to fences (traders and info rmants) in the City. Each mission also has thre e
pieces of specially named loot that are wo r th more cash.
Hand Weapons
.
Blackjack
Blunt club-like
weapon used to knock out
opponents from behind.
Sneak up behind someone who
hasn’t caught you sneaking
around. Attack to knock them
out for the rest of the mission.
Dagger
Bladed weapon
used to kill opponents.
Use the dagger to backstab
opponents who haven’t spotted
you, or someone you’re fighting
face-to-face.
Sneak up behind an
unaware victim and strike
after you see the blade rise.
Page 12
Items Subscreen
Selecting Item from the Gear Screen displays a
list that is very similar t o the Loot screen in
appearance. However, it doesn’t display values
and quantities, and it only shows items that are
critical to the mission. For instance, if you pick
up a crested medallion or special key, it appears
in the Item list.
Map Subscreen
This screen shows a sketched map
of the area. You get a map for each
mission, and you can buy addi-
tional maps from some of the
thievery stores in the City. (For
instance, you can buy the
Museum map from the shop
in the Old Quarter.) Other
maps are found on people or
during the mission.
Arrows
Broadhead
Attack projectile used for ranged
sniper attacks.
Aim at an opponent’s head or
chest and fire at someone who
has not yet detected you.
Fire arrow
Attack projectile that explodes
upon contact.
S h o o t at enemies to injure th e m ,
Aim at oil puddles to sta rt fi re s .
Aim at unlit to rches or fi r es to
light th e m .
Noisemaker
Non-combat arrow used to
distract guards or civilians.
Fire into a remote area to draw
guards toward it.
Page 11
Gas arrow
Attack projectile that releases a
poisonous gas upon contact.
Aim for an enemy’s face to
cause him or her to pass out.
Water
Non-combat arrow used to put
out torches and small fires.
Aim at flames to quench them
and increase stealth.
Aim at pools of blood to wash
them away.
Moss arrow
Non-combat arrow that covers a
surface with moss.
Fi r e at loud surfaces such as
m e tal floors so that you can
walk over them silently.
20
21
Page 13

Items (Explosives, Flasks and Potions)
Thieving Tool Upgrades
Explosive mine
Area-effect explosive
you can use to boobytrap enemies.
Time your throw and toss one
in your opponent’s path. After
the red light flashes, it explodes
as soon as someone moves
within a few steps of it.
Flash bomb
Explosive device that
temporarily blinds and
deafens your enemy.
Time your throw so that your
enemy is facing you when the
bomb detonates.
Gas bomb
Area-effect explosive
that creates a large cloud
of poisonous gas.
T h r ow near enemies to fo rce anyone in the vicinity to pass out.
“
…imagine all that we have worked
for…all we have created and all that we
know…wiped out in the blink of an eye…
Health potion
Liquid potion you can
drink to heal damage
you’ve taken during
combat.
Use the potion to drink it and
restore health.
Holy water fl a s k
Flask that bursts on
impact and creates a
puddle of holy water.
T h row it at an undead enemy to
cause damage, or th row on th e
ground to cre a te a holy puddle
that stops their pursuit cold.
Oil fl a s k
Explosive device that
creates a puddle of oil at
the point of impact, causing enemies to slip and fall.
Throw the flask at the ground.
To ignite the puddle, aim a Fire
arrow at it.
Lockpick
Tool used to pick locks on protected
doors or chests.
To learn how, see Picking Locks.
Page 13
Wall climbing gloves
Hardy leather gloves that help you scale
stone or brick walls.
To use gloves, jump onto a wall and look
up (R7), then move forward (L7).
Page 9
Keeper Door Glyph
Powerful Keeper symbol often stenciled
or mounted on walls.
Use the symbol to reveal doors to hidden
Keeper areas.
Mechanical Eye
Garrett’s artificial eye zooms in several
levels to see something up close.
Press D7to zoom in,
D3
to zoom out.
Page 10
- From A Discourse on the Dark Ages:
Keeper Falek III
22
23
Page 14

THE WORLD OF THIEF: DEADLY SHADOWS
Your chosen profession requires you to be nocturnal. So, you sleep by day and
prowl by night, always with open eyes and ears. You perform your thievery in
the City proper, and in missions that send you into buildings and underground
City environments.
To enter a mission, look for a
floating glyph outside of a building or
door. Use it to start that mission.
Missions
Missions are focused excursions that
send you into a specific area to complete a certain
task. When the game starts, you begin a training mission in an Inn. Once you
finish the training mission, you’re launched into a second mission to steal a
valuable gemstone. After that mission, you’ll find yourself in your apartment in
the City for the first time.
In missions, everyone is hostile, and the best policy is to hide as much as possible. Civilians run to find guards, and guards attack you on sight. In later missions, undead and beastly enemies also attack you on sight.
The City
The City is the “hub” for most of the game, and home to the apartment Garrett
uses to sleep away days between missions. The City is full of opportunity and
victims, and you’re free to seek out victims to mug, pocket items carelessly left
out in the open, and eavesdrop to keep a pulse on the City.
You’re distrusted by the City Watch, who won’t hesitate to attack you if they
spot you. For the most part, the urban peasants and traders will leave you alone
unless you strike them or try to steal their merchandise.
Your only City allies are fences and black- m a r ket
s to r es. (See Trading on the Black Market,
p. 16.)
L a t e r, you may perfo rm favors for Fe n c e s ,
Pagans, Hammers and even Keepers. These
l u c ra t i ve ta s ks are dange rous, though
rewa rding, and affect how yo u’re perc e i v e d
by others.
It pays to listen to the town talk — civilians and
a ri s to c rats alike often hint at new missions or loot .
Mission Icon
City Apartment
Faction
As you progress and complete certain tasks and missions in the game, you alter
how various social groups perceive you. To see your current status, you can view
the Faction Screen, which shows your current alliance status with the two main
societies — Pagans and Hammers. By doing favors for or attacking members of
a group, you affect how each group reacts to you.
Hammers. Armed with warhammers, this zealous group worships the Builder,
the accepted creator of all civilization. The Hammers founded the City through
discipline and craftmanship, but its priests now aggressively inflict forceful obedience. Hammers will do anything to tilt the balance of power, including calling on
master thieves for favors.
Pagans. The pri m i t i v e Pagans seek to pro m o te nature and chaos at the expense of
d e s t roying pro g ress. The Shamans, wa rriors, and beast-like members of the Pa g a n
cult pray to the Tri cks t e r , an ancient god of nature and chaos. Like the Hammers,
Pagans also seek to enlist underground help to further their own ideals.
Faction Screen
To view your current status, pause the game (g) and select Faction if it’s
available. (You won’t see this until after a few missions.)
• Hostile. Group attacks you on sight.
• Ne u t r al. G r oup wo n’t atta ck you on
sight, but will if you enter its terri to ry.
• Allied. Group wo n’t atta c k you on
sight, or when you enter its terri to r y.
Faction Screen
“
Him reachers downing to
them abysses
And pulls Him out them
worming ones”
– Origin unknown
24
25
Page 15

GAME OPTIONS
To view adjustable game options,
select Options from the Title
Menu. Select the category you want
to view. Changes you make here are
permanent and affect all games.
h
•
saves changes.
• Defaults resets current
options to their original
values.
Control Options
Changes certain control options.
• Invert Y Axis. Reverses the up
and down view function.
• Look Spring. When enabled,
releasing Rafter looking up
or down returns your view to the forward
position (first-person mode only).
• Vibration. Enables or disables Xbox controller vibration.
Control Layout (Buttons)
Changes the default controller settings. The left column shows the action, and
the other columns show the current control.
To change it, move the cursor over the command and select it. When it flashes,
press the desired control. Press hto save your changes.
AV Settings. Adjusts visual options in the game.
• Brightness. Slider that makes the screen darker or brighter.
• Subtitles. Shows or hides onscreen text for all spoken conversations.
Page 10
GAME CREDITS
IonStorm and Eidos team members who contributed to Thief: Deadly Shadows.
The Thief: Deadly Shadows Team
Ion Storm Austin
Studio Director
Warren Spector
Project Director
Randy Smith
Executive Producer
Denise Fulton
Associate Producer
Kristine Coco
Additional Production
Tara Thomas, Paul Weaver
Lead Programmer, Ian Dunlop
Programmers
Alex Chrisman, James
Clarendon, Gabe Farris, David
Kalina, Mike McShaffry, Tim
Perry, Elan Ruskin, Kain Shin,
Erik Touve
Additional Programming
Matt Baer, Jay Baxter, Chris
Carollo
Director of Technology
Tim Little
Technology Group
Alex Duran, Ted Jump,
Donavon Keithley, Brian
Sharp, Pete Shelus, John
Talley, Wendy White
Additional Technical
Management
Ken Demarest
Lead Designer
Jordan Thomas
Designers
Steve Allen, Nate Blaisdell,
Brian Glines, Jeremy Graves,
Heather Kelley, Monte
Martinez, David Riegel
Additional Design
Kent Hudson, Sarah Paetsch,
Harvey Smith
Art Director
Sergio Rosas
Artists
Chris Cobb, Mike Dean,
Chuck Furlong, Raby
Hampton, Rob Kovach, Jim
Magill, Terry Manderfeld,
Artists (continued)
Joey Santori, Hugh Suh, Brady
Townsend, Mike Washburn,
Sam Yeates
Concept Art
Frank Teran
Additonal Art
Gregory Callahan, Steve
Hartman, Clay Hoffman, Jay
Lee, Chris Mead
Writing
Terri Brosius
Additional Writing
Laura Baldwin
Audio Director
Eric Brosius, courtesy of
Irrational Studios
Additional Audio
Mark Lampert, Todd Simmons
Quality Assurance Manager
Kay Gilmore
Quality Assurance Leads
John Alme, Jacob Beucler
Quality Assurance Supervisor
Josh Stoke
Build Master
Nathan Regener
Quality Assurance Team
Liz Becker, Thomas Bonner,
Mark Capers, Robert Cogburn,
Christian Holton, Tim
Johnson, Amanda Krauss,
Devin Krieg, Brad Lyons, Ben
Potter, Jeff Shelton, Dwight
Spaulding, Matt Wydra
Additional QA
Dane Caruthers, Jon Savinelli
Support Staff
Chuque Berry, Mark Fletcher,
Stan Herndon, Ethan
McDonald, Whitney
Papadatos, Kim Wale, Chad
Warren, Pam Wolford
Cinematics
Rustmonkey Productions
Documentation
Incan Monkey God Studios
Translation Tool
Logan by Terra-Byte
Special Thanks
Ion Storm’s other projects,
Ross Angus, Jennifer Ayres,
Whitney Ayres, Scott Baker,
Dr. Randolph Bias, Jim Black
(Nvidia), Jon Blow, Alex
Brandon, Doug Church, Ray
Cobo, Kevin Daugherty, Andy
Dombroski, Austin Grossman,
John Harries, Jake Hughes,
Noah Hughes, Alex Jones,
Lulu Lamer, Shannon Lucas,
Emil Pagliarulo, Mike Privett,
Michael Smith, Paul Tozour,
Dave Watkins (MS), David
Whitney, Crystal Dynamics,
Microsoft ATG Group, the
University of Texas at Austin
School of Information, TTLG,
& our fans and supporters.
Thanks to Unreal(tm)
Technology Development, Tim
Sweeney
and the rest of the Unreal(tm)
team at Epic Games, Inc.
Havok.com, (c)Copyright 1999-
2004 Telekinesys Research
Limited.
Thief: Deadly Shadows Uses
Bink Video.
(C)Copyright 1997-2004 by
RAD Game Tools, Inc
Eidos Inte ractive US
President
Rob Dyer
Senior VP of North American
Product Development
John Spinale
VP of Marketing
Paul Baldwin
VP of Legal and
Business Affairs
Sheila Leunig
Marketing
Director
Chip Blundell
26
27
Page 16

Global Brand Manager
Matt Gorman
Channel Marketing Director
Kim Pendleton
Director of Product Operations
Kathy Schoback
Quality Assurance Manager
Michael R. Kelly
Asst. QA Manager/Internal
Producer
Colby McCracken
Product Submissions Manager
Brian King
Product Test Coordinators
Erik Kennedy (Xbox), Ralph
Ortiz (PC)
Asst. Product Test Coordinators
Kip Ernst (Xbox), Julian
Mehlfeld (PC)
Customer Support Supervisor
Scott Holbert
Test Team
Quinn Aguirre, Brit Bake r, Mark
B rand, Stephen Cavo r et to ,
Nicole Fe rra ra, Daniel Fra n k l i n ,
M i chael Gonos, Pa t ri ck
Goodspeed, Ka ri Hattner,
Vadim Kuznet s ov, Bret t
Johnson, Russell O’Henly,
J o rdan Ro m a i d i s
PR Manager
Michelle Seebach Curran
PR Specialist
Denny Chiu
Website
Boon Khoo
Special Thanks
Chip Blundell, Adam Braswell,
Christian Chatterjee, Kevin
Gill, Wyman Jung,
Julie Leibowitz, Michael
Minson, Mike Orenich, Shelley
Porter, Greg Richardson, Sam
Tehrani, Frank Teran, Kjell
Vistad, Kevin Weston, and
Greg Wu.
Eidos Inte ractive UK
CEO
Mike McGarvey
Producer
Luke Valentine
Head of Development
Operations
Flavia Timiani
Development Director
David Rose
Group Localisation Manager
Caroline Simon
Localisation Coordinator
Monica Dalla Valle
Brand Manager
Helen Lawson
Head of Mastering/Compatibility
Jason Walker
Mastering
Phil Spencer, Ray Mullen
Compatibility
Gordon Gram, Scott
Sutherland
QA Director
Chris Rowley
Assistant QA Manager
John Ree
Product Test Coordinator
Tyrone O’Neill
Asst Product Test Coordinator
Andrew Standen
QA Technicians
Vincent Boon, Darran
Gibbons, Kevin Haddon,
Daniel Mills, Gareth Mills,
Andrew Nicholas, Jonathon
Redington, Andy Secchi
Localisation QA Supervisor
Marco Vernetti
Localisation Product Test
Coordinator
Dario Scimone
Special Thanks
Mark Allen, Marcus Behrens,
Benoit Bohet, Louise Fisher,
Bernadette Hannah, Nicola
Mason, Tom Waine, and Lars
Wittkuhn.
Voice Actors
Garrett
Stephen Russell
Keepers
Alexander Brandon, Ken
Carberry, Marc Carver,
Maureen Keiller, Jerry Kissel
Julie Perkins
Hammerites
John Haag, Ron Hayden, Jerry
Kissel, Stephen Russell
Pagans
Brian Hoffman, Sarah
Newhouse, Chip Phillips,
Paula Plum
Guards
Scott Dickson, Jerry Kissel,
George Ledoux, Stephen
Russell, Daniel Thron
Thugs
Lonnie Farmer, George
Ledoux, Chloe Leamon
Townspeople
Lily Allen, Stacy Fischer, Gray
Haddock, George Ledoux,
Paula Plum, Stephen Russell,
Richard Snee
Fences & Store owners
Terri Brosius, Stacy Fischer,
John Haag, George Ledoux,
Chip Phillips, Paula Plum,
Paula Rester, Richard Snee
Artemus
Nate Wells
Orland
Ken Webster
Caduca
Paula Rester
Gamall
Wren Ross
Lauryl
Terri Brosius
Enforcers
Jerry Kissel
Inspector Drept
Kevin Collins
Lady Elizabeth
Maureen Keiller
Widow Moira
Terri Brosius
The Eye
Daniel Thron
The Heart
Stacy Fischer
Kurshok
Eric Brosius, Mark Stevick
Rat Beasts
Ricardo Bare, Ryan
Wickerham
Statues
Eric Brosius
Undead
Steve Allen, Ricardo Bare,
Mark Lampert
Miscellaneous cutscene voices
Jim Canning, Shiela Gordon,
David Jarrott, Everett Skaggs
28
 Loading...