

Page 1
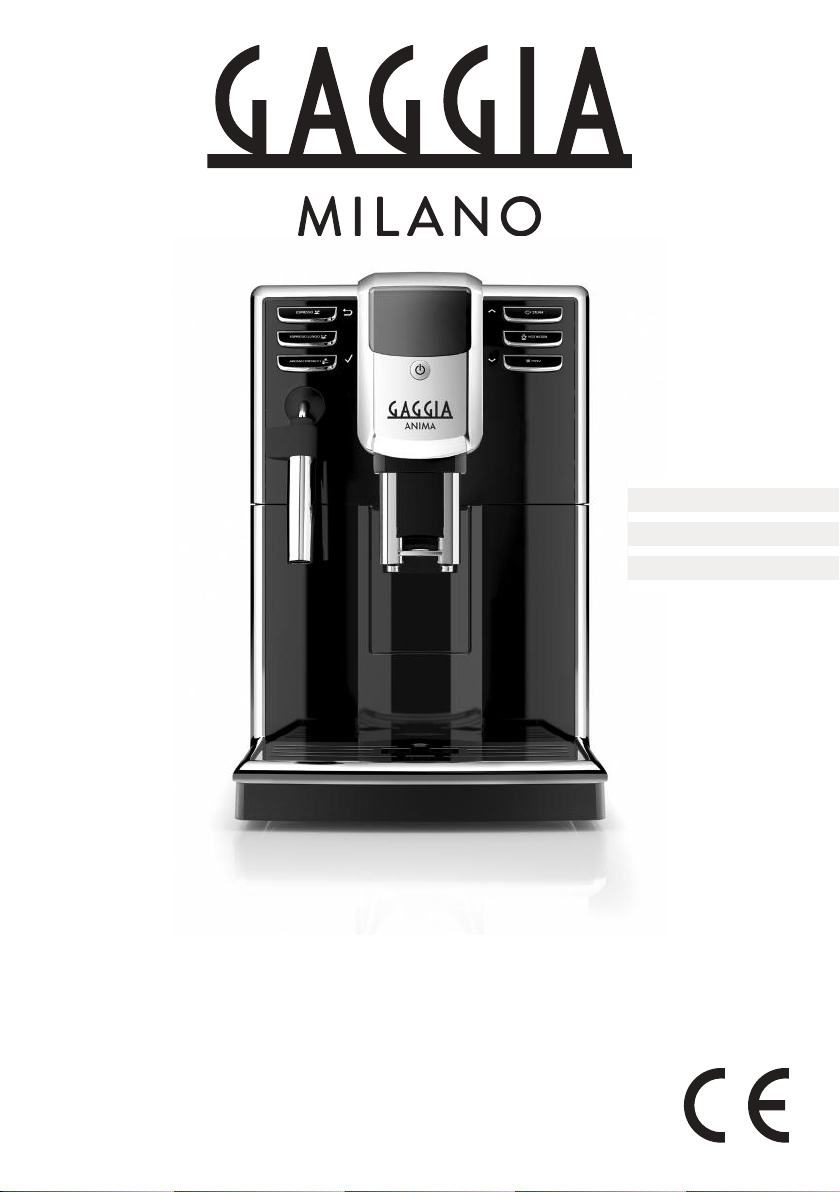
GAGGIA ANIMA
Manuale d’istruzione
Instruction manual
Bedienungsanleitung
ITALIAN
ENGLISH
GERMAN
Page 2

Page 3
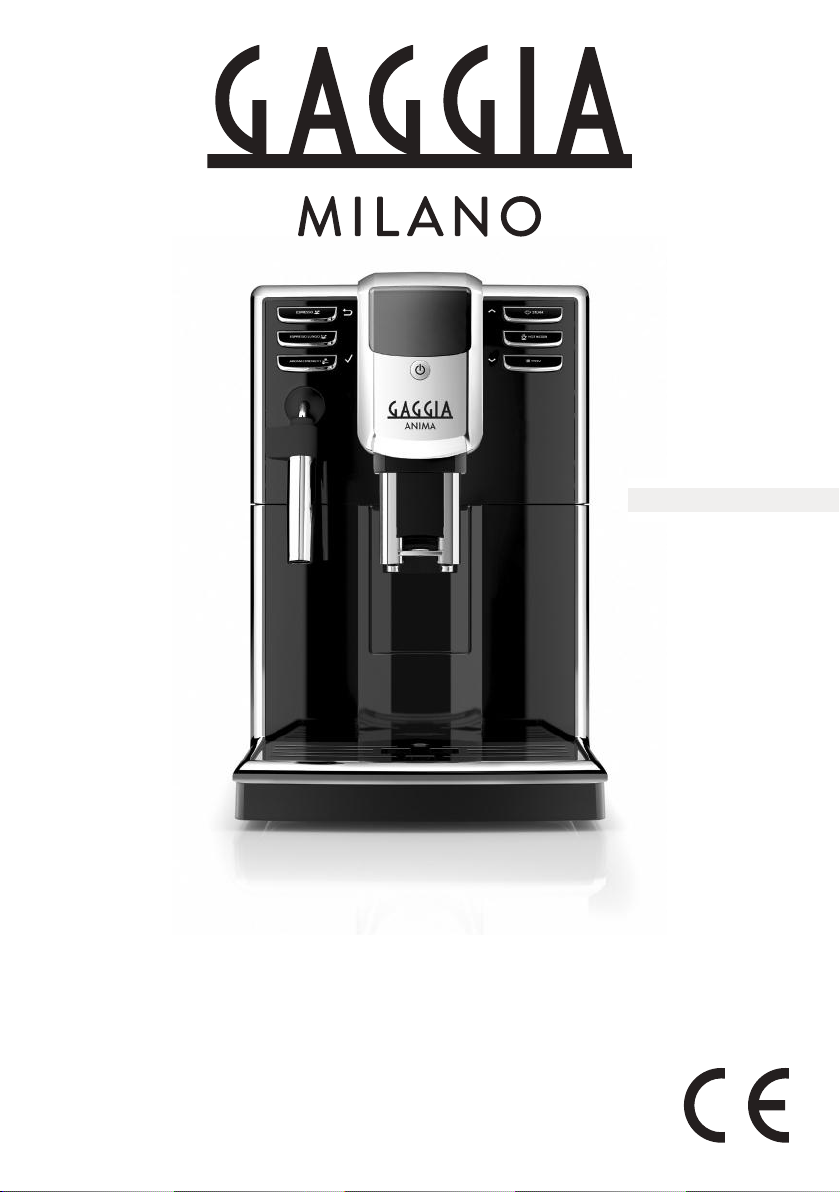
GAGGIA ANIMA
Instruction manual
ENGLISH
Page 4

Contents
1. Introduction to the manual...........1
2. Product overview ...................1
2.1 The product ...........................1
2.2 Accessories.............................1
2.3 Main components . . . . . . . . . . . . . . . . . . . . . . .2
2.4 Main removable parts ....................2
2.5 Control buttons and display...............2
3. Safety.............................3
3.1 Safety instructions .......................3
4. Preliminary operations ..............5
4.1 Positioning .............................5
4.2 Water tank lling ........................5
4.3 Coffee bean hopper lling ................5
4.4 Plug in and start .........................5
5. Activation and deactivation...........6
5.1 Using the selection buttons ...............6
5.2 First start ..............................6
5.2.1 Water circuit priming ....................6
5.2.2 Automatic rinse/self-cleaning cycle .........6
5.2.3 Manual rinse cycle .......................6
5.3 Adjustments ............................7
5.3.1 Water hardness measurement and setting...7
5.3.2 Aroma intensity adjustment ...............7
5.3.3 Ceramic coffee grinder adjustment.........7
5.3.4 Brewing temperature adjustment ..........8
5.3.5 Coffee dispensing spout adjustment ........8
5.4 Deactivation and reactivation..............8
6. Use...............................8
6.1 Coffee-based preparations................8
6.1.1 Use of pre-ground coffee (one specialty
only) ..................................8
6.1.2 Brewing a product with one button ........9
6.1.3 Brewing two products with one button
(possible only when using coffee beans) ....9
6.1.4 Adjustment of coffee length in the cup
during preparation.......................9
6.2 Milk frother.............................9
6.3 Milk- and coffee-based preparations.......10
6.3.1 Brewing a milk-based product ............10
6.4 Hot water-based preparations ...........10
6.4.1 Hot water dispensing ...................10
7. Cleaning and maintenance ..........10
7.1 Machine cleaning .......................11
7.1.1 Machine cleaning when needed...........11
7.1.2 Weekly cleaning of the machine ..........11
7.2 Brew group cleaning ....................11
7.2.1 Weekly brew group cleaning cycle ........11
7.2.2 Monthly lubrication of the brewing unit
(one cleaning cycle using a lubricant) . . . . . . 12
7.2.3 Monthly degreasing of the brew group (one
cleaning cycle using a degreaser)..........13
7.3 Containers cleaning.....................13
7.3.1 Cleaning of the water tank...............13
7.3.2 Monthly cleaning of the coffee
compartments .........................13
7.4 Milk frother cleaning ....................14
7.4.1 Milk frother cleaning cycle ...............14
7.4.2 Weekly cleaning of the milk frother
components ...........................14
7.5 Descaling cycle.........................14
7.5.1 Interruption of the descaling cycle ........15
8. Default settings....................15
8.1 List of default settings ...................15
8.2 Changing the default settings .............16
8.3 Reset to the default settings..............16
9. Troubleshooting ...................16
9.1 Alarm signals summary: red display ........16
9.2 Warnings signals summary ...............17
9.3 The machine is out of service ............17
9.4 Troubleshooting table ...................18
10. Maintenance accessories and products 19
10.1 Maintenance products...................19
10.2 INTENZA+ water lter ................19
10.2.1 INTENZA+ installation..................20
10.2.2 INTENZA+ replacement ................20
11. Technical characteristics ............21
12. Transportation and disposal .........21
13. Warranty and service...............21
13.1 How to contact Gaggia..................21
Symbols
The following symbols are used in some parts of the
booklet:
Indicates actions that should on no account be
carried out.
Indicates actions that require some caution.
> Requests the specied action.
Page 5

IMPORTANT SAFEGUARDS
When using electrical appliances, basic safety precautions should always
be followed, including the following:
1. Read all instructions.
2. Do not touch hot surfaces. Use handles or knobs.
3. To protect against re, electric shock and injury to persons do not immerse
cord, plugs, or appliance in water or other liquid.
4. Close supervision is necessary when the appliance is used by or near
children.
5. Unplug from outlet when not in use and before cleaning. Allow to cool
before putting on or taking off parts, and before cleaning the appliance.
6. Do not operate any appliance with a damaged cord or plug or after the
appliance malfunctions, or has been damaged in any manner. Return
appliance to the nearest authorized service facility for examination,
repair or adjustment.
7. The use of accessory attachments not recommended by the appliance
manufacturer may result in re, electric shock or injury to persons.
8. Do not use outdoors.
9. Do not let cord hang over edge of table or counter, or touch hot surfaces.
10. Do not place on or near a hot gas or electric burner, or in a heated oven.
11. Always attach plug to appliance rst, then plug cord into wall outlet. To
disconnect, turn any control to “off ”, then remove plug from wall outlet.
12. Do not use appliance for other than intended use.
13. Save these instructions.
SAVE THESE INSTRUCTIONS
Page 6

CAUTION
This appliance is for household use only. Any servicing, other than cleaning
and user maintenance, should be performed by an authorized service
center.
Do not immerse machine in water. To reduce the risk of re or electric
shock, do not disassemble the machine. There are no parts inside the
machine serviceable by the user. Repair should be done by authorized
service personnel only.
1. Check voltage to be sure that the voltage indicated on the nameplate
corresponds with your voltage.
2. Never use warm or hot water to ll the water tank. Use cold water only.
3. Keep your hands and the cord away from hot parts of the appliance
during operation.
4. Never clean with scrubbing powders or harsh cleaners. Simply use a soft
cloth dampened with water.
5. For optimal taste of your coffee, use puried or bottled water. Periodic
descaling is still recommended every 2-3 months.
6. Do not use caramelized or avored coffee beans.
INSTRUCTIONS FOR
THE POWER SUPPLY CORD
A. A short power-supply cord (or detachable power-supply cord) is to be
provided to reduce risks resulting from becoming entangled in or tripping
over a longer cord.
B. Longer detachable power-supply cords or extension cords are available
and may used if care is exercised in their use.
C. If a long detachable power-supply cord or extension cord is used,
1. The marked electrical rating of the detachable power-supply cord or
extension cord should be at least as great as the electrical rating of the
appliance.
2. If the appliance is of the grounded type, the extension cord should be a
grounding-type 3-wire cord, and
3.
The longer cord should be arranged so that it will not drape over the counter
top or table top where it can be pulled on by children or tripped over.
Page 7
1. Introduction to the manual
Foreword
Congratulations for your purchase of a Gaggia Anima fully automatic coffee machine!
This manual contains all necessary information to install, use, clean and descale your
machine.
•
In the “2. Product overview” chapter you will become familiar with the various buttons
and components of the machine.
•
The “3. Safety” chapter requires careful study to avoid any risk due to incorrect or
improper use of the machine.
•
The “4. Preliminary operations” and “5. Activation and deactivation” chapters provide a
step-by-step description of the machine placement and preparation for use.
•
The “6. Use” chapter describes how the machine is to be used, with a list of all the
drinks that can be prepared with the machine itself.
•
“7. Cleaning and maintenance” chapter will keep your machine in top form.
•
For any operation issues please refer to the “9. Troubleshooting” chapter.
•
The remaining chapters provide support for quick use.
Notes
This document is an integral part of the machine and must be stored with care for
future reference. The document is copyrighted.
2. Product overview
2.1 The product
The machine can be used to brew coffee from whole beans and is equipped with
a classic milk frother to prepare the perfect cappuccino easily and quickly. It can also
dispense steam and hot water.
These are the machine’s special features:
Gaggia Adapting System
Coffee is a natural product and its characteristics may vary according to origin, blend
and roasting. The machine is equipped with a self-adjustment system that allows it
to valorise your favourite coffee beans. It regulates itself after brewing a few coffees.
Coffee intensity adjustment
You can choose your favourite coffee blend and adjust the quantity of coffee to be
ground according to your personal taste. It is possible to use pre-ground coffee.
Ceramic coffee grinder
The ceramic grinding wheels guarantee consistently excellent grinding, and allow you
to adjust the grinder to completely suit your taste. This technology provides absolute
aroma preservation, thus guaranteeing that each cup has the true taste of Italian
coffee.
Energy saving function
The fully automatic Gaggia espresso machine is designed as an energy saving device,
as shown by the A rating. After a preset idle time, the machine goes into stand-by
mode automatically.
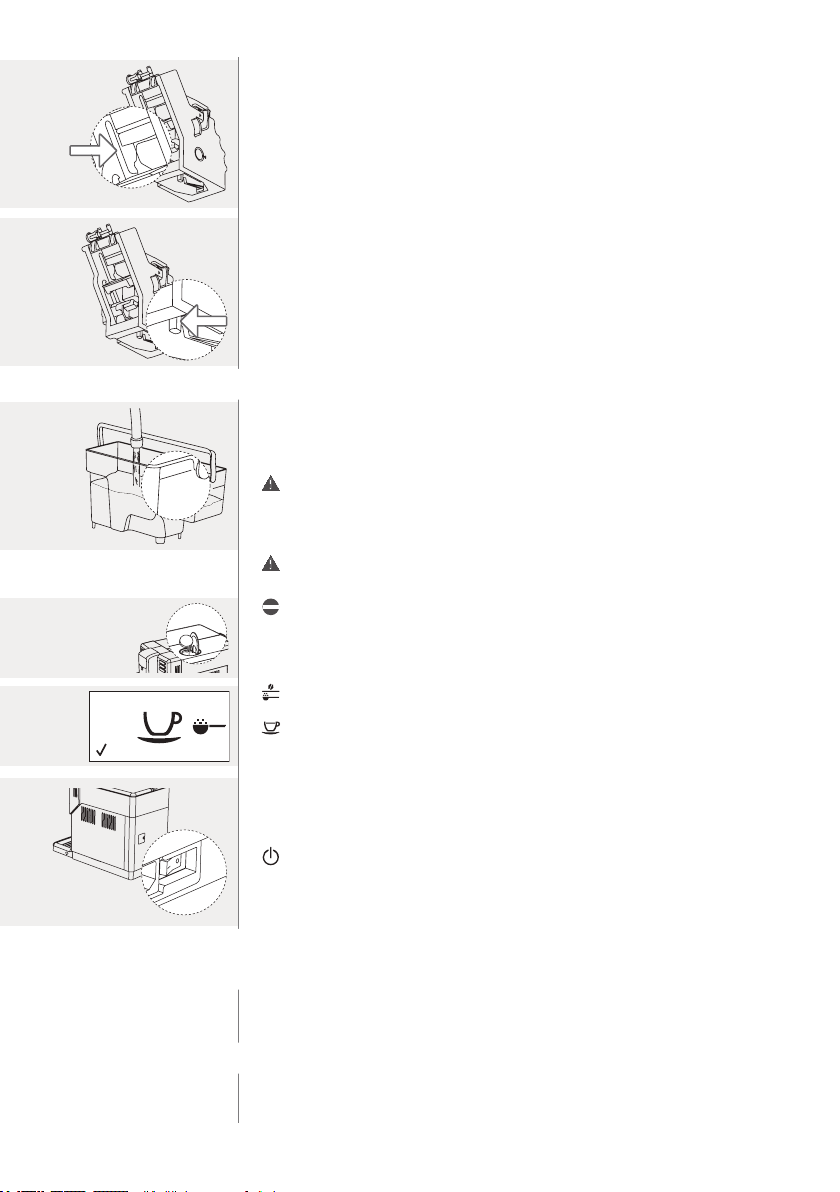
2.2 Accessories
1
2
5
1. Power cord
2. Instruction manual
3. Disposable strip for water hardness test
3
4. Multifunction tool
• Coffee grinder adjustment key
• Powder coffee outlet duct cleaning tool
64
• Pre-ground coffee measuring scoop
5. Cleaning brush (optional)
6. Brew group grease (optional)
ENGLISH
1
Page 8

2.3 Main components
2
1
12
11
10
9
2.4 Main removable parts
9
11
7
10
8
1. STAND-BY button
2. Water tank seat
3. Coffee bean hopper
4.
Pre-ground coffee compartment
3
4
MAX
5. Removable water tank
5
6. Main switch
I. ON
0. OFF
7. Power cord socket
8. Coffee grounds drawer
9. Drip tray
10. Drip tray grill
8
6
7
1
2
11. Coffee dispensing spout
12. Classic milk frother
1. Water tank lid
2. Coffee bean hopper lid
3. Pre-ground coffee
compartment lid
3
4. Service door
5. Coffee residues drawer
4
6. Brew group
7. Coffee dispensing spout
8. Drip tray
9. Coffee grounds drawer
10. ‘Drip tray full’ indicator
11. Classic milk frother
PUSH
6
5
N
• Steam wand (xed)
• Rubber grip
2.5 Control buttons and display
8
1
ESPRESSO
2
ESPRESSO LUNGO
AROMA STRENGTH
3
ENGLISH
2
1. ESPRESSO button
ESC button
4
STEAM
5
HOT WATER
MENU
7
6
2. ESPRESSO LUNGO button
3. AROMA STRENGTH button
OK button
4. STEAM button
UP button
5. HOT WATER button
6. MENU button
DOWN button
7. STAND-BY button
8. Display
In the example:
Main menu; ready for brewing
Page 9
3. Safety
This machine is equipped with safety features. Nevertheless, read and follow
the “3.1 Safety instructions” chapter carefully, and only use the machine as
described in these instructions to avoid accidental injury or damage due to
improper use of the machine. Keep this user manual for future reference.
3.1 Safety instructions
•
The “Warnings” section warns against possible severe injuries, danger to life
and/or damage to the machine.
•
The “Cautions” section warns against slight injuries and/or damage to the
machine.
It’s necessary a careful reading of the manual before performing any
operation or maintenance.
Warnings
Connect the machine to a wall socket with a voltage matching the technical
specications of the machine.
Connect the machine to an earthed wall socket.
Do not let the power cord hang over the edge of a table or counter, or touch
hot surfaces.
Never immerse the machine, mains plug or power cord in water (danger of
electrical shock!).
Do not pour liquids on the power cord connector.
Never direct the hot water jet towards body parts: danger of burns!
Do not touch hot surfaces. Use handles and knobs.
Turn off the machine from the main switch located on the back before
removing the plug from the socket:
- If a malfunction occurs.
- If the machine will not be used for a long time.
- Before cleaning the machine.
Pull on the plug, not on the power cord.
Do not touch the mains plug with wet hands.
Do not use the machine if the mains plug, the power cord or the machine
itself is damaged.
Do not make any modications to the machine or its power cord.
Only have repairs carried out by a service centre authorized by Gaggia to
avoid a hazard.
The machine should not be used by children younger than 8 years old.
ENGLISH
3
Page 10

The machine can be used by children of 8 years and upwards if they have
previously been instructed on the correct use of the machine and made
aware of the associated dangers or if they are supervised by an adult.
Cleaning and maintenance should not be carried out by children unless they
are more than 8 years old and supervised by an adult.
Keep the machine and its power cord out of reach of children under 8 years
old.
The machine may be used by persons with reduced physical, sensory or
mental capabilities or lacking sufcient experience and/or skills if they have
previously been instructed on the correct use of the machine and made
aware of the associated dangers or if they are supervised by an adult.
Children should be supervised to ensure that they do not play with the
machine.
Never insert ngers or other objects into the coffee grinder.
Cautions
The machine is for household use only. It is not intended for use in
environments such as canteens, staff kitchens of shops, ofces, farms or
other work environments.
Always put the machine on a at and stable surface.
Do not place the machine on hot surfaces, directly next to a hot oven, heater
or similar sources of heat.
Only put roasted coffee beans into the coffee bean hopper. If ground coffee,
instant coffee, raw coffee beans or any other substance is put in the coffee
bean hopper, it may damage the machine.
Let the machine cool down before inserting or removing any parts. The
heating surfaces may retain residual heat after use.
Never use warm or hot water to ll the water tank. Use only cold non
sparkling drinking water.
Never clean with scrubbing powders or harsh cleaners. Simply use a soft
cloth dampened with water.
Descale your machine regularly. The machine indicates when descaling is
needed. Not doing this will make your appliance stop working properly. In
this case repair is not covered under your warranty!
Do not keep the machine at temperature below 0 °C. Residue water in the
heating system may freeze and cause damage.
Do not leave water in the water tank when the machine is not used over a
long period of time. The water can be contaminated. Use fresh water every
time you use the machine.
4
ENGLISH
Page 11
4. Preliminary operations
MAX
Make sure to read the “3. Safety” chapter.
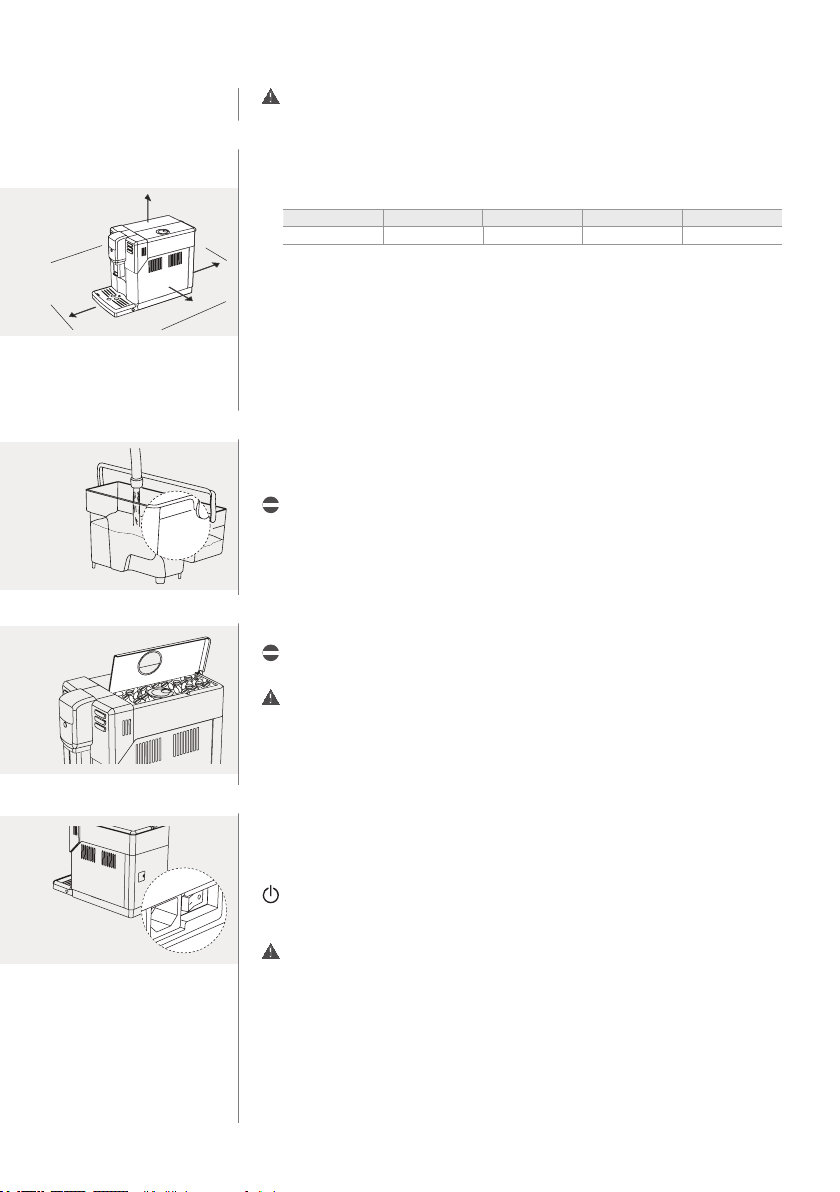
4.1 Positioning
To facilitate the use of the machine, it should be placed in an appropriate location that
provides adequate space to operate.
H1
L1
W1
W2
L2
4.2 Water tank lling
MAX
CALC
CLEAN
4.3 Coffee bean hopper lling
Working spaces
L1 L2 W1 W2 H1
150 mm 221 mm 430 mm 150 mm 340 mm
Unpacking and placement
The original packaging was designed and produced to protect the machine while
being moved; it is recommended to keep it, in case the machine needs to be moved
again.
> Remove the machine from its packaging.
> Choose a secure and horizontal surface away from heat sources and out of the
weather, in a sufciently lit and hygienic room, next to an easily accessed power socket.
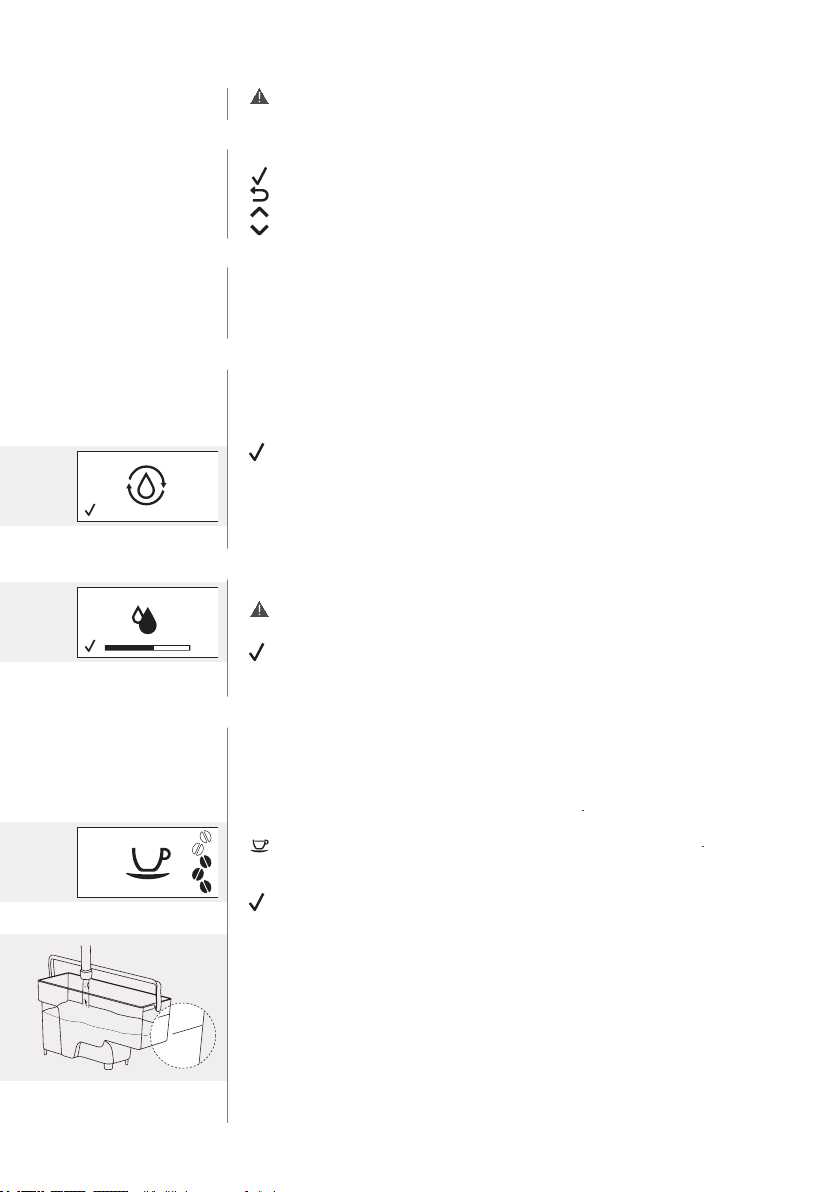
> Position the machine allowing for working spaces.
> Lift the lid of the water tank.
> Lift the water tank by its handle.
> Rinse the water tank with cold water.
Do not ll the water tank with hot, boiling or carbonated water or with other liquids
that might damage the tank and the machine. Use fresh water every time you use
the machine.
> Fill the water tank with fresh cold water to the MAX level.
> Put the tank back into the machine, checking that it is fully settled.
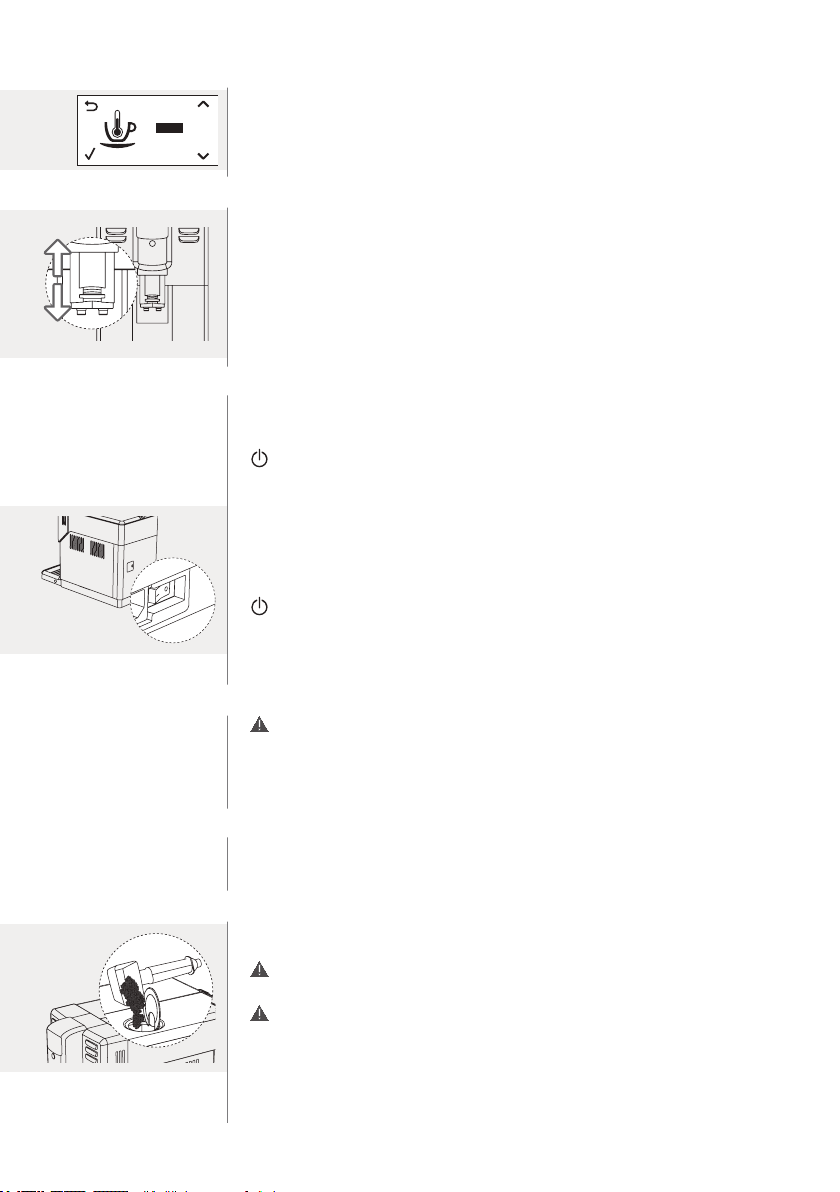
> Lift the coffee bean hopper lid.
Do not place too many coffee beans in the coffee bean hopper, so as to avoid
damaging grinding performance.
Coffee powder, soluble coffee, raw coffee and other substances, if placed in the coffee
bean hopper, may damage the machine. Always ll the coffee bean hopper with roasted
coffee beans only. Do not ll it with green, caramelised or avoured coffee beans.
> Pour the coffee beans slowly in the coffee bean hopper and close the lid.
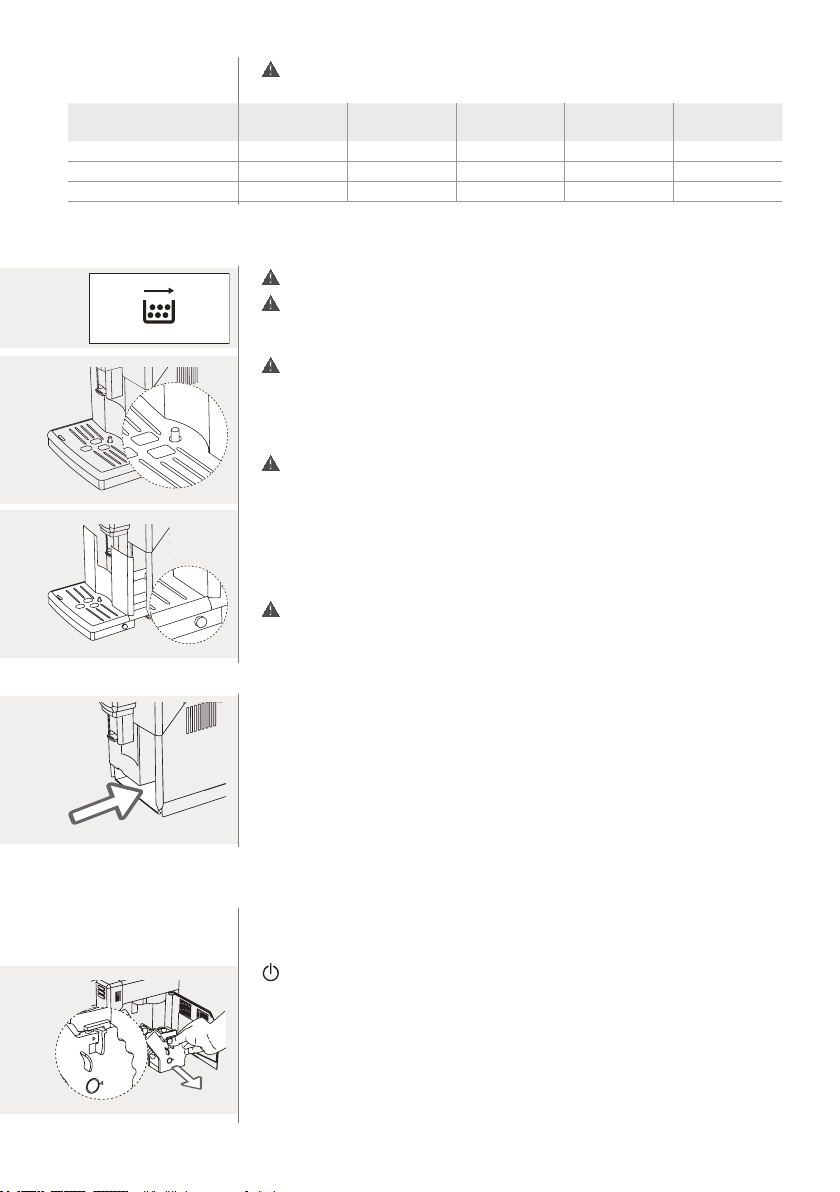
4.4 Plug in and start
> Insert the plug into the socket located on the back of the machine.
> Insert the plug at the other end of the power cord into a wall socket with suitable
power voltage, as shown in the tag inside the service door.
> Turn the main switch to the ON position to turn the machine on.
> The STAND-BY button is ashing. Press the button to turn on the machine. The
display shows that it is necessary to prime the circuit: proceed as described in the
“5.2 First start” chapter.
Keeping the STAND-BY button pressed for over 8 seconds causes the DEMO MODE
function to start. To exit the demo mode, turn the machine OFF and ON using the
main switch.
ENGLISH
5
Page 12
5. Activation and deactivation
CALC
CLEAN
Make sure to read the “3. Safety” chapter.
5.1 Using the selection buttons
Some function buttons can be used to navigate through functions / menus:
The OK button is used to select / conrm / stop the function.
The ESC button is used to return to the main menu, one level at a time.
The UP button is used to move upwards.
The DOWN button is used to move downwards.
5.2 First start
Before rst use the following operations must be carried out:
• Water circuit priming.
• One automatic rinse/self-cleaning cycle.
• One manual rinse cycle.
5.2.1 Water circuit priming
During this process fresh water ows through the internal circuit and the machine
heats up. The process requires a few minutes.
> Check that the classic milk frother is installed.
> Place a container under the milk frother.
> Press the OK button to start the water circuit priming cycle. The machine star ts
dispensing hot water through the milk frother. The progress bar on the display shows
the status of the operation. The machine automatically stops dispensing water at the
end of the process. The display shows that the machine is heating. At the end of the
heating phase, the machine launches an automatic clean water rinse/self-cleaning cycle
of the internal circuits.
5.2.2 Automatic rinse/self-cleaning cycle
> Place a container under the coffee dispensing spout.
Burning hazard! Be careful of hot water or steam sprays.
The operation lasts less than a minute. Wait for the cycle to end automatically.
If necessary, the cycle can be interrupted by pressing the OK button.
> Empty the container. The machine goes back to the main menu.
Now it is possible to launch the manual rinse cycle.
5.2.3 Manual rinse cycle
The complete manual rinse cycle comprises two consecutive phases:
• One “Coffee brewing circuit rinsing phase”, to be repeated twice.
• One “Hot water dispensing circuit rinsing phase”.
Coffee brewing circuit rinsing phase
During this phase, the coffee brewing cycle is started.
> Place a container under the coffee dispensing spout.
> Press the ESPRESSO LUNGO button. The machine starts brewing coffee.
Repeat the previous operations, then proceed.
> After the product has been brewed, empty the container.
If necessary, the cycle can be interrupted by pressing the OK button.
Hot water circuit rinsing phase
> Follow the instructions in the “4.2 Water tank lling” chapter and ll the water tank up
to the CALC CLEAN level.
6
ENGLISH
MAX
LC
CA
CLEAN
Page 13

>
y
Follow the instructions in the “6.4.1 Hot water dispensing” chapter and dispense water
until the ‘Water tank empty’ symbol is displayed. Empty the container.
>
red
displa
Follow the instructions in the “4.2 Water tank lling” chapter and ll the water tank up
to the MAX level. The machine is ready for brewing.
5.3 Adjustments
The machine is supplied with standard brewing default settings. To enhance the quality and
taste of the coffee, it is recommended to adjust the settings. In par ticular, to obtain a stronger
taste, set the brewing temperature, aroma and grinding neness to the top of the scale.
5.3.1 Water hardness measurement and setting
It is essential to measure water hardness to:
• Determine the descaling schedule for the machine.
• Use correctly the INTENZA+ water lter. Please, refer to the “10.2 INTENZA+ water
lter” chapter.
>
Dip the disposable strip in water for 1 second, to test the water hardness (strip
supplied with the machine).
>
1
2
3
4
4
3
2
1
5.3.2 Aroma intensity adjustment
5.3.3 Ceramic coffee grinder adjustment
Remove the disposable strip and wait for 1 minute.
>
Check how many squares change colour, then refer to the table.
number of red squares
1 1 very soft water
2 2 soft water
3 3 hard water
4 4 very hard water
Refer to the “8.2 Changing the default settings” chapter to change the water hardness
default.
> Every time the AROMA STRENGTH button is pressed, the aroma of your coffee
changes by one degree. The display changes with the chosen aroma.
extra light aroma
light aroma
medium strength aroma
strong aroma
extra strong aroma
pre-ground coffee
Adjustments to the coffee grinder must be made exclusively when the machine is
grinding coffee beans.
>
Lift the coffee bean hopper lid.
>
Identify the grinder adjustment knob. Reference marks placed around the knob show the
grinding settings. It is possible to set the machine to one of ve different grinding neness
levels: from the leftmost position, for coarse grinding and a lighter taste (minimum setting)
to the rightmost one, for ne grinding and a stronger taste (maximum setting).
>
Place a small cup under the coffee dispensing spout.
>
Press the ESPRESSO button.
>
While the machine is grinding, press and rotate the knob by one unit at a time. Use the
special coffee grinder adjustment key supplied. The taste difference will be detectable
after brewing 2-3 coffee cups.
value to be set water hardness
The machine will automatically dose
the right quantity of coffee.
The right quantity of coffee will be dosed
by using the supplied measuring scoop.
ENGLISH
7
Page 14
5.3.4 Brewing temperature adjustment
MAX
MED
MIN
Refer to the “8.2 Changing the default settings” chapter to change the coffee
temperature default.
5.3.5 Coffee dispensing spout adjustment
The height of the coffee dispensing spout can be adjusted to adapt to the size of the
cup one wishes to use.
>
To adjust the settings, lift or lower the coffee dispensing spout with your ngers.
5.4 Deactivation and reactivation
After 15 minutes in idle mode, the machine goes automatically in stand-by mode. The
start time of the stand-by mode can be changed. To know how, read the “8. Default
settings” chapter.
In this phase the STAND-BY button is ashing.
The machine might launch an automatic rinse/self-cleaning cycle, as described in the
“5.2.2 Automatic rinse/self-cleaning cycle” chapter.
Shutdown
> To turn the machine off completely, the main switch at the back of the machine must
be in the OFF position.
Reactivation
> The main switch at the back of the machine must be in the ON position.
>
To restart the machine, press the STAND-BY button.
The machine might request a “5.2.1 Water circuit priming”, or simply go through an
automatic rinse/self-cleaning cycle as described in the “5.2.2 Automatic rinse/self-
cleaning cycle” chapter.
6. Use
Make sure to read the “3. Safety” chapter.
In order to preserve product quality, every time the machine is turned on, the “5.2.2
Automatic rinse/self-cleaning cycle” will be launched. When the machine is started after
remaining unused for a long period of time, we recommend running a “5.2.3 Manual
rinse cycle”.
6.1 Coffee-based preparations
The quantity of brewed product in the cup is set by default. To change this value refer
to the “6.1.4 Adjustment of coffee length in the cup during preparation” chapter.
The machine can brew one or two coffee-based drinks.
6.1.1 Use of pre-ground coffee (one specialty only)
It is possible to select the function that uses pre-ground coffee. It brews only one
product.
Placing anything other than pre-ground coffee may seriously damage the machine.
These damages are NOT covered by the warranty.
Use only the measuring scoop supplied with the machine. If the dose is more than
one, or excessive, the machine does not brew the product and the coffee will be
discharged in the coffee grounds drawer.
>
Lift the compartment lid and add one measuring scoop of pre-ground coffee. If no
dose is added, the machine will dispense water only.
>
Close the pre-ground coffee compartment lid.
ENGLISH
8
Page 15

>
Press the AROMA STRENGTH button repeatedly, to select the pre-ground coffee
brewing function.
Proceed by following the further instructions on the preparation of the desired
specialty.
6.1.2 Brewing a product with one button
> Place one cup under the coffee dispensing spout.
One espresso/one espresso lungo
> To brew one espresso, press the ESPRESSO button.
>
Otherwise, to brew one espresso lungo, press the ESPRESSO LUNGO button.
After the pre-infusion cycle, coffee starts pouring from the coffee dispensing spout.
Coffee will be brewed to a preset level; it is possible, however, to stop brewing it
before this level is reached, by pressing the OK button.
After the product has been brewed, the machine goes back to the main menu.
6.1.3 Brewing two products with one button (possible only when using coffee beans)
> Place two cups under the coffee dispensing spout.
Two espresso/two espresso lungo
> To brew two espresso, press the ESPRESSO button twice.
>
2X
2X
Otherwise, to brew two espresso lungo, press the ESPRESSO LUNGO button twice.
After the pre-infusion cycle, coffee starts pouring from the coffee dispensing spout.
The machine carries out two grinding cycles in sequence.
Coffee will be brewed to a preset level; it is possible, however, to stop brewing it
before this level is reached, by pressing the OK button.
After the product has been brewed, the machine goes back to the main menu.
6.1.4 Adjustment of coffee length in the cup during preparation
It is possible to adjust the quantity of product brewed according to one’s taste and
the size of the cups. This function makes it possible to change the default setting for
the quantity of product brewed in the cup. For a stronger taste, reduce the brewed
quantity. Prepare the machine for one espresso / espresso lungo and place a cup
under the coffee dispensing spout.
Espresso length/espresso lungo length
> To adjust the espresso length, keep the ESPRESSO button pressed until the MEMO
M
E
M
O
symbol is displayed, then release the button.
>
Otherwise, to adjust the espresso lungo length, keep the ESPRESSO LUNGO button
pressed until the MEMO symbol is displayed, then release the button.
The machine is in the programming stage and is starting to brew the chosen
product.
>
Press the OK button as soon as the desired quantity has been reached.
M
E
M
O
Now the button is programmed: every time it is pressed, the machine will brew the
product in the quantity just set. After the product has been brewed, the machine goes
back to the main menu.
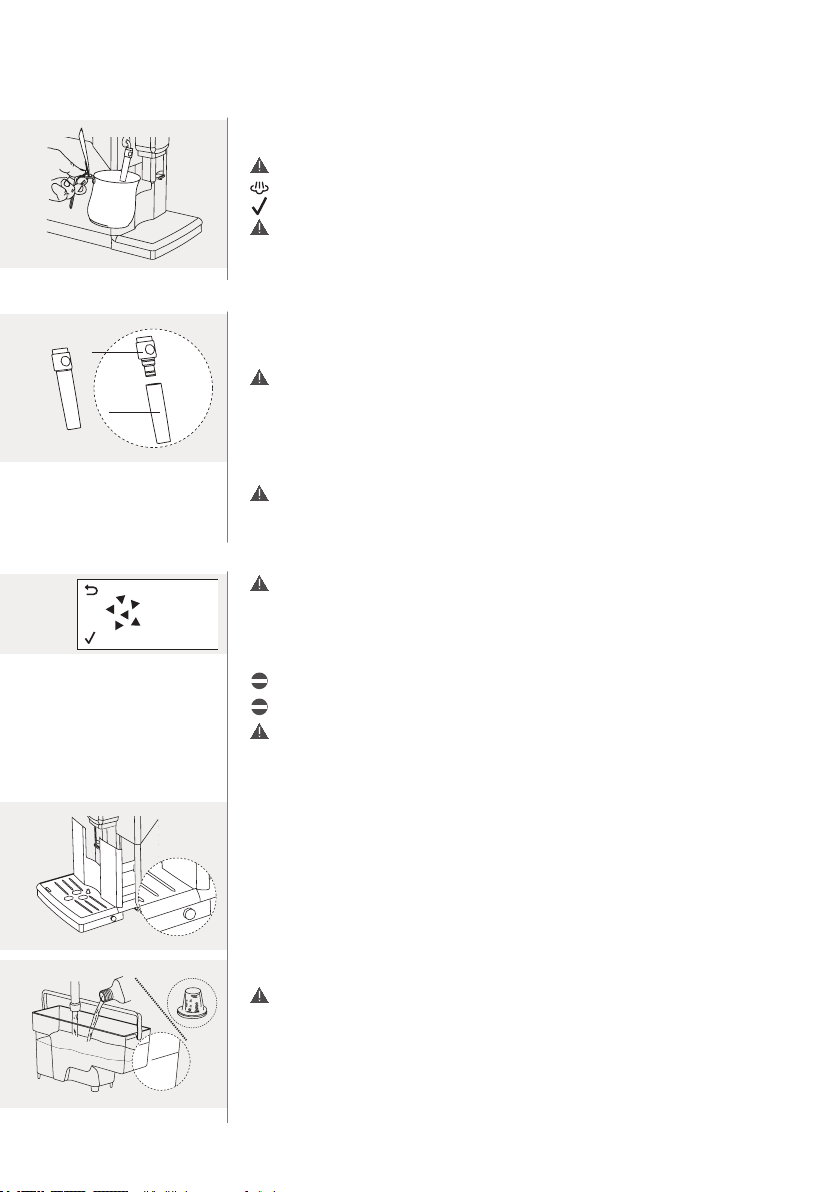
6.2 Milk frother
This chapter explains how to use the milk frother to prepare frothed milk. When using
the machine for the rst time, clean it accurately as described in the “7.4.1 Milk frother
cleaning cycle” chapter.
Burning hazard! At the beginning of each product brewing, hot water or steam sprays
might be present. The milk frother may reach high temperatures. Never touch it with
bare hands. Use the appropriate protective handle.
Water circuit cleaning
> Check that the classic milk frother is installed.
>
Press the STEAM button to dispense steam for a few seconds.
>
To stop dispensing, press the OK button.
ENGLISH
9
Page 16

Inserting phase
> Insert the milk frother in the steam wand seat, until it locks in place.
Burning hazard! If the machine has been recently used the steam wand could be hot.
The rubber grip on the steam wand must be properly inserted, without going beyond
its seat, otherwise the milk frother does not operate correctly.
Removing phase
> Pull the milk frother out to remove it from the steam wand.
6.3 Milk- and coffee-based preparations
To prepare a good cappuccino, use cold milk (~5°C / 41°F) with a protein content
of at least 3%. It is possible to use whole and skimmed milk, soy milk and lactose free
milk, according to personal taste.
6.3.1 Brewing a milk-based product
> Fill 1/3 of a container with cold milk.
>
Immerse the milk frother in the milk.
Burning hazard! At the beginning of each product brewing, milk or steam sprays might
be present.
The milk frother must be installed.
One frothed milk
>
Press the STEAM button to start dispensing steam.
Wait for the necessary pre-heating time.
>
Froth the milk by gently swirling the container and moving it up and down.
>
When the milk froth has the desired consistency, press the OK button to stop dispensing
steam. It will take a few seconds before the machine stops dispensing completely.
The machine automatically stops dispensing if no button is pressed for 3 minutes.
It is immediately possible to brew coffee or dispense hot water.
>
To prepare a cappuccino, brew an espresso or an espresso lungo, as indicated at the
“6.1 Coffee-based preparations” chapter.
When nished it is necessary to dispense a small amount of hot water into a container,
as described in the “7.4.1 Milk frother cleaning cycle” chapter.
6.4 Hot water-based preparations
6.4.1 Hot water dispensing
> Check that the classic milk frother is installed.
>
Place a container under the milk frother.
Burning hazard! At the beginning of each product brewing, hot water or steam sprays
might be present. The steam wand may reach high temperatures. Never touch the
steam wand with bare hands. Use the appropriate protective grip.
>
Press the HOT WATER button to dispense hot water. Wait for the necessary preheating time. The machine starts dispensing hot water.
Dispense the desired hot water quantity.
>
To stop dispensing, press the OK button. After the product has been brewed, the
machine goes back to the main menu.
7. Cleaning and maintenance
Regular cleaning and maintenance of the machine are fundamental to prolong its life
cycle. Otherwise, the machine will stop working correctly. This chapter describes the
details of the operations to be carried out and their schedule.
Make sure to read the “3. Safety” chapter.
All cleaning operations must be carried out when the machine has cooled.
To clean the machine use a wet soft cloth: do not use alcohol, solvents and/or abrasive
objects. Only the drip tray grill and those parts of the milk frother indicated in the
“7.4.2 Weekly cleaning of the milk frother components” section can be washed in the
dishwasher. All other components must be washed in lukewarm water.
10
ENGLISH
Page 17
Damages or improper use caused by cleaning and maintenance activities are NOT
y
PUSH
N
covered by the warranty.
Maintenance schedule Machine Water tank
Coffee
compartments
Brew group Milk frother
When needed chapter no. 7.1.1 ; 7.5 7.3.1 7.4.1
Weekly chapter no. 7.1.2 7.2.1 7.4.2
Monthly chapter no. 7.3.2 7.2.2 ; 7.2.3
7.1 Machine cleaning
7.1.1 Machine cleaning when needed
When the ‘Coffee grounds drawer full’ symbol is displayed, proceed as follows.
red
displa
Burning hazard! Before cleaning the machine, check that the machine, the grounds and
the water in the tank have cooled.
These processes must be launched every time the ‘drip tray full’ indicator raises. If
the indicator is completely raised, this means that the tray is full: be careful when you
remove it.
With the machine turned on, empty and clean the coffee grounds drawer and the
drip tray.
If the machine is turned off, once turned on the ‘Coffee grounds drawer full’ signal is
still on. Please refer to the “9.4 Troubleshooting table”.
> Press the side buttons.
>
Remove the drip tray.
>
Remove the coffee grounds drawer and empty it.
>
Empty and wash the drip tray.
>
Put the coffee grounds drawer in the drip tray and put the latter back into the machine.
Further maintenance operations can be carried out only when the machine is turned
off and disconnected from the power grid.
7.1.2 Weekly cleaning of the machine
> Follow the step-by-step instructions in the “7.1.1 Machine cleaning when needed”
>
7.2 Brew group cleaning
7.2.1 Weekly brew group cleaning cycle
> Turn the machine off with the STAND-BY button. Wait for the STAND-BY button to
>
SH
U
P
N
>
>
>
>
chapter until you reach the seat of the drip tray. Now clean the drip tray seat.
Place the components back.
The brew group must be cleaned at least once a week.
Weekly cleaning of the brew group is a cleaning cycle with water (accurate rinsing).
Disassembly and cleaning phase
start ashing and disconnect the power cord plug.
Press the side buttons.
Remove the drip tray.
Open the service door.
To remove the brew group:
• Place the thumb on the PUSH button and then the other ngers, on the handle.
• Press the PUSH button and pull the handle.
Remove horizontally without rotating it.
ENGLISH
11
Page 18

>
N
PUSH
Clean the coffee outlet duct thoroughly with the appropriate cleaning tool, supplied
together with the machine.
>
Remove the coffee residues drawer and wash it thoroughly.
> Wash the brew group accurately with lukewarm water and clean the upper lter
accurately.
Do not use detergents or soap to clean the brew group.
>
Let the brew group air dry completely.
>
PUSH
N
Clean the inside of the machine accurately with a wet soft cloth.
Reassembly phase
> Insert the coffee residues drawer in its seat and check that it is placed correctly.
PUSH
N
If the coffee residues drawer is not placed correctly, it might be impossible to place
the brew group in the machine.
>
Make sure that the brew group is in the idle position: the two reference marks on the
side of the brew group must match.
> If they do not match, press the lever slightly downwards until it touches the base of
the brew group, so that the two check reference marks match.
PUSH
N
>
Press the PUSH button hard.
PUSH
N
> Make sure that the brew group lock is in the correct position.
>
If it is still lowered, raise it until it locks in place.
>
Put the brew group back in place until it locks, without pressing the PUSH button.
>
Put back the coffee grounds drawer with the drip tray inside the machine and close
the service door.
7.2.2 Monthly lubrication of the brewing unit (one cleaning cycle using a lubricant)
Lubricate the brew group after about 500 coffee cups brewed or at least once a month.
The lubricating grease for the brew group can be bought separately. For fur ther details
please refer to the “10.1 Maintenance products” chapter. Perform the “Disassembly and
cleaning phase” of the “7.2.1 Weekly brew group cleaning cycle” procedure.
ENGLISH
12
Page 19
>
MAX
Apply the grease uniformly on both side guides.
PUSH
N
> Lubricate the shaft too.
Perform the “Reassembly phase” of the “7.2.1 Weekly brew group cleaning cycle”
PUSH
N
procedure.
7.2.3 Monthly degreasing of the brew group (one cleaning cycle using a degreaser)
Launch this cleaning cycle with degreasing tablets after brewing 500 coffees or at least
once a month. This operation completes the brew group maintenance process. The
degreasing tablets are sold separately. For further details please refer to the “10.1
Maintenance products” chapter.
MAX
CALC
CLEAN
Degreasing tablets are recommended only for cleaning purposes, they have no
descaling properties. For descaling, use the Gaggia descaling product and follow the
procedure described in the “7.5 Descaling cycle” chapter.
>
Place a large container (1.5 l) under the dispensing spout.
Burning hazard! Be careful of hot water or steam sprays.
>
Make sure to ll the water tank with fresh water to the MAX level.
Do not place pre-ground coffee in the pre-ground coffee compartment.
>
Place a degreasing tablet in the pre-ground coffee compartment.
>
Select the pre-ground coffee brewing function by pressing the AROMA STRENGTH
button. The machine is ready for brewing.
>
Press the ESPRESSO LUNGO button. The machine starts dispensing water from the
coffee dispensing spout.
> As soon as the progress bar has reached the middle, put the main switch to the OFF
position to turn the machine off.
Let the degreasing solution work for about 15 minutes.
>
Turn the main switch to the ON position to turn the machine on.
>
Press the STAND-BY button. Wait for the end of the “5.2.2 Automatic rinse/self-
cleaning cycle”.
Perform a complete “7.2.1 Weekly brew group cleaning cycle”.
The machine is ready for brewing.
7.3 Containers cleaning
7.3.1 Cleaning of the water tank
> Remove the water lter from the tank and wash it with fresh water.
>
Restore the water lter to its seat, pressing lightly and with a slight rotation.
>
Fill the water tank with fresh water.
7.3.2 Monthly cleaning of the coffee compartments
> Once a month, empty and clean the coffee bean hopper with a wet cloth.
>
Fill it again with the coffee beans.
>
If necessary, clean the pre-ground coffee compartment with a dry cloth.
ENGLISH
13
Page 20
7.4 Milk frother cleaning
CALC
CLEAN
7.4.1 Milk frother cleaning cycle
It is important to clean the milk frother after every use, in order to promote hygiene
and guarantee the perfect thickness of the frothed milk.
The milk frother must be installed.
>
Press the STEAM button to dispense steam for a few seconds.
>
To stop dispensing, press the OK button.
Burning hazard! The steam wand and the milk frothed could be hot.
>
Remove the milk frother and wash it with lukewarm water.
7.4.2 Weekly cleaning of the milk frother components
The weekly cleaning is more thorough.
2
1
1. Milk frother
2. Rubber grip
Burning hazard! If the machine has been recently used the steam wand and the milk
frothed could be hot.
>
Remove the milk frother (1) and wash it with lukewarm water.
>
Remove the rubber grip (2) and wash it with fresh water.
>
Clean the steam wand with a wet cloth.
>
Perform the previous operations in reverse order and reassemble the milk frother.
The rubber grip on the steam wand must be properly inserted, without going beyond
its seat, otherwise the milk frother does not operate correctly.
7.5 Descaling cycle
START
CALC
CLEAN
When the CALC CLEAN symbol is displayed, it is necessary to descale the machine.
If this is not done, the machine may stop working correctly: in this case, repairs are
NOT covered by the warranty.
The descaling cycle has a duration of roughly 30 minutes. It consists of a proper
cleaning cycle, with the Gaggia descaling product, followed by a rinse cycle.
Do not remove the brew group during the descaling process.
Do not drink the descaling solution or the products resulting from the descaling cycle.
Use exclusively the Gaggia descaling solution. The use of other products may damage
the machine and leave residue in the water. The Gaggia descaling solution is sold
separately. For fur ther details please refer to the “10.1 Maintenance products” chapter.
Preparation phase
> Press the side buttons.
>
Remove the drip tray.
>
Remove the coffee grounds drawer and empty it.
>
Empty and wash the drip tray.
>
Restore all the components.
>
Place a large container (1.5 l) under the dispensing spout.
>
If installed, remove the milk frother from the steam wand.
14
MAX
ENGLISH
Descaling phase
If the INTENZA+ water lter is present, extract the lter from the water tank and
replace it with the original small white lter.
>
CALC
CLEAN
Pour all the descaling solution in the water tank.
>
Then ll the tank with fresh water to the CALC CLEAN level.
>
Put the water tank back in the machine.
Page 21
START
y
MAX
CALC
CLEAN
> Press the OK button to select the descaling function.
> Press the OK button to launch the descaling cycle. The machine star ts dispensing the
descaling solution at intervals. The bar shows the cycle progress status.
The cycle can be paused by pressing the ESC button and restarted by pressing the OK
button. This makes it possible for the user to empty the container or leave for a while.
Let the water be discharged until the tank is empty.
> Press the MENU button and scroll the menu to go to the descaling function.
CALC
red
displa
CLEAN
> Remove the water tank and rinse it.
>
Fill it with fresh water to the MAX level and return it to its proper place.
>
Remove and empty the container.
Repeat the entire sequence of operations described in the “Preparation phase” above
MAX
CALC
CLEAN
and proceed with the “Rinsing phase”.
Rinsing phase
> Press the OK button to launch the rinse cycle.
CALC
CLEAN
The cycle can be paused by pressing the ESC button and restarted by pressing the OK
button. This makes it possible for the user to empty the container or leave for a while.
If the water tank was not lled to the MAX level, the machine might require another
rinse cycle. In this case, ll the water tank to the MAX level, put it back in the machine
and repeat the “Rinsing phase”.
Let the product be dispensed until the process stops automatically.
>
Press the OK button to exit the descaling cycle. The machine goes through the heating
and automatic rinse process.
>
Remove and empty the container with dispensed water.
CALC CLEAN
Perform the “7.4.2 Weekly cleaning of the milk frother components” procedure.
Perform the “7.2.1 Weekly brew group cleaning cycle” procedure.
If supplied, remove the small white lter and replace it with the INTENZA+ lter.
At the end, the machine goes back to the main menu.
Place the milk frother back on the steam wand.
It is recommended to perform a “5.2.3 Manual rinse cycle”.
7.5.1 Interruption of the descaling cycle
Once the descaling cycle has started, you must complete it till the very end without
turning off the machine.
> In case you get stuck during the cycle you can exit by pressing the STAND-BY button.
START
CALC
CLEAN
>
If this occurs, or in case of power failure or accidental disconnection of the power
cord, empty and rinse carefully the water tank, then ll it up to the CALC CLEAN
level. Follow the instructions provided in the “5.2.3 Manual rinse cycle” chapter before
brewing any product. If the cycle was not completed, the machine will require another
descaling cycle to be performed at your earliest convenience.
8. Default settings
8.1 List of default settings
Display Setting Value Description
MAX
MED
MIN
COFFEE
TEMP
Coffee
temperature
average Coffee brewing temperature setting.
ENGLISH
15
Page 22
Display Setting Value Description
180’
STANDBY
60’
Stand-by time 15 minutes Stand-by time setting.
30’
15’
FILTER
DISPLAY
CONTRAST
WATER
HARDNESS
WATER
FILTER
4
3
2
1
ON
OFF
FILTER
Contrast average Display contrast setting.
Water hardness
INTENZA+
water lter
4 (very hard
water)
OFF (not
installed)
Water hardness setting. For further details, please
refer to the “5.3.1 Water hardness measurement and
setting” chapter.
INTENZA+ settings. For further details, please refer
to the “10.2 INTENZA+ water lter” chapter.
8.2 Changing the default settings
It is possible to customise the machine functions through the programming menu. The
machine must be turned on and ready to work.
If necessary, refer to the “8.1 List of default settings” chapter.
>
Press the MENU button and scroll through functions list to select the function whose
DISPLAY
CONTRAST
settings are to be modied.
Note: the images at the side refer to a sample function.
>
Press the OK button to select the desired function.
Once selected:
>
Press the UP button to increase the value.
>
Press the DOWN button to decrease the value.
>
Press the OK button to conrm the change.
When the change has been implemented, the OK message will be displayed.
The modied but unconrmed values will not be stored.
>
Press the ESC button to exit the programming function.
The machine automatically exits the programming mode if no button is pressed for
3 minutes.
8.3 Reset to the default settings
It is possible to restore the default settings through the programming menu. The
machine must be turned on and ready to work.
>
Press the MENU button and scroll through functions list to select the RESET function.
>
Press the OK button to select the function.
RESET
When the change has been implemented, the OK message will be displayed.
>
Press the ESC button to exit the programming function.
The machine automatically exits the programming mode if no button is pressed for
3 minutes.
9. Troubleshooting
This chapter summarises the most common issues that might concern your machine.
If the following information is insufcient to solve the problem, please refer to the
FAQ page of the www.gaggia.com website, or contact the Gaggia hotline. Contacts
are included in the warranty booklet supplied separately or can be found at www.
gaggia.com.
The machine is colour coded for easier interpretation of the display signals. The colour
code of the symbols is based on the trafc light concept.
9.1 Alarm signals summary: red display
Display Description Action
Put back the drip tray and coffee
grounds drawer; close the service
door.
Read the “7.1.1 Machine cleaning when needed”
chapter to restore the components to their proper
places.
16
ENGLISH
Page 23
Display Description Action
y
Coffee bean hopper empty.
Follow the relevant instructions in the “4.3 Coffee
bean hopper lling” chapter.
Close the service door. Turn the machine off and
Brew group not inserted.
back on again. The brew group automatically returns
to the starting position.
Coffee grounds drawer full.
Empty the coffee grounds drawer as described in
the “7.1.1 Machine cleaning when needed” chapter.
Water tank empty.
A beverage has been selected with
the coffee been hopper lid open.
The machine is out of service.
XX
9.2 Warnings signals summary
Display Description Action
The machine is ready to brew
products: coffee bean hopper empty.
The machine is ready to brew
products: replace the INTENZA+
water lter.
The machine is waiting to start the
water circuit priming process.
START
CALC
CLEAN
The machine must be descaled.
The machine is heating up. Wait.
The machine is rinsing. Wait.
Follow the relevant instructions in the “4.2 Water
tank lling” chapter.
Close the coffee bean hopper lid on the machine
within 30 seconds to complete brewing.
(Only for 120V machines)
Follow the relevant instructions in the “9.3 The
machine is out of service” chapter.
Follow the relevant instructions in the “4.3 Coffee
bean hopper lling” chapter.
Follow the relevant instructions in the “10.2.2
INTENZA+ replacement” chapter.
Follow the relevant instructions in the “5.2.1 Water
circuit priming” chapter.
Follow the relevant instructions in the “7.5 Descaling
cycle” chapter.
Brew group rebooting. Wait.
9.3 The machine is out of service
If the machine error alarm signal is triggered, the error code is displayed in the bottom
right corner of the display.
red
displa
Error
code
Coffee grinder
1
blocked
XX
Behaviour Cause Action
Please, consult the following table.
Coffee outlet duct clogged
Clean the coffee outlet duct thoroughly as described
in the “7.2.1 Weekly brew group cleaning cycle” chapter.
ENGLISH
17
Page 24

Error
code
3 - 4
Behaviour Cause Action
Brew group
locked, cannot be
taken out
Water circuit
5
error
The brew group is incorrectly
positioned.
Air in the water circuit
For any other error code:
>
Turn the machine off and then back on again after 30 seconds.
>
Try 2 or 3 times.
If the machine does not start, contact the Gaggia hotline and mention the error
code shown on the display. Contacts are included in the warranty booklet supplied
separately or can be found at www.gaggia.com.
Close the service door. Turn the machine off and
back on again. Wait for the ‘Ready for brewing’ signal
and then remove the brew group.
Remove and restore the water tank a couple of
times, making sure to position it correctly. Check
that the water tank seat is clean.
9.4 Troubleshooting table
Behaviour Cause Action
The machine does not turn
on.
The machine is in simulated
working mode.
The drip tray lls up quickly. To guarantee a perfect coffee at
The ‘Coffee grounds drawer
full’ signal is still on, even if
it’s emptied or with only
few coffee grounds in it.
It is impossible to remove
the brew group.
It is impossible to insert the
brew group.
Coffee has too little cream
or is watery.
Coffee is leaking from the
coffee dispensing spout.
Coffee is not hot enough. Cups are cold. Warm the cups with hot water.
The machine is disconnected or the
main switch is in the OFF position.
The STAND-BY button has been
pressed for more than 8 seconds.
every brewing, the machine rinses
and warms itself by ushing water in
the drip tray.
The coffee grounds drawer has been
emptied while the machine was off.
The brew group is incorrectly
positioned.
The coffee grounds drawer is in place. Remove the coffee grounds drawer before removing
The brew group is not in the idle
position.
The gearbox is incorrectly positioned. Place the drip tray and coffee grounds drawer in
Grinders are set to a coarse position. Adjust the grinding neness as described in the “5.3.3
The blend is not right, coffee is not
freshly roasted or is ground too
coarse.
The machine must perform the selfadjustment.
The coffee dispensing spout is
clogged.
The temperature is incorrectly
regulated.
The machine circuit is clogged by
limescale.
Plug in the machine and place the main switch in the
ON position.
Turn the machine OFF and ON using the main switch.
Empty the drip tray. To avoid that rinsing water ends
in the drip tray, place a cup below the dispensing
spouts.
After emptying drip tray and coffee grounds drawer,
wait for the ‘Close service door’ signal to be displayed.
Place the components back.
Close the service door. Turn the machine off and back
on again. Wait for the ‘Ready for brewing’ signal and
then remove the brew group.
the brew group.
Make sure that the brew group is in the idle position
as described in the “7.2.1 Weekly brew group cleaning
cycle” chapter, “Reassembly phase”.
their proper seats. Close the service door. Turn the
machine on without the brew group. The gearbox
goes back to the correct position. Turn the machine
off and put the brew group in place following the
instructions in the “7.2.1 Weekly brew group cleaning
cycle” chapter, “Reassembly phase”.
Ceramic coffee grinder adjustment” chapter.
Change coffee blend or adjust the grinding neness
as described in the “5.3.3 Ceramic coffee grinder
adjustment” chapter.
Brew a few cups of coffee.
Clean the coffee dispensing spout and its holes using
a toothpick.
Adjust the temperature as described in the “5.3.4
Brewing temperature adjustment” chapter.
Descale the machine as described in the “7.5
Descaling cycle” chapter.
18
ENGLISH
Page 25
Behaviour Cause Action
The machine grinds the
coffee beans, but coffee
does not come out.
Coffee comes out slowly. Coffee is ground too nely. Change coffee blend or adjust the grinding as
The machine takes too
much time to heat up
or the quantity of water
dispensed is insufcient.
The frothed milk is too cold. Cups are cold. Warm the cups with hot water.
Milk does not froth. The milk frother is dirty or incorrectly
Water empty. Fill the water tank and prime the circuit again as
The brew group is dirty. Clean the brew group as described in the “7.2.1
The circuit is not primed. Prime the circuit as described in the “5.2.1 Water
The coffee dispensing spout is dirty. Clean the coffee dispensing spout and its holes using
The machine must perform the selfadjustment.
The circuit is not primed. Prime the circuit as described in the “5.2.1 Water
The brew group is dirty. Clean the brew group as described in the “7.2.1
The machine must perform the selfadjustment.
The machine circuit is clogged by
limescale.
placed.
The type of milk used is not suitable
for frothing.
described in the “5.2.1 Water circuit priming” chapter.
Weekly brew group cleaning cycle” chapter.
circuit priming” chapter.
a toothpick.
Brew a few cups of coffee.
described in the “5.3.3 Ceramic coffee grinder
adjustment” chapter.
circuit priming” chapter.
Weekly brew group cleaning cycle” chapter.
Brew a few cups of coffee.
Descale the machine as described in the “7.5
Descaling cycle” chapter.
Clean the milk frother as described in the “7.4.2
Weekly cleaning of the milk frother components” and
insert it in the machine as shown in the “6.2 Milk
frother” chapter, “Inserting phase”.
Read the “6.3 Milk- and coffee-based preparations”
chapter.
10. Maintenance accessories and products
10.1 Maintenance products
To clean and descale the machine use exclusively Gaggia maintenance products.
Should it prove difcult to nd the machine maintenance products, please contact the
nearest Gaggia hotline in your country. Contacts are included in the warranty booklet
supplied separately or can be found at www.gaggia.com.
MAINTENANCE PRODUCTS
Product
• Descaling solution
• INTENZA+ water lter cartridge
• Brew group grease
• Degreasing tablets
• Milk circuit cleaning system
• Maintenance kit
10.2 INTENZA+ water lter
It is recommended to install the INTENZA+ water lter that limits limescale formation
inside the machine and improves the aroma of your coffee.
Water is a fundamental component of coffee brewing: this is why it is essential to lter
it professionally. The INTENZA+ water lter can prevent the formation of mineral
deposits and improve water quality. It is sold separately.
ENGLISH
19
Page 26

10.2.1 INTENZA+ installation
A
B
C
A
B
C
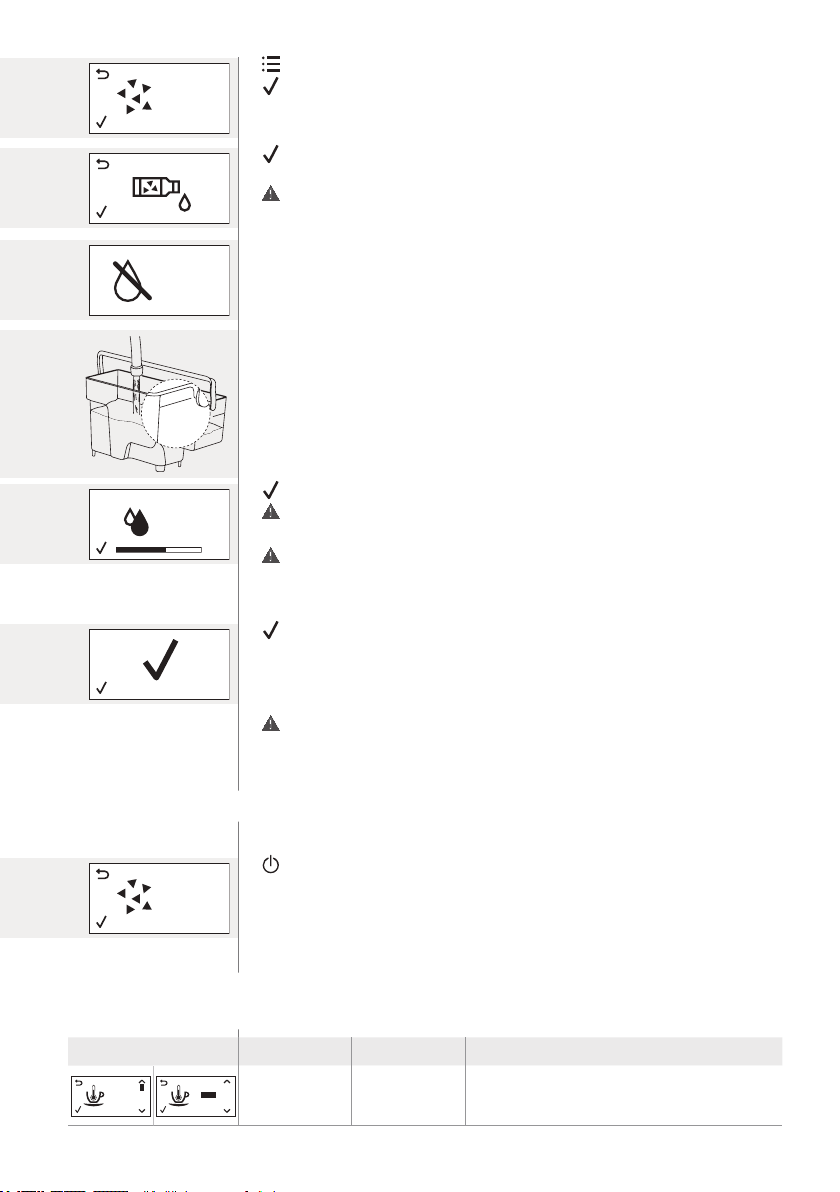
> Remove the small white lter in the water tank and store it in a dry place.
Filter setting phase
> Remove the INTENZA+ water lter from its packaging, immerse it vertically in cold
water, with the opening upwards, and slightly press the sides to let air bubbles out.
In order to use the lter correctly, it is necessary to measure the water hardness as
shown in the “5.3.1 Water hardness measurement and setting” chapter.
>
Set the INTENZA+ water lter according to the results of the test, operating on the
lter base:
> Insert the INTENZA+ water lter in the empty water tank.
>
Push it to the lowest possible point.
>
Fill the water tank with fresh water and restore it to the machine.
Dispense all the water contained in the tank as detailed in the “6.4.1 Hot water
dispensing” chapter.
>
Fill the water tank again.
Machine setting phase during the installation
> Press the MENU button and scroll the menu to go to the ‘INTENZA+ Filter function.’
The default setting is OFF (inactive lter).
>
Press the UP button to select the ON value.
>
ON
OFF
FILTER
Press the OK button to conrm the change.
The modied but unconrmed values will not be stored.
With the ON value the machine is programmed to inform the user that the
INTENZA+ water lter must be replaced.
Once the INTENZA+ lter has been activated, no icon appears on the
display.
>
Press the ESC button to exit the programming function.
The machine automatically exits the programming mode if no button is pressed for 3
minutes. At the end, the machine goes back to the main menu.
10.2.2 INTENZA+ replacement
The ‘INTENZA+ water lter to be replaced’ signal is displayed.
Replace the INTENZA+ water lter as described in the “10.2.1 INTENZA+
FILTER
installation” chapter, performing only the “Filter setting phase” section, and then
proceed as follows.
Machine setting phase during the replacement
> Press the MENU button and scroll the menu to go to the ‘INTENZA+ Filter function.’
ON
OFF
FILTER
RESET
The value is ON (active lter).
Letter on the lter Water hardness Test strip squares
A soft water 1 - 2
B hard water (standard) 3
C very hard water 4
20
ENGLISH
>
If you wish to replace the INTENZA+ water lter with a new INTENZA+ lter, press
ON
OFF
FILTER
RESET
the DOWN button until the RESET value can be selected. Alternatively, if you wish to
remove the INTENZA+ lter without replacing it, select the OFF value.
>
Press the OK button to conrm the change.
The modied but unconrmed values will not be stored.
Selecting RESET, the machine is programmed to manage a new INTENZA+ water
lter, otherwise, selecting OFF, replace the supplied white lter in the tank.
>
Press the ESC button to exit the programming function.
The machine automatically exits the programming mode if no button is pressed for 3
minutes. At the end, the machine goes back to the main menu.
Page 27

11. Technical characteristics
The manufacturer reserves the right to improve the technical specications of the
product. All the preset quantities are approximate.
Description Value
Housing material Thermoplastic type
Size (w x h x d) 221 x 340 x 430 mm
Weight 7,5 kg
Power cord length 800 - 1200 mm
Control panel Front type
Cup size Up to 152 mm
Water tank 1.8 litres - Removable type
Coffee bean hopper
capacity
Coffee grounds drawer
capacity
Pump pressure 15 bar
Boiler Stainless steel boiler
Safety devices Thermal fuse
Energy saving mode < 1 Wh
Nominal voltage - Power
rating - Power supply
Preset quantities default min max
ESPRESSO 40 ml 10 ml 230 ml
ESPRESSO LUNGO 120 ml 10 ml 230 ml
250 g
15
Read the data plate placed inside the service door
Electromagnetic elds (EMF)
This Gaggia appliance complies with all the applicable standards and regulations
relating to the exposure to electromagnetic elds.
12. Transportation and disposal
This symbol on a product means that the product is covered by European Directive
2012/19/EU. Inform yourself about the local separate collection system for electrical
and electronic products. Follow local rules and never dispose of the product with
normal household waste. Correct disposal of old products helps prevent negative
consequences for the environment and human health.
13. Warranty and service
Warranty
For detailed information on the warranty and its conditions, please refer to the
relevant booklet, supplied separately.
The manufacturer reserves the right to improve its models while maintaining the
essential specications described in this manual.
Service
We wish to make sure that you are enjoying your machine.
If you need help or assistance, please visit the Gaggia website at www.gaggia.com or
contact the nearest Gaggia hotline in your Country.
13.1 How to contact Gaggia
Contacts are included in the warranty booklet supplied separately or can be found
at www.gaggia.com.
ENGLISH
21
Page 28

GAGGIA S.p.a. reser ves the right to carry out all modications which might be considered necessary.
GAGGIA S.p.A.
Sede Legale/Registered Ofce
Piazza Eleonora Duse, 2
20122 MILANO
Sede Amministrativa/Administrative Ofce
Via Tor retta, 240
40041 Gaggio Montano (BO)
+39 0534 771111
www.gaggia.com
Rev. 01 19.05.2015
Page 29

GAGGIA ANIMA
Manuale d’istruzione
ITALIANO
Page 30

Indice
1. Introduzione al manuale .............1
2. Panoramica del prodotto.............1
2.1 Il prodotto .............................1
2.2 Accessori ..............................1
2.3 Componenti principali ...................2
2.4 Parti mobili principali.....................2
2.5 Tasti di comando e display ................2
3. Sicurezza..........................3
3.1 Indicazioni per la sicurezza ................3
4. Operazioni preliminari ..............5
4.1 Collocazione ...........................5
4.2 Riempimento del serbatoio dell’acqua . . . . . .5
4.3 Riempimento del contenitore per il caffè....5
4.4 Collegamento alla rete elettrica ed
accensione .............................5
5. Attivazione e disattivazione ..........6
5.1 Uso dei tasti di selezione .................6
5.2 Prima accensione........................6
5.2.1 Caricamento del circuito dell’acqua ........6
5.2.2 Ciclo automatico di risciacquo / autopulizia..6
5.2.3 Ciclo di risciacquo manuale . . . . . . . . . . . . . . .6
5.3 Regolazioni .............................7
5.3.1 Misurazione e impostazione durezza acqua..7
5.3.2 Regolazione intensità dell’aroma ...........7
5.3.3 Regolazione macinacaffè in ceramica .......7
5.3.4 Regolazione temperatura di erogazione.....8
5.3.5 Regolazione erogatore caffè...............8
5.4 Disattivazione e riattivazione ..............8
6. Utilizzo ...........................8
6.1 Preparazioni a base di solo caffè ...........8
6.1.1 Utilizzo di caffè pre-macinato (una sola
specialità) ..............................8
6.1.2 Erogazione di una specialità con un pulsante 9
6.1.3 Erogazione di due specialità con un pulsante
(possibile solo con caffè in grani) ..........9
6.1.4 Regolazione lunghezza caffè in tazza durante
la preparazione .........................9
6.2 Montalatte .............................9
6.3 Preparazioni a base di latte e caffè ........10
6.3.1 Erogazione di una specialità a base di latte..10
6.4 Preparazioni a base di acqua calda ........10
6.4.1 Erogazione acqua calda..................10
7. Pulizia e manutenzione . . . . . . . . . . . . . 10
7.1 Pulizia della macchina ...................11
7.1.1 Pulizia della macchina al bisogno ..........11
7.1.2 Pulizia settimanale della macchina .........11
7.2 Pulizia del gruppo caffè..................11
7.2.1 Ciclo di pulizia settimanale del gruppo caffè 11
7.2.2 Lubricazione mensile del gruppo caffè (un
ciclo di pulizia con uso di lubricante) .....12
7.2.3 Sgrassatura del gruppo caffè (un ciclo di
pulizia con uso di sgrassante).............13
7.3 Pulizia dei contenitori ...................13
7.3.1 Pulizia del serbatoio dell’acqua............13
7.3.2 Pulizia mensile dei contenitori caffè .......13
7.4 Pulizia del montalatte ...................14
7.4.1 Ciclo di pulizia del montalatte ............14
7.4.2 Pulizia settimanale dei componenti del
montalatte ............................14
7.5 Ciclo di decalcicazione .................14
7.5.1 Interruzione del ciclo di decalcicazione ...15
8. Impostazioni di fabbrica ............15
8.1 Lista delle impostazioni di fabbrica ........15
8.2 Come modicare le impostazioni di fabbrica 16
8.3 Ripristino impostazioni di fabbrica.........16
9. Risoluzione problemi ...............16
9.1 Riepilogo segnali di allarme: display di colore
rosso .................................16
9.2 Riepilogo segnali di avviso................17
9.3 La macchina non funziona ...............17
9.4 Tabella di risoluzione eventuali problemi ...18
10. Accessori e prodotti per la
manutenzione.....................19
10.1 Prodotti per la manutenzione ............19
10.2 Filtro acqua INTENZA+.................20
10.2.1 Installazione INTENZA+ ................20
10.2.2 Sostituzione INTENZA+ ................20
11. Caratteristiche tecniche ............21
12. Trasporto e smaltimento............21
13. Garanzia ed Assistenza .............22
13.1 Come contattare Gaggia ................22
Simbologia
In alcune parti del libretto sono utilizzati i simboli:
Indica azioni che non devono essere
assolutamente eseguite.
Indica azioni che richiedono cautela.
> Richiede l’esecuzione dell’azione specicata.
Page 31

1. Introduzione al manuale
Premessa
Congratulazioni per l’acquisto della macchina per caffè superautomatica Gaggia Anima.
In questo manuale troverete tutte le informazioni necessarie per installare, utilizzare,
pulire e decalcicare la Vostra macchina.
•
Nel capitolo “2. Panoramica del prodotto” familiarizzerete con tasti e componenti della
macchina.
•
Il capitolo “3. Sicurezza” necessita di un’accurata lettura per evitare qualsiasi possibile
rischio dovuto ad un uso non conforme o improprio.
•
I capitoli “4. Operazioni preliminari” ed “5. Attivazione e disattivazione” descrivono passo
dopo passo collocazione e preparazione all’uso della macchina.
•
In “6. Utilizzo” ne viene descritto l’uso, ovvero sono elencate tutte le preparazioni
offerte dalla macchina.
•
“7. Pulizia e manutenzione” Vi consentiranno di mantenere la Vostra macchina al meglio.
•
Per qualsiasi problema relativo al funzionamento potrete consultare il capitolo “9.
Risoluzione problemi”.
•
I rimanenti capitoli servono di supporto ad un rapido utilizzo.
Note
Questa pubblicazione è parte integrante della macchina e deve essere conservata con
cura per eventuali riferimenti futuri. Il documento è protetto da copyright.
2. Panoramica del prodotto
2.1 Il prodotto
La macchina è indicata per la preparazione di caffè espresso con chicchi interi ed è
provvista di un montalatte classico per preparare un perfetto cappuccino in modo
semplice e veloce. Può anche preparare vapore ed acqua calda.
Speciali caratteristiche della macchina sono:
Gaggia Adapting System
Il caffè è un prodotto naturale e le sue caratteristiche possono cambiare in funzione
dell’origine, della miscela e della tostatura. La macchina è dotata di un sistema di autoregolazione che consente di utilizzare al meglio il Vostro caffè in grani preferito. Si
regola automaticamente dopo l’erogazione di alcuni caffè.
Regolazione dell’intensità del caffè
Potete scegliere la Vostra miscela di caffè preferita e regolare la quantità di caffè da
macinare in base ai Vostri gusti personali. È possibile l’utilizzo di caffè pre-macinato.
Macinacaffè in ceramica
Le macine in ceramica garantiscono sempre un grado di macinatura perfetto e consentono
di regolare la macinatura per soddisfare appieno il Vostro gusto. Questa tecnologia offre
una conservazione totale dell’aroma garantendo il vero gusto italiano in ogni tazza.
Funzione di risparmio energetico
La macchina per caffè espresso superautomatica Gaggia è progettata per il risparmio
energetico, come dimostrato dall’etichetta energetica di Classe A. Dopo un tempo di
inattività prestabilito, la macchina entra automaticamente in modalità stand-by.
2.2 Accessori
1
2
5
1. Cavo di alimentazione
2. Manuale d’istruzione
3. Provino monouso per test durezza acqua
3
4. Utensile multifunzione
• Chiave regolazione macinacaffè
• Utensile per pulizia condotto caffè
64
• Misurino caffè pre-macinato
5. Pennello di pulizia (optional)
6. Grasso lubricante gruppo caffè (optional)
ITALIANO
1
Page 32

2.3 Componenti principali
2
1
12
11
10
9
2.4 Parti mobili principali
9
11
7
10
8
1. Tasto STAND-BY
2. Vano serbatoio acqua
3. Serbatoio caffè in grani
4. Serbatoio caffè pre-macinato
3
4
MAX
5. Serbatoio acqua estraibile
5
6. Interruttore generale
I.
0.
ACCESO
SPENTO
7. Alloggiamento spinotto
alimentazione
8. Cassetto raccoglifondi
9. Vasca raccogligocce
8
6
7
1
2
10. Griglia poggiatazze
11. Erogatore caffè
12. Montalatte classico
1.
Sportello serbatoio acqua
2.
Sportello serbatoio caffè in grani
3.
Sportello serbatoio caffè premacinato
3
4
4.
Sportello di ser vizio
5.
Cassetto raccogli caffè
6.
Gruppo caffè
7.
Erogatore caffè
8.
Vasca raccogligocce
9.
Cassetto raccoglifondi
10.
Indicatore ‘vasca raccogligocce
piena’
PUSH
6
5
N
11.
Montalatte classico
• Tubo vapore (sso)
• Protezione in gomma
2.5 Tasti di comando e display
8
1
ESPRESSO
2
ESPRESSO LUNGO
AROMA STRENGTH
3
ITALIANO
2
1. Tasto ESPRESSO
Tasto ESC
4
STEAM
5
HOT WATER
MENU
7
6
2. Tasto ESPRESSO LUNGO
3. Tasto AROMA STRENGTH
Tasto OK
4. Tasto STEAM
Tasto SU
5. Tasto HOT WATER
6. Tasto MENU
Tasto GIU
7. Tasto STAND-BY
8. Display
Nell’esempio:
Menu principale; pronto per
l’erogazione
Page 33

3. Sicurezza
La macchina è dotata di dispositivi di sicurezza. È tuttavia necessario leggere
e seguire attentamente il capitolo “3.1 Indicazioni per la sicurezza” nelle
presenti istruzioni d’uso in modo da evitare danni accidentali a persone o
cose dovuto all’uso scorretto della macchina. Conservare questo manuale
per eventuali riferimenti futuri.
3.1 Indicazioni per la sicurezza
•
La sezione “Attenzioni” avvisa l’utente su situazioni di rischio che possono
causare lesioni personali gravi, pericolo di vita e/o danni alla macchina.
•
La sezione “Avvertenze” avvisa l’utente su situazioni di rischio che possono
causare lesioni personali lievi e/o danni alla macchina.
Viene richiesta la lettura attenta del manuale prima di eseguire qualsiasi
operazione di utilizzo o manutenzione.
Attenzioni
Collegare la macchina a una presa a muro adeguata, la cui tensione principale
corrisponda ai dati tecnici dell’apparecchio.
Collegare la macchina a una presa a muro dotata di messa a terra.
Evitare che il cavo di alimentazione penda dal tavolo o dal piano di lavoro o che
tocchi superci calde.
Non immergere la macchina, la presa di corrente o il cavo di alimentazione in
acqua: pericolo di shock elettrico!
Non versare liquidi sul connettore del cavo di alimentazione
Non dirigere il getto di acqua calda verso parti del corpo: pericolo di scottature!
Non toccare superci calde. Utilizzare i manici e le manopole.
Dopo aver spento la macchina dall’interruttore generale posto sul retro, rimuovere
la spina dalla presa:
- se si vericano delle anomalie;
- se la macchina rimarrà inutilizzata per lungo tempo;
- prima di procedere alla pulizia della macchina.
Tirare dalla spina e non dal cavo di alimentazione.
Non toccare la spina con le mani bagnate.
Non utilizzare la macchina se la spina, il cavo di alimentazione o la macchina
stessa risultano danneggiati.
Non alterare né modicare in alcun modo la macchina o il cavo di alimentazione.
Tutte le riparazioni devono essere eseguite da un centro assistenza autorizzato da
Gaggia per evitare qualsiasi pericolo.
La macchina non è destinata all’uso da parte di bambini con età inferiore a 8 anni.
ITALIANO
3
Page 34

La macchina può essere utilizzata da bambini di 8 anni di età (e superiore)
se precedentemente istruiti riguardo ad un utilizzo corretto della macchina
e coscienti dei relativi pericoli o sotto la supervisione di un adulto.
Pulizia e manutenzione non devono essere eseguite da bambini, a meno
che non abbiano più di 8 anni e siano supervisionati da un adulto.
Tenere la macchina e il suo cavo di alimentazione lontano dalla portata dei
minori di 8 anni.
La macchina può essere utilizzata da persone con ridotte capacità
siche, mentali, sensoriali o con mancanza di esperienza e/o competenze
insufcienti se precedentemente istruite riguardo ad un utilizzo corretto
della macchina e coscienti dei relativi pericoli o sotto la supervisione di un
adulto.
I bambini devono essere sorvegliati per assicurarsi che non giochino con
l’apparecchio.
Non mettere le dita o altri oggetti dentro all’interno del macina caffè.
Avvertenze
La macchina è prevista per il solo uso domestico e non è indicata per
l’utilizzo in ambienti quali mense o zone cucina di negozi, ufci, fattorie o altri
ambienti lavorativi.
Posizionare sempre la macchina su una supercie piana e stabile.
Non posizionare la macchina su superci calde, in prossimità di forni caldi,
riscaldatori o analoghe sorgenti di calore.
Immettere nel contenitore sempre e soltanto caffè tostato in grani. Caffè in
polvere, solubile, caffè crudo, nonché altri oggetti, se inseriti nel contenitore
caffè in grani, possono danneggiare la macchina.
Lasciare raffreddare la macchina prima di inserire o rimuovere qualsiasi
componente, le superci riscaldanti sono soggette a calore residuo dopo l’uso.
Non riempire il serbatoio con acqua calda o bollente. Utilizzare solo acqua
fredda potabile non gassata.
Per la pulizia, non utilizzare polveri abrasive o detergenti aggressivi. È
sufciente un panno morbido inumidito con acqua.
Effettuare la decalcicazione della macchina regolarmente. Se questa
operazione non viene svolta, l’apparecchio smetterà di funzionare
correttamente. In questo caso la riparazione non è coperta da garanzia!
Non tenere la macchina a una temperatura inferiore a 0 °C. L’acqua residua
all’interno del sistema di riscaldamento può congelare e danneggiare la
macchina.
Non lasciare acqua nel serbatoio se la macchina non verrà utilizzata per un
lungo periodo. L’acqua potrebbe subire delle contaminazioni. Ogni volta che
si usa la macchina, utilizzare acqua fresca.
ITALIANO
4
Page 35

4. Operazioni preliminari
MAX
Si raccomanda di aver letto il capitolo “3. Sicurezza”.
4.1 Collocazione
Per agevolare l’utilizzo della macchina si consiglia di posizionarla in un ambiente
adeguato tenendo conto degli spazi di manovra.
H1
L1
W1
W2
L2
4.2 Riempimento del serbatoio dell’acqua
MAX
CALC
CLEAN
4.3 Riempimento del contenitore per il caffè
Spazi di rispetto
L1 L2 W1 W2 H1
150 mm 221 mm 430 mm 150 mm 340 mm
Disimballo e Posizionamento
L’imballo originale è stato progettato e realizzato per proteggere la macchina durante
la spedizione; si consiglia di conservarlo per un eventuale trasporto futuro.
> Estrarre la macchina dall’imballo.
> Scegliere un piano di appoggio sicuro ed orizzontale, lontano da fonti di calore, al
riparo da agenti atmosferici, in un’ ambiente sufcientemente illuminato, igienico e con
presa di corrente facilmente accessibile.
> Posizionare la macchina tenendo conto degli spazi di rispetto.
> Sollevare lo sportello del serbatoio dell’acqua.
> Sollevare il serbatoio dell’acqua utilizzando la maniglia.
> Risciacquare il serbatoio dell’acqua con acqua fredda.
Non riempire il serbatoio dell’acqua con acqua calda, bollente, gassata o con altri
liquidi che potrebbero danneggiare il serbatoio stesso e la macchina. Ogni volta che si
usa la macchina, utilizzare acqua fresca.
> Riempire il serbatoio dell’acqua con acqua fresca e fredda no al livello MAX.
> Reinserire il serbatoio nella macchina, vericando che sia inserito a fondo.
> Sollevare lo sportello del contenitore caffè in grani.
Non versare troppi chicchi di caffè nel contenitore caffè in grani per non diminuire le
prestazioni di macinatura della macchina.
Caffè in polvere, solubile, caffè crudo, nonché altre sostanze, se inserite nel contenitore
caffè in grani, possono danneggiare la macchina. Immettere sempre e soltanto caffè
tostato in grani. Non riempire con grani crudi, caramellati o aromatizzati.
> Versare lentamente il caffè in grani nell’apposito contenitore e chiudere lo sportello.
4.4 Collegamento alla rete elettrica ed accensione
> Inserire lo spinotto nell’alloggiamento posto sul retro della macchina.
> Inserire la spina all’estremità opposta del cavo di alimentazione in una presa di
corrente a muro dotata di presa a terra, di tensione adeguata, come indicata nella
targhetta posta all’interno dello sportello di servizio.
> Portare l’interruttore generale sulla posizione ACCESO per accendere la macchina.
> Il tasto STAND-BY lampeggia. Premere il tasto per accendere la macchina. Il display
indica che è necessario procedere al caricamento del circuito: procedere come
indicato al capitolo “5.2 Prima accensione”.
La pressione prolungata del tasto STAND-BY per oltre 8 secondi causa l’avvio della
funzione DEMO MODE. Per uscire dalla funzione, spegnere e riaccendere la macchina
usando l’interruttore generale.
ITALIANO
5
Page 36

5. Attivazione e disattivazione
CALC
CLEAN
Si raccomanda di aver letto il capitolo “3. Sicurezza”.
5.1 Uso dei tasti di selezione
Alcuni tasti funzione sono utili alla navigazione tra funzioni / menu:
Il tasto OK si usa per selezionare / confermare / terminare la funzione.
Il tasto ESC si usa per tornare al menu principale, un livello alla volta.
Il tasto SU si usa per spostarsi verso l’alto.
Il tasto GIU si usa per spostarsi verso il basso.
5.2 Prima accensione
Prima del primo utilizzo devono essere eseguiti:
• Caricamento del circuito dell’acqua.
• Un ciclo automatico di risciacquo / autopulizia.
• Un ciclo di risciacquo manuale.
5.2.1 Caricamento del circuito dell’acqua
Durante questo processo l’acqua fresca scorre nel circuito interno e la macchina si
riscalda. L’operazione richiede alcuni minuti.
> Vericare che il montalatte classico sia installato.
> Posizionare un contenitore sotto il montalatte.
> Premere il tasto OK per avviare il ciclo di caricamento del circuito dell’acqua. La
macchina inizia ad erogare acqua calda dal montalatte La barra di avanzamento
sul display indica lo stato dell’operazione. Al termine del processo la macchina
interrompe automaticamente l’erogazione. Il display indica che la macchina è in fase di
riscaldamento. Al termine del riscaldamento, la macchina esegue un ciclo automatico
di risciacquo / autopulizia dei circuiti interni.
5.2.2 Ciclo automatico di risciacquo / autopulizia
> Posizionare un contenitore sotto l’erogatore caffè.
Pericolo scottature! Prestare attenzione ad eventuali schizzi d’acqua calda o vapore.
L’operazione richiede meno di un minuto. Attendere che termini automaticamente.
In caso di necessità, il ciclo può essere interrotto premendo il tasto OK.
> Vuotare il contenitore. La macchina torna al menu principale.
Ora è possibile eseguire il ciclo di risciacquo manuale.
5.2.3 Ciclo di risciacquo manuale
Il ciclo completo di risciacquo manuale si compone di due fasi consecutive:
• Una “Fase di risciacquo circuito di erogazione caffè”, da ripetere due volte.
• Una “Fase di risciacquo circuito di erogazione acqua calda”.
Fase di risciacquo circuito di erogazione caffè
Durante questa fase, si attiva il ciclo di erogazione caffè.
> Posizionare un contenitore sotto l’erogatore caffè.
> Premere il tasto ESPRESSO LUNGO. La macchina inizia ad erogare caffè.
Ripetere le operazioni precedenti, quindi proseguire.
> Al termine dell’erogazione, vuotare il contenitore.
In caso di necessità, il ciclo può essere interrotto premendo il tasto OK.
Fase di risciacquo circuito di erogazione acqua calda
> Eseguire il capitolo “4.2 Riempimento del serbatoio dell’acqua”, riempiendo il serbatoio
no al livello CALC CLEAN.
ITALIANO
6
MAX
LC
CA
CLEAN
Page 37

>
y
Seguire le istruzioni indicate al capitolo “6.4.1 Erogazione acqua calda”, erogando
acqua no a visualizzare il simbolo ‘Serbatoio acqua vuoto’. Vuotare il contenitore.
>
rosso
displa
Eseguire il capitolo “4.2 Riempimento del serbatoio dell’acqua”, riempiendo il
serbatoio no al livello MAX. La macchina è pronta per l’erogazione.
5.3 Regolazioni
La macchina viene fornita con impostazioni di erogazione standard. Per esaltare al
meglio qualità e gusto del caffè si consiglia di regolare le impostazioni. In particolar
modo, per un gusto più deciso, agire impostando temperatura di erogazione, aroma e
grado di macinatura ai valori massimi.
5.3.1 Misurazione e impostazione durezza acqua
La misurazione della durezza dell’acqua è molto importante per:
• Determinare la frequenza di decalcicazione della macchina.
• Il corretto utilizzo del ltro acqua INTENZA+. Consultare il capitolo “10.2 Filtro acqua
INTENZA+”.
>
Immergere in acqua per 1 secondo il provino monouso per il test di durezza dell’acqua
(in dotazione con la macchina).
>
1
2
3
4
4
3
2
1
5.3.2 Regolazione intensità dell’aroma
5.3.3 Regolazione macinacaffè in ceramica
Estrarre il provino monouso ed attendere 1 minuto.
>
Vericare quante bande cambiano di colore, quindi consultare la tabella.
numero bande rosse valore da impostare durezza dell’acqua
1 1 acqua molto dolce
2 2 acqua dolce
3 3 acqua dura
4 4 acqua molto dura
Consultare il capitolo “8.2 Come modicare le impostazioni di fabbrica” per modicare
l’impostazione di durezza acqua.
> Premendo il tasto AROMA STRENGTH, ad ogni pressione l’aroma cambia di un
grado. Il display cambia in funzione dell’aroma prescelto.
aroma extra leggero
aroma leggero
aroma medio
aroma forte
aroma extra forte
caffè pre-macinato
La regolazione va effettuata esclusivamente mentre la macchina sta macinando caffè in grani.
>
Sollevare lo sportello del contenitore caffè in grani.
>
Individuare la manopola di regolazione della macinatura. I riferimenti posti attorno
alla manopola indicano il grado di macinatura impostato. È possibile impostare cinque
diversi gradi di macinatura: dalla posizione più a sinistra, per una macinatura grossa ed
un gusto più leggero (grado minimo), alla posizione più a destra, per una macinatura
ne e un gusto più forte (grado massimo).
>
Posizionare una tazzina sotto l’erogatore caffè.
>
Premere il tasto ESPRESSO.
>
Mentre la macchina macina, premere e ruotare la manopola di uno scatto alla volta.
Servirsi dell’apposita chiave di regolazione macinacaffè fornita in dotazione. La
differenza di gusto sarà percepibile dopo aver erogato 2-3 caffè.
La macchina doserà automaticamente
la giusta quantità di caffè.
La giusta quantità di caffè andrà dosata
mediante il misurino in dotazione.
ITALIANO
7
Page 38

5.3.4 Regolazione temperatura di erogazione
MAX
MED
MIN
Consultare il capitolo “8.2 Come modicare le impostazioni di fabbrica” per modicare
l’impostazione di temperatura caffè.
5.3.5 Regolazione erogatore caffè
L’erogatore può essere regolato in altezza per meglio adattarsi alla dimensione delle
tazze che si desidera utilizzare.
>
Per effettuare la regolazione, alzare o abbassare manualmente l’erogatore con le dita.
5.4 Disattivazione e riattivazione
Dopo 15 minuti di inattività, la macchina entra automaticamente in modalità di stand-
by. Il tempo di avvio della modalità di stand-by è modicabile. Per sapere come,
consultare il capitolo “8. Impostazioni di fabbrica”.
Durante questa fase il tasto STAND-BY lampeggia.
La macchina potrebbe effettuare un ciclo automatico di risciacquo / autopulizia, come
descritto al capitolo “5.2.2 Ciclo automatico di risciacquo / autopulizia”.
Spegnimento
> Per spegnere completamente la macchina, l’interruttore generale, posto sul retro della
macchina, deve essere posizionato su SPENTO.
Riattivazione
> L’interruttore generale, posto sul retro della macchina, deve essere posizionato su
ACCESO.
>
Per riavviare la macchina, premere il tasto STAND-BY.
La macchina potrebbe richiedere il “5.2.1 Caricamento del circuito dell’acqua”, oppure
effettuare il solo ciclo automatico di risciacquo / autopulizia, come descritto al capitolo
“5.2.2 Ciclo automatico di risciacquo / autopulizia”.
6. Utilizzo
Si raccomanda di aver letto il capitolo “3. Sicurezza”.
Al ne di preservare la qualità del prodotto, ogni volta che la macchina viene riattivata,
il “5.2.2 Ciclo automatico di risciacquo / autopulizia” si avvia automaticamente. Se la
macchina è rimasta inutilizzata per un lungo periodo, è consigliabile avviare un “5.2.3
Ciclo di risciacquo manuale”.
6.1 Preparazioni a base di solo caffè
La quantità della preparazione in tazza è impostata con un valore di fabbrica. Per
modicarla far riferimento al capitolo “6.1.4 Regolazione lunghezza caffè in tazza
durante la preparazione”.
La macchina consente di erogare una o due preparazioni a base di caffè.
6.1.1 Utilizzo di caffè pre-macinato (una sola specialità)
È possibile selezionare la funzione che utilizza caffè pre-macinato. Consente di erogare
una sola preparazione.
L’inserimento di qualsiasi sostanza che non sia caffè premacinato può causare gravi
danni alla macchina. Tali danni NON sono coperti da garanzia.
Servirsi solo del misurino in dotazione con la macchina. Se la dose è più di una, o
eccessiva, la macchina non eroga il prodotto e il caffè macinato sarà scaricato nel
cassetto raccoglifondi.
>
Sollevare lo sportello del serbatoio e aggiungere un misurino raso di caffè premacinato. Se non viene aggiunto caffè pre-macinato, si avrà solo erogazione d’acqua.
>
Richiudere lo sportello del serbatoio caffè pre-macinato.
ITALIANO
8
Page 39

>
Premere il tasto AROMA STRENGTH più volte, no a selezionare la funzione di
erogazione del caffè pre-macinato.
Proseguire seguendo le istruzioni successive, relative all’erogazione della specialità
desiderata.
6.1.2 Erogazione di una specialità con un pulsante
> Posizionare una tazza sotto l’erogatore caffè.
Un espresso/un espresso lungo
> Per erogare un espresso, premere il tasto ESPRESSO.
>
In alternativa, per erogare un espresso lungo, premere il tasto ESPRESSO LUNGO.
Dopo aver effettuato il ciclo di pre-infusione, il caffè inizia a fuoriuscire dall’erogatore.
L’erogazione del caffè si interrompe automaticamente quando viene raggiunto il livello
preimpostato; è tuttavia possibile interromperla in anticipo, premendo il tasto OK.
Al termine dell’erogazione, la macchina torna al menu principale.
6.1.3 Erogazione di due specialità con un pulsante (possibile solo con caffè in grani)
> Posizionare due tazze sotto l’erogatore caffè.
Due espresso/due espresso lungo
> Per erogare due espresso, premere il tasto ESPRESSO due volte consecutive.
>
2X
2X
In alternativa, per erogare due espresso lungo, premere il tasto ESPRESSO LUNGO
due volte consecutive.
Dopo aver effettuato il ciclo di pre-infusione, il caffè inizia a fuoriuscire dall’erogatore.
La macchina esegue due operazioni di macinatura del caffè in sequenza.
L’erogazione del caffè si interrompe automaticamente quando viene raggiunto il livello
preimpostato; è tuttavia possibile interromperla in anticipo, premendo il tasto OK.
Al termine dell’erogazione, la macchina torna al menu principale.
6.1.4 Regolazione lunghezza caffè in tazza durante la preparazione
La macchina consente di regolare la quantità di prodotto erogato in base ai propri
gusti e alle dimensioni delle tazze. Questa funzione infatti permette di modicare il
valore di fabbrica relativo alla quantità di prodotto erogata in tazza. Per un gusto più
deciso, agire diminuendo la quantità erogata. Predisporre la macchina all’erogazione
di un solo espresso / espresso lungo, posizionando una tazza sotto l’erogatore caffè.
Lunghezza espresso/lunghezza espresso lungo
> Per regolare la lunghezza espresso, tenere premuto il tasto ESPRESSO no a
M
E
M
O
visualizzare il simbolo MEMO, quindi rilasciare il tasto.
>
In alternativa, per regolare la lunghezza espresso lungo, tenere premuto il tasto
ESPRESSO LUNGO no a visualizzare il simbolo MEMO, quindi rilasciare il tasto.
La macchina è in fase di programmazione ed inizia l’erogazione del prodotto scelto.
>
Premere il tasto OK non appena si è raggiunta la quantità desiderata.
M
E
M
O
A questo punto il tasto è programmato: ad ogni pressione, la macchina erogherà la
quantità di prodotto appena memorizzata. Al termine dell’erogazione, la macchina
torna al menu principale.
6.2 Montalatte
Questo capitolo illustra come utilizzare il montalatte per emulsionare il latte. Al primo
utilizzo procedere ad un’accurata pulizia come descritto nel capitolo “7.4.1 Ciclo di
pulizia del montalatte”.
Pericolo di scottature! All’inizio dell’erogazione possono vericarsi brevi spruzzi
di acqua calda o vapore. Il montalatte può raggiungere temperature elevate. Non
toccarlo a mani nude. Utilizzare l’apposita protezione.
Pulizia del circuito acqua
> Vericare che il montalatte classico sia installato.
>
Premere il tasto STEAM per erogare del vapore per alcuni secondi.
>
Per interrompere l’erogazione, premere il tasto OK.
ITALIANO
9
Page 40

Fase di inserimento
>
Inserire il montalatte nel tubo vapore no allo scatto in posizione.
Pericolo di scottature! Se la macchina è stata utilizzata di recente il tubo vapore potrebbe
essere caldo.
La protezione in gomma deve essere inserita correttamente, non oltre la propria sede,
altrimenti il montalatte non funzionerà a dovere.
Fase di rimozione
>
Slare il montalatte dal tubo vapore per rimuoverlo.
6.3 Preparazioni a base di latte e caffè
Per ottenere un cappuccino di buona qualità, si consiglia di utilizzare latte freddo (~5°C / 41°F)
con contenuto proteico pari almeno al 3%. È possibile utilizzare latte intero, latte scremato, latte
di soia e latte senza lattosio, in base ai gusti personali.
6.3.1 Erogazione di una specialità a base di latte
>
Riempire un recipiente con 1/3 di latte freddo.
>
Immergere il montalatte nel latte.
Pericolo di scottature! All’inizio dell’erogazione possono vericarsi brevi spruzzi di latte o vapore.
Il montalatte deve essere installato.
Un latte emulsionato
>
Premere il tasto STEAM per avviare l’erogazione di vapore.
Attendere il necessario tempo di preriscaldamento.
>
Montare il latte compiendo con il contenitore dei leggeri movimenti circolari in alto ed in basso.
>
Quando il latte emulsionato raggiunge la consistenza desiderata, premere il tasto OK per
interrompere l’erogazione vapore. La macchina impiega alcuni secondi prima di interrompere
l’erogazione completamente.
La macchina smette automaticamente l’erogazione se non viene premuto alcun tasto per 3 minuti.
Da subito è possibile erogare caffè o acqua calda.
>
Per ottenere un cappuccino, erogare un espresso o un espresso lungo, come indicato al capitolo
“6.1 Preparazioni a base di solo caffè”.
A ne utilizzo è necessario erogare una piccola quantità di acqua calda in un contenitore, come
descritto nel capitolo “7.4.1 Ciclo di pulizia del montalatte”.
6.4 Preparazioni a base di acqua calda
6.4.1 Erogazione acqua calda
>
Vericare che il montalatte classico sia installato.
>
Posizionare un contenitore sotto il montalatte
Pericolo di scottature! All’inizio dell’erogazione possono vericarsi brevi spruzzi di acqua calda
o vapore. Il tubo vapore può raggiungere temperature elevate. Non toccarlo a mani nude.
Utilizzare l’apposita protezione.
>
Premere il tasto HOT WATER per avviare l’erogazione di acqua calda. Attendere il necessario
tempo di preriscaldamento. La macchina inizia a erogare acqua calda.
Erogare la quantità di acqua calda desiderata.
>
Per interrompere l’erogazione, premere il tasto OK. Al termine dell’erogazione, la macchina
torna al menu principale.
7. Pulizia e manutenzione
Pulizia e manutenzione puntuali della macchina sono fondamentali per prolungarne il ciclo
di vita. In caso contrario, la macchina smetterà di funzionare correttamente. Questo capitolo
descrive in dettaglio quali operazioni svolgere e con quale frequenza.
Si raccomanda di aver letto il capitolo “3. Sicurezza”.
Tutte le operazioni di pulizia devono essere effettuate a macchina fredda.
Per pulire la macchina utilizzare un panno morbido inumidito con acqua: non utilizzare alcool,
solventi e/o oggetti abrasivi. è possibile lavare in lavastoviglie solamente la griglia appoggia
tazze e le parti del montalatte indicate al paragrafo “7.4.2 Pulizia mensile dei componenti del
montalatte”. Tutti gli altri componenti devono essere lavati con acqua tiepida.
10
ITALIANO
Page 41

Danni o usi impropri causati dalle attività di pulizia e manutenzione NON sono
y
PUSH
N
coperti da garanzia.
Piano di manutenzione
Macchina
Serbatoio
acqua
Contenitori
caffè
Gruppo caffè Montalatte
Al bisogno capitolo nr. 7.1.1 ; 7.5 7.3.1 7.4.1
Settimanale capitolo nr. 7.1.2 7.2.1 7.4.2
Mensile capitolo nr. 7.3.2 7.2.2 ; 7.2.3
7.1 Pulizia della macchina
7.1.1 Pulizia della macchina al bisogno
Quando compare il simbolo ‘Cassetto raccoglifondi pieno’ procedere come di seguito.
Pericolo di scottature! Prima di effettuare la pulizia assicurarsi che la macchina, i fondi
rosso
displa
7.1.2 Pulizia settimanale della macchina
e l’acqua in vaschetta si siano raffreddati.
Queste azioni vanno inoltre eseguite ogni volta che l’indicatore ‘vasca raccogligocce
piena’ si solleva. Se l’indicatore è completamente sollevato signica che la vaschetta è
completamente piena: prestare attenzione nella rimozione.
A macchina accesa, vuotare e pulire il cassetto raccoglifondi e la vasca raccogligocce.
Se la macchina viene spenta, al riavvio il segnale ‘Cassetto raccoglifondi pieno’ rimane
attivo. Consultare il capitolo “9.4 Tabella di risoluzione eventuali problemi”.
> Premere i tasti laterali.
>
Rimuovere la vaschetta raccogligocce.
>
Rimuovere il cassetto raccoglifondi e vuotarlo.
>
Vuotare e lavare la vasca raccogligocce.
>
Reinserire il cassetto raccoglifondi nella vasca raccogligocce e riposizionare
quest’ultima nella macchina.
Ulteriori interventi di manutenzione possono essere effettuati solo con la macchina
spenta e scollegata dalla rete elettrica.
> Seguire passo dopo passo le istruzioni al capitolo “7.1.1 Pulizia della macchina al
bisogno” no a raggiungere la sede della vasca raccogligocce. A questo punto pulire la
sede della vasca raccogligocce.
>
Riposizionare i componenti.
7.2 Pulizia del gruppo caffè
7.2.1 Ciclo di pulizia settimanale del gruppo caffè
Il gruppo caffè deve essere pulito almeno una volta alla settimana. La pulizia settimanale
del gruppo caffè si compone di un ciclo di pulizia con acqua (un accurato risciacquo).
Fase di smontaggio e pulizia
> Spegnere la macchina premendo il tasto di STAND-BY. Attendere che il tasto di
STAND-BY lampeggi e staccare la spina del cavo di alimentazione.
>
Premere i tasti laterali.
>
SH
U
P
N
Rimuovere la vaschetta raccogligocce.
>
Aprire lo sportello di servizio.
>
Per estrarre il gruppo caffè:
• Posizionare il pollice sul tasto PUSH e quindi le altre dita a seguire, sulla maniglia.
• Premere il tasto PUSH tirando la maniglia.
>
Estrarlo orizzontalmente senza ruotarlo.
ITALIANO
11
Page 42

>
N
PUSH
Pulire a fondo il condotto di uscita del caffè con l’apposito utensile per pulizia, fornito
in dotazione con la macchina.
>
Rimuovere il cassetto raccogli caffè e lavarlo con cura.
> Lavare accuratamente il gruppo caffè con acqua tiepida e pulire con cura il ltro
superiore.
Non utilizzare detergenti o sapone per pulire il gruppo caffè.
>
Lasciare asciugare completamente all’aria il gruppo caffè.
>
PUSH
N
Pulire accuratamente l’interno della macchina utilizzando un panno morbido inumidito
con acqua.
Fase di rimontaggio
> Inserire il cassetto raccogli caffè nell’apposita sede e assicurarsi che sia posizionato
PUSH
N
correttamente.
Se il cassetto raccogli caffè non è posizionato correttamente, il gruppo caffè potrebbe
non inserirsi nella macchina.
>
Assicurarsi che il gruppo caffè sia in posizione di riposo: i due segni di riferimento a
lato del gruppo devono corrispondere.
> Se non corrispondono, premere delicatamente la leva verso il basso no a toccare la
base del gruppo caffè, in modo tale che i due segni di riferimento si afanchino.
PUSH
N
> Premere con forza il tasto PUSH.
PUSH
N
>
Assicurarsi che il gancio per il blocco del gruppo caffè sia nella posizione corretta.
>
Se è ancora in posizione abbassata spingerlo verso l’alto no ad agganciarlo
correttamente.
>
Introdurre di nuovo in sede il gruppo caffè no ad agganciarlo, senza premere il tasto
PUSH.
>
Reinserire il cassetto raccoglifondi con la vasca raccogligocce all’interno della macchina
e chiudere lo sportello di ser vizio.
7.2.2 Lubricazione mensile del gruppo caffè (un ciclo di pulizia con uso di lubricante)
Lubricare il gruppo caffè dopo circa 500 caffè o almeno una volta al mese. Il grasso per
la lubricazione del gruppo caffè può essere acquistato separatamente. Per maggiori
dettagli consultare il capitolo “10.1 Prodotti per la manutenzione”. Eseguire la “Fase di
smontaggio e pulizia” della procedura “7.2.1 Ciclo di pulizia settimanale del gruppo caffè”.
ITALIANO
12
Page 43

>
MAX
Applicare il grasso in modo uniforme su entrambe le guide laterali.
PUSH
N
> Lubricare anche l’albero.
Eseguire la “Fase di rimontaggio” della procedura “7.2.1 Ciclo di pulizia settimanale del
PUSH
N
gruppo caffè”.
7.2.3 Sgrassatura del gruppo caffè (un ciclo di pulizia con uso di sgrassante)
Eseguire questo ciclo di pulizia con pastiglie sgrassanti dopo circa 500 caffè o almeno
una volta al mese. Questa operazione completa il processo di manutenzione del
gruppo caffè. Le pastiglie sgrassanti sono in vendita separatamente. Per maggiori
dettagli consultare il capitolo “10.1 Prodotti per la manutenzione”.
MAX
CALC
CLEAN
Le pastiglie sgrassanti sono indicate esclusivamente per la pulizia e non hanno funzione
decalcicante. Per la decalcicazione, utilizzare il decalcicante Gaggia seguendo la
procedura descritta nel capitolo “7.5 Ciclo di decalcicazione”.
>
Posizionare un contenitore sotto gli erogatori.
Pericolo scottature! Prestare attenzione ad eventuali schizzi d’acqua calda o vapore.
>
Assicurarsi di riempire il serbatoio dell’acqua con acqua fresca no al livello MAX.
Non inserire caffè pre-macinato nel serbatoio del caffè pre-macinato.
>
Inserire una pastiglia sgrassante nel serbatoio del caffè pre-macinato.
>
>
> Non appena la barra di avanzamento ha raggiunto il centro, portare l’interruttore
>
>
7.3 Pulizia dei contenitori
7.3.1 Pulizia del serbatoio dell’acqua
> Rimuovere il ltro acqua dal serbatoio, e lavarlo con acqua fresca.
>
>
7.3.2 Pulizia mensile dei contenitori caffè
> Una volta al mese, vuotare e pulire il contenitore caffè in grani con un panno umido.
>
>
Selezionare la funzione di erogazione del caffè pre-macinato premendo il tasto
AROMA STRENGTH. La macchina è pronta per l’erogazione.
Premere il tasto ESPRESSO LUNGO. La macchina inizia ad erogare acqua
dall’erogatore caffè.
generale sulla posizione SPENTO per spegnere la macchina.
Lasciare agire la soluzione per circa 15 minuti.
Portare l’interruttore generale sulla posizione ACCESO per accendere la macchina.
Premere il tasto di STAND-BY. Attendere no al termine del “5.2.2 Ciclo automatico
di risciacquo / autopulizia”.
Eseguire un intero “7.2.1 Ciclo di pulizia settimanale del gruppo caffè”.
La macchina è pronta per l’erogazione.
Riposizionare il ltro acqua nella sua sede, premendo e ruotando leggermente.
Riempire il serbatoio con acqua fresca.
Riempirlo quindi nuovamente con il caffè in grani.
Se necessario, pulire il contenitore del caffè pre-macinato con un panno asciutto.
ITALIANO
13
Page 44

7.4 Pulizia del montalatte
CALC
CLEAN
7.4.1 Ciclo di pulizia del montalatte
È importante pulire il montalatte dopo ogni utilizzo, al ne di mantenere l’igiene e
garantire perfetta consistenza all’emulsione del latte.
Il montalatte deve essere installato.
>
Premere il tasto STEAM per erogare del vapore per alcuni secondi.
>
Per interrompere l’erogazione, premere il tasto OK.
Pericolo di scottature! Il tubo vapore e il montalatte potrebbero essere caldi.
>
Rimuovere il montalatte e lavarlo con acqua tiepida.
7.4.2 Pulizia settimanale dei componenti del montalatte
La pulizia settimanale è più approfondita.
2
1
1. Montalatte
2. Protezione in gomma
Pericolo di scottature! Se la macchina è stata utilizzata di recente il tubo vapore e il
montalatte potrebbero essere caldi.
>
Rimuovere il montalatte (1) e lavarlo con acqua tiepida.
>
Rimuovere la protezione in gomma (2) e lavarla con acqua fresca.
>
Pulire il tubo vapore con un panno umido.
>
Eseguire in senso inverso le operazioni precedenti e rimontare il montalatte.
La protezione in gomma deve essere inserita correttamente, non oltre la propria sede,
altrimenti il montalatte non funzionerà a dovere.
7.5 Ciclo di decalcicazione
START
CALC
CLEAN
Quando viene visualizzato il simbolo CALC CLEAN è necessario procedere alla
decalcicazione. Se questa operazione non viene eseguita, la macchina smetterà di
funzionare regolarmente: in tal caso la riparazione NON è coperta da garanzia.
Il ciclo di decalcicazione richiede circa 30 minuti. Si compone di un vero e proprio
ciclo di pulizia con utilizzo del decalcicante Gaggia, seguito da un ciclo di risciacquo.
Non estrarre il gruppo caffè durante il processo di decalcicazione.
Non bere la soluzione decalcicante ed i prodotti erogati dal ciclo.
Usare esclusivamente la soluzione decalcicante Gaggia. L’utilizzo di altri prodotti può
causare danni alla macchina e lasciare residui nell’acqua. La soluzione decalcicante
Gaggia è in vendita separatamente. Per maggiori dettagli consultare il capitolo “10.1
Prodotti per la manutenzione”.
Fase di preparazione
> Premere i tasti laterali.
>
Rimuovere la vaschetta raccogligocce.
>
Rimuovere il cassetto raccoglifondi e vuotarlo.
>
Vuotare e lavare la vasca raccogligocce.
>
Riposizionare tutti i componenti.
>
Posizionare un contenitore capiente (1,5 l) sotto l’ erogatore.
>
Se installato, rimuovere il montalatte dal tubo vapore.
14
MAX
CALC
CLEAN
ITALIANO
Fase di decalcicazione
Se presente il ltro acqua INTENZA+ estrarre il ltro dal serbatoio dell’acqua e
sostituirlo con il ltrino bianco originale.
>
Versare tutta la soluzione decalcicante nel serbatoio acqua.
>
Quindi riempire il serbatoio con acqua fresca no al livello CALC CLEAN.
>
Riposizionare il serbatoio dell’acqua nella macchina.
Page 45

>
y
MAX
START
CALC
CLEAN
Premere il tasto MENU e scorrere no alla funzione di decalcicazione.
>
Premere il tasto OK per selezionare la funzione.
>
Premere il tasto OK per avviare il ciclo di decalcicazione. La macchina inizia ad erogare
soluzione decalcicante ad intervalli. La barra indica lo stato di avanzamento del ciclo.
Il ciclo può essere messo in pausa premendo il tasto ESC e riavviato premendo il
tasto OK. Ciò consente di svuotare il contenitore o di assentarsi per un breve periodo.
Lasciar proseguire l’erogazione nché il serbatoio dell’acqua si svuota.
CALC
rosso
displa
CLEAN
> Estrarre il serbatoio dell’acqua e risciacquarlo.
>
Riempirlo con acqua fresca no al livello MAX e reinserirlo nella
macchina.
>
Rimuovere e vuotare il contenitore.
MAX
CALC
CLEAN
Ripetere per intero la sequenza di operazioni descritta nella precedente “Fase di
preparazione” e proseguire con la successiva “Fase di risciacquo”.
Fase di risciacquo
> Premere il tasto OK per avviare il ciclo di risciacquo.
CALC
CLEAN
Il ciclo può essere messo in pausa premendo il tasto ESC e riavviato premendo il
tasto OK. Ciò consente di svuotare il contenitore o di assentarsi per un breve periodo.
Se il serbatoio dell’acqua non è stato riempito no al livello MAX la macchina può
richiedere l’esecuzione di un altro ciclo di risciacquo. In questo caso, riempire il
serbatoio dell’acqua no a livello MAX, reinserirlo e ripetere la “Fase di risciacquo”.
Lasciar proseguire l’erogazione nché il processo termina automaticamente.
>
Premere il tasto OK per uscire dal ciclo di decalcicazione. La macchina esegue il
processo di riscaldamento e risciacquo automatico.
>
Rimuovere e vuotare il contenitore dell’acqua erogata.
CALC CLEAN
Effettuare la procedura di “7.4.2 Pulizia settimanale dei componenti del montalatte”.
Effettuare la procedura di “7.2.1 Pulizia settimanale del gruppo caffè (un ciclo di pulizia)”.
Se in dotazione, rimuovere il ltrino bianco e riposizionare il ltro acqua INTENZA+.
Al termine la macchina torna al menu principale.
Riposizionare il montalatte sul tubo vapore.
È consigliabile eseguire un “5.2.3 Ciclo di risciacquo manuale”.
7.5.1 Interruzione del ciclo di decalcicazione
> Vericare il collegamento elettrico e riaccendere la macchina.
START
CALC
CLEAN
>
Se il processo è stato interrotto in fase “Fase di decalcicazione”, il segnale di
decalcicazione rimane attivo: premere il tasto OK per riattivare il ciclo.
>
Altrimenti eseguire un “5.2.3 Ciclo di risciacquo manuale”.
8. Impostazioni di fabbrica
8.1 Lista delle impostazioni di fabbrica
Display Impostazione Valore Descrizione
MAX
MED
MIN
180’
60’
30’
15’
Temperatura
caffè
Stand-by 15 minuti Regolazione del tempo di ingresso in stand-by.
COFFEE
TEMP
STANDBY
medio
Regolazione della temperatura di erogazione del
caffè.
ITALIANO
15
Page 46

Display Impostazione Valore Descrizione
FILTER
DISPLAY
CONTRAST
WATER
HARDNESS
WATER
FILTER
ON
OFF
FILTER
Contrasto medio Regolazione del contrasto del display.
4
3
2
1
Durezza acqua
Filtro acqua
INTENZA+
4 (acqua molto
dura)
OFF (non
installato)
Regolazione della durezza dell’acqua di utilizzo.
Per ulteriori dettagli consultare il capitolo “5.3.1
Misurazione e impostazione durezza acqua”.
Impostazione ltro INTENZA+. Per ulteriori dettagli
consultare il capitolo “10.2 Filtro acqua INTENZA+”.
8.2 Come modicare le impostazioni di fabbrica
È possibile personalizzare le funzioni della macchina, accedendo al menu di
programmazione. La macchina deve essere accesa e pronta per l’erogazione.
Se necessario, consultare il capitolo “8.1 Lista delle impostazioni di fabbrica”.
>
Premere il tasto MENU e scorrere la lista delle funzioni no a visualizzare la funzione
DISPLAY
CONTRAST
di cui si vuole modicare l’impostazione.
Nota: Le immagini a lato si riferiscono ad una funzione di esempio.
>
Premere il tasto OK per selezionare la funzione desiderata.
Una volta selezionata:
>
Premere il tasto SU per aumentare il valore.
>
Premere il tasto GIU per diminuire il valore.
>
Premere il tasto OK per confermare l’impostazione.
A modica avvenuta appare il messaggio OK.
I valori modicati ma non confermati non vengono memorizzati.
>
Premere il tasto ESC per uscire dal menu.
La macchina esce automaticamente dalla modalità di programmazione se non viene
premuto alcun tasto per 3 minuti.
8.3 Ripristino impostazioni di fabbrica
È possibile ripristinare le impostazioni di fabbrica, accedendo al menu di
programmazione. La macchina deve essere accesa e pronta per l’erogazione.
>
Premere il tasto MENU e scorrere la lista delle funzioni no alla funzione di ripristino.
>
Premere il tasto OK per selezionare la funzione.
RESET
A modica avvenuta appare il messaggio OK.
>
Premere il tasto ESC per uscire dalla programmazione.
La macchina esce automaticamente dalla modalità di programmazione se non viene
premuto alcun tasto per 3 minuti.
9. Risoluzione problemi
Questo capitolo riassume i problemi più comuni che potrebbero interessare la Vostra macchina.
Se le informazioni riportate di seguito non Vi aiutano a risolvere il problema, consultate la
pagina FAQ al sito www.gaggia.com, oppure contattate la hotline Gaggia. I contatti sono
indicati nel libretto di garanzia fornito separatamente o all’indirizzo www.gaggia.com.
La macchina è provvista di un sistema di colori per semplicare l’interpretazione dei
segnali a display. Il codice cromatico dei simboli è basato sul principio del semaforo.
9.1 Riepilogo segnali di allarme: display di colore rosso
16
Display
ITALIANO
Vasca raccogligocce e cassetto
raccoglifondi da reinserire; sportello
di servizio da richiudere.
Caffè in grani esaurito.
Descrizione Azione
Consultare il capitolo “7.1.1 Pulizia della macchina al
bisogno” per riposizionare i componenti nelle loro
sedi.
Seguire le istruzioni indicate al capitolo “4.3
Riempimento del contenitore per il caffè”.
Page 47

Display
y
Descrizione Azione
Gruppo caffè non inserito.
Chiudere lo sportello di ser vizio. Spegnere e
riaccendere la macchina. Il gruppo caffè ritorna
automaticamente in posizione.
Cassetto raccoglifondi pieno.
Serbatoio dell’acqua vuoto.
La macchina non funziona.
XX
9.2 Riepilogo segnali di avviso
Display
START
CALC
CLEAN
Macchina pronta per l’erogazione
dei prodotti: contenitore con caffè in
grani vuoto.
Macchina pronta per l’erogazione dei
prodotti: ltro acqua INTENZA+ da
sostituire.
Macchina in attesa di attivare il
processo di caricamento del circuito
dell’acqua.
La macchina deve essere
decalcicata.
Macchina in fase di riscaldamento. Attendere.
Macchina in fase di risciacquo. Attendere.
Descrizione Azione
Svuotare il cassetto raccoglifondi come descritto al
capitolo “7.1.1 Pulizia della macchina al bisogno”.
Seguire le istruzioni indicate al capitolo “4.2
Riempimento del serbatoio dell’acqua”.
Seguire le istruzioni indicate al capitolo “9.3 La
macchina non funziona”.
Seguire le istruzioni indicate al capitolo “4.3
Riempimento del contenitore per il caffè”.
Seguire le istruzioni indicate al capitolo “10.2.2
Sostituzione INTENZA+”.
Seguire le istruzioni indicate al capitolo “5.2.1
Caricamento del circuito dell’acqua”.
Seguire le istruzioni indicate al capitolo “7.5 Ciclo di
decalcicazione”.
Gruppo caffè in fase di ripristino. Attendere.
9.3 La macchina non funziona
rosso
displa
Codice
Comportamento
d’errore
Macinacaffè
1
bloccato
Gruppo bloccato,
3 - 4
non si riesce ad
estrarre
Errore sul circuito
5
idraulico
XX
Macinacaffè bloccato
Gruppo bloccato, non si riesce ad
estrarre
Errore sul circuito idraulico
Nel caso si attivi il segnale di allarme che indica errore macchina, nell’angolo del display
in basso a destra viene visualizzato il codice d’errore.
Consultare la successiva tabella.
Comportamento Azione
Pulire a fondo il condotto caffè come descritto al capitolo
“7.2.1 Ciclo di pulizia settimanale del gruppo caffè”.
Chiudere lo sportello di ser vizio. Spegnere e riaccendere
la macchina. Attendere la comparsa del segnale ‘Macchina
pronta per l’erogazione’ e quindi rimuovere il gruppo caffè.
Rimuovere e reinserire un paio di volte il
serbatoio dell’acqua, assicurandosi di riposizionarlo
correttamente. Vericare che il vano serbatoio acqua
sia pulito.
ITALIANO
17
Page 48

Per qualsiasi altro codice d’errore:
>
Spegnere la macchina e riaccenderla dopo 30 secondi.
>
Eseguire 2 o 3 tentativi.
Se la macchina non si avvia, contattare la hotline Gaggia e comunicare il codice di
errore indicato sul display. I contatti sono indicati nel libretto di garanzia fornito
separatamente o all’indirizzo www.gaggia.com.
9.4 Tabella di risoluzione eventuali problemi
Comportamento
La macchina non si accende. Macchina non collegata alla rete
Macchina in simulazione di
funzionamento.
La vasca raccogligocce si
riempie velocemente.
Il segnale ‘Cassetto
raccoglifondi pieno’ rimane
attivo, anche se il cassetto
è vuoto o con pochi fondi.
Impossibile estrarre il
gruppo caffè.
Impossibile inserire il
gruppo caffè
Il caffè ha poca crema
oppure è troppo acquoso.
Fuoriesce caffè all’esterno
dell’erogatore.
Il caffè non è abbastanza
caldo.
elettrica oppure interruttore generale
su SPENTO.
Il tasto STAND-BY è stato premuto
per più di 8 secondi.
Per garantire un caffè perfetto ad ogni
erogazione, la macchina si risciacqua
e si riscalda facendo scorrere l’acqua
nella vasca raccogligocce.
È stato svuotato il cassetto
raccoglifondi mentre la macchina era
spenta.
Il gruppo caffè è fuori posizione. Chiudere lo sportello di servizio. Spegnere e
Il cassetto raccoglifondi è inserito. Estrarre il cassetto raccoglifondi prima di rimuovere
Il gruppo caffè non è in posizione di
riposo.
Il motoriduttore non è in posizione
corretta.
Le macine sono impostate per una
macinatura grossa.
La miscela non è adatta, il caffè non
è fresco di torrefazione oppure è
macinato troppo grosso.
La macchina deve eseguire
l’autoregolazione.
L'erogatore è otturato. Pulire l’erogatore e i suoi fori di uscita utilizzando uno
Le tazze sono fredde. Scaldare le tazze con acqua calda.
La temperatura non è regolata
correttamente.
Il circuito della macchina è intasato
dal calcare.
Causa Azione
Collegare la macchina alla rete elettrica e portare
l'interruttore generale su ACCESO.
Spegnere e riaccendere la macchina utilizzando
l’interruttore generale.
Svuotare la vasca raccogligocce. Per evitare che
l’acqua di risciacquo nisca nella vasca raccogligocce,
posizionare una tazza sotto i beccucci di erogazione.
Dopo aver vuotato il cassetto raccoglifondi, attendere
la comparsa del segnale ‘Sportello di servizio da
richiudere’. Riposizionare i componenti.
riaccendere la macchina. Attendere la comparsa del
segnale ‘Macchina pronta per l’erogazione’ e quindi
rimuovere il gruppo caffè.
il gruppo caffè.
Assicurarsi che il gruppo caffè sia in posizione di
riposo come descritto al capitolo “7.2.1 Ciclo di pulizia
settimanale del gruppo caffè”, “Fase di rimontaggio”.
Inserire la vasca raccogligocce ed il cassetto
raccoglifondi. Chiudere lo sportello di servizio.
Accendere la macchina senza che il gruppo caffè sia
inserito. Il motoriduttore ritorna in posizione corretta.
Spegnere la macchina e reinserire il gruppo come
descritto al capitolo “7.2.1 Ciclo di pulizia settimanale
del gruppo caffè”, “Fase di rimontaggio”.
Regolare il grado di macinatura come descritto al
capitolo “5.3.3 Regolazione macinacaffè in ceramica”.
Cambiare miscela di caffè o regolare il grado
di macinatura come descritto al capitolo “5.3.3
Regolazione macinacaffè in ceramica”.
Erogare alcuni caffè.
stuzzicadenti.
Regolare la temperatura come descritto nel capitolo
“5.3.4 Regolazione temperatura di erogazione”.
Decalcicare la macchina come descritto al capitolo
“7.5 Ciclo di decalcicazione”.
18
ITALIANO
Page 49

Comportamento
La macchina macina i
chicchi di caffè ma il caffè
non fuoriesce.
Il caffè fuoriesce
lentamente.
La macchina impiega
troppo tempo per scaldarsi
o la quantità di acqua
erogata è insufciente.
Il latte montato è troppo
freddo.
Il latte non si emulsiona. Il montalatte è sporco o non inserito
Manca acqua. Riempire il serbatoio dell’acqua e ricaricare il circuito
Il gruppo caffè è sporco. Pulire il gruppo caffè come descritto al capitolo
Il circuito non è carico. Caricare il circuito come descritto al capitolo “5.2.1
L'erogatore è sporco. Pulire l’erogatore e i suoi fori di uscita utilizzando uno
La macchina deve eseguire
l’autoregolazione.
Il caffè è troppo ne. Cambiare miscela di caffè o regolare la macinatura
Il circuito non è carico. Caricare il circuito come descritto al capitolo “5.2.1
Il gruppo caffè è sporco. Pulire il gruppo caffè come descritto al capitolo
La macchina deve eseguire
l’autoregolazione.
Il circuito della macchina è intasato
dal calcare.
Le tazze sono fredde. Scaldare le tazze con acqua calda.
correttamente.
Il tipo di latte utilizzato non è idoneo
all’emulsione.
Causa Azione
come descritto al capitolo “5.2.1 Caricamento del
circuito dell’acqua”.
“7.2.1 Ciclo di pulizia settimanale del gruppo caffè”.
Caricamento del circuito dell’acqua”.
stuzzicadenti.
Erogare alcuni caffè.
come descritto al capitolo “5.3.3 Regolazione
macinacaffè in ceramica”.
Caricamento del circuito dell’acqua”.
“7.2.1 Ciclo di pulizia settimanale del gruppo caffè”,.
Erogare alcuni caffè.
Decalcicare la macchina come descritto al capitolo
“7.5 Ciclo di decalcicazione”.
Pulire il montalatte come descritto al capitolo “7.4.2
Pulizia settimanale dei componenti del montalatte” ed
inserirlo correttamente come descritto al capitolo
“6.2 Montalatte”, “Fase di inserimento”.
Consultare il capitolo “6.3 Preparazioni a base di latte
e caffè”.
10. Accessori e prodotti per la manutenzione
10.1 Prodotti per la manutenzione
Per la pulizia e la decalcicazione usare solo i prodotti per la manutenzione Gaggia.
In caso di difcoltà nel reperire i prodotti per la manutenzione della macchina,
contattare la hotline Gaggia del Vostro Paese. I contatti sono indicati nel libretto di
garanzia fornito separatamente o all’indirizzo www.gaggia.com.
PRODOTTI PER MANUTENZIONE
Prodotto
• Decalcicante
• Cartuccia ltro acqua INTENZA+
• Grasso lubricante gruppo caffè
• Pastiglie sgrassanti
• Sistema di pulizia circuito latte
• Kit manutenzione
ITALIANO
19
Page 50

10.2 Filtro acqua INTENZA+
A
B
C
Si consiglia di installare il ltro acqua INTENZA+ che limita la formazione di calcare
all’interno della macchina e dona un aroma più intenso al Vostro caffè.
L’acqua è un elemento fondamentale nella preparazione del caffè: per questo è
estremamente importante ltrarla sempre in modo professionale. Il ltro acqua
INTENZA+ previene la formazione di depositi minerali, migliorando la qualità
dell’acqua. è in vendita separatamente.
10.2.1 Installazione INTENZA+
> Rimuovere il ltrino bianco dal serbatoio dell’acqua e conservarlo in un luogo asciutto.
Fase di impostazione ltro
> Rimuovere il ltro acqua INTENZA+ dalla confezione, immergerlo ver ticalmente in
acqua fredda, con l’apertura verso l’alto, e premere piano ai lati per far uscire le bolle
d’aria.
Ai ni del corretto utilizzo del ltro è necessario aver eseguito la misurazione di durezza
acqua, come indicato al capitolo “5.3.1 Misurazione e impostazione durezza acqua”.
>
Impostare il ltro acqua INTENZA+ a seconda delle misurazioni effettuate, agendo
sulla base del ltro:
Lettera sul ltrino Durezza acqua Quadrati sul provino
> Inserire il ltro acqua INTENZA+ nel serbatoio d’acqua vuoto.
>
Spingerlo no al punto più basso possibile.
>
Riempire il serbatoio dell’acqua con acqua fresca e reinserirlo nella macchina.
Erogare tutta l’acqua contenuta nel serbatoio come spiegato al capitolo “6.4.1
Erogazione acqua calda”.
>
Riempire nuovamente il serbatoio dell’acqua.
Fase di impostazione macchina in installazione
> Premere il tasto MENU e scorrere no alla funzione ‘Filtro INTENZA+’. Il valore di
fabbrica è OFF (ltro non attivo).
>
Premere il tasto SU per selezionare il valore ON.
>
ON
OFF
FILTER
10.2.2 Sostituzione INTENZA+
FILTER
ON
OFF
FILTER
RESET
Premere il tasto OK per confermare la modica.
I valori modicati ma non confermati non vengono memorizzati.
Con il valore ON, la macchina è programmata per informare l’utente della necessità
di sostituire il ltro acqua INTENZA+.
Una volta attivato il ltro INTENZA+ sul display non viene visualizzata
nessuna icona.
>
Premere il tasto ESC per uscire dalla programmazione.
La macchina esce automaticamente dalla modalità di programmazione se non viene
premuto alcun tasto per 3 minuti. Al termine la macchina torna al menu principale.
Compare il segnale ‘Filtro acqua INTENZA+ da sostituire’.
Procedere alla sostituzione del ltro acqua INTENZA+ come descritto al capitolo
“10.2.1 Installazione INTENZA+” limitatamente alla sola “Fase di impostazione ltro”,
quindi procedere come di seguito.
Fase di impostazione macchina in sostituzione
> Premere il tasto MENU e scorrere no alla funzione ‘Filtro INTENZA+’. Il valore di
fabbrica è ON (ltro attivo).
A acqua dolce 1 - 2
B acqua dura (standard) 3
C acqua molto dura 4
20
ITALIANO
Page 51

>
A
B
C
Se si desidera sostituire il ltro INTENZA+ con un nuovo ltro INTENZA+, premere
ON
OFF
FILTER
RESET
il tasto GIU no a selezionare il valore RESET. In alternativa, se si desidera rimuovere
il ltro INTENZA+ senza sostituirlo, selezionare il valore OFF.
>
Premere il tasto OK per confermare la modica.
I valori modicati ma non confermati non vengono memorizzati.
Con il valore RESET la macchina è programmata per gestire un nuovo ltro acqua
INTENZA+. Viceversa con il valore OFF è necessario inserire nel serbatoio il ltrino
bianco rimosso in precedenza.
>
Premere il tasto ESC per uscire dalla programmazione.
La macchina esce automaticamente dalla modalità di programmazione se non viene
premuto alcun tasto per 3 minuti. Alla termine dell’erogazione, la macchina torna al
menu principale.
11. Caratteristiche tecniche
Il costruttore si riserva il diritto di modicare le caratteristiche tecniche per migliorare
il prodotto. Tutte le quantità preimpostate sono indicative.
Descrizione Valore
Materiale corpo Termoplastico
Dimensioni (l x a x p) 221 x 340 x 430 mm
Peso 7,5 kg
Lunghezza cavo 800 - 1200 mm
Pannello di comando Frontale
Dimensioni tazze Fino a 152 mm
Serbatoio acqua 1,8 litri - Estraibile
Capacità contenitore caffè
in grani
Capacità cassetto
raccoglifondi
250 g
15
Pressione pompa 15 bar
Caldaia Caldaia inox
Dispositivi di sicurezza Termofusibile
Consumo in modalità
risparmio energetico
< 1 Wh
Tensione nominale
- Potenza nominale -
Consultare la targhetta posta all’interno dello sportello di servizio.
Alimentazione
Quantità predenite default min max
ESPRESSO 40 ml 10 ml 230 ml
ESPRESSO LUNGO 120 ml 10 ml 230 ml
Campi elettromagnetici
Questo apparecchio è conforme a tutti gli standard e le normative applicabili in
materia di esposizione ai campi elettromagnetici.
12. Trasporto e smaltimento
Questo simbolo su un prodotto indica che il prodotto è coperto dalla direttiva
europea 2012/19 / UE. Informatevi sul sistema di raccolta differenziata in vigore per
i prodotti elettrici ed elettronici. Seguire le regole locali e non smaltire il prodotto
con i riuti domestici. Il corretto smaltimento dei vecchi prodotti aiuta a prevenire
conseguenze negative per l’ambiente e la salute umana.
ITALIANO
21
Page 52

13. Garanzia ed Assistenza
Garanzia
Per informazioni dettagliate sulla garanzia e sulle condizioni ad essa collegate,
consultare il libretto di garanzia fornito separatamente.
La ditta costruttrice si riser va il diritto di appor tare miglioramenti ai propri modelli,
pur mantenendo intatte le caratteristiche essenziali descritte nel presente manuale.
Assistenza
Vogliamo assicurarci che siate soddisfatti della Vostra macchina.
Se avete bisogno di supporto o assistenza, visitate il sito web di Gaggia www.gaggia.
com oppure contattate la hotline Gaggia del Vostro Paese.
13.1 Come contattare Gaggia
I contatti sono indicati nel libretto di garanzia fornito separatamente o all’indirizzo
www.gaggia.com.
22
ITALIANO
Page 53

Page 54

GAGGIA S.p.a. si riserva il diritto di apportare tutte le modiche ritenute necessarie.
GAGGIA S.p.A.
Sede Legale/Registered Ofce
Piazza Eleonora Duse, 2
20122 MILANO
Sede Amministrativa/Administrative Ofce
Via Tor retta, 240
40041 Gaggio Montano (BO)
+39 0534 771111
www.gaggia.com
Rev. 01 19.05.2015
Page 55

GAGGIA ANIMA
Bedienungsanleitung
DEUTSCH
Page 56

Inhalte
1.
Einführung.........................1
2. Vollständige Ansicht des Produktes ....1
2.1 Das Produkt ...........................1
2.2 Zubehör ...............................1
2.3 Hauptbestandteile .......................2
2.4 Abnehmbare Teile .......................2
2.5 Bedientasten und Display ................2
3. Sicherheit .........................3
3.1 Sicherheitshinweise ......................3
4. Vorbereitung.......................5
4.1 Aufstellung .............................5
4.2 Füllung des Wasser tanks..................5
4.3 Füllung des Kaffeebohnenbehälters.........5
4.4 Einstecken und Starten ...................5
5. Ein- und Ausschalten ................6
5.1 Verwendung der Anwahltasten . . . . . . . . . . . .6
5.2 Erste Einschaltung .......................6
5.2.1 Entlüftung des Wassersystems .............6
5.2.2 Automatischer Spülzyklus/
Selbstreinigungszyklus ....................6
5.2.3 Manueller Spülzyklus .....................6
5.3 Einstellungen............................7
5.3.1 Messen und Programmierung der
Wasserhärte............................7
5.3.2 Einstellung Aromaintensität ...............7
5.3.3 Einstellung des Keramikmahlwerks .........7
5.3.4 Einstellung der Brühtemperatur............8
5.3.5 Einstellung Kaffeeauslauf ..................8
5.4 Deaktivierung und Reaktivierung...........8
6. Bedienung .........................8
6.1 Zubereitung von Getränken mit Kaffee .....8
6.1.1 Verwendung von vorgemahlenem Kaffee
(nur eine Spezialität) .....................8
6.1.2 Ausgabe eines Produktes mit einer Taste ....9
6.1.3 Ausgabe von zwei Produkten mit einer Taste
(nur bei der Verwendung von Kaffeebohnen
möglich) ...............................9
6.1.4 Einstellung Kaffeemenge in der Tasse
während der Zubereitung ................9
6.2 Milchaufschäumer .......................9
6.3 Zubereitung von Getränken mit Milch und
Kaffee ................................10
6.3.1 Ausgabe eines Milchgetränks .............10
6.4 Getränke mit Heißwasser ...............10
6.4.1 Heißwasserausgabe.....................10
7. Reinigung und Pege ...............10
7.1 Reinigung des Geräts ...................11
7.1.1 Reinigung des Geräts bei Bedarf . . . . . . . . . . 11
7.1.2 Wöchentliche Reinigung des Geräts.......11
7.2 Reinigung der Brühgruppe ...............11
7.2.1 Wöchentlicher Reinigungszyklus der
Brühgruppe ...........................11
7.2.2 Monatliche Schmierung der Brühgruppe
(ein Reinigungszyklus unter Verwendung
eines Schmiermittels) ...................12
7.2.3 Monatliche Entfettung der Brühgruppe (ein
Reinigungszyklus unter Verwendung eines
Entfetters).............................13
7.3 Reinigung der Behälter ..................13
7.3.1 Reinigung des Wassertanks ..............13
7.3.2 Monatliche Reinigung des Kaffeefachs......13
7.4 Reinigung des Milchaufschäumers ........14
7.4.1 Reinigungszyklus des Milchaufschäumers ...14
7.4.2 Wöchentliche Reinigung der Teile des
Milchaufschäumers .....................14
7.5 Entkalkungszyklus.......................14
7.5.1 Unterbrechung des Entkalkungszyklus .....15
8. Default-Einstellungen...............15
8.1 Liste der Default-Einstellungen ...........15
8.2 Änderung der Default-Einstellungen .......16
8.3 Zurücksetzen auf die Default-Einstellungen 16
9. Problemlösung ....................16
9.1 Zusammenfassung Alarmsignale: rotes
Display ...............................16
9.2 Zusammenfassung Hinweissignale.........17
9.3 Das Gerät funktioniert nicht .............17
9.4 Tabelle Problemlösung ..................18
10. Pege-Zubehör und Produkte........19
10.1 Pege-Produkte ........................19
10.2 INTENZA+ Wasserlter ................20
10.2.1 Installation INTENZA+..................20
10.2.2 Austausch INTENZA+..................20
11. Technische Eigenschaften ...........21
12. Transport und Entsorgung...........21
13. Garantie und Kundendienst..........22
13.1 Kontakt Gaggia.........................22
Symbole
Die folgenden Symbole werden in einigen Teilen der
Bedienungsanleitung benutzt:
Kennzeichnet Vorgänge, die keinesfalls ausgeführt
werden dürfen.
Kennzeichnet Vorgänge, bei denen besondere
Aufmerksamkeit erforderlich ist.
> Anforderung des angegebenen Vorgangs.
Page 57

1. Einführung
Vorwort
Herzlichen Glückwunsch zu Ihrem Kauf eines Kaffeevollautomaten Gaggia Anima!
In dieser Bedienungsanleitung nden Sie alle erforderlichen Informationen für die
Inbetriebnahme, den Gebrauch, die Reinigung und Entkalkung Ihres Geräts.
•
Im Kapitel “2. Vollständige Ansicht des Produktes” können Sie sich mit den verschiedenen Tasten
und Teilen des Geräts vertraut machen.
•
Das Kapitel “3. Sicherheit” sollte aufmerksam gelesen werden, um eventuelle Gefahren durch
einen falschen oder unsachgemäßen Gebrauch des Geräts zu vermeiden.
•
Kapitel “4. Vorbereitung” und “5. Ein- und Ausschalten” beschreiben Schritt für Schritt die
Aufstellung und die Vorbereitung auf den Betrieb des Geräts.
•
Kapitel “6. Bedienung” beschreibt, wie das Gerät bedient wird und liefert eine Liste aller
Getränke, die mit dem Gerät zubereitet werden können.
•
Kapitel “7. Reinigung und Pege” beschreibt die Vorgänge, mit denen Ihr Gerät in Top-Form bleibt.
•
Für alle Fragen zum Betrieb ist auf Kapitel “9. Problemlösung” Bezug zu nehmen.
•
In den anderen Kapiteln nden Sie Hilfe für die schnelle Verwendung.
Hinweise
Das vorliegende Dokument stellt einen wesentlichen Bestandteil des Geräts dar und muss für
eine spätere Verwendung aufbewahrt werden. Das Dokument ist urheberrechtlich geschützt.
2. Vollständige Ansicht des Produktes
2.1 Das Produkt
Das Gerät dient der Zubereitung von Kaffee mit ganzen Bohnen und ist mit einem klassischen
Milchaufschäumer für die einfache und schnelle Zubereitung eines perfekten Cappuccino
ausgestattet. Es kann auch Dampf und Heißwasser ausgeben.
Das Gerät verfügt über folgende besondere Eigenschaften:
Gaggia Adapting System
Kaffee ist ein Naturprodukt und seine Eigenschaften können je nach Herkunft, Mischung und
Röstung unterschiedlich sein. Das Gerät ist mit einem System zur Selbsteinstellung ausgestattet,
mit dem Sie den Geschmack Ihrer bevorzugten Kaffeebohnen optimal genießen können. Es
reguliert sich automatisch nach der Ausgabe von einigen Tassen Kaffee.
Einstellung Kaffeestärke
Wählen Sie Ihre Lieblings-Kaffeemischung aus und stellen Sie die zu mahlende Kaffeemenge
nach Ihrem persönlichen Geschmack ein. Es besteht auch die Möglichkeit der Anwahl der
Funktion Vorgemahlener Kaffee.
Keramikmahlwerk
Die Keramikmahlwerke garantieren einen stets perfekten Mahlgrad und können eingestellt
werden, um den Mahlgrad des Kaffees an Ihren persönlichen Geschmack anzupassen. Diese
Technologie garantiert eine vollständige Bewahrung des Aromas und damit einen echten
italienischen Kaffeegenuss.
Energiesparmodus
Der Gaggia Espresso-Vollautomat wurde umweltfreundlich entwickelt, wie die
Energieefzienzkennzeichnung der Klasse A zeigt. Nach einem voreingestellten Zeitraum, in
dem kein Vorgang ausgeführt wird, schaltet das Gerät automatisch in den Standby-Modus.
2.2 Zubehör
1
2
5
1. Netzkabel
2. Bedienungsanleitung
3. Teststreifen zum Bestimmen der Wasserhärte
3
4. Multifunktions-Utensil
• Schlüssel für die Einstellung des Mahlgrads
• Reinigungszubehör Kaffeezufuhr Pulverkaffee
64
• Messlöffel vorgemahlener Kaffee
5. Reinigungspinsel (optional)
6. Fett für Brühgruppe (optional)
DEUTSCH
1
Page 58

2.3 Hauptbestandteile
2
1
12
11
10
9
2.4 Abnehmbare Teile
9
11
7
10
8
1. Taste STAND-BY
2. Aufnahme Wassertank
3. Kaffeebohnenbehälter
4.
Fach für vorgemahlenen Kaffee
3
4
MAX
5. Abnehmbarer Wassertank
5
6. Hauptschalter
I. ON
0. OFF
7. Steckdose Netzkabel
8. Kaffeesatzbehälter
9. Abtropfschale
10. Tassenabstellrost
8
6
7
1
2
11. Kaffeeauslauf
12. Klassischer Milchaufschäumer
1. Deckel des Wasser tanks
2. Deckel Kaffeebohnenbehälter
3. Deckel Fach für
vorgemahlenen Kaffee
3
4. Servicetür
5. Kaffeeauffangbehälter
4
6. Brühgruppe
7. Kaffeeauslauf
8. Abtropfschale
9. Kaffeesatzbehälter
10. Anzeige ‘Abtropfschale voll’
11. Klassischer Milchaufschäumer
PUSH
6
5
N
• Dampfdüse (fest)
• Gummischutz
2.5 Bedientasten und Display
8
1
ESPRESSO
2
ESPRESSO LUNGO
AROMA STRENGTH
3
DEUTSCH
2
1. Taste ESPRESSO
Taste ESC
4
STEAM
5
HOT WATER
MENU
7
6
2. Taste ESPRESSO LUNGO
3. Taste AROMA STRENGTH
Taste OK
4. Taste STEAM
Taste UP
5. Taste HOT WATER
6. Taste MENU
Taste DOWN
7. Taste STAND-BY
8. Display
Im Beispiel:
Hauptmenü; bereit für Ausgabe
Page 59

3. Sicherheit
Das Gerät ist mit Sicherheitsvorrichtungen ausgestattet. Dennoch sollten Sie das
Kapitel “3.1 Sicherheitshinweise” aufmerksam lesen und umsetzen, und das Gerät
nur entsprechend der vorliegenden Bedienungsanleitungen benutzen, um eventuelle
Personen- und Sachschäden durch einen unsachgemäßen Gebrauch des Geräts zu
vermeiden. Bewahren Sie diese Bedienungsanleitung für eine spätere Verwendung auf.
3.1 Sicherheitshinweise
•
Abschnitt "Achtung" weist den Benutzer auf Gefahrensituationen hin, die zu schweren
Verletzungen, auch verbunden mit Lebensgefahr, und/oder Schäden am Gerät führen können.
•
Abschnitt "Hinweise" weist den Benutzer auf Gefahrensituationen hin, die zu
leichteren Verletzungen und/oder Schäden am Gerät führen können.
Die Bedienungsanleitung sollte aufmerksam gelesen werden, bevor Bedienungsoder Wartungsvorgänge jeder Art vorgenommen werden.
Achtung
Schließen Sie das Gerät an einer geeigneten Wandsteckdose an, deren
Hauptspannung den technischen Daten des Geräts entspricht.
Das Gerät an eine Steckdose mit Erdungsanlage anschließen.
Ein Herabhängen des Netzkabels vom Tisch oder der Arbeitsäche oder die Auage
desselben auf heißen Flächen sollte vermieden werden.
Das Gerät, die Steckdose oder das Netzkabel dürfen nicht in Wasser getaucht
werden (Gefahr von Stromschlägen!).
Keine Flüssigkeiten auf den Stecker des Netzkabels gießen.
Den Heißwasserstrahl nicht auf Körperteile richten: Verbrennungsgefahr!
Berühren Sie keine heißen Oberächen. Benutzen Sie die vorgesehenen Griffe und
Drehknöpfe.
Nach dem Ausschalten des Geräts über den Hauptschalter auf der Rückseite den
Stecker von der Steckdose abziehen:
- Wenn Störungen auftreten.
- Wenn das Gerät für einen längeren Zeitraum nicht benutzt wird.
- Bevor das Gerät gereinigt wird.
Am Stecker, und nicht am Netzkabel ziehen.
Den Stecker nicht mit nassen Händen berühren.
Verwenden Sie das Gerät nicht, wenn der Netzstecker, das Netzkabel oder das
Gerät selbst defekt oder beschädigt sind.
Das Gerät oder das Netzkabel dürfen keinesfalls modiziert werden.
Alle Reparaturen müssen durch ein von Gaggia autorisiertes Kundendienstzentrum
ausgeführt werden, um jede Gefahr zu vermeiden.
Das Gerät darf nicht von Kindern unter 8 Jahren benutzt werden.
DEUTSCH
3
Page 60

Das Gerät darf von Kindern ab 8 Jahren benutzt werden, wenn diese zuvor in den
korrekten Betrieb des Geräts eingewiesen wurden und sich der entsprechenden
Gefahren bewusst sind oder durch einen Erwachsenen überwacht werden.
Die Reinigung und die Pege dürfen nicht durch Kinder unter 8 Jahren und ohne das
Beisein eines Erwachsenen ausgeführt werden.
Das Gerät und dessen Netzkabel sollten außerhalb der Reichweite von Kindern
unter 8 Jahren aufgestellt werden.
Dieses Gerät darf von Personen mit körperlichen, mentalen oder sensorischen
Einschränkungen sowie mangelnder Erfahrung und/oder Wissen verwendet werden,
sofern sie zuvor in den korrekten Betrieb des Geräts eingewiesen wurden und
sich der entsprechenden Gefahren bewusst sind oder durch einen Erwachsenen
überwacht werden.
Achten Sie darauf, dass Kinder nicht mit dem Gerät spielen.
Führen Sie weder Finger noch andere Gegenstände in das Mahlwerk ein.
Hinweise
Dieses Gerät ist nur für den Gebrauch im privaten Haushalt bestimmt. Es ist z.B.
nicht für die Verwendung in Personalküchen von Geschäften, Büros, Betrieben oder
anderen Arbeitsbereichen vorgesehen.
Stellen Sie das Gerät auf eine waagerechte, ebene und stabile Fläche.
Das Gerät nicht auf heißen Flächen, in der Nähe von heißen Öfen, Heizgeräten oder
ähnlichen Wärmequellen abstellen.
In den Behälter dürfen ausschließlich geröstete Kaffeebohnen eingefüllt werden.
Wenn Pulver- oder Instantpulver, Rohkaffee oder andere Gegenstände in den
Kaffeebohnenbehälter eingefüllt werden, können Schäden am Gerät verursacht werden.
Bevor Teile eingebaut oder herausgenommen werden, sollte abgewartet werden, bis
das Gerät abkühlt. Die Heizächen weisen nach der Benutzung Restwärme auf.
Keinesfalls heißes oder kochendes Wasser in den Tank füllen. Verwenden Sie
ausschließlich kaltes Trinkwasser ohne Kohlensäure.
Für die Reinigung sollten keine Scheuerpulver oder aggressive Reinigungsmittel
verwendet werden. Für die Reinigung des Geräts ist ein weiches, leicht mit Wasser
getränktes Tuch ausreichend.
Das Gerät muss regelmäßig entkalkt werden. Das Gerät zeigt an, wann das
Entkalken erforderlich ist. Diesen Vorgang nicht auszuführen, führt dazu, dass das
Gerät nicht mehr störungsfrei funktioniert. Eine entsprechende Reparatur ist nicht
durch die Garantie gedeckt!
Das Gerät darf keiner Temperatur unter 0°C ausgesetzt werden. Das im Heizsystem
verbliebene Restwasser kann gefrieren und das Gerät beschädigen.
Entleeren Sie den Wassertank, wenn das Gerät für einen längeren Zeitraum nicht
verwendet wird. Das Wasser könnte verunreinigt werden. Bei jedem Betrieb des
Geräts ist frisches Wasser zu verwenden.
DEUTSCH
4
Page 61

4. Vorbereitung
MAX
Das Kapitel “3. Sicherheit” sollte gelesen werden.
4.1 Aufstellung
Um die Bedienung des Geräts zu erleichtern, sollte dieses an einem geeigneten Standort aufgestellt
werden, der ausreichenden Freiraum für die Bedienung gewährleistet.
H1
L1
W1
W2
L2
4.2 Füllung des Wassertanks
MAX
CALC
CLEAN
4.3 Füllung des Kaffeebohnenbehälters
Arbeitsbereiche
L1 L2 W1 W2 H1
150 mm 221 mm 430 mm 150 mm 340 mm
Herausnahme aus der Verpackung und Aufstellung
Die Original-Verpackung wurde für den Schutz des Geräts während des Versandes entwickelt
und hergestellt. Es wird empfohlen, diese Verpackung für eventuelle zukünftige Transporte
aufzubewahren.
>
Das Gerät aus der Verpackung herausnehmen.
>
Einen Standor t mit sicherer und ebener Auageäche mit ausreichender Entfernung von
Wärmequellen auswählen. Der Raum sollte ausreichend beleuchtet und hygienisch unbedenklich
sein und die Steckdose muss leicht zugänglich sein.
>
Das Gerät so aufstellen, dass ein entsprechender Freiraum für die Bedienungsvorgänge verbleibt.
>
Den Deckel des Wassertanks abnehmen.
>
Den Wassertank an seinem Griff anheben.
>
Den Wassertank mit kaltem Wasser ausspülen.
Den Tank keinesfalls mit heißem oder kochendem Wasser, Wasser mit Kohlensäure oder anderen
Flüssigkeiten füllen. Dadurch könnte der Tank oder das Gerät beschädigt werden. Bei jedem Betrieb
des Geräts ist frisches Wasser zu verwenden.
>
Den Wassertank mit frischem kaltem Wasser bis zum Füllstand MAX füllen.
>
Dann wieder in das Gerät einsetzen. Überprüfen, ob dieser vollständig eingesetzt wurde.
>
Den Deckel des Kaffeebohnenbehälters abnehmen.
Füllen Sie nicht zu viele Kaffeebohnen in den Kaffeebohnenbehälter, um eine Beeinträchtigung der
Mahlleistung zu vermeiden.
Wenn Pulver- oder Instantpulver, Rohkaffee oder andere Gegenstände in den Kaffeebohnenbehälter
eingefüllt werden, können Schäden am Gerät verursacht werden. In den Behälter dürfen
ausschließlich geröstete Kaffeebohnen eingefüllt werden. Keine rohen, karamelisierten oder
aromatisierten Kaffeebohnen einfüllen.
>
Die Kaffeebohnen langsam in den Kaffeebohnenbehälter einfüllen und den Deckel wieder schließen.
4.4 Einstecken und Starten
>
Den Stecker in die Steckdose auf der Rückseite des Geräts einstecken.
>
Den Stecker des anderen Endes des Netzkabels in eine Wandsteckdose mit geeigneter Spannung
einstecken. Diese wird auf einem Aufkleber auf der Innenseite der Servicetür angegeben.
>
Den Hauptschalter auf die Position ON stellen, um die Maschine einzuschalten.
>
Die Taste STAND-BY blinkt. Die Taste drücken, um die Maschine einzuschalten. Das Display zeigt an,
dass die Entlüftung des Systems vorgenommen werden muss: Dabei ist vorzugehen, wie im Kapitel
“5.2 Erste Einschaltung” beschrieben.
Wird die Taste STAND-BY für mehr als 8 Sekunden gedrückt, schaltet das Gerät in die Funktion
DEMO MODE.
Um den Demo-Modus zu verlassen, wird die Maschine mit dem Hauptschalter auf
OFF und auf ON geschaltet.
DEUTSCH
5
Page 62

5. Ein- und Ausschalten
CALC
CLEAN
Das Kapitel “3. Sicherheit” sollte gelesen werden.
5.1 Verwendung der Anwahltasten
Einige Funktionstasten können für die Navigation in den Funktionen/Menüs benutzt werden:
Die Taste OK wird für die Anwahl/Bestätigung/Ausschaltung der Funktion benutzt.
Die Taste ESC dient der Rückkehr zum Hauptmenü um jeweils eine Stufe pro Druck.
Die Taste UP dient der Bewegung nach oben.
Die Taste DOWN dient der Bewegung nach unten.
5.2 Erste Einschaltung
Vor dem ersten Gebrauch müssen folgende Vorgänge ausgeführt werden:
•
Entlüftung des Wassersystems.
•
Ein automatischer Spülzyklus/Selbstreinigungszyklus.
•
Ein manueller Spülzyklus.
5.2.1 Entlüftung des Wassersystems
Während dieses Vorgangs läuft frisches Wasser durch das interne System und heizt das Gerät
auf. Der Vorgang dauert einige Minuten.
>
Sicherstellen, dass der klassische Milchaufschäumer installiert ist.
>
Einen Behälter unter den Milchaufschäumer stellen.
>
Die Taste OK drücken, um den Zyklus der Entlüftung des Wassersystems zu starten. Das Gerät
startet die Ausgabe von Heißwasser über den Milchaufschäumer. Der Balken auf dem Display
zeigt den Fortschritt des Vorgangs an. Nach der Beendigung des Vorgangs beendet das Gerät
die Wasserausgabe automatisch. Das Display zeigt an, dass das Gerät aufheizt. Nach Abschluss
der Aufheizphase führt das Gerät einen automatischen Spülzyklus/Selbstreinigungzyklus der
internen Systeme mit frischem Wasser durch.
5.2.2 Automatischer Spülzyklus/Selbstreinigungszyklus
>
Einen Behälter unter den Kaffeeauslauf stellen.
Verbrennungsgefahr! Es können heiße Wasserspritzer oder Dampf austreten.
Der Vorgang dauert weniger als eine Minute. Abwarten, bis der Zyklus automatisch beendet
wird.
Im Bedarfsfall kann der Zyklus durch Druck der Taste OK unterbrochen werden.
>
Den Behälter leeren. Das Gerät schaltet zurück in das Hauptmenü.
Nun kann der manuelle Spülzyklus ausgeführt werden.
5.2.3 Manueller Spülzyklus
Der vollständige manuelle Spülzyklus umfasst zwei aufeinander folgende Phasen:
•
Eine “Spülphase des Kaffeeausgabesystems”, die zweimal wiederholt wird.
•
Eine “Spülphase des Ausgabesystems des Heißwassers”.
Spülphase des Kaffeeausgabesystems
Während dieser Phase wird der Kaffeeausgabezyklus gestartet.
>
Einen Behälter unter den Kaffeeauslauf stellen.
>
Die Taste ESPRESSO LUNGO drücken. Das Gerät startet Kaffee auszugeben.
Den vorigen Vorgang wiederholen.
>
Nach der Ausgabe des Produkts den Behälter leeren.
Im Bedarfsfall kann der Zyklus durch Druck der Taste OK unterbrochen werden.
Spülphase des Ausgabesystems des Heißwassers
> Die Hinweise im Kapitel “4.2 Füllung des Wassertanks” beachten und den Wassertank
bis zum Füllstand CALC CLEAN füllen.
DEUTSCH
6
MAX
LC
CA
CLEAN
Page 63

>
y
Die Hinweise im Kapitel “6.4.1 Heißwasserausgabe” beachten und Wasser ausgeben, bis das
Symbol ‚Wassertank leer‘ angezeigt wird. Den Behälter leeren.
>
rotes
Displa
Die Hinweise im Kapitel “4.2 Füllung des Wassertanks” beachten und den Wassertank
bis zum Füllstand MAX füllen.
5.3 Einstellungen
Das Gerät wird mit Default-Einstellung für die Ausgabe geliefert. Um die Qualität und das
Aroma des Kaffees zu verbessern, wird empfohlen, die Einstellungen anzupassen. Insbesondere
sind die Ausgabetemperatur, das Aroma und der Mahlgrad auf die oberen Werte der Skala
einzustellen, wenn ein stärkeres Aroma gewünscht wird.
5.3.1 Messen und Programmierung der Wasserhärte
Die Messung der Wasserhärte ist äußerst wichtig:
•
für die Festlegung der Häugkeit des Entkalkens des Geräts.
•
für die korrekte Benutzung des Wasserlters INTENZA+. Nehmen Sie hierzu auf das Kapitel
“10.2 INTENZA+ Wasserlter” Bezug.
>
Den Teststreifen zum Bestimmen der Wasserhärte (im Lieferumfang des Geräts enthalten) für
einen Zeitraum von 1 Sekunde in das Wasser eintauchen.
>
1
2
3
4
4
3
2
1
5.3.2 Einstellung Aromaintensität
5.3.3 Einstellung des Keramikmahlwerks
Der Teststreifen aus dem Wasser nehmen und 1 Minute abwarten.
>
Die Anzahl der Quadrate, die die Farbe wechseln, ablesen und mit der Tabelle vergleichen.
Anzahl rote Quadrate einzustellender Wert Wasserhärte
1 1 sehr weiches Wasser
2 2 weiches Wasser
3 3 hartes Wasser
4 4 sehr hartes Wasser
Um die Default-Wasserhärte zu ändern, ist auf Kapitel “8.2 Änderung der Default-Einstellungen”
Bezug zu nehmen.
>
Bei jedem Druck der Taste AROMA STRENGTH wird das Aroma Ihres Kaffees um einen Grad
geändert. Das Display ändert sich mit dem angewählten Aroma.
extra-mildes Aroma
mildes Aroma
mittleres Aroma
starkes Aroma
extra-starkes Aroma
vorgemahlener Kaffee
Die Einstellungen am Mahlwerk dürfen nur dann vorgenommen werden, wenn das Gerät
Kaffeebohnen mahlt.
>
Den Deckel des Kaffeebohnenbehälters abnehmen.
>
Den Drehknopf Mahlgradeinstellung identizieren. Die Markierungen um den Drehknopf
herum geben die Mahlwerkeinstellungen an. Auf dem Gerät können fünf unterschiedliche
Mahlgrade eingestellt werden: von der Position ganz links für einen groben Mahlgrad und ein
leichteres Aroma (geringste Einstellung) bis zur Position ganz rechts für einen feinen Mahlgrad
und ein stärkeres Aroma (höchste Einstellung).
>
Eine kleine Tasse unter den Kaffeeauslauf stellen.
>
Die Taste ESPRESSO drücken.
>
Während das Gerät den Mahlvorgang ausführt, den Drehknopf drücken und jeweils um eine Einheit
drehen. Das besondere mitgelieferte Schlüssel für die Einstellung des Mahlgrads benutzen. Der
Geschmacksunterschied ist nach der Ausgabe von 2-3 Tassen Kaffee wahrnehmbar.
Das Gerät ist nun ausgabebereit.
Das Gerät dosiert automatisch die
richtige Kaffeemenge.
Die richtige Kaffeemenge wird mit dem
Messlöffel aus dem Lieferumfang dosiert.
DEUTSCH
7
Page 64

5.3.4 Einstellung der Brühtemperatur
MAX
MED
MIN
Um die Default-Kaffeetemperatur zu ändern, ist auf Kapitel “8.2 Änderung der Default-
Einstellungen” Bezug zu nehmen.
5.3.5 Einstellung Kaffeeauslauf
Der Kaffeeauslauf kann in der Höhe eingestellt werden, um ihn an die Abmessungen der
verwendeten Tassen anzupassen.
>
Für diese Einstellung wird der Kaffeeauslauf von Hand nach oben oder nach unten geschoben.
5.4 Deaktivierung und Reaktivierung
Nach einem Zeitraum von 15 Minuten, in dem kein Vorgang ausgeführt wird, schaltet das Gerät
automatisch in den Standby-Modus. Die Standby-Zeit kann auf einen anderen Wert eingestellt
werden. Hierfür ist das Kapitel “8. Default-Einstellungen” zu lesen.
In dieser Phase blinkt die Taste STAND-BY.
Eventuell startet das Gerät einen automatischen Spülzyklus/Selbstreinigungszyklus wie im
Kapitel “5.2.2 Automatischer Spülzyklus/Selbstreinigungszyklus” beschrieben.
Ausschalten
>
Um das Gerät vollständig auszuschalten, muss sich der Hauptschalter auf der Rückseite der
Maschine in der Position OFF benden.
Reaktivierung
>
Der Hauptschalter auf der Rückseite der Maschine muss sich in der Position ON benden.
>
Um das Gerät erneut zu starten, die Taste STAND-BY drücken.
Eventuell fordert das Gerät eine “5.2.1 Entlüftung des Wassersystems” oder startet einfach einen
automatischen Spülzyklus/Selbstreinigungszyklus wie im Kapitel “5.2.2 Automatischer Spülzyklus/
Selbstreinigungszyklus” beschrieben.
6. Bedienung
Das Kapitel “3. Sicherheit” sollte gelesen werden.
Um die Produktqualität zu gewährleisten, wird der “5.2.2 Automatische Spülzyklus/Selbstreinigungszyklus”
bei jeder Einschaltung des Geräts gestartet. Wurde das Gerät für einen längeren Zeitraum nicht
benutzt, so wird die Ausführung eines “5.2.3 Manuellen Spülzyklus” empfohlen.
6.1 Zubereitung von Getränken mit Kaffee
Die Menge des ausgegebenen Produkts in der Tasse ist per Default eingestellt. Für die
Änderung dieses Werts ist auf das Kapitel “6.1.4 Einstellung Kaffeemenge in der Tasse während
der Zubereitung” Bezug zu nehmen.
Das Gerät kann ein oder zwei Getränke mit Kaffee ausgeben.
6.1.1 Verwendung von vorgemahlenem Kaffee (nur eine Spezialität)
Es besteht die Möglichkeit der Anwahl der Funktion Vorgemahlener Kaffee. Dabei wird nur ein
Produkt ausgegeben.
Die Einfüllung anderer Produkte als vorgemahlenem Kaffee kann zu schweren Schäden am
Gerät führen. Diese Schäden werden NICHT durch die Garantie gedeckt.
Ausschließlich den mit dem Gerät gelieferten Messlöffel benutzen. Ist die Portion zu groß oder
werden mehrere Portionen eingefüllt, wird das Produkt nicht ausgegeben und der Kaffee wird
in den Kaffeesatzbehälter entleert.
>
Den Deckel des Fachs anheben und einen gestrichenen Messlöffel vorgemahlenen Kaffee
einfüllen. Wird keine Portion eingefüllt, erfolgt lediglich die Ausgabe von Wasser.
>
Den Deckel des Fachs für vorgemahlenen Kaffee schließen.
DEUTSCH
8
Page 65

>
Die Taste AROMA STRENGTH mehrmals drücken, um die Funktion für die Ausgabe von
vorgemahlenem Kaffee anzuwählen.
Folgen Sie dann den weiteren Hinweisen für die Zubereitung der gewünschten Kaffeespezialität.
6.1.2 Ausgabe eines Produktes mit einer Taste
>
Eine Tasse unter den Kaffeeauslauf stellen.
Ein Espresso/ein großer Espresso
>
Um einen Espresso auszugeben, die Taste ESPRESSO drücken.
>
Um hingegen einen großen Espresso auszugeben, die Taste ESPRESSO LUNGO drücken.
Nach dem Vorbrühzyklus beginnt der Kaffee aus dem Kaffeeauslauf zu ießen.
Die Kaffeeausgabe erfolgt bis zum Erreichen einer voreingestellten Menge. Sie kann jedoch auch
durch Druck der Taste OK vorzeitig abgebrochen werden.
Nach Abschluss der Produktausgabe kehrt das Gerät zum Hauptmenü zurück.
6.1.3 Ausgabe von zwei Produkten mit einer Taste (nur bei der Verwendung von Kaffeebohnen
möglich)
>
Zwei Tassen unter den Kaffeeauslauf stellen.
Zwei Espresso/zwei große Espresso
>
Um zwei Espresso auszugeben, die Taste ESPRESSO zweimal drücken.
>
2X
2X
Um hingegen zwei große Espresso auszugeben, die Taste ESPRESSO LUNGO zweimal drücken.
Nach dem Vorbrühzyklus beginnt der Kaffee aus dem Kaffeeauslauf zu ießen.
Das Gerät führt zwei Mahlzyklen nacheinander aus.
Die Kaffeeausgabe erfolgt bis zum Erreichen einer voreingestellten Menge. Sie kann jedoch auch
durch Druck der Taste OK vorzeitig abgebrochen werden.
Nach Abschluss der Produktausgabe kehrt das Gerät zum Hauptmenü zurück.
6.1.4 Einstellung Kaffeemenge in der Tasse während der Zubereitung
Bei diesem Gerät kann die ausgegebene Produktmenge je nach Geschmackspräferenz
und Tassengröße eingestellt werden. Mit dieser Funktion kann die Default-Einstellung der
ausgegebenen Produktmenge in der Tasse geändert werden. Für ein stärkeres Aroma wird die
Ausgabemenge reduziert. Das Gerät für einen Espresso/großen Espresso vorbereiten und eine
Tasse unter den Kaffeeauslauf stellen.
Tassenmenge Espresso/großer Espresso
>
Um die Kaffeemenge des Espresso einzustellen, wird die Taste ESPRESSO gedrückt gehalten, bis
M
E
M
O
das Symbol MEMO angezeigt wird. Dann die Taste loslassen.
>
Um hingegen die Kaffeemenge des großen Espresso einzustellen, wird die Taste ESPRESSO
LUNGO gedrückt gehalten, bis das Symbol MEMO angezeigt wird. Dann die Taste loslassen.
Das Gerät bendet sich in der Phase der Programmierung und beginnt die Ausgabe des
angewählten Produkts.
>
Die Taste OK drücken, sobald die gewünschte Menge erreicht wird.
M
E
M
O
Nun ist die Taste programmiert. Jedes Mal, wenn die Taste gedrückt wird, gibt das Gerät die
soeben eingestellte Menge aus. Nach Abschluss der Produktausgabe kehr t das Gerät zum
Hauptmenü zurück.
6.2 Milchaufschäumer
>
>
>
>
Im vorliegenden Kapitel wird die Benutzung des Milchaufschäumers für die Zubereitung von
aufgeschäumter Milch erläutert. Wird das Gerät zum ersten Mal benutzt, ist es sorgfältig zu
reinigen, wie im Kapitel “7.4.1 Reinigungszyklus des Milchaufschäumers” beschrieben.
Verbrennungsgefahr! Beim Start der Produktausgabe können heiße Wasserspritzer oder Dampf
austreten. Der Milchaufschäumer kann hohe Temperaturen erreichen. Keinesfalls direkt mit den
Händen berühren. Ausschließlich den speziellen Schutzgriff benutzen.
Reinigung des Wassersystems
Sicherstellen, dass der klassische Milchaufschäumer installiert ist.
Die Taste STEAM drücken, um für einige Sekunden Dampf auszugeben.
Um die Ausgabe abzubrechen, die Taste OK drücken.
Einsetzen
Den Milchaufschäumer in die Aufnahme der Dampfdüse einsetzen, bis er in der korrekten
Position einrastet.
DEUTSCH
9
Page 66

Verbrennungsgefahr! Wurde das Gerät kürzlich benutzt, kann die Dampfdüse hohe
Temperaturen aufweisen.
Den Gummischutz auf der Dampfdüse nicht über die markierte Aufnahme hinausschieben.
Im diesem Falle besteht die Möglichkeit, dass der Milchaufschäumer nicht korrekt funktionier t.
Abnahme
>
Den Milchaufschäumer herausziehen, um ihn von der Dampfdüse abzunehmen.
6.3 Zubereitung von Getränken mit Milch und Kaffee
Für einen Cappuccino von guter Qualität sollte kalte Milch (~5°C / 41°F) mit einem
Proteingehalt von mindestens 3% verwendet werden. Je nach persönlicher Vorliebe kann
sowohl Vollmilch wie entrahmte Milch, Sojamilch oder laktosefreie Milch verwendet werden.
6.3.1 Ausgabe eines Milchgetränks
>
Einen Behälter zu 1/3 mit kalter Milch füllen.
>
Den Milchaufschäumer in die Milch eintauchen.
Verbrennungsgefahr! Beim Start der Produktausgabe können Milchspritzer oder Dampf
austreten.
Der Milchaufschäumer muss installiert sein.
Eine aufgeschäumte Milch
>
Die Taste STEAM drücken, um die Dampfausgabe zu beginnen.
Die erforderliche Vorheizzeit abwarten.
>
Die Milch aufschäumen, indem mit dem Behälter leicht kreisende Bewegungen nach oben und
nach unten ausgeführt werden.
>
Erreicht der Milchschaum die gewünschte Konsistenz, die Taste OK drücken, um die
Dampfausgabe abzubrechen. Nach einigen Sekunden stoppt das Gerät die Ausgabe vollständig.
Das Gerät stoppt die Ausgabe automatisch, wenn für einen Zeitraum von 3 Minuten keine Taste gedrückt wird.
Die Ausgabe von Kaffee oder Heißwasser ist unverzüglich möglich.
>
Für die Zubereitung eines Cappuccino wird ein Espresso oder ein großer Espresso ausgegeben,
wie in Kapitel “6.1 Zubereitung von Getränken mit Kaffee” beschrieben.
Nach Abschluss des Vorgangs muss eine kleine Menge Heißwasser in einen Behälter ausgegeben
werden, wie im Kapitel “7.4.1 Reinigungszyklus des Milchaufschäumers” beschrieben.
6.4 Getränke mit Heißwasser
6.4.1 Heißwasserausgabe
>
Sicherstellen, dass der klassische Milchaufschäumer installiert ist.
>
Einen Behälter unter den Milchaufschäumer stellen.
Verbrennungsgefahr! Beim Start der Produktausgabe können heiße Wasserspritzer oder Dampf
austreten. Die Dampfdüse kann hohe Temperaturen erreichen. Die Dampfdüse keinesfalls
direkt mit den Händen berühren. Ausschließlich den speziellen Schutzgriff benutzen.
>
Die Taste HOT WATER drücken, um Heißwasser auszugeben. Die erforderliche Vorheizzeit
abwarten. Das Gerät startet die Ausgabe von Heißwasser.
Die gewünschte Menge Heißwasser ausgeben.
>
Um die Ausgabe abzubrechen, die Taste OK drücken. Nach Abschluss der Produktausgabe kehrt
das Gerät zum Hauptmenü zurück.
7. Reinigung und Pege
Die regelmäßige Reinigung und Pege des Geräts sind von wesentlicher Bedeutung für
die Verlängerung des Betriebslebens desselben. Werden diese nicht beachtet, so treten
Betriebsstörungen beim Gerät auf. Dieses Kapitel beschreibt in detaillierter Weise, welche
Arbeitsvorgänge wie oft auszuführen sind.
Das Kapitel “3. Sicherheit” sollte gelesen werden.
Alle Reinigungsvorgänge dürfen nur dann ausgeführt werden, wenn das Gerät abgekühlt ist.
Für die Reinigung des Geräts sollte ein weiches feuchtes Tuch verwendet werden: Keinen Alkohol,
Lösungsmittel und/oder scheuernde Produkte verwenden. In der Geschirrspülmaschine dürfen ausschließlich
der Tassenabstellrost und die im Abschnitt “7.4.2 Wöchentliche Reinigung der Teile des Milchaufschäumers”
genannten Teile gereinigt werden. Alle anderen Teile müssen mit lauwarmem Wasser gereinigt werden.
Schäden oder unsachgemäße Verwendung durch Reinigung und Pege sind NICHT von der
Garantie gedeckt.
DEUTSCH
10
Page 67

Wartungsplan Gerät Wassertank Kaffeefach Brühgruppe
y
PUSH
N
Bei Bedarf Kapitel Nr.
Wöchentlich Kapitel Nr.
Monatlich Kapitel Nr.
7.1.1 ; 7.5 7.3.1 7.4.1
7.1.2 7.2.1 7.4.2
7.3.2 7.2.2 ; 7.2.3
7.1 Reinigung des Geräts
7.1.1 Reinigung des Geräts bei Bedarf
Wenn das Symbol ‘Kaffeesatzbehälter voll’ angezeigt wird, ist wie folgt vorzugehen.
Verbrennungsgefahr! Bevor das Gerät gereinigt wird, sollte überprüft werden, ob das Gerät, der
rotes
Displa
7.1.2 Wöchentliche Reinigung des Geräts
Kaffeesatz und das Wasser im Tank abgekühlt sind.
Diese Vorgänge müssen immer dann vorgenommen werden, wenn der Anzeiger ‘Abtropfschale
voll’ angehoben wird. Wird der Anzeiger vollständig angehoben, so bedeutet dies, dass die
Schale voll ist. Gehen Sie bei der Abnahme vorsichtig vor.
Bei eingeschaltetem Gerät den Kaffeesatzbehälter und die Abtropfschale entleeren und reinigen.
Ist das Gerät ausgeschaltet, wird das Signal ‘Kaffeesatzbehälter voll’ bei der erneuten Einschaltung
immer noch angezeigt. Nehmen Sie hierzu auf das Kapitel “9.4 Tabelle Problemlösung” Bezug.
>
Die seitlichen Tasten drücken.
>
Die Abtropfschale abnehmen.
>
Den Kaffeesatzbehälter abnehmen und leeren.
>
Die Abtropfschale leeren und auswaschen.
>
Den Kaffeesatzbehälter in die Abtropfschale einsetzen und diese wieder in das Gerät einsetzen.
Weitere Wartungsvorgänge dürfen erst dann ausgeführt werden, wenn das Gerät ausgeschaltet
und vom Stromnetz abgenommen wurde.
>
Hierfür sind die im Kapitel “7.1.1 Reinigung des Geräts bei Bedarf” beschriebenen Schritte
auszuführen, bis die Aufnahme der Abtropfschale erreicht wird. Dann die Aufnahme der
Abtropfschale reinigen.
>
Die Teile wieder einsetzen.
Milchaufschäumer
7.2 Reinigung der Brühgruppe
7.2.1 Wöchentlicher Reinigungszyklus der Brühgruppe
Die Brühgruppe muss mindestens einmal pro Woche gereinigt werden.
Die wöchentliche Reinigung der Brühgruppe besteht aus einem Reinigungszyklus mit Wasser
(sorgfältige Spülung).
Abnahme und Reinigung
>
Das Gerät mit der Taste STAND-BY ausschalten. Warten, bis die Taste STAND-BY beginnt zu
blinken und den Stecker des Netzkabels abnehmen.
>
Die seitlichen Tasten drücken.
>
SH
U
P
N
Die Abtropfschale abnehmen.
>
Die Servicetür öffnen.
>
Abnahme der Brühgruppe:
•
Den Daumen auf die Taste PUSH und die anderen Finger um den Griff legen.
•
Die Taste PUSH drücken und am Griff ziehen.
>
Waagrecht herausnehmen, ohne zu drehen.
DEUTSCH
11
Page 68

>
N
PUSH
Die Kaffeezufuhr mit dem geeigneten Reinigungsutensil aus dem Lieferumfang des Geräts
sorgfältig reinigen.
>
Den Kaffeeauffangbehälter abnehmen und sorgfältig auswaschen.
>
Die Brühgruppe mit lauwarmem Wasser reinigen und den oberen Filter sorgfältig reinigen.
Für die Reinigung der Brühgruppe dürfen keine Reinigungsmittel oder Seife verwendet werden.
>
Die Brühgruppe vollständig an der Luft trocknen lassen.
>
Der Innenbereich des Geräts sollte unter Verwendung eines weichen, leicht mit Wasser
PUSH
N
getränkten Tuchs sorgfältig gereinigt werden.
Erneute Montage
>
Den Kaffeeauffangbehälter in seine Aufnahme einsetzen und überprüfen, ob er korrekt
PUSH
N
positioniert wurde.
Wurde der Kaffeeauffangbehälter nicht korrekt positioniert, so ist es eventuell nicht möglich, die
Brühgruppe in das Gerät einzusetzen.
>
Sicherstellen, dass sich die Brühgruppe in der Ruheposition bendet; die zwei Bezugspunkte
müssen übereinstimmen.
>
Im gegenteiligen Falle den Hebel vorsichtig nach unten drücken, bis er die Basis der Brühgruppe
berührt und die beiden Bezugspunkte übereinstimmen.
PUSH
N
>
Die Taste PUSH kräftig drücken.
PUSH
N
>
Sicherstellen, dass sich der Haken für die Sperre der Brühgruppe in der korrekten Position
bendet.
>
Wenn sich dieser noch in der unteren Position bendet, ist er bis zum ordnungsgemäßen
Einhaken nach oben zu ziehen.
>
Die Brühgruppe wieder in die Aufnahme einsetzen, bis sie einrastet. Dabei nicht die Taste PUSH
drücken.
>
Den Kaffeesatzbehälter mit der Abtropfschale wieder in das Gerät einsetzen und die Servicetür
schließen.
7.2.2 Monatliche Schmierung der Brühgruppe (ein Reinigungszyklus unter Verwendung eines
Schmiermittels)
Die Brühgruppe sollte nach jeweils 500 Tassen Kaffee oder mindestens einmal monatlich
geschmiert werden. Das für die Schmierung der Brühgruppe verwendete Fett ist separat
erhältlich. Weitere Details werden im Kapitel “10.1 Pege-Produkte” aufgeführt. Die Phase
“Abnahme und Reinigung” des Vorgangs “7.2.1 Wöchentlicher Reinigungszyklus der Brühgruppe”
vornehmen.
DEUTSCH
12
Page 69

>
MAX
Das Fett gleichmäßig auf beide seitlichen Führungen auftragen.
PUSH
N
>
Auch die Welle schmieren.
Die Phase “Erneute Montage” des Vorgangs “7.2.1 Wöchentlicher Reinigungszyklus der Brühgruppe”
PUSH
N
vornehmen.
7.2.3 Monatliche Entfettung der Brühgruppe (ein Reinigungszyklus unter Verwendung eines Entfetters)
Der Reinigungszyklus mit den Kaffeefettlöser-Tabletten sollte nach jeweils 500 Tassen Kaffee
oder mindestens einmal monatlich ausgeführt werden. Mit diesem Vorgang wird die Wartung
der Brühgruppe abgeschlossen. Die Kaffeefettlöser-Tabletten sind separat erhältlich. Weitere
Details werden im Kapitel “10.1 Pege-Produkte” aufgeführt.
MAX
CALC
CLEAN
Die Kaffeefettlöser-Tabletten sind ausschließlich für die Reinigung bestimmt, sie haben keinerlei
entkalkende Funktion. Für das Entkalken sollte der Entkalker Gaggia verwendet werden. Dabei
ist der im Kapitel “7.5. Entkalkungszyklus” beschriebene Vorgang auszuführen.
>
Einen großen Behälter (1,5 l) unter die Auslauftülle stellen.
Verbrennungsgefahr! Es können heiße Wasserspritzer oder Dampf austreten.
>
Sicherstellen, dass der Wassertank bis zum Füllstand MAX mit frischem Wasser gefüllt wird.
Keinen vorgemahlenen Kaffee in das Fach für vorgemahlenen Kaffee einfüllen.
>
Eine Kaffeefettlöser-Tablette in das Fach für den vorgemahlenen Kaffee einwerfen.
>
Die Funktion Ausgabe Vorgemahlener Kaffee durch Druck der Taste AROMA STRENGTH
anwählen. Das Gerät ist nun ausgabebereit.
>
Die Taste ESPRESSO LUNGO drücken. Das Gerät startet die Ausgabe von Wasser über den
Kaffeeauslauf.
>
Sobald die Mitte der Anzeige des Fortschrittbalkens erreicht ist, den Hauptschalter in die
Position OFF drehen, um das Gerät auszuschalten.
Das Entfettungsmittel für 15 Minuten einwirken lassen.
>
Den Hauptschalter auf die Position ON stellen, um die Maschine einzuschalten.
>
Die Taste STAND-BY drücken. Abwarten, bis der “5.2.2 Automatische Spülzyklus/
Selbstreinigungszyklus” beendet ist.
Einen vollständigen Zyklus gemäß “7.2.1 Wöchentlicher Reinigungszyklus der Brühgruppe” vornehmen.
Das Gerät ist nun ausgabebereit.
7.3 Reinigung der Behälter
7.3.1 Reinigung des Wassertanks
>
Den Wasserlter aus dem Tank herausnehmen und unter frischem Wasser reinigen.
>
Den Wasserlter wieder in seine Aufnahme einsetzen, indem er leicht angedrückt und gedreht wird.
>
Den Wassertank mit frischem Wasser füllen.
7.3.2 Monatliche Reinigung des Kaffeefachs
>
Einmal monatlich sollte der Kaffeebohnenbehälter geleert und mit einem feuchten Tuch
gereinigt werden.
>
Dann wieder mit Kaffeebohnen auffüllen.
>
Soweit erforderlich kann das Fach für vorgemahlenen Kaffee mit einem trockenen Tuch gereinigt
werden.
DEUTSCH
13
Page 70

7.4 Reinigung des Milchaufschäumers
CALC
CLEAN
7.4.1 Reinigungszyklus des Milchaufschäumers
Der Milchaufschäumer muss nach jeder Benutzung gereinigt werden, um die Hygiene und die
Zubereitung der aufgeschäumten Milch mit perfekter Konsistenz zu gewährleisten.
Der Milchaufschäumer muss installiert sein.
>
Die Taste STEAM drücken, um für einige Sekunden Dampf auszugeben.
>
Um die Ausgabe abzubrechen, die Taste OK drücken.
Verbrennungsgefahr! Die Dampfdüse und der Milchaufschäumer können hohe Temperaturen
aufweisen.
>
Den Milchaufschäumer entfernen und unter lauwarmem Wasser reinigen.
7.4.2 Wöchentliche Reinigung der Teile des Milchaufschäumers
Die wöchentliche Reinigung ist gründlicher.
1.
2
1
Milchaufschäumer
2.
Gummischutz
Verbrennungsgefahr! Wurde das Gerät kürzlich benutzt, können die Dampfdüse und der
Milchaufschäumer hohe Temperaturen aufweisen.
>
Den Milchaufschäumer (1) entfernen und unter lauwarmem Wasser reinigen.
>
Den Gummischutz (2) entfernen und unter frischem Wasser reinigen.
>
Die Dampfdüse mit einem feuchten Tuch reinigen.
>
Die oben genannten Vorgänge in umgekehrter Reihenfolge ausführen und den Milchaufschäumer
wieder zusammenbauen.
Den Gummischutz auf der Dampfdüse nicht über die markierte Aufnahme hinausschieben.
Im diesem Falle besteht die Möglichkeit, dass der Milchaufschäumer nicht korrekt funktionier t.
7.5 Entkalkungszyklus
START
CALC
CLEAN
Wird das Symbol CALC CLEAN angezeigt, so muss das Entkalken des Geräts vorgenommen
werden. Diesen Vorgang nicht auszuführen, führt dazu, dass das Gerät nicht mehr ordnungsgemäß
funktioniert. Eine entsprechende Reparatur ist NICHT durch die Garantie gedeckt.
Der Entkalkungszyklus dauert ca. 30 Minuten. Er besteht aus einem Reinigungszyklus mit dem
Gaggia Entkalker, gefolgt von einem Spülzyklus.
Die Brühgruppe während dem Vorgang des Entkalkens nicht abnehmen.
Das Entkalkungsmittel und die bis zum Abschluss des Entkalkungszyklus ausgegebenen Produkte
dürfen keinesfalls getrunken werden.
Es sollte ausschließlich das Entkalkungsmittel von Gaggia verwendet werden. Die Verwendung anderer
Produkte kann zu Schäden am Gerät und zu Rückständen im Wasser führen. Das Entkalkungsmittel
Gaggia ist separat erhältlich. Weitere Details werden im Kapitel “10.1 Pege-Produkte” aufgeführt.
Vorbereitung
>
Die seitlichen Tasten drücken.
>
Die Abtropfschale abnehmen.
>
Den Kaffeesatzbehälter abnehmen und leeren.
>
Die Abtropfschale leeren und auswaschen.
>
Alle Teile wieder anbringen.
>
Einen großen Behälter (1,5 l) unter die Auslauftülle stellen.
>
Soweit dieser installiert ist, den Milchaufschäumer von der Dampfdüse abnehmen.
14
MAX
CALC
CLEAN
DEUTSCH
Entkalken
Ist der Wasserlter INTENZA+ vorhanden, so wird dieser Filter aus dem Wassertank
herausgezogen und durch den kleine weiße Original-Filter ersetzt.
>
Das gesamte Entkalkungsmittel in den Wassertank einfüllen.
>
Den Wassertank bis zum Füllstand CALC CLEAN mit frischem Wasser füllen.
>
Den Wassertank wieder in das Gerät einsetzen.
Page 71

>
y
MAX
Die Taste MENU drücken und das Menü überiegen, bis die Funktion Entkalken angezeigt wird.
START
CALC
CLEAN
>
Die Taste OK drücken, um die Funktion Entkalken anzuwählen.
>
Die Taste OK drücken, um den Entkalkungszyklus zu starten. Das Gerät startet die Ausgabe des
Entkalkungsmittels in regelmäßigen Intervallen. Der Balken zeigt den Fortschritt des Zyklus an.
Der Zyklus kann durch Druck der Taste ESC unterbrochen werden. Um den Zyklus fortzusetzen,
wird die Taste OK gedrückt. Dadurch kann der Behälter entleert oder das Gerät für einen kurzen
Zeitraum unbeaufsichtigt gelassen werden.
Das Wasser ausgeben, bis der Tank leer ist.
CALC
rotes
Displa
CLEAN
>
Den Wassertank abnehmen und ausspülen.
>
Bis zum Füllstand MAX mit frischem Wasser füllen und wieder ins Gerät einsetzen.
>
Den Behälter leeren und wieder einsetzen.
Die gesamte Abfolge der Vorgänge ausführen, die im Abschnitt “Vorbereitung” beschrieben werden,
MAX
CALC
CLEAN
dann die “Spülphase” vornehmen.
Spülphase
>
Die Taste OK drücken, um den Spülzyklus zu starten.
CALC
CLEAN
Der Zyklus kann durch Druck der Taste ESC unterbrochen werden. Um den Zyklus fortzusetzen,
wird die Taste OK gedrückt. Dadurch kann der Behälter entleert oder das Gerät für einen kurzen
Zeitraum unbeaufsichtigt gelassen werden.
Wird der Wassertank nicht bis zum Füllstand MAX gefüllt, besteht die Möglichkeit, dass das Gerät
einen weiteren Spülzyklus anfordert. In diesem Fall den Wassertank bis zum Füllstand MAX füllen,
wieder in das Gerät einsetzen und die “Spülphase” wiederholen.
Das Produkt ausgeben, bis der Vorgang automatisch beendet wird.
>
Die Taste OK drücken, um den Entkalkungszyklus zu verlassen. Das Gerät führt das Aufheizen und
die automatische Spülung aus.
>
Den Behälter mit dem ausgegebenen Wasser entfernen und leeren.
CALC CLEAN
Die “7.4.2 Wöchentliche Reinigung der Teile des Milchaufschäumers” ausführen.
Den Zyklus aus “7.2.1 Wöchentlicher Reinigungszyklus der Brühgruppe” ausführen.
Soweit im Lieferumfang enthalten, den kleinen weißen Filter entfernen und durch den Filter
INTENZA+ ersetzen.
Abschließend schaltet das Gerät zurück in das Hauptmenü.
Den Milchaufschäumer wieder auf die Dampfdüse setzen.
Es wird empfohlen, einen Zyklus gemäß “5.2.3 Manueller Spülzyklus” auszuführen.
7.5.1 Unterbrechung des Entkalkungszyklus
Sobald der Entkalkungszyklus begonnen wird, muss dieser vollständig durchlaufen werden. Es ist zu
vermeiden, dass die Maschine ausgeschaltet wird.
>
Sollte während des Zyklus eine Blockierung auftreten, so kann dieser durch Druck der Taste
START
CALC
CLEAN
STAND-BY verlassen werden.
>
Sollte dies auftreten, oder im Falle eines Stromausfalls oder einer unbeabsichtigten Trennung
des Netzkabels, den Wassertank leeren und sorgfältig ausspülen. Dann erneut bis zum Füllstand
CALC CLEAN füllen. Vor der Ausgabe von Produkten jeder Ar t sind die Hinweise im Kapitel
“5.2.3 Manueller Spülzyklus” umzusetzen. Wurde der Zyklus nicht vollständig abgeschlossen,
fordert das Gerät zur Ausführung eines weiteren Entkalkungszyklus auf. Dieser sollte so bald
wie möglich ausgeführt werden.
8. Default-Einstellungen
8.1 Liste der Default-Einstellungen
Display Einstellung We r t Beschreibung
MAX
MED
Kaffeetemperatur Durchschn. Einstellung Brühtemperatur Kaffee.
MIN
COFFEE
TEMP
DEUTSCH
15
Page 72

Display Einstellung We r t Beschreibung
180’
STANDBY
60’
Standby-Zeit 15 Minuten Einstellung Standby-Zeit.
30’
15’
FILTER
DISPLAY
CONTRAST
WATER
HARDNESS
WATER
FILTER
4
3
2
1
ON
OFF
FILTER
Kontrast Durchschn. Einstellung Displaykontrast.
Wasserhärte
INTENZA+
Wasserlter
4 (sehr hartes
Wasser)
OFF (nicht
installiert)
Einstellung Wasserhärte. Weitere Details werden
im Kapitel “5.3.1 Messen und Programmierung der
Wasserhärte” aufgeführt.
Einstellungen des Filters INTENZA+. Weitere Details
werden im Kapitel “10.2 INTENZA+ Wasserlter”
aufgeführt.
8.2 Änderung der Default-Einstellungen
Über das Programmmenü können die Funktionen des Geräts mit persönlichen Einstellungen
programmiert werden. Hierfür muss das Gerät eingeschaltet und betriebsbereit sein.
Im Bedarfsfall ist auf das Kapitel “8.1 Liste der Default-Einstellungen” Bezug zu nehmen.
>
Die Taste MENU drücken und das Menü überiegen, bis die Funktion angewählt werden kann,
DISPLAY
CONTRAST
deren Einstellungen geändert werden sollen.
Hinweis: Die seitlichen Abbildungen beziehen sich auf eine Musterfunktion.
>
Die Taste OK drücken, um die gewünschte Funktion anzuwählen.
Nach der Anwahl:
>
Die Taste UP drücken, um den Wert zu erhöhen.
>
Die Taste DOWN drücken, um den Wert zu reduzieren.
>
Die Taste OK zur Bestätigung der Änderung drücken.
Wurde die Änderung übernommen, wird die Meldung OK angezeigt.
Die geänderten, jedoch noch nicht bestätigten Werte werden nicht gespeichert.
>
Die Taste ESC drücken, um die Programmierungsfunktion zu verlassen.
Das Gerät verlässt das Programmmenü automatisch, wenn innerhalb von 3 Minuten keinerlei
Taste gedrückt wird.
8.3 Zurücksetzen auf die Default-Einstellungen
Über das Programmmenü können die Default-Einstellungen wiederhergestellt werden. Hierfür
muss das Gerät eingeschaltet und betriebsbereit sein.
>
Die Taste MENU drücken und das Menü überiegen, bis unter allen Funktionen die Funktion
RESET angewählt werden kann.
>
RESET
Die Taste OK drücken, um die Funktion anzuwählen.
Wurde die Änderung übernommen, wird die Meldung OK angezeigt.
>
Die Taste ESC drücken, um die Programmierungsfunktion zu verlassen.
Das Gerät verlässt das Programmmenü automatisch, wenn innerhalb von 3 Minuten keinerlei
Taste gedrückt wird.
9. Problemlösung
Im vorliegenden Kapitel werden die häugsten Probleme, die auf Ihrem Gerät auftreten können,
zusammengefasst.
Helfen Ihnen die nachfolgend aufgeführten Informationen nicht bei der Behebung des Problems,
so besuchen Sie die Seite FAQ auf der Webseite www.gaggia.com oder wenden Sie sich an die
Hotline Gaggia. Die jeweiligen Kontaktdaten werden im separat gelieferten Garantieheft oder
unter der Adresse www.gaggia.com genannt.
Das Gerät ist mit einem Farbsystem ausgestattet, das die Interpretation der Displaysignale
vereinfacht. Der Farbcode basiert auf dem Ampelprinzip.
9.1 Zusammenfassung Alarmsignale: rotes Display
Display Beschreibung Vorgehensweise
Die Abtropfschale und den
Kaffeesatzbehälter wieder in das Gerät
einsetzen und die Servicetür schließen.
Das Kapitel “7.1.1 Reinigung des Geräts bei Bedarf ” lesen,
um die Teile wieder korrekt einzusetzen.
16
DEUTSCH
Page 73

Display Beschreibung Vorgehensweise
y
Kaffeebohnenbehälter leer.
Die entsprechenden Hinweise im Kapitel “4.3 Füllung des
Kaffeebohnenbehälters” beachten.
Brühgruppe nicht eingesetzt.
Kaffeesatzbehälter voll.
Wassertank leer.
Das Gerät funktioniert nicht.
XX
9.2 Zusammenfassung Hinweissignale
Display Beschreibung Vorgehensweise
Das Gerät ist bereit für die Ausgabe von
Produkten: Kaffeebohnenbehälter leer.
Das Gerät ist bereit für die Ausgabe von
Produkten: Den Wasserlter INTENZA+
austauschen.
Das Gerät wartet auf den Star t der
Entlüftung des Wassersystems.
START
CALC
CLEAN
Das Gerät muss entkalkt werden.
Das Gerät heizt auf. Warten.
Die Servicetür schließen. Das Gerät aus- und wieder
einschalten. Die Brühgruppe kehrt automatisch in die
Startposition zurück.
Den Kaffeesatzbehälter leeren, wie im Kapitel “7.1.1
Reinigung des Geräts bei Bedarf ” beschrieben.
Die entsprechenden Hinweise im Kapitel “4.2 Füllung des
Wassertanks” beachten.
Die entsprechenden Hinweise im Kapitel “9.3 Das Gerät
funktioniert nicht” beachten.
Die entsprechenden Hinweise im Kapitel “4.3 Füllung des
Kaffeebohnenbehälters” beachten.
Die entsprechenden Hinweise im Kapitel “10.2.2
Austausch INTENZA+” beachten.
Die entsprechenden Hinweise im Kapitel “5.2.1 Entlüftung
des Wassersystems” beachten.
Die entsprechenden Hinweise im Kapitel “7.5
Entkalkungszyklus” beachten.
Das Gerät führt die Spülung durch. Warten.
Rückstellung der Brühgruppe. Warten.
9.3 Das Gerät funktioniert nicht
Wurde das Alarmsignal Maschinenalarm ausgelöst, wird der Fehlercode in der unteren rechten
Ecke des Displays angezeigt.
rotes
Displa
Fehler-
code
1
Mahlwerk blockiert Kaffeezufuhr verstopft.
XX
Verhalten Ursache Vorgehensweise
Nehmen Sie hierzu auf die folgende Tabelle Bezug.
Die Kaffeezufuhr gründlich reinigen, wie im Kapitel
“7.2.1 Wöchentlicher Reinigungszyklus der Brühgruppe”
beschrieben.
DEUTSCH
17
Page 74

Fehler-
code
3 - 4
Verhalten Ursache Vorgehensweise
Brühgruppe gesperr t,
sie kann nicht
herausgenommen
werden
Fehler im
5
Wassersystem
Die Brühgruppe wurde falsch eingesetzt.
Luft im Wassersystem vorhanden.
Für alle anderen Fehlercodes:
>
Das Gerät aus- und nach 30 Sekunden wieder einschalten.
>
2 oder 3 Mal versuchen.
Kann das Gerät nicht gestartet werden, wenden Sie sich an die Hotline von Gaggia und geben
Sie dabei den auf dem Display angezeigten Fehlercode an. Die jeweiligen Kontaktdaten werden
im separat gelieferten Garantieheft oder unter der Adresse www.gaggia.com genannt.
Die Servicetür schließen. Das Gerät aus- und wieder
einschalten. Auf das Signal ‘Bereit für Ausgabe’ warten und
dann die Brühgruppe abnehmen.
Den Wassertank einige Male entfernen und wieder
einsetzen. Dabei darauf achten, dass er korrekt eingesetzt
wird. Überprüfen, ob die Aufnahme des Wassertanks
sauber ist.
9.4 Tabelle Problemlösung
Verhalten Ursache Vorgehensweise
Das Gerät schaltet sich nicht
ein.
Das Gerät bendet sich im
Demo-Modus.
Die Abtropfschale füllt sich
schnell.
Das Signal ‘Kaffeesatzbehälter
voll’ wird immer noch
angezeigt, auch wenn dieser
geleert wurde oder sich
nur eine geringe Menge
Kaffeesatz darin bendet.
Die Brühgruppe kann nicht
herausgenommen werden.
Die Brühgruppe kann nicht
eingesetzt werden.
Der Kaffee hat wenig Crema
oder ist wässrig.
Der Kaffee tritt neben dem
Kaffeeauslauf aus.
Das Gerät ist nicht angeschlossen oder
der Hauptschalter bendet sich in der
Position OFF.
Die Taste STAND-BY wurde für mehr
als 8 Sekunden gedrückt.
Um bei jeder Ausgabe
Kaffee zu gewährleisten, spült das
Gerät und heizt auf, indem es Wasser
in die Abtropfschale ablässt.
Der Kaffeesatzbehälter wurde bei
ausgeschaltetem Gerät geleert.
Die Brühgruppe wurde falsch
eingesetzt.
Den Kaffeesatzbehälter bendet sich in
der Aufnahme.
Die Brühgruppe bendet sich nicht in
der Ruheposition.
Der Getriebemotor bendet sich nicht
in der korrekten Position.
Die Mahlwerke sind auf einen groben
Mahlgrad eingestellt.
Die Kaffeemischung ist nicht geeignet,
der Kaffee ist nicht röstfrisch oder das
Kaffeepulver wurde zu grob gemahlen.
Das Gerät muss die Selbsteinstellung
ausführen.
Der Kaffeeauslauf ist verstopft. Den Kaffeeauslauf und seine Öffnungen mit einem
einen
perfekten
Das Gerät anschließen und den Hauptschalter in die
Position ON drehen.
Das Gerät mit dem Hauptschalter auf OFF und auf ON
stellen.
Die Abtropfschale leeren. Um zu vermeiden, dass das
Spülwasser in die Abtropfschale läuft, eine Tasse unter
die Auslauftüllen stellen.
Nach dem Leeren der Abtropfschale und dem
Kaffeesatzbehälter abwarten, bis das Signal ‘Servicetür
schließen’ angezeigt wird. Die Teile wieder einsetzen.
Die Servicetür schließen. Das Gerät aus- und wieder
einschalten. Auf das Signal ‘Bereit für Ausgabe’ warten
und dann die Brühgruppe abnehmen.
Den Kaffeesatzbehälter abnehmen, bevor die
Brühgruppe entfernt wird.
Sicherstellen, dass sich die Brühgruppe in der
Ruheposition bendet, wie im Kapitel “7.2.1
Wöchentlicher Reinigungszyklus der Brühgruppe” “Erneute
Montage” beschrieben.
Die Abtropfschale und den Kaffeesatzbehälter wieder
in ihre Aufnahmen einsetzen. Die Ser vicetür schließen.
Das Gerät ohne Brühgruppe einschalten. Der
Getriebemotor fährt in die richtige Position zurück.
Das Gerät ausschalten und die Brühgruppe einsetzen,
wie im Kapitel “7.2.1 Wöchentlicher Reinigungszyklus der
Brühgruppe” “Erneute Montage” beschrieben.
Den Mahlgrad des Mahlwerks einstellen, wie im Kapitel
“5.3.3 Einstellung des Keramikmahlwerks” beschrieben.
Die Kaffeemischung wechseln oder den Mahlgrad des
Mahlwerks einstellen, wie im Kapitel “5.3.3 Einstellung
des Keramikmahlwerks” beschrieben.
Einige Tassen Kaffee ausgeben.
Zahnstocher reinigen.
18
DEUTSCH
Page 75

Verhalten Ursache Vorgehensweise
Der Kaffee ist nicht heiß
genug.
Das Gerät führt den
Mahlvorgang der
Kaffeebohnen aus, aber es
wird kein Kaffee ausgegeben.
Langsame Kaffeeausgabe. Der Kaffee ist zu fein gemahlen. Die Kaffeemischung wechseln oder den Mahlgrad
Das Gerät braucht zu lange
für das Aufheizen oder die
ausgegebene Wassermenge
ist ungenügend.
Die aufgeschäumte Milch ist
zu kalt.
Die Milch wird nicht
aufgeschäumt.
Die Tassen sind kalt. Die Tassen mit heißem Wasser vorwärmen.
Die Temperatur wurde nicht korrekt
eingestellt.
Das System des Geräts ist durch
Kalkablagerungen verstopft.
Wasser leer. Den Wassertank füllen und das System erneut entlüften,
Die Brühgruppe ist verschmutzt. Die Brühgruppe reinigen, wie im Kapitel “7.2.1
Das System ist nicht entlüftet. Das System entlüften, wie im Kapitel “5.2.1 Entlüftung
Der Kaffeeauslauf ist verschmutzt. Den Kaffeeauslauf und seine Öffnungen mit einem
Das Gerät muss die Selbsteinstellung
ausführen.
Das System ist nicht entlüftet. Das System entlüften, wie im Kapitel “5.2.1 Entlüftung
Die Brühgruppe ist verschmutzt. Die Brühgruppe reinigen, wie im Kapitel “7.2.1
Das Gerät muss die Selbsteinstellung
ausführen.
Das System des Geräts ist durch
Kalkablagerungen verstopft.
Die Tassen sind kalt. Die Tassen mit heißem Wasser vorwärmen.
Der Milchaufschäumer ist verschmutzt
oder nicht korrekt eingesetzt.
Die benutzte Milch eignet sich nicht für
die Aufschäumung.
Die Temperatur einstellen, wie im Kapitel “5.3.4
Einstellung der Brühtemperatur” beschrieben.
Das Gerät entkalken, wie im Kapitel “7.5
Entkalkungszyklus” beschrieben.
im Kapitel “5.2.1 Entlüftung des Wassersystems”
beschrieben.
Wöchentlicher Reinigungszyklus der Brühgruppe”
beschrieben.
des Wassersystems” beschrieben.
Zahnstocher reinigen.
Einige Tassen Kaffee ausgeben.
einstellen, wie im Kapitel “5.3.3 Einstellung des
Keramikmahlwerks” beschrieben.
des Wassersystems” beschrieben.
Wöchentlicher Reinigungszyklus der Brühgruppe”
beschrieben.
Einige Tassen Kaffee ausgeben.
Das Gerät entkalken, wie im Kapitel “7.5
Entkalkungszyklus” beschrieben.
Den Milchaufschäumer reinigen, wie im Kapitel “7.4.2
Wöchentliche Reinigung der Teile des Milchaufschäumers”
beschrieben, und in das Gerät einsetzen, wie im Kapitel
“6.2 Milchaufschäumer”, “Einsetzen” gezeigt.
Lesen Sie das Kapitel “6.3 Zubereitung von Getränken
mit Milch und Kaffee”.
10. Pege-Zubehör und Produkte
10.1 Pege-Produkte
Für die Reinigung und das Entkalken dürfen ausschließlich die Pege-Produkte von Gaggia
benutzt werden.
Sind die Pege-Produkte für das Gerät nicht erhältlich, so wenden Sie sich an die Hotline Gaggia
in Ihrem Land. Die jeweiligen Kontaktdaten werden im separat gelieferten Garantieheft oder
unter der Adresse www.gaggia.com genannt.
Produkt
•
Entkalkungsmittel
•
INTENZA+ Wasserlter Kartusche
•
Fett für Brühgruppe
•
Kaffeefettlöser-Tabletten
•
Reiniger Milchsystem
•
Wartungsset
PFLEGE-PRODUKTE
DEUTSCH
19
Page 76

10.2 INTENZA+ Wasserlter
A
B
C
Es wird empfohlen, den Wasserlter INTENZA+ zu installieren, der die Bildung von
Kalkablagerungen im Inneren des Geräts begrenzt und ein intensiveres Aroma des Kaffees
gewährleistet.
Das Wasser ist ein wesentliches Element bei der Zubereitung eines Kaffees. Aus diesem Grunde
ist es außerordentlich wichtig, dass das Wasser stets professionell geltert wird. Der Wasserlter
INTENZA+ beugt der Bildung von Mineralablagerungen vor und verbessert die Wasserqualität.
Er ist separat erhältlich.
10.2.1 Installation INTENZA+
>
Den kleinen weißen Filter aus dem Wassertank herausnehmen und an einem trockenen Ort
aufbewahren.
Filter-Einstellung
>
Den Wasserlter INTENZA+ aus der Verpackung herausnehmen und senkrecht (so dass
die Öffnung nach oben zeigt) in kaltes Wasser tauchen. Den Filter leicht an den Seiten
zusammendrücken, um die Luftblasen zu entfernen.
Für eine korrekte Verwendung des Filters muss die Wasserhärte gemessen werden. Dieser
Vorgang wird im Kapitel “5.3.1 Messen und Programmierung der Wasserhärte” beschrieben.
>
Der Wasserlter INTENZA+ muss gemäß den Testergebnissen auf der Basis des Filters
eingestellt werden:
Buchstabe auf dem Filter Wasserhärte Felder Teststreifen
>
Den Wasserlter INTENZA+ in den leeren Wassertank einsetzen.
>
So weit wie möglich nach unten drücken.
>
Den Wassertank mit frischem Wasser füllen und wieder in das Gerät einsetzen.
Das gesamte im Tank enthaltene Wasser ausgeben, wie im Kapitel “6.4.1 Heißwasserausgabe”
beschrieben.
>
Den Wassertank erneut auffüllen.
Einstellung des Geräts während der Installation
>
Die Taste MENU so oft drücken, bis die ‘Funktion INTENZA+ Filter’ angezeigt wird. Die DefaultEinstellung ist OFF (Filter nicht aktiv).
>
Die Taste UP drücken, um den Wert ON anzuwählen.
>
ON
OFF
FILTER
10.2.2 Austausch INTENZA+
FILTER
ON
OFF
FILTER
RESET
Die Taste OK zur Bestätigung der Änderung drücken.
Die geänderten, jedoch noch nicht bestätigten Werte werden nicht gespeichert.
Bei einem auf ON eingestellten Wert ist das Gerät nun entsprechend programmier t, um den
Benutzer auf die Notwendigkeit des Austauschs des Wasserlters INTENZA+ hinzuweisen.
Kein Symbol wird auf dem Display angezeigt, nachdem den Filter INTENZA+
aktiviert wird.
>
Die Taste ESC drücken, um die Programmierungsfunktion zu verlassen.
Das Gerät verlässt das Programmmenü automatisch, wenn innerhalb von 3 Minuten keinerlei
Taste gedrückt wird. Abschließend schaltet das Gerät zurück in das Hauptmenü.
Das Signal ‘Austausch INTENZA+ Wasserlter erforderlich’ wird angezeigt.
Den Austausch des Wasserlters INTENZA+ vornehmen, wie im Kapitel “10.2.1 Installation
INTENZA+” beschrieben. Dabei lediglich den Abschnitt “Filter-Einstellung” ausführen, und dann
wie folgt vorgehen.
Einstellung des Geräts während des Austauschs
>
Die Taste MENU so oft drücken, bis die ‘Funktion INTENZA+ Filter’ angezeigt wird. Die Wer t
steht auf ON (Filter aktiv).
A weiches Wasser 1 - 2
B har tes Wasser (Standard) 3
C sehr har tes Wasser 4
20
DEUTSCH
Page 77

>
A
B
C
Soll der Wasserlter INTENZA+ durch einen neuen Filter INTENZA+ ersetzt werden, wird
ON
OFF
FILTER
RESET
die Taste DOWN gedrückt, bis die Option RESET angewählt werden kann. Soll der Filter
INTENZA+ entfernt werden, ohne einen neuen Filter einzusetzen, wird die Option OFF
angewählt.
>
Die Taste OK zur Bestätigung der Änderung drücken.
Die geänderten, jedoch noch nicht bestätigten Werte werden nicht gespeichert.
Durch die Anwahl von RESET wird das Gerät für die Verwaltung eines neuen Wasserlters
INTENZA+ programmiert. Wird OFF angewählt, muss der weiße Filter aus dem Lieferumfang
wieder im Tank eingesetzt werden.
>
Die Taste ESC drücken, um die Programmierungsfunktion zu verlassen.
Das Gerät verlässt das Programmmenü automatisch, wenn innerhalb von 3 Minuten keinerlei
Taste gedrückt wird. Abschließend schaltet das Gerät zurück in das Hauptmenü.
11. Technische Eigenschaften
Der Hersteller behält sich das Recht vor, technische Änderungen am Produkt vorzunehmen.
Die voreingestellten Mengen sind lediglich richtungsweisend.
Beschreibung Wert
Gehäusematerial Thermoplastisches Material
Abmessungen (L x H x T) 221 x 340 x 430 mm
Gewicht 7,5 kg
Netzkabellänge 800 - 1200 mm
Bedienfeld Front
Tassengröße Bis 152 mm
Wassertank 1,8 Liter - herausnehmbar
Fassungsvermögen
Kaffeebohnenbehälter
Fassungsvermögen
Kaffeesatzbehälter
Pumpendruck 15 bar
Durchlauferhitzer Durchlauferhitzer aus rostfreiem Edelstahl
Sicherheitsvorrichtungen Thermosicherung
Energiesparmodus < 1 Wh
Nennspannung - Nennleistung -
Versorgung
Voreingestellte Mengen Default min. max.
ESPRESSO 40 ml 10 ml 230 ml
ESPRESSO LUNGO 120 ml 10 ml 230 ml
250 g
15
Siehe Datenschild auf der Innenseite der Servicetür
Elektromagnetische Felder (EMV)
Dieses Gerät von Gaggia entspricht allen anwendbaren Standards und Vorschriften zur
Belastung durch elektromagnetische Felder.
12. Transport und Entsorgung
Dieses Symbol weist darauf hin, dass das Produkt in den Geltungsbereich der europäischen
Richtlinie 2012/19/EU fällt. Informieren Sie sich über die geltenden Bestimmungen zur getrennten
Sammlung elektrischer und elektronischer Geräte. Örtliche Vorschriften beachten und das
Produkt nicht als Hausmüll entsorgen. Die korrekte Entsorgung von Altgeräten ist ein Beitrag
zur Vermeidung möglicher negativer Folgen für die Umwelt und die menschliche Gesundheit.
DEUTSCH
21
Page 78

13. Garantie und Kundendienst
Garantie
Für ausführliche Informationen zur Garantie und den damit verbundenen Bedingungen ist auf
das separat gelieferte Garantieheft Bezug zu nehmen.
Der Hersteller behält sich das Recht vor, seine Gerätemodelle zu verbessern. Dabei werden die
im vorliegenden Handbuch beschriebenen, grundlegenden Eigenschaften beibehalten.
Kundendienst
Wir möchten sicherstellen, dass Sie mit Ihrem Gerät zufrieden sind.
Für Hilfe oder den Kundendienst besuchen Sie die Webseite Gaggia www.gaggia.com oder
wenden sich an die Hotline Gaggia in Ihrem Land.
13.1 Kontakt Gaggia
Die jeweiligen Kontaktdaten werden im separat gelieferten Garantieheft oder unter der
Adresse www.gaggia.com genannt.
22
DEUTSCH
Page 79

Page 80

GAGGIA S.p.a. hält das Recht alle notwendigen Änderungen durchzuführen.
GAGGIA S.p.A.
Sede Legale/Registered Ofce
Piazza Eleonora Duse, 2
20122 MILANO
Sede Amministrativa/Administrative Ofce
Via Tor retta, 240
40041 Gaggio Montano (BO)
+39 0534 771111
www.gaggia.com
Rev. 01 19.05.2015
Page 81

Page 82

Page 83

Page 84

GAGGIA S.p.a. si riserva il diritto di apportare tutte le modiche ritenute necessarie.
GAGGIA S.p.a. reser ves the right to carry out all modications which might be considered necessary.
GAGGIA S.p.a. hält das Recht alle notwendigen Aenderungen durchzuführen.
GAGGIA S.p.A.
Sede Legale/Registered Ofce
Piazza Eleonora Duse, 2
20122 MILANO
Sede Amministrativa/Administrative Ofce
Via Tor retta, 240
40041 Gaggio Montano (BO)
+39 0534 771111
www.gaggia.com
COD. 421946028571 Rev. 01 19.05.2015
 Loading...