

Page 1

TABLE OF CONTENTS
Operation and maintenance manual
Before using the machine, please read the attached operating instructions.
Carefully read the safety rules
Manuale uso e manutenzione
Prima di utilizzare la macchina consultare le presenti istruzioni.
Leggere attentamente le norme di sicurezza
Page 2

IMPORTANT SAFEGUARDS
When using electrical appliances, basic safety precautions should always be
followed, including the following:
1. Read all instructions.
2. Do not touch hot surfaces. Use handles or knobs.
3. To protect against fire, electric shock and injury to person do not immerse
cord, plugs, or machine in water or other liquid.
4. Close supervision is necessary when the appliance is used by or near
children.
5. Unplug from outlet when not in use and before cleaning. Allow to cool before
putting on or taking off parts, and before cleaning the appliance.
6. Do not operate any appliance with a damaged cord or plug or after the
appliance malfunctions, or has been damaged in any manner. Return
appliance to the nearest authorized service facility for examination, repair or
adjustment.
7. The use accessory attachments not recommended by the appliance
manufacturer may result in fire, electric shock or injury to persons.
8. Do not use outdoors.
9. Do not let cords hang over edge of table or counter, or touch hot surfaces.
10. Do not place on or near a hot gas or electric burner, or in a heated oven.
11. Always attach plug to appliance first, then plug cord into wall outlet. To
disconnect, turn any control to “off”, then remove plug from wall outlet.
12. Do not use appliance for than intended use.
13. Save this instructions.
SAVE THESE INSTRUCTIONS
Page 3

CAUTION
This appliance is for household use only. Any servicing, other than cleaning and
user maintenance, should be performed by an authorized service centre. Do
not immerse machine in water. To reduce the risk of fire or electric shock, do not
disassemble the machine. There are no parts inside the machine serviceable
by the user. Repair should be done by authorized service personnel only.
1 Check voltage to be sure that the voltage indicated on the nameplate
corresponds with your voltage.
2 Never use warm or hot water to fill the water tank. Use cold water only.
3 Keep your hands and the cord away from hot parts of the appliance during
operation.
4 Never clean with scrubbing powders or harsh cleaners. Simply use a soft
cloth dampened with water.
5 For optimal taste of your coffee, use purified or bottled water. Periodic
descaling is still recommended every 2-3 months.
6 Do not use caramelized coffee
INSTRUCTIONS FOR THE POWER
SUPPLY CORD
A. A short power-supply cord (or detachable power-supply cord) is to be
provided to reduce risks resulting from becoming entangled in or tripping
over a longer cord.
B. Longer detachable power-supply cords or extension cords are available and
may used if care is exercised in their use.
C. If a long detachable power-supply cord or extension cord is used,
1. The marker electrical rating of the detachable power-supply cord or
extension cord should be at least as great as the electrical rating of the
appliance
2. If the appliance is of the grounded type, the extension cord should be a
grounding-type 3-wire cord, and
3. The longer cord should be arranged so that it will not drape over the counter
top or table top where it can be pulled on by children or tripped over.
Page 4

2
GENERAL INFORMATION .................................................................................................................................3
MAC HINE ........................................................................................................................................................4
ACCESSORIES ....................................................................................................................................................................4
INS TALL ATION ................................................................................................................................................5
STARTING THE MACHINE ........................................................................................................................................................5
MANUAL PRIMING OF THE WATER CIRCUIT ....................................................................................................................................6
SETTING THE LANGUAGE AND THE CLOCK ....................................................................................................................................6
"AQUA PRIMA" FILTER ..........................................................................................................................................................7
DISPLAY .........................................................................................................................................................8
CHOOSE COFFEE AROMA ........................................................................................................................................................8
ADJ US TM EN TS ...............................................................................................................................................9
COFFEE INTENSITIY ..............................................................................................................................................................9
ADJUSTING THE HEIGHT OF THE DRIP TRAY. .................................................................................................................................9
FILLING THE MILK CONTAINER..................................................................................................................................................9
BEVERAGE DISPENSING ................................................................................................................................10
ESPRESSO / COFFEE / LONG COFFEE .......................................................................................................................................10
DISPENSING BEVERAGES WITH GROUND COFFEE ...........................................................................................................................11
HOT WATER DISPENSING ......................................................................................................................................................12
LATTE MACCHIATO .............................................................................................................................................................12
ESPRESSO MACCHIATO ........................................................................................................................................................14
CAPPUCCINO ...................................................................................................................................................................14
DISPENSING HOT MILK ........................................................................................................................................................15
BEVERAGE PROGRAMMING ..........................................................................................................................15
BEVERAGE PROGRAMMING MENU ............................................................................................................................................ 15
ESPRESSO / COFFEE / LONG COFFEE PROGRAM ........................................................................................................................... 15
PROGRAMMING MILK BEVERAGES ............................................................................................................................................16
PROGRAMMING THE MACHINE .....................................................................................................................18
MACHINE SETTINGS ...........................................................................................................................................................18
LANGUAGE MENU ............................................................................................................................................................. 19
CUP ILLUMINATION MENU .................................................................................................................................................... 19
AQUA PRIMA FILTER MENU ................................................................................................................................................... 19
WATER HARDNESS MENU ....................................................................................................................................................20
RINSE MENU ...................................................................................................................................................................20
CUP WARMING PLATE MENU ................................................................................................................................................. 21
ACCOUSTIC TONES AND ALARMS MENU.................................................................................................................................... 21
DISPLAY MENU ................................................................................................................................................................ 21
BEVERAGE SETTINGS ..........................................................................................................................................................22
ADJUSTMENT OF THE COFFEE BREW TEMPERATURE ..................................................................................................................... 22
AROMA ADJUSTMENT FOR COFFEE BREWING.............................................................................................................................. 23
PREBREWING ADJUSTMENT (ONLY COFFEE BEVERAGES) ................................................................................................................ 23
ADDITIONAL FUNCTIONS ......................................................................................................................................................24
COFFEE OF THE WORLD FUNCTION ......................................................................................................................................... 24
DEMO MODE ................................................................................................................................................................... 26
BEVERAGE COUNTER FUNCTION ............................................................................................................................................. 26
MAINTENANCE..................................................................................................................................................................27
MILK CIRCUIT RINSE CYCLE ..................................................................................................................................................27
MILK CIRCUIT WASH CYCLE .................................................................................................................................................. 28
COFFEE CIRCUIT CLEANING CYCLE (BREW GROUP WASH CYCLE) ....................................................................................................... 31
BLOCK DISPLAY .............................................................................................................................................................. 31
DESCALING .................................................................................................................................................................... 32
CLOCK SETTINGS ..............................................................................................................................................................34
TIME SETTING ................................................................................................................................................................. 34
AUTOMATIC TIMER SETTINGS................................................................................................................................................ 35
ENERGY SAVING SETTINGS ................................................................................................................................................... 37
SPECIAL .........................................................................................................................................................................38
FACTORY SETTINGS ........................................................................................................................................................... 38
CLEANING AND MAINTENANCE ....................................................................................................................39
MAINTENANCE DURING OPERATION ..........................................................................................................................................39
GENERAL MACHINE CLEANING ................................................................................................................................................39
MILK CONTAINER MAINTENANCE AND CLEANING...........................................................................................................................40
CLEANING THE BREW GROUP .................................................................................................................................................42
GRINDER MAINTENANCE ......................................................................................................................................................43
ERROR CODES ..............................................................................................................................................44
TECHNICAL DATA ..........................................................................................................................................45
SAFETY RULES .............................................................................................................................................46
TABLE OF CONTENTS
Page 5

3
The coffee machine is intended for preparing espresso by using either coffee beans or ground coffee. It
includes an automatic device for preparing milk beverages and a hot water dispenser.
The machine is elegantly designed for domestic use and is not suitable for continuous heavy duty or
professional use.
Warning: no liability is assumed for any damage caused by:
• Incorrect use not in accordance with the intended uses;
• Repairs not carried out by authorized customer service centers;
• Tampering with the power cord;
• Tampering with any part of the machine;
• The use of non-original spare parts and accessories;
• Failure to descale the machine or use at temperatures below 0°C.
IN THESE CASES, THE WARRANTY IS NOT VALID.
Keep these operating instructions in a safe place and make them available to anyone else who may use the coffee
machine. For further information or if you experience problems not completely or suffi ciently addressed in these
instructions, please contact an Authorized Customer Service Center.
KEEP THESE INSTRUCTIONS
A WARNING TRIANGLE DRAWS ATTENTION TO ALL THE INSTRUCTIONS THAT
ARE IMPORTANT FOR USER SAFETY. PLEASE FOLLOW THESE INSTRUCTIONS
CAREFULLY TO AVOID SERIOUS INJURY!
HOW TO USE THESE OPERATING INSTRUCTIONS
GENERAL INFORMATION
Page 6
4
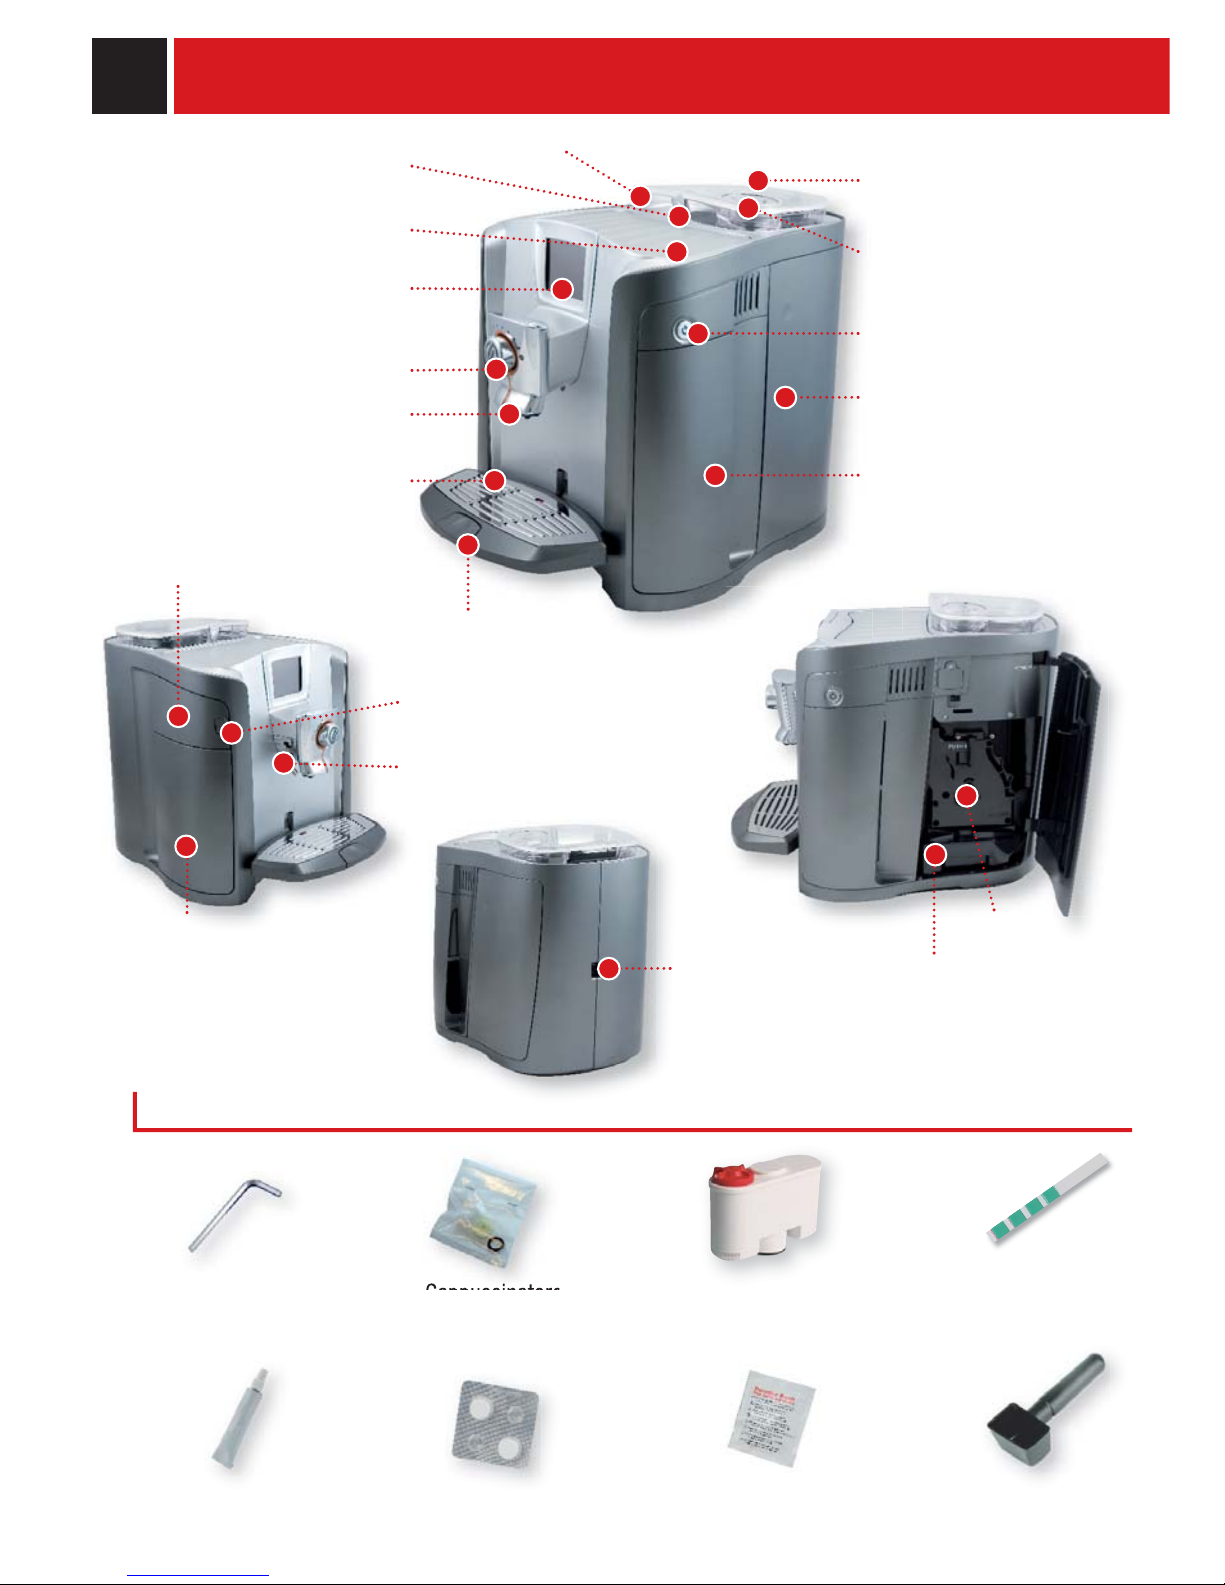
Cappuccinatore
maintenance kit
Compartment for preground coffee
Brew group
Coffee grounds drawer
Socket for
power cord
Open coffee bean hopper
button
Coffee bean hopper
Cup warming plate
Main switch
Service door
ACCESSORIES
Coffee bean hopper cover
Drip tray
Button for raising/lowering
the drip tray
TOUCH SCREEN Display
SBS System
Dispensing head
Drip tray + grill and fl oat
Compartment for milk
container
Hot water spout
Water tank
"Aqua Prima" Filter
Ground coffee
measuring scoop
Cleaning detergent
(Brew group)
Water hardness
tester
Grinder
adjustment key
MACHINE
Lubricant for the
brew group
Detergent for cleaning
milk container
Milk compartment
button
Page 7

5
1 2 3
4
7
65
INSTALLATION
Attach the female end of the
power cord to the machine. Insert
the male end into the power
outlet.
Place a container beneath the hot
water spout.
Press the button on the coffee
hopper to open the cover. Fill the
hopper with coffee beans.
Close the cover pushing it down
completely.
Remove the water tank.
We recommend installing the "Aqua
Prima" fi lter (see page 7).
Press the main switch once to turn
on the machine. The appliance
automatically performs a diagnosis
of its functions. This test is
performed each time the machine
is turned on.
The machine automatically
primes the water circuit.
The machine is now ready
for use.
Make sure that the main power button is not switched to the “ON” position.
Fill the tank with fresh drinking
water. Do not exceed the “max”
level indicated on the water tank.
Once fi lled place the tank back
into the machine.
Water may not be dispensed
into the glass.
This should not be considered
a malfunction.
STARTING THE MACHINE
TO ASSESS WATER HARDNESS, SEE "WATER
HARDNESS MENU" ON PAGE 20.
Page 8
6
1 3
Press to select the desired
language.
The machine starts and displays
the menu in the selected
language.
See manual on page 34 to
adjust the clock.
5
italiano (ch)
language
1/2
français
deutsch
nederlands
english
Italiano ( i)
ok
1
Select the desired language.
Press
for the other languages.
Press “ok”.
demo
self-test
4
italiano (ch)
language
1/2
français
deutsch
nederlands
english
Italiano ( i)
ok
2
italiano (ch)
language
1/2
français
deutsch
nederlands
english
Italiano ( i)
ok
3
If desired, the “demo” function (see page 26)
may be activated by pressing the key, each time
the machine carries out a self-diagnosis.
demo
self-test
4
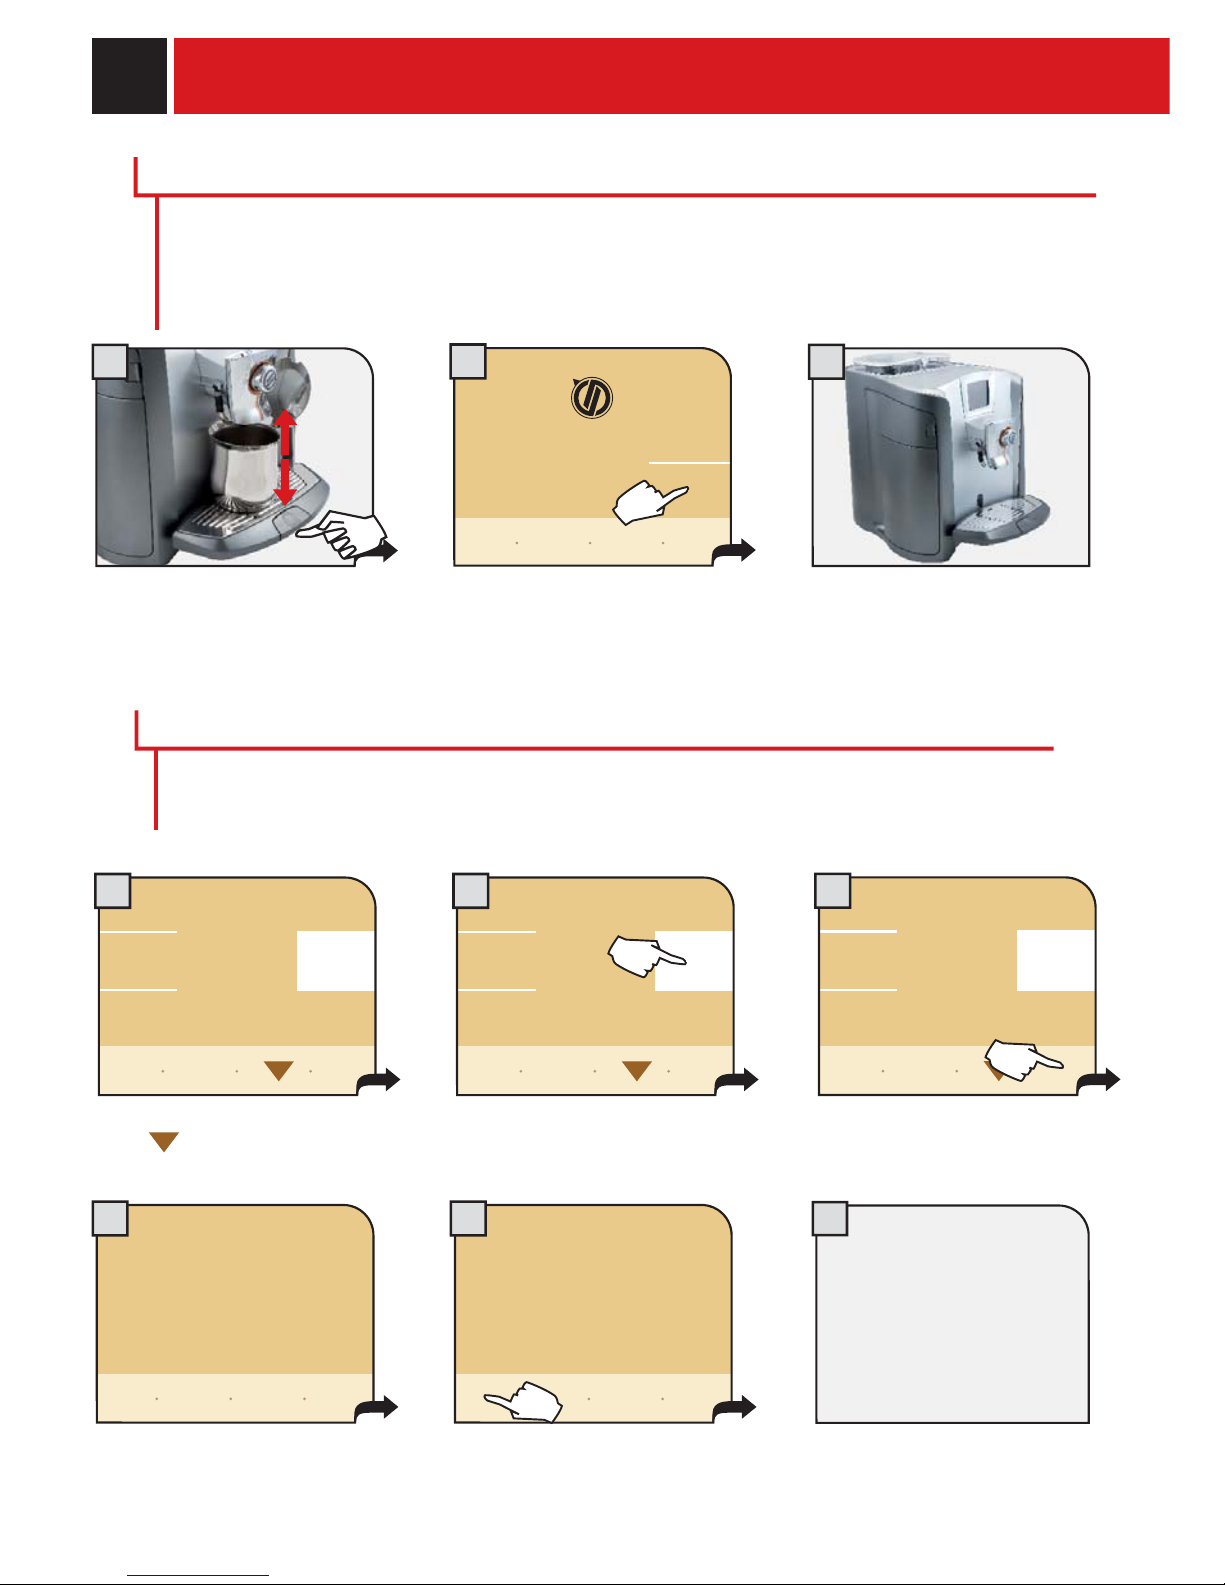
MANUAL PRIMING OF THE WATER CIRCUIT
Position a container under the hot
water spout (it is possible that
water will not come out of the
spout).
Press the display once and the
machine will begin priming the
water circuit.
When the prime circuit cycle is
fi nished, remove the container.
The machine is now ready for
use.
INSTALLATION
SETTING THE LANGUAGE AND THE CLOCK
When the machine is switched-on for the fi rst time, it requires the selection of the desired language.
This allows you to adjust the parameters of the beverages to the typical parameters of the country
where the machine is used. This is why some languages are differentiated also by country.
2
start
priming the machine
position the SBS system as shown
Manually prime the water circuit only when display (2) appears.
Note: fi rst make sure that the water tank is full.
Important: before performing the circuit priming, position the SBS system (see page 9) as shown on the
display. Then adjust as desired.
Page 9

7
3
4
5
1 2
8
Remove the "Aqua Prima" fi lter
from its packaging. Enter the date
of the current month.
«AQUA PRIMA» FILTER
To improve the quality of the water used, install the "Aqua Prima" fi lter. After installation, go to the
fi lter activation program (see programming). In this mode the machine advises the user when the
fi lter must be replaced.
Insert the fi lter in its place within
the empty tank (see fi gure).
Press down until it clicks into
place.
Press "machine settings".
Press "water fi lter".
Press "activate fi lter".
water
fi lter
inserted
not
inserted
activate
fi lter
The machine then activates the "Aqua Prima" fi lter. Wait for the cycle to fi nish automatically.
When the activation cycle ends, the machine proceeds to the choose beverage menu.
NOTE: occasionally, the machine may not dispense the desired quantity of water for the correct water
fi lter initialization. In this case, repeat the operations described from point 6 and following.
Fill the tank with fresh water. Let
the fi lter soak for 30 minutes. After
30 minutes discard the water in the
tank and refi ll with fresh water.
Place a container beneath the
hot water spout.
Press "programming menu".
show icon
explanation
my custom
coffee
program-
ming
menu
main-
tenance
main
menu
specials
machine
settings
clock
settings
extras
beverage
settings
energy
saving
back to
coffee
menu
alerts &
acoustic
settings
machine
settings
display
language
rinsing
water
hardness
water
fi lter
cup
illumination
cup
warmer
go back
restore
default
settings
back to
menu
go back
restore
default
settings
back to
menu
save
settings
7
6
Page 10
8
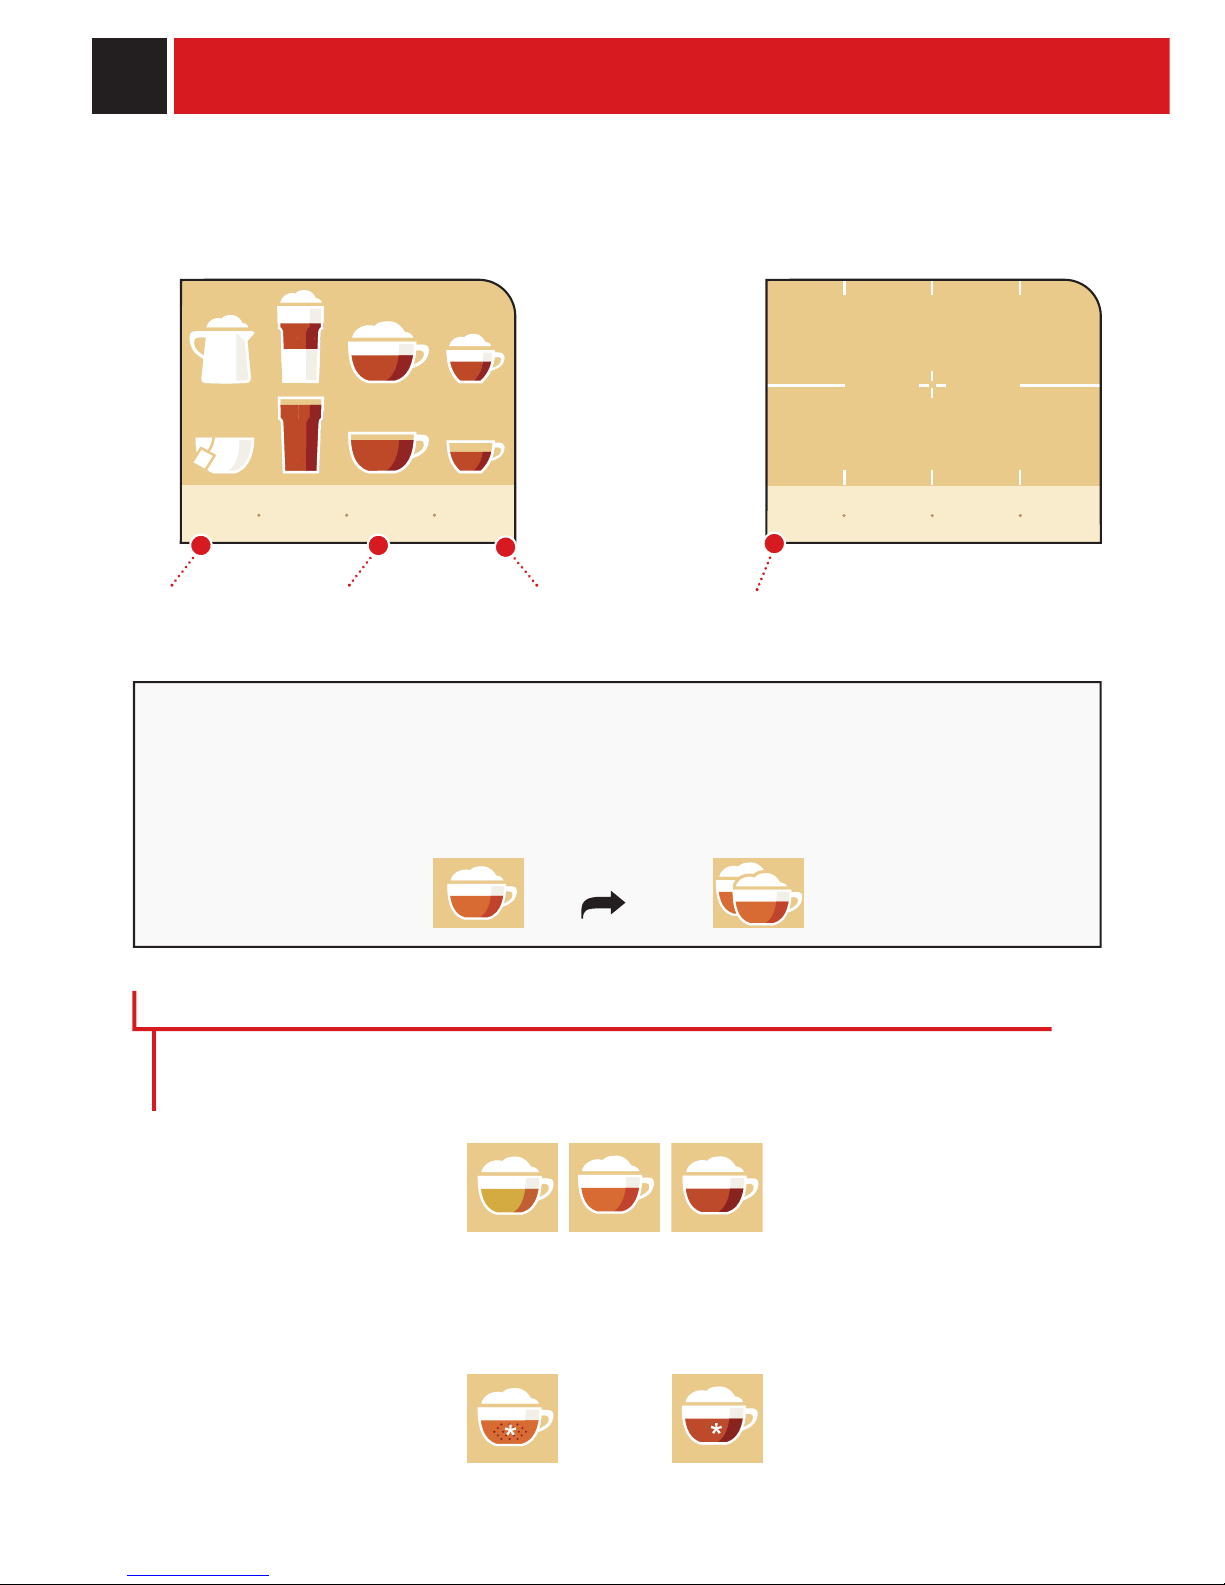
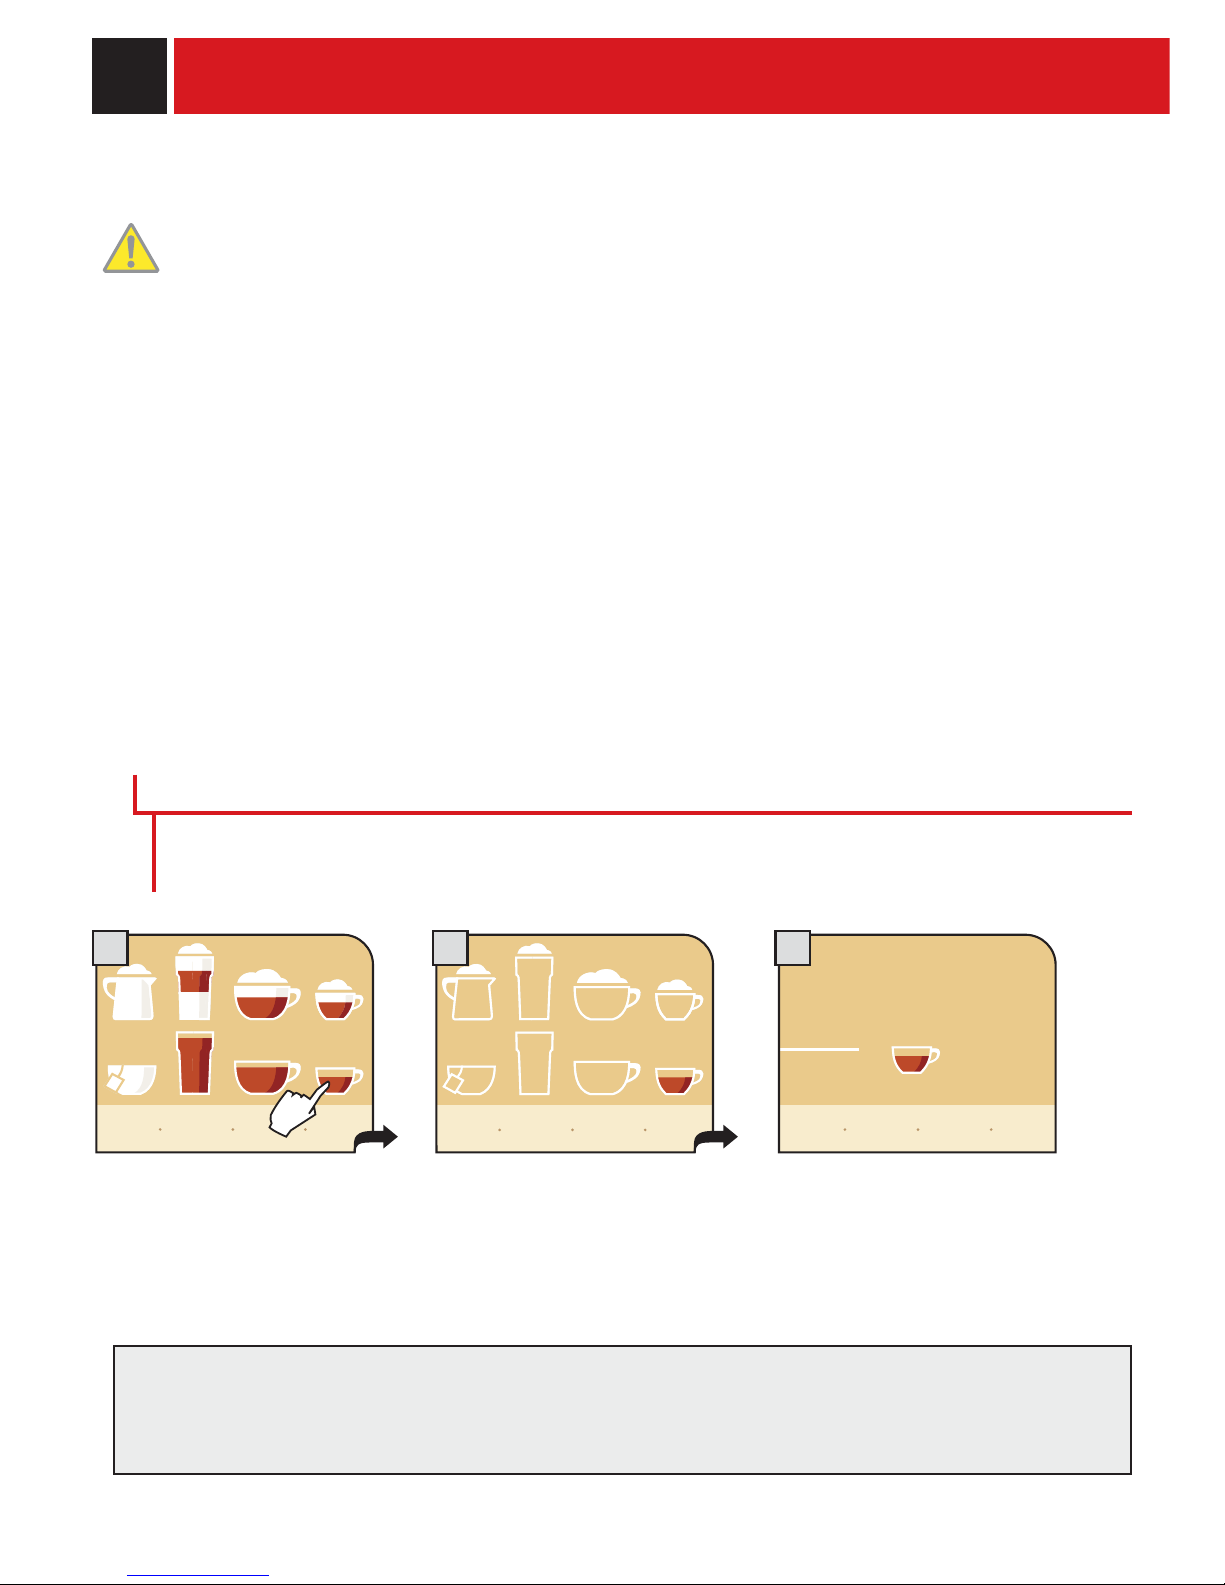
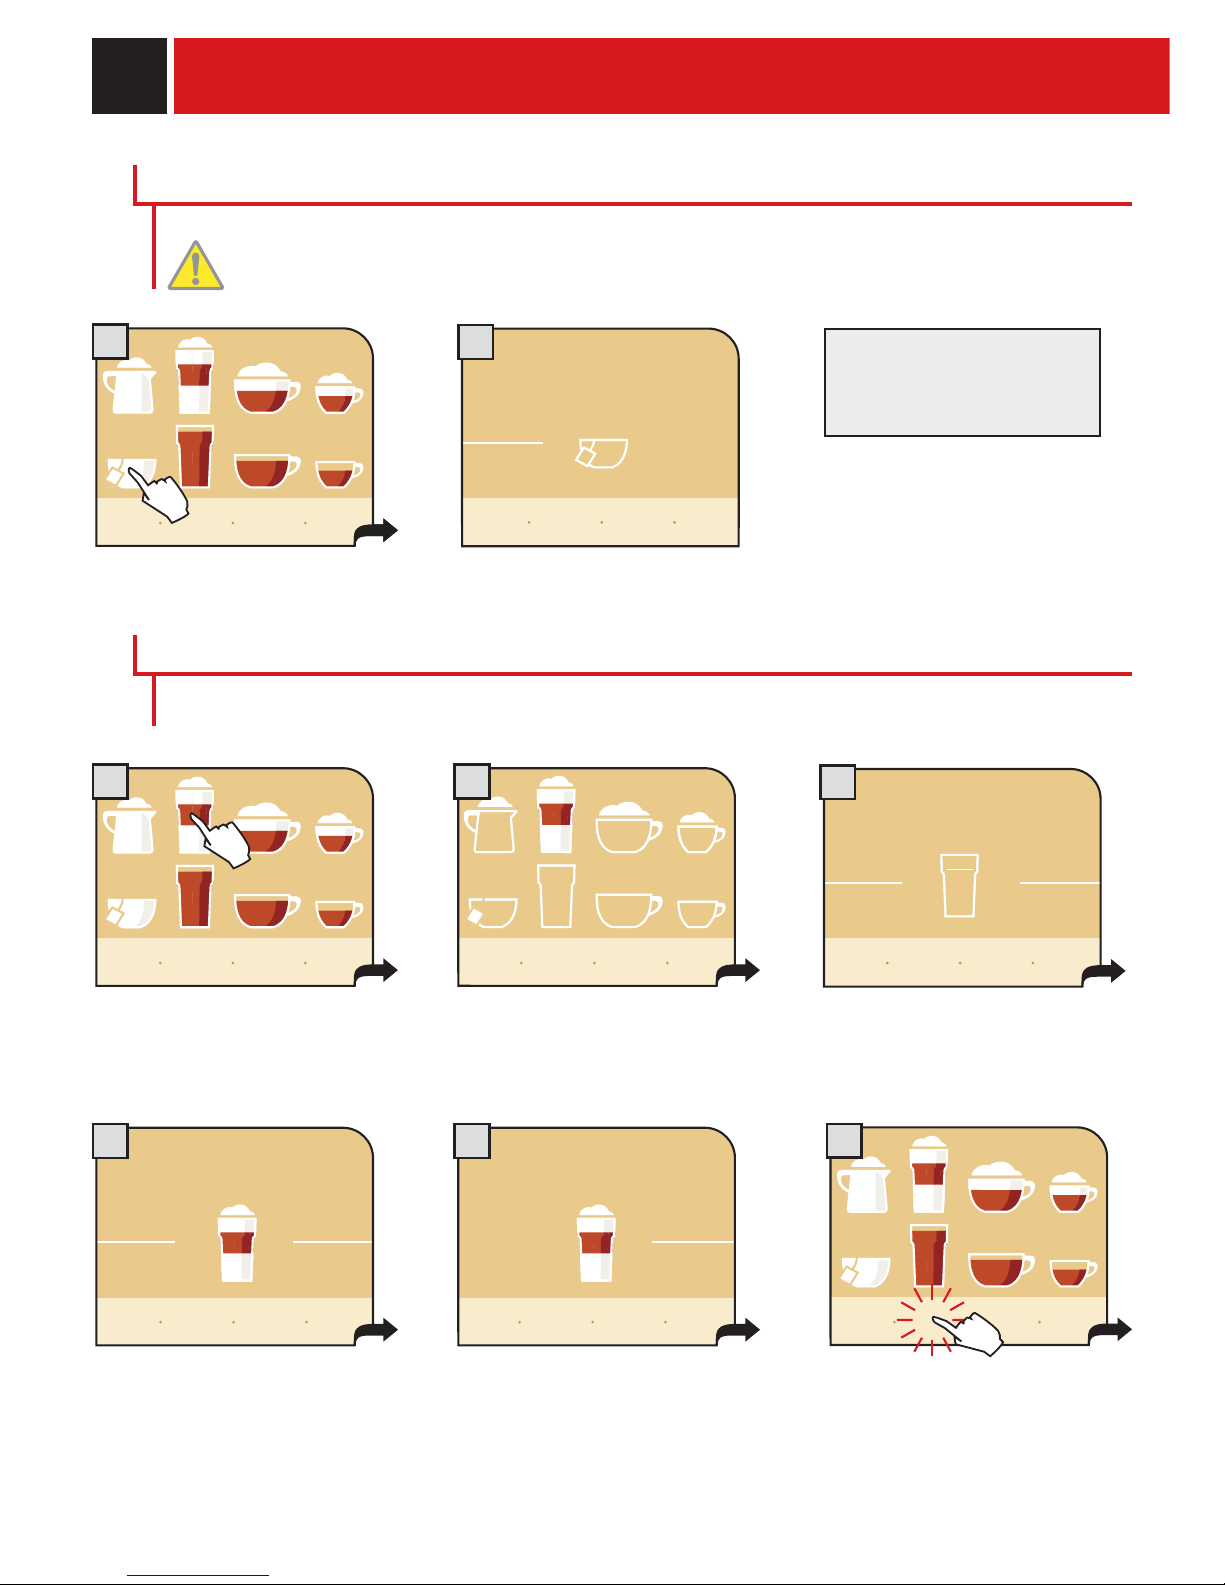
• To get the desired beverage, press the corresponding symbol on the display.
The machine automatically performs all the necessary operations.
• To make 2 cups, press the beverage symbol twice.
press twice
weak medium strong
The intensity of the color on the cup icon (only valid for coffee beverages) indicates the aroma, or
quantity of coffee to be ground, for preparing the beverage. The greater the quantity of coffee
ground the stronger the coffee will taste.
DISPLAY
Go to the "text
format" menu
Beverage
programming
Accessing the
programming menu
It is possible to change the type of display and choose between " icon format" and "text format"
ICON FORMAT
long
coffee
hot
water
coffee espresso
hot
milk
latte
macchiato
espresso
macchiato
cappuccino
medium strongmedium
medium strongmedium
Go to the "icon
format" menu
TEXT FORMAT
CHOOSE COFFEE AROMA
When the machine is programmed to use pre-ground coffee or when a beverage is customized, the
icon is displayed in a different way and/or accompanied by an asterisk (see section on
“programming beverages”.)
pre-ground customization
show icon
explanation
my custom
coffee
program-
ming
menu
show
icon
my custom
coffee
program-
ming
menu
Page 11

9
MEDIUM
COFFEE
STRONG
COFFEE
MILD
COFFEE
SBS System adjusts the intensity of the brewed
coffee, and can even be adjusted while
brewing. Any adjustment has an immediate
effect on the brewing coffee.
COFFEE INTENSITIY
SBS SYSTEM
Height adjustable drip tray.
To raise the drip tray, press lightly on the lower part of the button. To lower the tray,
press lightly on the upper part of the button; when the desired height is reached,
release the button.
Note: There is a red fl oater in the drip tray. When it rises, the tray must be emptied
and washed.
ADJUSTING THE HEIGHT OF THE DRIP TRAY
FILLING THE MILK CONTAINER
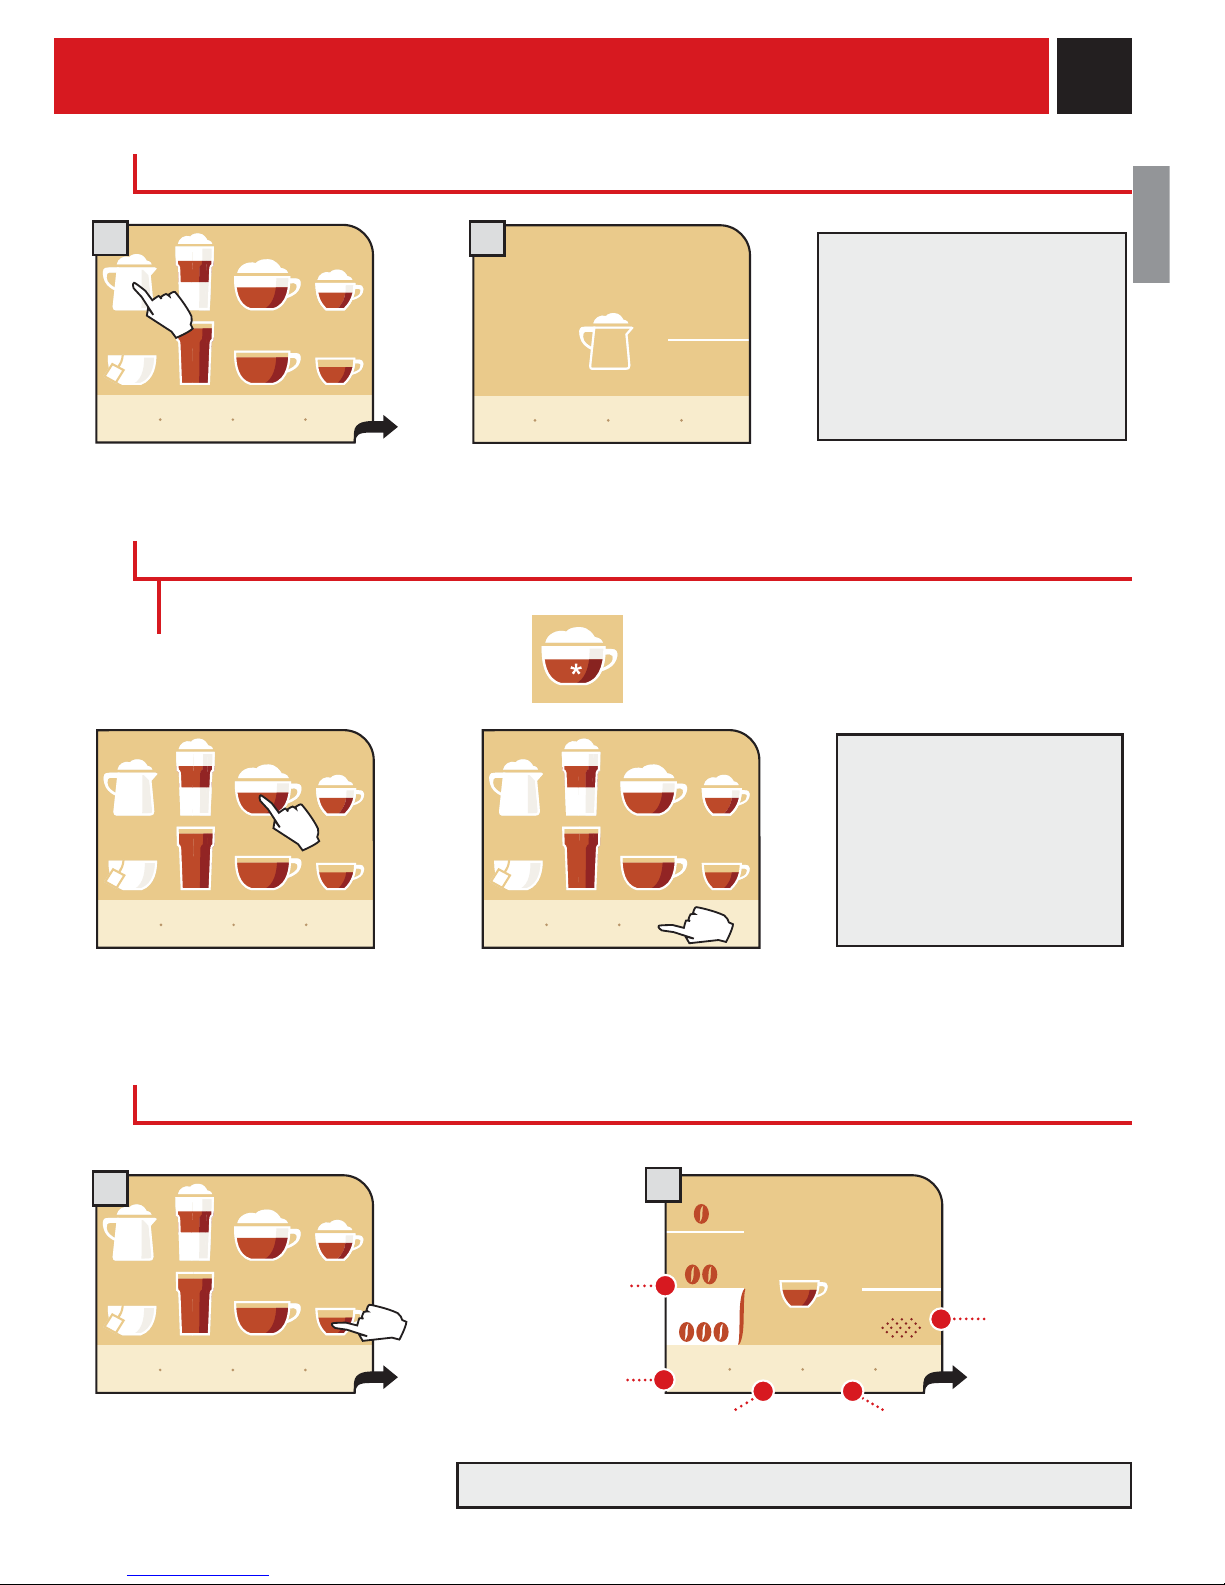
ADJUSTMENTS
The SBS system has been carefully designed to give your coffee the intense taste you desire. Simply
turn the dial and you will notice that the coffee goes from mild intensity to strong intensity.
Only the container with the cappuccinatore must be fi lled before preparing beverages with milk. Do not
use milk after the best-before date. (Important! Refer to the instructions for maintenance and cleaning
of the cappuccinatore on page 40).
Adjust the drip tray before dispensing any beverages.
21 3
Open the milk compartment by
pressing the button and remove
the milk container.
Remove the cover and pour in the
milk. DO NOT EXCEED THE
MAXIMUM LEVEL shown in the
fi g u r e .
Replace the lid on the container
and place it back in the milk
compartment. Make sure to
carefully close the compartment.
Page 12
10
1 2
3
DISPENSING COFFEE, HOT WATER AND MILK CAN BE INTERRUPTED AT ANY TIME BY
SELECTING THE "STOP ... DISPENSING" BUTTON.
THE DISPENSED MILK CAN REACH HIGH TEMPERATURES: THERE IS A DANGER OF
SCALDING. DO NOT TOUCH IT WITH BARE HANDS.
Check that all the containers are clean. To do this operation, follow the instructions in the "Cleaning and
Maintenance" (see page 39).
WHEN YOU HAVE FINISHED PREPARING BEVERAGES CONTAINING MILK, PROCEED WITH
CLEANING THE CONTAINER AND THE MACHINE'S CIRCUIT.
To brew 2 cups, the machine dispenses half of the entered quantity and briefl y interrupts dispensing in
order to grind the second serving of coffee. Coffee dispensing is then restarted and completed.If a milk
beverage has been chosen, the machine automatically dispenses the milk. If the fi rst coffee is interrupted,
the second will not be dispensed.
THE MILK USED MUST HAVE BEEN PROPERLY PRESERVED.
DO NOT USE IT AFTER THE EXPIRATION DATE ON THE PACKAGE.
ESPRESSO / COFFEE / LONG COFFEE
Choose the beverage and press
the corresponding icon on the
display: once for 1 cup and twice
for 2 cups.
The machine begins grinding the
quantity of coffee entered.
Begin dispensing the selected
beverage.
stop
coffee
dispensing
espresso
BEVERAGE DISPENSING
This procedure shows how to dispense an espresso. To dispense another type of coffee, press the
appropriate icon. Use appropriate espresso or coffee cups so that the coffee will not overfl ow.
The machine ends dispensing automatically according to the quantity determined by the manufacturer. It is
possible to customize this quantity. See page 15.
If you wish to interrupt the dispensing cycle, press the " stop coffee dispensing" button.
show icon
explanation
my custom
coffee
program-
ming
menu
Page 13

11
1 2 3
4 5
DISPENSING BEVERAGES WITH GROUND COFFEE
Pre-ground coffee must be poured into the appropriate compartment positioned next to the coffee bean
hopper. Pour in only coffee ground for espresso machines and never coffee beans or instant coffee. (see the
"Beverage programming" chapter on page 15).
WARNING: PUT PRE-GROUND COFFEE IN THE COMPARTMENT ONLY WHEN YOU WISH TO
DISPENSE THIS TYPE OF BEVERAGE.
INSERT ONLY ONE SCOOP OF GROUND COFFEE AT A TIME. TWO CUPS OF COFFEE CANNOT BE
DISPENSED AT THE SAME TIME.
Press the appropriate button and
the display will show:
A message appears, reminder the
user to pour ground coffee in the
appropriate compartment.
add preground
coffee
start!
go
back
Press the "start! "button to start
dispensing.
Pour ground coffee into the preground coffee compartment using
the measuring scoop provided
with the accessories.
add preground
coffee
start!
go
back
Begins dispensing the selected
beverage.
long
coffee
stop
coffee
dispensing
Note:
• After 1 minute from when the message appears (2), if brewing has not started the machine will return to
the main menu and dump any inserted coffee into the coffee grounds drawer.
• If no pre-ground coffee is poured into the compartment, only water will be dispensed.
• If 2 or more scoops of coffee are added, the machine will not dispense the beverage and the coffee in the
compartment will be dumped into the coffee grounds drawer.
In the example given below, we chose to dispense a long coffee using pre-ground coffee.
The customized choice of using pre-ground coffee is shown on the display with an asterisk next to the
chosen beverage.
show icon
explanation
my custom
coffee
program-
ming
menu
Page 14
12
2
2
3
4 5
1
1
6
Press the hot water icon once.
HOT WATER DISPENSING
WHEN THE HOT WATER BEGINS TO DISPENSE, SHORT SPURTS OF HOT WATER MAY BE
DISPENSED WHICH POSE A RISK OF SCALDING. THE HOT WATER SPOUT CAN REACH
HIGH TEMPERATURES: AVOID TOUCHING IT WITH BARE HANDS.
Begin hot water dispensing.
To dispense another cup of
hot water, repeat this
operation.
BEVERAGE DISPENSING
latte
macchiato
latte
macchiato
latte
macchiato
The machine begins grinding the
quantity of coffee entered.
Select the beverage and press the
corresponding icon on the
display: once for 1 cup and twice
for 2 cups.
When the coffee fi nishes grinding,
the machine will automatically
dispense the programmed quantity
of hot milk.
Once milk has been dispensed, the
machine automatically prepares the
coffee.
After this, the machine allows you to
dispense more milk if you wish. This
option remains active for
approximately 2 seconds. To activate,
press the “add milk” button.
The “milk rinsing” icon will fl ash
once the machine is done
dispensing in order to clean the
milk circuit. Press the “milk
rinsing” icon to clean the internal
milk circuit.
stop
milk
dispensing
add
milk
stop
water
dispensing
hot
water
milk
rinsing
Fill the milk container
LATTE MACCHIATO
show icon
explanation
my custom
coffee
program-
ming
menu
show icon
explanation
my custom
coffee
program-
ming
menu
show icon
explanation
my custom
coffee
program-
ming
menu
stop
coffee
dispensing
stop
milk
dispensing
stop
coffee
dispensing
SEE INSTRUCTIONS ON PAGE 40 FOR OPTIMAL MILK DISPENSING
Page 15
13
9
start
rinsing
milk rinsing cycle
8
rinsing...
rinsing mi l k circuit-
please wait
If the user wishes to continue preparing other drinks the
machine will keep the “milk rinsing” signal active.
After 20 minutes of inactivity, the machine requires the user
to perform a rinsing cycle as described in Step 7.
If the machine is turned off immediately after dispensing a
milk beverage, the next time the machine is turned on it will
require the user to perform a rinsing cycle.
Note: Before performing the “milk rinsing” function make
sure that:
1. an adequate sized container is placed under the
dispensing head
2. the water tank is full of fresh water.
7
To perform a rinse cycle,
press “start rinsing”.
Wait for the cycle to be completed.
After this, the machine returns to
the main menu.
THIS PROCEDURE MUST BE PERFORMED FOR ALL MILK BEVERAGES!
AFTER USE, ALWAYS REMOVE THE MILK CONTAINER AND PUT IT IN THE REFRIGERATOR IF IT
CONTAINS REMAINING MILK.
Remove the container and put
it in the refrigerator if it
contains remaining milk.
THE CONTAINER MAY BE LEFT IN THE MACHINE ONLY IF IT HAS BEEN WASHED WITH
DRINKING WATER AND IT DOES NOT CONTAIN MILK (SEE PAGE 40).
After performing the rinse cycle, the machine reminds the user to
remove the container with the remaining milk through the message
“remove milk”.
REMOVE THE MILK CONTAINER ONLY WHEN THE MACHINE IS ON.
show icon
explanation
my custom
coffee
program-
ming
menu
remove
milk
milk
cleaning
show icon
explanation
my custom
coffee
program-
ming
menu
After 14 days from the fi rst dispensing of
a milk-based beverage, the message
“milk cleaning” is displayed; it is
advisable to clean the milk circuits as
shown on page 28.
After another 7 days the machine stops
dispensing milk-based beverages and the
milk circuits must be washed; during this
phase, coffee and hot water may be
brewed.
Page 16

14
2
31
4
5
2
3
4 5
1
BEVERAGE DISPENSING
espresso
macchiato
espresso
macchiato
cappuccino
cappuccino
cappuccino
ESPRESSO MACCHIATO
The machine begins grinding the
quantity of coffee entered.
Press the icon once for 1 cup and
twice for 2 cups.
Espresso macchiato begins
brewing.
Once the coffee has been brewed,
the machine automatically prepares
the hot milk.
CAPPUCCINO
The machine begins grinding the
quantity of coffee entered.
Press the icon once for 1 cup and
twice for 2 cups.
After this, the machine allows you to dispense more milk if you wish.
Press the “add milk” button within 2 seconds.
Fill the milk container
Fill the milk container
When the "milk rinsing"
symbol fl ashes, clean the
milk circuits as described for
latte macchiato (see page 12,
Step 6).
When the "milk rinsing"
symbol fl ashes, clean the
milk circuits as described for
latte macchiato (see page 12,
Step 6).
When the coffee fi nishes grinding,
the machine will dispense the
programmed quantity of hot milk.
Once milk has been dispensed, the
machine automatically prepares the
coffee.
add
milk
To dispense more milk, press the
“add milk” icon.
espresso
macchiato
show icon
explanation
my custom
coffee
program-
ming
menu
show icon
explanation
my custom
coffee
program-
ming
menu
stop
milk
dispensing
stop
coffee
dispensing
stop
milk
dispensing
stop
coffee
dispensing
stop
milk
dispensing
stop
coffee
dispensing
stop
milk
dispensing
stop
coffee
dispensing
add
milk
Page 17
15
2
1
2
1
BEVERAGE PROGRAMMING
BEVERAGE PROGRAMMING MENU
Hold down the beverage button for
two seconds
Press the button "my coffee" and
within two seconds, press the
beverage button
Each beverage can be programmed according to your individual taste. Customization is shown on the
display with the addition of an asterisk.
To program the desired beverage:
or
ESPRESSO / COFFEE / LONG COFFEE PROGRAM
Enter the menu of the beverage to
be customized by pressing and
holding the button for 2 seconds.
In this menu you can:
save settings.restore factory settings.
return to the
previous
window.
select the quantity
of coffee to be
ground (aroma).
go
back
save
settings
restore
settings
strong
preground
my
espresso
medium
light
start!
Once a beverage has been
customized it will only
dispense that type of
beverage. To change or modify
the beverage a new customization must be done.
Selecting a different quantity of coffee changes the aroma of the beverage.
show icon
explanation
my custom
coffee
program-
ming
menu
show icon
explanation
my custom
coffee
program-
ming
menu
show icon
explanation
my custom
coffee
program-
ming
menu
select the use
of pre-ground
coffee.
hot
milk
DISPENSING HOT MILK
Press the hot milk icon once. The hot milk is dispensed.
Fill the milk container
To dispense another cup of milk,
repeat this operation.
When the "milk rinsing" symbol
fl ashes, clean the milk circuits as
described for latte macchiato
(see page 12, Step 6).
show icon
explanation
my custom
coffee
program-
ming
menu
stop
milk
dispensing
Page 18
16
1
5
6 7
BEVERAGE PROGRAMMING
To brew an amount of coffee greater
than that preset by the
manufacturer, press “custom
coffee amount” before the end of
the brew cycle in progress. When
the quantity is reached,
press “stop coffee dispensing”.
Pressing start! allows the
machine to brew coffee.
The machine automatically starts and
fi nishes brewing the coffee, according to
the standard settings.
The brew cycle may be
interrupted only by pressing
“stop coffee dispensing”.
If the button is not pressed,
the coffee can overfl ow in
the cup.
Once the brew cycle fi nishes,
press "save settings" within fi ve
seconds.
If the "save settings" button
is not pressed the machine
returns to the main menu
and the customized settings
will not be saved.
saved!
The display shows the confi rmation of
the memorized settings, and the
machine automatically returns to the
main menu.
PROGRAMMING MILK BEVERAGES
Enter the menu of the beverage to
be customized by pressing and
holding the button for 2 seconds.
In this menu you can:
select the
quantity of
coffee to be
ground.
select the use
of pre-ground
coffee.
save settings.restore factory settings.
return to the
previous
window.
my
espresso
custom
coffee
amount
my
espresso
my
espresso
my latte
macchiato
Fill the milk tank
After pressing the start!
button, the brew cycle will
start.
my
espresso
my
espresso
show icon
explanation
my custom
coffee
program-
ming
menu
go
back
save
settings
restore
settings
strong
preground
medium
light
start!
go
back
save
settings
restore
settings
strong
preground
medium
light
start!
stop
coffee
dispensing
custom
coffee
amount
stop
coffee
dispensing
save
settings
go
back
3 4
2
Page 19

17
8
9
Pressing start! allows the
machine to start the brewing
cycle.
The machine automatically starts and
fi nishes dispensing the milk,
according to the standard settings.
my latte
macchiato
To dispense an amount of milk greater than that preset by the
manufacturer, press “custom milk amount” before the end of the
dispensing cycle in progress. When the quantity is reached, press
“stop milk dispensing”.
The dispensing cycle may
be interrupted only by
pressing “stop milk
dispensing”.
If the button is not pressed,
the milk may overfl ow.
my latte
macchiato
The machine automatically starts
and fi nishes brewing the coffee,
according to the standard
settings.
my latte
macchiato
To brew an amount of coffee greater than that preset by the
manufacturer, press “custom coffee amount” before the end of the
brew cycle in progress. When the desired quantity is
reached, press “stop coffee dispensing”.
The brew cycle may be
interrupted only by pressing
“stop coffee dispensing”.
If the button is not
pressed, the coffee may
overfl ow.
save
settings
Once the brew cycle fi nishes,
press "save settings" within fi ve
seconds.
If the "save settings" button
is not pressed the machine
returns to the main menu
and the customized settings
will not be saved.
saved!
my latte
macchiato
The display shows the confi rmation of the
saved settings, and the machine
automatically returns to the main menu.
my latte
macchiato
my latte
macchiato
After pressing the start!
button, the brew cycle will
start.
my latte
macchiato
go
back
save
settings
restore
settings
strong
preground
medium
light
start!
custom
coffee
amount
stop
coffee
dispensing
stop
milk
dispensing
custom
milk
amount
stop
milk
dispensing
custom
milk
amount
custom
coffee
amount
stop
coffee
dispensing
stop
milk
dispensing
custom
milk
amount
custom
coffee
amount
stop
coffee
dispensing
stop
milk
dispensing
custom
milk
amount
custom
coffee
amount
stop
coffee
dispensing
go
back
3
5
7
6
4
Page 20

18 PROGRAMMING THE MACHINE
MACHINE SETTINGS
When the machine settings are selected the following screen appears. Here you can:
set the language of the menus.
set the illuminate cups function.
set the machine’s operation
through the “Aqua Prima” fi lter.
set/activate the tones.
set the water hardness.
set the circuit rinse cycle.
set the operation of the cup warming plate.
set the brightness of the
display colors.
After having set each of the following menus, press
- "go back" to return to the previous screen
- "restore default settings" to restore the initial values
- "save settings" to save the settings
- "back to menu" to return to the main menu
Some of the machine’s functions can
be programmed to customize
operations according to your own
requirements.
Press the "programming menu" button.
The programming menu will access:
Programming the machine
operations (see page 18)
Special functions
(see page 38)
Maintenance (cleaning the
machine) (see page 27)
In depth beverage programming
(see page 22)
- Current date and time
- Standby timer
- Times to turn on/turn off over
the span of a day (see page 34).
Extra functions (see page 24)
Activate standby
Exit
show icon
explanation
my custom
coffee
program-
ming
menu
main-
tenance
main
menu
specials
machine
settings
clock
settings
extras
beverage
settings
energy
saving
back to
coffee
menu
alerts &
acoustic
settings
machine
settings
display
language
rinsing
water
hardness
water
fi lter
cup
illumination
cup
warmer
go back
restore
default
settings
back to
menu
Page 21
19
“LANGUAGE” MENU
For changing the language of the display.
This function was described at the
beginning of the manual.
This setting is of fundamental
importance for correctly adjusting
the parameters of the machine
according to the country where the
machine is used.
language
“AQUA PRIMA FILTER” MENU
The "Aqua Prima" fi lter purifi es water and allows you to taste all the aroma of the coffee.
proceed with the initialization
(cleaning) of the water fi lter (see
page 7). After initialization the
«insert» option is activated.
set the machine to
operate without the”Aqua
Prima” fi lter.
set the machine to operate
with the “Aqua Prima” fi lter.
turn off illumination.
“CUP ILLUMINATION” MENU
This function allows activating/ deactivating the dispensing area illumination.
turn on illumination.
italiano (ch)
language
1/2
français
deutsch
nederlands
english
Italiano ( i)
inserted
not
inserted
activate
fi lter
Note:
• Press "activate fi lter" each time a new "Aqua Prima" fi lter is installed.
• Press "not inserted" when an "Aqua Prima" fi lter is not used.
• Press “inserted” when an “Aqua Prima” fi lter is used. This function operates even after pressing the
“activate fi lter” button.
cup
illumination
water
fi lter
In this menu you can:
In this menu you can:
water
fi lter
cup
illumination
off
on
go back
back to
menu
go back
restore
default
settings
back to
menu
save
settings
go back
restore
default
settings
back to
menu
save
settings
Press to display the next page.
Page 22

20
1
2
PROGRAMMING THE MACHINE
rinsing
on
off
“RINSE” MENU
To clean the internal circuits for coffee brewing in order to guarantee that beverages are brewed with fresh water
only.
In this menu you can:
deactivate the rinse cycle. activate the rinse cycle.
Note: This rinse cycle is
performed every time the
machine is turned on when it
is cool.
water
hardness
rinsing
water
hardness
“WATER HARDNESS” MENU
To adjust the level of water hardness, shown on a scale of 1 to 4. The machine is preset at a hardness value of 3.
Immerse the water hardness strip included in
the welcome pack for one second in water.
Set the water hardness on the
machine by pressing + or -
Check the value.
The test can be used only for
one measurement.
Press the "water hardness" button.
go back
restore
default
settings
back to
menu
save
settings
go back
restore
default
settings
back to
menu
save
settings
1234
Page 23

21
In this menu you can:
activate/deactivate a machine
ready tone.
activate/deactivate a tone
each time a button is pressed.
activate/deactivate a tone that
reminds the user to proceed with
washing the circuits to prepare
milk.
Note: The tones are divided in the following way:
• Long continuous tone indicates a machine malfunction;
• Brief tone when a button is pressed and to indicate that the machine is ready for use;
• Intermittent tone to indicate that the machine needs to be cleaned.
activate/deactivate a tone that
reminds the user to perform the
rinse cycle of the milk circuits (the
tone is activated after one minute
from the beverage brewing).
machine ready
tone
off
milk quality
alert
off
key tones
on
alerts &
acoustic
settings
go back
restore
default
settings
back to
menu
save
settings
milk rinsing
alert
off
cup
warmer
off
off in
standby
always
on
“CUP WARMING PLATE” MENU
To activate the cup warming plate on the upper part of the machine.
keep the cup warming plate
always on.
In this menu you can:
keep the cup warming plate
off when the machine is in
stand-by.
keep the cup warming plate
always off.
“ACOUSTIC TONES AND ALARMS” MENU
To activate/deactivate the machine’s acoustic tones. Pressing the button does not immediately change the status.
“DISPLAY” MENU
To set the correct brightness of the display colors, press the “display” button.
Adjust the brightness by
pressing + or -
cup
warmer
display
alerts &
acoustic
settings
display
go back
restore
default
settings
back to
menu
save
settings
go back
restore
default
settings
back to
menu
save
settings
Page 24
22 PROGRAMMING THE MACHINE
BEVERAGE SETTINGS
To adjust the general brew parameters of the various beverages containing coffee, press the
“beverage settings” button on the main menu.
For every single beverage, you can adjust:
the coffee’s brew temperature.
the quantity of coffee to be ground
and the use of pre-ground coffee.
the coffee’s
pre-brewing.
The current programming status is indicated according to each parameter.
ADJUSTMENT OF THE COFFEE BREW TEMPERATURE
To set the temperature for preparing coffee, press the “temperature” button and select the desired temperature.
low temperature
medium temperature
high temperature
temperature
medium
beverage
settings
long
coffee
coffee
cappuccino
espresso
latte
macchiato
espresso
macchiato
low
coffee
temperature
medium
high
coffee
settings
temperature
medium
strength
medium
prebrewing
normal
go back
back to
menu
go back
restore
default
settings
back to
menu
go back
restore
default
settings
back to
menu
save
settings
Page 25

23
“AROMA” ADJUSTMENT FOR COFFEE BREWING
To set the “Aroma” function, that is to say the quantity of coffee to be ground, and to set the use of pre-ground
coffee. You can have your beverage with the quantity of coffee you desire or you can choose to prepare it with
decaffeinated coffee by using the “preground” function.
light
medium
strong
normal
coffee
prebrew
strong
off
“PREBREWING” ADJUSTMENT (ONLY COFFEE BEVERAGES)
To set the prebrewing function. The coffee is slightly dampened before brewing, bringing out the full aroma of the
coffee and extracting the best fl avor.
normal prebrewing
strong prebrewing (longer)
deactivate prebrewing
preground
strenght
medium
prebrewing
normal
light
coffee
strength
medium
strong
go back
restore
default
settings
back to
menu
save
settings
go back
restore
default
settings
back to
menu
save
settings
Page 26

24
“COFFEE OF THE WORLD” FUNCTION
This function allows the user to prepare coffee according to the most famous recipes in the world.
coffee
of the
world
espresso
italiano
ristretto
good night
milk
café creme
café
american
coffee
good morning
coffee
prepare a true Italian
ristretto.
prepare a typical North European
coffee.
prepare a typical French/
Swiss coffee.
prepare a fl avorful latte macchiato
without the fear of not being able
to sleep.
prepare a coffee for a day full
of energy.
prepare a typical Italian
espresso.
prepare a typical American coffee.
PROGRAMMING THE MACHINE
beverage
counters
extras
coffee
of the
world
demo
There are some additional functions of the machine. Pressing the “extras” button allows you to access the menu
and the following message will appear on the display.
ADDITIONAL FUNCTIONS
In this menu you can:
access the menu where some of
the most famous recipes in the
world are kept.
activate the “demo” function to
show the machine’s main
functions.
view the quantities of every type
of product brewed.
In this menu you can:
coffee
of the
world
go back
restore
default
settings
back to
menu
save
settings
go back
back to
menu
Page 27

25
This message
remains active for
approximately 5
seconds and then
returns to the main
message.
american
coffee
The beverages in the “Coffee of the World” function, if
saved, will be associated with the following buttons,
and accompanied by an asterisk:
• ristretto:
• Italian espresso:
• coffee:
• café crème:
• American coffee:
• good morning coffee:
• good night milk:
espresso (small cup)
espresso (small cup)
coffee (medium cup)
coffee (medium cup)
long coffee (glass)
espresso (small cup)
latte macchiato
To save the beverage you just made, the display shows the icon that allows this function.
american
coffee
If, for example, you want to taste a typical American coffee, you must press the “American coffee” button. In this
case, the following message appears in the display.
After brewing the desired beverage, it can be saved on one of the icons of the main menu.
go
back
the position of the SBS system knob is
shown with the best cup size to use
Pressing the
go!
button starts
the brewing process.
return to the recipe
preparation menu
save the beverage
You can associate only one beverage with a single icon. The original settings can be restored using the “Beverage
Settings” menu.
is now saved under the icon
choose an icon to brew it
do you want to save
this beve ra ge?
american coffee
go!
no yes
Page 28

26
beverage counters
BEVERAGE COUNTER FUNCTION
This function shows how many beverages have been prepared for every single type of beverage.
hot milk 0
latte macchiato 1
cappuccino 0
espresso macchiato 0
hot water 0
coffee long 15
coffee 0
espresso 0
PROGRAMMING THE MACHINE
This function shows the machine’s potential.
This is the way the “demo” mode
operation begins. The messages that
follow illustrate the machine’s
functionality.
To exit this mode, press anywhere on
the display.
“DEMO” MODE
Note: When this function is activated, the machine is in stand-by and all the functions
are disabled. The “demo” mode is saved even when the machine is turned off by the
main switch.
The next time the machine is turned on, the machine will still be in the “demo” mode.
Pressing the demo button on the display shows:
continue the tour exit and activate the
machine’s normal functions
demo
beverage
counters
no yes
leave demo mode?
go back
back to
menu
Page 29

27
coffee
cleaning
cycle
maintenance
descaling
cycle
lock
display
MAINTENANCE
To clean/maintain all of the machine’s internal circuits, press the “maintenance” button on the main menu.
In this menu you can:
begin the wash cycle of the brew
group.
perform the descaling cycle.
begin rinsing the milk
circuits.
lock the Touch Screen (to
preform cleaning of the display).
MILK CIRCUIT RINSE CYCLE
To rinse the machine’s internal circuits used for preparing milk.
This short cycle must be performed after 20 minutes from the last dispensing of a beverage with milk.
If it is not performed, the machine comes to a halt and does not allow the dispensing of milk beverages.
Before performing this function make sure that:
1. a large enough container is positioned under the spout.
2. the milk container has been correctly inserted in the machine;
3. the water tank contains a suffi cient quantity of water.
Press the "milk rinsing cycle" button and then "start rinsing" to start the milk circuit rinse cycle.
Wait for the cycle to fi nish.
The machine will return to the main
menu.
Remove the container, rinse and
dry.
milk
cleaning
cycle
milk circuit
rinsing
cycle
begin washing the milk
circuits.
rinsing...
rinsing mi l k circuit-
please wait
milk circuit
rinsing
cycle
start
rinsing
go back
back to
menu
AFTER USE, ALWAYS REMOVE THE MILK CONTAINER AND PUT IT IN THE REFRIGERATOR.
The container may be left in the machine only if it has been washed with drinking water and it does not contain
milk; see page 40.
Page 30
28 PROGRAMMING THE MACHINE
MILK CIRCUIT WASH CYCLE
To rinse the machine’s internal circuits used for preparing milk.
This cycle is proposed after 14 days from the fi rst dispensing of a milk-based beverage. After 14 days, the “milk
cleaning” message starts fl ashing (see page 13). Perform the wash cycle as described in this section.
Select the function by
pressing the “milk cleaning
cycle” button.
coffee
cleaning
cycle
maintenance
descaling
cycle
lock
display
milk
cleaning
cycle
milk circuit
rinsing
cycle
go back
back to
menu
Push the “milk cleaning” button and refer to the instructions below, at step 2. The machine switches to the status
described at point 7.
If the milk circuit wash cycle is not performed after 14 days, the dispensing of milk-based beverages will be still
possible for only 7 more days. After 7 days, the wash cycle must be performed because the dispensing of milk-based
beverages is disabled. (The machine still enables dispensing hot water and coffee).
To remind the user of this important operation, the message “milk cleaning -3” is shown on the display 3 days before
the deadline and is updated on subsequent days.
Before performing this function make sure that:
1. a large enough container is at hand.
2. the milk container has been adequately cleaned of all milk residue.
3. the water tank contains a suffi cient quantity of water.
THE WASH CYCLE CANNOT BE INTERRUPTED. A PERSON MUST BE PRESENT DURING THE OPERATION.
USE ONLY AND EXCLUSIVELY THE PROVIDED DETERGENT.
Open the compartment and
remove the milk container.
Insert the content of the
detergent packet into the
container.
3
2
1
milk
cleaning
show icon
explanation
my custom
coffee
program-
ming
menu
milk
cleaning
-3
show icon
explanation
my custom
coffee
program-
ming
menu
Page 31

29
add cleaner
to milk conteiner
milk cleaning cycle
cleaning...
milk cleaning cycle
Fill the milk container with
fresh water up to the «max»
level.
7 8
Position an adequately sized
container under the milk spout.
The wash cycle starts automatically.
Wait for the wash cycle to fi nish.
9
11
12
ok
Insert the container into the
drawer and close the drawer.
Close the compartment.
Press the button.
When the wash cycle has
fi nished the following appears…
The machine emits a tone.
Remove the milk container.
start
Rinse the container and fi ll it
with fresh water.
Insert the container and press
the button.
rinse the milk container
milk cleaning cycle
fill milk container with cold water
milk cleaning cycle
start rinsing cycle
milk cleaning cycle
5 64
10
Detergent residue or water may remain in the container during the wash and rinse cycles. In this case, empty the
container from any residue before fi lling it again.
Page 32

30
13
14
16
15
rinsing...
milk cleaning cycle
rinse the milk container
milk cleaning cycle
fill milk container with cold water
milk cleaning cycle
Wait… When the rinse cycle has fi nished
the above message will appear.
Remove the milk container.
Rinse the container and fi ll it
with fresh water.
Perform another rinse cycle as
shown previously.
When fi nished, the machine
automatically returns to the
main menu.
PROGRAMMING THE MACHINE
Page 33

31
COFFEE CIRCUIT CLEANING CYCLE (BREW GROUP WASH CYCLE)
To clean the machine’s internal circuit used for brewing coffee.
It is advisable to perform this wash cycle after 500 coffee brewing cycles, or monthly.
Packages of detergent tablets may be purchased at your local dealer or by Authorized Service Centres
Note: before performing this function make sure that:
1. a large enought container is positioned under the spout.
2. the appropriate tablet for cleaning the brew group has been inserted into the
compartment for pre-ground coffee.
3. the water tank contains a suffi cient quantity of water.
THE WASH CYCLE CANNOT BE INTERRUPTED.
A PERSON MUST BE PRESENT DURING THE OPERATION.
Press the "coffee cleaning cycle" button and then "start cleaning cycle" to start the wash cycle.
cleaning coffee circuit –
please wait
cleaning...
Wait for the cycle to fi nish. The machine will
return to the main menu.
BLOCK DISPLAY
To clean the display. The touch screen display can be cleaned with a soft dampened cloth or with the appropriate
detergents for cleaning displays sold on the market.
SOLVENTS, ALCOHOL, HARSH DETERGENTS AND/OR SHARP OBJECTS THAT CAN DAMAGE THE DISPLAY MUST
NOT BE USED.
Press the "lock display" button
To reactivate the display, press "unlock" on the lower right-hand corner and then
(within two seconds) "unlock" in the upper left-hand corner (this button appears
only after having pressed the previous button).
coffee
cleaning
cycle
start
cleaning
cycle
lock
display
unlock
display
locked
unlock
THE MAINTENANCE AND CLEANING OF THE
BREW GROUP IS DESCRIBED ON PAGE 42.
display
locked
21
Page 34

32
21
For the descaling process, you can use a not toxic and/or harmful descaling solution for coffee machines, which is
available on the market. The used solution is to be disposed of according to the manufacturer’s instructions and/or
regulations in force in the country of use.
Note: Before beginning the descaling cycle make sure that:
1. a large enough container is positioned under the water spout and the brew head.
2. THE “AQUA PRIMA” FILTER HAS BEEN REMOVED.
3. the water tank has been fi lled with the descaling solution up to the level indicated with an
.
Pause descaling.
The descaling and/or rinsing can be paused and then restarted. When descaling is interrupted the machine will
warn the user that it must be turned off.
WARNING! DESCALING MUST BE COMPLETED WITHIN 24 HOURS FROM ITS INTERRUPTION.
The next time the machine is turned on, the machine will warn the user that the descaling and/or rinse process
must be completed.
DESCALING
To perform the automatic descaling cycle.
Descaling is necessary every 3-4 months, according to the water hardness, when water comes out more slowly than
normal or when the machine indicates it.
The machine must be turned on and will automatically manage the distribution of the descaling agent.
A PERSON MUST BE PRESENT DURING THE OPERATION.
WARNING! NEVER USE VINEGAR AS A DESCALER.
The machine indicates to the user the need to complete the descaling
through the message on the main menu. This does not block the
machine’s operation.
The number under the message indicates the number of beverages that
can be dispensed before the machine needs to be descaled.
30 beverages before descaling, the button will begin to fl ash. When the
number reaches zero, the machine must be descaled.
Pressing the descaling button accesses the descaling menu.
When in the descaling menu, the
message “fi ll the water tank with
descaling solution” appears on the
display.
Perform the descaling cycle by
pressing “start descaling” as
shown.
descaling cycle
fi ll the water tank
with descaling solution
start
descaling
descaling
200
show icon
explanation
my custom
coffee
program-
ming
menu
go back
back to
menu
PROGRAMMING THE MACHINE
Page 35

33
1
ciclo di risciacquo
3
2
65
4
The machine begins to dispense the descaling solution through the hot
water spout. The dispensing occurs at preestablished intervals, in order to
allow the solution to be more effective.
In order to run a descaling cycle before the machine indicates the necessity to do so, press the button "descaling
cycle" and then "start descaling" to start the descaling cycle.
When the solution is fi nished the
following message appears on the
display:
Remove the water tank and rinse
with fresh drinking water to
eliminate traces of descaling
solution.
Then, refi ll with fresh drinking
water and reinsert water tank.
Rinse the machine circuits by
pressing "start rinsing".
start
rinsing
The machine performs the rinse cycle. At the
end of the rinse cycle you are requested to fi ll
the tank with fresh drinking water. Before
refi lling the tank, reinsert the Aqua Prima fi lter
if desired.
Put a container under the water spout. When the water
tank is inserted the machine automatically proceeds to
prime the water circuit. If this operation is not successful,
consult "manually priming the circuit" (see page 6)
rinsing...
descaling
cycle
start
descaling
insert the water tank
with fresh water
pause
rinsing
descaling cy cle
please wait
descaling...
pause
descaling
rinsing
cycle
descaling cy cle
please wait
descaling cy cle
please wait
descaling cy cle
please wait
Page 36

34
current
time
09:45 ( am)
time
settings
time
format
current
weekday
thursday
TIME SETTING
To set all the parameters relating to the clock and calendar. Important: To correctly program the times for turning the
machine on and off, press the “timer settings” button.
view the current time setting.
view the current time format
setting.
modify the settings relating to
viewing the time (in 24 hour or
am/pm format).
CLOCK SETTINGS
To adjust the current date and time, the timer for stand-by (energy savings) and the times for automatically turning on
and turning off the machine. Press the "clock settings" button on the main menu.
In this menu you can:
set
- the current time
- the current date
- the view format
(24 hour – AM/PM)
set the intervals for turning the
machine on and off (three
intervals that can be activated
separately).
set the parameters
for stand-by after
the last brew.
Current time/day of the week
To set the day of the week and the current time on the machine. Press the "time/weekday" button.
view the current day of the week
setting.
time
weekday
modify the settings related to the
current time and the day of the
current week.
Adjust the day
pressing
or
09h (am)
43 min
Adjust the hour by
pressing + or -
Adjust the minutes
pressing + or -
thursday
time
weekday
time
settings
current
format
24h
In this menu you can:
In this menu you can:
time
weekday
time
settings
clock
settings
energy
saving
settings
clock
settings
go back
back to
menu
go back
restore
default
settings
back to
menu
save
settings
go back
back to
menu
save
settings
PROGRAMMING THE MACHINE
Page 37

35
Time format
To set the time view mode. This setting adjusts all clock functions to either “am/pm” or “24 hour” formats.
To set the time view mode, press the “time format” button. The modifi catino is immediately applied and in small
writing appears ‘am/pm” or “24 hour”.
AUTOMATIC TIMER SETTINGS
With this function you can turn on (activate) and turn off (energy savings) the machine at the desired times.
Remember that the machine manages this function only if it is turned on.
set the second interval
for turning on
set the third interval
for turning on
set the fi rst
interval for turning
on
To correctly program the automatic timer settings, you must:
- set the individual intervals for turning on and turning off the machine.
- choose on which days to apply these auto on/off intervals.
It is recommended to not overlap intervals for turning on the machine.
clock
settings
choose on what days
the intervals are
active
In this menu you can:
setting 2
on 12:00 pm
off 14:00 pm
select a
timer setting
setting
weekday
setting 3
on 17:00 pm
off 19:00 pm
setting 1
on 07:00 am
off 09:00 am
go back
restore
default
settings
back to
menu
save
settings
go back
back to
menu
current
time
09:45 ( am)
time
settings
time
format
current
weekday
thursday
time
weekday
current
format
24h
Page 38

36
08h (am )
turn
machine
on
15 min
Setting an interval for turning on the machine
In order to program an interval for turning on the machine, press the button for the interval that you wish to set.
Adjust the hour to turn on by
pressing + or -
Adjust the minutes by
pressing + or -
To save the adjusted settings and go to the next screen
Adjust the hour to turn off by
pressing + or -
Adjust the minutes by
pressing + or -
To save the adjusted setting
For every day, choose the intervals for turning on
Arrow through the days of the week, and for each day, select the automatic timer intervals you wish to activate.
setting 2
monday
Select the day by pressing
or
Each day you can select various intervals.
To save the settings
setting 2
on 12:00 pm
off 14:00 pm
09h (am)
turn machine
off
15 min
setting 2
edit weekday
timer
setting 2
on 12:00 pm
off 14:00 pm
setting 1
on 07: 00 am
off 09:00 am
setting 3
on 17:00 pm
off 19:00 pm
Interval active for the
selected day
setting
weekday
Interval not active
for the selected day
go back
back to
menu
save
settings
go back
back to
menu
save
settings
go back
back to
menu
save
settings
PROGRAMMING THE MACHINE
1
2
Page 39

37
ENERGY SAVING SETTINGS
To set after what duration of time, from the last dispensed beverage, the machine will go into stand-by mode.
The default setting is "after 3 hours".
When the selected duration of time has
passed, the display reads “stand-by”.
To activate the machine, press “start”.
After having performed the function
diagnostics and the heating up phase,
the machine is once again ready for
use.
energy
saving
setting
Select the desired time to
activate stand-by.
after
30 min
standby
setting
after
3 hours
after
1 hour
after
15 min
energy
saving
start
go back
restore
default
settings
back to
menu
save
settings
Page 40

38
FACTORY SETTINGS
The function for restoring all the factory settings is contained in this menu. This function is particularly important for
restoring the original settings. Press the “factory settings” button.
If "yes" is selected, a subsequent confi rmation by inverted switch buttons is
requested to be sure that you want to perform the reset.
Selecting "yes" restores the
settings.
ALL THE CUSTOM SETTINGS WILL BE LOST AND CANNOT BE RECOVERED. AFTER RESTORING FACTORY
SETTINGS, YOU MUST, IF DESIRED, REPROGRAM ALL THE MACHINE'S FUNCTIONS.
On the display, the message “all
default settings are restored”
appears for two seconds.
After this period, the machine
returns to the main display.
SPECIAL
This menu allows you to access special functions present on the machine. Press the "specials" button on the main
menu.
factory
settings
specials
factory
settings
yes
attention!
no
do you really want to
restore all factory settings?
all custom settings will be lost!
no
are you sure?
yes
do you really want to
restore all factory settings?
all custom settings will be lost!
all default settings
are restored
show icon
explanation
my custom
coffee
program-
ming
menu
go back
back to
menu
go back
back to
menu
go back
back to
menu
PROGRAMMING THE MACHINE
1
3
2
4
Page 41

39CLEANING AND MAINTENANCE
1 2 3
1
6
54
MAINTENANCE DURING OPERATION
During normal operation, the “empty dreg drawer” message may appear. This operation must be performed
when the machine is on.
If the coffee grounds drawer is emptied with the
machine off or when it is not signalled on the
display, the count of the coffee grounds contained in
the drawer is not reset. For this reason the machine
might display the “empty dreg drawer” message
even after preparing a few coffees.
Turn the machine off and unplug
the cord.
Clean the tank and the cover. Remove the drip tray, empty and
hand wash.
Remove the
grounds drawer
, empty and wash.
Remove the drip tray, empty and
hand wash.
GENERAL MACHINE CLEANING
The cleaning described below must be performed once a week.
Note: Always use fresh water. If water is in the machine for several days, empty tank and refi ll it.
WARNING! Do not immerse the machine in water.
Refer to the instructions for maintenance and cleaning of the cappuccinatore on pages 40-41.
Clean the cappuccinatore as
shown in the corresponding
sections on page 40 and 41.
Clean the pre-ground coffee
compartment with a dry cloth.
Clean the display (see page 31).
Page 42

40 CLEANING AND MAINTENANCE
The milk container and the cappuccinatore have been designed to optimize the milk froth.
Thorough cleaning and maintenance of the milk container and cappuccinatore will allow you to savour
excellent milk-based beverages.
The cappuccinatore must be completely cleaned at least once a week.
MILK CONTAINER MAINTENANCE AND CLEANING
Pour any extra milk into a
container.
QUICK MAINTENANCE OF THE CAPPUCCINATORE
If you notice a reduction in the milk froth, simply turn the fl ow regulator
as shown in the fi gure.
Turn the regulator 2-3 times to perform quick maintenance.
Note: if the adjusting device installed is missing, replace it with the
adjusting device supplied with the cappuccinatore maintenance kit.
Rinse all the parts in contact with
milk with lukewarm water.
1 2
3
Dry and replace the milk
container into the compartment.
WASHING TO STORE THE CONTAINER IN THE MACHINE
After using milk to prepare beverages, the container may be stored in the machine only if it has been
washed with fresh drinking water. These few simple steps guarantee that the machine will operate properly.
MAINTENANCE OF O-RING FOR MILK CONTAINER
In the machine there is an O-ring which guarantees the correct
operation of the milk container.
Every 6 months, remove the water tank, open the milk container and
lubricate the O-ring using the grease supplied with the machine.
The grease for the Brew Group’s lubrication may be purchased in
authorized service centres.
Page 43

41
Remove the cappuccinatore.
THOROUGH MAINTENANCE OF THE CAPPUCCINATORE
Thoroughly wash the cappuccinatore at least once a week.
The components should be hand-washed with household detergents.
Separate the upper part of the
cappuccinatore from the lower
part.
Remove the regulator.
Remove the cap from the lower
part.
Wash all components. Make sure
that the hole is clean and
unobstructed.
Reassemble the components and
install the cappuccinatore in the
container.
Remove the O-ring with a pointy
object.
Insert the new O-ring pressing it
delicately.
Assemble the upper and lower
part of the cappuccinatore.
O-RING REPLACEMENT
When the upper and lower parts of the cappuccinatore move too freely, replace the O-ring with the ones
supplied.
1 2 3
4 5 6
1 2
3
Page 44

42
1 2 3
54
Press to open the service door.
The Brew Group must be cleaned at least once a week.
Lubricate the Brew Group after approximately 500 brewing cycles. The grease for the lubrication of the
Brew Group may be purchased by Authorized Service Centres.
Wash the brew group with warm water.
WARNING! Do not wash the brew group with detergents that can compromise its correct operation. Do
not wash in the dishwasher.
Wash any coffee residues from
the brew group.
Press the PUSH button to remove
the brew group.
Make sure the group is ready to
be put back in. The two
references must align.
CLEANING THE BREW GROUP
Wash the upper fi lter with
running water.
CLEANING AND MAINTENANCE
7 8 9
The lever on the rear part of
the group must be in contact
with the group base.
6
Make sure the components are in
the correct position. The hook
shown must be in the correct
position; to check its position,
fi rmly press the “PUSH” button.
Lubricate the Brew Group guides
only with the supplied grease.
Apply the grease evenly.
Page 45

43
65
4
After approximately 2000 grinding cycles, the grinder needs a slight adjustment to ensure it is running in
peak condition.
WARNING!
This operation should be carried out carefully and by an experienced user. The screw could fall into the
grinder; if it happens remove it before restarting the machine. Protect the grinder hole with a cloth to avoid
this problem. The snap is signalled by a message on the coffee bean hopper; refer to these messages when
this adjustment is performed.
EMPTY THE COFFEE BEAN HOPPER.
GRINDER MAINTENANCE
Adjust until it clicks.Remove screws and service door.
Unscrew the screw that holds the
service door closed.
Then reposition the door and attach it with the previously removed screw.
10 1211
Apply the grease evenly. Insert the coffee grounds drawer.
Close the service door.
Insert the washed and dried Brew
Group. DO NOT PRESS THE
“PUSH” BUTTON.
3
Repeat the cycle, turn off the
machine and unplug it.
1
Press and dispense two coffees.
2
add coffee
beans
ok
When the following display appears,
press “ok” and repeat the
operations from point (1) just once.
show icon
explanation
my custom
coffee
program-
ming
menu
Page 46

44 ERROR CODES
GUIDE MESSAGE THAT APPEARS HOW TO REMOVE THE MESSAGE
restart the machine Turn off and after 30 minutes turn the machine on again
to restore normal operation.
call assistance Problem that requires the intervention of the customer
service center.
insert drip tray Insert drip tray under the brew group.
close coffee bean container Close the coffee bean hopper cover to be able to brew
any beverage.
add ground coffee This message guides the user when, in the customized
beverage programming, the use of this type of coffee has
been chosen.
insert brew group Insert the brew group in its place.
insert dreg drawer Insert the
grounds drawer.
empty dreg drawer Remove the
grounds drawer
and empty the grounds in
an appropriate container.
Note: The
grounds drawer
must be emptied only when
the machine signals to do so, and when the machine is
turned on.
Emptying the drawer with the machine turned off does
not allow the machine to register that it has been
emptied.
close side door In order for the machine to operate, the side door must
be closed.
refi ll water tank The tank must be removed and refi lled with fresh
drinking water.
empty drip tray Open the side door and empty the drip tray under the
brew group.
insert the milk container Insert the milk container in its compartment.
prime the machine Press on the display in order to proceed with manually
priming the water circuit. The machine performs an
automatic attempt to prime the circuit. If this attempt
does not perform correctly you must proceed with these
instructions.
circuit priming failure Contact the customer service center (toll free number) to
request assistance on how to resolve the problem.
the descaling cycle has not been completed
correctly
Repeat the operation as described in the descaling
section.
milk rinsing see page 13 and 27.
milk cleaning see page 13 and 28.
Page 47

45ERROR CODES / TECHNICAL DATA
Subject to engineering and manufacturing changes due to technological developments.
The machine conforms to the European Directive 89/336/EEC (Italian Legislative Decree 476 dated 04/12/92)
concerning electromagnetic compatibility.
Nominal voltage See label on the appliance
Power rating See label on the appliance
Power supply See label on the appliance
Shell material Plastic
Size (w x h x d) 355 x 380 x 460 mm - 13.8” x 15.4” x 16.9”
Weight 14 Kg - 30.9 lbs
Cable length 1200 mm - 42.2”
Control panel (Digital) Front
Water tank 2 liters - 68 oz. / Removeable
Milk Tank ca. 0.400 liters - 12.5 oz. / Removeable
Coffee Bean Hopper Capacity 350 grams - 8.9 oz. / of coffee beans
Pump pressure 15 bar
Boiler Two in stainless steel
Coffee grinder With ceramic grinders
Pressure safety device Boiler pressure safety valve
Temperature safety device Boiler thermostats and thermal fuses
TECHNICAL DATA
GUIDE MESSAGE THAT APPEARS HOW TO REMOVE THE MESSAGE
change acqua prima fi lter The Aqua Prima fi lter must be replaced in the following
cases:
1. 60 liters of water has been dispensed;
2. 90 days have passed since its installation;
3. 20 days have passed and the machine has not been
used.
Note: this message appears only when "inserted" has
been selected in the water fi lter function (See page 19).
the cleaning cycle has not been completed
correctly
Repeat the operation as described in the appropriate
section.
insert milk container with cappuccinatore Insert the cappuccinatore in the milk container. Without
the cappuccinatore, milk-based beverages cannot be
dispensed.
Close milk container drawer Close the milk compartment in order to dispense the
beverage.
rinse the milk tank The user must wash the milk tank after it has been used.
descale the machine A descaling cycle must be performed on the machine's
internal circuits.
energy saving Press the "start" button
Page 48

46
SOS
IN CASE OF EMERGENCY
Immediately unplug the cord from the outlet.
ONLY USE THE APPLIANCE
• Indoors.
• For preparing coffee, hot water and for foaming milk.
• For domestic use.
• This appliance is not intended for use by persons (including children) with reduced physical, sensory or mental
capabilities, or lack of experience and knowledge, unless they have been given supervision or instruction concerning
use of the appliance by a person responsible for their safety.
PRECAUTIONS FOR THE USE OF THE MACHINE
• Do not use the machine for purposes other than those indicated above, in order to avoid danger.
• Do not introduce any substances other than those indicated in the instruction manual.
• During the normal fi lling of any reservoirs, all nearby reservoirs must be closed.
• Fill the water tank only with fresh drinking water: Hot water and/or any other liquid may damage the machine.
• Do not use water with carbon dioxide added.
• Do not put fi ngers or any material other than coffee beans in the coffee grinder.
• Before manipulating the coffee grinder, turn of the machine's main switch and unplug the cord.
• Do not put instant coffee or whole bean coffee in the ground coffee container.
• To operate the machine with the touch screen, use only your fi ngers.
CONNECTION TO ELECTRICAL POWER
The connection to the electrical network must be carried out in accordance with the safety regulations in force in
the user's country.
The machine must be connected to a socket which is:
• compatible with the type of plug installed on the machine;
• suitably sized to comply with the ratings shown on the machine identifi cation plate.
• effectively grounded.
The power cord must not:
• come into contact with any type of liquid: danger of electric shocks and/or fi re;
• be crushed and/or come in contact with sharp surfaces;
• be used to move the machine;
• be used if damaged;
• be handled with damp or wet hands;
• be wound in a coil when the machine is being operated.
• be tampered with.
INSTALLATION
• Choose a solid, stationary fl at surface (no more than 2° of inclination).
• Do not install the machine in areas where water could be sprayed.
• Optimal operational temperature: 10°C - 40°C / 50-104 degrees Fahrenheit
• maximum humidity: 90%.
• The machine should be installed in an adequately lit, ventilated, hygienic location and the electric socket should be
within easy reach.
• Do not place on heated surfaces!
• Install it at least 10 cm / 4" from the walls and cooking surfaces.
• Do not use in places where the temperature may drop to a level equal to and/or lower than 0°C / 32 degrees
Fahrenheit. If the machine has been exposed to such conditions notify the customer service center, who will have to
carry out a safety check.
• Do not use the machine near infl ammable and/or explosive substances.
• The machine must not be used in an explosive or volatile atmosphere or where there is a high concentration of dust
or oily substances suspended in the air.
• Do not install the machine on top of other appliances.
DANGERS
• Children should be supervised to ensure that they do not play with the appliance.
• The appliance is dangerous to children. When left unattended, unplug from the electrical outlet.
• Keep the coffee machine packaging out of the reach of children.
SAFETY RULES
Page 49

47
• Never direct the jet of hot water and/or steam towards yourself or others. Danger of scalding.
• Do not insert objects through the appliance’s openings. (Danger! Electrical Current!).
• Do not pull out the plug by yanking on the power cord or touching it with wet hands.
• Warning. Danger of burning when in contact with hot water, steam and the hot water spout.
FAILURES
• Do not use the appliance if a failure has been verifi ed or suspected, for example after being dropped.
• Any repairs must be performed by an authorized customer service center.
• Do not use the appliance with a defective power cord. The manufacturer or its customer service center will have to
replace the power cable if damaged. (Caution! Electrical Current!)
• Turn off the appliance before opening the service door. Danger of burns!
CLEANING / DESCALING
• Clean the milk circuit only with the recommended detergent powder supplied with the machine. Carefully follow the
safety instructions given on the packaging.
• Clean the coffee circuit only with the recommended detergent tablets supplied with the machine. Carefully follow
the safety instructions given on the packaging.
• Before cleaning the machine, the main switch must be turned to OFF (0), unplugged from the socket and cooled
down.
• Keep the appliance from coming into contact with splashes of water or immersing in water.
• Do not dry the machine’s parts in conventional or microwave ovens.
• The machine and its components must be cleaned and washed after the machine has not been used for a certain
period.
REPLACEMENT PARTS
For safety reasons, use only original replacement parts and original accessories.
WASTE DISPOSAL
- The packing materials can be recycled.
- Appliance: unplug the appliance and cut the power cord.
- Deliver the appliance and power cord to a service center or public waste disposal facility
This product complies with EU Directive 2002/96/EC.
The symbol on the product or on its packaging indicates that this product may not be treated as household waste.
Instead it shall be handed over to the applicable collection point for the recycling of electrical and electronic
equipment. By ensuring this product is disposed of correctly, you will help prevent potential negative
consequences for the environment and human health, which could otherwise be caused by inappropriate waste
handling of this product. For more detailed information about recycling of this product, please contact your local
city offi ce, your household waste disposal service or the shop where you purchased the product.
FIRE SAFETY
In case of fi re, use Carbon Dioxide extinguishers (CO2). Do not use water or dry-powder extinguishers.
ADDITIONAL INFORMATION FOR CORRECTLY USING THE “AQUA PRIMA” FILTER.
Please follow these simple instructions to correctly use the “Aqua prima” fi lter:
1. Keep the “Aqua prima” fi lter cool and away from sunlight; the room temperature should be between +5°C and
+40°C;
2. Do not use the fi lter in temperatures over 60°C.
3. If the coffee machine is not used for 3 days, we recommend washing the “Aqua prima” fi lter;
4 If the coffee machine is not used for more than 20 days, it is advisable to replace the fi lter.
5. To store an already opened fi lter, seal it in a nylon bag and keep in the fridge; do not store it in the freezer to avoid
damaging the fi lter properties.
6. Before using the fi lter, leave it to soak in the water tank for 30 minutes.
7. Once it is taken out of its pack, do not keep the fi lter in the open air.
8. The fi lter must be replaced 90 days after opening the packing or after treating 60 litres of drinking water.
Page 50

INDICE
PRECAUZIONI IMPORTANTI ................................................................................... 2
APPAR ECCHIO ...................................................................................................... 4
ACCESSORI ......................................................................................................................4
INSTALLAZIONE ................................................................................................... 5
AVVIO DELLA MACCHINA .......................................................................................................5
CARICAMENTO MANUALE CIRCUITO IDRAULICO ..............................................................................6
IMPOSTARE LA LINGUA E L'OROLOGIO ........................................................................................ 6
FILTRO "AQUA PRIMA" .........................................................................................................7
DISPLAY ............................................................................................................... 8
INDICAZIONE AROMA CAFFÈ ................................................................................................... 8
REGOL A ZION I ....................................................................................................... 9
CORPOSITÀ CAFFÈ ..............................................................................................................9
REGOLAZIONE DELL'ALTEZZA DELLA VASCA RACCOGLI GOCCE .............................................................9
RIEMPIMENTO CONTENITORE DEL LATTE .....................................................................................9
EROGAZIONE PRODOTTO .....................................................................................10
ESPRESSO / CAFFÈ / CAFFÈ LUNGO ........................................................................................10
EROGAZIONE BEVANDA CON CAFFÈ MACINATO ............................................................................ 11
EROGAZIONE DI ACQUA CALDA .............................................................................................. 12
LATTE MACCHIATO ........................................................................................................... 12
ESPRESSO MACCHIATO ...................................................................................................... 14
CAPPUCCINO .................................................................................................................. 14
EROGAZIONE DEL LATTE CALDO ............................................................................................ 15
PROGRAMMAZIONE BEVANDA .............................................................................15
MENU PROGRAMMAZIONE BEVANDA ........................................................................................ 15
PROGRAMMAZIONE ESPRESSO / CAFFÈ / CAFFÈ LUNGO ................................................................. 15
PROGRAMMAZIONE BEVANDE CON LATTE .................................................................................. 16
PROGRAMMAZIONE MACCHINA ...........................................................................18
IMPOSTAZIONI MACCHINA ................................................................................................... 18
MENU "LINGUA".....................................................................................................................................19
MENU "ILLUMINAZIONE TAZZE" ..................................................................................................................19
MENU "FILTRO ACQUA PRIMA" ....................................................................................................................19
MENU "DUREZZA ACQUA" ..........................................................................................................................20
MENU "RISCIACQUO" ...............................................................................................................................20
MENU "PIASTRA SCALDATAZZE" .................................................................................................................. 21
MENU "TONI E ALLARMI ACUSTICI" ..............................................................................................................21
MENU "DISPLAY" ...................................................................................................................................21
Page 51

INDICE
IMPOSTAZIONI BEVANDE ..................................................................................................... 22
REGOLAZIONE TEMPERATURA PER L'EROGAZIONE DEL CAFFÈ ..................................................................................22
REGOLAZIONE "AROMA" PER L'EROGAZIONE DEL CAFFÈ .......................................................................................23
REGOLAZIONE "PREINFUSIONE" (SOLO BEVANDE CON CAFFÈ) ................................................................................23
FUNZIONI AGGIUNTIVE ....................................................................................................... 24
FUNZIONE "COFFEE IN THE WORLD" .............................................................................................................. 24
FUNZIONE "DEMO" .................................................................................................................................26
FUNZIONE "CONTATORI PRODOTTI" ..............................................................................................................26
MANUTENZIONE .............................................................................................................. 27
CICLO RISCIACQUO CIRCUITI LATTE ...............................................................................................................27
CICLO LAVAGGIO CIRCUITI LATTE ..................................................................................................................28
CICLO PULIZIA CIRCUITI CAFFÈ (CICLO DI LAVAGGIO GRUPPO EROGATORE) ................................................................... 31
BLOCCO DISPLAY ....................................................................................................................................31
DECALCIFICAZIONE ..................................................................................................................................32
IMPOSTAZIONI OROLOGIO .................................................................................................... 34
IMPOSTAZIONE ORA .................................................................................................................................34
IMPOSTAZIONE OROLOGIO ..........................................................................................................................35
IMPOSTAZIONE RISPARMIO ENERGIA ..............................................................................................................37
SPECIALI ......................................................................................................................38
CANCELLARE TUTTE LE IMPOSTAZIONI ...........................................................................................................38
PULIZIA E MANUTENZIONE ................................................................................. 39
MANUTENZIONE DURANTE IL FUNZIONAMENTO ............................................................................39
PULIZIA GENERALE DELLA MACCHINA ......................................................................................39
PULIZIA E MANUTENZIONE DEL CONTENITORE LATTE ..................................................................... 4 0
PULIZIA GRUPPO EROGATORE ...............................................................................................42
MANUTENZIONE MACINE ..................................................................................................... 43
CODICI DI GUASTO ............................................................................................. 44
DATI TECNICI ...................................................................................................... 45
NORME DI SICUREZZA ....................................................................................... 46
Page 52

2
Durante l'utilizzo di elettrodomestici, è consigliabile prendere alcune precauzioni per limitare il rischio
di incendi, scosse elettriche e/o incidenti.
• Leggere attentamente tutte le istruzioni ed informazioni riportate in questo manuale e in qualsiasi altro opuscolo
contenuto nell'imballo prima di avviare o utilizzare la macchina espresso.
• Non toccare superfi ci calde.
• Non immergere cavo, spina o corpo della macchina in acqua o altro liquido per evitare incendi, scosse
elettriche o incidenti.
• Fare particolare attenzione durante l'utilizzo della macchina espresso in presenza di bambini.
• Togliere la spina dalla presa se la macchina non viene utilizzata o durante la pulizia. Farla raffreddare prima
di inserire o rimuovere pezzi e prima di procedere alla sua pulizia.
• Non utilizzare la macchina con cavo o spina danneggiati o in caso di guasti o rotture. Far controllare o riparare
l'apparecchio presso il centro di assistenza più vicino.
• L'utilizzo di accessori non consigliati dal produttore puó causare danni a cose e persone.
• Non utilizzare la macchina espresso all'aperto.
• Evitare che il cavo penda dal tavolo o che tocchi superfi ci calde.
• Tenere la macchina espresso lontano da fonti di calore.
• Controllare che la macchina espresso abbia l'interruttore generale in posizione "Spento" prima di inserire
la spina nella presa. Per spegnerla, posizionarla su "Spento" e rimuovere quindi la spina dalla presa.
• Utilizzare la macchina unicamente per uso domestico.
• Fare estrema attenzione durante l'utilizzo del vapore.
La macchina espresso è stata studiata unicamente per uso domestico. Qualsiasi intervento di riparazione
e/o assistenza, fatta eccezione per le operazioni di normale pulizia e manutenzione, dovrà essere prestato
unicamente da un centro di assistenza autorizzato. Non immergere la macchina in acqua.
• Controllare che il voltaggio indicato sulla targhetta corrisponda a quello dell'impianto elettrico della vostra
abitazione.
• Non utilizzate mai acqua tiepida o calda per riempire il serbatoio dell'acqua. Utilizzate unicamente acqua fredda.
• Non toccate con le mani le parti calde della macchina ed il cavo di alimentazione durante il funzionamento.
• Non pulire mai con detersivi corrosivi o utensili che graffi ano. É suffi ciente un panno morbido inumidito con acqua.
• Non utilizzare caffè caramellato.
PRECAUZIONI IMPORTANTI
AVVERTENZA
Page 53

3
• Viene fornito un cavo elettrico abbastanza corto per evitare che si attorcigli o che vi inciampiate.
• Si possono utilizzare, con molta attenzione, delle prolunghe.
Qualora venga utilizzata una prolunga, verifi care:
a. che il voltaggio riportato sulla prolunga sia corrispondente al voltaggio elettrico dell'elettrodomestico;
b. che sia munita di una spina a tre spinotti e con messa a terra (qualora il cavo dell'elettrodomestico
sia di questo tipo);
c. che il cavo non penda dal tavolo per evitare di inciamparvi.
• Non utilizzare prese multiple
La macchina da caffè è indicata per la preparazione di caffè espresso impiegando sia caffè in grani sia
caffè macinato; è dotata di un dispositivo automatico per la preparazione dei prodotti con il latte
e di un erogatore dell'acqua calda.
Il corpo della macchina, dall'elegante design, è stato progettato per uso domestico e non è indicato per
un funzionamento continuo di tipo professionale.
Attenzione: non si assumono responsabilità per eventuali danni in caso di:
• impiego errato e non conforme agli scopi previsti;
• riparazioni non eseguite presso i centri d'assistenza autorizzati;
• manomissione del cavo d'alimentazione;
• manomissione di qualsiasi componente della macchina;
• impiego di pezzi di ricambio ed accessori non originali;
• mancata decalcifi cazione della macchina o in caso d'uso a temperature al di sotto di 0°C.
IN QUESTI CASI VIENE A DECADERE LA GARANZIA.
Conservare queste istruzioni per l'uso in un luogo sicuro ed allegarle alla macchina per caffè qualora un'altra persona
dovesse utilizzarla. Per ulteriori informazioni o nel caso di problemi rivolgetevi ai Centri di Assistenza Autorizzati.
CONSERVARE QUESTE ISTRUZIONI
IL TRIANGOLO D'AVVERTIMENTO INDICA TUTTE LE ISTRUZIONI
IMPORTANTI PER LA SICUREZZA DELL
'UTENTE. ATTENERSI SCRUPO-
LOSAMENTE A TALI INDICAZIONI PER EVITARE FERIMENTI GRAVI!
IMPIEGO DI QUESTE ISTRUZIONI
GENERALITÀ
ISTRUZIONI SUL CAVO ELETTRICO
Page 54

4
Pulsante apertura
scompartimento latte
Filtro „Aqua prima“
Misurino caffè
pre-macinato
Detergente per pulizia
gruppo erogatore
Provino per test
durezza acqua
Chiave regolazione
Grasso per
gruppo erogatore
Kit manutenzione
cappuccinatore
Detergente per pulizia
contenitore latte
Scompartimento per
caffè pre-macinato
Gruppo erogatore
Cassetto raccoglifondi
Presa a vaschetta per
cavo alimentazione
Pulsante apertura
contenitore caffè in grani
Contenitore caffè in grani
Piastra scaldatazze
Interruttore generale
Sportello di servizio
ACCESSORI
Coperchio serbatoio
caffè in grani
Vasca recupero
liquidi
Tasto per alzare/abbassare
la vasca raccogli gocce
Display TOUCH-SCREEN
SBS System
Erogatore
Vasca raccogli gocce +
griglia e galleggiante
Scompartimento per
contenitore latte
Tubo (beccuccio)
erogazione acqua calda
Serbatoio acqua
APPARECCHIO
Page 55

5
1 2 3
4
7
65
INSTALLAZIONE
Inserire la spina nella presa posta
nella parte posteriore della
macchina, e l'altro capo
in una presa di corrente adeguata
(vedere targhetta dati).
Posizionare un contenitore sotto
al beccuccio per l'erogazione
dell'acqua calda.
Premere il pulsante posto sul
contenitore caffè per aprire il
coperchio. Riempire il con tenitore
con caffè in grani.
Chiudere il coperchio premendolo
fi n o i n f o n d o .
Estrarre il serbatoio dell'acqua.
Consigliamo d'installare il fi ltro
"Aqua Prima" (vedere pag. 7).
Premere l'interruttore generale
sulla posizione "Acceso".
L'apparecchio effettua
autonomamente una diagnosi
delle funzioni; questo test viene
eseguito ad ogni avvio.
La macchina esegue
automaticamente il
caricamento del circuito
idraulico.
La macchina é pronta al
funzionamento.
Assicurarsi che l'interruttore generale non sia premuto.
Riempire il serbatoio con acqua
fresca potabile; non superare mai
il livello massimo riportato sul
serbatoio. Riposizionare infi ne il
serbatoio.
È possibile che nel bicchiere
non venga erogata acqua.
Questo non deve essere
considerat0 un'anomalia.
AVVIO DELLA MACCHINA
PER REGOLARE IL GRADO DI DUREZZA DELL'ACQUA
VEDERE «MENU DUREZZA ACQUA» PAG. 20.
Page 56

6
1 2 3
CARICAMENTO MANUALE CIRCUITO IDRAULICO
Posizionare un contenitore sotto al
beccuccio per l'acqua calda (è
possibile che dal beccuccio non
fuoriesca acqua).
Premere una volta sul display; la
macchina avvia il ciclo di
caricamento del circuito idraulico.
Quando il caricamento del circuito
è terminato rimuovere il
contenitore. La macchina è pronta
al funzionamento.
avvio
caricare il circuito
posizionare il dispositivo SBS
come indicato
INSTALLAZIONE
Procedere con il caricamento manuale del circuito idraulico solo quando appare la videata (2) .
Nota: prima di procedere accertarsi che il serbatoio dell'acqua sia pieno.
Importante: prima d'eseguire il caricamento, posizionare l'SBS System (vedi pag.9) come indicato nel
display. Successivamente regolarlo a piacimento.
IMPOSTARE LA LINGUA E L'OROLOGIO
Alla prima accensione la macchina richiede la selezione della lingua desiderata; questo permette di
adattare i parametri delle bevande al gusto proprio del Paese di utilizzo. Ecco perchè alcune lingue
sono differenziate anche per Paese.
Premere per selezionare la lingua
desiderata.
italiano (ch)
lingua
1/2
français
deutsch
nederlands
english
Italiano ( i)
2
La macchina si avvia e mostra il
menu nella lingua selezionata.
Consultare il manuale a
pag. 34 per la regolazione
dell'orologio.
6
italiano (ch)
language
1/2
français
deutsch
nederlands
english
Italiano ( i)
ok
1
Selezionare la lingua desiderata.
Premere
per le altre lingue.
Premere "ok".
italiano (ch)
lingua
1/2
français
deutsch
nederlands
english
Italiano ( i)
3
ok ok
demo
autodiagnosi
4
demo
autodiagnosi
5
Se desiderato, premendo il tasto, si può attivare
la funzione "demo" (vedere pag.26) ogni volta in
cui la macchina effettua l'autodiagnosi.
Page 57

7
3
4 5
1
2
8
Togliere il fi ltro "Aqua Prima"
dalla confezione; impostare la
data del mese in corso.
FILTRO «AQUA PRIMA»
Per migliorare la qualità dell'acqua utilizzata, garantendo nel contempo una vita più lunga
all'apparecchio, consigliamo d'installare il fi ltro "Aqua Prima". Dopo l'installazione procedere con il
programma d'attivazione del fi ltro (vedere programmazione); in questo modo la macchina avvisa
l'utente quando il fi ltro deve essere sostituito.
Inserire il fi ltro nella sede
all'interno del serbatoio vuoto
(vedere fi gura);
Premere fi no al punto di arresto.
manu-
tenzione
menu
principale
speciali
impostazioni
macchina
impostazioni
orologio
funzioni
aggiuntive
impostazioni
bevande
risparmio
energia
menu pre-
parazione
caffè
Premere "impostazioni macchina".
toni e
allarmi
acustici
impostazioni
macchina
display
lingua
risciacquo
durezza
acqua
fi ltro
Aqua Prima
illuminazione
tazza
piastra
scaldatazze
Premere "fi ltro Aqua Prima".
Premere "attivazione Aqua
Prima".
fi ltro
Aqua Prima
inserito
non
inserito
attivazione
Aqua Prima
salva
imposta-
zioni
torna
al menu
ripristino
valori
standard
torna
indietro
torna
indietro
ripristino
valori
standard
torna
al menu
La macchina esegue l'attivazione del fi ltro "Aqua Prima". Attendere che il ciclo fi nisca automaticamente.
Quando il ciclo di attivazione termina, la macchina si riporta nel menu di selezione dei prodotti.
NOTA: raramente si può verifi care che la macchina non eroghi la quantità di acqua richiesta per la corretta
attivazione del fi ltro. In questo caso, ripetere le operazioni descritte dal punto 6 e seguenti.
Riempire il serbatoio con acqua
fresca potabile. Lasciare il fi ltro
nel serbatoio pieno per 30 minuti
per una corretta attivazione.
Posizionare un contenitore sotto
al beccuccio per l'erogazione
dell'acqua calda.
Premere "menu programmazione".
visualizza
menu con
testi
il mio
caffè
menu
programma-
zione
7
6
Page 58

8
• Per ottenere la bevanda desiderata, premere il simbolo corrispondente sul display.
La macchina esegue automaticamente tutte le operazioni necessarie.
• Per ottenere 2 tazze, premere 2 volte consecutivamente il simbolo della bevanda.
premere 2 volte
leggero medio forte
L'intensità del colore dell'icona (valido solo per bevande con caffè) indica la quantità di caffè da
macinare per la preparazione del prodotto. Maggiore sarà la quantità di caffè che viene macinato e
più forte sarà il caffè erogato.
DISPLAY
visualizza
menu con
testi
il mio
caffè
menu
programma-
zione
Vai al menu
"formato testo"
Programma zione
dei prodotti
Accedere al menu
di programmazione
È possibile modifi care la videata del display e scegliere tra il "formato icona" ed il "formato testo"
FORMATO ICONA
visualizza
icone
il mio
caffè
caffè
lungo
acqua
calda
caffè espresso
latte
caldo
latte
macchiato
espresso
macchiato
cappuccino
forte forteleggero
medio fortemedio
Vai al menu
"formato icona"
FORMATO TESTO
menu
programma-
zione
(OPTI-DOSE) INDICAZIONE QUANTITÀ DI CAFFÈ MACINATO
Quando si programma la macchina per utilizzare il caffè pre-macinato o quando si personalizza un
prodotto, l'icona viene visualizzata in modo differente e/o viene contrassegnata con un asterisco
(consultare i paragrafi per la programmazione delle bevande).
pre-macinato personalizzazione
Page 59

9
CAFFÈ
MEDIO
CAFFÈ
FORTE
CAFFÈ
LEGGERO
Per regolare la corposità del caffè erogato. La
regolazione può essere eseguita anche durante
l'erogazione del caffè. Questa regolazione ha un
effetto immediato sull'erogazione selezionata.
CORPOSITÀ CAFFÈ
SBS SYSTEM
Vasca raccogli gocce regolabile in altezza.
Per alzare premere leggermente sulla parte inferiore del tasto, per abbassare
premere leggermente sulla parte superiore del tasto; quando è stata raggiunta
l'altezza desiderata, rilasciare il tasto.
Nota: nella vasca raccogli gocce è presente un galleggiante rosso che serve a
richiamare l'attenzione sulla necessità di vuotare la vasca.
REGOLAZIONE DELL'ALTEZZA DELLA VASCA RACCOGLI GOCCE
RIEMPIMENTO CONTENITORE DEL LATTE
REGOLAZIONI
Il dispositivo SBS System è stato appositamente studiato per consentirvi di dare al caffè la corposità e
l'intensità di gusto desiderata. Una semplice rotazione del pomello e noterete che il caffè assumerà il
carattere che meglio si addice ai vostri gusti, con una crema sempre perfetta.
Il contenitore con il cappuccinatore deve essere riempito prima di preparare tutte le bevande con il
latte. Non utilizzare il latte dopo la sua naturale scadenza. (Importante! Consultare le istruzioni per la
manutenzione e la pulizia del cappuccinatore a pag.40).
Regolare la vasca raccogli gocce prima dell'erogazione dei prodotti per poter usare qualunque tipo di tazze.
21 3
Aprire lo scompartimento del latte
premendo il pulsante e prelevare
il contenitore.
Togliere il coperchio e versarvi il
latte. NON SUPERARE IL LIVELLO
MASSIMO indicato in fi gura.
Ri chiudere e riposizionare
nell'apposita sede, assicurandosi
di chiudere con cura lo
scompartimento.
Page 60

10
1 2
3
L'EROGAZIONE DEL CAFFÈ, DELL'ACQUA CALDA E DEL LATTE PUÒ ESSERE INTERROTTA IN OGNI MOMENTO CON LA SELEZIONE DEL TASTO «FERMA EROGAZIONE... »
IL LATTE EROGATO PUÒ RAGGIUNGERE TEMPERATURE ELEVATE: PERICOLO DI
SCOTTATURE. EVITARE DI TOCCARLO DIRETTAMENTE CON LE MANI.
IL LATTE UTILIZZATO DEVE ESSERE STATO CORRETTAMENTE CONSERVATO.
NON UTILIZZARLO DOPO LA DATA DI SCADENZA RIPORTATA SULLA CONFEZIONE.
Verifi care che tutti i contenitori siano puliti; per eseguire questa operazione seguire le istruzioni
nel capitolo "Pulizia e manutenzione" (vedere pag. 39)
DOPO LA PREPARAZIONE DELLE BEVANDE CHE CONTENGONO LATTE, BISOGNA
PROCEDERE AL RISCIACQUO DEL CONTENITORE E DEI CIRCUITI DELLA MACCHINA.
Per l'erogazione di 2 tazze di caffè, la macchina eroga metà della quantità impostata e interrompe
brevemente l'erogazione per macinare la seconda dose di caffè. L'eroga zione del caffè viene quindi riavviata
e portata a termine. Nel caso si scelga una bevanda a base di latte la macchina gestisce automaticamente
l
'erogazione del latte. Se viene interrotta l'erogazione del primo caffè, il secondo non sarà erogato.
ESPRESSO / CAFFÈ / CAFFÈ LUNGO
Scegliere il prodotto e premere
l'icona corrispon dente sul display;
una volta per 1 tazza e due volte
per 2 tazze.
La macchina inizia la
macinatura del quantitativo
di caffè impostato.
Inizia l'erogazione della bevanda
selezionata.
visualizza
menu con
testi
il mio
caffè
menu
program-
mazione
ferma
erogazione
caffè
espresso
EROGAZIONE PRODOTTO
Questa procedura mostra come erogare un espresso. Per erogare un altro tipo di caffè premere
l'icona relativa. Utilizzare tazzine o tazze idonee per evitare che il caffè fuoriesca.
La macchina termina l'erogazione del caffè automaticamente secondo le quantità impostate in fabbrica. È
possibile personalizzare le quantità vedere pag.15.
Se si desidera interrompere il ciclo d'erogazione, premere il tasto "ferma erogazione caffè".
Page 61

11
1 2 3
4 5
EROGAZIONE BEVANDA CON CAFFÈ MACINATO
La macchina consente l'uso di caffè pre-macinato e decaffeinato.
Il caffè pre-macinato deve essere versato nell'apposito scomparto posto a fi anco del contenitore
del caffè in grani. Versare solo caffè per macchine espresso macinato e mai caffè in grani o solubile. (vedere
capitolo "Programmazione bevanda" pag. 15)
ATTENZIONE: SOLO QUANDO SI DESIDERA EROGARE UN PRODOTTO CON CAFFÈ
PRE-MACINATO VERSARE NELLO SCOMPARTO QUESTO TIPO DI CAFFÈ.
INSERIRE UN SOLO MISURINO DI CAFFÈ MACINATO ALLA VOLTA. NON SI POSSONO
EROGARE DUE CAFFÈ CONTEMPORANEAMENTE.
Premere il tasto relativo e sul
display appare:
La videata ricorda all'utente di
versare il caffè macinato
nell'apposito scomparto.
visualizza
menu con
testi
il mio
caffè
menu
program-
mazione
aggiungi caffè
premacinato
avvia!
torna
indietro
Premere il tasto
avvia!
per
iniziare l'erogazione.
Versare caffè macinato
nell'apposito scomparto
utilizzando il misurino fornito a
corredo.
aggiungi caffè
premacinato
avvia!
torna
indietro
Inizia l'erogazione della bevanda
selezionata.
caffè
lungo
ferma
erogazione
caffè
Nota:
• Dopo 1 minuto da quando appare la videata (2), se non si avvia l'erogazione, la macchina ritorna al menu
principale e scarica l'eventuale caffè inserito nel cassetto raccogli fondi;
• Se non viene versato il caffè pre-macinato nello scomparto, si avrà solo l'erogazione dell'acqua;
• Se vengono aggiunti 2 o più misurini di caffè la macchina non eroga il prodotto ed il caffè versato sarà
scaricato nel cassetto raccogli fondi.
Nell'esempio sotto riportato si mostra la preparazione di un caffè lungo con l'utilizzo di caffè pre-macinato.
La scelta personalizzata d'utilizzare il caffè pre-macinato viene visualizzata sul display mediante l'asterisco
e l'icona opportunamente modifi cata posto sulla bevanda prescelta.
Page 62

12
2
2
3
4 5
1
1
6
Premere una volta l'icona
corrispondente all'acqua calda.
EROGAZIONE DI ACQUA CALDA
ALL'INIZIO POSSONO VERIFICARSI BREVI SPRUZZI DI ACQUA CALDA CON IL PERICOLO
DI SCOTTATURE. IL BECCUCCIO PER L'EROGAZIONE DELL'ACQUA PUÒ RAGGIUNGERE
TEMPERATURE ELEVATE: EVITARE DI TOCCARLO DIRETTAMENTE CON LE MANI.
Inizia l'erogazione dell'acqua.
Per erogare un'altra tazza di
acqua calda, ripetere
l'operazione.
EROGAZIONE PRODOTTO
latte
macchiato
latte
macchiato
latte
macchiato
La macchina inizia la macinatura
del quantitativo di caffè
impostato.
Scegliere il prodotto e premere
l'icona corrispon dente sul display;
una volta per 1 tazza
e due volte per 2 tazze
Quando il macinacaffè ha
terminato, la macchina eroga
automaticamente la quantità
di latte caldo programmato.
Una volta terminata l'ero gazione del
latte, la macchina prepara
automaticamente il caffè.
Successivamente la macchina
per mette, se desiderato, di erogare
una quantità aggiuntiva di latte.
Questa opzione rimane attiva circa
2 secondi; per atti varla premere il
tasto "aggiungere latte".
La macchina propone la pulizia
dei circuiti del latte; il tasto
lampeggia. Premere "risciacquo
latte" per eseguire la pulizia dei
circuiti interni.
ferma
erogazione
latte
ferma
erogazione
caffè
ferma
erogazione
latte
ferma
erogazione
caffè
aggiungere
latte
ferma
erogazione
acqua
acqua
calda
visualizza
menu con
testi
il mio
caffè
menu
program-
mazione
visualizza
menu con
testi
il mio
caffè
menu
program-
mazione
visualizza
menu con
testi
il mio
caffè
menu
program-
mazione
risciacquo
latte
Riempire il serbatoio del latte
LATTE MACCHIATO
PER UNA EROGAZIONE OTTIMALE DEL LATTE, CONSULTARE LE INDICAZIONI RIPORTATE A
PAG. 40
Page 63

13
Nonostante la segnalazione “risciacquo latte”
lampeggiante, si può continuare ad erogare altri prodotti,
ma - decorsi 20 minuti di inattività - si deve
necessariamente fare un ciclo di risciacquo, altrimenti non
sarà possibile erogare altre bevande a base di latte.
Se la macchina viene spenta subito dopo aver erogato un
prodotto a base di latte, alla successiva riaccensione
richiederà un ciclo di risciacquo dei circuiti del latte.
Nota: prima d'eseguire questa funzione assicurarsi che:
1. un contenitore di di men sioni adeguate sia stato
posizionato sotto l'erogatore;
2. il serbatoio dell'acqua contenga una quantità d'acqua
suffi ciente.
Dopo 14 giorni dalla prima erogazione di una
bevanda a base di latte, appare il messaggio
"pulizia latte"; si consiglia d'eseguire il
lavaggio dei circuiti del latte come descritto a
pag.28.
Trascorsi altri 7 giorni la macchina blocca
l'erogazione dei prodotti con il latte e deve
essere eseguito obbligatoriamente il lavaggio
dei circuiti del latte; in questa fase si può
comunque erogare caffè e acqua calda.
9
avvio
risciacquo
ciclo risciacquo circuiti latte
Per eseguire il risciacquo premere
"avvio risciacquo".
8
risciacquo...
risciacquo circuiti latte
attendere prego
Attendere che il ciclo sia concluso.
Quindi la macchina ritorna al menu
principale.
QUESTA PROCEDURA DEVE ESSERE ESEGUITA PER TUTTI I PRODOTTI CON LATTE!
DOPO L'USO RIMUOVERE SEMPRE IL CONTENITORE CON IL LATTE E RIPORLO NEL FRIGORIFERO
SE CONTIENE LATTE RESIDUO.
Togliere il contenitore e
riporlo nel frigorifero se
contiene latte residuo.
7
IL CONTENITORE PUÒ ESSERE CONSERVATO NELLA MACCHINA SOLO SE È STATO LAVATO
CON ACQUA POTABILE E NON CONTIENE LATTE (VEDERE PAG 40).
Dopo aver eseguito il ciclo di risciacquo, la macchina ricorda
all'utente di rimuovere il contenitore con il latte residuo mediante il
messaggio "rimuovere latte".
RIMUOVERE IL CONTENITORE DEL LATTE SOLO A MACCHINA ACCESA.
visualizza
menu con
testi
il mio
caffè
menu
program-
mazione
rimuovere
latte
visualizza
menu con
testi
il mio
caffè
menu
program-
mazione
pulizia
latte
Page 64

14
2
31
4
5
2
3
4 5
1
EROGAZIONE PRODOTTO
ferma
erogazione
latte
ferma
erogazione
caffè
espresso
macchiato
ferma erogazi-
one latte
ferma
erogazione
caffè
espresso
macchiato
ferma
erogazione
latte
ferma
erogazione
caffè
cappuccino
ferma
erogazione
latte
ferma
erogazione
caffè
cappuccino
aggiungere
latte
cappuccino
ESPRESSO MACCHIATO
La macchina inizia la macinatura
del quantitativo di caffè impostato
Premere l'icona; una volta per
1 tazza e due volte per 2 tazze.
Inizia l'erogazione
dell'espresso macchiato.
Una volta terminata l'erogazione del
caffè, la macchina prepara
automaticamente il latte caldo.
CAPPUCCINO
La macchina inizia la
macinatura del quantitativo
di caffè impostato.
Premere l'icona; una volta per 1
tazza e due volte per 2 tazze.
Successivamente la macchina per mette, se desiderato, di erogare una
quantità aggiuntiva di latte. Premere il tasto "aggiungere latte" entro 2
secondi.
Riempire il serbatoio del latte
Riempire il serbatoio del latte
visualizza
menu con
testi
il mio
caffè
menu
program-
mazione
visualizza
menu con
testi
il mio
caffè
menu
program-
mazione
Quando il simbolo
"risciacquo latte" lampeggia
eseguire la pulizia dei
circuiti del latte come
descritto a pag. 12, icona 6
e successive
Quando il simbolo
"risciacquo latte" lampeggia
eseguire la pulizia dei
circuiti del latte come
descritto a pag. 12, icona 6
e successive
Finito di macinare, la macchina
eroga la quantità di latte caldo
programmato.
Terminata l'ero gazione del latte, la
macchina prepara automaticamente
il caffè.
aggiungere
latte
Premere "aggiungere latte" per
erogare, se desiderato, una quantità
aggiuntiva di latte.
espresso
macchiato
Page 65

15
2
1
2
1
PROGRAMMAZIONE BEVANDA
MENU PROGRAMMAZIONE BEVANDA
Tenere premuto per due
secondi il tasto della bevanda
Premere il tasto "il mio caffè" ed entro
due secondi premere il tasto della
bevanda da personalizzare.
Ogni bevanda può essere programmata secondo i propri gusti personali. La personalizzazione
viene evidenziata nel display con l'aggiunta di un asterisco.
Per programmare la bevanda
desiderata:
oppure
PROGRAMMAZIONE ESPRESSO / CAFFÈ / CAFFÈ LUNGO
Entrare nel menu della bevanda
da personalizzare tenendo
premuto il tasto per due secondi.
In questa fase si può:
selezionare
l'utilizzo
del caffè
pre-macinato
salvare le impostazioni ripristinare le impostazioni
di fabbrica
ritornare
alla fi nestra
precedente
selezionare la
quantità di caffè
da macinare
(opti-dose)
torna
indietro
salva
imposta-
zioni
ripristina
imposta-
zioni
forte
premacinato
il mio
espresso
medio
leggero
avvia!
visualizza
menu con
testi
il mio
caffè
menu
programmazione
visualizza
menu con
testi
il mio
caffè
menu
program-
mazione
visualizza
menu con
testi
il mio
caffè
menu
program-
mazione
Quando un prodotto è stato
personalizzato, è possibile erogare
solo quel tipo di bevanda; per
modifi care le quantità di latte/
caffè, si deve procedere ad una
nuova personalizzazione o al reset
della personalizzazione.
Selezionando una quantità differente di caffè, si varia l'aroma della bevanda.
ferma
erogazione
latte
latte
caldo
EROGAZIONE DEL LATTE CALDO
Premere una volta l'icona
corrispondente al latte caldo
Inizia l'erogazione del latte caldo
visualizza
menu con
testi
il mio
caffè
menu
program-
mazione
Riempire il serbatoio del latte
Per erogare un'altra tazza di latte,
ripetere l'operazione.
Quando il simbolo "risciacquo latte"
lampeggia eseguire la pulizia dei
circuiti del latte come descritto a
pag. 12, icona 6 e successive
Page 66

16
1
5
6 7
PROGRAMMAZIONE BEVANDA
Per erogare una quantità di caffè
superiore a quella preimpostata dal
costruttore premere "impostazione
personale caffè" prima del termine
dell'erogazione in atto. Raggiunta la
quantità premere "ferma erogazione
caffè"
Premendo
avvia!
la macchina si
prepara all'erogazione del caffè.
La macchina inizia e porta a termine
automaticamente l'erogazione del caffè,
secondo le impostazioni standard.
L'erogazione può essere
interrotta solo premendo
"ferma erogazione caffè".
Se il tasto non viene premuto
si può avere la fuoriuscita
del caffè dalla tazza.
Una volta conclusa l'erogazione
premere "salva impostazioni"
entro cinque secondi.
Se il tasto "salva
impostazioni" non viene
premuto la macchina ritorna
nel menu prin cipale e le
imposta zioni personali non
saranno memorizzate.
memorizzato!
Sul display appare la conferma
della memorizzazione, la macchina
torna automaticamente al menu
principale.
ferma
erogazione
caffè
ferma
erogazione
caffè
PROGRAMMAZIONE BEVANDE CON LATTE
Entrare nel menu della bevanda da
personalizzare tenendo premuto il
tasto per due secondi.
In questa fase si può:
selezionare la
quantità
di caffè da
macinare
(opti-dose)
selezionare
l'utilizzo del
caffè premacinato, per
la successiva
preparazione
salvare le impostazioni ripristinare le impostazioni
di fabbrica
ritornare
alla fi nestra
precedente
Il mio
espresso
impostazione
personale
caffè
Il mio
espresso
impostazione
personale
caffè
Il mio
espresso
salva
imposta-
zioni
forte
premacinato
Il mio latte
macchiato
medio
leggero
avvia!
Riempire il serbatoio del latte
Premendo il tasto
avvia!
si deve obbligatoriamente
fi nire il ciclo d'erogazione,
Il mio
espresso
visualizza
menu con
testi
il mio
caffè
menu
program-
mazione
torna
indietro
salva
imposta-
zioni
ripristina
imposta-
zioni
forte
macinato
il mio
espresso
medio
leggero
avvia!
torna
indietro
salva
imposta-
zioni
ripristina
imposta-
zioni
torna
indietro
3 4
2
Page 67

17
8
9
Premendo
avvia!
la macchina si
prepara all'erogazione della
bevanda.
La macchina inizia e porta a termine
automaticamente l'erogazione del
latte, secondo le impostazioni
standard.
Il mio latte
macchiato
Per erogare una quantità di latte superiore a quella preimpostata
dal costruttore premere “impostazione personale latte” prima del
termine dell”erogazione in atto. Raggiunta la quantità premere
“ferma erogazione latte”.
L'erogazione può essere
interrotta solo premendo
"ferma erogazione latte".
Se il tasto non viene
premuto si può avere la
fuoriuscita del latte dalla
tazza.
Il mio latte
macchiato
La macchina inizia e porta a
termine automaticamente
l'erogazione del caffè, secondo le
impostazioni standard.
Il mio latte
macchiato
Per erogare una quantità di caffè superiore a quella preimpostata dal
costruttore premere "impostazione personale caffè" prima del
termine dell'erogazione in atto. Raggiunta la quantità desiderata
premere "ferma erogazione caffè".
L'erogazione può essere
interrotta solo premendo
"
ferma erogazione caff
è".
Se il tasto non viene premuto
si può avere la fuoriuscita
del caffè dalla tazza.
salva
imposta-
zioni
Una volta conclusa l'erogazione
premere "salva impostazioni"
entro cinque secondi.
Se il tasto "salva impostazioni" non viene premuto
la macchina ritorna nel menu
principale e le impostazioni
personali non saranno
memorizzate.
memorizzato!
Il mio latte
macchiato
Sul display appare la conferma della
memorizzazione, la macchina torna
automaticamente al menu principale.
impostazione
personale
caffè
ferma
erogazione
caffè
impostazione
personale
latte
ferma
erogazione
latte
impostazione
personale
caffè
ferma
erogazione
caffè
ferma erogazi-
one latte
impostazion
personale
latte
impostazione
personale
caffè
ferma
erogazione
caffè
ferma
erogazione
latte
impostazion
personale
latte
impostazione
personale
caffè
ferma
erogazione
caffè
ferma
erogazione
latte
impostazion
personale
latte
forte
macinato
Il mio latte
macchiato
medio
leggero
avvia!
Il mio latte
macchiato
Premendo il tasto
avvia!
si deve obbligatoriamente
fi nire il ciclo d'erogazione.
Il mio latte
macchiato
torna
indietro
salva
imposta-
zioni
ripristina
imposta-
zioni
torna
indietro
3
5
7
6
4
Page 68

18 PROGRAMMAZIONE MACCHINA
toni e
allarmi
acustici
impostazioni
macchina
display
lingua
risciacquo
durezza
acqua
fi ltro
Aqua Prima
illuminazione
tazza
piastra
scaldatazze
IMPOSTAZIONI MACCHINA
Quando si seleziona il menu impostazioni macchina appare la seguente videata. Qui si può:
impostare la lingua
dei menu
impostare il funzionamento
dell'illuminazione delle tazze
impostare il funzionamento
della macchina mediante
il fi ltro "Aqua Prima"
impostare/attivare
gli avvisi acustici
impostare la durezza
dell'acqua
impostare il risciacquo
dei circuiti
impostare il funzionamento della piastra scaldatazze
impostare la luminosità
dei colori del display
torna
al menu
ripristino
valori
standard
torna
indietro
Dopo aver impostato ciascuno dei menu seguenti, premere
- "torna indietro" per tornare alla videata precedente
- "ripristino valori standard" per ripristinare i valori iniziali
- "salva impostazioni" per salvare le impostazioni
- "torna al menu" per tornare al menu principale
Alcune funzioni della macchina
possono essere programmate
per personalizzarne il funzionamento
secondo le proprie esigenze.
Premere il tasto "menu programmazione".
Si accede al menu di programmazione:
Programmazione delle funzioni
della macchina (vedere pag. 18)
Funzioni speciali
(vedere pag. 38)
Manutenzione (pulizia della
macchina) (vedere pag. 27)
Programmazione approfondita
dei prodotti (vedere pag. 22)
- Ora e data corrente
- Timer di standby
- Orari di accensione/
spegnimento nell'arco della
giornata (vedere pag. 34)
Funzioni extra (vedere pag. 24)
Attivazione standby
Uscita
visualizza
menu con
testi
il mio
caffè
menu
programma-
zione
manu-
tenzione
menu
principale
speciali
impostazioni
macchina
impostazioni
orologio
funzioni
aggiuntive
impostazioni
bevande
risparmio
energia
menu pre-
parazione
caffè
Page 69

19
MENU «LINGUA»
Per cambiare la lingua del display. Premere il tasto "lingua".
Questa funzione è stata descritta
all'inizio del manuale.
L
'
impostazione è di fondamentale
importanza per la corretta
regolazione dei parametri della
macchina in funzione del paese
d'utilizzazione.
lingua
MENU «FILTRO ACQUA PRIMA»
Il fi ltro "Aqua Prima" purifi ca l'acqua e permette di gustare tutto l'aroma del caffè.
procedere con l'attivazione
(lavaggio) del fi ltro (vedere
pag.7). Dopo l'attivazione viene
attivata l'opzione «inserito»
impostare la macchina per
funzionare senza il fi ltro
"Aqua Prima".
impostare la macchina
per funzionare con il fi ltro
"Aqua Prima".
spegnere
l'
illuminazione.
torna
al menu
ripristino
valori
standard
salva
imposta-
zioni
torna
indietro
MENU «ILLUMINAZIONE TAZZA»
Questa funzione permette di attivare/disattivare l’illuminazione della zona di erogazione.
accendere
l'
illuminazione.
italiano (ch)
lingua
1/2
français
deutsch
nederlands
english
Italiano ( i )
torna
indietro
torna
al menu
inserito
non
inserito
attivazione
Aqua Prima
Nota:
• Premere "attivazione Aqua Prima" tutte le volte che si installa un fi ltro "Aqua Prima" nuovo.
• Premere "non inserito" quando non si usa un fi ltro "Aqua Prima".
• Premere "inserito" quando si usa un fi ltro "Aqua Prima". Questa funzione viene attivata anche dopo
aver premuto il tasto "attivazione fi ltro".
illuminazione
tazza
fi ltro
Aqua Prima
In questo menu si può:
In questo menu si può:
fi ltro
Aqua Prima
illuminazione
tazza
disattivato
attivato
torna
al menu
ripristino
valori
standard
salva
imposta-
zioni
torna
indietro
Premere per visualizzare la pagina successiva
Page 70

20
1
2
PROGRAMMAZIONE MACCHINA
risciacquo
attivato
disattivo
MENU «RISCIACQUO»
Per la pulizia dei condotti interni per l'erogazione del caffè, al fi ne di garantire che l'erogazione delle bevande sia
eseguita solo con acqua fresca.
In questo menu si può:
disattivare il risciacquo attivare il risciacquo
Nota: questo risciacquo
viene eseguito ad
ogni avvio della macchina
quando questa si è
raffreddata.
durezza
acqua
torna
al menu
ripristino
valori
standard
salva
imposta-
zioni
torna
indietro
risciacquo
torna
al menu
ripristino
valori
standard
salva
imposta-
zioni
torna
indietro
durezza
acqua
MENU «DUREZZA ACQUA»
Grazie alla funzione "Durezza acqua" potrete adattare la vostra macchina al grado di durezza dell’acqua che
utilizzate, in modo che la macchina vi chieda di decalcifi care al momento opportuno.
La durezza è espressa in scala da 1 a 4. L’apparecchio è preimpostato su un valore pari a 3.
Immergere, per 1 secondo
nell'acqua, il provino per i test di durezza
dell'acqua, presente nel welcome pack.
Impostare la durezza dell'acqua, sul
valore letto nel test, sulla macchina
premendo + o –
Verifi care il valore.
Il test può essere usato solo
per una misurazione.
Premere il tasto "durezza acqua".
1234
Page 71

21
piastra
scaldatazze
disattivato
spento
quando
in standby
sempre
acceso
MENU «PIASTRA SCALDATAZZE»
Per attivare la piastra scaldatazze posta nella parte superiore della macchina.
mantenere la piastra scaldatazze
sempre accesa.
In questo menu si può:
mantenere la piastra
scaldatazze spenta quando
la macchina è in stand-by
mantenere la piastra scaldatazze
sempre spenta.
MENU «TONI E ALLARMI ACUSTICI»
Per attivare/disattivare gli avvisi acustici della macchina. La pressione del tasto ne modifica immediatamente lo
stato.
In questo menu si può:
MENU «DISPLAY»
Per impostare la corretta luminosità dei colori del display. Premere il tasto "display".
Regolare la luminosità premendo + o –
attivare/disattivare un avviso
sonoro di pronto macchina
attivare/disattivare un avviso
sonoro ad ogni pressione di un
tasto
attivare/disattivare un avviso
sonoro che ricorda all
'
utente di
procedere al lavaggio dei circuiti per
la preparazione del latte
piastra
scaldatazze
torna
al menu
ripristino
valori
standard
salva
imposta-
zioni
torna
indietro
torna
al menu
ripristino
valori
standard
salva
imposta-
zioni
torna
indietro
display
torna
al menu
ripristino
valori
standard
salva
imposta-
zioni
torna
indietro
tono avviso
pronto
disattivato
avviso
qualità latte
disattivato
tono
pressione
tasto
attivato
toni e
allarmi
acustici
display
toni e
allarmi
acustici
Nota: gli avvisi acustici di norma sono suddivisi nel seguente modo:
• Avviso continuo lungo segnala un'anomalia della macchina;
• Avviso breve per la pressione di un tasto e per avvisare che la macchina è pronta all'uso;
• Avviso intermittente per segnalare la necessità di un intervento di pulizia.
attivare/disattivare un avviso sonoro
che ricorda all
'
utente di procedere al
risciacquo dei circuiti per la
preparazione del latte (l'avviso
avviene dopo un minuto dal termine
della preparazione della bevanda. )
avviso risciac-
quo latte
disattivato
Page 72

22 PROGRAMMAZIONE MACCHINA
IMPOSTAZIONI BEVANDE
Per regolare i parametri generali d'erogazione delle diverse bevande che contengono caffè. Premere
il tasto "impostazioni bevande" dal menu principale.
Lo stato attuale di programmazione è indicato in corrispondenza di ogni parametro
REGOLAZIONE TEMPERATURA PER L'EROGAZIONE DEL CAFFÈ
Per impostare la temperatura per la preparazione del caffè. Premere il tasto "temperatura" e selezionare
la temperatura desiderata.
Temperatura bassa
Temperatura media
Temperatura alta
torna
al menu
ripristino
valori
standard
torna
indietro
torna
al menu
torna
indietro
temperatura
media
torna
al menu
ripristino
valori
standard
salva
imposta-
zioni
torna
indietro
impostazioni
bevande
caffè
lungo
caffè
cappuccino
espresso
latte
macchiato
espresso
macchiato
bassa
temperatura
caffè
media
alta
impostazioni
caffè
temperatura
media
dose macinata
medio
preinfusione
normale
Selezionando ogni singolo prodotto si può:
regolare la temperatura di
erogazione del caffè
regolare la quantità di caffè
da macinare e l'impiego del
caffè pre-macinato
regolare la preinfusione
del caffè
Page 73

23
REGOLAZIONE «OPTI-DOSE» PER L'EROGAZIONE DEL CAFFÈ
Per impostare la quantità di caffè da macinare e impostare l'impiego di caffè pre-macinato.
Potete gustare la vostra bevanda con la quantità di caffè che desiderate o potete scegliere di prepararla con il
caffè decaffeinato utilizzando la funzione "premacinato".
leggero
medio
forte
normale
preinfusione
caffè
forte
disattivato
REGOLAZIONE «PREINFUSIONE» (SOLO BEVANDE CON CAFFÈ)
Per impostare la preinfusione: il caffè viene leggermente inumidito prima dell'infusione e ciò fa risaltare l'aroma
pieno del caffè che acquista un gusto eccellente.
preinfusione normale
preinfusione forte (più lunga)
preinfusione disattivata
premacinato
dose macinata
medio
torna
al menu
ripristino
valori
standard
salva
imposta-
zioni
torna
indietro
torna
al menu
ripristino
valori
standard
salva
imposta-
zioni
torna
indietro
preinfusione
normale
leggero
dose
macinata
caffè
medio
forte
Page 74

24
FUNZIONE «CAFFÈ DEL MONDO»
Questa funzione permette di gustare i principali tipi di caffè consumati nel mondo. Viaggiate con la fantasia in questo
tour sensoriale del gusto!
caffè
nel
mondo
espresso
italiano
ristretto
goodnight
milk
café
creme
café
caffè americano
goodmorning
coffee
preparare un vero
ristretto all'italiana
preparare un tipico caffè nord
europeo
preparare un tipico caffè
Francese/Svizzero
preparare un latte macchiato
gustoso senza il timore di non
riuscire a dormire
preparare un caffè per una
giornata piena d'energia
preparare un tipico espresso
italiano
preparare un caffè tipico americano
PROGRAMMAZIONE MACCHINA
contatori
prodotto
funzioni
aggiuntive
caffè
nel
mondo
demo
Nella macchina sono presenti delle funzioni aggiuntive. Premendo il tasto "funzioni aggiuntive" si accede al
menu e sul display appare la seguente videata:
FUNZIONI AGGIUNTIVE
torna
al menu
ripristino
valori
standard
salva
imposta-
zioni
torna
indietro
In questo menu si può:
accedere al menu ove sono
contenute alcune tra le
ricette più famose al mondo
attivare la funzione «demo» per
mostrare le principali funzioni
della macchina
visualizzare per ogni tipologia di
prodotto le quantità erogate
In questo menu si può:
torna
al menu
torna
indietro
caffè
nel
mondo
Page 75

25
Questa videata
rimane attiva per
circa 5 secondi e poi
si riporta nella
videata principale.
caffè americano
Le bevande della funzione "caffè del mondo ", se
memorizzate, saranno associate ai seguenti tasti con
l'aggiunta di un asterisco:
•
ristretto :
•
espresso italiano :
•
cafè :
•
cafè creme :
•
caffè americano :
•
goodmorning coffee :
•
goodnight milk :
espresso (tazza piccola)
espresso (tazza piccola)
caffè (tazza media)
caffè (tazza media)
caffè lungo (bicchiere)
espresso (tazza piccola)
latte macchiato
Nel caso si scelga di salvare il prodotto appena erogato; il display mostra il pulsante che ne permette l'accesso
rapido.
caffè americano
Se, per esempio, vogliamo gustarci un tipico caffè americano, deve essere premuto il tasto "caffè americano" in
questo caso apparirà la seguente videata nel display:
Dopo aver erogato la bevanda desiderata la si può memorizzare nei tasti del menu principale per poterla erogare
quando si preferisce.
torna
indietro
viene mostrata la posizione della manopola
SBS System e la tazza che preferibilmente
si deve utilizzare
Premendo il tasto
avvia!
la macchina inizia ad erogare la
bevanda prescelta.
ritornare al menu di
preparazione delle ricette
memorizzare la bevanda
Si può associare una sola bevanda per ogni singolo tasto.
Si possono ripristinare i valori di base utilizzando il menu «Impostazioni bevande».
ora è salvato sotto l'icona
selezionare l'icona per la sua erogazione
Salvare questo
prodotto?
caffè americano
avvia!
no
si
Page 76

26
contatori prodotto
FUNZIONE «CONTATORI PRODOTTI»
Questa funzione permette di mostrare quanti prodotti sono stati preparati per ogni singolo tipo di bevanda.
latte caldo 0
latte macchiato 1
cappuccino 0
espresso macchiato 0
acqua calda 0
caffè lungo 15
caffè 0
espresso 0
PROGRAMMAZIONE MACCHINA
Questa funzione permette di mostrare le potenzialità della macchina.
In questo modo inizia il
funzionamento in modalità
"demo".
Le videate che seguiranno avranno
lo scopo di illustrare le funzionalità
della macchina.
Per uscire dalla funzione premere un
punto qualsiasi del display.
FUNZIONE «DEMO»
Nota: quando si attiva questa funzione la macchina è in stand-by e tutte le funzioni sono disabilitate. La funzione
"demo" rimane memorizzata anche quando
la macchina viene spenta tramite l'interruttore generale; alla successiva riaccensione la macchina ripartirà con la
funzione "demo".
Premendo il tasto
"demo" sul display appare:
continuare nella
visualizzazione
uscire ed attivare le
funzioni normali della
macchina
demo
contatori
prodotto
torna
al menu
torna
indietro
no si
uscire da modalità demo?
Page 77

27
ciclo pulizia
circuiti caffè
manutenzione
decalcifi -
cazione
blocco
display
MANUTENZIONE
Per pulire/manutenere tutti i circuiti interni della macchina. Premere il tasto "manutenzione" dal menu principale.
In questo menu si può:
iniziare il ciclo di lavaggio
del gruppo erogatore
eseguire il ciclo di
decalcifi cazione
iniziare il risciacquo dei
circuiti del latte
questa funzione blocca il
Touch-screen (es.eseguire
la pulizia del display)
CICLO RISCIACQUO CIRCUITI LATTE
Per eseguire il risciacquo dei circuiti interni della macchina adibiti alla preparazione del latte.
Questo breve ciclo deve essere eseguito obbligatoriamente dopo 20 minuti dall'erogazione dell'ultima bevanda con il
latte. Se non viene eseguito, la macchina si blocca e non consente l'erogazione di bevande contenenti latte.
Nota: prima d'eseguire questa funzione assicurarsi che:
1. un contenitore di dimensioni adeguate sia stato posizionato sotto l'erogatore;
2. il contenitore del latte sia stato inserito nella macchina;
3. il serbatoio dell'acqua contenga una quantità d'acqua suffi ciente.
Premere il tasto "ciclo risciacquo circuiti latte" e poi "avvio risciacquo" per iniziare il ciclo di risciacquo dei circuiti del
latte.
Attendere che il ciclo sia concluso,
la macchina torna al menu principale.
Togliere il contenitore,
risciacquarlo e asciugarlo.
torna
al menu
torna
indietro
ciclo di
lavaggio
circuiti latte
ciclo di
risciacquo
circuiti latte
iniziare il lavaggio dei
circuiti del latte
risciacquo...
risciacquo circuiti latte
attendere prego
ciclo di
risciacquo
circuiti latte
avvio
risciacquo
DOPO L'USO RIMUOVERE SEMPRE IL CONTENITORE CON IL LATTE E RIPORLO NEL FRIGORIFERO.
Il contenitore può essere conservato nella macchina solo se è stato lavato con acqua potabile e non contiene latte;
vedere pagina 40.
Page 78

28
3
2
PROGRAMMAZIONE MACCHINA
CICLO LAVAGGIO CIRCUITI LATTE
ciclo pulizia
circuiti caffè
manutenzione
decalcifi -
cazione
blocco
display
torna
al menu
torna
indietro
ciclo di
lavaggio
circuiti latte
ciclo di
risciacquo
circuiti latte
Selezionare la funzione
premendo il tasto.
Per eseguire il lavaggio dei circuiti interni della macchina adibiti alla preparazione del latte.
Questo ciclo viene proposto dopo 14 giorni dall'erogazione della prima bevanda con il latte. Decorsi 14 giorni, appare la
scritta “pulizia latte” lampeggiante (vedere pag. 13); eseguire il lavaggio come descritto nel presente paragrafo.
Premere il pulsante "pulizia latte" e consultare (a pag 28-29) le indicazioni riportate al punto 2; la macchina si porta al
punto 7.
Sarà comunque possibile erogare bevande a base di latte per altri 7 giorni. A questo punto il ciclo di lavaggio deve
essere necessariamente eseguito poichè è inibita l’erogazione dei prodotti a base di latte. (La macchina consente
comunque l’erogazione di acqua calda e caffè).
Per aiutare l'utente a non dimenticare questa importante operazione, 3 giorni prima della scadenza viene visualizzato
sul display il messaggio "pulizia latte -3" che si aggiorna nei giorni successivi.
Premere il pulsante "pulizia latte" e consultare (a pag 28-29) le indicazioni riportate al punto 2; la macchina si porta al
punto 7.
Nota: prima d’eseguire questa funzione assicurarsi che:
1. un contenitore di dimensioni adeguate sia a portata di mano;
2. un contenitore del latte sia stato adeguatamente lavato da tutti i residui di latte;
3. il serbatoio dell’acqua contenga una quantità d’acqua suffi ciente.
IL CICLO DI LAVAGGIO NON PUÒ ESSERE INTERROTTO. DEVE ESSERE PRESENTE UNA PERSONA DURANTE
L’OPERAZIONE. UTILIZZARE SOLO ED ESCLUSIVAMENTE IL DETERGENTE FORNITO IN DOTAZIONE.
Confezioni di detergente in polvere Saeco possono essere acquistate presso il vostro rivenditore di fi ducia o nei centri
d‘assistenza autorizzati.
Aprire lo scompartimento ed
estrarre il contenitore latte.
Inserire il contenuto della
bustina di detergente nel
contenitore.
1
visualizza
menu con
testi
il mio
caffè
menu
program-
mazione
pulizia
latte
visualizza
menu con
testi
il mio
caffè
menu
program-
mazione
pulizia
latte
-3
Page 79

29
7 8
5 6
Inserire un contenitore di
adeguate capacità sotto
l’erogatore del latte. È possibile
utilizzare anche il secondo
contenitore latte
Il ciclo di lavaggio viene avviato
automaticamente.
Attendere che sia completato il
lavaggio.
9
10 11 12
Inserire detergente nel
contenitore del latte
ciclo di lavaggio circuiti latte
ok
lavaggio...
ciclo di lavaggio circuiti latte
Aprire lo scompartimento ed
inserirvi il contenitore con il
detergente.
Chiudere lo scompartimento.
Premere sul tasto.
4
Riempire il contenitore latte
con acqua fresca fi no al livello
«max».
risciacquare serbatoio latte
Quando il lavaggio è terminato
appare....
La macchina emette un segnale
sonoro.
ciclo di lavaggio circuiti latte
Rimuovere il contenitore del
latte.
riempire d‘acqua fredda
il contenitore del latte
avviare ciclo di risciacquo
avvio
Sciacquare il contenitore e
riempirlo con acqua fresca.
Inserire il contenitore e
premere il tasto.
ciclo di lavaggio circ uiti latte ciclo di lavaggio circ uiti latte
Eventuali residui di detergente o di acqua durante i cicli di lavaggio e risciacquo possono essere normali. In ogni
caso vuotare il liquido presente nel contenitore prima di procedere al suo successivo riempimento.
Page 80

30
13
14
16
15
risciacquo... risciacquare serbatoio latte
riempire d‘acqua fredda
il contenitore del latte
ciclo di lavaggio circuiti latte
Attendere.... Quando il risciacquo è
terminato appare....
Rimuovere il contenitore del
latte.
Sciacquare il contenitore e
riempirlo con acqua fresca.
Eseguire un altro ciclo di
risciacquo come mostrato in
precedenza.
Quando fi nito la macchina si
riporta automaticamente nel
menu principale
ciclo di lavaggio circ uiti latte ciclo di lavaggio cir cuiti latte
PROGRAMMAZIONE MACCHINA
Page 81

31
CICLO PULIZIA CIRCUITI CAFFÈ (CICLO DI LAVAGGIO GRUPPO EROGATORE)
Per eseguire la pulizia dei circuiti interni della macchina adibiti all'erogazione del caffè.
Vi consigliamo d'eseguire questo ciclo di lavaggio dopo 500 erogazioni di bevande contenenti caffè o mensilmente.
Confezioni di detergente in pastiglie possono essere acquistate presso il vostro rivenditore di fi ducia o nei centri
d’assistenza autorizzati
Nota: prima d'eseguire questa funzione assicurarsi che:
1. un contenitore di dimensioni adeguate sia stato posizionato sotto l'erogatore;
2. nel gruppo erogatore sia stata inserita l'apposita pastiglia per la pulizia;
3. il serbatoio dell'acqua contenga una quantità d'acqua suffi ciente.
IL CICLO DI LAVAGGIO NON PUÒ ESSERE INTERROTTO.
DEVE ESSERE PRESENTE UNA PERSONA DURANTE L'OPERAZIONE.
Premere il tasto "ciclo pulizia circuiti caffè" e poi "avvio ciclo lavaggio" per iniziare il ciclo
di lavaggio.
lavaggio circuiti caffè ––
attendere prego
lavaggio...
Attendere che il ciclo sia concluso,
la macchina ritorna al menu principale.
BLOCCO DISPLAY
Per pulire il display. Si può pulire il display touch-screen con un panno morbido inumidito o con gli appositi detergenti
per display venduti in commercio.
E' VIETATO UTILIZZARE SOLVENTI, ALCOOL, DETERGENTI AGGRESSIVI E/O OGGETTI APPUNTITI CHE POSSANO
DANNEGGIARE LA SUPERFICIE DEL DISPLAY.
Premere il tasto "blocco display"
Per riattivare il display premere "sblocco" in basso a destra e successivamente
(entro due secondi) "sblocco" in alto a sinistra (questo tasto appare solo dopo
aver premuto il precedente).
ciclo pulizia
circuiti caffè
avvio
ciclo
lavaggio
blocco
display
sblocco
display
bloccato
sblocco
display
bloccato
LA MANUTENZIONE E LA PULIZIA DEL GRUPPO
EROGATORE È DESCRITTA A PAG.42.
1 2
Page 82

32
21
Per la decalcifi cazione utilizzare un prodotto decalcifi cante per macchine da caffè di tipo non tossico e/o nocivo,
reperibile in commercio. La soluzione che viene utilizzata deve essere smaltita secondo quanto previsto dal
costruttore e/o dalle norme vigenti nel paese d’utilizzo.
Nota: prima d’iniziare il ciclo di decalcifi cazione assicurarsi che:
1. un contenitore di dimensioni adeguate sia stato posizionato sotto al tubo dell’acqua e l’erogatore;
2. SIA STATO RIMOSSO IL FILTRO “AQUA PRIMA”.
3. il serbatoio dell’acqua sia stato riempito con la soluzione decalcifi cante fi no al livello indicato con il simbolo
.
Sospensione della decalcifica zione.
La decalcificazione e/o risciacquo può essere sospesa per essere ripresa successivamente. Quando si
interrompe la decalcificazione la macchina avverte l’utente che deve essere spenta.
ATTENZIONE! LA DECALCIFICAZIONE DEVE ESSERE PORTATA A TERMINE ENTRO 24 ORE DALLA SUA
INTERRUZIONE.
Alla successiva riaccensione, la macchina avvisa l’utente che il processo di decalcificazione e/o risciacquo
deve essere portato a termine.
DECALCIFICAZIONE
Per eseguire il ciclo automatico di decalcifi cazione.
La decalcifi cazione è necessaria ogni 3-4 mesi in base alla durezza dell'acqua utilizzata, quando l'acqua esce più
lentamente del solito o quando la macchina lo segnala. La macchina deve essere accesa e gestisce automaticamente
la distribuzione del decalcifi cante.
DEVE ESSERE PRESENTE UNA PERSONA DURANTE L'OPERAZIONE.
ATTENZIONE! NON UTILIZZARE IN NESSUN CASO L'ACETO COME DECALCIFICANTE.
La macchina segnala all'utente la necessità d'eseguire la
decalcifi cazione mediante la scritta fi ssa sul menu principale. L'allarme
non blocca il funzionamento della macchina. Il numero sotto la scritta
indica il numero di erogazioni prima del blocco della macchina e viene
decrementato ad ogni erogazione. 30 erogazioni prima del blocco il
tasto comincia a lampeggiare. Terminate le erogazioni disponibili la
macchina si blocca non permettendo l'erogazione di alcun tipo di
bevanda e si deve eseguire la decalcifi cazione.
Premendo il tasto si accede al menu decalcifi cazione.
Quando la macchina si blocca, sul
display appare la scritta "riempire il
serbatoio acqua con la soluzione
decalcifi cante".
Eseguire la decalcifi ca zione
premendo "avvio decalcifi cazione"
come descritto.
decalcifi cazione
riempire il serbatoio acqua
con la soluzione decalcifi cante
avvio decal-
cifi cazione
decalcifi care
200
torna
indietro
visualizza
menu con
testi
il mio
caffè
menu
program-
mazione
torna
al menu
PROGRAMMAZIONE MACCHINA
Page 83

33
1
ciclo di risciacquo
3
2
65
4
La macchina comincia ad erogare la soluzione decalcifi cante attraverso il
tubo d'erogazione acqua calda. L'erogazione avviene ad intervalli
prestabiliti; per consentire alla soluzione d'agire in modo effi cace.
Per eseguire la decalcifi cazione prima che la macchina si blocchi o che segnali la necessità di eseguirla,
premere il tasto "decalcifi cazione" e poi "avvio decalcifi cazione" per iniziare il ciclo di decalcifi cazione.
Quando la soluzione è terminata
sul display appare:
Estrarre il serbatoio dell'acqua,
risciacquarlo con acqua fresca
potabile per eliminare tracce di
soluzione decalcifi cante, quindi
riempirlo con acqua fresca potabile
e reinserirlo.
Eseguire il risciacquo
dei circuiti della macchina
premendo "avvio risciacquo".
ciclo di decalcifi cazione
attendere prego
avvio
risciacquo
La macchina esegue il risciacquo.
Alla fi ne del risciacquo viene richiesto di
riempire il serbatoio con acqua fresca potabile.
Prima di riempire il serbatoio inserire
nuovamente, se desiderato, il fi ltro Aqua prima.
Mettere un contenitore sotto al beccuccio erogazione acqua.
Quando s'inserisce il serbatoio dell'acqua la macchina
procede automaticamente al caricamento del circuito
dell'acqua. Se questa operazione non riesce consultare
"caricamento manuale del circuito" (vedere pag. 6)
ciclo di decalcifi cazione
attendere prego
risciacquo...
decalcifi -
cazione
avvio decal-
cifi cazione
ciclo di decalcifi cazione
attendere prego
inserire il serbatoio
con acqua fresca
pausa
risciacquo
ciclo di decalcifi cazione
attendere prego
decalcifi care...
pausa
decalci-
fi cazione
ciclo di
risciacquo
Page 84

34
ora
attuale
09:45 ( am)
impostazione
ora
formato
ora
giorno
settimana
martedì
IMPOSTAZIONE ORA
Per impostare tutti i parametri relativi all'orologio e al calendario. Importante per programmare correttamente orari
d'accensione e spegnimento della macchina! Premere il tasto "impostazione ore"
visualizzare l'ora attualmente
impostata
visualizzare il formato ora
attualmente impostato
modifi care le impostazioni
relative alla visualizzazione
dell'orario (in formato 24h o
in formato am/pm).
IMPOSTAZIONI OROLOGIO
Per regolare la data e l'ora corrente, il timer per lo stand-by (risparmio energia) e gli orari per l'ac censione e lo
spegnimento automatico della macchina. Premere il tasto "impostazioni orologio" dal menu principale.
In questo menu si può:
impostare
- l'ora corrente;
- la data corrente
- il formato di visualizzazione
(24 ore – AM/PM)
impostare gli intervalli
d'accensione e spegnimento della
macchina (tre intervalli attivabili
separatamente)
impostare i
parametri per lo
stand-by dopo
l'ultima erogazione
Ora attuale/Giorno settimana
Per impostare il giorno della
settimana e l'ora corrente
sulla macchina.
Premere il tasto "ora giorno della
settimana".
visualizzare il giorno della
settimana attualmente impostato
ora
giorno della
settimana
modifi care le impostazioni relative
all'orario corrente e al giorno della
settimana corrente;
Regolare il giorno
premendo
o
09h (am)
43 min
Regolare l'ora
premendo + o –
Regolare i minuti
premendo + o –
martedì
ora
giorno
impostazione
ore
formato
attuale
24h
torna
al menu
ripristino
valori
standard
torna
indietro
In questo menu si può:
salva
imposta-
zioni
torna
al menu
torna
indietro
salva
imposta-
zioni
In questo menu si può:
ora
giorno della
settimana
torna
indietro
torna
al menu
impostazione
ore
impostazioni
orologio
impostazione
risparmio
energia
impostazione
orologio
PROGRAMMAZIONE MACCHINA
Page 85

35
Formato ora
Per impostare la modalità di visualizzazione dell'ora. La modifi ca di questa impostazione regola tutti i parametri che
richiedono una visualizzazione/impostazione dell'ora! Premere il tasto "formato ora". La modifica viene
immediatamente applicata e nel testo scritto in caratteri più piccoli appare "am/pm" o "24h".
IMPOSTAZIONE OROLOGIO
Con questa funzione potete accendere (attivare) e spegnere (risparmio energia) la macchina agli orari che
desiderate.
Ricordatevi che la macchina gestisce questa funzione solo se è accesa.
impostare il secondo
intervallo d'accensione
impostare il terzo
intervallo d'accensione
impostare il primo
intervallo d'accensione
Per eseguire una corretta impostazione si devono:
- impostare i singoli intervalli d'accensione e di spegnimento della macchina.
- scegliere in quali giorni questi intervalli provvederanno ad accendere e spegnere la macchina.
Si consiglia di non sovrapporre gli intervalli d'accensione.
ora
attuale
09:45 ( am)
impostazione
ora
formato
ora
giorno
settimana
martedì
ora
giorno della
settimana
formato
attuale
24h
torna
al menu
ripristino
valori
standard
torna
indietro
salva
imposta-
zioni
impostazione
orologio
scegliere in quali giorni gli
intervalli sono attivi
torna
indietro
torna
al menu
In questo menu si può:
impostazione 2
acceso 12:00 pm
spento 14:00 pm
seleziona
l'impostazione
impostazione
giorno
settimana
impostazione 3
acceso 17:00 pm
spento 19:00 pm
impostazione 1
acceso 07:00 am
spento 09:00 am
Page 86

36
08h (am )
accendere
la macchina
15 min
Impostazione di un intervallo d'accensione
Per regolare un intervallo d'accensione premere sul tasto dell'intervallo che si desidera impostare.
Regolare l'ora di accensione
premendo + o –
Regolare i minuti
premendo + o –
per salvare le impostazioni regolate e passare alla videata successiva
Regolare l'ora di spegnimento
premendo + o –
Regolare i minuti
premendo + o –
per salvare le impostazioni regolate
Scegliere, per ogni giorno, gli intervalli d'accensione
Scorrere i giorni della settimana e, per ogni giorno, selezionare in modo indipendente la/e impostazione/i che si
desiderano attivare.
impostazione 2
martedi
Selezionare il giorno
premendo
o
Per ogni giorno si possono selezionare intervalli differenti
per memorizzare le impostazioni
impostazione 2
acceso 12:00 pm
spento 14:00 pm
torna
al menu
torna
indietro
salva
imposta-
zioni
09h (am)
spegnere
la macchina
15 min
impostazione 2
torna
al menu
torna
indietro
salva
imposta-
zioni
modifi ca timer
giorno settimana
torna
al menu
torna
indietro
salva
imposta-
zioni
impostazione 2
acceso 12:00 pm
spento 14:00 pm
impostazione 1
acceso 07:00 am
spento 09:00 am
impostazione 3
acceso 17 : 00 pm
spento 19:00 pm
Intervallo
non attivo
per il giorno
selezionato
impostazione
giorno
settimana
Intervallo attivo
per il giorno selezionato
PROGRAMMAZIONE MACCHINA
1
2
Page 87

37
IMPOSTAZIONE RISPARMIO ENERGIA
Per impostare dopo quanto tempo, dall'ultima erogazione, la macchina passerà in stand-by.
Il tempo di default impostato è «dopo 3 ore».
Trascorso il tempo impostato per ritardo
di spegnimento appare:
Per attivare la macchina premere
"avvia". Dopo aver eseguito la diagnosi
delle funzioni e la fase di
riscaldamento, la macchina è di nuovo
pronta per l'uso.
torna
al menu
ripristino
valori
standard
torna
indietro
salva
imposta-
zioni
impostazione
risparmio
energia
Selezionare il tempo di ritardo di
spegnimento.
dopo
30 min
impostazione
risparmio
energia
dopo
3 ore
dopo
1 ora
dopo
15 min
risparmio
energia
avvio
Page 88

38
CANCELLARE TUTTE LE IMPOSTAZIONI
In questo menù è contenuta la funzione per ripristinare tutti i valori di fabbrica. Questa funzione è particolarmente
importante per ripristinare i parametri di base. Premere il tasto "regolazioni di fabbrica".
Se viene selezionato "si" si richiede
una successiva conferma a pulsanti
invertiti per essere sicuri della volontà
di eseguire il reset.
Selezionando "si" viene
eseguito il ripristino.
TUTTE LE IMPOSTAZIONI PERSONALI ANDRANNO PERDUTE E NON POTRANNO PIÙ ESSERE RECUPERATE;
DOPO IL RIPRISTINO DELLE IMPOSTAZIONI SI DOVRANNO, SE SI DESIDERA, RIPROGRAMMARE TUTTE
LE FUNZIONI DELLA MACCHINA.
Sul display appare per 2 secondi
il messaggio "Tutti i parametri
sono stati ripristinati"
Dopo tale periodo la macchina
ritorna nella videata principale.
SPECIALI
Questo menu consente l'accesso a funzioni speciali presenti nella macchina. Premere il tasto "speciali" dal menu
principale.
torna
al menu
torna
indietro
regolazioni
di fabbrica
torna
indietro
torna
al menu
visualizza
menu con
testi
il mio
caffè
menu
program-
mazione
speciali
regolazioni
di fabbrica
si
attenzione!
no
volete real mente tornare alle impostazion i
della fabbrica?
tutte le impostazioni personali
saranno cancellate!
no
siete sicuri?
si
volete realmen te t ornar e alle impostazioni
della fabbrica?
tutte le impostazioni personali
saranno cancellate!
tutti i parametri
sono stati ripristinati
torna
indietro
torna
al menu
1
3
2
4
Page 89

39PULIZIA E MANUTENZIONE
1 2 3
1
6
54
MANUTENZIONE DURANTE IL FUNZIONAMENTO
Durante il normale funzionamento può apparire il messaggio "Svuotare raccogli fondi". Questa operazione
deve essere eseguita quando la macchina è accesa.
Vuotando i fondi quando la macchina è spenta o
quando non viene segnalato sul display, il
conteggio del fondi depositati nel cassetto non
viene azzerato. Per questo motivo la macchina può
visualizzare il messaggio "Svuotare raccogli fondi"
anche dopo aver preparato pochi caffè.
Spegnere la macchina e
scollegare la spina.
Lavare il serbatoio e
il coperchio.
Estrarre la vasca raccogli gocce,
svuotarla e lavarla
Estrarre il cassetto raccogli fondi, svuotarlo e lavarlo.
Estrarre la vasca recupero
liquidi, svuotarla e lavarla
PULIZIA GENERALE DELLA MACCHINA
La pulizia di seguito descritta deve essere eseguita almeno una volta a settimana.
Nota: se l'acqua rimane per più giorni nel serbatoio non riutilizzarla.
ATTENZIONE! non immergere la macchina nell'acqua.
Per la pulizia e la manutenzione del cappuccinatore consultare la relativa sezione a pag.40.
Estrarre il contenitore del latte e
lavarlo (consulare pag.40 per la
pulizia del cappuccinatore).
Con un panno asciutto pulire lo
scomparto caffè pre-macinato.
Pulire il display (vedere pag. 31)
Page 90

40
Il contenitore del latte ed il cappuccinatore sono stati studiati per ottimizzare il trattamento del latte.
La loro costante pulizia e manutenzione consentiranno di degustare ottime bevande a base di latte.
La pulizia completa del cappuccinatore va eseguita almeno una volta a settimana
PULIZIA E MANUTENZIONE DEL CONTENITORE LATTE
1 2
Versare il latte in un contenitore.
MANUTENZIONE RAPIDA CAPPUCCINATORE
Può accadere che il latte non venga montato in modo ottimale. In questi
casi è suffi ciente ruotare il regolatore di fl usso mostrato in fi gura.
Far eseguire 2-3 rotazioni al regolatore per eseguire una
manuatenzione rapida.
Nota: nel caso venisse smarrito il regolatore installato, sostituirlo con
quello fornito con il kit manutenzione cappuccinatore.
Risciacquare con acqua tiepida
tutte le parti che sono venute a
contatto con il latte.
PULIZIA E MANUTENZIONE
Asciugare e riporre nello
scompartimento.
3
LAVAGGIO PER RIPORRE IL CONTENITORE NELLA MACCHINA
Dopo aver utilizzato il latte per la preparazione delle bevande, per riporre il contenitore nella macchina,
bisogna lavarlo con acqua fresca potabile. Con poche e semplici operazioni possiamo garantire un
funzionamento ottimale della macchina.
MANUTENZIONE O-RING PER CONTENITORE LATTE
Nella macchina è presente un O-ring che garantisce il corretto
funzionamento del contenitore del latte.
Ogni 6 mesi, rimuovere il serbatoio dell'acqua, aprire il contenitore del
latte e provvedere alla lubrifi cazione dell'O-ring con il grasso fornito a
corredo con la macchina.
Il grasso per la lubrifi cazione del gruppo erogatore è acquistabile
presso i centri d'assistenza autorizzati.
Page 91

41
1 2
Rimuovere il cappuccinatore.
MANUTENZIONE APPROFONDITA CAPPUCCINATORE
Il cappuccinatore deve essere accuratamente lavato almeno una volta alla settimana.
I componenti possono essere lavati con l'utilizzo di detergenti ad uso domestico.
3
Separare la parte superiore del
cappuccinatore dalla parte
inferiore.
Rimuovere il pomello.
4 5
Rimuovere il tappo dalla parte
inferiore
6
Lavare tutti i componenti.
Assicurarsi che il foro sia pulito e
libero da ostruzioni
Rimontare i componenti ed
installare il cappuccinatore nel
contenitore.
1 2
3
Rimuovere l'O-ring utilizzando un
oggetto appuntito
Inserire l'O-ring nuovo
premendolo delicatamente
Assemblare la parte superiore e
la parte inferiore del
cappuccinatore
SOSTITUZIONE O-RING
Quando le due parti del cappuccinatore si muovono troppo liberamente, si deve sostituire l'O-ring con quelli
forniti in dotazione.
Page 92

42
1 2
5
7
4
3
8 9
PULIZIA E MANUTENZIONE
Premere per aprire lo sportello di
servizio.
Il gruppo erogatore deve essere pulito almeno una volta a settimana. Lubrifi care il gruppo erogatore dopo
circa 500 erogazioni. Il grasso per la lubrifi cazione del gruppo erogatore è acquistabile presso i centri
d'assistenza autorizzati.
Lavare il gruppo erogatore con acqua tiepida.
ATTENZIONE! Non lavare il gruppo erogatore con detergenti che possono comprometterne il corretto
funzionamento. Non lavarlo in lavastoviglie
Lavare il fi ltro superiore con
acqua corrente.
Premere sul tasto PUSH per
estrarre il gruppo erogatore.
Assicurarsi che il gruppo sia in
posizione di riposo; i due
riferimenti devono coincidere.
La leva posta nella parte
posteriore del gruppo deve
essere a contatto con la base.
PULIZIA GRUPPO EROGATORE
6
Assicurarsi che i componenti
siano nella corretta posizione. Il
gancio mostrato deve essere nella
corretta posizione; per verifi care
premere con decisione il tasto
PUSH”.
Solo con il grasso fornito in
dotazione, lubrifi care le guide del
gruppo.
Distribuire il grasso
uniformemente.
Lavare il gruppo erogatore dai
residui di caffè.
Page 93

43
65
4
10 1211
3
Ripetuto il ciclo, spegnere la
macchina e scollegare la spina.
Le macine dopo molti cicli di macinatura (circa 2000) hanno bisogno di una piccola regolazione per rendere
il caffè sempre ottimo.
ATTENZIONE!
Si consiglia d'eseguire con attenzione questa operazione; può essere eseguita da un utente esperto. La vite
potrebbe cadere nel macinacaffè; se dovesse accadere recuperarla prima di riavviare la macchina; per
evitare questo inconveniente proteggere il foro del macinacaffè con un panno.
Lo scatto viene segnalato con un'indicazione nel contenitore caffè; fare riferimento a queste indicazioni
quando di esegue la regolazione.
SVUOTARE IL CONTENITORE CAFFÈ IN GRANI.
MANUTENZIONE MACINE
Regolare di uno scatto.Rimuovere vite e sportellino.
Svitare la vite che tiene chiuso lo
sportellino di servizio.
Successivamente riposizionare lo sportellino e fi ssarlo con la vite rimossa in precedenza.
Distribuire il grasso
uniformemente.
Chiudere lo sportello di servizio e
Inserire il cassetto raccogli fondi.
Rimontarlo senza premere sul
tasto PUSH!
1
Premere ed erogare due caffè.
visualizza
menu con
testi
il mio
caffè
menu
program-
mazione
2
aggiungere
caffè
ok
Quando appare la seguente
videata, premere "ok" e ripetere
dal punto (1) una sola volta.
Page 94

44 CODICI DI GUASTO
MESSAGGIO DI GUIDA CHE APPARE COME RIPRISTINARE IL MESSAGGIO
spegnere e
riaccendere la macchina
Spegnere e dopo 30" riaccendere la macchina
per ripristinare il normale funzionamento.
chiamare assistenza Problema che richiede l'intervento del centro assistenza.
inserire la vasca di raccolta Inserire la vasca raccogli gocce.
chiudere coperchio contenitore caffè in grani Chiudere il coperchio del contenitore caffè in grani per poter
erogare qualsiasi prodotto.
inserire caffè macinato Questo messaggio guida l'utente quando nella
programmazione personale dei prodotti, è stato scelto
d'utilizzare questo tipo di caffè.
inserire gruppo erogatore Inserire il gruppo erogatore nella propria sede.
inserire il cassetto raccogli fondi Inserire il cassetto raccogli fondi.
svuotare cass. raccogli fondi Estrarre il cassetto raccoglifondi e svuotare i fondi in un
contenitore idoneo.
Nota: il cassetto raccogli fondi deve essere vuotato solo
quando la macchina lo richiede e a macchina accesa. Lo
svuotamento del cassetto a macchina spenta non permette
alla macchina di registrare l›avvenuto svuotamento.
chiudere la porta laterale Per poter rendere operativa la macchina si deve chiudere
la porta laterale.
riempire il serbatoio dell’acqua Si deve estrarre il serbatoio e riempirlo con acqua fresca
potabile
svuotare la vasca di raccolta posta sotto il
gruppo erogatore
Aprire lo sportello laterale e svuotare la vaschetta di
raccolta che si trova sotto il gruppo erogatore.
inserire il contenitore del latte Inserire il contenitore del latte nello scompartimento
apposito
caricare circuito Premere sul display per procedere con il caricamento
manuale del circuito dell'acqua.
La macchina esegue un tentativo automatico di caricamento
del circuito; se questo tentativo non viene eseguito
correttamente allora si deve procedere con questo sistema.
caricamento circuito non riuscito Contattare il centro assistenza (Numero verde) per
richiedere consigli su come risolvere il problema.
il ciclo di decalcifi cazione non è
stato eseguito correttamente
Ripetere l'operazione come descritto nell'apposita sezione.
risclacquo latte consultare pag.13 e pag.27
pulizia latte consultare pag.13 e pag.28
Page 95

45CODICI DI GUASTO / DATI TECNICI
Con riserva di modifi che di costruzione ed esecuzione dovute al progresso tecnologico.
Macchina conforme alla Direttiva Europea 89/336/CEE (Decreto legislativo 476 del 04/12/92),
relativa all'eliminazione dei disturbi radiotelevisivi.
Tensione nominale Vedere targhetta posta sull'apparecchio
Potenza nominale Vedere targhetta posta sull'apparecchio
Alimentazione Vedere targhetta posta sull
'
apparecchio
Materiale corpo Plastica
Dimensioni (l x a x p) 355 x 380 x 460 mm
Peso 14 Kg
Lunghezza del cavo 1200 mm
Pannello comandi Frontale (Digitale)
Serbatoio acqua 2 litri - Estraibile
Serbatoio latte 0,400 litri - Estraibile
Capacità contenitore caffè 350 grammi di caffè in grani
Pressione della pompa 15 bar
Caldaie Due in acciaio inossidabile
Macinacaffè Con macine in ceramica
Dispositivo di sicurezza pressione Valvola di sicurezza pressione caldaia
Dispositivo di sicurezza temperature Termostati e termofusibili caldaia
DATI TECNICI
MESSAGGIO DI GUIDA CHE APPARE COME RIPRISTINARE IL MESSAGGIO
cambiare il fi ltro Aqua Prima Il fi ltro Aqua Prima deve essere sostituito per i seguenti casi
1. sono stati erogati 60 litri di acqua;
2. sono passati 90 giorni dalla sua installazione:
3. sono passati 20 giorni e la macchina non è mai stata
utilizzata.
Nota: questo messaggio appare solo se è stato selezionato
«inserito» nella funzione fi ltro acqua (Vedere pag.19).
Il ciclo di pulizia non è stato eseguito
correttamente
Ripetere l'operazione come descritto nell'apposita sezione.
inserire il contenitore del latte con
cappuccinatore
Inserire il cappuccinatore nel contenitore del latte.
Senza il cappuccinatore non può essere erogato nessun
prodotto contenente latte.
chiudere il contenitore del latte Chiudere il contenitore del latte per erogare il prodotto.
risciaquare serbatoio latte L'utente deve lavare il serbatoio del latte dopo che questo è
stato utilizzato.
decalcifi care la macchina Si deve eseguire un ciclo di decalcifi cazione dei circuiti
interni della macchina.
risparmio energia Premere il tasto "avvio"
Page 96

46
SOS
IN CASO D'EMERGENZA
Estrarre immediatamente la spina dalla presa di rete.
UTILIZZARE ESCLUSIVAMENTE L'APPARECCHIO
• In luogo chiuso.
• Per la preparazione di caffè, acqua calda e per montare il latte.
• Per l'impiego domestico.
• L’apparecchio non è destinato ad essere utilizzato da persone (compresi i bambini) con ridotte capacità fi siche,
mentali o sensoriali o con esperienza e/o competenze insuffi cienti, a meno che non siano sotto la supervisione di una
persona responsabile della loro sicurezza o non vengano da essa istruite sull’uso dell’apparecchio.
PRECAUZIONI PER L'UTILIZZO DELLA MACCHINA
• Non utilizzare la macchina per scopi diversi da quelli sopra indicati, al fi ne di evitare pericoli.
• Non introdurre nei contenitori sostanze diverse da quelle indicate nel manuale istruzioni.
• Durante il normale riempimento di ogni contenitore, è obbligatorio chiudere tutti i contenitori vicini.
• Riempire il serbatoio acqua soltanto con acqua fresca potabile: acqua calda e/o altri liquidi possono danneggiare la
macchina.
• Non utilizzare acqua addizionata con anidride carbonica.
• Nel macinacaffè è vietato introdurre le dita e qualsiasi materiale che non sia caffè in grani.
• Prima di intervenire all'interno del macinacaffè spegnere la macchina con l'interruttore generale e togliere
la spina dalla presa di corrente.
• Non introdurre caffè solubile o in grani nel contenitore caffè macinato.
• Per far funzionare la macchina, tramite il display touch-screen, utilizzare solo le dita della mano.
ALLACCIAMENTO ALLA RETE
Il collegamento alla rete elettrica deve essere eseguito in conformità alle norme di sicurezza vigenti nel paese
d'utilizzazione.
La presa, alla quale collegare la macchina deve essere:
• conforme al tipo di spina installata nella medesima;
• dimensionata per rispettare i dati della targhetta dati sul fondo dell'apparecchio.
• collegata ad un effi ciente impianto di messa a terra.
Il cavo d'alimentazione, non deve:
• entrare in contatto con qualsiasi tipo di liquido: pericolo di scosse elettriche e/o incendio;
• essere schiacciato e/o entrare in contatto con superfi ci taglienti;
• essere utilizzato per spostare la macchina;
• essere utilizzato se risulta danneggiato;
• essere manipolato con le mani umide o bagnate;
• essere avvolto in una matassa quando la macchina è in funzione.
• essere manomesso.
INSTALLAZIONE
• Scegliere un piano d'appoggio ben livellato (non deve superare i 2° d'inclinazione), solido e fermo.
• Non installare la macchina in zone nelle quali può essere utilizzato un getto d'acqua.
• Temperatura ottimale di funzionamento: 10°C÷40°C
• Umidità massima: 90%.
• Il locale deve essere suffi cientemente illuminato, areato, igienico e la presa di corrente deve essere facilmente
raggiungibile.
• Non collocare su superfi ci incandescenti!
• Porre ad almeno 10 cm di distanza da pareti e piastre di cottura.
• Non utilizzare in ambienti la cui temperatura possa raggiungere valori uguali e/o inferiori a 0°C; nel caso
in cui la macchina abbia raggiunto tali condizioni contattare un centro assistenza per effettuare un controllo di
sicurezza.
• Non utilizzare la macchina in prossimità di sostanze infi ammabili e/o esplosive.
• E vietato l'utilizzo della macchina in atmosfera esplosiva, aggressiva o ad alta concentrazione di polveri o sostanze
oleose in sospensione nell'aria.
• Non installare la macchina sopra ad altre apparecchiature.
PERICOLI
• Tenere i bambini sotto supervisione, per evitare che giochino con l’apparecchio.
• L'apparecchio è pericoloso per i bambini. Se incustodito, scollegarlo dalla presa di alimentazione.
NORME DI SICUREZZA
Page 97

47NORME DI SICUREZZA
• Non lasciare i materiali utilizzati per imballare la macchina alla portata dei bambini.
• Non dirigere contro se stessi e/o altri il getto di vapore surriscaldato e/o d'acqua calda: pericolo di scottature.
• Non inserire oggetti attraverso le aperture dell'apparecchio (Pericolo! Corrente elettrica!).
• Non toccare la spina con le mani e piedi bagnati, non estrarla dalla presa tirando il cavo.
• Attenzione pericolo di ustioni al contatto con l'acqua calda, il vapore e il beccuccio per l'acqua calda.
GUASTI
• Non utilizzare l'apparecchio in caso di guasto accertato o sospetto, ad esempio dopo una caduta.
• Eventuali riparazioni devono essere effettuate dal servizio assistenza autorizzato.
• Non utilizzare un apparecchio con cavo di alimentazione difettoso. Se il cavo d'alimentazione è danneggiato,
deve essere cambiato dal produttore o dal suo servizio assistenza clienti. (Pericolo! Corrente elettrica!).
• Spegnere l'apparecchio prima di aprire lo sportello di servizio. Pericolo di ustioni!
PULIZIA / DECALCIFICAZIONE
• Per la pulizia dei circuito latte utilizzare solo il detergente in polvere consigliato e fornito con la macchina
Attenersi scrupolosamente alle indicazioni di sicurezza evidenziate nella confezione.
• Per la pulizia dei circuito caffè utilizzare solo il detergente in pastiglie consigliato e fornito con la macchina.
Attenersi scrupolosamente alle indicazioni di sicurezza evidenziate nella confezione.
• Prima di pulire la macchina, è indispensabile posizionare l'interruttore generale su SPENTO (0); staccare
la spina dalla presa di corrente ed attendere che la macchina si raffreddi.
• Impedire che l'apparecchio venga a contatto con schizzi d'acqua o immerso in acqua.
• Non asciugare le parti della macchina in forni convenzionali e/o a microonde.
• L'apparecchio ed i suoi componenti devono essere puliti e lavati dopo
un periodo d'inutilizzo dell'apparecchio.
PARTI DI RICAMBIO
Per ragioni di sicurezza, utilizzare solo parti di ricambio e accessori originali.
SMALTIMENTO
INFORMAZIONE AGLI UTENTI ai sensi dell’art. 13 del Decreto Legislativo 25 luglio 2005, n. 151”Attuazione delle
Direttive 2002/95/CE, 2002/96/CE e 2003/108/CE, relative alla riduzione dell’uso di sostanze pericolose nelle
apparecchiature elettriche ed elettroniche, nonché allo smaltimento dei rifi uti”.
Il simbolo del cassonetto barrato riportato sull’apparecchiatura o sulla sua confezione indica che il prodotto alla fi ne
della propria vita utile deve essere raccolto separatamente dagli altri rifi uti. L’utente dovrà, pertanto, conferire
l’apparecchiatura giunta a fi ne vita agli idonei centri di raccolta differenziata dei rifi uti elettronici ed elettrotecnici,
oppure riconsegnarla al rivenditore al momento dell’acquisto di una nuova apparecchiatura di tipo equivalente, in
ragione di uno a uno. L’adeguata raccolta differenziata per l’avvio successivo dell’apparecchiatura dismessa al
riciclaggio, al trattamento e allo smaltimento ambientalmente compatibile contribuisce ad evitare possibili effetti
negativi sull’ambiente e sulla salute e favorisce il reimpiego e/o riciclo dei materiali di cui è composta
l’apparecchiatura. Lo smaltimento abusivo del prodotto da parte dell’utente comporta l’applicazione delle sanzioni
amministrative previste dalla normativa vigente.
ANTINCENDIO
In caso di incendio utilizzare estintori ad anidride carbonica (CO2).
Non utilizzare acqua o estintori a polvere.
INFORMAZIONI AGGIUNTIVE PER IL CORRETTO UTILIZZO DEL FILTRO “AQUA
PRIMA”
Per utilizzare correttamente il fi ltro “Aqua prima” vi elenchiamo alcune avvertenze da prendere in considerazione:
1. Conservare il fi ltro “Aqua prima” in un ambiente fresco al riparo dal sole; la temperatura dell’ambiente deve essere
compresa tra +5°C e +40°C;
2. Utilizzare il fi ltro in ambienti la cui temperatura non superi i 60°C.
3. Consigliamo di lavare il fi ltro “Aqua prima” dopo 3 giorni d’inutilizzo della macchina da caffè;
4. È necessario sostituire il fi ltro dopo 20 giorni d’inutilizzo della macchina da caffè;
5. Nel caso si voglia conservare un fi ltro già aperto, chiuderlo ermeticamente in un sacchetto di nylon e riporlo nel
frigorifero; è vietato conservarlo nel freezer in quanto si alterano le proprietà del fi ltro.
6. Prima d’utilizzare il fi ltro lasciarlo immerso nel serbatoio dell’acqua per 30 minuti.
7. Non conservare il fi ltro all’aperto una volta estratto dalla confezione.
8. Il fi ltro deve essere sostituito dopo 90 giorni dall’apertura dell’imballo o dopo aver trattato 60 litri di acqua potabile.
Page 98

Amministratore Unico: Ing.
Jean Paludetto
Robecco sul Naviglio, 16/04/2006
EC DECLARATION OF CONFORMITY
EC 73/23, EC 89/336
EC92/31, EC93/68
Gaggia s.p.a.
Strada prov. per Abbiategrasso, snc
20087 Robecco sul Naviglio - Milano . Italy
declare under our responsability that the product:
Household coffee machine
Models - SUP 030 ADR
to which this declaration relates is in conformity with the following standards or other normative documents :
• Safety of household and electrical appliances - General requirements
EN 60335-1(2002); - A1(2004) - A11(2004).
• Safety of household and electrical appliances - Part 2^
Particular requirements for appliances for heating liquids
EN 60335-2-15(2002).
• Safety of household and electrical appliances - Part. 2^
Particular requirements for coffee mills and coffee grinders
EN 60335-2-14 (2006).
• Limits and methods of measurements of radio disturbance characteristics of electrical motor-operated and thermal
appliances for households and similar purposes, electric tools and similar electric apparatus - EN 55014-1(1993)
A1(1997) + A2(1999)
• Electromagnetic compatibility (EMC)
Part. 3^ Limits - Section 2 : Limits for harmonic current emissions (equipment input current ≤ 16A per phase) - EN
61000-3-2 (1995) - A1(1998) + A2(1998) + A14(2000)
• Electromagnetic compatibility (EMC)
Part 3^ : Limits - Section 3 : Limitation of voltage fl uttuations and fl icker in low-voltage supply systems for equipment
with rated current ≤ 16 A.
EN 61000-3-3 Edit. 1995
• Immunity requirements for household appliances, tools and similar apparatus.
Product family standard EN 55014-2 (1997).
Following the provision of the directives: EC 73/23, EC 89/336, EC 92/31, EC 93/68
Page 99

DICHIARAZIONE DI CONFORMITA’ CE
CE 73/23, CE 89/336
CE 92/31, CE 93/68
Gaggia s.p.a.
Strada prov. per Abbiategrasso, snc
20087 Robecco sul Naviglio - Milano . Italy
dichiara sotto la prorpia responsabilità che il prodotto:
Macchina per caffè ad uso domestico
Modello - SUP 030 ADR
al quale si riferisce questa dichiarazione è conforme alle seguenti norme:
• Sicurezza di elettrodomestici e apparecchi elettrici - Requisiti generali
EN 60335-1 (2002) ; - A1(2004) -A11(2004).
• Sicurezza di elettrodomestici e apparecchi elettrici - Parte 2^
Requisiti specifi ci per apparecchi per riscaldare liquidi
EN 60335-2-15 (2002).
• Sicurezza di elettrodomestici e apparecchi elettrici - Parte 2^
Requisiti specifi ci per polverizzatori e macinacaffè
EN 60335-2-14 (2006).
• Limiti e metodi di misurazione dei disturbi radio caratteristici di apparecchi con motore elettrico e termici per uso domestico e simili scopi, strumenti elettrici e simili apparecchiature elettriche - EN 55014-1 (1993)
A1 (1997) + A2 (1999)
• Compatibilità elettromagnetica (EMC)
Parte 3^ Limiti - Sezione 2 : Limiti per le emissioni di corrente armonica (corrente in ingresso dell’apparecchiatura ≤16A
per fase) - EN 61000-3-2 (1995) - A1 (1998) + A2 (1998) + A14 (2000)
• Compatibilità elettromagnetica (EMC)
Parte 3^ Limiti - Sezione 3 : Limitazione delle fl uttuazioni e dei picchi di tensione nei sistemi di alimentazione a bassa
tensione per apparecchiature con corrente nominale ≤ 16A.
EN 61000-3-3 Ediz. 1995
• Requisiti di immunità per elettrodomestici, strumenti e apparecchi similari.
Norma per famiglia di prodotti EN 55014-2 (1997).
secondo le disposizioni delle direttive CE 73/23, CE 89/336, CE 92/31, CE 93/68.
Amministratore Unico: Ing.
Jean Paludetto
Robecco sul Naviglio, 16/04/2006
Page 100

Gaggia S.p.A.
20087 Robecco S/Naviglio Milano Italy
Tel. +39 02 949931 Fax: +39 02 9470888
E-mail: gaggia@gaggia.it
The manufacturer reserves the right to change the features of the product without prior notice.
Il produt tore si riserva il diritto d`apportare qualsiasi modifica senza preav viso.
© Gaggia S.p.A.
Type SUP030ADR Cod.15001071 Rev.00 del 05-03-07
 Loading...