

Page 1
USER’S MANUAL
FX-3850
Page 2

2
1 INTRODUCTION
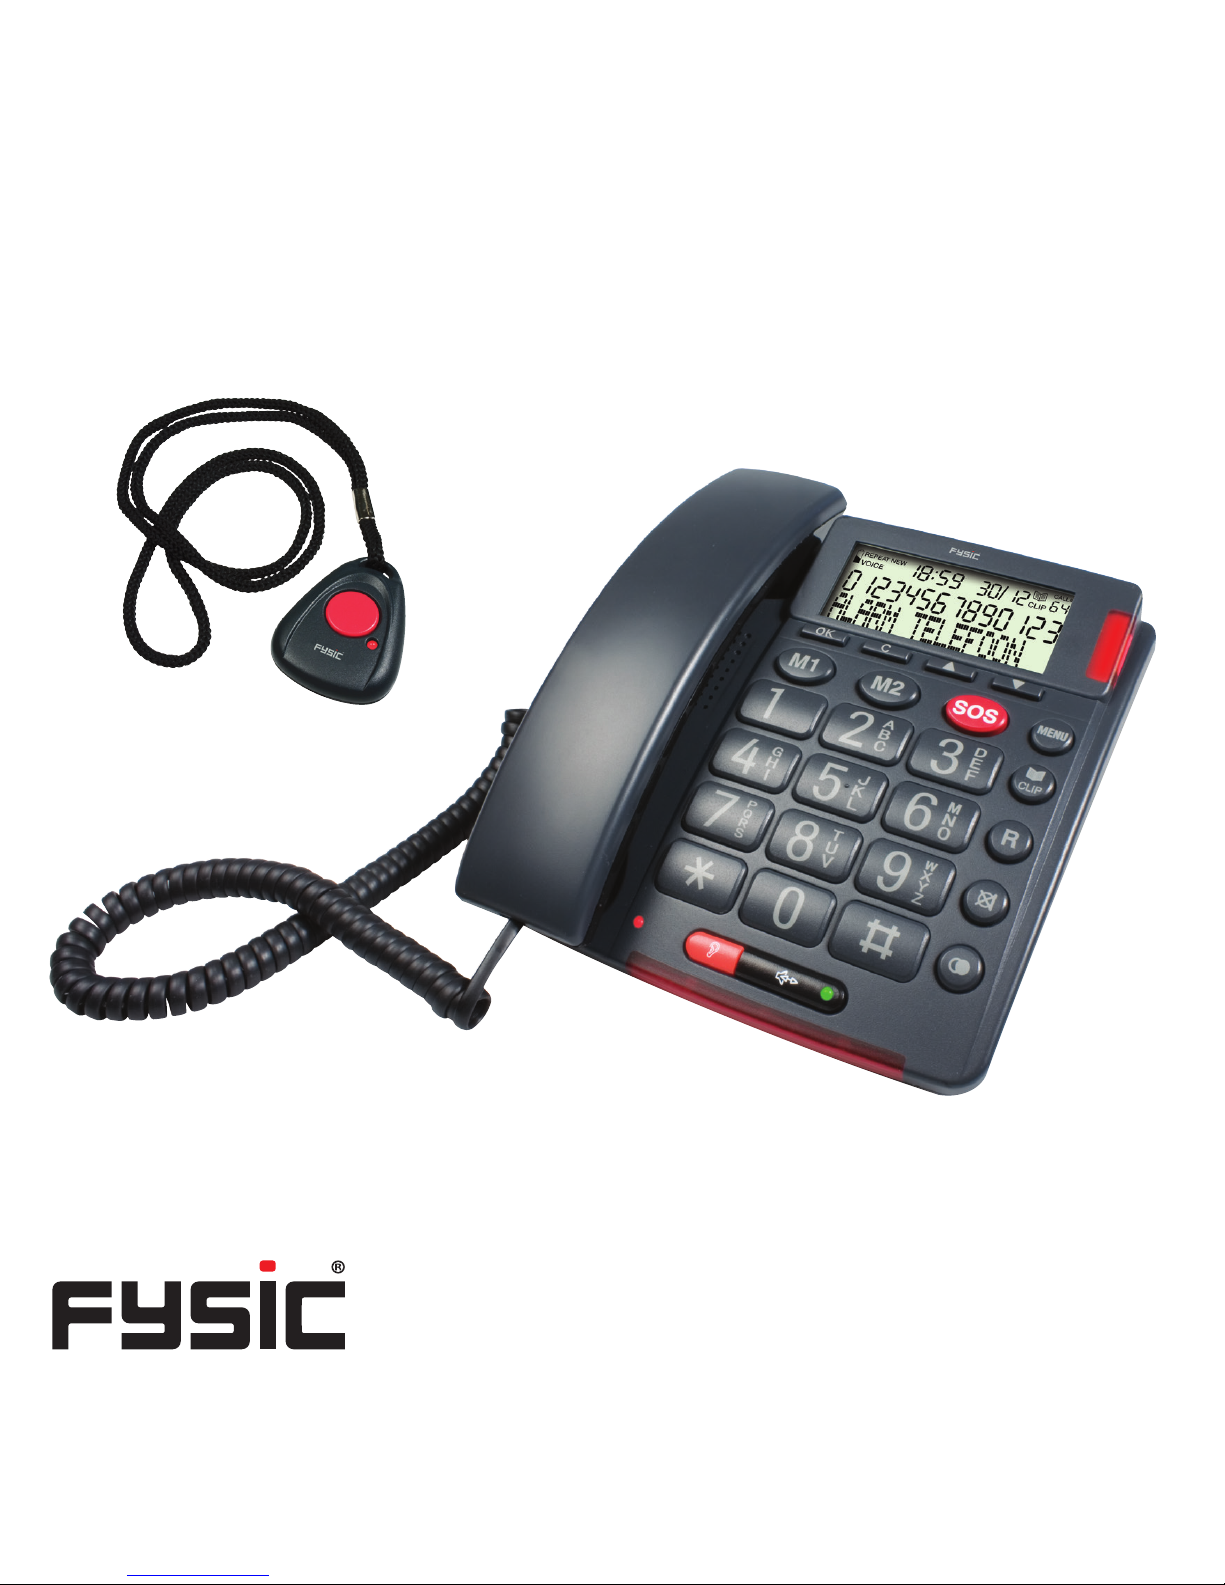
The FX-3850 is a comfort phone with extensive functions to support
especially people with impaired hearing or sight.
Sight support:
- Big keys with contrasting numbers.
- Illuminated display with big characters.
- Also spoken support at pressing the keys and during set up.
- Possibility to record the concerning name with memory numbers.
These will be spoken when searching the memory.
Hearing support:
- Extra loud ring.
- Adjustable handset volume.
- Activation hearing aids.
Beside these extensive phone functions, the FX-3850 offers the possibility
to call a number of people, up to 30, automatically in case you need help.
- Alarm activation directly on the phone or through the included remote
control.
- The people that have been determined by you will be called, in the
order as indicated by you.
- If the emergency call is not answered, the next person will be called.
- Automatic enabling of the loudspeaker function.
Page 3

3
So if you need help, and you press the red ‘SOS’ button on your phone,
or the red ‘SOS’ button on the remote control, these people will be called
one-by-one, and they will hear your recorded emergency message.
As soon as a called person actually responds, they can enable the
handsfree function of your phone remotely, and where possible consult
with and arrange help.
This way you do not depend on ofcial emergency centers, with their
monthly subscription fees, and you can also call for help for less urgent
issues.
Page 4
4
2 INSTALLATION
2.1 Phone check:
The phone checks whether the phone line is connected. If the phone line
has not been connected yet, but the batteries have been inserted, or the
adapter has been connected, a short alert tone will sound every 10 seconds. As soon as you have connected the phone to the phone connection,
this tone will stop.
2.2 Batteries:
To be able to have access to all phone function in case of a failure of the
230 V mains power or the adapter, you shall insert 4 batteries.
1. Unplug the phone connector off the phone socket.
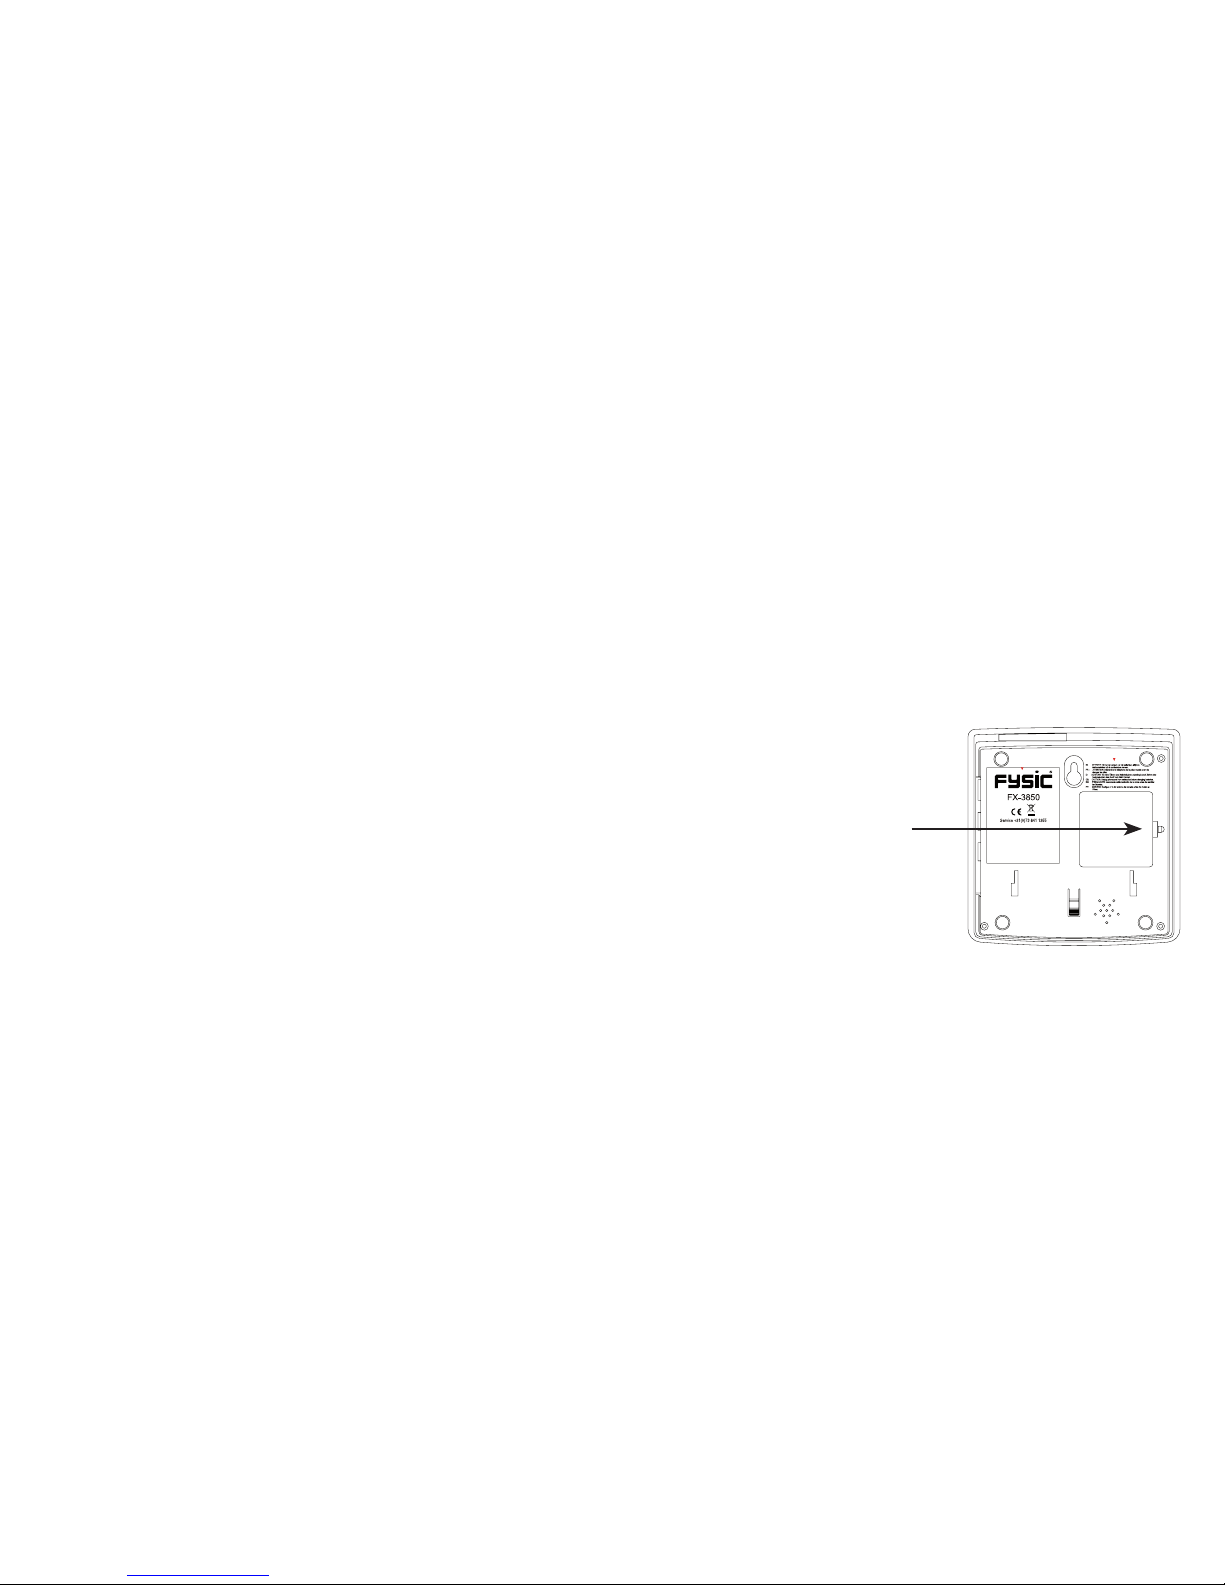
2. Use a pointy object to remove the battery cover from
the underside of the phone.
3. Insert 4 alkaline batteries AA 1.5 V, as is indicated in
the battery compartment; at this, pay attention to the
polarity (+ and -).
4. Replace the battery cover onto the telephone.
Depending on the quality of the batteries, they can supply the phone
12 hours or more with power when the adapter is out of order.
ATTENTION: IF NO BATTERIES HAVE BEEN INSERTED, OR IF THEY
ARE EMPTY AND THE ADAPTER IS NOT CONNECTED, YOU ARE
STILL ABLE TO CALL THROUGH THE HANDSET. ALL OTHER FUNCTIONS, INCLUDING THE ALARM FUNCTION CANNOT BE USED ANYMORE.
Page 5
5
2.3 Power adapter:
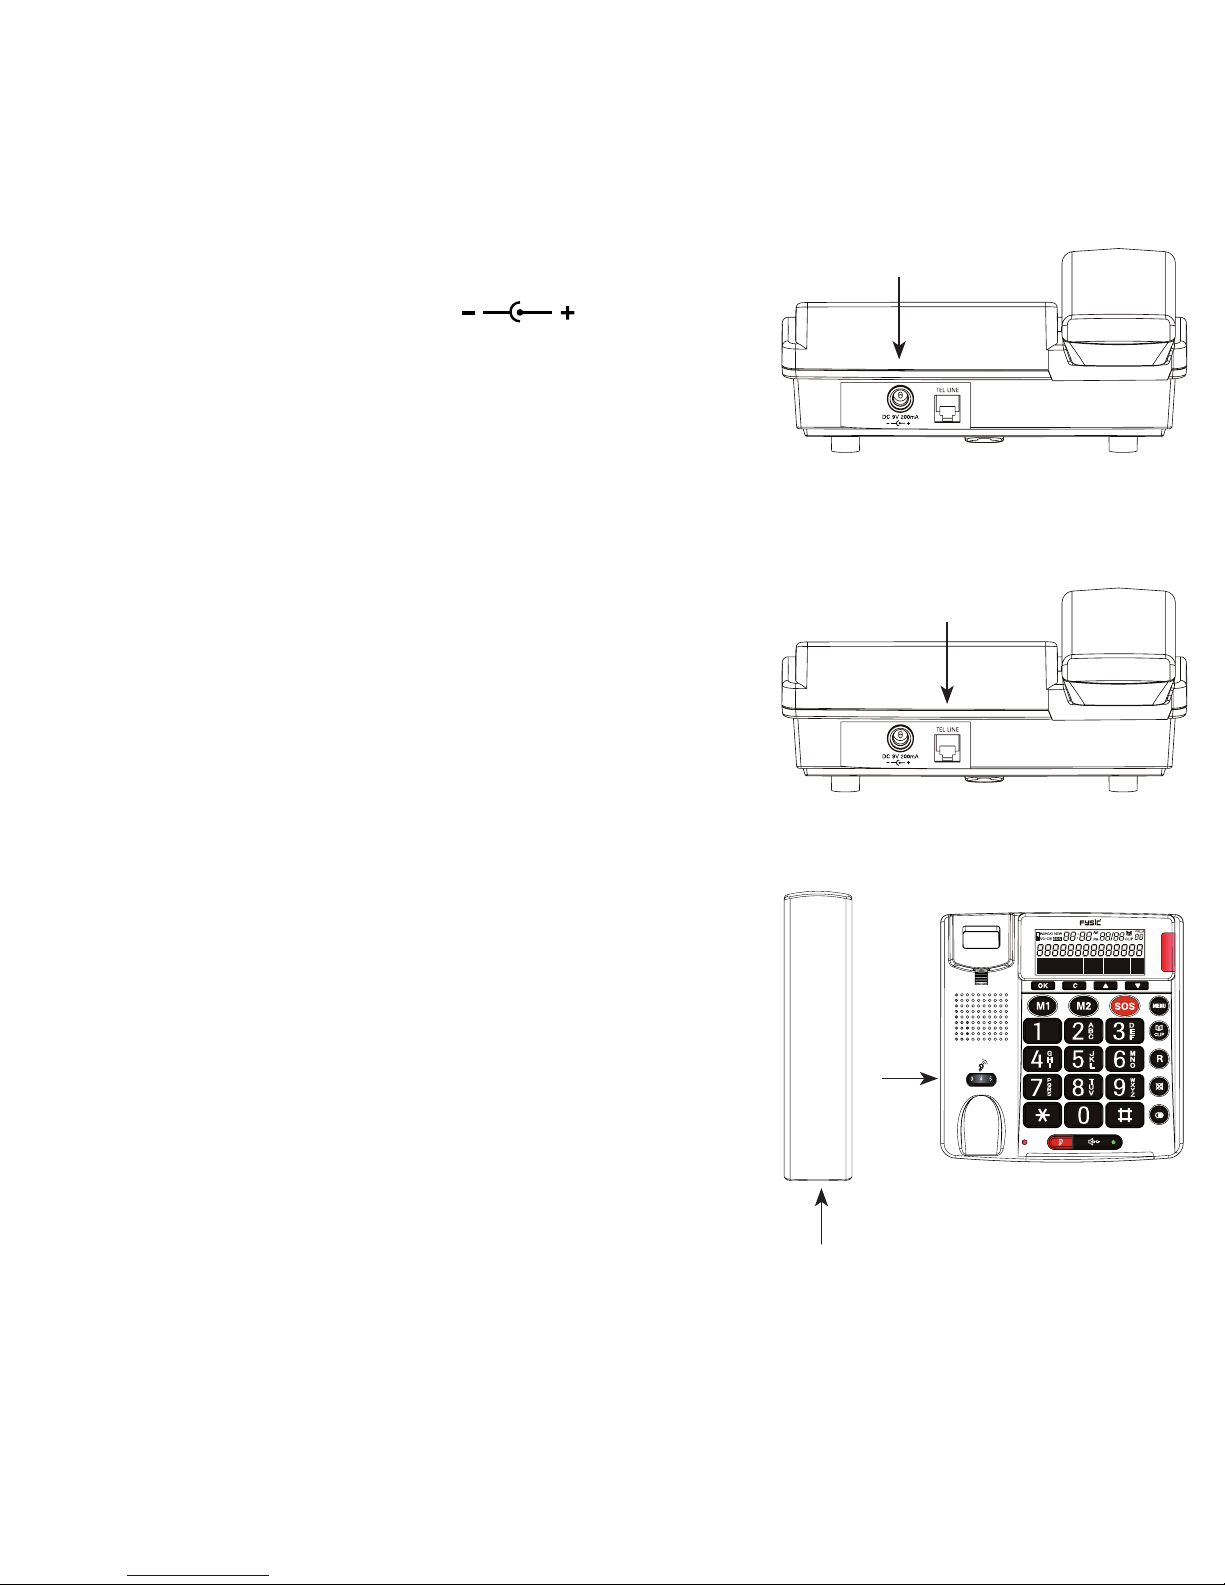
1. Plug the little connector of the adapter cable
into the 9 V DC, 200 mA connection
at the backside of the phone.
2. The power adapter in a 230 Volt mains
socket; nly use the included power adapter
with type number: S004LV0900020.
2.4 Phone cable:
1. Plug the little connector of the phone cord
cable into the TEL.LINE connection at the
backside of the phone; press the connector
until it clicks in place.
2. The Phone cable into a telephone wall jack.
2.5 Receiver:
1. Connect the receiver with the telephone by
attaching one side of the spiral cable to the
bottom of the receiver and the other side to
the left side of the telephone
2. Push in the plugs until they’re securely
connected
Page 6

6
2.6 Wall mounting:
1. In a vertical line, drill 2 holes at a distance of 8.3 cm from each other
and insert plugs and screws; let the head of the screws protrude for
5 mm
2. Click the wall bracket to the underside of the
phone in conformity with the drawing (1), and
push it up (2).
3. Of the telephone, turn it 180° and place it back
onto the telephone; this clamp will hold
the receiver in case of wall-mounting
4. Hook the telephone with the screw
holes over the screws and press it downward
5. Fix the phone and adapter cables to the wall
with cable holders.
The wall bracket can be removed by pushing in the
locking tab (1), and sliding the bracket downwards
to remove it from the phone (2).
Page 7

7
2.7 Remote control:
The remote control has been tted with a battery in the factory, and it is
ready for use.
Replacing the battery:
If the red indicator light on the remote control illuminates weakly or not
when you press the red SOS button, or you cannot activate an alarm anymore, the battery shall be replaced.
1. Open the remote control by unscrewing the 4 small Phillips screws at
the backside, and open the remote control.
2. Remove the old, dead battery and insert a new battery; voltage: 12 Volt,
size 23A.
3. Close the remote control and fasten the screws.
TIP: check the condition of the battery regularly, for example once a
month, by pressing the red SOS-key more than a second. Now the phone
shall enable the emergency status (you hear the local alarm signal from
the phone, or you can see from the display that the rst programmed
emergency number is dialed. Now take the handset from the phone for a
while and hang it up again, to disable this test alarm.
To be sure that the remote control functions properly, we suggest to replace the battery once every 10 to 12 months.
Page 8

8
3 OVERVIEW OF THE PHONE
3.1 Top view:
Volume control
of the handset
amplier.
Indicator light:
ashes when the
local alarm sounds in
an emergency situa-
tion, when new calls
have been registered
in the call list.
Indicator light:
illuminates when the
handset amplier has
been enabled.
Indicator lights:
illuminate when
you are called.
Tongue for handset,
keeps the handset
in case of wall
mounting.
Handset switch,
terminates the
connection when
the handset is put
down.
Built-in microphone, for
making handsfree calls,
for recording the memory
names and for recording
the emergency message.
Page 9

9
OK key for programming and set up.
delete key.
keys to browse through the memory.
Also keys for setting with programming and set up.
direct memory keys
key for enabling the alarm
key to start programming
key for selection phone book memory/dial list
key for forwarding/telecom function
key for disabling the microphone
pause/redial last number
keyboard
‘star’ key and ‘hash’ key, for example for internet banking
key for enabling/disabling the loudspeaker function; with indicator light
key for enabling and disabling the handset amplier.
Page 10

10
3.2 Right side view:
3.3 Backside:
Volume control for
the handsfree sound.
Switch ring volumeTone control for the
sound of the handset.
Connection for the
power adaptor.
Connection phone
cable
Page 11
11
3.4 Display:
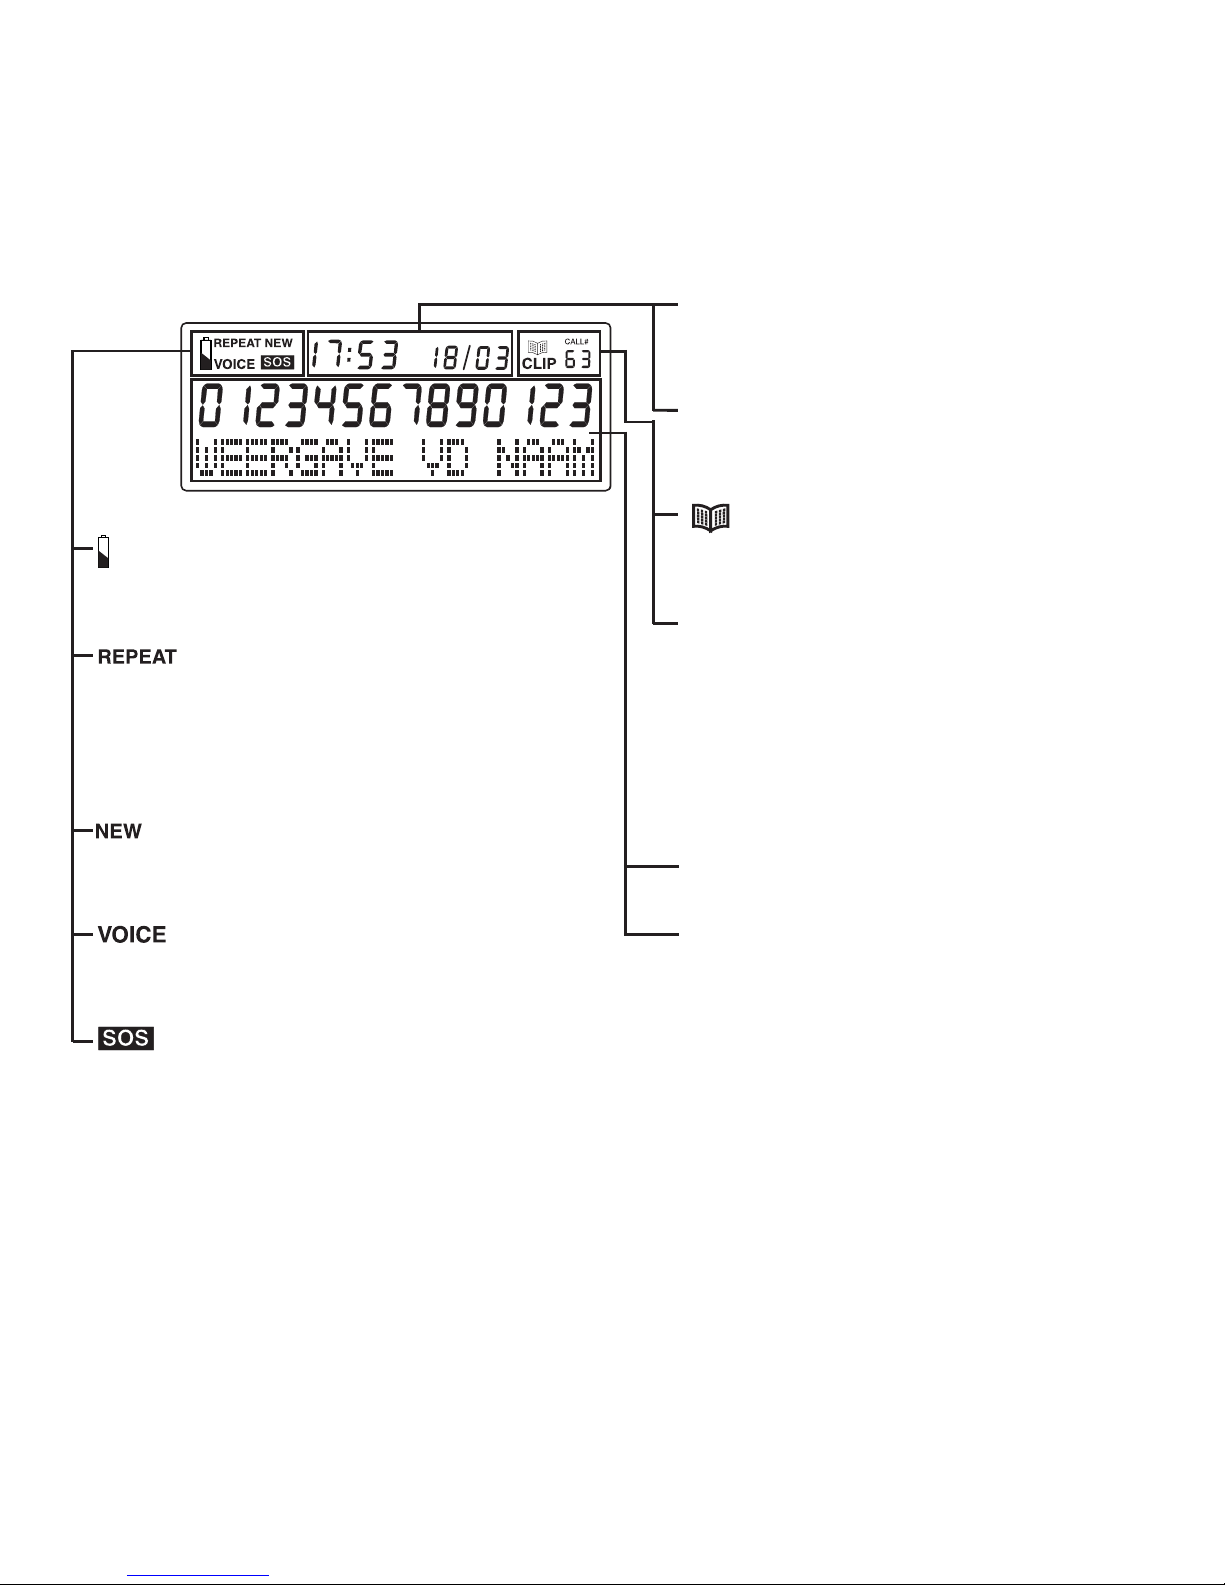
: Illuminates when the back-up batteries are empty or have not been
inserted.
: Illuminates when the same
person has called you multiple times
since you consulted the call list for
the last time.
: Illuminates when new calls
have been registered in the call list.
: Illuminates when you have
recorded a name with this memory.
: Illuminates when you have set
this memory number as emergency
number; also illuminates when the
phone is in the alarm state.
Displays the actual time and date
when idle.
With call list: displays the time and
date of the call.
: Illuminates when you consult
the phone book memory.
CALL# : at idle: indicates how
many numbers have been stored
in the call list.
With reading memory: indicates the
sequence number of the concerning phone number.
Displays the phone number.
Displays the name or the programming instruction.
Page 12
12
4 USING THE TELEPHONE
4.1 Incoming calls:
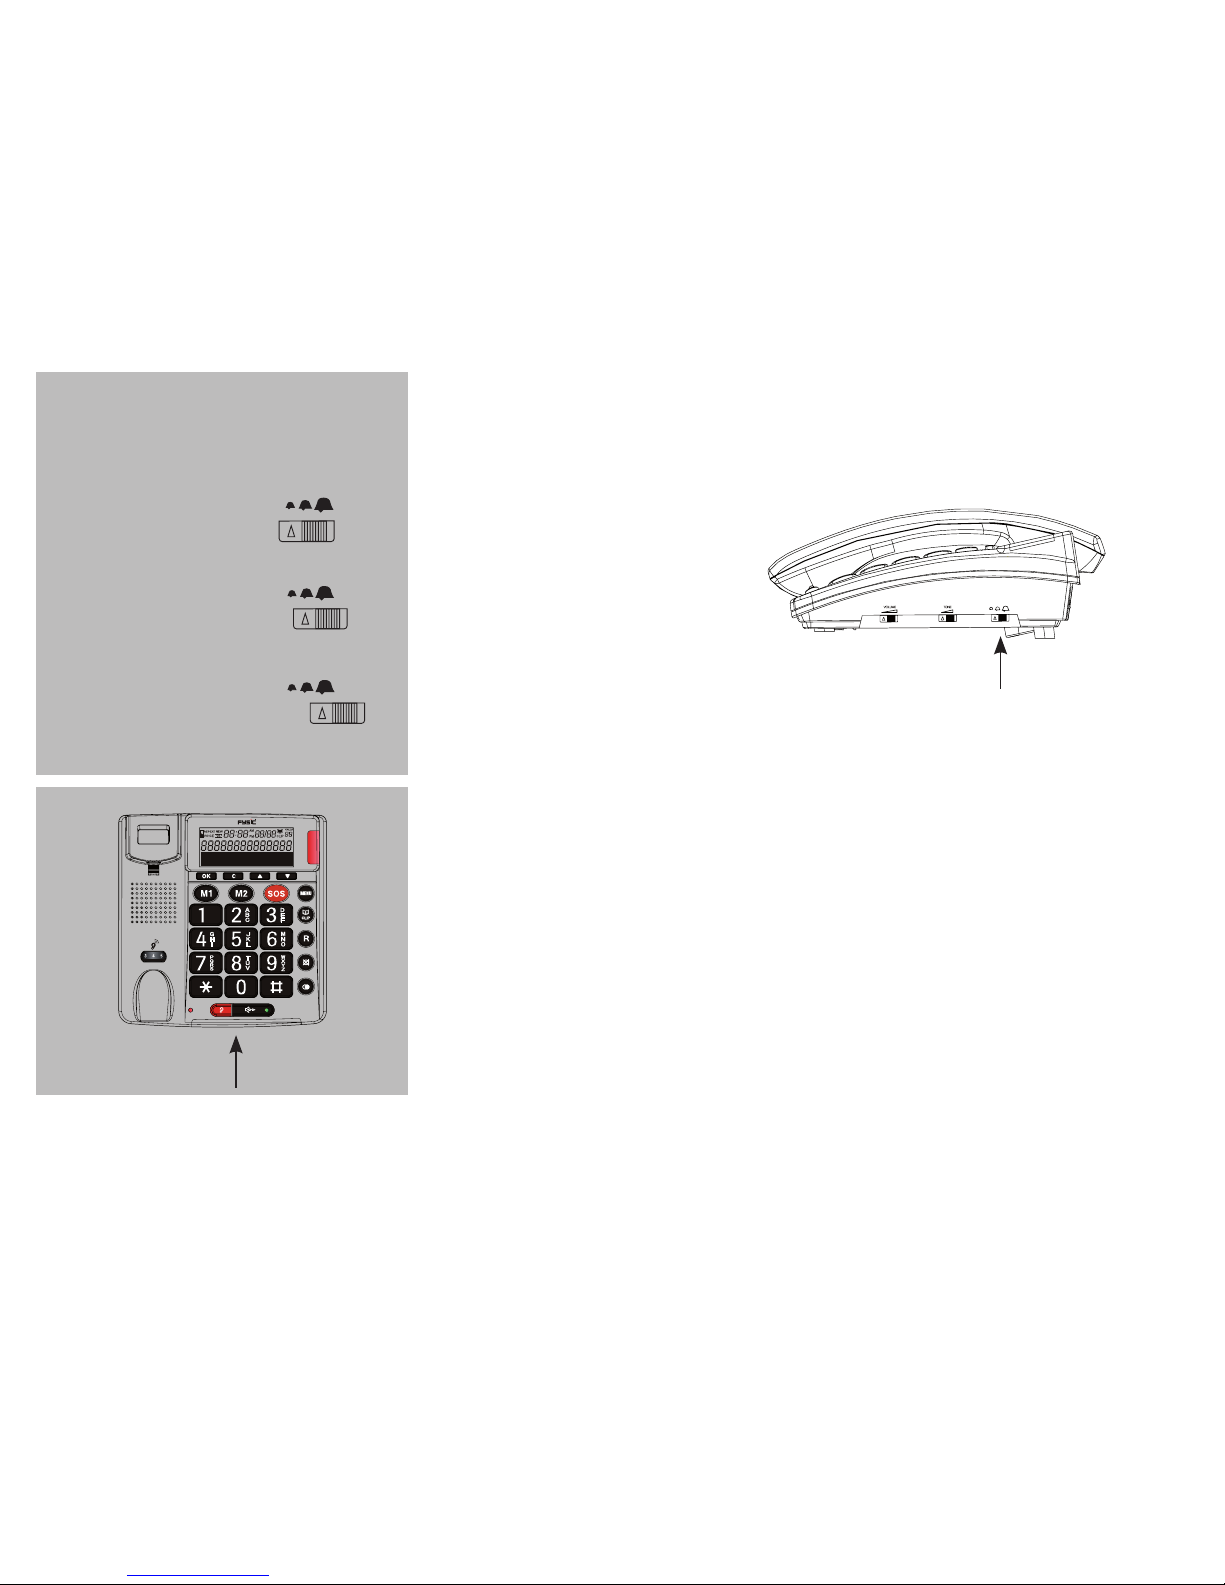
adjust the call volume using the call volume
switch at the bottom of the telephone:
Bell quiet
Bell normal
Bell loud
the call indicator with also light up when you
receive an incoming call
Page 13
13
4.2 Answering calls:
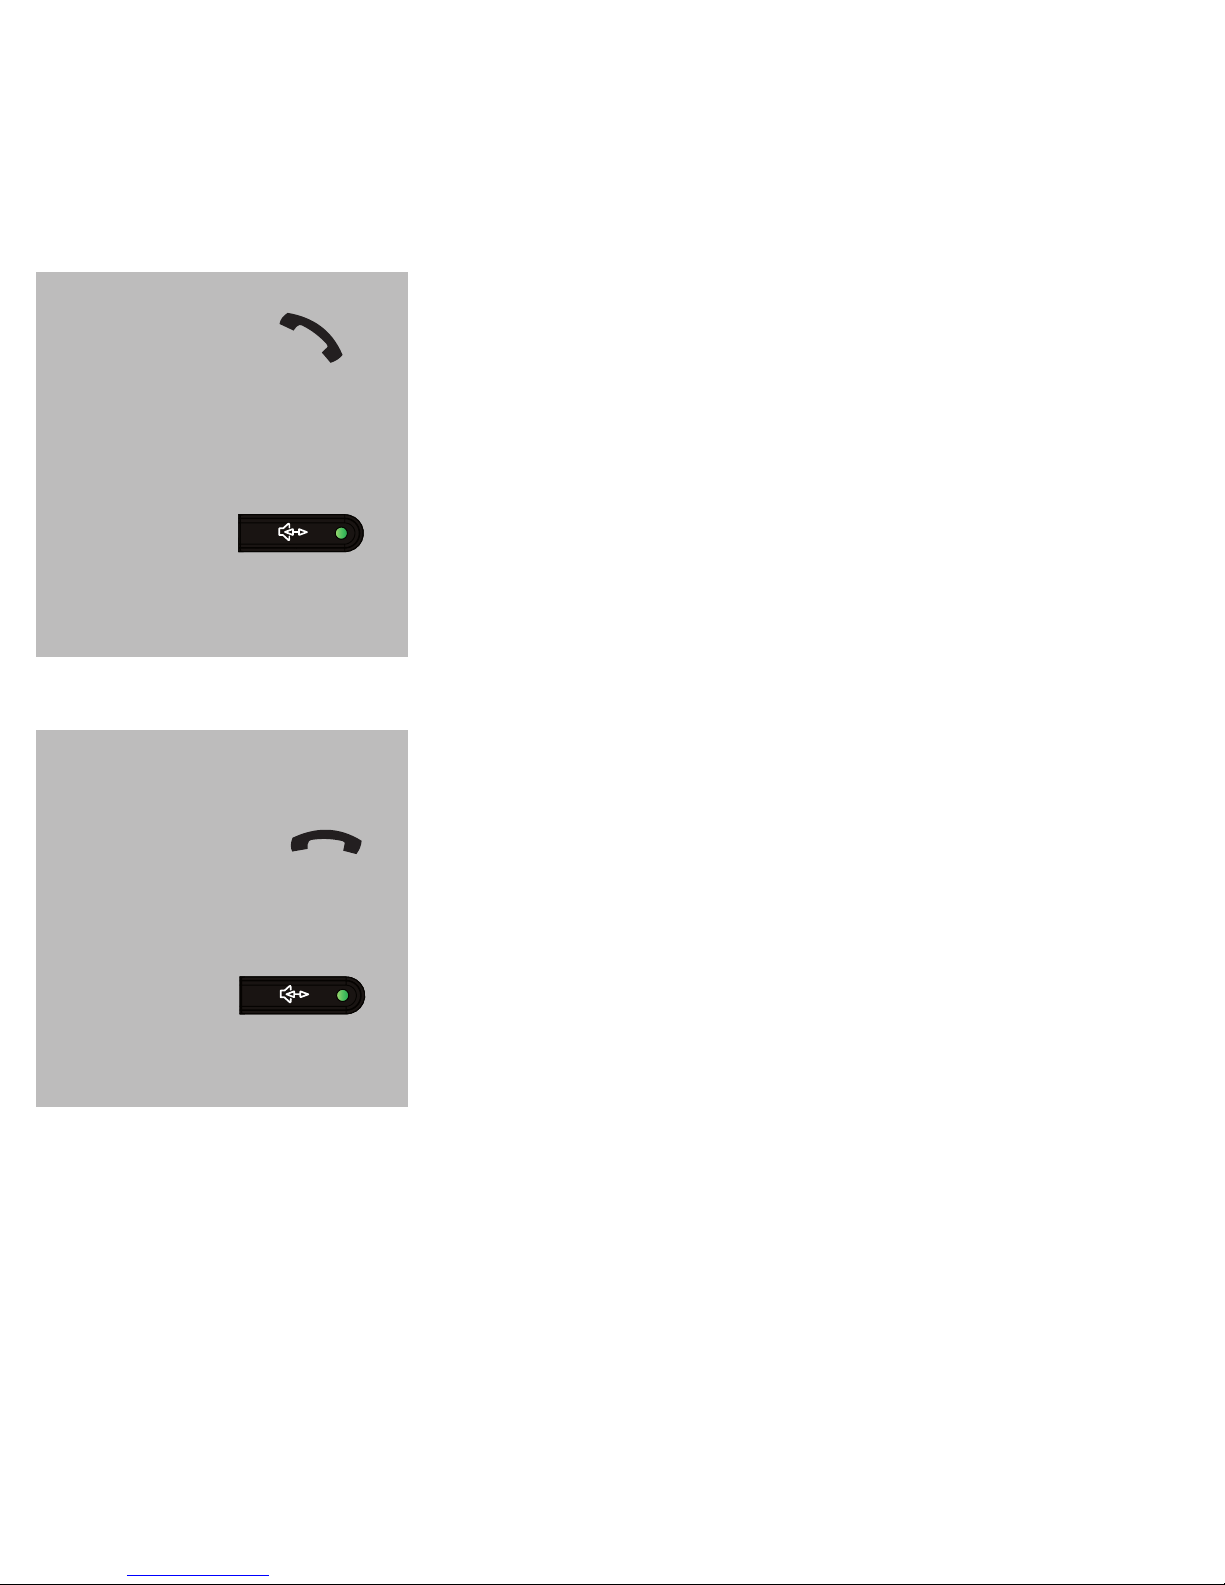
pick up the receiver to have your conversation
through the receiver
or
briey press the speaker button to answer the
call in hands-free mode
4.3 Ending calls:
put the receiver back onto the cradle if using
the receiver for the current call
or
press the speaker button again to end the call if
using the speaker for the current call
Page 14
14
4.4 Dialling numbers:
Normal:
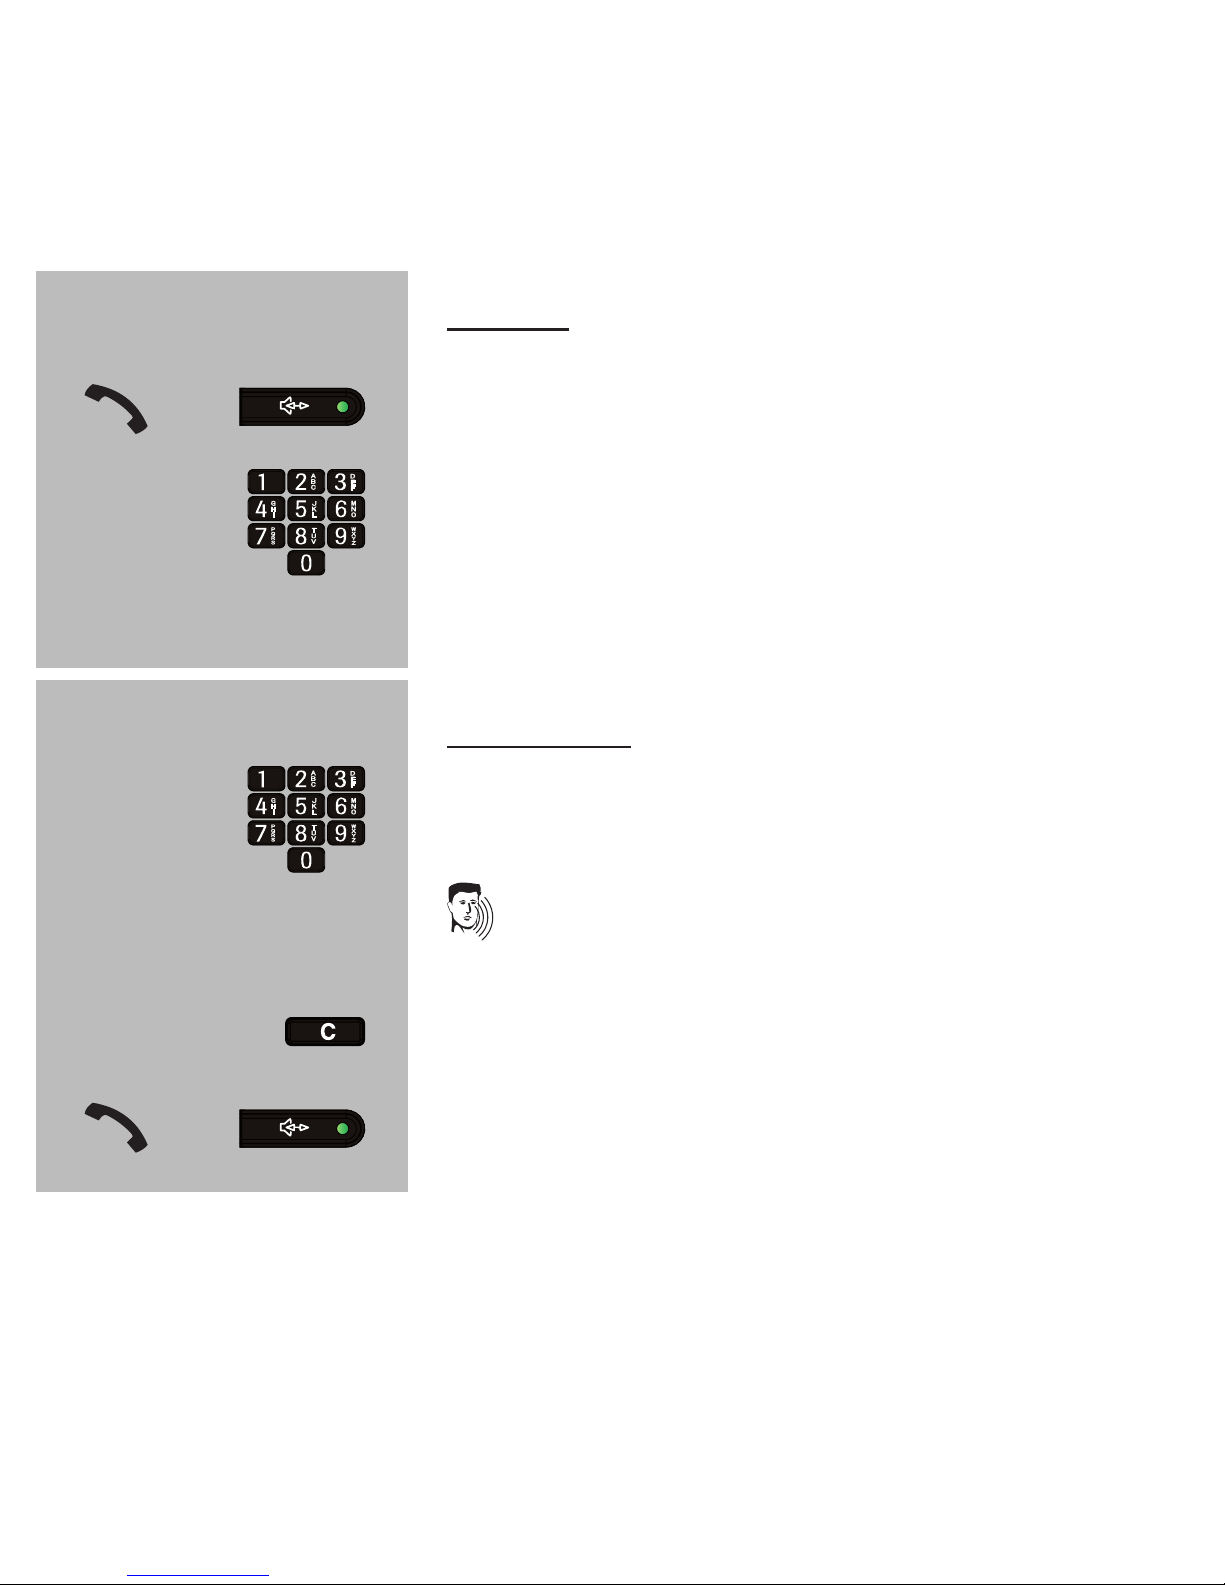
pick up the receiver or turn
on the speaker function
enter the desired phone number
the number will be dialled directly
Pre-dialling:
enter the number
The number that you enter sounds from the
loudspeaker
Use key C to correct a mistake.
pick up the receiver or turn on the speaker function, that number will be dialled
or
or
Page 15

15
4.5 Dialing pause:
Press the pause key during the entering the
phone number to add a dialing pause (for example, after the -0- if you call through a home
switchboard).
4.6 Call volume:
Handset volume:
Press the handset amplier switch to enable or
disable the handset amplier (you can only en-
able this amplier when the handset has been
picked up and is disabled automatically when
you put down the handset).
You can adjust the volume with the rotary control under the handset.
You can set the tone with the sliding control
‘TONE’ at the right side of the phone.
!
The volume and tone control are only effective when the handset ampli-
er is enabled.
Page 16

16
Loudspeaker volume
You can adjust the volume of the loudspeaker
function with the sliding control ‘VOLUME’ at
the right side of the phone.
4.7 Redialing:
Pick up the receiver or turn on the speaker
function
Press the redial key; the last dialed number is
dialed again.
You can also press the redial key rst.
The last dialed number is spoken.
Then press on the OK key to dial this number
handsfree.
or
Page 17

17
4.8 R button (FLASH):
The R button (also called FLASH) is used to
briey interrupt the telephone connection; this
brief interruption is used by some home or
ofce switchboards for call forwarding; public
switchboards use this button for telecom functions, such call waiting.
4.9 Consultation:
Press the key microphone-off, to disable the microphone, in order to consult with housemates
while your calling partner on the phone cannot
listen in.
!
As soon as you release this key, the micro-
phone is enabled again.
4.10 Call timer:
The call duration is kept on the display during
the call.
Page 18

18
5 PHONEBOOK MEMORY
5.1 Introduction:
The phone book memory of the FX-3850 has a capacity for 30 phone
numbers with name.
• You can program a name with every number, which will appear on the
display when this subscriber calls you (only applicable when you have
the service Caller Identication (caller-ID).
• You can record a name with every number; this name is spoken when
you browse through the memory. This name is also spoken when you
are called by this subscriber (only applicable when you have the ser-
vice Caller Identication (caller-ID)
• You can set this number as SOS-number for every memory; in case of
an emergency, this number will be dialed.
5.2 Add memories:
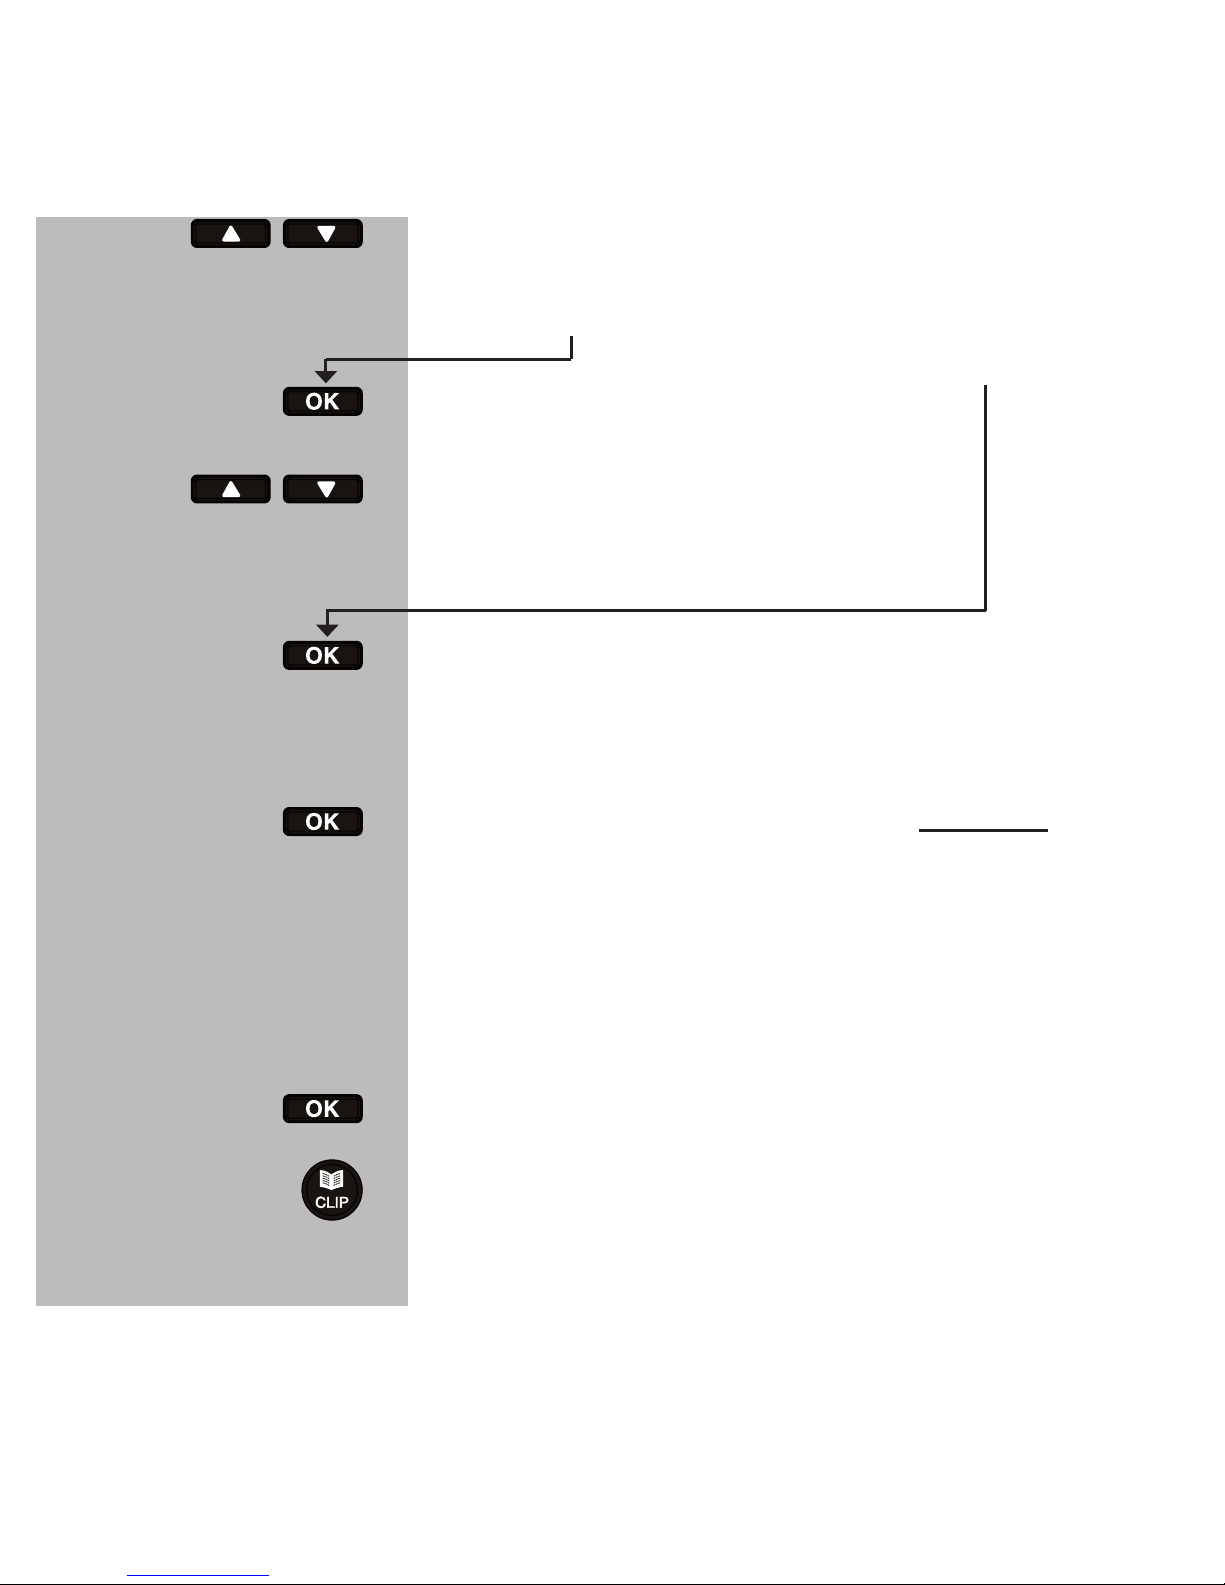
display: [STORE NUMBER]
Press OK
Enter the phone number and press OK
Enter the name (see paragraph 5.10) and press
the key OK
5x
Page 19
19
Indicate whether this concerns an emergency
number.
[EMERGENCY ON]
[EMERGENCY OFF]
display: [LOCATION]
Indicate where in the order this
number shall be dialed in case
of an emergency.
display: [SAVED]
display: [NAME RECORDING]
Keep the key OK pressed; after the beep you
have 3 seconds to record the name of the subscriber with the built-in microphone (keep key OK
pressed during the recording)
(you can always correct, delete or record the
name afterwards).
Enter the next memory
or
Return to the idle mode of the phone.
3 sec
Page 20
20
5.3 Select memory:
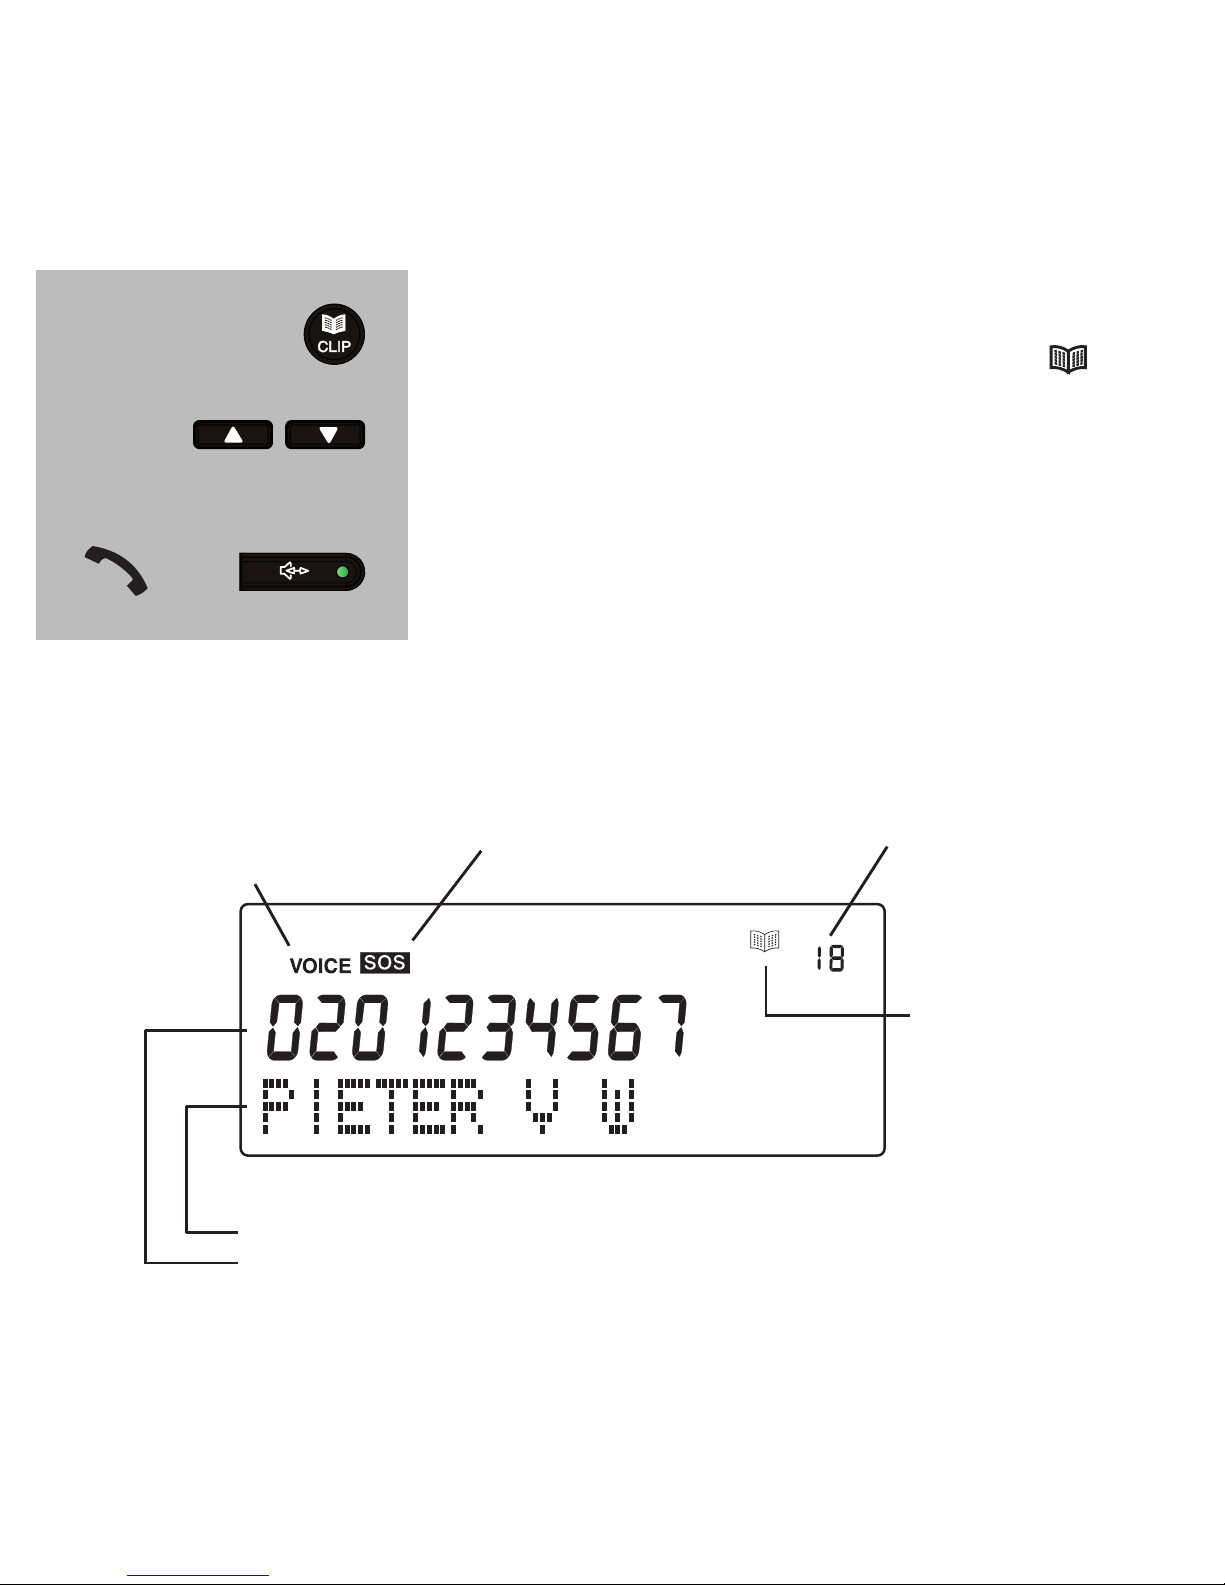
Press the key CLIP once or twice, so that you
hear “PHONEBOOK”, and the symbol illuminates.
Find the desired memory (with this, the name or
the number is spoken).
Pick up the handset or press on the loudspeaker key to dial this number.
5.4 Screen display at reading memory:
1x / 2x
Name
Phone number
When VOICE illuminates,
you have recorded a name
with this memory.
When SOS illuminates,
you have set this number
as emergency number.
Indication that the
phone book is
open.
Indication for the
order for dialing in
case of an alarm.
or
Page 21

21
5.5 Delete memory:
Per number:
Open the phone book and nd the number to
be deleted.
Press the key C shortly.
display: [DELETE?]
Now, keep key C pressed for 3 seconds to delete this memory.
display: [EMPTY?]
Complete memory:
Open the phone book and make sure a random
memory appears on the display.
Press during 5 seconds on toets C
display: [DELETE ALL]
Keep key C pressed for 5 seconds again
display: [EMPTY?]
5 sec
5 sec
3 sec
short
Page 22

22
5.6 Correct/change memory:
Open the phone book and nd the number to
be corrected.
Keep the key MENU pressed for 3 seconds.
display: [EDIT]
Press OK
Use key C to delete the old number, enter the
new number and press OK.
Repeat this for the name.
Set the number as emergency number or not.
If necessary, change the sequence at which this
number shall be dialed in an emergency.
Press OK
display: [SAVED]
3 sec
Page 23
23
5.7 Add or change spoken name with memories:
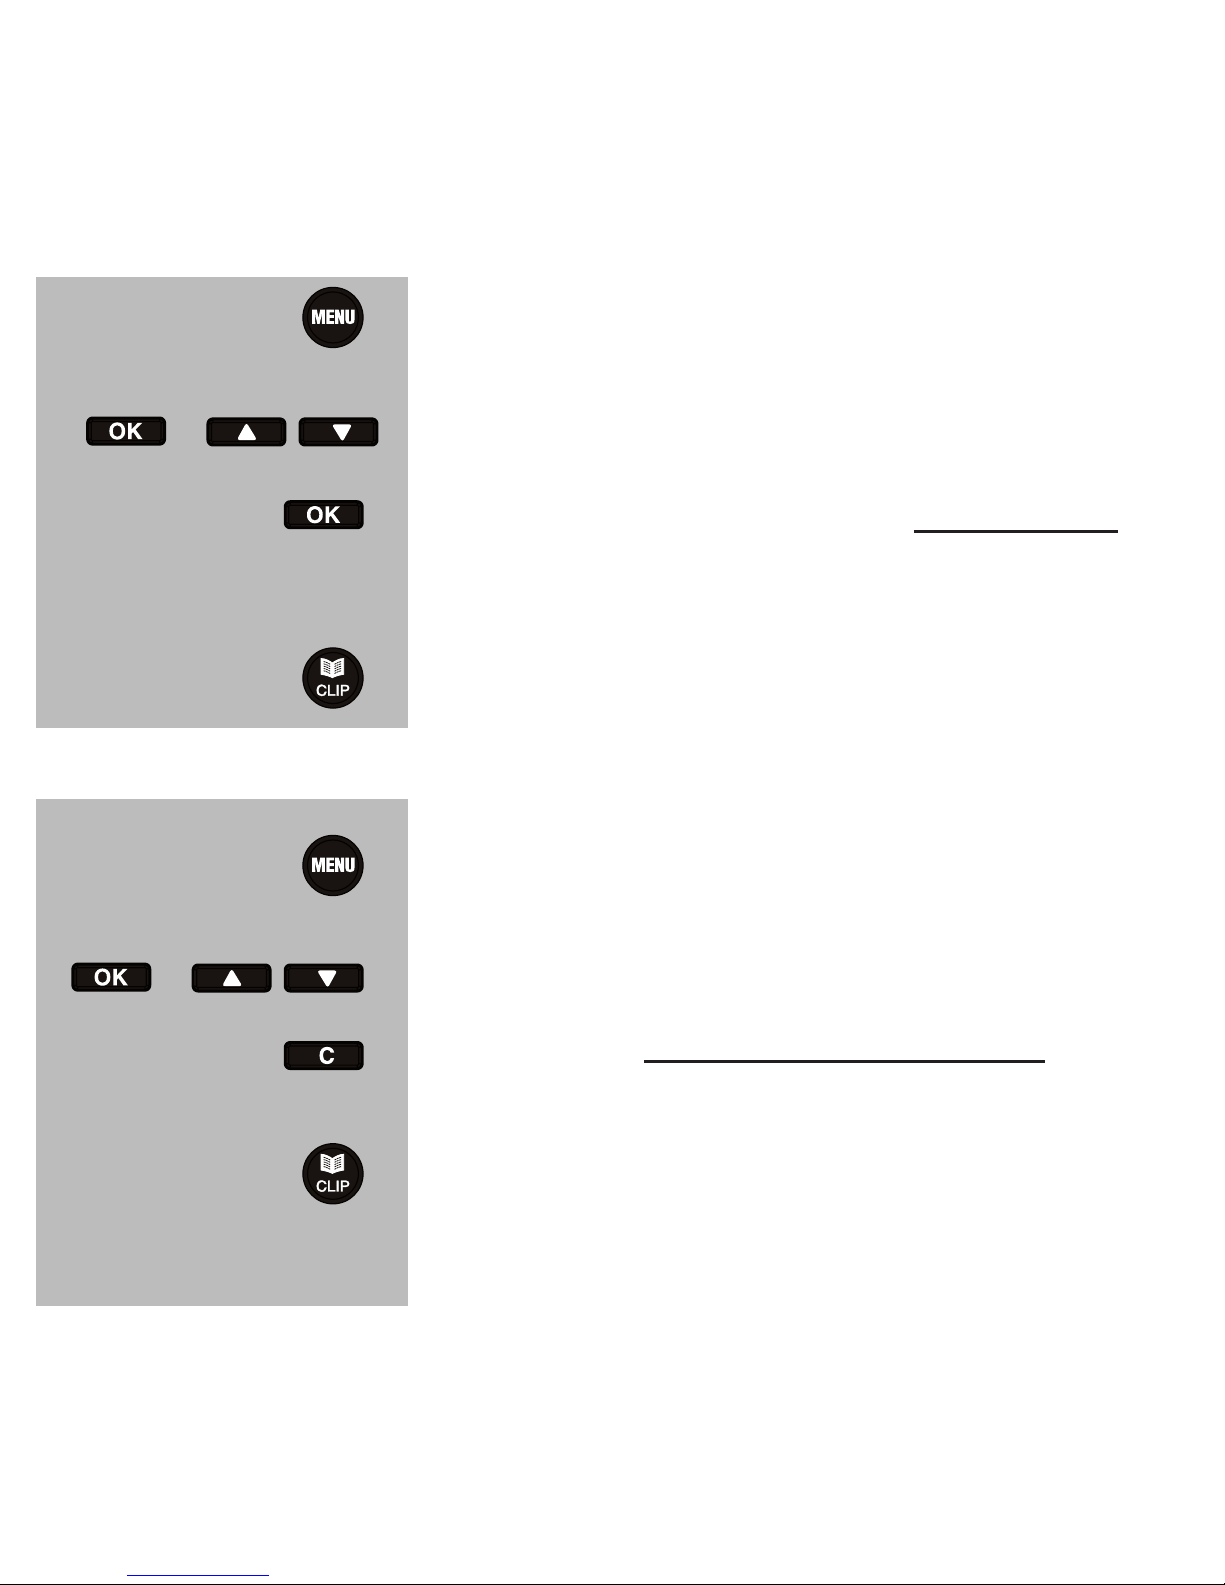
Press the key MENU 6 times.
display: [NAME RECORDING]
Press the key OK and nd the memory.
Now keep the key OK pressed; after the beep you
have 3 seconds to record the name of the subscriber (keep key OK pressed).
Return to the idle mode of the phone.
5.8 Delete spoken name with memories:
Press the key MENU 6 times.
display: [NAME RECORDING]
Press the key OK and nd the memory.
Press key C during speaking the name; the
recorded name is cleared.
Return to the idle mode of the phone.
6x
3 sec
6x
Page 24

24
5.9 Tips and remarks concerning the memories:
* The memory capacity is 30 memories of 22 digits at most for the num-
ber, and 16 characters for the name.
* The memories are stored alphabetically.
* You can add a dialing pause with key .
* You can delete an incorrect entry with key C.
* In case no numbers have been stored in the memory, [EMPTY] will ap-
pear on the display after pressing the key .
* When consulting the memory, [END LIST] appears on the display at the
end of the list.
* Beside phone numbers of the doctor and of family members or neigh-
bors, you can also program the mobile numbers of GSM phones as
emergency number.
*
It is advisable with memory numbers which you have set as emergency
numbers, to inform the concerning subscriber about the operation of
your alarm phone, and how to act when they are called in an emergency
situation; see for this paragraph 7.
Page 25

25
5.10 Add a name:
The name is added by means of the keys on the phone. The following
characters are possible:
Press character after .. :
Keys 1x 2x 3x 4x 5x 6x
1 Space + & - / 1
2 A B C 2
3 D E F 3
4 G H I 4
5 J K L 5
6 M N O 6
7 P Q R S 7
8 T U V 8
9 W X Y Z 9
0 , . : ; ? 0
* ‘ @ ( ) *
# $ _ % ! #
Page 26

26
6 DIRECT MEMORY M1 AND M2
6.1 Introduction:
The direct memory keys M1 and M2 are suitable for numbers that you call
frequently. Pay attention that you can NOT set these numbers as emergency numbers; so they are not dialed automatically in an emergency situation. You cannot link a recorded name with these memories.
6.2 Programming memory:
Press the key MENU 5 times.
display: [STORE NUMBER]
Press the key OK
Enter the phone number and press OK.
Enter the name (see paragraph 5.10.)
Press key M1 or M2 to save the number.
5x
or
Page 27
27
6.3 Direct dialing memory:
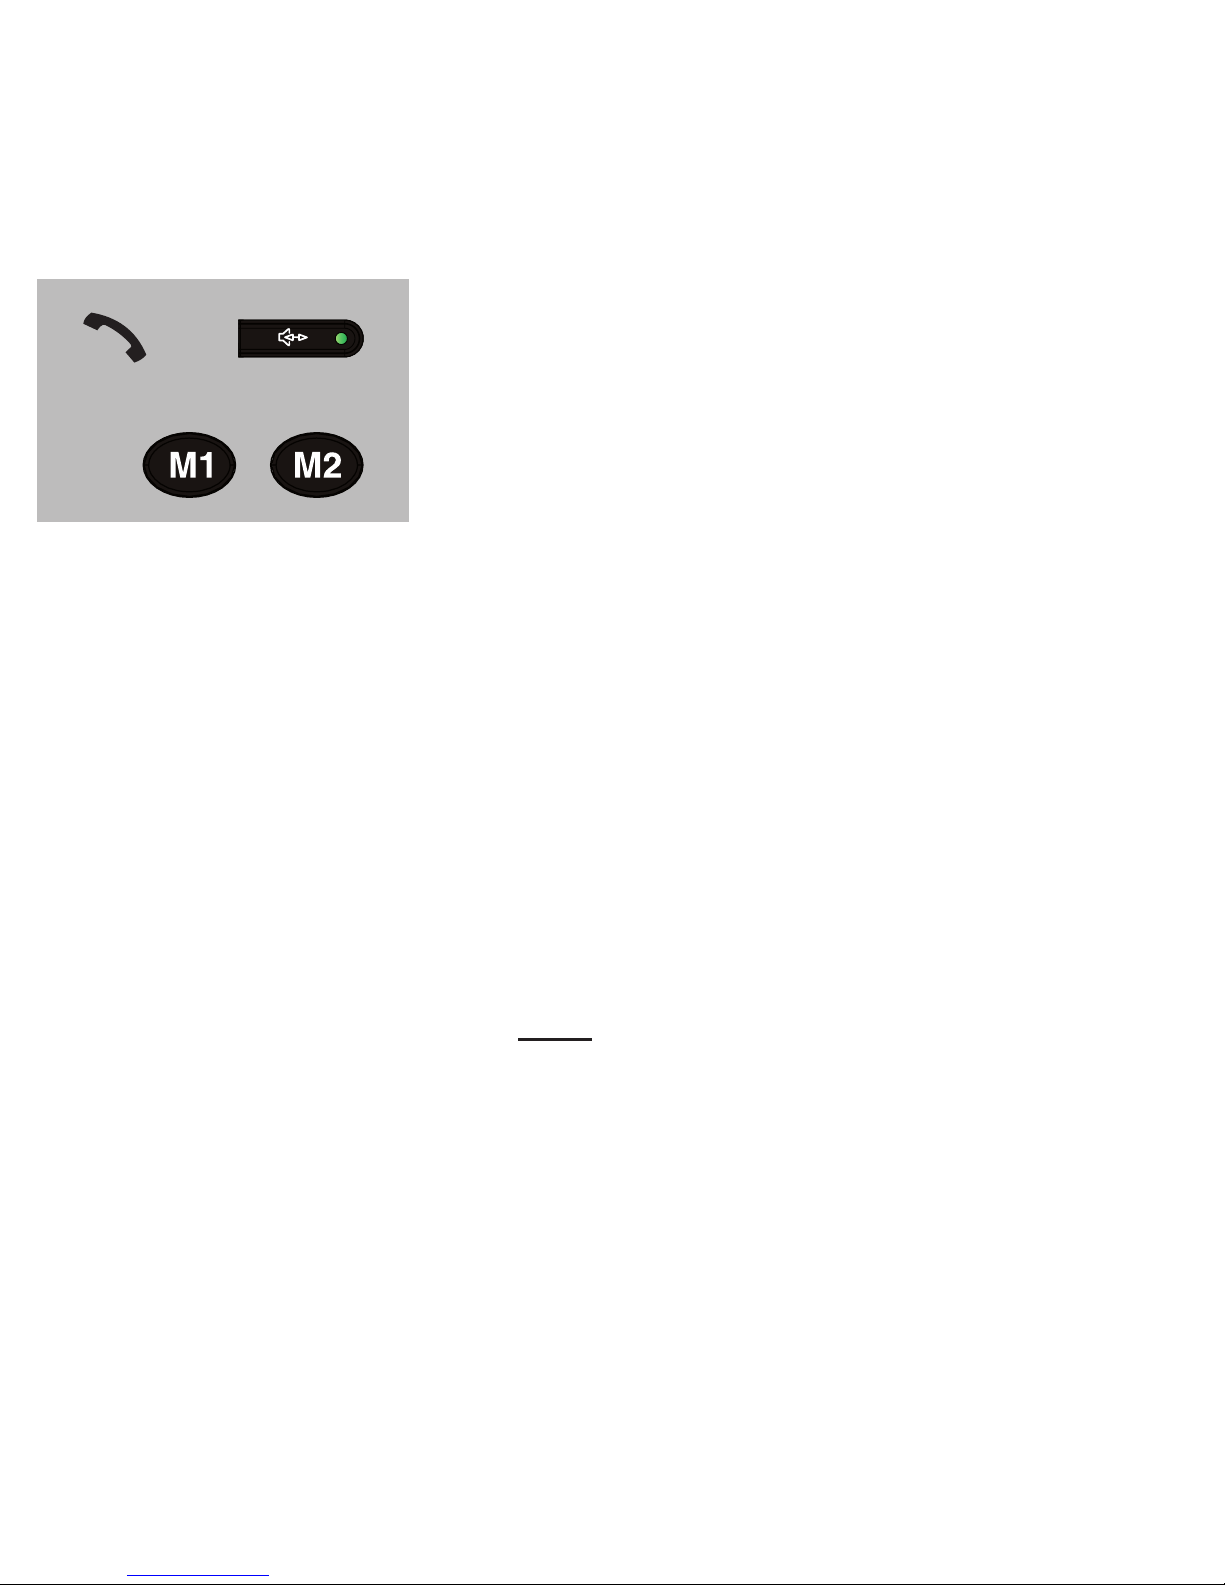
Pick up the handset or press the loudspeaker
key.
Press on the desired memory key to dial this
number.
6.4 Correct memory:
You cannot correct or change a direct memory number. However, you can
program a new number over the old number; the old number will lapse.
6.5 Delete memory:
It is not possible to delete a direct memory. However, you can program a
non-existing number (for example, only -0-).
6.6 Specications:
* A direct memory number can be at most 22 digits; the name can be at
most 16 characters.
* Direct memory numbers are NOT dialed automatically in an emergency
situation. If you do want to use these numbers as emergency numbers,
you shall program these numbers in the ‘normal’ memory AS WELL, as
described in paragraph 5.2.
or
or
Page 28

28
7 ALARM FUNCTION
7.1 Introduction:
KEEP IN MIND THAT THE ALARM FUNCTION ONLY FUNCTIONS
WHEN THE POWER ADAPTOR IS CONNECTED AND/OR FULL BATTERIES ARE INSTALLED!
In case of an emergency situation, you can bring
the phone in the emergency state by means of the
red SOS-key on the remote control or through the
key on the phone.
To prevent false alarm, you need to keep the
emergency key pressed for more than 1 second.
You can choose between sounding a local alarm
for 30 seconds rst, so that people in the vicinity
can offer help before the programmed emergency
numbers are called, and a silent alarm, at with
the programmed emergency numbers are dialed, but no sound comes
from your phone at all, until the called care worker enters a code on their
phone.
An alarm can always be interrupted by picking up the handset shortly and
putting it down again.
Press
> 1 second.
Page 29
29
7.2 Emergency message:
The emergency message is the message that is played in an emergency
situation. You can make use of the preprogrammed emergency message
or you can record your own emergency message:
The preprogrammed emergency message sounds as follows:
“THIS IS AN EMERGENCY CALL, TO ACCEPT THIS CALL PRESS ZERO”
Recording your own emergency message: (*)
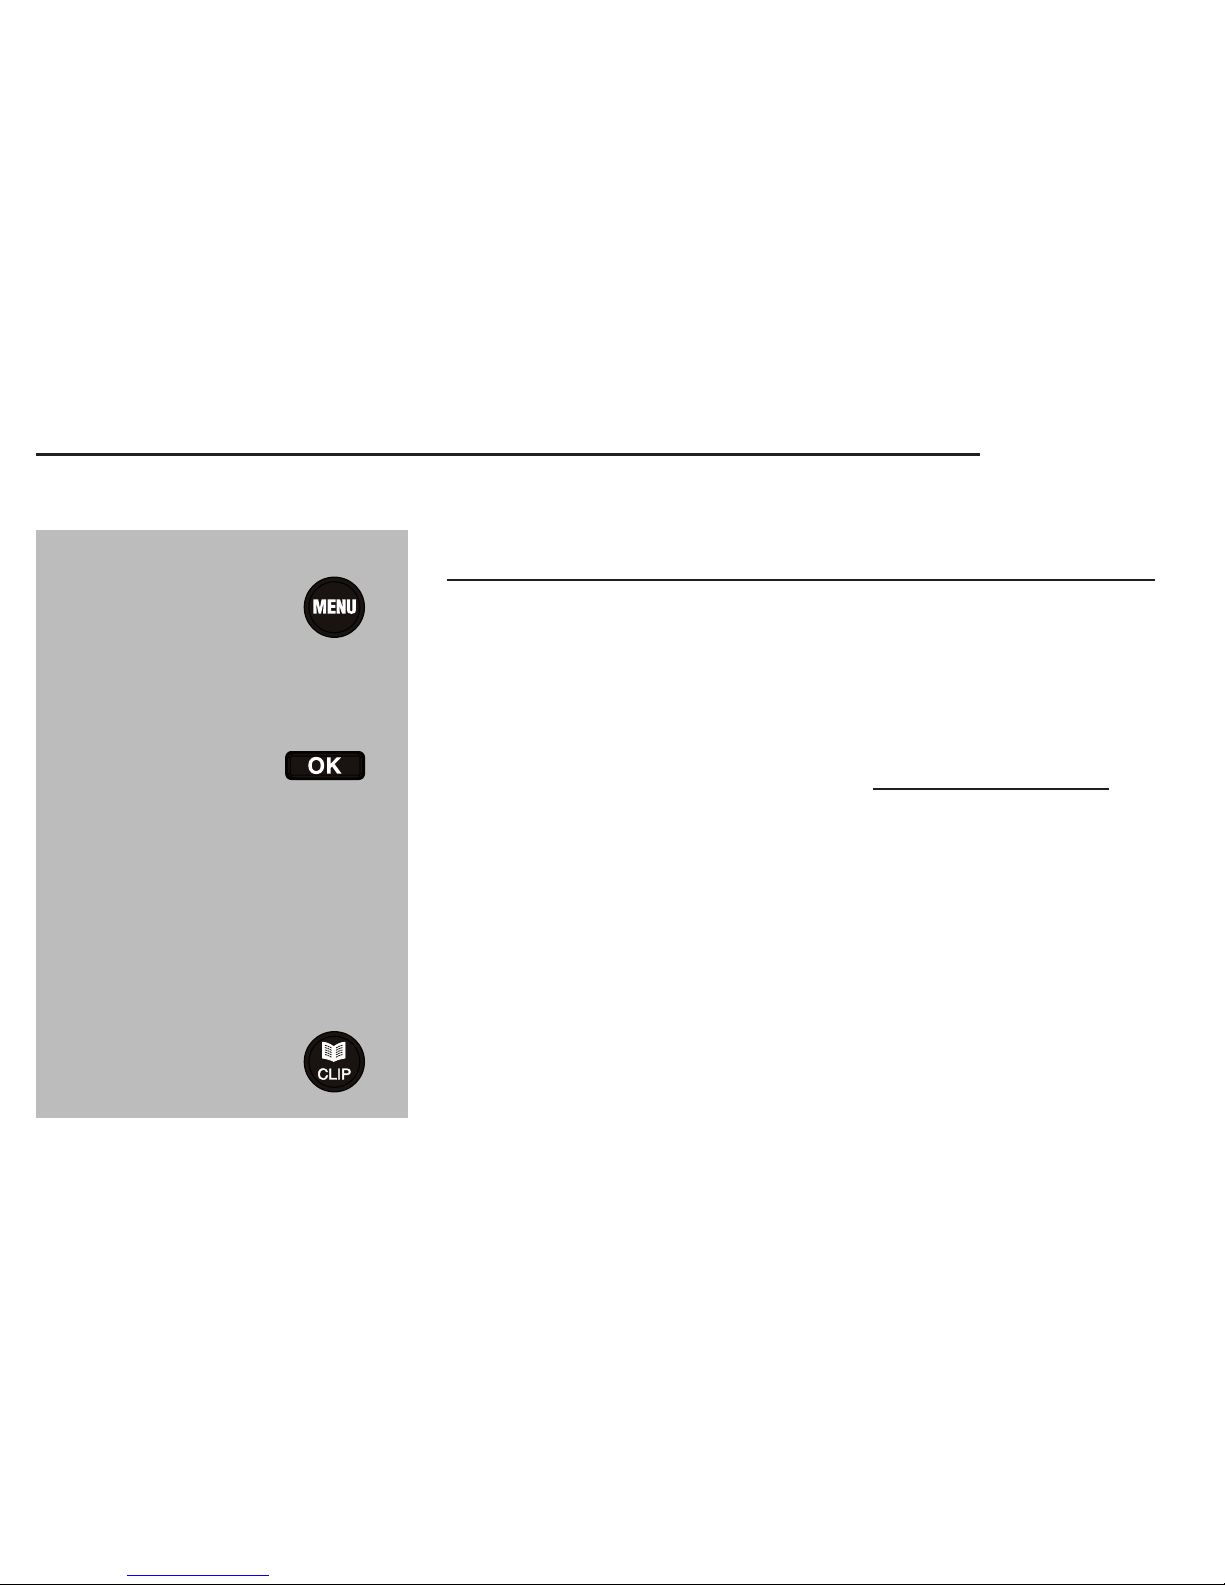
Press the key MENU 7 times.
display: [RECORD MESSAGE]
Now press the key OK and keep it pressed.
After the beep, you have 20 seconds to record
the emergency message with the built-in microphone (keep the key OK pressed during the
recording). After the recording, the message is
played once in order to check it.
Return to the idle mode of the phone.
*: It is advisable to read the remarks and tips in paragraph 7.6, before you
record your own emergency message.
7x
20 sec
Page 30

30
Checking the emergency message:
Press the key MENU 8 times.
display: [CHECK MESSAGE]
Press the key OK; the emergency message is
played.
Return to the idle mode of the phone
Deleting your own emergency message:
Press the key MENU 8 times.
display: [CHECK MESSAGE]
Press the key OK; the emergency message is
played.
Press key C during playback of the emergency
message; your own emergency message is
deleted, and the preprogrammed emergency
message is active again.
Return to the idle mode of the phone
8x
8x
Page 31

31
7.3 Setting emergency numbers:
See also chapter 5. Programming the memory numbers is discussed here.
You can indicate with each number whether or not this number shall be
called in case of an emergency. You can also indicate the order here. You
can change these settings always (see chapter 5.6).
7.4 Silent alarm on or silent alarm off:
Depending on your situation, you can set the FX-3850 to silent alarm on or
silent alarm off. Read the descriptions below carefully, and determine the
kind of alarm that ts best with your situation.
Silent alarm off:
1. Firstly, a loud alarm tone sounds from the loudspeaker of your FX-3850
for 30 seconds. No emergency number is dialed yet, but maybe persons
in your direct vicinity can offer help.
2. After the local alarm, you hear that the rst emergency number is dialed, and directly after that, you hear the emergency message. If the
called emergency number is busy or not at home, this emergency message is played for 1 minute before the next number is dialed.
3. In case the called emergency number answers and presses key 0, you
will have a handsfree sound connection for three minutes to discuss the
situation.
4. Depending on the situation, the care worker can enter a certain code
now; see for this paragraph 7.5.
Page 32

32
Silent alarm on:
1. After pressing the red SOS key on the remote control or on the phone
for more than one second, the rst emergency number is dialed IMMEDIATELY. So NO local alarm will sound.
2. You do not hear that a number is dialed, and you do NOT hear that your
emergency message is played.
3. If the called emergency number is busy or not at home, the next emergency number is called.
4. In case the called emergency number answers, they shall enter the
code 0-1-2 or 0-1-6. At that moment, a handsfree audio connection
is established, and you can discuss your situation, or the called care
worker can listen to the situation at your home.
5. Depending on the situation, the care worker can enter a follow-up code;
see for this the next paragraph.
Enabling or disabling the silent alarm:
Press the key MENU 10 times.
display: [QUIET SETTING]
Press the key OK; the display will show
[QUIET ON] or [QUIET OFF].
Choose the desired alarm, and press the key
OK.
Return to the idle mode of the phone
10x
Page 33

33
7.5 Codes:
Depending on the type alarm and the situation, the care worker shall enter
the following codes through the keyboard of the phone (*). It is wise to
inform the concerning care worker(s) about these codes beforehand, and
arrange them with them.
When the silent alarm is off:
0 The care worker shall press key 0, to establish an audio connection
between their phone and yours; now you situation can be discussed
for at most 3 minutes.
If the care worker does not enter any code after this, the connection
is terminated, and the next emergency number is dialed.
However, the care worker can also choose from the following followup codes:
1-2: - The connection is terminated after an audio connection of
3 minutes.
- The emergency state is ended; NO next emergency number is dialed.
1-2-* - The connection is terminated after an audio connection of
3 minutes.
- The next emergency number is dialed.
*: Pay attention that this shall be a DTMF or tone phone (you hear tones
when you press a number key).
Page 34

34
1-2-# - The connection is terminated immediately after pressing the
key #.
- The emergency state is ended; NO next emergency number is dialed.
1-6 - The audio connection stays open CONTINUOUSLY.
1-6-# - The audio connection stays open continuously, until the
care worker presses key #.
- The emergency state is ended; NO next emergency number is dialed.
When the silent alarm is on:
0-1-2 There is an audio connection between you and the care worker for
a maximum of 3 minutes.
If the care worker does not enter a code after this, the connection
is terminated, and the emergency situation is ended. So NO next
emergency number is dialed.
However, the care worker can also choose from the following follow-up codes:
* - The connection is terminated immediately.
- The next emergency number is dialed.
# - The connection is terminated immediately.
- The emergency state is ended; NO next emergency number is
dialed.
Page 35

35
0-1-6 A continuous audio connection is established between you and the
care worker; the care worker only has follow-up code # at their disposal:
# - The connection is terminated immediately.
- The emergency state is ended; NO next emergency number is
dialed.
7.6 Important tips:
Emergency numbers:
* In case of an emergency, only the numbers that you have set as emer-
gency numbers will be dialed.
* When no numbers have been programmed in the memory or have been
set as emergency numbers, only the local and loud alarm signal on your
own phone will sound for 30 seconds. When [silent alarm] is enabled,
the FX-3850 will not respond at all).
* The numbers that you have programmed under the direct memory keys
M1 and M2, are NOT dialed in an emergency situation.
Emergency message:
* The maximum duration of your emergency message is 20 seconds.
Prepare this text on paper rst, and record it calmly.
* It is important to include your name and the instruction to accept the
emergency calls by dialing the number 0 in the emergency message.
Only then a handsfree connection can be established between your
phone and the phone of the called person; in case you have enabled
the function [silent alarm], the care worker shall press 0-1-2 or 0-1-6 to
establish an audio connection.
Page 36

36
Remote control:
* You can only enable the alarm function through the remote control if you
are within reach of the phone bent.
* It is advisable to check the functioning of the remote control regularly.
Do not forget to pick up the handset of your phone and put it down
again within 30 seconds, when ‘silent alarm off, in order to disable the
alarm again. At silent alarm, you can see on the display that a number
is dialed. Pick up the handset to disable the alarm.
* Separate remote controls are available from the FYSIC customer ser-
vice, at phone number 073 6411 355 (The Netherlands), 03 238 5666
(Belgium), or through the internet at WWW.FYSIC.COM. You can register up to 5 remote controls. In paragraph 9.7 is described how you can
register additional remote controls on the phone.
Order number standard
remote control: +FX-3850.000
Order number waterproof
remote control: +FX-3850.00
Page 37

37
Follow-up alarm:
* Inform everybody of whom you have set their phone numbers as emer-
gency numbers, of your alarm phone, and how to respond in case of an
emergency. Discuss the possible codes, so that your care worker knows
which code to use best in your situation:
0-1-2 3 minutes audio connection; after that the alarm state is
ended.
0-1-2-* The connection is terminated immediately after pressing *;
after this, the next emergency number is dialed.
0-1-2-# The connection is terminated immediately after pressing #,
and the alarm state is ended.
0-1-6 Unlimited audio connection
0-1-6-# The connection is terminated immediately after pressing #,
and the alarm state is ended.
Page 38

38
8 CALL LIST (CLIP)
8.1 Display on the screen:
The following information can appear on the display when receiving calls
and/or consulting the call list:
8.2 Open call list:
If the indicator light at the top-right of the phone flashes, there you have
received new calls since the last time you consulted the memory.
The key CLIP once or twice, in order to sound
[CALLER-ID].
Use the keys and to browse through the
memory.
Total 64 calls in the memory; 2 of which are new.
Phone number of the subscriber.
REPEAT = this subscriber has called more often.
NEW = this is a newly received call.
Memory sequence number of this call.
Time and date of this
call.
(Since you referred to the
memory the last time.)
1x / 2x
Page 39
39
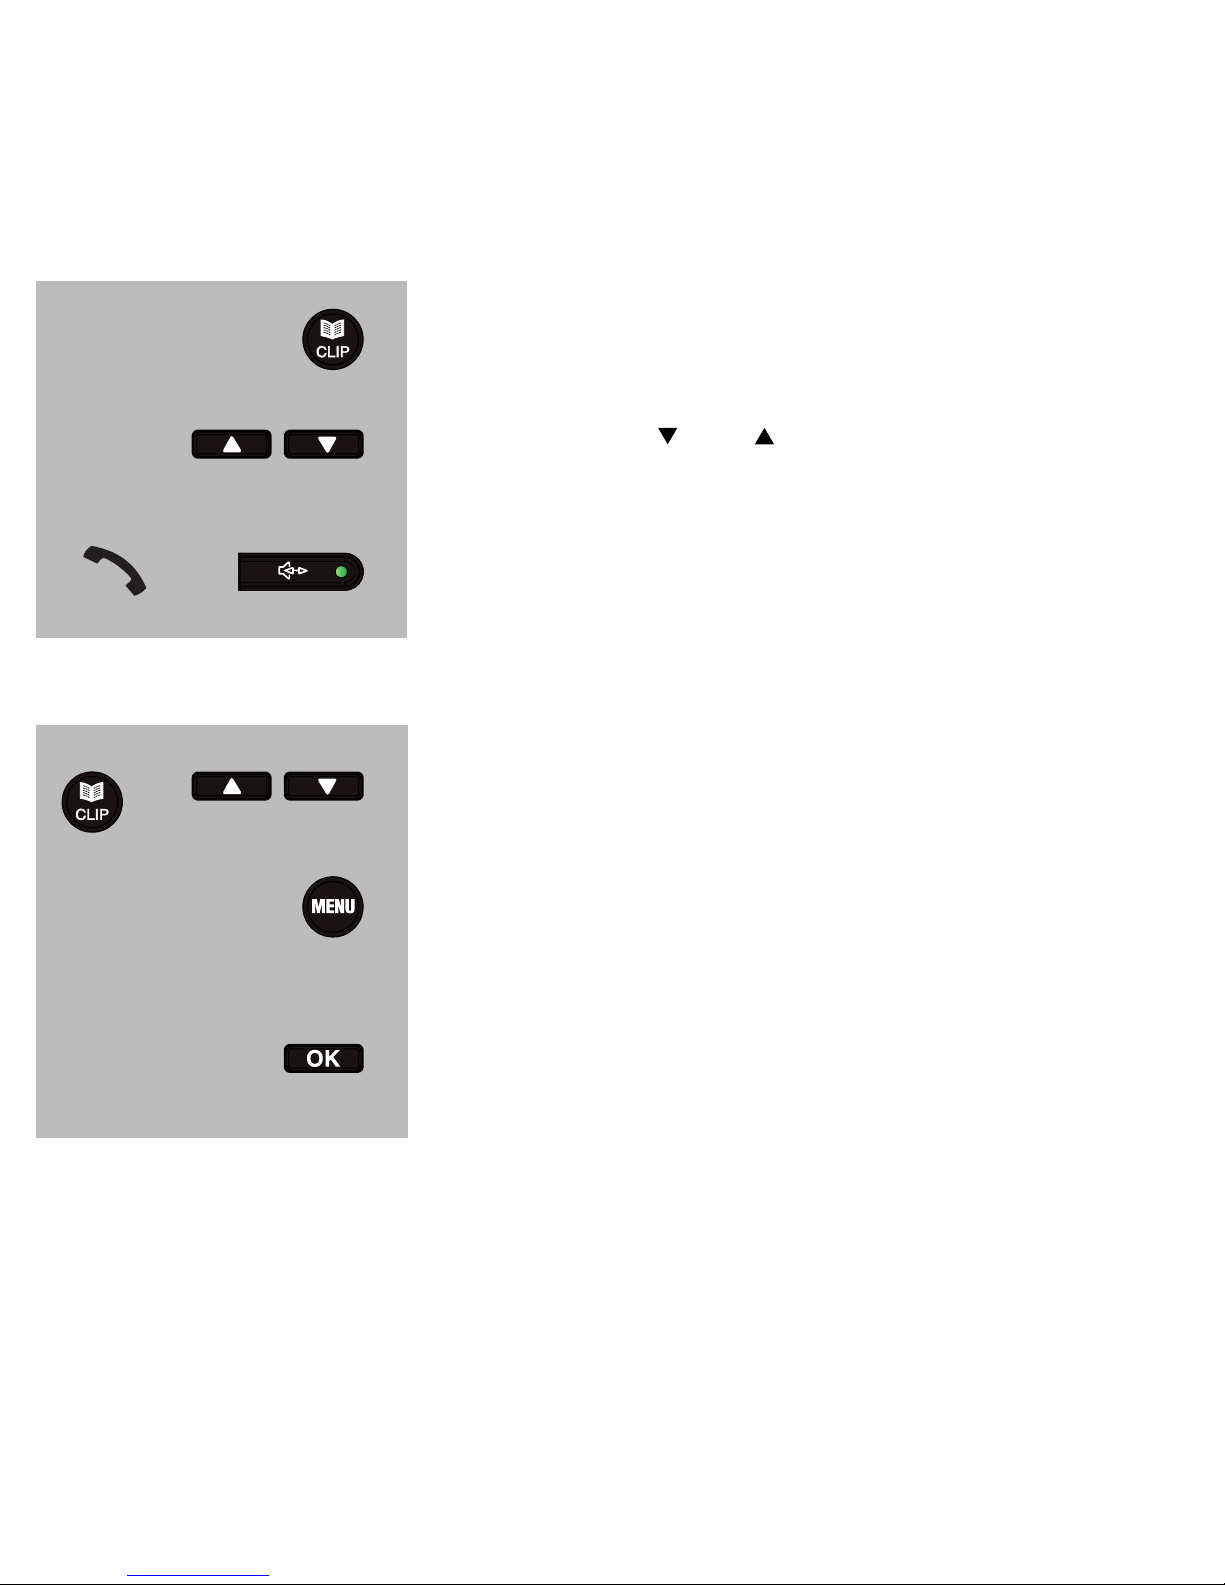
8.3 Call back:
The key CLIP once or twice, in order to sound
[CALLER-ID] .
Use the keys and to select the desired number.
Pick up the handset or press on the loudspeaker key to dial this number.
8.4 Copying to the memory:
Open the call list and nd the number to be
copied.
Press the key MENU for 3 seconds.
display: [COPY TO MEMORY]
Press the key OK to store the number in the
phone book memory.
See paragraph 5.6, to add a name to this number, and to set this number
as an emergency number.
3 sec
1x / 2x
or
1x / 2x
Page 40

40
8.5 Delete call list:
Deleteing per call:
Open the call list and nd the call to be deleted.
Press key C for 3 seconds and then release this
key.
display: [DELETE?]
Press key C for 3 seconds again to delete this
call.
Deleteing the complete call list:
Open the call list and make sure a number appears on the display.
Press key C for 6 seconds.
display: [DELETE ALL]
Press key C for 3 seconds to delete all calls.
3 sec
1x / 2x
1x / 2x
3 sec
6 sec
3 sec
Page 41

41
8.6 Tips for & specifications of the call list:
- If the network supports this, or if you have programmed this number
together with a name in the phone book memory of the phone, this
name is also shown on the display. If you have recorded a name, this
name is also spoken.
- For correctly displaying the name from the phone memory, it is of
importance that the programmed phone number is identical to the
number from which you receive the call, so including the area code.
- If the display shows [PRIVATE], the subscriber has blocked the
transmission of name and number.
- If the text [NEW CALL PROTECT] appears when deleteing the call list,
the call list still contains calls that you have not seen yet. You can delete
all calls, after you have read them.
- The memory capacity of the call list is 64 calls. Attention: when this
memory is full, every following call will delete the oldest call in the
memory.
Page 42

42
9 SETTINGS
9.1 Display contrast:
Press the key MENU 1 times.
display: [LCD CONTRAST]
Press the key OK; the current setting appears
on the display:
Use the keys and to change the setting:
1 = contrast low.
5 = contrast high.
Press the key OK to save the setting.
Press the key CLIP to return to the idle mode of
the phone.
1x
Page 43

43
9.2 Time and date:
Press the key MENU 2 times.
display: [ENTER TIME/DATE]
Press the key OK; the hours start ashing.
Set the hours with the keys and .
Press the key OK; the minutes start ashing.
Set the minutes with the keys and .
Press the key OK; the date starts ashing.
Set the date with the keys and .
Press the key OK; the month starts ashing.
Set the month with the keys and .
Press the key OK to save the time and date.
Return to the idle mode of the phone
2x
Page 44
44
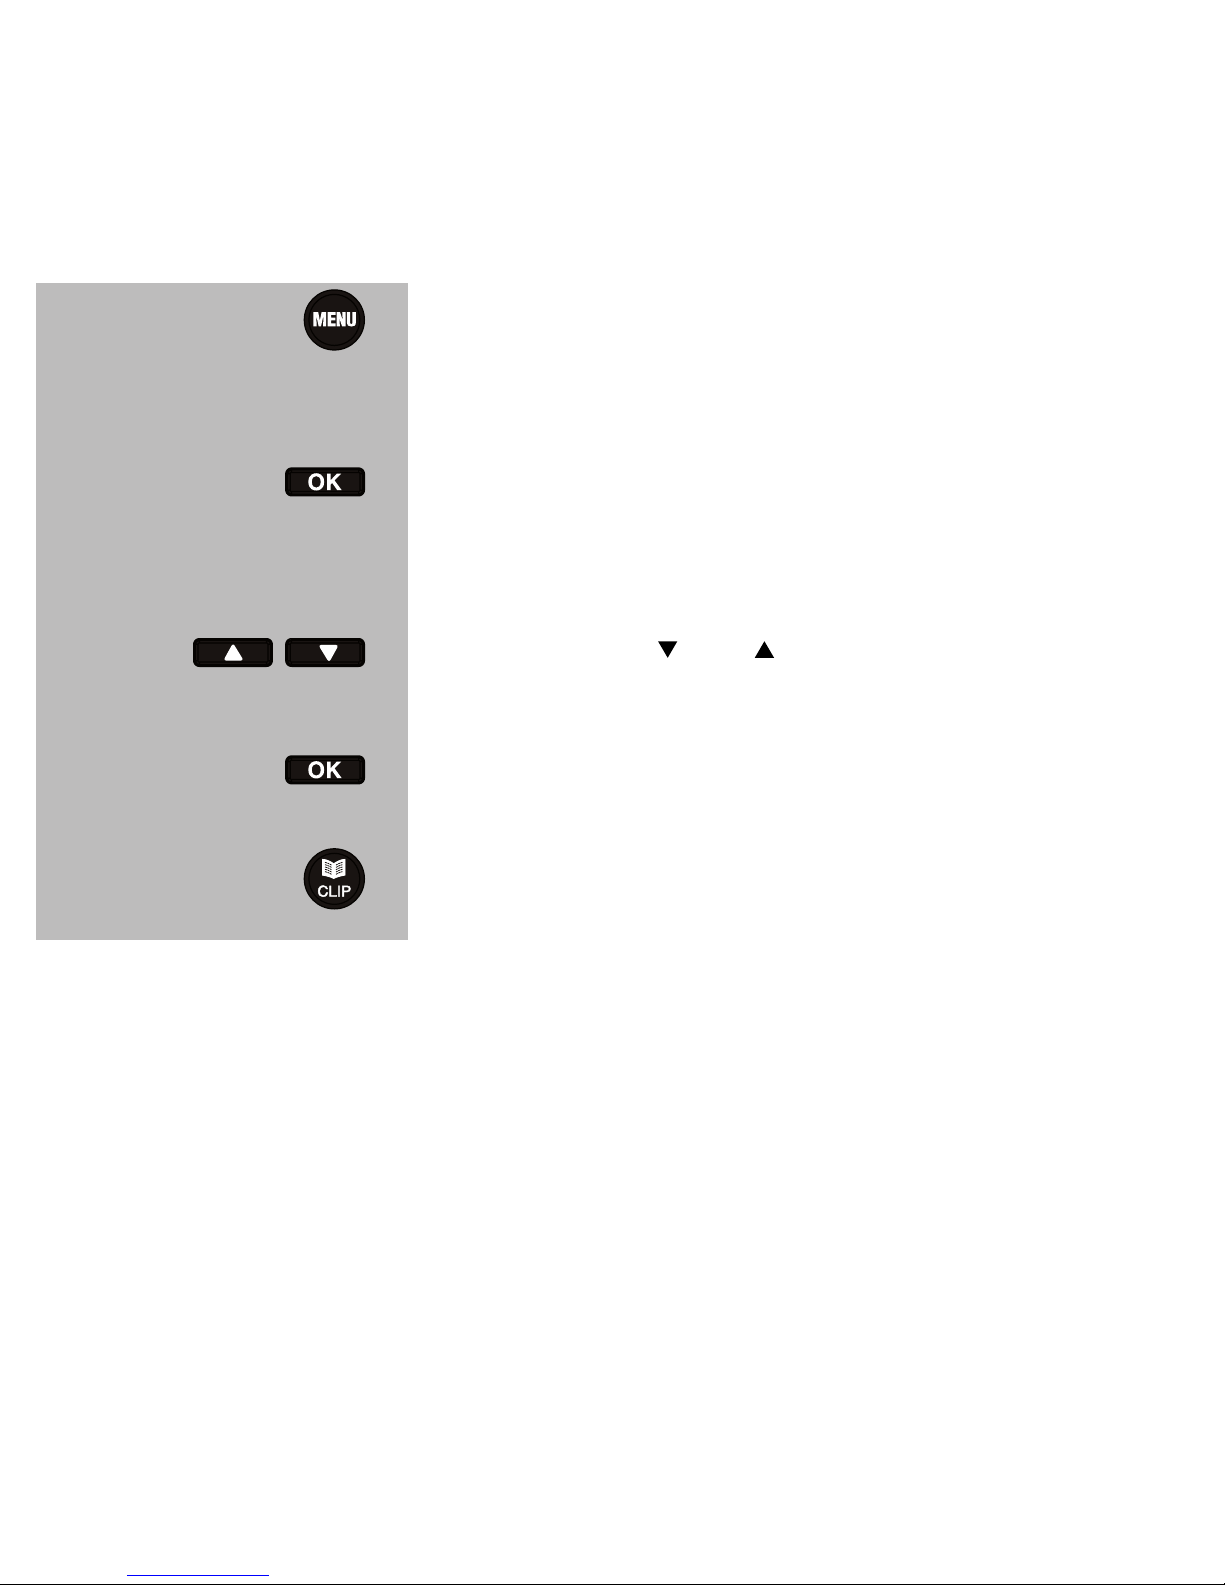
9.3 Display language: (attention, this is not the spoken language)
Press the key MENU 3 times.
display: [LANGUAGE]
Press the key OK, the currently set language
appears on the display (a star (*) is after this
language).
Use the keys and to select the desired language.
Press the key OK to save the language.
Press the key CLIP to return to the idle mode of
the phone.
3x
Page 45

45
9.4 Voice assistance: (on/off and language)
Press the key MENU 4 times.
display: [VOICE]
Press the key OK, the current setting appears on
the display (after this language is a star).
Use the keys and to select the desired
language. (Select [VOICE OFF] to disable the
voice assistant.)
Press the key
OK
to save the choice.
Press the key CLIP to return to the idle mode of
the phone.
4x
Page 46

46
9.5 FLASH interruption time:
This function, at which the connection is interrupted shortly, is used to
forward calls or enable additional telecom functions, for example ‘Call
waiting’, on some home switchboards. The standard interruption time
is 100 ms, which has been set at the factory. For some (home or office)
switchboards a longer interruption time is needed. You can set these as
follows:
Press the key MENU 9 times.
display: [FLASH]
Press the key OK; the current interruption time
appears on the display:
Use the keys and to select the desired interruption time (for this, refer to the user manual or
the supplier of the home or ofce switchboard).
Press the key OK to save the setting.
Press the key CLIP to return to the idle mode of
the phone.
9x
Page 47

47
9.6 TONE/PULSE dialing:
You can choose between dialing the phone numbers with tones (DTMF) of
with pulses (dialer system). Tone dialing has been standardized in almost
the entire Benelux, and has been set at the factory.
Press the key MENU 11 times.
display: [TONE / PULSE]
Press the key OK; the current interruption time
appears on the display
Use the keys and to select the desired dialing mode.
Press the key OK to save the choice.
Press the key CLIP to return to the idle mode of
the phone.
11x
Page 48

48
9.7 Registering and deregistering remote controls:
You can deregister (faulty or lost) remote controls with this function. You
can also register additional (*) remote controls, so that more people can
issue an alarm through this phone.
Add remote controls:
Press the key MENU 12 times.
display: [REMOTE PENDANT]
Press the key OK; the word [PAIRING] appears
on the display.
Press the red SOS key on the (new) remote
control and keep this key pressed.
Press the OK key on the phone shortly.
When the display shows [PAIRED], the remote
control is activated, and you can release the
SOS key on the (new) remote control.
Press the key CLIP to return to the idle mode of
the phone.
PAIRED
12x
Page 49
49
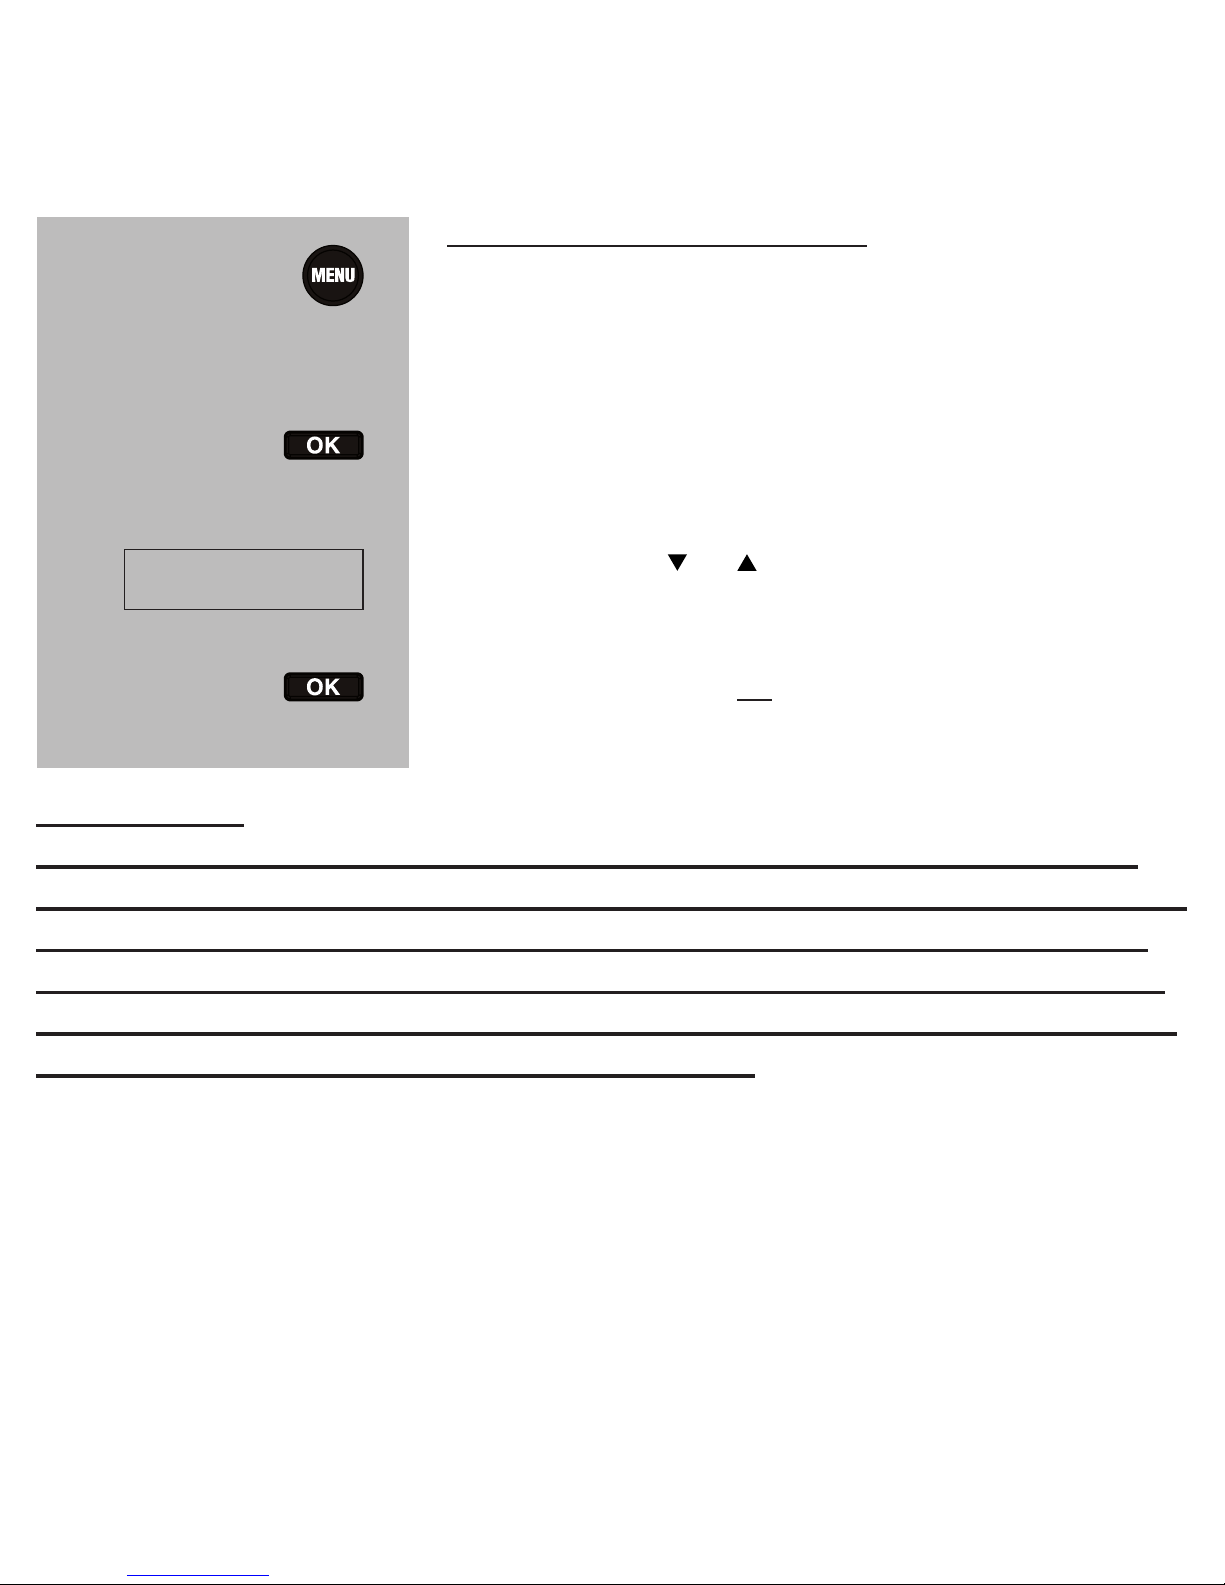
Deregister remote controls:
Press the key MENU 12 times.
display: [REMOTE PENDANT]
Press the key OK; the word [PAIRING] appears
on the display.
Press the key or , so that [DELETE] appears
on the display:
Press the key OK; all remote controls are
deregistered.
ATTENTION:
Make sure that you do not deregister remote controls by accident.
Test the functioning of remote controls after (re)registering: press the
red SOS key for 3 seconds, to sound the alarm tones of the phone.
After that, pick up the handset of your phone and put it down again,
within 30 seconds, to disable the alarm. When using multiple remote
controls, they shall all be checked this way.
*: Separate remote controls are available from the FYSIC customer ser-
vice, phone 073 6411 355 (The Netherlands), 03 238 5666 (Belgium),
018 0503 0085 (Germany) of through the internet at www.fysic.com.
You can register op to 5 remote controls.
DELETE
12x
Page 50

50
10 WARNINGS AND USER TIPS
10.1 System check:
• It is of great importance that you regularly test the alarm function of the
remote control(s) and of the phone, preferably once a month, at a xed
time. At this, take care that the red indicator light on the remote control
illuminates clearly (if the indicator light illuminates weakly, replace the
battery). Do not forget to inform the called people that it concerns a test.
10.2 General:
• Carefully read the user’s manual and follow all directions.
• Always remove the telephone plug from the adapter from the wall socket before cleaning the device.
• Never install or use the telephone in wet or moist rooms or environments. This does not apply to the waterproof remote control.
• Ensure adequate heat dissipation; never cover the telephone nor place
it directly next to a heat source.
• Take care of proper heat dissipation; never cover the phone and/or the
power supply adapter(s), and do not place them directly beside a heat
source. Use only the included adapter(s); connecting another type of
adapter may cause damage to the electronics.
• Take care that the cable of the phone and the adapter do not get damaged, and prevent that they cause tripping or falling.
• Never dismantle the phone and/or the power adapter. This may only be
done by qualied personnel.
Page 51

51
10.3 Installation:
• Connect or disconnect the cables of the phone and the phone supply
adapter only to the base station when the power supply adapter has
been unplugged from the mains socket, and the phone connector has
been disconnected from the phone socket.
• Do not install the phone during a lightning storm.
• Do not install a phone connection point in a wet or moist environment.
• Do not touch uninsulated phone or adapter cables, unless they are disconnected from the phone network or the mains power.
10.4 Placement:
• The phone is powered by a power adapter. A 230 Volt mains socket
shall be available at the location where the phone is placed.
• Preferably, do not place the device on surfaces that have been treated
with cellulose; the rubber feet can leave traces on these.
• Do not place the phone in the direct vicinity of other phones or other
electronic (medical) devices, TL tubes and other gas discharge lamps;
The emitted radio waves of these products may interfere with the receipt of the alarm signal of the remote control.
10.5 Mains power failure:
• In case of failure of the mains voltage, batteries (if inserted) support the
complete functioning of this phone, including alarm function, for more
than 12 hours (depending on the type and quality of the batteries).
Page 52

52
10.6 Remote control:
• The remote control range is up to 50 meters in the open eld. This
range depends on local circumstances.
• For an optimal range, the phone shall be placed centrally at your premises or home. There shall be the least possible interference by steel
constructions, walls, oors, etc.
10.7 Battery warning:
• As soon as the symbol illuminates on the display, the batteries shall be
replaced. See paragraph 2.2 concerning inserting/replacing batteries.
- Always replace all batteries at the same time.
- Insert only equal alkaline batteries of 1.5Volt.
- You can not use rechargeable batteries for this phone, because of
their lower voltage.
- The memories and the recorded names and messages are stored in
ash memory chips that do not need backup power supply. So these
memories are not deleted when the batteries are empty.
10.8 Callingthroughahome-orofceswitchboard:
• We advise against to connect this alarm phone after a home or ofce
switchboard, at which a 0 of or other initial digits shall be dialed for an
outside line.
The reason for this is that it is often not necessary to dial this 0 during a
failure of the voltage, but that the phone does dial this 0. This results in an
incorrect connection.
Page 53

53
10.9 Hearingamplication/hearingaids(HAC):
• The handset of this phone is suitable for wearers of hearing aids (integrated ring coil).
10.10 Environment:
• The packaging of this telephone can be collected as old paper. However,
we recommend you to save it, to adequately protect the phone during
transport.
• You shall dispose of faulty or exhausted batteries at your local depot for
small chemical waste, or at the specially designated battery collection
points. Never dispose of batteries with the household waste.
• At the end of the product’s life span, it must not be disposed of as
normal domestic waste. You must bring it to a collection point for
the recycling of electric and electronic equipment.
10.11 Maintenance:
• Only clean the baby monitor with a moist cloth; never use chemical cleaners. Before any cleaning, you must disconnect the adapters.
• Before cleaning, any connected power adaptors must be disconnected.
Page 54

54
11 POSSIBLE PROBLEMS AND SOLUTIONS
The phone doesn’t do
anything/cannot dial
numbers.
Check the connections with the phone socket
and the power adapter.
Check whether the batteries have been inserted and are full.
Poor or no readability
of the display.
Check the connection with the power adapter
and check whether the batteries have been
inserted and are full.
Check the setting for the contrast of the display
(see paragraph 9.1).
Cannot issue an
alarm through the
remote control.
You are out of reach of the phone. Shorten the
distance: Check the batteries of the remote
control (does the red indicator light illuminate
properly when pressing the SOS-key?).
No numbers are dialed in an emergency
situation.
No numbers have been programmed in the
phone book memory, or these numbers have
not been set as ‘emergency numbers’.
Weak handsfree
sound.
The volume control (at the right side of the
phone) is set at a low level. Increase the volume.
Page 55

55
No voice assistance
with the memories
and programming.
You have disabled it (see paragraph 9.4).
The volume is too low; increase it (see the sliding control at the right side of the phone.
Your phone does not
respond to the codes
that the called person
shall enter to accept
your emergency call.
The called person has a pulse phone that is
based on the dialer principle (rattling sound
in the handset when dialing a number). The
FX-3850 responds only to the tones of a tone
phone (u hear tones when you dial a number)
An alert tone sounds
from the phone every
10 seconds.
The connection with the carrier is lost. Check
the connections. If needed, plug in another
phone to check the phone socket.
If the problem cannot be solved by the aforementioned possible solutions, disconnect the power adapter and the phone cable form the phone,
and remove the batteries (de memories will be kept during this powerless
state). Connect all after more than 20 minutes again.
In case the failure has not been solved, contact the Fysic customer service
at phone number 073 6411 355 (The Netherlands), 03 238 5666 (Belgium), of through the internet at WWW.FYSIC.COM.
Page 56

56
12 DECLARATION OF CONFORMITY
The declaration of conformity is available on the
website WWW.FYSIC.COM
13 NETWORK COMPATIBILITY
This telephone is designed for use on the ‘public switched telephone
networks (analogue single line)’ of telephony and cable companies in
all countries of the EU. However, each provider could require a different
connecting wire with plug. This device meets the essential requirements
and other relevant provisions as stipulated by the European Guideline
1999/5/EC.
Page 57

57
14 TECHNICAL SPECIFICATIONS
Dialing ............................................... tone (DTMF) & pulse
R/FLASH ........................................... 80/100/270/300/ 600 ms
Power supply phone .......................... 9V DC 200 mA ( )
(through power adapter)
Back-up power supply phone ............ 4 x 1.5 Volt Penlight AA batteries
Life of back-up batteries .................... >12 hours (Alkaline batteries)
Power supply remote control ............. 12 Volt battery (A23, 28 x 10 mm)
Frequency remote control.................. 868.350 MHz
Operational temperature.................... 0 °C to 40 °C
Page 58

58
15 TABLE OF CONTENTS
1 INTRODUCTION ....................................2
2 INSTALLATION
2.1 Phone check ........................................4
2.2 Batteries ...........................................4
2.3 Power adapter .......................................5
2.4 Phone cable ........................................5
2.5 Receiver ...........................................5
2.6 Wall mounting .......................................6
2.7 Remote control ......................................7
3 OVERVIEW OF THE PHONE
3.1 Top view ...........................................8
3.2 Right side view .....................................10
3.3 Backside ..........................................10
3.4 Display ............................................11
4 USING THE TELEPHONE
4.1 Incoming calls ......................................12
4.2 Answering calls .....................................13
4.3 Ending calls ........................................13
4.4 Dialling numbers ....................................14
4.5 Dialing pause. . . . . . . . . . . . . . . . . . . . . . . . . . . . . . . . . . . . . . . 15
Page 59

59
4.6 Call volume ........................................15
4.7 Redialing .........................................16
4.8 R button (FLASH) ...................................17
4.9 Consultation .......................................17
4.10 Call timer ..........................................17
5 PHONEBOOK MEMORY
5.1 Introduction ........................................18
5.2 Add memories ......................................18
5.3 Select memory .....................................20
5.4 Screen display at reading memory ......................20
5.5 Delete memory .....................................21
5.6 Correct/change memory ..............................22
5.7 Add or change spoken name with memories ..............23
5.8 Delete spoken name with memories .....................23
5.9 Tips and remarks concerning the memories ...............24
5.10 Add a name ........................................25
6 DIRECT MEMORY M1 AND M2
6.1 Introduction ........................................26
6.2 Programming memory ................................26
6.3 Direct dialing memory ................................27
6.4 Correct memory .....................................27
6.5 Delete memory .....................................27
6.6 Specications ......................................27
Page 60

60
7 ALARM FUNCTION
7.1 Introduction ........................................28
7.2 Emergency message. . . . . . . . . . . . . . . . . . . . . . . . . . . . . . . . . 29
7.3 Setting emergency numbers ...........................31
7.4 Silent alarm on or silent alarm off .......................31
7.5 Codes ............................................33
7.6 Important tips. . . . . . . . . . . . . . . . . . . . . . . . . . . . . . . . . . . . . . . 35
8 CALL LIST (CLIP)
8.1 Display on the screen ................................38
8.2 Open call list. .......................................38
8.3 Call back ..........................................39
8.4 Copying to the memory ...............................39
8.5 Delete call list ......................................40
8.6 Tips for & specications of the call list ....................41
9 SETTINGS
9.1 Display contrast .....................................42
9.2 Time and date .....................................43
9.3 Display language (attention, this is not the spoken language) . 44
9.4 Voice assistance (on/off and language) ..................45
9.5 FLASH interruption time ..............................46
9.6 TONE/PULSE dialing ................................47
9.7 Registering and deregistering remote controls .............48
Page 61

61
10 WARNINGS AND USER TIPS
10.1 System check ......................................50
10.2 General ...........................................50
10.3 Installation .........................................51
10.4 Placement ........................................51
10.5 Mains power failure ..................................51
10.6 Remote control .....................................52
10.7 Battery warning .....................................52
10.8 Calling through a home- or ofce switchboard .............52
10.9 Hearing amplication/hearing aids (HAC) .................53
10.10 Environment .......................................53
10.11 Maintenance .......................................53
11 POSSIBLE PROBLEMS AND SOLUTIONS ..............54
12 DECLARATION OF CONFORMITY .....................56
13 NETWORK COMPATIBILITY ..........................56
14 TECHNICAL SPECIFICATIONS ........................57
15 TABLE OF CONTENTS ..............................58
16 WARRANTY .......................................62
17 ALARM LIST .......................................63
Page 62

62
16 WARRANTY
For the Alecto FX-3850 you have a warranty of 24 months from the date
of purchase. During this period, we guarantee the free repair of defects
caused by material and workmanship errors. All this subjected to the final
assessment of the importer.
HOW TO HANDLE:
If you notice any defect, first refer to the user’s manual. If the manual
provides no definite answer, please contact the supplier of this baby video
monitor or contact customer service of FYSIC on telephone number 073
6411 355.
THE WARRANTY BECOMES NULL AND VOID:
In case of improper use, incorrect connections, leaking and/or incorrectly
installed batteries, use of unoriginal parts or accessories, negligence
and in case of defects caused by moisture, fire, flooding, lightning and
natural disasters. In case of unauthorised modifications and/or repairs
performed by third parties. In case of incorrect transportation of the device
without adequate packaging and when the device is not accompanied by
this warranty card and proof of purchase. The warranty does not cover
connecting cables, plugs and batteries.
All further liability, especially concerning any consequential damages, is
excluded.
Page 63

63
17 ALARM LIST
Make copies of this page, and write down the order of the people that will
be called in case of an emergency.
sequence: name:
Phone
number:
sequence: name:
Phone
number:
Page 64
64
Service
Help
Service Help
NL 073 6411 355
(Lokaal tarief)
BE 03 238 5666
(Lokaal tarief)
(Tarif local)
DE 0180 503 0085
Lokale Festnetzkosten
Hesdo, Australiëlaan 1
5232 BB, ‘s-Hertogenbosch
The Netherlands
WWW.FYSIC.COM
[email protected]
NL 073 6411 355
BE 03 238 5666
DE 0180 503 0085
Hesdo, Australiëlaan 1, 5232 BB,
‘s-Hertogenbosch,
The Netherlands
(Lokaal tarief)
(Tarif local)
(Lokaal tarief)
(Lokale Festnetzkosten)
ver 4.1
 Loading...