

Page 1
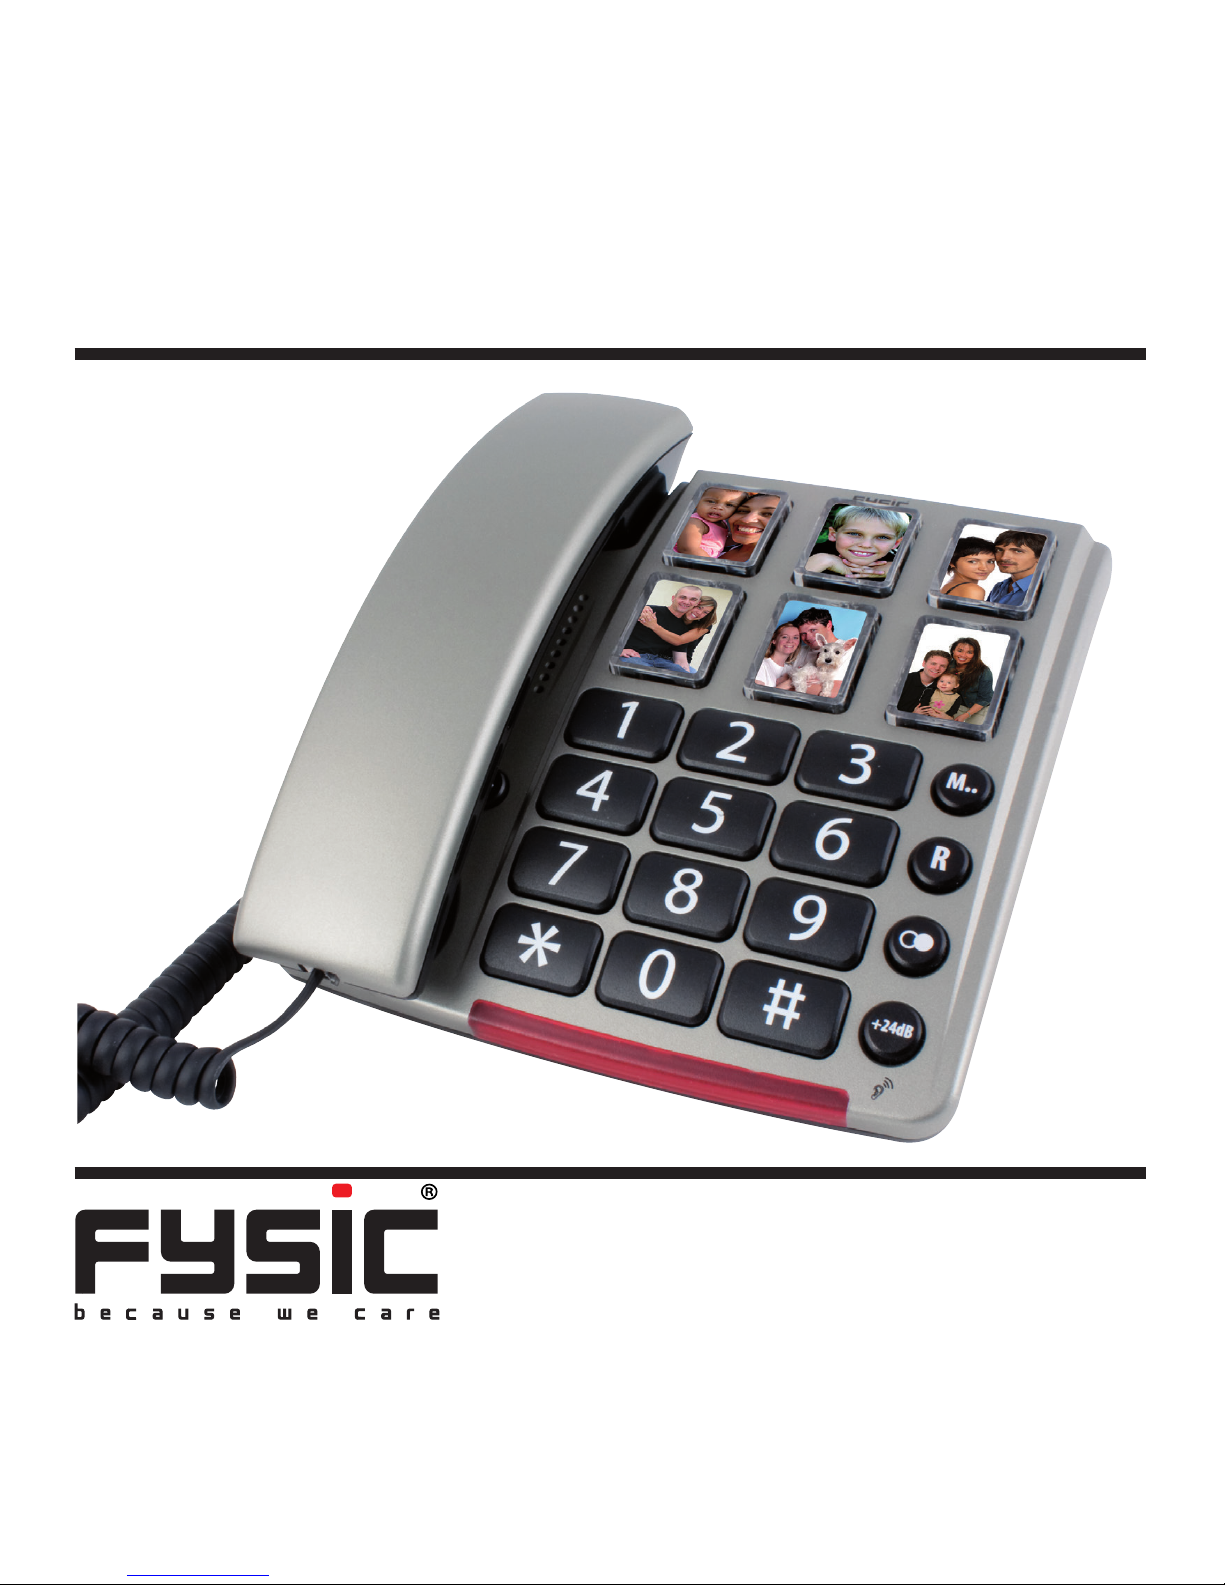
USER’S MANUAL
FX-3360
Page 2

2
Page 3

3
DECLARATION OF CONFORMITY
The declaration of conformity is available on the website WWW.
FYSIC.COM
NETWORK COMPATIBILITY
This telephone is designed for use on the ‘public switched telephone
networks (analogue single line)’ of telephony and cable companies
in all countries of the EU. However, each provider could require a
different connecting wire with plug.
This device meets the essential requirements and other relevant
provisions as stipulated by the European Guideline 1999/5/EC.
The FX-3360 has a loading factor of 25
MAINTENANCE
• Only clean the housing with a moist cloth, never use chemical
cleaning agents.
• Never place the FX-3360 onto cellulose-treated surfaces; the rubber feet could leave tracks.
Page 4
4
PHONE OVERVIEW
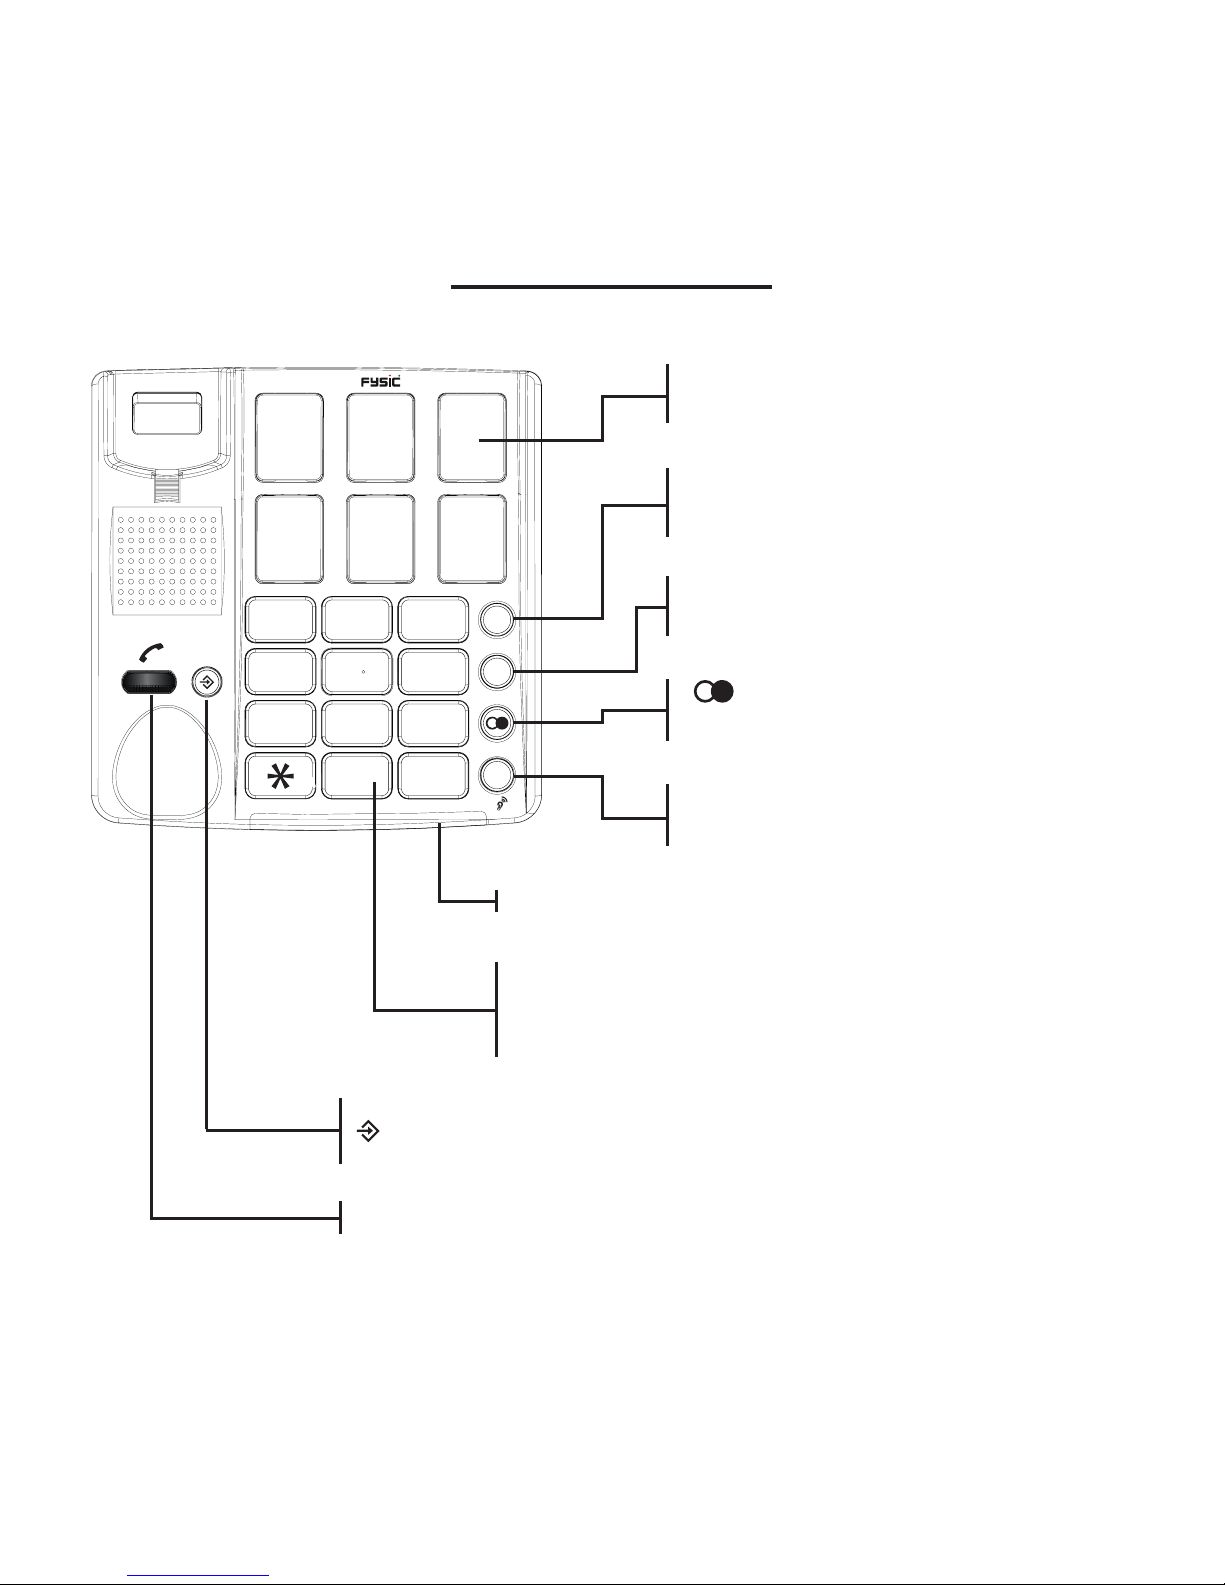
6 photo buttons: to dial numbers
directly
M... button: for access to the indirect memories 1 through 0
R button: button for e.g. accepting
a waiting call
button: to redial the last dialled
number
+24dB button: to amplify the
receiver volume
Call indicator: illuminates when receiving a call
keypad: to dial numbers
(the * (asterisk) and # (pound) buttons are used
for, amongst others, tele-banking)
button: program button, for programming memories
0...9 buttons: to set the receiver volume
345
+24dB
R
M..
1
2
3
4
5
6
789
0
#
Page 5
5
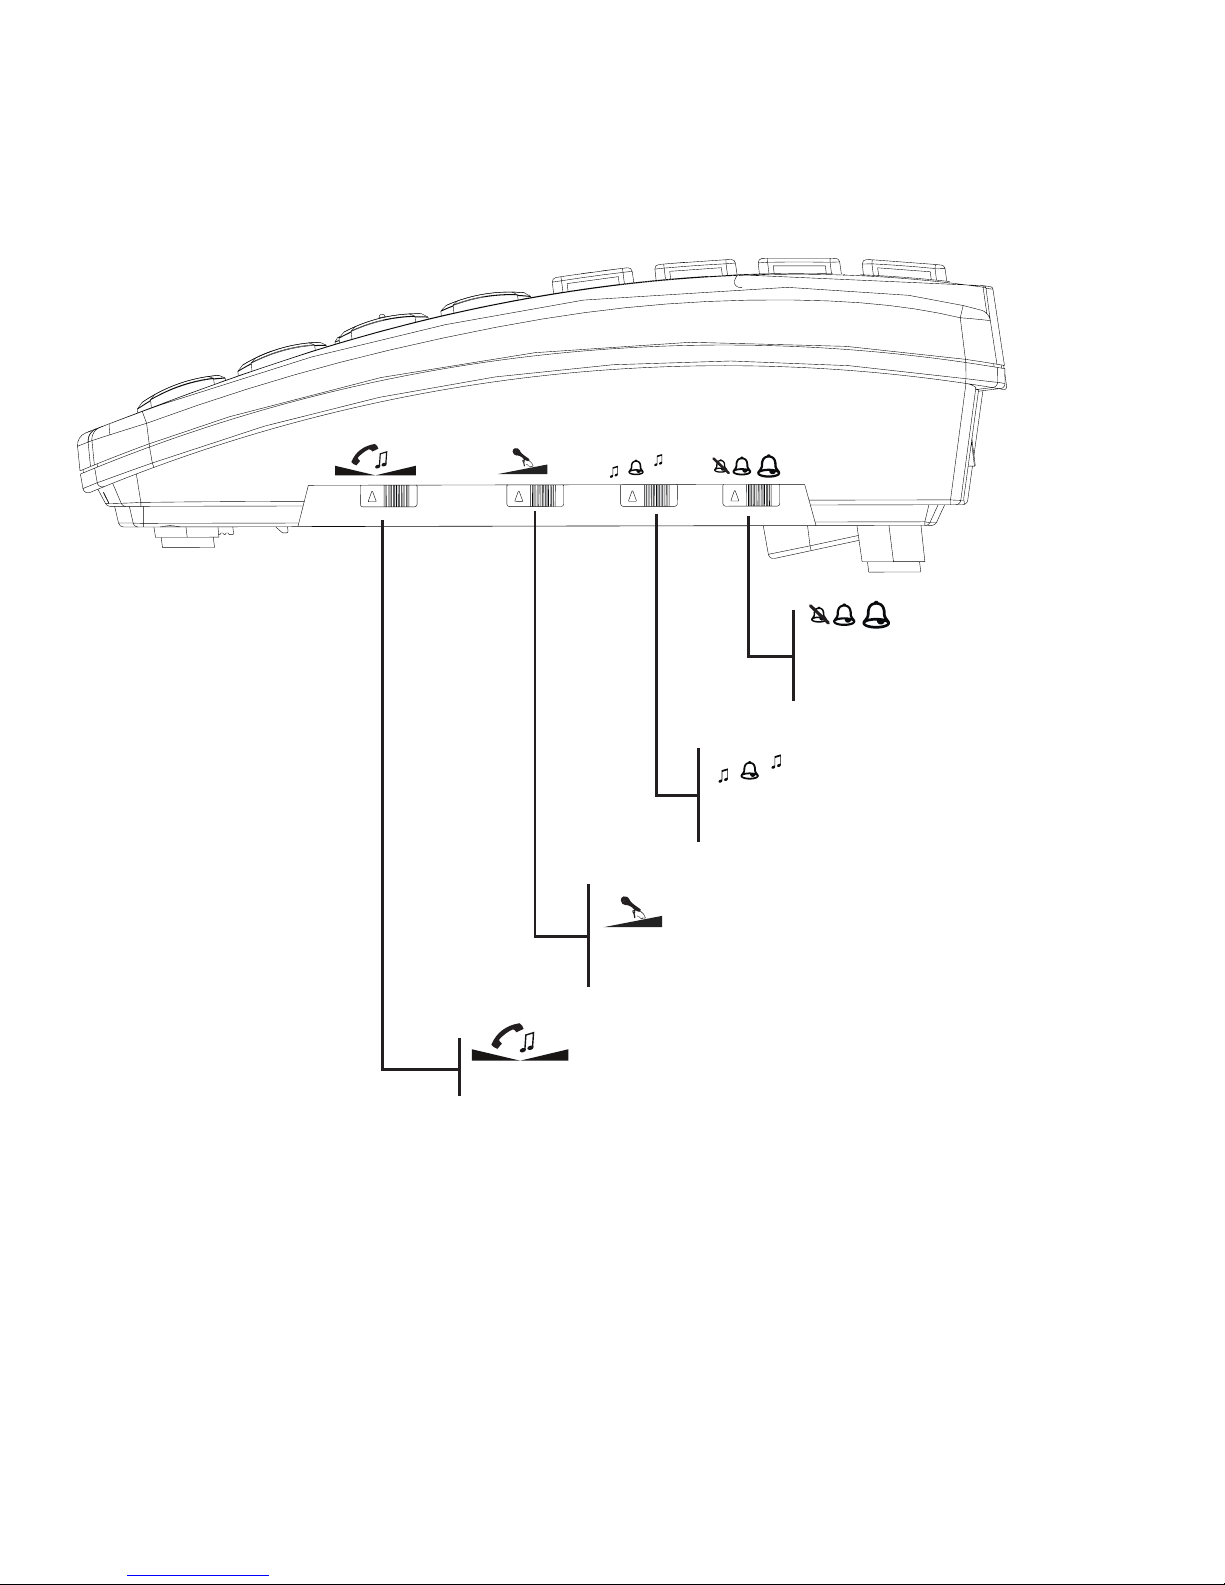
switch:
switch for call volume
setting
switch:
switch for call rhythm selection
switch:
switch for microphone volume setting
slide control:
slide control for the receiver sound pitch
Page 6
6
INSTALLATION
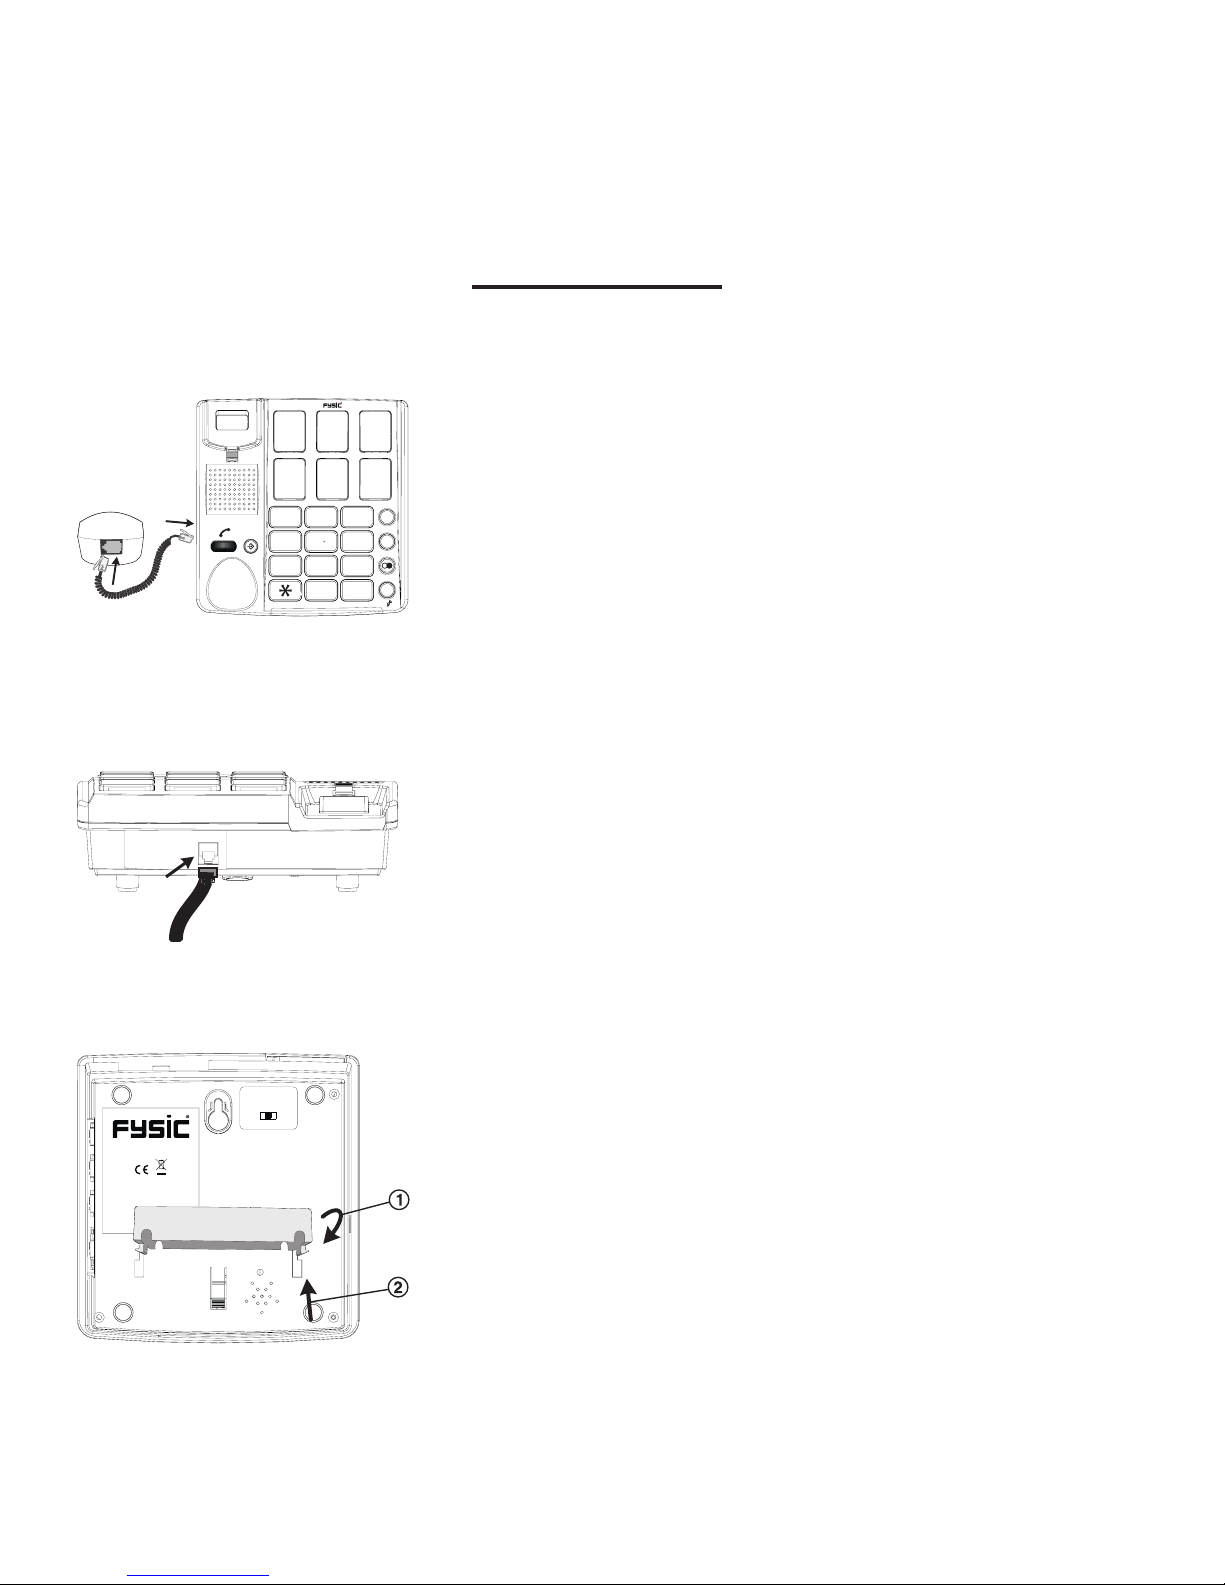
Receiver:
1. connect the receiver with the telephone
by attaching one side of the spiral cable
to the bottom of the receiver and the other
side to the left side of the telephone
2. push in the plugs until they’re securely
connected
Telephone:
1. plug the telephone wire into the bottom of
the telephone
2. insert the telephone plug into a telephone
wall socket
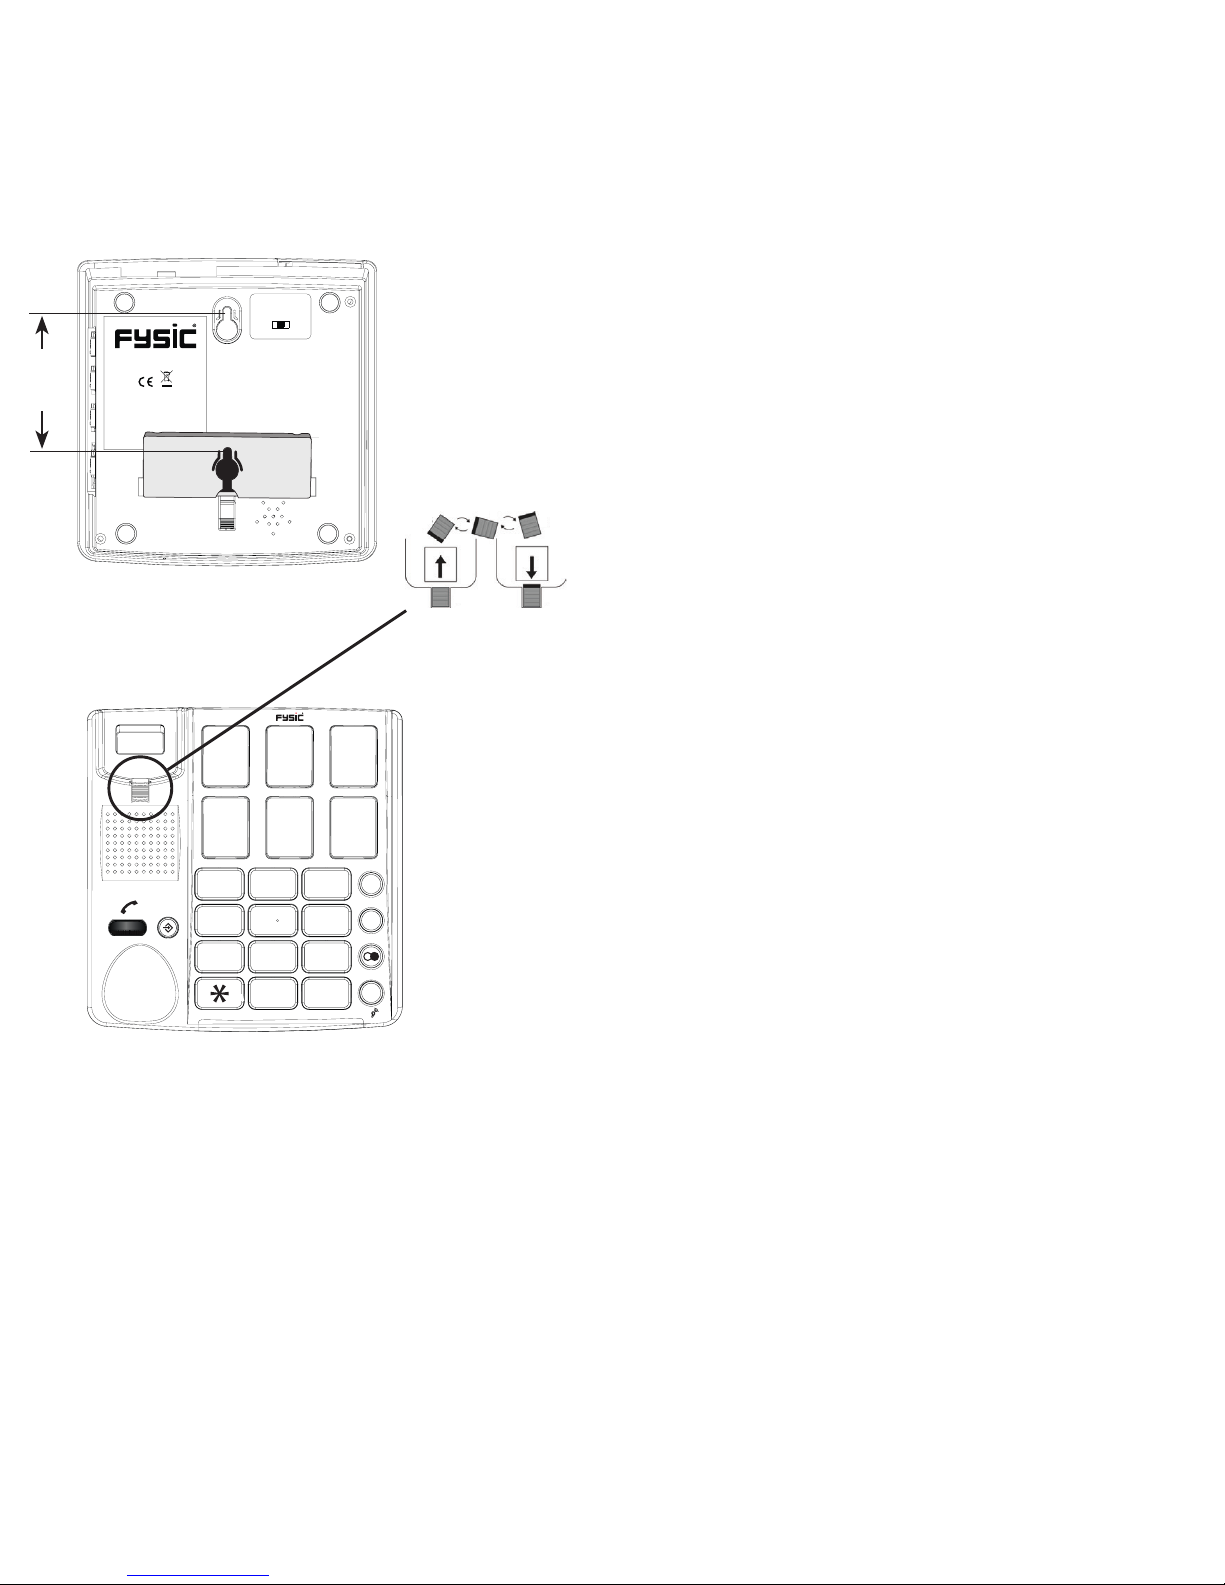
Wall-mounting:
1. click the wall bracket onto the bottom of
the phone (1) and press it upward (2) according to the illustration below
345
+24dB
R
M..
1
2
3
4
5
6
789
0
#
TEL.LINE
Service +31(0)73 641 1355
);
R
100ms 300ms
Page 7
7
2. in a vertical line, drill 2 holes at a distance
of 8.5 cm from each other and insert plugs
and screws; let the head of the screws
protrude for 5 mm
3. slide the receiver clamp out of the telephone, turn it 180° and place it back onto
the telephone; this clamp will hold the
receiver in case of wall-mounting
4. hook the telephone with the screw holes over the screws and
press it downward
5. x the telephone wire to the wall using the cable clips
Service +31(0)73 641 1355
);
R
100ms 300ms
85mm
345
+24dB
R
M..
1
2
3
4
5
6
789
0
#
Page 8
8
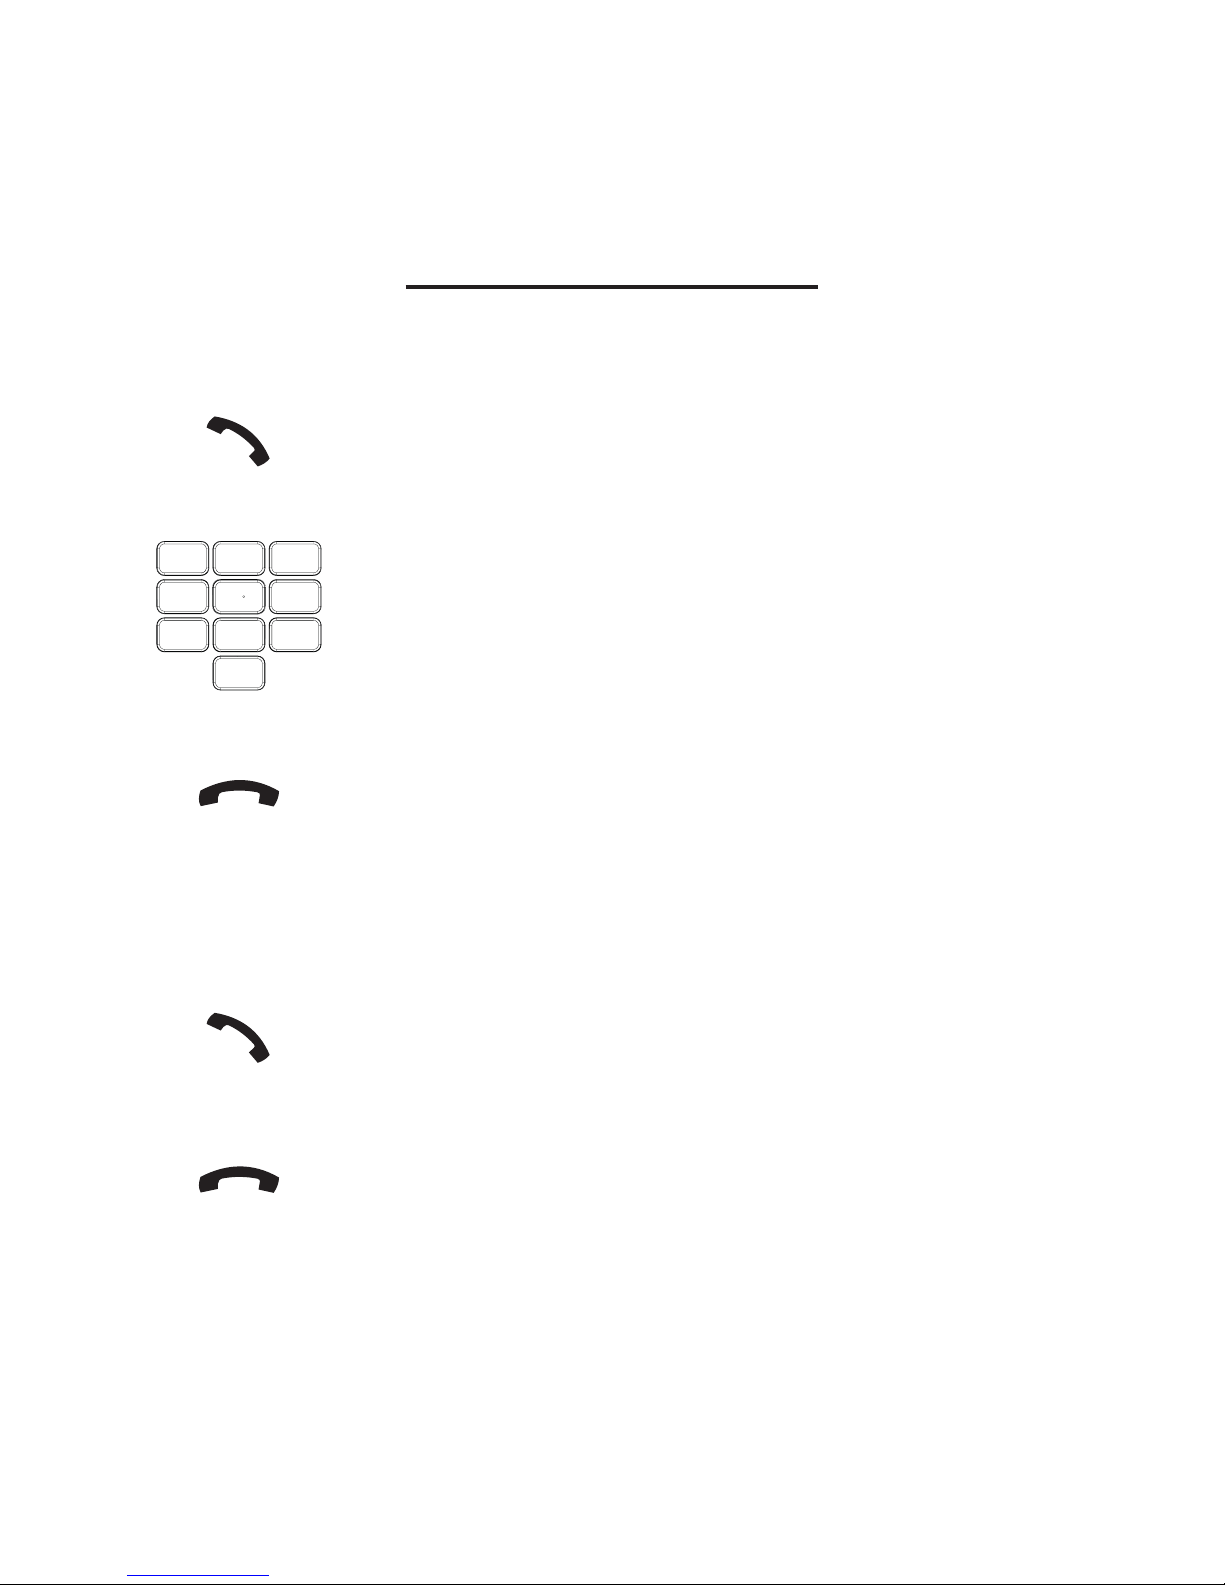
USING THE TELEPHONE
Dialling numbers:
pick up the receiver
input the phone number using the keypad
at the end of your conversation, put down the
receiver to disconnect the call
Answering calls:
pick up the receiver to accept incoming calls
at the end of your conversation, put down the
receiver to disconnect the call
1
2
3
4
5
6
789
0
Page 9
9
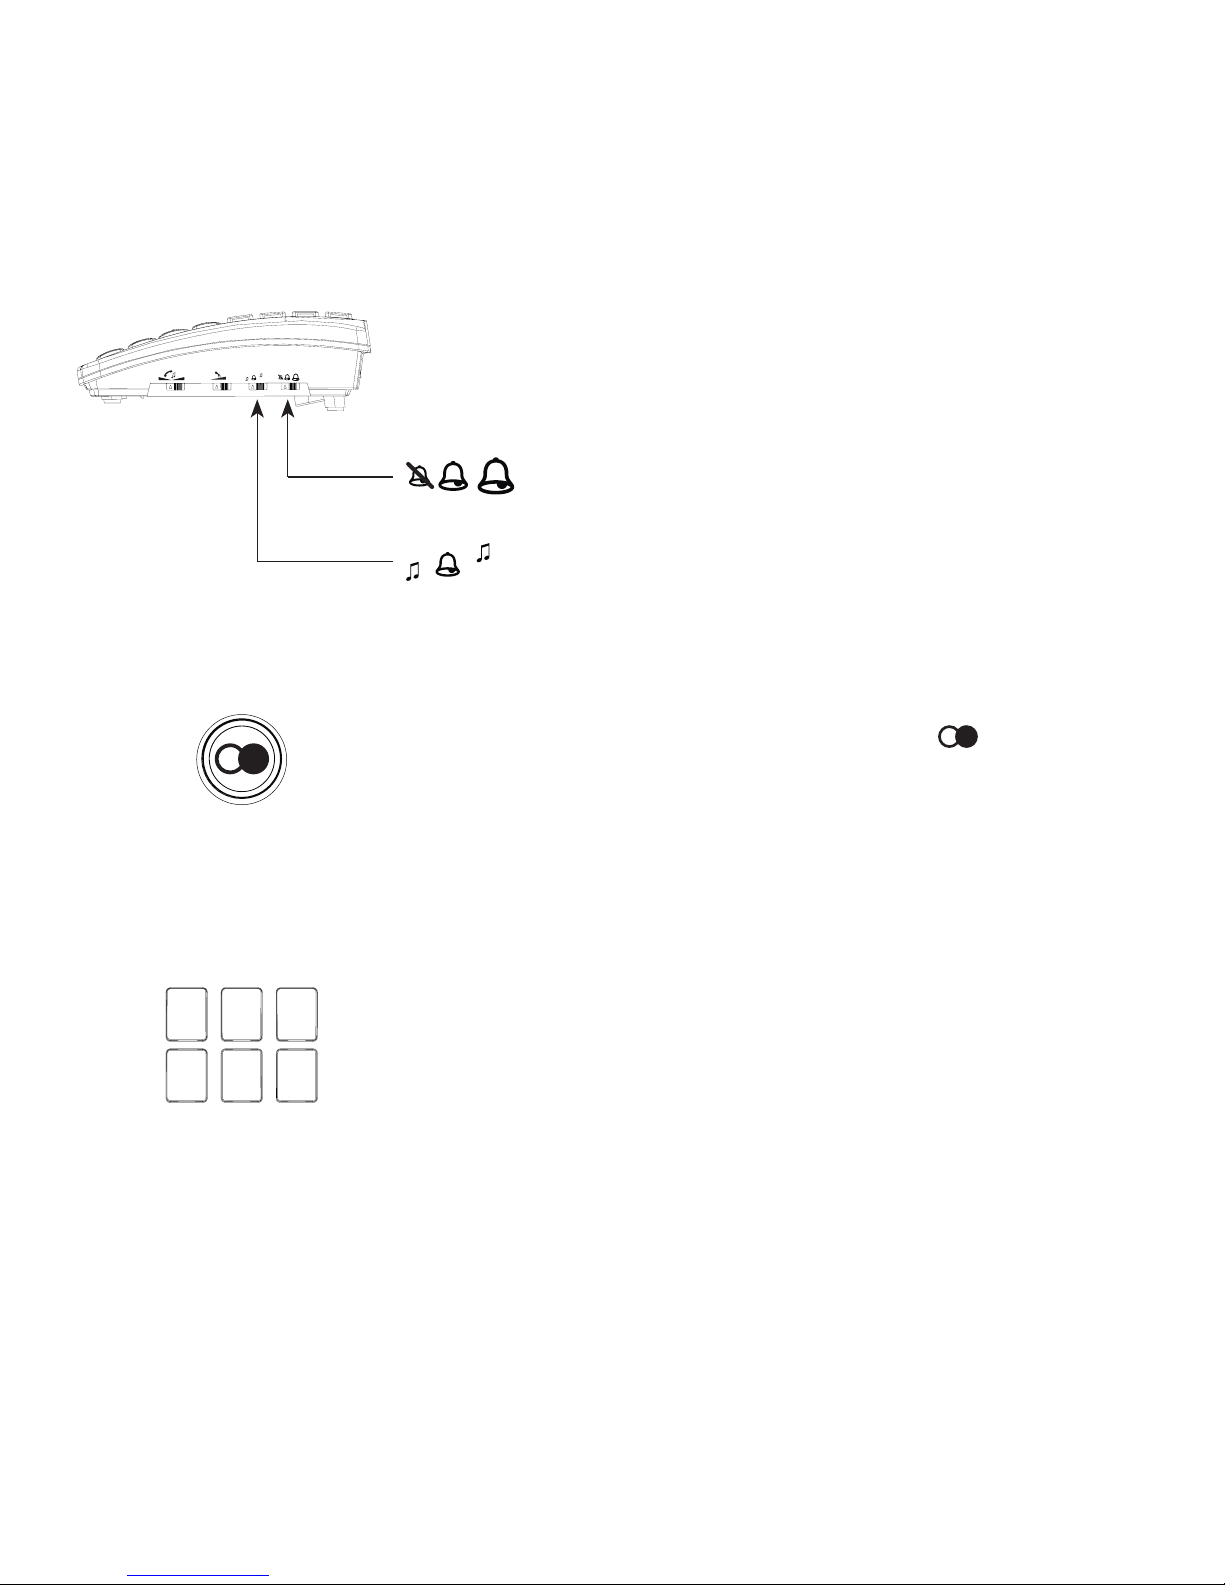
Call signal:
: use this to set the call volume
: use this to change the call melody
Redialling:
pick up the receiver and press the button to
redial the last dialled number
Photo dialling:
pick up the receiver and press the desired photo button to dial the corresponding number
(see page 13 for programming the photo buttons)
Page 10
10
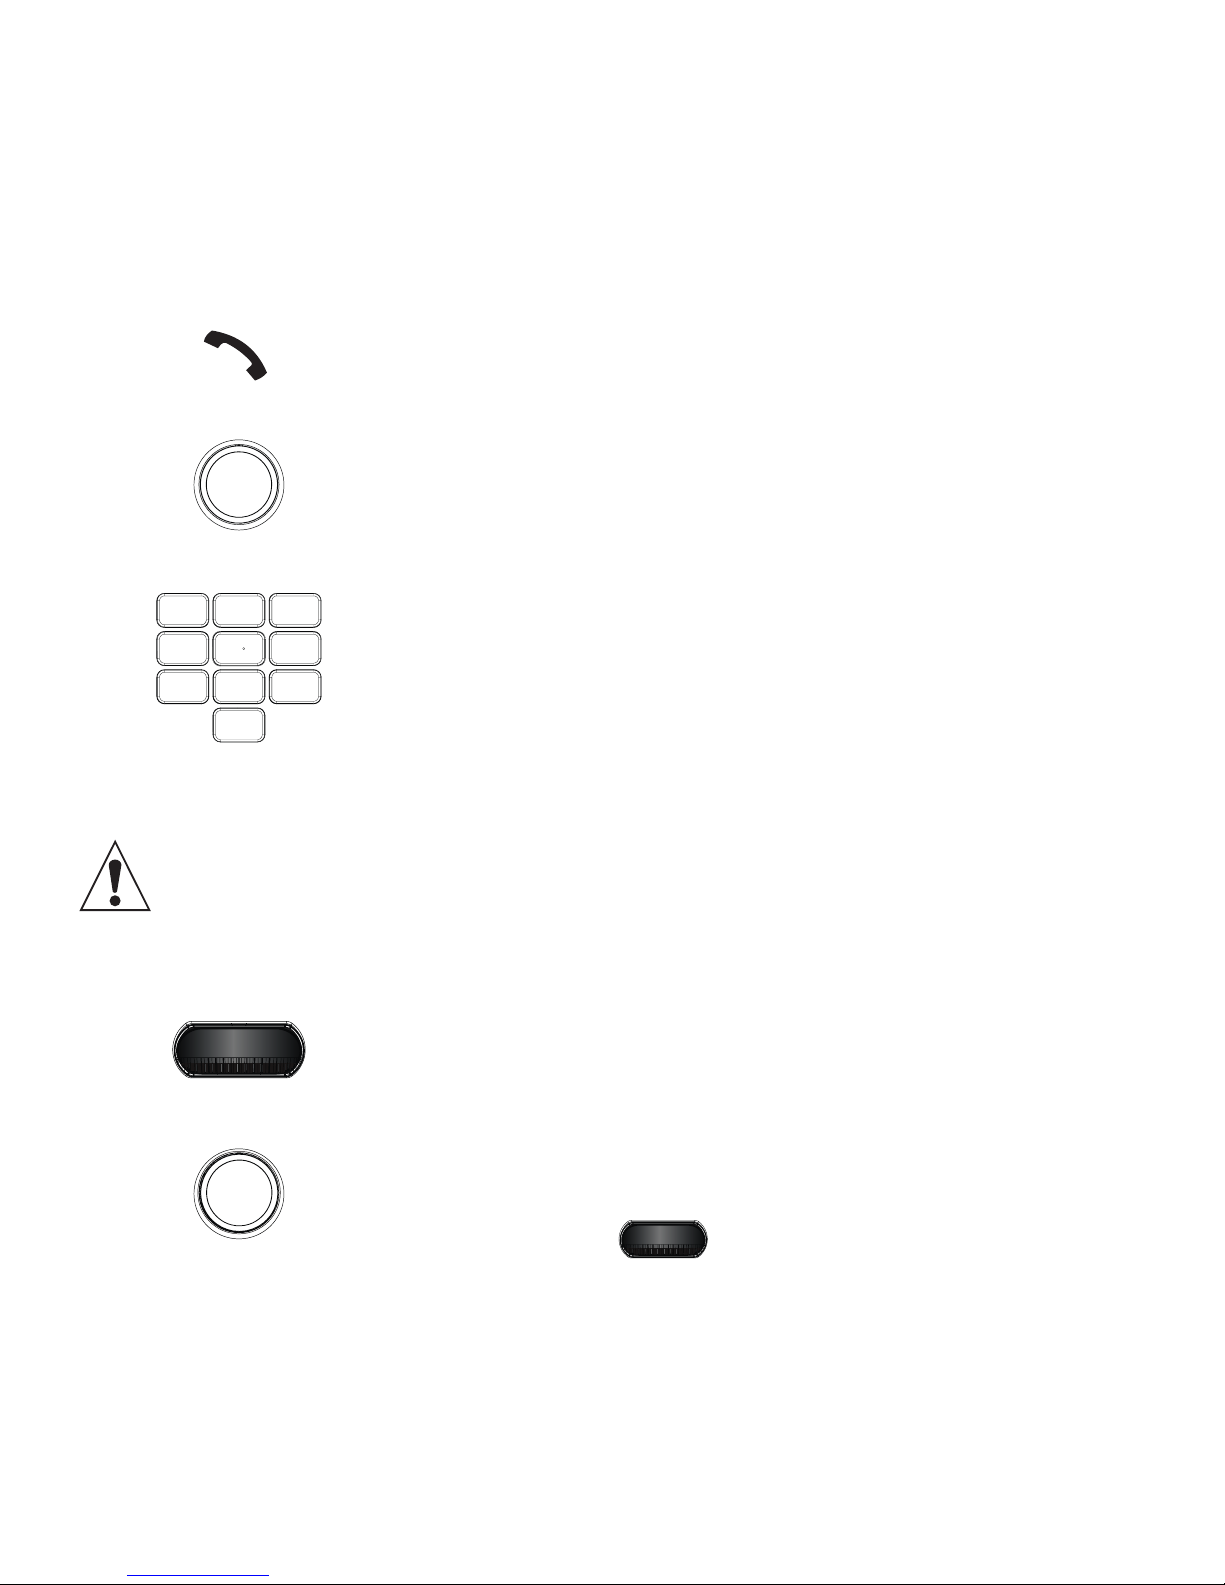
Memory dialling:
pick up the receiver
press 1x the M... button
press the desired memory button (0 ~ 9) to dial
the corresponding memory number
(see page 14 for programming the memories)
Call volume:
ATTENTION: EXCESSIVE VOLUMES CAN LEAD TO HEARING LOSS. IF SHARING THE PHONE WITH MULTIPLE
USERS, ALWAYS TURN THE CONTROL BACK TO 0 AFTER
EVERY CONVERSATION.
use the rotary control underneath the receiver
to adjust the receiver sound
press the +24dB button to amplify the sound to
24dB (you can use this in combination with the
rotary control
345
)
345
M..
1
2
3
4
5
6
789
0
+24dB
Page 11
11
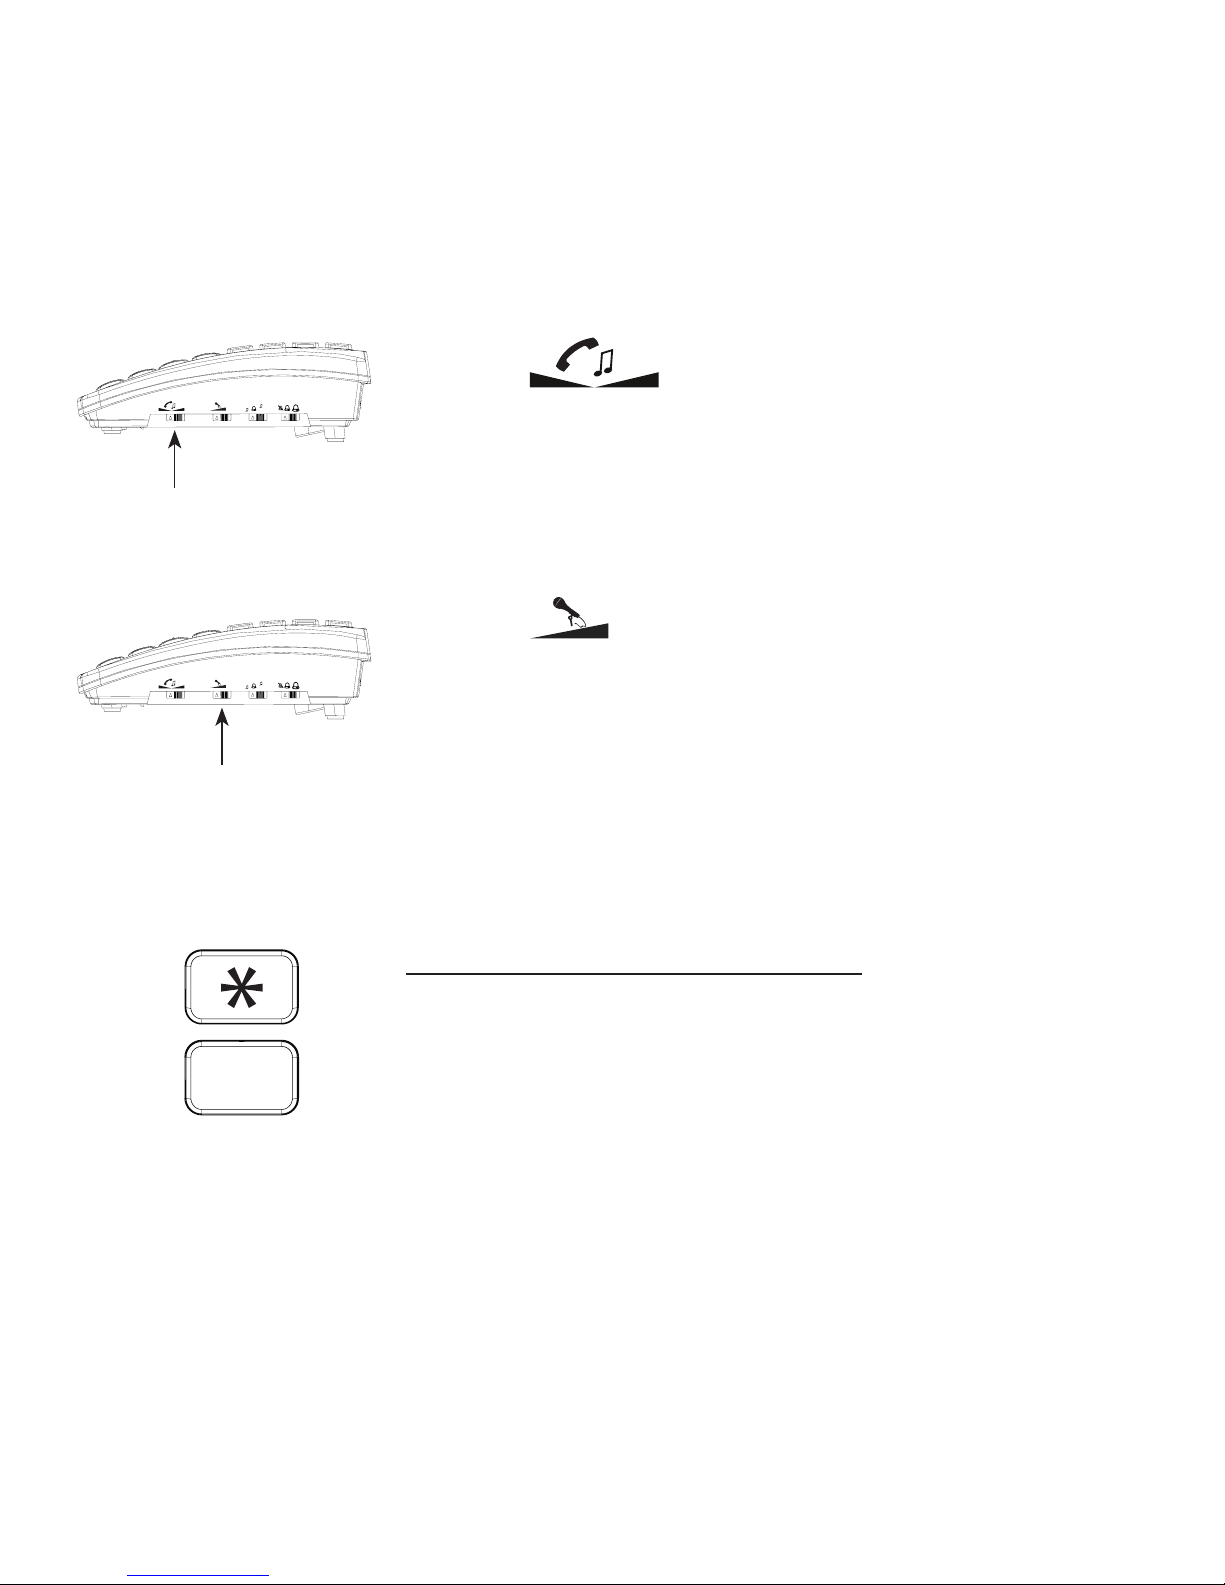
Pitch:
use the slide control to adjust the pitch
of the receiver sound
Microphone amplier:
use the slide control to slightly lower the
microphone signal (slide to the left) or to amplify it (slide to the right); slide to the middle for a
neutral microphone volume
Extra functions:
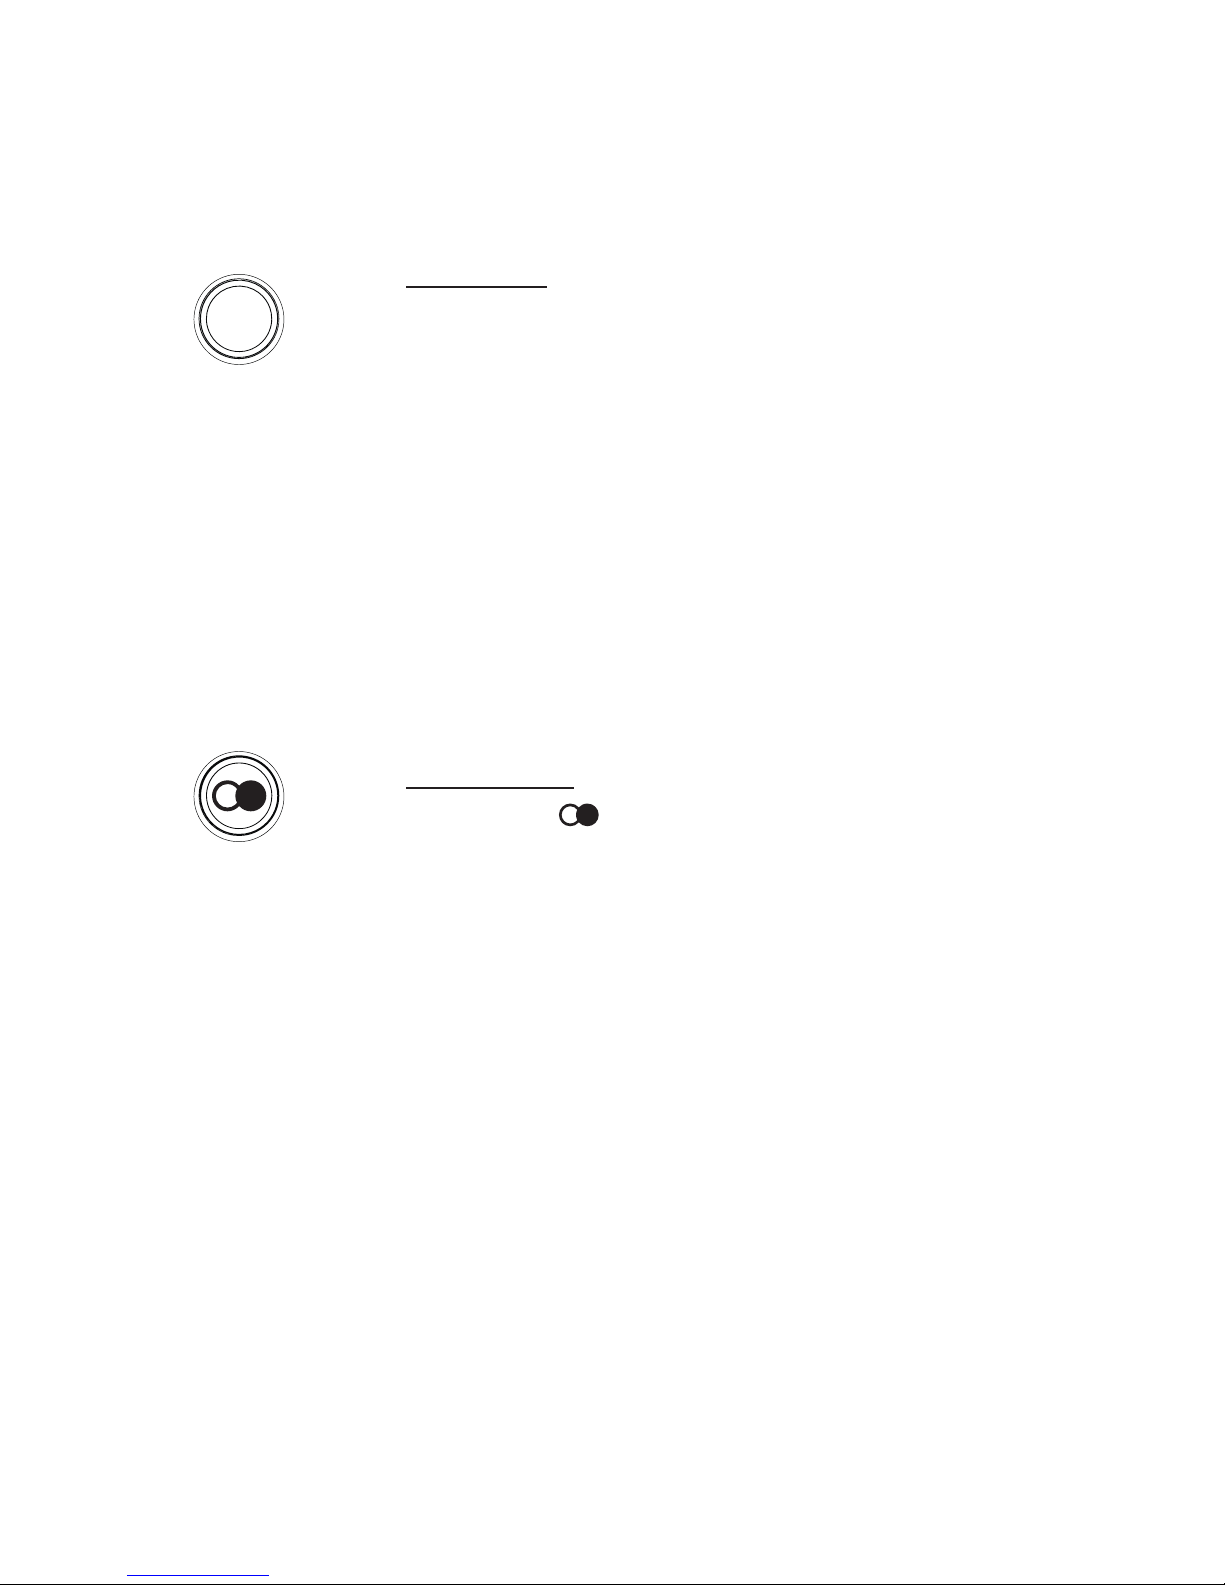
‘asterisk’ and ‘pound’ buttons:
the * and # buttons are used mainly for
tele-banking:
- press the * button when asked to press the
ASTERISK button
- press the # button when asked to press the
POUND button
#
Page 12
12
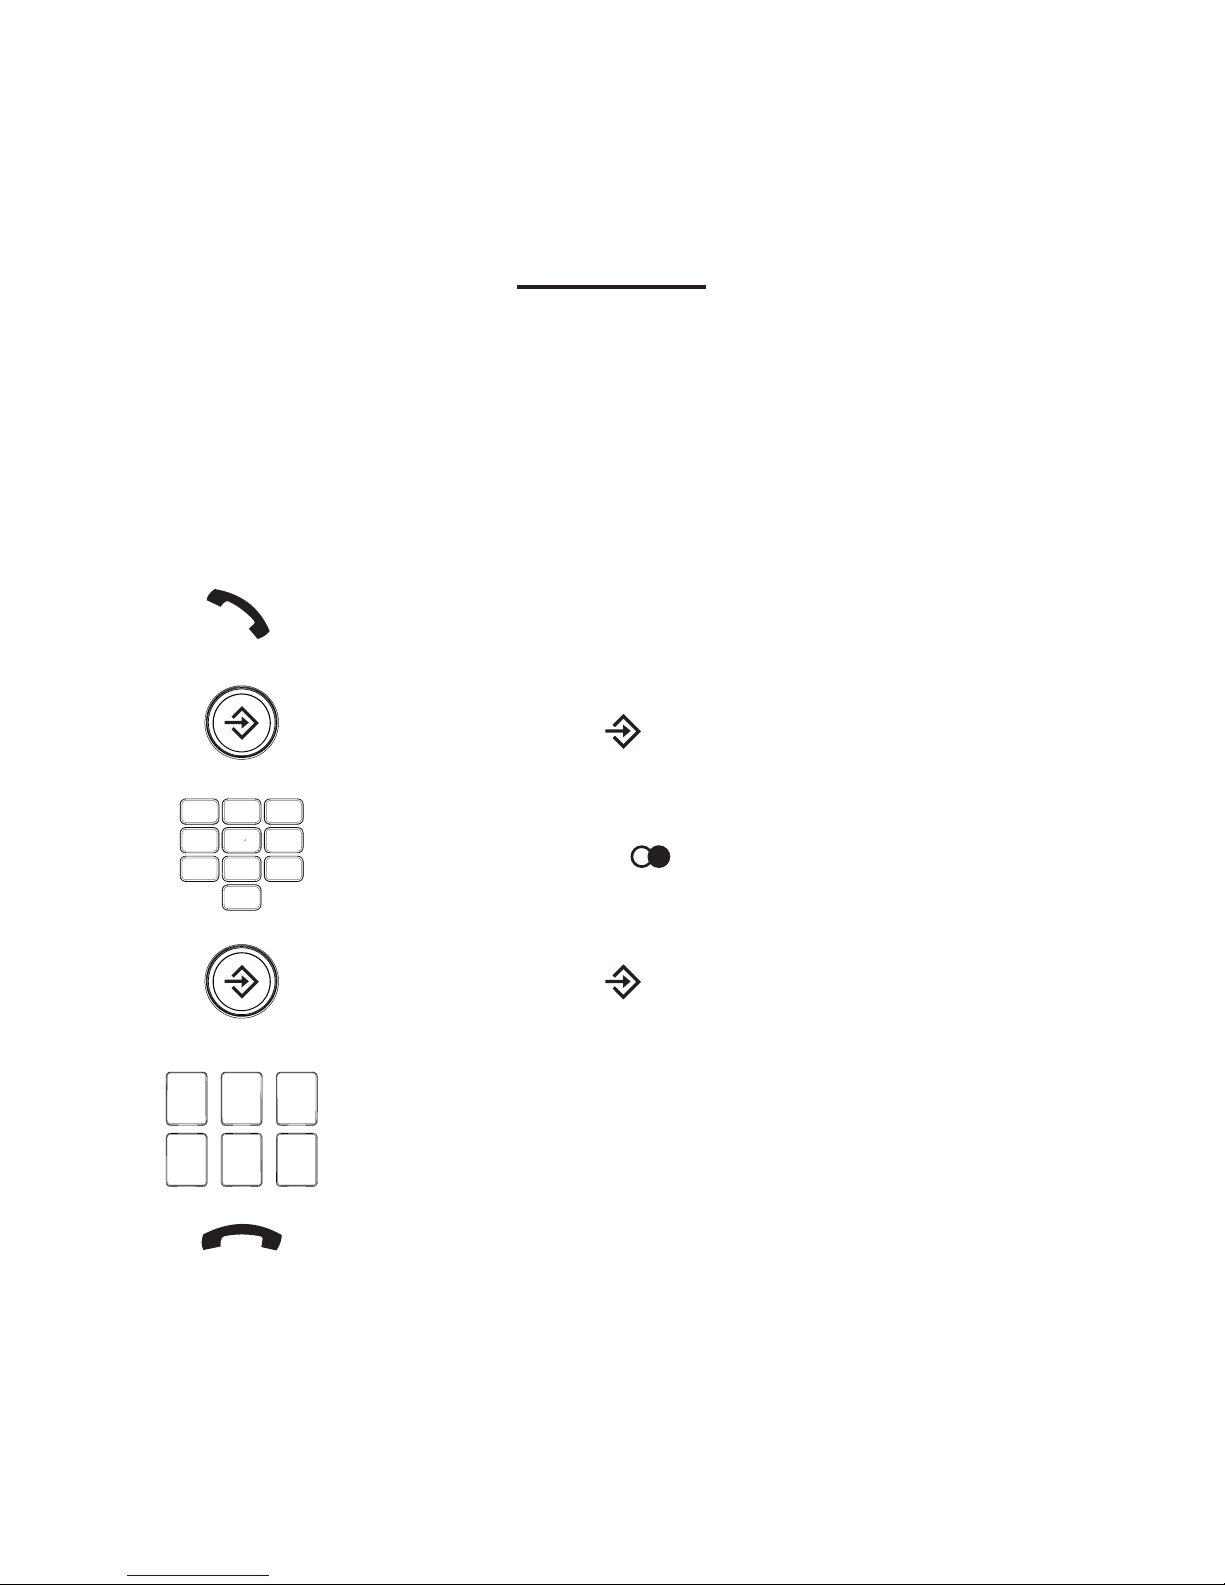
R button:
you can use the R button to accept or start a
2nd call
keep in mind that this service is not offered by
every telephone service provider and that it
most likely requires an additional subscription
when connected to a switchboard, you can also
use this button to forward calls; for this, refer to
the user manual of your telephone switchboard
or the installer
dial pause:
press the button to insert a dialling pause
R
Page 13
13
MEMORIES
Your phone has a memory capacity for 6 phone numbers to be stored
under the photo buttons and 10 number memories to be stored under
the dial buttons 0-9.
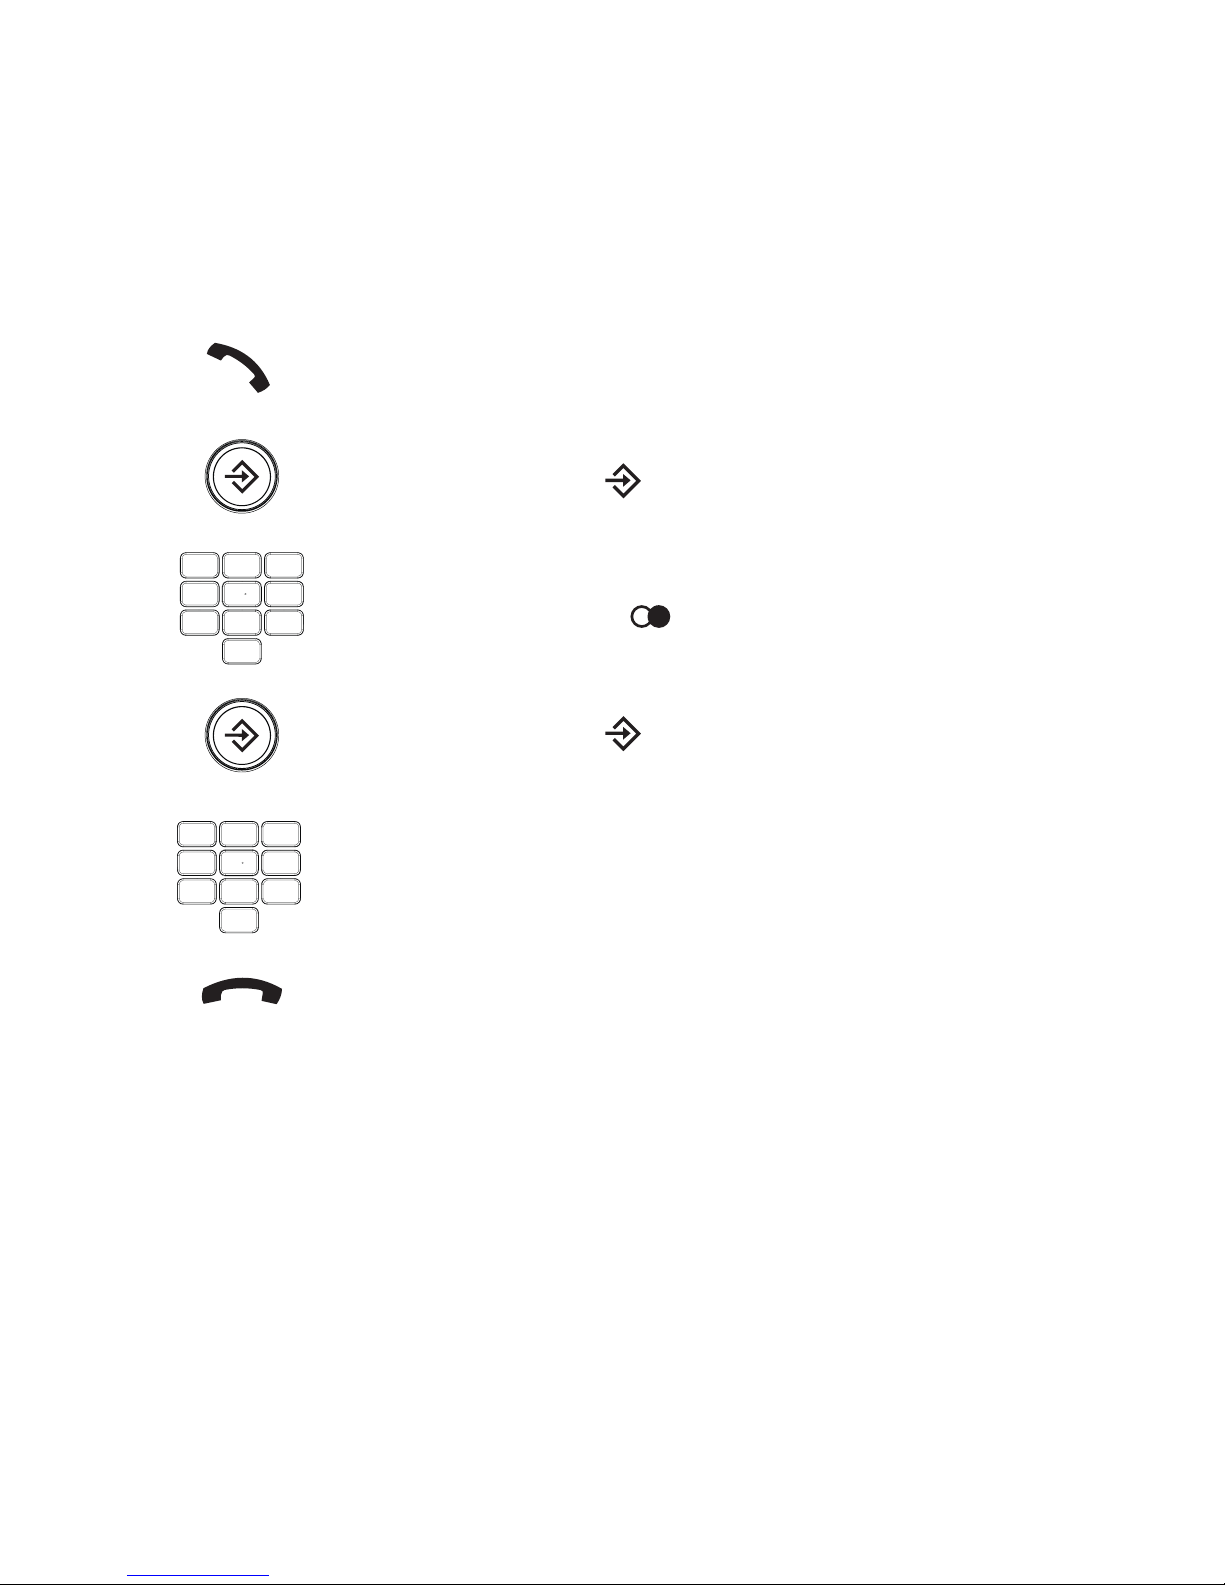
Programming photo buttons:
Pick up the receiver and put it next to your
phone
press 1x the button
use the keypad to input the desired phone number (press the button to insert a pause)
press 1x the button
press the photo button under which you’d like to
save the number
put the receiver back onto the phone
1
2
3
4
5
6
789
0
Page 14
14
Programming number memories:
Pick up the receiver and put it next to your
phone
press 1x the button
use the keypad to input the desired phone number (press the button to insert a pause)
press 1x the button
press one of the 0-9 buttons to save the number
put the receiver back onto the phone
1
2
3
4
5
6
789
0
1
2
3
4
5
6
789
0
Page 15
15
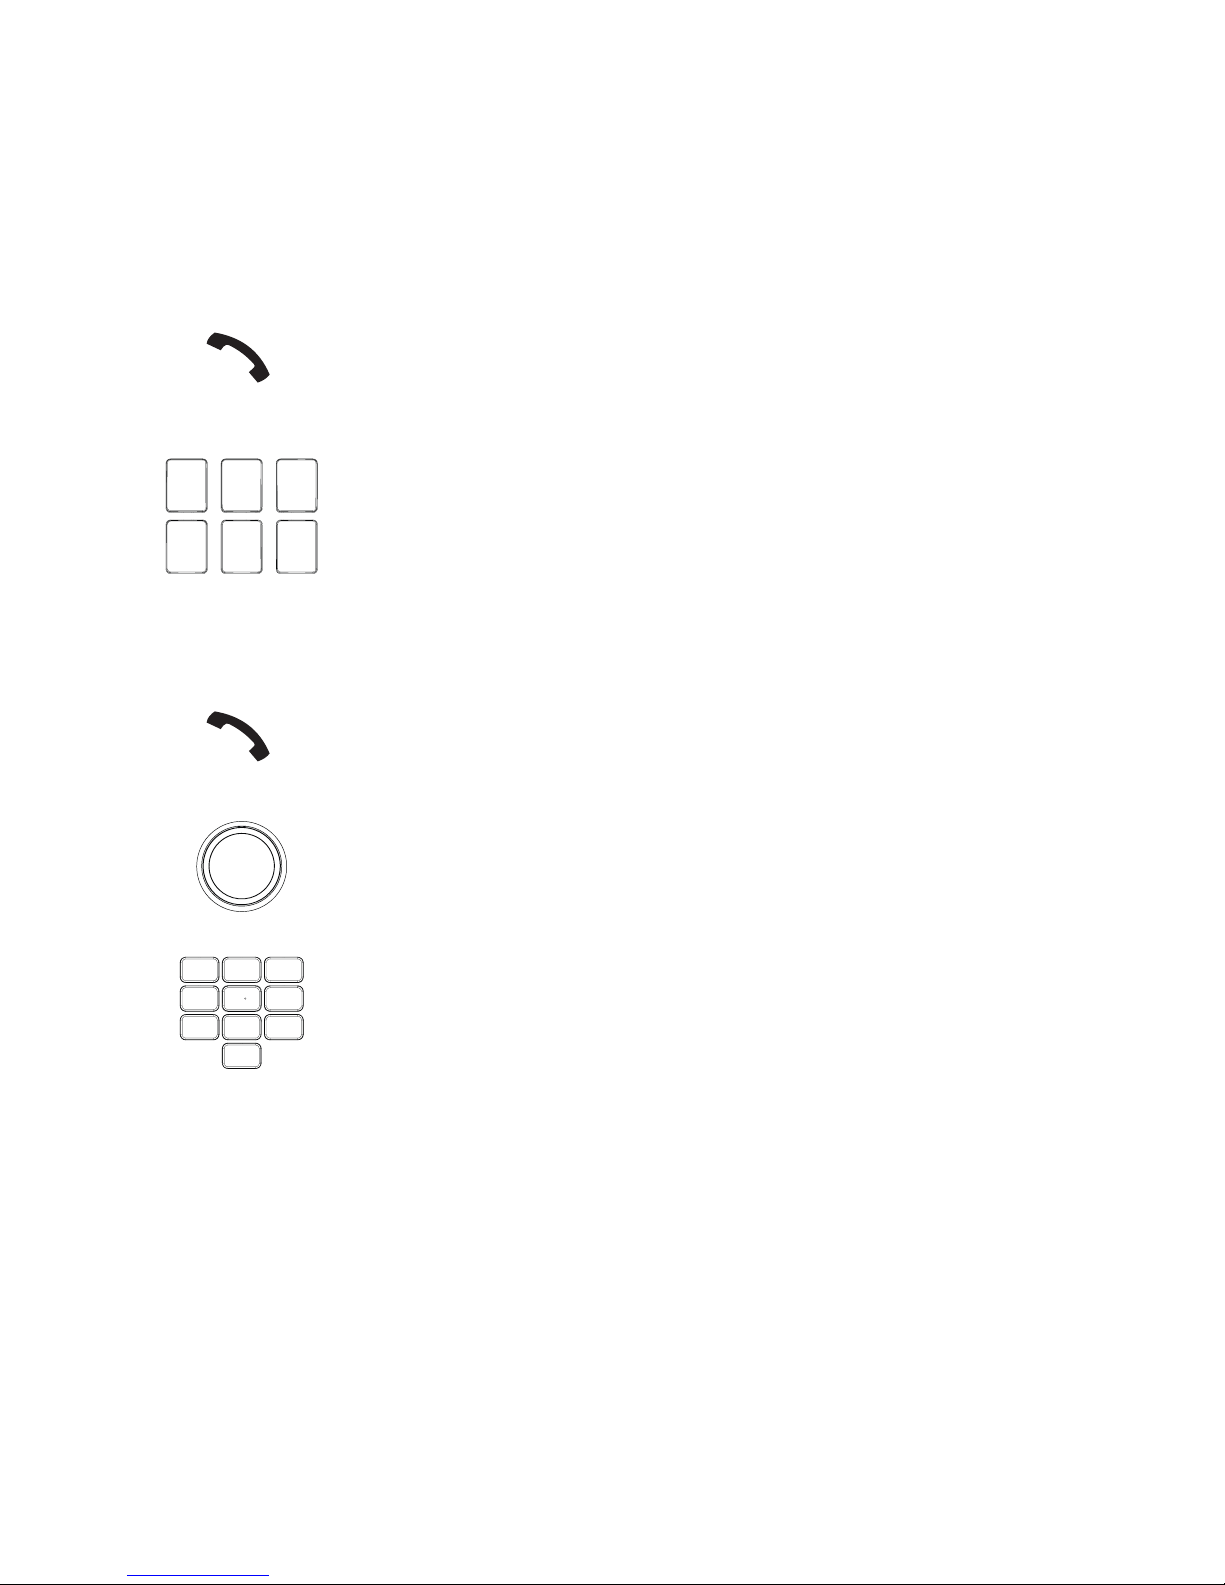
Dialling photo buttons:
pick up the receiver
press the photo button to dial the corresponding
assigned number
Dialling number memories:
pick up the receiver
press 1x the M... button
press one of the 0-9 buttons to dial the corresponding assigned phone number
M..
1
2
3
4
5
6
789
0
Page 16
16
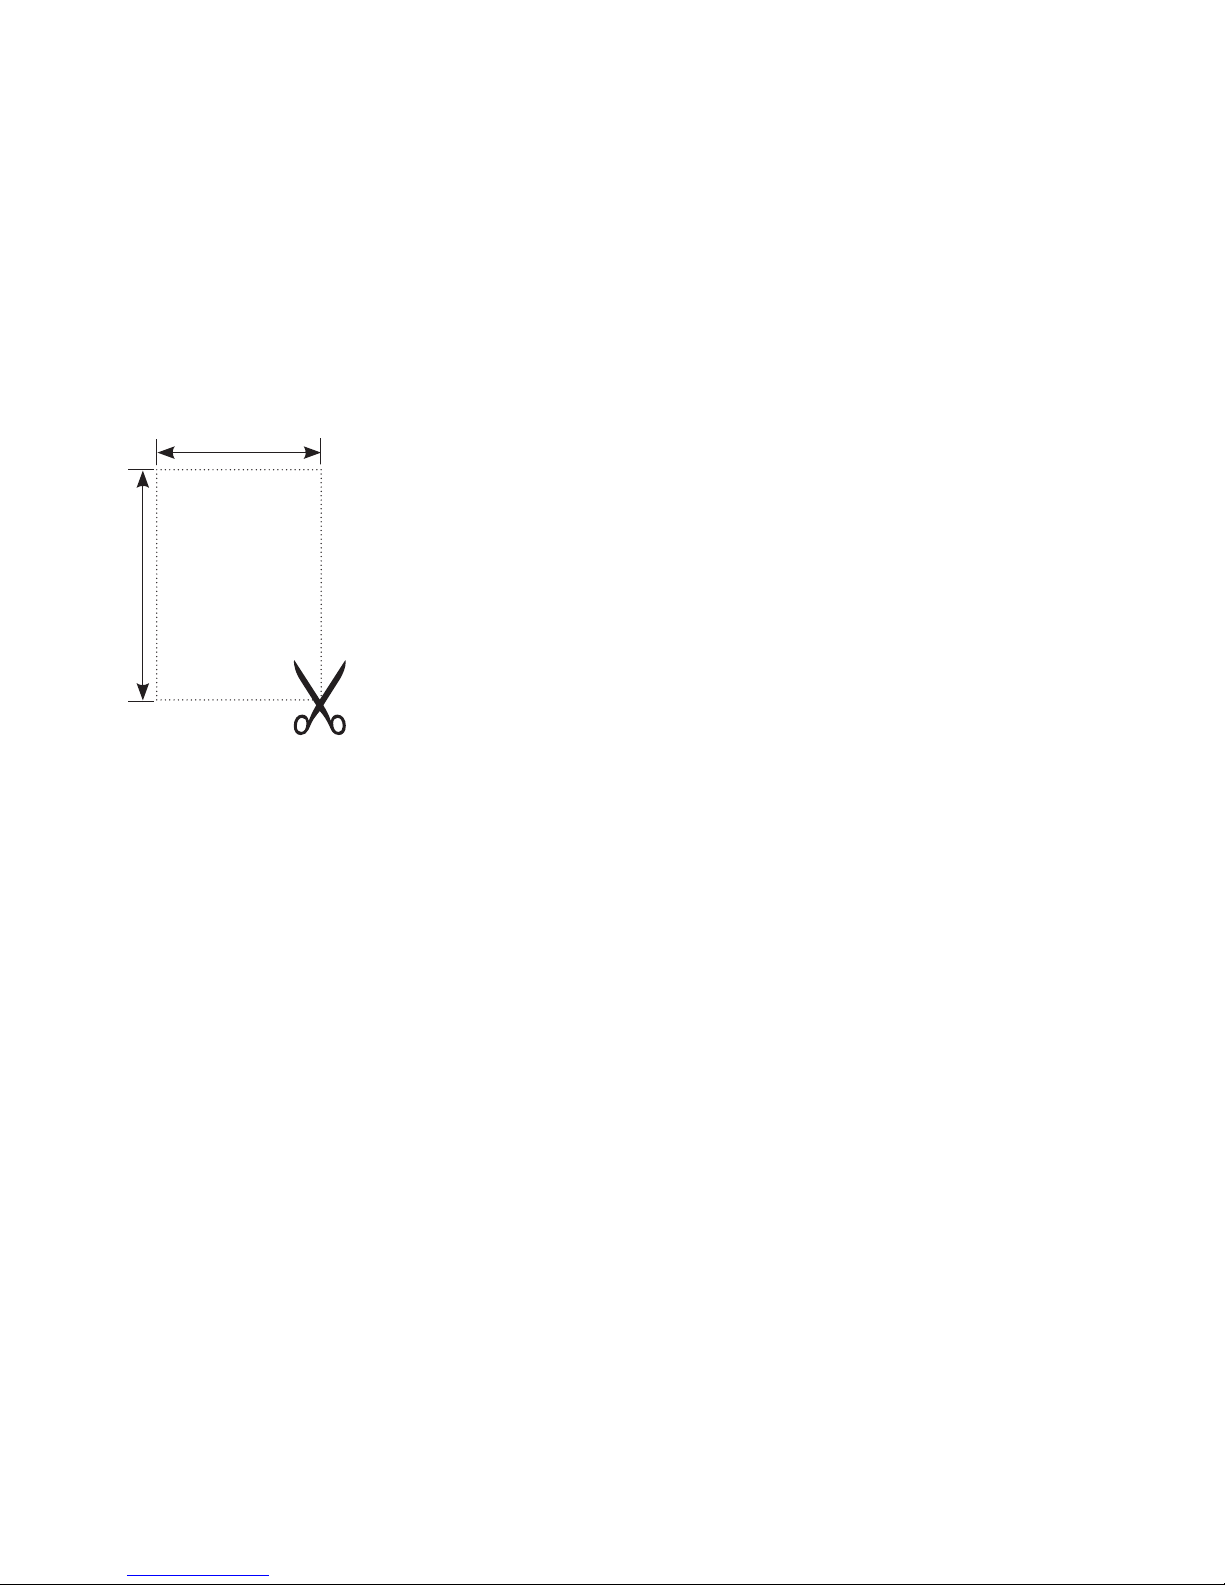
Replacing photos of photo buttons:
the frames of the photo buttons are provided
with an indentation at the sides; use this inden-
tation to lift up the frames with your ngernail
cut your photos to the dimensions 20mm wide x
28mm high
put your photo on the phone and replace the
frame over this button
instead of photos, you can also use logos or icons (for example, a
red cross for your doctor, a police car for the police, etc.).
Tips and remarks:
The phone uses the voltage of the telephone connectors to store the
memories, which means you don’t need to insert batteries. However,
make sure to keep the phone connected at all times. A brief interruption, e.g. for quickly moving the phone, is possible without losing the
memories.
A memory number may contain up to a maximum of 32 digits.
20mm
28mm
Page 17

17
In addition to normal phone numbers, you can also store the numbers of mobile phones.
Editing or deleting:
• You can change a number by programming the new number over
the old number. This will overwrite and delete the old number.
• You can delete a number by programming a non-existing number
(e.g. 0000) over the old number. This will overwrite and delete the
old number.
TIPS AND WARNINGS
General:
• Read the user manual carefully and follow all instructions.
• Always disconnect the phone plug from the phone socket before
cleaning your phone.
• Never place or use the phone in a wet or moist room or
environment.
• Take care of proper heat dissipation; never cover the phone and
do not place them directly beside a heat source.
• Take care that the cable of the phone and the adapter do not get
damaged, and prevent that they cause tripping or falling.
• Never disassemble the phone. This may only be done by qualied
personnel.
Page 18

18
Installation:
• Connect or disconnect the cables of the phone only to the base
station when the power supply adapter has been unplugged
from the mains socket, and the phone connector has been
disconnected from the phone socket.
• Do not install the phone during a lightning storm.
• Do not install a phone connection point in a wet or moist
environment.
• Do not touch uninsulated phone, unless they are disconnected
from the phone network or the mains power.
Environment:
The packaging of this telephone can be collected as old paper.
However, we recommend you to save it, to adequately protect the
phone during transport. When replacing this telephone, please return
it to the supplier to ensure environment-friendly processing.
Page 19

19
WARRANTY
For the FYSIC FX-3360 you have a warranty of 24 months from the
date of purchase. During this period, we guarantee the free repair
of defects caused by material and workmanship errors. All this
subjected to the final assessment of the importer.
HOW TO HANDLE: If you notice any defect, first refer to the user’s
manual. If the manual provides no definite answer, please contact
the supplier of this baby video monitor or contact customer service of
FYSIC on telephone number 073 6411 355.
THE WARRANTY BECOMES NULL AND VOID: In case of improper
use, incorrect connections, leaking and/or incorrectly installed
batteries, use of unoriginal parts or accessories, negligence and
in case of defects caused by moisture, fire, flooding, lightning and
natural disasters. In case of unauthorised modifications and/or
repairs performed by third parties. In case of incorrect transportation
of the device without adequate packaging and when the device is not
accompanied by this warranty card and proof of purchase.
The warranty does not cover connecting cables, plugs and batteries.
All further liability, especially concerning any consequential damages,
is excluded.
Page 20
20
ver. 1.1
Service Help
Aziëlaan 12
‘s-Hertogenbosch
WWW.HESDO-SERVICE.NL
[email protected]
[email protected]
NL +31 (0) 73 6411 355
FR +32 (0) 3 238 5666
DE +49 (0) 180 503 0085
 Loading...