

Page 1

User / Installation Manual
Marine HD Widescreen
LED Television With DVD
MS-TV190LED, MS-TV220LED
www.fusionelectronics.com
FUSION Electronics New Zealand Ph: +64 9 369 2900
FUSION Electronics Australia Ph: +61 1300 736 012
FUSION Electronics Europe Ph: +31 76 572 3632
FUSION Electronics USA Ph: +1 623 580 9000
Page 2
WARNING
RISK OF ELECTRIC SHOCK
DO NOT OPEN
WARNING: TO REDUCE THE RISK OF ELECTRIC SHOCK DO NOT
REMOVE COVER OR BACK. NO USER-SERVICEABLE PARTS INSIDE.
REFER SERVICING TO QUALIFIED SERVICE PERSONNEL.
Double insulation this is class II apparatus.
The mains plug used as the disconnect device. The disconnect device shall remain readily operable.
WARNING: To reduce the risk of electric shock do not expose this apparatus to rain or moisture and
objects lled with liquids, such as vases, should not be placed on this apparatus.
WARNING: According to the industrial standards, there are a certain number of defective pixels both
bright and dark that are acceptable. Although we produce panel with more than 99.99 percent active
cells, there still may be some cells that do not produce light or remain lit. For more information, please
contact sales or the technical support.
CAUTION
Changes or modications not expressly approved by the party responsible for compliance
with the FCC Rules could void the use’s authority to operate this equipment.
Important Safety Instructions
1. READ INSTRUCTIONS - All the safety and operating instructions should be read before the unit is
operated.
2. RETAIN INSTRUCTIONS - The safety and operating instructions should be retained for future
reference.
3. HEED WARNINGS - All warnings on the unit and in the operating instructions should be adhered to.
4. FOLLOW INSTRUCTIONS - All operating and use instructions should be followed.
5. CLEANING - Unplug this unit from the wall outlet before cleaning. Do not use liquid cleaners or
aerosol cleaners. Use a damp cloth for cleaning the exterior cabinet only.
6. ATTACHMENTS - The manufacturer of this unit does not make any recommendations for
attachments, as they may cause hazards.
7. WATER AND MOISTURE - Do not use this unit near water. For example, near a bathtub, washbowl,
kitchen sink, laundry tub, in a wet basement, or near a swimming pool.
8. ACCESSORIES - Do not place this unit on an unstable cart, stand, tripod, bracket, or table. The unit
may fall, causing serious injury, and serious damage to the unit. An appliance and cart combination
should be moved with care. Quick stops, excessive force, and uneven surfaces may cause the
appliance and cart combination to overturn.
PORTABLE CART WARNING
S3126A
9. VENTILATION - Slots and openings in the cabinet back or bottom are provided for ventilation, to
ensure reliable operation of the unit and to protect it from overheating. These openings should never
be blocked by placing the unit on a bed, sofa, rug, or other similar surface. This unit should never be
placed near or over a radiator or heat source. This unit should not be placed in a built-in installation,
such as a bookcase, or rack unless proper ventilation is provided or the manufacture’s instructions
have been adhered to.
10. POWER SOURCE - This unit should be operated only from the type of power source indicated on the
rating plate. If you are not sure of the type of power supply to your home, consult your appliance
dealer or local power company. For units intended to operate from battery power, or other sources,
refer to the operating instructions.
11. POLARIZATION - This unit is equipped with a polarized alternating current line plug (a plug having
one blade wider than the other). This plug will t into the power outlet only one way. This is a safety
feature. If you are unable to insert the plug fully into the outlet, try reversing the plug. If the plug still
fails to t, contact your electrician to replace your obsolete outlet. Do not defeat the safety purpose
of the polarized plug.
12. POWER-CORD PROTECTION - Power supply cords should be routed so that they are not likely to be
walked on or pinched by items placed upon or against them, paying particular attention to cords at
plugs, convenience receptacles, and the point where they exit from the appliance.
13. LIGHTNING - To protect your unit during a lightning storm, or when it is left unattended and unused
for long periods of time, unplug it from the wall outlet and disconnect the antenna or cable system.
This will prevent damage to the unit due to lightning and power line surges.
14. POWER LINES - An outside antenna system should not be located in the vicinity of overhead power
lines, or other electric light or power circuits, or where it can fall into such power lines or circuits.
When installing an outside antenna system, extreme care should be taken to keep from touching
such power lines or circuits as contact with them might be fatal.
15. OVERLOADING - Do not overload wall outlets and extension cords as this can result in a risk of re
The lightning flash with arrowhead symbol, within an
equilateral triangle, is intended to alert the user to the
presence of uninsulated “dangerous voltage” within the
product’s enclosure that may be of sufficient magnitude
to constitute a risk of electric shock to persons.
The exclamation point within an equilateral triangle is
intended to alert the user to the presence of important
operating and maintenance (servicing) instructions in
the literature accompanying the appliance.
WARNING: Do not leave any stationary images, patterns, PIP box, or letterbox images on the screen
for an extended period of time. Also, do not display the same stationary patterns frequently. This
may result in permanent ghost images on the display unit. This type of damage is not covered under
warranty. Examples of this type of situation can be but not limited to the following: side bar images,
stock market report bars, video game patterns, closed captioning, shopping channel logo, price
display, and letterbox black bars. To prevent this type of damage, display constant moving images
that ll the screen as often as possible.
TV/CATV MODE SELECTION
When shipped from the factory, the TV/CATV menu option is set to the “TV” mode.
If using CATV, set the menu option to “CATV” (Cable Television)
or electric shock.
16. OBJECT AND LIQUID ENTRY - Do not push objects through any openings in this unit as they may
touch dangerous voltage points or short out parts that could result in re or electric shock. Never
spill or spray any type of liquid into the unit.
17. OUTDOOR ANTENNA GROUNDING - If an outside antenna or cable system is connected to the unit,
be sure the antenna or cable system is grounded to provide some protection against voltage surges
and built-up static charges. Section 810 of the National Electrical Code, ANSI/NFPA 70, provides
information with respect to proper grounding of the mast and supporting structure, grounding of
the lead-in wire to an antenna discharge unit, size of grounding conductors, location of antenna
discharge unit, connection to grounding electrodes, and requirements for the grounding electrode.
18. SERVICING - Do not attempt to service this unit yourself as opening or removing covers may expose
you to dangerous voltage or other hazards. Refer all servicing to qualied service personnel.
19 .DAMAGE REQUIRING SERVICE - Unplug this unit from the wall outlet and refer servicing to qualied
service personnel under the following conditions:
A. When the power-supply cord or plug is damaged.
B. If liquid has been spilled, or objects have fallen into the unit.
C. If the unit has been exposed to rain or water.
D. If the unit does not operate normally by following the operating instructions. Adjust only
those controls that are covered by the operating instructions, as an improper adjustment
of other controls may result in damage and will often require extensive work by a qualied
technician to restore the unit to Its normal operation.
E. If the unit has been dropped or the cabinet has been damaged.
F. When the unit exhibits a distinct change in performance, this indicates a need for service.
20. REPLACEMENT PARTS - When replacement parts are required, be sure the service technician uses
replacement parts specied by the manufacturer or those that have the same characteristics as the
original part. Unauthorized substitutions may result in re, electric shock or other hazards.
21. SAFETY CHECK - Upon completion of any service or repairs to this unit, ask the service technician to
perform safety checks to determine that the unit is in proper operating condition.
22. HEAT - The product should be situated away from heat sources such as radiators, heat registers,
stoves, or other products (including ampliers) that produce heat.
23. NOTE TO CATV SYSTEM INSTALLER - This reminder is provided to call the CATV system installer’s
attention to Article 820-40 of the NEC that provides guidelines for proper grounding and, In particular,
species that the cable ground shall be connected to the grounding system of the building, as close
to the point of cable entry as practical.
EXAMPLE OF ANTENNA GROUNDING AS PER
NATIONAL ELECTRICAL CODE S2898A
ANTENNA LEAD
IN WIRE
ANTENNA DISCHARGE UNIT
GROUND
CLAMP
ELECTRIC
SERVICE
EQUIPMENT
NEC - NATIONAL ELECTRIC CODE
(NEC SECTION 810-20)
GROUNDING CONDUCTORS
(NEC SECTION 810-21)
GROUND CLAMPS
POWER SERVICE GROUNDING
ELECTRODE SYSTEM
(NEC ART 250. PART H)
Specifications
MS-TV190LED MS-TV220LED
Screen size, visible 19” Wide Screen LED 22” Wide Screen LED
Screen Format 16:9 16:9
Resolution 1366 x 768 Pixel 1920 x 1080 Pixel
Max. contrast ratio 1000:1 1000:1
Brightness (Typical) 250 cd/m2 250 cd/m2
Response Time (Typical) 5ms 5ms
Display Colours 16.7M 16.7M
Power Supply 110-240V AC, 12V DC 5 metre cable 110-240V AC, 12V DC 5 metre cable
Power Consumption 36W 48W
Standby Power Dissipation ≤1W ≤1W
Colour System PAL PAL
Sound System BG/DK/I BG/DK/I
AV Playback PAL/SECAM/NTSC PAL/SECAM/NTSC
All Models Feature:
» Conformal coated PCB
» Built-in DVD/CD mechanism
» Built in DVB-T digital tuner
» HDMI input for true digital connection
» PVR functionality (record digital TV)**
» Component and Composite video inputs
» VGA port for connection to a PC
» Multi-language On-screen display
» Parental Lock
» Sleep Timer
» Built in speakers (4W x 2)
» Wall mounting bracket included
» USB connection for digital media playback
Troubleshooting
PROBLEM SOLUTION
No picture or sound Check the power supply is plugged in and turned on.
Picture is OK but no sound Make sure the volume is not set to minimum or mute. Turn o the TV and turn back on.
Remote control doesn’t work Check the battery connection is correct. Check the batteries. Make sure no obstacles are between the sensor of the remote and TV
No TV Signal Check the source is set to ATV or DTV. Check the antenna signal status.
No external video signal Check the source is set to AV
Picture lacks colour or is to dark Check colour, brightness and contrast settings
All channels lose colour intermittently Check the antenna in case it is broken, disconnected or damaged.
Poor reception, loss of colour Check channel is tuned correctly
Diagonal stripes on picture Receiver may be aected by interference. e.g. nearby radio broadcasting transmitter or from another TV receiver.
Ghost images appear Antenna direction may have been changed by a storm or strong wind. Ghost images are caused from both the signal travelling
directly from the transmitter and a signal reected from a hill or large building. Direction of the antenna should be chosen to avoid
this situation.
USB media les don’t work FAT 32 formatted ash drive required. Reformat if required.
Time Shift and PVR don’t work FAT 32 formatted ash drive required. Reformat if required.
013
Page 3
PVR File System
(Only for DTV source)
012
The PVR File System Menu Description
SELECT DISK: Select the PVR le system disk
Check PVR File System: Check the disk le format.
USB Disk: Display the USB Disk activation status, “PASS” ag is activation
Format: Format the USB device, create PVR le system format on the USB device
Time Shift Size: Show the TSR capacity information
Speed: Read and write speed.
Free Record Limit: Set the recording set-up time, unit is hours.
Digital Video Record
» Insert a USB device and enter the PVR File System page.
» Select Check PVR File System, if USB device not previously formatted the system will
automatically prompt USB disk formatting.
» The size of the USB device aects the recording time available.
» To record a DTV program press the button. The recording will continue until
the Stop button is pressed or the USB device is full.
» Press the button to shrink the on-screen information.
» Pressing the REC MENU button will open the recorded program page.
» Recorded Programs can be viewed or deleted.
DVD
DVD Setup Menu
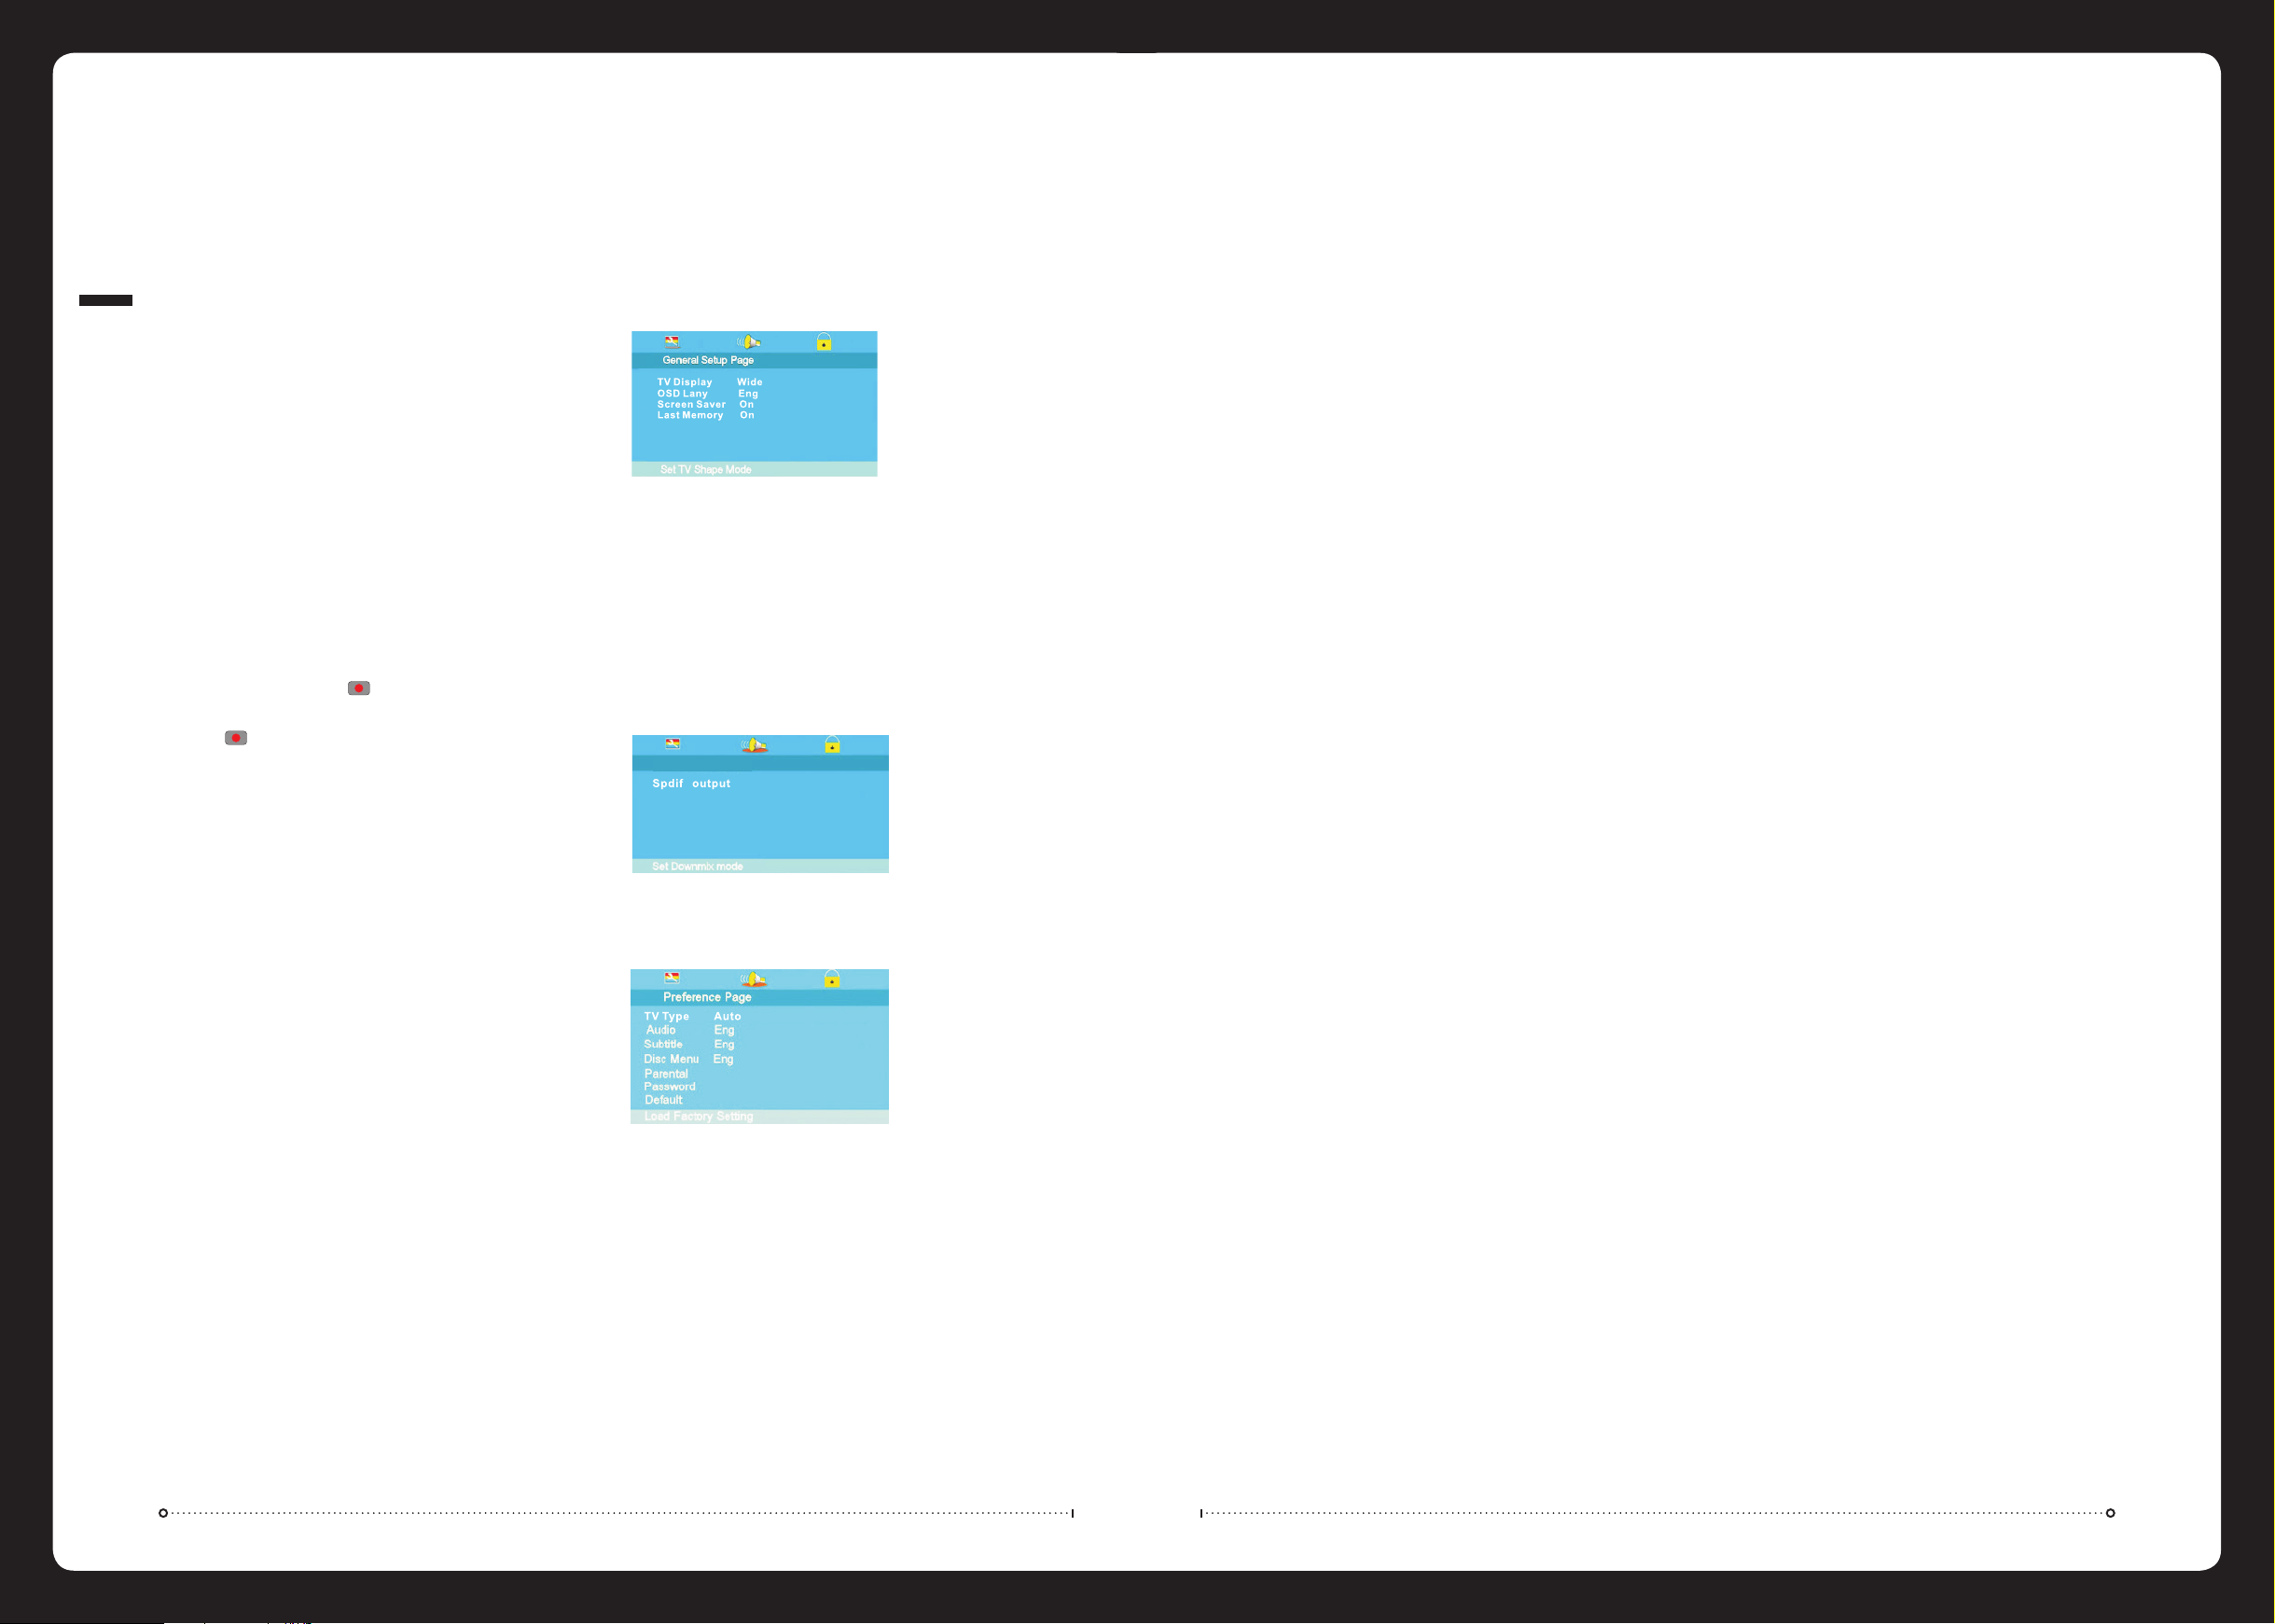
General Setup Page:
TV Display: Select the display aspect ratio from:
» Normal / PS: Pan & Scan (4:3)
» Norm al /LB: Letterbox
» Wide: Widescreen (16:9)
OSD Lang: Select the OSD Language (English is the default).
Screen Saver: Whether the screen saver is displayed after 3mins of inactivity.
Last Memory: Whether the DVD Player will remember the last position on a previous disc.
S p ea ke r s etu p p ag e
Contents
Installation 2
Connections 3
Antenna Connection 3
Basic Operation 4
Control Description 4
Remote Control 5
Menu Operation 6
EPG (Electronic Program Guide) 6
Source Selection 6
Channel 7
Picture 8
Important Recording Information
» The USB device must be at least 1 GB.
» When formatting a USB device all contents will be deleted. Formatting will fail if
the USB device contains a virus or any other defect.
» PVR function is only available in DTV source
» USB device must be compatible USB 2.0 HS specication.
Speaker Setup Page:
Downmix: Select the downmix for SPDIF out.
Preference Page:
TV Type: Select the colour type from PAL , Auto, or NTSC.
Audio: Select the llanguage for the audio track on the disc (English is the default).
Subtitles: Select the lannguage for the subtitles on the disc (English is the default).
Disc Menu: Select the DVD Menu language (English is the default).
Parental: Select the Parental level allowed (Adult is the default). You will be asked for a
password to change (123456).
Password: Change the Parental password.
Default: Reset DVD Setup to factory default settings.
Time 9
Sound 10
Options 10
Lock 11
Media Play Function (DMP) 11
PVR File System 12
DVD 12
Specifications 13
Troubleshooting 13
Page 4

Installation
Lock
Media Play Function (DMP)
Thank you very much for your purchase of this product. Please read this manual carefully and keep it safe for reference.
Please use the power cord designated for the product. When an extension cord is required, use one with the correct power rating. The cord must be grounded. The product should be
002
installed on a at surface to avoid tipping. Space should be maintained between the back of the product and the wall for proper ventilation. If you would like to mount the TV to the wall,
please see “Preparing the LCD for Wall Mounting” below for additional information. Avoid installing the product in the kitchen, bathroom or other places with high humidity.
Preparing Your LCD TV For Wall Mounting
The HDTV can either be kept on the stand or mounted to the wall for viewing. If you choose
to mount the HDTV to the wall, please follow the instructions below .
» Unplug all the cables and cords from your LCD TV.
» Place the LCD TV face down on a soft and at surface (blanket, foam, cloth, etc) to
prevent any damage to the display.
» Remove the stand screws allowing the stand to be removed.
» The mounting bracket is made up of two parts - the wall bracket and the TV
bracket. Attach the TV bracket to the TV via the included screws.
» Using the supplied mounting template, mark the location for the mounting bracket.
» Attach the wall bracket to the wall with appropriate screws. Ensure the wall is
suitable to hold the weight of the TV.
» Slide the TV bracket into the wall bracket.
Installing the LCD TV Base Assembly
If you choose to mount the HDTV on the supplied base, please follow the instructions
below .
» Unplug all the cables and cords from your LCD TV.
» Place the LCD TV face down on a soft and at surface (blanket, foam, cloth, etc) to
prevent any damage to the display.
» Connect the base support to the metal axle from the rear using 2 of the supplied
4x10 screws.
» Secure the base support using the nal 4x10 screw through the bottom of the
base support.
Important Notes
RESET: Like any product controlled by microprocessors this TV may hang or become
unresponsive, in the unlikely event this occurs simple disconnect the power and reconnect
after 10 seconds.
REMOTE: To prevent leakage which may result in bodily harm or damage to the remote:
1. Install AAA batteries correctly, and make sure polarities are correctly aligned with the
battery compartment markings.
2. Do not mix batteries (OLD and NEW or CARBON and ALKALINE ,etc)
3. Remove batteries when the remote is not used for a long time.
My music, movie or image les do not display?
Due to the large variation of le sizes, compression formats and codec available, playback
of all les cannot be guaranteed.
I cannot record onto my USB ash drive?
FAT 32 formatted ash drive is required.
Time Shift functionality does work work?
FAT 32 formatted ash drive is required.
Warning! Do not keep images on the screen for a long time
To prevent the screen from burn in, do not leave static images including menu screens
displayed for a period of time. Burn in is not covered under warranty provision.
ATTENTION: Do not try to update the TV unless directed by a service technician.
Product miscongured by an incorrect update is not covered under warranty.
» Ax the base to the base support and secure with 2 of the supplied 3x8 screws.
Press MENU button on the remote and ◄/► use to cycle to LOCK page:
Note: All options are initially greyed out until password is entered (see below)
Lock System:
Set TV system time settings
» Select Lock System
» Enter factory default password (0000)
Set Password:
» From the LOCK menu select SET PASSWORD
» Change password from factory default (above):
Block Program:
» From the LOCK menu select Block Program.
» Select channels to block and require password to watch.
Parental Guidance:
» From the LOCK menu select Parent Guidance.
» Select age restriction
Access media les (Photo’s, Music, Movie’s and Text) via the TV’s USB port.
Press MEDIA button on the remote.
Picture:
Supported picture formats include .jpg/jpeg and .gif
The image should be no bigger than 3000 x 3000 pixels.
» Select Photo source
» Use ◄ or ► to select disk and press ENTER to view photo list
» Select the desired Photo/s
» Press PLAY to view
» Press EXIT to remove OSD
Music:
Supported music formats include .mp3
» Select Music source
» Use ◄ or ► to select disk and press ENTER to view music list
» Select the desired music track/s
» Press PLAY to begin playback
» Press EXIT to remove OSD
Movie:
Supported movie formats include .mpg, .vob, .avi, and .mp4
The maximum matrix is below MPEG2 MA/ML.
» Select Movie source
» Use ◄ or ► to select disk and press ENTER to view movie list
» Select the desired movie.
» Press PLAY to begin playback
» Press EXIT to remove OSD
011
PUBLISHED BY FUSION ELECTRONICS LIMITED. © Copyright 2010 by FUSION Electronics Limited. All rights reserved. Specications and design are subject to change without notice.
YOU CAN HELP PROTECT THE ENVIRONMENT Please remember to respect the local regulations: Hand in the non-working electrical equipment to an appropriate waste disposal centre. v3.2
Text:
Supported text format is .txt
» Select Text source
» Use ◄ or ► to select disk and press ENTER to view text list
» Select the desired text.
» Press PLAY to view text le
» Press EXIT to remove OSD
Page 5
Sound
Y
IN
VIDEO L R USB 2
HDMI 2
IN
RF
IN
IN
Y PB PR
12V DC
IN USB 1
HDMI 1
IN VGA AUDIO VIDEO
OUTIN
L R
EAR
PHONE
OUT OUT
COAXIAL
Options
Connections
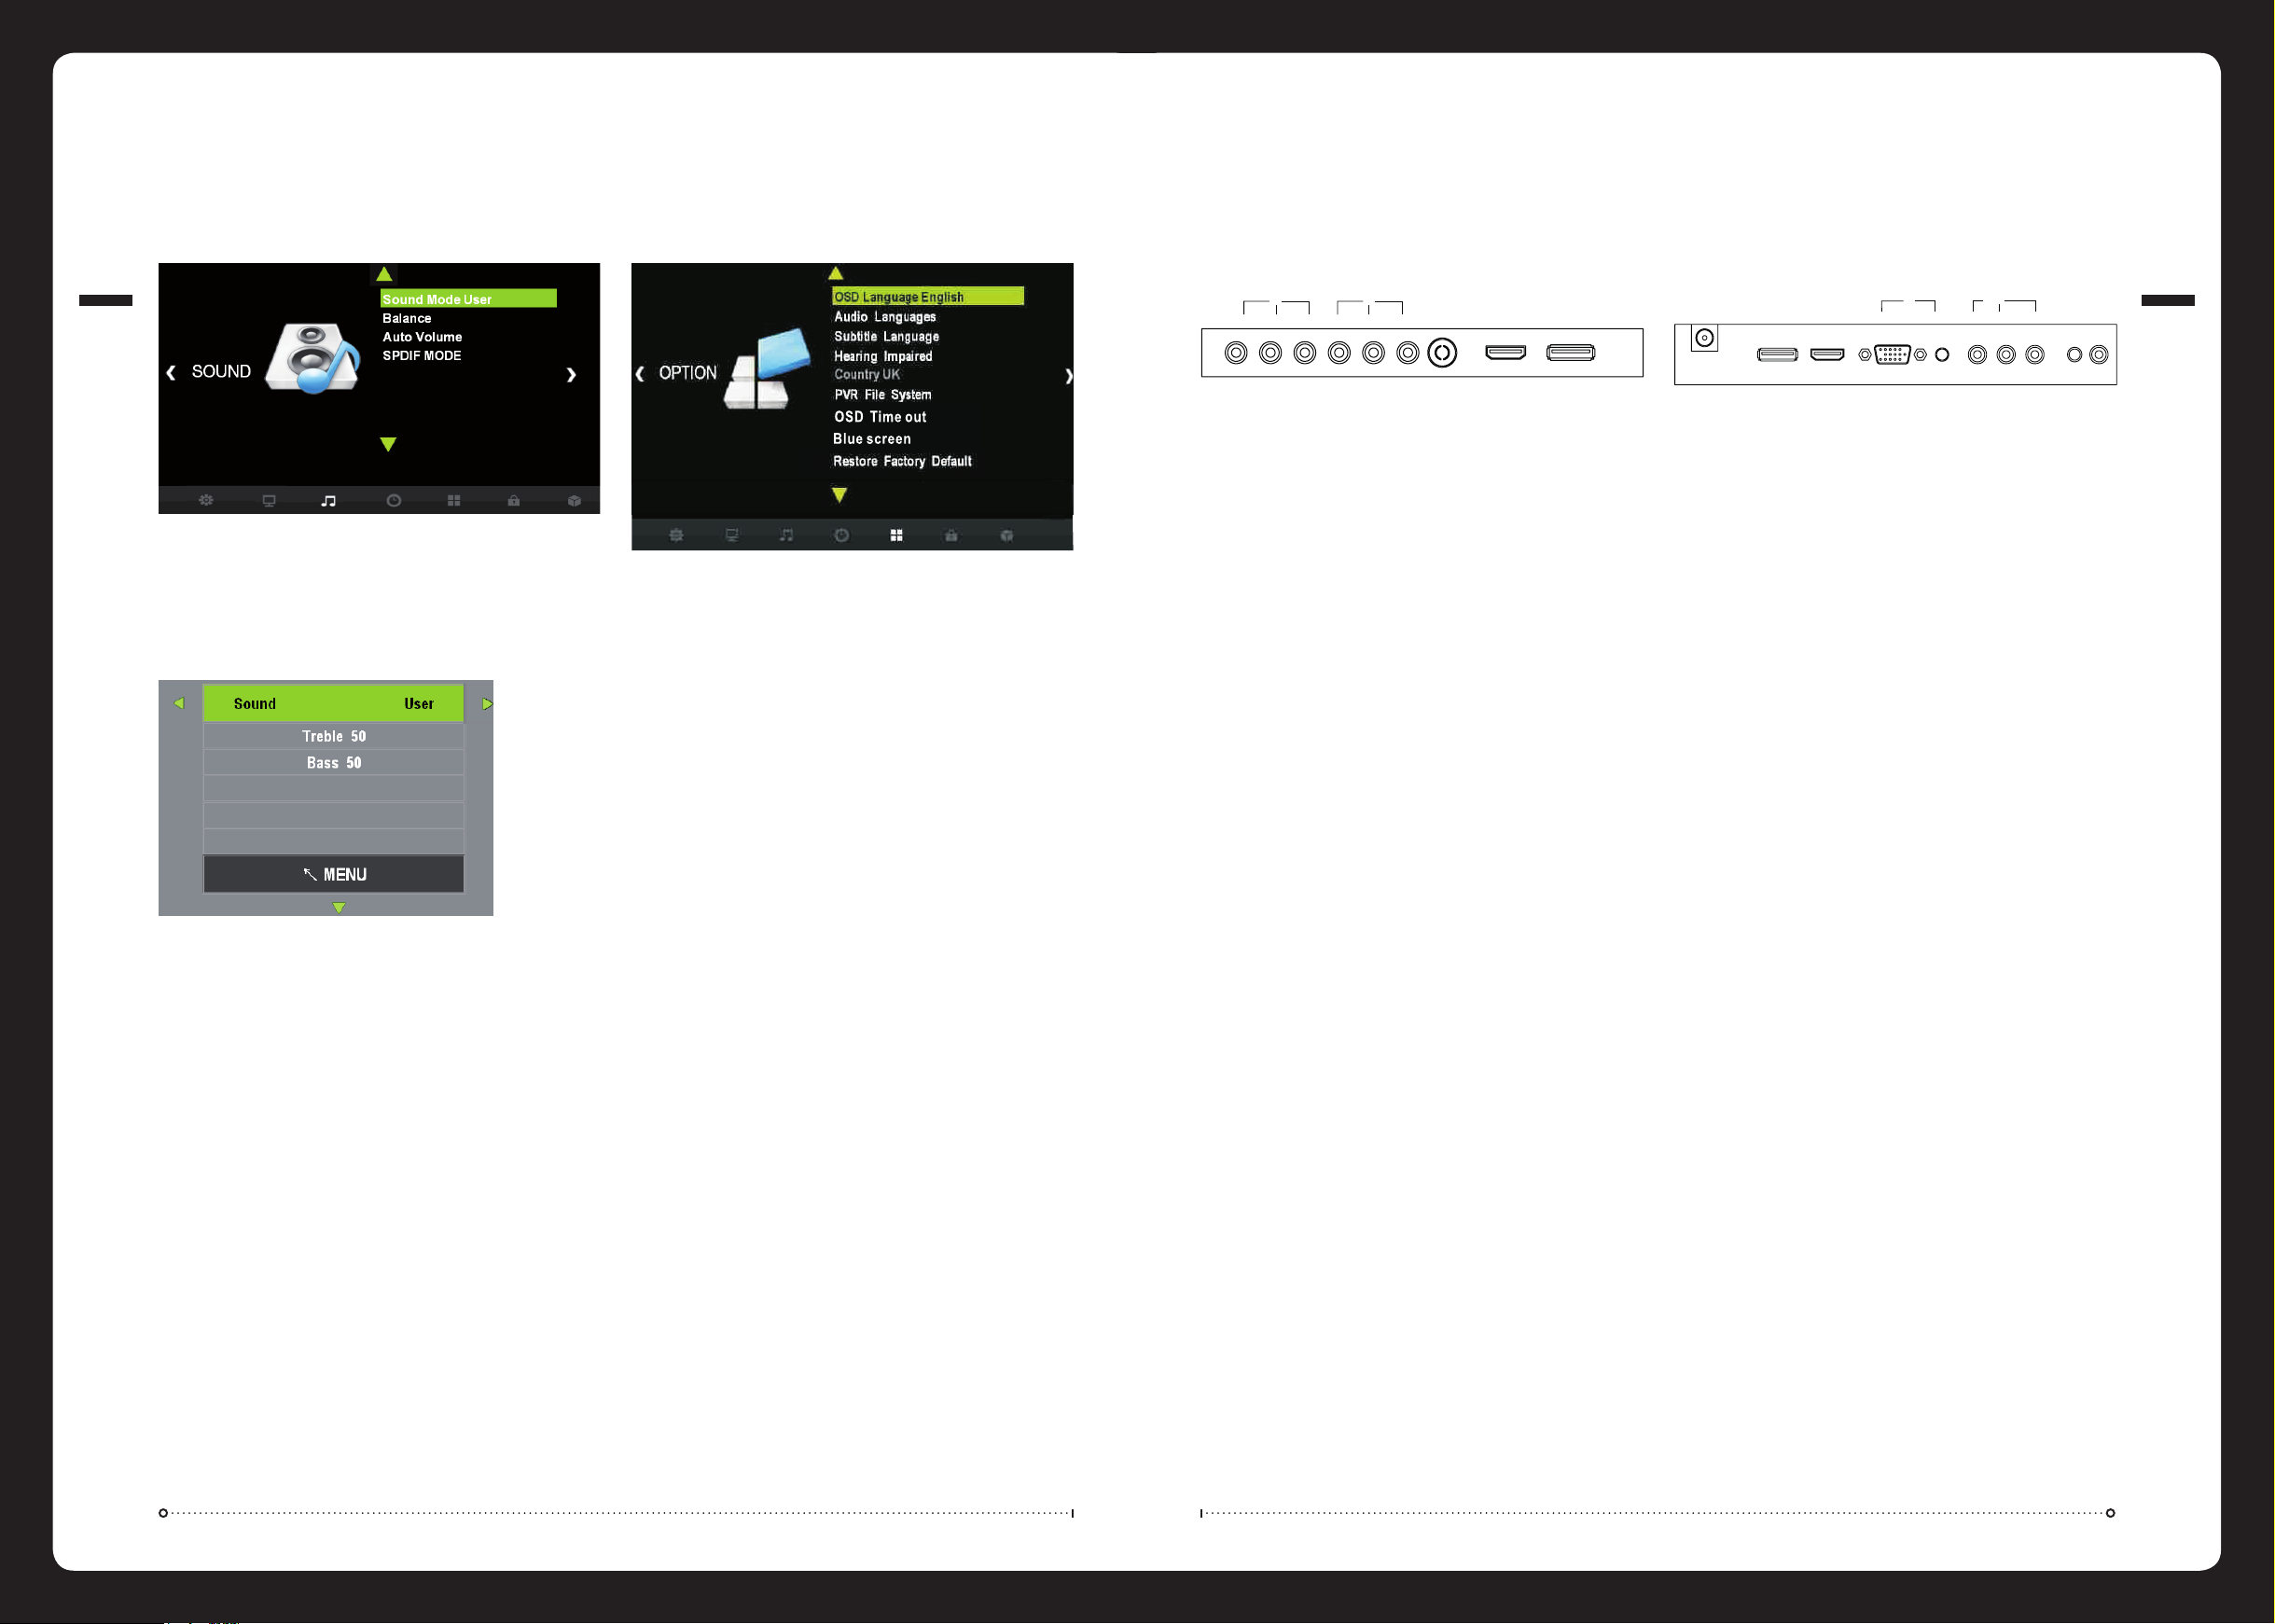
Press MENU button on the remote and ◄/► use to cycle to SOUND page below:
010
Sound Mode:
» Select Sound Mode
» Press ◄ or ► to cycle through available sound modes:
Standard, Music, Movie, Sports and User.
Note: Treble and Bass can only be changed under User.
Adjust Balance:
» From the SOUND menu select Balance
Auto Volume:
» From the SOUND menu select Auto Volume.
» Select ON or OFF
SPDIF Mode:
» From the SOUND menu select SPDIF MODE.
» Press ▲ or ▼ to cycle through available modes for SPDIF:
PCM, Auto, or O.
Press MENU button on the remote and ◄/► use to cycle to OPTION page below:
OSD Language:
Set current menu language
» Select OSD Language
Audio Language:
Set audio language
» Select Audio Language
» Press ◄ or ► to cycle through available languages:
Subtitle Language:
Set subtitle language
» Select Subtitle Language
» Press ◄ or ► to cycle through available languages:
Hearing Impaired:
» Select Hearing Impaired
» Select ON or OFF
PVR File System:
(Reference ‘PVR File System’ on following page)
OSD Time Out:
» Select OSD Time Out
» Select from OFF, or from 10S - 90S
Blue Screen:
» Select Blue Screen
» Select ON or OFF for whether a Blue Screen is displayed when there is no signal input.
(Except MEDIA and DVD)
Video/Audio In:
Connect the VIDEO and AUDIO output jack of the DVD or VCR to the VIDEO/L/R IN jacks
using an AV cable (Yellow [Video], White and Red [left and right audio]).
Select the AV input source using the INPUT button on the remote.
RF IN:
Connect the antenna to the RF IN connection. Please refer to the Antenna Connection
paragraph below.
Y/Pb/Pr In:
Connect the Y Pb Pr output of the accessory device to the Y Pb Pr input on the TV.
Connect the Audio output of the accessory device to the L/R IN input jacks on the TV
using the RCA cable.
Select the Y Pb Pr input source using the INPUT button on the remote.
HDMI 2:
Connect the HDMI output of the accessory device to the HDMI input on the TV.
Select the HDMI input source using the INPUT button on the remote.
USB 2:
Insert the USB ash drive into the USB slot on the TV.
Select the USB input source using the MEDIA or INPUT button on the remote.
Antenna Connection
To ensure good picture and sound, a Terrestrial TV antenna system needs to be
installed. For best reception, an outdoor antenna is recommended.
NOTE:
• Do not put the Coaxial cable close to the mains lead to avoid noise.
• Do not place the Coaxial cable under the TV.
• Additional equipment, cables and adapter plugs shown are not supplied with
this TV set.
• To obtain optimum quality picture and sound, an Aerial, the correct cable (75 Ω
coaxial) and the correct terminating plug are required.
• Your local dealer may be able to assist you in obtaining the correct Aerial system
for your particular area and the accessories required.
Bottom Connection Panel:Side Connection Panel:
003
Power:
Connect the AC power pack or 5M DC y lead to the 12V DC IN connection on the TV.
USB 1:
Insert the USB ash drive into the USB slot on the TV.
Select the USB input source using the MEDIA or INPUT button on the remote.
HDMI 1:
Connect the HDMI output of the accessory device to the HDMI input on the TV.
Select the HDMI input source using the INPUT button on the remote.
VGA/Audio In:
Connect the RGB output of the PC to the VGA input on the TV.
Connect the PC audio output of the PC to the Audio input jack on the TV
Select the VGA input source using the INPUT button on the remote.
Video/Audio Out:
Connect the AUDIO output from the television to the AUX input of the device using the
supplied A/V cable (White and Red [left and right audio]).
Connect the VIDEO output from the television to the Composite VIDEO input of the device
using the supplied A/V cable (Yellow [video]).
NOTE: Video out functionality is only available through the DTV, ATV and AV sources.
Video out will not work on HDMI, MEDIA, or Y Pb Pr.
Restore Factory Default:
» Select Restore Factory Default to restore to initial settings
Page 6

Basic Operation
Control Description
004
» Press CH- or CH+ to scan through channels.
» Press V OL- or VOL+ to decrease or increase the sound level.
» Press MENU to bring up the main menu screen.
» Press SOURCE to select the input source.
» Press to play/pause
» Press to eject the disc when in DVD source only
» Press POWER button to alternate between standby and ‘on’ modes.
Volume +/-
To adjust the volume:
» Press the VOL+ button to increase the volume.
» Press the V OL- button to decrease the volume.
Mute
To mute the audio:
» Press the MUTE button to mute the audio. (Note: This will not mute the line-level
audio output).
» The HDTV will indicate that it is in a mute state.
» Press the MUTE button to un-mute the audio.
Power
To operate the HDTV:
» Ensure you have connected the HDTV correctly and that power is supplied to the TV.
» A RED LED indicates Standby Mode. A GREEN LED indicates the HDTV is ON.
» Press the POWER button to power ON the television. The front LED will change from
RED to GREEN to indicate that that HDTV has been turned ON.
» Press the POWER button to power OFF the television. The front LED will change from
GREEN to RED to indicate that that HDTV has been turned OFF.
Channel +/-
» Press the + button to change the channel/chapter up.
» Press the - button to change the channel/chapter down.
Time
Press MENU button on the remote and ◄/► use to cycle to TIME page below:
Clock:
Set TV system time settings
» Select Clock
» Press ◄ or ► to cycle through available clock settings:
Date, Month, Year, Hour and Minute.
Off Time:
Set TV system to turn o automatically.
» From the TIME menu select O Time
» Press ◄ or ► to select O Time mode:
O, Once, Every Day, Mon - Fri, Mon - Sat, Sat -Sun or Sunday
» Set the Hour and Minute
On Time:
Set TV system to turn on automatically.
» From the TIME menu select On Time
» Press ◄ or ► to select On Time mode:
O, Once, Every Day, Mon - Fri, Mon - Sat, Sat -Sun or Sunday
» Set the Hour and Minute
» Select the input source
» If AT V or DTV source is selected, also select the program number
» Select the Volume setting at turn on
009
Display
» Press the DISPLAY button to preview the curent program number, current input mode,
or any relevent source information.
» Press the DISPLAY button again to remove this information.
Numeric Keypad
To directly select a channel or chapter number:
» Press the required number from 0-9 on the keypad. It will directly change to the
choosen channel/chapter.
» To select a 2-digit channel/chapter number, press the -/-- button followed by the
numbers you desire.
Sleep Timer:
» From the TIME menu select Sleep Timer
» Select Sleep Timer setting:
O, 10min, 20min, 30min, 60min, 90min, 120min, 180min or 240min
Auto Sleep:
» From the TIME menu select Auto Sleep.
» Select ON or OFF
Time Zone:
» From the TIME menu select TIME ZONE.
» Select your Time Zone
Page 7

Picture
Press MENU button on the remote and ◄/► use to cycle to PICTURE page below:
008
Aspect Ratio:
» From the PICTURE menu select Aspect Ratio
» Press ▲/▼ to select Aspect Ratio: Auto, 4:3 and Full.
Remote Control
POWER - Switch between Standby and On
Eject in DVD Source
MUTE - Press to mute the audio. Press again or press VOL+ to resume
POWER
MUTE
NUMBER BUTTONS - Press 0-9 to select a TV channel directly when watching TV
The channel changes after 2 seconds or press ENTER button to change immediately
Press to change the channel bit when watching TV
Return to the previously viewed program
1
2
3
005
Picture Mode:
» Select Picture Mode
» Press ◄ or ► to cycle through available picture modes:
Standard, Mild, User and Dynamic.
Note: Contrast, Brightness, Color and Sharpness can only be changed under User.
Color Temperature:
» From the PICTURE menu select Color Temperature
» Press ◄ or ► to cycle through available color temperature modes:
Medium, User, Warm and Cool.
Note: Red, Green, and Blue can only be changed under User.
Noise Reduction:
» From the PICTURE menu select Noise Reduction
» Press ▲/▼ to select Noise Reduction: O, Low, Middle, and High.
Screen:
Note : Only available in VGA Source
» From the PICTURE menu select Screen
» Press ▲/▼ to select Screen Options:
Auto Adjust, Horizontal Position, Vertical Position, Size and Phase.
4
7
-/--
ASPECT
+
VOL
_
LCD
MENU
PMODE
INPUT
FAV
TEXT HOLD
ANGLE
INDEX
D.MENU
MEDIA
PROG
FAV-
ZOOM
SIZE
TITLE
PBC
5
8
0
AUDIO
DISPLAY
SMODE
TV/RADIO
REVEAL
D.DISP
REPEAT A-B
FAV+
6
9
+
CH
_
DVD
SETUP
SLEEP
EPG
SUBTITLE
SUBPAGE
GOTO
EXIT
VOL+/- - Press to increase or decrease volume
ASPECT - Select the screen aspect
AUDIO - Press to change the language of the audio in DTV or DVD source.
CH+/- - Press to change channel
▲/▼/◄/►/OK - Allows you to navigate the on-screen menus and adjust the
system settings to your preference
LCD MENU - Access the on-screen menu
DVD SETUP - DVD menu setup
EXIT - Exit the menu or sub menu
INPUT - Select the TV source
P.MODE - Select the picture mode
S.MODE - Select the audio mode
SLEEP - Set the TV to turn o after a specied time
FAV - Press to display favorite programs
FAV + - Press to change favorite program
FAV- - Press to change favorite program
EPG - Press to display EPG information (Electronic Program Guide) (DTV only)
TEXT - Press to turn the Teletext On and O
ANGLE - Press to choose a dierrent angle (DVD)
HOLD - HOLD On or O the current page display
ZOOM - Press to change the magnication.
TV/RADIO - Press to switch between DTV and radio programs (DTV Only)
SUBTITLE - Select subtitle language
INDEX - Press to return to the index/initial page
D.MENU - Display the DVD menu
SIZE - Change the size of display in Teletext mode
TITLE - Press to display Title information
REVEAL - Reveal or Hide the hidden words
D.DISP - Press to cycle the DVD disc information.
SUBPAGE - Display a sub-page of upper options
GOTO - Press to goto specic chapter in DVD
MEDIA - Access DMP menu
►II - Play/pause
◄◄/►► - Play fast backward/forward
REC - Press to record the program immediately
■ - Stop playing
I◄◄/►►I - Play previous/next media le
PROG - Use in Teletext, DTV and ATV modes
PBC - VCD scan
REPEAT - Press to change the playing mode
A-B - Repeat the segment between A and B
Page 8

Menu Operation
Menu Operation
This section explores the menus of your TV. Each menu is outlined and detailed to help
you get the most from your TV.
006
To access the main menu page press MENU on the remote.
Press ◄/► to cycle through the seven main functions below:
» CHANNEL
» PICTURE
» SOUND
» TIME
» OPTION
» LOCK
EPG (Electronic Program Guide)
Only available for DTV source.
» Press EPG on remote to enter menu
» Follow on screen instructions for EPG control and navigation.
Source Selection
To access the input source’s press INPUT on the remote.
» Press ▲/▼ to move the cursor
» Press OK to conrm your selection
Channel
Press MENU button on the remote to enter the CHANNEL page below:
Auto Tuning:
ATV and DTV auto program, operate as below:
» Select Auto Tuning and press OK .
» To return to previous page press MENU or Exit
» To interrupt tuning, press MENU or Exit. The below conrmation screen will appear.
Press ◄ to conrm exit, or ► to continue tuning.
ATV Manual Tuning
Input source is ATV, operate as below:
» From the CHANNEL menu select ATV Manual Tuning
» Select Storage To 1 and enter channel that you wish to store program to (1-100).
» Select System DK and select TV system.
» Select Search to start ATV Manual Tuning. To interrupt press MENU or Exit
» Select Fine Tune and use ◄/► to ne tune program
007
DTV Manual Tuning
Input source is DTV, operate as below:
» From the CHANNEL menu select
DTV Manual Tuning
» Select channel number by pressing ◄/►
» Press ENTER to search
Program Edit
» From the CHANNEL menu select Program Edit
» Select the program using ▲/▼ and press the following:
Delete Program: Delete selected program
Rename Program: Edit program name (DTV Only)
Reorder Program: Select rst program and then select the second program.
The two programs will swap order.
Skip Program: Select program to be skipped.
Favourite: Press the remote FAV button to activate. Select program to add
to favourite list.
Signal Information
Display’s the signal information of current program.
» From the CHANNEL menu select Signal Information
 Loading...