

Page 1

CAUTION
WARNING
INSTALLATION GUIDE
HUB-102
Network Hub
Do not open the shield
cover unless totally familiar
with electrical circuits.
Only qualified personnel
should work inside the
equipment.
Do not install the unit where it may be
submerged in water.
Water in the unit can result in fire, electrical
shock, or damage to the equipment.
Observe the following compass safe
distances to prevent interference to a
magnetic compass:
standard
compass
HUB-102 0.05 m 0.05 m
steering
compass
Use only the supplied power cable.
Fire or damage to the equipment can result
if a different power cable is used.
Do not disassemble or modify the
equipment.
Fire, electrical shock, or serious injury
can result.
https://www.furuno.com/
Page 2

HUB-102-CBL-05
- 1
Power cable assy.
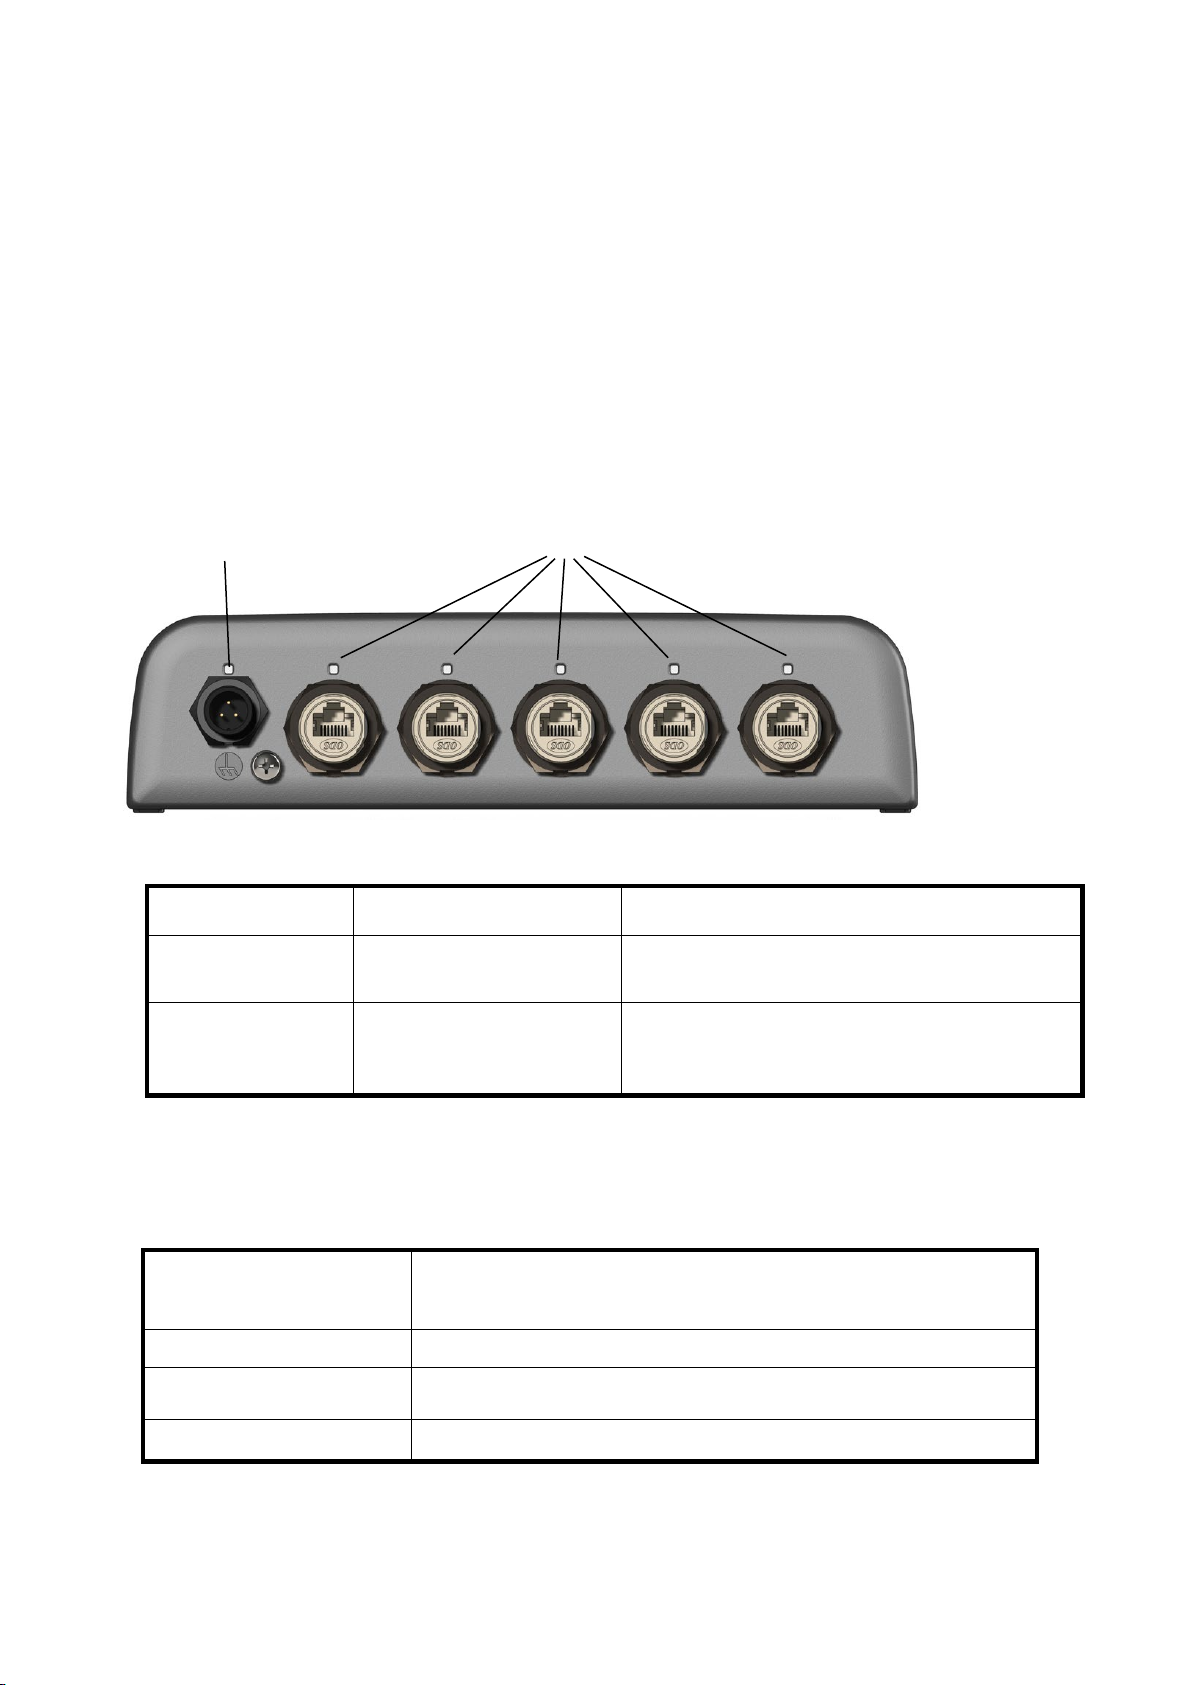
Transmission speed
I/O Ports 5 ports
Environmental conditions
Power supply 12-24 VDC/0.2-0.1 A
10Mbps/100Mbps half/full duplex
1000Mbps full duplex
Ambient temperature
Relative humidity
EMC IEC 60945 Ed.4
Dustproofing, waterproofing IP56 (IEC 60529)
-15 to 55
93% or less
°C
Equipment List
Name Type Part No. Qty Remarks
Specifications
Ethernet HUB HUB-102
-
1
Installation
materials
Self-tapping screws
Installation Manual
-
-
1 set
1
M3 screws (4pcs.)
Installation
Mounting considerations
The HUB-102 can be mounted on a desktop or a bulkhead. When choosing a mounting location,
keep in mind the following points:
•
Locate the unit where it will not be submerged in water.
•
Keep the unit out of direct sunlight to prevent build up heat inside the cabinet.
•
Cables should point down to prevent any possible water wicking.
Mounting
Fix the unit to the mounting location with four self-tapping screws, referring to the outline drawing in
this manual.
2
Page 3

Waterproof RJ45 Cable)
Power cable
HUB-102-CBL-05
Red: V+
NOTE: The connection of GND nut to
performances.
V+
V-
Frame Ground
Wiring
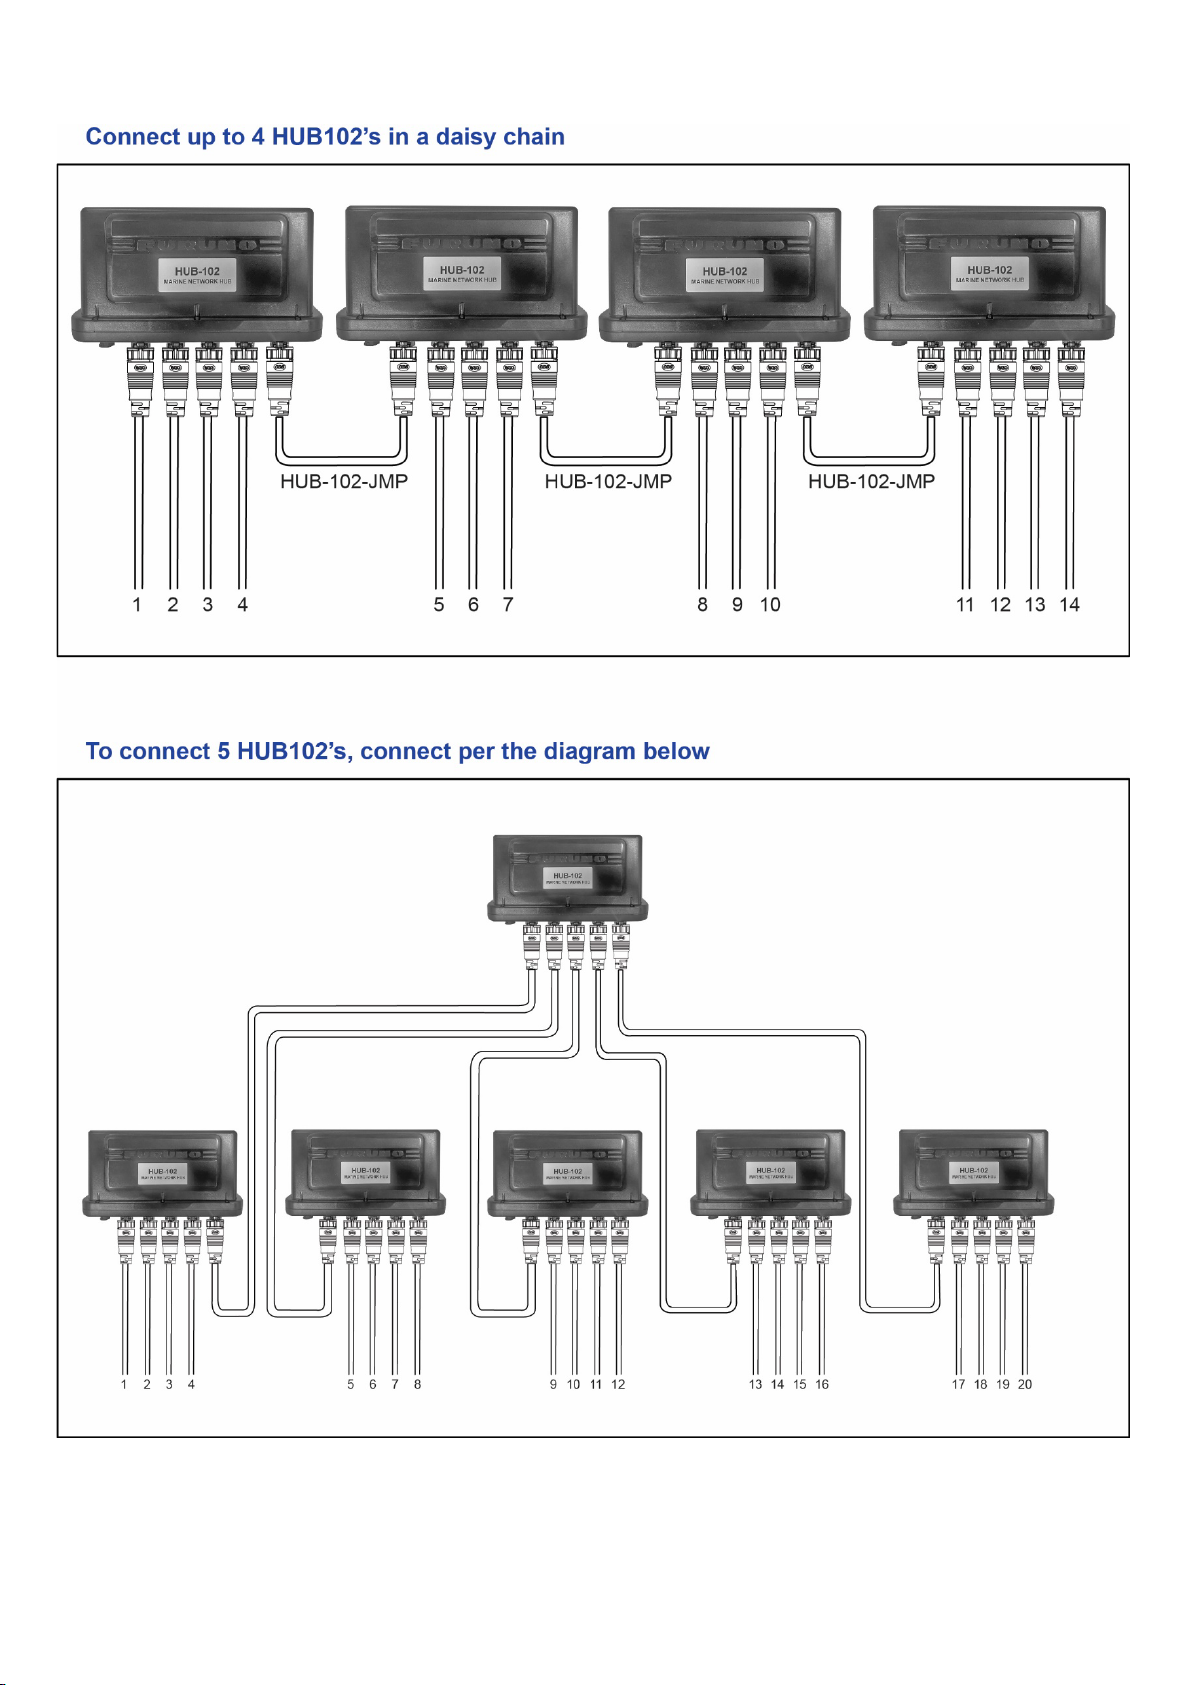
Interconnection
To connect NavNet equipment, use the optional cables shown below depending on the unit
connected. (All cables below are shielded.)
Connected unit Type Part No. Cable length
Waterproof equipment
(Waterproof RJ45 to
Waterproof RJ45 Cable)
Non-waterproof equipment
(Waterproof RJ45 to Non-
Waterproof adapter cable
Multiple HUB-102
FRU-RZWPWP-002G
FRU-RZWPWP-005G
FRU-RZWPWP-010G
FRU-RZWPNWP-002G
FRU-RZWPNWP-005G
FRU-RZWPNWP-010G
001-653-250-00 2 m
001-653-260-00 5 m
001-653-270-00 10 m
001-646-960-00 2 m
001-646-980-00 5 m
001-647-000-00 10 m
WRJ-ADP-05M 0.5 m
HUB-102-JMP 0.5 m
Power connection
The HUB-102 power supply must be connected to a power source as follows:
The HUB-102 is protected by an internal auto resetting fuse.
boat's ground in not mandatory. It is
suggested in case of particular noise
conditions on the boat to enhance the
immunity of the system and have better
POWER SOURCE
Black: VWhite: Frame Ground (FG)
3
Page 4

Optional cables
4
Page 5

Use shielded CAT5E or better cable
Use shielded CAT5E or better cable
5
Page 6

Use shielded CAT5E
Use shielded CAT5E or better cable
or better cable
6
Page 7
7
Page 8
FR-10 / FR-12
MODEL1815
Power LED
LAN LED x5
Turning Power on, LED function
No operation is required by the user. Simply turn on the HUB-102’s DC power source to power it.
LED display
There are LEDs to monitor power and LAN communication on the unit. The LEDs light, blink or go off
according to equipment status as shown in the table below. When the equipment is powered on,
LEDs light as following.
Power on sequence
•
Power LED: ON
•
LAN LEDs: Blink once, then go off.
LED Status Meaning
Power (green)
LAN LED (green)
On
Off
On
Off
Blinking
Equipment powered
Equipment off
Connected to terminal
Disconnected from terminal
Data TX or RX
Compatible model / unit
NavNet MFD
FLEX Function Display SFD-1010 / SFD-1012
TZT10X / TZT13X / TZT16X / TZT22X / TZT24X / TZTBBX
TZT9F / TZT12F / TZT16F / TZT19F / TZT2BB
Marine Radar
Fish Finder FCV-38 / FCV-2100 / FCV-1900G / FCV-1900B / FCV-1900
8
Page 9

I
MINIMUM SERVICE CLEARANCE
30mm
30mm
Dimension Drawing
 Loading...