

Page 1
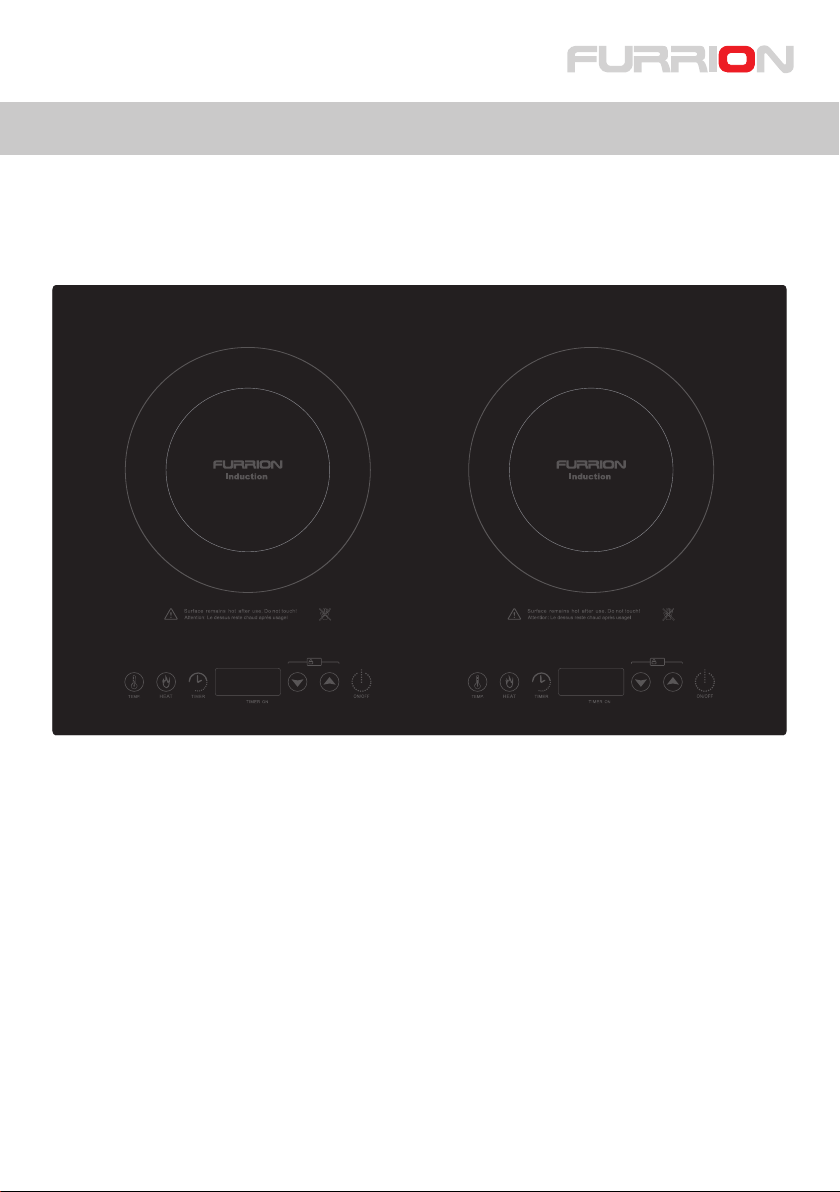
FIH2ZEA-BG Induction Cook-top
Operating and Installation
Instructions
Please read this manual before
installing or using the cook-top
Page 2

ContentsWelcome
FURRION FIH2ZEA-BG INDUCTION COOK-TOP
SUITABLE FOR DOMESTIC HOUSEHOLD USE, RV’s, MODULAR HOMES OR ANY
RESTRICTED POWER APPLICATION.
Thank you for choosing a Furrion Induction Cook-top.
Before installation and use, please read all instructions carefully. This will ensure safe use
and reduce the risk of injury to persons.
IMPORTANT SAFETY INSTRUCTIONS............................................................................4 - 5
Cooking by Induction.......................................................................................................6
Control Panel.....................................................................................................................7
Use..................................................................................................................................8 - 9
Cleaning.................................................................................................................10
Troubleshooting...............................................................................................11-12
Noise...............................................................................................................................12
Installation.............................................................................................................13
Ventilation..............................................................................................................14
Dimensions & Specications.........................................................................................15
2
3
Page 3
IMPORTANT SAFETY INSTRUCTIONS IMPORTANT SAFETY INSTRUCTIONS
READ THESE INSTRUCTIONS CAREFULLY BEFORE
INSTALLING OR USING THE COOKTOP
z Before use, ensure the cook-top is
installed and grounded by a qualied
technician.
z Do not use outdoors. The Furrion
FIH2ZEA-BG is intended for indoor use
only.
z Before servicing, disconnect the
appliance from the main power supply.
Use
z DO NOT TOUCH SURFACE
COOK-TOPS OR AREAS NEAR COOKTOPS - Surface areas may be hot even
though they are dark in color. Areas
near surface cook-tops may become
hot enough to cause burns. During and
after use, do not touch, or let clothing,
pot-holders, or other ammable materials contact surface cook-tops or areas
near cook-tops until they have had sucient time to cool.
z Do not heat or warm unopened food
containers. Build-up of pressure may
cause the container to burst and cause
injury.
Child Safety
z Do not allow children to use this
appliance unless closely supervised
by an adult. Children and pets should
not be left alone or unattended in the
area where the appliance is in use. They
should never be allowed to play in its
vicinity, whether or not the appliance is
in use.
z Never allow children to sit or stand on
any part of the cook-top.
z Keep all pots and pans out of children's
reach.
Fire safety
z Do not allow aluminum foil, plastic,
paper or cloth to come in contact with a
hot surface element.
Do not allow pans to boil dry.
z Do not let ammable materials, i.e.
cooking grease, accumulate on the
appliance.
z Never cover the cook-top with a cloth.
A re may result.
z Flammable materials should not be
stored on or near the appliance.
z Never leave the cook-top unattended
at high settings or when cooking with oil
or fat.
z If installing in a RV or Manufactured
Home, please refer to the relevant safety
standards & guidelines.
Cook-top damage
z Never set down hot pans and pots
on the control panel or frame. This may
cause damage.
z Cookware with rough bottoms will
scratch the glass ceramic surface.
z Salt, sugar or grains of sand will scratch
the glass ceramic surface.
z Never use the cook-top as a working
surface or for setting things down.
z Do not use a steam cleaner to clean
this appliance. Steam could penetrate
electrical components and cause a short
circuit.
z Clean the cook-top following the in-
structions outlined in this manual.
4
5
Page 4

Cooking by induction Control Panel
Suitable cookware
Only ferromagnetic (magnetic) pans are
suitable for induction cooking, these can
be made from:
• enamelled steel
• cast iron
• special stainless steel utensils for
induction cooking
Unsuitable cookware
Never use pans made of:
• thin normal steel
• glass
• clay
• copper
• aluminum
Never use cookware with support rings
such as woks.
Check that the bases of your pans are
attracted by a magnet to nd out if they
are suitable.
Cookware size Control panel functions
Optimal cookware has a at bottom and
a diameter of 4.5” to 10”.
Round, at bottom pans give the best
results. Pans with warped or curved bottoms will not heat evenly.
1
- Used to start the TEMP settings.
1
- Used to start the HEAT function.
2
- Used to start the TIMER function.
3
- LED Display that displays settings,
4
function and error notications.
2
5
3
4 6
- Child Safety Lock Indicator.
5
7
Lights up when the Safety Lock is activated.
- These UP & DOWN keys are used to
6
set values for HEAT, TEMP & TIMER
- Press the UP & DOWN keys simul-
taneously to Lock or Unlock the Child
Safety Lock
- Turns the cook-top ON & OFF.
7
Never heat up empty pans
This could damage the appliance
and cookware.
6
7
Page 5

Use
Turning on the cook-top Heat balancing functionality Timer function Auto Shut O
Plug the power plug into a suitable
connection. The indicators will ash and
a beep will sound.
The cook-top is now in stand-by mode.
Turning the hotplates
With suitable cookware on a hotplate,
press and hold the
ond.
Press the key and the hotplate will
turn on at it’s default Heat function setting of 5.
key for one sec-
Adjusting the Heat level
Use the keys to adjust and set the
Heat level.
There are 10 Heat function levels, 1-10.
The Heat level can be adjusted at anytime.
Once the heat level is set, this icon
will ash to conrm setting.
When using a single hotplate, the maximum Heat level is 10. When using both
hotplates, the maximum Heat level is 10
across both hotplates.
In use this means that if the Heat level
on one hotplate is increased, the level
on the other hotplate is automatically
decreased.
Example: Both hotplates are at Heat level
5. If one hotplate’s level is increased to 6,
the other will decrease to 4.
If one hotplate is using the Heat function
and the other is using the Temp function,
the maximum Heat level is 5.
Using the Temp setting
Once the cook-top is on, the Temp setting can be used.
Press the
will activate at the default temperature
of 270 °F
Use the
temperature.
Once the temperature level is set, this
icon
Selectable temperatures
150°F 180°F 210°F 240°F 270°F
300°F 330°F 360°F 390°F 420°F
450°F
once and the Temp setting
keys to adjust and set the
will ash to conrm setting.
Once the Heat or Temp modes are set
up, press the
Timer function. The timer indicator will
light up and the display will blink 0:00.
Use the
desired time. A short key press adjusts
the time by 1 minute and a long key
press by 10 minutes. The timer is adjustable to a maximum of 3 hours.
Once set, the timer will count down in 1
minute decrements.
Once set, the selected time will blink for
a few seconds and then the cooker will
start.
When the set time has elapsed, a beep
will sound and the cook-top will automatically switch o.
key once to activate the
keys to adjust and set the
Child Safety Lock function
The cook-top is equipped with a safety
lock to prevent the it from accidentally
being turned on or any settings changed.
To activate the Child Safety Lock
Press the
Lock the cook-top.
The Safety Lock indicator
When the safety lock is activated, the
cooktop has only limited functions:
- The Heat level, Temp Setting and Timer
Settings cannot be changed.
- Only the
o, functions.
keys simultaneously to
will light up.
key, to turn the cook-top
As a safety feature, the cook-top is
designed to automatically turn o after 2
hours of continuous use; this is unless the
timer has been set for over 2 hours, then
it will turn o after the timer setting has
elapsed. This applies to both Heat and
Temp modes.
To continue cooking, start the cook-top
as per normal.
Turning o the cook-top
To turn o the cook-top, press the key.
Use
Press the
several seconds to Unlock the cook-top.
The Safety Lock indicator
8
keys simultaneously for
will go o.
9
Page 6

Cleaning Troubleshooting
Daily cleaning
Clean the surface when it is completely
cool (except for the specic circumstances listed).
Wipe o spatters with a clean, damp
sponge or a paper towel. Rinse and dry.
Use white vinegar if smudge
remains; rinse.
Apply a small amount of the glass
ceramic cook-top cleaner. When dry, bu
surface with a clean paper towel
or cloth.
Stubborn soiling is best removed with a
shielded scraper
blade.
Dry sugar, sugar syrup, milk or tomato
spills. Melted plastic lm or foil. All
these items
REQUIRE IMMEDIATE REMOVAL. Failure to remove these immediately can
permanently damage the surface.
Remove these types of spills while the
surface is hot using a shielded scraper
blade. Remove pan and turn o the
element.
Wearing an oven mitt, hold scraper at 30°
angle, using care not to gouge or scratch
the glass. Push soil o the
heated area. After the surface has cooled,
remove the residue and apply the glass
ceramic cook-top cleaner.
Use caution when handling the
shielded scraper blade.
Use caution while the surface is still hot.
DO NOT
Do not use any kind of cleaner on
the glass while the surface is hot. The
resulting fumes can be hazardous to
your health. Heating the cleaner can
chemically attack and damage the
surface.
Do not use a steam cleaner to clean
this appliance. Steam could penetrate
electrical components and cause a
short circuit. Pressurized steam could
cause permanent damage to the surface and to components.
Do not use any sharp pointed
objects which could damage the
seal between the ceramic surface,
the surrounding frame and the
counter-top.
Do not use glass cleaners which
contain ammonia or chlorine bleach.
These ingredients may damage or
permanently stain the cook-top.
Do not use caustic or abrasive cleaners
Do not use metal scouring pads and
scrub sponges.
Error codes
In the unlikely event of a fault, the display will show an error code.
Error
Error Possibly cause Solution
displayed &
alarms sounds
E1 A sensor is faulty or there may be an
E2 A sensor is faulty or there may be a
E3 Extended use and/ or at maximum
E4 A sensor is faulty or there may be an
E5 A sensor is faulty or there may be a
E6 The ventilation area is blocked, this
E7 Voltage is under 80V
Incompatible cookware unsuitable for
the induction cook-top.
There is no cookware on the induction
cook-top.
open circuit.
short circuit.
temperature.
open circuit.
short circuit.
can cause the internal device to overheat. Please keep a minimum distance
of 2 to 6 3⁄4 inches from the cook-top
to the walls or other obstructions.
Solution
Make sure the cookware is
induction compatible.
See page 6
Please contact seller for
support if this problem
persists.
Please contact seller for
support if this problem
persists.
Turn power OFF, remove
plug from outlet, and
allow the cook-top to cool
fully. When fully cooled,
plug the cook-top back
into the outlet and restart.
Please contact seller for
support if this problem
persists.
Please contact seller for
support if this problem
persists.
Turn power OFF, remove
plug from outlet, and
allow the cook-top to
cool fully. After allowing
ventilation space, plug the
cook-top back into the
outlet and restart.
10
E8
Voltage is over 140V
11
Page 7

InstallationTroubleshooting
Error
Error Possibly cause Solution
Solution
EA The cooking utensil may be empty. Please contact seller for
support if this problem
persists.
EB Possibly caused by a big pot of water
heating using a low setting with a low
indoor temperature.
EC
A fan may be faulty.
Please contact seller for
support if this problem
persists.
Please contact seller for
support if this problem
persists.
Noise
When cooking with an induction cooktop, the following noises may be heard
from the cookware, depending on
constructiona and the matreial of the
cookware.
The appliance has a cooling fan to help
extend the life of the electronics. When
the cook-top is being used at high levels
for a long period of time, this will come
on and you will hear a whirring sound.
The fan may continue to run after the
appliance has been switched o.
z Buzzing may be heard when the cook-
top is being used on higher power settings. This may decrease or cease when
the power settings are reduced.
z Cracking sounds may be heard if the
cookware base is made of layers of
dierent material.
z Whistling can occur if both elements
are being used at the same time at
the highest power settings, and the
cookware has bases made of layers of
dierent material.
z Clicking may be heard from the elec-
tronic switches, especially when the
cook-top is being used at lower power
settings.
1
Minimum distance from cook-top
to any object above must be at least
30’’ *
2
Minimum distance from cook-top
to any surface below must be at least
1
5
3
2
5
4
3/4’
6
’ *
3
Cut-out width: 14
4
Cut-out length: 23
5
Ventilation cut-outs.
6
There must be at least 2”
1/4
”
2
1/
”
from the edge of the cook-top
to any walls or cabinets.*
7
Sealing strip around the
edge of the cut-out. *
12
6
7
6
*If installing in a RV or Manufactured Home,
please refer to the relevant safety standards &
guidelines.
13
Page 8

Ventilation
Dimensions & Specications
1
Maximum thickness 1
2
Ventilation cut-out.
1/2
1
”
Length 24
6/16
”
To ensure proper ventilation fo the
2
1
3
4
22
cook-top, there should be a ventilation cut-out at the back or front.*
3
Ventilation cut-out width 22”*
4
If a protective base/ other appliance is tted beneath, there should
be at least 6
3/4
” from the protective
base/ appliance to the top of the
1
2
Width 14
2
15/16
”
counter-top.*
3
Height 2
3
1/2
”
14
*If installing in a RV or Manufactured Home,
please refer to the relevant safety standards &
guidelines.
Specications
Model FIH2ZEA-BG
Maximum Power 1800W combined
1500W per hotplate
Voltage 120V AC 60Hz
Cook-top Black Crystal Glass
Control Touch Sensor
Display 4 Digit LED
15
Page 9

Furrion reserve the right to alter the information in this document without prior notice.
Furrion shall not be liable for technical or editorial errors or omissions contained herein.
FURRION.COM
IM-FIH2ZEA-BG-V4
 Loading...