

Furrion DV3300S Users Manual
DV3300S-BL

Welc ome
Thank y ou for purc hasing th is Furrio n DV3300S -BL Enterta inment Sy stem.
®
Befor e operati ng your new a pplianc e, please r ead these i nstruct ions care full y.
This in structi on manual c ontains i nformat ion for saf e use, inst allatio n and
maint enance of t he applia nce.
Pleas e keep this i nstruct ion manua l in a safe pla ce for futu re refere nce.
This wi ll ensure s afe use and r educe the r isk of inju ry. Be s ure t o pass o n thi s
manua l to new owne rs of this ap pliance .
The man ufactur er does not a ccept res ponsibi lity for an y damages d ue to not
obser ving thes e instruc tions.I f you have an y further q uestion s regardi ng our
produ cts, plea se contac t us at suppo rt@furr ion.com
pers on s.
Read t hr oug h th is inst ructi on m anu al b efore i nstal la tio n an d use.
outs id e of th e un it.
Do not o pe n the c ov er or tou ch a ny of the c ompon en ts insi de of the u ni t. Only a q ua li ed
tech ni cia n sh ould se rv ice the u nit.
dama gi ng th e un it.
Do not p la ce th e un it in moi st o r humid c ondit io ns. Moi sture w il l affect no rm al op er ation a nd
dama ge t he un it .
WARNI NG
1.Do n ot i nge st t he batt er y,C hemic al B urn H az ard (Th e re mot e co ntrol s up pli ed w ith).
2.Th is p rod uc t conta in s a coin/ butto n ce ll batt er y.
3.If t he c oin /b utton c el l batte ry is swa ll owed, i t ca n cau se s evere i nt ern al b urns in j us t 2 hou rs a nd
can le ad t o dea th .
4.Ke ep n ew an d us ed batt er ies a wa y from ch il dren.
5.If t he b att er y compa rt ment do es not cl os e secur el y, st op us in g the pro du ce an d ke ep it awa y fr om
chil dr en.
6.If y ou t hin k ba tteri es m ight ha ve been s wa llowe d or plac ed i nside a ny p art o f th e body,see k,
imme di ate m ed ical at te ntion .
CAUT IO N
1.Da ng er of e xp losio n if b atter y is inco rr ectly r ep lac ed .
2.Re pl ace o nl y with th e sa me or equ ivale nt t ype.
3.Th e ba tte ry s hall no t be e xpose d to exce ss ive hea t su ch as s un shine , fi re or t he l ike.

Contents
1. Before Operation.......................................................................................................3
1.1 Feature............................................................................................................. 3
1.2 Precautions........................................................................................................3
1.3 Maintenance and Cleaning of Discs..................................................................4
1.4 Battery Information of the Remote Control........................................................4
1.5 The Remote Control Description.......................................................................5
1.6 Locations and Names of the Controls...............................................................6
1.7 Wiring Diagram................................................................................................11
1.8 Mounting Installation........................................................................................14
2. Common Operation..................................................................................................15
3. Radio Operation.......................................................................................................17
4. Basic Disc, USB Operation.....................................................................................18
4.1 Begin Playback.................................................................................................18
4.2 Pause Playback................................................................................................19
4.3 Stop Playback ..................................................................................................19
4.4 Select Chapter/Track with the the >>|/|<< Buttons...........................................19
4.5 Select Chapter/Track with the Number Buttons...............................................19
4.6 Select Chapter/Track with the Root/PBC Menu...............................................19
4.7 Terminate the Playback....................................................................................20
5. Advanced Disc, USB Operation.............................................................................20
5.1 Playback with Speed........................................................................................20
5.2 Playback with Slow Speed...............................................................................20
5.3 Playback with Still Frame ................................................................................21
5.4 Playback Repeatedly........................................................................................21
5.4.1 One/All Repeat..............................................................................................21
5.4.2 A-B Repeat....................................................................................................21
5.5 Playback from a specified Chapter/Track or a Specified Time.........................22
5.6 Playback in Random.........................................................................................22
5.7 Playback in Different Angle...............................................................................22
5.8 Playback in Zoom Mode...................................................................................22
5.9 Change the Caption Language.........................................................................23
5.10 Change the Audio Language..........................................................................23
5.11 Look over the Playback Status..... .................................................................23
5.12 Program Playback................... ......................................................................24
5.13 Playback the Picture CD in JPEG Format......................................................24
5.14 Mp4 OPERATION...........................................................................................25
5.15 ESP and ID3 Function....................................................................................25
5.16 USB Operation ...............................................................................................25
5.17 The DVD System Menu Setup Operation.......................................................25
5.18 The Parental Control.......................................................................................29
5.19 The Region Code............................................................................................30
6. Bluetooth Handsfree System....................................................................................31
APP CONTROL........................................................................................................33
7. Trouble Shooting......................................................................................................37
8. Specification.............................................................................................................38

1. Before Operation
Thank you for purchasing a Furrion Product, we hope you will enjoy using our
product. For maximum enjoyment please look through the following manual
to learn about all the features of your Furrion Stereo.
1.1 Features:
Digital AM / FM Tuner
DVD/CD-R/RW/MP3/MP4/WMA Compatible
Bluet ooth with N FC functi on
Auxil iary inpu ts on front a nd rear
USB inp ut with cha rging fun ction
2 zone mu lti room au dio outpu t
1 x HDMI ou tput with AR C functio n
1 x RCA audi o/video o utput for c onnecti ng additi onal TV
1 x subwo ofer outp ut
Clock
1.2 Precautions
Connect this product to a 12V DC negative ground battery system which is
standard in North America and European Vehicles.
Ensure when installing the stereo, all wire ends which are not being used are
terminated with a insulated end to avoid wires shorting or earthing which
can lead to the risk of fire or electrical shock.
Avoid inserting foreign objects into the disk loading slot of the stereo as this
will cause malfunction.
Do not expose this product to moisture or wet environments, if condensation is
present in the screen, wait for 1 hour or more for the moisture to evaporate.
If the interior of the vehicle is extremely hot, do not use the player until the
vehicle internal temperature has cooled down.
Do not use cleaning products on the front face of the product, only use a
slightly damp cloth for cleaning.
Do Not attempt to disassemble or adjust this product, contact a service center
for assistance.
4
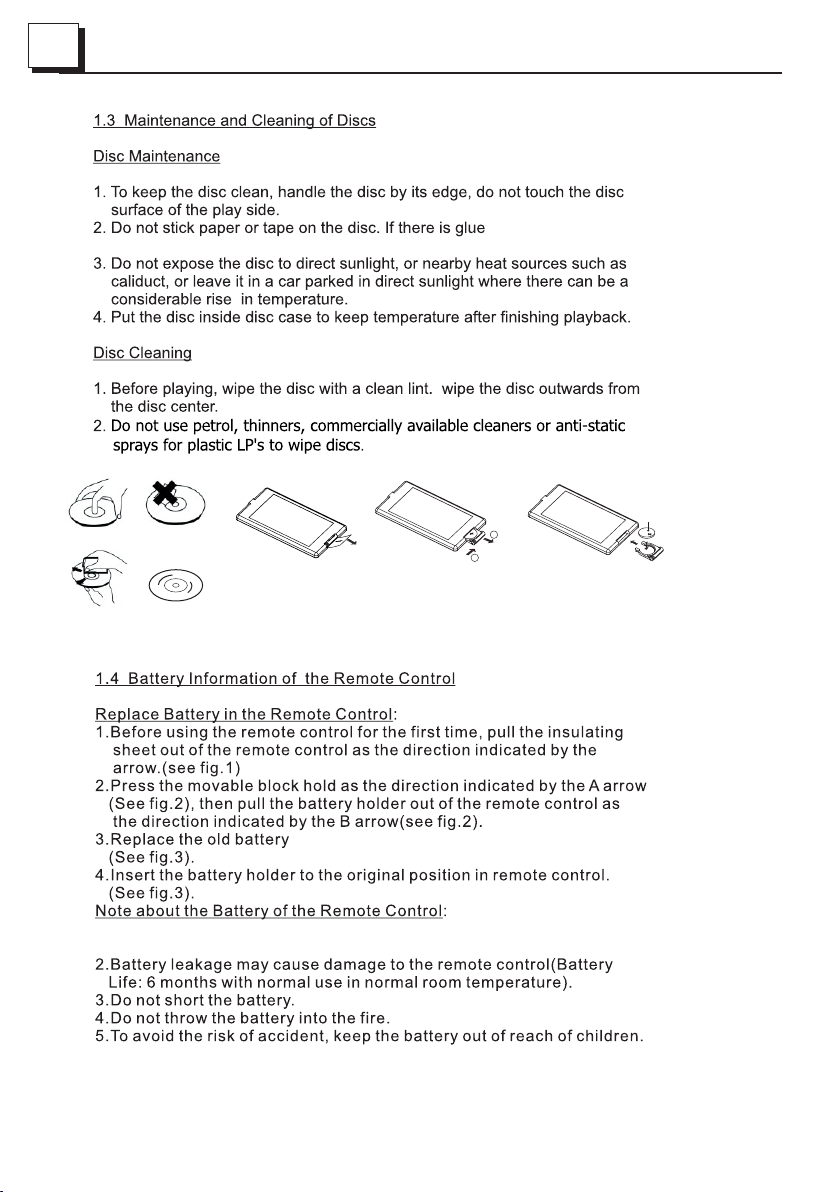
wipe i t off befor e usi ng .
correc t
correc t
wrong
wrong
Fig .1
Fig .2
on the d isc sur fac e,
B
A
Fig .3
+ side up
with a n ew ba tte ry with ( +) po lar ity sid e upw ard .
1.Im pro per u se of a bat ter y may c ause ov erh eating or an e xpl osi on that c oul d
,
resu lt in i nju ry or re .
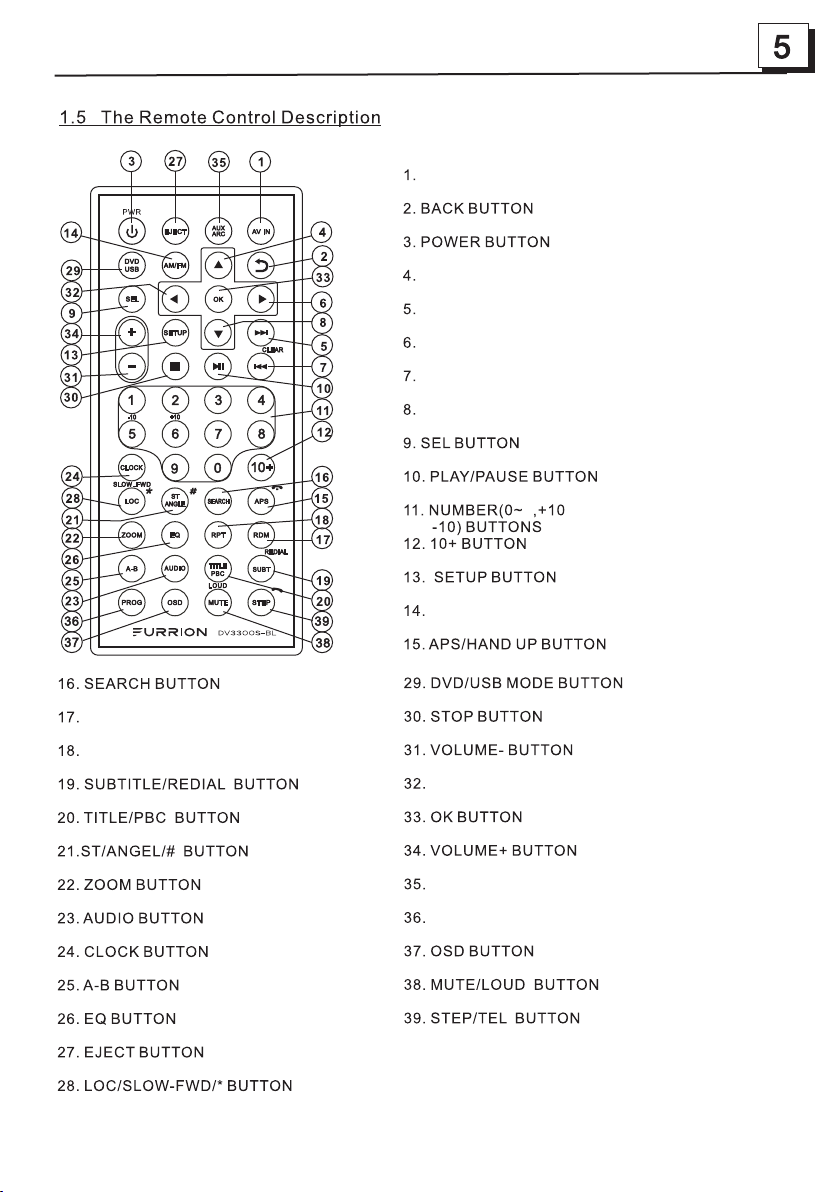
RAND OM B UTTON
REPE AT BUTTON
AV IN MODE BU TT ON
UP BUTTON
NEXT BUT TO N
RIGH T BU TT ON
PREV IO US BU TT ON /CLEA R BU TTON
DOWN B UT TO N
9
AM/F M RA DIO M OD E BUTTON
LEFT BUT TO N
AUX/ AR C MODE BU TT ON
PROG RA M BUT TO N

6
1.6 Lo cat ion s and Nam es of t he Cont rol s
22
1
21
2
3
4
5
6
8
7
9
11
10
1. DISC SLOT
2. IR REMOTE CONTROL SE NSO R
3. 1/2/3 BUTTO N
1 TEL /REDIAL BU TTON
2 HANG UP BUT TO N
4.ZONE 1/2 BUTTON
5.
/ BUTTON
6.PLAY/PAUS E BUT TON
RADIO REGION SELECT BU TTON
7.POWER BUTTON
8.STOP BUTTON
AS/PS BUTTON
9.AUX IN SOCKET
14
16 17
12 13
15
10.HEADPHONE SOCKET
11. USB S OCK ET
12.BT MOD E BUT TO N/E Q BUT TON
13.MICROPHONE IN
14.RESET BUT TO N
15.INPUT MOD E BUT TO N/B AND B UTTON
16.5/RANDOM BUTTON
17.VOL KNOB /SE L BU TTON
18.6/TITLE BUTTON
19.4/REPEAT BUT TON
20.LCD DISPLAY
21.EJECT BUT TO N
22.NFC DETECTION AREA
20
19
18
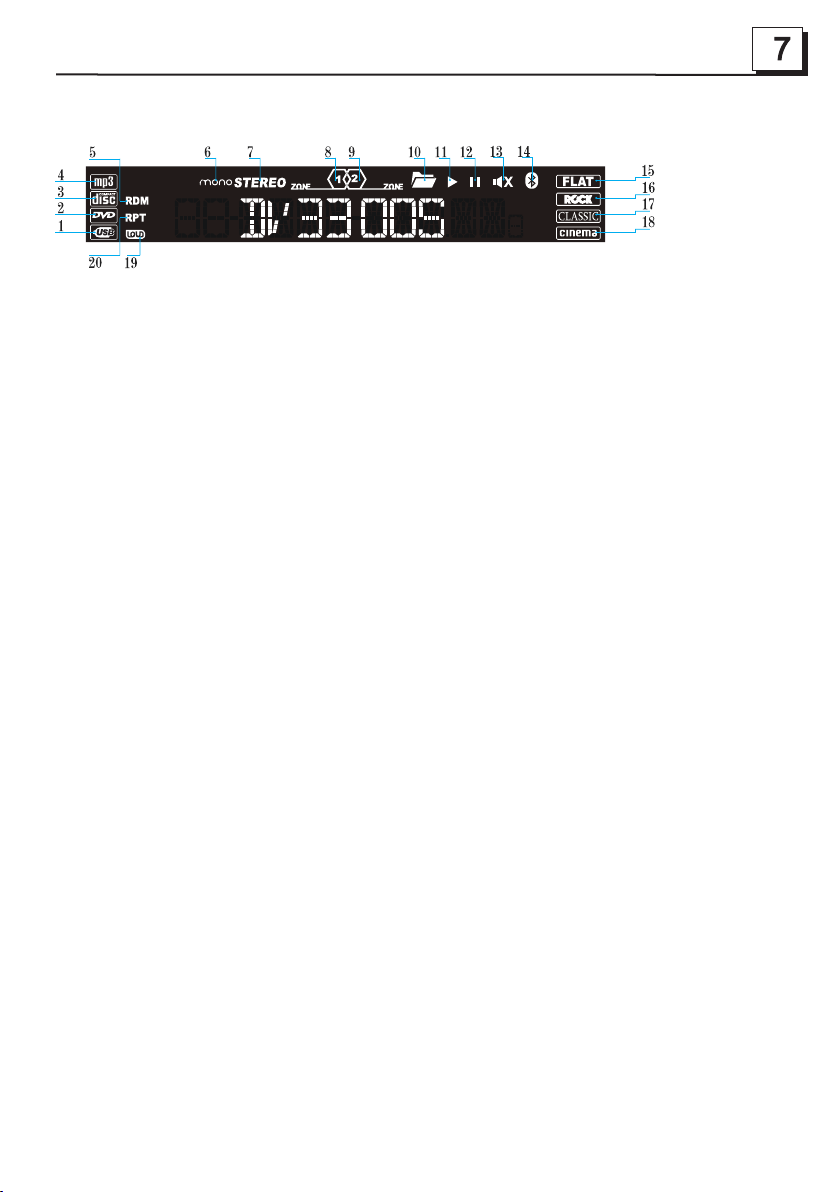
Descr ipti on of ic ons on the LCD display
1.USB icon
After inser tin g a USB s tor age, USB icon is lit.
2.DVD icon
After inser tin g a DVD d isc , DVD icon is lit.
3.DISC ico n
After inser tin g a dis c(D VD,VCD,CD), DIS C ico n is li t.
4.MP3 icon
If a disc or a USB stor age c ont ain s MP3 format fil es, M P3 ic on is l it.
5.RDM icon
In random pl ayb ack m ode , RDM icon is lit.
6.MONO ico n
In mono audi o mod e, MO NO ic on is lit.
7.STEREO
In stereo au dio m ode , STE REO icon is lit.
8. ZONE <1> ic on
When selec tin g the Z ONE 1 s peakers, ZONE <1> i con i s lit .
9.ZONE <2> i con
When selec tin g the Z ONE 2 s peakers, ZONE <2> i con i s lit .
10. FOLDER i con
If a USB storage co nta ins m ore t han 2 folders( con tai ns pl ayback file),
FOLDER ico n is li t.
11.PL AYBACK icon
During dis c or US B pla yba ck state, PLAYBAC K ico n is lit.
12.PAUSE i con
During dis c or US B pau se pl ayback state, PAU SE ic on is lit.
13.MUTE ic on
When the Ste reo i s on mu te st ate , MUTE icon is lit .
14. BLUETOOT H icon
When the Ste reo i s pai red a nd connected succ ess ful ly, BLUETOO TH ic on is lit.
15.FLAT icon
When selec tin g fla t aud io mode playback, F LAT icon is lit .
16.ROCK ic on
When selec tin g roc k aud io mode playback, R OCK i con i s lit .
17.CLASS IC ic on
When selec tin g cla ssi c audio mode playba ck, C LAS SIC i con is lit.
18.CINEM A icon
When selec tin g cin ema a udio mode playbac k, CI NEM A icon i s lit.
19.LOUD ic on
When selec tin g lou d aud io mode playba ck, L OUD i con i s lit .
20.RPT ic on
In repeat pl ayb ack m ode , RPT icon i s lit .
8
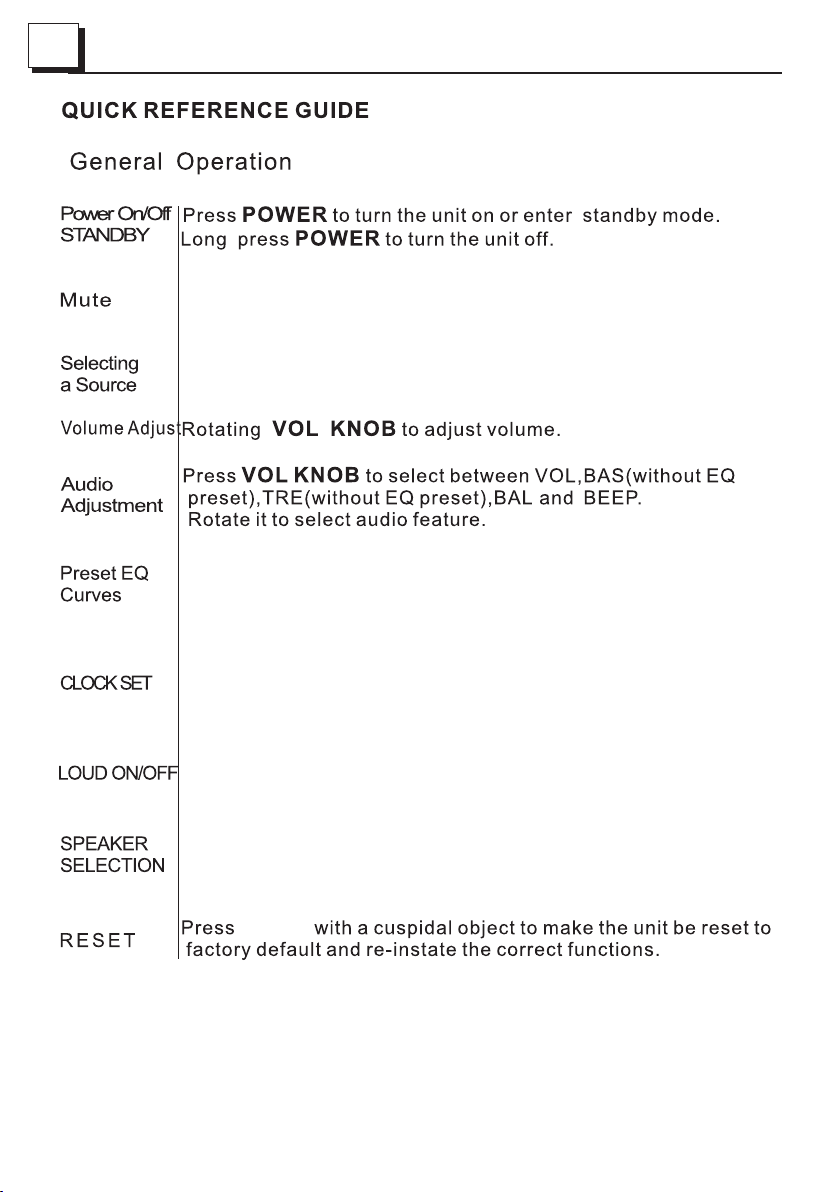
Press MUTE but ton on the remo te con trol to mute th e audio,
“MUTE” icon wi ll flash in the d isplay. Press MUT E agai n to cancel.
Press INPUT MO DE button rep eate dly to select Tu ner,Disc(After
inserting a di sc),USB(A fter i nserting a US B storage), BT,ARC
AV IN and AUX mode.
Press EQ butto n to select bet ween C INEMA,ROC K CLASSIC,
FLAT.
Press an d hold C LOCK button o n the remote contro l to enter
CLOCK Setup, r otate VOL KNOB to ad just hour. Pre ss it br iefly
to minute sett ing and rotat e it to ad just. Once ti me is set,the unit
will aut omat ically set af ter a fe w seconds.
Press an d hold L OUD button on t he remote control t o turn on
or off LOUD mod e.
Press ZONE 1 or 2 bu tton to selec t spea ker output,
“ZONE <1>” or “Z ONE <2>” will d ispl ay
on the LCD o nce it i s selected.
RESET
9
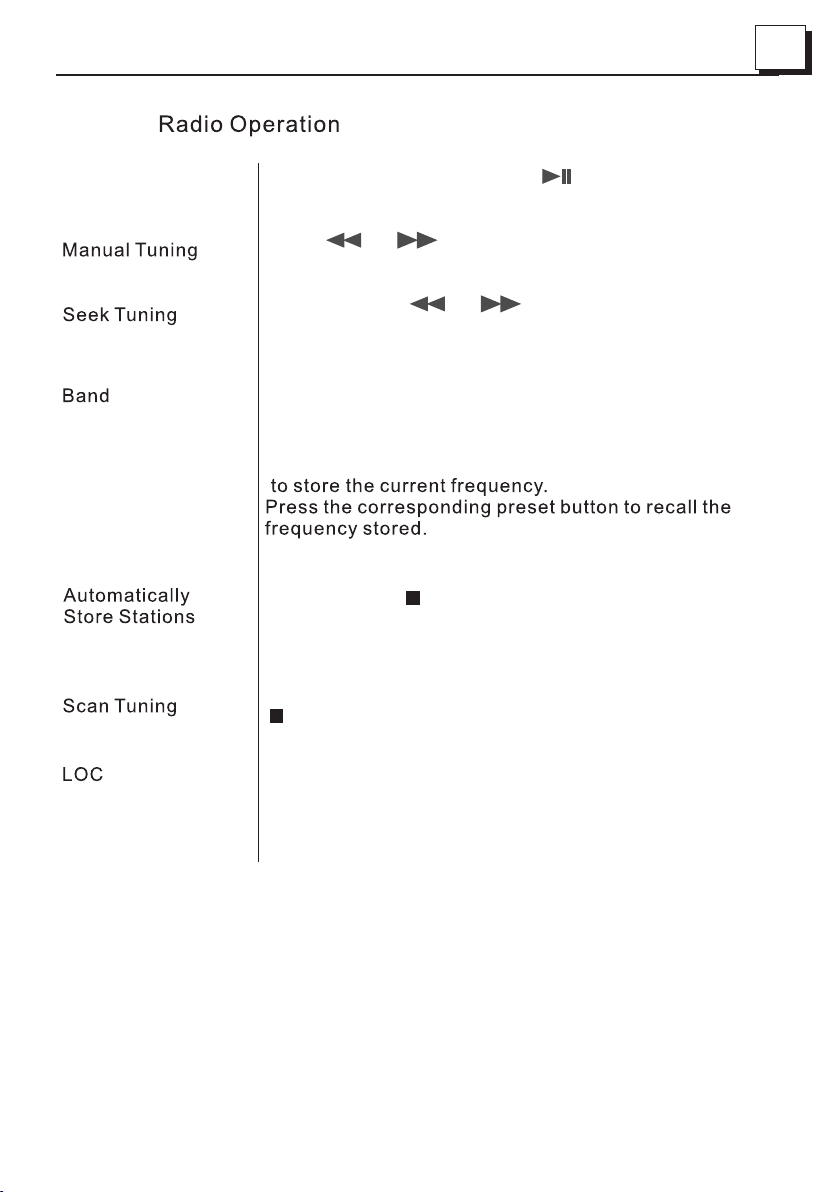
Area Fr equency
Selec tion
Stori ng and Reca llin g
Stati on Preset s
Press and hold PLAY/PAU SE but ton fo r 5 seconds
to set AM/FM radio regi on(E urop e/USA1/USA2/AUST-
RALIA)
Press or button to move radi o
frequence down or up o ne ste p at a tim e.
Press and hold or button to
search the next stro nges t stat ion automatically.
Press and hold INPUT M ODE bu tton o n the front panel
or briefly press AM/ FM but ton on t he remote control to
select between FM1 ,FM2 .FM3 ,AM1,AM2.
Press and hold any one o f the si x pres et buttons(1-6)
Press and hold APS but ton on t he rem ote control or
press and hold butto n on the f ront p anel to
automatically st ore th e six st rongest stations in the
current band.(Up t o18 FM s tati ons and 12 AM stations
can be stored)
Briefly Press APS bu tton o n the re mote control or press
button on the front pa nel to s can pr esets 1-6 in
the current band.
Press LOC button on th e remo te con trol to turn on/off
LOC.
Stere o/Mono
In FM mode,press ST bu tton o n the re mote control to
select the Stereo or M ono so und mo de.
10
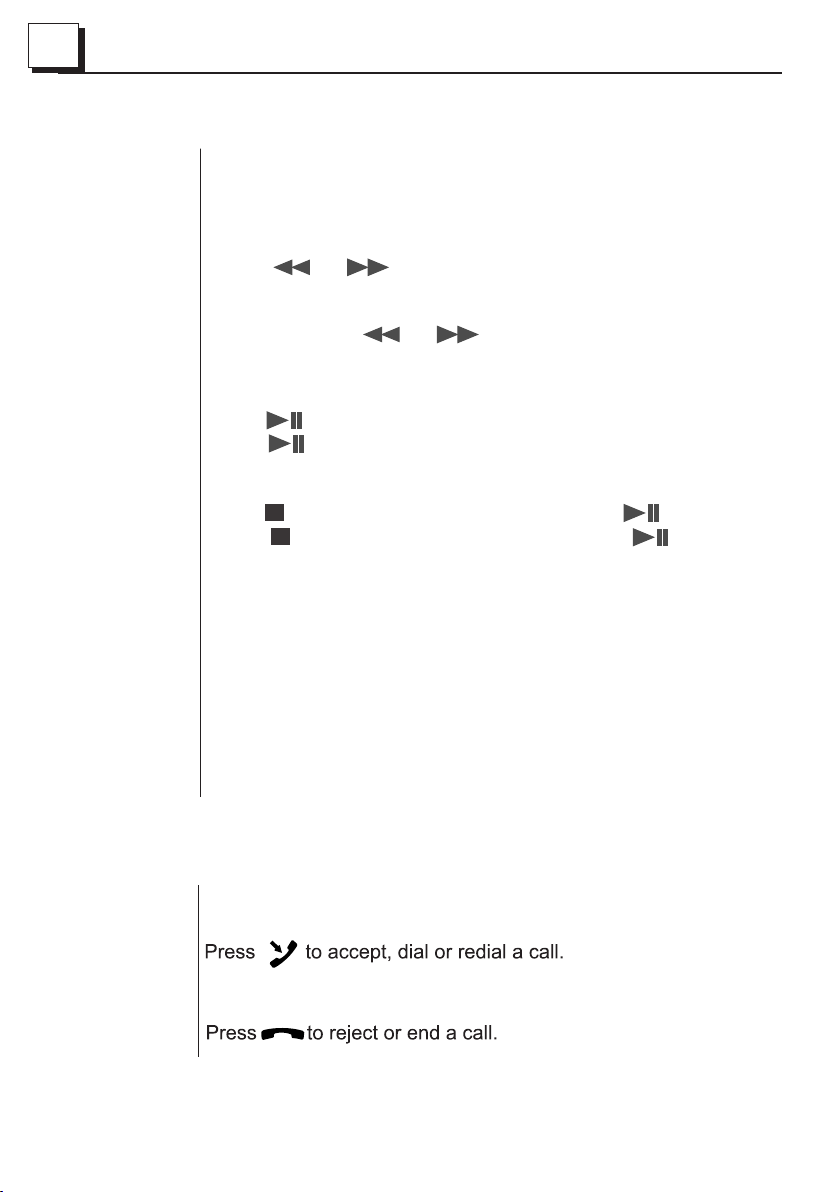
Disc USB Opreation
Insert Disc
Eject Disc
Track Select
Fast Forward
and Backward
Pause
Playback
Stop
Playback
Repeat
Random
With the label fa cing up ,inse rt a disc into the disc slot.
The disc will automati cally b egin pl ayback.
Press EJECT to eject the disc.
Press or b utton t o move to
previous or nex t track /chap ter.
Press and hold or b utton to
fast backward s or forw ard.
Press to t empor arily s top the playback.
Press ag ain to re sume pl ayback.
Press once to pau se the pl aybac k,press to resume;
press twice to st op play back, then press to start
playback from t he begi nning o f the first chapter/track.
Press RPT t o repea t current playing track/chapter.
Press RPT t o resum e.
Press RDM t o play ea ch track in random order.
Press RDM a gain to r esume.
Title
In DVD/VCD mode ,pres s TITLE on the remote control to
display the tit le list .
BLUETOOTH OPERATION
Dial or
Accept Call
Reject or
End Call
Press the 1 butto n on the fr ont pan el to accept, dial or redial
a call.
Press the 2 butto n on the fr ont pan el to reject or end a call.

1.7 Wiring Diagram
11
1
BLACK
HDMI O UT (A RC )
BLACK
WIRI NG C ON NECTI NG S OC KET A
WIRI NG C ON NECTI NG S OC KET B
The Description of the Wiring Diagram for Socket A and Socket B
WIRING C ON NE CT IN G SO CK ET A
WIRING HARNESS PLUG A WIRING H AR NE SS P LU G B
WIRING C ON NE CT IN G SO CK ET B
 Loading...