

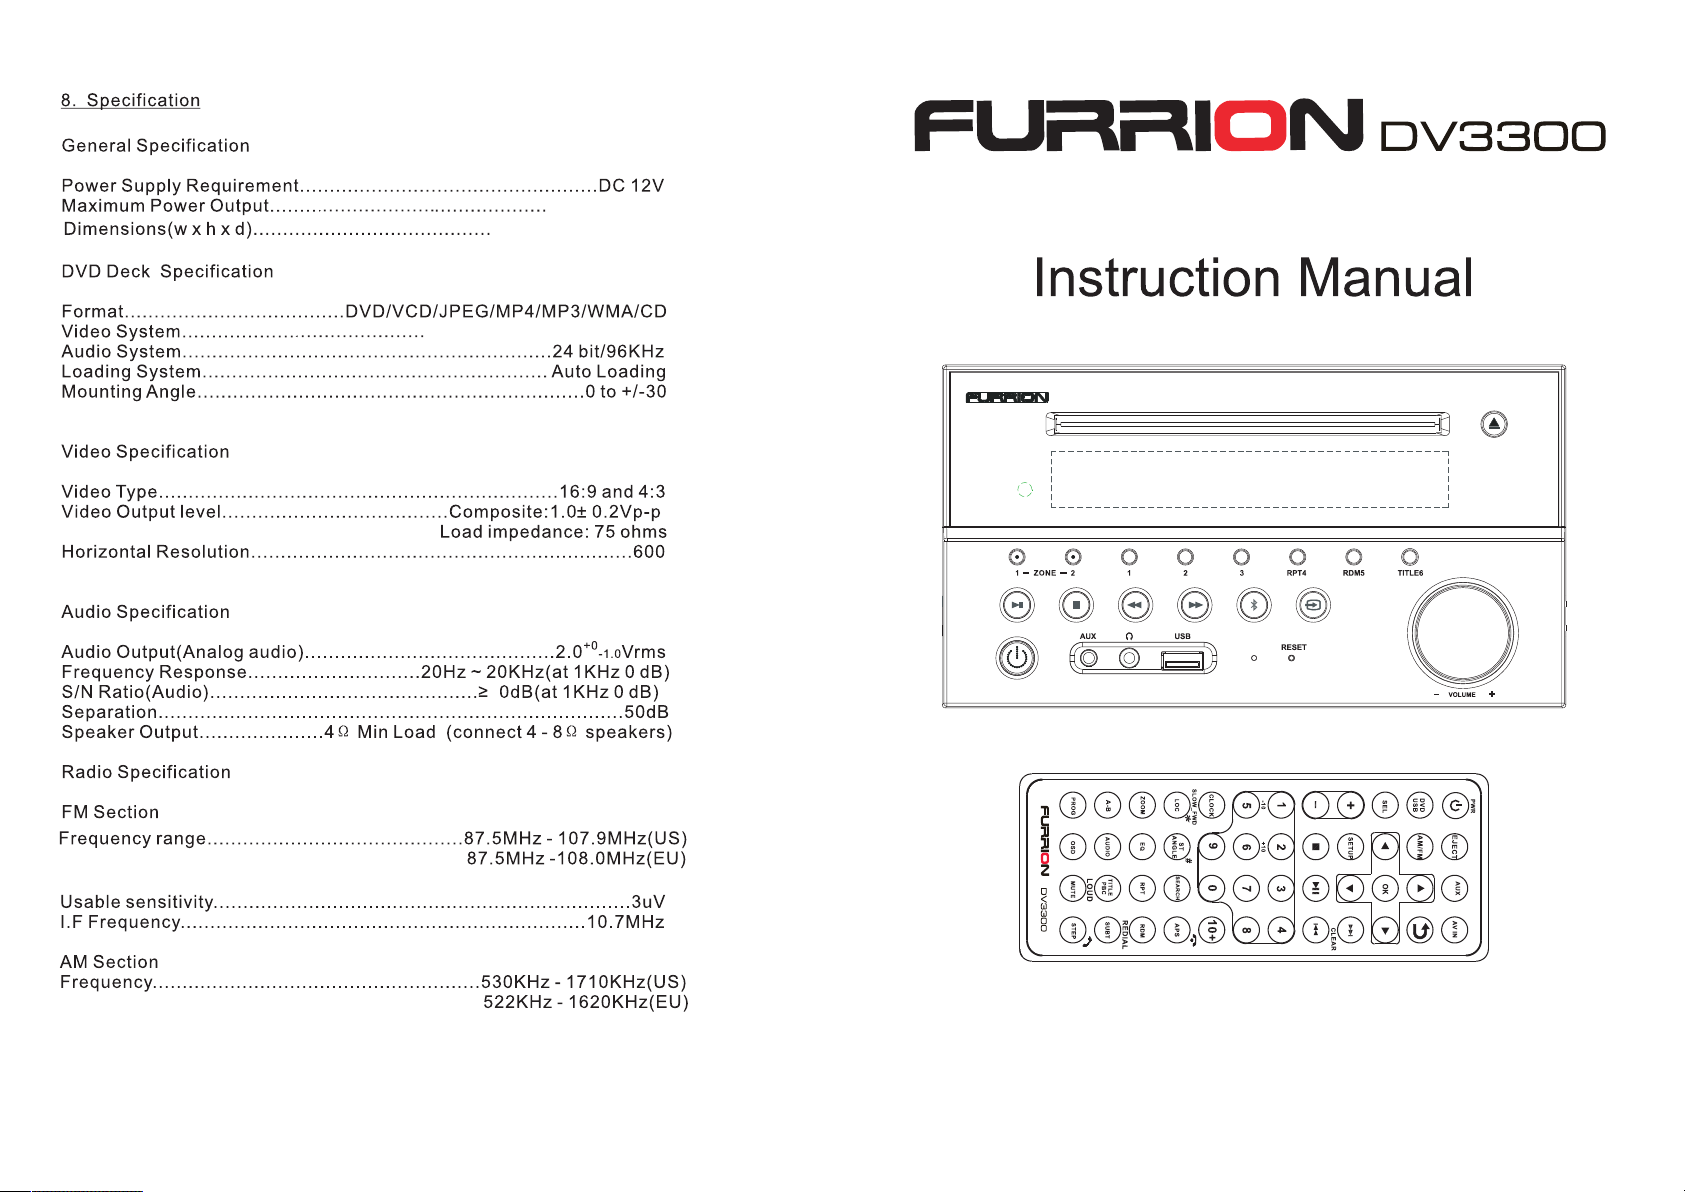
Page 1
4x24W RMS
200x110.5x190mm
NTSC/PAL/AUTO( op ti on al )
6
87.5MHz - 108.0MHz(AUS)
522KHz - 1710KHz(AUS)
ARC
Entertainment System
Page 2
Page 3
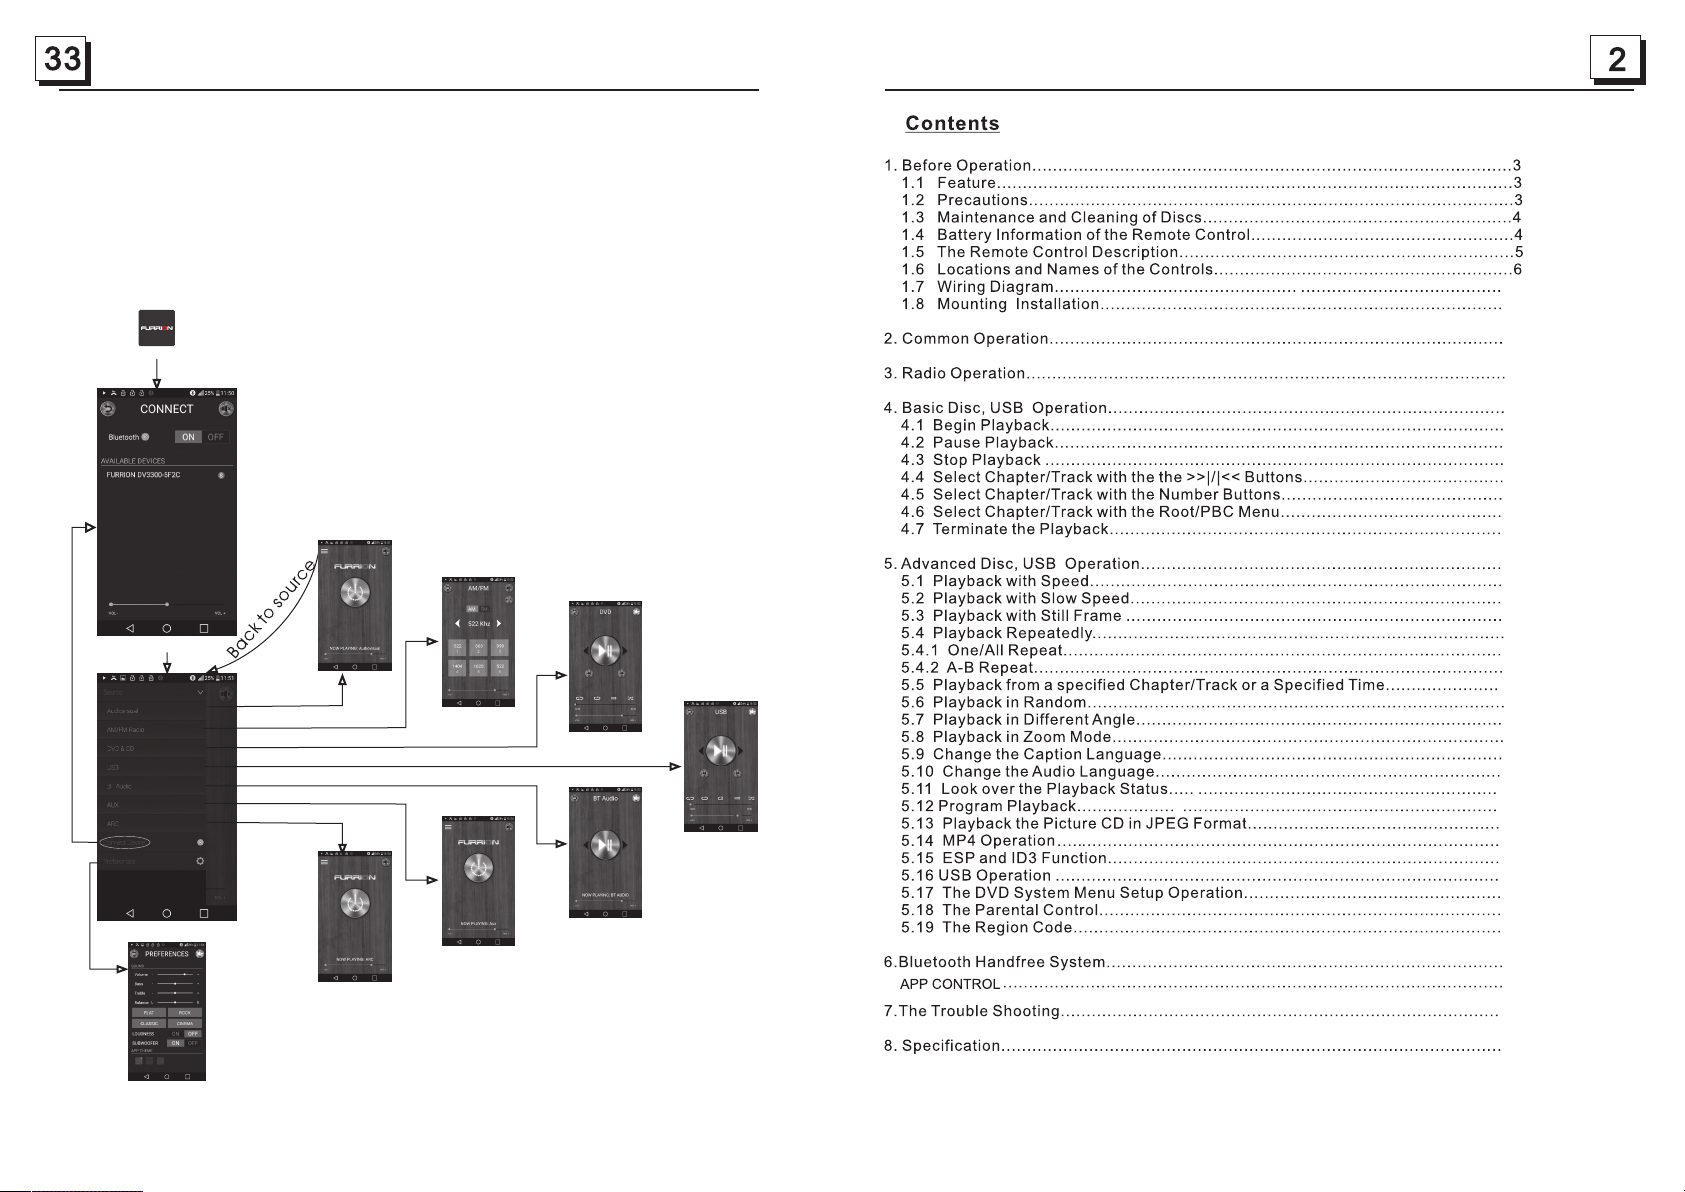
APP CONTROL (support both iOS and Android system):
1. APP Installation.
Another way to control the unit instead of using the front panel or remote control, you can use
your smartphone. You will need to install the “ES Control” app onto your mobile device.The app
will need to be downloaded from Google Play(Android smartphone) or App Store(iPhone). Do a
search for “ES Control” and proceed to download. Install per the app instructions.
2. Turn on the BT function of your smartphone and pair with DV3300.
3. Under BT connection,tap the “ES Control” icon to enter the APP connection interface,then select
the name “FURRION DV3300-XXXX”(Android smartphone) or “DV3300-4.0-XXXX"(iPhone) to
enter it.(where X can be any character A-Z or number 0-9 )
4. Use the APP to control the DV3300 freely.
APP ICON
ES Co ntrol
Aud iov isu al
11
14
15
17
18
18
19
19
19
19
19
20
CON NEC T
SOU RCE
Preferences
ARC
RADIO
AUX
DVD/CD
BT
USB
20
20
20
21
21
21
21
22
22
22
22
23
23
23
24
24
25
25
25
25
29
30
31
33
34
35
Page 4
Bluetooth with NFC function
Auxiliary inputs on front and rear
USB input with charging function
2 zone multi room audio output
1 x HDMI output with ARC function
2 x RCA audio/video outputs for connecting 2 additional TVs
1 x subwoofer output
Clock
terminated with an insulated end to avoid wires shorting or earthing which
(1) Short press T EL b utton on the re mo te control or 1 but to n on the front pane l,
it will show last p ho ne number on th e LC D, then it will exe cu te the dialing.
(2) Short press R ED IAL butto n on the remote con tr ol, it will dial th e la st phone number.
5.1 Incoming ca ll r inging, short p ress TEL button o n th e remote contro l or 1 b utton on
the front panel t o ac cept the call .
5.2 To re je ct Incoming cal l ri nging, short pr es s HANG UP button on t he r emote contr ol
or 2 button on the fr on t panel to REJE CT the call.
5.3 During a phon e ca ll, short press H AN G UP button on th e re mote control
or 2 button on the fr on t panel to end th e ca ll.
Note: When an i ncoming cal l is p resent the ca ller ’s phone nu mb er will be disp la yed
on the screen .
6. To play an aud io file from an ext ernal Bluetoo th d evice(mob il e phone) on the w al l
mount Stere o
After the device ha s be en paired success fu lly and Wall mount St er eo screen display s
LINK OK
If your mobile devi ce s upports A2DP you wi ll t hen be able to stream m us ic from
your Bluetooth de vi ce so it can be played by s te reo speaker.
You mu st select on yo ur m obile Blu et ooth devi ce t o play the audi o through Blu etooth.
If your mobil e device supp orts AVRCP then you wi ll b e able to contr ol the basic ph one
audio outpu t functions b y the Wal l mount Ste re o control s. E g.Play Pa us e.
Note : Du ring othe r modes(e xecpt B lu etoot h co nvers at ion), p ress BT MOD E button on t he
front pan el to switc h the mod e wi th othe rs .
Do not attempt to disassemble or adjust this product, contact a service center
for assistance.
7.To setup your S te reo using NFC (o nly support mob ile phone with NF C function)
(1) Turn on the NF C fu nction of you r mo bile phone and ma ke sure the scree n is active
and unlocke d.
(2) With the NF C de tection are a of y our phone tou ch w ith the NFC detec tion area
of the Stereo , yo u can connect o r di sconnect yo ur m obile phone wit h the Stereo
convenien tl y.
Note: For the f ir st time pair an d co nnect, it wil l as k you to input a pa ss word.
The pas sw ord is “0000”.
Page 5
4
2)Select th e it em of Finding the B lu etooth Devi ce a nd enter it. Aft er f inishing the
finding,i t wi ll show the name of t he Bluetooth De vi ce FURRION DV3 30 0-XXXX
(where X can be a ny c haracter A-Z or n um ber 0-9 ) .Sele ct i t and enter it, t he n it will
show an inter fa ce that ask you to in put a password, i np ut the passwo rd 0 000 and
enter it. Then it will tell yo u pa ir OK.
mobile
Note: Press BT MO DE b utton on the fr on t panel to switch b et ween Unit and Pho ne
during BT pho ne conversati on .
corre ct
corre ct
wrong
wrong
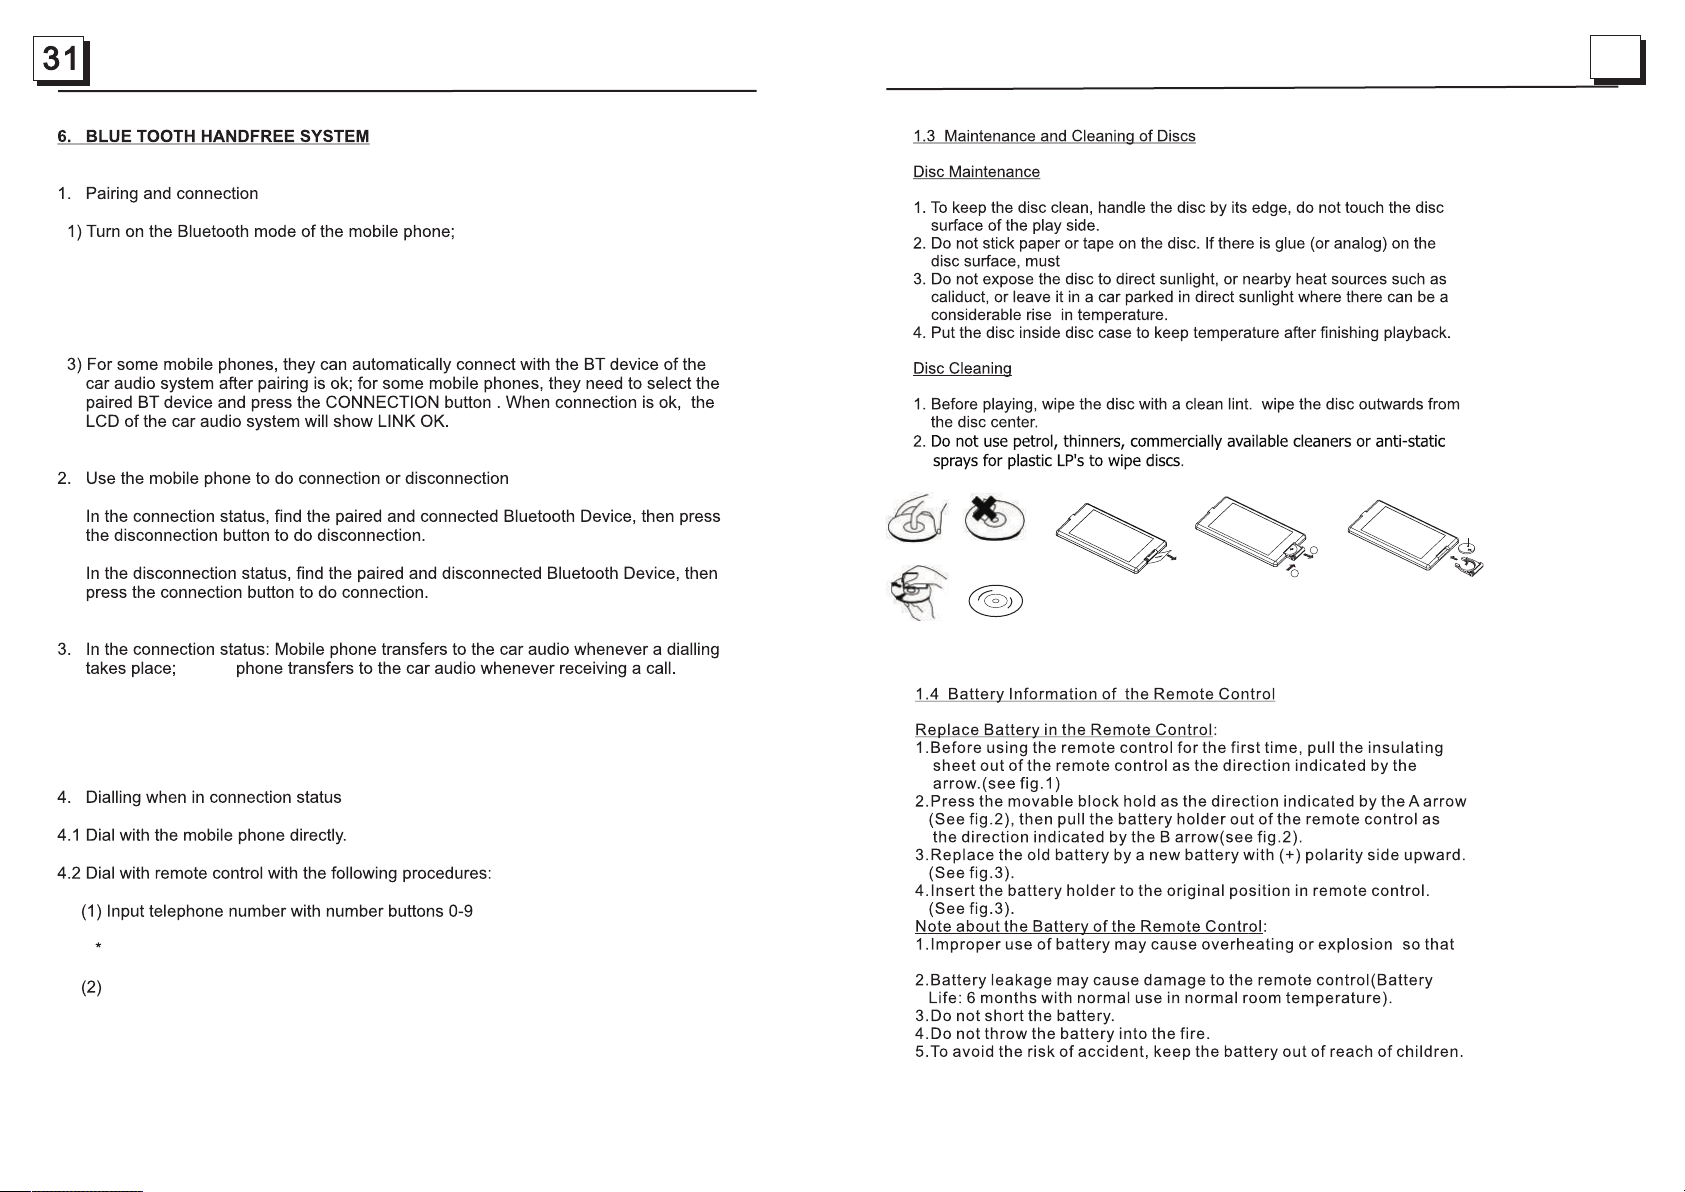
wipe it off before u sing.
Fig .1
Fig .2
B
A
Fig .3
+ side up
Short press C LE AR button to ca nc el the wrongl y in put number if n ec essary
Short press T EL button to ex ecute the diali ng.
result in injury or f ir e.
,
Page 6
30
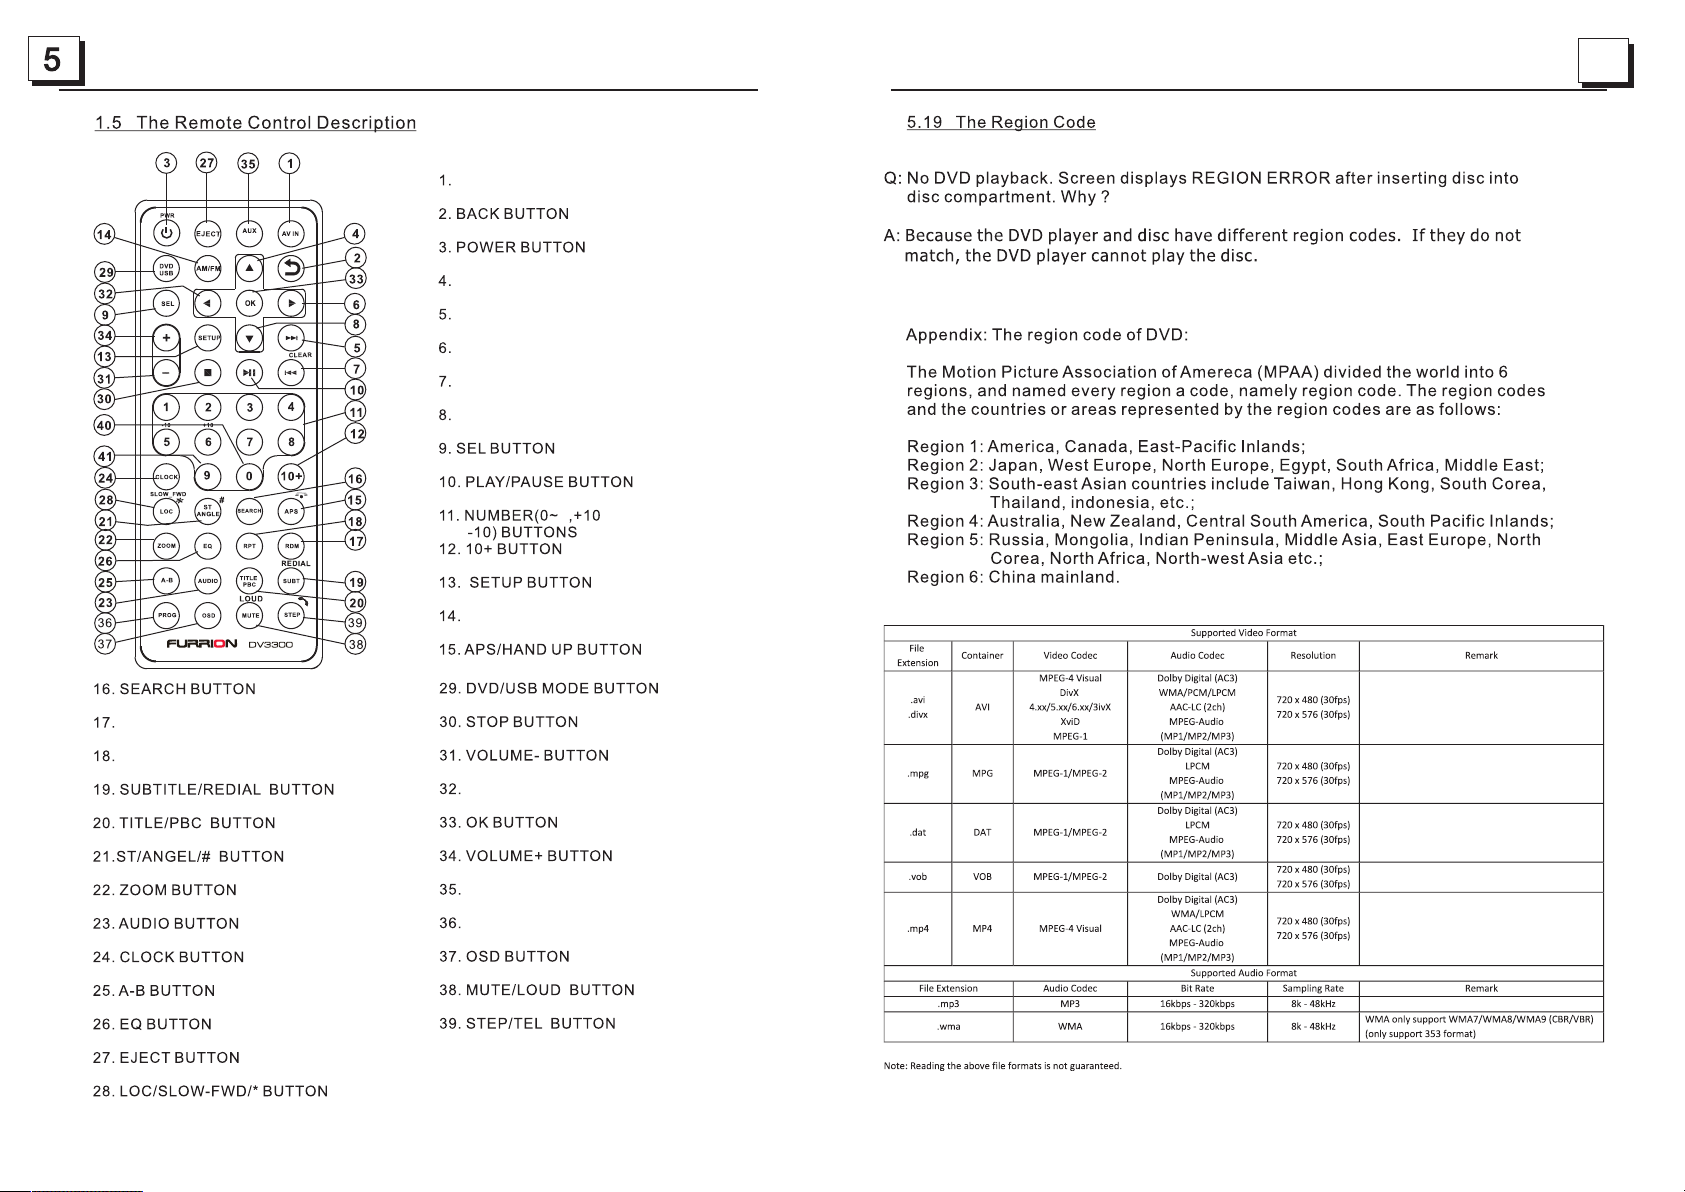
AV IN MODE B UTTON
ARC
UP BUTTON
NEXT BU TTO N
RIGHT B UTTON
PREVI OUS BUTTON/C LEAR BU TTON
DOWN BU TTON
9
AM/FM R ADIO MODE B UTTON
RANDO M BU TTO N
REPEAT BUTT ON
LEFT BU TTO N
AUX/A RC MODE B UTTON
PROGR AM BUTTON
Page 7

1.6 Locat io ns and Name s of t he Contro ls
22
1
21
the relative content of SYSTEM SETUP menu for details.
2
3
4
5
6
8
7
1 2
AUX
9
USB
11
10
1. DISC SLOT
2. IR REMOTE CONT RO L SEN SO R
3. 1/2/3 BUTTON
1 TEL /REDIAL BUTTO N
2 HANG UP BUT TON
4.ZONE 1/2 BUTTON
5.
/ BUTTON
6.PLAY/PAUSE BUTTO N
RADIO REGION SE LE CT BUTTON
7.POWER BUTTON
8.STOP BUTTON
AS/PS BUTTON
9.AUX IN SOCKET
3
12 13
20
19
RPT4
RESE T
14
15
RDM5
TITL E6
VOLUM E
16 17
18
10.HEADPHON E SO CKET
11. USB SOCK ET
12.BT MOD E BU TTON/EQ B UT TON
13.MICROPHO NE I N
14.RESET BU TTON
15.INPUT MO DE BUTTON /B AN D BUTTON
16.5/RANDOM B UT TON
17.VOL KNOB/SEL BUTTO N
18.6/TITLE BU TTON
19.4/REPEAT BUTTO N
20.LCD DISPLAY
21.EJECT BU TTON
22.NFC DETECT IO N AREA
Page 8

28
Descri pt io n of icons on the LCD display
1.USB icon
After inserting a USB stor ag e, U SB icon is lit.
2.DVD icon
After inserting a DVD disc , DV D ic on is lit.
3.DISC icon
After inserting a disc(D VD ,V CD,CD), DISC icon is lit.
4.MP3 icon
If a disc or a USB storage co nt ai ns MP3 format files, MP3 icon i s li t.
5.RDM icon
In random playback mode , RD M ic on is lit.
6.MONO icon
In mono audio mode, MONO ic on i s li t.
7.STEREO
In stereo audio mode, STE RE O icon is lit.
8. ZONE <1> icon
When selecting the ZONE 1 s pe ak ers, ZONE <1> icon is lit.
9.ZONE <2> icon
When selecting the ZONE 2 s pe akers, ZONE <2> icon is lit.
10. FOLDER icon
If a USB storage contai ns m or e than 2 folders(contains p la yb ack file),
FOLDER icon is lit.
11.PLAYBA CK icon
During disc or USB playba ck s ta te, PLAYBACK i co n is l it.
12.PAUSE ico n
During disc or USB pause pl ay ba ck state, PAUS E ic on i s lit.
13.MUTE icon
When the Stereo is on mute st at e, MUTE icon is lit.
14. BLUETOO TH i co n
When the Stereo is paired a nd c on nected successfully, BLUETOOT H ic on i s lit.
15.FLAT ic on
When selecting flat aud io m od e playback, FLAT icon is lit.
16.ROCK icon
When selecting rock aud io m od e playback, ROCK icon is li t.
17.CLASSIC icon
When selecting classi c au di o mode playback, CLASSI C ic on i s lit.
18.CINEMA icon
When selecting cinema a ud io m ode playback, CINEMA ico n is l it .
19.LOUD icon
When selecting loud aud io m od e playback, LOUD icon is li t.
20.RPT icon
In repeat playback mode , RP T icon is lit.
CONTRAST
It is for adjusting the contrast of the video output
HUE
It is for adjusti ng t he h ue of the video out pu t.
SATURATION
It is for adjusti ng t he s aturation of th e vi de o output.
SHARPNESS
It is for adjusti ng t he s harpness of the v id eo o utput.
5.17.5 SPEAKER SE TU P
DOWNM IX
It is for selecti ng y ou r desired sound effect when ther e is n o center speaker
and subwoofer. There are 3 modes: LT/RT, ST ER EO, VSS.
LT/RT: Whe n playing a disc with P RO L OGIC Dolby stereo e ffect, choo se t he
item, so it will ou tp ut a udio signal with vi vi d theater eff ect.
STEREO: If you ch oo se t he item, when out pu tt ing audio signa l wi th 5 .1 channels,
it will output th e le ft a nd right channe ls o f si gnal ; when outpu tt in g audio signal
with 2 channels , it w il l output the comm on 2 c ha nnels of stereo s ig na l.
VSS: If you choos e th e it em, when playin g a di sc r ecorded with 5.1 ch an nels,
the main channe l sp ea kers can output aud io s ignal with VSS effect.
5.17.6 DIGITAL SETUP
DYNAMIC RANGE
After selecti ng t he c ompression mode o f LI NE OUT, set the item, s o yo u ca n
adjust the linear c om pression ratio. I f yo u set it to be FULL, th e Pe ak -to-Peak
value of the audio si gn al is the minimum; if y ou s et it to be OFF, the Pe ak -toPeak value is the max im um.
DUAL MONO
It is for selecti ng a d es ired audio output m od e for the left and ri gh t wa ys of signal.
It is mainly for Ka ra ok e of Ac3. Ther e ar e 4 modes in all as follo ws :
STEREO, MONO L, M ON O R, MIX MONO.
Page 9

27
an audio language.
Pres s MUTE button on the re mote control to mut e the audio,
“MUT E” icon will flash in t he display. Press MUTE again t o cancel.
Pres s INPUT MODE button r epeatedly to sele ct Tuner,Disc(Aft er
inse rting a disc),USB (After insertin g a USB storage), BT,AR C
AV IN and AUX mode.
Pres s EQ button to select b etween CINEMA,R OCK CLASSIC,
FLAT.
AUDIO OUT:
For the selection o f Di gital output meth od . SP D IF/OFF ,SPD IF /RAW,SPD IF/ PC M.
HDMI AU DIO:
AUTO: Sel ec te d to output the audio a ut omatically by RAW or PCM type.
PCM: Selected to ou tp ut the audio by PCM typ e. .
Pres s and hold CLOCK butt on on the remote cont rol to enter
CLOC K Setup, rotate VOL KNOB to adj ust hour. Press it bri efly
to min ute setting and rot ate it to adjust. Onc e time is set,the uni t
will a utomatically se t after a few seconds .
Pres s and hold LOUD butto n on the remote contr ol to turn on
or off LOUD mode.
Pres s ZONE 1 or 2 button to sel ect speaker outpu t,
“ZON E <1>” or “ZONE <2>” wi ll display
on the L CD once it is selecte d.
RESE T
Page 10

9
Area Frequency
Selection
Storing and Recall in g
Station Presets
Stereo/Mono
Pres s an d hold PLAY/PAUSE button f or 5 s econds
to set AM/F M radio region(Euro pe /USA1/USA2/AUST-
RALI A)
Pres s or b utton to move radio
freq ue nce down or up one step at a ti me.
Pres s an d hold or button to
sear ch t he next strongest sta ti on automatically.
Pres s an d hold INPUT MODE butto n on t he front panel
or bri ef ly press AM/FM button o n th e remote control to
sele ct b etween FM1,FM2.FM 3, AM1,AM2.
Pres s an d hold APS button on the re mote control or
pres s an d hold button on the fron t pa nel to
auto ma tically store the six s tr ongest station in the
curr en t band.(Up to18 FM stat io ns and 12 AM stations
can be s to red)
Brie fl y Press APS button on the r em ote control or press
button o n the front panel to scan p re sets 1-6 in
the cu rr ent band.
Pres s LO C button on the remote co nt rol to turn on/off
LOC.
In FM mode ,press ST button on the r em ote control to
sele ct t he Stereo or Mono sound m od e.
26
For the DVD System Me nu , there are 6 setup pages i n al l. They displ ay a s follows:
5.17.1 SYSTEM SET UP
TV SYSTEM
The Stereo suppor ts o utput of various TV system.
If your TV ha s on ly N TSC or PAL system, the sc re en will blink and becom e
colorless when a wr on g TV system is se le ct ed. In this case go to TV SYSTEM
and select NTSC, PAL or AU TO to match the sys te m of your TV.
RESOLUTION
The setup is for reso lu tion level selectio n.
TV TYPE
The setup item is for m at ching TV scre en s ize.
4:3 PS: Choose the it em w hen connecting a TV s et with 4:3 screen. W he n playing
the pictures with 1 6: 9 size, the left and ri gh t pa rts of the video will b e cu t out,
and display in full s cr een.
4:3 LB: Choose the it em w hen connecting a TV s et with 4:3 screen. W he n playing
the pictures with 1 6: 9 size, the top and bot to m pa rts of the TV s cr ee n will be
turned into a black s qu are respectively.
16:9: Choose the it em w hen connecting a TV s et with 16:9 wide scr ee n.
PASSWORD
This setup item is fo r lo cking or unlocking th e ra ting level of the Par en ta l Control.
The defaulted sta te i s locked. The d ef au lted password is 00 00 .
You ca n se t a new password that you l ik e: Select the PASS WORD item and then
press the > button to e nt er it, then input the o ri gi nal password 0000 , an d th en
press the OK button t o un lock it. Press the > bu tt on t o enter it again, the n in pu t
a new password that y ou l ike and then press the OK b ut ton to make it effe ctive.
Before the other pe rs ons see the Manual, you s ho uld get the passwor d in m in d
and cut out the part of PASSWORD in the Man ua l.
RATING
The item is for setti ng a n ew rating level of the Pa re ntal Control.
1. Select the PASS WORD item and then pr es s the > button to enter it, t he n input
the password ment io ned above, and then pre ss t he OK button to unloc k th e
setting of the rati ng l evel of the Parenta l Co nt rol.
2. Select the RATI NG item and then pres s th e > button to enter it, the n us e the
direction butto ns t o select your desired r at ing level, then pre ss t he O K button
to confirm.
3. Select the PASS WORD item again and t he n press the > button to ent er i t, then
input the passwor d, a nd then press the OK butt on t o lock the new settin g of
the rating level of t he P arental Control.
DEFAULT
This item is for maki ng a ll setup items change b ac k to original statu s.
Page 11

25
10
3. During J PE G playbac k, p ress one of t he d irectio n bu ttons to ch an ge the angl e of
viewing p ic ture that i s di splayin g as f ollows:
>: 90 deg cw; < : 90 deg ccw; ^: UP <-->DOW N; v : LEFT<-- >R IGHT
During JP EG p layback , pr ess PROG bu tt on on the rem ot e control t o ch ange the mo de o f
refresh p ic ture. Dur in g JPEG play ba ck, press S TOP but ton to stop pla ying and retu rn
to the root m en u.
* During JP EG p layback , th e followi ng b uttons ar e no t availab le : SLOW- FW D,
SUBT, TITLE /P BC, ANG LE, STEP, AU DI O, RDM an d A-B.
* In JPEG mod e, the other o pe rations a re s ame as ones i n MP 3/WMA mo de .
5.14 MP4 Op er ation
1. The ro ot m enu is disp la yed on TV w hen beginni ng to switch on D ISC mode, the n it will
automat ic ally play t he f irst file .
During pl ay back, pre ss S TOP but to n to stop pla yi ng and retu rn t o the root me nu .
2. When dis pl aying the r oo t menu, pre ss t he direct io n buttons t o se lect your d es ired
FOLDER or f il e, then pre ss O K or PLAY/ PAUS E bu tton to ope n th e FOLDER, o r
play the se le cted file .
When disp la ying the ro ot m enu, you ca n al so use the nu mb er button s to s elect the
serial nu mb er of the fil e an d play the fi le .
* ANGLE, PR OG , RDM, and TI TL E/PBC but to ns are not va li d.
* The oth er f unction s ar e same as one s in D VD disc; bu t th e “Repeat ” fu nction is s am e
as one in MP3 /W MA.
5.15 ESP an d ID3 Funct io n
There i s ES P funct ion for all for mats of discs .
In MP3/WM A mod e, during p la yback, th e in formati on o f the file na me , folder na me ,
song s titl e, a rtist and a lb um will be sc ro lling on th e LC D display. As l ong as the
current p la ying MP3 mu si c contain s re levant ID 3 ta g informa ti on in versi on 1 .0/2.0
format, t he 3 i tems unde rl ined abov e wi ll be scrol li ng on the LCD d is play; oth er wise,
they will n ot .
Disc USB Opreation
Inse rt Disc
Eject Disc
Track Select
Fast F orward
and Ba ckward
Pause
Playback
Stop
Playback
Repeat
With t he label faci ng up,inser t a disc into the d isc slot.
The di sc will autom atically be gin playback.
Press EJECT t o eject the dis c.
Press or button to mo ve to
previous or next tr ack/chapt er.
Pres s and hold or but ton to
fast b ackwards or f orward.
Press to temporar ily stop the pl ayback.
Press again to resu me playback .
Press once to pause t he playback ,press to res ume;
pres s twice to stop p layback, th en press to sta rt
playback from the b eginning of the first chap ter/track .
Pres s RPT to repe at current pl aying track /chapter.
Pres s RPT to resu me.
5.16 USB Op er ation
Power on th e DV D player, th en i nsert the U SB s torage, t he n the monit or w ill displ ay
the root me nu o f the USB sto ra ge
This de vi ce suppor t pi cture(J PG f ormat), au dio(MP3 o r WM A format) an d Video
(MP4 form at ), all the op er ations ar e sa me as ones of t he c orrespo nd ing forma t.
NOTE: 1 .P layba ck file f or mat is no t guara nt eed.
2.The U SB i nput wi th char gi ng func tion (n ot a ll prod ucts ca n be c harge d from th e un it)
5.17 Th e DV D System Me nu S etup Oper at ion
1. Press SE TU P button on t he r emote con tr ol to acces s th e DVD Syste m Me nu on
the monit or.
2. Ther e ar e 6 setup pag es i n all for the S ys tem Menu. P re ss the > or < but to n to select
an desire d se tup page.
3. Press th e ^ or v b utton to se le ct an setup i te m in the sele ct ed setup pa ge .
4. Press th e > bu tton to ent er t he setup it em . Then pr es s the v or ^ butt on to select a
desired m od e of the setu p it em, final ly p ress OK but to n to confir m it .
* Press the < b ut ton to retu rn t o the upper l ev el.
* Press SET UP b utton on th e re mote cont ro l again or us e th e directi on b uttons to h ig hlight th e
item of the E XI T SETUP and t he n press OK bu tt on to exit th e Sy stem Menu .
Random
Press RDM to play e ach track in ra ndom order.
Press RDM again to resume.
Title
In DVD /VCD mode,p ress TITLE on t he remote con trol to
display the title l ist.
BLUETOOTH OPERATION
Dial or
Accept Call
Reject or
End Call
Press the 1 button on t he front pane l to accept, di al or redial
a call.
Press the 2 button on t he front pane l to reject or en d a call.
Page 12

11
1.7 Wiring Diagram
1
2
24
5.12 Program Playback
It allows you to enter the order in w hi ch y ou w ant some chapters/tracks in
DVD/VCD/MP3/WMA/CD disc t o pl ay.
1 During playback, press PROG but to n on t he remote control to enter a program
interface as follows:
For DVD discs /MP3/WMA For VCD /C D di sc s
WIRIN G CONNE CTI NG SOCK ET A
BLACK
HDMI OU T(A RC)
BLACK
WIRIN G CONNE CTI NG SOCK ET B
The Description of the Wiring Diagram for Socket A and Socket B
WIRIN G CON NEC TING SO CKE T A
WIRING HARNESS PLUG A WIRIN G HAR NES S PLUG B
WIRIN G CON NEC TING SO CKE T B
2 Use the direction buttons to mo ve c ur so r onto the desired place for inputtin g
the sequence number.
3 Use the number button to input de si re d se qu ence number of title/chapter/
track with desired sequence .
4 Use the direction button to mov e cu rs or o nto PL AY, th en p re ss O K button on the
remote control to play the prog ra mm ed t itles/chapters/tracks in prog ra mm ed
order;only pressing PLAY/PAU SE b ut to n also can play the programmed
titles/chapters/track s in p ro gr ammed order.
* To exit program playb ac k, f ir stly press STOP but to n, t he n press PLAY/PAUSE
button to enter sequence play ba ck ; or p ress PROG button twice again.
* To remove the all progr am me d se quence numbers, move the cursor o nt o
CLEAR, then press OK button on th e re mo te c ontrol.
* To change the program me d se qu ence, move the cursor onto the item y ou
want to change, input the desir ed s eq ue nce number.
* During VCD playback, if it is in PB C ON m od e, a t the same time of entering
the state of program playback , it t ur ns o ff PBC mode.
5.13 Playback the Picture CD in J PE G Fo rm at
1. The root menu is dis pl ay ed o n the monitor when beginning to switc h on D IS C
mode. At the time, it plays MP3/WM A fil e. ( TI TL E or PBC button is not
available).
In the root menu, the left file sor t ic on i s fo r MP3/WMA file; the middle file sort
icon is for VIDEO file; the right f il e so rt i con is for JPEG file. If one of these 3
file sort does not exist, you can n ot m ov e cu rsor onto the file sort icon.
2. When displaying the root menu, p re ss t he direction buttons to select your
desired FOLDER, file or file so rt i co n, t hen press OK or PLAY /PAUSE
button to open the FOLDER, or pla y th e se le cted file, or play only this sort of
file. When displaying the roo t me nu , yo u can also use the number buttons to
select the serial number of the f il e an d pl ay the file.
When you select a JPEG file sort ic on , pr es s one of the direction buttons to
select the first JPEG file, the n pr es s th e v button to select the desired JPEG f il e,
finally press OK or PLAY/PAUSE but to n to d is play the JPEG picture in full screen
from the selected JPEG pictur e.
Page 13

23
PIN NO
COLOR
FUNCTION
1
YELLOW
+12V DC MEM ORY B+
2
PINK
AUTO ANT EN NA
3
RED
+12V DC IGN IT ION SWITC H
4
BLACK
POWER GRO UN D(-12DC )
12
ZOOMx2,ZOOMx3 ,Z OO Mx4,ZOOMx1/2, ZO OM x1/3,ZOOMx1/4 ,Z OO M OFF.
Press one of the dire ct io n buttons to select the a re a you want to enlarge.
5.9 Change the Captio n La nguage
When playing DVD disc s, p ress SUBT button on the r em ote control repeate dl y to
select the langua ge o f th e caption or turn off t he caption.(depen d on t he disc used.)
When playing VCD/ MP 3/ WMA/CD discs, the but to n is not available.
5.10 Change the Au di o Language
1. When playing DVD d is cs , press AUDIO button on t he r emote control
repeatedly to sel ec t th e desired language ty pe (depend on the disc use d)
2. When playing VCD d is cs , press AUDIO button on t he r emote control repea te dl y to
select the sound mo de o f th e MONO L, MONO R, and Stere o, n o language function .
3. When playing CD/WM A/ MP3 discs, AUDIO on the r em ote control button is i nv al id.
5.11 Look over t he P layback Status
1. When playing DVD d is cs , press OSD button on the r em ote control
repeatedly to tur n on /o ff the playba ck s ta tus. When it is on, it wi ll d is play the
information suc h as : th e serial number of the pl ay ing title, the serial n um be r
of the playing chap te r, th e elapsed time of the pla yi ng chapter, the remain in g
time of the playing c ha pt er, the elapsed time of th e pl aying title, the rema in in g
time of the playing t it le , etc.
WIRING CONNECTING SOCKET A VIEW
PURPLE
PURPLE
WIRING CONNECTING SOCKET B VIEW
2. When playing VCD /C D di scs, press OSD button o n th e remote control
repeatedly to tur n on /o ff the playba ck s ta tus. When it is on, it wi ll d is play the
information suc h as : th e serial number of the pl ay ing track, the elapse d ti me
of the playing trac k, t he r emaining time of the pl ay ing track, the elapse d ti me
of the disc, the rema in in g time of the disc.
Page 14

13
W
22
5.5 Playback from a specified chapter/track or a specified time
K
C
U
R
T
R
O
T
A
O
B
,
V
M R
O
R
S F
E
R
I
1. When playing DVD discs, press SEARCH button on the remote control to
display an interface and highlight the title item, then use the number buttons
to input the serial number of the title; use the direction buttons to highlight the
chapter item,then use the number buttons to input the serial number of the
chapter; finally press OK or PLAY/ PAUSE button to play the selected
chapter.
ZON E 1 SPEAK ER WIRE S
ZON E 1 SPEAK ER WIRE S
1
ZON E 2 SPEAK ER WIRE S
1
ZON E 2 SPEAK ER WIRE S
2
2
2. When playing VCD/MP3/WMA/CD discs, press SEARCH button on the remote
control to display an interface and highlight the track item, then use the number
buttons to input the serial number of the track; finally press OK or PLAY/ PAUSE
button to play the selected track .
5.6 Playback in Random
When playing DVD/VCD(PBC OFF)/MP3/WMA/CD discs, press RDM
button to switch between RANDOM ON /RANDOM OFF. When in RANDOM
ON mode, it will play in random.
5.7 Playback in Different Angle
1. When playing VCD/MP3/WMA/CD discs, ANGLE button on the remote
control is not available.
2. When playing DVD discs, press ANGLE button on the remote control
repeatedly to view in different angle.(This function is only for the DVD
discs with ANGLE function)
5.8 Playback in Zoom Mode
In DVD/VCD mode, during playback, press ZOOM button on the remote
control repeatedly to enlarge a certain area of the images on the screen
with these multiples:
ZON E 1 SPEAK ER WIRE S
S F
R
O
M S
T
E
R
E
O C
O
N
N
E
C
T
O
R
ZON E 1 SPEAK ER WIRE S
E
R W
I
R
E
ZON E 2 SPEAK ER WIRE S
D S
P
E
A
K
ZON E 2 SPEAK ER WIRE S
P
O
W
E
R
A
N
Page 15

21
14
During slow forward, press PLAY/PAUSE button to resume normal
playback.
The function is only for video.
5.3. Playback with still frame
If the unit is currently running DVD.VCD disc,press STEP button on the remote
control consecutively to display the still frame forward with step by step.
Press PLAY/PAUSE button to resume normal playback.
5.4 Playback Repeatedly
5.4.1 ONE/ALL Rep ea t
1. In the mode of DVD disc playback:
Press RPT button to select REP CHAPTER, REP TITLE, REP ALL
or REP OFF.
2. In the mode of VCD(PBC OFF)/CD disc playback:
press RPT button to select REP ONE, REP ALL or OFF.
When it is in the state of PBC ON, during VCD disc playing, the RPT
button is not available.
3. In the mode of MP3/WMA disc playback:
Press RPT button to select REP ONE, REP DIR , RE P ALL or O FF.
1. 8 Mounting Inst allation
Lo ca tion
* Ch oo se a m ou nting location away f ro m hu mi d ar ea s, w ater sources, appli an ce s or a ny
eq uipment that can radiat e he at .
* Se le ct an area on a wa ll o r cabinet which is free fro m ca bl e, f ue l or b ra ke lines and ensure
th e ar ea b ehind the wall mount ster eo h as a v en t ho le o r if i t is a n en cl os ed b ox a nd h as
ad equate room around the rear of the unit f or c oo li ng.
* En su re w hen the stereo is mounted in the cut out th at t he w ir es a t th e re ar o f the unit are not
pr essed against the heat sink
In stalling th e unit.
* Be fore fina lly insta ll ing the u nit, conn ect the wir ing tempo rarily an d make su re
th e unit and the syste m work prop erly.
*F ix the unit w ith screw a ccordin g to following dia gram.
SCREW
PLASTIC SHELL
OF THE FRONT PANEL
5.4.2 A-B Repeat
Press A-B button on the remote control if you want to repeat a specific
segment on a disc that you define:
1. Press A-B button at a point (A) where you want it to be the start point
of the repeat segment. P ress A-B button again at a point (B) where you
want it to be the terminal point of the repeat segment. Then it will play the
segment repeatedly.
2. To cancel A-B repeat mode and resume normal playback, press A-B
button for the third time.
Note:
During DVD/VCD/MP3/WMA/CD playback, points A and B must be within the
same track.
SCREW
1. Remove plastic shell of the front panel from the unit.
2. Fix the unit with 4 pieces #8 pan head self tapping screw.
3. Put back plastic shell of the front panel to the unit.
Page 16

15
20
2. Common Operation
1.Tur ni ng O n an d Off the unit
By pressing the power button will turn on or enter standby mode
2.Selecting a Source:
1) Use INPUT MODE button on the front panel.
Press INPUT MODE button repeatedly to select Tuner,Disc(After
inserting a disc),USB(After inserting a USB storage), BT,ARC,AV IN and AUX
mode.
Note: By pressing BT button to enter into the Bluetooth mode directly.
Press again to back to current playback mode.
2) Use the corresponding buttons on the remote control.
DVD / USB - once a DVD or USB is inserted into the unit, the unit will
automatically switch to display this source menu. Press this function button on
the remote control to select DVD if a disk is already inserted and the unit is
playing from another source.
AM/FM - by pressing this button on the remote control will scroll through the FM1
FM2, FM3, AM1, AM2.To switch this units AM/FM receiver between USA and
Europe frequencies press and hold PLAY/PAUSE button on the front panel
for 5 seconds until the region is displayed on the screen.
AUX/ARC-by pressing this button on the remote control allow you to scroll
through the AUX /ARC inputs fitted to the stereo.
AUX- connection on the front of the unit (Audio and Video input function)
ARC- connection a TV with Audio Return Channel function to the HDMI Output
Jack on the rear of the unit.(Make sure the ARC function of the TV is ON)
*For details on settings and operating your TV, refer to the instruction manual for
the TV.
*About Audio Return Channel (ARC)
ARC allows audio signals to travel both ways under HDMI Control. If you
connect a TV that supports HDMI Control and ARC to the unit with a single HDMI
cable, you can output video/audio to the TV or input TV audio to the unit.
In case noises are produced from the speakers connected to the unit because
TV audio signals input to the unit via ARC are not supported by the unit, use the
TV’s speakers.
AV IN - connection on the rear of the unit to connect an external audio source.
3.Volume Adjust
Rotate VOLUME KNOB clockwise to increase volume, rotate anticlockwise to
reduce volume.
In VCD mode
1. When starting to turn on the PBC function, it will play from the beginning of
the disc till it display the PBC menu on TV screen if the disc include the PBC
menu.
2. Press the number buttons to select your desired track to play.
In MP3/WMA mode
1. The root menu is displayed on the monitor screen all the time(and the TITLE/
PBC button is not available).
2. Press the direction buttons to select your desired FOLDER, then press
OK or PLAY/PAUSE button to open the FOLDER, and then press the
direction buttons to select your desired file, finally press OK button to
play the selected file.
In CD mode, the TITLE/PBC button is disabled.
4.7 Terminate the Playback
1. Press EJECT button to eject disc.
2. Press and hold POWER button on the front panel or briefly press
POWER button on the remote control to turn off the Stereo.
5. Ad va nc ed D is c, U SB O pe ra ti on
5.1 Playback with Speed
During normal playback, Press and hold or button on
the front panel repeatedly or press and hold / button on the remote
control repeatedly to fast backwards or forwards at the following
speeds: x2, x4, x8,x16, x20, normal.
During speed playback, press PLAY/ PAUSE button to resume normal
playback.
5.2 Playback with Slow Speed
During playback , press SLOW_FWD button on the remote control to execute
the Slow Forward function.
With each consecutive pressing of SLOW_FWD button, the playback
speed decreases. The speed levels in Slow Forward as follows:
x1/2,,x1/3,x1/4,x1/5,x1/6,1/7,normal.
Page 17

19
4.2 Pause Playbac k
When playing DVD/ VC D/CD/MP4/MP3/ WM A dis cs, press PLAY/PAUSE
button on the front p an el or remote contro l to p au se the playback, pr es s
PLAY/PAUSE butto n ag ai n to resume normal pl ay ba ck.
4.3 Stop Playback
When playing DVD/ VC D/MP3/WMA/CD di sc s, p ress STOP b ut to n once to
pause the playbac k, t hen press the PLAY button to resu me t he normal playback;
press STO P bu tt on twice to stop the pl ay back, then press PL AY/PAUS E
button to start pla yb ack from the beginn in g of t he first chapter/ tr ack.
4.4 Select Chapte r/ Tra ck w it h the or button or / Bu tt on
Press or button o n th e fr ont panel or / Butt on
on the remote contr ol d uring playback to s el ec t the previous or nex t ch apter/track
to playback.
Note: Press or bu tt on o r press / Button
multiple times to a dv ance multiple cha pt er s/tracks backwa rd o r forward .
16
4. Mute
Press MUTE button to mute what ever source is playing and display mute on the screen.
Press MUTE button again to release unit from mute.
5. Clock Set
1) To displ ay t he clock on t he L CD displa y, press CLO CK button on th e remote cont rol
2) To adjus t or s et the cloc k, p ress and ho ld C LOCK butt on o n the remot e co ntrol
until the c lo ck set feat ur e is displa ye d on the LCD di sp lay of the st er eo then use
VOLUME KN OB o n the unit or + a nd - o n the remot e co ntrol to ad ju st the time ,
push in the v ol ume knob on t he s tereo or pr es s SEL but to n on the remo te c ontrol
to change f ro m setting h ou rs to minut es . Once time i s se t the stere o wi ll automa ti cally
set after a f ew s econds if n ot p ressing a ny f unction s.
6. To select a preset EQ mode
Press and hold BT button on the front panel or briefly press EQ button
on the remote control to select the preset music equalizer curves:
CINE MA, ROCK, CLA SSIC, FLAT. The sound eff ec t wi ll b e ch an ge d.
7. To turn on/off LOU D mo de
Press and hold LOUD button on the remote control to turn on/off LOUD
mode.
4.5 Select Chapte r/ Tra ck w it h the Number Button s
When playing DVD/ VC D(PBC OFF)/MP3/ WM A/ CD discs, press one o f th e
1~9 and the 0 number bu tt ons to directly sel ec t an d play the 1st to 9th tra ck /
chapter.
If you want to play the t ra ck/chapter with s er ia l number bigger tha n 9,
use the 10+, 1~9 and 0 bu tt on. For example 1, to p la y th e 13th track/
chapter, firstly p re ss the 10+ button onc e, t he n press the 3 button. F or
example 2, to play th e 34 th track/chapte r, fi rs tly press the 10+ but to n for 3
times, then press t he 4 b utton.
Note: pressing an d ho lding the +10 or -10 bu tt on s will allow you to mov e up o r
down 10 tracks at a tim e( only for MP3/WMA) .
4.6 Select Chapte r/ Tra ck w it h the Root/PBC Menu ( If t he disc includes th e
root/PBC menu)
When playing DVD di sc s:
1. Press TITLE butt on o n the remote contro l to d is play the title list .
2. Press the direct io n buttons to select y ou r de sired title, and th en p ress OK
or PLAY/ PAUSE button t o op en the root menu of the s el ected title.
3. Press the direct io n buttons to select y ou r de sired chapter, fin al ly press the
OK or PLAY/PAUSE butto n to p lay the selected ch ap ter.
During playback , pr essing TITLE butt on o n fr ont panel or long pre ss ing
TITLE button on the r em ote can directly di sp la y the root menu of the ti tl e that is
playing.
8.To adjust the sound equalizer curves
To adjust the sound equalizer curves, briefly and repeatedly press SEL button on
the remote control to select the sound equalizer curves of VOL, BAS(without
preset EQ), TRE (without preset EQ), BAL,BEEP(ON/OFF), then rotate the
VOL KNOB on the front panel or press the + and - on the remote control to adjust
level.
9.ZONE 1/2 BUTTON
Pressing ZONE 1 or 2 button will turn on or off the audio source in each of
the different areas which your speakers are connected. “ZONE <1>” or
“ZONE <2>” will display on the LCD once it is selected.
10.Press the button or TITLE button up to the previous menu.
11.To reset the unit
When the display is incorrect, or the function buttons are not effective or
sound is distorted, then use a sharp point to press RESET button, that
will make the unit be reset to factory default and re-instate the correct functions.
Page 18

17
18
3. Radio Operation
1. FREQUENCY SELECT
In RADIO mode. Press and hold PLAY/PAUSE button for about 5 seconds to
select your desired frequency EUROPE,USA1,USA2 or AUSTRALIA.
2. AM/FM BUTTON
In RADIO mode, press and hold INPUT MODE button on the front panel or briefly press
AM/FM button on the remote control to select your desired radio band of FM1, FM2, FM3,
AM1, AM2 , and the selected band will be displayed on the LCD of the front panel.
3. TUNE/SEEK UP/DOWN
In RADIO mode:
1) Press and hold or button on the front panel or Press and hold
/ button on the remote control to automatically search down/up for a available
station from the current frequency.
2) Press or button on the front panel or press / button on
the remote control to manually search up or down with step by step for your desired station
from the current frequency.
4. APS BUTTON
In RADIO mode:
1) When pressing and holding APS button on the remote control or press and hold button on
the front panel, the radio searches from the lowest frequency and checks the signal strength level
until 1 cycle search is finished.And then the 6 strongest stations are preset to the corresponding preset
number memory bank. The AS operation is implemented in each bank of the selected band.
When the AS operation is finished, it will resume broadcasting
on the M1.(It can store 3x6 stations for FM and 2x6 stations for AM in all)
2) When briefly pressing APS button on the remote control or press button on the front panel,
the radio searches for each preset station from the M1. When the field strength level is more than
the threshold level of the stop level, the radio holds at that preset number for a few seconds with
releasing mute, and then searches again.
After finishing a circle of searching, it will stop searching on the M1.
NOTE: In FM band, FM1,FM2,FM3 is checked one at a time.
In AM band, AM1, AM2 is checked one at a time.
5. PRESET STATION [ 1-6 ] BUTTONS
In RADIO mode:
1) To memorize the current frequency on the current band, press and hold any one of the six preset
buttons (1-6) .
2) To recall the preset memory on the current band, press one of the preset buttons [1-6] .
6. STEREO/MONO BUTTON
Press ST button on the remote control to select the STEREO or MONO sound mode for
FM band.
4 Basic Disc, USB Operation
4.1 Begin playback
1. Press POWER button briefly to turn on the DVD player.
After turning on the DVD player, please turn on the monitor, and ensure that
the video output of the monitor is the video input from the DVD player
connected with the monitor.
? Common Question
Q: There is not anything is displayed on TV scr ee n when the DVD player is
turned on. How to solve the problem?
A: Ensure that the TV was set to right video input(not TV c ha nn el ); f or
example, if you make VIDEO1 INPUT of TV a nd D VD p la ye r co nn ec te d
with each other, then you need set TV to VIDEO1.
2. Insert a disc into the DISC SLOT(Label surface up).
! NOTE
1. For some discs that are seriously scratched or poor manufacturing or
recording quality, it may not play.
2. If the player can not read disc under normal condition, please try to
eject and reload the disc again.
3. Remark:
1) In addition to normal CD and DVD, this unit supports to play CD-R,
CD-R/W, DVD-R and DVD-R/W as well; however, depending on the
conditions of the recording equipment, recording program or the disc
itself, some CD-R, CD-R/W, DVD-R or DVD-R/W may not play.
2) When dealing with CD-R, CD-R/W, DVD-R or DVD-R/W recording,
too high recording speed may result in poor signal quality and therefore,
it is recommendable to select as lower as possible recording speed.
7. LOC BUTTON
1) In RADIO mode, when the signal of the distance radio station are very weak and the receiving
effect is bad during tuning, press LOC button on the remote control to turn off the LOC function,
then tune again for the distance radio station;
2) In RADIO mode, when the signals from the local radio stations are too strong, this could lead
to interference. press LOC button on the remote control to turn on the LOC function,
Re-tune for the local station required.
 Loading...