

Page 1
P3PC-3182-01ENZ0
ScanSnap N1800 Network Scanner
Operator's Guide
Page 2

Contents
Copyright .................................................................................... 18
Introduction ................................................................................ 24
■ About This Manual .............................................................. 25
■ Opening Help ....................................................................... 28
Chapter 1 Overview ................................................................... 30
1.1 Scanner Features ............................................................ 31
■ Basic Uses for Scanned Data ........................................... 31
■ Configure and Manage with Ease ..................................... 32
■ Advanced Security Measures ............................................ 32
1.2 Part Names and Functions ............................................. 34
■ Front View ......................................................................... 34
■ Rear View .......................................................................... 35
■ Removable Parts ............................................................... 36
1.3 User Types and Operations ........................................... 37
1.3.1 Operations with Administrator Right....................................... 38
■ System Settings ................................................................ 38
■ Network Settings ............................................................... 39
■ Monitoring & Management ................................................ 42
■ Device Test ....................................................................... 44
■ Job Mode Settings ............................................................. 44
1.3.2 Regular User Operations ....................................................... 45
1.4 System Requirements .................................................... 46
1.4.1 Requirements for Admin Tool ................................................ 46
1.4.2 Requirements for Central Admin Console.............................. 47
1.4.3 Requirements for Central Admin Server ................................ 48
1.4.4 Requirements for Related Servers......................................... 49
1.4.5 Network Requirements for Central Admin.............................. 52
2
Page 3

1.4.6 Scanner Requirements for Central Admin ............................. 52
1.4.7 Port Number List .................................................................... 53
Chapter 2 Basic Scanner Operations ......................................56
2.1 Turning the Power On/Off .............................................. 57
2.1.1 Turning the Power On ............................................................ 57
2.1.2 Turning the Power Off............................................................ 58
2.2 Using the Scanner Buttons ............................................ 59
■ Using the Power Button ..................................................... 59
■ Using the Top Cover Scan Button ..................................... 61
2.3 Using the LCD Touch Panel ........................................... 62
2.4 Using the On-Screen Keyboard ..................................... 63
■ Showing/Hiding the On-Screen Keyboard ......................... 63
■ Using the On-Screen Keyboard ........................................ 64
■ Keyboard Layout ............................................................... 64
Chapter 3 Administrator Operations (Overview) ..................... 66
3.1 Operating and Managing Scanners ............................... 67
3.2 Required Scanner Function Settings ............................ 69
Chapter 4 Administrator Operations
(LCD Touch Panel and Admin Tool) ........................... 74
4.1 Windows .......................................................................... 75
4.1.1 Administrator Windows via the LCD Touch Panel ................. 75
4.1.2 Administrator Windows via the Admin Tool............................ 76
4.2 Administrator Login ........................................................ 78
4.2.1 Administrator Login: via the LCD Touch Panel ...................... 78
■ When Automatic Login is Not Set ...................................... 78
■ When Automatic Login is Set ............................................ 79
3
Page 4

4.2.2 Setting up for Administrator Access via the Admin Tool ........ 80
■ Checking the Internet Explorer Cache Settings ................ 80
■ Setting the Internet Explorer Trusted Sites ....................... 81
■ Installing the Admin Tool ................................................... 82
■ Uninstalling the Admin Tool ............................................... 86
4.2.3 Administrator Login: via the Admin Tool ............................... 87
4.3 Setting the System Settings with the Installation
Wizard on the LCD Touch Panel .................................... 90
4.4 Setting the Setting Mode for the LCD Touch Panel ..... 92
4.5 Configuring the System ................................................. 94
4.5.1 Setting the Scanner Name ..................................................... 94
4.5.2 Setting the Language............................................................. 96
4.5.3 Setting the Region/Timezone................................................. 97
4.5.4 Setting the Date/Time ............................................................ 98
4.5.5 Setting the Keyboard.............................................................. 99
4.5.6 Managing Certificates .......................................................... 100
■ Importing a Certificate File .............................................. 100
■ Deleting a Certificate File ............................................... 101
4.6 Setting the Scan Options ............................................. 102
4.6.1 Setting the Multifeed Detection Method ............................... 102
4.6.2 Adjusting the Scan Starting Position
(Offset/Magnification)........................................................... 105
4.6.3 Setting General Scanner Settings........................................ 106
4.7 Configuring the Login-Related Settings ..................... 107
4.7.1 Setting the Login Settings .................................................... 107
4.7.2 Setting the Time to Standby Mode ...................................... 110
4.7.3 Changing the Admin Password............................................ 112
4.8 Configuring the Network Settings ............................... 113
4.8.1 Giving the Scanner an IP Address ....................................... 113
4.8.2 Setting the DNS Server........................................................ 115
4.8.3 Setting the WINS Server...................................................... 116
4.8.4 Setting the NTP Server ........................................................ 117
4.8.5 Setting the Proxy Server ...................................................... 118
4.8.6 Checking the Network Connection with a Ping Test ............ 119
4
Page 5

4.8.7 Checking the Network Operating Status .............................. 121
■ Checking the Network Status .......................................... 121
■ Setting the Link Speed/Duplex Mode .............................. 122
■ Setting Wake On LAN ..................................................... 122
4.8.8 Setting the Admin Connection.............................................. 123
4.8.9 Setting a Central Admin Server............................................ 125
4.9 Configuring the LDAP Settings ................................... 127
4.9.1 Setting the Login LDAP Server ............................................ 127
■ LDAP Search Target ....................................................... 129
4.9.2 Setting the e-Mail LDAP Server ........................................... 133
4.9.3 Setting the LDAP Search Parameters.................................. 135
4.10 Configuring the e-Mail-Related Settings ..................... 137
4.10.1 Setting the e-Mail Server...................................................... 137
4.10.2 Configuring Settings for Sending e-Mail............................... 139
4.10.3 Setting a File Name Format for When Attaching Scanned
Data to e-Mail....................................................................... 140
4.11 Setting the Fax Server .................................................. 142
4.12 Setting Folders for Saving Scanned Data .................. 143
4.12.1 Setting the Network Folders................................................. 143
■ Registering a Network Folder (Network Tree) ................. 144
■ Registering a Network Folder (Network Path) ................. 146
■ Renaming a Network Folder ............................................ 147
■ Removing a Network Folder ............................................ 147
■ Viewing the Network Folder Details ................................ 148
4.12.2 Setting the FTP Server Folders............................................ 149
■ Registering an FTP Server Folder ................................... 149
■ Changing the FTP Server Folder Settings ...................... 151
■ Removing an FTP Server Folder ..................................... 151
■ Viewing the FTP Server Folder Details ........................... 152
4.12.3 Setting the SharePoint Folders ............................................ 153
■ Renaming a SharePoint Folder (Display Name) ............. 154
■ Removing a SharePoint Folder ....................................... 155
4.12.4 Setting a File Name Format for When Saving Scanned
Data...................................................................................... 156
5
Page 6

4.13 Setting the Network Printers ........................................ 159
■ Checking the Printer Drivers ........................................... 160
■ Setting the Printer Properties .......................................... 161
■ Registering a Network Printer (Network Tree) ................ 164
■ Registering a Network Printer (Network Path) ................ 167
■ Renaming a Network Printer ........................................... 168
■ Removing a Network Printer ........................................... 169
■ Viewing the Printer Details .............................................. 169
4.14 Viewing the Scanner Details ........................................ 170
4.14.1 Viewing the System Status .................................................. 170
4.14.2 Viewing the Usage Status .................................................... 171
■ Viewing the Status of Consumable Parts ........................ 171
■ Resetting the Usage Counter .......................................... 171
4.14.3 Viewing the Status of Installed Options................................ 172
4.14.4 Managing the User Log........................................................ 173
■ Viewing the User Log Details .......................................... 173
■ Downloading the User Logs in CSV Format .................... 174
■ Clearing the User Logs .................................................... 174
4.14.5 Managing the System Log ................................................... 175
■ Viewing the System Log Details ...................................... 175
■ Downloading the System Log in CSV Format ................. 176
■ Clearing the System Log ................................................. 176
4.15 Managing the User Data Store and System
Settings .......................................................................... 177
4.15.1 Maintaining the User Data Store .......................................... 177
■ Backing up the User Data Store ...................................... 178
■ Restoring the User Data Store ........................................ 180
■ Clearing the User Data Store .......................................... 180
4.15.2 Maintaining the System Settings.......................................... 181
■ Downloading the System Settings in CSV Format .......... 181
■ Backing up System Settings ............................................ 182
■ Restoring the System Settings ........................................ 183
■ Resetting Factory Defaults .............................................. 184
6
Page 7

4.16 Maintaining the System ................................................ 185
4.16.1 Updating the Scanner's System Software............................ 185
4.16.2 Checking for New Updates .................................................. 187
■ Checking for New Updates Manually .............................. 187
■ Checking for Updates at Scanner Startup ....................... 188
■ Requesting e-Mail Notification When a New Update is
Available ......................................................................... 188
4.16.3 Maintaining Add-in Modules................................................. 189
■ Installing an Add-in Module ............................................. 189
■ Uninstalling an Add-in Module ......................................... 190
■ Viewing the Add-in Status ............................................... 190
■ Uploading an Add-in Settings File ................................... 191
■ Setting the On-Screen Keyboard When Running
an Add-in ....................................................................... 191
4.16.4 Setting the Information Output Level.................................... 192
4.16.5 Obtaining Technical Support................................................ 193
4.16.6 Setting the Destination for Alert Notifications....................... 194
4.16.7 Getting a Screenshot on the LCD Touch Panel ................... 195
4.17 Setting a Job Sequence ............................................... 197
4.17.1 Job Setting Quick User Guide.............................................. 199
4.17.2 Setting a Job Sequence....................................................... 201
■ Adding a Job Sequence .................................................. 201
■ Cloning a Job Sequence ................................................. 207
■ Editing a Job Sequence .................................................. 207
■ Deleting a Job Sequence ................................................ 208
■ Filtering Job Sequences .................................................. 208
■ Filtering the LDAP List ..................................................... 209
4.17.3 Setting a Job Menu .............................................................. 210
■ Adding a Job Menu ......................................................... 210
■ Cloning a Job Menu ........................................................ 214
■ Editing a Job Menu .......................................................... 214
■ Deleting a Job Menu ....................................................... 215
■ Viewing the Detailed Settings for a Job Menu ................. 215
4.17.4 Setting a Job Group ............................................................. 216
■ Adding a Job Group ........................................................ 216
■ Editing a Job Group ......................................................... 220
■ Deleting a Job Group ...................................................... 220
■ Viewing the Detailed Settings for a Job Group ................ 221
7
Page 8

■ Assigning Job Menus to Users Not Included in a Job
Group ............................................................................. 221
■ Filtering the LDAP List ..................................................... 223
4.18 Messages ...................................................................... 224
4.18.1 Administrator Window Messages......................................... 225
Chapter 5 Administrator Operations
(Central Admin Console) ........................................... 226
5.1 Function List ................................................................. 227
5.2 Central Admin Console Window ................................. 230
5.3 Central Admin Console Quick Guide .......................... 231
5.4 Pre-settings for Using Central Admin Console .......... 233
5.4.1 Installing the Central Admin Server Software ...................... 233
■ Importing the Certificate .................................................. 237
5.4.2 Installing the Central Admin Console ................................... 238
5.4.3 Setting up a Firewall for the Central Admin Server .............. 240
5.4.4 Configuring the Scanner Settings for Central Admin
Management ........................................................................ 240
5.4.5 Uninstalling the Central Admin Server Software/Central
Admin Console..................................................................... 241
■ Uninstalling the Central Admin Server Software ............. 241
■ Uninstalling the Central Admin Console .......................... 241
5.5 Central Admin Server Login: via the Central Admin
Console .......................................................................... 242
5.6 Setting the Central Admin Server ................................ 245
■ Setting the Operating Environment ................................. 245
■ Changing the Admin Password ....................................... 248
■ Clearing the User Roaming Data .................................... 250
5.7 Setting Scanner Configuration .................................... 251
■ Importing Scanner Configuration ..................................... 254
■ Exporting Scanner Configuration .................................... 255
■ Adding Scanner Configuration ........................................ 256
8
Page 9

■ Cloning a Scanners Configuration ................................... 257
■ Editing Scanner Configuration ......................................... 257
■ Deleting Scanner Configuration ...................................... 258
■ Viewing the Scanner List ................................................. 259
5.8 Monitoring and Maintaining the Scanner Network .... 260
5.9 Updating the System .................................................... 261
5.10 Installing an Add-in ....................................................... 263
5.11 Updating the Scanner Settings .................................... 266
5.12 Setting the Job Mode .................................................... 269
5.13 Viewing the Update Status Lists ................................. 272
5.14 Viewing the Scanners Operating Status ..................... 274
5.15 Viewing Event Log ........................................................ 275
■ Viewing Event Log ........................................................... 275
■ Downloading Event Log .................................................. 276
■ Clearing All Events .......................................................... 276
5.16 Collecting and Exporting Audit Logs .......................... 277
5.16.1 Collecting Audit Logs ........................................................... 277
5.16.2 Exporting Audit Logs............................................................ 278
5.16.3 File Format of Audit Logs ..................................................... 279
5.17 Maintaining Central Admin Server Settings ............... 281
5.17.1 Backing Up Central Admin Server Settings ......................... 281
5.17.2 Restoring Central Admin Server Settings ............................ 283
5.17.3 Obtaining Technical Support on the Central Admin Server . 284
5.17.4 Migrating Data to an Updated Version of the Central Admin
Server Software ................................................................... 285
5.18 Messages ....................................................................... 287
5.18.1 Central Admin Console Messages....................................... 287
5.18.2 Event Log............................................................................. 288
■ System Event Log ........................................................... 288
9
Page 10

5.18.3 Backup/Restore Command Messages................................. 290
■ Information ...................................................................... 290
■ Error ................................................................................ 290
5.18.4 Audit Log Export Command Messages................................ 295
Chapter 6 Regular User Operations ...................................... 296
6.1 Loading Documents ..................................................... 297
6.1.1 How to Load Documents...................................................... 297
6.1.2 Loading Documents Using a Carrier Sheet.......................... 300
6.2 Using LCD Touch Panel Windows: Regular User ...... 303
6.2.1 [Main Menu] Window............................................................ 303
6.2.2 [Job Menu] Window.............................................................. 304
6.2.3 Regular User Settings Overview .......................................... 305
6.3 Logging in: Regular User Mode ................................... 306
6.4 Sending the Scanned Data by e-Mail .......................... 309
6.4.1 Selecting an e-Mail Target from the e-Mail Address Book... 313
6.4.2 Adding an e-Mail Target to the e-Mail Address Book........... 317
6.4.3 Editing an e-Mail Target in the e-Mail Address Book ........... 321
6.4.4 Deleting an e-Mail Target from the e-Mail Address Book .... 323
6.5 Sending the Scanned Data by Fax .............................. 324
6.5.1 Selecting a Fax Number from the Fax Number List ............. 327
6.5.2 Adding a Contact to the Fax Number List ............................ 329
6.5.3 Editing a Contact in the Fax Number List............................. 331
6.5.4 Deleting a Contact from the Fax Number List ...................... 332
6.6 Printing the Scanned Data ........................................... 333
6.6.1 Scaling ................................................................................. 337
6.6.2 Positioning............................................................................ 341
6.6.3 Print Side.............................................................................. 343
6.7 Saving the Scanned Data to a Network Folder .......... 344
6.8 Saving the Scanned Data to a SharePoint Folder ...... 348
10
Page 11

6.9 Setting the Scan Options ............................................. 356
6.9.1 Carrier Sheet........................................................................ 362
6.9.2 Color Mode........................................................................... 363
6.9.3 Paper Size............................................................................ 364
■ Long Page Mode ............................................................. 365
6.9.4 Resolution ............................................................................ 366
6.9.5 Scan Mode........................................................................... 367
6.9.6 Document Feed Direction .................................................... 368
6.9.7 File Format........................................................................... 369
6.9.8 Searchable PDF................................................................... 371
6.9.9 Setting a Keyword for the PDF............................................. 373
6.9.10 PDF Password ..................................................................... 378
6.9.11 Compression........................................................................ 380
6.9.12 Brightness ............................................................................ 383
6.9.13 Contrast................................................................................ 384
6.9.14 Sharpness............................................................................ 385
6.9.15 Dropout Color....................................................................... 386
6.9.16 Background Removal........................................................... 387
6.9.17 Blank Page Skip................................................................... 388
6.9.18 Page Orientation .................................................................. 389
6.9.19 Multifeed Detection (Layer and Length)............................... 392
6.9.20 Edge Cropping ..................................................................... 393
6.10 Enabling/Disabling the Scan Viewer ........................... 395
6.11 Editing the Scanned Data in the Scan Viewer ............ 398
6.11.1 Viewing Scanned Data......................................................... 398
6.11.2 Rotating a Scanned Page .................................................... 399
6.11.3 Sorting Pages....................................................................... 399
6.11.4 Scanning an Additional Page ............................................... 400
6.11.5 Deleting a Scanned Page .................................................... 401
6.11.6 Editing Marked Characters to Be Set as Keywords ............. 401
6.12 Checking the User Log ................................................. 402
6.13 Maintenance .................................................................. 403
6.14 Processing a Job .......................................................... 405
6.14.1 Enabling/Disabling the Message Screen ............................. 408
6.14.2 Changing a File Name (for Save/e-Mail Attachment)........... 410
11
Page 12

6.14.3 Checking the Number of Sheets to Be Scanned.................. 411
6.15 Changing a User Password ......................................... 414
Chapter 7 Scanner Care ......................................................... 416
7.1 Cleaning Supplies and Part to Clean .......................... 417
■ Cleaning Supplies ........................................................... 417
■ Which Parts and When .................................................... 418
7.2 Cleaning the Exterior of the Scanner .......................... 419
■ Cleaning Parts Other Than the LCD Touch Panel .......... 419
■ Cleaning the LCD Touch Panel ....................................... 419
7.3 Cleaning Inside the Scanner ........................................ 420
7.4 Cleaning the Carrier Sheet ........................................... 425
7.5 Replacing Parts ............................................................. 426
7.5.1 Part Numbers and Replacement Cycle................................ 426
7.5.2 Checking the Consumable Alert Status ............................... 427
7.5.3 Replacing the Pad Assy ....................................................... 428
7.5.4 Replacing the Pick Roller ..................................................... 430
7.5.5 Purchasing the Carrier Sheet............................................... 435
7.6 Performing a Scan Test ................................................ 436
■ Regular User ................................................................... 436
■ Administrator ................................................................... 438
7.7 Calibrating the LCD Touch Panel ................................ 439
Chapter 8 Troubleshooting .................................................... 442
8.1 Removing Jammed Documents .................................. 443
8.2 Network Connection Troubleshooting ........................ 446
8.2.1 Basic Network Operation Tests............................................ 446
■ Checking Basic Network Operation with a Ping Test ...... 446
■ Checking the Network Operating Status ......................... 448
12
Page 13

■ Checking the NTP Server Settings by Synchronizing the
System Time .................................................................. 449
■ Checking the Mail Server by Sending a Test Mail ........... 450
8.2.2 Other Network Connection Troubleshooting ........................ 451
■ Failure to Connect to a Server Using Its IP Address ....... 451
■ Failure to Connect to a Server Using Its Host Name or
FQDN ............................................................................. 453
■ Failure to Add a Network Printer ..................................... 454
■ Failure to Print on a Network Printer ............................... 455
8.2.3 Failure to Access the Scanner using a Web Browser, Admin
Tool, or Central Admin Server.............................................. 456
8.3 Other Troubleshooting ................................................. 459
■ Scanner Cannot Be Turned On ....................................... 460
■ Scanner Does Not Start Up ............................................. 460
■ Data Cannot Be Scanned Properly ................................. 461
■ Scanned Data Is Inappropriate ........................................ 463
■ Cannot Login ................................................................... 464
■ Operation Does Not Work ............................................... 465
8.4 Points to Check before Contacting Your FUJITSU
Scanner Dealer .............................................................. 467
8.4.1 General Details .................................................................... 467
8.4.2 Error Status.......................................................................... 468
■ Problem When Connecting to the Scanner
via Computer .................................................................. 468
■ Document Feed Trouble .................................................. 468
■ Problem with Central Admin Server Software ................. 469
■ Sending an Original Document and Scanned Data ......... 469
8.5 Checking the Scanner Labels ...................................... 470
8.6 Pre-Maintenance Preparations .................................... 471
Appendix A Paper Specifications ........................................... 472
A.1 Paper Size ...................................................................... 473
A.2 Paper Quality ................................................................. 474
A.3 Maximum Document Loading Capacity ...................... 476
13
Page 14

A.4 Area not to be Perforated ............................................. 477
A.5 Multifeed Detection Conditions ................................... 478
A.6 Conditions for Using the Carrier Sheet ...................... 480
A.6.1 Paper Size............................................................................ 480
A.6.2 Paper Quality ....................................................................... 480
Appendix B Management Settings and Files .......................482
B.1 e-Mail Address Setting Values ..................................... 483
B.2 Scanner Configuration File Format ............................. 484
B.2.1 Scanner Configuration File Format (for Importing)............... 484
B.2.2 Scanner Configuration File Format (for Exporting) .............. 485
Appendix C Root Certification Authority ............................... 488
C.1 Root Certification Authority List ................................. 489
Appendix D Scanner Specifications ...................................... 492
D.1 Installation Specifications ............................................ 493
D.2 Basic Scanner Specifications ...................................... 494
D.3 Changing the Functions on the On-Screen
Keyboard ....................................................................... 495
D.3.1 Switching the Keyboard Layout............................................ 495
Appendix E Editing Using User Editor ................................... 496
E.1 What is User Editor? ..................................................... 497
E.2 System Requirements .................................................. 498
E.2.1 Requirements for User Editor............................................... 498
E.2.2 Port Number List .................................................................. 498
14
Page 15

E.3 Pre-settings ................................................................... 499
E.3.1 Installing User Editor ............................................................ 499
E.3.2 Uninstalling User Editor........................................................ 502
E.4 Windows of User Editor ............................................... 503
E.5 Starting/Exiting User Editor ......................................... 505
■ Starting User Editor ......................................................... 505
■ Exiting User Editor ........................................................... 505
E.6 Viewing the Mail Address Book/Local Accounts ....... 506
■ Loading from a Scanner .................................................. 506
■ Loading from a File .......................................................... 507
■ File Format of Mail Address Book Loaded from a File .... 508
■ File Format of Local Accounts Loaded from a File .......... 509
E.7 Editing an e-Mail Target in the Mail Address Book ... 510
E.7.1 Setting a Group.................................................................... 510
■ Adding a Group ............................................................... 510
■ Changing the Group Name ............................................. 511
■ Deleting a Group ............................................................. 511
E.7.2 Setting a Distribution List ..................................................... 512
■ Adding a Distribution List ................................................. 512
■ Editing a Distribution List ................................................. 513
■ Deleting a Distribution List ............................................... 513
E.7.3 Setting an e-Mail Address .................................................... 514
■ Adding an e-Mail Address ............................................... 514
■ Editing an e-Mail Address ............................................... 515
■ Deleting an e-Mail Address ............................................. 515
E.8 Editing Local Accounts ................................................ 516
E.8.1 Adding a Local Account ....................................................... 516
E.8.2 Editing a Local Account........................................................ 517
E.8.3 Deleting a Local Account ..................................................... 517
E.9 Discarding the Edited Mail Address Book or Local
Accounts ........................................................................ 518
15
Page 16

E.10 Saving the Mail Address Book/Local Account ........... 519
■ Saving the Edited Information to the Scanner ................. 519
■ Saving the Edited Information to a File ........................... 520
E.11 User Editor Information Shown in User Log .............. 521
Appendix F Compatibility with Different Versions ................ 522
F.1 Updating System Settings from the Central Admin
Server ............................................................................. 523
F.2 Functional Compatibility Between the Scanner and
Central Admin Server ................................................... 524
F.3 Backing Up/Restoring Data Between Different
Versions of the Central Admin Server Software ........ 525
F.4 Event Source Name Output by Central Admin
Server ............................................................................. 526
Appendix G Glossary ............................................................... 528
About Maintenance .................................................................. 534
Index .......................................................................................... 536
16
Page 17

17
Page 18

Copyright
NetAdvantage 2007
Copyright© 2000-2007 Infragistics, Inc.
LEADTOOLS for .NET
Copyright© 2005 LEAD Technologies, Inc.
WinPcap3.1
Copyright© 1999 - 2005 NetGroup, Politecnico di Torino (Italy).
Copyright© 2005 - 2006 CACE Technologies, Davis (California).
All rights reserved.
Redistribution and use in source and binary forms, with or without
modification, are permitted provided that the following conditions are met:
1 Redistributions of source code must retain the above copyright notice, this list of
conditions and the following disclaimer.
2 Redistributions in binary form must reproduce the above copyright notice, this list of
conditions and the following disclaimer in the documentation and/or other materials
provided with the distribution.
3 Neither the name of the Politecnico di Torino, CACE Technologies nor the names of
its contributors may be used to endorse or promote products derived from this
software without specific prior written permission.
THIS SOFTWARE IS PROVIDED BY THE COPYRIGHT HOLDERS AND CONTRIBUTORS
"AS IS" AND ANY EXPRESS OR IMPLIED WARRANTIES, INCLUDING, BUT NOT LIMITED
TO, THE IMPLIED WARRANTIES OF MERCHANTABILITY AND FITNESS FOR A
PARTICULAR PURPOSE ARE DISCLAIMED. IN NO EVENT SHALL THE COPYRIGHT
OWNER OR CONTRIBUTORS BE LIABLE FOR ANY DIRECT, INDIRECT, INCIDENTAL,
SPECIAL, EXEMPLARY, OR CONSEQUENTIAL DAMAGES (INCLUDING, BUT NOT
LIMITED TO, PROCUREMENT OF SUBSTITUTE GOODS OR SERVICES; LOSS OF USE,
DATA, OR PROFITS; OR BUSINESS INTERRUPTION) HOWEVER CAUSED AND ON ANY
THEORY OF LIABILITY, WHETHER IN CONTRACT, STRICT LIABILITY, OR TORT
(INCLUDING NEGLIGENCE OR OTHERWISE) ARISING IN ANY WAY OUT OF THE USE
OF THIS SOFTWARE, EVEN IF ADVISED OF THE POSSIBILITY OF SUCH DAMAGE.
This product includes software developed by the University of California, Lawrence Berkeley
Laboratory and its contributors.
This product includes software developed by the Kungliga Tekniska Hogskolan and its
contributors.
This product includes software developed by Yen Yen Lim and North Dakota State University.
18
Page 19

Portions Copyright© 1990, 1991, 1992, 1993, 1994, 1995, 1996, 1997 The Regents of the
University of California.
All rights reserved.
Redistribution and use in source and binary forms, with or without
modification, are permitted provided that the following conditions are met:
1 Redistributions of source code must retain the above copyright notice, this list of
conditions and the following disclaimer.
2 Redistributions in binary form must reproduce the above copyright notice, this list of
conditions and the following disclaimer in the documentation and/or other materials
provided with the distribution.
3 All advertising materials mentioning features or use of this software must display the
following acknowledgement: "This product includes software developed by the
University of California, Berkeley and its contributors."
4 Neither the name of the University nor the names of its contributors may be used to
endorse or promote products derived from this software without specific prior written
permission.
THIS SOFTWARE IS PROVIDED BY THE INSTITUTE AND CONTRIBUTORS "AS IS" AND
ANY EXPRESS OR IMPLIED WARRANTIES, INCLUDING, BUT NOT LIMITED TO, THE
IMPLIED WARRANTIES OF MERCHANTABILITY AND FITNESS FOR A PARTICULAR
PURPOSE ARE DISCLAIMED. IN NO EVENT SHALL THE REGENTS OR
CONTRIBUTORS BE LIABLE FOR ANY DIRECT, INDIRECT, INCIDENTAL, SPECIAL,
EXEMPLARY, OR CONSEQUENTIAL DAMAGES (INCLUDING, BUT NOT LIMITED TO,
PROCUREMENT OF SUBSTITUTE GOODS OR SERVICES; LOSS OF USE, DATA, OR
PROFITS; OR BUSINESS INTERRUPTION) HOWEVER CAUSED AND ON ANY THEORY
OF LIABILITY, WHETHER IN CONTRACT, STRICT LIABILITY, OR TORT (INCLUDING
NEGLIGENCE OR OTHERWISE) ARISING IN ANY WAY OUT OF THE USE OF THIS
SOFTWARE, EVEN IF ADVISED OF THE POSSIBILITY OF SUCH DAMAGE.
Portions Copyright© 1983 Regents of the University of California.
All rights reserved.
Redistribution and use in source and binary forms are permitted provided that the above
copyright notice and this paragraph are duplicated in all such forms and that any
documentation, advertising materials, and other materials related to such distribution and use
acknowledge that the software was developed by the University of California, Berkeley. The
name of the University may not be used to endorse or promote products derived from this
software without specific prior written permission.
THIS SOFTWARE IS PROVIDED "AS IS" AND WITHOUT ANY EXPRESS OR IMPLIED
WARRANTIES, INCLUDING, WITHOUT LIMITATION, THE IMPLIED WARRANTIES OF
MERCHANTIBILITY AND FITNESS FOR A PARTICULAR PURPOSE.
Portions Copyright© 1995, 1996, 1997 Kungliga Tekniska Hogskolan (Royal Institute of
Technology, Stockholm, Sweden).
All rights reserved.
Redistribution and use in source and binary forms, with or without modification, are permitted
provided that the following conditions are met:
19
Page 20

1 Redistributions of source code must retain the above copyright notice, this list of
conditions and the following disclaimer.
2 Redistributions in binary form must reproduce the above copyright notice, this list of
conditions and the following disclaimer in the documentation and/or other materials
provided with the distribution.
3 All advertising materials mentioning features or use of this software must display the
following acknowledgement: "This product includes software developed by the
Kungliga Tekniska Hogskolan and its contributors."
4 Neither the name of the University nor the names of its contributors may be used to
endorse or promote products derived from this software without specific prior written
permission.
THIS SOFTWARE IS PROVIDED BY THE INSTITUTE AND CONTRIBUTORS "AS IS" AND
ANY EXPRESS OR IMPLIED WARRANTIES, INCLUDING, BUT NOT LIMITED TO, THE
IMPLIED WARRANTIES OF MERCHANTABILITY AND FITNESS FOR A PARTICULAR
PURPOSE ARE DISCLAIMED. IN NO EVENT SHALL THE INSTITUTE OR
CONTRIBUTORS BE LIABLE FOR ANY DIRECT, INDIRECT, INCIDENTAL, SPECIAL,
EXEMPLARY, OR CONSEQUENTIAL DAMAGES (INCLUDING, BUT NOT LIMITED TO,
PROCUREMENT OF SUBSTITUTE GOODS OR SERVICES; LOSS OF USE, DATA, OR
PROFITS; OR BUSINESS INTERRUPTION) HOWEVER CAUSED AND ON ANY THEORY
OF LIABILITY, WHETHER IN CONTRACT, STRICT LIABILITY, OR TORT (INCLUDING
NEGLIGENCE OR OTHERWISE) ARISING IN ANY WAY OUT OF THE USE OF THIS
SOFTWARE, EVEN IF ADVISED OF THE POSSIBILITY OF SUCH DAMAGE.
Portions Copyright© 1997 Yen Yen Lim and North Dakota State University.
All rights reserved.
Redistribution and use in source and binary forms, with or without modification, are permitted
provided that the following conditions are met:
1 Redistributions of source code must retain the above copyright notice, this list of
conditions and the following disclaimer.
2 Redistributions in binary form must reproduce the above copyright notice, this list of
conditions and the following disclaimer in the documentation and/or other materials
provided with the distribution.
3 All advertising materials mentioning features or use of this software must display the
following acknowledgement: "This product includes software developed by Yen Yen
Lim and North Dakota State University"
4 The name of the author may not be used to endorse or promote products derived
from this software without specific prior written permission.
THIS SOFTWARE IS PROVIDED BY THE AUTHOR "AS IS" AND ANY EXPRESS OR
IMPLIED WARRANTIES, INCLUDING, BUT NOT LIMITED TO, THE IMPLIED
WARRANTIES OF MERCHANTABILITY AND FITNESS FOR A PARTICULAR PURPOSE
ARE DISCLAIMED. IN NO EVENT SHALL THE AUTHOR BE LIABLE FOR ANY DIRECT,
INDIRECT, INCIDENTAL, SPECIAL, EXEMPLARY, OR CONSEQUENTIAL DAMAGES
(INCLUDING, BUT NOT LIMITED TO, PROCUREMENT OF SUBSTITUTE GOODS OR
SERVICES; LOSS OF USE, DATA, OR PROFITS; OR BUSINESS INTERRUPTION)
HOWEVER CAUSED AND ON ANY THEORY OF LIABILITY, WHETHER IN CONTRACT,
STRICT LIABILITY, OR TORT (INCLUDING NEGLIGENCE OR OTHERWISE) ARISING IN
20
Page 21

ANY WAY OUT OF THE USE OF THIS SOFTWARE, EVEN IF ADVISED OF THE
POSSIBILITY OF SUCH DAMAGE.
Portions Copyright© 1993 by Digital Equipment Corporation.
Permission to use, copy, modify, and distribute this software for any purpose with or without
fee is hereby granted, provided that the above copyright notice and this permission notice
appear in all copies, and that the name of Digital Equipment Corporation not be used in
advertising or publicity pertaining to distribution of the document or software without specific,
written prior permission.
THE SOFTWARE IS PROVIDED "AS IS" AND DIGITAL EQUIPMENT CORP. DISCLAIMS
ALL WARRANTIES WITH REGARD TO THIS SOFTWARE, INCLUDING ALL IMPLIED
WARRANTIES OF MERCHANTABILITY AND FITNESS. IN NO EVENT SHALL DIGITAL
EQUIPMENT CORPORATION BE LIABLE FOR ANY SPECIAL, DIRECT, INDIRECT, OR
CONSEQUENTIAL DAMAGES OR ANY DAMAGES WHATSOEVER RESULTING FROM
LOSS OF USE, DATA OR PROFITS, WHETHER IN AN ACTION OF CONTRACT,
NEGLIGENCE OR OTHER TORTIOUS ACTION, ARISING OUT OF OR IN CONNECTION
WITH THE USE OR PERFORMANCE OF THIS SOFTWARE.
Portions Copyright© 1995, 1996, 1997, 1998, and 1999 WIDE Project.
All rights reserved.
Redistribution and use in source and binary forms, with or without modification, are permitted
provided that the following conditions are met:
1 Redistributions of source code must retain the above copyright notice, this list of
conditions and the following disclaimer.
2 Redistributions in binary form must reproduce the above copyright notice, this list of
conditions and the following disclaimer in the documentation and/or other materials
provided with the distribution.
3 Neither the name of the project nor the names of its contributors may be used to
endorse or promote products derived from this software without specific prior written
permission.
THIS SOFTWARE IS PROVIDED BY THE PROJECT AND CONTRIBUTORS "AS IS" AND
ANY EXPRESS OR IMPLIED WARRANTIES, INCLUDING, BUT NOT LIMITED TO, THE
IMPLIED WARRANTIES OF MERCHANTABILITY AND FITNESS FOR A PARTICULAR
PURPOSE ARE DISCLAIMED. IN NO EVENT SHALL THE PROJECT OR
CONTRIBUTORS BE LIABLE FOR ANY DIRECT, INDIRECT, INCIDENTAL, SPECIAL,
EXEMPLARY, OR CONSEQUENTIAL DAMAGES (INCLUDING, BUT NOT LIMITED TO,
PROCUREMENT OF SUBSTITUTE GOODS OR SERVICES; LOSS OF USE, DATA, OR
PROFITS; OR BUSINESS INTERRUPTION) HOWEVER CAUSED AND ON ANY THEORY
OF LIABILITY, WHETHER IN CONTRACT, STRICT LIABILITY, OR TORT (INCLUDING
NEGLIGENCE OR OTHERWISE) ARISING IN ANY WAY OUT OF THE USE OF THIS
SOFTWARE, EVEN IF ADVISED OF THE POSSIBILITY OF SUCH DAMAGE.
21
Page 22

Portions Copyright© 1996 Juniper Networks, Inc. All rights reserved.
Redistribution and use in source and binary forms, with or without modification, are permitted
provided that: (1)source code distributions retain the above copyright notice and this
paragraph in its entirety, (2) distributions including binary code include the above copyright
notice and this paragraph in its entirety in the documentation or other materials provided with
the distribution.
The name of Juniper Networks may not be used to endorse or promote products derived
from this software without specific prior written permission.
THIS SOFTWARE IS PROVIDED "AS IS" AND WITHOUT ANY EXPRESS OR IMPLIED
WARRANTIES, INCLUDING, WITHOUT LIMITATION, THE IMPLIED WARRANTIES OF
MERCHANTABILITY AND FITNESS FOR A PARTICULAR PURPOSE.
Portions Copyright© 2001 Daniel Hartmeier
All rights reserved.
Redistribution and use in source and binary forms, with or without modification, are permitted
provided that the following conditions are met:
z Redistributions of source code must retain the above copyright notice, this list of
conditions and the following disclaimer.
z Redistributions in binary form must reproduce the above copyright notice, this list of
conditions and the following disclaimer in the documentation and/or other materials
provided with the distribution.
THIS SOFTWARE IS PROVIDED BY THE COPYRIGHT HOLDERS AND CONTRIBUTOR
"AS IS" AND ANY EXPRESS OR IMPLIED WARRANTIES, INCLUDING, BUT NOT LIMITED
TO, THE IMPLIED WARRANTIES OF MERCHANTABILITY AND FITNESS FOR A
PARTICULAR PURPOSE ARE DISCLAIMED. IN NO EVENT SHALL THE COPYRIGHT
HOLDERS OR CONTRIBUTORS BE LIABLE FOR ANY DIRECT, INDIRECT, INCIDENTAL,
SPECIAL, EXEMPLARY, OR CONSEQUENTIAL DAMAGES (INCLUDING, BUT NOT
LIMITED TO, PROCUREMENT OF SUBSTITUTE GOODS OR SERVICES; LOSS OF USE,
DATA, OR PROFITS; OR BUSINESS INTERRUPTION) HOWEVER CAUSED AND ON ANY
THEORY OF LIABILITY, WHETHER IN CONTRACT, STRICT LIABILITY, OR TORT
(INCLUDING NEGLIGENCE OR OTHERWISE) ARISING IN ANY WAY OUT OF THE USE
OF THIS SOFTWARE, EVEN IF ADVISED OF THE POSSIBILITY OF SUCH DAMAGE.
Portions Copyright 1989 by Carnegie Mellon.
Permission to use, copy, modify, and distribute this program for any purpose and without fee
is hereby granted, provided that this copyright and permission notice appear on all copies
and supporting documentation, the name of Carnegie Mellon not be used in advertising or
publicity pertaining to distribution of the program without specific prior permission, and notice
be given in supporting documentation that copying and distribution is by permission of
Carnegie Mellon and Stanford University. Carnegie Mellon makes no representations about
the suitability of this software for any purpose. It is provided "as is" without express or implied
warranty.
22
Page 23

WinDump3.9.5
Copyright© 1999 - 2005 NetGroup, Politecnico di Torino (Italy).
Copyright© 2005 - 2006 CACE Technologies, Davis (California).
All rights reserved.
Redistribution and use in source and binary forms, with or without modification, are permitted
provided that the following conditions are met:
1 Redistributions of source code must retain the above copyright notice, this list of
conditions and the following disclaimer.
2 Redistributions in binary form must reproduce the above copyright notice, this list of
conditions and the following disclaimer in the documentation and/or other materials
provided with the distribution.
3 Neither the name of the Politecnico di Torino, CACE Technologies nor the names of
its contributors may be used to endorse or promote products derived from this
software without specific prior written permission.
THIS SOFTWARE IS PROVIDED BY THE COPYRIGHT HOLDERS AND CONTRIBUTORS
"AS IS" AND ANY EXPRESS OR IMPLIED WARRANTIES, INCLUDING, BUT NOT LIMITED
TO, THE IMPLIED WARRANTIES OF MERCHANTABILITY AND FITNESS FOR A
PARTICULAR PURPOSE ARE DISCLAIMED. IN NO EVENT SHALL THE COPYRIGHT
OWNER OR CONTRIBUTORS BE LIABLE FOR ANY DIRECT, INDIRECT, INCIDENTAL,
SPECIAL, EXEMPLARY, OR CONSEQUENTIAL DAMAGES (INCLUDING, BUT NOT
LIMITED TO, PROCUREMENT OF SUBSTITUTE GOODS OR SERVICES; LOSS OF USE,
DATA, OR PROFITS; OR BUSINESS INTERRUPTION) HOWEVER CAUSED AND ON ANY
THEORY OF LIABILITY, WHETHER IN CONTRACT, STRICT LIABILITY, OR TORT
(INCLUDING NEGLIGENCE OR OTHERWISE) ARISING IN ANY WAY OUT OF THE USE
OF THIS SOFTWARE, EVEN IF ADVISED OF THE POSSIBILITY OF SUCH DAMAGE.
This product includes software developed by the University of California, Lawrence Berkeley
Laboratory and its contributors.
Secure iNetSuite 2.5J
Copyright© 2008 Dart Communications
23
Page 24

Introduction
Thank you for purchasing the Network Scanner ScanSnap N1800.
This easy-to-operate network scanner is used to scan documents for further use.
Trademarks
Microsoft, Windows, Windows Vista, Windows Server, and SharePoint are either registered
trademarks or trademarks of Microsoft Corporation in the United States and/or other
countries.
Adobe, the Adobe logo, Acrobat, and Adobe Reader are either registered trademarks or
trade names of Adobe Systems Incorporated in the United States and/or other countries.
Intel, Pentium, and Intel Core are registered trademarks or trademarks of Intel Corporation in
the United States and other countries.
ABBYY and FineReader are trademarks of ABBYY.
Linux is the registered trademark or trademark of Linus Torvalds in the U.S. and other
countries.
Red Hat is the registered trademark or trademark of Red Hat, Inc. in the United States and
other countries.
ScanSnap and the ScanSnap logo are registered trademarks or trademarks of PFU LIMITED
in Japan.
Other company names and product names are the registered trademarks or trademarks of
the respective companies.
Manufacturer
PFU LIMITED
International Sales Dept., Imaging Business Division, Products Group Solid Square East
Tower, 580 Horikawa-cho, Saiwai-ku, Kawasaki-shi Kanagawa 212-8563, Japan
Phone: (81-44) 540-4538
All Rights Reserved, Copyright© PFU LIMITED 2010
24
Page 25
Manuals
WARNING
CAUTION
The following manuals are prepared for the scanner. Read them as needed.
Manual Description
ScanSnap N1800
Getting Started
(paper)
ScanSnap N1800
Operator's Guide
(PDF)
ScanSnap N1800
Help (HTML)
Provides useful and detailed information on the scanner
setup and cable connections.
Read this manual first.
Referred to as "Getting Started" in this manual.
Contains further information about scanner settings,
scanner administration, and scanner operations, and may
be used as a general reference.
Referred to as "Operator's Guide" in this manual.
Provides information about items on the screens, and
descriptions and actions to take for the messages. Read it
as needed.
■About This Manual
Warning Indications Used in This Manual
The following indications are used in this manual to obviate any chance of accident or
damage to you and people near you, and your property. Warning labels indicate the warning
level and statements. The symbols indicating warning levels and their meanings are as
follows:
This indication alerts operators to an operation that, if not strictly observed,
may result in severe injury or death.
This indication alerts operators to an operation that, if not strictly observed,
may result in safety hazards to personnel or damage to the product.
25
Page 26
Symbols Used in This Manual
Central Admin
Console
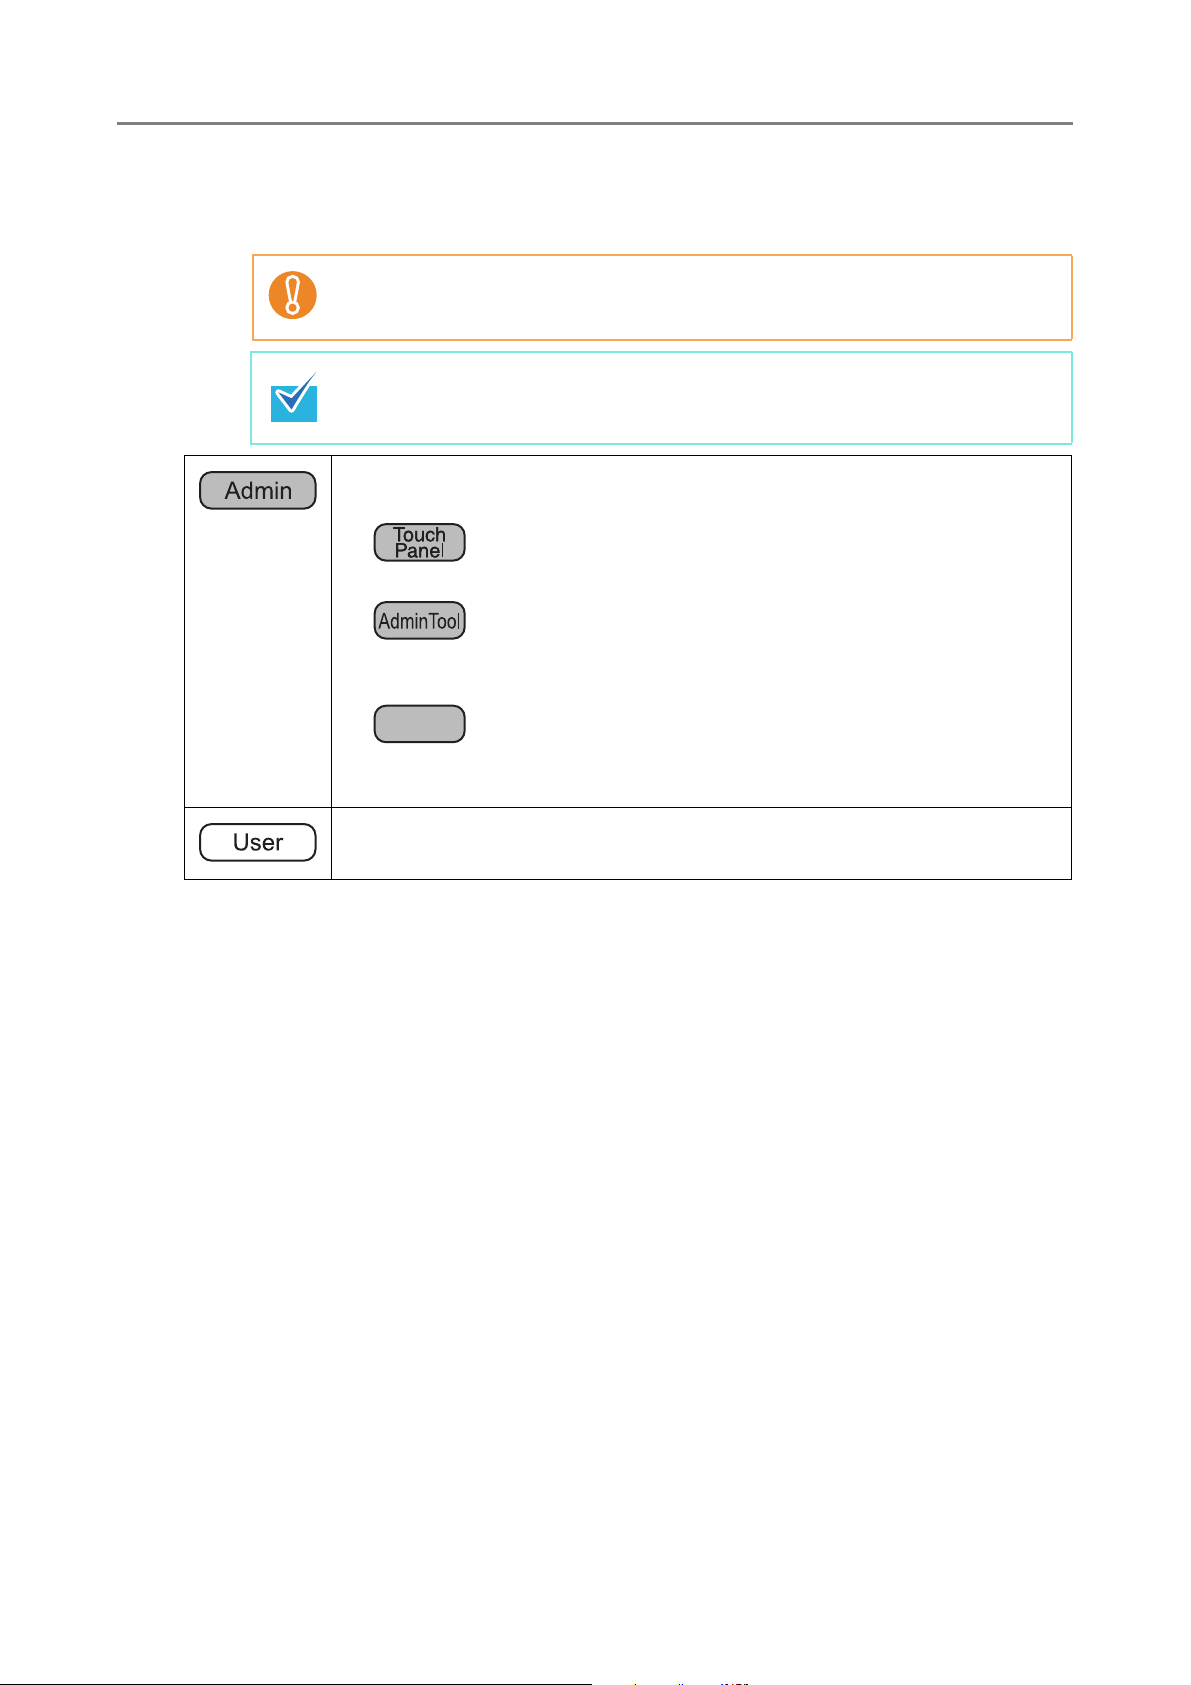
Besides warning indicators, the following symbols are also used in this manual:
This symbol alerts operators to particularly important information. Be sure to
read this information.
This symbol alerts operators to helpful advice regarding operations.
This symbol is used to indicate information about administrator operations.
Each operation method is indicated by the following symbols:
z
Administrator operating via the LCD touch panel.
z
Administrator operating via the network interface using the Network Scanner
Admin Tool.
z
Administrator operating via the network interface using the Scanner Central
Admin Console.
This symbol is used to indicate information about regular user operations.
Arrow Symbols in This Manual
Right-arrow symbols (J) are used to connect icons or menu options you should select in
succession.
Example: Select the [Start] menu J [Computer].
Screen Examples in This Manual
Screenshots in this manual are used according to guidelines provided by Microsoft
Corporation.
The screen examples in this manual are subject to change without notice in the interest of
product improvement.
The screen examples used in this manual are of Windows Vista.
The actual windows and operations may differ depending on the operating system that you
are using. If the actual screen differs from the screen examples in this manual, operate by
following the actual displayed screen.
26
Page 27

Abbreviations Used in This Manual
The following abbreviations are used in this manual:
Abbreviation
Used
Windows
Windows XP
Windows Vista
Windows 7
®
Windows
Windows
Windows
operating system
®
XP Professional operating system
®
XP Home Edition operating system
Windows Vista
Windows Vista
Windows Vista
Windows Vista
Windows Vista
®
Windows
Windows
Windows
Windows
Windows
7 Starter operating system
®
7 Home Premium operating system
®
7 Professional operating system
®
7 Enterprise operating system
®
7 Ultimate operating system
Option
®
Home Basic operating system
®
Home Premium operating system
®
Business operating system
®
Enterprise operating system
®
Ultimate operating system
Windows Server
2003
Windows Server
2008
Exchange
.NET Framework
SharePoint
Windows Server
Windows Server
Windows Server
Windows Server
Windows Server
Windows Server
®
Microsoft
Microsoft
Exchange Server 2003
®
Exchange Server 2007 (supported by 64-bit operating
systems only)
®
Microsoft
Exchange Server 2010 (supported by 64-bit operating
systems only)
®
Microsoft
Microsoft
Microsoft
.NET Framework
®
Office SharePoint® Server 2007
®
SharePoint® Server 2010 (supported by 64-bit operating
systems only)
®
2003, Standard Edition
®
2003, Enterprise Edition
®
2003, Datacenter Edition
®
2008 Standard
®
2008 Enterprise
®
2008 Datacenter
OpenSolaris OpenSolaris™
27
Page 28

Abbreviation
Used
Solaris 10 Solaris™ 10 Operating System
Option
Red Hat
Enterprise Linux
Suse Linux
Enterprise Server
Internet Explorer
IIS
SQL Server 2005
Red Hat
Red Hat
Suse
Suse
Microsoft
Microsoft
Microsoft
®
Enterprise Linux® 4
®
Enterprise Linux® 5
®
Linux Enterprise Server 10
®
Linux Enterprise Server 11
®
Internet Explorer
®
Internet Information Services
®
SQL Server™ 2005 Express Edition
®
Express Edition
Adobe Acrobat
Adobe Reader
Adobe
Adobe
®
Acrobat
®
Reader
®
®
RightFax RightFax Business Server (Version 9.3)
Intel Pentium III
®
Intel
Pentium® III Processor
Processor
Scanner Network Scanner ScanSnap N1800
Carrier sheet ScanSnap Carrier Sheet
Admin Tool Network Scanner Admin Tool
User Editor Network Scanner User Editor
Central Admin
Scanner Central Admin Console
Console
Central Admin
Scanner Central Admin Server
Server
Network Folder A folder that is set to save scanned data in the file server or FTP
server
SharePoint
A folder that is set to save scanned data in the SharePoint server
Folder
■Opening Help
When the [Help] button is available on the window or dialog box that is displayed during the
operation, you can open Help by pressing it.
Help provides information about items on the screens and actions to take for the messages.
On the touch panel, the Help button is displayed as .
28
Page 29

29
Page 30

Chapter 1
Overview
1.1 Scanner Features.................................................................................................. 31
1.2 Part Names and Functions................................................................................... 34
1.3 User Types and Operations ................................................................................. 37
1.4 System Requirements .......................................................................................... 46
30
Page 31

1.1 Scanner Features
ᧄⵝ⟎
User
Authentification
1
2
3
4
5
LDAP Server
Scanner
Original
Document
SharePoint
Server
SharePoint
Folder
Save
Save
Scanned Data
Send e-Mail
Internet
Network
Folder
File Server
or
FTP Server
Print Server
Send Fax
Print
Fax Server
SMTP Server
■ Basic Uses for Scanned Data
This easy-to-operate network scanner is used to scan documents for further use:
1. Scanned data can be sent as an e-mail attachment.
2. Scanned data can be sent by fax.
3. Scanned data can be printed on a network printer.
4. Scanned data can be saved in a network folder.
5. Scanned data can be saved in a SharePoint folder.
31
Page 32

1.1 Scanner Features
Computer
Computer
Admin Too l
Central Admin
Server
Set multiple scanners
at a time via the
network interface
Central Admin Console
Set one scanner at
a time via the
network interface
Scanner
Scanner
Scanner
Scanner
Directly set one
scanner at a time
LCD Touch Panel
■ Configure and Manage with Ease
Configuration and management of the scanner can be easily performed via the LCD touch
panel on the scanner or via the "Admin Tool" or the "Central Admin Console" installed on
a computer.
■ Advanced Security Measures
The following security functions are provided for the scanner.
Since the scanner is intended to be shared by multiple users, data privacy is an important
factor. The following security measures are used to protect the data against untoward
access:
z Admin Tool
Application that connects to each scanner and configures the scanner settings.
z Central Admin Console
Application that connects Central Admin Server, which manages multiple
scanners, and manages operating environment and operating status of multiple
scanners.
z Login authentication can restrict user access.
z Scanned data can be converted to password protected PDF files.
z Scanned data can be protected.
z Encryption
The scanned data is temporarily stored in the scanner during being e-mailed,
faxed, printed, or saved. Because it is always stored in encrypted form, no one can
read it even if the disk contents are parsed.
z Scanned data deletion
After the scanned data has been e-mailed, faxed, printed or saved, the temporary
data is deleted. Even if an error interrupts this process, leaving some scanned data
in the scanner, this will automatically be deleted at the next start up.
32
Page 33

z Secure initialize
When initializing the data in the scanner, the free disk space can be also
overwritten with meaningless random data. When the user data store is cleared
from the scanner, the old cipher key is deleted and a new cipher key is generated.
This totally eliminates the possibility of access to any user data remaining in the
free disk space.
There is no input pathway to the scanner for files via external memory media, and input
pathways of files via the network are limited to the minimum. Security patches are
provided to protect the scanner against virus attacks. Taking these measures enables the
scanner to be protected against virus infection.
33
Page 34

1.2 Part Names and Functions
Power button
Scan button
LCD touch panel
Stacker
Side guides
Top cover
Top cover release catch
ADF paper chute
Extension
■ Front View
1.2 Part Names and Functions
Part Name Function
Extension Can be pulled out and adjusted to the size of the document
being scanned.
ADF paper chute Holds the documents waiting to be scanned.
Side guides Adjust to the width of the paper, to prevent skewing of the
scanned pages.
Top cover release catch Pull to open the top cover.
Power button Turns on scanner or brings up the [Login] window from
standby mode or power off status. For details, refer to
"Using the Power Button" (page 59).
Scan button Starts the scan process. For details, refer to "Using the
LCD touch panel Accepts user input and displays the scanner control
Top Cover Scan Button" (page 61).
windows. The LCD touch panel buttons are used to setup
scans.
For details, refer to "2.3 Using the LCD Touch Panel"
(page 62).
34
Page 35

Part Name Function
Power connector
Security cable slot
LAN connector
Ventilation ports
Top cover Frames the LCD touch panel, and covers the upper
scanner/ADF mechanism. Must be opened to clean inside
the scanner, or when replacing consumable parts.
Stacker Open before scanning. Scanned documents are ejected
on the stacker.
■ Rear View
Part Name Function
Ventilation ports Lets out the heated air from the inside of the scanner to
the outside.
Power connector Connects the scanner to the AC adapter.
LAN connector Connects the scanner to the network.
Security cable slot Slot for commercially available security cable to prevent
against theft.
The following security cable is recommended.
Cylindrical part: diameter 25 mm (max), length 50 mm
(max)
Type: Right angle
(includes bent part if a straight cable is used)
35
Page 36

■ Removable Parts
Sheet guide
Pick roller
Pad assy
ADF paper chute
1.2 Part Names and Functions
Part Name Function
ADF paper chute Help to guide documents from the ADF paper chute to the
Sheet guide
Pick roller
Pad assy
stacker.
36
Page 37

1.3 User Types and Operations
When you use the scanner, login to the scanner as a user with the following operation
right.
z Regular user rights
Operation rights given when you login to the scanner with a regular user account.
When you login to the scanner with these rights, you are a "regular user" of the
scanner.
A regular user can scan documents and then send, print, or save the resulting
data.
z Administrator rights
Operation rights given when you login to the scanner with an administrator
account.
When you login to the scanner with these rights, you are an "administrator" of the
scanner.
An administrator can setup and manage the scanner.
Note that the method of login to the scanner varies depending on the user type as follows:
Login method
Operation rights
LCD touch panel Admin Tool
Regular user rights
Administrator rights
A: available NA: not available
The following table lists the operations available for the administrator and regular users.
ANANA
AAA
Central Admin
Console
37
Page 38

1.3.1 Operations with Administrator Right
■ System Settings
1.3 User Types and Operations
Item Function
Local Settings
Import
Scanner
Import scanner
settings
Settings
Scanner
Name
Language
Set the scanner
name (*1)
Set the language
Selection
Region/
Timezone
Set the region/
timezone (*1)
Date/Time Set the date/time
(*1)
Keyboard
Set the keyboard
Settings
LCD touch panel
Admin
Basic
mode
NA NA NA A page 266
AAANApage 94
AAANApage 96
AAAApage 97
AAAA
NA A A A page 99
Advanced
mode
Tool
Central
Admin
Console
(*2)
See...
page 98
Certificate
Management
Scanner Settings
Multifeed
Settings
Scanner
Adjustment
General
Scanner
Settings
Manage
certificates
Set the multifeed
detection method
Set the offset and
magnification
settings
Set general
scanner settings
NA A
(*3)
NA A A A page 102
NA A A NA page 105
NA A A A page 106
AApage 100
38
Page 39

Item Function
Login Settings
LCD touch panel
Basic
mode
Advanced
mode
Admin
Tool
Central
Admin
Console
See...
Login
Settings
Standby
Mode
Set the login
settings (*1)
Set the standby
mode and/or
automatic logout
Admin
Password
Change the
admin password
(*1)
A: available NA: not available
(*1): Operations can be performed in the Installation Wizard.
(*2): The [Date / Time] input field and [Get Time] button cannot be used.
(*3): Certificates cannot be imported.
■ Network Settings
Item Function
NA A A A page 107
NA A A A page 110
AAANApage 112
LCD touch panel
Basic
mode
Advanced
mode
Admin
Tool
Central
Admin
Console
See...
Basic
IP Address Set the IP
address (*1)
DNS Server Set the DNS
server (*1)
WINS Server Set the WINS
server
NTP Server Set the NTP
server
Proxy Server Set the proxy
server
AAANA page 113
AAAApage 115
AAAApage 116
NA A A A
(*2)
NA A A A page 118
page 117
39
Page 40

1.3 User Types and Operations
Item Function
Ping Check the
network
connection with a
Ping test
Network
Status
Check the
network operating
status
Network Admin
Admin
Connection
Scanner
Central
Set the admin
connection
Set the Central
Admin Server (*1)
Admin
Server
LCD touch panel
Admin
Basic
mode
AAANApage 119
AAANApage 121
AAAA
AAAA
Advanced
mode
Tool
Central
Admin
Console
(*3)
(*4)
See...
page 123
page 125
Authentication Server
Login LDAP
Server
e-Mail LDAP
Server
Customize
LDAP
Search
Set the login
LDAP server
Set the e-mail
LDAP server
Customize the
LDAP search
parameters
e-Mail
SMTP server Set the e-mail
server (SMTP
server)
Send e-Mail Set the e-mail-
related settings
File Names
(e-Mail)
Set the file name
format used for
when attaching
scanned data to
e-mails
NA A A A page 127
NA A A A page 133
NA A A A page 135
AAAApage 137
NA A A A page 139
NA A A A page 140
40
Page 41

Item Function
Fax
LCD touch panel
Basic
mode
Advanced
mode
Admin
Tool
Central
Admin
Console
See...
Fax Server Set the fax server
Network Folder
Network
Folder
File Names
(Save)
Set the network
folders
Set the file name
format used for
when saving
scanned data
FTP Server Folder
FTP Server
Folder
File Names
(Save)
Set the FTP
server folders
Set the file name
format used for
when saving
scanned data
SharePoint Folder
NA A A A page 142
AAAA
(*5)
NA A A A page 156
NA A A A
(*5)
NA A A A page 156
page 143
page 143
SharePoint
Folder
File Names
(Save)
Print
Network
Printer
A: available NA: not available
Set the
SharePoint
NA NA A A
(*5)
page 153
folders
Set the file name
NA NA A A page 156
format used for
when saving
scanned data
Set the network
printers
AAAA
(*5)
page 159
(*1): Operations can be performed in the Installation Wizard.
(*2): Synchronization not possible.
(*3): Contents of the SSL Certificate are not shown.
(*4): [Address] and [Port Number] cannot be set.
(*5): Printers, folders and SharePoint folders that can be accessed from the Central
Admin Server can be set.
41
Page 42

■ Monitoring & Management
1.3 User Types and Operations
Item Function
Status Details
System
Status
Usage
Status
Installed
Options
View the system
status
View the usage
status
View the status of
installed options
User Log Manage user logs
System Log Manage the
system log
Data Management
User Data
Store
Maintain the user
data store
LCD touch panel
Admin
Basic
mode
AAAA
AAAA
NA A A A
AAANApage 173
AAANApage 175
NA A
Advanced
mode
(*2)
Tool
ANApage 177
Central
Admin
Console
(*1)
(*1)
(*1)
See...
page 170
page 171
page 172
System
Settings File
Maintain the
system settings
NA A
(*3)
ANApage 181
42
Page 43

Item Function
Maintenance
LCD touch panel
Basic
mode
Advanced
mode
Admin
Tool
Central
Admin
Console
See...
System
Update
Add-in
Software
Technical
Support
Update the
scanner system
software/check for
released updates
View the Add-in
status
Install/uninstall an
Add-in module
Set whether or not
the on-screen
keyboard is
displayed when
running an Add-in
Set the
information output
level
Obtain technical
support
NA A
(*5)
NA A A NA
NA NA A A
NA A A NA page 191
NA A A NA page 192
NA NA A NA page 193
ANA
(*4)
(*1)
(*4)
page 185
page 190
page 189
Alert
Notification
Set the
destination for
alert notifications
A: available NA: not available
(*1): Operations cannot be performed from the scanner settings edit window, but
can be viewed on the Central Admin Console [Scanner Details] window.
(*2): When using the LCD touch panel, only the user data delete operation can be
performed.
(*3): When using the LCD touch panel, only the system settings reset or clear
operation can be performed.
(*4): Operations cannot be performed from the scanner settings edit window, but
can be performed from the Central Admin Console [Scanner Admin
Operations] window.
(*5): When using the LCD touch panel, the update cannot be performed.
NA A A A page 194
43
Page 44

■ Device Test
1.3 User Types and Operations
Item Function
Screen
Calibration
Scan Test Perform a scan
A: available NA: not available
Calibrate the LCD
touch panel
test
■ Job Mode Settings
Item Function
Job
Sequences
Set a job
sequence
LCD touch panel
Admin
Basic
mode
A A NA NA page 439
A A NA NA page 436
LCD touch panel
Basic
mode
NA NA A A page 201
Advanced
mode
Advanced
mode
Tool
Admin
Tool
Central
Admin
Console
Central
Admin
Console
See...
See...
Job Menus Set a job menu
Job Groups Set a job group
A: available NA: not available
NA NA A A page 210
NA NA A A page 216
44
Page 45

1.3.2 Regular User Operations
Item Function See...
e-Mail Send the scanned data by e-mail
Fax Send the scanned data by fax
Print Print the scanned data
Save Save the scanned data to a network
folder
Scan to SharePoint Save the scanned data to a SharePoint
folder
Scan Settings Set the scan options
Scan Viewer Enable/disable the scan viewer
Maintenance
Edit e-Mail Addresses Edit e-mail targets in the e-mail address
book
Edit Fax Numbers Edit contacts in the fax number list
Roller Cleaning Clean the inside of scanner
Scan Test Perform a scan test
Administrator Login Show the window for administrator login
page 309
page 324
page 333
page 344
page 348
page 356
page 395
page 321
page 331
page 420
page 436
page 79
Change Password Change a user password
Consumable Alert Indicate when parts need replacing
User Log Check user operations
Job Menu Process a job
page 414
page 426
page 402
page 405
45
Page 46

1.4 System Requirements
1.4.1 Requirements for Admin Tool
For use of the Admin Tool, the following requirements apply:
Software (English Versions)
z Operating System
z Windows XP SP3 or later
z Windows Vista SP1 or later
z Windows 7
z Windows Server 2003 SP2 or later
z Windows Server 2008
z .NET Framework 2.0 SP2 or later, .NET Framework 3.0 SP2 or later, or .NET
Framework 3.5 SP1 or later (*1)
z Internet Explorer 6 SP2 or later (*2)
1.4 System Requirements
(*1): If .NET Framework is not installed, the administrator will be notified.
Download .NET Framework from the Microsoft Web site and install it into
the computer.
When installing .NET Framework, check that there is enough free disk
space. For .NET Framework 2.0, at least 280 MB of additional free disk
space is required.
(*2): Confirm that the latest security patch has been applied. If the latest patch
has not been applied, download operations (such as manual download)
may not be possible. For Windows XP, "KB933566" must be applied to
Internet Explorer.
Hardware
z Any computer which runs the supported software
32 MB or more of free memory space
64 MB or more of free disk space
z XGA monitor or better
z LAN cable
z Pointing device (e.g. mouse)
46
Page 47

1.4.2 Requirements for Central Admin Console
For use of the Central Admin Console, the following requirements apply:
Software (English Versions)
z Operating System
z Windows XP SP3 or later
z Windows Vista SP1 or later
z Windows 7
z Windows Server 2003 SP2 or later
z Windows Server 2008
z Admin Tool
z .NET Framework 2.0 SP2 or later, .NET Framework 3.0 SP2 or later, or .NET
Framework 3.5 SP1 or later (*1)
z Internet Explorer 6 SP2 or later (*2)
(*1): If .NET Framework is not installed, the administrator will be notified.
Download .NET Framework from the Microsoft Web site and install it into
the computer.
When installing .NET Framework, check that there is enough free disk
space. For .NET Framework 2.0, at least 280 MB of additional free disk
space is required.
(*2): Confirm that the latest security patch has been applied. If not applied,
problems with the window display may arise. MS08-024 (KB947864) and
subsequent security update programs are required.
Hardware
z Any computer which runs the supported software
32 MB or more of free memory space
64 MB or more of free disk space
z XGA monitor or better
z LAN cable
z Pointing device (e.g. mouse)
47
Page 48

1.4.3 Requirements for Central Admin Server
For use of the Central Admin Server, the following requirements apply:
Software (English Versions)
z Operating System
z Windows Server 2003 SP2 or later
z Windows Server 2008 (*1)
z .NET Framework 2.0 SP2 or later, .NET Framework 3.0 SP2 or later, or .NET
Framework 3.5 SP1 or later
z Internet Explorer 6 SP2 or later (*2)
z IIS 5.0 or later (*3) (*4)
z SQL Server 2005 Express Edition
(*1): To use HTTPS, CAPICOM must be previously installed. If CAPICOM is not
installed, the self-signed certificate is not imported for communicating with
HTTPS.
1.4 System Requirements
(*2): Confirm that the latest security patch has been applied.
(*3): A Web server function of IIS 5.0 or later must be installed.
(*4): When installing IIS 7.0 or later, make sure to install the following
components.
z IIS-WebServer
z IIS-CommonHttpFeatures (IIS-StaticContent/IIS-DefaultDocument/
IIS-HttpErrors)
z IIS-ApplicationDevelopment (IIS-ASPNET/IIS-NetFxExtensibility/IIS-
ISAPIExtensions/IIS-ISAPIFilter)
z IIS-HealthAndDiagnostics (IIS-HttpLogging/IIS-RequestMonitor)
z IIS-Security (IIS-RequestFiltering)
z IIS-Performance (IIS-HttpCompressionStatic)
z IIS-WebServerManagementTools
z IIS-ManagementConsole
Hardware
z Any computer which runs the supported software
Intel Pentium III Processor, 1 GHz and above, or equally interchangeable
processor
512 MB or more of free memory space
700 MB or more of free disk space
z XGA monitor or better
z LAN cable
48
Page 49

1.4.4 Requirements for Related Servers
For related servers, the following requirements apply:
Server Operating System Function
LDAP server Windows Server 2003 Active Directory
Windows Server 2008
OpenSolaris OpenLDAP
Solaris10
Red Hat Enterprise Linux
Suse Linux Enterprise Server
SMTP Server Windows Server 2003 SMTP, Exchange
Windows Server 2008
File Server Windows Server 2003 Windows Shared Folder
Windows Server 2008
OpenSolaris Samba
Solaris10
Red Hat Enterprise Linux
Suse Linux Enterprise Server
SharePoint Server Windows Server 2003 SharePoint
Windows Server 2008
FTP Server Windows Server 2003 FTP
Windows Server 2008
Print Server Windows Server 2003 Windows Shared Printer (*)
Windows Server 2008
DNS Server Windows Server 2003 DNS
Windows Server 2008
WINS Server Windows Server 2003 WINS
Windows Server 2008
DHCP Server Windows Server 2003 DHCP
Windows Server 2008
49
Page 50

1.4 System Requirements
Server Operating System Function
NTP Server Windows Server 2003 NTP
Windows Server 2008
Red Hat Enterprise Linux
Fax Server Windows Server 2003 RightFax
Windows Server 2008
(*): To use as network printer, Windows XP compatible printer driver must be
installed.
LDAP Server
LDAP (Lightweight Directory Access Protocol) is a protocol for accessing a directory
databases over a TCP/IP network. It can be used to administrator networked users e-mail
addresses and operating environments.
When connected using encryption (SSL), this is called the "LDAPS Server".
The LDAP server can be used to perform the following:
z User authentication at login
z Finding or entering e-mail addresses in an address book
SMTP Server
SMTP (Simple Mail Transfer Protocol) is a protocol for sending e-mail.
The SMTP server can be used to perform the following:
z Sending the scanned data as an e-mail
z Sending the scanned data by fax
File Server
The file server shares the disk on a server with other computers on a network, and
enables use of the disk from an external computer.
Using this file server enables scanned data to be saved to a file server network folder.
SharePoint Server
SharePoint is the collective name for the elements of an Internet Explorer based
document management platform provided by Microsoft.
Using a SharePoint server enables scanned data to be saved to a SharePoint folder on
the SharePoint server.
50
Page 51

FTP Server
FTP (File Transfer Protocol) is a standard network protocol used for copying files between
hosts on the network based on TCP/IP.
An FTP server which connects with SSL encryption is called an "FTPS Server".
Using this FTP server enables scanned data to be saved to an FTP server network folder.
Print Server
The print server refers to the computer or device used when multiple client computers use
a printer on the network. It receives print requests from the client computers on the
network and delivers them to the printer connected with the print server.
z Windows XP compatible printer drivers must be registered.
z Printer must be able to spool print jobs (to hard disk or memory). Contact your
printer dealer if uncertain whether your printer has a spool function.
z Printers that allow the status of print errors to be easily checked (via an LCD control
panel, or similar) are recommended.
DNS Server
The function of DNS servers is the translation (resolution) of humanly memorable host
names and FQDN into the corresponding numeric IP addresses.
WINS Server
The WINS server handles name registration requests from WINS clients and registers
their names and IP addresses with the server database. The WINS server responds to
NetBIOS name queries submitted by clients and returns the IP address of the queried
name if it is listed in the server database. In addition, when a DNS name resolution fails,
the query can be transferred to the WINS server.
DHCP Server
DHCP (Dynamic Host Configuration Protocol) is an auto-configuration protocol used for
an IP network. Network administrator intervention is not required when the DHCP server
is used because it assigns the IP addresses of scanners as well as computers
automatically.
NTP Server
NTP (Network Time Protocol) is a protocol to synchronize the time of computers on the
network with the correct time.
It is used when a client makes a time query through the network.
Fax Server
The fax server refers to the computer equipped with a fax modem or a dedicated fax
board connected with a telephone line. It is used for sending faxes.
This scanner supports the following fax servers:
z RightFax Business Server (Version 9.3)
This fax server can be used to send the scanned data by fax.
51
Page 52
1.4.5 Network Requirements for Central Admin
This section describes the required network conditions for Central Admin.
For Central Admin, the following network conditions are required.
z HTTP/HTTPS communication is possible from the Central Admin Server to the
scanner
z HTTP/HTTPS communication is possible from the scanner to the Central Admin
Server
z HTTP/HTTPS communication is possible from the Central Admin Console to the
Central Admin Server
z Wake-On-LAN Magic Packet routing is possible from the Central Admin Server to
the scanner (when Wake-On-LAN is used)
The connection between a scanner and Central Admin Server has the following
limitations.
z Communication via an HTTP proxy is not supported.
z Networks where IP addresses using NAT/NAPT are not supported.
1.4 System Requirements
1.4.6 Scanner Requirements for Central Admin
Up to 1,000 scanners can be managed with Central Admin.
If 1,000 scanners are registered on the server, no more scanners can be registered as
targets for central admin. If the number of scanners exceeds 1,000, multiple Central
Admin Servers will be prepared. The target scanners for each server should not exceed
1,000.
52
Page 53

1.4.7 Port Number List
Function From/To Port Number
Admin Tool
Connection
Central Admin
Server
Connection
Admin Tool D Scanner 80 (HTTP) (*1) 6 (TCP)
443 (HTTPS) (*1) 6 (TCP)
Central Admin Server D
Scanner
Scanner D Central
Admin Server
Central Admin
ConsoleD
Central Admin Server
Central Admin Server D
LDAP server
80 (HTTP) (*1) 6 (TCP)
443 (HTTPS) (*1) 6 (TCP)
20444 (HTTP/HTTPS) (*1) 6 (TCP)
10444 (HTTP/HTTPS) (*1) 6 (TCP)
389 (LDAP) 6 (TCP)
636 (LDAPS) 6 (TCP)
3268 (Active Directory Global
Catalog)
3269 (Active Directory Global
Catalog over SSL)
Protocol
Number
6 (TCP)
6 (TCP)
Central Admin Server D
Print server
Central Admin Server D
File server
Central Admin Server D
FTP server
Central Admin Server D
FTPS server
Central Admin Server D
SMTP server
Central Admin Server D
Proxy server
Central Admin Server
SharePoint link
DHCP Server Scanner D DHCP server 67 (DHCP) 17 (UDP)
DNS Server Scanner D DNS server 53 (DNS) 17 (UDP)
137,138,139,445 (SMB) 6 (TCP)
17 (UDP)
137,138,139,445 (SMB) 6 (TCP)
17 (UDP)
20,21 (FTP) (*1) 6 (TCP)
989,990 (FTPS) (*1) 6 (TCP)
25 (SMTP) (*1) 6 (TCP)
Free 6 (TCP)
30444 (HTTP/HTTPS) (*1) 6 (TCP)
WINS Server Scanner D WINS server 1512 (WINS) 17 (UDP)
53
Page 54

1.4 System Requirements
Function From/To Port Number
Synchronization Scanner D SNTP server 123 (SNTP) 17 (UDP)
Proxy Server Scanner D Proxy server Free 6 (TCP)
Authentication/
e-Mail
Address Search
Sending e-Mail Scanner D SMTP server 25 (SMTP) (*1) 6 (TCP)
Sending Fax Scanner D SMTP server 25 (SMTP) (*1) 6 (TCP)
Scanner D LDAP server 389 (LDAP) (*1) 6 (TCP)
636 (LDAPS) (*1) 6 (TCP)
3268 (Active Directory Global
Catalog) (*1)
3269 (Active Directory Global
Catalog over SSL) (*1)
465 (SMTP over SSL) (*1) 6 (TCP)
587 (SMTP over STARTTLS)
(*1)
Protocol
Number
6 (TCP)
6 (TCP)
6 (TCP)
465 (SMTP over SSL) (*1) 6 (TCP)
587 (SMTP over STARTTLS)
(*1)
Print Scanner D Print server 137,138,139,445 (SMB) 6 (TCP)
SharePoint
Server
FTP Server Scanner D FTP server 20,21 (FTP) (*1) 6 (TCP)
FTPS Server Scanner D FTPS server 989,990 (FTPS) (*1) 6 (TCP)
Saving to a
Folder
Ping Scanner D Another
(*1): Changing the Port Number is possible
Scanner D SharePoint
server
Scanner D File server 137,138,139,445 (SMB) 6 (TCP)
computer or server
80 (HTTP) (*1) 6 (TCP)
443 (HTTPS) (*1) 6 (TCP)
—1 (ICMP)
6 (TCP)
17 (UDP)
17 (UDP)
54
Page 55

55
Page 56

Chapter 2
Basic Scanner Operations
2.1 Turning the Power On/Off .................................................................................... 57
2.2 Using the Scanner Buttons.................................................................................. 59
2.3 Using the LCD Touch Panel................................................................................. 62
2.4 Using the On-Screen Keyboard........................................................................... 63
56
Page 57

2.1 Turning the Power On/Off
CAUTION
2.1.1 Turning the Power On
Do not move or shake the scanner when it is turned on.
This may damage components in the scanner and cause data to be lost.
1. Press the power button.
D After the scanner starts up, the [Login] window appears.
After turning the power off, wait for at least 10 seconds before turning the power
back on again.
57
Page 58

2.1.2 Turning the Power Off
1. Press the [Shutdown] button on the [Login] window.
To turn the power of the scanner off, make sure to press the [Shutdown] button.
Do not turn the power of the scanner off forcibly by pressing and holding down
the power button for 4 seconds. It may cause the scanner to function
abnormally.
2.1 Turning the Power On/Off
D A confirmation window appears.
2. Press the [OK] button.
D The scanner power is turned off.
58
Page 59

2.2 Using the Scanner Buttons
■ Using the Power Button
When the scanner is off or in standby mode, pressing the power button will start the
scanner up and display the login window.
When the scanner is on and a window displaying the [Shutdown] button is shown,
pressing the power button opens a shutdown confirmation window via which the scanner
can be shutdown.
Shutdown
LED Dark
Press Button
Operating
LED Lit
Login Window
Login
Press Button(*1)
Operation Windows
No operation
for set period
Standby
LED Lit
(*1) Other than pressing the power button, any of the following operations will startup
the scanner from standby mode.
z Loading the documents into the ADF paper chute.
z Closing the top cover.
z Pressing the power button.
z Pressing the Scan button.
z Touching the LCD touch panel.
The window displayed after a re-startup varies according automatic login settings in the
following way:
z If automatic login is enabled, the operation window is displayed.
z If automatic login is disabled, the login window in displayed.
(*2) The [Shutdown] button is shown on the following windows. Pressing the button
shows a confirmation window from which the power can be turned off.
z Shown on the login window, if automatic login is not set.
z Shown on the main menu or job menu, if automatic login is set.
Press Button(*2)
59
Page 60

2.2 Using the Scanner Buttons
z When the scanner is starting up or in standby mode, be careful to never hold the
power button down for 4 seconds, as this will cause the scanner to shutdown. If this
happens, saved scanned data may become unusable.
If the power button is accidentally held down too long, causing the scanner to
shutdown, temporally detach the AC adaptor to ensure that the power is completely
off.
z After turning the power off, wait for at least 10 seconds before turning the power
back on again. To shutdown the scanner correctly, press the [Shutdown] button on
the [Login] window.
z When the scanner is left in standby mode for a long period of time, it may take a
long time to be resumed.
z The idle time before standby mode entered can be changed. For details, refer to
"4.7.2 Setting the Time to Standby Mode" (page 110).
z Automatic login without displaying the [Login] window is possible. For more details
about how to set automatic login, refer to "4.7.1 Setting the Login Settings" (page
107).
z If automatic login is set, login via the Admin Tool is possible while the main menu or
job menu is displayed.
60
Page 61

■ Using the Top Cover Scan Button
When a button with is displayed on the LCD touch panel, the Scan button
becomes available.
When a button with is displayed, the Scan button can be pressed to start the scan.
Scan
The LCD touch panel [Scan] button with may appear as follows:
z [Scan]
z [Scan & Send]
z [Scan & Print]
z [Scan & Save]
z [Scan More]
One of those buttons on the LCD touch panel can be pressed to start the scan.
61
Page 62

2.3 Using the LCD Touch Panel
When using the LCD touch panel, buttons only need to be lightly pressed to select them.
For details about the LCD touch panel, refer to the following:
z
"4.1.1 Administrator Windows via the LCD Touch Panel" (page 75)
z "6.2 Using LCD Touch Panel Windows: Regular User" (page 303)
z Do not use a pen or other hard object on the LCD touch panel.
The LCD touch panel may be damaged.
z If the screen is dirty, this may cause the LCD touch panel to malfunction. Clean the
screen if it is visibly dirty.
For details, refer to "Cleaning the LCD Touch Panel" (page 419).
2.3 Using the LCD Touch Panel
62
Page 63

2.4 Using the On-Screen Keyboard
On the LCD touch panel, the on-screen keyboard can be used to enter text in the input
field on the window.
The on-screen keyboard can be used in the following ways.
■ Showing/Hiding the On-Screen Keyboard
To show/hide the on-screen keyboard, press the following button displayed on the LCD
touch panel.
Button Description
Press this button to show the on-screen keyboard.
The on-screen keyboard is displayed to enable entering characters.
This button is displayed while the on-screen keyboard is enabled.
Pressing this button hides the on-screen keyboard.
This button is displayed when there is no input field in the window.
In this state, the keyboard cannot be displayed.
When you touch any input field, the on-screen keyboard is displayed. In the [Login]
window, the on-screen keyboard is automatically displayed.
For an Add-in, you can use the [Add-in Software] window to set the on-screen
keyboard not to be displayed when running an Add-in.
When you display the on-screen keyboard when running an Add-in, you can change
the display location of the button used for displaying the on-screen keyboard.
63
Page 64

■ Using the On-Screen Keyboard
Key Function
Tab Switches focus to the input field.
Enter Performs the following.
z Closes the on-screen keyboard if it is displayed.
z Inserts a line feed when multiple lines are input in the input field.
z Commits the input in the [Login] window.
When logged in via the LCD touch panel, the administrator cannot select the menu
items using the on-screen keyboard. Select buttons in the menu by pressing the
LCD touch panel.
■ Keyboard Layout
2.4 Using the On-Screen Keyboard
A keyboard layout can be selected on the [Keyboard Settings] window. The on-screen
keyboard is compliant with the QWERTY layout. The French on-screen keyboard is
compliant with the AZERTY layout. The keyboard layout of the on-screen keyboard can
be switched by pressing a specific key. For details, refer to "D.3 Changing the Functions
on the On-Screen Keyboard" (page 495).
64
Page 65

65
Page 66

Chapter 3
Administrator Operations
(Overview)
3.1 Operating and Managing Scanners..................................................................... 67
3.2 Required Scanner Function Settings.................................................................. 69
66
Page 67

3.1 Operating and Managing Scanners
The administrator can configure and manage the scanner in the following ways.
z LCD touch panel
Scanner settings management can be implemented directly via the scanner's LCD
touch panel.
Setting mode
The administrator can operate the LCD touch panel in the following setting modes.
z Basic mode
A setting mode for Administrators with basic knowledge of computers.
Basic required scanner settings can be performed.
z Advanced mode
A setting mode for Administrators with advanced knowledge of networks and
servers.
Settings which are more advanced than those of Basic mode, such as,
authentication server, server environment, or advanced scanning settings can be
performed.
For details about the configuration of setting modes, refer to "4.4 Setting the Setting
Mode for the LCD Touch Panel" (page 92).
In addition, using the wizard on the LCD touch panel, you can configure minimum
settings required to setup the scanner. You can also use the wizard to restrict the
configurable functions. For details about the configuration with the wizard, refer to "4.3
Setting the System Settings with the Installation Wizard on the LCD Touch Panel"
(page 90).
z Admin Tool
Scanner settings management, and updates can be implemented via the network
interface by using the Admin Tool installed on a computer.
Settings can be performed for one scanner at a time.
z Central Admin Console
Scanner settings management, and updates can be implemented via the network
interface by using the Central Admin Console installed on a computer, for multiple
scanners together.
In this case, settings made with the Central Admin Console are applied to scanners via
a Central Admin Server.
67
Page 68

3.1 Operating and Managing Scanners
Central Admin Server
Central Admin Console
Admin Too l
Set multiple scanners
at a time via the
netw
ork interface
Set one scanner at
a time via the
network interface
Scanner
Scanner
Scanner
Scanner
Computer
Computer
Directly set one
scanner at a time
LCD Touch Panel
68
Page 69

3.2 Required Scanner Function Settings
Buttons are displayed in accordance with the settings
specified by the administrator
Which scanner settings are required differs according to scanner functions to be used by
the user.
The function buttons are displayed on the [Main Menu] window, in accordance with the
settings specified by the administrator.
The following shows the necessary settings for each function to be used.
69
Page 70

System Settings
3.2 Required Scanner Function Settings
Menu e-Mail Fax Print Save
Local Settings
Import Scanner
Settings
Scanner Name
Language
Selection
Region /
Timezone
Date / Time
Keyboard
Settings
Certificate
Management
Scanner Settings
Scan to
SharePoint
———— — page 266
NNNN N page 94
———— — page 96
AAAA A page 97
AAAA A page 98
NNNN N page 99
———— — page 100
See ...
Multifeed Settings
Scanner
———— — page 102
———— — page 105
Adjustment
General Scanner
———— — page 106
Settings
Login Settings
Login Settings
Standby Mode
Admin Password
———— — page 107
———— — page 110
AAAA A page 112
N: Necessary A: Advisable —: Not required
70
Page 71

Network Settings
Menu e-Mail Fax Print Save
Basic
IP address
DNS Server
WINS Server
NTP Server
Proxy Server
Ping
Network Status
Network Admin
Admin
Connection
Scanner Central
Admin Server
Scan to
SharePoint
NNNN N page 113
AAAA A page 115
AAAA A page 116
AAAA A page 117
——— A A page 118
———— — page 119
———— — page 121
———— — page 123
———— — page 125
See ...
Authentication Server
Login LDAP
Server
e-Mail LDAP
Server
Customize LDAP
Search
e-Mail
SMTP Server
Send e-Mail
File Names
(e-Mail)
Fax
Fax Server
A
(*1)
———— — page 133
———— — page 135
NN—— — page 137
A ——— — page 139
A ——— — page 140
—N—— — page 142
A
(*1)
A
(*1)
A
(*1)
A
(*1)
page 127
71
Page 72

3.2 Required Scanner Function Settings
Menu e-Mail Fax Print Save
Network Folder
Network Folder
File Names
(Save)
FTP Server Folder
FTP Server
Folder
File Names
(Save)
SharePoint Folder
SharePoint Folder
File Names
(Save)
Print
Scan to
SharePoint
——— N — page 143
——— A — page 156
——— N — page 143
——— A — page 156
———— N page 153
———— A page 156
See ...
Network Printer
—— N — — page 159
N: Necessary A: Advisable —: Not required
(*1): Only necessary if connecting to an LDAP server.
72
Page 73

73
Page 74

Chapter 4
Administrator Operations
(LCD Touch Panel and Admin Tool)
This chapter provides an explanation of administrator operations (setting up and
managing the scanner) via the scanner's LCD touch panel, or via the network interface
using the Admin Tool. The same operations may also be performed via the scanner
settings edit window and the job mode edit window of the Central Admin Console. For
details about the Central Admin Console windows, refer to "Chapter 5 Administrator
Operations (Central Admin Console)" (page 226).
4.1 Windows ................................................................................................................ 75
4.2 Administrator Login.............................................................................................. 78
4.3 Setting the System Settings with the Installation Wizard on the LCD Touch
Panel ............................................................................................................................ 90
4.4 Setting the Setting Mode for the LCD Touch Panel........................................... 92
4.5 Configuring the System........................................................................................ 94
4.6 Setting the Scan Options ................................................................................... 102
4.7 Configuring the Login-Related Settings ........................................................... 107
4.8 Configuring the Network Settings..................................................................... 113
4.9 Configuring the LDAP Settings ......................................................................... 127
4.10 Configuring the e-Mail-Related Settings......................................................... 137
4.11 Setting the Fax Server ...................................................................................... 142
4.12 Setting Folders for Saving Scanned Data....................................................... 143
4.13 Setting the Network Printers............................................................................ 159
4.14 Viewing the Scanner Details ............................................................................ 170
4.15 Managing the User Data Store and System Settings..................................... 177
4.16 Maintaining the System.................................................................................... 185
4.17 Setting a Job Sequence....................................................................................197
4.18 Messages........................................................................................................... 224
74
Page 75

4.1 Windows
Menu
4.1.1 Administrator Windows via the LCD Touch Panel
Selecting a menu displays its sub-menu.
The sub-menu items are shown in the right-side of the window.
Selecting the lowest level menu displays the setting window for the menu.
75
Page 76

4.1.2 Administrator Windows via the Admin Tool
Menu
Tool Menu
Administrator windows via the Admin Tool are as follows.
z When the [Scanner Settings] button is pressed
Selecting a menu displays its sub-menu.
Selecting the lowest level menu displays the setting window for the menu.
4.1 Windows
76
Page 77

z When the [Job Menu Settings] button is pressed
Job Mode SettingsJob Mode Settings
Tool Menu
When a tab is selected in the job mode settings menu, the related setting window is
displayed.
77
Page 78

4.2 Administrator Login
4.2.1 Administrator Login: via the LCD Touch Panel
■ When Automatic Login is Not Set
z The default user name and password for the administrator are set as follows:
User name: admin
Password: password
z The scanner setup can be configured by one user.
1. Enter the user name and password of the administrator.
4.2 Administrator Login
If [Active Directory Global Catalog] is selected for the login LDAP server, the
[UPN Suffix] input field is displayed.
A UPN suffix is not required when logging in as an administrator. Even if entered,
it is ignored.
2. Press the [Login] button.
D If the user name and password are valid, the [System Settings] window appears.
78
Page 79

■ When Automatic Login is Set
When automatic login has been set, login to the administrator windows from the regular
user window.
1. From the [Maintenance] window, press the [Administrator Login] button.
D The [Administrator Login] window appears.
2. Enter the administrator user name and password.
3. Press the [OK] button.
D When authenticated, the system settings window is shown.
79
Page 80

4.2 Administrator Login
4.2.2 Setting up for Administrator Access via the Admin Tool
This section describes the required settings for logging in via the Admin Tool.
The following are required for administrator login via the Admin Tool:
z "4.5.1 Setting the Scanner Name" (page 94)
z "4.7.3 Changing the Admin Password" (page 112)
z "4.8.1 Giving the Scanner an IP Address" (page 113)
z "4.8.8 Setting the Admin Connection" (page 123)
z "4.8.2 Setting the DNS Server" (page 115)
z "4.8.3 Setting the WINS Server" (page 116)
■ Checking the Internet Explorer Cache Settings
Check the Internet Explorer cache settings.
1. From the Internet Explorer [Tools] menu, select [Internet Options].
D The [Internet Options] dialog box appears.
2. On the [General] tab, press the [Settings] button on the [Browsing
history].
D The [Temporary Internet Files and History Settings] dialog box appears.
3. For [Check for newer versions of stored pages], select [Automatically].
4. For [Disk space to use], specify 63 MB or above.
5. Press the [OK] button.
z Different browser versions may require a different set up procedure.
z Do not use a proxy server setting.
If any updates or service packs are available for Internet Explorer, make sure they
are applied.
80
Page 81

■ Setting the Internet Explorer Trusted Sites
Enter the target scanner URL as Internet Explorer trusted sites.
If not set, connection to a scanner is blocked, and certification cannot be installed.
1. From the Internet Explorer [Tools] menu, select [Internet Options].
D The [Internet Options] dialog box appears.
2. On the [Security] tab, select [Trusted sites].
3. Press the [Sites] button.
D The [Trusted sites] dialog box appears.
4. Clear the [Require server verification (https:) for all sites in this zone]
check box.
5. Enter the URL of the scanner in the [Add this website to the zone] field,
and press the [Add] button.
Example: http://IP_address or scanner_name/
Different browser versions may require a different setup procedure.
If any updates or service packs are available for Internet Explorer, make sure they
are applied.
81
Page 82

4.2 Administrator Login
■ Installing the Admin Tool
To setup the scanner via the network interface, install the Admin Tool to your computer.
1. To access a scanner, specify the scanner name as a URL using a Web
browser.
According to the settings described in "4.8.8 Setting the Admin Connection" (page 123),
specify the URL in one of the following ways.
z SSL is [Off], no port number change
http://scanner_name or IP_address/
z SSL is [Off], port number change
http://scanner_name or IP_address:port_number/
For port_number, enter the changed port number.
z SSL is [On], no port number change
https:// scanner_name or IP_address/
z SSL is [On], port number change
https://scanner_name or IP_address:port_number/
For port_number, enter the changed port number.
For SSL, the [Security Alert] window is displayed when connecting. Press the [Yes]
button on the [Security Alert] window.
D The [Login] window appears.
2. Enter the user name and password of the administrator.
3. Press the [Login] button.
D The download window appears.
82
Page 83
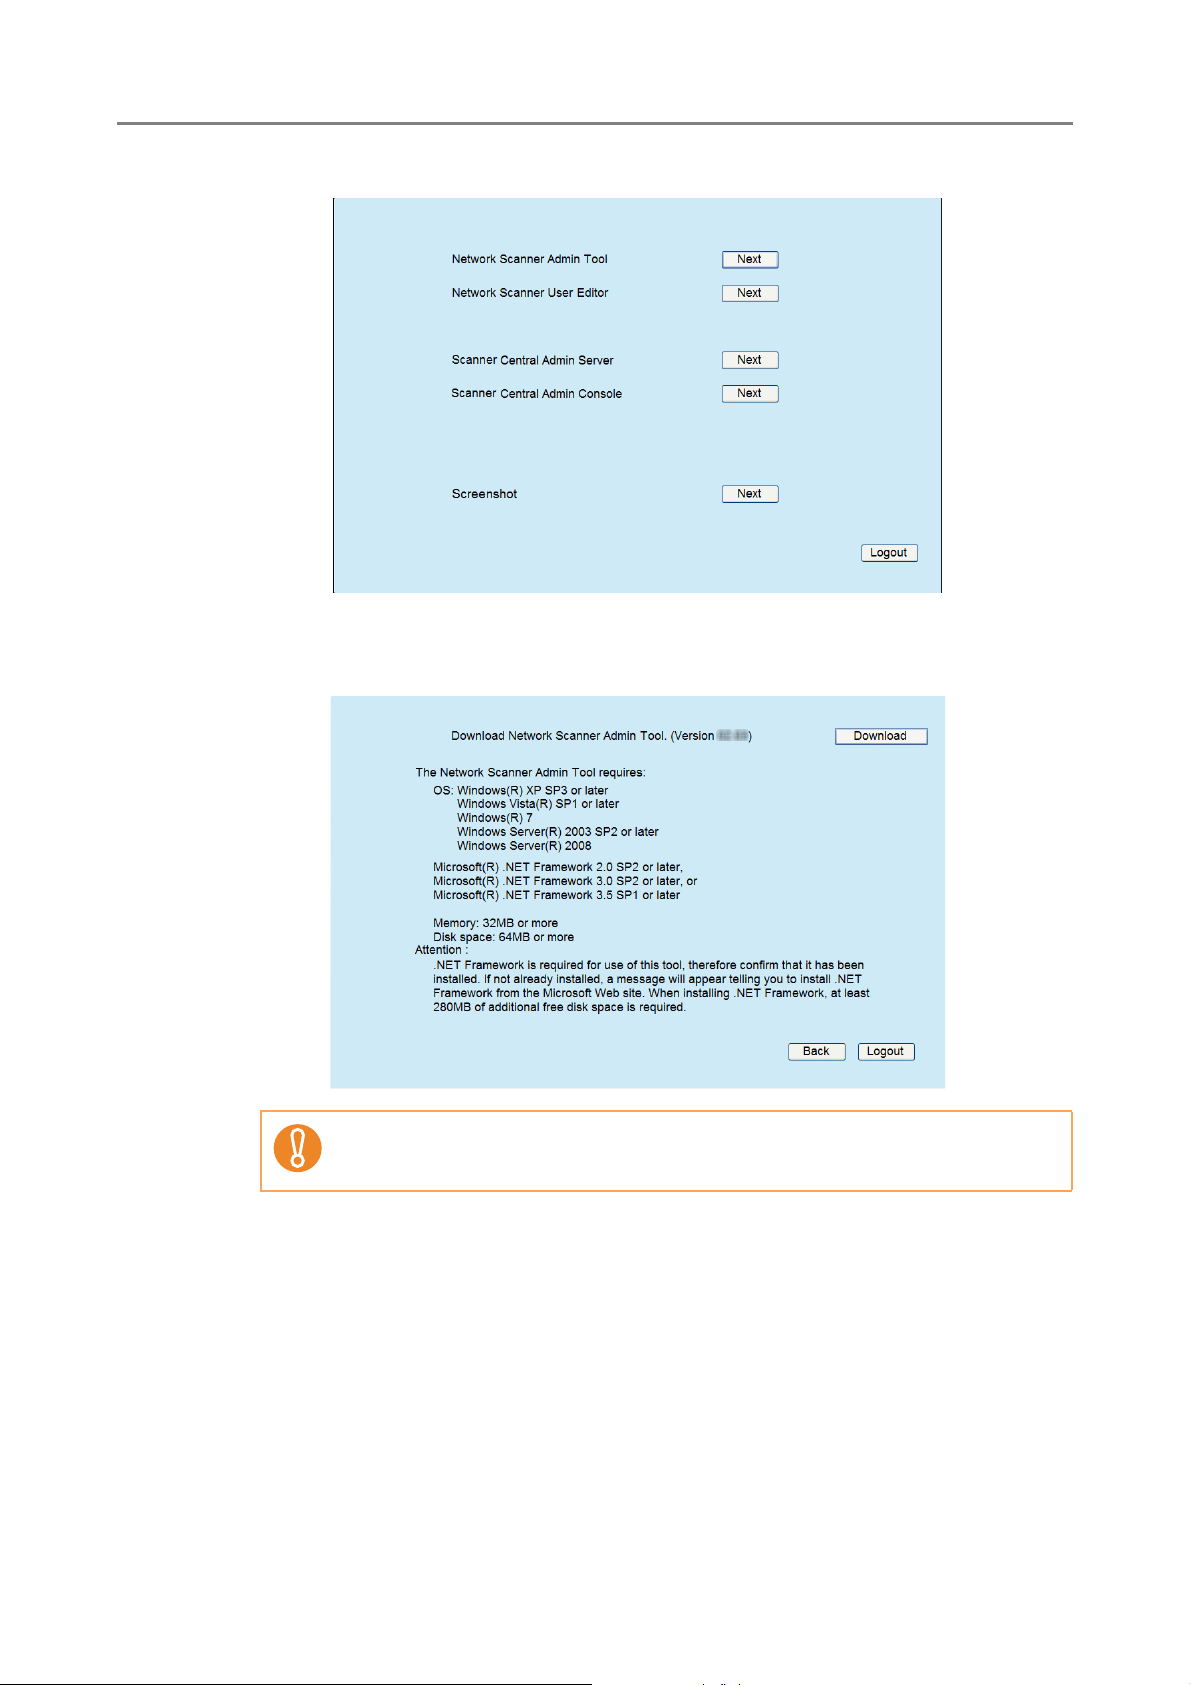
4. Press the [Next] button for the Network Scanner Admin Tool download.
D The Network Scanner Admin Tool download window appears.
5. Press the [Download] button.
Downloading is not possible while a scanner operation is in process.
D The [File Download - Security Warning] dialog box appears.
83
Page 84

6. Press the [Run] button.
D The Network Scanner Admin Tool Setup Wizard appears.
Do not close the Web browser or logout until installation is complete.
If .NET Framework is not installed, the Microsoft Web site is accessed when
installing the Admin Tool.
After installing .NET Framework, try again from Step 1.
4.2 Administrator Login
7. Press the [Next] button.
D The [Select Installation Folder] window appears.
84
Page 85

8. Specify an installation folder for the Admin Tool and the target user
setting.
To select a different folder, press the [Browse] button.
To check the free space available for the currently selected folder, press the [Disk
Cost] button.
Installation fails if the length of any installation path (folder path plus
installation file name) exceeds 259 characters. Select an installation folder
that respects this limit.
9. Press the [Next] button.
D From here on after, follow the instructions on the window to proceed the
operation.
When "Network Scanner Admin Tool has been successfully installed" is
displayed, the installation is complete. Press the [Close] button.
D After installation is completed, log out from the scanner on the Web browser and
close the Web browser.
D After installation, the Admin Tool can be started by selecting the [Start] menu J
[All Programs] J [Network Scanner] J [Network Scanner Admin Tool].
85
Page 86

4.2 Administrator Login
z If this tool has already been installed, skip to section "4.2.3 Administrator Login: via
the Admin Tool" (page 87) for details about Admin Tool operations.
z From the Web browser [Tools] menu, select [Internet Options], and note the
following points about the settings shown on the [Internet Options] dialog box.
z In the [Accessibility] dialog box shown when pressing the [Accessibility] button
on the [General] tab, do not change the formatting and user style sheet
settings. If these settings are changed, the displayed style of the Admin Tool
may be corrupted.
z In the [Language Preference] dialog box shown when pressing the
[Languages] button on the [General] tab, move the same language as for the
Central Admin Server operation system to the top. If a different language is
specified, a problem may occur with the input or displays for the Admin Tool.
z On the [Security] tab, if [Security level for this zone] is set to [High], part of the
Admin Tool window may not be correctly displayed.
In this case, on the [Security] tab, add the scanner or Central Admin Server to
the trusted site zone and press the [Default Level] button. Or press the [Custom
Level] button and set [Binary and script behaviors] to [Enable].
z When the font size is large, part of the dialog box may not be shown correctly. In this
case, use a smaller font size.
■ Uninstalling the Admin Tool
This section uses Windows Vista as an example.
Uninstall the Admin Tool from [Control Panel] - [Programs] - [Programs and Features] in
the computer in which it is installed.
Close the Admin Tool before uninstalling.
If the Admin Tool is uninstalled while still open, normal operation of the open Admin
Tool is not guaranteed.
86
Page 87

4.2.3 Administrator Login: via the Admin Tool
The Admin Tool can be set up to manage the scanner via a computer.
This section explains how to login using the Admin Tool.
When an administrator or user is already logged into a scanner, login via the Admin Tool
is not possible.
However, if automatic login is set, login via the Admin Tool is possible while the main
menu or job menu is displayed.
z If the normal screen display does not appear (for example: an "X" mark appears),
wait for a few minutes and try again. If the problem still occurs, contact your
FUJITSU scanner dealer or an authorized FUJITSU scanner service provider.
z If a button is rapidly pressed many times in succession, a "Connection error"
message may appear. In this case, wait for a few minutes and try again.
z For details about setting up to manage the scanner via a computer, refer to "1.4.1
Requirements for Admin Tool" (page 46).
z The default user name and password for the administrator are set as follows:
User name: admin
Password: password
z The scanner setup can be configured by one user.
z Session timeout time is 20 minutes (fixed). The session timeout time is extended by
a further 20 minutes for the following:
z when a menu button is pressed
z when the [OK] button is pressed
87
Page 88

4.2 Administrator Login
1. Select the [Start] menu J [All Programs] J [Network Scanner] J
[Network Scanner Admin Tool].
D The Admin Tool is started.
2. Specify the [Connect to] (of the scanner).
Enter the IP address, scanner name, or FQDN for the scanner to be setup or
managed.
z If the port number was changed in "4.8.8 Setting the Admin Connection"
(page 123), enter the port number changed in [Port Number].
z When trying to connect with a port number other than the specified number, it
takes up to 20 seconds before a connection error occurs.
z To use SSL, select the [Use HTTPS] check box.
z If the Admin Tool is started while there is insufficient free memory, a script
error may occur. Try again after ensuring that there is enough free memory.
3. Press the [Connect] button.
D The [Login] window appears.
88
Page 89

4. Enter a [User Name] and [Password].
5. Press the [Login] button.
D If the user name and password are valid, the [System Settings] window appears.
89
Page 90

4.3 Setting the System Settings with the Installation Wizard on the LCD Touch Panel
4.3 Setting the System Settings with the Installation
Wizard on the LCD Touch Panel
Using the Installation Wizard on the LCD touch panel, you can set the following items:
z Scanner Name
z Region/Timezone
z Date/Time
z Login Settings
z Admin Password
z IP Address
z DNS Server
z Central Admin Server
1. On the [Admin Menu] window, press .
D The [Admin Settings] window appears.
For [Show the Installation Wizard at next start up?], you can set whether or
not to show the Installation Wizard immediately after starting the scanner.
90
Page 91

2. Press the [Installation Wizard] button.
D The [Installation Wizard] window appears.
3. Select the check boxes for items you want to configure with the
Installation Wizard.
When the [Region/Timezone Date/Time] check box is selected, the window for
setting the region/timezone and the window for setting the date/time will be
displayed.
4. Press the [Start] button.
D A window for configuring the selected items appear in the Installation Wizard.
5. Follow the wizard to configure the settings.
For details about the procedure for configuring system settings, refer to the "Getting
Started".
91
Page 92

4.4 Setting the Setting Mode for the LCD Touch Panel
4.4 Setting the Setting Mode for the LCD Touch Panel
Set the setting mode used for configuring or managing system settings via administrator
windows on the LCD touch panel.
For details about setting modes, refer to "3.1 Operating and Managing Scanners" (page
67).
For details of the operations available in each setting mode, refer to "1.3.1 Operations
with Administrator Right" (page 38).
1. On the [Admin Menu] window, press .
D The [Admin Settings] window appears.
92
Page 93

2. Press the [Select Mode] button.
D The [Select Mode] window appears.
3. Press to select a setting mode.
4. Select the check boxes of the functions to be enabled for the setting
mode.
5. Press the [OK] button.
D The setting mode is set.
93
Page 94

4.5 Configuring the System
4.5.1 Setting the Scanner Name
Set a scanner name to provide a network alias for the scanner.
Do not use a name already being used in the network.
Name duplication will cause a network connection error. For details about how to
deal with such errors, refer to "4.18.1 Administrator Window Messages" (page 225).
1. Select [System Settings] J [Local Settings] J [Scanner Name].
D The [Scanner Name] window appears.
4.5 Configuring the System
2. Enter a [Scanner Name].
3. In the [Member of] section, specify the scanner as a [Workgroup] or
[Domain] member.
4. Enter a workgroup name or domain name in the input field.
5. Press the [OK] button.
D The restart confirmation window appears.
94
Page 95

In the following case, the authentication window appears.
z When specifying the scanner as a domain member
z When changing the name of a scanner that is a member of a domain
Check the required authentication information when adding to a domain, and
enter a user name that can be added to the domain and the password.
User names may be up to 256 characters long.
Passwords may be up to 256 characters long. [User Name] and [Password]
are case sensitive.
If the user name and password are valid, the restart confirmation window
appears.
6. Press the [Now] button.
D The scanner is restarted.
z Scanner names may be duplicated depending on the network status.
If the specified scanner name is the same as one already in use, network
communication problems occur.
In this case, try the following steps:
1. Disconnect the LAN cable.
2. Press the [Shutdown] button on the LCD touch panel to turn the scanner off.
3. Press the power button to start the scanner with the LAN cable disconnected.
4. Enter a non-duplicated scanner name.
5. Reboot the scanner.
6. Re-connect the LAN cable to the scanner.
z The connection is lost if the scanner name is changed via the network interface. To
continue with other settings, wait a short time for the scanner to restart, then login to
the network interface again.
95
Page 96
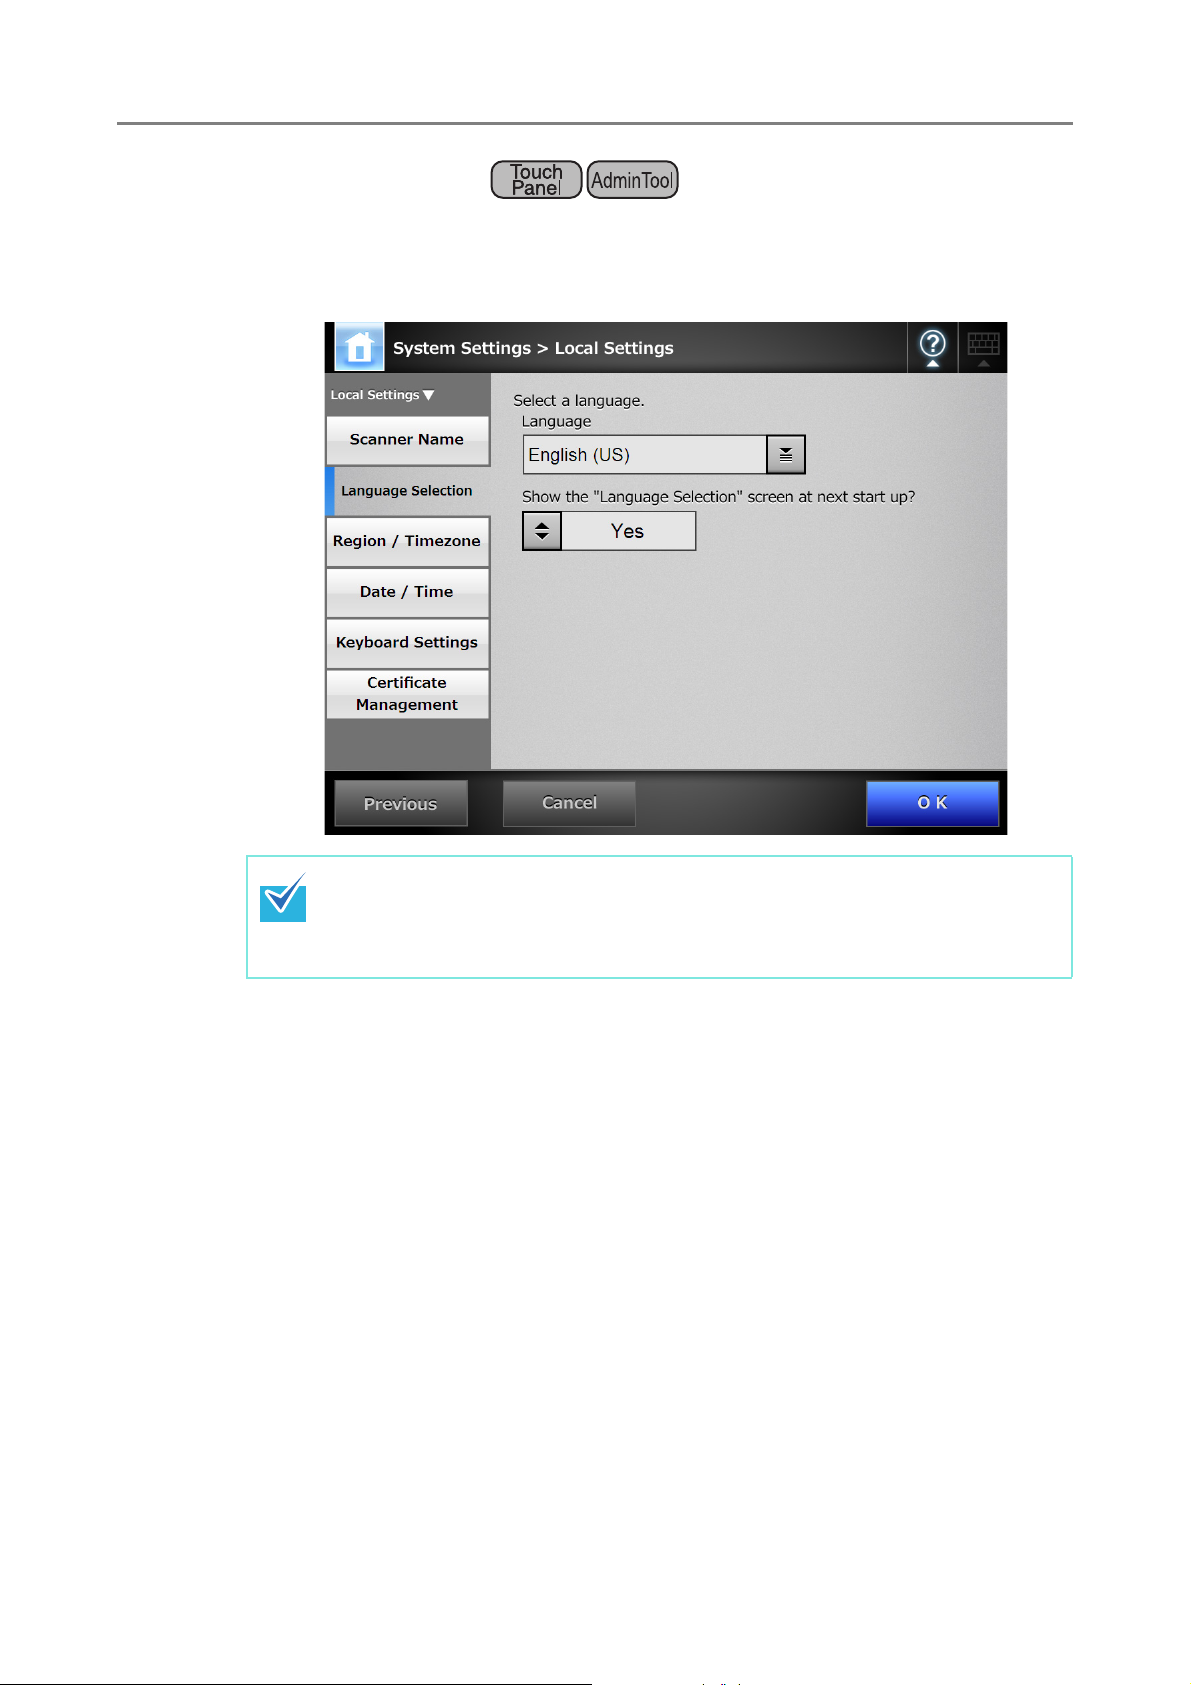
4.5.2 Setting the Language
1. Select [System Settings] J [Local Settings] J [Language Selection].
D The [Language Selection] window appears.
4.5 Configuring the System
You can select whether or not to display this window again at the next scanner
startup. To display the window again, for "Show the "Language Selection"
screen at next start up?", select [Yes]. To not display this window at next start
up, select [No].
2. Select a language.
Select the desired language for the operating environment.
D This returns to the [Language Selection] window.
3. Press the [OK] button.
D A language setting confirmation message appears in the selected language.
4. Press the [OK] button.
96
Page 97

4.5.3 Setting the Region/Timezone
1. Select [System Settings] J [Local Settings] J [Region/Timezone].
D The [Region/Timezone] window appears.
Central Admin
Console
2. Select a region/timezone.
3. If you select a region/timezone in which daylight savings time is used,
select whether [Daylight Savings Time] should be on or off.
4. Press the [OK] button.
D The region/timezone is set.
97
Page 98

4.5 Configuring the System
4.5.4 Setting the Date/Time
1. Select [System Settings] J [Local Settings] J [Date/Time].
D The [Date/Time] window appears.
Central Admin
Console
For Central Admin Console, the [Date/Time] input field and [Get Time] button
cannot be used.
2. Select a date format.
3. Enter the current date and time in the [Date/Time] input field.
Pressing the [Get Time] button refreshes the [Date/Time] input field with the current
value of the internal system date/time.
4. Press the [OK] button.
D The date and time are set.
For the Admin Tool, an adjustment that advances the system time by 20
minutes or more results in a session timeout and causes the scanner to
logout. However, the specified time adjustment will be made.
98
Page 99

4.5.5 Setting the Keyboard
Set the keyboard.
1. Select [System Settings] J [Local Settings] J [Keyboard Settings].
D The [Keyboard Settings] window appears.
Central Admin
Console
2. Select a keyboard language.
3. Press the [OK] button.
D The keyboard is set.
99
Page 100

4.5.6 Managing Certificates
Certificates to be used for server authentication in SSL communication can be imported or
removed.
4.5 Configuring the System
■ Importing a Certificate File
X.509 certificate files (*.cer, *.crt) can be imported.
Up to 100 certificate files can be imported.
Central Admin
Console
1. Select [System Settings] J [Local Settings] J [Certificate Management].
D The [Certificate Management] window appears.
2. Specify an authentication certificate file.
D Press the [Browse] button to specify a certificate file.
3. Press the [Import] button.
D The certificate file is imported.
The imported file is saved in the Trusted Root Certificate Authority store.
When a certificate file is distributed from the Central Admin Server, any
previously imported certificates will be deleted, and replaced by the contents
of the new file.
100
 Loading...