

Page 1

Mobile Printer
FTP-628WSL210 Series
User's Guide
FUJITSU COMPONENT LIMITED
Page 2

Page 3

IInnttrroodduuccttiioonn
Thank you for purchasing the FTP-628WSL210 Series Mobile Printer
hereafter referred to as “this product”). (
This User's Guide (hereafter referred to as “this guide”) contains
precautions to use it safely and correctly.
Before using this product, please read the complete this guide.
I n addition, please keep this guide handy for future reference.
If you have any suggestions or comments about this guide, please
o not hesitate to contact us. d
Bluetooth
Apple, iPod, iPhone and iPad are are trademarks of Apple Inc, registered in
the U.S. and other countries.
Android is trademarks of Google Inc.
All other product names and service names are trademarks or registered
rademarks of their respective companies. t
All Rights Reserved, Copyright FUJITSU COMPONENT LIMITED 2012
®
is registered trademark of Bluetooth SIG.
1
Page 4

CCaauuttiioonnss
■ Change of content
The contents of this guide and this product are subject to change without
prior notice.
■ Use in high safety applications
This product is designed, developed and manufactured for general use,
such as standard industrial, general, personal and household use. This
product is not designed, developed and manufactured for “high safety
applications”, such as an application which requires extremely high
safety, which may have a serious effect on society, expose individuals to
serious danger (death, personal injury, severe physical damage or other
loss), if extremely high safety is not assured (including, without
limitation, nuclear reaction control in a nuclear facility, aircraft automatic
flight control, air traffic control, transport control in a mass transport
system, medical equipment for life support, missile launch control of a
weapons system), or an application which requires extremely high
reliability (including, without limitation, submarine relay, space
satellite).
If you wish to use this product in an environment that requires high
safety, please consult with our sales representatives.
■ Copyright
This product and this guide are copyrighted works of
FUJITSU COMPONENT LIMITED.
This product and this manual must not be reproduced, duplicated, used,
or modified, partially or in full, without permission.
2
Page 5

■ Regulatory Compliance
For Customers in USA (FCC)
This device complies with Part 15 of the FCC Rules. Operation is subject
to the following two conditions:
1) This device may not cause harmful interference, and
2) This device must accept any interference received,
including interference that may cause undesired operation.
This equipment has been tested a nd found to comp ly wit h the limits for
a Class B digital device, pursuant to Part 15 of the FCC Rules. These
limits are designed to provide reasonable protection against harmful
interference in a residential installation. This equipment generates,
uses and can radiate radio frequency energy and if not installed and
used in accordance with the instructions, may cause harmful
interference to radio communications. However, there is no guarantee
that interference will not occur in a particular installation. If this
equipment does cause harmful interference to radio or television
reception, which can be determined by turning the equipment off and
on, the user is encouraged to try to correct the interference by one of
the following measures:
- Reorient or relocate the receiving antenna.
- Increase the separation between the equipment and receiver.
- Connect the equipment into an outlet on a circuit different from
that to which the receiver is connected.
- Consult the dealer or an experienced radio/TV technician for help.
To assure continued compliance, any changes or modifications not
expressly approved by the party responsible for compliance could void
the userʼs authority to operate this equipment. (Example- use only
shielded interface cables when connecting to computer or peripheral
devices).
3
Page 6

For Customers in CANADA (Industry Canada)
This equipment complies with Industry Canada RSS210 rules.
Operation is subject to the following two conditions:
1) This device may not cause harmful interference, and
2) This device must accept any interference received,
including interference that may cause undesired operation.
For Customers in EU (CE Marking)
This product is in conformance with the requirements of European
Council Directive:
R&TTE Directive 1995/5/EC
Applied standards:
EN 60950-1
EN 300 328
01 489-1
EN 3
EN 301 489-17
EN 50581
■ Export
This device may contain commodities, technology or software subject to
export laws and regulations from the US and other countries. Diversion
contrary to the country law is prohibited.
■ Warranty
We shall not be responsible for any failure caused by wrong operation or
usage in the wrong environment.
Moreover, we cannot be responsible for the loss, the passive damages or
the claim by a third party, even if it is caused by use or failure of this
product.
In addition, this productʼs range of failure will never exceed the amount
of money paid for it.
4
Page 7

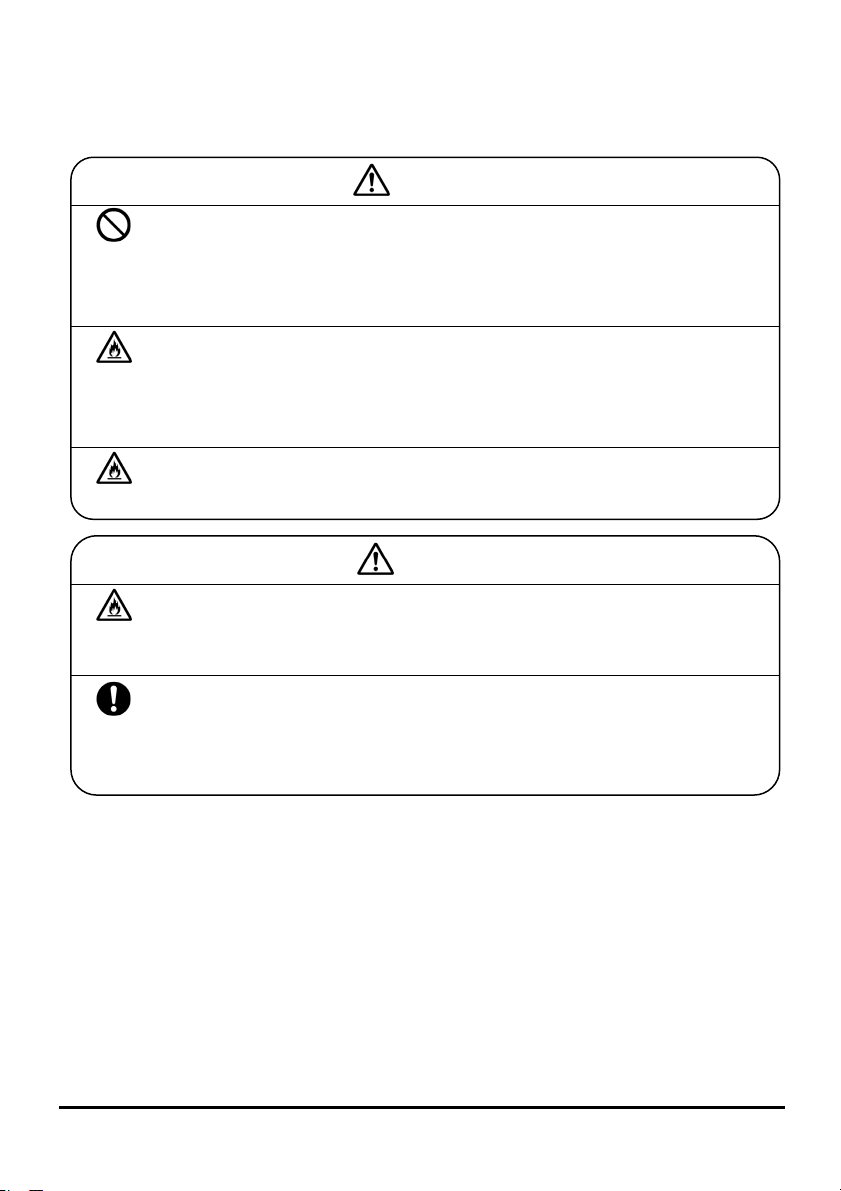
SSaaffeettyy CCaauuttiioonnss
■ Explanation of Symbols
The following symbols are used in this guide. Please read and
nderstand the meaning of each symbol in this guide. u
If this product should malfunction, immediately stop using it, and
contact your sales representative.
Indicates an imminent risk of causing severe
Danger
Warning
Caution
personal injury or death if not used properly.
This level is not described in this document.
Indicates possibility of causing severe
personal injury or death if not used properly.
Indicates that a minor or some personal injury
may occur or that the product itself or other userʼs
roperty may be damaged. p
Indicates an action that must not be performed.
Detailed description is on the side of this symbol.
Important
Indicates danger, warning and caution.
Detailed description is on the side of this symbol.
Indicates an action that must be performed.
etailed description is on the side of this symbol. D
Indicates important points by using this product.
5
Page 8

■ General Cautions
- Do not use in the environment with corrosive gas or salt
Break-
down
Modify
Fire
Fire
Fire
Fire
Fire
Fire
wind is present.
Failure to observe this may cause failure.
- Do not modify or disassemble.
Failure to observe this may cause fire, explosion or
breakdown.
- Do not burn or heat.
Failure to observe this may cause smoke, fire or breakdown.
- Do not pour water.
This equipment is not waterproof. Failure to observe this
may cause fire, explosion or breakdown.
- Do not use or store the equipment in a hot
environment.
Failure to observe this may cause smoke, fire or breakdown.
- Do not throw or drop.
Failure to observe this may cause fire, explosion or
breakdown.
- Do not use with wet hands. Do not drip or drop liquid
such as drinking water, clips or other foreign matter.
Failure to observe this may cause fire or electric shock.
- In the event of heat, unusual smells, smoke or
excessive noise while using the product, please stop
using it immediately. Unplug the power cable, remove
the battery.
Failure to observe this may cause fire.
Warning
6
Page 9

Injury
Failure
Break-
down
Fire
Fire
Fire
Break-
down
Caution
- Do not use while driving a vehicle or walking.
Failure to observe this may cause traffic accidents and
injuries.
- Do not use the printer near the equipment that
generates large radiation noise, such as a high voltage
device and a large motor.
Failure to o bse rve thi s ma y ca use malfu nct ion or b reakdown.
- Do not use under direct sunlight or dusty environment
that contains the oil and iron.
Failure to observe this may cause heat, fire or failure.
- If charging is not completed within the specified time,
unplug the charger and stop charging.
The battery may leak by overcharging.
- Do not apply force to the cable.
Failure to observe this may cause fire or electric shock.
- Keep the power line away from other devices which
generate noise. (Large motor etc.)
Failure to o bse rve thi s ma y ca use malfu nct ion or b reakdown.
- Before using this product, be sure to read complete
user's guide.
It may cause the failure by incorrect use.
7
Page 10

■ Printer
- Do not use the printer in a location where radio wave
Accident
- During or immediately after operation, do not touch the
Burn
- Do not put metal objects or flammable objects into the
Fire
- Surely turn off the printer's power and confirm that the
Burn
Warning
generation is prohibited.
Might cause accidentally a malfunction of the instrument.
print head, the support plate and the motor. Heat is not
immediately discharged.
Failure to observe this may cause burn injury.
gaps of the case.
Failure to observe this may cause fire or electric shock.
printer head is sufficiently cooled down before cleaning.
Failure to observe this may cause burn injury.
Caution
- Never insert fingers or metal into the paper insertion
Injury
Injury
and/or eject slots of the paper cutter.
Failure to observe this may cause equipment failure or injury.
- Be careful not to get a hand or hair caught in moving
parts.
Failure to observe this may cause burn injury.
8
Page 11

■ Battery
- Do not use the battery for other device or purpose.
Break-
down
- Do not disassemble the battery.
Modify
Fire
Fire
Fire
Fire
Fire
- Only use the specified battery.
- Only charge the battery with the charger specified.
- Do not short-circuit the electrode of the battery.
- Do not solder the terminal of battery.
- Do not make impact or pressure on battery.
Warning
Failure to observe this may cause destruction.
Failure to observe this may cause heat, fire or destruction.
Failure to observe this may cause fire or electric shock.
Failure to observe this may cause fire or destruction.
Failure to observe this may cause heat, fire or destruction.
Failure to observe this may cause heat, fire or destruction.
Failure to observe this may cause heat, fire or destruction.
Break-
down
Break-
down
Caution
- Remove the battery if the printer is not expected to be
used for long period.
Failure to observe this may cause deterioration of the battery
and over-discharge state.
- Turn off the power of the printer before removing the
battery.
Failure to observe this may cause destruction.
9
Page 12
■ AC Adapter
- Do not use the AC adapter for any other devices or
Break-
down
Fire
Fire
Fire
Break-
down
purposes.
Failure to observe this may cause damage to the printer
and/or battery.
- Only connect the AC adapter to the specified voltage
and/or frequency.
Fail ure to obser ve this may c ause f ire or elect ric sh ock du e to
cable disconnection.
- Only use the specified AC adapter.
Failure to observe this may cause heat, fire or destruction.
- Please connect or remove the AC adapter after the
power is turned off.
Failure to observe this may cause breakdown.
- If you do not use the AC adapter for a long time, please
unplug the power cable.
Fail ure to obser ve thi s may cause electric shock or f ire du e to
dust and moisture.
Warning
Caution
10
Page 13

■ Warning Label of Product
This product comes with the following warning label.
This label must not be peeled off or erased from the display.
Moreover, please contact the distributor when the label is
difficult to see due to dirt, scratching etc.
Warning display Content
HEAD ヘッド
GEAR & HOOK
ギア・フック
CAUTION 注意
Do not touch the printer head and its
support plate directly, because it becomes
hot during printing.
Pay attention that fingers and hair do not
get caught in moving parts such as a gear
or hook.
Please do not touch the cutter blade when
you exchan ge the paper roll because i t may
cause an injury.
11
Page 14

TTaabbllee ooff CCoonntteennttss
1 Types of Product .............................................................13
2 Preparation to Print .........................................................14
2.1 Packaging .............................................................14
2.2 Optional Accessories...............................................15
2.3 Getting to Know the Printer .....................................16
2.4 Inserting the Battery ..............................................19
2.5 Connecting AC Adapter (Charging)...........................20
2.6 Connecting AC Adapter (Operating)..........................21
2.7 Inserting the Paper ................................................22
2.8 Attaching the Belt Clip ............................................23
3 Operating Procedures ......................................................24
3.1 Power On..............................................................24
3.2 Test Print ..............................................................25
3.3 USB Communication...............................................27
3.4 Bluetooth Communication .......................................28
3.5 Printer Error ..........................................................29
4 Indicator Lights...............................................................31
4.1 Normal Operation ..................................................31
4.2 Printer Error ..........................................................32
4.3 Charging...............................................................33
4.4 Maintenance Mode .................................................33
5 Maintenance ...................................................................34
5.1 Thermal Head........................................................34
5.2 Platen Roller..........................................................35
5.3 Paper Sensor.........................................................35
5.4 Paper Cover ..........................................................36
5.5 POWER/FEED Switch ..............................................37
6 Troubleshooting ..............................................................38
7 Specifications .................................................................42
7.1 Printer Specifications ..............................................42
7.2 Paper Specifications ...............................................43
8 Recycle ..........................................................................44
9 Appendix .......................................................................45
9.1 Bluetooth Communication .......................................45
10 Product Support ............................................................47
12
Page 15

1 Types of Product
Types of Product
1 1 Types of Product
The following product types are available.
Please note that the printer may not support the function of
the printer model, even if there is a description in this guide.
MODEL NAME
FTP-628WSL210#20-R
a : Supply item
(Refer to Table 1-1)
b : Interface
(Refer to Table 1-2)
Table 1-1. Supply items
Content
a
20 Available Available Available
Table 1-2. Interface
Content
b
10 Available Available Available
11 Available Not available Available
12 Not available Not available Available
Printer Battery AC Adapter
Bluetooth
Bluetooth
(iOS supported)
USB
13
Page 16

2 Preparation to Print
Preparation to Print
2 2 Preparation to Print
2.1 Packaging
The following items are included.
If anything is missing, please contact the distributor.
Printer Battery
14
AC adapter Safety Cautions
Page 17

2 Preparation to Print
2.2 Optional Accessories
The following optional parts are available. Purchasing
information for these accessories can be obtained from the
place where you bought this printer.
Paper Battery AC adapter
AC cable
(PSE or UL/CSA)
USB cable
Belt Clip
15
Page 18

2 Preparation to Print
2.3 Getting to Know the Printer
■ Front Side (Cover Closed)
1
2
3
4
5
1
Paper Cover : Co
ver to open and load paper.
6
7
8
16
2
Paper Cutter : To cut paper.
3
Status LED : Displa
4
POWER Switch : T
5
FEED Switch : To feed paper.
6
Cover Open Lever : T
7
USB Connector : T
8
Battery Cover : Cover to open and insert the battery.
ys status of the printer.
o turn the power supply ON or OFF.
o open the cover.
o connect to PC etc.
Page 19

■ Front Side (Cover Open)
2 Preparation to Print
9
10
9
Platen Roller : T
10
Warning Label :
12
o feed paper.
This shows warning when using printer.
11
11
Thermal Head : This applie
12
Paper Sensor : This senso
s heat to paper.
r detects the status of paper.
17
Page 20

2 Preparation to Print
■ Rear Side
13
14
15
13
Screw for Belt Clip : This attaches the Belt Clip.
14
AC Adapter Jack : Open and connect AC adapter.
15
Product Label : Di
other product
splays printer type and
information.
18
Page 21

r
2.4 Inserting the Battery
2 Preparation to Print
Caution
Life of the battery is about 500 charges. (At the normal temperature)
If an old battery is used, not only the equipment malfunctions
and this might cause destruction.
1. Please push cover lock and lift
the battery cover to open.
Battery cove
Cover lock
2. Please place the label surface
of battery downward, insert
the battery form its terminal
side.
Battery
3. Please hook battery cover on
the battery insertion area
and push the ba ttery cove r to
close.
(2)
(1)
19
Page 22

2 Preparation to Print
r
r
2.5 Connecting AC Adapter (Charging)
T he battery is charged by the printer's built-in charger.
Caution
Please stop charging immediately if an abnormal charge is generated.
1. Please connect the AC cable with
the AC adapter, and connect the
AC plug to an outlet.
AC adapter AC cable
2. Please hook up the jack cover to
open.
AC adapte
Jack
Jack
Cove
Insert DC output terminal of AC
adapter into the AC adapter jack.
<Side view>
3. When the charge starts, the LED turns red, and when the
battery is fully charged, the LED turns off. Please refer to
chapter 4.3 for the LED display of charging status.
4. Please hang the hook of the jack
(2)
(1)
cover to the hole of AC jack, and
20
push center of the jack cover to
close.
Important
When the printer power supply is turned on, it is not able to
charge.
Page 23

2 Preparation to Print
r
r
2.6 Connecting AC Adapter (Operating)
T his product can also be operated with the AC adapter.
1. Please connect the AC cable
with the AC adapter, and
connect the AC plug with
AC cable AC adapter
the outlet.
2. Please open the Jack Cover, and
connect the DC output terminal of
AC adapte
Jack
Jack
Cove
the AC adapter to the AC adapter
Jack.
<Side view>
3. Please turn on the power supply of the printer. Please
refer to chapter 3.1 for how to turn on the power supply.
Important
- The battery must be inserted in the printer though it operates
with only the AC adapter.
- When the power supply is turned OFF, it is possible to charge it.
- When the power supply is turned ON, it is not possible to charge
it.
21
Page 24

2 Preparation to Print
r
2.7 Inserting the Paper
1. Please push up the cover open
lever to open the paper cover.
Thermal Pape
(Thermosensitive Side)
2. Please insert the paper in
the printer.
3. Please put out the edge of the paper
and close the paper cover. Push
center of the paper cover firmly
when closing.
Cover Open Lever
22
Page 25

2 Preparation to Print
2.8 Attaching the Belt Clip
The printer can be attached to the waist belt with a Belt
Clip.
Below are recommendations how to attach the Belt Clip:
How to attach it
1. Please remove the screw for the Belt Clip on the back of
the printer.
2. Please tighten the screw of the Belt Clip after setting it
in the desired direction.
Important
- If the Belt Clip is misaligned, it cannot be installed correctly.
- There are two tapped holes in the Belt Clip.
used depends on the desired direction clip.
The hole which is
23
Page 26

3 Operating Procedures
33 OOppeerraattiinngg PPrroocceedduurreess
3.1 Power On
1. Please push the POWER Switch until the LED light turns
green.
2. It is possible to turn the power off by pushing the POWER
Switch until the LED turns off.
24
Page 27

3 Operating Procedures
3.2 Tes t P r in t
This product has a test print function.
The setting of the printer can be confirmed by this test
rint. p
1. Please turn the power off and push the FEED switch.
2. Please turn the power on while holding with the FEED
switch down.
Then, the test print starts.
3. When the test print ends, the printer automatically turns
off the power supply.
4. Please turn the power off when you want to stop the test
print.
5. Please refer to the next page for a detailed description of
the test print. (The content of the test print is different
for each model)
Important
The test print fails if a printer error such as "Paper End" or "Paper
Cover Open" etc. occurs.
Please retry after resolving the error.
25
Page 28

3 Operating Procedures
---------------AD Ver 1.00
628
----------------
Serial No : 22000001
Printer ID : 01
PrinterSUM : 00000001
Power OFF : 30 min
Power Down : 1.0 sec
HD VOLT: 5.0 V HD TEMP: 25 ゚ C
INTERFACE : Bluetooth/USB
HAND SHAKE : Non process
BT FIRM: 0000D1000000000437
BD ADDR: 00 11 22 33 44 55
BT NAME: 628WSL210_000001
BT LINK: 0 sec
!"#$%&'()*+,-./0123456789:;<=>?
@ABCDEFGHIJKLMNOPQRSTUVWXYZ[\]^_
'abcdefghijklmnopqrstuvwxyz{|}~
!"#$%&'()*+,-./0123456789:;<=>?@ABCDEFGHIJKLMNO
PQRSTUVWXYZ[\]^_'abcdefghijklmnopqrstuvwxyz{|}~
亜唖娃阿哀愛挨姶逢葵茜穐悪握渥旭
葦芦鯵梓圧斡扱宛姐虻飴絢綾鮎或粟
袷安庵按暗案闇鞍杏以伊位依偉囲夷
委威尉惟意慰易椅為畏異移維緯胃萎
衣謂違遺医井亥域育郁磯一壱溢逸稲
茨芋鰯允印咽員因姻引飲淫胤蔭院陰
隠韻吋右宇烏羽迂雨卯鵜窺丑碓臼渦
嘘唄欝蔚鰻姥厩浦瓜閏噂云運雲荏餌
叡営嬰影映曳栄永泳洩瑛盈穎頴英衛
詠鋭液疫益駅悦謁越閲榎厭円園堰奄
宴延怨掩援沿演炎焔煙燕猿縁艶苑薗
遠鉛鴛塩於汚甥凹央奥往応押旺横欧
殴王翁襖鴬鴎黄岡沖荻億屋憶臆桶牡
乙
俺卸恩温穏音下化仮何伽価佳加可
嘉夏嫁家寡科暇果架歌河火珂禍禾稼
Check pattern
The thermal head open circuit
etc. can be confirmed.
Version
The firmware version can be
confirmed.
Setting information etc
The setting information etc can
be confirmed. This print example
shows the following content.
- Printer serial number
- Printer ID
- Firmware sum value
- Auto power off transition
duration
- Auto power down transition
duration
Voltage and Temperature
The power voltage and
temperature of thermal head can
be confirmed.
Interface
Available interface and protocol
can be confirmed.
Bluetooth information
The Bluetooth information can
be confirmed.
Installing font
Installing font can be confirmed.
26
Page 29

3 Operating Procedures
3.3 USB Communication
Explanation of how to communicate and print with a USB
able from a terminal such as a personal computer: c
1. Please use the USB cable. The plug on the printer side
(device side) is the mini B type.
2. Please open the USB connecter cover and insert the USB
connector.
3. Please connect the plug of host with the host terminal
connecter.
4. Please start the application in the host terminal (The
communication port is opened).
Then, the Status LED display shows the USB connection.
Important
When other interfaces are used, it is not possible to connect it.
27
Page 30

3 Operating Procedures
3.4 Bluetooth Communication
Explanation of how to communicate and print with
a Bluetooth device from a terminal such as a personal
omputer: c
1. Please turn the printer on.
2. Please find the Bluetooth device in the host terminal.
3. The device name of the connected printer is displayed.
Then, please select the device and connect it.
4. Please input "9999" when the PIN code is requested.
(This status is standard and set by the factory)
5. The LED display shows the status of the Bluetooth
connection.
28
Important
- There is a product that does not support this communication.
Please refer to the C.1 for the supporting product.
- Please refer to chapter 9.2 for the connection with a general
tablet PC.
- When other interfaces are used, it is not possible to connect it.
Page 31

3 Operating Procedures
3.5 Printer Error
The error occurs when the printer cannot print/work
normally. The type of error is shown by the LED when the
error is occurring.
Please reset the status when the error occurs.
The following example explains reasons and solutions for
problems.
Error Cause Solution
Paper End - There is no paper
in the paper cover.
- It is not correctly set
though
- Particles have
collecte
sensor.
Paper Cover
Open
Thermal Head
Temperature
Error
Important
- It is normal that the temperature goes up because this printer
prints by heating the thermal head.
- The Thermal Head Temperature Error is generated easily by the
high ambient temperature.
- The paper cover is
open.
- The thermal head is
too hot.
there is paper
d on the paper
- Please correctly set
the pa
refer to chapter 2.7.
- Please clean the paper
sensor
refer to chapter 5.3.
- Please correctly
close the paper
cover,
refer to chapter 2.7.
- Please do not print
for a while.
Once the thermal
head cools down, the
error disappears.
per,
,
29
Page 32

3 Operating Procedures
Error Cause Solution
Supply Voltage
Error
Mark
Undetection
Hardware Error
MCU Operation
Error
RAM Error
Bluetooth Er
Charge Error ・ The battery is broken.
ror
- The battery charge is
low.
- The AC adapter is out
order. (At the AC
of
adapter operation)
- The mark of paper is
not correctly printed.
- Particles have
collecte
sensor.
- The printer is broken. - Please send
・ The A
for the charge is
broken.
・ The
board is broken.
d on the paper
C adapter used
printer control
- Please charge
the batter
- Please exchange
the AC adapter
- Please use the paper
n which the mark is
o
correctly printed.
- Please clean
the pa
refer to chapter 5.3.
this printer in for
repair
- Please exchange
the batter
- Please exchange
the AC adapter
- Please send
this printer in for
repair
y.
.
per sensor,
.
y.
.
.
30
Important
The battery may need to be replaced when it has been fully
recharged and the Supply Voltage Error or Low Battery sign
appear.
Please stop using this battery, and exchange it for a new battery.
Page 33

g)
(
])
4 Indicator Lights
44 IInnddiiccaattoorr LLiigghhttss
The LED displays printer error and the low battery status.
Important
It may be difficult to see the LED display in a bright place such as
in direct sunshine etc.
4.1 Normal Operation
Printer Status
Standb y
USB Conn ecting
Blue to oth Conn ecting
Power Off
Low Bat tery
LED Indications (LED Symbol ○:Lighting, ●:Blinkin
Green Ora nge Red
●
1time
●
2times
●
3times
○
●●
Blink Cycle
ON
OFF
ON
OFF
ON
OFF
ON
OFF
ON
OFF
125
Unit [msec
000
125
125
125
Re d
1000
125
1000
Power off
Green
250
125
250 250
1000
500 50 0 500 500
Green
Red
125
31
Page 34

4 Indicator Lights
g)
(
])
4.2 Printer Error
Printer Status
Pape r E nd
Pape r Co ver Open
Thermal He ad
Temperature Error
Supp ly V oltage Error
Hardware Error
Mark U nde tect ion
MCU Operation Error /
RAM Error
Blue to oth Error
LED Indications (LED Symbol ○:Lighting, ●:Blinkin
Green Ora nge Red
●
time
●
times
●
times
●
times
●
times
●
times
●
times
●
times
Blin k Cycle
ON
OFF
ON
OFF
ON
OFF
ON
OFF
ON
OFF
ON
OFF
ON
OFF
ON
OFF
125
125
250
125
250
125
250
125
250
125
250
125
250
125
250
Unit [msec
1000
125
125
125
50
125
Blink
4 times
125
Blink
5 times
125
Blink
6 tim es
125
Blink
7 tim es
125
Blink
8 tim es
1000
1000
125
125
125
125
125
1000
1000
1000
1000
1000
32
Page 35

g)
])
)
g)
(
])
4.3 Charging
Printer Status
Chargeing
Full Char ge
Charge Error
(Over charge,
Over disch arge,
Over t ime
LED Indications (LED Symbol ○:Lighting, ●:Blinkin
Green Ora nge Red
○
●
4.4 Maintenance Mode
Printer Status
Printer Firmware
Downloa ding
LED Indications (LED Symbol ○:Lighting, ●:Blinkin
Green Ora nge Red
●●
1tim e
Blink Cycle(Unit [msec
ON
OFF
ON
OFF
ON
OFF
Blin k Cycle
ON
OFF
Charging
125 100 0
950
Unit [msec
ed
Char ging
Full c harge
Oran ge
4 Indicator Lights
950
33
Page 36

5 Maintenance
55 MMaaiinntteennaannccee
P lease service this printer regularly.
Caution
- Do not service the printer while the battery is inserted or the AC
adapter connected.
- Do not completely service, disassemble and repair any parts that
are not explained in this chapter.
5.1 Thermal Head
Please service the thermal head once a month.
1. Please open the paper cover. (Refer to chapter 2.7)
2. Soak a cotton ball with some alcohol and wipe the
thermal head gently until it is clean. Please use isopropyl
alcohol.
3. With a soft cloth completely wipe off the thermal head
and only close the paper cover when it is completely dry.
34
Page 37

5 Maintenance
5.2 Platen Roller
Please service the platen roller once a month.
1. Please open the paper cover. (Refer to chapter 2.7)
2. Soak a cotton ball with some alcohol and wipe the platen
roller gently until it is clean. Please use isopropyl alcohol.
3. With a soft cloth completely wipe off the platen roller and
only close the cover when it is completely dry.
5.3 Paper Sensor
Please service the paper sensor once a month.
1. Please open the paper cover. (Refer to chapter 2.7)
2. Please remove the dust particles with a soft nylon brush
etc.
Important
The paper sensor is an optical sensor. This lens might scratch if
too much pressure is applied to it when cleaning.
printer might not detect the paper correctly.
As a result the
35
Page 38

5 Maintenance
r
5.4 Paper Cover
If the paper cover comes off, please repair it according to
the following instructions.
1. Please push the opening and
closing fulcrum of the paper
cover to the printer with the
paper cover opened, and it
connects the printer.
Opening and closing fulcrum
of paper cove
2. Please confirm the correct connection by opening and
closing the paper cover 2-3 times.
36
Page 39

5 Maintenance
5.5 POWER/FEED Switch
If the Power switch or the FEED switch falls off, please
repair according to the following instructions.
1. Please push the power switch
back into its round hole.
Please push the FEED switch
back into its oval hole.
Switch
<Front view>
<Side view>
2. Please confirm that the repaired switch works correctly.
37
Page 40

6 Troubleshooting
66 TTrroouubblleesshhoooottiinngg
■ Power
Problem Cause Solution
Printer does not
turn on
Battery does not
charge
or
Charging error
occurs
Power supply
s suddenly
cut
Battery charge
does not hold
Is a battery inserted? or
Is it inserted reversed?
Is the battery fully
charged?
Is the POWER Switch
correctly pushed?
Is the battery old? Please exchange it for
Is a battery inserted? or
Is it inserted reversed?
Is the battery old? Please exchange it for
Is the AC adapter
correctly connected?
Has the battery already
been fully charged?
Is the power not turned
on? It is not possible to
charge, when the power
is turned on.
Is the printer used at an
incorrect o
temperature?
Is the auto power off set?
Please confirm the setting
via test print. (C. 3.2)
Is the battery charge
low?
Does an error occur?
(C. 4.2)
Is the battery old? Please exchange it for
perating
Please insert the battery
correctly. (C. 2.4)
Please charge
the battery. (C. 2.5)
Please push the POWER
correctly. (C. 3.1)
Switch
a new battery.
Please insert the battery
correctly. (C. 2.4)
a new battery.
Please connect the AC
adapter correctly.
(C. 2.5)
The charge is
unnecessary.
Please turn off the
. (C. 3.1)
power
Please charge it at a
correct o
temperature. (C. 7.1)
It is normal operation
by
function.
Please charge
the battery. (C. 2.5)
Please troubleshoot the
error. (C. 3.5)
a new battery.
perating
the auto power off
38
Page 41

■ Communication
Problem Cause Solution
6 Troubleshooting
Printer does not
communicate
Printer does not
communicat
(with USB)
Printer does not
communicat
(with Bluetooth)
e
e
Is the power turned off? Please turn on the
power. (C. 3.1)
Is the application or the
for this product
driver
used?
Is USB cable correctly
connected?
Is the USB cable
broken?
Is the Bluetooth
connected?
Is USB COM driver
correctly installed?
Is the link correctly
connected?
Is the USB cable
connected?
Does the transmitter
correspond with
the SPP profile?
Is equipment too close
that it causes radio
interference?
Is there a shield between
the transmitter and the
printer that interferes
ith the radio? w
Please use the
application or the dri
for this product.
Please connect the
cable correctly.
(C. 3.3)
Please use the cable
without the breakdown.
Please use the USB cable
after disconnecting the
Bluetooth.
Please install the COM
driver correctly.
Please connect the link
correctly. (C. 3.4)
Please connect
Bluetooth
ter disconnecting the
af
USB cable.
Please use
ansmitter that
the tr
corresponds with
the SPP profile.
Please stop the device
that cause
interference or keep
the transmitter and the
printer away from the
device.
Please use it in a place
without the shield.
s the radio
ver
39
Page 42

6 Troubleshooting
Problem Cause Solution
Printer does not
feed the paper
or
Paper jam
occurs
Printer does not
print
Print is too light
or
Print is
smudging
Is the power turned off? Please turn on the
power. (C. 3.1)
Is the paper correctly
inserted?
Is the paper cover
closed?
Does a printer error
occur? (C. 4.2)
Is the platen roller dirty? Please clean the platen
Is the power turned off? Please turn on the
Is the paper correctly
inserted?
Is the paper cover
closed?
Does a printer error
occur? (C. 4.2)
Is the platen roller dirty? Please clean the platen
Is the paper correctly
inserted?
Is the paper cover
closed?
Is the platen roller dirty? Please clean the platen
Is the correct paper
used?
Is the battery old? Please exchange it for a
Please insert the paper
correctly. (C. 2.7)
Please close the paper
cover firmly. (C. 2.7)
Please correct the
printer error. (C. 3.5)
. (C. 5.2)
roller
power. (C. 3.1)
Please insert the paper
correctly. (C. 2.7)
Please close the paper
cover firmly. (C. 2.7)
Please correct the
printer error. (C. 3.5)
roller. (C. 5.1)
Please insert the paper
correctly. (C. 3.1)
Please close the paper
cover firmly. (C. 2.7)
roller. (C. 5.1)
Please use the correct
paper. (C. 7.2)
new batter
y.
40
Page 43

■ Others
Problem Cause Solution
6 Troubleshooting
Print starting
location is
incorrect
Printing is slow
Paper cover
does not open or
lose
c
Important
- Please contact technical support when problems cannot be solved
by these suggestions.
- In parentheses (C. **) in the table indicates the corresponding
chapter number.
Does the mark detection
ate correctly?
oper
(C. 4.2)
Is the battery charge
low?
Is the battery old? Please exchange it for a
Is too much black
printed?
Isn't the ambient
temperature low?
Does the paper cover
come off
?
Please remove the
ason for the mark
re
detection error.
(C. 3.5)
Please charge
the battery. (C. 2.5)
new battery.
It is not a breakdown
though the print slows
when there is too much
black printed.
It is not a breakdown
though the print slows
when the ambient
temperature is low.
Please set the paper
cover.
41
Page 44

7 Specifications
77 SSppeecciiffiiccaattiioonnss
7.1 Printer Specifications
Items Contents
Print Method Thermal Line-dot Printing
Resolution 8dot/mm (203dpi)
Dimensions 84×136.5×43.6mm
Weight About 220g
Including battery, excluding paper
Max Print Width About 48mm
Print Speed Max 40mm/sec
Battery full charge, print ratio 12.5%
Character Alphanumeric, Katakana
: 8x16, 16x16, 12x24, 24x24
Kanji : 16x16, 24x24
Barcode UPC-A, UPC-E, JAN13(EAN13),
JAN8(EAN8), CODE39, ITF,
CODABAR, CODE128, GS1 DataBar,
QR code, MAXI code, PDF417
Interface USB, Bluetooth (Depends on model)
Conformity
Standards
Operating
Temperature
Operating Humidity 30 to 85%RH (no dew condensation)
Storage
Temperature
Storage Humidity 5 to 90%RH (no dew condensation)
TELEC, VCCI, FCC, IC, CE marking
0 to 50 deg C
5 to 40 deg C (Print Quality assurance)
0 to 40 deg C (with AC adapter)
-20 to 60 deg C
42
Page 45

7.2 Paper Specifications
Items Contents
Type Thermal Roll Paper
Width 58
Outer
Diameter
Inner
Diameter
Thickness 60 to 80μm
Specified Type Name Manufacture
Paper High Sensitive TF50KS-E4 Nippon Paper Group
Standard Paper TF60KS-E Nippon Paper Group
PD150R Oji Paper Group
Medium Term TP60KS-F1 Nippon Paper Group
Storage PD170R Oji Paper Group
P220VBB-1 Mitsubishi Paper
+0
mm
-1
Up to φ36mm
φ 8mm or more
Mills Limited
Long Term HA220AA Mitsubishi Paper
Mills Limited Storage
7 Specifications
Important
Thermal paper will discolor due to chemical reaction.
When handling it, pay attention to the following points:
・ Do not store it in a high-temperature, high-humidity place.
・ Do not store f or l ong periods o f ti me in places e xpo sed to direct
sun-light.
・ Do not use solvent type glue for pasting.
・ Do not let it touch plastic film containing plasticizer for a long
time.
・ Do not wet and scratch paper.
zotized copying paper. ・ Do not stick it together with dia
43
Page 46

8 Recycle
88 RReeccyyccllee
This symbol means:
Do not dispose of this product together with
your household waste!
Please refer to your local community or contact
our dealers to properly handle the end-of-life of
electric and electronic equipment. Recycling this product
will help to conserve natural resources and prevent
potential negative impact on the environment and human
ealth caused by inappropriate handling. h
44
Page 47

9 Appendix
99 AAppppeennddiixx
9.1 Bluetooth Communication
(1) Android Terminal
1. Please turn on the power of printer.
2. Please open "Settings" - " WIRELESS & NETWORKS"
from the menu of terminal, and turn on Bluetooth.
3. Please open the "Bluetooth”, and tap "FTP-628WSL…".
(Please tap "SEARCH FOR DEVICES", if it does not
appear)
4 Please input the PIN code, and tap "OK".
PIN code is "9999" and it is set by the factory.
(The PIN only needs to be entered once)
5. When the connection with the printer is successful, it is
displayed in "FTP-628WS…" in "PAIRED DEVICES".
6. Please connect and print by using the application.
45
Page 48

9 Appendix
(2) iOS Terminal
1. Please turn on the power of printer.
2. Please open "Settings" - "General" - "Bluetooth" from
the menu of terminal, and turn on Bluetooth.
3. Please tap "FTP-628WS…" from "Devices".
4. Please input the PIN code, and tap "Pair".
PIN code is "9999" in the state of the factory shipment.
(The PIN code input is unnecessary at the connection of
second and subsequent)
5. When the connection with the printer succeeds,
"Connected" is displayed to "FTP-628WS…".
6. Please connect and print by using the application.
46
Page 49

10 Product Support
1100 PPrroodduucctt SSuuppppoorrtt
If you have questions about the product, please inquire
with the distributor or the following.
Moreover, when you request repair, please provide the
model name and the product serial number in addition to
information on the actual failure etc.
T chnical Support Sectione
FUJITSU COMPONENT LIMITED (Japan)
Global Marketing Dept.2
Tel: +81-3-5449-7014 Fax: +81-3-5449-2628
E-mail: promothq@fcl.fujitsu.com
FUJITSU COMPONENTS EUROPE,B.V. (EU)
European Headquarters
Tel: +31-(0)23-556-0910 Fax: +31-(0)23-556-0950
FUJITSU COMPONENTS AMERICA,INC. (USA)
North American Headquaters
Tel: (408) 745-4900 Fax: (408)745-4970
47
Page 50

MMEEMMOO
Page 51

Mobile Printer FTP-628WSL210 Series
U ser's Guide
L0NA02265-L11802RS
Published by FUJITSU COMPONENT LIMITED
Nov. 2012 Rev. 1
Page 52

 Loading...