

Page 1
PREP EQUIPMENT
Frymaster
Universal Holding Cabinet-High Density
Models UHC-HD
Frymaster Universal Holding Cabinet-High Density (UHC-HD) Models UHC-HD PR 50
PR 50
Daily maintenance tasks
PR 50 Clean UHC
Annual maintenance tasks
PR 50 Clean air exhaust
fans and driver
board
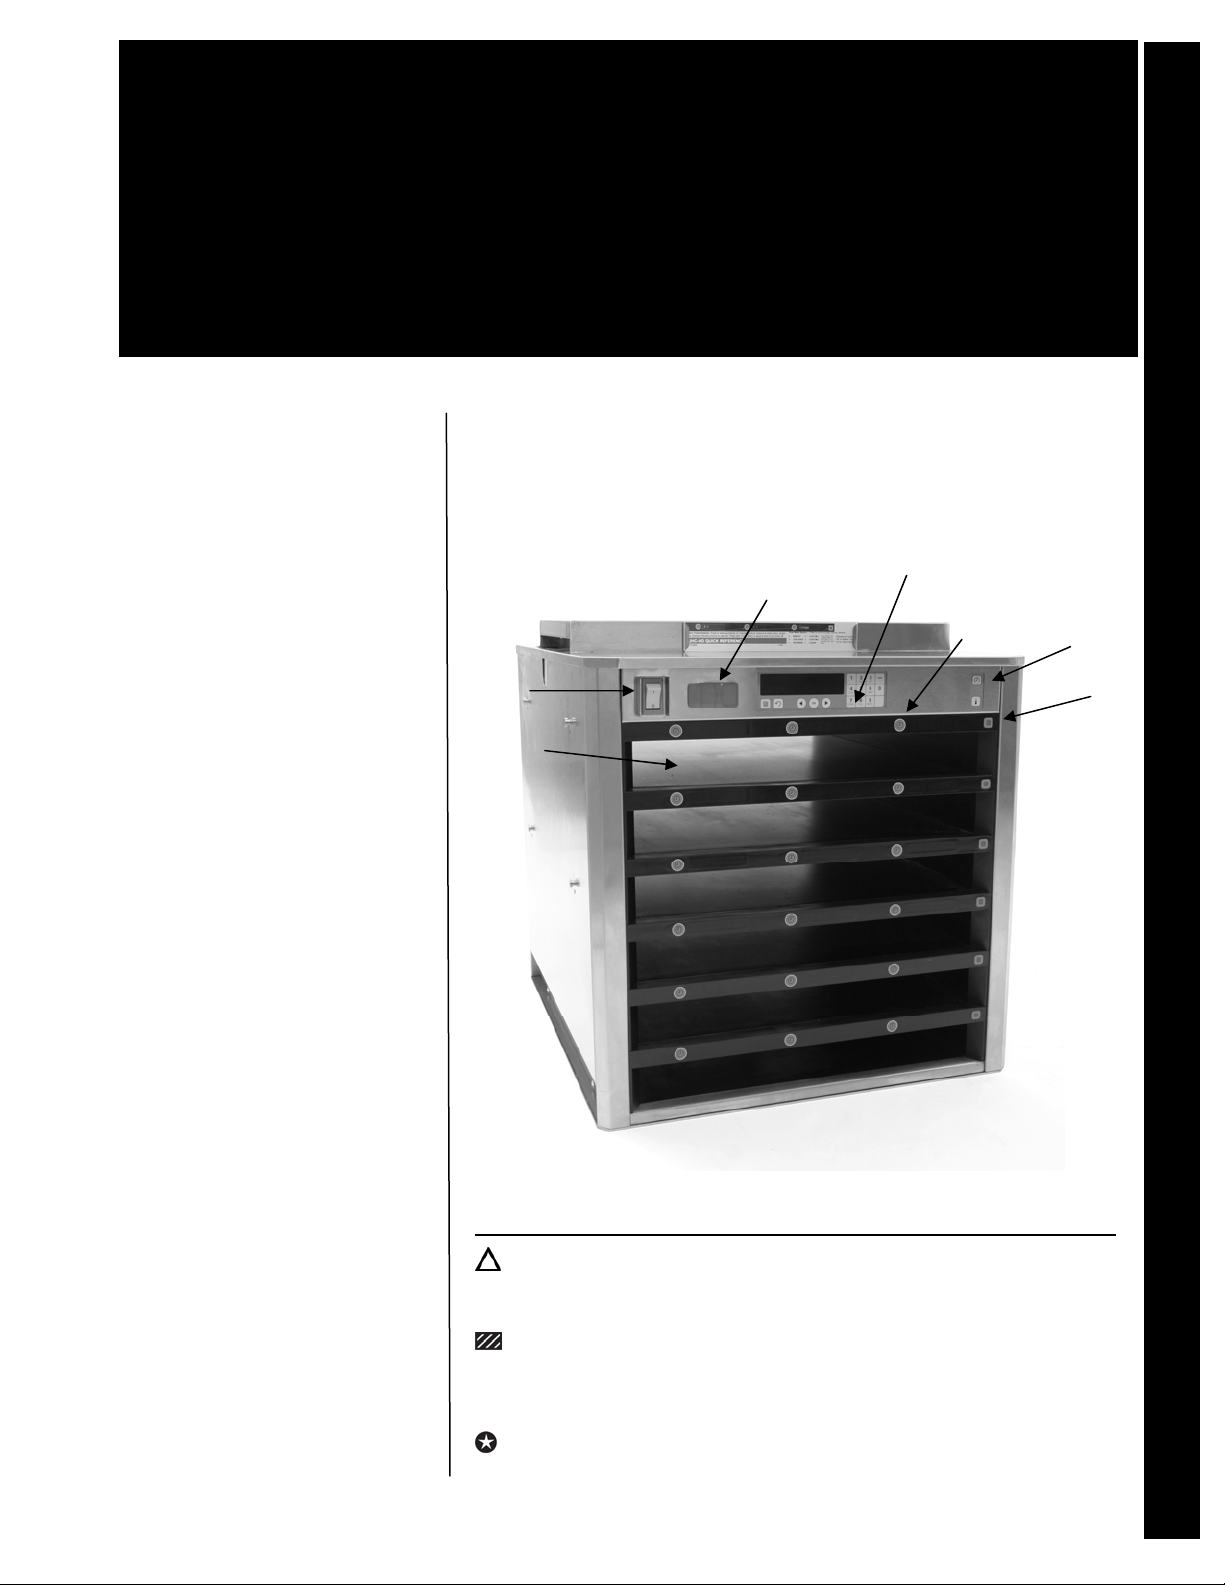
Model UHC-HD, 6-row
A. Power switch. B. Row. C. USB Port. D. Master Controller. E. Item Timer Button.
F. Time/Temperature Button. G. Row Mode Button.
D
C
E
F
A
B
G
Hazards
These icons alert you to a possible risk of personal injury.
Equipment alerts
Look for this icon to find information about how to avoid damaging the
equipment while doing a procedure.
Tips
Look for this icon to find helpful tips about how to do a procedure.
©McDonald’s Corporation · Planned Maintenance Manual · Revised April 2010
Page 2
Clean UHC Daily PR 50
Why
To maintain effectiveness of the heater plate and to reduce the risk of cross contamination
Frymaster Universal Holding Cabinet (UHC) Model UHCHD
Time required
Time of day
Hazard icons
Tools and supplies
Brush, UHC
Procedure
Prepare UHC for cleaning and
1
allow to cool.
Set the UHC to “CLEAN
MODE” and remove all UHC
trays and wire racks. The display alternates between
CLEAN and Not Safe Yet.
Allow UHC to cool.
Do not attempt to clean a hot
UHC.
30 minutes to prepare 15 minutes to complete
After close For 24-hour restaurants: during low-volume times
McD All Purpose
Super Concentrate
(APSC) solution
Take the UHC trays and racks
to the back sink to clean.
Bucket, clean and
sanitized towels
.
Bucket, soiled towels
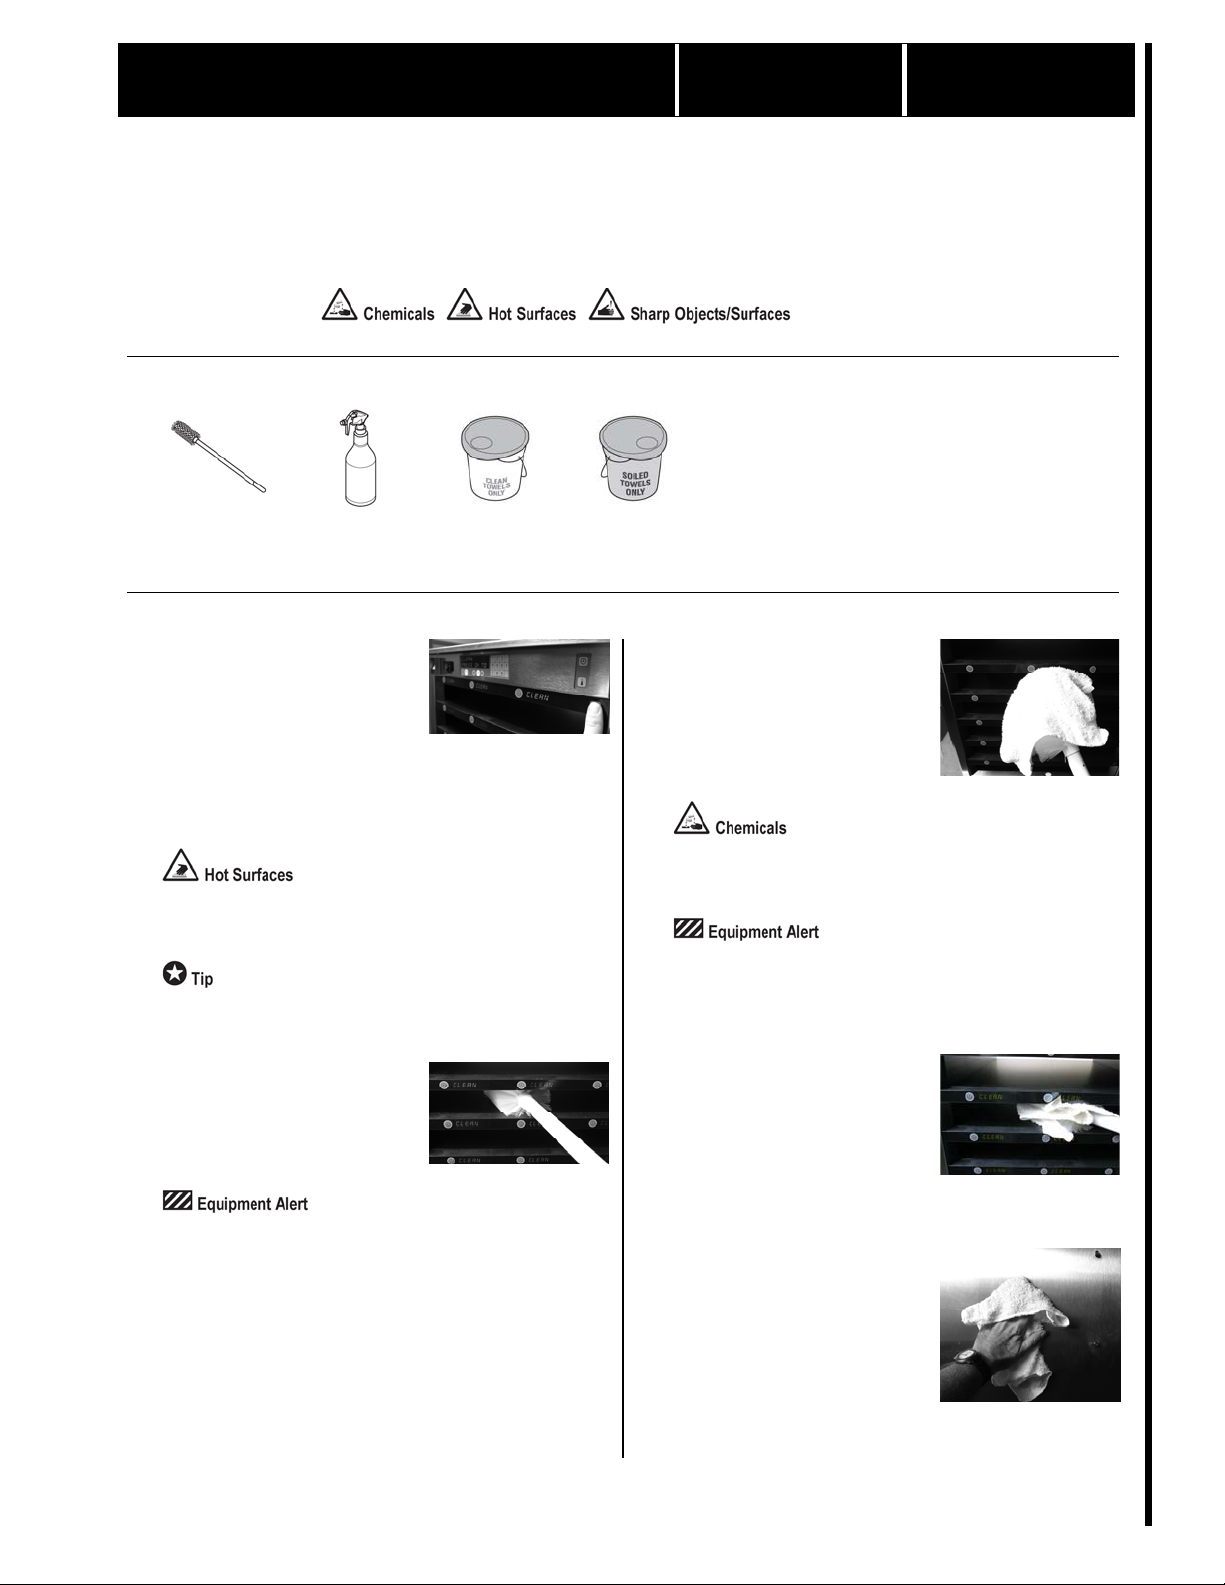
3
Clean UHC slots.
Wrap the UHC brush with a
clean, sanitized towel soaked
in McD APSC. Use the
wrapped brush to clean the
top and bottom of each slot.
Sanitizer solution,
McD APSC
Do not use other cleaning
products. They can damage
the controls.
Wipe slots with clean,
Remove loose debris.
2
Use the UHC brush to push
loose crumbs and debris out
the opposite side of the UHC.
Do not use no-scratch pads,
scrapers, or other brushes.
They can damage the surface.
4
sanitized towel.
Wipe each slot with a fresh
clean, sanitized towel
wrapped around the UHC
brush.
Clean outside of UHC.
5
Wipe down the outside of the
entire UHC with a clean, sanitized towel saturated with
McD APSC.
Daily PR 50
©McDonald’s Corporation · Planned Maintenance Manual · Revised July 2007 Page 1 of 1
Page 3

Clean air exhaust fan and driver board Annual PR50
Why
To maintain proper cooling of electronic components
Frymaster Universal Holding Cabinet (UHC) Models UHC-HD
Time required
Time of day
Hazard icons
Tools and supplies
Tools supplied by
technician
Procedure
2 minutes to prepare 30 minutes to complete
After close For 24-hour restaurants: during low-volume periods
QUALIFIED TECHNICIANS ONLY
Perform all UHC daily maintenance procedures.
1
Set the UHC to “CLEAN MODE” and remove all
UHC trays and wire racks. Allow the UHC to cool until
CLEAN is displayed. Perform all daily maintenance
procedures.
Do not attempt to clean a hot UHC.
Unplug UHC power cord.
2
Remove the UHC power cord plug from the wall outlet.
Failure to unplug the power at the wall outlet could
result in serious injury or death. The power switch on
the UHC does not disconnect all incoming power to the
cabinet.
5
6
Access exhaust fan.
Remove the 8 screws in the top panel. Use a
socket wrench or nut driver. Place screws in a small
container to avoid misplacing or loss. Remove the top
panel.
If removing the cabinet from its fixed position for disassembling and cleaning, the UHC requires at least 2
people.
Clean air exhaust fan blades.
Wipe the blades of each air exhaust fan with a clean,
sanitized towel sprayed with McD APSC solution. Do
not allow the moist towel to touch any electrical connections.
Sanitizer solution, McD APSC
5
/16-in
QUALIFIED TECHNICIANS ONLY
Replace top and side panels.
Remove side panels.
3
Remove the 2 screws in each side panel with a Phillips
screwdriver. Set the screws aside. Remove the side
panels from the UHC.
Brush dust from circuit boards.
4
Use a dust free anti-static brush to gently brush any
dust from the circuit boards on the left side of the
UHC.
819‐6712
©McDonald’s Corporation · Planned Maintenance Manual · Revised July 2007 Page 1 of 1
7
Replace the top panel. Insert and tighten the 8 screws.
Replace the side panels. Insert and tighten the 2 screws
per side.
Annual PR 50
 Loading...