


www.frsky-rc.com
2011/5/31
Setting up FrSky TFRSP as a wireless trainer system
What you need:
z Radio used by teacher, which will control the model
(not necessarily Futaba FASST compatible)
z Radio used by student
(Futaba FASST compatible)
z FrSky TFRSP Futaba FASST compatible receiver﹡
z WTC/x trainer connector cable matching your radio's trainer port
(WTC/1 Futaba plug is available now, cable for other brand radios,
such as Graupner/JR MX22/MX24s will be available soon)
Set up:
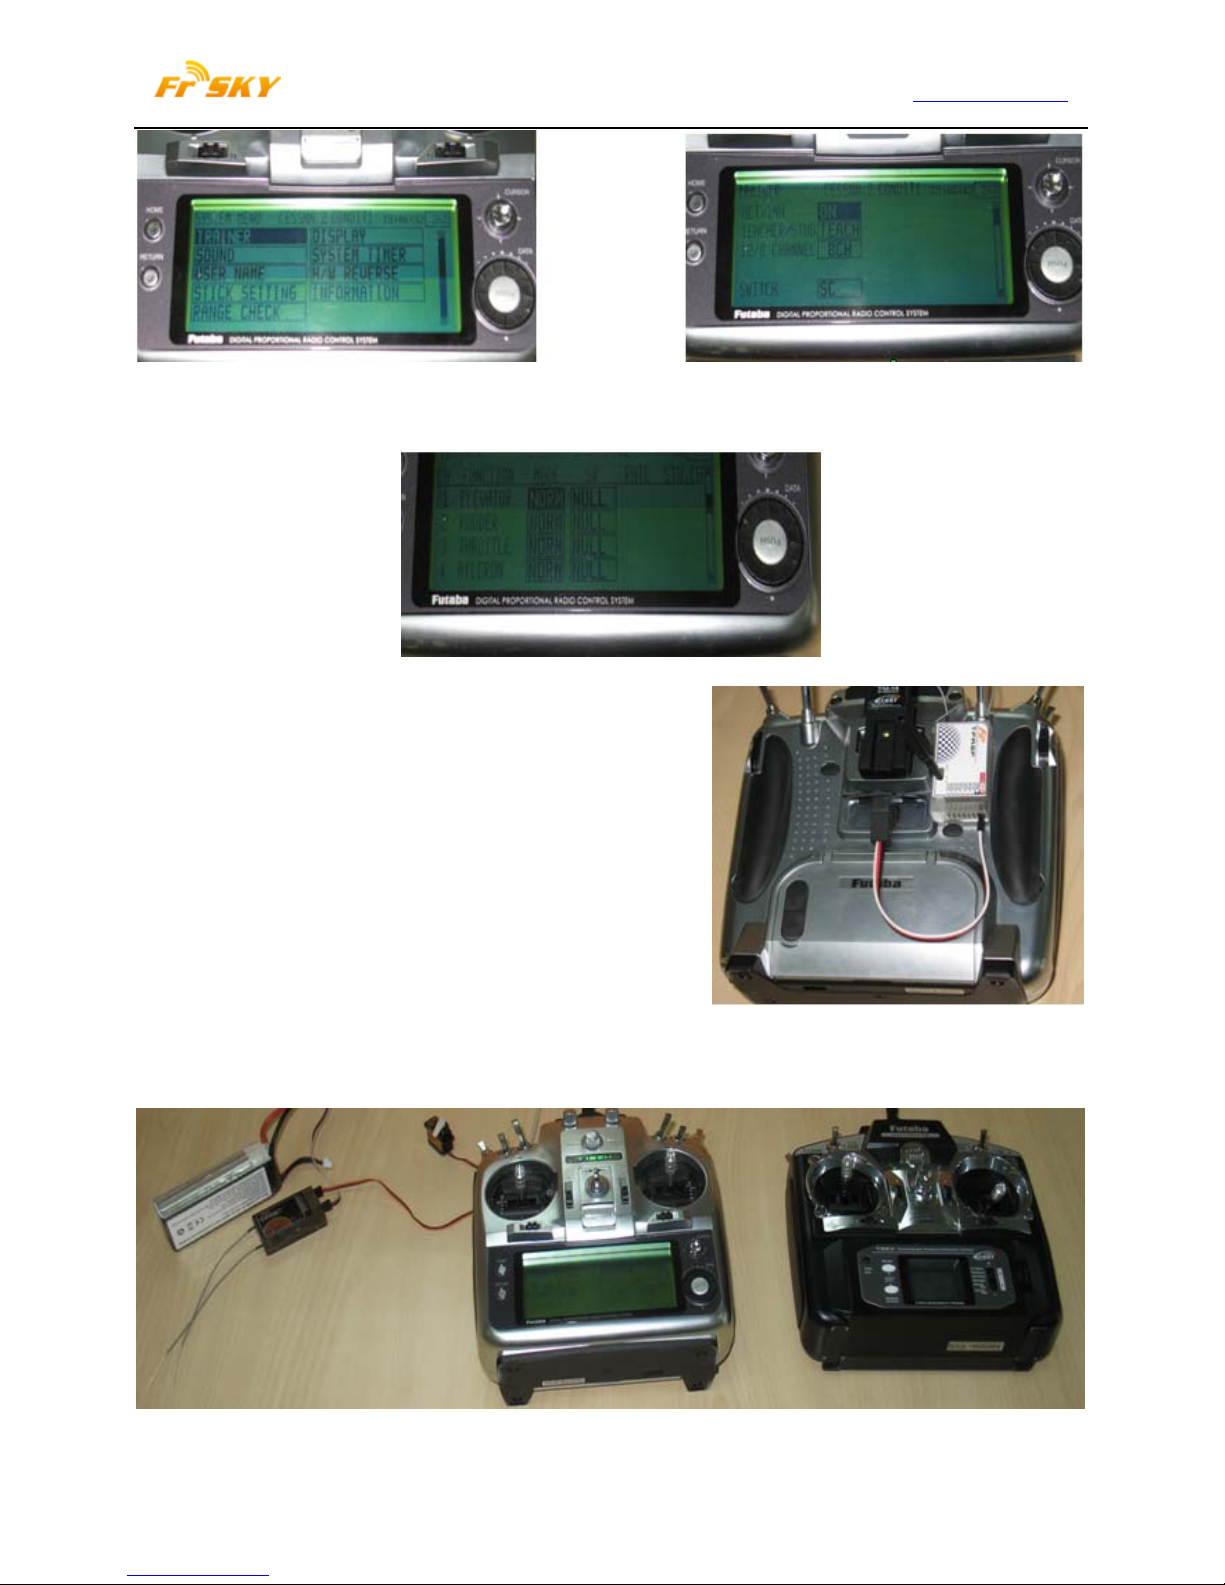
z Fix FrSky TFRSP and connect it to the transmitter
Find a suitable place to fix FrSky TFRSP. We recommend a flat spot where velcro tape can hold firmly,
not too far away from the trainer socket of the teacher's radio. Connect the WTC/x to the CPPM port of
TFRSP and the radio's trainer port.
z Set up the teacher’s radio as appropriate:
In this example, a specific radio is used. Your radio may require different steps to achieve the goals
demonstrated.
www.frsky-rc.com
2011/5/31
Certain radios require activation of the trainer port, others not. Some radios allow the teacher to select
which function the student may control. See in your radio's manual how to allocate these.
z Bind your TFRSP to the student's radio:
1. Switch the student’s radio on
2. Set the student's radio up to use PPM protocol
3. Power the teacher's radio on while pressing down the
TFRSP's F/S button. Observe the flashing of your
TFRSP's LED, which indicates the binding process is
completed successfully
4. Cycle the power of the teacher's radio
5. The link should be set up and your TFRSP is bound to
the student's radio, which is indicated by a constant lit
LED of your TFRSP
6. In case the binding process goes wrong, repeat steps 1 to 5
z Enjoy your wireless trainer system:
 Loading...