

Page 1
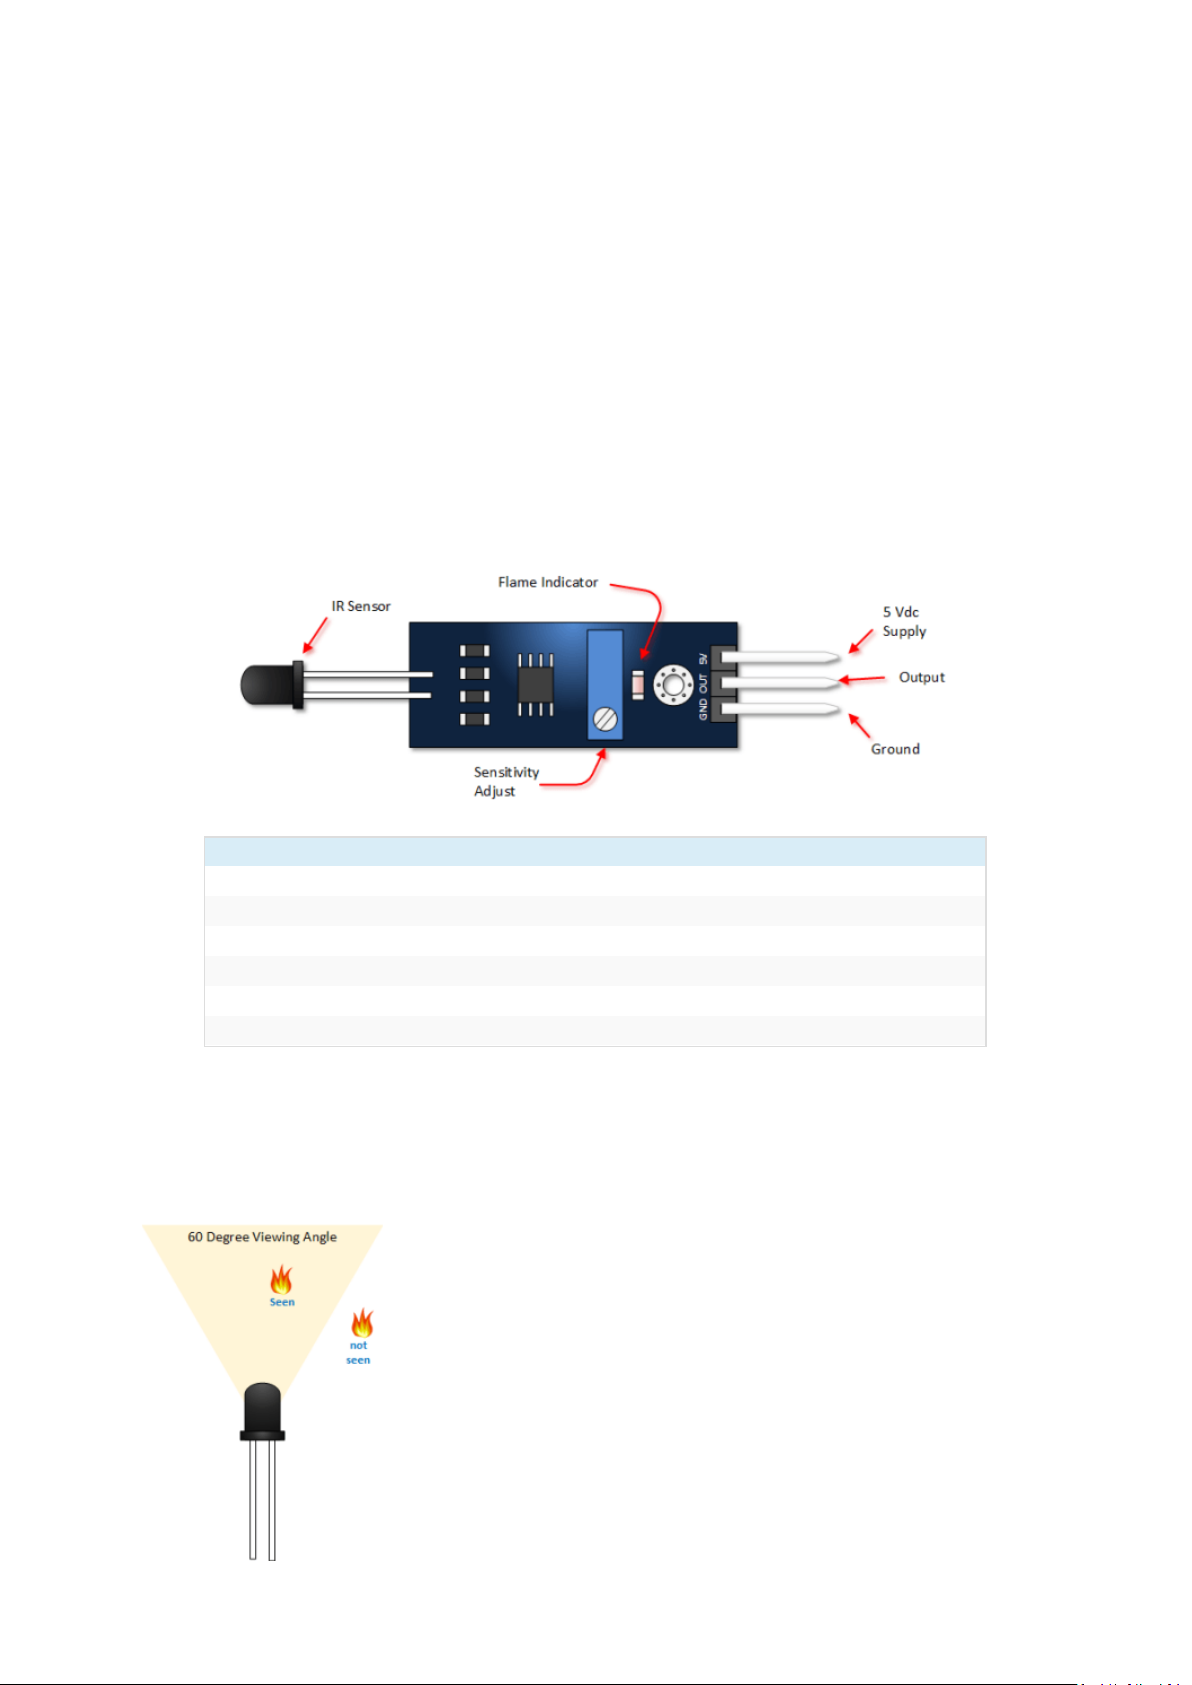
Flame Sensor
Pin
Function
5V
5 Vdc supply Input
Out
Goes low when flame is detected
GND
Ground input
Flame Indicator
Illuminates when flame is sensed
Sensitivity Adjust
CW is more sensitive
IR Detector
60° view angle and is sensitive to the wavelengths typical of flames
The Flame Detector module is representative of the many similar devices that are designed to
interface with micro-controllers. This particular device consists of an IR detector, op amp circuitry,
sensitivity adjustment and an LED indicator.
The IR detector is sensitive to light wavelengths typical of flames. When a flame is present, the
module will turn on its red LED and it will set its output low.
Flame Sensor Module Pin Out
Only three connections are required to allow this device to work with your Arduino. The following
picture and table describe these pins.
Application Considerations
As previously mentioned, the viewing angle is at sixty degrees. Thus the sensor view is incredibly
important as you design your projects.
The flame sensor module detects wavelengths from 760nm-1100nm.
There are other sources of heat that will also detect this wavelength. It
is therefore important that you ensure that the only source of this
particular range will be the flame that you want to detect. Otherwise,
your project may be riddled with false measurements.
During the course of testing this device, I used a defective lighter. It
took several attempts to see a flame. However, each time I tried the
sparks from lighter caused the LED to flash.
Page 2
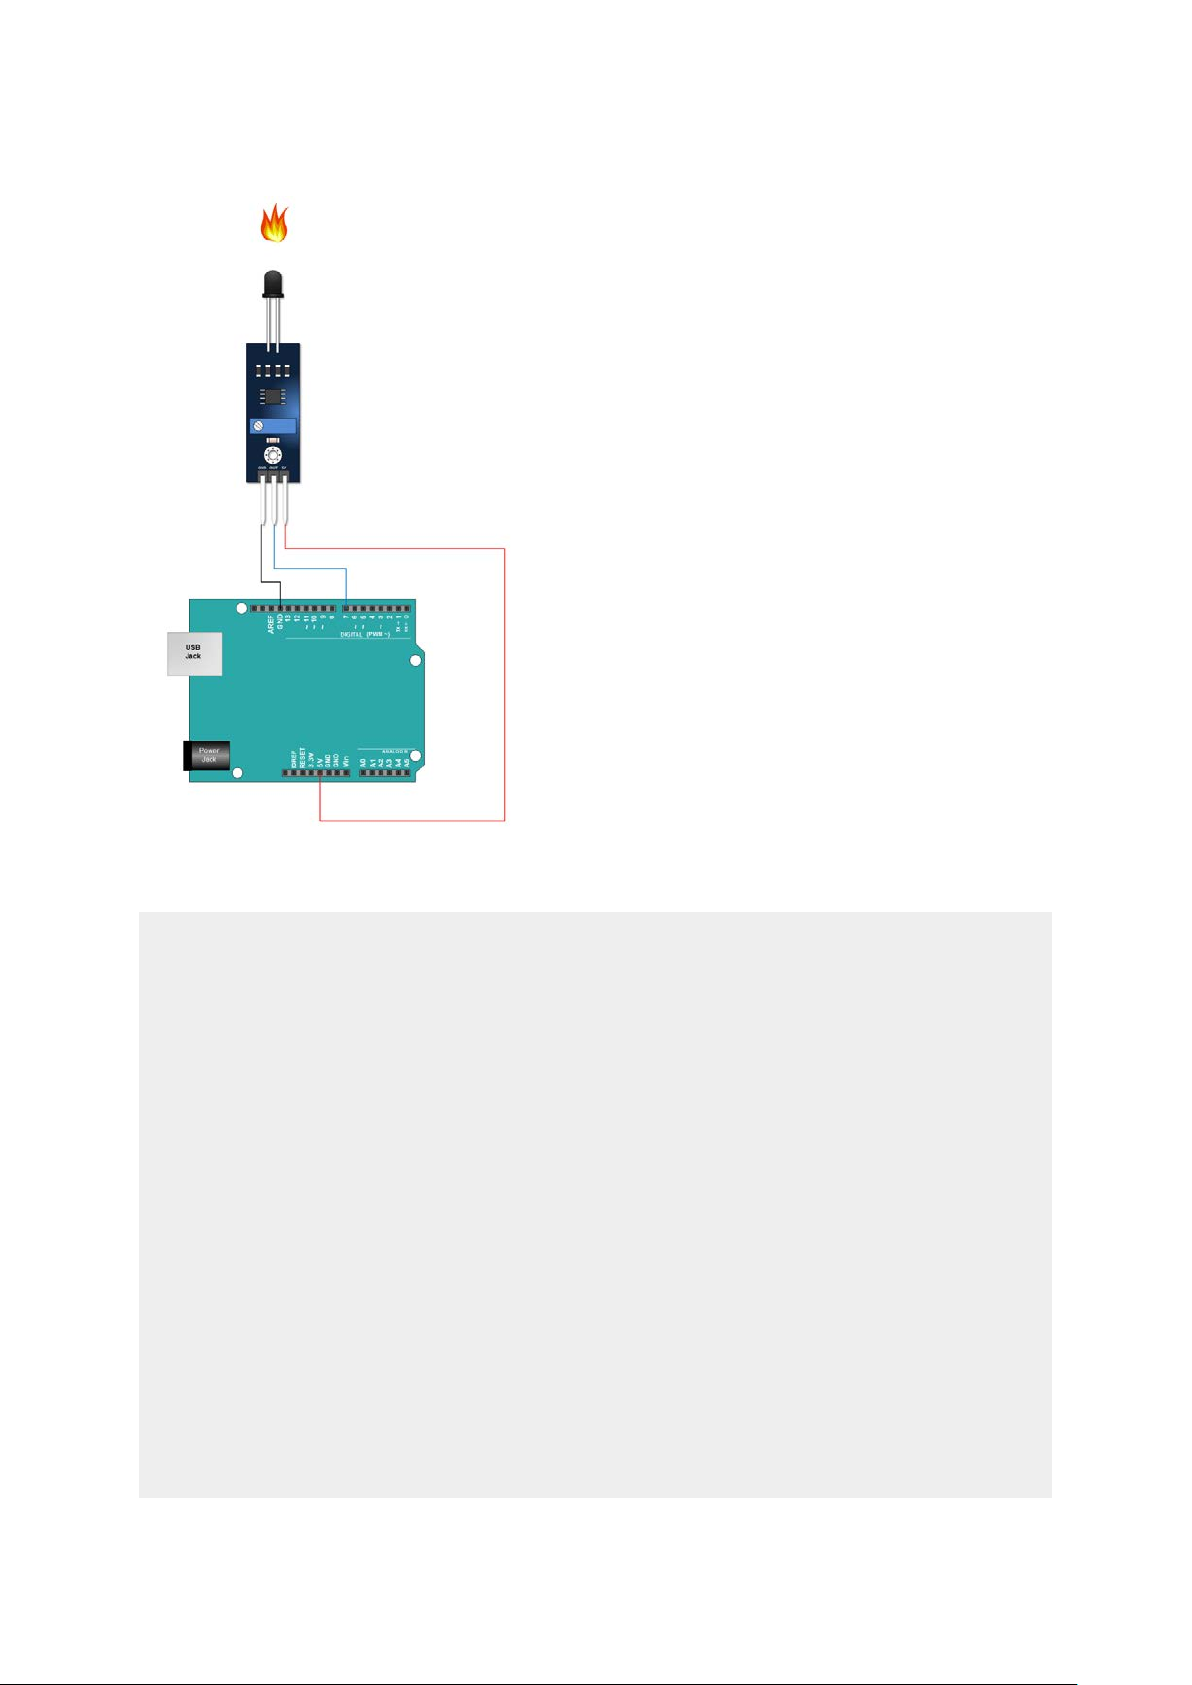
Connect the Flame Sensor Module to Arduino
Use the schematic to connect your micro-controller to
the flame detector.
Copy, Paste and Upload the Arduino Flame Detector
Module Sketch
The sketch below is pretty straight forward. It uses the
LED connected to Pin 13 of serial monitor of your
Arduino IDE to see the output.
int LED = 13; // Use the onboard Uno LED
int isFlamePin = 7; // This is our input pin
int isFlame = HIGH; // HIGH MEANS NO FLAME
void setup() {
pinMode(LED, OUTPUT);
pinMode(isFlamePin, INPUT);
Serial.begin(9600);
}
void loop() {
isFlame = digitalRead(isFlamePin);
if (isFlame== LOW)
{
Serial.println("FLAME, FLAME, FLAME");
digitalWrite(LED, HIGH);
}
else
{
Serial.println("no flame");
digitalWrite(LED, LOW);
}
}
Page 3
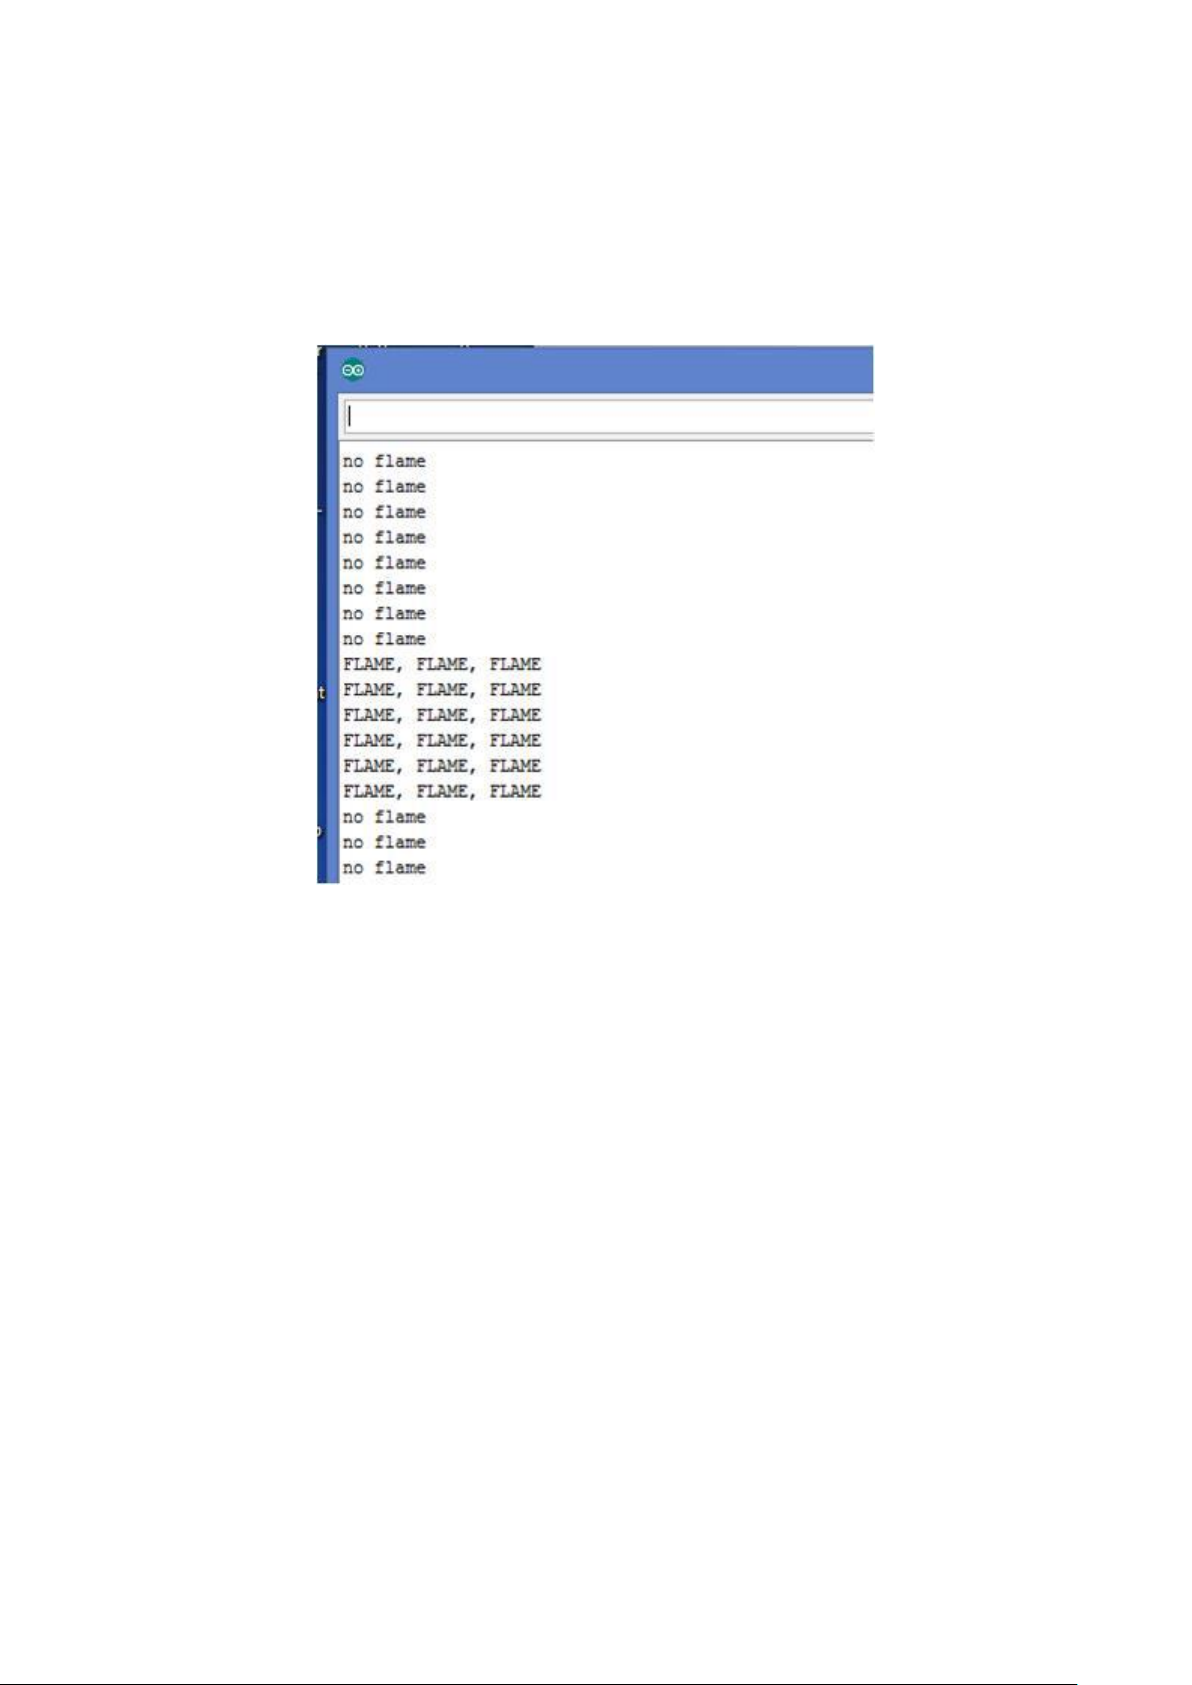
Verify Operation of the Flame Detector and Adjust Sensitivity
Open the Serial Monitor on your Arduino program. Move a flame in and out of the viewing angle of
the sensor. You should see an output that looks something like the picture below. You should also
see the red LED illuminate on your module and you should see also see the module LED connected to
pin 13 of your Arduino light up.
Project Ideas
The temptation with a flame detector is the temptation to design it in as a safety device. That’s fine.
However, it should never be relied upon as the sole means of protection, particularly at a DIY project
or experimental level.
• Turn off Power If Flame – You could turn power off to device in the presence of a flame. Turning off
ventilation fans if flame were detected comes to mind.
• Close a Valve if there is no Flame – You could turn off an automated valve carrying gas if there were
an absence of a flame.
• Spark Detection – Discovering the device responds to sparks gives a whole new range of ideas. You
could set a flag if sparks were detected inside an electrical enclosure, or you could detect if a device
designed to produce a spark is failing.
 Loading...