

Page 1
!ooo2o4
.... 4°5
............. 5_6
Controls ............... 6
laire.corn
2
iiiiiiiiiiiiiiiiiii_i_i_i_i_i_i_i_i_i_i_i_i_i_i_i_i_i_i_i_i_i_i_i_i_i_i_i_i_i_i_i_i_i_i_i_i_i_i_i_i_i_i_i_i_i_i_i_i_i_i_i_i_i_i_;_ iiiiiiiiiiiiiiiiiiiiiiii!i!_!i!!!iiii
Setting Oven Controls .................... 7
Adjusting Your Oven
Temperature (some models) ............ 8
Genera_ Care & C_eaning ......... 6-10
Before You Call
Solutions to Common Problems ........................ 11
Warranty ......................... Back Page
READ AND SAVE THESE INSTRUCTIONS p/n 316460402 rev A (0605)
,u
Page 2
Congratulations on your purchase of a new range! At Electrolux Home
Products, we are very proud of our product and are completely committed to
providing you with the best service possible, Your satisfaction is our number
one priority,
We know you'll enjoy your new range and Thank You for choosing our product,
We hope you consider us for future purchases,
PLEASE CAREFULLY READ AND SAVE THESE INSTRUCTIONS
This Use & Care blanuaUprovides specific operating instructions for your model
Use your appliance only as instructed in this manual, These instructions are
not meant to cover every possible condition or situation that may occur,
Common sense & caution must be practiced when installing, operating &
Please record your model and serial numbers betow for future
reference.
ModeUNumber:
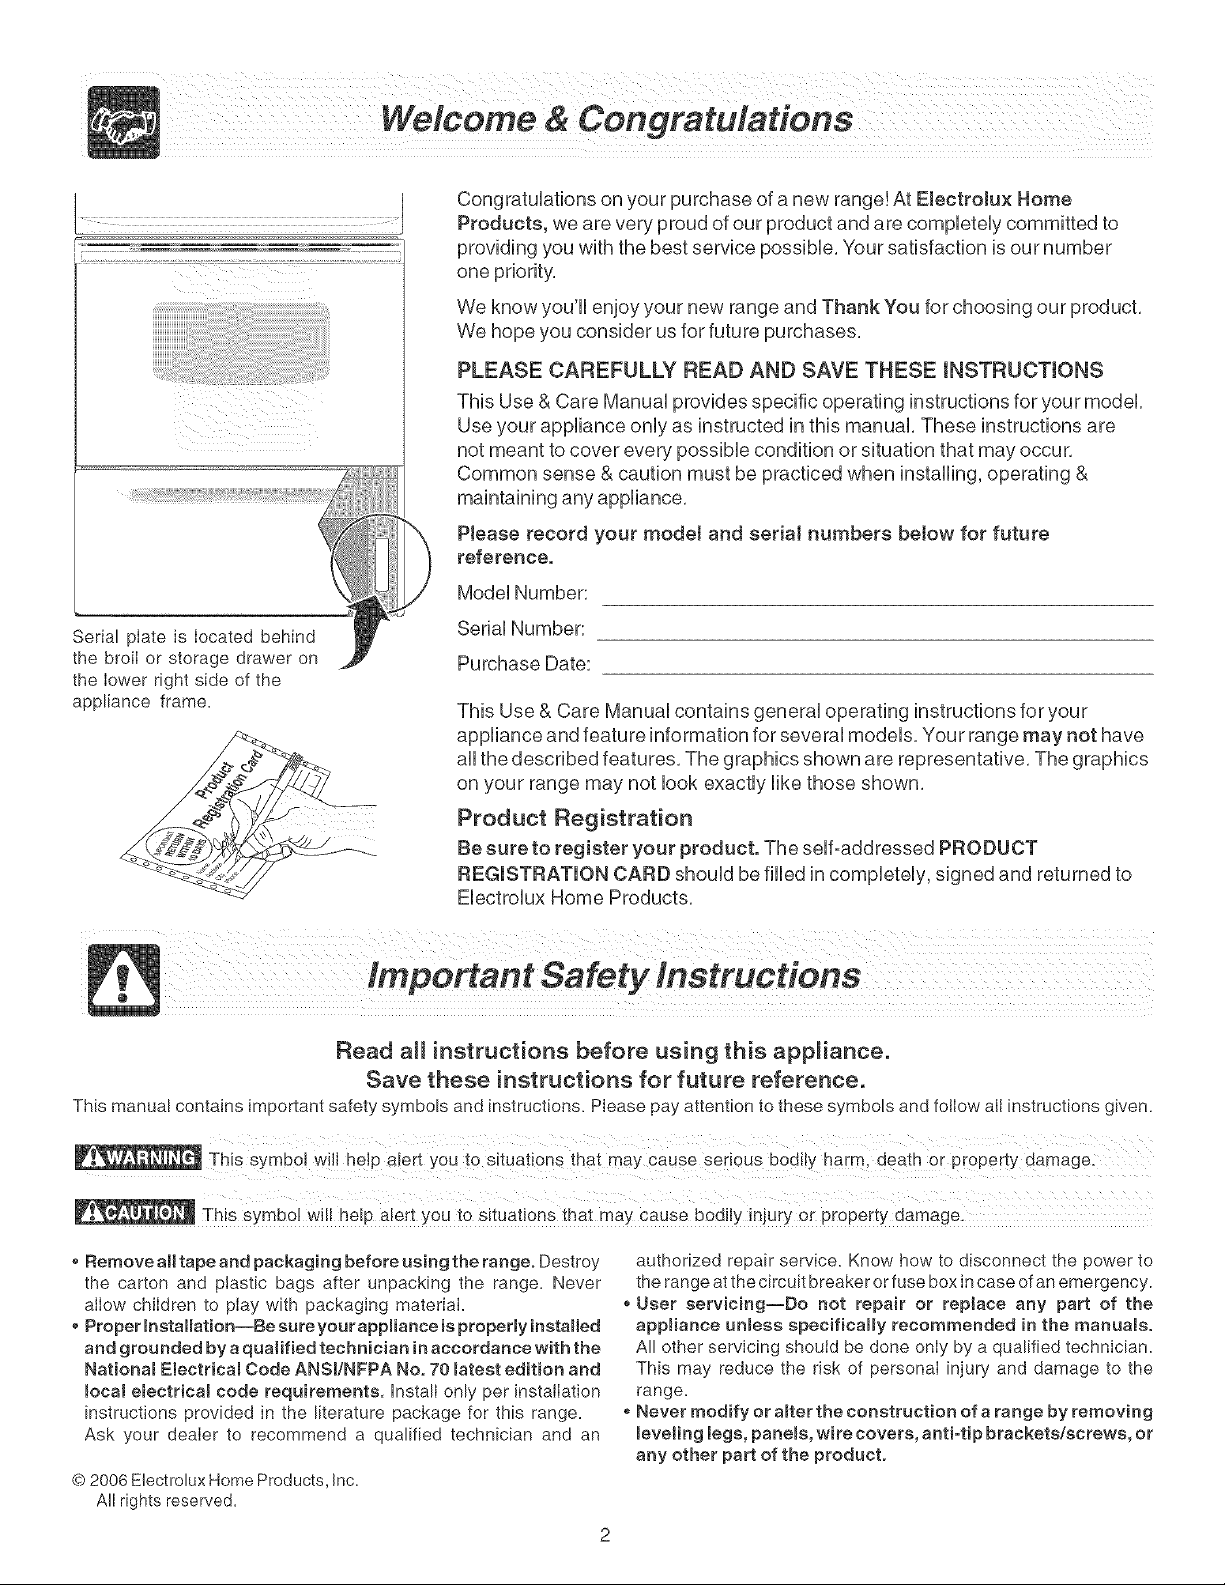
Serial pIate is Iocated behind
the broiI or storage drawer on
the Iower right side of the
appliance frame.
SeriaUNumber:
Purchase Date:
This Use & Care Manual contains general operating instructions for your
appliance and feature information for several models, Your range may not have
all the described features, The graphics shown are representative, The graphics
on your range may not look exactly like those shown,
Product Registration
Be sure to register your product. The soUl-addressed PRODUCT
REGISTRATION CARD should be filled in compUeteUy, signed and returned to
Ebctroiux Home Products.
Important Safety instructions
Read aH instructions before using this appliance°
Save these instructions for future reference.
This manual contains important safety symbols and instructions. Please pay attention to these symbols and folIow aII instructions given.
This Symbol will help alert you to Situations thai may Cause bodily injury or property damage:
,,Remove aHtape and packaging before using the range. Destroy
the carton and ptastic bags after unpacking the range. Never
aIIow chiIdren to pIay with packaging material.
,,Proper hstaHation--Be sure your appliance is properly installed
and grounded by a qualified technician in accordance with the
NationaB EmectricamCode ANSl/NFPA No. 70 matest edition and
moca[eBectricaI code requirements, install only per instaiiation
instructions provided in the literature package for this range.
Ask your dealer to recommend a qualified technician and an
@2006 Electrolux Home Products, Inc.
All rights reserved.
authorized repair service. Know how to disconnect the power to
the range at the circuit breaker or fuse box in case of an emergency.
,, User servicing--Do not repair or replace any part of the
appliance unmess specifically recommended in the manuals.
All other servicing shouid be done only by a qualified technician.
This may reduce the risk of personal injury and damage to the
range.
,, Never modify or amterthe construction of a range by removing
meveling legs, panems,wire covers, anti=tip brackets/screws, or
any other part of the product.
Page 3
All ranges can tip.
• Injury to persons could result.
Install anti-tip device packed with range.
See Installation Instructions.
_To reduce the risk of
tipping, the rangemust be secured by
properly installed anti-tip bracket provided
with the range. To check if the bracket is
installed properly, visually check that rear
leveling leg is inserted into and fully
secured by the anti-tip bracket by
removing lower panel or storage drawer.
For models with a warmer drawer, grasp
the top rear edge of the range and
carefully attempt to tilt it forward. Refer to
the installation instructions for proper anti*
,_Wear Proper AppareI--Loose4itting or hanging garments
shoumd never be worn while using the appliance. Do not let
clothing or other flammable materials contact hot surfaces.
,_Do Not Use Water or Fmouron Grease Fires--Smother the fire
with a pan lid, or use baking soda, a dry chemicam or foam4ype
extinguisher.
,_When heating fat or grease, watch it ctosemy. Fat or grease may
catch fire if allowed to become too hot.
,_Use Only Dry Pothoiders--Moist or damp pothoJders on hot
surfaces may result in burns from steam. Do not let pothoiders
touch hot heating elements. Do not use a towel or other bulky cloth
instead of a pothoider.
,_Do Not Heat Unopened Food Containers--Buimdup of pressure
may cause container to burst and result in injury.
Removethe oven door from any unused range if it isto be stored
or discarded.
IMPORTANT--Do not attempt to operate the range during a
power failure. If the power fails, always turn off the range. If the
range is not turned off and the power resumes, the range will begin
to operate again. Once the power resumes, reset the clock and
oven function.
Stepping, leaning or sitting on the doors or
drawers of this range can result in serious injuries and amso
cause damage to the range. Do not allow children to climb or play
around the range. The weight of a child on an open door may
cause the range to tip, resulting in serious burns or other injury.
Do not use the oven or warmer drawer (if
equipped) for storage.
Do not store items of interest to children in the
cabinets above a range or on the backguard of a range. Children
climbing on the range to reach items could be seriously injured.
the Room.
Storage in or on AppHance--Fmammable matedaBs should not
be stored in an oven, warmer drawer, near surface units or in
the storage drawer. This includes paper, plastic and cloth items,
such as cookbooks, plasticware and towels, as well as flammable
liquids. Do not store explosives, such as aerosol cans, on or near
the range.
Do Not Leave Chimdren Amone--OhHdren shoumd not be meftatone
or unattended in the area where appliance is in use. They
should never be allowed to sit or stand on any part of the
appliance.
DO NOTTOUCH SURFACE UNiTS, AREAS NEAR THESE UNITS,
HEATSNGELEMENTS OR _NTERIOR SURFACES OFTHE OVEN.
Both surface units and oven heating elements may be hot even
though they are dark in color. Areas near surface units may
become hot enough to cause burns. During and after use, do not
touch, or let clothing or other flammable materials touch these
areas until they have had sufficient time to cool Among these
areas are the cook top, surfaces facing the cook top, the oven vent
openings and surfaces near these openings, oven door and
window.
mMPORTANT mNSTRUCTmONS FOR USmNGYOUR
COOKTOP
Know which knob controls each surface heating unit= Place a
pan of food on the unit before turning it on, and turn the unit off
before removing the pan=
Use Proper Pan Size--This appliance is equipped with one or
more surface units of different sizes. Select utensils having fiat
bottoms large enough to cover the surface unit heating element.
The use of undersized utensils will expose a portion of the
heating element to direct contact and may result in ignition of
clothing= Proper relationship of utensil to element wilI also
improve efficiency=
UtensimHandmes Shoumd Be Turned inward and Not Extend Over
Adjacent Surface Emements--To reduce the risk of burns, ignition
of flammable materials, and spillage due to unintentional contact
with the utensil, the handle of the utensil should be positioned so
that it is turned inward, and does not extend over adjacent surface
units.
,_Never Leave Surface Elements Unattended at High Heat
Settings--Boilovers cause smoking and greasy spillovers that
may ignite, or a pan that has boiled dry may melt.
,_Do Not immerse or Soak Removable Heating E_ements--
Heating elements should never be immersed in water. Heating
elements clean themselves during normal operation.
,_Glazed Cooking Utensils--Only certain types of glass, glass/
ceramic, ceramic, earthenware, or other glazed utensils are
suitable for cook top service without breaking due to the sudden
change in temperature. Check the manufacturer's
recommendations for cook top use.
,_When flaming foods under a ventilating hood, turn the fan on.
Page 4
ImportantSafetyInstructions
mMPORTANT mNSTRUCTmONS FOR USmNGYOUR
OVEN
. Use Care When Opening Oven Door or Warmer Drawer (if
equipped)--Stand to the side of the range when opening the door
of a hot oven, Let hot air or steam escape before you remove or
replace food in the OVER,
Keep Oven Vent Ducts Unobstructed. The oven vent is located
under the left rear surface element if your model is equipped with
col elements. The oven vent is Iocated below the backguard for
models equipped with ceramic-glass cook tops. Touching the
surfaces in this area when the oven is operating may cause
severe burns. Also, do not piace plastic or heat-sensitive items
on or near the oven vent. These items could melt or ignite.
,,Pmacement of Oven Racks. Always place oven racks in desired
location while oven is cool. If rack must be moved while oven is
hot use extreme caution. Use potholders and grasp the rack with
both hands to reposition. Do not let potholders contact the hot
heating elements in the oven. Remove nil utensils from the rack
before moving.
,,Do not use the broiler pan without its insert. The broiler pan and
its insert allow dripping fat to drain and be kept away from the high
heat of the broiler.
Do not cover the broiler insert with aluminum foil Exposed fat
and grease could }gn{te.
,,Protective Liners--Do not use aIuminum foiI to line the oven
bottom. Only use aluminum foil as recommended in this manual.
Improper installation of these liners may result in risk of electric
shock, or fire.
mMPORTANT mNSTRUCTmONS FOR CLEANmNG
YOUR RANGE
,_CBean the range regularly to keep a/parts free of grease that
could catch fire. Pay particular attention to the area underneath
each surface element. Do not allow grease to accumulate.
,_Kitchen cmeaners and aerosols--Amways follow the
manufacturer's recommended directions for use. Be aware
that excess residue from cleaners and aerosoIs may ignite
causing damage and injury.
,_OCeanVentlating Hoods Frequenty--Grease should not be
allowed to accumumate on the hood or filter. Follow
manufacturer's instructions for cleaning.
COIL COOK TOP MODELS
,_Make Sure Reflector Pans or Drip Bowls Are in Prance--Absence
of these pans or bowls during cooking may subject wiring or
components underneath to damage.
,,Protective Liners--Do not use aluminum foil to ire surface unit
drip bowls, or reflector pans. Only use aluminum foil as
recommended in this manual. Improper insta/ation of these
liners may result in risk of electric shock, or fire. Improper
instalation of these liners may result in risk of electric shock, or
fire.
IMPORTANT SAFETY NOTICE
The California Safe Drinking Water and Toxic Enforcement Act
requires the Governor of California to publish a list of substances
known to the state to cause cancer, birth defects or other reproductive
harm, and requires businesses to warn customers of potential
exposure to such substances.
The ELement ON mndicator Light
The Coil Cook Top range is equipped with a surface control light that will glow on your range--
the Element ON indicator light, The Element ON indicator light (all models) located on the
control panel, will glow when any surface element is turned ON, A quick glance at this light after
cooking is an easy check to be sure all surface controls are turned OFF,
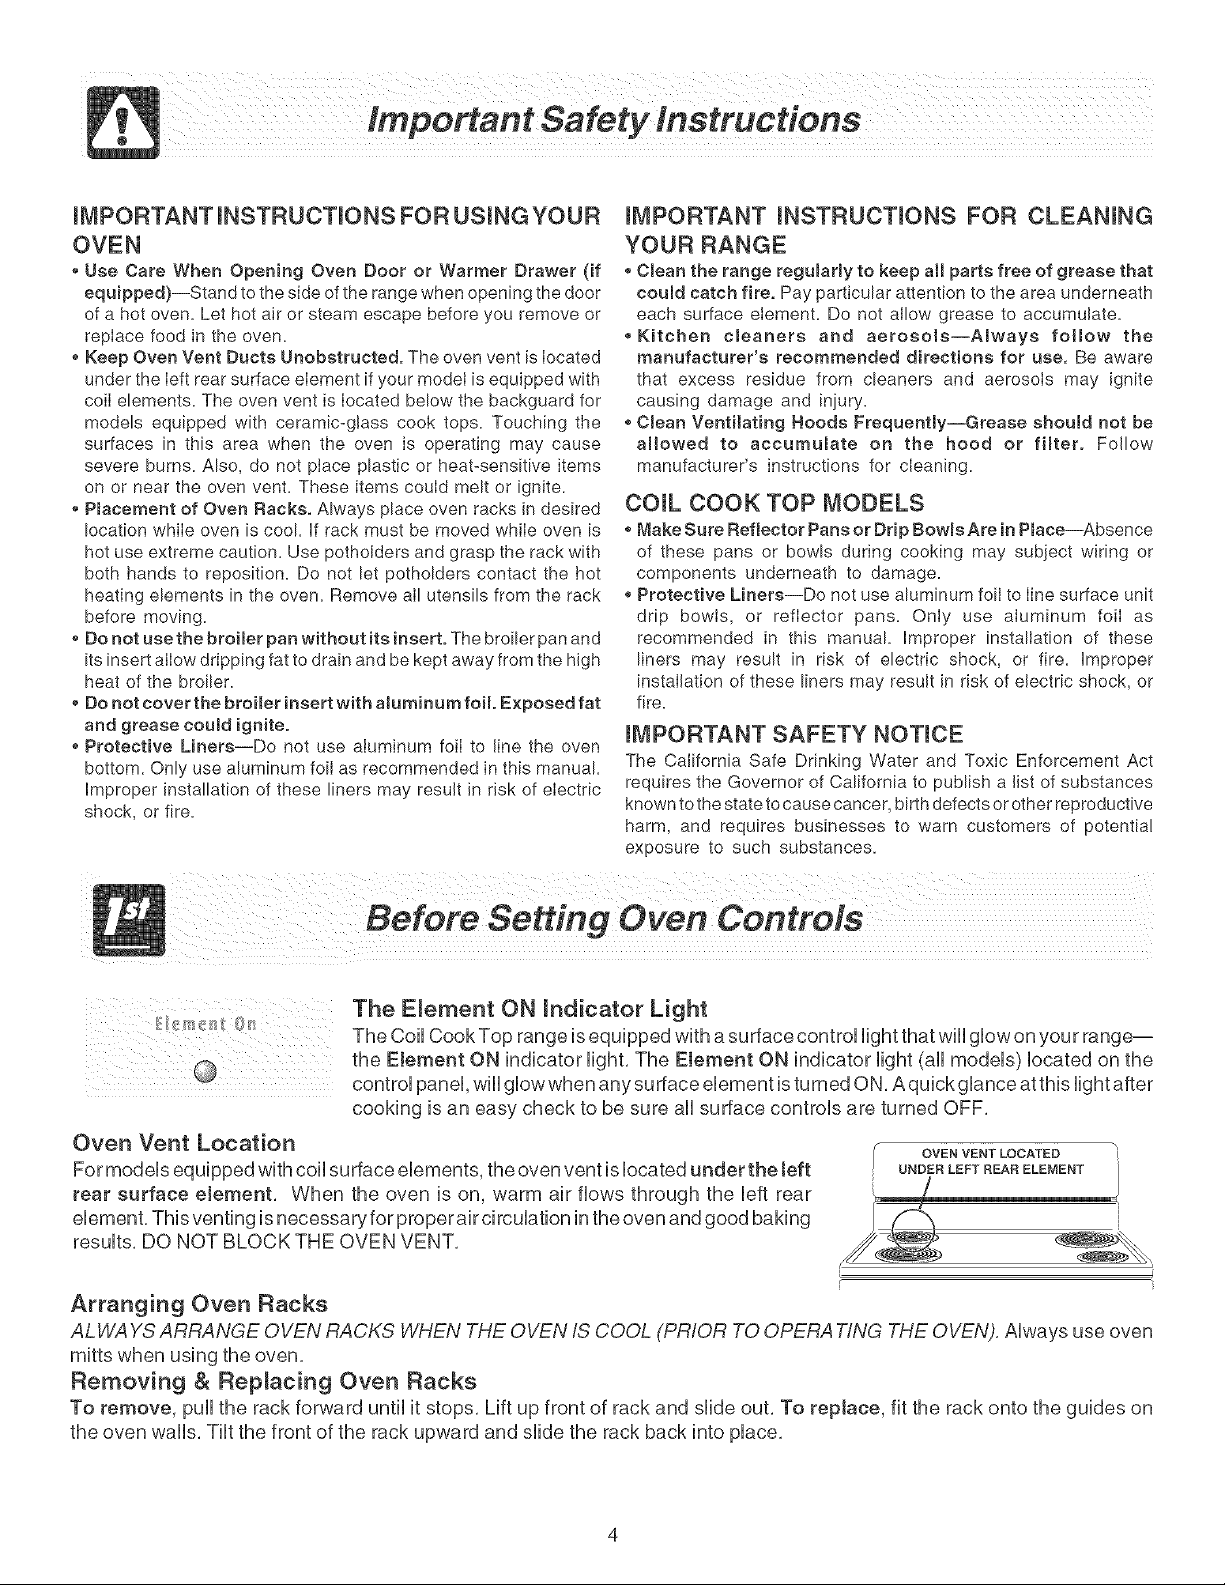
Oven Vent Location
OVEN VENT LOCATED _1
For models equipped with coil surface elements, the oven vent is located under the teft
rear surface element. When the oven is on, warm air flows through the left rear
UNDiR LEFT REAR ELENENT 1
element. This venting is necessary for proper airci rculation in the oven and good baking
results. DO NOT BLOCK THE OVEN VENT.
, j
c
Arranging Oven Racks
ALWAYS ARRANGE OVEN RACKS WHEN THE OVEN IS COOL (PRIOR TO OPERA -!ING THE OVEN). Always use oven
mitts when using the oven.
Removing & Replacing Oven Racks
To remove, pull the rack forward until it stops. Lift up front of rack and slide out. To replace, fit the rack onto the guides on
the oven walls. Tilt the front of the rack upward and slide the rack back into place.
Page 5

Arranging Oven Racks
To bake on a single rack, pHacethe rack on position 2 or 3. To bake on 2 racks,
pHacethe racks on positions 1 & 3.
Recomended Rack Positions for Broilinq, Baking & Roasting:
Food
Broiling meats, chicken or fish,
Cookies, cakes, pies, biscuits & muffins,
Frozen pies, angel food cake, yeast, bread, casseroHes, small
cuts of meat or poultry,
Turkey, roast or ham.
Note: The time ef day must first be set in erder t0 operate the oven.
BAKE PAD--Used to UP & DOWN ARROW PADS-- Used along with
select the bake the function pads to select oven temperature,
function, time of day, clean time & minute timer.
--m
PAD--
BROIL o
Used to
select the
variable •
broil
function.
/ F
TmMERON/OFF PAD-- CLOCK SET
Used to set or cancel the PAD-- Used
minute timer. The minute to set the time
timer does not start or of day.
stop cooking.
READ THE INSTRUCTIONS CAREFULLY BEFORE USING
THE OVEN. For satisfactory use of your oven, become familiar
with the various functions of the oven as described below,
To Set the C_ock
When the range is first plugged in, or when the power supply
to the range has been interrupted, the display will flash "12:00",
1, Press _.
2, Within 5 seconds, press and hold the
correct time of day appears in the display,
/
CLEAR/OFF -- Used to
clear any function
previously entered except
the time of day and minute
timer. Press CLEAR!OFF to
stop cooking.
L
[
J
until the
Rack Position
(See Broiling section)
2or3
1
1 or Roasting SheHf
To
Set the Minute Timer (cont'd):
time in 10 minute increments, The timer can be set for
any amount of time from 1 minute to 11 hours and 59
minutes,
Note: If you press the _first, the timer will advance
to 11 hours and 59 minutes,
3,
The display shows the timer count down in minutes
until one minute remains, Then the display will count
down in seconds,
4,
When the set time has run out, the timer will sound a 3
second beep, 0:00 will appear in the display until
is pressed,
Note: While the minute timer is counting down, the ":" will
flash, The minute timer does not start or stop cooking, It
serves as an extra timer in the kitchen that will beep when
the set time has run out, The minute timer can be used
alone or during any of the other oven functions, When the
minute timer is in use with any other function, the minute
timer will be shown in the display, To view other functions,
press the pad for that function,
To Change the Minute Timer while it is in use:
While the timer is active and shows in the display, press
and hold the to increase or decrease the time,
To Cancel the Minute Timer before the set time has
To Set the Minute Timer:
1, Press _.
2, Press the to increase the time in one minute
increments, Press and hold the ,to increase the
run out: Press _).
Page 6

Note:Thetimeofdaymustfirstbesetin order to operate the oven,
Changing the Temperature Display Mode (some models)
The electronic oven control temperature display mode was factory preset to display (Fahrenheit) °F oven tempertaures,
Note: Oven cooking temperatures may be set from 170°F to 550°F (77°C to 287°C),
To change the Temperature Display Mode to °C (Celsius) or from °C to °F (do not use Bake or Broil while changing
the Temperature Display Mode):
1,
Press & hold the _"_ key pad for 6-8 seconds until For ['appears in the display, Note: At this time the display will
show the current Temperature Display Mode whether set for For E,
2, Press the A key pad once to choose the (Fahrenheit) °F mode; or press the V key pad once to choose the
(Celsius) °C mode,
3, After 5 seconds, the display will flash, To accept the change, wait 5 more seconds until the oven control beeps once,
To complete the change skip step 4 below, OR;
4, if at any time during the process of changing the Temperature Display Mode (For E) you decide the change is not
desired, press the _'_ key pad before the oven control beeps once to cancet the process,
5, The control will beep once, The display wiUUthen return to the time of day with any temperature display mode change
you may have requested,
Fig, 1
Do not pUace
pUastic items such as saUtand
pepper shakers, spoon hoUdersor
pUasticwrappings on top of the
range when it is in use, These
items couUdmeUtor ignite,
PothoUders, toweUsor wooden
spoons couUdcatch fire if pUaced
too dose to the eUement,
To Operate the Surface E_ements
1, PUacecooking utensil on the surface eUement,
2, Push in and turn the surface controUknob in either direction to the desired setting
(See Fig,l), Start most cooking operations on a higher setting and then turn to a
Uowersetting to finish cooking, The control knobs do not have to be set exactly on
a particular setting, Use the settings as a guide and adjust the control knob as
needed,
3, When cooking is completed, turn the surface element off before removing the pan,
Note: The surface "Element On" indicator light(s) will glow when one or more
elements are turned ON, A quick glance at these indicator light(s) when cooking is
finished is an easy check to be sure all surface elements are turned OFF,
Suggested Surface Contro_ Settings
The suggested settings found in the chart below are based on cooking in medium°
weight metal pans with lids, Settings may vary when using other types of pans, Note:
The size and type of utensil used, and the amount and type of food being cooked will
influence the setting needed for best cooking results,
Surface Contro_ Settings
Setting Type of Cooking
HIGH (HI -9) Start most foods, bring water to a boil, pan broiling
MEDIUM HIGH (7 - 8) Continue a rapid boil, fry, deep fat fry
MEDIUM (5 -6) Maintain a slow boil, thicken sauces & gravies, steam
vegetables
MEDIUM LOW (2 - 4) Keep foods cooking, poach, stew
LOW (LO - 1) Keep warm, melt, simmer,
Page 7

Note:Thetimeofdaymustfirstbesetinordertooperatetheoven.
To Set or Change the Temperature for Baking
The oven can be programmed to bake at any temperature
from 170°F to 500°F.
To Set the Controls for Baking:
1. Press ..... appears in the display.
2. Within 5 seconds, press the or . The display
wiii show "350°F. '' By pressing and holding the or
heating to the selected temperature. When the
displayed temperature reaches the desired baking
temperature, the control will beep once (1 time).
4,
To cancel the baking function, press @.
To Change the Oven Temperature after Baking has
Started:
P,the temperature can then be adjusted in 5°F
increments.
3. When the is released, the oven will begin
Broiling
1. Arrange oven rack while oven is still cool. Position the rackas suggested in the
chart below. See "Arranging Oven Racks" in Before Setting Oven Controls,
Back Position Food
3 or 4 Medium=rare steaks
3 Fish, medium=well done hamburgers & chops
1 or 2 Well=done foods such as chicken & lobster
2, Press
To insure proper results
when broiling use ONLY Electrolux Home
Products, Inc. approved Broil Pan & insert
(some models).
3, Press and hold the
the display, Press the bfor LO broil, Most foods can
be broiled at the HI broil setting, Select the LO broil setting to avoid excess
browning or drying of foods that should be broiled to the well=done stage,
4, Place the insert on the broiler pan (some models), then place the food on the
insert, DO NOT use the broiler pan without the insert or cover the insert with
aluminum foil. The exposed grease could ignite.
5. Place the pan on the oven rack. Open the oven door to the broil stop
position when broiling (see illustration).
6. Broil on one side until food is browned; turn andcook on the second side. Note:
Always pull the rack out to the stop position before turning or removing food.
1. Press and make sure the bake temperature is
displayed.
2. Press the
temperature.
or _to increase or decrease the set
until the desired broil setting level appears in
The broiler pan & the insert (some
models) allows grease to drain and be
kept away from the high heat of the
broiler. DO NOT use the pan without the
insert. DO NOT cover the insert with foil;
the exposed grease could ignite.
7. When broiling is finished, press @.
Should an oven fireoccu r,close the oven door and turn off the oven.
if the fire continues, use a fire extinguisher. DO NOT put water or flour on the fire.
Flour may be explosive.
Page 8

Yournewovenhasbeenfactorycalibratedandtestedtoensureanaccuratebakingtemperature,Forthefirstfewuses,follow
yourrecipetimesandtemperaturerecommendationscarefully,UfyoufeeUyourovenistoohotortoocooUfromyourbaking
experience,theoventemperaturemaybeadjustedtoyourHking,
Note:DONOTadjustyouroventemperaturebasedonoventhermometers,suchasthosefoundingrocerystores,theymay
notbeaccurate,
ToAdjusttheOvenTemperature(donotuseBakeorBroilwhileadjustingtheoventemperature):
1,
Press& hoUdthe_ keypadandreUeaseafterthe dispUaybeginsflashingthefactorytemperaturesettingofDO,
Note: Ufthe oven temperature has been previousUyadjusted from the factory setting, the current temperature adjusted vaUue
wHUflash in the dispUayinstead,
2, You may increase the oven temperatu re in 5°F increments with each press ofthe ,/_ key padto a maximu moven adjustment
of +35°F, You may aUsoadjust the oven temperature downward in 5°F increments with each press of the V key pad (totaU
adjustment range of -35to ÷35 F, Note: Your oven control was factory set in the (Fah renheit) °F Temperature Display Mode,
To change for (Celsius) °C, see Changing the Temperature Display Mode in the Oven Control Functions section of this
Use & Care Manual,
3, If no other key pad is pressed after 5 seconds the display will begin to flash,
4, If you do not want to keep the display adjustment, press the _'_ key pad before the oven control beeps,
the temperature adjustment procedure, To start this procedure over again begin with step 1 above OR;
5, If you want to keep the adjustment, wait until the display quits flashing and the oven control beeps once,
6, The oven temperature adjustment has be accepted by the oven control and the display will return to the time of day,
This will cancel
Notes: The oven temperature adjustment may be made if your oven control has been set to operate in the (Celsius) °C
Temperature DispJay Mode, in this case each press of the A or V key will adjust in 1°C increments upward (maximum
+18°C) or downward (maximum -18°C), depending on which arrow key pad is pressed.
Surfaces How to Ctean
Glass, Painted
Plastic Body Parts &
Control Knobs
Painted Control
Pane{s & Display
areas
Porcelain Enamel
BurRer Grates,
Cooktop Surface,
Below Cooktop,
Broimer Pan & Insert,
Broiler Drawer, Door
Liner & Oven Bottom
For general cleaning, use a soft cloth, clean with mild dish detergent & water or a 50/50 solution
of vinegar & water. Follow by rinsing the area with clean water; dry & polish with a soft cloth.
Glass cleaners may be used if sprayed on a soft cloth 1st. DO NOT spray liquids directly on the
control pad and display areas. DO NOT use large amounts of water on the control panel - excess
water on the control area may cause damage to the appliance. DO NOT use other liquid
cleaners, abrasive cleaners, scouring pads, or some paper towels - they will damage the finish.
Before cleaning the control panel, turn all controls to OFF & remove the control knobs. To
remove, pull each knob straight off the shaft. Use the general cleaning instructions provided in the
paragraph above.
Clean burner grates, broiler pan & insert in the dishwasher and dry upon removal. If soils are not
removed, follow the cooktop cleaning instructions below.
Gentle scouring with a soapy scouring pad will remove most spots. Rinse with a 1:1 solution of
clean water & ammonia, if necessary:, cover difficult spots with an ammonia-soaked paper towel
for 30 to 40 minutes. Rinse with clean water and a damp cloth, then scrub with a soap-filled
scouring pad. Rinse & wipe dry with a clean cloth. Remove all cleaners or the porcelain may
become damaged during future heating. DO NOT use spray oven cleaners on the range top.
Page 9

General Care & Cleaning
Surfaces How to Ctean
Oven Racks Remove racks. See "Removing & Replacing Oven Racks" under Before Setting Oven Controls. Use a
mud, abrasive cleaner, following the cleaner's recommendations. Rinse with clean water & let dry. After
cleaning the racks, rub the sides of the racks with wax paper or a cloth containing a small amount of baby
oil or salad oil (this will make the racks glide easier into the oven rack positions).
Oven Door Use soap & water to thoroughly clean the top, sides & front of the oven door. Rinse well. You may use a
glass cleaner on the outside glass of the oven door. DO NOT immerse the door in water. DO NOT spray
or almow water or the gmaes cleaner to enter the door vents, DO NOT use oven cleaners, cleaning
powders or any harsh abrasive cleaning materials on the outside of the oven door. DO NOT clean the oven
door gasket. The oven door gasket is made of a woven material, on Self-Charting models, which is
essential for a good seal. Care should be taken not to rub, damage or remove this gasket.
Stainless
Steel
Clean stainless steel with hot soapy water & a dishcloth. Rinse with clean water and a cloth. DO NOT use
cleaners with high conecentrations of chlorides or cMorines. DO NOT use harsh scrubbing cleaners. Only
use kitchen cleaners that are especially made for cleaning stainbss steel. Always be sure to rinse the
cleaners form the surface as bluish stains may occur during heating that cannot be removed.
C(eaning Recommendations for Coil Element Cooktop
Surface elements can be unplugged and removed to make cleaning the drip pans easier, The surface elements clean themselves
when they are turned on, Food spilled on a hot element will burn off, Food spilled on a cool element may be cleaned with a damp
cloth--any remaining soil will burn off the next time the element is used,
Never immerse a surface etement in water.
Be sure the range is cool
before removing elements or drip bowls,
Be careful not to bend terminal ends when
replacing ebmentsafterdeaning,
Termlna[ End
Removing the Surface Elements & Drip BowJs
1, Lift the edge of the drip bowl across from the terminal end, Lift the surface
etement & drip bowl together just enough to clear the cooktop,
2, While holding the drip bowl and surface element, gently pull the terminal end
out from the terminal plug, if equipped, DO NOT remove the hold down clip from
the drip bowl,
Cteaning the Drip Bowls
Wash in hot soapy water or in the dishwasher. Rinse & dry while still warm.
Hard to remove or burned on soil can be removed by soaking the drip bowls for
about 20 minutes in a lightly diluted liquid cleanser or a solution of ammonia &
water (1/2 cup ammonia to 1 gallon of water). A nylon scrubber may be used
after soaking. DO NOT use abrasive cleaners or steel wool, as they wiii scratch
the surface. Always rinse with clean water & polish dry with a soft cloth.
Main top
Lift-up
range top, grasp the sides with finger-tips
only, Be careful not to pinch fingers, DO
NOT drop or bend the range top when
raising or lowering, This could damage
the surface,
Replacing Drip Bowls & Surface Elements
1. Slide the terminal end on the element through the opening in the drip bowl.
2. Align the element support to rest on the rim inside the drip bowl. if your drip
bowl is equipped with a hold down clip, align the element support opposite
the terminal end with the slot in the hold down clip & snap into place.
3. After the element is positioned in the drip bowl, line up the terminal end
with the terminal plug as shown.
4. Hold the surface element & drip bowl together as level as possible & firmly
push the terminal end into the terminal plug. Make sure element terminal is
seated properly into terminal plug. Make sure the surface element is level
to reduce the hazard of pans sliding off the element.
Raising the Top for Cleaning
1. Grasp the sides &lift from the front. Lift-up rods will support the top in a
raised position. Only lift the top far enough to allow the support rods to
snap into place.
2. Clean underneath using a clean cloth & hot soapy water.
3. To lower the top, gently push back on each rod to release the notched
support. Hold the range top and slide the lift rods down into the range
frame,
9
Page 10

GeneralCare&Cleaning
C_eaning the Oven Bottom
The bake eUement is designed to be gentUytilted up using your hand from the front of
the bake eUement, This wHUallow easier access to the oven bottom for cUeaning, Be
carefuUnot to raise the element more than 4 or 5 inches from the resting position,
Care & C_eaning of Stainless Stee_
Some models are equipped with stainless steel exterior parts, Special care and
cleaning are required for maintaining the appearance of stainless parts, Please
refer to the Cleaning Chart provided at the beginning of the GeneraJ Care &
Cteaning section in this Use & Care Manual,
The baking
element
may be tilted
about 4 or 5
inches to
clean the
oven
bottom.
Changing the Interior Oven Light (some models)
On some models, the oven light automatically tu ms on when the door is opened, Some models
have a switch located on the control panel to turn on the light, The oven light is located at the
rear of the oven,
To reptace the oven light:
1, Turn electrical power off at the main source or unplug the range,
2, Replace bulb with a new 40 watt appliance bulb,
3, Turn power back on again at the main source (or plug the range back in),
4, The clock will then need to be reset, To reset, see Setting Oven Controls in this Use &
Care Manual,
Be sure the range is unplugged and all parts are COOL before replacing oven
light, Wear a leather-faced glove for protection against possible broken glass,
Removing & Replacing the Oven Door
The door is heavy, For safe, temporary storage, lay the door flat with the
inside of the door facing down,
To Remove Oven Door:
1, Open oven door completely (horizontal with floor °See Fig, 1),
2, Remove 2 screws located on the inside of the oven door liner (See A Fig, 2)
3, Insert the 2 screws into the door hinge holes located on the side of the hinge arm,
one into each hinge (See B Fig, 2),
4, Close oven door until the door stops, (Do not force the door to close any further), The
Fig. 1
placement of these screws should keep door open in about a 45 degree position,
5, Grasp oven door firmly on both sides and slide door up and off hinges at the same
angle, (See Fig, 3)
6, To clean oven door, follow the instructions provided in the Cleaning Chart at the
beginning of the Care & Cteaning section (See Door Liner),
Ove n
Light
or
use
a Nail
Fig. 2
Hinge
Fig. 3
To RepJace Oven Door:
1, Be sure the hinge arms remain at the 45 degree angle position, Be sure the screws
are still locking the hinge arms from moving, If the screws fall out of the hinge holes,
the hinge(s) may snap back against the oven frame and could pinch fingers or chip
the porcelain finish on the oven front frame,
2, Hold door at the sides near the top while resting the lower front of door on your knee,
Insert the door channels at the bottom of door over the door hinges, (See Fig, 3),
3, Allow the door to slide down into the door hinges evenly at the same 45 degree
angle, The hinge arms should be inserted into the bottom corners as far as they can
go,
4, Open door completely (horizontal with floor) and remove both screws from holes in
door hinges,
5, Reinstall the 2 screws into the door liner (See C Fig, 2),
6, If the door is not in alignment with the oven frame, remove door & repeat the above
steps,
10
Page 11

Solutions to Common Problems
Before you calf for service, review the following list, it may save you time & expense, The list includes common occurrences
(shown in bold) that are not the result of defective workmanship or materials in this appliance, The possible corrections to these
problems are provided with the problem listed:
Range is not level - (1) Poor installation. Place oven rack in
center of oven. Place a level on the oven rack. Adjust leveling
legs at base of range until the oven rack is level. (2) Be sure
floor is level, strong &stabie enough to adequately support
range. (3) if floor is sagging or sloping, contact a carpenter to
correct the situation. (4) Kitchen cabinet alignment may make
range appear not level. Be sure cabinets are square & have
sufficient room for range clearance.
Cannot move appmiance easil .Ay.A_apmiance must be accessible
for service - (1) Cabinets not square or are built in too tightly.
Contact builder or insta!ier to make appliance accessible. (2)
Carpet interferes with range. Provide sufficient space so range
can be lifted over carpet.
Surface element too hot or net bet enough o incorrect control
setting. Be sure the correct control is ON for the element to be
used.
Surface element does net heat - (1) Lightweight or warped
pans used. Use only fiat, evenly balanced, medium or
heavyweight cookware. Fiat pans heat better than warped
pans. Cookware materials and weight of the material affect
heating. Heavy & medium-weight pans heat evenly. Because
lightweight pans heat unevenly, foods may burn easily. (2) No
power to the appliance. Check steps under "Entire Appmiaece
Does Not Operate" in this checklist. (3) incorrect control
setting. Make sure the correct control is ON for the surface
element to be used.
Entire a_?pffance does not operate o(1) The time of day is not
set. The time of day must first be set in order to operate the
oven. See "To Set the Clock" in the Setting Oven ContreBs
section.(2) Make sure cord/plug is plugged correctly into outlet.
(3) Service wiring is not complete. Contact your dealer,
installing agent or authorized service agent. (4) Electrical
power outage. Check house lights to be sure. Call your local
electric company for service.
Oven does not operate - Be sure the oven controls are set
properly for the desired function. See Setting Oven Controls in
this Use & Care Manual or read the instructions "Entire
appliance does not operate" in this checklist.
Oven ffqht does not work (some modeBs} - Replace or tighten
bulb. See Changing Oven Light section in this Use & Care Manual.
Oven smokes excessive1 durLn broilin o (1) Control(s) not
set properly. Follow Broil instructions under Setting Oven
Controgs. (2) Make sure oven door is opened to broil stop
position. (3) Meat too close to the broil element. Reposition the
broil rack to provide proper clearance between the meat & the
element. Preheat the broil element for searing. (4) Meat not
properly prepared. Remove excess fat from meat. Cut
remaining fatty edges to prevent curling, but do not cut into lean.
(5) insert on broiler pan wrong side up & grease not draining.
Always place grid on the broiler pan with ribs up & slots down to
allow grease to drip into pan (some models). (6) Grease has
built up on oven surfaces. Regular cleaning is necessary when
broiling frequently. Old grease or food spatters cause excessive
smoking.
Flames inside oven or smoking from oven vent oExcessive
spilIovers in oven. For example this wilI happen for pie
spillovers or large amounts of grease left on the oven bottom.
Wipe up excessive spilIovers before starting oven. if flames or
excessive smoke are present see "Broiling" in the Setting
Oven Controls section.
Oven controt beeps & dis ml_avsany F code error (for e×ampme
F!_ - Electronic control has detected a fault condition. Press
CLEAR/OFF to clear the display & stop beeping. Try the Bake or
Broil function again, if the F code error repeats, remove power
suppy to appliance, wait 5 minutes and then repower the
appliance and set clock time of day. Try the Bake or Broil
function again, if the fault recurs, record fault number, press
CLEAR/OFF & contact an authorized service agent.
Poor baking results - Many factors affect baking results. Make
sure the proper oven rack position is used. Center food in the
oven & space pans to allow air to circulate. Allow the oven to
preheat to the set temperature before piacing food in the oven.
Try adjusting the recipe's recommended temperature or baking
time. if you feet the oven is too hot or cool, see Adjusting Your
Oven Temperature in this Use & Care Manual.
Drip bowBs are pitting or rusting(Coil eBement modems} - (1)
Foods with acids, such as tomatoes if allowed to stand in or on
drip bowls wilI cause corrosion. Remove & wash drip bowls as
soon as possible after a spillover. (2) Normal environment.
Houses along coastal areas are exposed to salt air. Protect
bowls as much as possible from direct exposure to salt air.
Drip bowBs turning color or distorted (Coil element models} =
Bottom surface of cookware extends beyond surface elements
and touches cooktop surface. This can cause high enough
temperatures to discolor the drip bowls. DO NOT use cookware
of this type. Pan sizes should be matched to the size of the
element. Replacement drip bowls may be purchased from your
appliance dealer.
11
Page 12

Your appliance is covered by a one year limited warranty. For one year from your original date of
purchase, Electrolux will pay all costs for repairing or replacing any parts of this appliance that prove to be
defective in materials or workmanship when such appliance is installed, used and maintained in
accordance with the provided instructions.
Excmueions
This warranty does not cover the following:
1. Products with original serial numbers that have been removed, altered or cannot be readily determined.
2. Product that has been transferred from its original owner to another party or removed outside the USA or
Canada.
3. Rust on the interior or exterior of the unit.
4. Products purchased "as-is" are not covered by this warranty.
5. Food loss due to any refrigerator or freezer failures.
6. Products used in a commercial setting.
7. Service calls which do not involve malfunction or defects in materials or workmanship, or for appliances
not in ordinary household use or used other than in accordance with the provided instructions.
8. Service calls to correct the installation of your appliance or to instruct you how to use your appliance.
9. Expenses for making the appliance accessible for servicing, such as removal of trim, cupboards,
shelves, etc., which are not a part of the appliance when it is shipped from the factory.
10. Service calls to repair or replace appliance light bulbs, air filters, water filters, other consumables, or
knobs, handles, or other cosmetic parts.
11. Surcharges including, but not limited to, any after hour, weekend, or holiday service calls, tolls, ferry trip
charges, or mileage expense for service calls to remote areas, including the state of Alaska.
12. Damages to the finish of appliance or home incurred during installation, including but not limited to
floors, cabinets, walls, etc.
13. Damages caused by: services performed by unauthorized service companies; use of parts other than
genuine Electrolux parts or parts obtained from persons other than authorized service companies; or
external causes such as abuse, misuse, inadequate power supply, accidents, fires, or acts of God.
DISCLAIMER OF IMPLIED WARRANTIES; LIMITATION OF REMEDIES
CUSTOMER'S SOLEAND EXCLUSIVE REMEDY UNDER THIS LIMITED WARRANTY SHALL BE PRODUCT
REPAIR OR REPLACEMENTAS PROVIDED HEREIN. CLAIMS BASED ON IMPLIED WARRANTIES,
INCLUDING WARRANTIES OF MERCHANTABILITY OR FITNESS FOR A PARTICULAR PURPOSE, ARE
LIMITED TO ONE YEAR OR THE SHORTEST PERIODALLOWED BY LAW, BUT NOT LESS THAN ONE YEAR.
ELECTROLUX SHALL NOT BE LIABLE FOR CONSEQUENTIAL OR INCIDENTAL DAMAGES SUCH AS
PROPERTY DAMAGE AND INCIDENTAL EXPENSES RESULTING FROM ANY BREACH OF THIS WRITTEN
LIMITED WARRANTY OR ANY IMPLIED WARRANTY. SOME STATES AND PROVINCES DO NOTALLOW THE
EXCLUSION OR LIMITATION OF INCIDENTAL OR CONSEQUENTIAL DAMAGES, OR LIMITATIONS ON THE
DURATION OF IMPLIED WARRANTIES, SO THESE LIMITATIONS OR EXCLUSIONS MAY NOTAPPLY TO
YOU. THIS WRITTEN WARRANTY GIVES YOU SPECIFIC LEGAL RIGHTS. YOU MAY ALSO HAVE OTHER
RIGHTS THAT VARY FROM STATE TO STATE.
ffYou Need Keep your receipt, delivery slip, or some other appropriate payment record to establish the warranty period
Service should service be required. If service is performed, it is in your best interest to obtain and keep all receipts.
Service under this warranty must be obtained by contacting Electrolux at the addresses or phone
numbers below.
This warranty only applies in the USA and Canada. In the USA, your appliance is warranted by Electrolux Major Appliances
North America, a division of Electrolux Home Products, Inc. In Canada, your appliance is warranted by Electrolux Canada
Corp. Electrolux authorizes no person to change or add to any obligations under this warranty. Obligations for service and
parts under this warranty must be performed by Electrolux or an authorized service company. Product features or
specifications as described or illustrated are subject to change without notice.
USA
1.800.944.9044
Electrolux Major Appliances
North America
P.O. Box 212378
Augusta, GA 30907
Electrolu×
Electrolux Canada Corp.
Mississauga, Ontario, Canada
1.800.668.4606
5855 Terry Fox Way
Canada
LSV 3E4
 Loading...