

Page 1
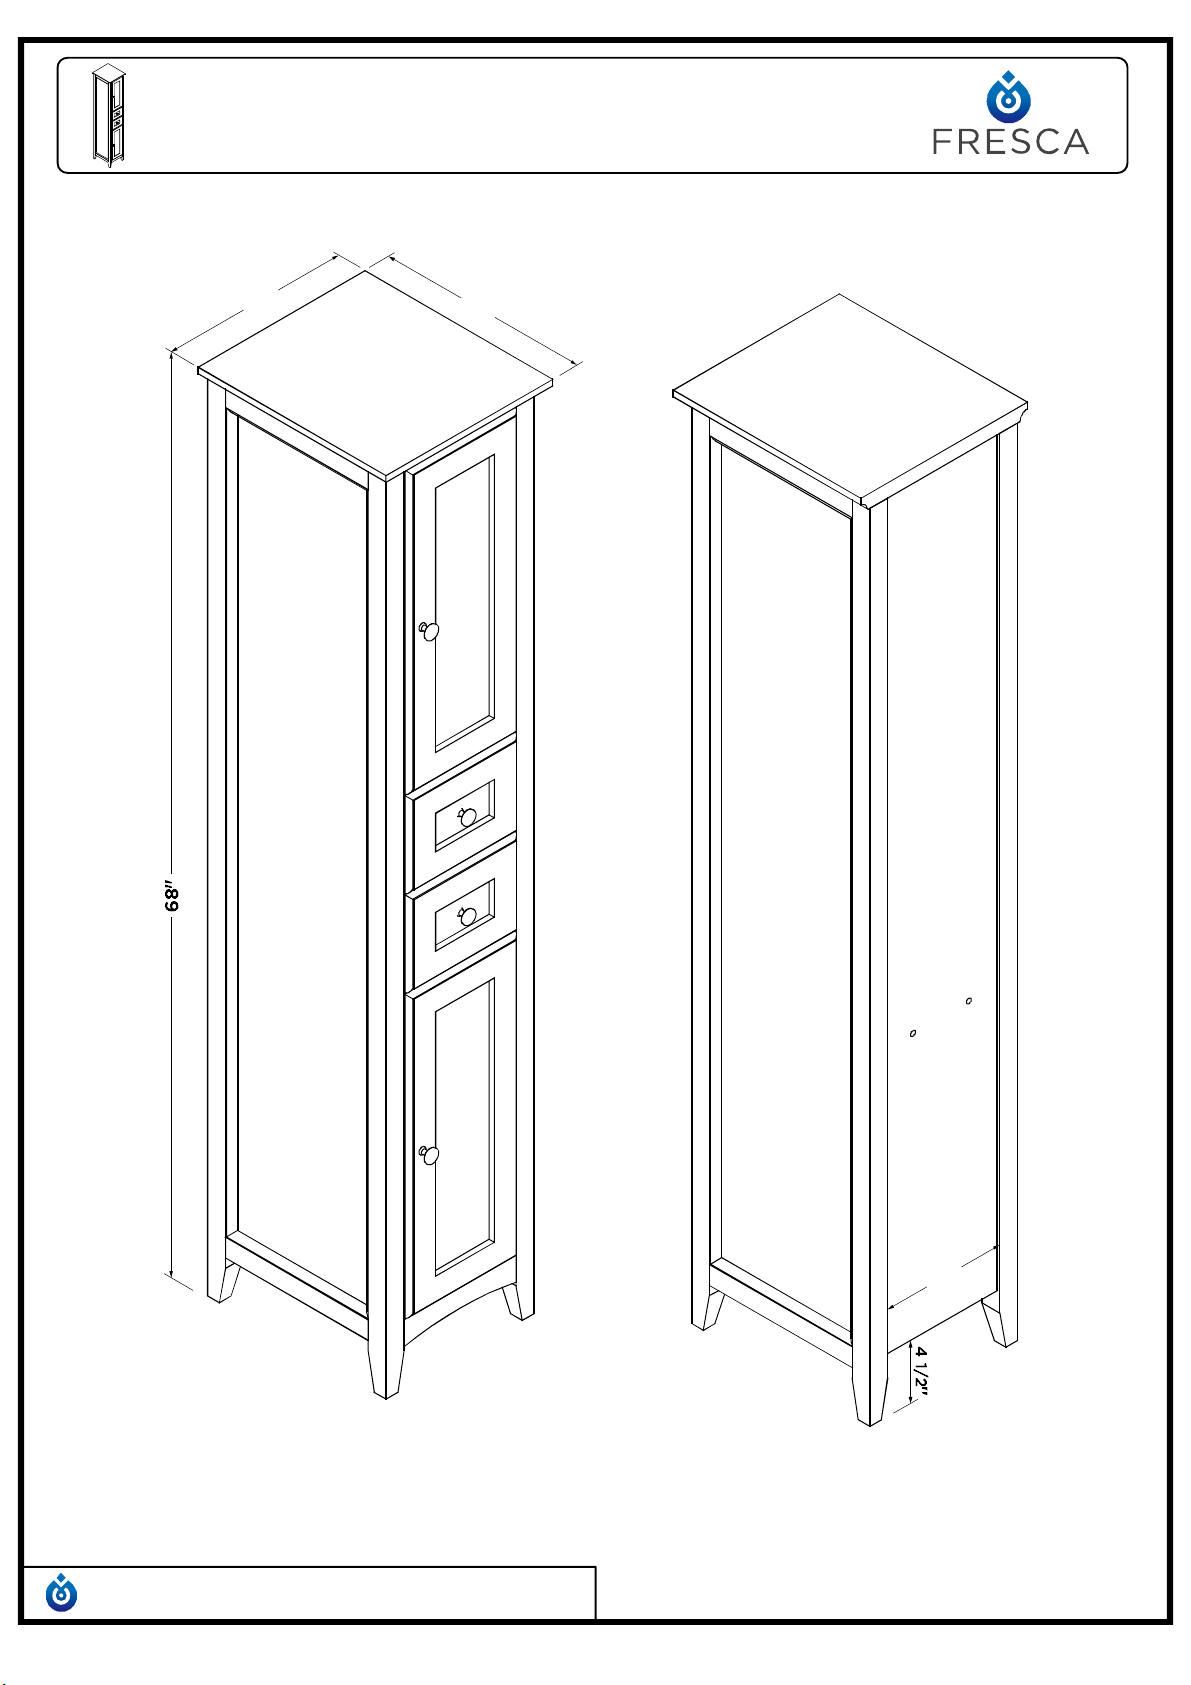
FST2060
OXFORD
INSTALLATION GUIDE
14"
15 3/4"
10 3/4"
Note:
©2013 Fresca ™ All rights reserved. This material may not be reproduced, displayed, modified or distributed without the express prior written permission of the copyright holder.
All dimensions and specifications are approximate and subject to change without notice.
OXFORD
INSTALLATION GUIDE
PAGE 1
Page 2
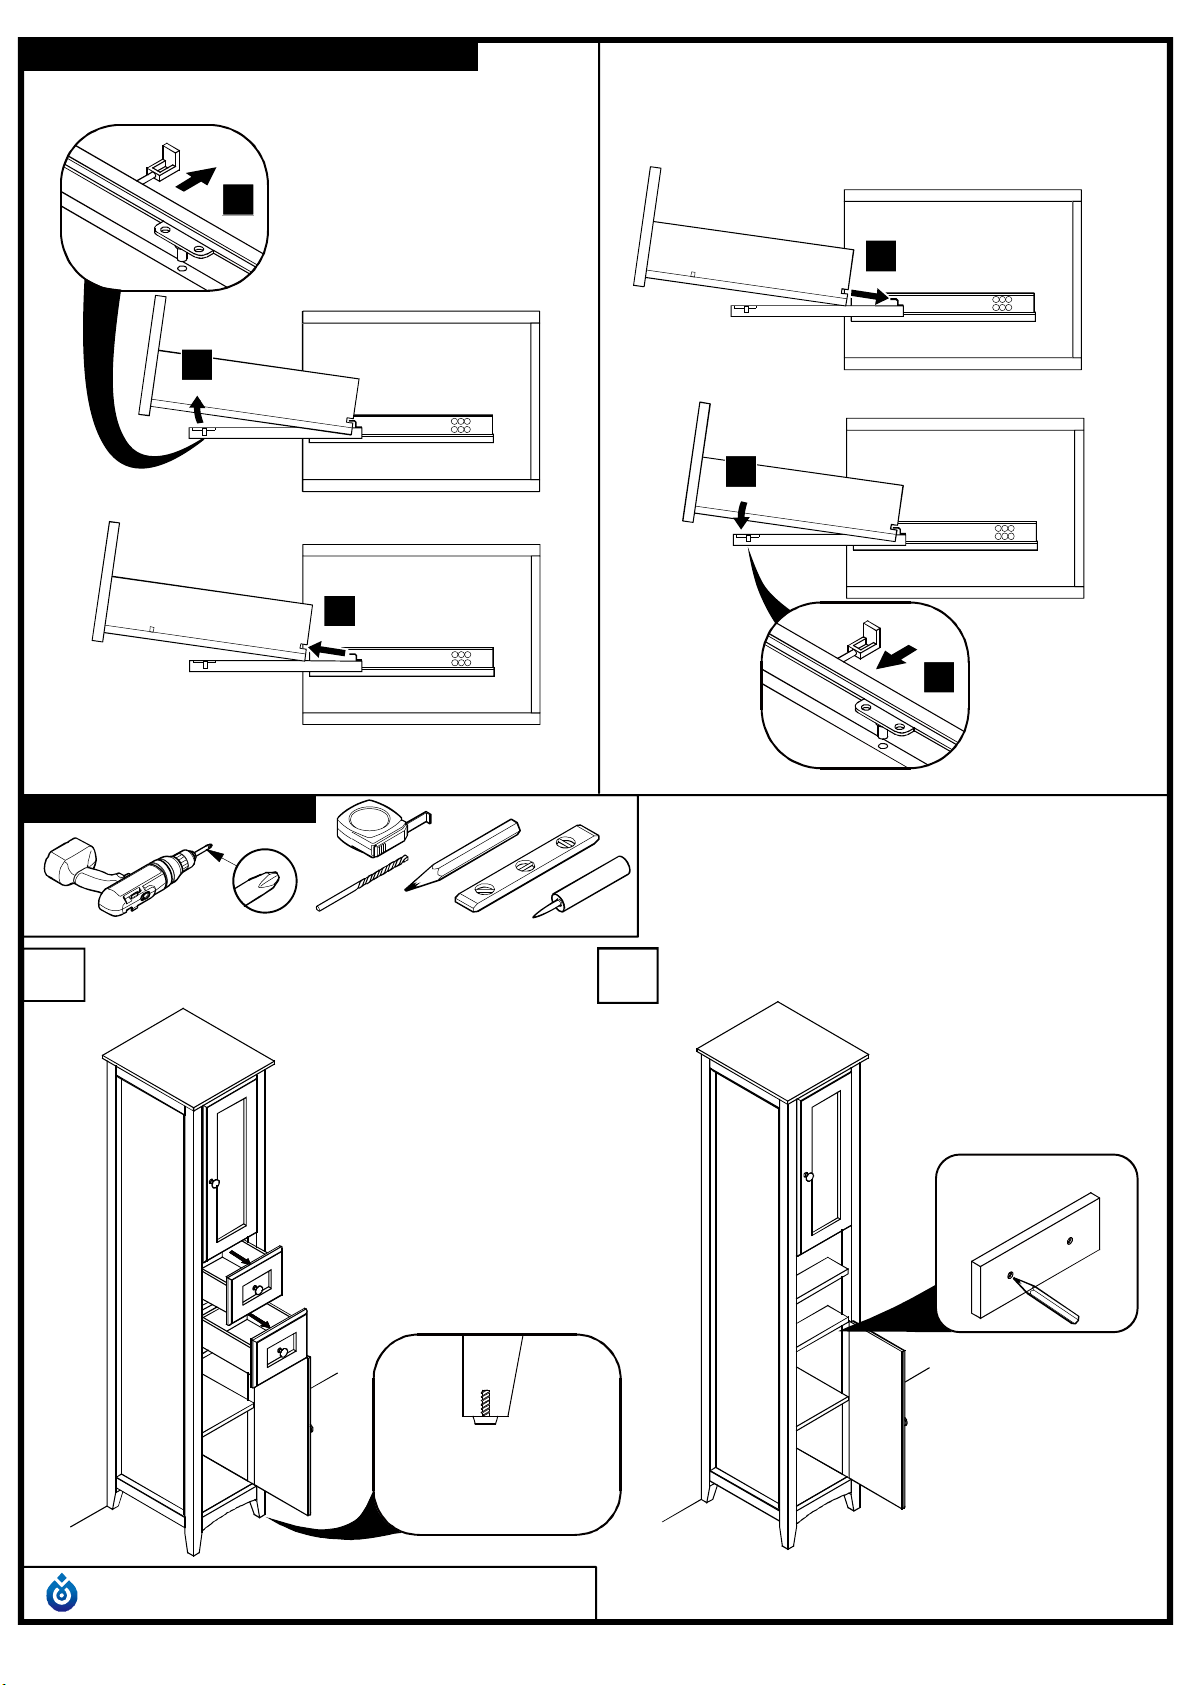
DRAWER REMOVAL & INSTALLATION
REMOVAL INSTALLATION
1
2
3
1
2
TOOLS FOR ASSEMBLY
#2
1/8" Drill bit
Level the cabinet and then open the drawers
1
and door as illustrated shown
Mark the installing position
2
3
INTERIOR VIEW
Adjust the adjustable level to
ensure the cabinet stable
OPTIONAL STEP
OXFORD
©2013 Fresca ™ All rights reserved. This material may not be reproduced, displayed, modified or distributed without the express prior written permission of the copyright holder.
INSTALLATION GUIDE
PAGE 2
Page 3
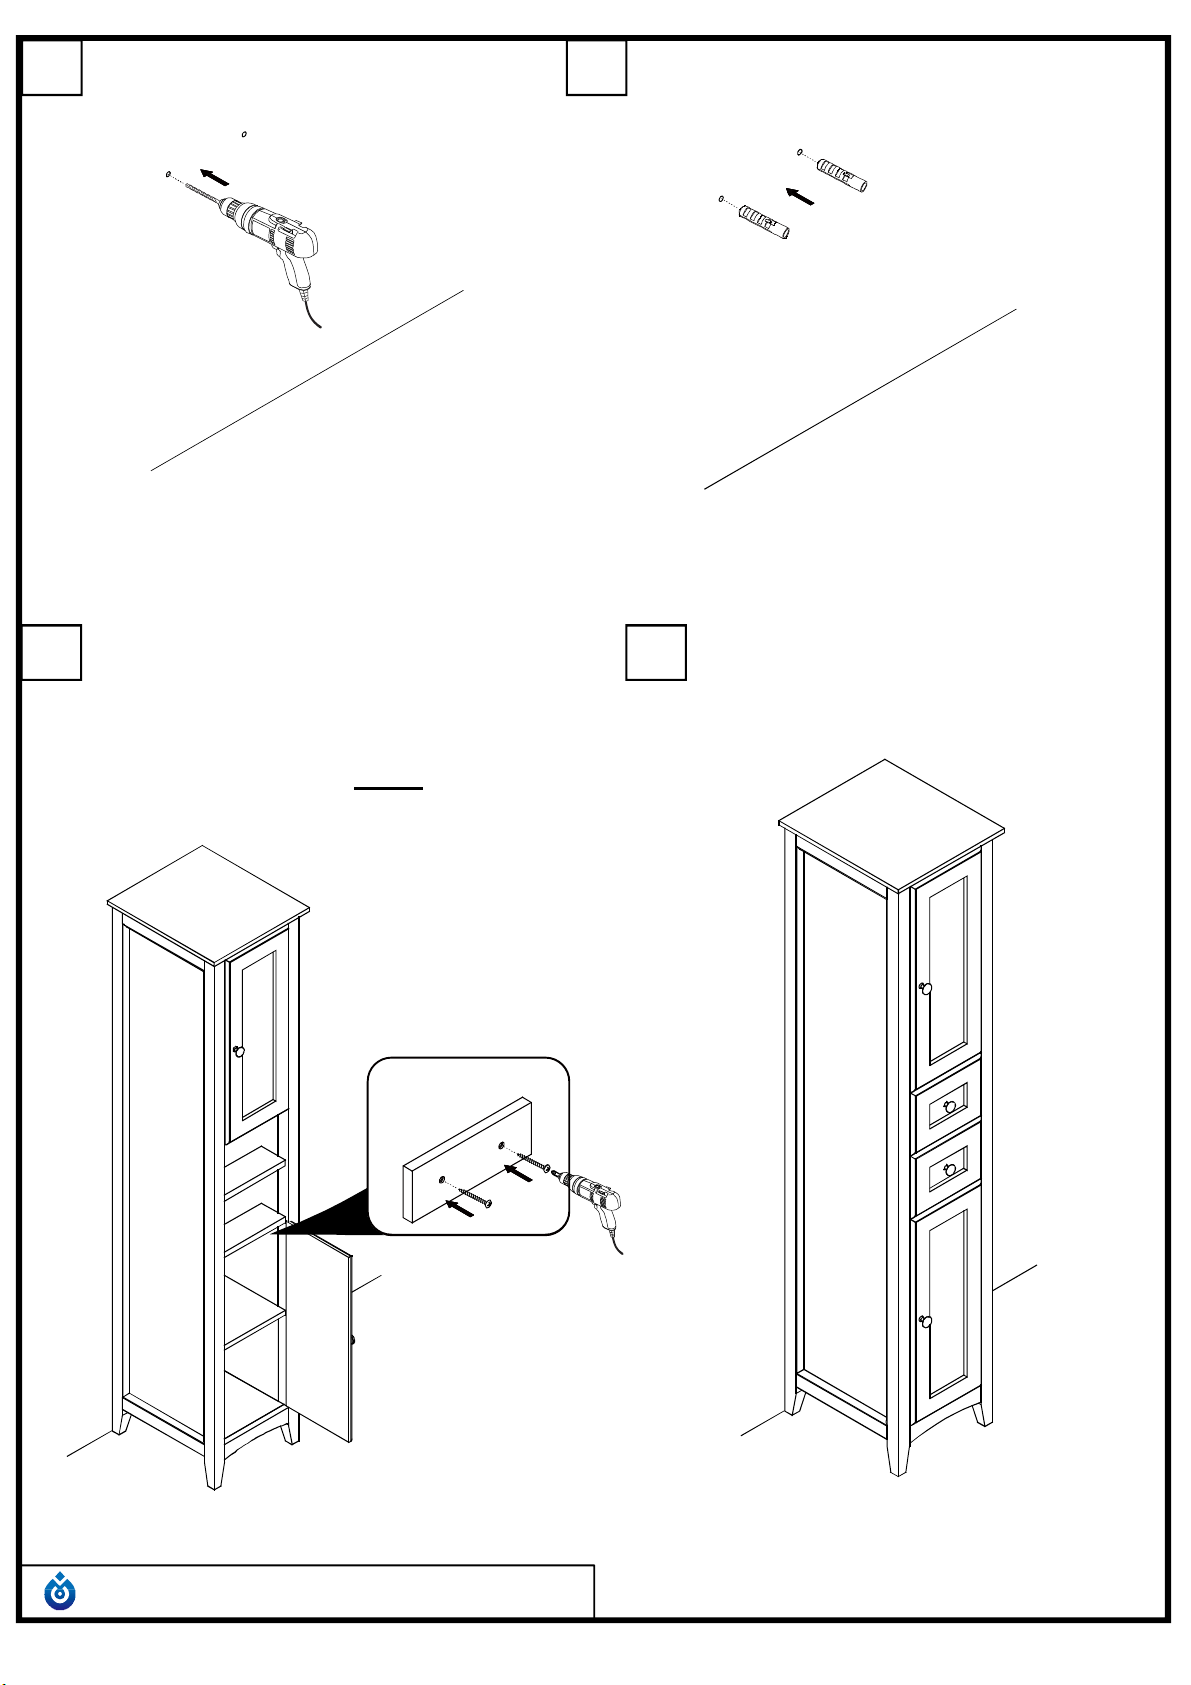
Drill the installation holes accordingly
3
4
Insert the expansible plastic plugs
5
IMPORTANT:
Install cabinet
Consult an expert for the proper
screws/bolts to use when attaching
to various wall constructions.
Screws provided do not attach to all
wall construction types.
INTERIOR VIEW
6
Reinstall the drawer and close the door
OXFORD
©2013 Fresca ™ All rights reserved. This material may not be reproduced, displayed, modified or distributed without the express prior written permission of the copyright holder.
INSTALLATION GUIDE
PAGE 3
 Loading...