

Page 1
INSTALLATION
INSTRUCTIONS
FFT3801CH
Three holes faucet
Important
We recommend that this product is installed by a qualified professional contractor.
●
Please check this product immediately to ensure that it has not been damaged and is complete.
●
Please flush the water system to ensure that no debris or any other impurities can enter the taps.
●
Turn off water supply before commencing work
● Please read these instructions carefully and keep for future reference.
.
Maintainance
We do NOT recommend you use any household cleaners to clean the product. Because these cleaners change substance or formula
too frequently. The product should always be cleaned with soapy water and rinsed with clean water and dried with a soft cloth.
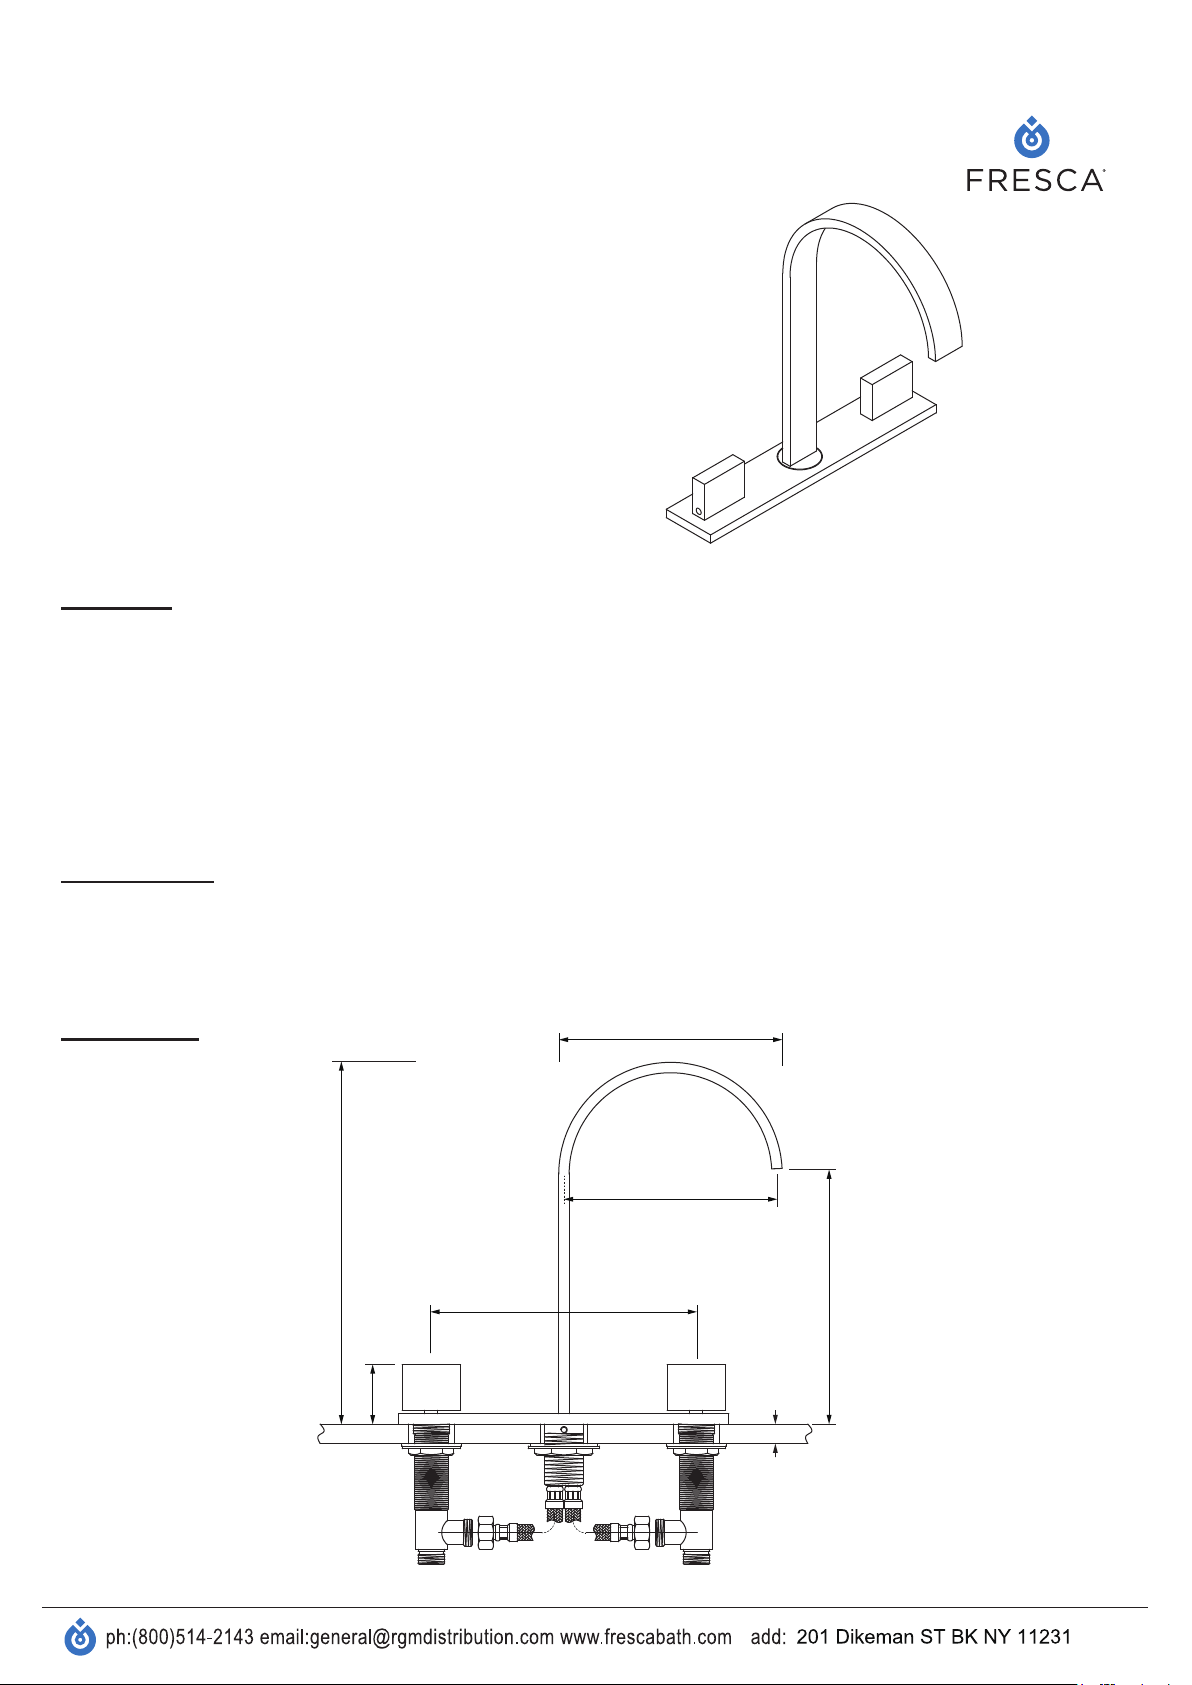
Dimensions
11″
8″
6 3/4″
6 1/2″
Unit:inches
7 3/4″
1 7/8″
Max 1.1″
1
Page 2
Installation
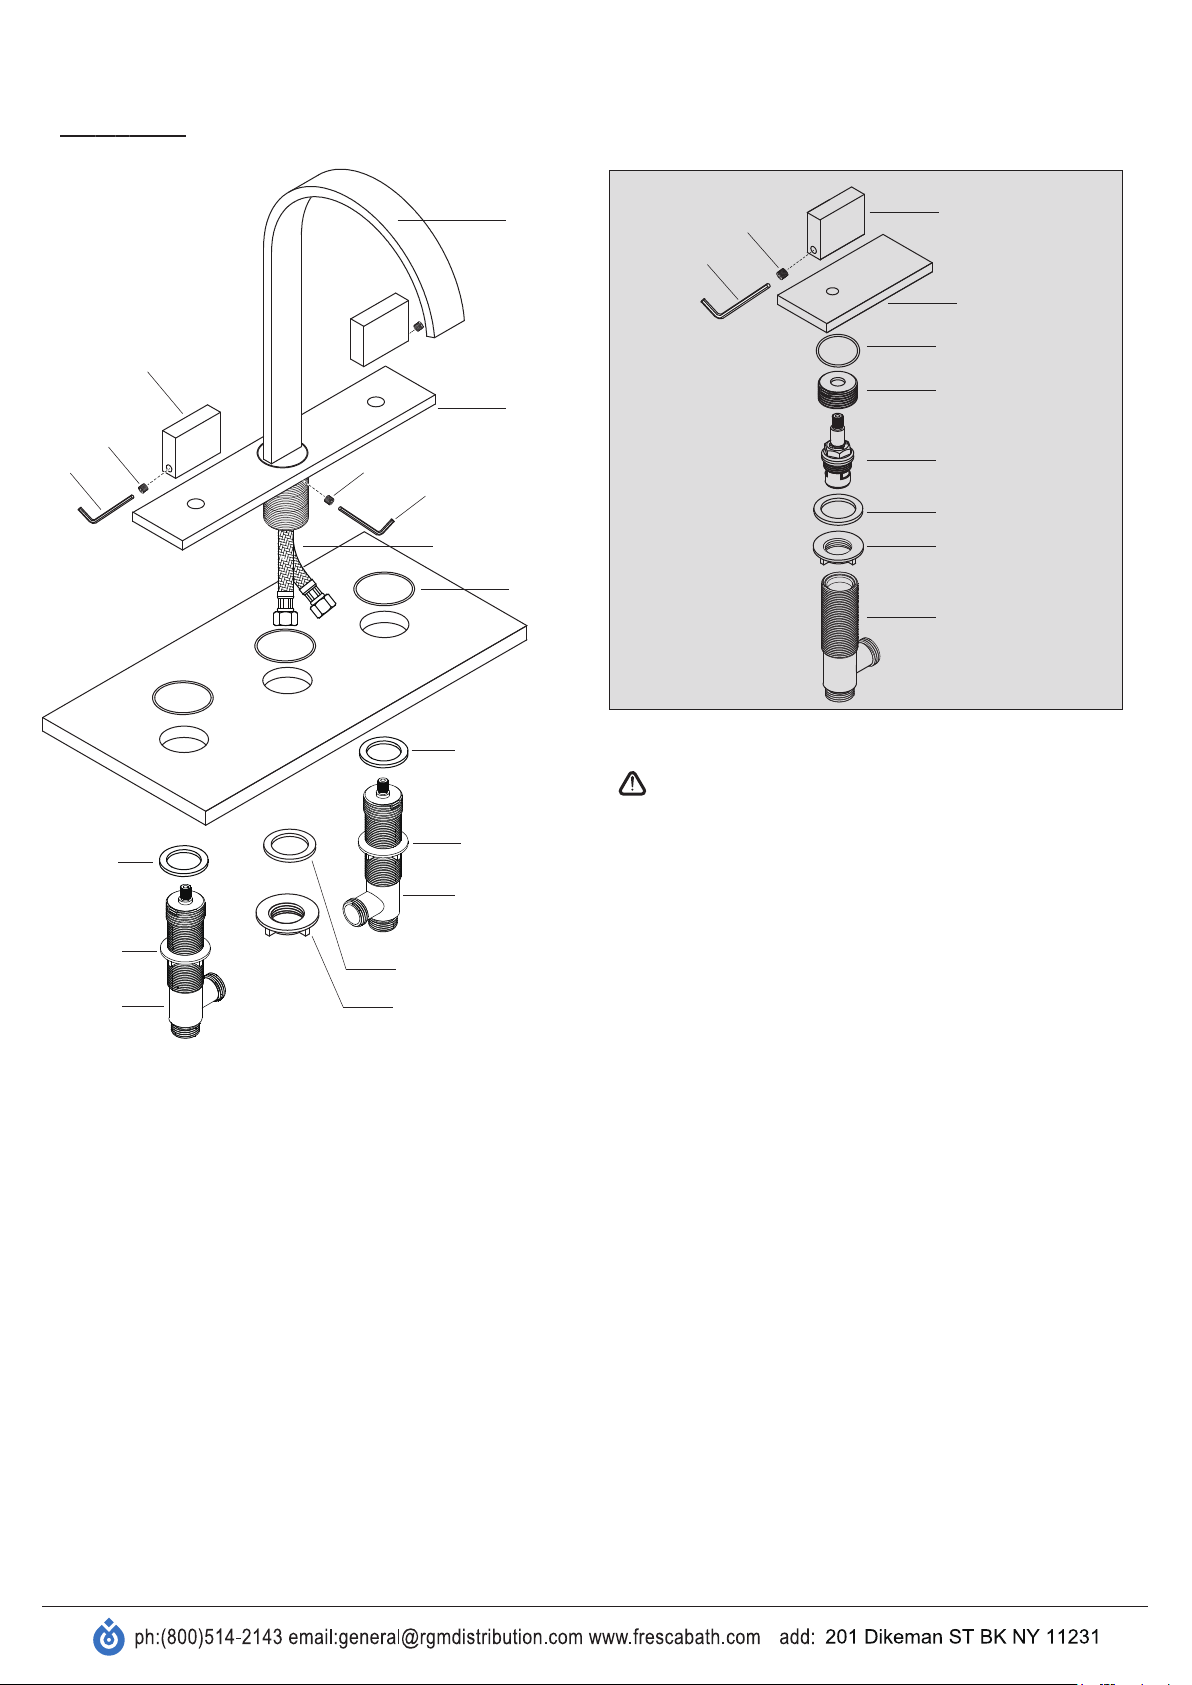
HANDLE
GRUB
SCREW
ALLEN
KEY
RUBBER
WASHER
FIXING NUT
VALVE(HOT)
GRUB
SCREW
ALLEN
KEY
RUBBER WASHER
FIXING NUT
FAUCET
PEDESTAL
SUPPLY LINES
O-RING
RUBBER WASHER
FIXING NUT
VALVE(COLD)
ALLEN
KEY
GRUB
SCREW
HANDLE
PEDESTAL
O-RING
RETAINING NUT
CARTRIDGE
RUBBER WASHER
FIXING NUT
VALV E
To remove the cartridge.
First shut off the water supply to the tap.
1: Loosen the grub screw from handle by allen key.
2: Take off the handle .
3: Unscrew the fixing nut.
4: Unscrew the valve.
5: Take off the valve.
6: Unscrew the retaining nut.
7: Take off the cartridge.
8: Dry and lightly grease the seals(only use silicone grease).
1: Place the faucet into the pedestal,then adjust the faucet to proper direction.
2: Tighten the grub screw underside of the pedestal by allen key.
3: Screw the supply lines into the faucet and fully hand tighten.
4: Fit the o-ring into the underside of the faucet.
5: Pass the tail of supply lines through the hole on the basin from above, and place the faucet in position on the basin, to see if any
alteration to the existing supply pipe work is necessary, make any necessary alterations to the pipe work.
6: Tighten the rubber washer with the fixing nut from the underside of the counter.
7: Pass the rubber washer through the valve,screw the valve upwards with pedestal,then tighten the fixing nut.
8: Place the handle aligned with the tip of valve,then tighten the grub screw by allen key.
9: Check the faucet is correctly positioned, fully tighen the fixing nuts.
10: Connect the water supply pipes to the tail of valves.
11: Connect the tail of valves to the hot water and cold water.
2
 Loading...