

Page 1
Assembly Instructions
Que Extension Table
Before you begin to assemble your new piece of furniture, please check to ensure that all parts have been supplied.
Follow instructions closely as deviation from them may void your warranty and present a possible safety risk.
It is recommended that assembly is done on a soft surface like carpet to avoid any damage.
If you experience any problems with your new purchase please phone Freedom Customer Service (FCS) on 1300 135 588
(Customers outside Australia should contact their closest Freedom store.)
Care Information
Periodically check and re-tighten all fasteners. Wipe down all surfaces using a clean cloth. For Timber Veneer tops, dust weekly
with a clean cloth. Use a Freedom recommended polish every three months. For Hi - Gloss tops, wipe down using a clean cloth.
Assembly Information
This table is heavy and requires at least two people to complete the assembly. Your nearest Freedom store can arrange assembly
at an additional charge.
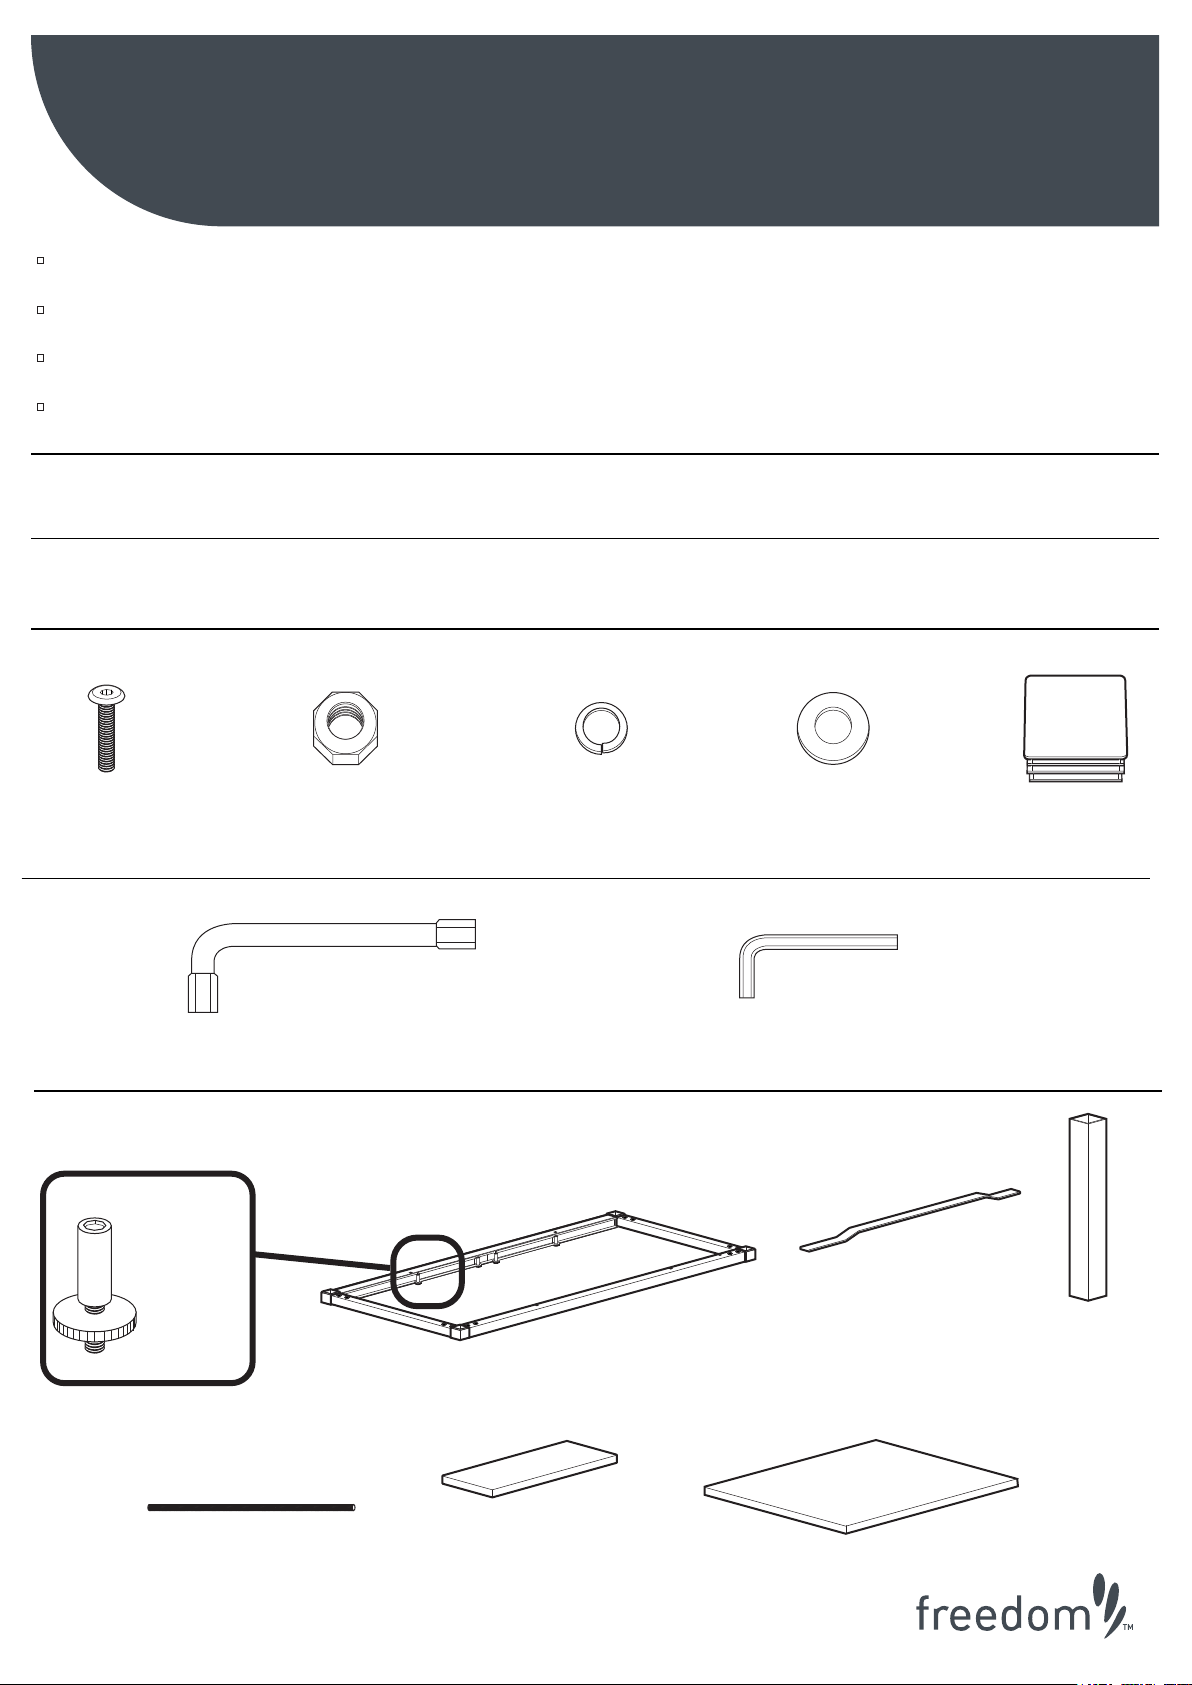
Hardware
4 x Part A 4 x Part B
(Affixed to Part K)
Tools
1 x Part F
Parts
8 x Part O
(Supplied)
1 x Part H
4 x Part C
(Affixed to Part K)
4 x Part D
(Affixed to Part K)
1 x Part G
(Supplied)
2 x Part I 4 x Part J
4 x Part E
rev 191208
Page 1
4 x Part K
2 x Part L 2 x Part M
Page 2
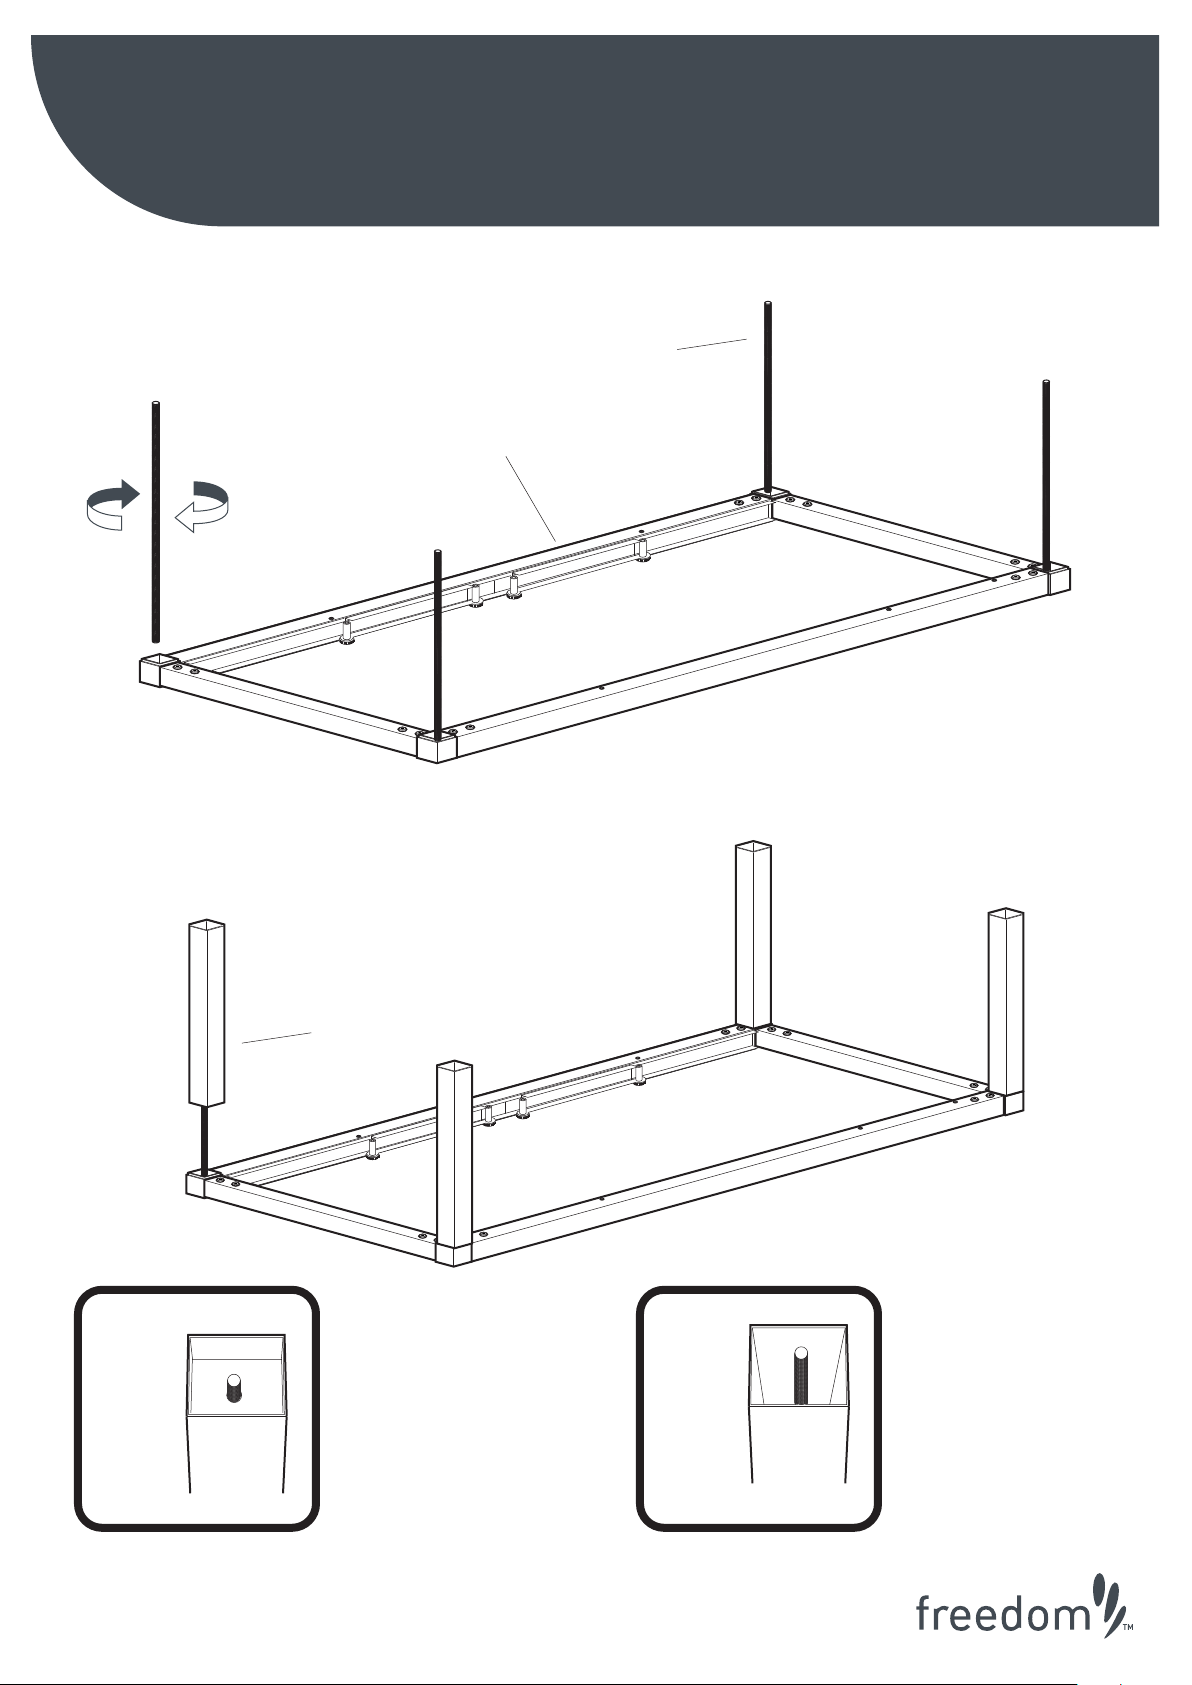
Step 1.
T
R
Assembly Instructions
Que Extension Table
Part K
Part H
Step 2.
Part J
rev 191208
Page 2
Page 3
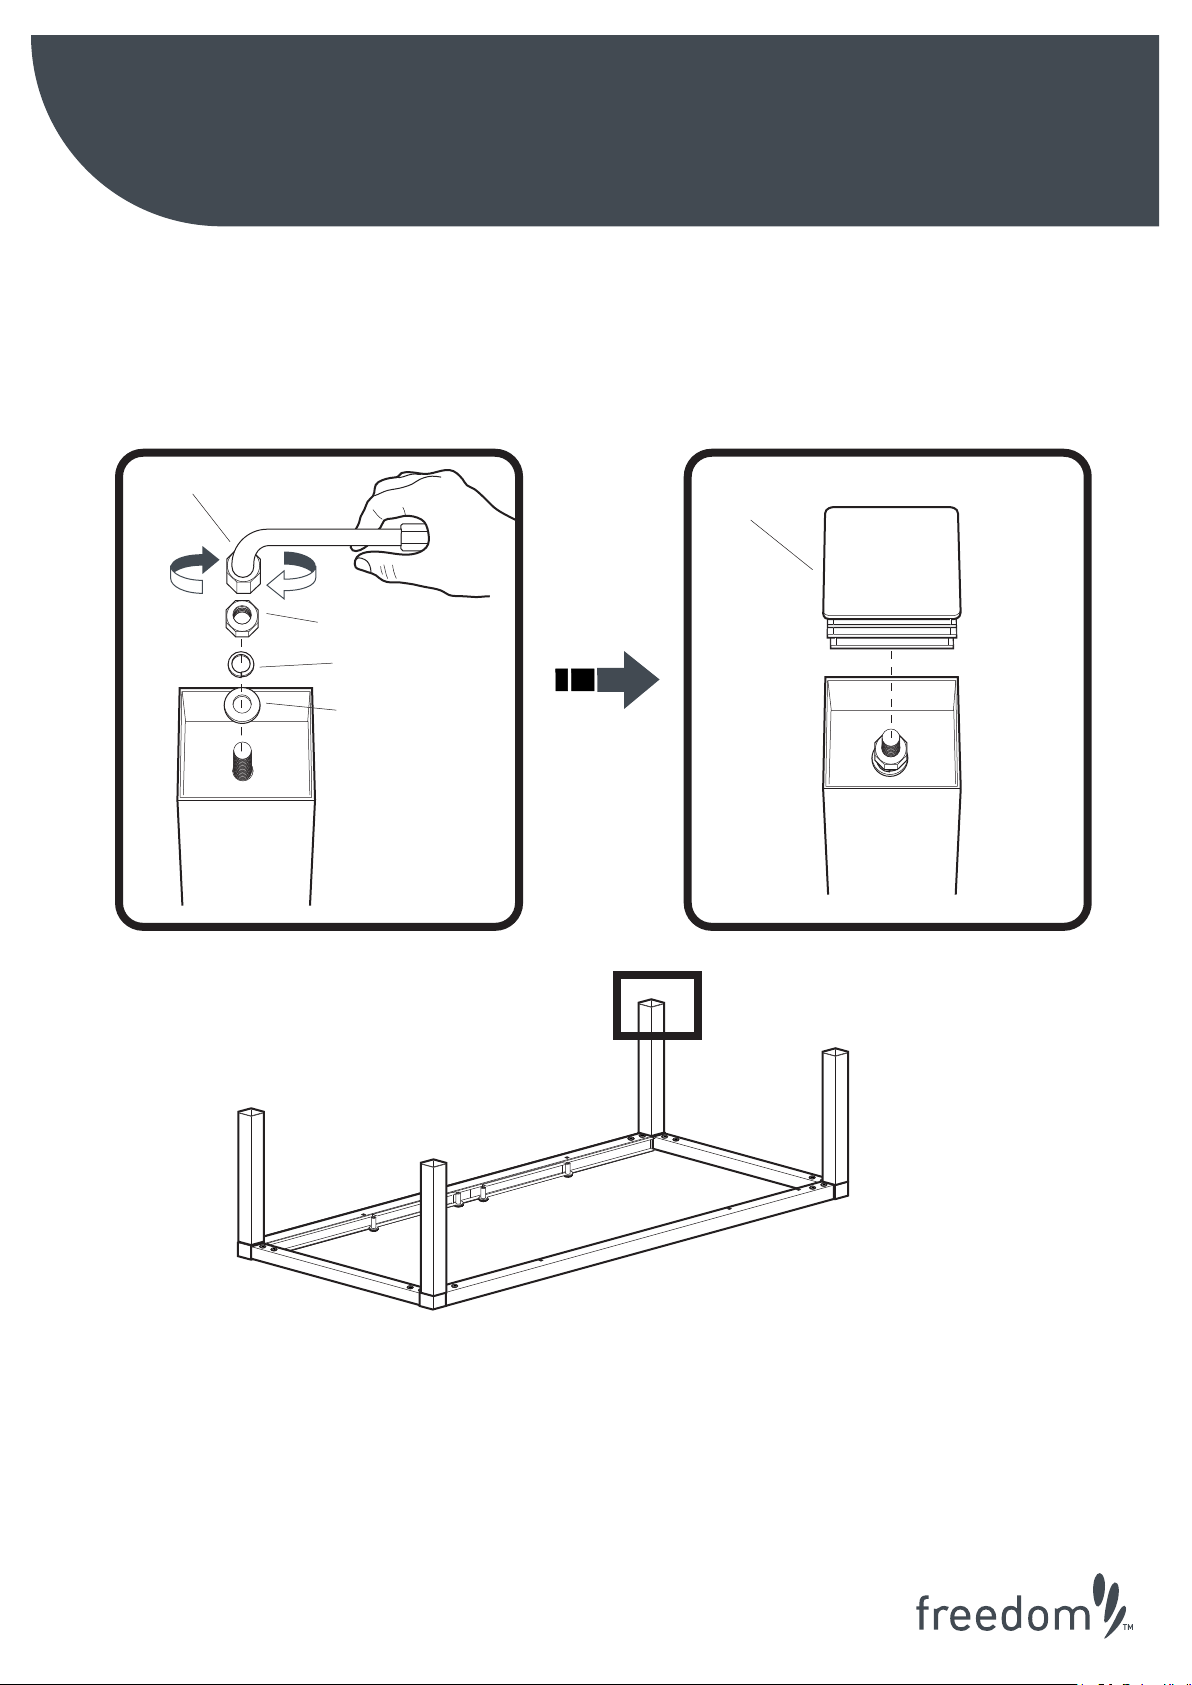
Step 3.
Part F
Assembly Instructions
Que Extension Table
Part E
Part B
Part C
Part D
rev 191208
Page 3
Page 4

Step 4.
Assembly Instructions
Que Extension Table
Step 5.
Part G
Part A
Part I
rev 191208
Page 4
Part M
Part M
Part O x 8
Adjust Part M to ensure it
is flush with the frame
Only loosely tighten Part O
Page 5

Step 6.
Assembly Instructions
Que Extension Table
Locked Unlocked
Two locking clips are located on
inside of the table frame.
Step 7.
rev 191208
Page 5
Page 6

Step 8.
Assembly Instructions
Que Extension Table
Part L
Part M
Adjusting the Ends of the Table (Part M)
Follow the instructions
below to adjust the table
top so the heights is even
and for uneven floors.
Adjusting the Leaves of the Table (Part L)
Slightly loosen Part O
Turn anti - clockwise
to increase the height
of the table ends
Turn clockwise
to decrease the height
of the table ends
Turn anti - clockwise
to increase the height
of the extension leaf
Tighten Part O
Turn clockwise
to decrease the height
of the extension leaf
rev 191208
Page 6
Page 7

Assembly Instructions
Storing the Extension Leaves (Part L)
Step 1.
Locked Unlocked
Que Extension Table
Part L
Step 2
Step 3
LockedUnlocked
rev 191208
Page 7
Page 8

Extension Leaves Options (Part L)
Option 1. Option 2.
Assembly Instructions
Que Extension Table
Pin
Matching hole on Leaf or Table End
Ensure Table ends are
locked after fitting the
Leaves
Always ensure that the
pins on the leaves align
with their matching hole
LockedUnlocked
rev 191208
Page 8
 Loading...