

Page 1
RF-512
Personal Organizer
Organizador Personal
User’s Guide
Manual del usuario
Page 2

Table of Contents
License Agreement .......................................... 2
Introduction ...................................................... 3
Notice ................................................................ 4
Getting Started ................................................. 5
Key Guide ......................................................... 8
Using the Clocks ............................................ 12
Setting the Alarms ......................................... 15
Using the Calendar ........................................ 17
Using the Telephone Directory ..................... 19
Using the Scheduler ...................................... 22
Using the Memo Directory ............................ 24
Using the Internet Directory..........................25
Using the To Do Directory............................. 26
Searching for and Editing Records .............. 27
Using the Expense Manager ......................... 29
Using the Anniversary Directory .................. 32
Using a Password .......................................... 33
Using the Calculator ...................................... 36
Using the Converter....................................... 38
Using the Built-in Conversion Rates............ 38
Installing the PC Sync ................................... 41
Transmitting or Receiving Records ............. 42
Connecting the Serial Cable ......................... 42
Synchronizing Data With PC Sync ............... 42
Replacing the Battery .................................... 48
Specifications................................................. 49
Limited Warranty (U.S. only) ......................... 50
FCC Notice...................................................... 51
1
E
N
G
Page 3

License Agreement
READ THIS LICENSE AGREEMENT BEFORE USING THE
ELECTRONIC REFERENCE. YOUR USE OF THE
ELECTRONIC REFERENCE DEEMS THAT YOU ACCEPT
THE TERMS OF THIS LICENSE. IF YOU DO NOT AGREE
WITH THESE TERMS, YOU MAY RETURN THIS P ACKAGE
WITH PURCHASE RECEIPT TO THE DEALER FROM
WHICH YOU PURCHASED THE ELECTRONIC REFERENCE AND YOUR PURCHASE PRICE WILL BE
REFUNDED. ELECTRONIC REFERENCE means the
software product and documentation found in this package and
FRANKLIN means Franklin Electronic Publishers, Inc.
Limited Use License
All rights in the ELECTRONIC REFERENCE remain the
property of FRANKLIN. Through your purchase, FRANKLIN
grants you a personal and nonexclusive licensed to use this
ELECTRONIC REFERENCE. Y ou may not make any copies
of the ELECTRONIC REFERENCE or of the data stored
therein, whether in electronic or print format. Such copying
would be in violation of applicable copyright laws. Further, you
may not modify, adapt, disassemble, decompile, translate,
create derivative works of, or in any way reverse engineer the
ELECTRONIC REFERENCE. Y ou may not export or reexport,
directly or indirectly, the ELECTRONIC REFERENCE without
compliance with appropriate governmental regulations. The
ELECTRONIC REFERENCE contains Franklin’s confidential
and proprietary information which you agree to take adequate
steps to protect from unauthorized disclosure or use. This
license is effective until terminated. This license terminates
immediately without notice from FRANKLIN if you fail to
comply with any provision of this license.
2
Page 4

Introduction
Congratulations! Y ou now own a Rolodex
tronics Personal Organizer that holds up to 512k
of memory. Using this organizer you can:
• keep track of daily appointments;
• store and retrieve:
• business and personal telephone numbers
and addresses
• e-mail addresses
• web site addresses
• memos
• schedules
• anniversaries
• to do lists
• expense records;
• set two clocks to keep time and date in 29 locations around the world;
• perform metric and currency conversions;
• set a Daily Alarm;
• link data with your PC;
• choose between 6 prompt languages;
• protect your data with a password.
Y ou can also use the backlight for easier viewing.
3
®
Elec-
E
N
G
Page 5

Notice
• The manufacturer strongly recommends that sepa-
rate permanent written records be kept of all important data. Data may be lost or altered in virtually
any electronic memory product under certain circumstances. Therefore, the manufacturer assumes
no responsibility for data lost or otherwise rendered
unusable whether as a result of improper use, repairs, defects, battery replacement, use after the
specified battery life has expired, or any other
cause.
• The manufacturer assumes no responsibility, di-
rectly or indirectly, for financial losses or claims
from third parties resulting from the use of this
product and any of its functions, such as stolen
credit card numbers, the loss or alteration of stored
data, etc.
• The information provided in this manual is subject
to change without notice.
Cautions
• Do not carry the organizer in the back pocket of
your slacks or trousers.
• Do not drop the organizer or apply excessive force
to it.
• Do not subject the organizer to extreme
temperatures.
• Clean only with a soft, dry cloth.
• Since this product is not waterproof, do not use it or
store it where fluids can splash onto it. Raindrops,
water spray, juice, coffee, steam, perspiration, etc.
will also cause the organizer to malfunction.
4
Page 6
Getting Started
Using the Organizer for the First Time
The first time you use this organizer, you should perform a
system reset. Warning! A system reset erases any userentered information and clears all settings. Pressing the reset button with more than light pressure may permanently
disable your organizer.
1. Install the batteries.
2. Press and hold ON/OFF for approximately 5
seconds to deactivate the sleep mode.
The unit is shipped in sleep mode to conserve battery life.
3. Press ON/OFF to turn the organizer off.
4. Use a thin, pointed object (e.g., a straightened paper
clip) to press the reset button on the back of the
organizer.
Caution: Do not use an object with a breakable or sharp
tip.
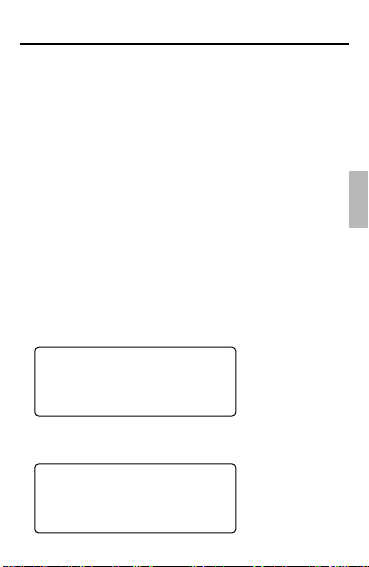
RESET?
5. Press ENTER to clear the memory.
To cancel, press any other key.
RESET TIME?
5
E
N
G
Page 7
Getting Started
5. Press ENTER to reset the time.
To cancel, press any other key.
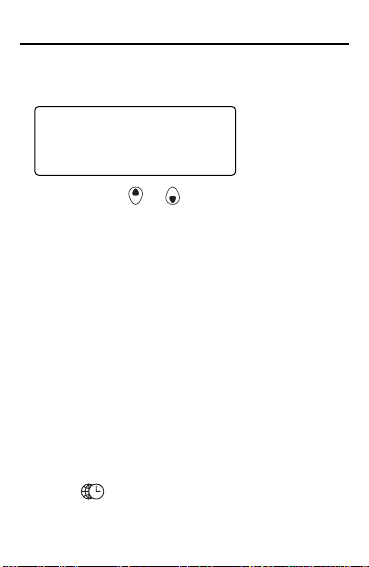
ENGLISH?
6. Press Search or to cycle through US
English, Spanish, French, German,
Portuguese, and Italian.
7. When the language you want is displayed on
the screen, press ENTER to select it.
The unit automatically returns to the Home Time
mode.
♦ Setting the Clock
To learn how to set the clock, see “Using the
Clocks”.
Changing the Language
This organizer can display prompts and other
messages in six languages. To select a language, do the following:
1. Press (Time).
6
Page 8
Getting Started
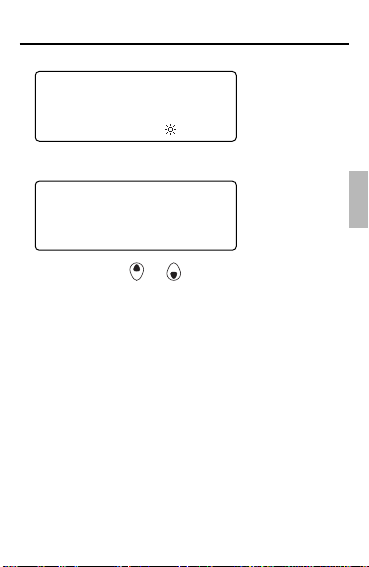
<<HOME TIME>>
FRI 1-JAN-1999
HONG KONG
12:35 40
PM
2. Press L(Lang).
ENGLISH?
3. Press Search or to cycle through US
English, Spanish, French, German,
Portuguese, and Italian.
4. When the language you want is displayed
on the screen, press ENTER to select it.
The unit automatically returns to the Home Time
mode.
♦ Auto Shut-Off
When none of the keys have been pressed for
approximately 5-6 minutes, the organizer
automatically turns the power off to save the
batteries. Press ON/OFF to resume. The actual
life of the batteries depends on the usage.
7
E
N
G
Page 9
Key Guide
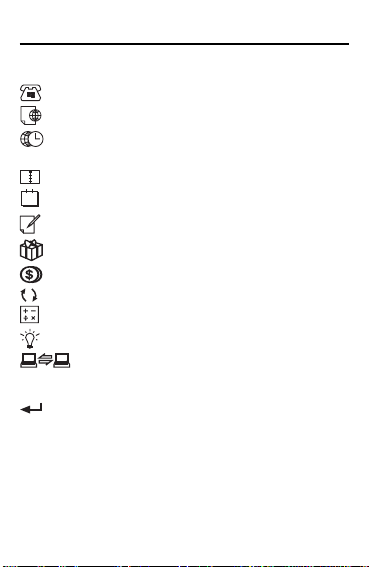
Function Keys
T oggles between 3 telephone directories.
Goes to the Internet directory.
T oggles between Home T ime, World time
and Daily Alarm.
Goes to the Scheduler.
1
Goes to the Calendar.
Goes to the To Do list/Memos.
Goes to the Anniversary directory.
Goes to the Expense Manager.
Goes to the Converter.
Goes to the Calculator.
Turns the backlight on or off.
Goes to Data communication.
Other Keys
(C/CE) Moves the cursor to the next line in a
ON/OFF Turns the organizer on and off.
ENTER Stores data in a record, confirms data
DEL Deletes a character when editing a
INS Allows characters to be inserted when
record in editing mode.
entries.
record. Deletes a record being viewed.
editing a record.
8
Page 10
Key Guide
SET/EDIT Allows you to edit information. Sets the
Home and World Times, Daily Alarm,
andconversion rates.
SYM Types special symbols, e.g. @, #, etc.
SPACE Types a space in records, accesses the
password in Home Time.
Search Cycles through records, world times,
conversions.
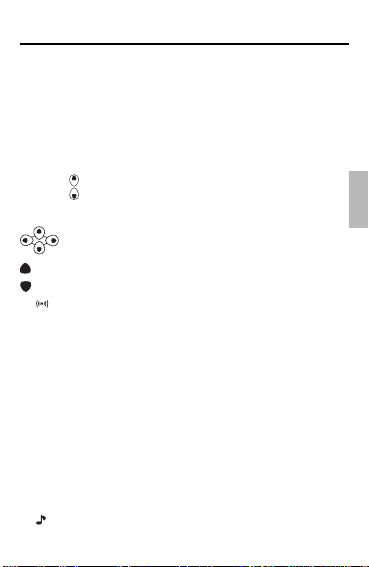
Moves cursor in indicated direction.
(Contr) Controls the screen contrast.
(Next) Displays next record.
C( ) Selects the alarm clock and then cycles
through the Daily, Hourly, and Schedule
alarms to activate/deactivate them.
D(DST) When the Home Time is displayed,
turns daylight savings on or off.
L(Lang) Changes the prompt language.
X(AM/PM) Toggles times between a.m. and p.m.
M(MD/DM) Toggles date display between M/D/Y
and
D/M/Y.
Z(12/24) Toggles times between 12- and 24-
hour time displays.
V( ) Turns the keytone on or off.
9
E
N
G
Page 11

Key Guide
Calculator Function Keys
MC) Clears the memory.
Q(
MR) Retrieves a number from the
W(
memory.
M-) Subtracts the displayed
E(
number from the number
stored in the memory .
M+) Stores a positive number in the
R(
memory.
+ Adds a number.
- Subtracts a number.
x Multiplies a number.
÷ Divides a number . Displays as
“/ “.
• Inserts a decimal point.
= Performs a calculation.
O(%) Calculates a percentage.
√) Calculates a square root.
I(
P(+/-) Changes the sign (+/-) of a
(C/Ce) Clears the most recent entry.
number.
10
Page 12
Key Guide
♦ Turning the Keytone Off or On
The keytone is the beep that sounds whenever a key is pressed. When the keytone is
on, an icon ( ) appears on the screen. To
turn the keytone on or off, press (Time) to
return to Home Time, and then press V( ).
♦ About the Backlight
You can press to switch the backlight on
and off. It will automatically turn off if you
have not pressed a key for about eight
seconds.
♦ About Symbols
SYM gives you the option of entering any of
23 symbols. Press SYM. Press Search or
to cycle through the symbols: + - = % • @
/ : _ , # $ £ ¥ ? ✽ ( ) ! & \ ➔ . Press 0-9
➔
to confirm the symbol you want.
♦ About Screen Illustrations
Some screen illustrations in this User’s
Guide may vary slightly from what you see
on the screen. This does not mean that your
organizer is malfunctioning.
11
E
N
G
Page 13
Using the Clocks
The clock lets you set a Home Time and view local times
around the world. Y ou should set the Home Time before
viewing world times or using the Schedule, To Do and
Anniversary directories, because world times are based on
the Home Time.
Setting Home Time
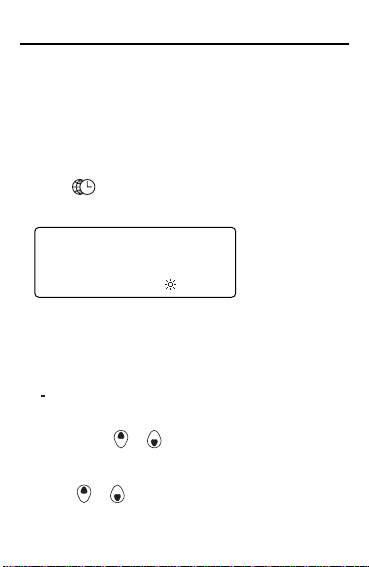
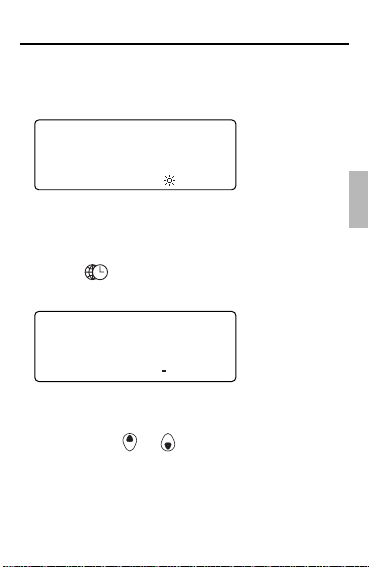
1. Press (Time) until the Home Time screen
appears.
<<HOME TIME>>
FRI 1-JAN-1999
HONG KONG
12:35 40
2. Press M(MD/DM) to toggle between the date display of
M/D/Y and D/M/Y.
3. Press D(
DST
time.
is displayed. To turn it off, press D(
4. Press SET/EDIT to start editing.
5. Press Search or to cycle through the list of 29
cities.
6. When you see the one you want, stop pressing
Search or to choose it as your home city.
Note: If you wish to change the label of your Home
city, type the name you want using up to 12 letters.
PM
) if you want to see daylight savings
DST
) again.
12
Page 14
Using the Clocks
7. Press ENTER and enter the date and Home
Time. For example, to enter 11-25-1999, 10:30
a.m., type 112519991030.
<<HOME TIME>>
THU 25-NOV-1999
NEW YORK
10:30 40
AM
8. Press ENTER to store your settings.
Setting World Time
1. Press (Time) until the World Time
screen appears.
<<WORLD TIME>>
FRI 1-JAN-1999
LONDON +05 : 00
4:35 40
AM
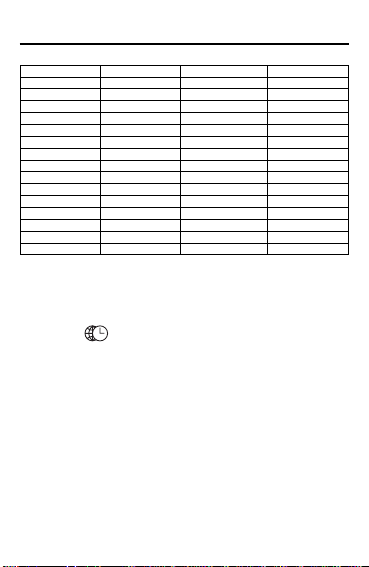
There are 29 built-in cities in different time
zones.
2. Use Search or to cycle through the
list of cities and view their corresponding
times.
Note: The World Time is based upon hours added
to or subtracted from the Home Time zone. It is not
a separate clock and cannot be set.
13
E
N
G
Page 15
Using the Clocks
City Code City Name City Code City Name
AUCKLAND Auckland CAIRO Cairo
GUAM Guam PARIS Paris
SYDNEY Sydney LONDON London
ADELAIDE Adelaide AZORES Azores
TOKYO Tokyo MID ATLANTIC Mid Atlantic
HONG KONG Hong Kong RIO. Rio De Janeiro
BANGKOK Bangkok CARACAS Caracas
YANGON Yangon NEW YORK New York
DHAKA Dhaka CHICAGO Chicago
DELHI Delhi DENVER Denver
KARACHI Karachi LOS ANGELES Los Angeles
KABUL Kabul ANCHORAGE Anchorage
DUBAI Dubai HAWAII Hawaii
TEHRAN Tehran MIDWAY Midway
MOSCOW Moscow
3. Press SET/EDIT to edit a city name of
your choice (up to 12 characters) and
press ENTER to confirm your choice.
4. Press (Time) to return to the Home
Time screen.
♦ Time Format
When setting time, press X (AM/PM) to toggle
between a.m. and p.m.
When viewing time, press Z (12/24) to toggle
between the 12-hour and 24-hour format.
14
Page 16
Setting the Alarms
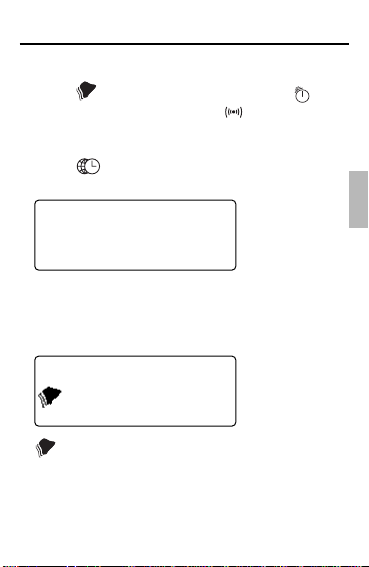
There are three kinds of alarms: the Daily Alarm, indicated by
the Schedule Alarm, indicated by .
Setting the Daily Alarm
1. Press (Time) until the Daily Alarm screen is
displayed.
2. Press SET/EDIT, then use the numbered keys to
enter a time. For example, enter 1015, and
press X(
3. Press ENTER to confirm your settings.
At the set time, your organizer will automatically
turn on (if it was off). The alarm will sound for about
20 seconds. Press any key to turn off the alarm.
, the Hourly Chime, indicated by , and
ALARM
12:00
AM
AM/PM) to select either a.m. or p.m.
ALARM
10:15
AM
indicates that the Daily Alarm is on.
15
E
N
G
Page 17
Setting the Alarms
Setting the Hourly Chime/Schedule
Alarm
The Hourly Chime sounds once every hour on the
hour.
The Schedule Alarm sounds at the selected day and
time.
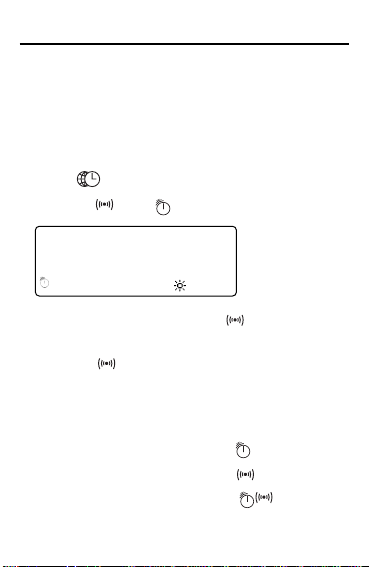
1. Press (Time) until Home Time is displayed.
2. Press C (
<<HOME TIME>>
FRI 1-JAN-1999
HONG KONG
3. To cancel the alarm, press C( ) until no icon
is displayed.
Press C (
selections:
Alarm Icon
No alarm No icon
Hourly Chime
Schedule Alarm
Hourly Chime and Schedule
Alarm
) until is displayed.
12:35 40
PM
) to cycle through four alarm
16
Page 18
Using the Calendar
You can view the current date or browse other dates
moving one day, one week, or one month at a time
through 200 years (from 1901/1/1 to 2099/12/31). You
can also view Scheduled events, and To Do and
Anniversary entries from the calendar. To learn how to
enter scheduled events, read “Using the Scheduler”.
To learn how to enter Anniversary entries, read “Using
the Anniversary Directory”. To learn how to enter To
Do events, read “Using the To Do Directory”.
Viewing Dates
1. Press 1(Cal).
1999 1 2 3 4
DEC
48/ 19 20 21 22 23 34 35
52 26 27 28 29 30 31
The current date will flash and the current month
and year will be displayed to the top left of the
screen.
The week number of the current day and the total
number of weeks in a year will be shown at the
bottom left of the screen.
2. Press
to move one day at a time.
to move one week at a time.
Press
Press Search
5 6 7 8 9 10 11
12 13 14 15 16 17 18
to move one month at a time.
17
E
N
G
Page 19
Using the Calendar
Viewing Schedule, Anniversary and To
Do Entries from the Calendar
1. Press 1(Cal).
2. Locate the month and week of the entry
following the steps on the previous page.
The dots to the right of the date indicate Schedule,
Anniversary and To Do entries. The upper dot
indicates a Schedule entry, the middle dot
indicates an Anniversary entry and the lower dot
indicates a To Do entry.
3. Highlight the entry you want using the
direction keys and then press (Sched),
(Anniv) or (To Do/Memo) to view the
detailed information about the entry.
If there is more than one Schedule, Anniversary or
To Do entry on that day, press Search
view them.
or to
18
Page 20
Using the T elephone Directory
Entering a Phone Record
There are three phone directories: Business 1,
Business 2 and Personal.
1. Press
directories.
2. Type a name. For example, to enter the name
Robert Edwards, type EDWARDS ROBERT.
Note: To alphabetize your entries by the last name,
you must type the last name first.
You can enter a maximum of 45 characters in the
name field, including letters, numbers and symbols.
To enter a symbol, press SYM. Press Search
9 to choose the symbol you want.
(Phone) to cycle between the three
<<BUSINESS - 1>>
NAME?
to cycle through the list of symbols and press 0-
NAME?
EDWARDS
_
19
or
E
N
G
Page 21
Using the Telephone Directory
Note: If the data on the first line exceeds 18
characters, it will automatically wrap to the next
line.
3. Press ENTER to confirm the entry in the Name
field.
COMPANY?
_
4. Type the name of a company.
In the Company field, you can enter a maximum of
18 characters including letters, numbers and
symbols.
5. Press ENTER to confirm the entry and go to the
next field.
6. Type a phone number. For example, type 201-
265-5600.
HOME?
h: 201-265-5600
In each number field, you can enter a maximum of
18 digits, including hyphens and spaces.
20
Page 22
Using the Telephone Directory
7. Press ENTER to go to the next field.
You can now enter a Work number, Fax number,
Cell phone number, Pager number (each up to 18
characters), E-mail address (up to 45 characters),
Street address (up to 81 characters) and NOTE (up
to 63 characters).
It is not necessary to complete each field. Skip an
unwanted field and move on to the next one by
pressing ENTER.
NOTE?
VISIT ABC COMPANY
This is the last field.
8. Press ENTER to store the record.
To learn how to view and edit records, please refer
to “Searching for and Editing Records”.
21
E
N
G
Page 23
Using the Scheduler
In each schedule record, you can enter the date, time,
and keywords for the event.
Entering a Schedule Record
1. Press (Sched).
<<SCHEDULE>>
DATE/TIME?
2. To type the date and time, press any number
key to start the input mode and then type your
information. For example, to enter 20-09-1999,
11:30, type 200919991130.
Press X to choose a.m. or p.m., if needed.
The date format follows the one chosen on the
Home Time screen. See “Setting Home Time”.
3. Press ENTER to type keywords for the event.
For example, type STAFF MEETING.
You can enter a maximum of 108 characters,
including letters, numbers and symbols.
20-9-1999
AM
11:30
STAFF MEETING
22
Page 24
Using the Scheduler
Note: If your data on the first line exceeds 18
characters, it automatically wraps to the next line.
Schedule records are sorted chronologically by the
Date/Time entries.
4. Press ENTER to store the data.
<<SCHEDULE>>
( )
DATE/TIME?
5. To turn on the Schedule alarm, press
C( ) in the Home Time display mode.
To learn how to set the Schedule alarm, please
refer to “Setting the alarms”.
When the Schedule alarm is set, the alarm will
sound at the time of the appointment. The
organizer will turn on (if it was off), displaying the
relevant schedule record. Note: if you have set a
password, you must enter it to view the schedule
entry. See “Using a Password” for more
information.
To turn the alarm off, press C(
display mode until
To learn how to view and edit records, please refer
to “Searching for and Editing Records”.
disappears.
) in Home Time
23
E
N
G
Page 25
Using the Memo Directory
Y ou can enter a maximum of 108 characters
including letters, numbers and symbols in each
memo record.
Entering a Memo Record
1. Press (To Do/Memo) until the Memo
screen appears.
<<MEMO>>
MEMO?
2. Type your data.
Press SPACE to insert spaces in your data.
3. Press (C/CE) to move the cursor to the
next line.
4. Press ENTER to store your data.
To learn how to view and edit records,
please refer to “Searching for and Editing
Records”.
24
Page 26
Using the Internet Directory
Y ou can enter a maximum of 108 characters
including letters, numbers and symbols in each
internet record.
Entering an Internet Record
1. Press (Internet).
<<INTERNET>>
INTERNET?
2. Type a web location, e.g.
www.franklin.com.
3. Press (C/CE) to move the cursor to the
next line.
4. Type a note if you wish.
5. Press ENTER to store your data.
To learn how to view and edit records,
please refer to “Searching for and Editing
Records”.
25
E
N
G
Page 27
Using the T o Do Directory
In each To Do record, you can enter the date, time and
keywords for the entry.
Entering a T o Do Record
1. Press (To Do/Memo) until the To Do screen appears.
<<THING TO DO>>
DATE?
2. To type the date, press any number key to start the
input mode and then type your data. For example, to
enter 09-20-1999, type 09201999.
The date format follows the one chosen on the Home
Time screen. See “Setting Home Time”.
3. Press ENTER to type keywords for the entries. For
example, type FINISH ABC PROJECT.
20 - SEP - 1999
FINISH PROJECT
Y ou can enter a maximum of 108 characters, including
letters, numbers and symbols.
Note: If your data on the first line exceeds 18 characters, it
automatically wraps to the next line.
4. Press ENTER to store your data.
26
Page 28
Searching for and Editing Records
You can search for your records either directly or
sequentially. You can review your records, edit them
or delete them.
Searching for a Record
1. Press (Phone) to search for a Telephone
record, press
Schedule record, or press
search for a To Do or Memo record.
2. Press Search
Records in the phone directories are in alphabetical
order; records in the Schedule and To Do
directories are in chronological order and Memo
entries are in the order in which you entered them.
In any phone directory you can type the first few
letters of a name in the name field of a record and
then press Search
will display the first record starting with those letters
(if any). You can then use
the record.
In the Schedule and To Do directories, you can
type a date in the Date field of a record and press
Search
to scroll through the record.
Viewing a Record
1. Find the record you want to view.
See “Searching for a Record”, above.
(Sched) to search for a
(To Do/Memo) to
or to view records in order.
or to find it. The organizer
or to scroll through
or to find it. You can then use or
27
E
N
G
Page 29
Searching for and Editing Records
2. Press
or to view the full record.
Continue to press Search
records.
or to view more
Editing a Record
1. Find the record you want to edit.
T o learn how, read “Searching for a Record”.
2. Press SET/EDIT .
3. Move the cursor to the character you want to edit.
4. Press INS to insert a character.
Press DEL to delete a character.
5. Press ENTER to store your changes.
Deleting a Record
1. Find the record you want to delete.
T o learn how, read “Searching for a Record”.
2. Press DEL.
3. Press ENTER to delete the record.
T o exit without deleting, press any key other than
ENTER.
– – – WAI T– – –
After a moment, you will see the message
“DELETED” and you will return to the initial screen of
the directory you are in.
28
Page 30
Using the Expense Manager
In each expense record, you can enter the Date,
Amount, Expense type, Payment type and a
reference Note.
Entering an Expense Record
1. Press (Exp).
2. To type the date, press any number key to start
the input mode and then type your information.
For example, to enter 09-20-1999, type
09201999.
The date format follows the one chosen on the
Home Time screen. See “Setting Home Time”.
3. Press ENTER and type the expense amount.
4. Press ENTER to go to the EXPENSE TYPE
menu.
EXPENSE TYPE?
1. MEAL 2. HOT EL
3. CAR 4. P HONE
5. FARES 6. ENT RT
7. TIPS 8. MISC.
You have 8 expense types to choose from.
5. Press the number of the one you want and then
press ENTER to go to the PAYMENT TYPE
menu.
6. Press the number of the PAYMENT TYPE you
want, and press ENTER to go to the NOTE field.
7. Type a note.
You can enter a maximum of 108 characters.
8. Press ENTER to confirm the record.
1
29
E
N
G
Page 31
Using the Expense Manager
T o V iew an Expense Record
You can search your records either by Date or by
Note.
1. Press
DATE?
(Exp).
<<EXPENSES>>
To search by NOTE, press ENTER.
2. Type the DATE or NOTE you are looking for or
press Search
or to cycle through your
records.
T o Find a Specific Expense Record
1. Press (Exp) and then press ENTER till you
see the REPORT screen.
<<EXPENSES>>
REPORT
FROM: 01- 1-99
TO: 31- 1-99
Press SET/EDIT to change the start and end
dates of the Report period.
2. Press Search or to cycle through the report.
When you return to the REPORT screen, you can
enter a new date period.
30
Page 32
Using the Expense Manager
To learn how to edit and delete records, please refer
to “Editing a Record” and “Deleting a Record”.
To Edit the Expense Type Description
1. Press (Exp).
2. Press SET/EDIT.
TYPE 1?
MEAL
3. Edit the description using a maximum of 6
characters, and press ENTER to confirm.
You will now go to the next Type name that you can
edit. Type your changes or a new name and press
ENTER each time to confirm your changes.
It is not necessary to edit every Type. After you edit
the Types you want, press
mode.
C/CE to exit the edit
31
E
N
G
Page 33
Using the Anniversary Directory
In each anniversary record, you can enter the date
and keywords for the event.
Entering an Anniversary Record
1. Press (Anniv).
<<ANNI VERSAR Y>>
DATE?
2. Type the date using the number keys and press
ENTER.
3. Type keywords for the event.
You an enter a maximum of 108 characters,
including letters, numbers and symbols.
Viewing an Anniversary Record
1. Press (Anniv).
2. Press Search
records.
3. To search for a specific record, type the date
you want.
To learn how to edit and delete records, please refer
to “Editing a Record” and “Deleting a Record”.
or to cycle through your
32
Page 34
Using a Password
You can lock your organizer so that only the Clock,
Calendar, Calculator and Converter can be used
without supplying the password. Note: You do not
need to set a password to use this organizer.
Warning: Please keep written records of your
data. If you forget your password, you will not be
able to recover any of the data stored in your
organizer. To use the organizer again, you will
have to perform a system reset, which will clear
the password and erase all the data stored in
memory. To learn how to perform a system reset,
read “Getting Started”.
Setting the Password
1. Press (Time) until Home Time is displayed.
2. Press SPACE.
Type a password. You can use up to 6 digits.
Remember to write your password down and keep
it in a safe place.
3. Press ENTER to store your password.
The
icon will be displayed.
The next time you turn the unit on and press
(Phone), (Sched), (To Do/Memo),
(Exp), (Internet) or (Anniv) you will need
to enter your password to use these functions.
33
E
N
G
Page 35
Using a Password
Accessing Data When the Password is
Activated
1. After turning the unit on when the password is
activated, press
Do/Memo), (Anniv), (Exp) or (Internet).
P ASSWORD?
[ ]
You are prompted to enter your password. Type
your password and then press ENTER.
If you mistype your password, the message
“OPEN ERROR!” will appear and you will be
prompted to enter your password again.
After you enter your correct password, the
icon will disappear from the screen and you will be
able to enter your data.
2. You can now enter new data or view existing
data.
(Phone), (Sched), (To
34
Page 36
Using a Password
Changing or Deactivating the Password
1. Press (Time) until Home Time is displayed.
2. Press SPACE(
P ASSWORD?
[ ]
3. Type your old password and then press
ENTER.
You will be prompted to enter your new password.
To deactivate your password, just press ENTER
without pressing any number keys first.
4. Type your new password and then press
ENTER.
).
35
E
N
G
Page 37
Using the Calculator
Making a Calculation
1. Press (Calc).
<<CALCULAT OR>>
2. Type a number.
You can type up to 12 digits. To type a decimal,
press
..
To change a number from positive to negative,
press P (+/-).
To clear a number, press
3. Press +, -, x or ÷ to add, subtract, multiply, or
divide, respectively.
Or press I(
4. Type another number.
5. Press = to calculate.
Or press O(%) to calculate the percentage.
6. Press
√) to calculate a square root.
(C/Ce) to clear the calculations.
0.
(C/Ce).
36
Page 38
Using the Calculator
Using the Calculator Memory
1. In the Calculator, make a calculation or type a
number.
2. To add the number on the screen to the number
stored in memory, press R(
number on the screen from the number stored
in memory, press E(
<<CALCULATOR>>
M+). To subtract the
M-).
M
98.
M indicates the number is stored in memory.
3. To retrieve the number from memory, press
W(MR).
4. To clear the memory, press Q(
Note: When the integer part of a calculation
result, or any integer in the memory, exceeds
12 digits (including the decimal point), or any
other invalid operation is attempted, a calculator
error will occur and "E" will appear on the
display. Press (C/CE) to clear the error.
MC).
37
E
N
G
Page 39
Using the Converter
Using the Built-in Conversion Rates
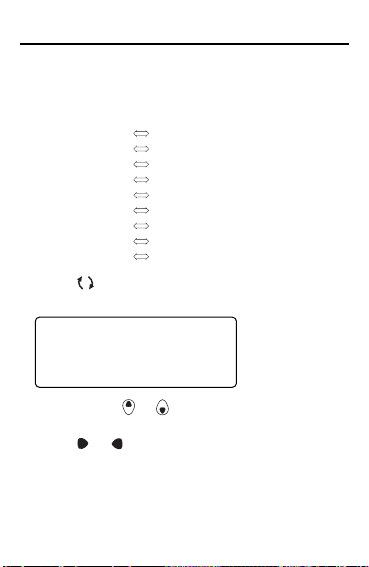
Use your organizer to do the following built-in
conversions:
Feet
Yard
Inch
Mile
Pound
US gallon
UK gallon
Ounce
Fahrenheit
1. Press
(Conv) until the Metric conversion
screen appears.
FEET –> M
FEET: 0.
M: 0.
<<METRIC>>
2. Press Search or to select a conversion
category, if needed.
3. Press
4. Type the number to be converted. For example
or to select the conversion
direction, if needed.
to convert 10 ft. to meters, type 10.
Meter
Meter
Centimeter
Kilometer
Kilogram
Liter
Liter
Gram
Centigrade
0.3048
38
0.
Page 40
Using the Converter
FEET –> M
FEET: 10.
M: 3.048
<<METRIC>>
0.3048
10.
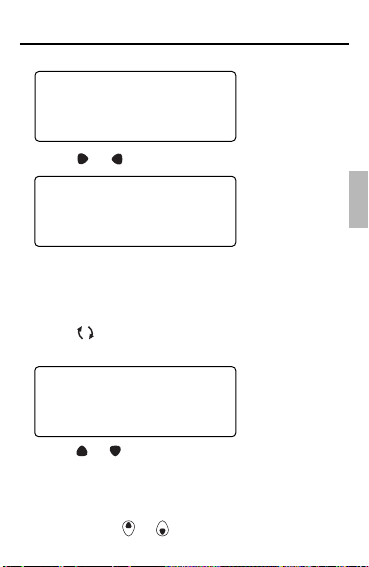
5. Press or to convert it in either direction.
FEET <– M
FEET: 32.8083989501
M: 10.
<<METRIC>>
3.28083989501
10.
Converting Currency
There are 15 built-in currency exchange rates, 3 of
which you can program.
1. Press
conversion screen.
2. Press or to select one of the built-in
currency exchanges.
3. Type the number for conversion on the bottom
row and press ENTER to convert.
4. Press Search or to view the other
currencies.
(Conv) until you see the currency
EURO 0.00
FRF 0.00
USD 0.00
CUR 1 0.00
CUR 2 0.00
EURO 0.
39
E
N
G
Page 41
Using the Converter
Note: The bottom row remains unchanged.
5. Type a new number to start the next conversion.
Setting a Currency Rate
1. Press (Conv) until you see the currency
conversion screen.
2. Press SET/EDIT .
EURO 1.
FRF 6.55957
USD 1.
CUR 1 1.
CUR 2 1.
USD (SET) 1.
<SET> will be displayed on the bottom row of the
screen to indicate that the unit is now ready for a rate
to be set.
Note: All rates must be in relation to the EURO. For
e.g. if 1 Euro = 1.0662 US$, enter 1.0662 as the
conversion rate for USD.
3. Press
4. Type the new currency name (up to 4 letters or
or to cycle through the 3
programmable currencies.
Note: The default names are USD, CUR1 and CUR2.
The default conversion rate is 1.
numbers) and press ENTER.
5. Type the new conversion rate.
Y ou can type up to 6 digits.
6. Press ENTER to save the rate.
40
Page 42

Installing the PC Sync
Use the following steps to install the PC Sync on your
personal computer. Please note that the program has
the following system requirements:
• Windows 95 or 98 (English version)
• 16 MB RAM
• 30 MB hard disk space
• CD ROM driver (for installation)
• One free serial communications (COM) port
Note: If you are updating from RF-128/RF-192, make
sure you still have the "ORGSYS" folder on your
system. This will enable you to access your old data.
Your CD comes with a README file which contains
detailed instructions on how to use your PC Sync.
Your PC Sync for windows will be installed in
C:\ORGANISER unless you specify otherwise.
If the CD ROM does not start automatically, then you
will need to do the following:
1. Go to Start | Programs | Windows Explorer.
2. Click on your CD ROM drive.
This is normally D:\. If you changed it, then choose
your CD ROM drive.
3. Double click Setup.EXE.
To start your PC Sync Program, do the following:
1. Go to Start | Programs | Windows Explorer.
2. Double click C:\ORGANISER.
3. Double click on DBANK.EXE.
41
E
N
G
Page 43

T ransmitting or Receiving Records
Connecting the Serial Cable
Before you can transmit or receive records you need
to do the following:
1. Turn your personal computer off.
2. Connect the 9-pin plug of the Organizer PC
Sync cable into a free communications (COM)
port.
3. Connect the single-pin plug of the cable into
the PC PORT hole on the left side of your
organizer.
Synchronizing Data With PC Sync
When you synchronize your data, records that were
deleted either in your Organizer or PC Sync Program
will be deleted in both. New records added in either,
will now be added in both. Edited records will be
updated in both. If you edit the same record in both
your Organizer and your PC Sync Program, copies of
both edited versions of the record will be retained.
WARNING! Once you synchronize your
Organizer with the PC Sync Program on one
computer, they become a matched pair . Should
you try to synchronize your Organizer data with
PC Sync on another computer, your data is likely
to be corrupted. It is best to synchronize between
a single matched pair.
42
Page 44

Transmitting or Receiving Records
1. Make sure that the cable is connected securely
to both the PC and the Organizer.
2. In the PC Sync for Windows, click File | Sync
with Organizer on the menu bar.
Verify the model and COM port information.
3. Click SYNC to confirm synchronization.
4. Press
(Time) on your Organizer until the
Home Time screen appears.
5. Press Data Sync to enter the data
communication mode.
43
E
N
G
Page 45

Transmitting or Receiving Records
1 - SYNC?
2 - TX?
3 - RX?
6. Use or to select
1-SYNC?
or press 1.
7. Press ENTER to start synchronization.
During synchronization, you will see the following
messages:
Transmitting… this means your Organizer is
Receiving… this means your PC has processed
WAIT… this means the Organizer is updating
OK! this means synchronization is
After the synchronization is complete, your Organizer
will return to the initial display mode.
transmitting the data necessary for
synchronization.
the data and is transmitting back the
data necessary for synchronization.
the records.
complete.
44
Page 46

Transmitting or Receiving Records
Note: Y ou cannot send or receive a single directory
between your handheld Organizer and PC Sync for
Windows. Y ou can send a single record or all the
directories.
Warning! When you transfer all directories, your old
records at the receiving end will be overwritten. If you
wish to retain records unique to your Organizer or PC
Sync, choose Synchronization instead of Import or
Export.
To Transmit A Single Record
1. Click (RECEIVE RECORD) on the toolbar of your PC
Sync for Windows.
2. Click OK.
Verify the model and COM port information.
3. Click the Import button to confirm the operation.
4. Find the file you wish to transmit on your
handheld Organizer.
5. Press Data Sync and
6. Press ENTER to start the transmission.
The record will be added to PC Sync as a new record.
2-TX?
will be displayed.
To Transmit All Records
1. Click File | Import from Organizer on the menu bar
of your PC Sync.
Verify the model and COM port information.
2. Click the Import button.
45
E
N
G
Page 47
Transmitting or Receiving Records
3. Click OK to confirm the operation.
4. Press
until the Home Time screen appears.
5. Press Data Sync to enter the data
communication mode.
6. Use
7. Press ENTER to start the transmission.
(Time) on your handheld Organizer
or to select 2-TX? or press 2.
To Receive A Single Record
1. Press (Time) on your handheld Organizer
until the Home Time screen appears.
2. Press Data Sync to enter the data
communication mode.
3. Use
or to select 3-Rx? or press 3 to start
the transmission.
4. In the PC Sync for Windows, highlight the
record you wish to transmit.
5. Click
PC Sync for Windows.
6. Click OK.
Verify the model and COM port information.
7. Click the Export button to begin transmission.
The record will be added to your Organizer as a
new record.
(SEND RECORD) on the toolbar of your
46
Page 48

Transmitting or Receiving Records
To Receive All Records
1. Press (Time) on your handheld Organizer
until the Home Time screen appears.
2. Press Data Sync to enter the data
communication mode.
or to select 3-Rx? or press 3 to start
3. Use
the transmission.
4. Click File | Export to Organizer on the menu bar
of your PC Sync.
5. Click the Export button to confirm the
operation.
47
E
N
G
Page 49

Replacing the Battery
This organizer uses two AAA batteries. Before you follow these
steps you should have a small Phillips screwdriver (one that fits
into screws with an “
1. Turn on the organizer and enter the Alarm mode.
2. Press INS for six seconds.
3. Press ENTER to confirm that your Organizer is entering
sleep mode.
4. With the Phillips screwdriver, remove the screw to the
battery cover and then remove the lid.
5. Remove the old batteries and quickly replace them with
the new batteries.
6. Press ON for seven seconds to activate the organizer.
7. Replace the battery cover.
Warning! If RESET? appears when you next turn on the
organizer, do not press ENTER unless you want to
reset the organizer and erase all your information.
♦ Keep Written Copies of Important Data
Warning! Information can be lost or corrupted if you make a
mistake while operating this organizer. Therefore, always
keep written copies of your important information in case it is
corrupted or lost.
This unit may change operating modes due to
Electrostatic Discharge. Normal operation of this
unit can be re-established by pressing the reset
key, ON/OFF, or by removing/replacing batteries.
✕” notch) and the new batteries at hand.
48
Page 50

Specifications
Model: RF-512a
Size: 14.5 x 7.8 X 2.1 cm • Weight: 4.5 oz.
Battery: Two AAA • Storage capacity: 512 Kb
ISBN 1-56712-539-5
Contacts For registration and sales call 1-800-266-5626 (U.S. only)
or visit us at www.franklin.com. Please have your product number
(RF-512a
For customer service call 609-239-4333. For technical support call
609-386-8997.
Cleaning This Product
T o clean this product, spray a mild glass cleaner onto a cloth and
wipe its surface. Don’t spray liquids directly onto the unit. Don’t use
or store your organizer in extreme or prolonged heat, cold, humidity,
or other adverse conditions.
Copyrights, Trademarks and Patents
© 2000 Franklin Electronic Publishers, Inc.
Burlington, N.J. 08016-4907 USA. All rights reserved.
ROLODEX® is a registered trademark of Berol Corporation, a subsidiary of Newell Rubbermaid, Inc. Patents Pending
DataGuard
Publishers, Inc
Limited Warranty (outside U.S.)
This product, excluding batteries, is guaranteed by Franklin for a period of one year from the date of purchase. It will be repaired or replaced with an equivalent product (at Franklin’s option) free of
charge for any defect due to faulty workmanship or materials.
Products purchased outside the United States that are returned under warranty should be returned to the original vendor with proof of
purchase and description of fault. Charges will be made for all repairs unless valid proof of purchase is provided.
This warranty explicitly excludes defects due to misuse, accidental
damage, or wear and tear. This guarantee does not affect the
consumer’s statutory rights.
Executive Organizer
)
and date of purchase handy when you call to register.
is a registered trademark of Franklin Electronic
.
49
E
N
G
Page 51

Limited Warranty (U.S. only)
LIMITED WARRANTY, DISCLAIMER OF WARRANTIES AND LIMITED REMEDY
(A) LIMITED WARRANTY. FRANKLIN WARRANTS TO THE ORIGINAL END USER THAT FOR A
PERIOD OF ONE (1) YEAR FROM THE ORIGINAL DATE OF PURCHASE AS EVIDENCED BY A
COPY OF YOUR RECEIPT, YOUR FRANKLIN PRODUCT SHALL BE FREE FROM DEFECTS IN
MATERIALS AND WORKMANSHIP. THIS LIMITED WARRANTY DOES NOT INCLUDE DAMAGE
DUE TO ACTS OF GOD, ACCIDENT, MISUSE, ABUSE, NEGLIGENCE, MODIFICATION,
UNSUITABLE ENVIRONMENT OR IMPROPER MAINTENANCE. THE SOLE OBLIGATION AND
LIABILITY OF FRANKLIN, AND YOUR EXCLUSIVE REMEDY UNDER THIS LIMITED
WARRANTY, WILL BE REPAIR OR REPLACEMENT WITH THE SAME OR AN EQUIVALENT
PRODUCT OF THE DEFECTIVE PORTION OF THE PRODUCT, AT THE SOLE OPTION OF
FRANKLIN IF IT DETERMINES THAT THE PRODUCT WAS DEFECTIVE AND THE DEFECTS
AROSE WITHIN THE DURATION OF THE LIMITED WARRANTY. THIS REMEDY IS YOUR
EXCLUSIVE REMEDY FOR BREACH OF THIS WARRANTY. THIS WARRANTY GIVES YOU
CERTAIN RIGHTS; YOU MAY ALSO HAVE OTHER LEGISLATED RIGHTS THAT MAY VARY
FROM JURISDICTION TO JURISDICTION.
(B) DISCLAIMER OF WARRANTIES AND LIMITATION OF LIABILITY. EXCEPT FOR THE LIMITED
WARRANTIES EXPRESSLY RECITED ABOVE, THIS FRANKLIN IS PROVIDED ON AN “AS IS”
BASIS, WITHOUT ANY OTHER WARRANTIES OR CONDITIONS, EXPRESS OR IMPLIED,
INCLUDING, BUT NOT LIMITED TO, WARRANTIES OF MERCHANTABLE QUALITY,
MERCHANTABILITY OR FITNESS FOR A PARTICULAR PURPOSE, OR THOSE ARISING BY
LAW, STATUTE, USAGE OF TRADE, OR COURSE OF DEALING. THIS WARRANTY APPLIES
ONLY TO PRODUCTS MANUFACTURED BY FRANKLIN AND DOES NOT INCLUDE BATTERIES,
CORROSION OF BATTERY CONTACTS OR ANY OTHER DAMAGE CAUSED BY BATTERIES.
NEITHER FRANKLIN NOR OUR DEALERS OR SUPPLIERS SHALL HAVE ANY LIABILITY TO
YOU OR ANY OTHER PERSON OR ENTITY FOR ANY INDIRECT, INCIDENTAL, SPECIAL, OR
CONSEQUENTIAL DAMAGES WHATSOEVER, INCLUDING, BUT NOT LIMITED TO, LOSS OF
REVENUE OR PROFIT, LOST OR DAMAGED DATA OR OTHER COMMERCIAL OR ECONOMIC
LOSS, EVEN IF WE HAVE BEEN ADVISED OF THE POSSIBILITY OF SUCH DAMAGES, OR
THEY ARE OTHERWISE FORESEEABLE. WE ARE ALSO NOT RESPONSIBLE FOR CLAIMS BY
A THIRD PARTY. OUR MAXIMUM AGGREGATE LIABILITY TO YOU, AND THAT OF OUR
DEALERS AND SUPPLIERS, SHALL NOT EXCEED THE AMOUNT PAID BY YOU FOR THE
FRANKLIN PRODUCT AS EVIDENCED BY YOUR PURCHASE RECEIPT. YOU ACKNOWLEDGE
THAT THIS IS A REASONABLE ALLOCATION OF RISK. SOME STATES/COUNTRIES DO NOT
ALLOW THE EXCLUSION OR LIMITATION OF LIABILITY FOR CONSEQUENTIAL OR
INCIDENTAL DAMAGES, SO THE ABOVE LIMITATION MAY NOT APPLY TO YOU. IF THE LAWS
OF THE RELEVANT JURISDICTION DO NOT PERMIT FULL WAIVER OF IMPLIED
WARRANTIES, THEN THE DURATION OF IMPLIED WARRANTIES AND CONDITIONS ARE
LIMITED TO THE DURATION OF THE EXPRESS WARRANTY GRANTED HEREIN.
(C) WARRANTY SERVICE: UPON DISCOVERING A DEFECT, YOU MUST CALL FRANKLIN’S
CUSTOMER SERVICE DESK, 1-800-266-5626, TO REQUEST A RETURN MERCHANDISE
AUTHORIZATION (“RMA”) NUMBER, BEFORE RETURNING THE PRODUCT
(TRANSPORTATION CHARGES PREPAID) TO:
FRANKLIN ELECTRONIC PUBLISHERS, INC.
ATTN: SERVICE DEPARTMENT
ONE FRANKLIN PLAZA
BURLINGTON, NJ 08016-4907
IF YOU RETURN A FRANKLIN PRODUCT, PLEASE INCLUDE A NOTE WITH THE RMA, YOUR
NAME, ADDRESS, TELEPHONE NUMBER, A BRIEF DESCRIPTION OF THE DEFECT AND A
COPY OF YOUR SALES RECEIPT AS PROOF OF YOUR ORIGINAL DATE OF PURCHASE. YOU
MUST ALSO WRITE THE RMA PROMINENTLY ON THE PACKAGE IF YOU RETURN THE
PRODUCT, OTHERWISE THERE MAY BE A LENGTHY DELAY IN THE PROCESSING OF YOUR
RETURN. WE STRONGLY RECOMMEND USING A TRACKABLE FORM OF DELIVERY TO
FRANKLIN FOR YOUR RETURN.
50
Page 52

FCC Notice
NOTE: This equipment has been tested and found to
comply with the limits for a Class B digital device,
pursuant to Part 15 of the FCC Rules. These limits are
designed to provide reasonable protection against
harmful interference in a residential installation. This
equipment generates, uses and can radiate radio
frequency energy and, if not installed and used in
accordance with the instructions, may cause harmful
interference to radio communications. However, there is
no guarantee that interference will not occur in a
particular installation. If this equipment does cause
harmful interference to radio or television reception,
which can be determined by turning the equipment off
and on, the user is encouraged to try to correct the
interference by one or more of the following measures:
-Reorient or relocate the receiving antenna.
-Increase the separation between the equipment and
receiver.
-Connect the equipment into an outlet on a circuit
different from that to which the receiver is connected.
-Consult the dealer or an experienced radio/TV
technician for help.
NOTE: This unit was tested with shielded cables on the
peripheral devices. Shielded cables must be used with
the unit to insure compliance.
NOTE: The manufacturer is not responsible for any radio
or TV interference caused by unauthorized modifications
to this equipment. Such modifications could void the
user’s authority to operate the equipment.
REP-28092-00
P/N 7201667 Rev A
51
E
N
G
 Loading...