

Page 1
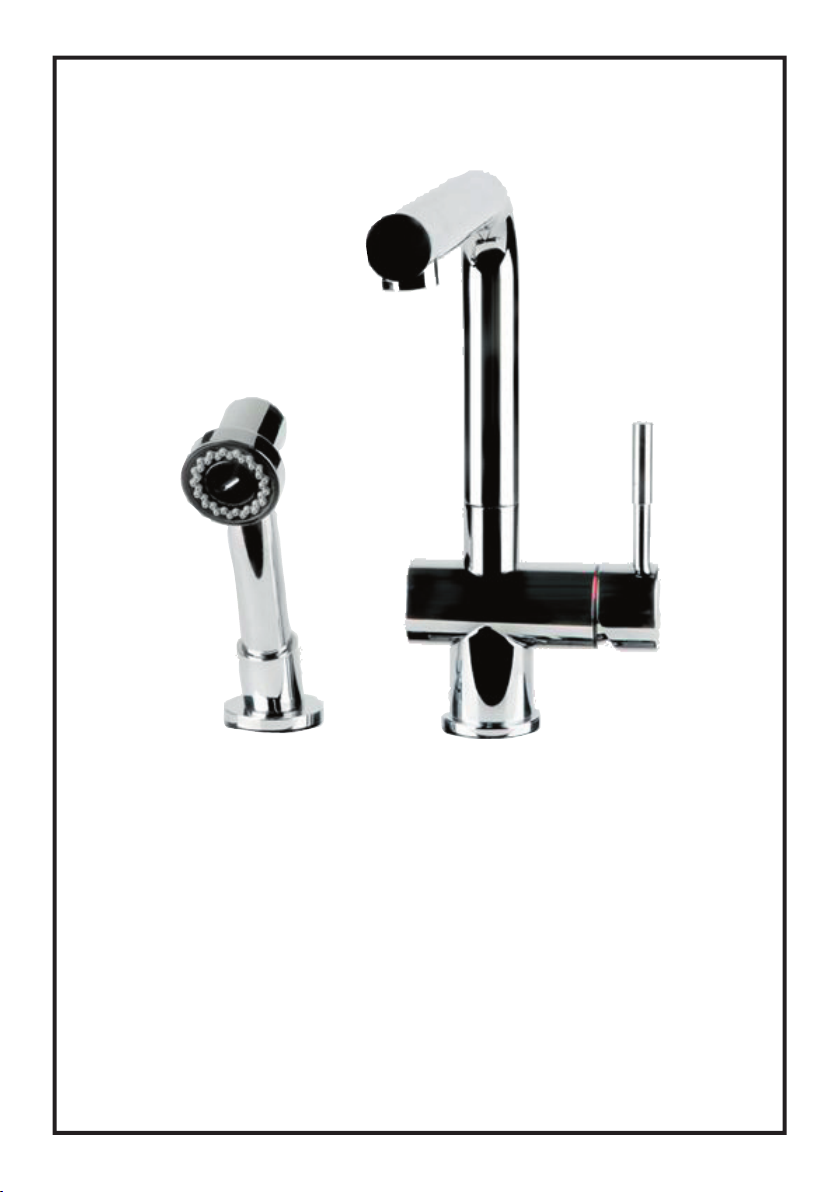
FF 5000 SERIES
Revolving mixer with separate handshower
Installation guide
Page 2
ENGLISH
G 28900.XX
G 1399.XX
G 1402.XX
G 13396.XX
G R0239.XX
G 1156
G R1190
G R0185
G 1697
G 1403
G 1404
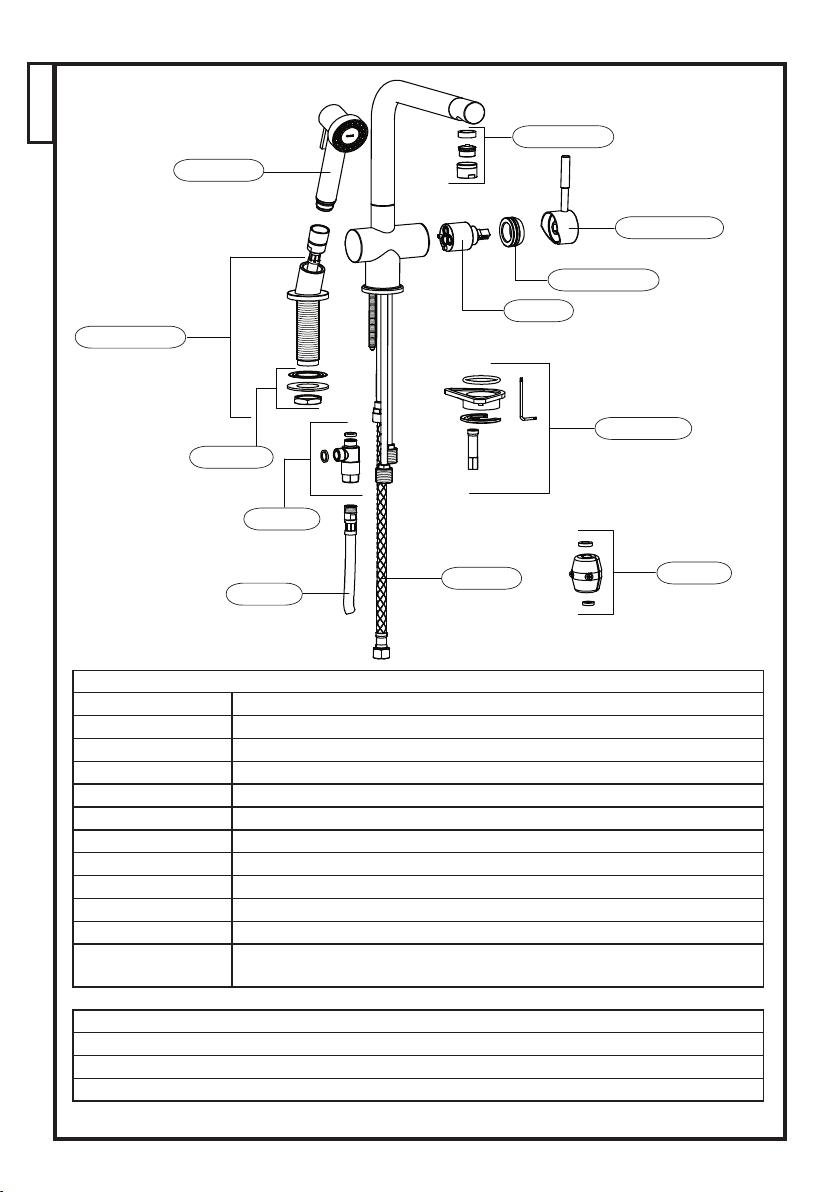
PARTS LIST
G 1156 Cartridge
G R0239.XX Ring cap
G 13396.XX Handle
G 1399.XX Aerator
G 1402.XX Side spray
G 28900.XX Hook for side spray
G R0185 Fastening set (rubber washer, metal washer, nut)
G 1697 Priority water flow system
G 1403 Flexible hose of the side spray
G 1404 Flexible hose
G 1635 Counter weight
G R1190
Fastening set (rubber washer, triangular flange, metal washer, nut, allen key
2,5mm)
TECHNICAL FEATURES
Maximum water flow 2.2 gpm - 60 psi
Recommended pressure range 15-75 psi - Over 75 psi PRV required
Complies with Proposition 65, NSF61, UPC and C-UPC requirements
G 1635
2
Page 3
Faucet installation
ENGLISH
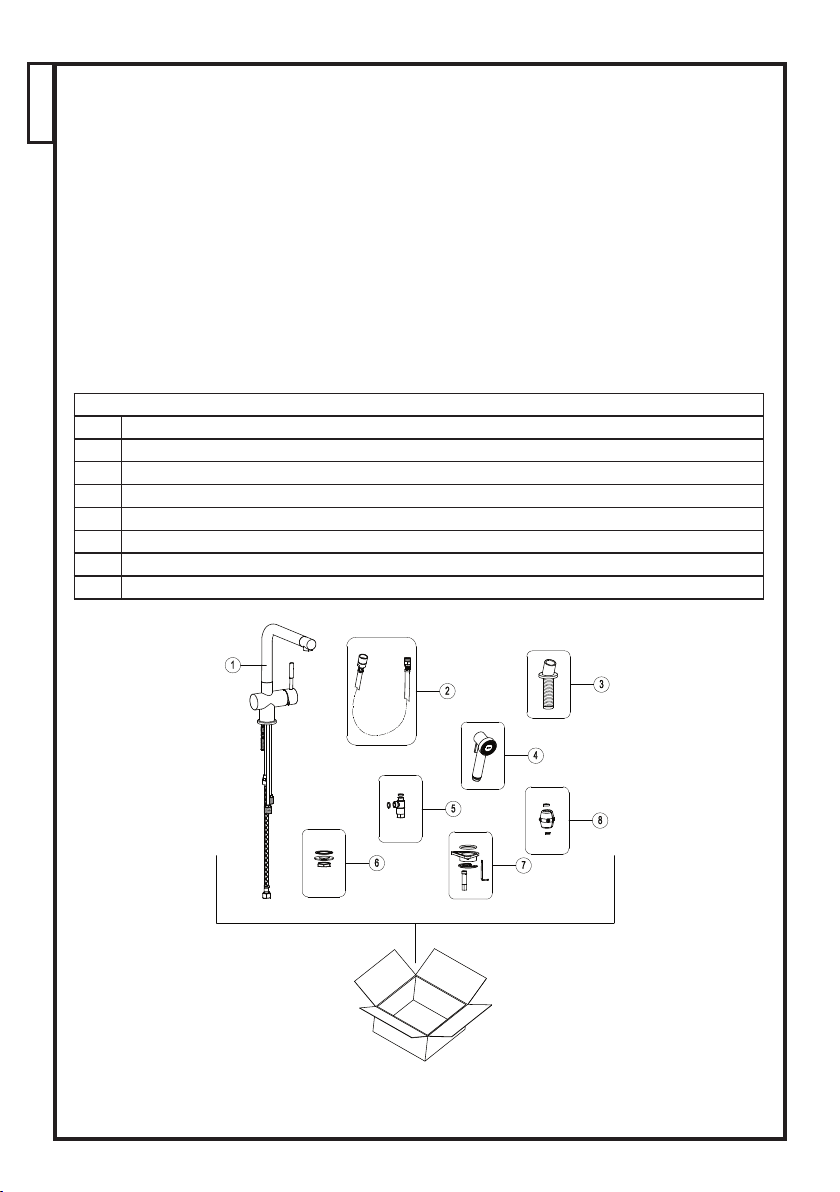
Please remove all components from package and inspect prior to
installation (see itemized table and picture).
NOTE:
Call us immediately if you see inconsistencies. (1-800-626-5771)
or visit
www.frankeksd.com
TABLE OF CONTENT
1 Faucet
2 Flexible hose of the side spray
3 Hook for side spray
4 Side spray
5 Priority water flow system
6 Fastening set (rubber washer, metal washer, nut)
7 Fastening set (rubber washer, triangular flange, metal washer, nut, allen key 2,5mm)
8 Counter weight
Remove all mounting hardware from protecting plastic bag.
3
Page 4
Install faucet to the sink or countertop
ENGLISH
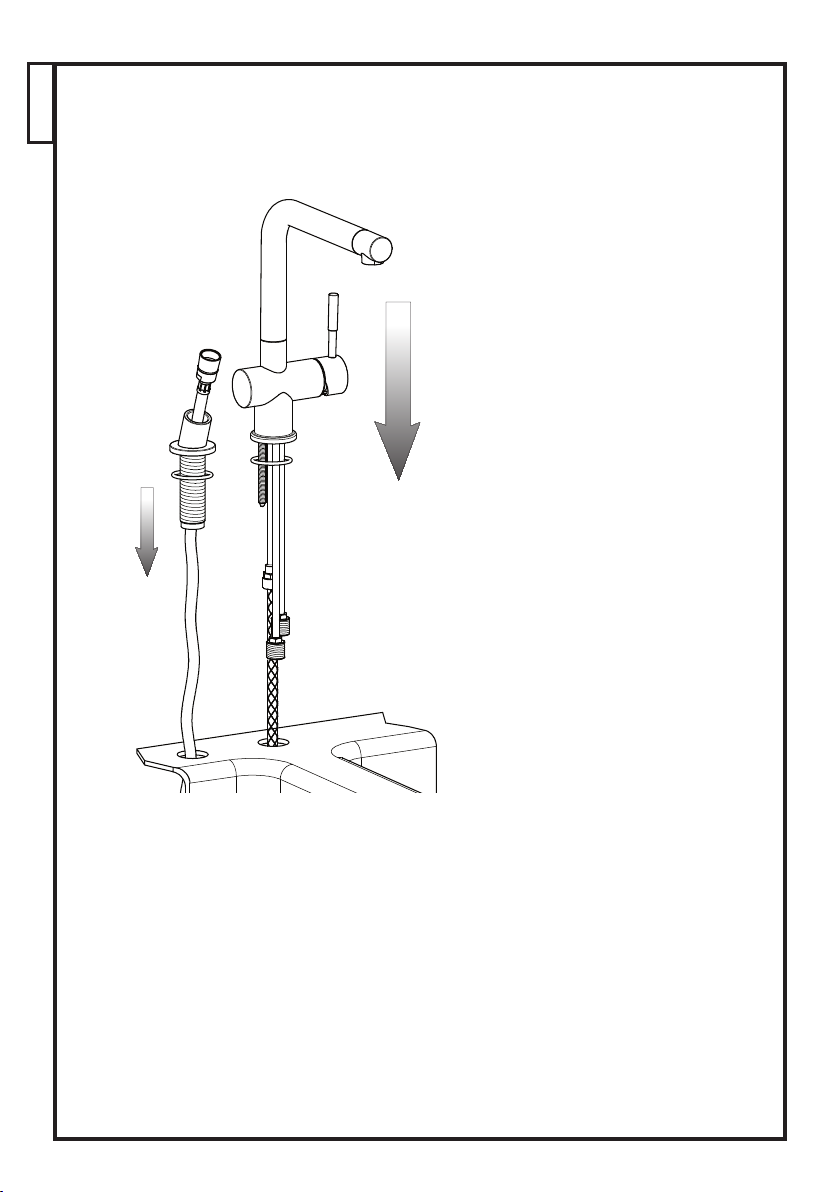
Set the faucet into place on the sink as indicated in the figure.
NOTE:
the rubber O-ring should be sitting on top of the countertop and between
the faucet body. DO NOT use putty or other sealant at this location.
4
Page 5

Install faucet to the sink or
ENGLISH
countertop - follows
1
2
3
4
5
6
7
Install the fastening components to the faucet’s threaded shank in
the following sequence: round gasket (1), triangular flange (2), metal
washer (3) and threaded nut (4) (the triangular flange can be omitted
if the sink/countertop is too thick). Install the fastening items of the
spray head holder in the following sequence: the flat rubber washer
(5), the metal washer (6) and the threaded nut (7).
5
Page 6

Assembly of side spray and connecting of the
~ 40 cm
ENGLISH
priority water flow system
A
B
filter washer
3
2
1
Proceed to the connection of the flexible hose of the side spray (A)
and the priority water flow system (B - follow the phases indicated).
Interposing the holding gaskets within the connections as indicated
in the figure. Fix the lead counter weight to the flexible hose of the
side spray at a distance of approx. 40 cm from the connection to the
outlet pipe.
6
Page 7

Connect the supply lines
ENGLISH
Arrow BLU
COLD water
Arrow RED
HOT water
Connect the hot and cold supply lines. Do not allow the supply
tubes to twist or bend sharply. Leave the valves closed.
- Move the faucet handle by rotating it onwards so that it opens in
the full hot position and open the hot supply for 15 seconds. Close
the hot supply.
- Move the faucet handle by rotating it backwards so that it opens in
the full cold position and open the cold supply for 15 seconds. Close the cold supply.
- Move the faucet handle to the off position.
7
Page 8

Replacing the cartridge
A
B
ENGLISH
B
A
Allen key 2.5 mm
G
F
28 mm wrench
E
D
C
Before starting, shut off the water supply to the faucet and move the
faucet handle to the off position. Use a 2.5 mm Allen key to loosen
the set screw (A) which is accessible from the back of the handle. Lift
the handle (B) from the cartridge (F). Find the small notch at the base
of the chrome ring cap and carefully pry up against this to remove the
cap (C). Remove the brass retaining ring (E) using a 28 mm wrench.
Lift out the cartridge (F). Ensure that the grommets (O-rings) are in
good condition and properly seated and remove all mineral deposits.
Install the new cartridge so that the central pivots fit into the corresponding seats.
8
Page 9

Cleaning of the aerator
ENGLISH
1
2
It is recommended that you periodically clean the aerator of your faucet. To do so, unscrew the aerator holder from its own seat. Simply
using a toothbrush, or something similar, rub the filter under the water, removing the impurities and any build up. Screw the areator back
into place.
Cleaning of the side spray
Any deposits which may accumulate on the nozzle can be removed
by simply running a finger over the rubber extrusions and then running the water for a few seconds. In extreme cases this step may have
to be repeated.
9
Page 10

General maintenance
ENGLISH
Clean aerator periodically.
Do not use harsh detergents, solvents, chemical agents, metallic
sponges, etc. that could harm the surface.
Clean only with a soft sponge and soapy water.
Clean and then dry properly the faucet in case of very hard or calcareous water, whose deposits cold damage the surface.
10
Page 11

Limited lifetime warranty
ENGLISH
Franke Consumer Products, Inc., Kitchen Systems Division extends the following warranty to the original purchaser of its faucets effective January 1, 2003.
All faucets installed in a private residence will carry a limited lifetime warranty on all mechanical
parts to be free of manufacturing defects in material and workmanship under normal usage. All chrome
finishes carry a limited lifetime warranty; all other finishes are warranted for five (5) years form the
original date of purchase.
Marine and Outdoor Installation: Franke Consumer Products, Inc. faucets are NOT warranted for
Marine and Outdoor installations.
This warranty applies only to the original owner, providing the product has been installed in accordance
with our installation instructions, used as recommended and in a normal residential application. In the
event of a warranty claim, the owner will be required to provide proof of purchase - save sales
receipt. This warranty covers all components which make the product operational. Franke, at its op-
tion, may repair or replace the product or components necessary to restore the product to good working
condition. Franke reserves the right to inspect the installation prior to the actual replacement of the
product or component part.
This warranty does not cover misuse or abuse, accidental damages, scuffs or scratches, improper installation, abnormal usage, negligence or damage caused by improper maintenance or cleaning. Normal
wear of parts is excluded from the warranty. Damage caused by impurities or acts beyond our control
are not covered. Any product or part which has been repaired or altered in any manner outside of Franke’s factory, unless previously authorized in writing by Franke, will void warranty. Any replacement
excludes transportation and any labor re-installation costs. This warranty does not allow recovery of
incidental or consequential damages such as loss of use, delay, property damage or other consequential
damage, and Franke accepts no liability for such damages.
The Franke warranty is limited to the above conditions and to the warranty period specified herein and is
exclusive. Franke DISCLAIMS all other warranties, expressed or implied, including IMPLIED WARRANTIES OF MERCHANTABILITY AND/OR FITNESS FOR AS PARTICULAR PURPOSE. This
warranty gives you specific legal rights that may vary from state to state.
Further information
For any further information about our products, about the installation
of them or about the guarantee, please dial the number of the
customer service:
Phone number +1-215-822-6590
Or: 1-800-626-5771
Fax number + 1-215-822-5873
Franke Consumer Products Inc. - Kitchen Systems Division
3050 Campus Drive, Suite 500 Hatfield, PA 19440
11
ET 39388 - R2
 Loading...