

Franke ASCONA TAP, 115.0250.635, 115.0250.636 Installation Instructions Manual
FRANKE ASCONA TAP
Installation instructions
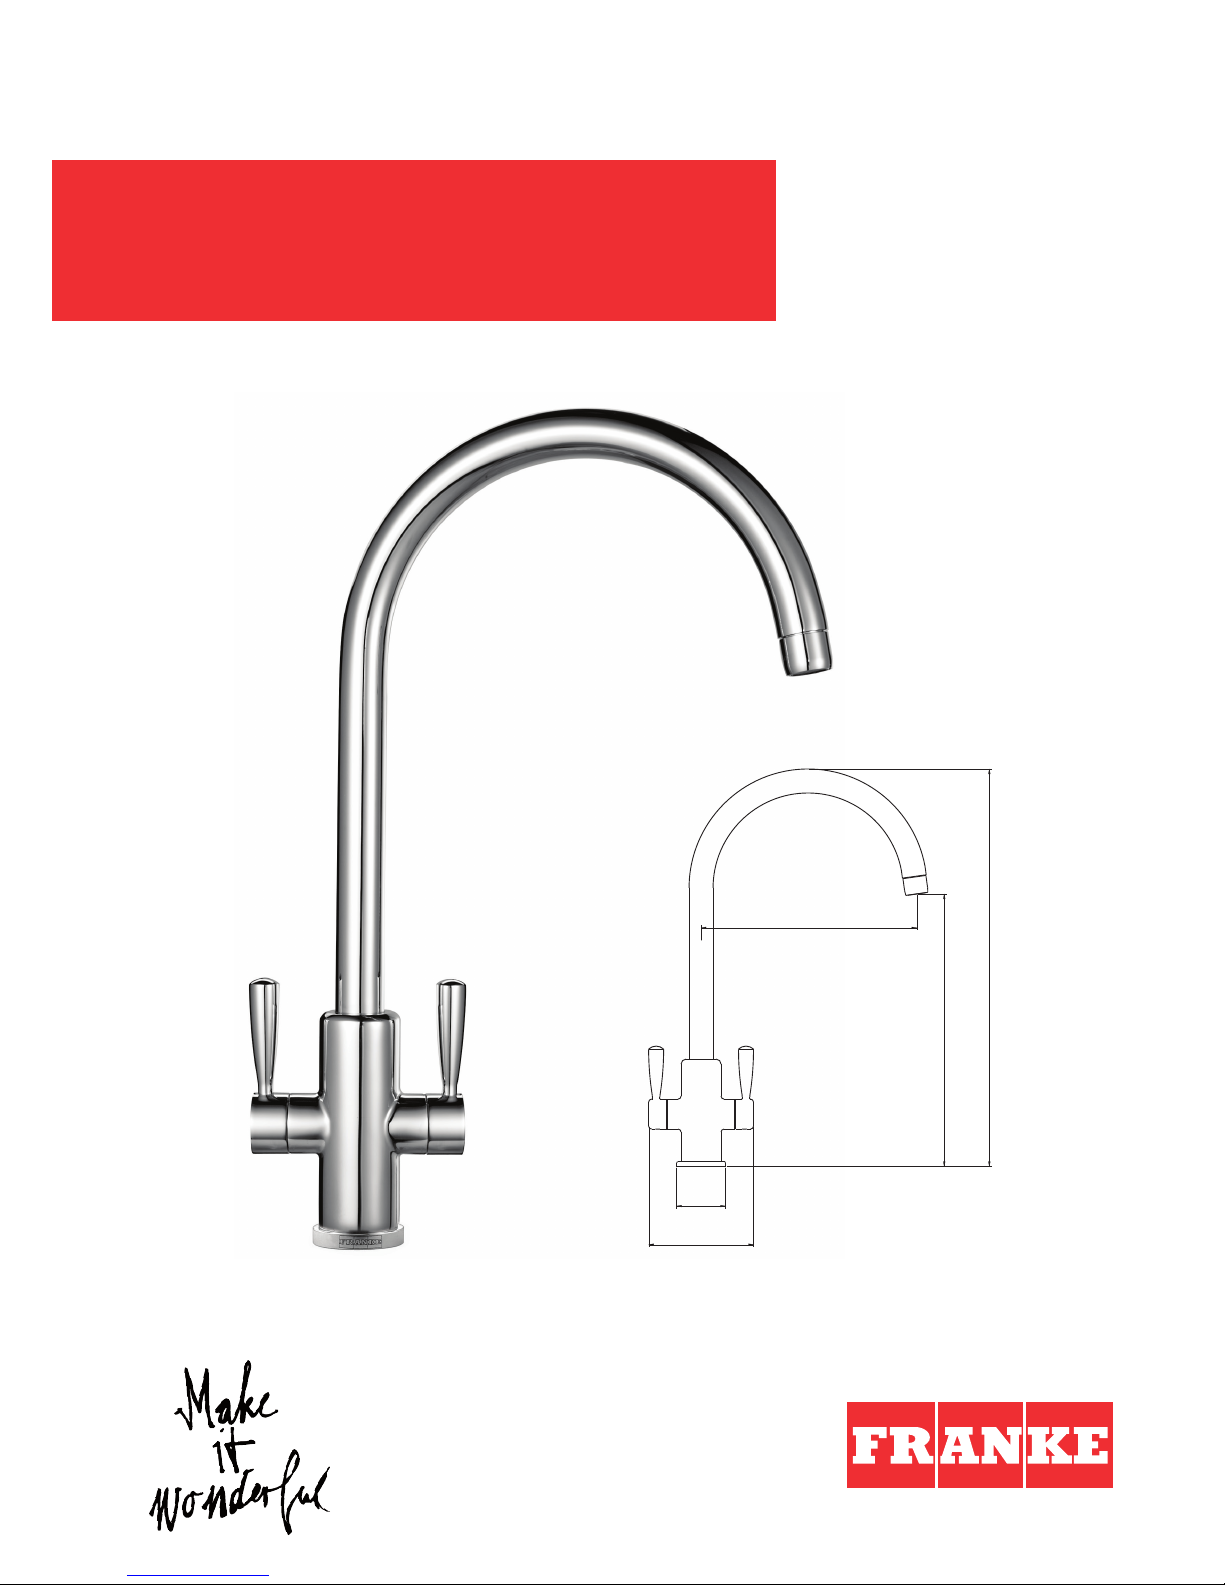
216
ø49
105
398
273

Technical data
Minimum water pressure: 7.25PSI (0.5 bar)
Maximum water pressure: 75PSI (5 bar)
Maximum hot water temperature: 70°C
Recommended hot water temperature: 65°C
Note: Exceeding these temperatures or water pressures
can result in damage to the tap.
A pressure reducing valve may be required to be fitted in
high water pressure situations.
Attention
Before installing the new mixer it is essential that you
thoroughly flush through the supply pipes in order to remove
any remaining swarf, solder or other impurities.
Failure to carry out this simple procedure could cause
problems or damage to the workings of the mixer.
Having first checked all new connections, turn on the mains
stopcock, close all taps except the new mixer and as the
system starts to refill check for leaks.
Once you have satisfied yourself that there are no leaks,
switch on the water heating.
Preparation
First shut off your water heating system then, with your
mains stopcock closed, open the lowest hot and cold taps
in the house and allow to run until the cold storage tank and
pipes are empty (the hot water storage cylinder always
remains full).
Installation
First screw the threaded stud into the mixer body. Screw the
tails into the mixer body and fully hand tighten.
After making any necessary alterations to existing pipework, pass
the plinth over the tails and fit in position.
The shaped upstand on the plinth will locate in the tap body
and the ‘O’ ring should be placed in the recess to make a
seal with the sink.
When the tap is in position (with the cold side on the right
when viewed from the front) slide the nylon bracing plate up to
the underside of the sink together with the retaining plate, and
secure by screwing the fixing nut finger tight.
Check that the mixer body and plinth are correctly positioned
and fully tighten fixing nut.
It is recommended that 15mm x 15mm compression fittings be
used to connect mixer to supply pipes. Cold is connected to
the right and hot on the left when viewed from the front.
Warning
These hints have been prepared for your guidance, you must
exercise due care at all times. We do not accept responsibility
for any problems that may occur through incorrect installation.
NB: If for any reason the spout is removed from the tap,
care must be taken when reinserting the spout into the body
to ensure that the Grub Screw is located in the split of the
white PTFE ring.
How to care for your tap
To maintain the appearance of this tap, ensure it is cleaned
only using a clean, soft damp cloth. A solution of warm water
and mild liquid detergent may be used where necessary, and
then the fitting rinsed thoroughly. Abrasive cleaners or acidic
cleaners MUST NOT BE USED under any circumstances.
Avoid contact with all solvents.
 Loading...