

Montage- und Serviceanleitung
Instructions de montage et d‘entretien
Istruzioni di montaggio e di assistenza
Instrucciones de montaje y servicio
802016
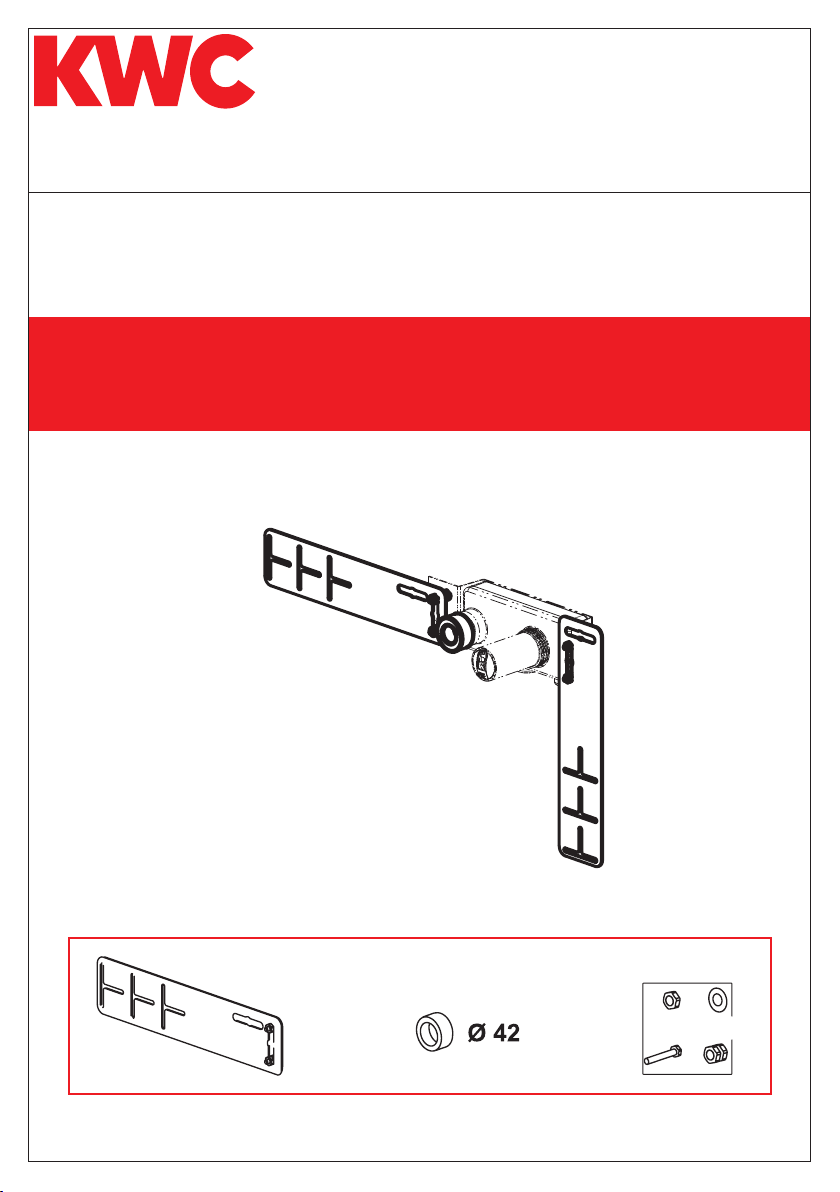
Montageanleitung Schiene 2-Loch Wand
Notice de montage rail paroi à 2 trous
Istruzioni di montaggio guida, 2 fori per parete
Installation instructions, 2-hole rail to wall
Instrucciones de montaje pletina 2 oricios a pared
Installation and service instructions
Z.536.828
Passend zu:
A combiner avec:
Adatto a:
Adecuado para:
Suitable for:
KWC ADRENA 39.321.400.931
KWC AVA 39.193.400.931
KWC ONO 39.151.400.931
KWC ZOE 39.193.400.931
KWC ELLA 39.001.400.931
1x 4x
2x
Franke Water Systems AG
KWC | Hauptstrasse 57 | P.O. Box 179 | CH-5726 Unterkulm | Phone +41 62 768 68 68 | www.kwc.com
802016-01 01/18
Montage / Montage / Montagio / Montaje / Installation
UP-Einheit auf Schiene befestigen.
1
(Montage bauseits)
Fixer l‘unité encastrable sur le rail.
(
Montage
Fissare l‘unità sotto muro sulla guida.
(
Montagio
Fixer l‘unité encastrable sur le rail.
(
Montajo
Fijar la unidad de empotrar a la pletina.
(
Installation
à procurer sur les lieux
sul cantiere)
en la obra)
on the site)
2
A
2
B
3
Schienen an Untergrund befestigen.
(Montagevarianten: seitlich / oben / unten)
Fixer les rails sur le support.
(variantes de montage: côté / haut / bas).
Fissare le guide alla base.
(varianti di montaggio: laterale / sopra / sotto)
Fijar las pletinas a la base.
(variantes: lateral / arriba / abajo)
Attach rails to base.
(Installation variants: side/top/bottom)
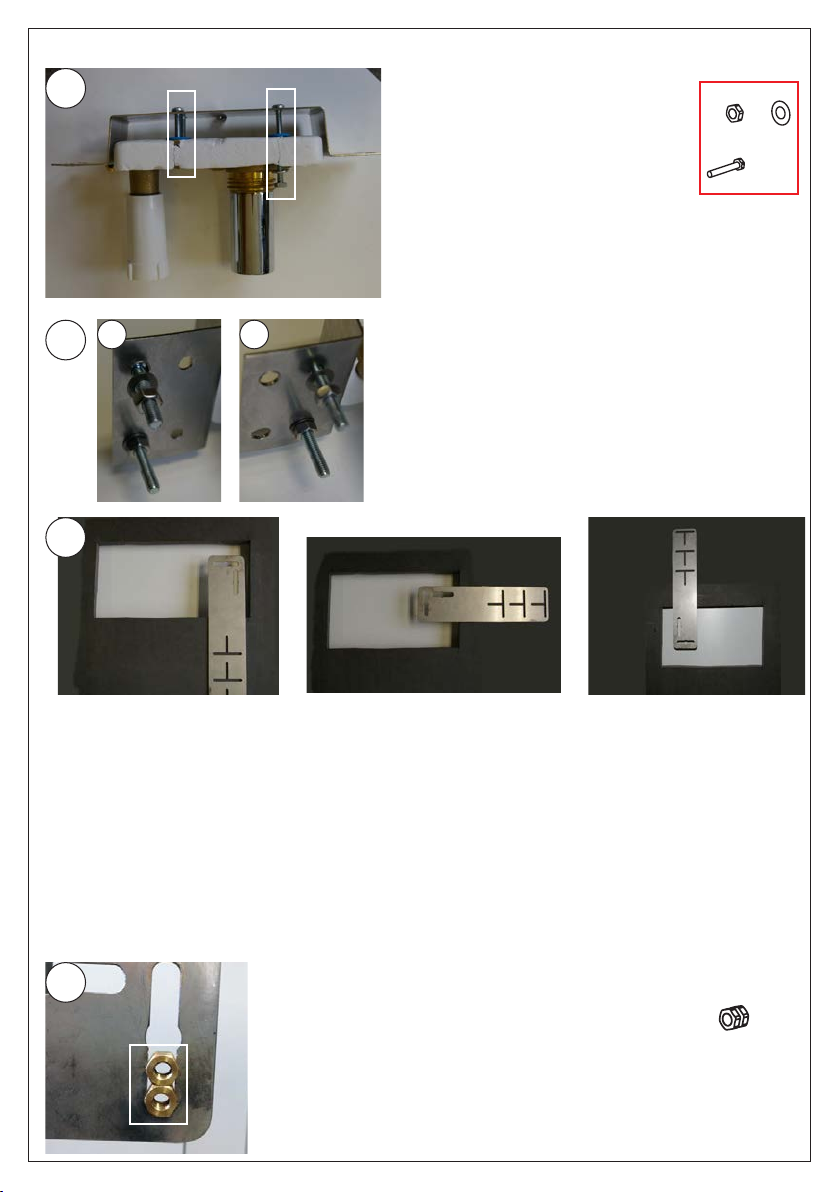
4x M5 Schrauben montieren auf Position (A) oder (B).
Monter 4x vis M5 en position (A) ou (B).
Montare 4 viti M5 su posizione (A) o (B).
Montar 4 tornillos M5 a posición (A) o (B).
Install 4 M5 screws to position (A) or (B).
4
4x Muttern (Messing) in Schienenschlitz einhängen.
Encastrer 4x écrous (laiton) dans la rainure du rail.
Inserire 4 dadi (ottone) nella fessura della guida.
Introducir las 4 tuercas (latón) en las ranuras de la pletina.
Insert 4 nuts (brass) into the rail slot.
4x
802016-01 01/18

Montage / Montage / Montagio / Montaje / Installation
5
A
Montageschiene mit UP-Einheit A+B verschrauben.
Fixer par vis le rail de montage avec A+B l‘unité encastrable en bas.
Avvitare la guida di montaggio A+B all’unità sotto muro nella
parte inferiore.
B
Atornillar la pletina de montaje A+B por la parte de abajo a la
unidad de empotrar.
Screw the mounting rail to the concealed A+B unit at the bottom.
3
6
Zum einstellen der Einbautiefe an den 4 Messingmuttern drehen.
Pour régler la profondeur de montage, agir sur les 4 écrous en
laiton.
Regolare la profondità di montaggio ruotando i 4 dadi in ottone.
Regular la profundidad de montaje girando las 4 tuercas de latón.
Turn the 4 brass nuts to adjust the installation depth.
7
0-13 mm
Achtung: Einbautiefe bachten
8
32–57 mm
47–72 mm
(Gelber Kleber min. – max.)
Kontrolle: Transparente Bauschutzkappe satt aufstecken.
Attention: veiller à la profondeur de montage.
(autocollant jaune min. – max.)
Contrôle: le couvercle transparent doit être bien mis en place.
Importante: rispettare la profondità di montaggio
(adesivo giallo min.-max.)
Controllo: calotta protettiva trasparente inserita a lo.
Atención: comprobar la profundidad de montaje
(Pegatina amarilla: mín. - máx.)
Control: introducir el capuchón protector transparente hasta el tope.
Caution: Pay attention to the installation depth
(yellow sticker indicates min./max.).
To check, t the transparent cover sleeve on fully.
½“ Rohr (Länge: min. 200 mm bauseits) in den Anschluss des Auslaufes
9
eindrehen.
Visser le tuyau ½“ (longueur: min. 200 mm à procurer sur les lieux)
dans l‘évacuation.
Inserire nella bocca il tubo da ½“ (lunghezza min. 200 mm sul cantiere).
Atornillar el tubo de ½“ (long.: mín. 200 mm en la obra ) en la salida
del caño.
Screw the ½“ pipe (length: at least 200 mm on the site) into the outlet
for the spout.
200 mm
802016-01 01/18

Montage / Montage / Montagio / Montaje / Installation
Schwarzer Kunststoffring (A) auf ½“ Rohr aufbringen.
10
A
B
Transparente Bauschutzkappe (B) entfernen.
Adapter l‘anneau de plastique noir (A) sur le tuyau ½“.
Enlever le couvercle transparent.
Applicare l’anello nero in plastica (A) alla base del tubo da ½“.
Rimuovere la calotta protettiva trasparente (B).
Colocar el anillo de plástico negro (A) en el tubo de ½“.
Retirar el capuchón protector transparente (B).
Fit the black plastic ring (A) to the ½“ pipe.
Remove the transparent cover sleeve (B).
11 12
4
Ausrichtung UP-Einheit:
Zur Kontrolle Wasserwaage über den schwarzen
Kunststoffring und verchromter Hülse legen. Zum
nivilieren an den Messingmuttern drehen, oder die
Montageschiene neu ausrichten.
Ajustage de l‘unité encastrable:
Pour vérier, placer le niveau à bulle par-dessus
l‘anneau de plastique noir et la douille chromée.
Pour la mise à niveau, agir sur les écrous de laiton
ou réajuster le rail de montage.
Verica allineamento unità sotto muro:
posizionare la livella ad acqua sull’anello nero in
plastica e sul manicotto cromato.Per livellare, ruotare
i dadi in ottone oppure riposizionare la guida di
montaggio.
Enderezar la unidad de empotrar:
Comprobar colocando el nivel de burbuja sobre el
anillo de plástico y la funda cromada. Para nivelar,
girar las tuercas de latón, o volver a colocar la pletina
de montage.
Alignment of the concealed unit: To check, place a
spirit level over the black plastic ring and chrome plated sleeve. To level up, turn the brass nuts or re-align
the mounting rail.
Für die Druckprüfung ist der weisse Kunststoffzapfen zu montieren und nach den
nationalen/lokalen Installationsvorschriften zu prüfen.
Pour vérier la pression, il convient de monter la cheville de plastique blanche et de tenir compte des
prescriptions d‘installation nationales/locales.
Eseguire la prova in pressione montando il perno bianco in plastica e attenendosi alle prescrizioni
d‘installazione nazionali o locali.
Para la prueba de presión, montar el tapón de plástico blanco y comprobar según las normas de instalación
nacionales/locales.
To check the pressure, t the white plastic spigot and check according to national or local installation
regulations.les.
Ausrichtung Auslauf:
Zur Kontrolle Wasserwaage auf ½“ Rohr legen.
Zum Ausrichten an den Messingmuttern drehen.
Ajustage de le bec:
Pour vérier, placer le niveau à bulle sur le tuyau ½“.
Pour ajuster, agir sur les écrous de laiton.
Verica allineamento bocca:
posizionare la livella ad acqua sul tubo da ½“.
Per allineare, ruotare i dadi in ottone.
Enderezar el caño de salida:
Para comprobar, colocar el nivel de burbuja sobre
el tubo de ½“.
Girar las tuercas de latón para enderezar.
Alignment of the spout:
To check, place a spirit level on the ½“ pipe.
To adjust the alignment, turn the brass nuts.
802016-01 01/18
 Loading...