

Fowler 54-100-312, 54-100-024-1, 54-100-042-1 Instructions Manual
INSTRUCTIONS:
Temperature: 5-40 ˚C
Relative Humidity: ≤80%
Prevent any liquid from contacting the protective sticker
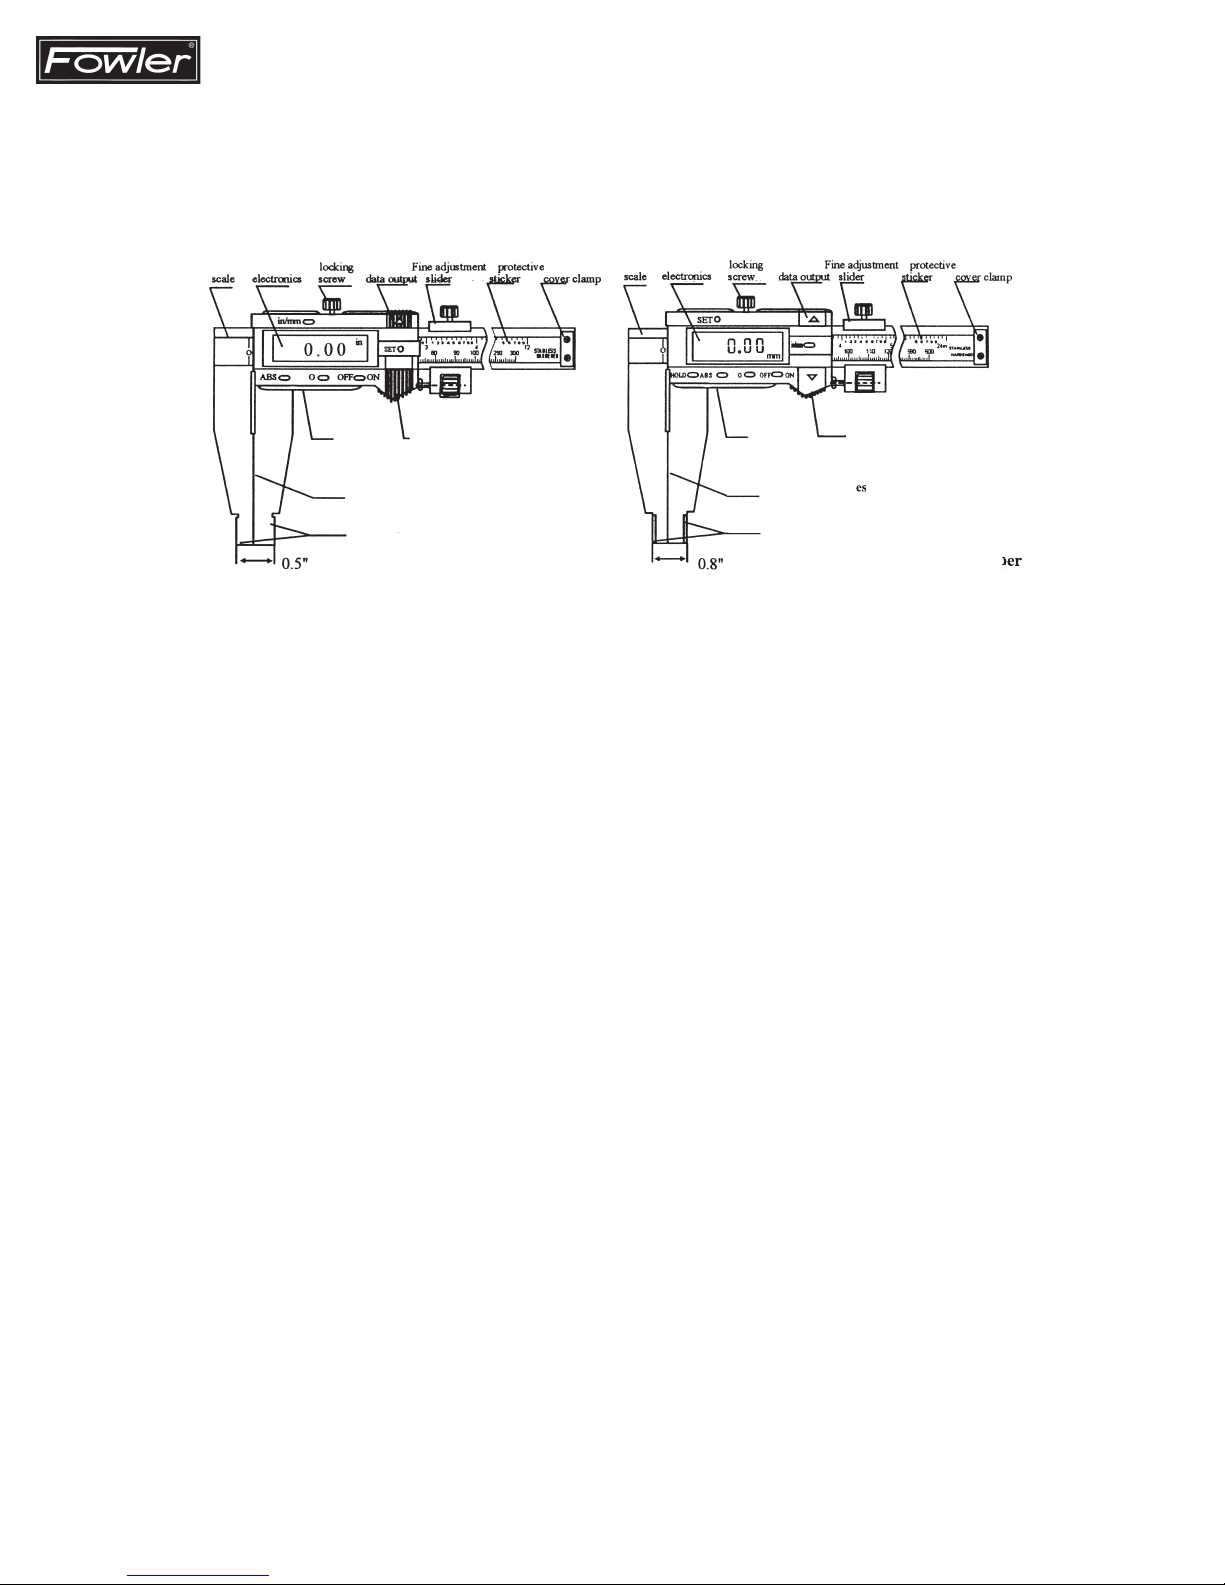
STRUCTURE (please refer to the sketch):
ON/OFF: Power on/off switch
ABS/INC: relative/absolute measurement
ZERO: zero setting button
mm/in: metric/inch conversion
SET: presetting button
HOLD: data hold button
1) Press ON/OFF button at any position when the power is off, the caliper will be ready to work and display the measuring value.
2) Press ON/OFF at any position when the power is on, the caliper will stop working.
3) In state of hold, the caliper cannot be shut down by pressing ON/OFF.
1) The caliper works in absolute mode after starting for the fi rst time, and displays absolute zero (at this time, the relative zero is set at the absolute zero). Move the slider for absolute mea sure ment.
2) Press “ABS” button in absolute mode (without “INC”), then move the slider for relative measurement, the caliper is ready for relative mea sure ment and si mul ta neous ly displays “INC,” showing relative
state.
3) Press “ABS” button is relative mode (with “INC” displaying), then the caliper is ready for absolute measurement and si mul ta neous ly “INC” disappears, showing absolute mode. Move the slider for
absolute measurement.
4) Press “ABS” at any position for relative/absolute measurement interchange.
1) In relative mode, press “ZERO” button to set the current point to zero and the caliper will display zero.
2) In absolute mode, press “ZERO” button to set the current point to the presetted value and the caliper will display this value.
1) Press “mm/in” button at any position for metric/inch conversion.
1) It’s for presetting a starting point (the value has been preset to zero in the factory).
2) With each one press on this button at any position, the caliper will switch to absolute mode automatically. The current point is set to the preset value and displays on the LCD.
The details are as the follows:
1 0.5”/12.7mm for internal measuring of 12” calipers
2 0.8”/20.32mm for internal measuring of 24” & 40” calipers
3 1”/25.4mm for optional measuring
4 2”/50.8mm for optional measuring
5 3”/ 76.2mm for optional measuring
6 4”/101.6mm for optional measuring
7 5”/127mm for optional measuring
8 0 standard, after internal & optional measuring, please set 0 for normal measuring
3) The process is circulative. The preset value is held even after powering off.
1) Press “H” button at any position, the caliper will hold the value as before and display “H” on the LCD. The data will not change even if you move the slider.
2) Press “H” button once again to release hold state (no character “H” displays), then the caliper displays the measured value.
The data can be input to a computer or special printer via a special cable. (RS232 output)
Interface: synchronous series
Data: Binary code, 24 bits, each data string will be sent twice. The cycle is 300ms (20ms is fast reading state), transmitting time is 0.5ms.
Three wires: data D, clock CP, Positive Power(+)
Pulse range of data: “0” Level ≤0.2V, “1” Level ≥1.3V
Clock CP: 90 KHz
2) Please preset the starting point over again after battery replacement.
• 66 Rowe Street. Newton. MA 02466
 Loading...