

Page 1

Stereo rack monitor
RM-3
8588134000
(594018)
Owner’s Manual
English
Thank you very much for purchasing a Fostex product.
This manual provides instructions for basic use of the unit.
Read this before using the unit for the fi rst time.
Table of contents
Introduction ............................................................................2
WARNINGS and PRECAUTIONS .......................... 2
IMPORTANT SAFETY INSTRUCTIONS .............. 2
Features of the RM-3 ................................................ 2
Accessories ..................................................................... 2
Part names and functions .............................................. 3
Front ................................................................................... 3
Back ....................................................................................3
DIP switch settings ............................................................. 4
Meter ........................................................................................... 5
Switches and buttons on the front of the unit
Dimensions .............................................................................6
Specifi cations ......................................................................... 7
© FOSTEX COMPANY All Right Reserved
... 6
Page 2
Introduction
RM-3 is a rack mount powered monitor that monitors digital and analog audio signals.
WARNINGS and PRECAUTIONS
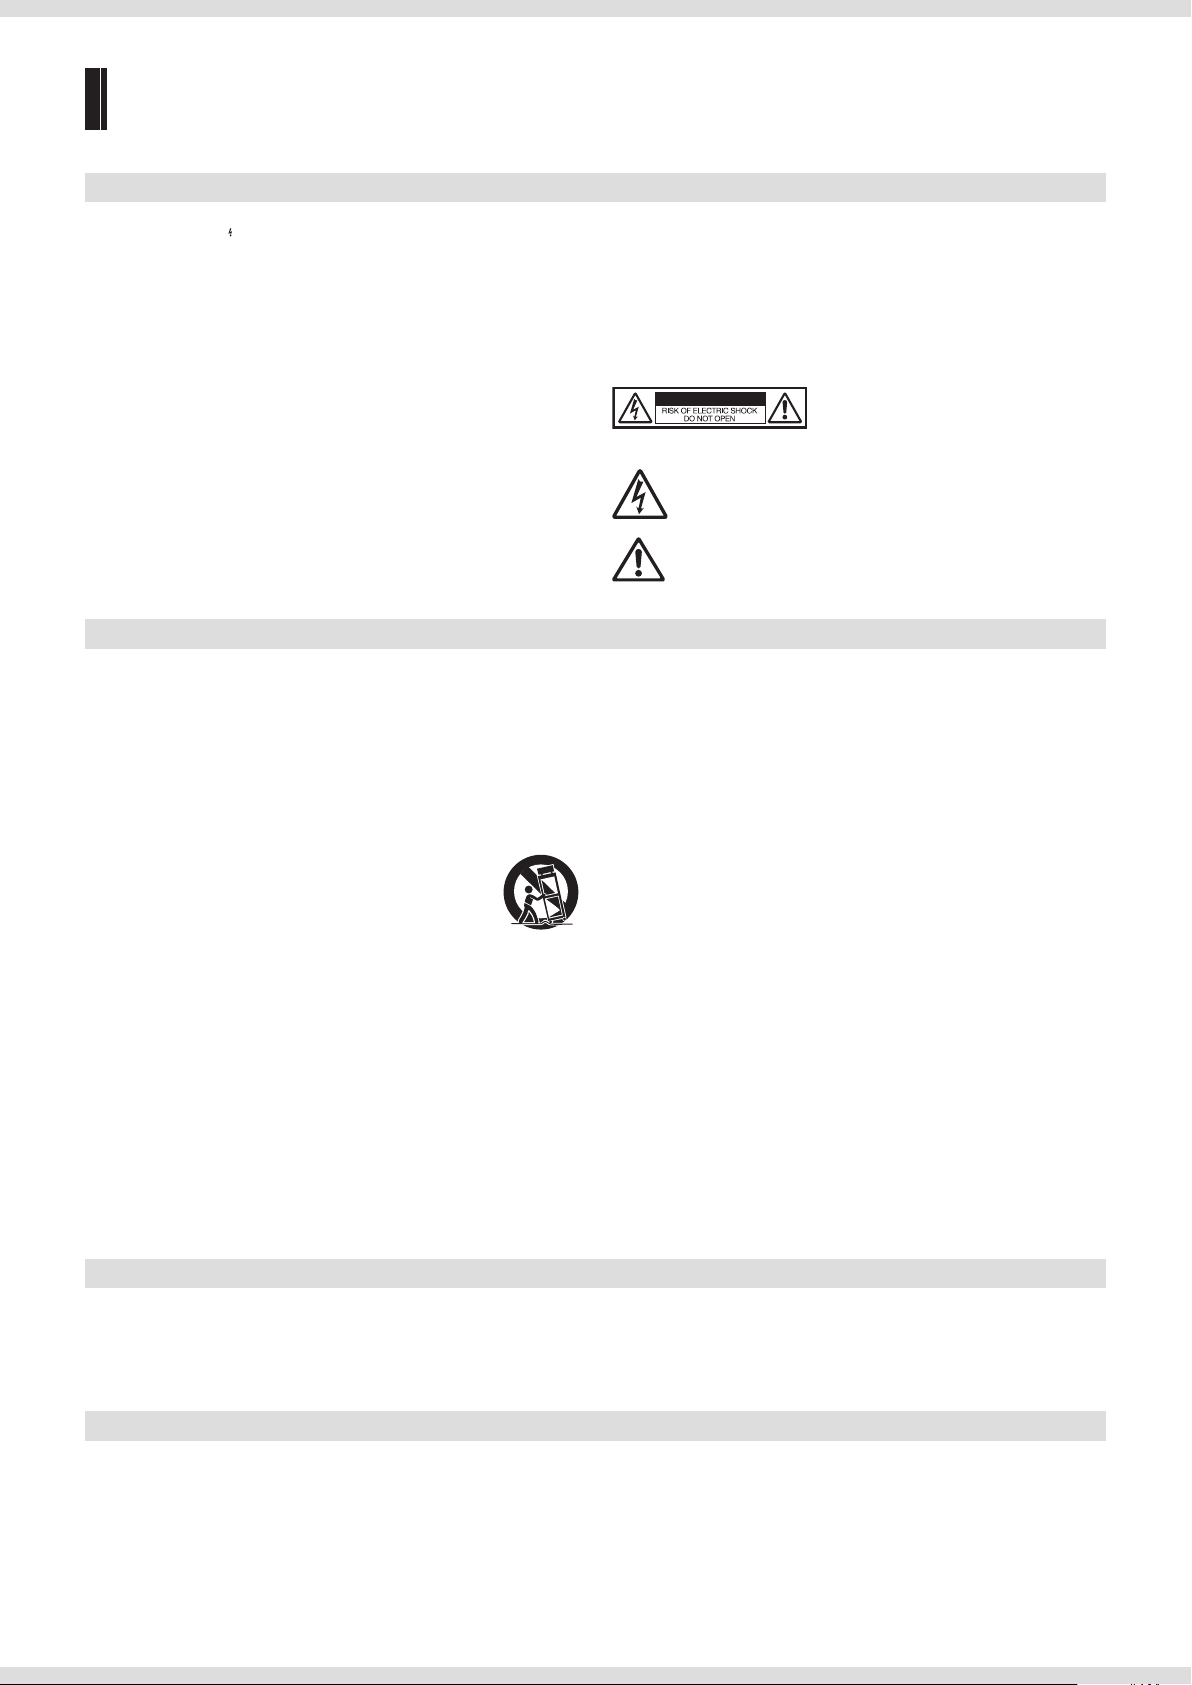
• CAUTION: The symbol To prevent electric shock hazard, do not connect to mains
power supply while grille is removed.
• WARNING: An apparatus with CLASS I construction shall be connected to a MAINS
socket outlet with a protective earthing connection.
• CAUTION: TO PREVENT ELECTRIC SHOCK, MATCH WIDE BLADE OF PLUG TO WIDE
SLOT, FULLY INSERT.
• WARNING: To reduce the risk of fire or electric shock, do not expose this apparatus to
rain or moisture.
• CAUTION: Use of any controls or adjustments or performance of procedures other
than those herein specified may result in hazardous radiation exposure.
• WARNING: Changes or modifications to this unit not expressly approved by the party
responsible for compliance could void the user’s authority to operate the equipment.
• WARNING: Do not place the unit on top of any soft, porous, or sensitive surfaces to
avoid damaging the surface. Use a protective barrier between the unit and surface to
protect the surface.
• WARNING: Use of this unit near fluorescent lighting may cause interference regarding
use of the remote. If the unit is displaying erratic behavior move away from any
fluorescent lighting, as it may be the cause.
• CAUTION: Danger of explosion if battery is incorrectly replaced. Replace only with the
same or equivalent type.
SAFETY INSTRUCTIONS
1. Read Instructions - All the safety and operating instructions should be read before
the appliance is operated.
2. Retain Instructions - The safety and operating instructions should be retained for
future reference.
3. Heed Warnings - All warnings on the appliance and in the operating instructions
should be adhered to.
4. Follow Instructions - All operating and use instructions should be followed.
5. Water and Moisture - The appliance should not be used near water - for example,
near a bathtub, washbowl, kitchen sink, laundry tub, in a wet basement, or near a
swimming pool, and the like.
6. Carts and Stands - The appliance should be used only with a cart or
stand that is recommended by the manufacturer.
The appliance and cart combination should be moved with care.
Quick stops, excessive force, and uneven surfaces may cause the
appliance and cart combination to overturn.
7. Wall or Ceiling Mounting - The appliance should be mounted to a wall or ceiling only
as recommended by the manufacturer.
8. Ventilation - The appliance should be situated so that its location or position does
not obstruct proper ventilation. For example, the appliance should not be situated
on a bed, sofa, rug, or similar surface that may block the ventilation openings; or,
placed in a built-in installation, such as a bookcase or cabinet that may impede the
flow of air through the ventilation openings.
9. Heat - The appliance should be situated away from heat sources such as radiators,
heat registers, stoves, or other appliances (including amplifiers) that produce heat.
10. Power Sources - The appliance should be connected to a power supply only of the
type described in the operating instructions or as marked on the appliance.
11. Grounding or Polarization - The precautions that should be taken so that the
grounding or polarization means of the appliance is not compromised.
12. Power Cord Protection - Power supply cords should be routed so that they are not
likely to be walked on or pinched by items placed upon or against them, paying
particular attention to cords at plugs, convenience receptacles, and the point where
they exit from the appliance.
• WARNING: Do not install this equipment in a confined space such as a book case or
similar unit.
• WARNING: Mains plug is used as disconnect device and it should remain readily
operable during intended use. In order to disconnect the apparatus from the mains
completely, the mains plug should be disconnected from the mains socket outlet
completely.
• Do not mix old and new batteries. Do not mix alkaline, standard (carbonzinc), or
rechargeable (ni-cad, ni-mh, etc) batteries.
CAUTION
The lightning flash with arrowhead symbol, within an equilateral triangle,
is intended to alert the user to the presence of uninsulated “dangerous
voltage” within the product’s enclosure that may be of sufficient magnitude
to constitute a risk of electric shock to persons.
The exclamation point within an equilateral triangle is intended to alert the
user to the presence of important operating and maintenance (servicing)
instructions in the literature accompanying the appliance.
13. Cleaning - The appliance should be cleaned only as recommended by the
manufacturer.
14. Nonuse Periods - The power cord of the appliance should be unplugged from the
outlet when left unused for a long period of time.
15. Object and Liquid Entry - Care should be taken so that objects do not fall and liquids
are not spilled into the enclosure through openings.
16. Damage Requiring Service - The appliance should be serviced by qualified service
personnel when:
A. The power supply cord or the plug has been damaged; or
B. Objects have fallen, or liquid has been spilled into the appliance; or
C. The appliance has been exposed to rain; or
D. The appliance does not appear to operate normally or exhibits a marked change
in performance; or
E. The appliance has been dropped, or the enclosure damaged.
17. Servicing - The user should not attempt to service the appliance beyond that
described in the operating instructions.
All other servicing should be referred to qualified service personnel.
18. The appliance should be situated away from drops of water or spraying water.
19. Objects containing liquid such as vases must not be put on the appliance.
20. The appliance is not completely isolated from the power supply even if the power
switch is in the off position.
21. Appliance shall not be exposed to dripping or splashing and no objects filled with
liquids, such as vases, shall be placed on the appliance.
22. Only use attachments/accessories specified by the manufacturer.
23. Appliances with a protective earth terminal should be connected to a mains outlet
with a protective earth connection.
24. The appliance should be placed in a position where an AC plug / inlet can be easily
pulled out by hand.
25. The main plug is used as the disconnection device. It shall remain readily operable
and should not be obstructed during intended use. To completely disconnect the
appliance from supply mains, the mains plug of the appliance shall be disconnected
from the mains socket outlet completely.
WARNING: TO REDUCE THE RISK OF ELECTRIC
SHOCK, DO NOT REMOVE COVER (OR BACK).
NO USERSERVICEABLE PARTS INSIDE. REFER
SERVICING TO QUALIFIED SERVICE PERSONNEL.
Features of the RM-3
• The unit supports balanced/unbalanced analog input and AES/EBU digital input.
• It has a power saving design with a digital amplifier and switched-mode power supply.
• The 26 dot LED meter supports 4 different display modes: VU, VU+PEAK, VU+PEAK HOLD, PEAK+PEAK HOLD.
• The display has 4 brightness settings.
Accessories
• Power cable × 1
• Rubber feet × 4
• Safety information sheet × 1
• Owner’s manual (this manual) × 1
2
Page 3
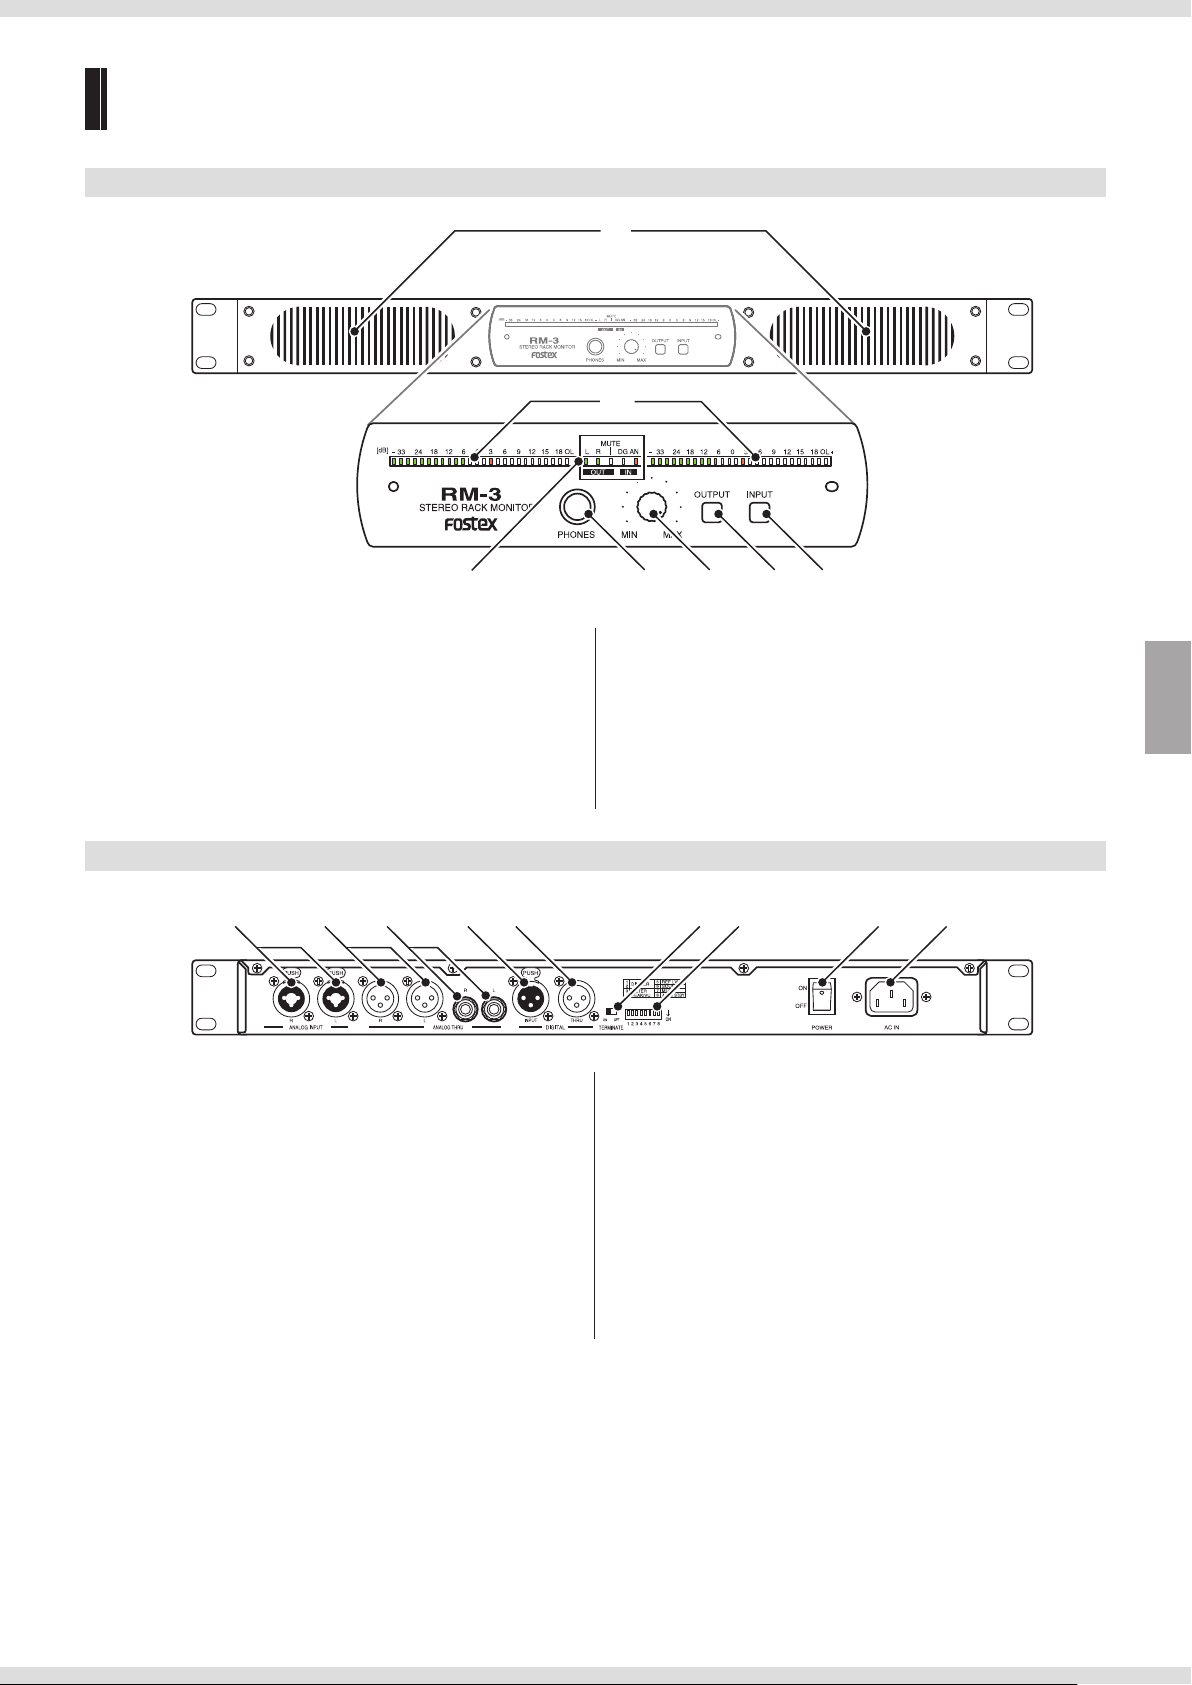
Part names and functions
①
⑨ ⑩ ⑪ ⑫ ⑬ ⑭ ⑮ ⑯ ⑰
Front
③ ④ ⑤ ⑦⑥ ⑧
②
① Speakers
The speakers do not emit any sound while headphones are
connected to the [PHONES] jack.
② Level meter
③ Status display
④ [PHONES] jack
⑤ Volume knob
Back
⑨ [ANALOG INPUT] terminals (for both XLR/TS phone)
⑩ [ANALOG THRU] terminals (XLR)
Outputs the signal being input through the [ANALOG INPUT]
(XLR) terminal.
⑪ [ANALOG THRU] terminals (TS phone)
Outputs the signal being input through the [ANALOG INPUT] (TS
phone) terminal.
⑫ [DIGITAL INPUT] terminal
⑬ [DIGITAL THRU] terminal
Outputs the signal being input through the [DIGITAL INPUT]
terminal.
⑥ Mute button
Press the button for approximately one second to mute
(
page 6). Cancel mute by briefly pressing the button again.
⑦ [OUTPUT] switch
Select an output channel from stereo, L, R, and L+R.
⑧ [INPUT] switch
⑭ [TERMINATE] switch
Turn off if you wish to connect the [DIGITAL THRU] terminal to a
digital input terminal on another device.
⑮ DIP switches
Used to configure various settings (
⑯ [POWER] switch
⑰ [AC IN] terminal
page 4).
English
3
Page 4

DIP switch settings
DIP switch
(default settings)
Switch position guide
Display brightness (DIMMER)
1 2 Setting
OFF OFF Bright
ON OFF
OFF ON
ON ON Dark
Level meter type
(METER PEAK/ VU)
3 4 Setting
OFF OFF VU+PEAK
ON OFF VU+PEAK HOLD
OFF ON PEAK+PEAK HOLD
ON ON VU
Reference level (REF LVL)
Choose an analog reference level indicated by 0 dB on the level
meter.
5 Setting
OFF +4 dBu (balanced)/–10 dBV (unbalanced)
ON 0 dBu (balanced)/–14 dBV (unbalanced)
The digital reference level is fixed at -20 dBFS.
Source sound type (SOUND)
There are two sound types. Choose the appropriate sound type.
6 Setting
OFF MUSIC
ON VOICE
MUSIC: Ideal for sound sources that have a wide frequency range,
such as music.
VOICE: Ideal for sound sources that have a narrow frequency
range, such as speech.
Volume when muted ( page 6) (MUTE)
7 Setting
OFF Volume: –∞
ON Volume: –20dB
Turn the auto standby function on/off
(AUTO STBY)
8 Setting
OFF Auto standby function: Off
ON Auto standby function: On
The auto standby function
When the “AUTO STBY” DIP switch on the back is set to “on”, if
input to the unit stays below a certain level for approximately 4
hours, the unit automatically goes into standby.
When in standby, power consumption is reduced to 0.5 W or
below. The unit will revert to its normal state when the mute
button is pressed.
The auto standby function does not work when the DIP switch is
set to “off”.
4
Page 5

Meter
Meter scale
[dB] –33 30 24 18 12 6 0 3 6 9
Meter
Input presence level indicator
Analog BAL: +4 dBu or 0 dBu
UNBAL: –10 dBV or –14 dBV
Digital –20 dBFS
The meter scale has 26 dot LED consisting of a 24 dot level meter, an input presence level indicator and a peak over level indicator.
You can choose from four combinations of PEAK and VU to be displayed on the meter (“DIP switch settings” (
24 dot LED (VU meter, PEAK meter)
Scale Alignment Level Permitted Level
–33 to +18 @0 dB = standard @+9 dB
• Reference level
Reference level display position: 0 dB
You can choose the reference level from +4 dBu/–10 dBV or 0 dBu/–14 dBV using the DIP switches.
12
15 18+ OL
Peak over level indicator
page 4)).
Peak meter specifications
Attack Time Fall Time Peak hold time
0.1 msec 1.7 sec/20 dB 2.0 sec
VU meter specifications
Attack/Fall Time
300 msec/@0 dB
Input presence level indicator
Presence level Presence hold time
@–46 dB 1.0 sec
Peak over level indicator
Peak over level
Reference level +20 dB
English
5
Page 6

Switches and buttons on the front of the unit
1 [INPUT] switch
Select the input (analog or digital) to monitor.
The unit will automatically store the switch status within approximately three
seconds.
Indicator Status
Analog input
Digital input
Digital input (unlocked)
2 [OUTPUT] switch
Select the output channel.
The unit will automatically store the switch status within approximately
three seconds.
Indicator Status
Stereo
L R
L
L L
R
R R
Monaural (L+R)
L+R L+R
3 Mute button
Dimensions
26
430
Press the mute button for approximately one second to mute the unit.
You can set the unit to standby by pressing the mute button for more
than 5 seconds.
When in mute or standby, briefly press the mute button again to return
to the normal state.
The unit is never muted (sound can be heard) when it is turned on.
284
260
482
44
(Unit: mm)
6
Page 7

Specifications
Speakers
Built-in unit 110 × 40 mm antimagnetic cone speakers
Impedance 8 Ω
Output sound
pressure level
Frequency
characteristic
Power amplifier
Maximum output 10 W × 2
Residual noise –50 dB or less (DIN AUDIO)
Distortion rate 0.1% or less
Digital input Connector XLR-3-31 type
Analog input Connector for both XLR/Φ6.3 mm (1/4”) TS phone
Digital THRU Connector XLR-3-31 type
Analog THRU Connector XLR-3-31 type
Phones Connector Φ6.3 mm stereo phones
Level meter Display 26 dot LED × 2
84 dB/W (1 m)
200 Hz to 20 kHz
Format IEC 60958 (AES/EBU)
Sampling frequency 44.1 kHz to 96 kHz
Rated input level XLR (balanced) +4/0 dBV
TS phone (unbalanced): –10/–14 dBV
Input impedance 10 kΩ or more
Φ6.3 mm (1/4”) TS phone
Adapted load impedance 16 Ω or more
Maximum output 20 mW+20 mW (32 Ω, 1 kHz)
Reference level Digital –20 dBFS
Analog XLR: +4/0 dBu TS phone:–10/–14 dBV
English
General
External
dimensions (mm)
Unit weight approx. 3.5 kg
Power AC 100 V to 240 V 50/60 Hz
Power consumption 10 W
482 (W ) × 44 (H) × 284 (D) (includes protruding parts)
7
Page 8

Declaration of EC Directive
This equipment is compatible with the EMC Directive (2004/108/EC) - Directive on approximation of member nation's ordinance concerning the
electromagnetic compatibility and with the Low Voltage Directive (73/23/EEC) - Directive on approximation of member nation's ordinance concerning
electric equipment designed to be used within the specified voltage range.
The Affect of Immunity on This Equipment
The affect of the European Specification EN61000-6-1 (coexistence of electromagnetic waves - common immunity specification) on this equipment are
as shown below.
In the electrical fast transient/burst requirements, surge, conducted disturbances by radio-frequency fields, power frequency magnetic field, radiate
electromagnetic field requirements and static electricity discharging environment, this could be affected by generation of noise in some cases.
FOSTEX DISTRIBUTORS LIST IN EUROPE
Austria
NAME: Mega Audio GmbH
ADD: Stromberger Str. 32, 55411 Bingen, Germany
TEL: (+49) 6721-94330, FAX: (+49) 6721-32046
Email: info@megaaudio.de
Web Site: http://www.megaaudio.de
Belgium
NAME: XLR sprl/bvba
ADD: Pierre Strauwenstraat 24, 1020 Brussels,
Belgium
TEL: (+32) 2 520 0827, FAX: (+32) 2 521 1977
Email: info@xlrpro.be
Web Site: http://www.xlrpro.be
Czecho
NAME: Praha Music Center spol s.r.o.
ADD: Ocelarska 937/39, Praha 9, 190 00, Czecho
TEL: (+420) 226-011-111, FAX: (+420) 226-011-112
Email: info@pmc.cz
Web Site: http://www.pmc.cz
Denmark
NAME: SC Sound A/S
ADD: Dalgas Alle 15, DK-6600 Vejen, Denmark
TEL: (+45) 4399 8877, FAX: (+45) 4399 8077
Email: mail@sc-sound.dk
Web Site: http://www.sc-sound.dk
Finland
NAME: Noretron Oy Audio
ADD: Mankkaantie 32, FIN-02180 ESPOO, Finland
TEL: (+358) 10-525-8000, FAX: (+358) 10-525-8010
Web Site: http://www.noretron.fi
France
NAME: Sennheiser France
ADD: 128 bis, avenue Jean-Jaures, 94851 Ivry-surSeine Cedex, France
TEL: (+33) 1 4987 0300, FAX: (+33) 1 4987 0324
Web Site: http://www.sennheiser.fr
France
NAME: Selectronic (Speaker Components Only)
ADD: Zac de L’Oree du Golf, 16 rue Jules Verne,
59790 Ronchin, France
TEL: (+33) 328 550 328, FAX: (+33) 328 550 329
Email: contact@selectronic.fr
France
NAME: Hamy Sound (Headphones and USB DAC
Only)
ADD: 28 Rue Edith Cavell, 92400 Courvevoie,
France
TEL: (+33) 1 4788 4702, FAX: (+33) 1 4789 4872
Email: sav@hamysound.com
Web Site: http://www.hamysound.com
Germany
NAME: Mega Audio GmbH
ADD: Stromberger Str. 32, 55411 Bingen, Germany
TEL: (+49) 6721-94330, FAX: (+49) 6721-32046
Email: info@megaaudio.de
Web Site: http://www.megaaudio.de
* Including non-EU countries (as of Jan. 2014)
Greece
NAME: Bon Studio S.A
ADD: 6 Zaimi Street, Exarchia, 106.83 Athens,
Greece
TEL: (+30) 210-3809-605, 606, 607, 608
FAX: (+30) 210-3845-755, 210-3827-868
Email: bon@bonstudio.gr
Web Site: http://www.bonstudio.gr
Hungary
NAME: Mega Audio GmbH
ADD: Stromberger Str. 32, 55411 Bingen, Germany
TEL: (+49) 6721-94330, FAX: (+49) 6721-32046
Email: info@megaaudio.de
Web Site: http://www.megaaudio.de
Italy
NAME: Backline S.u.r.l.
ADD: Via dell’Aprica, 16 - 20158 Milano, Italy
TEL: (+39) 02 6901 5709, FAX: (+39) 02 6901 5645
Email: info@backline.it
Web Site: http://www.backline.it
Italy
NAME: Art of Music sas (Hi-Fi system & Speaker
Components)
ADD: Via Dal Lino 23/2, 40134 Bologna, Italy
TEL: (+39) 347 2532215
Email: artofmusic@libero.it
Web Site: http://www.balloacoustics.it
The Netherlands
NAME: Iemke Roos Audio B.V.
ADD: Kuiperbergweg 20, 1101 AG Amsterdam, The
Netherlands
TEL: (+31) 20-697-2121, FAX: (+31) 20-697-4201
Email: sales@iemkeroos.nl
Web Site: http://www.iemkeroos.nl
Norway
NAME: Siv. Ing. Benum AS
ADD: P. O. Box 145, Vinderen, 0319 Oslo, Norway
TEL: (+47) 2213 9900, FAX: (+47) 2214 8259
Email: post@benum.no
Web Site: http://www.benum.no
Poland
NAME: Mega Music Spolka z o.o
ADD: Ul. Lesna 15, 81-876 Sopot, Poland
TEL: (+48) 58-551-18-82, FAX: (+48) 58-551-18-72
Email: pro@megamusic.pl
Web Site: http://pro.megamusic.pl
Portugal
NAME: Letusa (Pro Audio Products Only)
ADD: C/Laguna No.10, Poligono Industrial Urtinsa,
28923 Alcorcon, Madrid, Spain
TEL: (+34) 91-4862800, FAX: (+34) 91-6414597
Email: info@letusa.es
Web Site: http://www.letusa.es
Russia
NAME: MS-MAX
ADD: Entrance 12B, Kutuzovsky prospekt, 30/32,
121165, Moscow, Russia
TEL: (+7) 495-234-0006, FAX: (+7) 495-249-8034
Email: office@ms-max.ru
Web Site: http://www.ms-max.ru
Spain & Portugal
NAME: ATCONSUMER (Consumer, Hi-Fi system &
Speaker Components)
ADD: PO BOX 15, 08340Vilassar de Mar, Barcelona,
Spain
TEL: (+34) 609 288310
Email: info@atconsumer.es
Web Site: http://www.atconsumer.es
Spain
NAME: Letusa (Pro Audio Products Only)
ADD: C/Laguna No.10, Poligono Industrial Urtinsa,
28923 Alcorcon, Madrid, Spain
TEL: (+34) 91-4862800, FAX: (+34) 91-6414597
Email: info@letusa.es
Web Site: http://www.letusa.es
Sweden
NAME: Benum Nordic AS
ADD: Aldermansvagen 17, 171 48 Solna, Sweden
TEL: (+46) 8 207710
Email: sweden@benum.com
Web Site: http://www.benum.se
Sweden, Norway, Finland & Denmark
NAME: Supersonic Svenska AB (Speaker Components Only)
ADD: PO BOX 42043, 126 12 Stockholm, Sweden
TEL: (+46) 8 744 4700
Email: johan@supersonic.se
Switzerland
NAME: Audio Bauer Pro AG
ADD: Bernerstrasse-Nord 182, CH-8064 Zurich,
Switzerland
TEL: (+41) 44 432 3230, FAX: (+41) 44 432 6558
Email: info@audio-bauerpro.ch
Web Site: http://www.audio-bauerpro.ch
Turkey
NAME: Radikal Elektronik Ltd. Sti.
ADD: Ihlamur-Yildiz Cad, Kessaf Sok. 4/12 Besiktas,
Istanbul 34353, Turkey
TEL: (+90) (212) 259 7971, FAX: (+90) (212) 259
7993
Email: radikal@radikaltr.com
Web Site: http://www.radikaltr.com
UK
NAME: SCV London
ADD: Unit C1 Belcon Industrial Estate, Geddings
Road, Hodesdon, Hertfordshire, EN11 0NT, UK
TEL: (+44) 03 301 222500, FAX: (+44) 20-8418-0624
Email: fostex@scvlondon.co.uk
Web Site: http://www.scvlondon.co.uk
Ukraine
NAME: A & T Trade Petroshop
ADD: 29, Obolonskaya Str., Kiev, Ukraine 04071
TEL: (+380) 44-462-5358, FAX: (+380) 44-462-5092
Email: attrade@attrade.kiev.ua
Web Site: http://kiev.attrade.ru
FOSTEX CO.
1-1-109, Tsutsujigaoka, Akishima City, Tokyo, 196-8550, Japan
© Printed in China Sep 2014 8588134000 594018
 Loading...